

Hovertech Hoverjack HJBSC-200 Quick Start Manual

513 S. Clewell Street
Bethlehem, PA 18015
800-471-2776
www.HoverMa.com
IFU-HJBSC,Rev0
Baery Transport System
Part Number
HJBSC-200
Made in USA
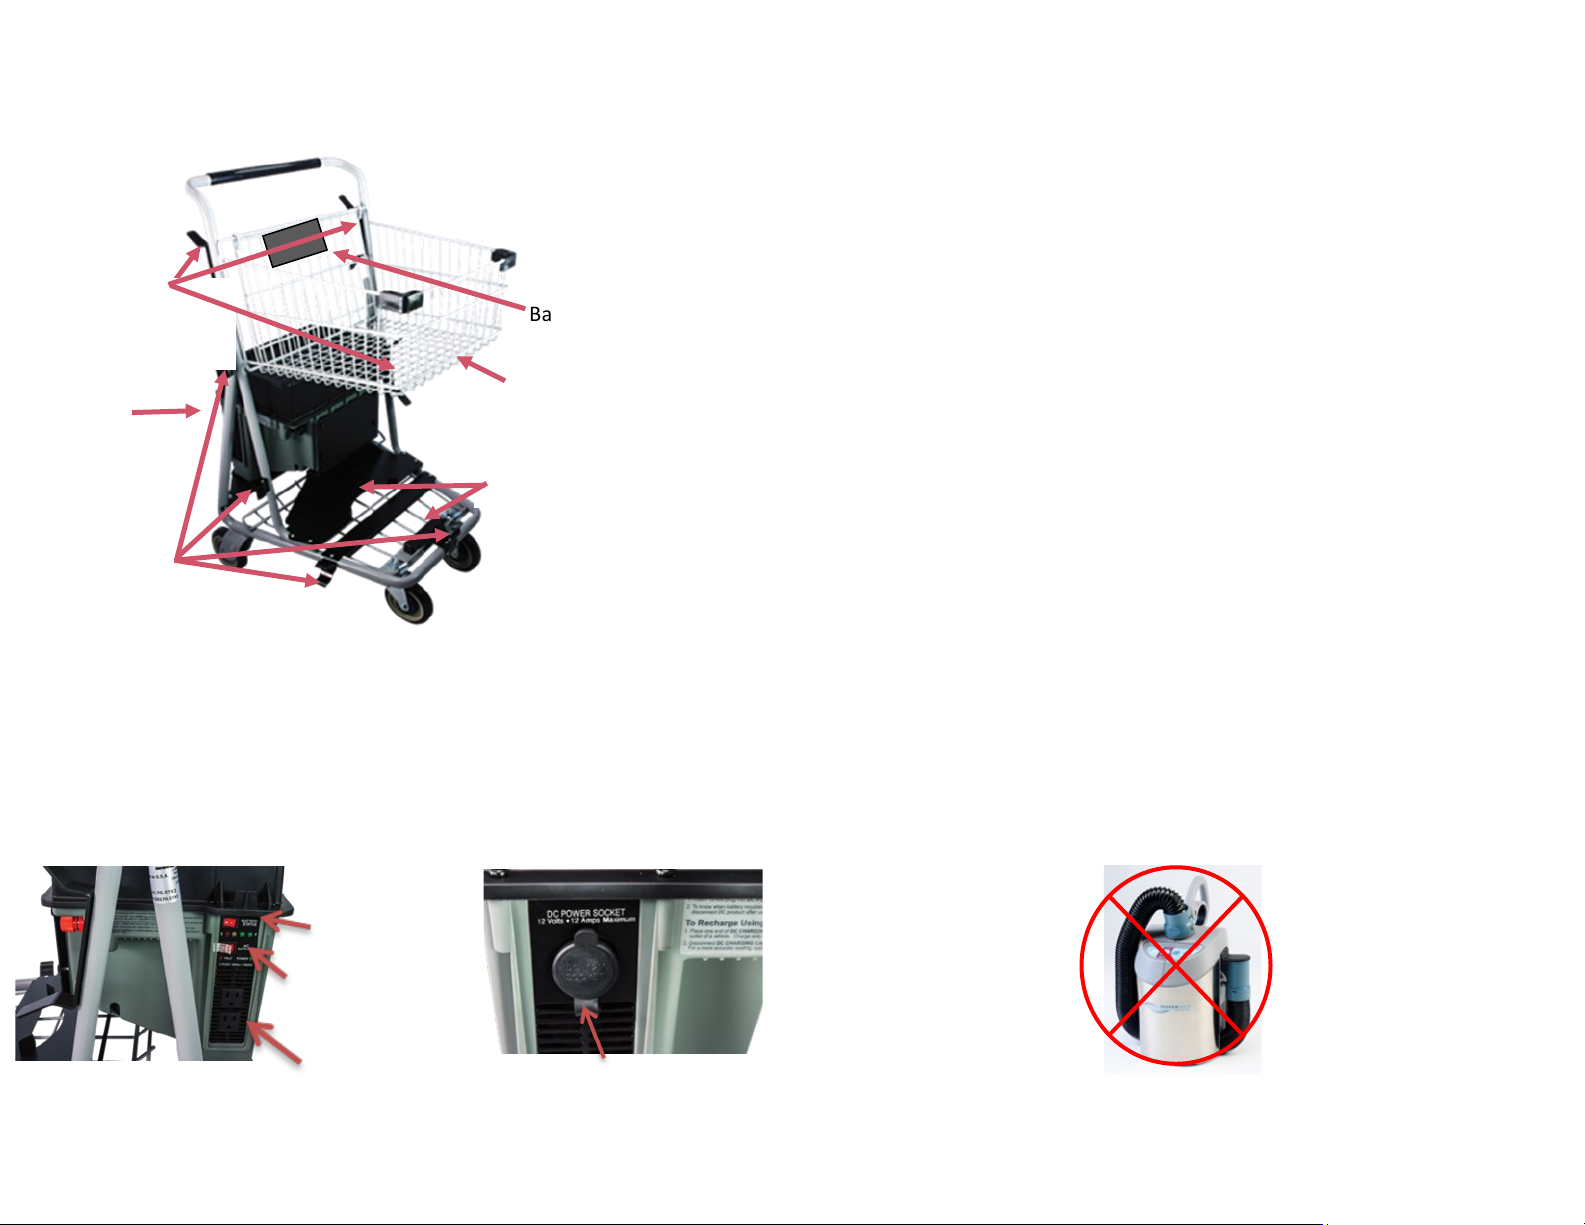
Cart Features
Le Side—AC Power Panel
Right Side - DC Power Panel
DC Power Charger
Dual AC Outlets
Status Indicator
Switch
AC Outlet
On/O Switch
Baery Charger Bracket
Air Hose
Mounts
HoverJack Basket
Baery
Air Supply Brackets
Power Cord
Hooks
Battery Transport System Instructions
Installation
Place AIR200G or AIR400G into Air Supply Brackets located on the bottom of the
cart. Align on/off switch of the Air Supply with the left front wheel. Secure hose into
the Air Hose Mounts on the bottom center and right side of the cart. Wrap cord
around the lower left side Power Cord Hook. Remove battery charger from the top
compartment of the battery and place into Battery Charger Bracket. Wrap electrical
and charging cord around upper Power Cord Hooks. Place folded HoverJack® in
top basket.
Operating Instructions
To operate, remove the DC plug from the DC Power Socket and turn on the AC
Outlets. Plug an AIR200G or AIR400G into one of the AC Outlets on the battery
cart. Turn on the air supply and proceed with the HoverJack or HoverMatt operation as trained.
Charging the Battery
To recharge, plug the AC Charger into a standard 115-volt AC outlet and the DC
plug (cigarette lighter end) into the DC Power Socket (cigarette lighter receptacle)
located on the DC Power Panel. Turn off the AC switches on the battery unit and
turn on the Battery Charger. The recharge Indicator on the AC Charger will change
from amber to green when charging is complete (up to 15 hours). It is safe to leave
the AC charger connected indefinitely. The battery’s charge level may be seen by
pressing the Battery Status Indicator Switch on the AC Power Panel.
Notes:
Always keep the battery plugged in and charging when not in use to preserve
battery life.
The battery cart is not for use with the HTAIR1200. Use only HoverTech’s
AIR200G or AIR400G with the battery cart.
See battery & charger owner’s guides for complete safety instructions.
 Loading...