

Hotpoint MWX 222.1 X Instructions For Use Manual

EN
145
Instructions for use
Contents
Installation, 2-6
Installation and connection
Built-in furniture
Prepare the Cabinet
Install the oven
Turntable Installation
Setting up your oven, 7
Overall view
Names of Oven Parts and Accessories
Start-up and use, 8-10
Operation instruction
Important safety instructions, 11-14
Utensils, 15-16
Utensil Test
Materials you can use in microwave oven
Materials to be avoided in microwave oven
Maintenance and care, 17
Cleaning
Troubleshooting, 18
Assistance, 1
English
EN
MICROWAVE OVEN
MWX 222.1 X
9
2
EN
! Read these instructions carefully before using your
microwave oven, and keep it carefully.
If you follow the instructions, your oven will provide you with
many years of good service.
! SAVE THESE INSTRUCTIONS CAREFULLY
PRECAUTIONS T O AVOID POSSIBLE EXPOSURE T
O EXCESSIVE MICROWAVE ENERGY
a) Do not attempt to operate this oven with the door open
since this can result in harmful exposure to microwave
energy. It is important not to break or tamper with the
safety interlocks.
(b) Do not place any object between the oven front face and
the door or allow soil or cleaner residue to accumulate on
sealing surfaces.
(c) WARNING: If the door or door seals are damaged, the
oven must not be operated until it has been repaired by a
competent person.
(d) WARNING: Ensure that the appliance is switched off
before replacing the lamp to avoid the possibility of electric
shock.
(e) Accessible parts may become hot during use. Young
children should be kept away.
(f) Steam cleaner is not to be used.
(g) Surface of a storage drawer can get hot.
(h) Do not use harsh abrasive cleaners or sharp metal
scrapers to clean the oven door glass since they can
scratch the surface, which may result in shattering of the
glass.
(i)
This appliance can be used by children aged from 8 years
and above and persons with reduced physical, sensory or
mental capabilities or lack of experience andknowledge if
they have been givensupervision or instruction concerning
useof the appliance in a safe way andunderstand the
hazards involved.Children shall not play with the appliance.
Cleaning and user maintenance shall not be made by
children unless they are older than 8 and supervised.
ADDENDUM
If the apparatus is not maintained in a good state of
cleanliness, its surface could be degraded and affect the
lifespan of the apparatus and lead to a dangerous situation.
Installation and connection
This appliance is only intended for domestic use.
2. This oven is intended for built-in use only. It is not
intended for counter-top use or for use inside a
cupboard.
3. Please observe the special installation instructions.
4. The appliance can be installed in a 60cm wide
wallmounted cupboard(at lease 55cm deep and 85cm
connected to a properly installed earthed socket.
6. The mains voltage must correspond to the voltage
7. The socket must be installed and connecting cable must
no longer to accessible following installation, an all-pole
disconnecting device must be present on the installation
side with a contact gap of at lease 3mm.
8. Adapters,multi-way multi-way strips and extension leads
must not be used. Overloading can result in a risk of
sistema di controllo elettronico per regolare al meglio
i parametri di cottura in base alle esigenze dell’utente.
The accessible surface may be hot during operation.
Please Read the Manual Carefully Before
Installation.
Please Note
Electrical connection
•
to a properly installed earthed socket. In accordance with
the appropriate regulations, the socket must only be installed and the connecting cable must only be replaced by
following installation and all-pole isolating switch must be
present on the installation side with a contact gap at least
3mm.
Installation
EN
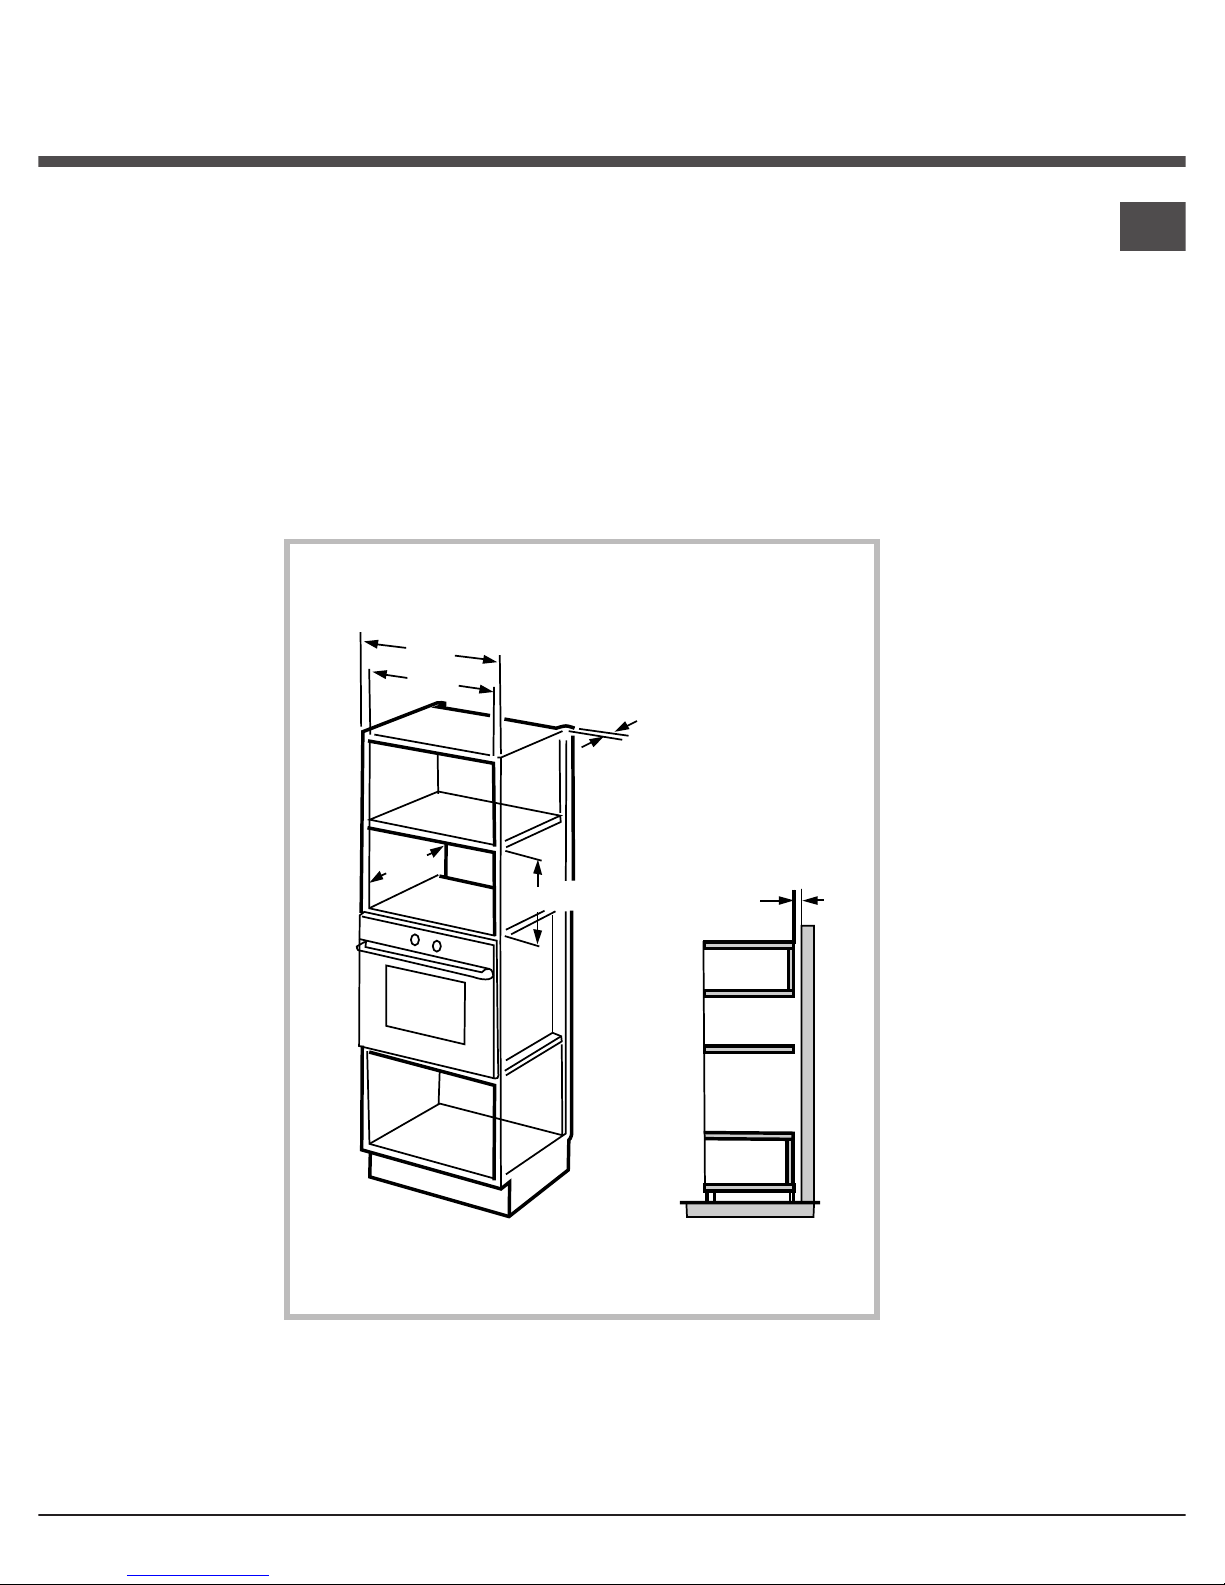
A. Built-in furniture
The built-in cabinet shall not have a rear wall behind the
appliance.
Minimum installation height is 85cm.
Do not cover ventilation slots and air intake points.
600
560
+8
(45)
(45)
5 0
min
380
+2
0
3
EN
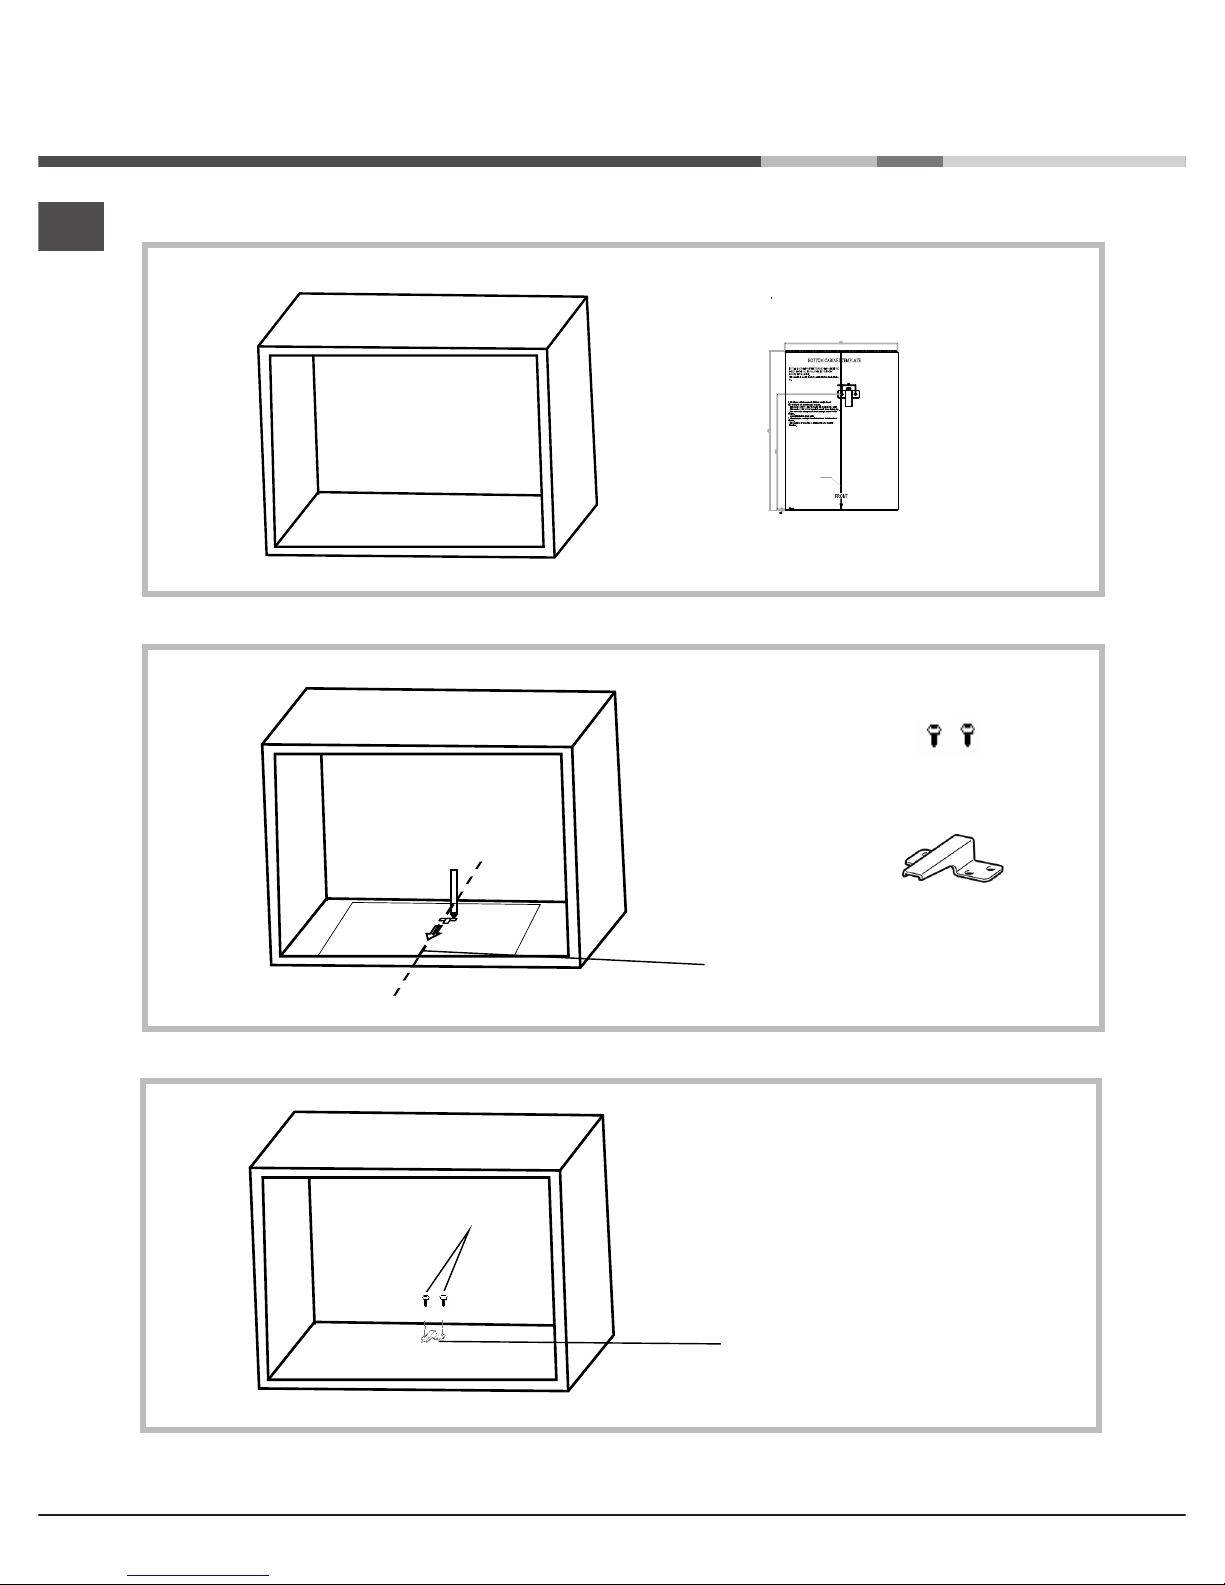
B. Prepare the Cabinet
1. Read the instruction on the BOTTOM CABINET TEMPLATE, put the template on the bottom plane of cabinet.
2. Make marks on the bottom plane of cabinet according to marks “a” of the template.
3. Remove the BOTTOM CABINET TEMPLATE, and fix the BOTTOM BRACKETS with SCREW A.
Installation
a
a
CENTER LINE
FRONT EDGE
LEFT EDGE
T EDGE RIGH
a
a
SCREW A
BRACKET
CENTRE LINE
Screw A
BRACKET
4

EN
C. Install the oven
BRACKET
4. Install the oven into the cabinet.
• Make sure the back of the oven is locked by bracket.
• Do not trap or kink the power cord.
5. Open the door, fix the oven to the cabinet with Screw B, at the installation hole.
Installation Hole
Screw B
5
EN
Model:
MWX 222.1 X
Rated Voltage: 240V~50Hz
Rated Input Power
(Microwave):
1450W
Rated Output Power
(Microwave):
900W
Rated Input Power
(Grill):
1000W
Oven Capacity: 25L
Turntable Diameter: ø 315mm
External Dimensions: 594x410x388mm
Net Weight: Approx. 19.7 kg
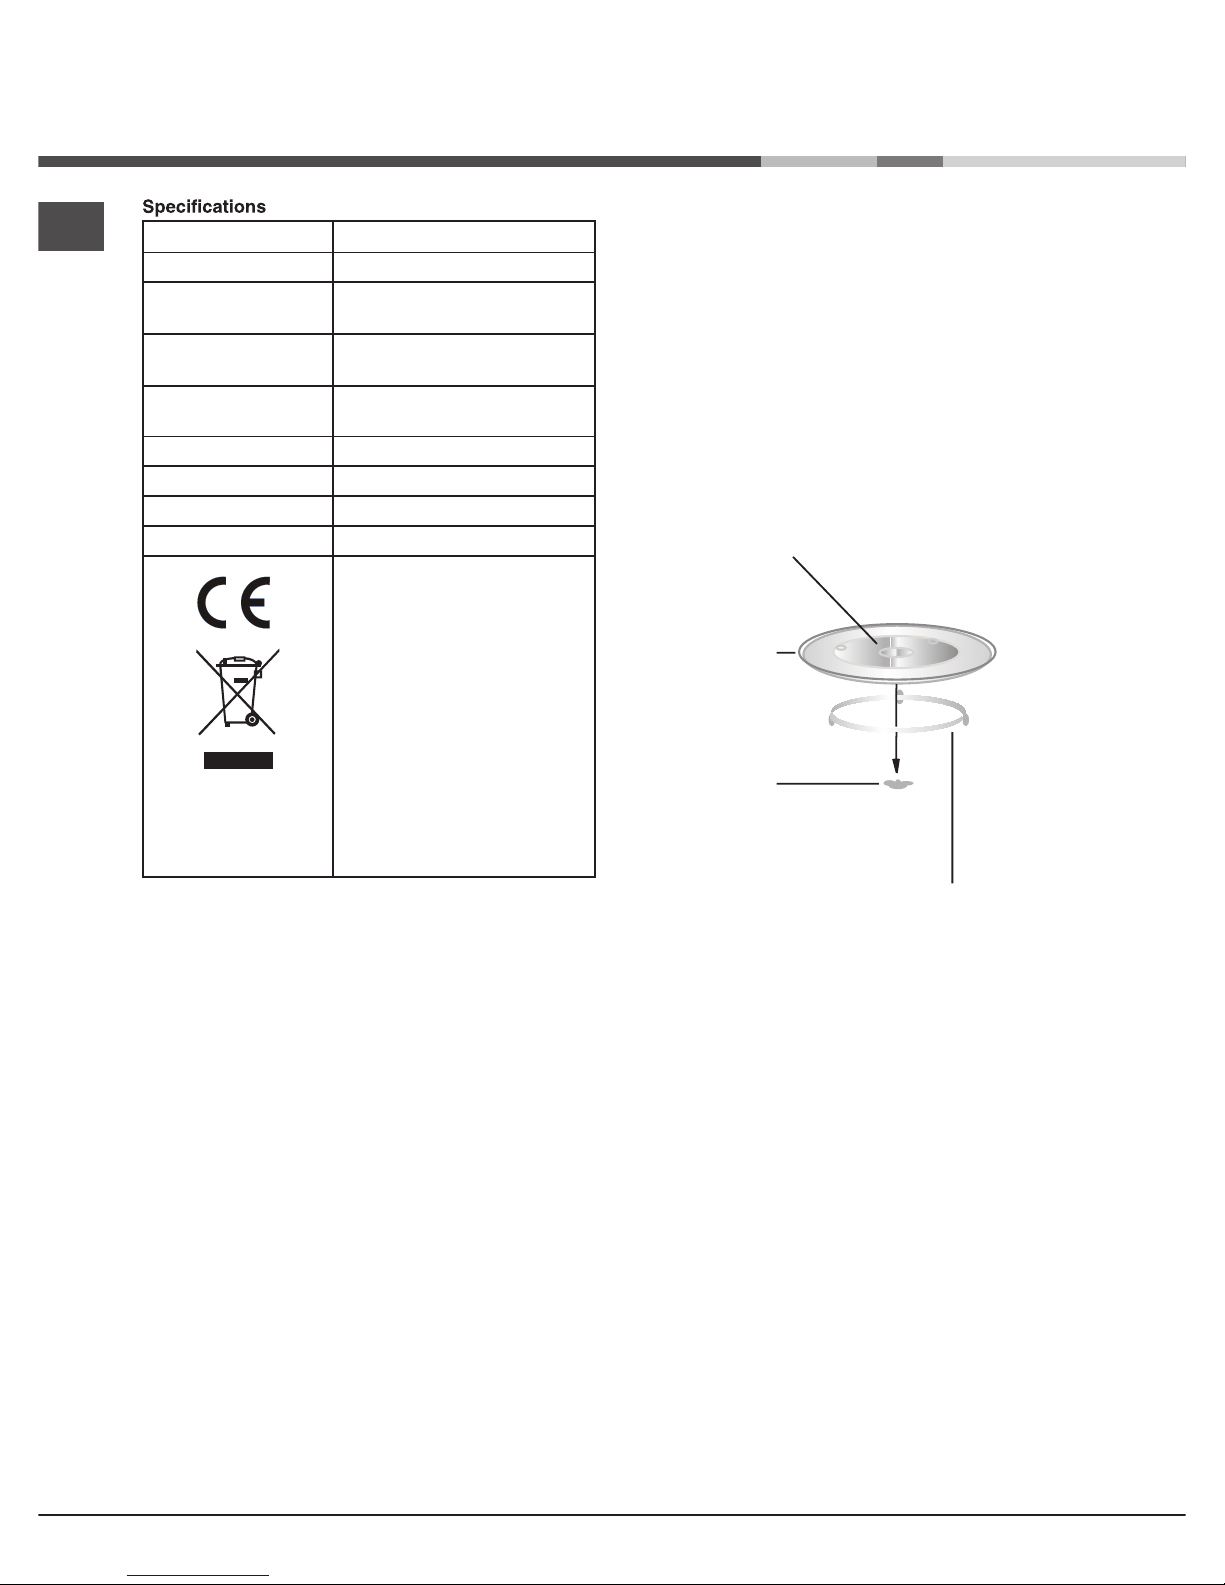
Turntable Installation
a) Never place the enamel tray upside down. The
enamal tray should never be restricted.
b) Both glass tray and turntable ring assembly must
always be used during cooking.
c) All food and containers of food are always placed on
the enamel tray for cooking.
d) If enamel tray cracks or breaks, contact your nearest
authorized service center.
Hub (underside)
Glass tray
Turntable ring assembly
Turntable
shaft
Installation
6
This appliance conforms to the
following European Economic
Community directives:
2006/95/EEC dated 12/12/06
(Low Voltage) and subsequent
amendments 2004/108/EEC
dated 15/12/04 (Electromagnetic Compatibility) and
subsequent amendments
93/68/EEC dated 22/07/93
and subsequent amendments
2012/19/EEC and subsequent
amendments.1275/2008
standby/off mode.
 Loading...