

Hotpoint MTM 5401 F User Manual

Operating Instructions
2-DOOR FRIDGE
GB F
PT
Portuges,
25
MTM 5401 F
Français, 9English, 1
40
AR
ES
Espanol, 17
Contents
GB
Installation, 2
Positioning and connection
Description of the appliance, 3
Overall view
Start-up and use, 4-5
Starting the appliance
Using the refrigerator to its full potential
Using the freezer to its full potential
Maintenance and care, 6
Switching the appliance off
Cleaning the appliance
Avoiding mould and unpleasant odours
Replacing the light bulb
Precautions and tips, 7
General safety
Disposal
Respecting and conserving the environment
Troubleshooting, 8
Assistance, 8

Installation
GB
! Before placing your new appliance into operation
please read these operating instructions carefully. They
contain important information for safe use, for
installation and for care of the appliance.
! Please keep these operating instructions for future
reference. Pass them on to possible new owners of the
appliance.
Positioning and connection
Positioning
1. Place the appliance in a well-ventilated humidity-free
room.
2. Do not obstruct the rear fan grills. The compressor
and condenser give off heat and require good
ventilation to operate correctly and save energy.
3. Leave a space of at least 10 cm between the top part
of the appliance and any furniture above it, and at least
5 cm between the sides and any furniture/side walls.
4. Ensure the appliance is away from any sources of
heat (direct sunlight, electric stove, etc.).
5. In order to maintain the correct distance between the
appliance and the wall behind it, fit the spacers
supplied in the installation kit, following the
instructions provided.
Electrical connections
After the appliance has been transported, carefully place
it vertically and wait at least 3 hours before connecting it
to the electricity mains. Before inserting the plug into the
electrical socket ensure the following:
• The appliance is earthed and the plug is compliant with
the law.
• The socket can withstand the maximum power of the
appliance, which is indicated on the data plate located
on the bottom left side of the fridge (e.g. 150 W).
• The voltage must be in the range between the values
indicated on the data plate located on the bottom left
side (e.g. 220-240V).
• The socket is compatible with the plug of the appliance.
If the socket is incompatible with the plug, ask an
authorised technician to replace it (
not use extension cords or multiple sockets.
! Once the appliance has been installed, the power supply
cable and the electrical socket must be easily accessible.
! The cable must not be bent or compressed.
! The cable must be checked regularly and replaced by
authorised technicians only (see Assistance).
! The manufacturer declines any liability should these
safety measures not be observed.
see Assistance
). Do
Levelling
1. Install the appliance on a level and rigid floor.
2. If the floor is not perfectly horizontal, adjust the
refrigerator by tightening or loosening the front feet.
2
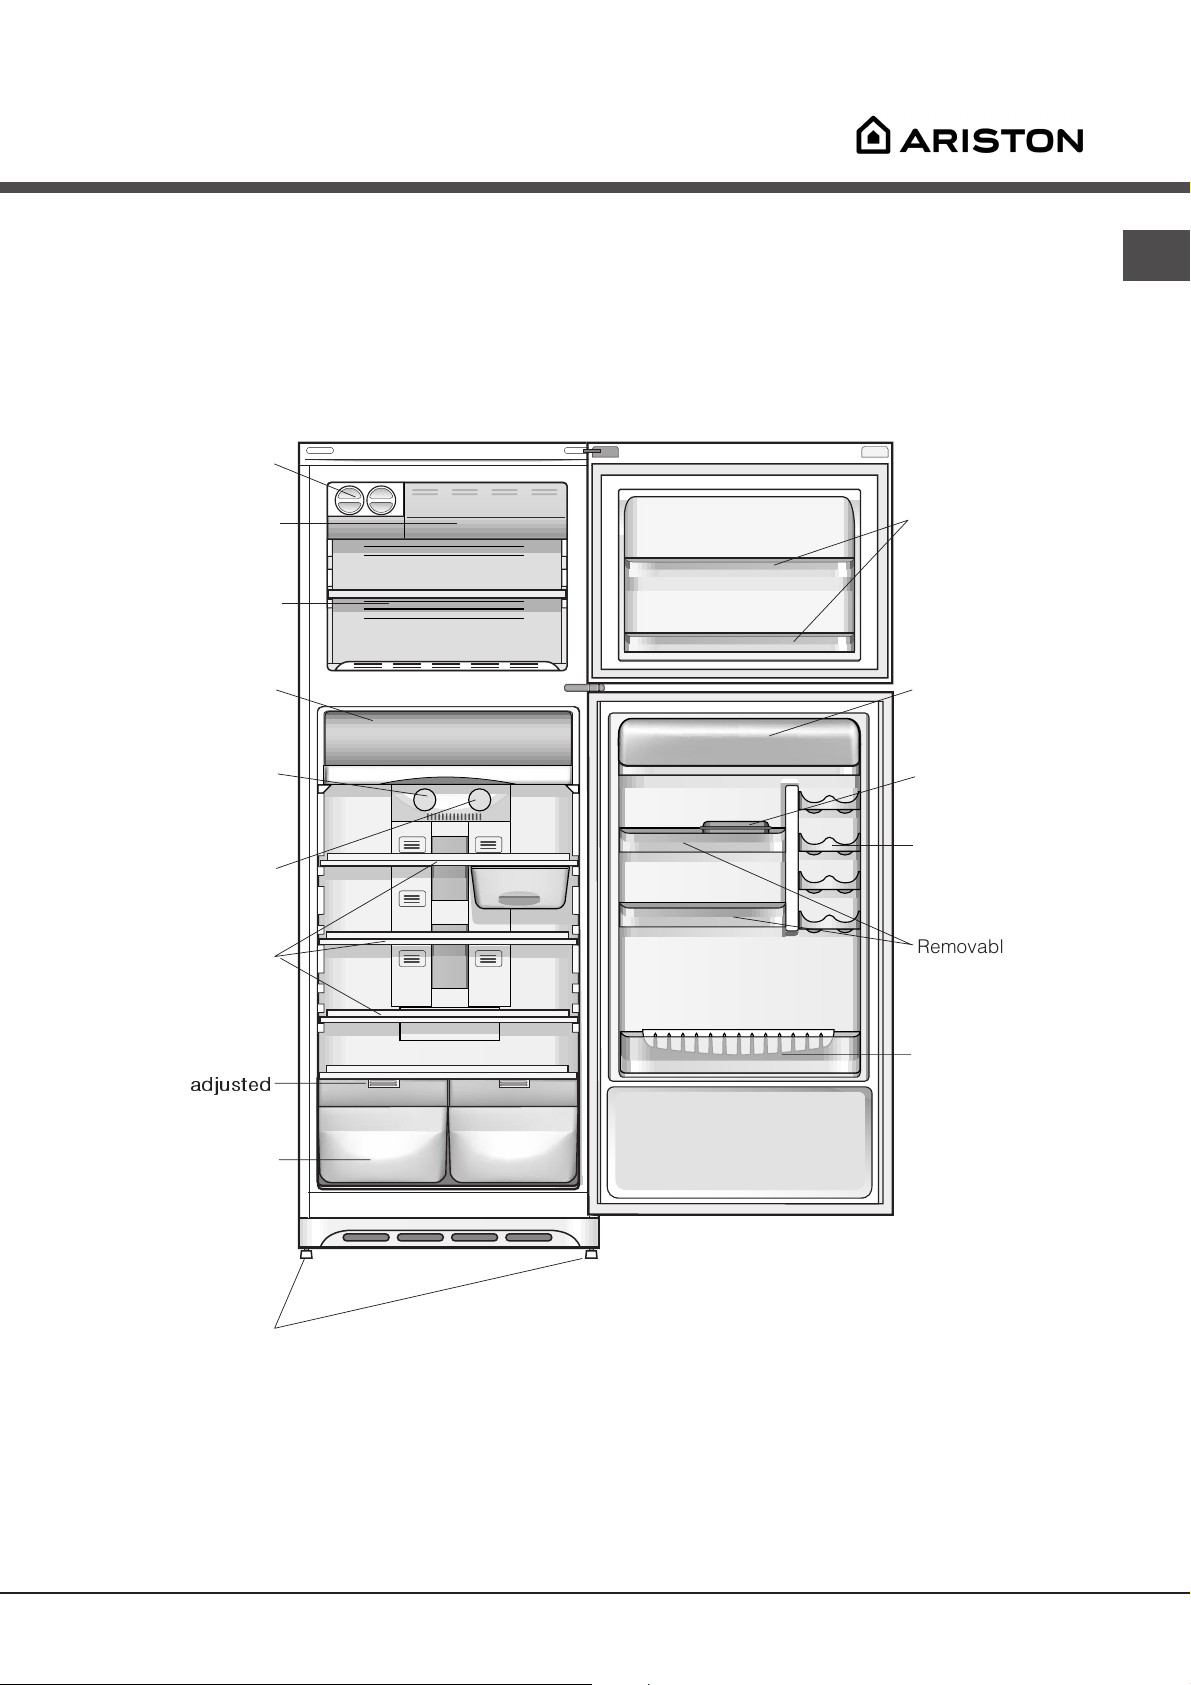
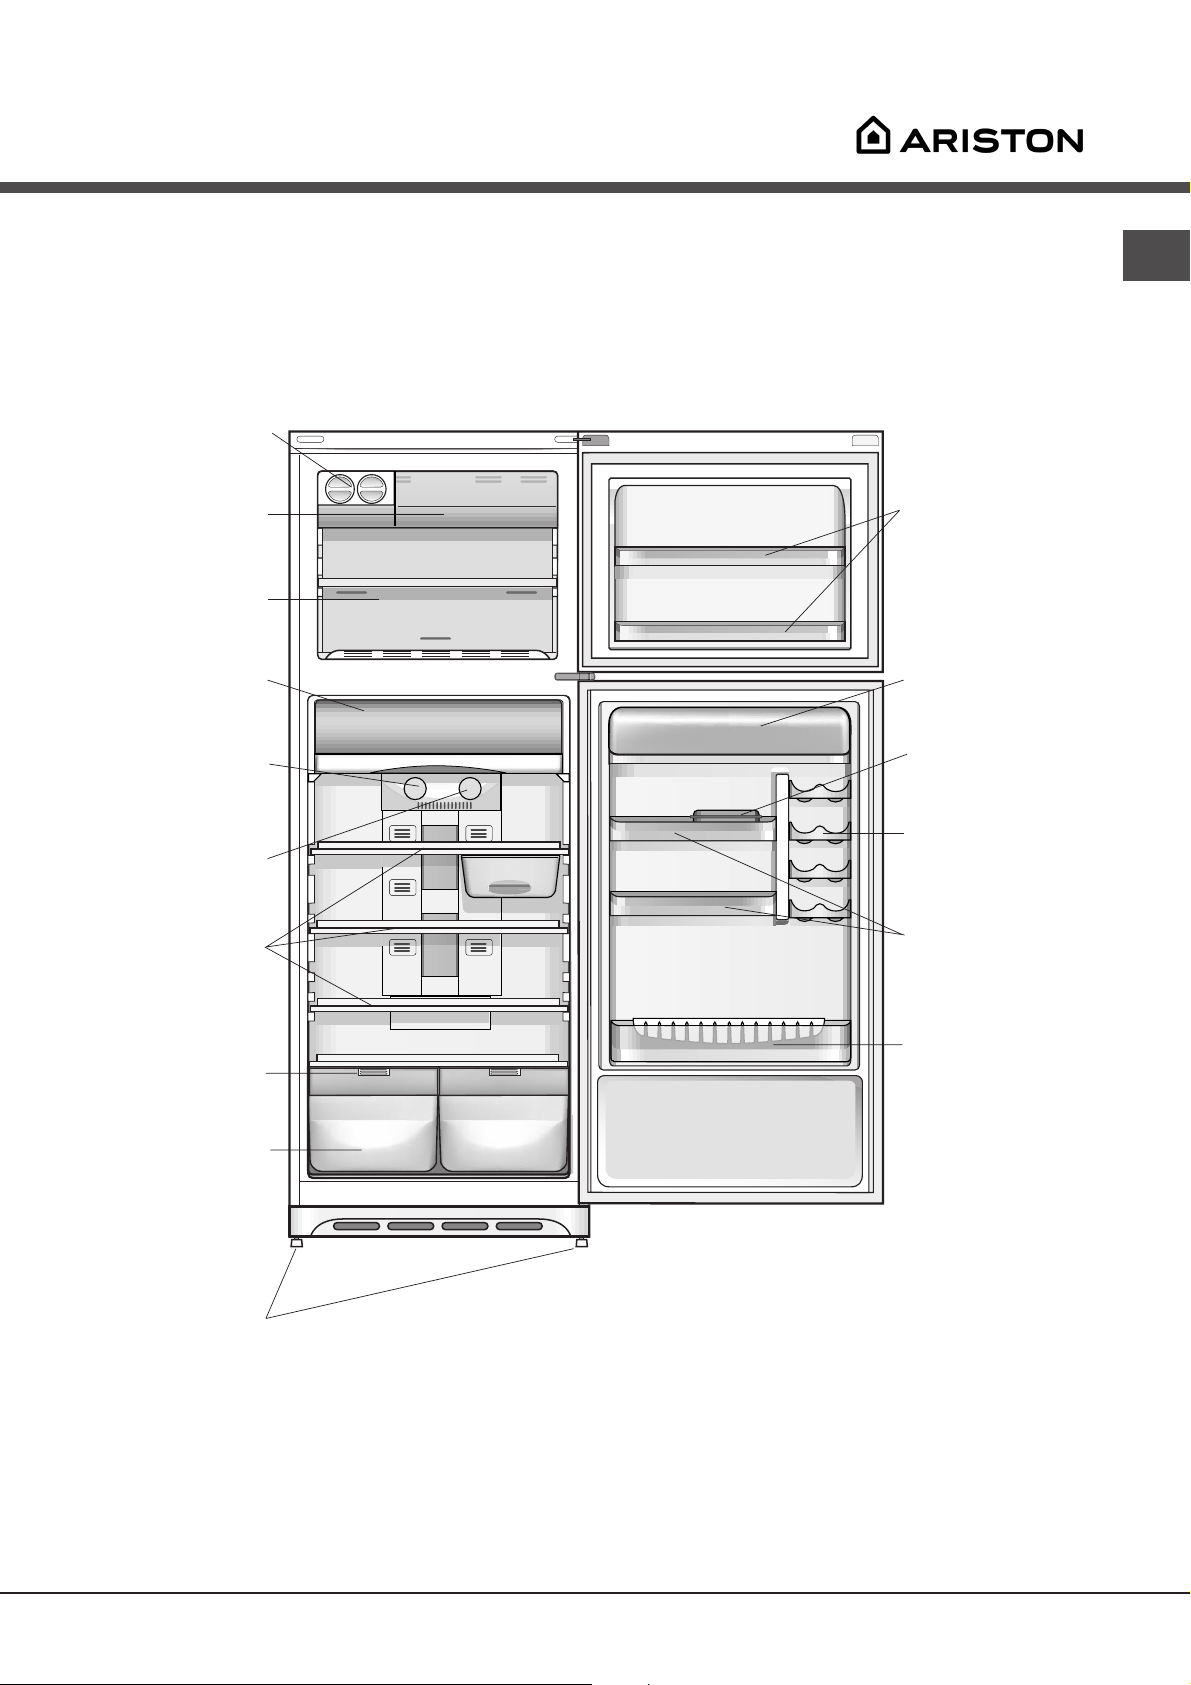
Description of the
appliance
Overall view
The instructions contained in this manual are applicable to different model refrigerators. The diagrams may not
directly represent the appliance purchased. For more complex features, consult the following pages.
ICE DEVICE
FAST FREEZER
compartment
STORAGE
compartment
FRESH BOX
Compartment
REFRIGERATOR
OPERATION
Knob
FREEZER
OPERATION
Knob
SHELVES
Removable
multipurpose
SHELVES
Removable lidded
shelf with EGG TRAY
BUTTER dish
BEVERAGE CAN
shelves
Removable
multipurpose
SHELVES
•
GB
*
MOISTIRE
Levelling FEET
adjusted
FRUIT and
VEGETABLE
bin
Varies by number and/or position.
Available only on certain models.
*
BOTTLE shelf
3
Start-up and use
Starting the appliance
GB
! Before starting the appliance, follow the
installation instructions (
! Before connecting the appliance, clean the
compartments and accessories well with lukewarm
water and bicarbonate.
1. Insert the plug into the socket and ensure that the
internal light illuminates.
2. Turn the TEMPERATURE ADJUSTMENT knob to an
average value. After a few hours you will be able to
put food in the refrigerator.
see Installation
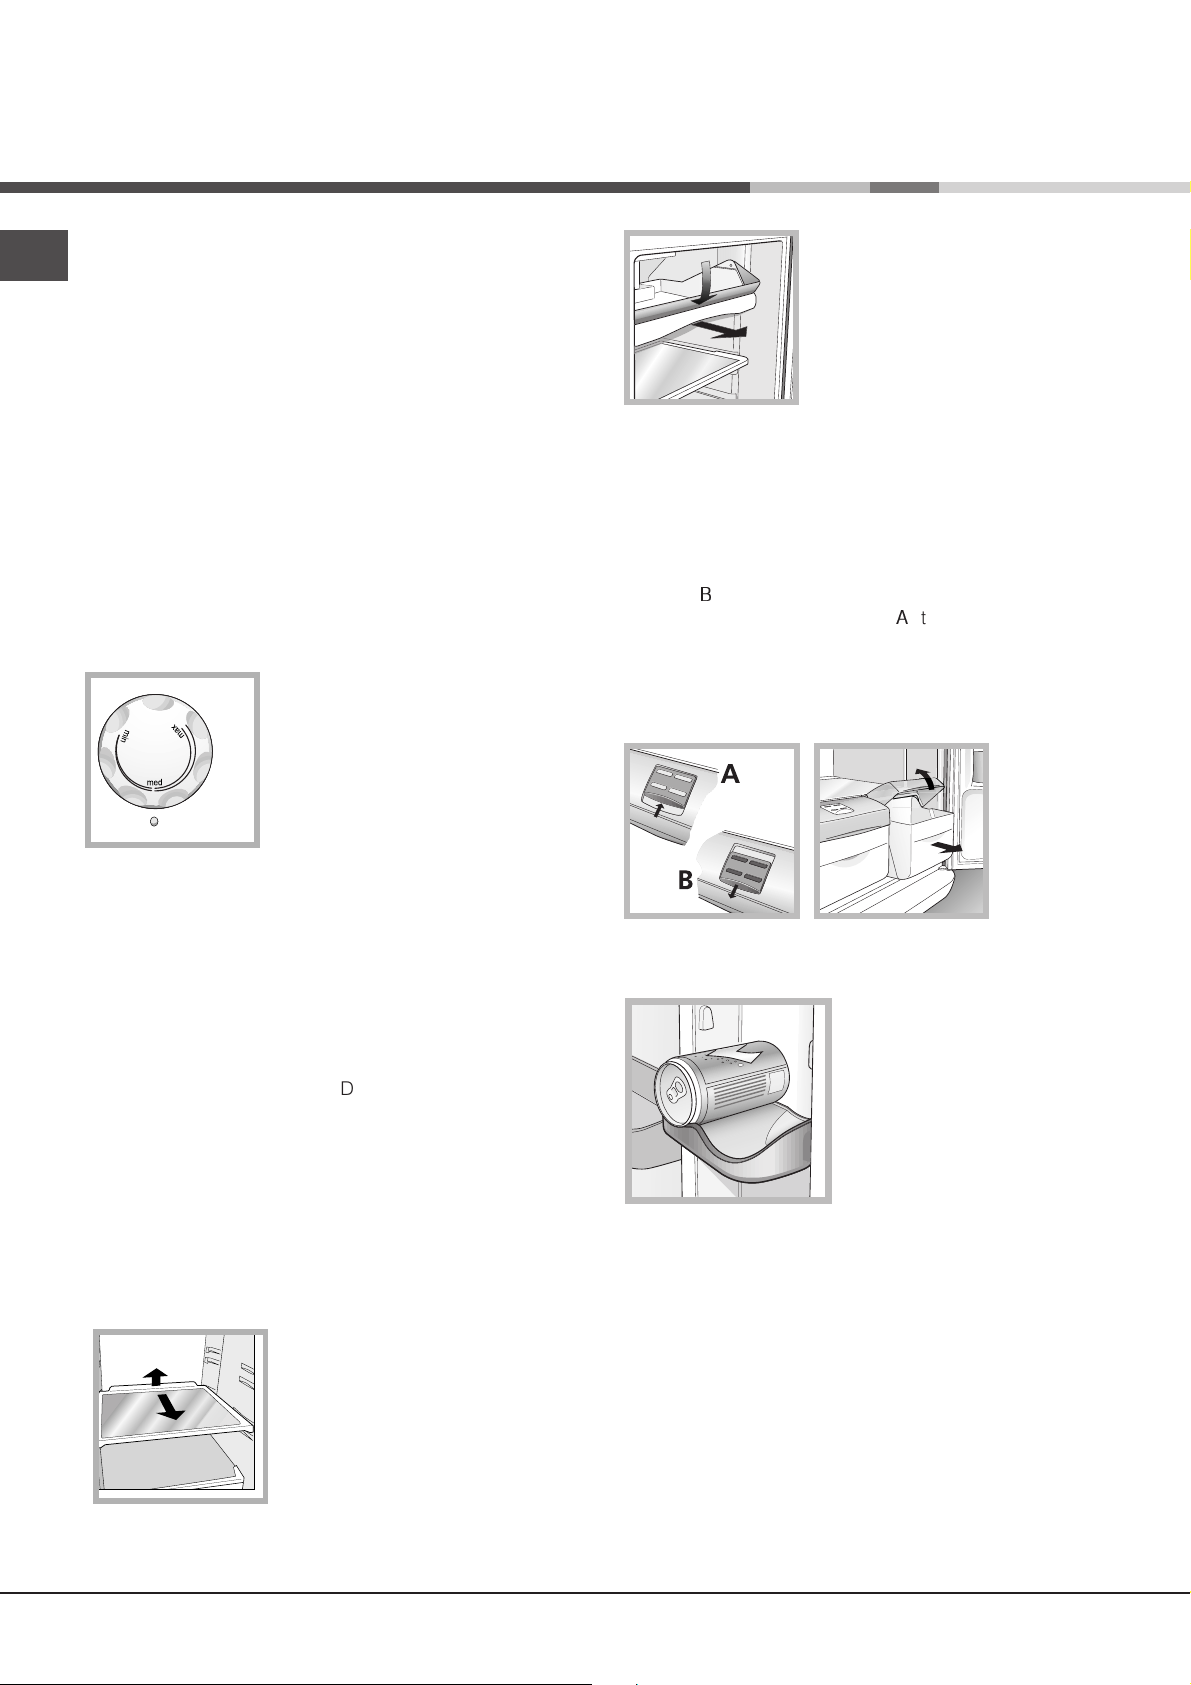
Using the refrigerator to its full potential
The temperature inside the
refrigerator compartment
automatically adjusts itself
according to the position of the
fridge
thermostat knob.
min = warmest
max = coldest
We recommend, however, a
medium position.
FRESH BOX: for fresh meat and
fish. Due to the compartment’s
low temperature (the coldest in
).
FRUIT and VEGETABLE bin
The salad crispers fitted inside the fridge have been
specially designed for the purpose of keeping fruit and
vegetables fresh and crisp. Open the humidity regulator
(position B) if you want to store food in a less humid
environment, or close it (position A) to store food in a more
humid environment.
The easy-to-open lids (all you have to do is pull the crisper
out) make it easy to put food in and take it out.
the refrigerator) and to the clear
door that provides protection
against oxidation and
blackening, food can be stored
for even up to one week. It can
also be used for “cold meals.”
It is recognisable by aeration cells located on the back
walls of the compartments.
The No Frost system circulates cold air continuously to
collect humidity and prevent ice and frost formation. The
system maintains an optimal humidity level in the
compartment, preserving the original quality of the food,
preventing the food from sticking together and making
defrosting a thing of the past. Do not block the aeration
cells by placing food or containers in direct contact with
the refrigerating back panel. Close bottles and wrap
food tightly.
Place only cold or lukewarm foods in the compartment,
not hot foods (
Remember that cooked foods do not last longer than raw
foods.
removal of the shelf.
see Precautions and tips
SHELVES: with or without grill.
1
2
Due to the special guides the
shelves are removable and the
height is adjustable (
diagram
storage of large containers
and food. Height can be
adjusted without complete
).
see
), allowing easy
BEVERAGE CAN shelves.
The can rack on the inner
door allows you to store not
only cans, but also yoghurt,
butter and other containers,
according to your
requirements.
4
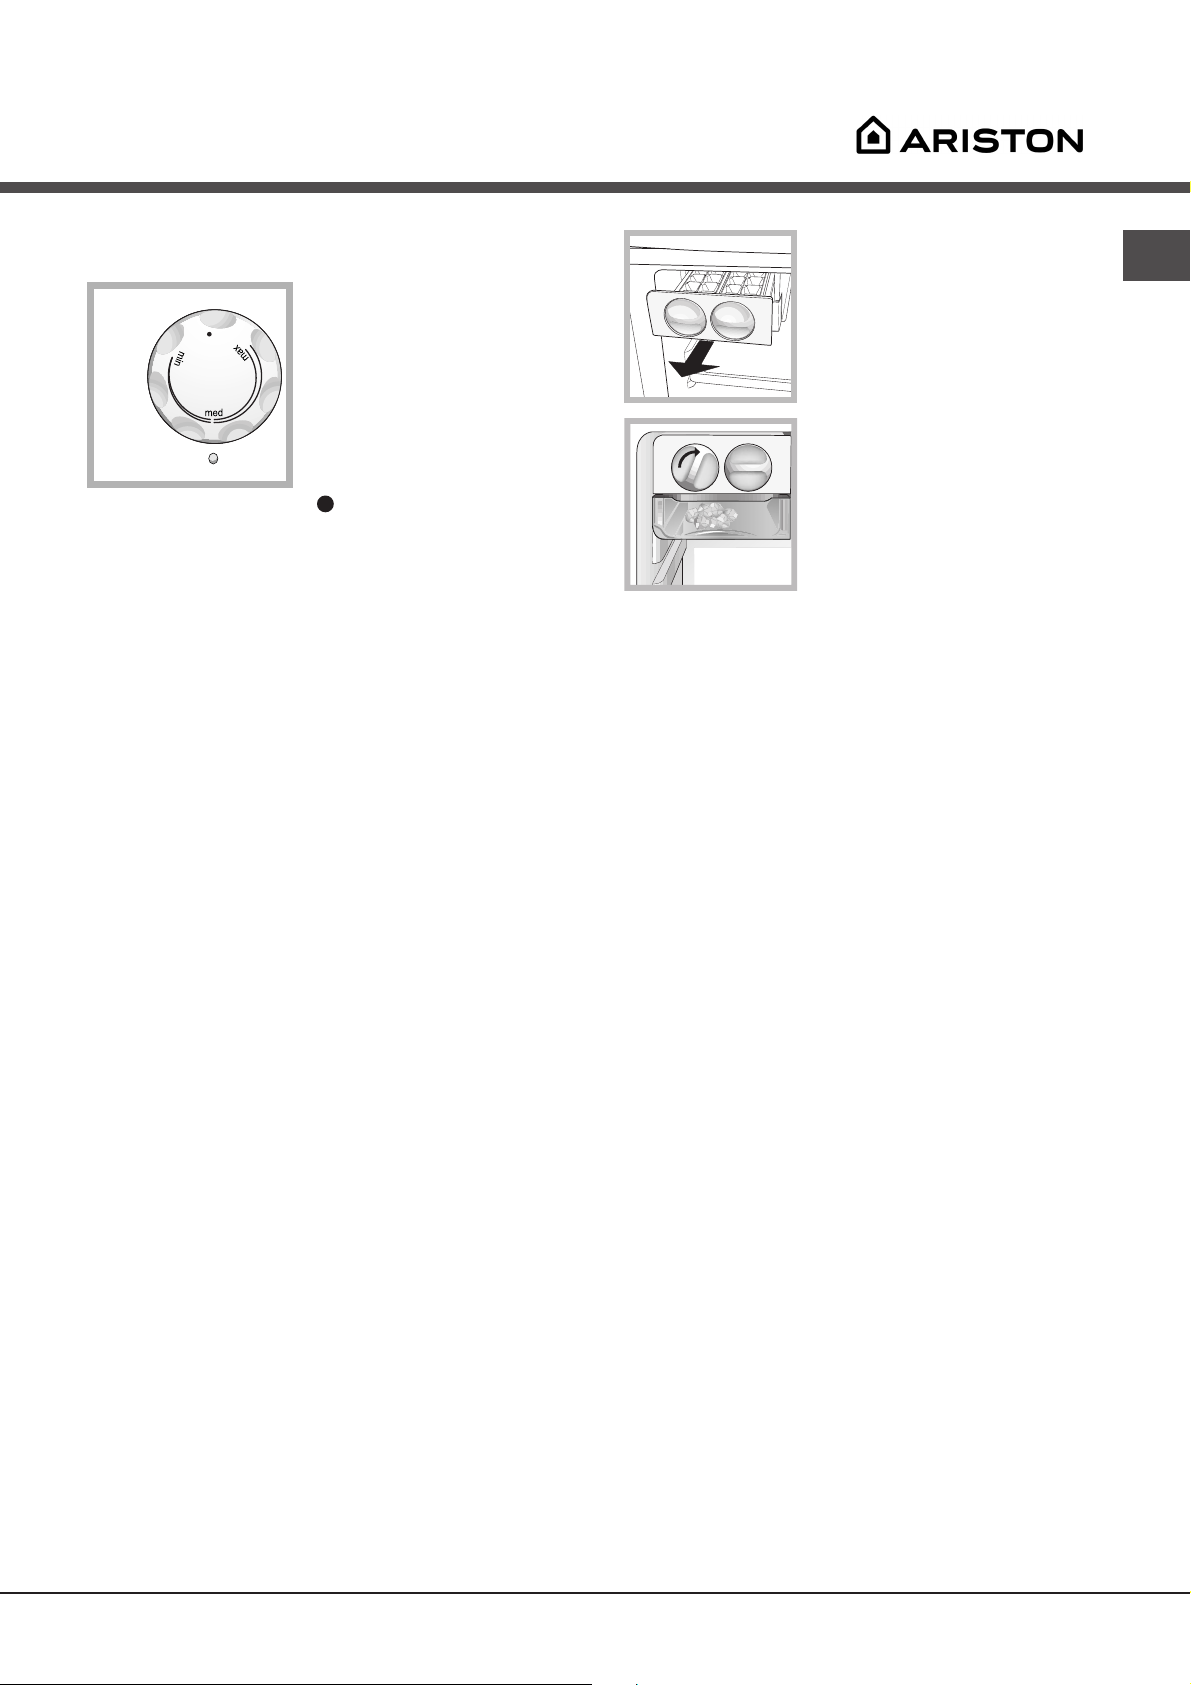
Using the freezer to its full potential
The temperature inside the
freezer compartment
automatically adjusts itself
according to the position of
the thermostat knob.
freezer
off, including the refrigerator.
Set the thermostat to the maximum max in order to freeze
foods quickly.
Set the thermostat to the medium med for normal use and
to store frozen foods for long periods.
Set the thermostat to the minimum min in order to keep ice
cubes frozen.
During hot seasons, when the knob is turned to max position,
your fridge will operate for elongated period. The thermostat
position should be brought to its initial position when the
freezer compartment is cooled sufficiently.
min = warmest
max = coldest
We recommend, however, a
medium position.
switches the appliance
ICE DEVICE
After pouring water in the special
ice cups, place them in their
places in the ice device. After
about 2 hours, the ice cubes will
be ready. In order to get the ice
cubes, it will be sufficient to turn
the two buttons to the right. The ice
cubes will fall in to the tray below,
ready to be used.
GB
• Do not re-freeze food that is defrosting or that has
already been defrosted. These foods must be cooked
and eaten (within 24 hours).
• Fresh food that needs to be frozen must not come
into contact with food that has already been
defrosted. Fresh food must be packed in the top
FAST FREEZER compartment where the temperature
drops below -18°C and guarantees rapid freezing.
• Do not place glass bottles which contain liquids, and
which are corked or hermetically sealed in the freezer
because they could break.
• The maximum quantity of food that may be frozen daily
is indicated on the plate containing the technical
properties located on the bottom left side of the
refrigerator compartment (for example: Kg/24h: 4)
! Do not open the door during freezing.
! If there is a power cut or malfunction, do not open the
freezer door. This will help maintain the temperature
inside the freezer, ensuring that foods are conserved for
at least 9 -14 hours.
! To avoid blocking the air circulation inside the freezer, it
is advisable not to obstruct the ventilation holes with food
or containers.
5
Maintenance and care
Switching the appliance off
GB
During cleaning and maintenance it is necessary to
disconnect the appliance from the electricity supply:
It is not sufficient to set the temperature adjustment
knobs on
contact.
(appliance off) to eliminate all electrical
Cleaning the appliance
• The external and internal parts, as well as the rubber
seals may be cleaned using a sponge that has been
soaked in lukewarm water and bicarbonate of soda or
neutral soap. Do not use solvents, abrasive products,
bleach or ammonia.
• The removable accessories may be soaked in warm
water and soap or dishwashing liquid. Rinse and dry
them carefully.
• The back of the appliance may collect dust which can
be removed by delicately using the hose of a vacuum
cleaner set on medium power. The appliance must be
switched off and the plug must be pulled out before
cleaning the appliance.
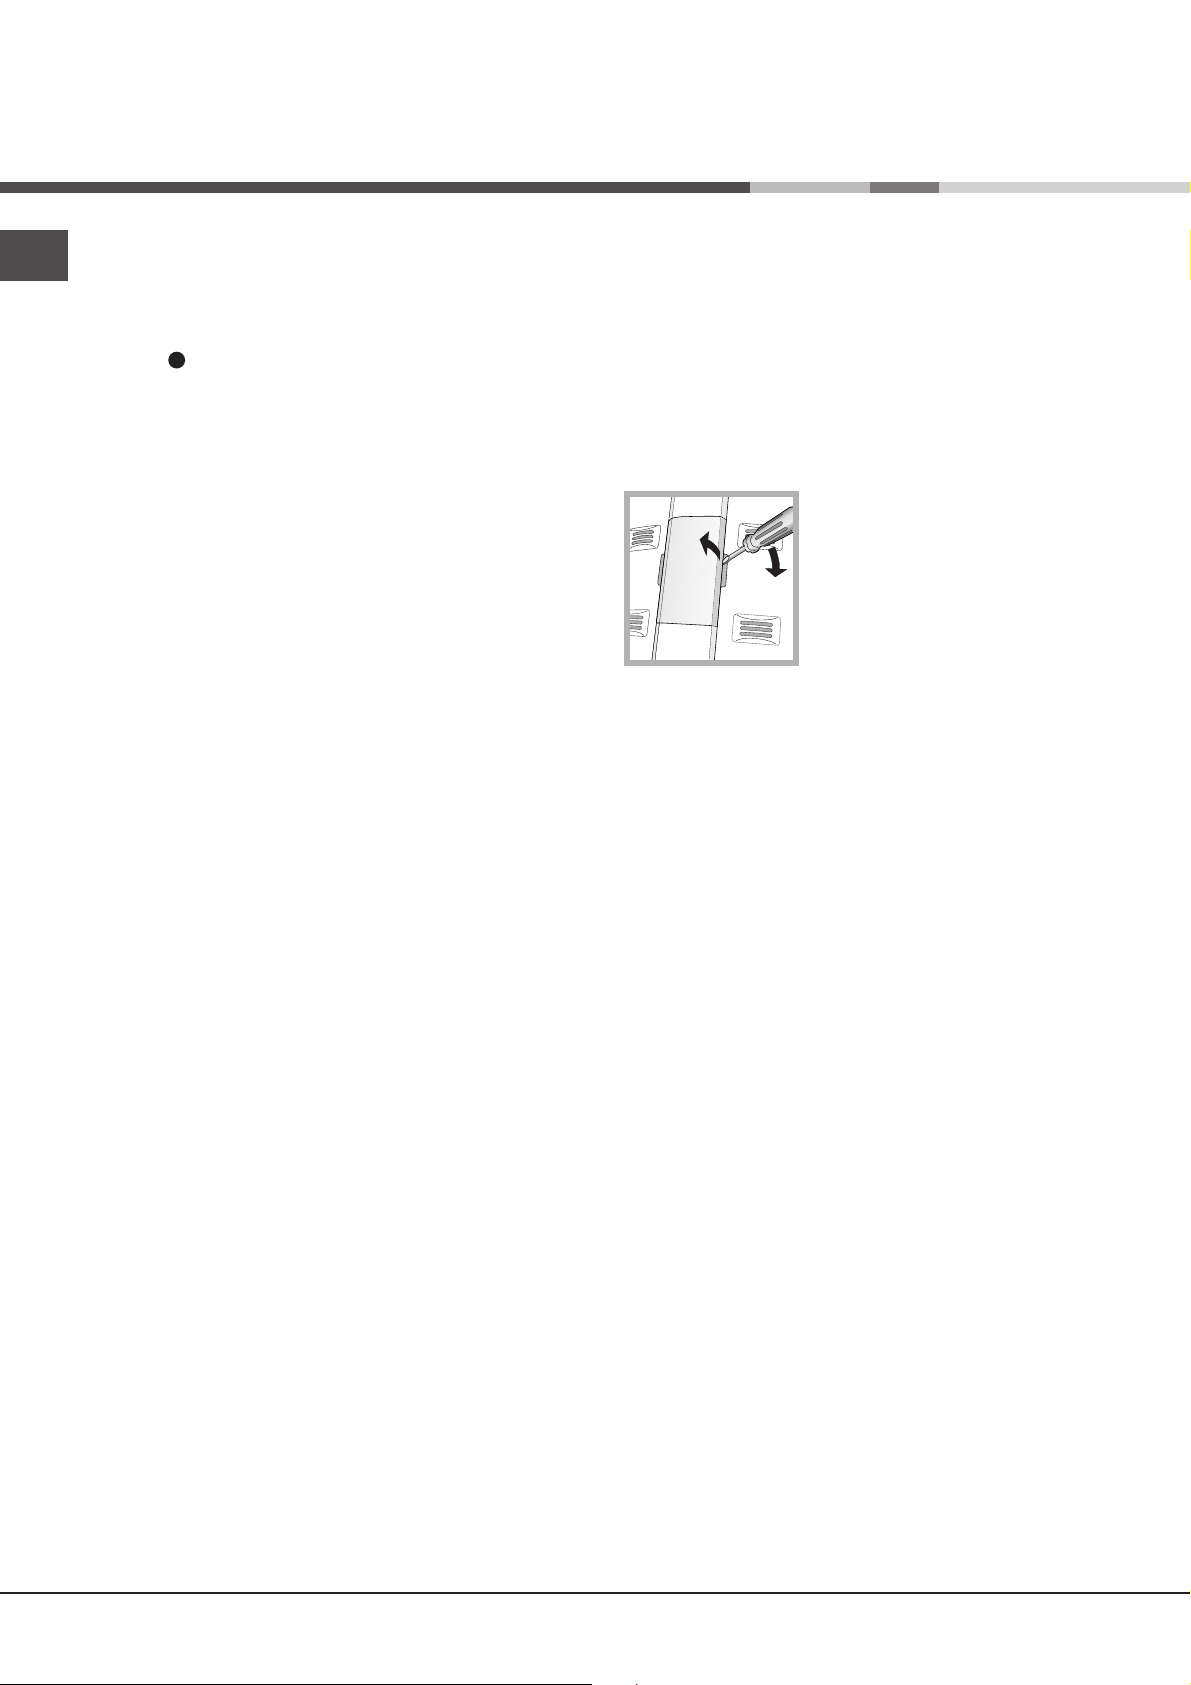
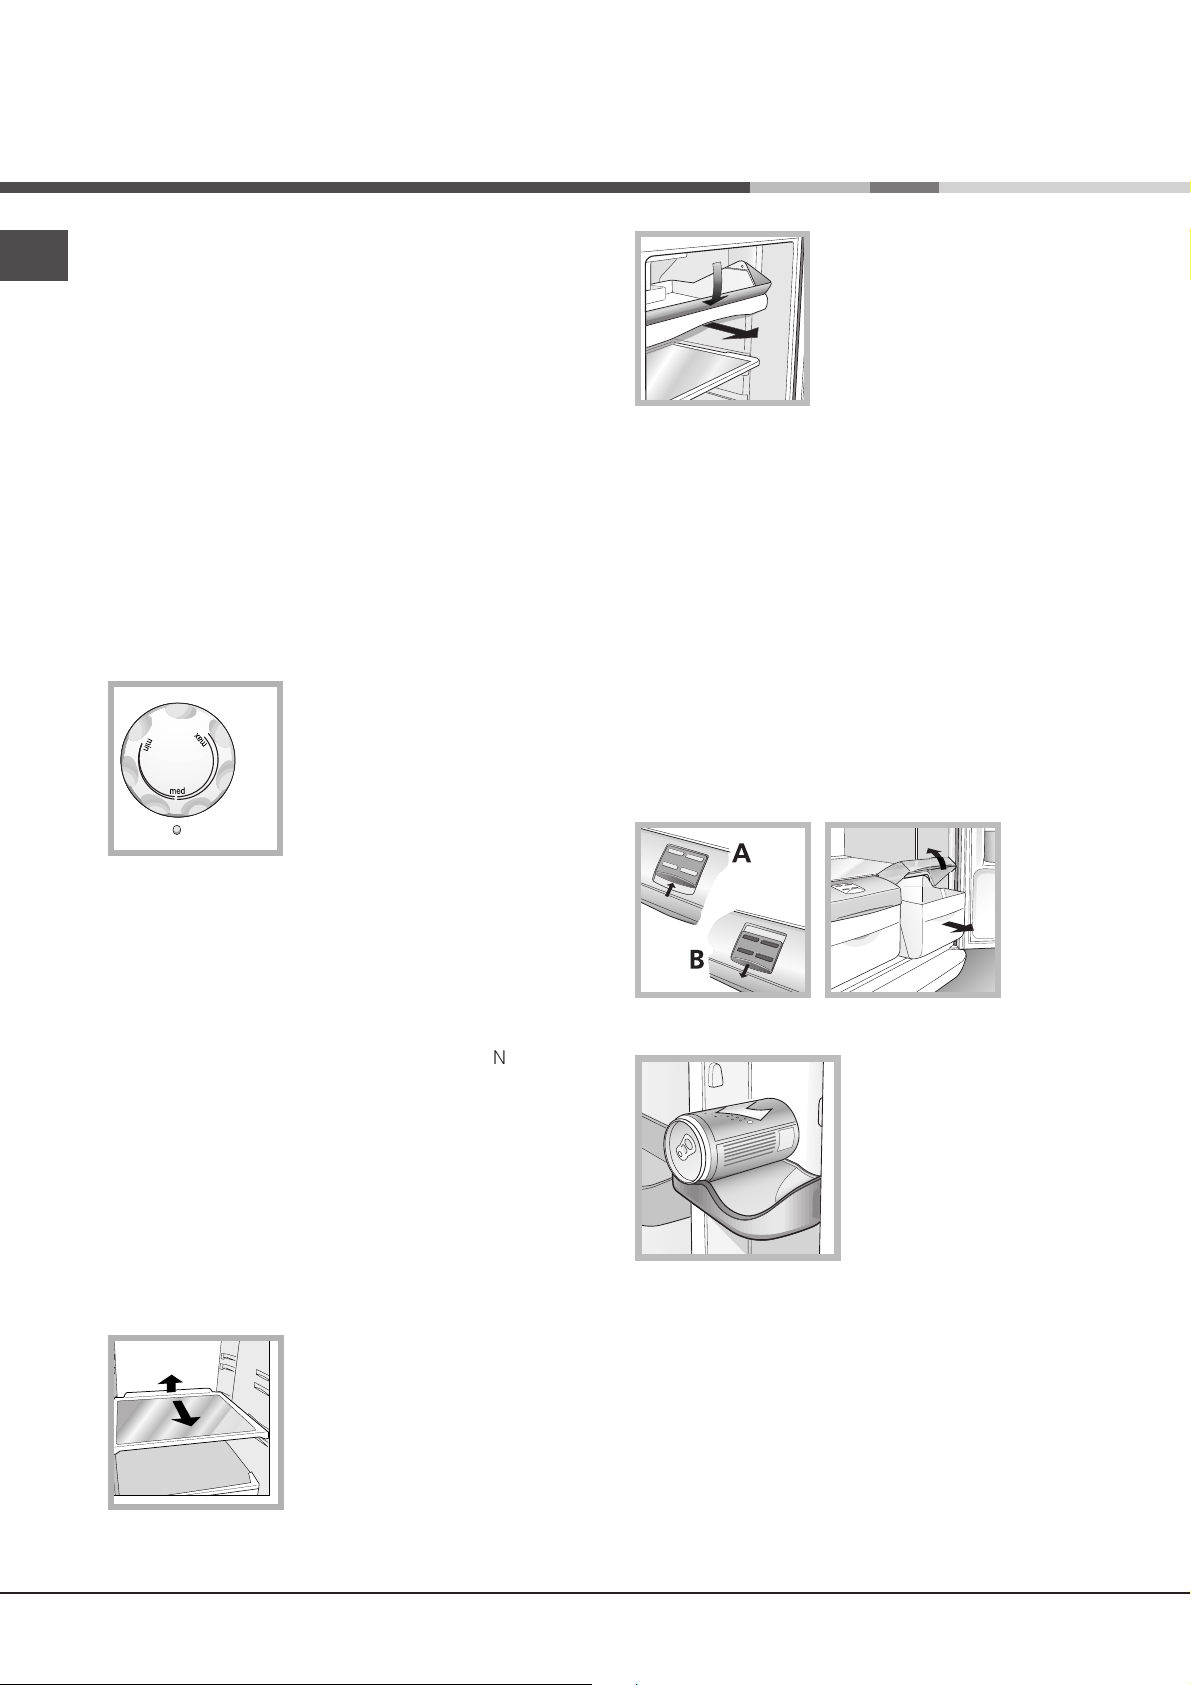
Replacing the light bulb
To replace the light bulb in the refrigerator compartment,
pull out the plug from the electrical socket. Follow the
instructions below which may vary according to the model
of the appliance.
Access the light bulb as shown (
replace it with a similar light bulb, the power of which
should not exceed 10 W.
see diagram
) and
Avoiding mould and unpleasant odours
• The appliance is manufactured with hygienic
materials which are odour free. In order to maintain an
odour free refrigerator and to prevent the formation of
stains, food must always be covered or sealed
properly.
• If you want to switch the appliance off for an extended
period of time, clean the inside and leave the doors
open.
6
Precautions and tips
! The appliance was designed and manufactured in
compliance with international safety standards. The
following warnings are provided for safety reasons
and must be read carefully.
This appliance complies with the following
Community Directives:
- 73/23/EEC of 19/02/73 (Low Voltage) and
subsequent amendments;
-89/336/EEC of 03.05.89 (Electromagnetic
Compatibility) and subsequent amendments;
- 2002/96/CE.
General safety
• The appliance was designed for domestic use inside
the home and is not intended for commercial or
industrial use.
• The appliance must be used to store and freeze food
products by adults only and according to the
instructions in this manual.
• The appliance must not be installed outdoors, even
in covered areas. It is extremely dangerous to leave
the appliance exposed to rain and storms.
• Do not touch the appliance with bare feet or with wet
or moist hands and feet.
• Do not touch the internal cooling elements: this
could cause skin abrasions or frost/freezer burns.
• When unplugging the appliance always pull the plug
from the mains socket, do not pull on the cable.
• Before cleaning and maintenance, always switch off
the appliance and disconnect it from the electrical
supply. It is not sufficient to set the temperature
adjustment knobs on
all electrical contact.
• In the case of a malfunction, under no circumstances
should you attempt to repair the appliance yourself.
Repairs carried out by inexperienced persons may
cause injury or further malfunctioning of the
appliance.
• Do not use utensils other than the scraper provided,
or electrical equipment which is not of the type
specified by the manufacturer, inside the frozen food
storage compartments.
• Do not put ice cubes taken directly from the freezer
into your mouth.
• Do not allow children to tamper with the controls or
play with the appliance. Under no circumstance
should they be allowed to sit on the bins or to hang
from the door.
• Keep packaging material out of the reach of children!
It can become a choking or suffocation hazard.
(appliance off) to eliminate
Disposal
• Observe local environmental standards when
disposing packaging material for recycling
purposes.
• The European Directive 2002/96/EC on Waste
Electrical and Electronic Equipment (WEEE), requires
that old household electrical appliances must not be
disposed of in the normal unsorted municipal waste
stream. Old appliances must be collected separately
in order to optimise the recovery and recycling of the
materials they contain and reduce the impact on
human health and the environment. The crossed out
“wheeled bin” symbol on the product reminds you of
your obligation, that when you dispose of the
appliance it must be separately collected.
Consumers should contact their local authority or
retailer for information concerning the correct
disposal of their old appliance.
Respecting and conserving the
environment
• Install the appliance in a fresh and well-ventilated
room. Ensure that it is protected from direct sunlight
and do not place it near heat sources.
• Try to avoid keeping the door open for long periods
or opening the door too frequently in order to
conserve energy.
• Do not fill the appliance with too much food:
cold air must circulate freely for food to be preserved
properly. If circulation is impeded, the compressor
will work continuously.
• Do not place hot food directly into the refrigerator.
The internal temperature will increase and force the
compressor to work harder and will consume more
energy.
• Defrost the appliance if ice forms (
A thick layer of ice makes cold transference to food
products more difficult and results in increased
energy consumption.
• Regularly check the door seals and wipe clean to
ensure they are free of debris and to prevent cold air
from escaping (
see Maintenance
see Maintenance
).
GB
).
7
Troubleshooting
Assistance
195059119.00
07/2006
If the appliance does not work, before calling for Assistance (
GB
Malfunctions:
The internal light does not
illuminate.
The refrigerator and the freezer do
not cool well.
Possible causes / Solutions:
• The plug has not been inserted into the electrical socket, or not far
enough to make contact, or there is no power in the house.
• The doors do not close properly or the seals are damaged.
• The doors are opened too frequently.
• The TEMPERATURE ADJUSTMENT knob is not in the correct position
• The refrigerator or the freezer have been over-filled.
The food inside the refrigerator is
beginning to freeze.
The motor runs continuously.
• The TEMPERATURE ADJUSTMENT knob is not in the correct
position.
• The door is not closed properly or is continuously opened.
• The outside ambient temperature is very high.
The appliance makes a lot of noise.
• The appliance has not been installed on a level surface (
Installation
• The appliance has been installed between cabinets that vibrate and
make noise.
• The internal refrigerant makes a slight noise even when the
compressor is off. This is not a defect, it is normal.
see Assistance
)
.
), check for a solution from the following list.
see
Assistance
Before calling for Assistance:
•
Check if the malfunction can be solved on your own (
• If after all the checks, the appliance still does not operate or the problem persists, call the nearest Service Centre
Communicating:
• type of malfunction
• appliance model (Mod.)
• serial number (S/N)
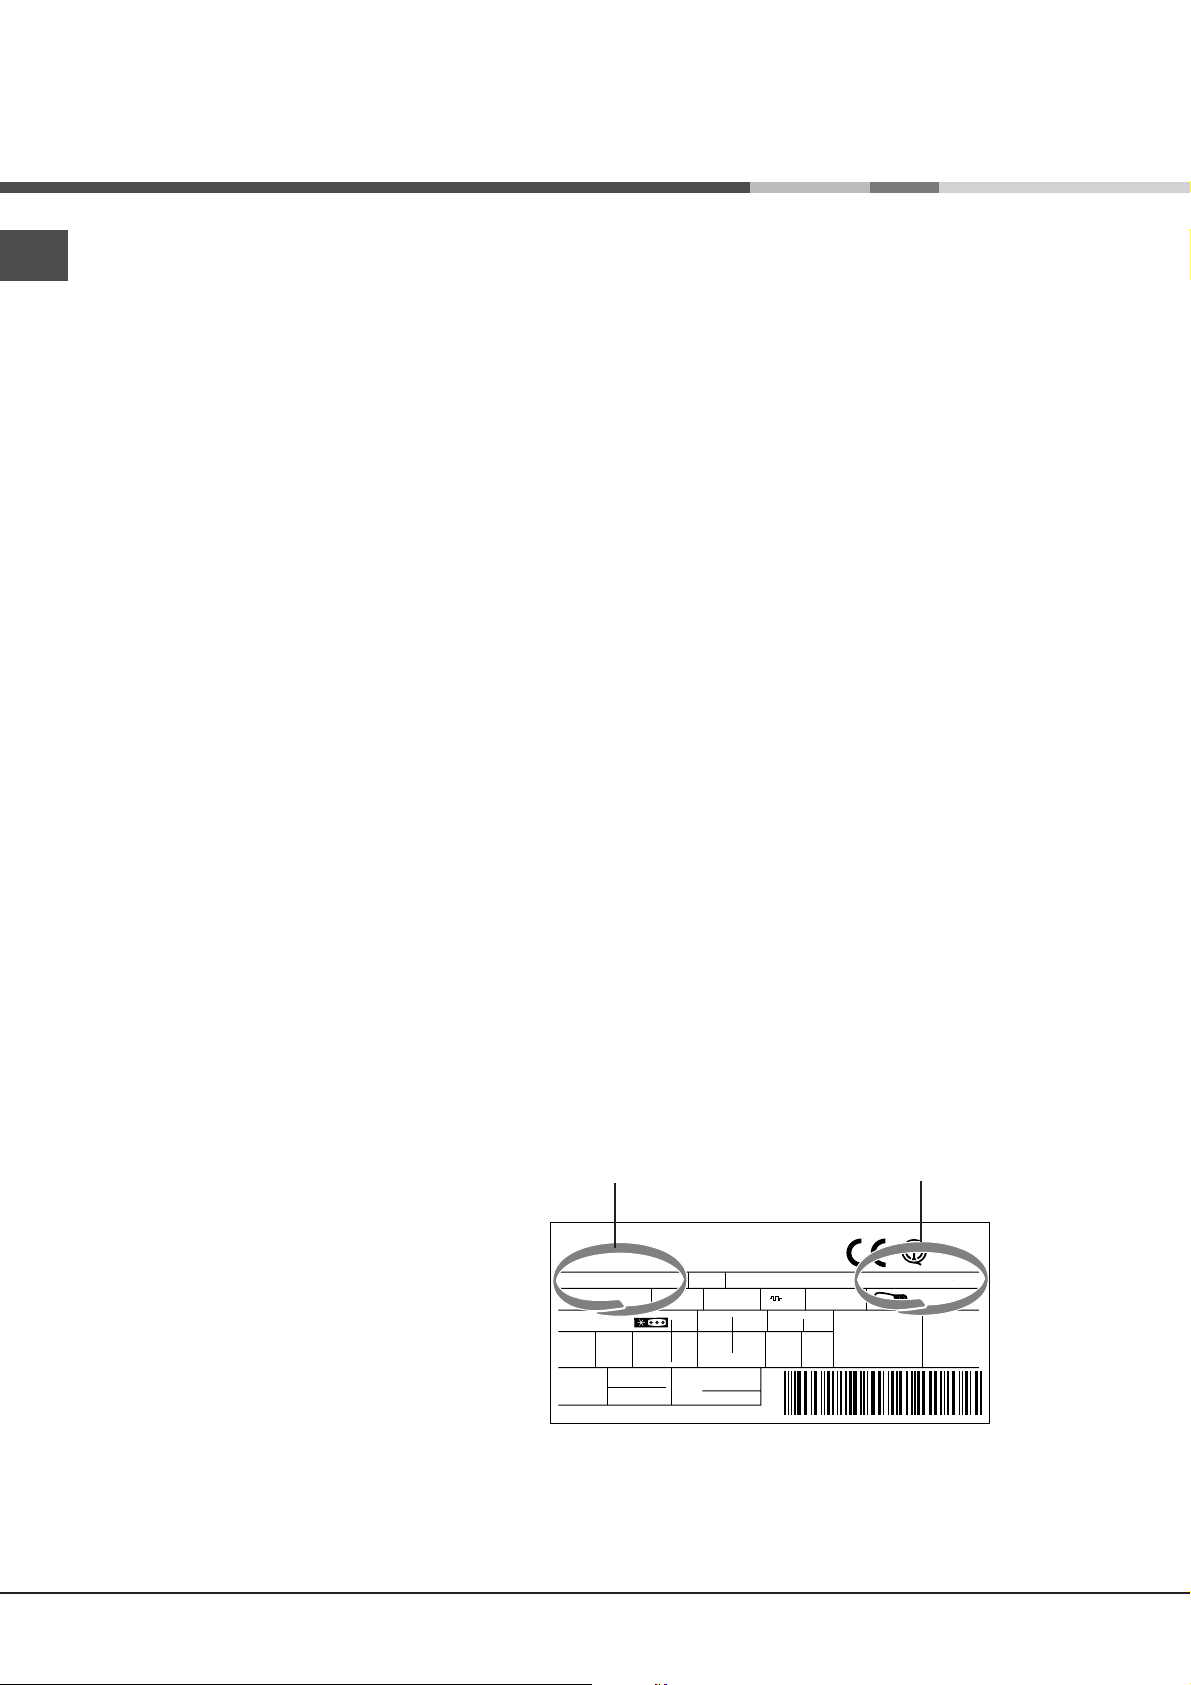
This information can be found on the data plate
located on the bottom left side of the refrigerator
compartment.
Never call on unauthorized technicians and always refuse spare parts which are not originals.
see Troubleshooting
model serial number
Gross
Bruto
Brut
75
Test
P.S-I.
TI
Net
Util
Utile
Pressure
HIGH-235
LOW 140
Cod.
RG 2330
Mod.
220 - 240 V- 50 Hz 150 W
340
Total
Gross
Bruto
Brut
Compr.
R 134 a
Syst.
kg 0,090
Kompr.
Made in Italy 13918
).
93139180000 S/N 704211801
Fuse
A
Freez. Capac
Poder de Cong
kg/24 h
4,0
Gross
Bruto
Brut
W
Max 15 w
Class
Clase
Classe
N
8
Mode demploi
REFRIGERATEUR 2 PORTES
GB F
PT
Portuges,
25
MTM 5401 F
Français, 9English, 1
40
AR
ES
Espanol, 17
Sommaire
F
Installation, 10
Mise en place et raccordement
Description de lappareil, 11
Vue d’ensemble
Mise en marche et utilisation, 12-13
Mise en service de l’appareil
Pour profiter à plein de votre réfrigérateur
Pour profiter à plein de votre congélateur
Entretien et soins, 14
Mise hors tension
Nettoyage de l’appareil
Contre la formation de moisissures et de mauvaises odeurs
Remplacement de l’ampoule d’éclairage
Précautions et conseils, 15
Sécurité générale
Mise au rebut
Economies et respect de l’environnement
Anomalies et remèdes, 16
Assistance, 16

Installation
! Conservez ce mode d’emploi pour pouvoir le consulter
F
à tout moment. En cas de vente, de cession ou de
déménagement, veillez à ce qu’il suive l’appareil pour
informer le nouveau propriétaire sur son fonctionnement
et lui fournir les conseils correspondants.
! Lisez attentivement les instructions : elles contiennent
des conseils importants sur l’installation, l’utilisation et la
sécurité de votre appareil.
Mise en place et raccordement
Mise en place
1. Placez l’appareil dans une pièce bien aérée et non
humide.
2. Ne bouchez pas les grilles d’aération arrière: le
compresseur et le condensateur produisent de la
chaleur et exigent une bonne aération pour bien
fonctionner et réduire la consommation d’électricité.
3. Prévoir au moins 10 cm entre le haut de l’appareil et
les meubles installés au-dessus et au moins 5 cm
entre les côtés et les meubles/parois latérales.
4. Installez l’appareil loin de sources de chaleur (rayons
directs du soleil, cuisinière électrique).
5. Pour maintenir une distance optimale entre le produit
et la paroi arrière, montez les cales d’espacement
comprises dans le kit d’installation et suivez les
instructions de la notice spécialement prévue.
Raccordement électrique
Après le transport, placez l’appareil à la verticale et
attendez au moins 3 heures avant de le raccorder à
l’installation électrique. Avant de brancher la fiche dans
la prise de courant, assurez-vous que:
• la prise est bien munie d’une terre conforme à la loi;
• la prise est bien apte à supporter la puissance
maximale de l’appareil, indiquée sur la plaquette
signalétique placée à l’intérieur du compartiment
réfrigérateur en bas à gauche (ex. 150 W);
• la tension d’alimentation est bien comprise entre les
valeurs indiquées sur la plaquette signalétique,
placée en bas à gauche (ex.220-240 V);
• la prise est bien compatible avec la fiche de l’appareil.
En cas d’incompatibilité, faites remplacer la fiche par
un technicien agréé (
rallonges ni prises multiples.
! Après installation de l’appareil, le câble électrique et la
prise de courant doivent être facilement accessibles.
! Le câble ne doit être ni plié ni excessivement écrasé.
! Il doit être contrôlé prériodiquement et ne peut être
remplacé que par un technicien agréé (voir Assistance).
! Nous déclinons toute responsabilité en cas de non
respect des normes énumérées ci-dessus.
voir Assistance
); n’utilisez ni
Mise à niveau
1. Installez l’appareil sur un sol plat et rigide.
2. Si le sol n’est pas parfaitement horizontal, vissez ou
dévissez les petits pieds avant pour bien niveler l’appareil.
10
Description de
lappareil
Vue densemble
Ces instructions d’utilisation s’appliquent à plusieurs modèles, il se peut donc que les composants illustrés
présentent des différences par rapport à ceux de l’appareil que vous avez acheté. Vous trouverez dans les pages
suivantes la description des objets plus complexes.
Bac à GLAÇONS
Compartiment FAST
FREEZER
Compartiment
CONSERVATION
Compartiment
FRESH BOX
Bouton
FONCTIONNEMENT
REFRIGERATEUR
Bouton
FONCTIONNEMENT
CONGELATEUR
CLAYETTE
Balconnet amovible
PORTE-OBJETS
Balconnet amovible à
abattant
Scatola
BURRO
Balconnet
PORTECANETTES
Balconnet amovible
PORTE-OBJETS
*
F
•
Reglage
DHUMIDITE
Bac FRUITS
et LEGUMES
PIED
de réglage
Leur nombre et/ou leur emplacement peut varier.
N’existe que sur certains modèles.
*
Balconnet
BOUTEILLES
11
Mise en marche et
utilisation
Mise en service de lappareil
F
! Avant de mettre lappareil en service, suivez bien
les instructions sur l’installation (
! Avant de brancher votre appareil, nettoyez bien les
compartiments et les accessoires à l’eau tiède
additionnée de bicarbonate.
1. Branchez la fiche dans la prise de courant et
assurez-vous que l’éclairage intérieur s’allume.
2. Amenez le bouton de REGLAGE DE LA
TEMPERATURE sur une valeur intermédiaire. Au bout
de quelques heures, vous pourrez commencer à
stocker des aliments dans le réfrigérateur.
voir Installation
Pour profiter à plein de votre réfrigérateur
Le réglage de la température à
l’intérieur du compartiment
réfrigérateur est automatique
en fonction de la position du
fridge
d’air froid qui absorbe l’humidité et empêche la formation
de glace et de givre: il maintient un niveau d’humidité
adéquat à l’intérieur du compartiment réfrigérateur et, grâce
à l’absence de givre, il préserve les qualités originaires des
aliments; dans le compartiment congélateur il évite la
formation de glace, il n’y a par conséquent plus besoin de
dégivrer et les aliments ne collent plus entre eux. Ne placez
pas d’aliments ou de récipients contre la paroi refroidissante
arrière pour ne pas boucher les trous d’aération et éviter une
formation rapide d’eau condensée. Fermez bien les
bouteilles et emballez les aliments.
N’introduisez que des aliments froids ou à peine tièdes,
jamais chauds (
Les aliments cuits contrairement à ce que l’on croit ne se
conservent pas plus longuement que les aliments crus.
voir Précautions et conseils
bouton du thermostat.
min = moins froid
max = plus froid
Nous conseillons toutefois une
position intermédiaire
Le No Frost gère un flux continu
FRESH BOX: pour viandes et
poissons frais. Ce compartiment
sert à prolonger la durée de
).
d’oxydation et de noircissement. Il peut aussi être utilisé
pour conserver des “plats froids”.
Bac FRUITS et LEGUMES
conservation jusqu’à une
semaine, grâce à sa
température très basse – la plus
froide du réfrigérateur – et à son
volet transparent qui protège
contre les phénomènes
Les tiroirs à fruits et légumes qui équipent le
réfrigérateur sont spécialement conçus pour garder
vos fruits et légumes frais et savoureux. Ouvrez le
régulateur d’humidité (position B) si vous désirez
conserver vos aliments dans un environnement moins
humide ou bien fermez-le (position A) pour les
conserver dans un environnement plus humide. Les
couvercles, faciles à ouvrir, il suffit pour cela de tirer le
tiroir vers vous, permettent d’introduire et de sortir
facilement les aliments.
Balconnet PORTE-
CANETTES
Le porte-canettes placé
dans la contre-porte vous
permet de ranger non
).
seulement vos canettes
mais aussi vos yogurts,
votre beurre et vos autres
récipients selon vos
exigences.
12
CLAYETTES: pleines ou
grillagées. Elles sont amovibles
1
2
et réglables en hauteur grâce à
des glissières spéciales (
), pour le rangement de
figure
récipients ou d’aliments de
grande dimension. Pour régler la
hauteur, pas besoin de sortir la
clayette complètement.
voir
 Loading...