How it Works
Log In / Sign Up
Buy Points
How it Works
FAQ
Contact Us
Questions and Suggestions
Users
Hotpoint
Loading...
L
LFZ2274
2
LFZ 3284 A IX EX
LFZ3384
LFZ 3384 A IX/HA
2
LFZ 3384 A IX TW
LFZ 338 A-HA IX
LFZ 338 A IX TW
LFZ338X
LH8FF2OX
LI2I2A
LI2I3A
LI2JBA
LI2JDA
LI2JEA
LI2SNA
LI2SZA
LI 420.C
LI 460.C
LI 460.C/HA
LI 470 A.C
LI 470 A.C/HA
LI 480 A
LI 480 A.C
LI640
LI 641 A
LI 661 A
LI 670 DUO
LI 671 A
LI 675 DUO
LI 685 PLUS
LI 68 DUO UK
LI 700 DUO
LI 700 I NA
LI700SNA
LI 700 X NA
LI 705 EXTRA
LIQ 68 DUO JADE
LIQ 700 DUO JADE
LIQ 700 DUO TI
LIQ 700 TI PLUS
LKF 61 EX
LKF 61 EX.R
LKF 6M EX.R
LKF 7114 AG.R
LKF7114EX
LKF 71 AG
LKF 71 IT/HA.R
LKF 7204 EX 60 HZ.R
LKF 720 AUS
LKF 720 AUS.R
LKF 720 EX
LKF 720 EX.R
LKF 720 SK/HA
LKF 720 X AUS
LKF 720 X AUS.R
LKF 720 X EX.R
LKF 720 X SK/HA
LKF 72 A IT/HA
LKF 72 A IT/HA.R
LKF 7M04 EX 60 HZ.R
LKF 7M0 EX.R
LKF 7M0 X EX.R
LKF 7M0 X KW.R
LKF 7M X EU
LKFA+ 7M14XFR
LL 40 EU.C
LL 42 AG.C
LL 42 AUS.C
LL 42 EU.C/HA
LL 430 FR
LL 430 FR.C
LL 430 FR.C/HA
LL 430 X FR
LL 430 X FR.C/HA
LL 43 S EU.C
LL 43 S EU.C/HA
LL 43 X AUS.C
LL 6063 EU
LL 6065 EU
LL 6065 X EU
LL 6066 EX
LL 6066 SK
LL 6066 X SK
LL 6088 SK
LL 6088 X SK
LL 63 TK.2
LL 64 77
LL 64 AUS
LL64BNA
LL 64 DE
LL 64 EU
LL 64 SK
LL 64 X AUS
LL 64 X EU
LL65
LL 6546 FR
LL 65 EU
LL 65 TK.2
LL 65 X EU
LL 66 X FR
Loading...
Loading...
Nothing found
LKF 720 EX
User Manual
52 pgs
213.36 Mb
0
Table of contents
Loading...
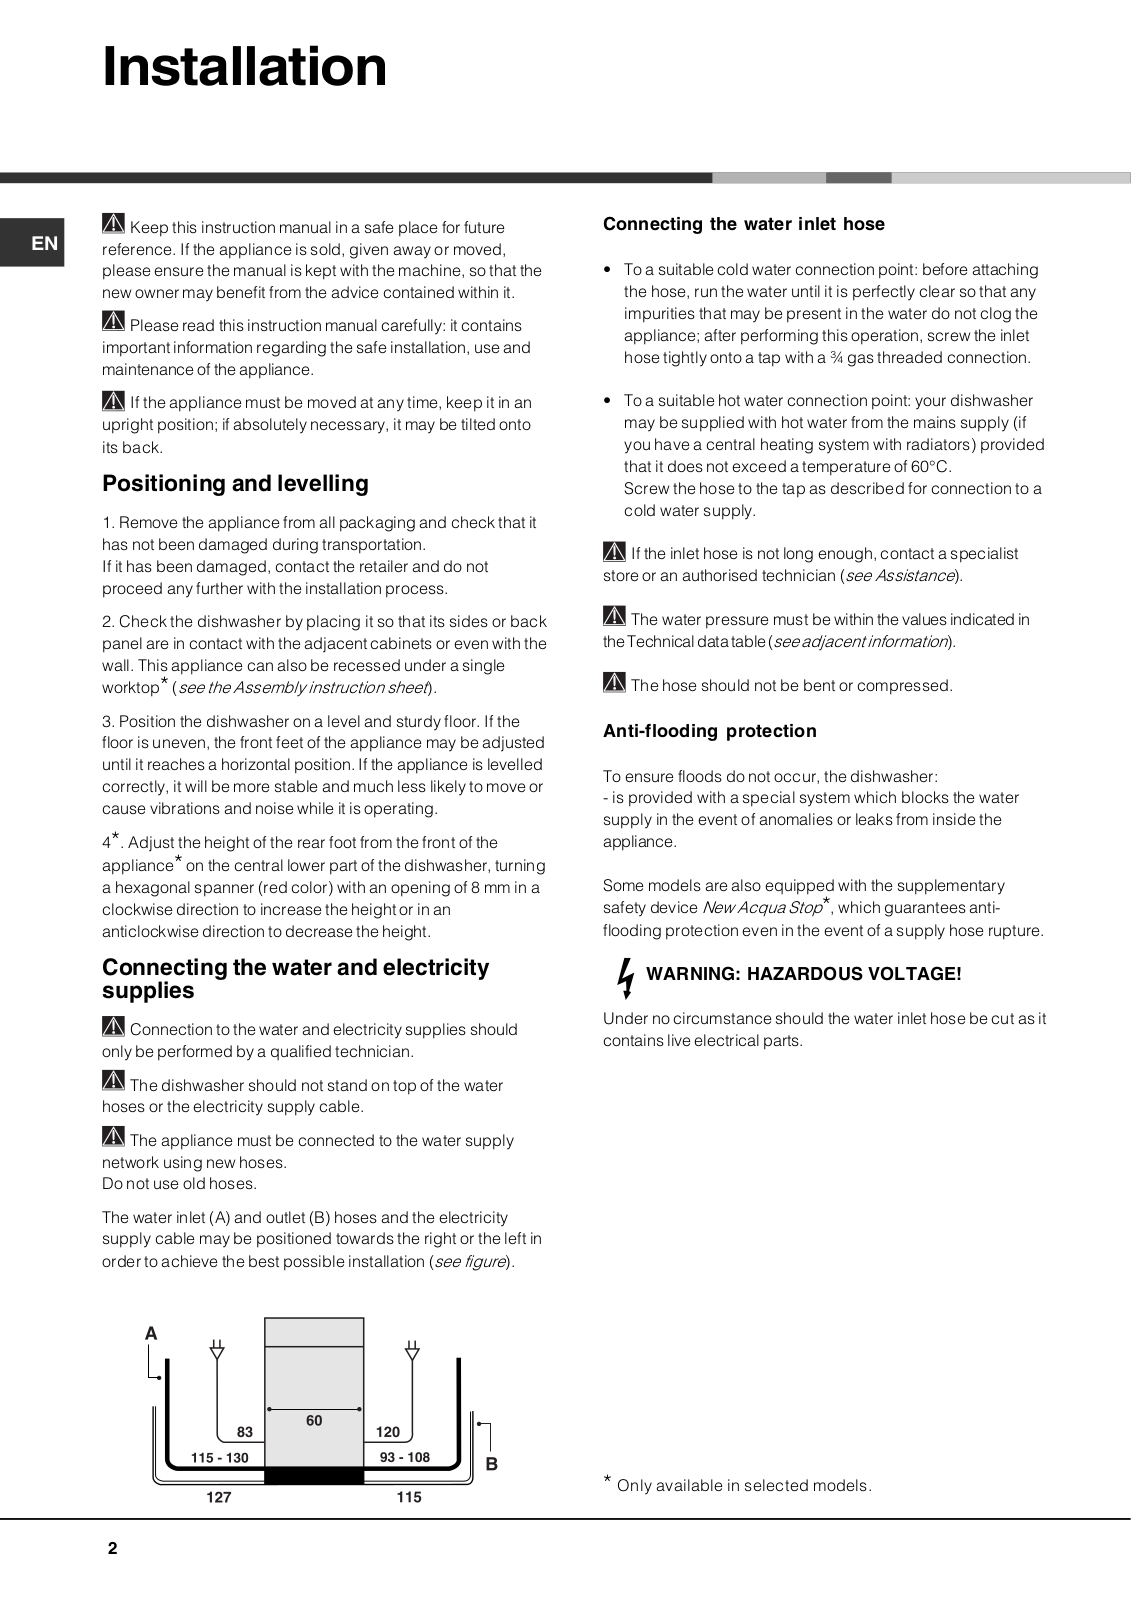
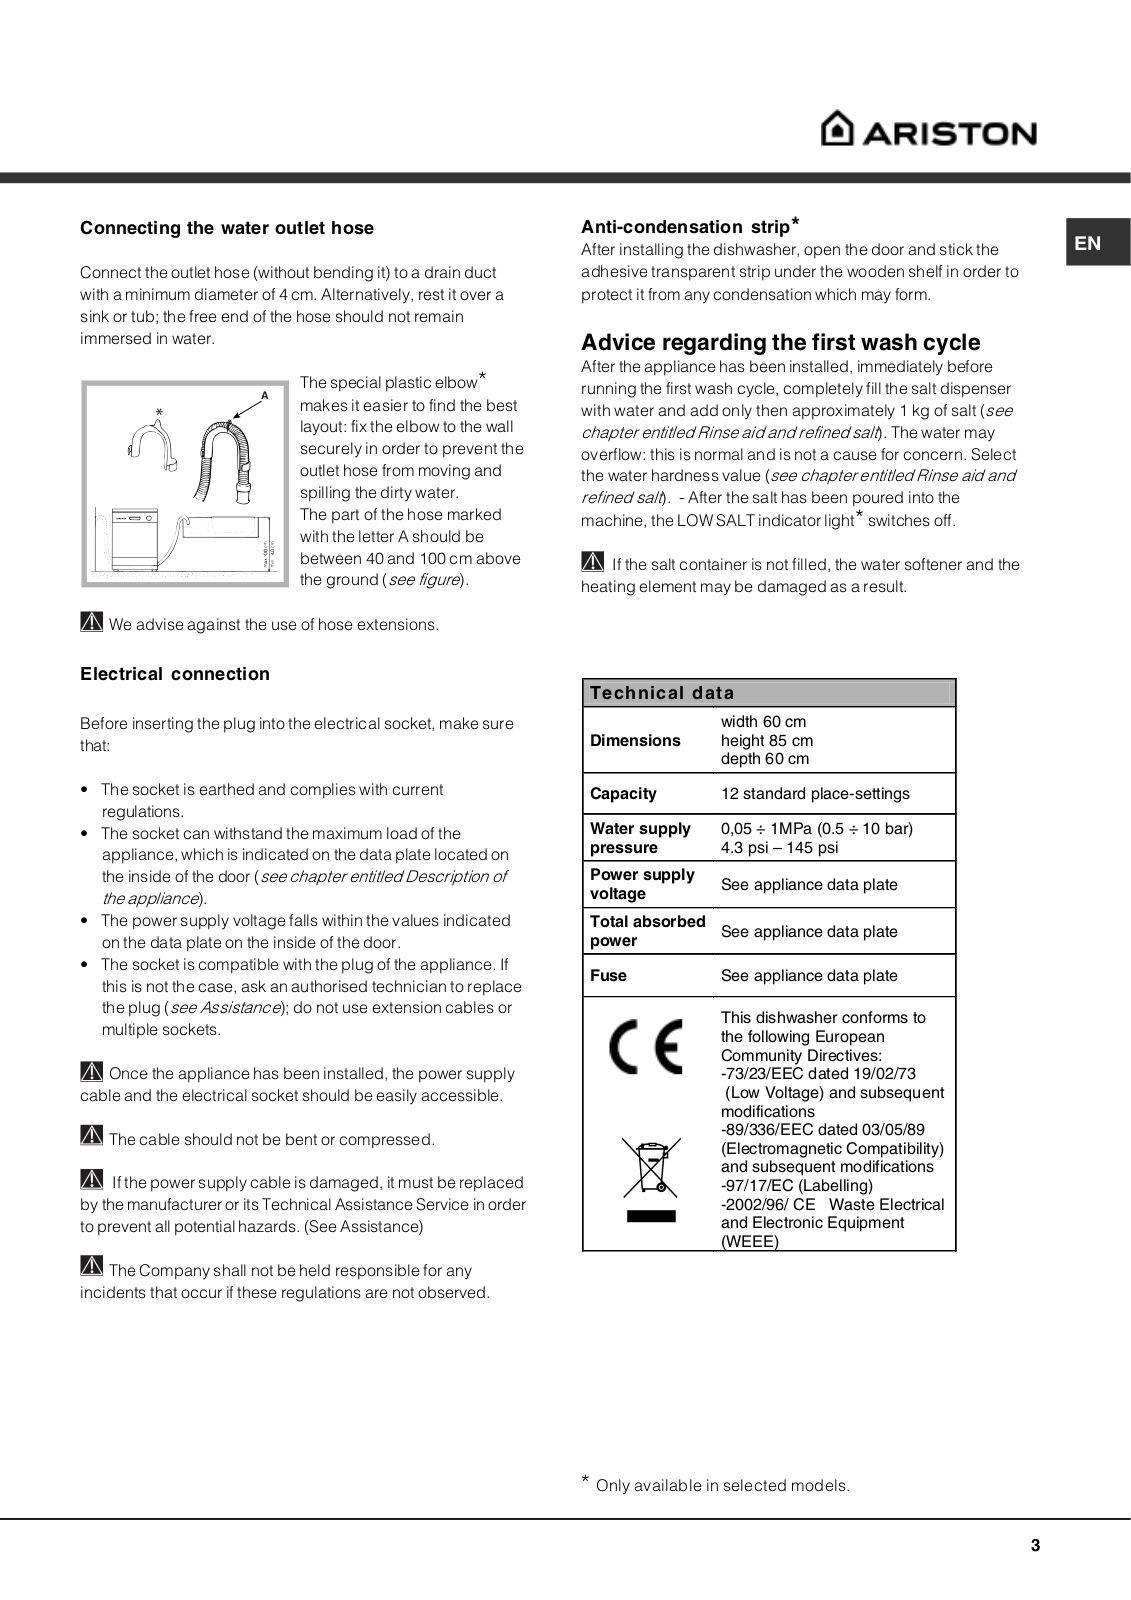
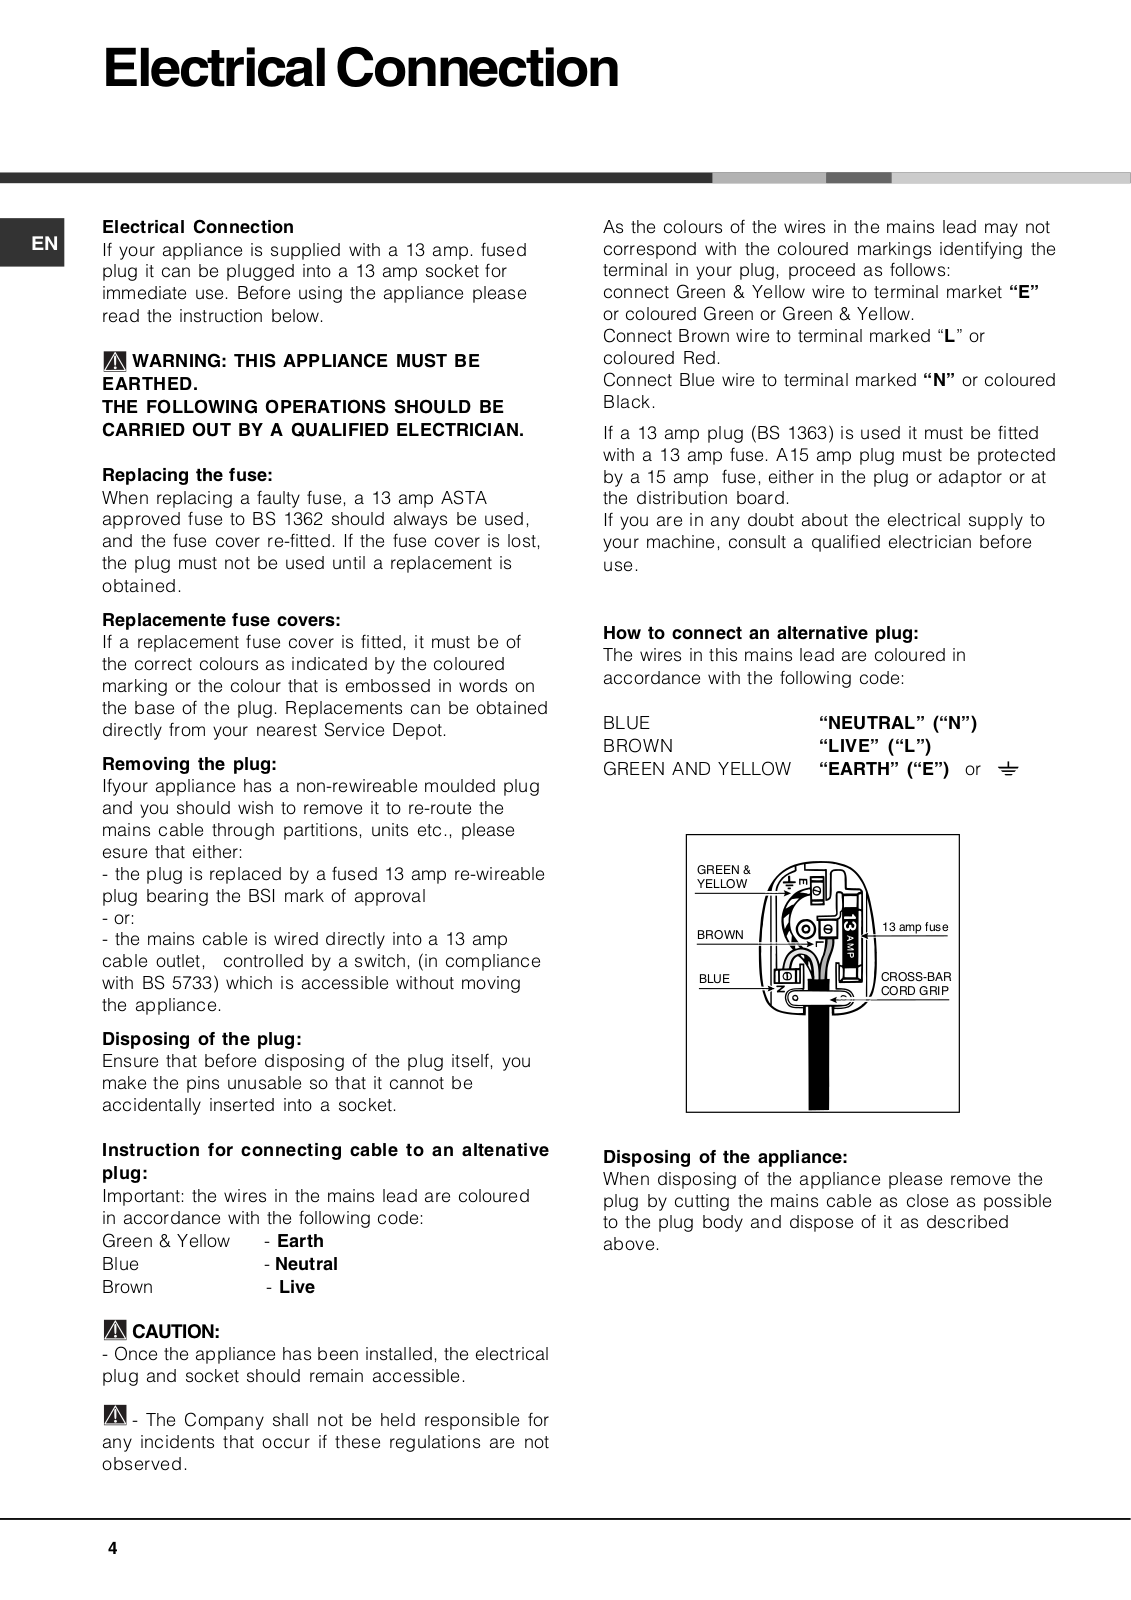
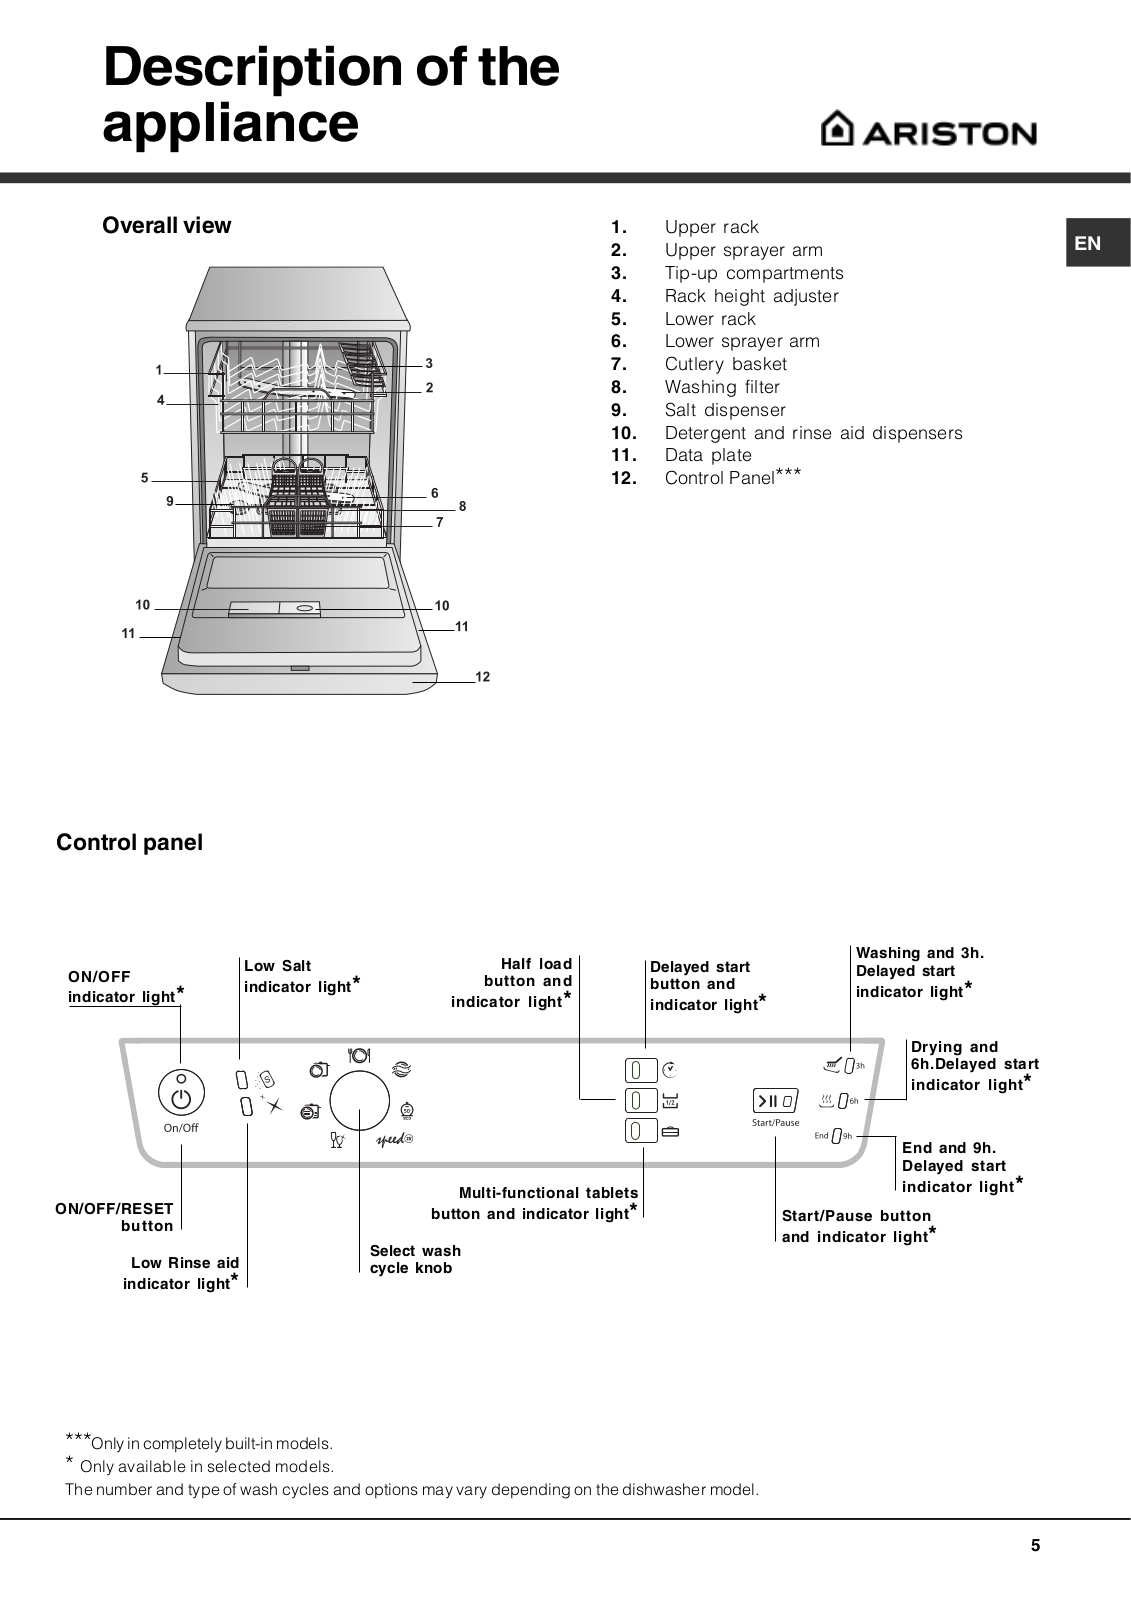
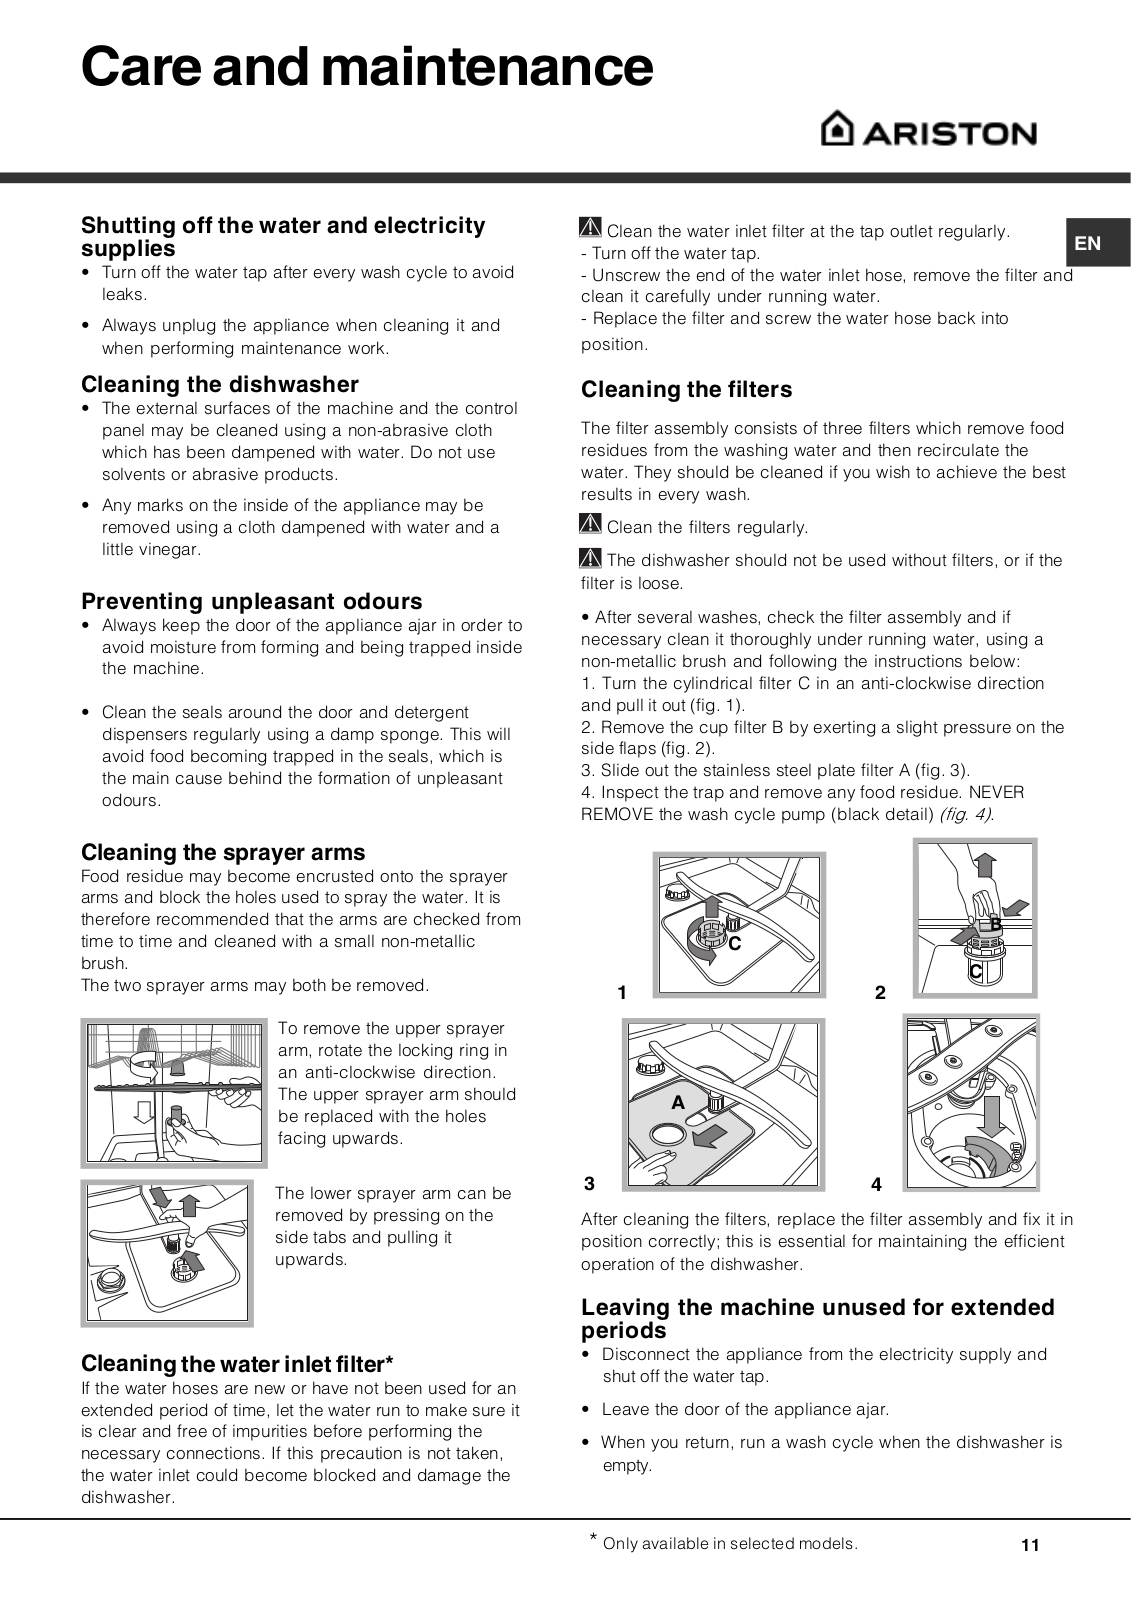
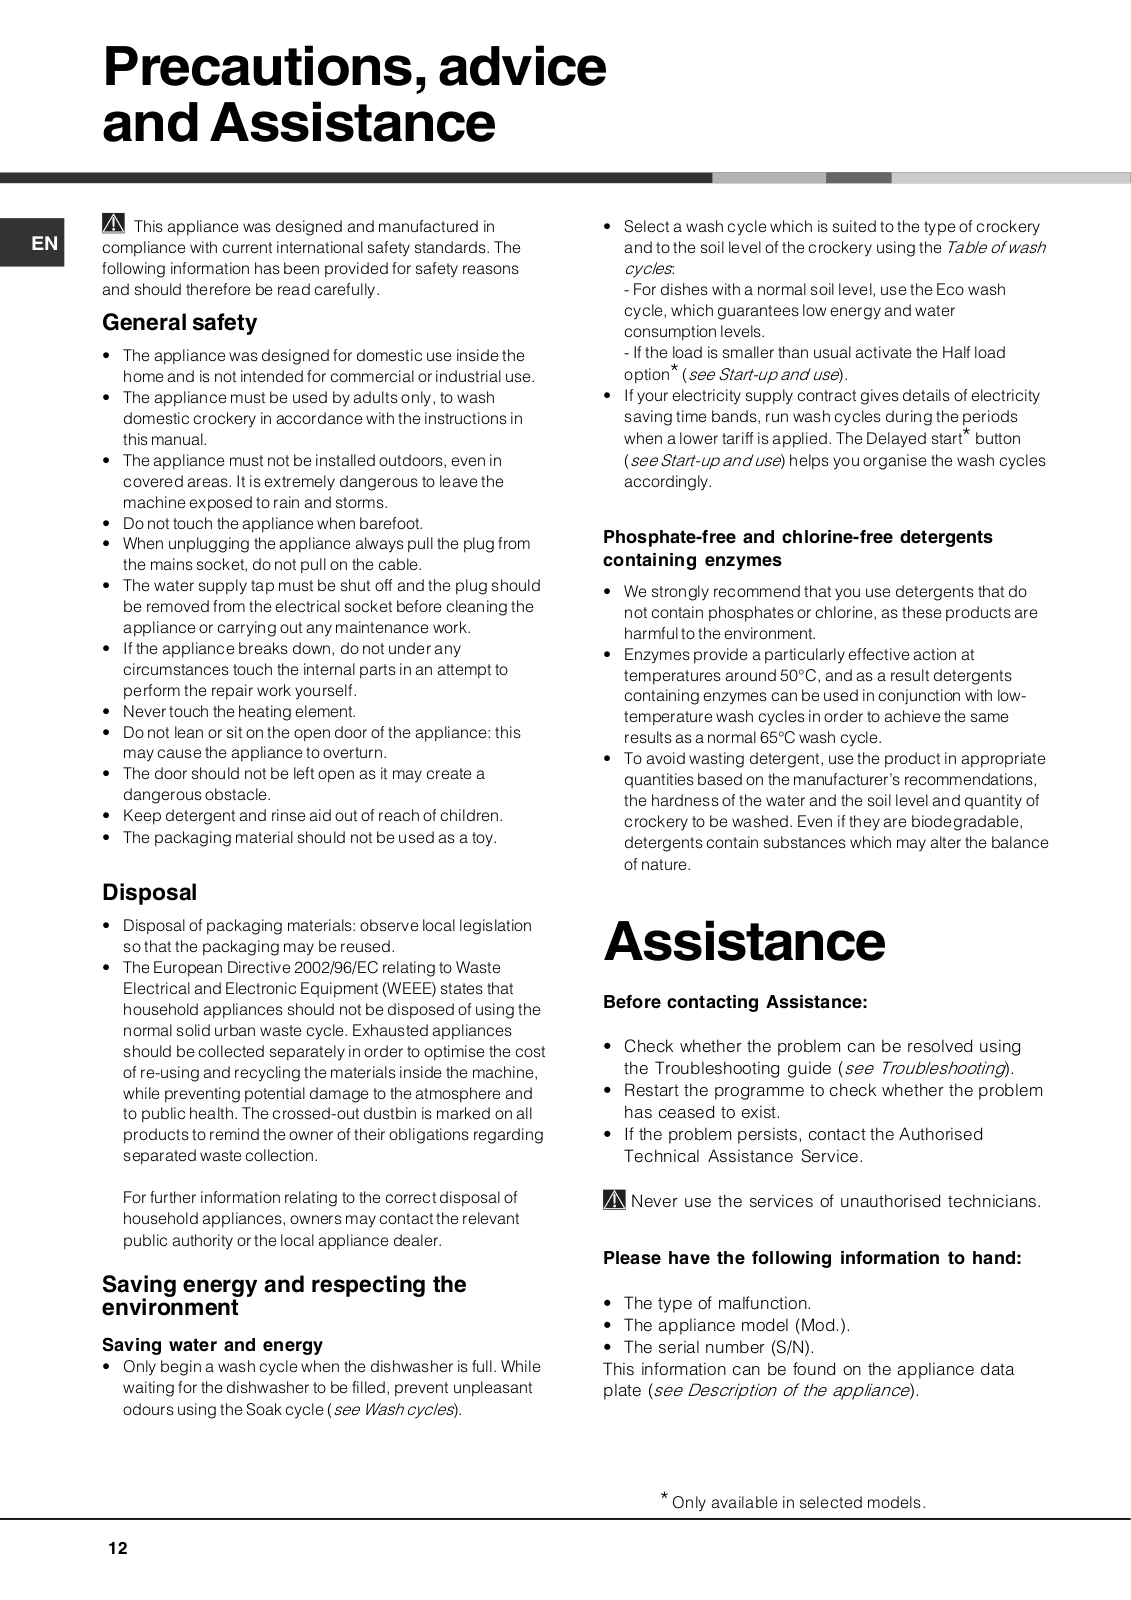
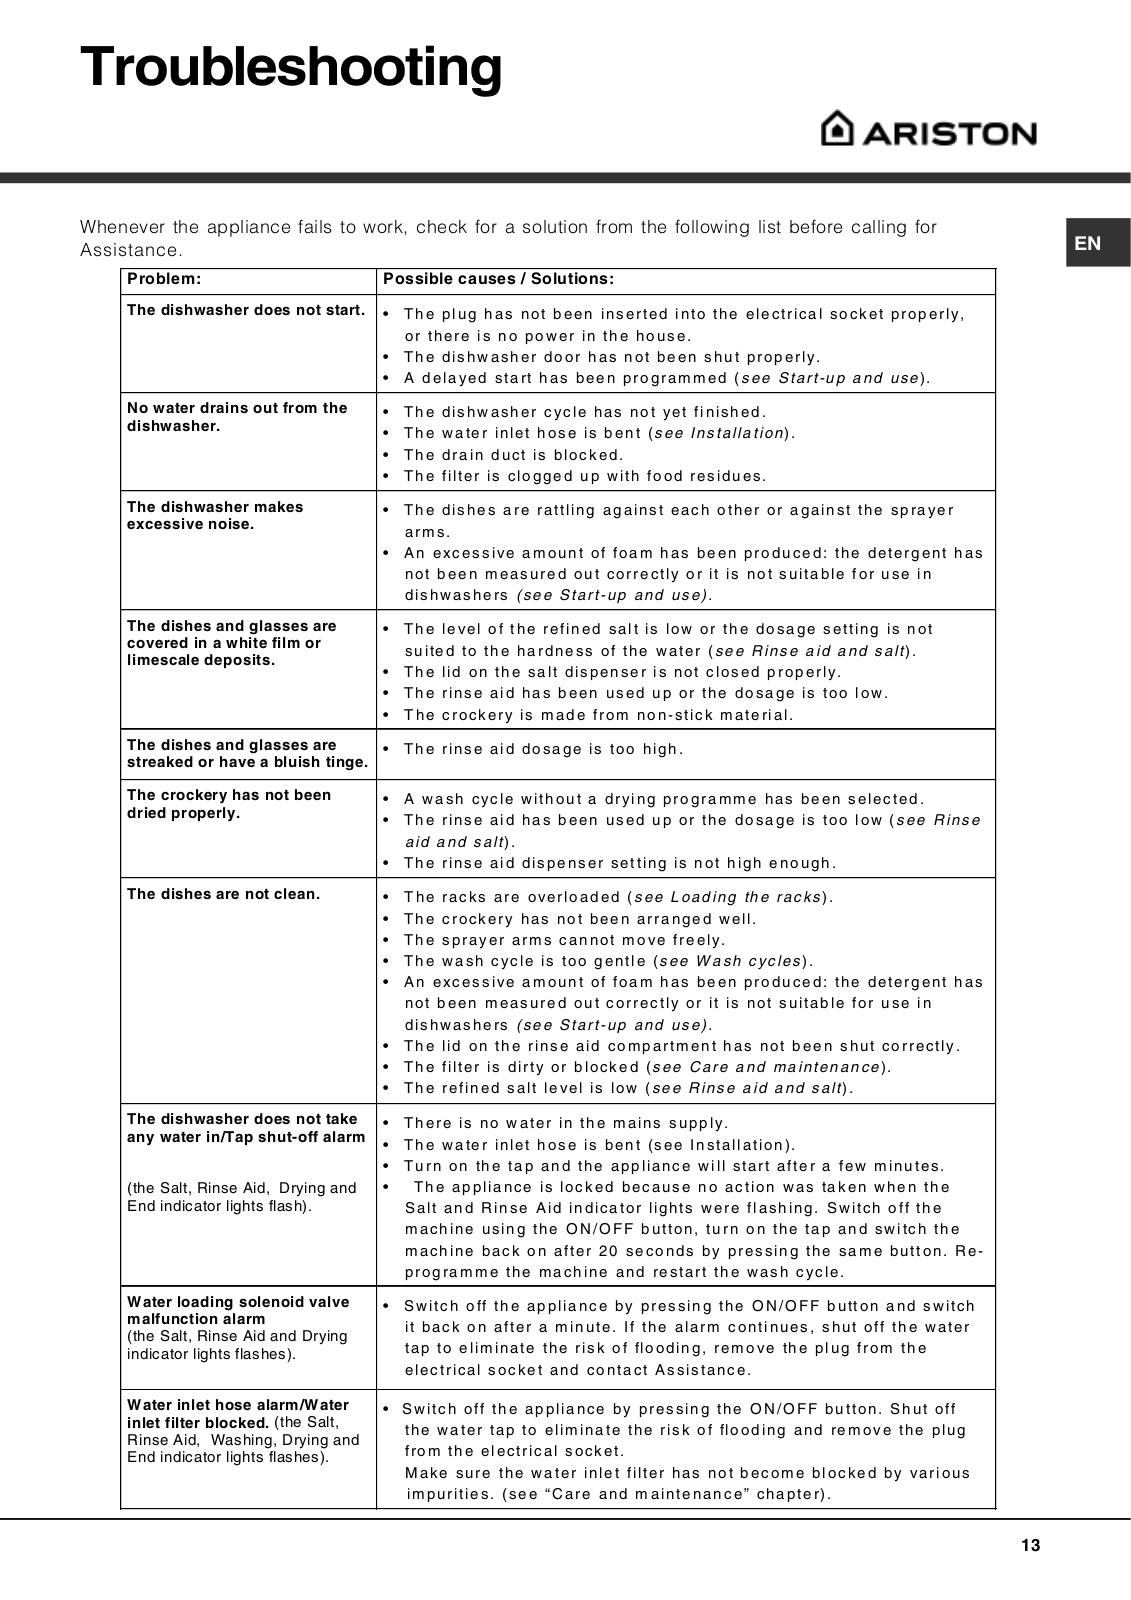
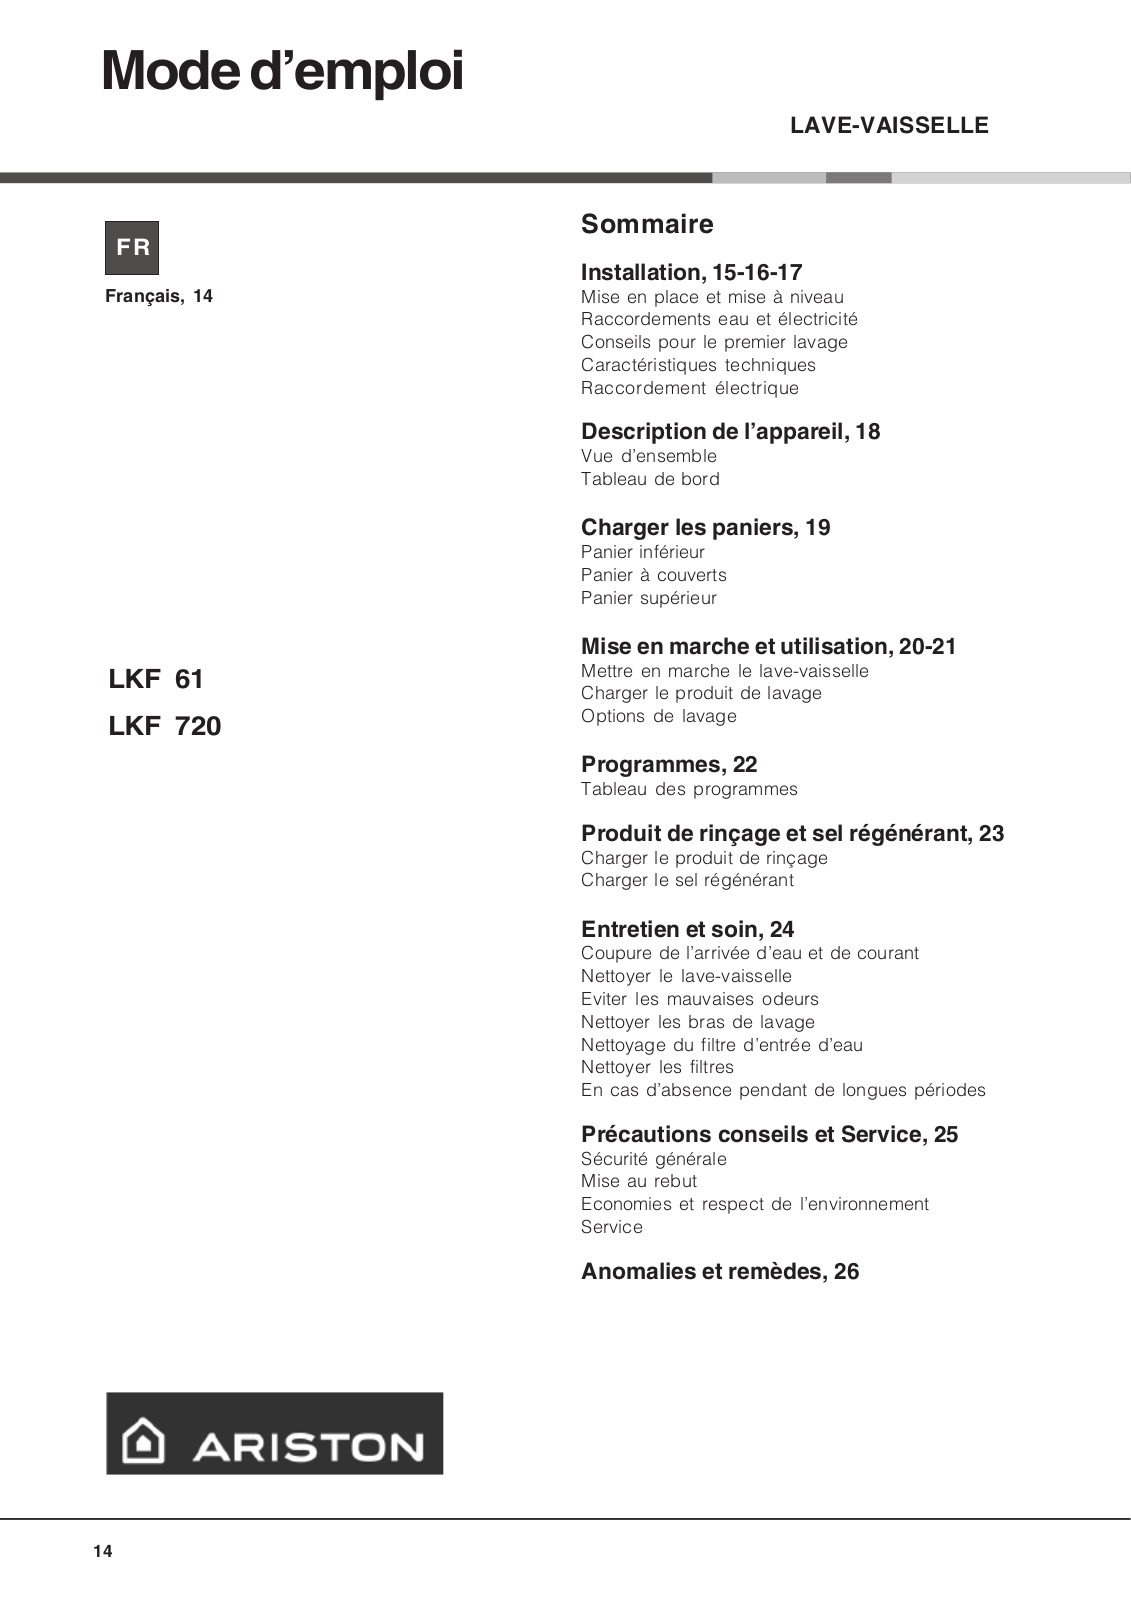
Hotpoint LKF 720 EX, LKF 720 X EX.R, LKF 61 EX, LKF 720 EX.R User Manual
...
Hotpoint User Manual
Download
Specifications and Main Features
Frequently Asked Questions
User Manual
Download
Loading...
+
36
hidden pages
Unhide
You need points to download manuals.
1 point = 1 manual.
You can buy points or you can get point for every manual you upload.
Buy points
Upload your manuals
 Loading...