

Page 1
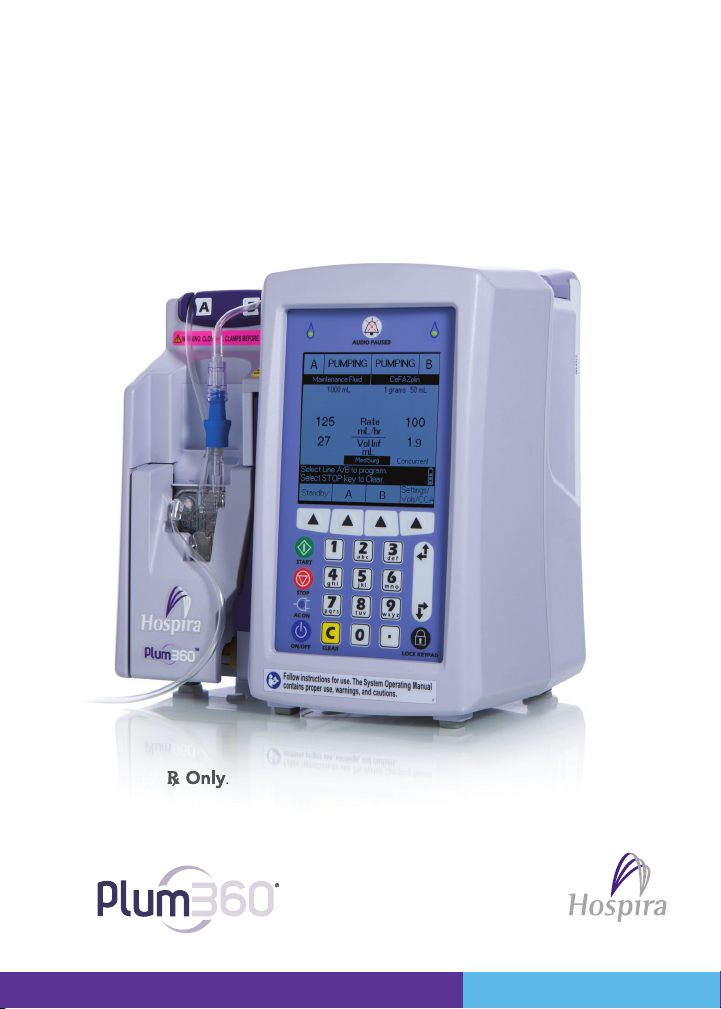
Plum 360® with
Hospira MedNet® System
Quick Reference Card Software 15.02 and 15.10
Please refer to the System Operating
Manual for complete operating instructions.
Page 2

CONTENTS
Definition of Terms 3
Definition of Operating Keys –
Indicators – Display Symbols 3
Set Up PlumSet
Clinical Care Area (CCA) Selection 6
Change CCA During Infusion 6
Programming Line A/B
with a Custom Drug Library 7
Programming Line A/B
without a Drug List 8
Programming a Bolus
(for Plum 360 SW 15.1 and higher) 8
Nurse Callback 9
Titrate Rate On Line A/B 9
Address VTBI Complete Alarm 10
Backprime 10
Stop and Start
with 1 Line Pumping 11
Stop and Start
when Line A and B Pumping 11
Standby – A/B Delivery Screen 12
Delayed Start 13
Loading Dose 13
Multistep 14
Lock Keypad (Method #1) 14
Lock Keypad (Method #2) 15
®
6
Unlock the Keypad 15
Set the Post Infusion Rate 16
View/Clear Volumes Infused 16
Adjust Display Lighting
and Contrast 17
View CCA and Infuser Settings 17
Set Distal Pressure Alarm Limit 18
Discontinue Electronic Flow
Control and Setting Gravity Flow 18
Discontinue Fluid Administration 19
Alarms and Troubleshooting 19
High Priority Alarms 20
Medium Priority Alarms 23
Low Priority Alarms 24
Line A – High Priority Alarms 25
Line A – Medium Priority Alarms 27
Line B – High Priority Alarms 28
Line B – Medium Priority Alarms 30
Line A and B –
High Priority Alarms 32
2 of 36
Page 3

DEFINITION OF TERMS
Hospira MedNet® Software – Enhances safety at the point of care
with highly customizable drug libraries that guide users and help to
protect patients by alerting to hard and soft limits, upper and lower
dosing limits intended to help prevent infusion errors. These limits
are based on a hospital’s specic IV administration practices.
Lower Hard Limit (LHL): The lower limit that cannot be overridden.
Lower Soft Limit (LSL): The lower limit that can be overridden.
Upper Soft Limit (USL): The upper limit that can be overridden.
Upper Hard Limit (UHL): The upper limit that cannot be overridden.
Auto-Program: Auto-programming refers to the ability to receive
a remotely congured therapy from Hospira MedNet
®
software.
DEFINITION OF OPERATING KEYS –
INDICATORS – DISPLAY SYMBOLS
[ON/OFF] – Infuser power on and off.
[START] – Is the rst key to press to start a delivery.
For safety reasons, every delivery must be conrmed
by checking the programming and then pressing an
additional softkey, in response to a prompt.
[STOP] – Stops delivery. If 2 lines are pumping when
you press [STOP], you must press one of the following
softkeys: s [Stop A], s [Stop B], or s [Stop All] in
response to the prompt to specify which line(s) to stop.
3
of 36
Page 4

[SELECT] – Moves the cursor between elds on the display.
The top pair of arrows moves the cursor up or to the left.
The bottom pair of arrows moves the cursor down or to the right
[LOCK KEYPAD] – Pressing this key, followed by entering a
lock passcode disables all keys on the keypad except
[STOP] until a valid passcode is entered.
[AUDIO PAUSED] – Has two functions, temporarily silencing all
audio output for any active alarms for two minutes or temporarily
silencing keypad input sound feedback for two minutes if there
is no active alarm.
[C] – Clears all values in the currently highlighted eld. [C]
also clears the dashes (- - -) that are displayed when an
entry is invalid or a drug delivery parameter is beyond the
pre-programmed hard limits. NOTE: [C] will NOT clear an
entire program.
Caution – Appears on the display to tell the clinician to use
CAUTION because the specied drug has been programmed
without rule sets (soft or hard limits), and may have been
programmed outside of specied safety limits for that
specic drug.
Upper Soft Limit Override – Appears next to the drug name
when the dosage of the drug being infused is higher than the
upper soft limit set for the drug in the Custom Drug Library.
4 of 36
Page 5

Lower Soft Limit Override – Appears next to the drug name
when the dosage of the drug being infused is less than the
lower soft limit set for the drug in the Custom Drug Library.
Wireless Connection – Appears when the infuser is
communicating with the network using a wireless connection.
Hospira MedNet Connection – Appears when the infuser
is communicating with Hospira MedNet software over either a
wireless or Ethernet connection.
Battery Capacity – Shows the battery charge level when a
battery is installed in the infuser, or indicates that a battery is
not installed.
To maintain maximum battery charge and to prolong
battery life, connect the infuser to AC (mains) power
whenever possible.
5
of 36
Page 6

SET UP PLUMSET
1
Prime the set according to package instructions.
2
Push in ow regulator to close.
3
Insert primed cassette into the infuser, close door.
4
Press [ON/OFF] to turn on the infuser.
®
CLINICAL CARE AREA (CCA) SELECTION
1
Use to highlight the desired CCA.
2
After you select the desired CCA, press s [Choose].
3
The on-screen message “New Patient” may appear – press s [Yes]
to clear all settings or s [No] to continue.
NOTE: If no settings currently exist or all settings are 0, this screen will
be bypassed.
CHANGE CCA DURING INFUSION
1
On the Delivery (A/B) screen, press s [Settings/Vol/CCA].
2
Press s [Change CCA].
• The current CCA is indicated by arrows before and after the CCA.
3
Use the [SELECT] s or t to highlight the new CCA.
4
Press s [Choose].
5
Press s [Previous Screen].
NOTE: New CCA is highlighted at the bottom of the screen.
NOTE: When the Delivery screen displays, the infuser will inform the
user that line is delivering under a prior CCA. Until a VTBI Complete
alarm occurs for the line, you can still titrate the infusion on that line
under the old CCA.
6 of 36
Page 7

PROGRAMMING LINE A/B WITH A CUSTOM DRUG LIBRARY
1
On the Delivery (A/B) screen, select a line to program. If you are
programming a primary delivery, select Line A. If you are
programming a secondary delivery, select Line B.
2
In the drug list, select the drug – You may use the alphanumeric
keypad to search.
3
Select a clinical use (if applicable).
4
Enter Weight (if applicable), Rate and/or Dose, VTBI, and Duration
as appropriate for the displayed program parameters. These values
can be entered in any order.
CAUTION: BEFORE STARTING DELIVERY, VERIFY THE VALUES.
5
Press [START].
6
Conrm the program.
7
Press s [Yes] to start the infusion.
• If a maximum hard limit is exceeded, an alert appears. You cannot
proceed until the entry is cleared. Press the
entry and enter a new value.
• If a soft limit is exceeded, an alert appears when
pressed to conrm the program.
• When the alert displays:
— Select s [Yes] to override and continue to the conrmation
screen.
or
— Select s [No] to return to the program screen and edit the value.
When programming Line B with a non-Piggybackable drug (as dened in
the Custom Drug Library), the delivery mode for Line B defaults to
Concurrent and cannot be changed.
If there is a conrmed program on Line A with a drug that is non-interruptible when programming Line B, the delivery mode for Line B will default to
Concurrent and cannot be changed.
If Line A is not programmed, or is programmed with a drug that is interruptible, and the drug selected on Line B is Piggybackable, select Piggyback
or Concurrent as the delivery mode (the default is Piggyback).
[C] key to clear the
[START] is
7
of 36
Page 8

PROGRAMMING LINE A/B WITHOUT A DRUG LIST
1
On the Delivery (A/B) Screen, select a line to program. If you are
programming a primary delivery, select Line A. If you are
programming a secondary delivery, select Line B.
2
On the Program screen, enter the Rate, VTBI and Duration.
Values can be entered in any order.
• A Caution Symbol will appear
on the Conrm Program screen
that alerts you that the infuser is being operated without rule sets.
3
Press [START].
• Before starting delivery, verify the values.
4
Press s [Yes] to start delivery.
PROGRAMMING A BOLUS (FOR PLUM 360_15.1 AND
HIGHER WITH HOSPIRA MEDNET SAFETY SOFTWARE)
• A Bolus can be delivered from either Line A or Line B (while in the
piggyback mode).
• A Bolus can be completed only if the following conditions are present:
—The line on which the bolus is to be delivered is currently infusing
—Bolus Dose is enabled within the medication’s selected prole
—Rule Sets permit the medication to be delivered by bolus
—There is adequate VTBI of the medication to complete
the bolus dose
—The device is in Piggyback mode (not Concurrent mode)
if the bolus is to be delivered on Line B
8 of 36
Page 9

1
Press s [A].
2
Press s [Bolus]. The Bolus softkey is available only if the medication
to be bolused is enabled in the drug library and is currently infusing.
3
On the Bolus programming screen enter:
Dose: ___________________________________
Duration: ________________________________
The Rate and VTBI will be calculated.
4
Press [START] for conrmation.
5
Select s [Yes] to start the delivery.
NURSE CALLBACK
1
On the programming screen, press s [Add Callback].
2
Press [START] and conrm your order for accuracy.
3
Press s [Yes] to start delivery.
Callback is available for Piggyback, Loading Dose, Multistep and
Bolus deliveries.
TITRATE RATE ON LINE A/B
1
On the Delivery (A/B) screen, select s [A] or [B] – Line does not
have to be stopped to titrate Rate.
2
Ensure Rate/Dose eld is highlighted and enter a new Rate/Dose.
3
Press [START] and conrm your order for accuracy.
4
Press s [Yes] to start the titration.
9
of 36
Page 10

ADDRESS VTBI COMPLETE ALARM
Upon completion of delivery, the screen shows a ashing “VTBI
completed Line A! – Add more VTBI or Clear Line A” message and the
audible alarm sounds.
You can change the default setting to one of the following:
— KVO: The infuser continues to deliver uid at a Keep Vein Open (KVO)
rate of 1 mL/hr. If the delivery rate of the infusion that just completed was
less than 1 mL/hr , the KVO rate will continue at the same delivery rate.
— RATE: The infuser continues to deliver uid at the programmed
rate, maintaining the therapeutic rate until the VTBI Complete
alarm can be resolved.
1
Press [AUDIO PAUSED] to stop the alarm sound.
2
Press s [A].
3
Ensure the VTBI eld is highlighted – using the numeric keypad,
enter a new VTBI.
3
Press [START] and conrm your order for accuracy.
4
Press s [Yes] to start the titration.
BACKPRIME
Before you begin a backprime, ensure that there is a line or a syringe
on the secondary port to accept the backprimed uid or expelled air.
When you release s [Backprime] the infuser performs a cassette test.
1
Press and hold s [Backprime] until uid pumped from Line A
to Line B clears air from the cassette and from Line B (if present).
NOTE: If you press and hold the [Backprime] key for two minutes,
a stuck key alarm sounds and the display screen shows Power Off then
On. Replace pump if alarm continues.
10 of 36
Page 11

2
If the cassette test detects that there is still air in the line, repeat
Step1 until the cassette test is successful.
3
Press [START] to restart the delivery. If two lines were pumping
when delivery stopped, press the appropriate softkey in response
to the prompt.
STOP AND START WITH 1 LINE PUMPING
1
On the Delivery (A/B) screen, press [STOP].
2
Press [START] to resume the infusion.
STOP AND START WHEN LINE A AND B PUMPING
1
On the Delivery (A/B) screen, press [STOP].
2
Press s [Stop All] or s [Stop A] or s [Stop B].
To Resume the infusion:
1
Press [START].
2
Press s [Start All] or s [Start A] or s [Start B].
11
of 36
Page 12

STANDBY – A/B DELIVERY SCREEN AND
CONFIRMATION SCREEN
Standby - Enables the clinician to postpone starting the delivery for a
period of 24-72 hours. Default is 72 hours.
If a line is in standby and the con gured maximum standby time expires,
the program is cleared and the infuser alarms 2 minutes later if there
has been no interaction with the pump on either line.
To place the infusion in Standby – from the Delivery Screen:
1
Press s [Standby] and select the
desired line to put in standby mode.
2
On the Con rm Standby screen –
press s [Yes]
To place the infusion in Standby –
from the Confi rmation Screen:
After entering program on desired line,
press
Program Screen:
1
2
[START]. From the Con rm
Press s [Standby] and select the
desired line to put in standby mode.
On the Con rm Standby screen,
press s [Yes] to put the delivery
in standby mode.
To restart the infusion from Standby:
1
Press [START].
The Cancel Standby screen displays. If both lines are in standby, the
infuser will give you the option to select a line.
2
Select the appropriate softkey. Delivery resumes on the selected line(s).
12 of 36
Page 13

DELAYED START
1
On the Program screen, press s [Delay].
2
Enter time in hours and minutes up to 23:59 hh:mm and press
s [Done]. Delivery screen shows DELAYED and delay time countdown.
3
Press [START] and s [Yes] to conrm to resume the infusion.
4
To clear a delay, choose the line, press s [Delay], then change or
clear the delay settings, then press s [Done].
LOADING DOSE
1
After your medication is selected, press s [Choose].
2
Press s [Loading Dose] before entering any values on the
programming screen. The Program Loading Dose screen appears.
3
Enter Rate and/or Dose, VTBI, and Duration as appropriate for the
parameters displayed for 1 (Loading Dose).
NOTE: On the Program Loading Dose screen, 1 represents the
Loading Dose and 2 represents the Maintenance Dose.
4
After completely programming 1 (Loading Dose) navigate to 2
(Maintenance Dose) and program the Maintenance Dose parameters.
5
When both Loading Dose and Maintenance Dose are programmed,
press
6
Conrm that all programming is correct, and then press s [Yes].
[START].
13
of 36
Page 14

MULTISTEP
1
After your medication is highlighted, press s [Choose].
2
Press s [Multistep] before entering any values on the programming
screen.
3
Enter Rate and/or Dose, VTBI, and Duration as appropriate for the
parameters displayed for Step 1.
4
After programming all values in 1 (Step 1), navigate to the 2 (Step 2),
and program that step.
5
After programming all values in 2 (Step 2), continue with 3 (Step 3)
if desired.
6
Press s [To Steps 4-10] to program additional steps if needed.
7
When all steps are programmed, press [START].
8
Conrm that all programming is correct, and then press s [Yes]
to start the delivery for 1 (Step 1).
LOCK KEYPAD (METHOD #1)
Using the Lock Keypad hardkey.
1
Press the
2
The Passcode data entry screen appears on the display.
3
Enter the passcode using the numeric keypad.
4
Press the s [Enter] softkey.
When the keypad is locked, the lock symbol
right corner of the delivery screen.
[LOCK KEYPAD] hardkey.
appears in the bottom
14 of 36
Page 15

LOCK KEYPAD (METHOD #2)
Via Settings/Vols/CCA
1
At the main delivery screen, press [Settings/Vols/CCA] softkey.
2
Press s [Lock Keypad] – the Passcode data entry screen appears
on the display.
3
Enter Passcode to Lock using the numeric keypad.
4
Press s [Enter] softkey.
When the keypad is locked, the lock symbol
appears in the bottom
right corner of the delivery screen.
UNLOCK THE KEYPAD
1
Press any key on the keypad to display the Passcode data entry
screen.
2
Enter the passcode using the numeric keypad.
3
Press the s [Enter] softkey.
NOTE: During an infusion, pressing
[STOP] or opening the cassette
door, activates an alarm that cannot be silenced until the keypad is
unlocked.
15
of 36
Page 16

SET THE POST INFUSION RATE
1
On the Main Delivery screen, press s [Settings/Vols/CCA].
The Settings/Vols/CCA screen appears, with the Post Infusion
Rate highlighted.
2
Press s [Choose]. The Post Infusion Rate screen appears, with
the current setting highlighted.
3
To change the current setting, press s [KVO/Rate]. To return to the
previous setting, press s [KVO/Rate] again.
4
Press s [Done] to save your changes and return to the Settings/
Vols/CCA screen and then press s [Previous Screen] to return to
the delivery screen.
NOTE: When changing the Post
Infusion Rate from what is defaulted
on the device, the new change will
remain in place for any subsequent
infusions programmed on the
device unless manually changed
back or, when powering the device
back ON and s [Yes] is answered
to the “New Patient?” screen.
Verify that the
Post Infusion
Rate is appropriate for the
Infusion.
VIEW/CLEAR VOLUMES INFUSED
1
On the Main Delivery screen, press s [Settings/Vols/CCA].
2
Use [SELECT] to highlight Volumes Infused and then press s
[Choose].
• The Volumes Infused Screen displays the volumes infused on Line A,
Line B and the total infused.
3
Document totals.
4
Press s [Clear A] to clear the Line A total only (and subtract the
total from the Total Volume).
5
Press s [Clear B] to clear the Line B total only (and subtract the
total from the Total Volume).
16 of 36
Page 17

6
Press s [Clear Total] to clear all values, including the Total Volume.
7
To return to the Settings/Vols/CCA screen, press s [Previous
Screen]. If you do not press a key in 30 seconds, the Delivery screen
automatically returns.
ADJUST DISPLAY LIGHTING AND CONTRAST
1
On the Main Delivery screen, press s [Settings/Vols/CCA].
2
Use [SELECT] to highlight Lighting/Contrast and press s [Choose].
The Lighting/Contrast screen appears, with the Backlight Intensity
highlighted.
3
Use s [Increase Setting] and s [Decrease Setting] to adjust the
backlight intensity.
4
Press [SELECT] to highlight Display Contrast.
5
Use s [Increase Setting] and s [Decrease Setting] to adjust the
display contrast.
6
Press s [Done] to save the current settings and return to the Settings/
Vols/CCA screen or press s [Previous Screen] to leave this screen
without saving changes.
7
Press s [Previous Screen] to return to the Settings/Vols/CCA screen.
VIEW CCA AND INFUSER SETTINGS
1
On the Main Delivery screen, press s [Settings/Vols/CCA].
2
Select s [CCA Settings] and press s [Choose]. The CCA Settings
screen displays.
3
Press s [Page Up] and s [Page Down] to view all the CCA and
infuser settings.
4
When nished, press s [Previous Screen] to return to the Settings/
Vols/CCA screen. Press s [Previous Screen] again to return to the
delivery screen.
17
of 36
Page 18

SET DISTAL PRESSURE ALARM LIMIT
NOTE: Prior to changing the Distal Pressure Alarm Limit, the infuser
must be stopped.
1
On the Main Delivery screen, press s [Settings/Vols/CCA].
2
Change the Distal Pressure Alarm Limit.
CAUTION –––––––––––––––––––––––––––––––
DO NOT SET THE DISTAL PRESSURE ALARM LEVEL LOWER THAN 3
PSI (155 MMHG) OR HIGHER THAN 12 PSI (624 MMHG). SETTING THE
ALARM OUTSIDE OF THAT RANGE MAY RESULT IN UNRELIABLE
ALARM FUNCTIONING.
–––––––––––––––––––––––––––––––––––––––
3
Use the keypad to press s [Done] to save your changes and return
to the Settings/Vols/CCA screen or press s [Previous Screen] to
view the settings without making changes.
4
Press s [Previous Screen] to return to the Main Delivery screen.
DISCONTINUE ELECTRONIC FLOW CONTROL AND
SETTING GRAVITY FLOW
WARNING –––––––––––––––––––––––––––––––
CLOSE ALL CLAMPS BEFORE OPENING THE CASSETTE DOOR.
–––––––––––––––––––––––––––––––––––––––
18 of 36
1
Press [STOP]. If two lines were pumping, press s [Stop All].
2
Press s [ON/OFF] to turn off the infuser.
3
Close all clamps.
4
Open the cassette door and remove the cassette.
Page 19

5
If only 1 line was pumping, open all clamps.
If 2 lines were pumping, you must choose one line for gravity ow.
Open the clamps on that proximal line and on the distal line. Make
sure one proximal line stays clamped.
6
Holding the cassette upright, set gravity ow by turning the ow
regulator counter-clockwise.
7
Check the drip chamber to measure the ow rate. Refer to the
administration set package for number of drops/mL.
DISCONTINUE FLUID ADMINISTRATION
1
Press [STOP]. If two lines are pumping, press [Stop All].
2
Press [ON/OFF] to turn off the infuser.
3
Close all clamps.
4
Detach the distal line from the patient access device.
5
Open the cassette door and remove the cassette.
6
Close the cassette door.
7
Discard the set and uid container per hospital policy/procedure.
ALARMS AND TROUBLESHOOTING
The Plum 360 infuser has an intelligent alarm system that handles more
than one alarm at a time. Alarms are prioritized as high, medium, or low.
You can distinguish the priority by the number of beeps:
Priority Number of Beeps
High 10
Medium 3
Low 2
19
of 36
Page 20

HIGH PRIORITY ALARMS
Alarm Message
and Priority
Power Off then On.
Replace pump if
alarm continues.
High
Replace pump.
Audio alarm failure.
High
Replace pump.
Backlight failure.
High
Line B VTBI
complete
in prior CCA!
Press STOP key.
High
Distal OCCLUSION!
Resolve then
Backprime.
High
Possible Cause Corrective Action
Malfunction. Power the infuser off,
and then on. Replace
infuser if this does
not clear the alarm.
Audio alarm is OFF
but sensed ON, or
ON but sensed OFF.
Backlight voltage
out of range during
operation.
Line B delivery
VTBI=0; the line was
programmed under
a different CCA than
the CCA currently
used; and Line B
has a Concurrent
delivery programmed.
Distal occlusion
detected while
attempting to
backprime or during
cassette check.
Power off the infuser.
Power off the infuser.
Stop the delivery
on Line B or open
the cassette door.
Examine the
distalline for kinks.
Resolve the distal
occlusion and then
either backprime or
open and close the
cassette door.
20 of 36
Page 21

Distal OCCLUSION!
Check IV line and site.
High
A distal occlusion
is detected and
either the maximum
auto-restarts have
occurred for the
infusion or autorestart was set to zero.
Examine the distal
line for kinks and
correct any found.
Restart the delivery.
NOTE: The alarm
can also be cleared by
clearing the conrmed
programs on any
programmed line or
opening the cassette
door.
See section in SOM on
Avoiding a Bolus While
Resolving a Distal
Occlusion.
WARNING –––––––––––––––––––––––––––––
THE PLUM 360 INFUSER DOES NOT HAVE CAPABILITY TO
DETECT INFILTRATION TO THE PATIENT
–––––––––––––––––––––––––––––––––––––––
Pump too high
above patient.
Lower pump
or replace set.
High
Distal occlusion
detected during
delivery due to too
much backpressure.
Resolve the occlusion
by lowering the infuser
on the pole to place
it closer to the level
of the patient’s heart
(see section on Delivery
Accuracy in SOM) and
then press
NOTE: The alarm can
also be cleared by
clearing the conrmed
programs on any
programmed line or
opening the cassette
door.
[START].
Continued on page 22
21
of 36
Page 22

Data was cleared.
Re-enter all
programming.
High
Distal AIR!
Disconnect/reprime.
Press START.
High
Corruption of retained
delivery parameters
is detected. Autoclear
of SEEP requires fresh
delivery setup.
The single air bolus
or the cumulative air
detected at the distal
sensor exceeds the air
detection threshold.
Acknowledge the
alarm.
Open the cassette
door. Clear programs.
See section in SOM
on Resolving a Distal
Air-In-Line Alarm.
Door opened! Infusion
stopped! Close Door.
High
Cassette test failure!
Check set.
High
Depleted Battery!
Plug into AC now!
High
Keypad locked.
Enter code to disable.
High
The cassette door
was opened during a
delivery.
Faulty cassette,
proximal or distal
occlusion, or air was
detected in the cassette
during the cassette test.
The infuser is running
on battery power and
the battery voltage is
below the depleted
battery threshold.
A 3 minute shut down
sequence begins.
While the keypad
was locked, someone
pressed
[STOP]
or opened the cassette
door during delivery.
Close the cassette
door with the cassette
inserted.
Resolve occlusion and
then open and close the
cassette door. Press s
[Backprime]. Replace
administration set.
Plug into an AC (mains)
power source.
After plugging the
device in, the pump
will automatically
reboot.
Enter valid keypad
unlock code.
22 of 36
Page 23

MEDIUM PRIORITY ALARMS
Alarm Message
and Priority
Door opened!
Delayed Start!
Close Door.
Medium
Distal OCCLUSION Paused!
Attempting restart.
Medium
Possible Cause Corrective Action
The cassette door
was opened while
an infusion was in
Close the cassette
door with cassette
inserted.
Delayed Start.
A distal occlusion
was detected and
the maximum number
of autoresets is
congured but has
not occurred for the
infusion.
Examine the distal line
for kinks and correct
any found. No action is
necessary if the patient
can resolve the alarm
condition within 60
seconds of activation
(for example, moving
an arm to eliminate the
occlusion) before the
maximum retry number
is reached. Open the
cassette door.
Continued on page 24
23
of 36
Page 24

LOW PRIORITY ALARMS
Alarm Message
and Priority
Keep Plugged into AC!
Service battery/replace
pump.
Low
Power Off then On.
Replace pump if
alarm continues.
Low
Low Battery! Plug into
AC power!
Low
Programming not
complete! Action
required!
Low
Possible Cause Corrective Action
The battery or battery
charge circuitry needs
servicing.
Battery voltage is
greater than the
expected limit.
The battery charge
level is low.
No operator input
for two minutes after
the infuser is powered
on in Clinical mode,
except for situations
that trigger an alarm.
Power off the infuser.
Replace the infuser
as soon as possible,
so that it can be sent
for repair.
Power off the infuser.
Plug into AC (mains)
power.
Press any hardkey
or softkey except the
hardkey that silences
alarms.
24 of 36
Page 25

LINE A – HIGH PRIORITY ALARMS
Alarm Message
and Priority
No Action Alarm!
Start or Clear Line A.
High
Line A VTBI complete
in prior CCA! Press
STOP key.
High
VTBI Completed Line
A! Add more VTBI or
Clear A.
High
Possible Cause Corrective Action
No operator action for
2 minutes when Line
A has been stopped
by the user and is not
cleared or restarted.
Press any key on
the infuser except
[AUDIO PAUSED].
Select Line A to
program or clear it.
NOTE: Will reassert if
the condition persists.
Line A was
programmed under
a different CCA than
Stop the delivery on
Line A. Open cassette
door.
is currently being
used and delivery
is complete.
Line A delivery is
complete and line was
programmed under the
Add VTBI on Line A.
Stop Line A. Open
cassette door.
CCA that is currently
being used.
Continued on page 26
25
of 36
Page 26

Proximal OCCLUSION
A! Check Line A.
High
Proximal occlusion or
air detected on Line A
during delivery.
Examine the proximal
line for kinks and
correct any found.
If the occlusion is
caused by a closed
clamp, open the
clamp. If all clamps
are open, the alarm
may be caused by
excessive air that is
creating backpressure
in the cassette.
To remove air, see
section in SOM on
Backpriming. Check
the syringe size. See
section in SOM on
Administration Sets
and Accessories
Guidelines. Restart
Line A.
NOTE: The alarm can
also be cleared by
clearing the conrmed
programs on any
programmed line or
opening the cassette
door.
Proximal AIR Line A!
Backprime.
High
26 of 36
The single air bolus
detected at the
proximal sensor in
Line A exceeds the air
detection threshold.
Press s [Backprime].
See section in SOM
on Backpriming.
Check the syringe
size. See section in
SOM on Administration
Sets and Accessories
Guidelines.
Page 27

LINE A – MEDIUM PRIORITY ALARMS
Alarm Message
and Priority
Callback to Line A!
Silence audio to clear.
Medium
Proximal OCCLUSION
A! Resolve then
Backprime.
Medium
Bolus complete on
Line A!
Medium
(SW 15.1 only)
Possible Cause Corrective Action
A Callback Alarm was
programmed for Line
Press
[AUDIO PAUSED].
A, and the VTBI for
Line A reaches 0 for
a Loading Dose or
any step in a multistep
therapy except the
last step.
Proximal occlusion
was detected on
Line A during
backprime.
Examine Line A for
kinks. Resolve the
occlusion. Either
backprime or open
and close the cassette
door. Check the
syringe size. See
section in SOM on
Administration Sets
and Accessories
Guidelines.
Bolus delivery
completes on Line A
Press
[AUDIO PAUSED].
and a Nurse Callback
was confgured.
Continued on page 28
27
of 36
Page 28

Proximal OCCLUSION
A Startup! Open/close
door or Backprime.
Medium
A proximal occlusion
was detected on Line
A during the cassette
integrity test.
LINE B – HIGH PRIORITY ALARMS
Examine Line A for
kinks. Resolve the
occlusion. Either
backprime or open
and close the cassette
door. See section
in SOM on Opening
the Cassette Door
Completely. Check
syringe size. See
section in SOM on
Administration Sets
and Accessories
Guidelines.
Alarm Message
and Priority
No Action Alarm! Start
or Clear Line B.
High
Line B VTBI complete
in prior CCA! Clear
Line B.
High
28 of 36
Possible Cause Corrective Action
No operator action for
2 minutes when Line
B has been stopped
by the user and is not
cleared or restarted.
NOTE: Will reassert if
the condition persists.
A Line B Piggyback
delivery that was
programmed under
a different CCA is
complete, and no
delivery is
programmed on
Line A.
Press any key on
the infuser except
[AUDIO PAUSED].
Select Line B to
program or clear it.
Clear the delivery
on Line B or open
the cassette door.
Page 29

VTBI Completed
Line B! Add more VTBI
or Clear B.
High
VTBI Completed Line
B! Add more VTBI
or Clear B.
High
A Piggyback delivery
on Line B is complete
and the line was
programmed under
the current CCA
and no delivery is
programmed to deliver
on Line A. NOTE:
Piggyback with a
Line A delivery will
not alarm; it will just
transition to Line A
delivery.
A Concurrent delivery
on Line B is complete
and the Line was
programmed under
the current CCA.
Add VTBI on Line B.
Clear program on
Line B. Open the
cassette door.
Add VTBI on Line B.
Stop delivery on
Line B. Open the
cassette door.
Proximal OCCLUSION
B! Resolve then
backprime.
High
Continued on page 30
Proximal occlusion
detected on Line B
during backprime.
Examine Line B for
kinks. Make sure a line
or syringe is attached
to the secondary
port and that the line
is unclamped or the
syringe has enough free
space to accept the
backprimed uid. Either
backprime or open and
close the cassette door.
See section in SOM
on Backpriming to
remove the air.
Check the syringe size.
See section in SOM on
Administration Sets and
Accessories Guidelines.
29
of 36
Page 30

Proximal OCCLUSION
B! Check Line B.
High
Proximal occlusion
detected on Line B
during delivery.
Examine the proximal
line for kinks and
correct any found.
Restart Line B.
NOTE: The alarm can
also be cleared by
clearing the conrmed
program or opening
the cassette door.
Proximal AIR Line B!
Backprime.
High
The single air bolus
detected at the
proximal sensor in
Line B exceeds the air
detection threshold.
LINE B – MEDIUM PRIORITY ALARMS
Alarm Message
and Priority
Callback to Line B!
Silence audio to clear.
Medium
Possible Cause Corrective Action
A Callback Alarm
was programmed
for Line B which is
in Piggyback mode,
Line A is programmed
to resume when Line
B completes, and
the VTBI for Line
B reaches 0 for a
Piggyback therapy,
Press s [Backprime].
See section in SOM on
Backpriming. Check
the syringe size. See
section in SOM on
Administration Sets
and Accessories
Guidelines.
Press
[AUDIO PAUSED].
30 of 36
Page 31

Callback to Line B!
Silence audio to clear.
Medium
Loading Dose,
Maintenance Dose or
any step in a multistep
therapy.
OR
A Callback Alarm
was programed for
Line B, which is in
Piggyback mode, Line
A is not programmed
to resume when Line
B completes, and
the VTBI for Line B
reaches 0 for Loading
Dose or any step in
a multistep therapy
except the last step.
OR
A Callback Alarm was
programed for Line B,
which is in Concurrent
mode, and the VTBI
for Line B reaches 0
for a Loading Dose or
any step in a multistep
therapy except the
last step.
Press
[AUDIO PAUSED].
Continued on page 32
31
of 36
Page 32

Proximal OCCLUSION
B. Resolve then
Backprime.
Medium
Proximal occlusion
detected on Line
B during cassette
integrity test.
Examine Line B for
kinks. Make sure a line
or syringe is attached
to the secondary
port and that the line
is unclamped or the
syringe has enough
free space to accept
the backprimed uid.
Either backprime or
open and close the
cassette door. Check
the syringe size. See
section in SOM on
Administration Sets
and Accessories
Guidelines.
Bolus complete on
Line B!
Silence audio to clear.
Medium
(SW 15.1 only)
Bolus delivery
completes on LIne B
and a Nurse Callback
was congured.
LINE A AND B – HIGH PRIORITY ALARMS
Alarm Message
and Priority
No Action Alarm!
Acknowledge Alert.
High
32 of 36
Possible Cause Corrective Action
Rate was recalculated;
operator has not
acknowledged
the alert within 30
seconds.
Press
[AUDIO PAUSED].
Press a labeled
softkey.
Page 33

Line not in STANDBY!
Choose line(s)
to Standby:
High
No operator action for
15 seconds when the
user has selected
s [Standby] when
both lines are able to
be put in standby, but
has not selected a line
(A, B or A & B) or
selected s [Cancel]
to complete the action.
Press
s [Standby All],
s [Standby A],
s [Standby B],
or s [Cancel].
Delivery was not
STOPPED!
Choose line(s) to stop.
High
Delivery was not
STARTED! Choose
line(s) to start.
High
No operator action for
15 seconds when the
user has attempted to
stop a delivery when
both lines are delivering by pressing
[STOP], but has not
selected a line (A, B or
A & B) or selected s
[Cancel] to complete
the action.
No operator action for
15 seconds when the
user has attempted
to start a delivery
when both lines are
conrmed by pressing
[START], but has
not selected a line
(A, B or A & B) or
selected s [Cancel]
to complete the action.
Press
s [Stop All],
s [Stop A],
s [Stop B],
ors [Cancel].
Press
s [Start All],
s [Start A],
s [Start B],
ors [Cancel].
Continued on page 34
33
of 36
Page 34

Yes: Start titration.
No: Edit
High
Standby is not possible
and no operator action
for 30 seconds when
a titrated program is
waiting to be conrmed.
Press s [Yes] to
conrm the program
or s [No] to go back
to the Program screen.
No Action Alarm!
Yes: Start
No: Edit
High
NOTE: Standby
is intentionally not
included in the
instruction text.
Yes: Start titration!
No: Edit
High
NOTE: Standby
is intentionally not
included in the
instruction text.
No Action Alarm!
START: Conrm
titration.
High
Standby is possible
and no operator action
for 2 minutes when a
new program is waiting
to be conrmed or
placed into Standby.
Standby is possible
and no operator action
for 30 seconds when
a titrated program
is waiting to be
conrmed or placed
into Standby.
No operator action for
the 30 seconds when
a line is titrated during
infusion and the
[START] hardkey
has not been pressed
for a program that can
be started.
NOTE: A delivery
cannot be started if
it is in a concurrency
violation. If it is in a
concurrency violation,
an alarm will occur.
Press s [Yes] to
conrm the program
or s [No] to go back
to the Program screen,
or press s [Standby].
Press s [Yes] to
conrm the program
or s [No] to go back
to the Program screen,
or press s [Standby].
Press
[START].
Press s [Return to
A/B].
34 of 36
Page 35

No Action Alarm!
Yes: Override.
No: Edit
High
Soft limit override
and no operator action
for 2 minutes when a
new program is waiting
to be conrmed.
OR
Soft limit override
and no operator action
for 30 seconds when
a titrated program
is waiting to be
conrmed.
Press s [Yes] to
conrm the program
or s [No] to go back
to the Program screen.
No Action Alarm!
Start or clear lines.
High
No Action Alarm!
Yes: Start
No: Edit
High
Continued on page 36
No operator action
for 2 minutes when
both lines have been
stopped by the user
and not cleared or
restarted.
OR
No operator action for
2 minutes after a Bolus
has been cancelled
(putting both lines into
a stopped state).
NOTE: Will reassert if
the condition persists.
Standby is not
possible and there is
no operator action for
2 minutes when a new
program is waiting
to be conrmed.
Press any
hardkey except
[AUDIO PAUSED].
Press s [Yes] or
s [No].
35
of 36
Page 36

Alarm Message
and Priority
Proximal AIR!
Backprime.
High
Possible Cause Corrective Action
The cumulative air detected at the proximal
sensors in Line A and
Line B exceeds the air
detection threshold.
Press s [Backprime].
See section in SOM on
Backpriming.
Check the syringe size.
See section in SOM on
Administration Sets and
Accessories Guidelines.
Reference Used: 430-98340-002 (A, 2017-03) Plum 360 System Operating Manual
© 2017 ICU Medical Inc. | www.icumed.com CS04-0015b-0317R2
 Loading...