

Page 1

System Operating Manual
Hospira, Inc., Lake Forest, IL 60045, USA
430-04684-002 (Rev. 01/06)
Page 2

Change History
Title Description of Change
Pages
Affected
430-04684-001
(Rev. 1/05)
430-04684-002
(Rev. 01/06)
Initial Release All
Second Release All
430-04684-002 (Rev. 01/06)
Page 3

LifeCare PCA 3 Infusion System i
Contents
1) DESCRIPTIVE INFORMATION . . . . . . . . . . . . . . . . 1-1
1.1 P
RODUCT DESCRIPTION . . . . . . . . . . . . . . . . . . . 1-1
NDICATIONS FOR USE . . . . . . . . . . . . . . . . . . . . . 1-2
1.2 I
patient selection . . . . . . . . . . . . . . . . . . . . . . . . 1-2
user qualification . . . . . . . . . . . . . . . . . . . . . . . . 1-3
1.3 C
ONTRAINDICATIONS FOR USE . . . . . . . . . . . . . . . 1-3
1.4 C
ONVENTIONS . . . . . . . . . . . . . . . . . . . . . . . . . . 1-4
warnings, cautions, and notes . . . . . . . . . . . . . . 1-4
1.5 D
EFINITIONS (GENERAL AND CLINICAL). . . . . . . . . 1-6
RECAUTIONS . . . . . . . . . . . . . . . . . . . . . . . . . . . 1-8
1.6 P
artifacts . . . . . . . . . . . . . . . . . . . . . . . . . . . . . . . 1-8
general . . . . . . . . . . . . . . . . . . . . . . . . . . . . . . . 1-9
programming . . . . . . . . . . . . . . . . . . . . . . . . . . 1-10
loading dose/dose limits . . . . . . . . . . . . . . . . . 1-11
operation . . . . . . . . . . . . . . . . . . . . . . . . . . . . . 1-12
maintenance . . . . . . . . . . . . . . . . . . . . . . . . . . 1-12
alarms . . . . . . . . . . . . . . . . . . . . . . . . . . . . . . . 1-13
epidural administration . . . . . . . . . . . . . . . . . . 1-13
battery operation . . . . . . . . . . . . . . . . . . . . . . . 1-14
sets and accessories . . . . . . . . . . . . . . . . . . . . 1-15
2) PRINCIPLES OF OPERATION . . . . . . . . . . . . . . . . 2-1
EATURES . . . . . . . . . . . . . . . . . . . . . . . . . . . . . 2-2
2.1 F
drug recognition . . . . . . . . . . . . . . . . . . . . . . . . 2-2
modes of delivery . . . . . . . . . . . . . . . . . . . . . . . 2-2
programming . . . . . . . . . . . . . . . . . . . . . . . . . . . 2-3
battery . . . . . . . . . . . . . . . . . . . . . . . . . . . . . . . . 2-3
bio medical . . . . . . . . . . . . . . . . . . . . . . . . . . . . 2-3
options . . . . . . . . . . . . . . . . . . . . . . . . . . . . . . . . 2-3
other features . . . . . . . . . . . . . . . . . . . . . . . . . . 2-3
2.2 A
DMINISTRATION EQUIPMENT . . . . . . . . . . . . . . . 2-4
administration sets . . . . . . . . . . . . . . . . . . . . . . 2-4
2.3 P
RINTER KITS . . . . . . . . . . . . . . . . . . . . . . . . . . . 2-5
430-04684-002
Page 4

ii Contents
3) EQUIPMENT DESCRIPTION . . . . . . . . . . . . . . . . . . 3-1
3.1 C
OMPONENTS . . . . . . . . . . . . . . . . . . . . . . . . . . . 3-1
3.2 O
PERATING BUTTONS & KEYS . . . . . . . . . . . . . . . 3-4
4) BASIC OPERATION . . . . . . . . . . . . . . . . . . . . . . . . 4-1
4.1 G
ETTING STARTED . . . . . . . . . . . . . . . . . . . . . . . 4-1
unpacking . . . . . . . . . . . . . . . . . . . . . . . . . . . . . 4-1
connecting the patient pendant . . . . . . . . . . . . 4-1
system self-tests . . . . . . . . . . . . . . . . . . . . . . . . 4-2
data retention . . . . . . . . . . . . . . . . . . . . . . . . . . 4-3
PERATING THE PCA 3 . . . . . . . . . . . . . . . . . . . 4-3
4.2 O
intravenous
epidural
OADING VIAL . . . . . . . . . . . . . . . . . . . . . . . . . . . 4-6
4.3 L
DJUSTING SETTINGS . . . . . . . . . . . . . . . . . . . . . 4-7
4.4 A
changing alarm volume . . . . . . . . . . . . . . . . . . . 4-8
changing contrast of main display . . . . . . . . . . . 4-9
changing or confirming time and date . . . . . . . . 4-9
4.5 G
UIDED START-UP FOR PREFILLED VIALS . . . . . . 4-12
purging the system . . . . . . . . . . . . . . . . . . . . . 4-13
loading dose. . . . . . . . . . . . . . . . . . . . . . . . . . . 4-15
4.6 G
UIDED START-UP FOR CUSTOM VIALS . . . . . . . 4-17
PCA administration . . . . . . . . . . . . . 4-3
PCA administration . . . . . . . . . . . . . . . . 4-4
5) SELECT MODE . . . . . . . . . . . . . . . . . . . . . . . . . . . . 5-1
5.1 M
ODES OF DELIVERY . . . . . . . . . . . . . . . . . . . . . 5-1
protocols . . . . . . . . . . . . . . . . . . . . . . . . . . . . . . 5-1
PCA only . . . . . . . . . . . . . . . . . . . . . . . . . . . . . . 5-1
continuous . . . . . . . . . . . . . . . . . . . . . . . . . . . . . 5-2
PCA+continuous . . . . . . . . . . . . . . . . . . . . . . . . 5-2
ROGRAMMING PCA ONLY . . . . . . . . . . . . . . . . . 5-3
5.2 P
5.3 C
ONTINUOUS MODE . . . . . . . . . . . . . . . . . . . . . . 5-7
5.4 PCA + C
ROTOCOLS . . . . . . . . . . . . . . . . . . . . . . . . . . . 5-16
5.5 P
5.6 D
OSE LIMIT (1 OR 4 HOUR) . . . . . . . . . . . . . . . . 5-18
ONTINUOUS MODE . . . . . . . . . . . . . . . 5-10
dose limit calculation . . . . . . . . . . . . . . . . . . . . 5-18
programming the 4 (or 1) hr dose limit. . . . . . . 5-20
to program a dose limit . . . . . . . . . . . . . . . . . . 5-20
to program
NO dose limit . . . . . . . . . . . . . . . . . 5-21
430-04684-002
Page 5

LifeCare PCA 3 Infusion System iii
to clear or change dose limit . . . . . . . . . . . . . . 5-22
clearing the history & Rx settings. . . . . . . . . . . 5-23
5.7 U
SING REVIEW SCREENS . . . . . . . . . . . . . . . . . . 5-24
HANGING SETTINGS DURING SETUP . . . . . . . . 5-25
5.8 C
5.9 S
TOPPING INFUSION OR TURNING PUMP OFF . . . 5-26
5.10 M
5.11 C
5.12 P
5.13 P
5.14 D
5.15 H
6) TROUBLESHOOTING . . . . . . . . . . . . . . . . . . . . . . . 6-1
6.1 S
6.2 P
6.3 S
6.4 A
AKING CHANGES AFTER SETUP . . . . . . . . . . 5-27
to review current settings . . . . . . . . . . . . . . . . 5-27
to change settings . . . . . . . . . . . . . . . . . . . . . . 5-28
to clear shift totals . . . . . . . . . . . . . . . . . . . . . . 5-29
to change a vial . . . . . . . . . . . . . . . . . . . . . . . . 5-30
to add a supplemental loading dose . . . . . . . . 5-32
HECKING HISTORY & SETTINGS . . . . . . . . . . . 5-33
RINTER SETUP . . . . . . . . . . . . . . . . . . . . . . . . 5-34
RINTING EVENT HISTORY LOG . . . . . . . . . . . . 5-39
OWNLOADING TO A PC. . . . . . . . . . . . . . . . . . 5-40
ISTORY AND EVENT LOG . . . . . . . . . . . . . . . . 5-43
TATUS MESSAGES . . . . . . . . . . . . . . . . . . . . . . 6-1
UMP ALARM SYSTEM . . . . . . . . . . . . . . . . . . . . . 6-2
ILENCING AN ALARM . . . . . . . . . . . . . . . . . . . . . 6-3
LARMS AND MESSAGES . . . . . . . . . . . . . . . . . . . 6-4
7) MAINTENANCE . . . . . . . . . . . . . . . . . . . . . . . . . . . . 7-1
7.1 P
UMP STORAGE . . . . . . . . . . . . . . . . . . . . . . . . . 7-1
LEANING AND SANITIZING . . . . . . . . . . . . . . . . . 7-1
7.2 C
ATTERY MAINTENANCE . . . . . . . . . . . . . . . . . . . 7-3
7.3 B
service . . . . . . . . . . . . . . . . . . . . . . . . . . . . . . . . 7-4
430-04684-002
Page 6

iv Contents
8) SPECIFICATIONS . . . . . . . . . . . . . . . . . . . . . . . . . . 8-1
8.1 S
TORED OCCLUSION VOLUME . . . . . . . . . . . . . . . 8-4
8.2 T
IME FROM OCCLUSION TO ALARM . . . . . . . . . . . . 8-4
ELIVERY RATE ACCURACY . . . . . . . . . . . . . . . . . 8-4
8.3 D
trumpet curves . . . . . . . . . . . . . . . . . . . . . . . . . . 8-5
example . . . . . . . . . . . . . . . . . . . . . . . . . . . . . . 8-5
8.4 T
RUMPET CURVES . . . . . . . . . . . . . . . . . . . . . . . . 8-7
9) PRESCRIPTION DELIVERY LIMITS . . . . . . . . . . . . 9-1
10) WARRANTY . . . . . . . . . . . . . . . . . . . . . . . . . . . . . 10-1
© Hospira, Inc. All Rights Reserved
This document and the subject matter disclosed herein are proprietary
information. Hospira retains all the exclusive rights of dissemination,
reproduction, manufacture and sale. Any party using this document
accepts it in confidence, and agrees not to duplicate it in whole or in
part nor disclose it to others without the written consent of Hospira.
430-04684-002
Page 7

LifeCare PCA 3 Infusion System 1- 1
1) Descriptive Information
The LifeCare® PCA 3TM Infusion System is the newest Hospira
LifeCare
PCA 3 system can be used in a wide range of clinical settings,
including but not limited to:
®
PCA device. Like its predecessor, the PCA Plus II, the
General Floor Labor/Delivery/
Post Partum
Medical/Surgical Operating Room Oncology
Critical Care
Units
The PCA 3 Infusion pump allows clinicians to administer or
patients to self-administer, analgesia safely and effectively within
clinician programmed limits. The epidural route can be used to
provide anesthesia or analgesia.
Post Anesthesia
Care Unit (PACU)
Burn Unit
Pediatrics
1.1 Product Description
The primary feature of the PCA 3 is the bar code reader, which is
designed to automate drug identification. Other enhancements
include new programming features, a numeric keypad to directly
enter programming values, and a device weight of less than 12
pounds.
The PCA 3 system includes a microprocessor based infusion
device with keypad controls, patient pendant, a bar coded drug
vial, and a compatible administration set (see Section 2.3 for list
of compatible sets). The pump has a serial port for connection to
a computer or printer, and the software is field upgradeable. It is
intended to operate on AC power, but an internal battery is
provided to maintain operation for short periods of time when AC
power is not available.
430-04684-002
Page 8

1- 2 1) Descriptive Information
The vials are single-use, bar coded and prefilled with a
prescription drug by
filled by the hospital pharmacy.
The PCA 3 system is capable of the following modes of delivery:
Hospira, or sterile and empty to be custom-
• PCA ONLY
• CONTINUOUS ONLY
• PCA+CONTINUOUS
The PCA 3 system also provides the ability to store frequently
used prescriptions called Protocols. The protocols are only
available for
the service mode by a hospital-designated authority.
Hospira pre-filled vials and must be set up through
1.2 Indications for Use
PCA is a method of pain management that permits patients to
treat their pain by self-administering doses of analgesics. PCA
can be used to manage all types of pain, but is most commonly
used to manage acute pain.
PATIENT SELECTION
Patients selected for use of PCA should be able to understand
the relationship between pain, pushing the PCA patient pendant
and pain relief, and can physically self-administer a PCA dose
using the patient pendant.
430-04684-002
Page 9

LifeCare PCA 3 Infusion System 1- 3
WARNING
FOR EPIDURAL USE, ADMINISTER ONLY
ANESTHETICS/ANALGESICS APPROVED FOR
EPIDURAL ADMINISTRATION (AS INDICATED OR
ALLOWED BY THE DRUGS’ FDA APPROVED
LABELING). EPIDURAL ADMINISTRATION OF DRUGS
OTHER THAN THOSE INDICATED FOR EPIDURAL
USE COULD RESULT IN SERIOUS INJURY TO THE
PATIENT.
USER QUALIFICATIONS
All clinicians should be appropriately trained on programming of
the PCA 3 pump prior to use.
The PCA 3 is intended for use at the direction or under the
supervision of licensed physicians or certified healthcare
professionals. They must be trained in the use of the pump,
administration of parenteral and epidural fluids and drugs, and
the prevention of related IV complication and precautions to
prevent accidental infusion of air. Training should emphasize the
assessment and monitoring of patients receiving potent analgesic
medications, and the appropriate treatment for possible adverse
reactions.
1.3 Contraindications For Use
The PCA 3 should not be used for patient controlled analgesia by
patients who do not have the cognitive ability to understand the
use of self-administered pain medication nor have the physical
capacity to operate the patient pendant, if required.
Drugs not compatible with silicone rubber or PVC plastic, or not
stable under infusion conditions, should not be used with this
system.
430-04684-002
Page 10

1- 4 1) Descriptive Information
1.4 Conventions
This section describes the conventions used throughout this
manual, as follows:
CONVENTION APPLICATION EXAMPLE
Italic Reference to a
section, figure, or
table
Function or mode
specific
instructions
[BRACKETED
ALL-CAPS]
ItalicSmallcaps> Softkey Options C
Initial Caps
lowercase
Bold Emphasis ...sets are
Keys or buttons
on the device are
displayed in
[BRACKETED
ALL-CAPS] or
with a graphic.
Screen displays
and device labels
(as appropriate)
(See Section 3-1,
Components)
Primary Only:
Attach an empty
container.
[START/PAUSE]
or
HOOSE>
Therapy
Dose Calculation
supplied Sterile
and are for....
WARNINGS, CAUTIONS, AND NOTES
Alert messages used throughout this manual are described
below. Pay particular attention to these messages.
430-04684-002
Page 11

LifeCare PCA 3 Infusion System 1- 5
WARNING
A WARNING MESSAGE CONTAINS SPECIAL SAFETY
EMPHASIS AND MUST BE OBSERVED AT ALL TIMES.
FAILURE TO OBSERVE A WARNING MESSAGE IS
POTENTIALLY LIFE THREATENING.
CAUTION: A
PROCEDURE
PREVENT IRREVERSIBLE PRODUCT DAMAGE OR
COULD
HARDWARE
COULD RESULT IN SERIOUS PATIENT OR USER INJURY.
CAUTION USUALLY APPEARS IN FRONT OF A
OR STATEMENT. IT CONTAINS INFORMATION THAT
FAILURE. FAILURE TO OBSERVE A CAUTION
NOTE: A Note highlights information that helps explain a
concept or procedure.
This symbol directs the user to consult accompanying
documents.
NOTE: Figures are rendered as graphic representations
to approximate the actual product. Therefore, figures
may not exactly reflect the product.
430-04684-002
Page 12

1- 6 1) Descriptive Information
1.5 Definitions (General and Clinical)
TERM DEFINITION
1 Hour Dose Limit Programmed parameter specifying
the maximum amount of drug that
can be administered in a rolling
(continuously advancing) one hour
time period.
4 Hour Dose Limit Programmed parameter specifying
the maximum amount of drug that
can be administered in a rolling
(continuously advancing) four hour
time period.
Accuracy The degree to which the instrument
is capable of delivering the volume
of analgesic drug that is displayed
or targeted to be delivered.
Accuracy shall be specified as the
maximum allowable delivery error
from a targeted or displayed value
(see product specification, Section
9).
Continuous Infusion therapy characterized by a
constant fixed-rate dose.
Custom Syringe or
Vial
Default Generally refers to the factory
History Displays Parameter Settings, Dose
Bar coded Hospira sterile empty
vial which is custom-filled by a
licensed pharmacy.
setting for parameters or options.
History and Event Log. Also
provides access to Print History
softkey.
430-04684-002
Page 13

LifeCare PCA 3 Infusion System 1- 7
TERM DEFINITION
Lockout Interval Programmed time interval
specifying the minimum time that
must pass after a PCA dose or
Loading Dose is administered
before the next PCA dose can be
infused. The bolus requests made
during this period are not delivered.
Loading Dose An optional dose delivered before
starting normal function of the
pump (or thereafter by unlocking
the door).
Occlusion Inability of the instrument to infuse
fluid to the patient. Possible causes
of occlusions include kinked
tubing, plugged tubing, etc.
Maximum
Occlusion Pressure
Patient Pendant Hand-held pendant connected to
PCA mode Infusion therapy characterized by
PCA 3 Vial Bar coded vial compatible with the
PCA 3 Instrument Programmable patient controlled
PCA 3 Set Tubing which connects the PCA 3
The maximum pressure observed in
response to a patient line
occlusion.
the instrument that allows the
patient to request a bolus PCA dose
by pressing a button.
bolus doses administered on
patient demand subject to a lockout
interval and, optionally, a 1 or 4
hour dose limit.
PCA 3 instrument that is either
prefilled or custom filled with a
drug.
infusion pump.
Vial to the patient.
430-04684-002
Page 14

1- 8 1) Descriptive Information
TERM DEFINITION
Prime Manually removing air from the
syringe and line.
Purge Running the mechanism to remove
system slack when a new vial/
injector is installed. (The system
must be primed first and
disconnected from the patient.)
Warning An indication to advise the
clinician:
A) of a possible dangerous
condition such as a low battery
B) that an attempt has been made to
use a function in the wrong
sequence, wrong time, or with the
wrong values, such as an invalid
key attempt
1.6 Precautions
• Product damage may occur unless proper care is
exercised during the unpacking and setup process. The
battery may not be fully charged upon receipt.
ARTIFACTS
• Nonhazardous, low-level electrical potentials are
commonly observed when fluids are administered using
infusion devices. These potentials are well within
accepted safety standards, but may create artifacts on
voltage-sensing equipment such as ECG, EMG, and EEG
machines. These artifacts vary at a rate that is
associated with the infusion rate. If the monitoring
machine is not operating correctly or has loose or
defective connections to its sensing electrodes, these
artifacts may be accentuated so as to simulate actual
430-04684-002
Page 15

LifeCare PCA 3 Infusion System 1- 9
physiological signals. To determine if the abnormality in
the monitoring equipment is caused by the infusion
device instead of some other source in the environment,
set the infusion device so that it is temporarily not
delivering fluid. Disappearance of the abnormality
indicates that it was probably caused by the electronic
noise generated by the infusion device. Proper setup and
maintenance of the monitoring equipment should
eliminate the artifact. Refer to the appropriate monitoring
equipment system documentation for setup and
maintenance instructions.
• The PCA 3 system is designed to operate normally in the
presence of most encountered electromagnetic
interference (EMI) conditions. In the event of extreme
levels of interference, such as those encountered next to
an electrosurgical generator, it is possible that the
normal operation of a sensor or microcomputer might be
disrupted. Even in this event, the outcome would likely
be a false alarm or detected system malfunction and
would not result in a hazard to patient or clinician.
• Use of radio frequency emitting devices such as cellular
telephones and 2-way radios in close proximity of this
device may affect its operation.
GENERAL
• Possible explosion hazard exists if used in the presence
of flammable anesthetics.
• Potent analgesic medications are used with this device.
Refer to drug package insert for precautions and
possible adverse reactions.
• Refer to analgesic package enclosure for possible
incompatibility with fluid or drug being delivered through
the IV line.
• Coupling together of more than one pump into one
patient line may significantly affect the infusion rate of at
least one of the pumps.
430-04684-002
Page 16

1- 10 1) Descriptive Information
• Do not use sharp objects such as pens, scissors, or
fingernails to press keys. Such objects may damage
keys and cause a malfunction.
• Arrange tubing, cords, and cables to minimize the risk of
patient strangulation or entanglement.
• Failure to use Hospira vials and Hospira PCA sets with
integral anti-siphon valve may cause an inaccurate dose
delivery to the patient.
• The system must be primed prior to purging. Remove all
air from vial before placing into pump.
• Always close slide clamp on PCA administration set
before removing or replacing syringe, and before
discontinuing infusion.
• Patient must be disconnected from the PCA set before
the purge cycle.
• Vial and injector must be securely locked into the infuser
before beginning delivery.
PROGRAMMING
WARNING
FOR CUSTOM SYRINGES, CONFIRM THAT THE
DISPLAYED CONCENTRATION (MG/ML) OR (MCG/
ML) EXACTLY MATCHES THE CONCENTRATION
VALUE AND DRUG NAME ON THE SYRINGE. IF THEY
DO NOT MATCH, UNDER/OVERDOSAGE MAY
RESULT.
• In the CONTINUOUS and PCA+CONTINUOUS modes, if a
purge is not performed after a syringe change, the pump
automatically performs a small system compliance step
to remove slack when the
pressed (with door locked). Although fluid is not
normally delivered to the patient during the compliance
step, under some conditions up to 0.3 mL of fluid may be
delivered. If 0.3 mL of fluid represents a hazard to the
patient, the set should be disconnected during this
operation.
[START/PAUSE] key is
430-04684-002
Page 17

LifeCare PCA 3 Infusion System 1- 11
• At flow rates less than 0.5 mL/hr, there may be a
significant delay before flow is established if system is
not purged.
• Selections are rounded up to the nearest tenth of a digit
for mg/mL values or to the nearest digit for mcg/mL
values.
LOADING DOSE/DOSE LIMITS
• A loading dose is included in the 4-hour (or 1) dose limit
calculation ONLY if administered after the 4-hour dose
limit has been programmed. If the loading dose is
administered prior to setting the 4-hour dose limit, it will
NOT be included in the 4-hour dose limit calculation. The
loading dose is always included in the total dose
delivered.
• A supplemental “booster” dose can be delivered at any
time during setup or operation, even if the 4-hour dose
limit is already reached or will be exceeded after delivery.
• Setting a new 4-hour dose limit will not erase the
previous 4-hour dose history.
• The concentration can only be changed by removing and
re-inserting a custom vial or by turning the pump OFF
then ON again. Once the concentration is programmed
and confirmed, it cannot be changed without performing
one of these two actions. If the concentration is
changed, the current settings and consequently the dose
limit accumulation are cleared.
• Partial boluses can be the result of interrupting delivery
by pressing [START/STOP] (PCA + Cont.), opening the
door (PCA Only), loss of power, reaching the dose limit,
emptying the vial, or a malfunction alarm.
• If the loading or supplemental “booster” dose causes the
4-hour dose limit to be exceeded, the complete dose will
still be delivered. The volume beyond the 4-hour dose
limit will count towards the “next” rolling 4-hour dose
limit.
430-04684-002
Page 18

1- 12 1) Descriptive Information
• Always monitor the PCA 3 when delivering medication
with the door open.
• Patient Pendant is only to be pressed by the intended
patient.
OPERATION
• Perform close assessment and monitoring of patients
receiving potent analgesic medication for possible
adverse reactions.
• The PCA 3 is not intended to be used for frequent, long-
term portable operation. Keep plugged into a properly
grounded AC receptacle whenever possible, and reserve
battery power for temporary portable operation and
emergency backup. If the AC receptacle is in doubt, use
battery power.
MAINTENANCE
• Always confirm bar code reader window is clean. Blood,
fingerprints, condensation, and other elements may
obstruct the view of the bar code reader. Elements on the
window (other than scratches) can be cleaned by using
one of the recommended cleaning solutions in the
Section 7, Maintenance.
• Window scratches cannot be wiped clean and will
probably lead to window replacement.
• To avoid mechanical or electrical damage, do not
immerse the pump in any fluids or cleaning solutions.
• Some cleaning and sanitizing compounds may slowly
degrade components made from some plastic materials.
Using abrasive cleaners or cleaning solutions not
recommended by Hospira may result in product damage.
Do not use compounds containing combinations of
isopropyl alcohol and dimethyl benzyl ammonium
chloride.
• Do not sterilize by heat, steam, ETO, or radiation.
• Do not place the PCA 3 in service if it fails the self-test.
430-04684-002
Page 19

LifeCare PCA 3 Infusion System 1- 13
• Hospira will be responsible for the effect on safety,
reliability, and performance of this device only if:
adjustments, modifications, or repairs are performed by
persons authorized by Hospira; the electrical setup at
the point of use complies with appropriate local
requirements; and the device is used in accordance with
the instructions for use identified in this operating
manual.
ALARMS
• If the MALFUNCTION alarm sounds, press the [ON/OFF]
key to turn the pump off. Then turn the pump back on. If
the malfunction alarm repeats, remove the pump from
service.
EPIDURAL ADMINISTRATION
• Recommended use of the epidural route is to provide
anesthesia or analgesia for periods up to 96 hours.
• It is strongly recommended that the epidural infusion
system be prominently identified as EPIDURAL. Failure
to identify the infusion system as epidural could result in
incorrect administration of intravenous rather than
epidural formulations. In addition, failure to identify the
epidural infusion system could result in confusion with
other infusion systems delivering concomitant
intravenous formulations.
• This device can be used to administer only those
anesthetics/analgesics approved for epidural
administration (as indicated or allowed by the drugs’
FDA approved labeling). Epidural administration of
drugs other than those indicated for epidural use could
result in serious injury to the patient.
• For epidural administration, the use of pump sets
without Y-sites, and "epidural" stickers indicating
ongoing epidural administration are recommended.
• Administration of drugs via the epidural route should be
limited to personnel familiar with associated techniques
430-04684-002
Page 20

1- 14 1) Descriptive Information
and patient management problems. Proper epidural
placement of the catheter is essential since catheter
migration could result in intravascular or intrathecal
administration. Facilities practicing epidural
administration must be equipped with resuscitative
equipment, oxygen, naloxone, and other resuscitative
drugs. Adequate monitoring equipment (e.g., Oximetry)
is recommended for continuous monitoring of the
patient during epidural administration. Patients must be
observed frequently for side effects in a fully-equipped
and staffed environment for at least 24 hours following
completion of drug administration by the epidural route.
DELAYED RESPIRATORY DEPRESSION FOLLOWING
CONTINUOUS EPIDURAL ADMINISTRATION OF
PRESERVATIVE-FREE MORPHINE SULFATE HAS BEEN
REPORTED.
• The epidural space has 58 openings through which fluid
can exit. Pressure buildup during administration is
transient. However, if a large volume of fluid is
administered over a short time period, the pressure will
take longer to return to normal. If overdelivery occurs
during administration, observe the patient closely for
signs of spinal cord compression (disorientation,
headache, transient neuralgias) and drug overdose.
BATTERY OPERATION
WARNING
DISCONNECT AC POWER CORD BEFORE
REMOVING BATTERY DOOR.
CAUTION: D
BATTERY
MAINTAINED
OPERATION
O NOT OPERATE THE PCA 3 WITH THE
REMOVED ON PATIENTS. USE OF A PROPERLY
AND CHARGED BATTERY HELPS ENSURE PROPER
.
• The battery may not be fully charged upon receipt.
Connect the PCA 3 to AC power for at least 16 hours.
430-04684-002
Page 21

LifeCare PCA 3 Infusion System 1- 15
• Use AC power whenever possible. Connect to AC power
during storage to ensure a fully charged battery for
emergencies.
• Always connect the pump to a properly grounded
receptacle unless battery operation is desired. If quality
earth grounding source is in doubt, use battery power.
• If the low-battery alarm sounds, connect to AC power
immediately.
SETS AND ACCESSORIES
Use Hospira Lifecare PCA Set List 6517 whenever the pump is in
CONTINUOUS or PCA+CONTINUOUS modes.
• When using PCA or PCA+CONTINUOUS mode, another
fluid line may be attached to the distal backcheck “Y”
site. Use Hospira Lifecare PCA Set, List 3559, 6516, or a
combination of List 6514 and 6517.
• It is recommended that highly viscous solutions and
drugs, colloidal suspensions and emulsions should not
be delivered through the inline backcheck valve of the
PCA set. Valve functionality may be compromised by the
presence of residue.
• Refer to vial and set package inserts for precautions and
information on proper handling.
430-04684-002
Page 22

1- 16 1) Descriptive Information
NOTES
430-04684-002
Page 23

LifeCare PCA 3 Infusion System 2- 1
2) Principles of Operation
The PCA 3 Infuser is a portable infusion pump that allows a
patient to self-administer analgesia within programmed limits as
well as providing continuous infusion of desired drug. Generally, a
nurse following a physician’s order programs the infuser with
operating parameters, which may include the following:
• Loading Dose
• Delivery Mode Setting, i.e., PCA, CONTINUOUS, or
PCA+CONTINUOUS
• PCA Dose
• Lockout Interval
• Rate of Continuous Flow
• 1 or 4 Hour Dose Limit (factory setting 4-hour)
• Protocols (Hospital configured settings for prefilled
vials)
Available operating parameters and their allowed ranges are
determined based on the confirmed vial and the delivery mode
selected. The loading dose and dose limits are optional. This
programmed flexibility allows the physician to tailor an effective
pain management program unique to each patient.
The PCA 3 can be programmed to deliver either PCA doses
(PCA mode), to deliver only a continuous background infusion
with no PCA doses permitted (CONTINUOUS mode), or to
deliver a continuous rate and allow PCA doses
(PCA+CONTINUOUS mode).
Analgesic drugs may be delivered through the PCA 3
intravenously by any of the three modes mentioned above. In
addition, Preservative-Free Morphine Sulfate Injection, USP, or
other approved analgesic drugs can be administered epidurally
through a recommended Low Priming Volume PCA Set without a
Y-adapter. The epidural route can be used to provide analgesia
by any of the three modes of infuser operation.
430-04684-002
Page 24

2- 2 2) Principles of Operation
A “lockout” interval controls the frequency with which a patient
may receive a PCA dose of analgesic. If the pump is set in the
PCA or PCA+CONTINUOUS mode, the patient may request a
bolus of analgesic during therapy by pressing a button on the
patient pendant, causing the pump to release the specified bolus
of analgesic into the IV line. After a Loading or Supplemental
“booster” Dose delivery, the patient cannot receive any additional
patient requested boluses until the lockout interval has elapsed,
assuming the dose limit has not been exceeded (see Section 5.4
for a detailed description of Dose Limits).
The PCA 3 records therapy settings and up to 400 “events” that
may occur during the therapy regimen. Events recorded include
opening or closing of the security door, start or stop of continuous
infusion, an alarm condition, and so on. All event descriptions are
preceded with time of occurrence.
The PCA 3 operates on AC or back-up battery power. It attaches
and locks to an IV pole and also has a locking security door to
prevent tampering.
The alarm system sounds an audible alarm to alert the user to
various conditions or a malfunction (see Section 6.3 for a detailed
description of alarm messages).
2.1 Features
DRUG RECOGNITION
• Bar code reader identifies drug name and concentra-
tion in the vial (prefilled Hospira vials only)
• Bar code reader identifies custom-filled vials when
pharmacy-filled vial is used
MODES OF DELIVERY
• PCA Only
430-04684-002
Page 25

LifeCare PCA 3 Infusion System 2- 3
• Continuous
• PCA + Continuous
PROGRAMMING
• Keypad with large numbers, decimal point & icons
for ease of use
• Prompting alphanumeric display
BATTERY
• 8 V Battery
• Long battery life (4 hours) for emergency backup and
temporary portable operation
BIO MEDICAL
• Serial Communication
• Upgradability (Field)
• Diagnostics Setup Options
• Alarm History
• Ability to store protocols for Hospira prefilled vials
OPTIONS
• Infusion History
OTHER FEATURES
• Microprocessor control
• Liquid crystal display (LCD) and Light-Emitting
Diode (LED) display
• Panel back illumination
• Security Features
• Prefilled and Sterile empty vials
430-04684-002
Page 26

2- 4 2) Principles of Operation
2.2 Administration Equipment
The following sets and catheters are supplied sterile and are for
single use only.
ADMINISTRATION SETS
List 3559: PCA Set, Mini-Bore with Integral Anti-
Siphon Valve-SL 170 cm. Approximate
Priming Volume 2.3 mL. For use in PCA
mode via Intravenous route.
List 6514: PCA Extension Set with Backcheck Valve-
SL 25 cm. Approximate Priming Volume 1.1
mL. For use in conjunction with set 6517 to
convert from Continuous to PCA mode via
Intravenous route.
List 6516: PCA Set-Long, Mini-Bore with Integral
Anti-Siphon Valve-SL 218 cm. Approximate
Priming Volume 2.6 mL. For use in PCA
mode when extra length needed via
Intravenous route.
List 6517: PCA Continuous Infusion Set, Mini-Bore
with Integral Anti-Siphon Valve-SL 203 cm.
Approximate Priming Volume 1.5 mL.
For use in Continuous and
PCA+Continuous modes via Intravenous
route.
For use in PCA, Continuous, and
PCA+Continuous modes via Epidural
route.
430-04684-002
Page 27

LifeCare PCA 3 Infusion System 2- 5
2.3 Printer Kits
List
12406-01:
List
12406-02:
** See current product sales catalog for available drugs **
Complete thermal printer kit includes:
printer, connector cable, battery pack, AC
adaptor, & paper pack.
Connector cable only
430-04684-002
Page 28

2- 6 2) Principles of Operation
NOTES
430-04684-002
Page 29

LifeCare PCA 3 Infusion System 3- 1
d
s
3) Equipment Description
3.1 Components
Security
Door
Vial
Cradle
Clips
Bar
code
Reader
Window
Injector
Vial
Cradle
Release
Mechanism
(Holder)
LED
Display
LCD
Display
Softkeys
Door
Lock
Keypa
Button
AC
Power
Indicator
Vial
Plunger
Basic Layout of Front Panel and Keypad
430-04684-002
Battery
Power
Indicator
Page 30

3- 2 3) Equipment Description
Cradle
Release
Mechanism
Vial Base
Upper Vial
Retainer
Bar code
Reader
Window
(Vial Bar
code must
face)
Vial
Stopper
Vial Lip
Injector
Injector
Flange (Vial
Plunger)
Luer-Lock
Fitment
Vial Cradle
Clips
Vial Sensor
Switch
(Top Vial
Cradle
Clip)
Lower Vial
Retainer
(Middle
Bracket)
Injector
Flange
Retainer
Injector
Sensor
Switch
(Back of
Retainer)
Vial Cradle Assembly
430-04684-002
Page 31
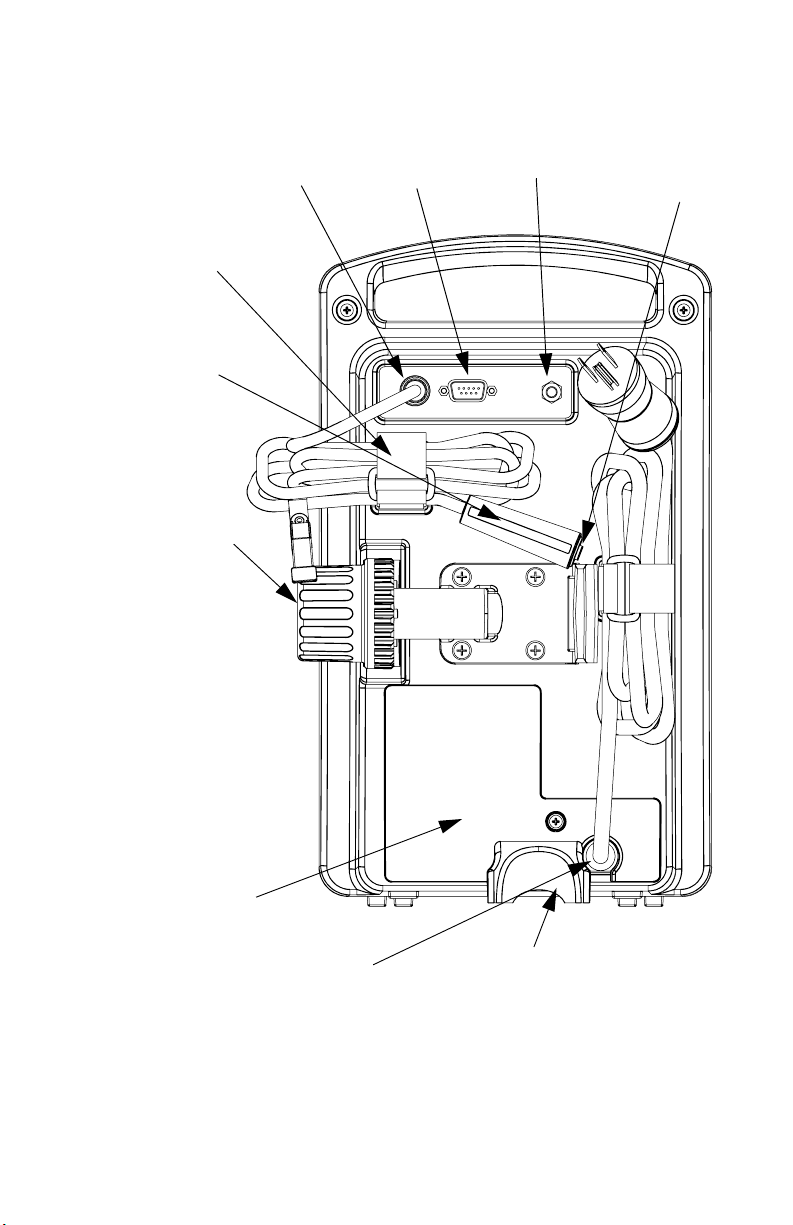
LifeCare PCA 3 Infusion System 3- 3
Patient
Pendant
Jack
Patient
Pendant
Cable
fastener
PCA 3
Patient
Pendant
(blue
handle)
Universal
IV Pole
Clamp with
Dual Lock
NOTE: Pole
Clamp is
locked when
security door
is closed and
locked. Unit
cannot be
removed from
IV pole
without key.
TM
Printer
Connector
Ground
Test Point
Patient
Pendant
Button
Battery and
Fuse Access
Door
AC Cord
Connector
Stabilizer
foot
Rear Panel
430-04684-002
Page 32
3- 4 3) Equipment Description
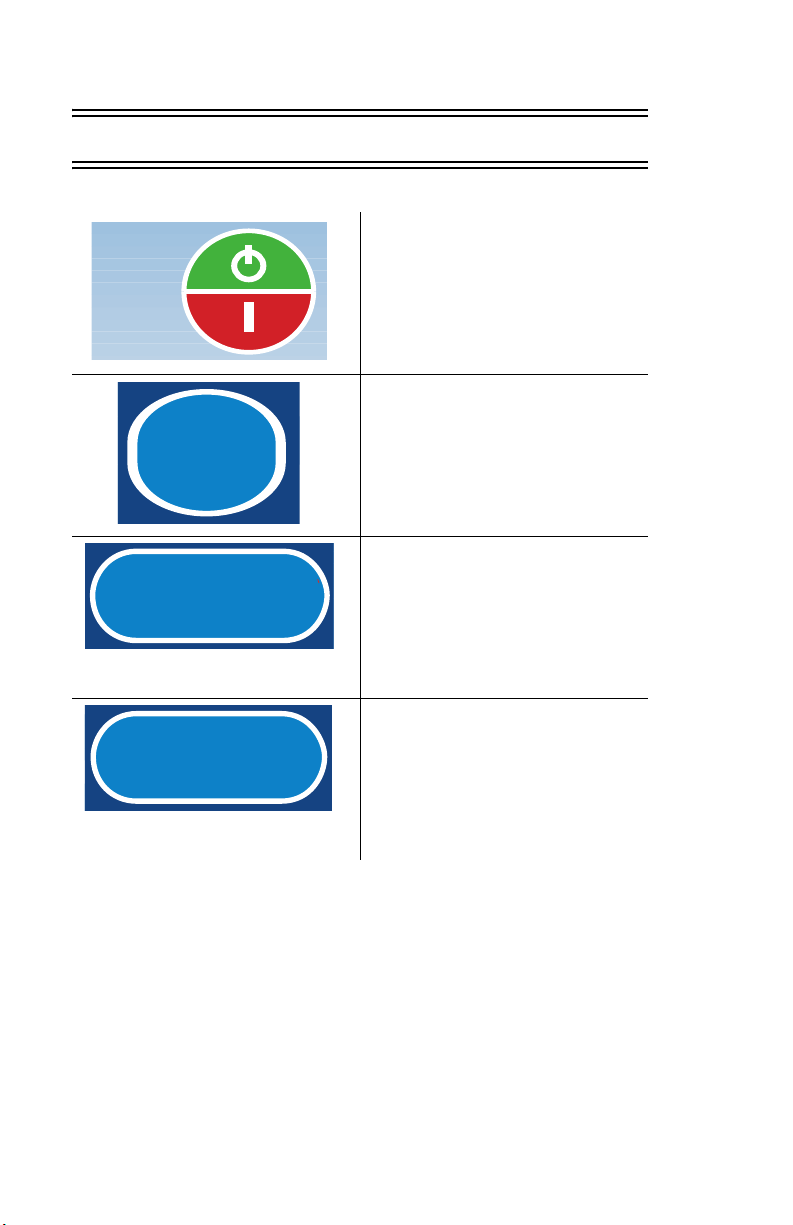
3.2 Operating Buttons & Keys
The [ON/OFF]
ON
OFF
CLR
ENTER
button is used to
control the power of
the PCA 3
instrument.
The [CLEAR] button
is used to clear an
entry.
The [ENTER] button
is used to select and
accept various screen
options.
The [EXIT] button is
used to return to the
EXIT
430-04684-002
main display from
non-programming
screens.
Page 33

LifeCare PCA 3 Infusion System 3- 5
The [SILENCE/
SILENCE
V OLUME
START
PA USE
HISTORY
VOLUME] button is
used to temporarily
silence an alarm
while correcting a
condition or to adjust
alarm volume when
the pump is in run
mode.
The [START/PAUSE]
button is used to
start or pause a
continuous infusion.
The [HISTORY]
button is used to
display parameter
settings, dose history,
and event log. It also
provides access to
the Print History
softkey.
430-04684-002
Page 34
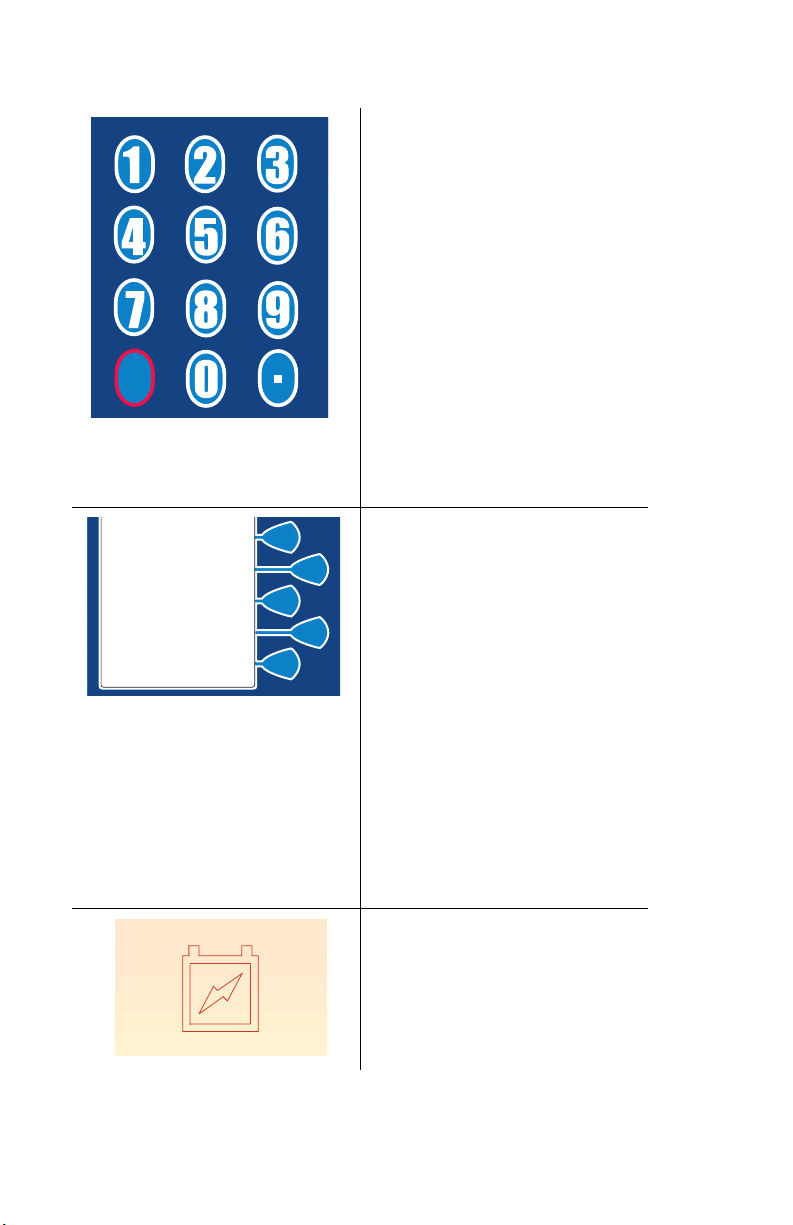
3- 6 3) Equipment Description
The numeric buttons
are used to enter
values for any field
requiring numeric
data.
The [DECIMAL
POINT] button is
C
L
R
used for entering
numbers with a
decimal point. An
example would be
10.5 mL.
Keys (or Softkeys) are
touchkeys which are
located to the right of
the main display.
They perform a
variety of functions
correlating to the
description displayed
on the screen.
An example of a
softkey in this
manual is
PCA ONLY>
Battery indicator
illuminates
continuously when
pump is running on
battery power.
430-04684-002
Page 35

LifeCare PCA 3 Infusion System 3- 7
AC (mains) power
indicator illuminates
when pump is
plugged into AC
power.
LED displays the dose
delivered.
When displaying
dose delivery in
micrograms, a
vertical “walking
stick” appears on the
right side of the
display.
When displaying
dose delivering in
milligrams, the
“walking stick”
appears on the left
side of the display.
430-04684-002
Page 36

3- 8 3) Equipment Description
PCA 3 Patient
Pendant is used by
the patient to deliver
the drug upon the
press of the button.
WARNING
PATIENT PENDANT IS
ONLY TO BE PRESSED
BY THE INTENDED
PATIENT.
If Patient Pendant is partially
pressed, a Pendant Fault
message will appear. This
can be corrected by releasing
the button. A PCA bolus will
not be delivered during a
Pendant Fault condition.
430-04684-002
Page 37

LifeCare PCA 3 Infusion System 4- 1
4) Basic Operation
4.1 GETTING STARTED
This section details the PCA 3 instrument setup procedures.
UNPACKING
CAUTION: PRODUCT DAMAGE MAY OCCUR UNLESS
PROPER
D
T
Inspect the PCA 3 packaging for possible shipping damage. If
damage is found, contact the delivery company immediately.
Use care when unpacking the PCA 3. Retain the packing slip and
save all packing material in case the PCA 3 is damaged or fails
the pump self-test and has to be returned to Hospira.
CARE IS EXERCISED DURING UNPACKING AND SETUP.
O NOT USE THE PCA 3 IF IT APPEARS DAMAGED IN ANY WAY.
HE BATTERY MAY NOT BE CHARGED UPON RECEIPT.
Inspect the PCA 3 thoroughly for damage.
CAUTION: I
CONTACT HOSPIRA.
F THE PCA 3 APPEARS TO BE DAMAGED,
CONNECTING THE PATIENT PENDANT
The Patient Pendant should be plugged into the unit prior to
programming.
1) Connect Patient Pendant plug into back of unit
opening labeled Patient Control.
2) Tighten connector ring snugly to confirm
proper attachment.
430-04684-002
Page 38

4- 2 4) Basic Operation
SYSTEM SELF-TESTS
Connect the AC power (mains) cord to an AC power receptacle,
then confirm that the power plug icon is illuminated on the front of
the pump.
A systematic self-testing of the processing, delivery, and safety
systems is performed whenever the PCA 3 is turned on, to verify
readiness for operation.
CAUTION: D
THE SYSTEM SELF-TESTS.
FAILS
O NOT PLACE THE PCA 3 IN SERVICE IF IT
NOTE: If the quality of earth grounding source is in
doubt, use battery power.
Failure during the Self-Tests will be reported in the Malfunction
Log as a Malfunction Condition.
Unlock door and press the [ON/OFF] button, or insert the vial, to
turn the power on. Check screen display and listen for a beep to
indicate the audio is working. Wait for the self-tests to complete. If
successful, put a vial (with a fully primed set) into the pump.
When operating on battery power, a Low Battery message will be
displayed informing you of the condition, and prompting you to
connect to AC power.
CAUTION: D
BATTERY
CHARGED
REMOVED. USE OF A PROPERLY MAINTAINED AND
O NOT OPERATE THE PCA3 WITH THE
BATTERY HELPS ENSURE PROPER OPERATION.
To ensure battery is fully charged, connect the PCA 3 to AC
power for a minimum of 16 hours while in the OFF mode.
If an alarm occurs during the power on self-test, identify the alarm
message, then take corrective action (see Section 6, Alarms and
Troubleshooting).
430-04684-002
Page 39

LifeCare PCA 3 Infusion System 4- 3
Power the pump ON. If the alarm recurs, remove the PCA 3 from
service and contact the hospital biomedical department or your
local Hospira representative.
DATA RETENTION
Delivery program settings and programming option selections are
retained in memory.
If the PCA 3 has been turned OFF for more than one hour, all
delivery settings are cleared and programming option selections
are returned to zero and new programming must be entered.
4.2 Operating the PCA 3
INTRAVENOUS PCA ADMINISTRATION
1) Connect the syringe to the set and manually
prime set.
2) Attach primary IV set line to recommended
PCA set, list #’s 3559, 6516, or 6517 attached to list
6514 via backcheck valve port.
3) Prime IV set and the lower portion of the PCA
set, and close the manual clamp on the IV set.
430-04684-002
Page 40

4- 4 4) Basic Operation
EPIDURAL PCA ADMINISTRATION
NOTE: The administration of drugs is restricted to those
analgesic drugs approved for continuous epidural
administration.
Recommended use of the epidural route is for labor and delivery,
acute pain control, or post-operative analgesia for periods up to
96 hours.
WARNING
IT IS STRONGLY RECOMMENDED THAT THE
EPIDURAL INFUSION SYSTEM BE PROMINENTLY
IDENTIFIED AS “EPIDURAL”. FAILURE TO IDENTIFY
IT AS EPIDURAL MAY RESULT IN INCORRECT
ADMINISTRATION OF INTRAVENOUS RATHER THAN
EPIDURAL FORMULATIONS. IN ADDITION, FAILURE
TO IDENTIFY THE EPIDURAL INFUSION COULD
RESULT IN CONFUSION WITH OTHER INFUSION
SYSTEMS DELIVERING CONCOMITANT
INTRAVENOUS FORMULATIONS.
FOR EPIDURAL USE, ADMINISTER ONLY
ANESTHETICS/ANALGESICS APPROVED FOR
EPIDURAL ADMINISTRATION (AS INDICATED OR
ALLOWED BY THE DRUGS’ FDA APPROVED
LABELING). EPIDURAL ADMINISTRATION OF DRUGS
OTHER THAN THOSE INDICATED FOR EPIDURAL
USE COULD RESULT IN SERIOUS INJURY TO THE
PATIENT.
If patient access device is not indwelling, prime and establish
epidurally. Confirm proper placement. Attach recommended low
priming volume pump set, without Y-injection sites, to patient
access device.
430-04684-002
Page 41

LifeCare PCA 3 Infusion System 4- 5
CAUTION: EPIDURAL ADMINISTRATION OF DRUGS BY PCA
AND/OR CONTINUOUS MODES SHOULD BE LIMITED TO
PERSONNEL
PATIENT
PLACEMENT
CATHETER
INTRATHECAL ADMINISTRATION. FACILITIES PRACTICING
AND
CONTINUOUS
WITH
OTHER
EQUIPMENT
CONTINUOUS
ADMINISTRATION
EFFECTS FREQUENTLY IN A FULLY EQUIPPED AND STAFFED
ENVIRONMENT
COMPLETION
FAMILIAR WITH ASSOCIATED TECHNIQUES AND
MANAGEMENT PROBLEMS. PROPER EPIDURAL
OF THE CATHETER IS ESSENTIAL SINCE
MIGRATION COULD RESULT IN INTRAVASCULAR
EPIDURAL ADMINISTRATION MUST BE EQUIPPED
RESUSCITATIVE EQUIPMENT, OXYGEN, NALOXONE AND
RESUSCITATIVE DRUGS. ADEQUATE MONITORING
(E.G., OXIMETRY) IS RECOMMENDED FOR
MONITORING OF THE PATIENT DURING EPIDURAL
. PATIENTS MUST BE OBSERVED FOR SIDE-
FOR AT LEAST 24 HOURS FOLLOWING
OF EPIDURAL DRUG ADMINISTRATION.
CAUTION: D
FOLLOWING
PRESERVATIVE
REPORTED
ELAYED RESPIRATORY DEPRESSION
CONTINUOUS EPIDURAL ADMINISTRATION OF
-FREE MORPHINE SULFATE HAS BEEN
.
If overdelivery occurs during administration, observe the patient
carefully for signs of the following:
• Compression on spinal cord (disorientation,
headache, or transient neuralgia)
• Drug overdose
The epidural space has 58 openings through which fluid can exit.
Pressure build-up during administration is transient. However, if a
large volume of fluid is administered over a short period, the
pressure will take longer to return to normal.
430-04684-002
Page 42

4- 6 4) Basic Operation
4.3 Loading Vial
WARNING
FAILURE TO USE COMPATIBLE HOSPIRA VIAL/
INJECTOR AND HOSPIRA PCA SETS WITH INTEGRAL
ANTI-SIPHON VALVE MAY CAUSE AN INACCURATE
DOSE DELIVERY TO THE PATIENT.
1. Squeeze Cradle Release
Mechanism together at the top of the
holder and move to the uppermost
position.
1
4
1
2
1
DRUG NAME
NOTE: Always confirm bar
code reader window is clean
before inserting vial.
2. Hold the vial with the graduated
markings facing the clinician. This
will ensure the vial bar code label
faces the bar code reader on the right
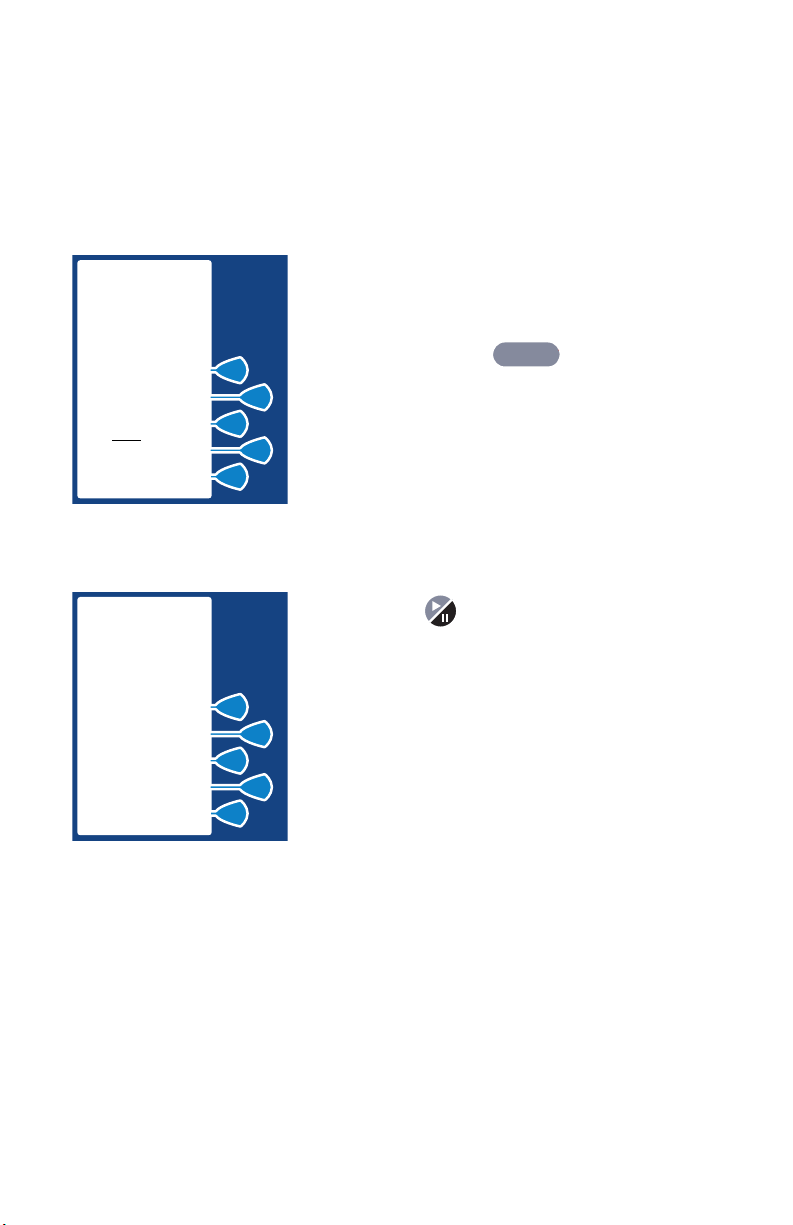
side of the vial compartment.
3
CAUTION: DO NOT LOAD VIAL
UPPER VIAL CLIP FIRST.
INTO
V
IAL LIP MAY CRACK OR CHIP.
3. Insert bottom of glass vial into
the middle black bracket.
5
4. Gently press upper end of glass
vial into upper black bracket.
5. Squeeze the top of the Cradle
Release Mechanism and move down
until the vial injector snaps into the
bottom bracket.
6. Select
CONTINUE>.
7. If vial bar code is not read by pump, slowly rotate the vial and
position with the bar code on the right until bar code has been read.
430-04684-002
Page 43

LifeCare PCA 3 Infusion System 4- 7
CAUTION: VIAL AND INJECTOR MUST BE SECURELY
LOCKED
INTO THE INFUSER BEFORE BEGINNING DELIVERY.
WARNING
CRACKED VIALS MAY NOT SHOW EVIDENCE OF
LEAKAGE UNTIL DELIVERY PRESSURE IS APPLIED.
NOTE: If the device is OFF, improper loading of syringe
will turn ON the device and activate a non-silenceable
CHECK SYRINGE alarm within 30 seconds after
C
ONTINUE> is selected. Proper loading (engaging injector
flange) will silence the alarm.
4.4 Adjusting Settings
1) Press button to power
on the pump. Upon initial
start-up, the self-test begins.
2) Select SYSTEM SETTINGS>
to view the Change Settings
menu.
LIFECARE PCA 3
SELF TEST
LIFECARE PCA 3
SELF TEST
COMPLETE
RAM . . . . . OK
FLASH . . . OK
CPU ID . . . OK
CPU . . . . . OK
TIMER . . . .OK
SYSTEM
SETTINGS
CONTINUE
430-04684-002
Page 44

4- 8 4) Basic Operation
3) Choose the setting to
SELECT
SETTING
TO CHANGE
VOLUME
CONTRAST
TIME/DATE
change by selecting the
appropriate softkey.
CONTINUE
CHANGING ALARM VOLUME
1) Select VOLUME>.
SELECT
SETTING
TO CHANGE
VOLUME
CONTRAST
TIME/DATE
CONTINUE
2) Select desired volume,
SELECT ALARM
VOLUME
HIGH
MEDIUM
LOW
CANCEL
SAVE & EXIT
then SAVE & EXIT>.
The current setting will flash at this
screen.
430-04684-002
Page 45

LifeCare PCA 3 Infusion System 4- 9
CHANGING CONTRAST OF MAIN DISPLAY
1) Select CONTRAST>.
SELECT
SETTING
TO CHANGE
VOLUME
CONTRAST
TIME/DATE
CONTINUE
2) Select desired adjustment
softkey repeatedly until
contrast is optimized for
viewing.
3) Select SAVE & EXIT>.
ADJUST LCD
CONTRAST TO
DESIRED LEVEL
LIGHTER
DARKER
CANCEL
SAVE & EXIT
CHANGING OR CONFIRMING TIME AND DATE
WARNING
CHANGING THE DATE OR TIME WILL CLEAR ALL
TOTALS. THE CURRENT PROGRAM WILL REMAIN
INTACT WHEN THE TIME/DATE FUNCTION IS
ACCESSED. LOCKOUTS OR LIMITS IN PLACE WHEN
THE TIME/DATE IS CHANGED WILL REMAIN IN
EFFECT.
430-04684-002
Page 46

4- 10 4) Basic Operation
1) Select TIME/DATE>.
SELECT
SELECT
SETTING
SETTING
TO CHANGE
TO CHANGE
VOLUME
CONTRAST
TIME/DATE
CONTINUE
After selecting TIME/DATE>, a warning
screen appears to inform you that
changing the date or time will clear all
totals. The current program will remain
intact when the time/date function is
accessed. Lockouts or limits in place
when the time/date is changed will
remain in effect.
2) Warning Screen appears,
select CONTINUE>.
WARNING
CHANGING THE
DATE OR TIME
WILL CLEAR ALL
TOTALS
CONTINUE
PREVIOUS
3) Set Time with number
SET TIME WITH
NUMBERS
BUTTONS
TOGGLE AM/PM
10:43 PM
buttons. Enter hour as two
digits (01:00) and minutes as
two digits (01:07 PM). Select
AM/PM> to alternate between
AM and PM.
AM/PM
NEXT
NOTE: Time can be displayed as
12 or 24 hour clock. The default
setting is 12 hour.
430-04684-002
Page 47

LifeCare PCA 3 Infusion System 4- 11
4) After changing time, select
NEXT> to change Date. Set
date with numbers buttons.
Current setting for Date will flash.
NOTE: Date must be entered in
MM/DD/YY sequence.
SET DATE WITH
NUMBERS
BUTTONS
01/15/05
NEXT
5) Select NEXT> again after
changing to desired date. This
will advance you to the
confirmation screen.
6) Select CONFIRM> to confirm
the changed settings.
CONFIRM
CURRENT
TIME AND DATE
SETTINGS
9:21 PM
01/15/05
CONFIRM
CHANGE
CANCEL
7) Then select CONTINUE> to
exit the Change System
Settings menu and display the
Vial Confirmation screen (if
vial is loaded properly).
SELECT
SETTING
TO CHANGE
VOLUME
CONTRAST
TIME/DATE
CONTINUE
430-04684-002
Page 48
4- 12 4) Basic Operation
4.5 Guided Start-Up for Prefilled vials
LIFECARE PCA 3
SELF TEST
MORPHINE
1 mg/mL
CONFIRM
1 MG/ML
M O R P H I N E P H
TO RX
REMOVE VIAL
IF NOT CORRECT
CONFIRM
1) Press button, or load
drug vial into cradle, to power
on the pump. Upon initial
start-up, the self-test begins.
(See Section 4.3)
This screen will be followed by another
displaying all self-test information,
including time, date, software version
and copyright information. It lasts about
2 seconds. During the self-test, the
pump will read the bar code label.
2) Select CONTINUE> to
advance to the next screen.
3) Select CONFIRM> to accept
the inserted drug or remove
the vial if not correct.
430-04684-002
Page 49

LifeCare PCA 3 Infusion System 4- 13
4) Select either YES> or NO>
to clear history and dose
settings if pump has been
OFF for 1 hour or less.
5) Select CONFIRM> to confirm
choice and continue.
A screen will appear confirming History
has been cleared.
MORPHINE
1 mg/mL
CLEAR
HISTORY AND
RX SETTINGS?
YES
MORPHINE
1 mg/mL
CONFIRM
CLEAR
HISTORY AND
RX SETTINGS
CONFIRM
PREVIOUS
NO
6) Select either YES> or NO>
to purge the system.
MORPHINE
1 mg/mL
PURGE?
PURGING THE SYSTEM
WARNING
PATIENT MUST BE DISCONNECTED FROM THE PCA
SET BEFORE THE PURGE CYCLE.
430-04684-002
YES
NO
Page 50

4- 14 4) Basic Operation
After the pump is turned on, and the self-tests complete, you are
prompted to purge the system. Confirm the PCA set is
disconnected from the patient’s IV line before pressing Y
initiate the purge cycle.
ES> to
Press and hold the P
URGE> key. The flow rate during purging is
approximately 250 mL/hr. As soon as fluid is seen at the end of
the administration set, and no air remains in the set, release the
key. After the P
URGE> key is released, the purge cycle will stop
and the pump will prompt you to respond if flow was seen. If flow
was not seen, the cycle may be repeated until a total of 3 mL has
been delivered.
To remove system slack when a new syringe is installed, it is
recommended that the pump be purged before beginning
operation.
NOTE: The system must be primed before purging.
Remove all air from the syringe before putting it into the
pump.
NOTE: Drug delivered during the purge cycle is not
stored in system memory and will not be displayed.
CAUTION: I
, IF A PURGE IS NOT PERFORMED AFTER A SYRINGE
MODES
CHANGE
SYSTEM
IS PRESSED (WITH DOOR LOCKED). ALTHOUGH FLUID IS NOT
NORMALLY
COMPLIANCE
OF FLUID MAY BE DELIVERED. IF 0.3 ML OF FLUID REPRESENTS
A
DISCONNECTED
, THE PUMP AUTOMATICALLY PERFORMS A SMALL
COMPLIANCE STEP TO REMOVE SLACK WHEN [START]
HAZARD TO THE PATIENT, THE SET SHOULD BE
N CONTINUOUS AND PCA+CONTINUOUS
DELIVERED TO THE PATIENT DURING THE
STEP, UNDER SOME CONDITIONS UP TO 0.3 ML
DURING THIS OPERATION.
430-04684-002
Page 51

LifeCare PCA 3 Infusion System 4- 15
7) If YES> is selected,
disconnect the set from the
patient, and press and hold
the PURGE> softkey.
While purging is occurring, the word
PURGING will be displayed.
NOTE: Purging is recommended to
remove system slack when a new
vial is inserted. The maximum
volume delivered during a purge is
3 mL.
Upon release of the P
URGE> softkey,
the display will ask if the purge is
complete.
8) Select YES> to continue, or
select NO> to purge again
until complete.
9) Reconnect Set to patient.
MORPHINE
1 mg/mL
DISCONNECT
SET FROM
PATIENT
PRESS AND HOLD
PURGE KEY
PURGE
PREVIOUS
MORPHINE
1 mg/mL
PURGE
COMPLETE?
YES
NO
10) Set Loading Dose (if
desired) by selecting YES>.
If NO> is selected, you will go directly to
the Select Mode screen. Information on
modes can be found in Section 5.
LOADING DOSE
After the drug concentration has been
confirmed, an optional loading dose
may be programmed to provide an
immediate bolus to the patient.
MORPHINE
1 mg/mL
SET LOADING
DOSE?
YES
NO
430-04684-002
Page 52
4- 16 4) Basic Operation
NOTE: A supplemental (booster) dose can be delivered
at any time during operation by opening the door and
selecting the L
Limit is set and has been reached, using the loading
dose function may result in exceeding the dose limit.
OADING DOSE> key. If the 4 (1) Hr Dose
MORPHINE
1 mg/mL
ENTER
LOADING DOSE
THEN PRESS
ENTER BUTTON
0.1 - 10 mg
5 mg
milligrams
PREVIOUS
MORPHINE
1 mg/mL
PRESS
START BUTTON
TO INFUSE
5 MG
LOADING DOSE
PREVIOUS
11) Enter a Loading Dose
within the displayed range.
12) Then press .
ENTER
13) Press button to infuse
programmed Loading Dose.
NOTE: If an occlusion condition is
detected, the delivery will stop for
10 seconds. If the occlusion
condition still exists at the 10second mark, then the Occlusion
Alarm occurs. Otherwise, the
delivery is automatically resumed.
430-04684-002
Page 53
LifeCare PCA 3 Infusion System 4- 17
Example screen displaying Loading
Dose Value as it infuses. Bottom of
screen displays text confirming
Loading Dose is active. Upon
completion, Red LED (above LCD)
displays Dose Delivered.
MORPHINE
1 mg/mL
PRESS
PAUSE BUTTON
TO STOP
2.5 mg
This will bring you to the Select Mode
screen which is described in the next
section.
milligrams
INFUSING
LOADING DOSE
4.6 Guided Start-Up for Custom Vials
1) Press button, or load
drug vial into cradle, to power
on the pump. Upon initial
start-up, the self-test begins.
This screen will be followed by another
displaying all self-test information,
including time, date, software version
and copyright information. It lasts about
2 seconds. During the self-test, the
pump will read the bar code label.
LIFECARE PCA 3
SELF TEST
2) Select CONTINUE> to
advance to the next screen.
430-04684-002
Page 54

4- 18 4) Basic Operation
CUSTOM VIAL
CONFIRM
CUSTOM
VIAL
TO RX
REMOVE VIAL
IF NOT CORRECT
CONFIRM
CUSTOM VIAL
CLEAR
HISTORY
YES
NO
CUSTOM VIAL
CONFIRM
CLEAR
HISTORY
3) Select CONFIRM> to accept
the inserted drug or remove
the vial if not correct.
4) Select either YES> or NO>
to clear history and dose
settings if pump has been
OFF one hour or less.
5) Select CONFIRM> to confirm
choice and continue.
A screen will appear confirming History
has been cleared.
CONFIRM
PREVIOUS
430-04684-002
Page 55

LifeCare PCA 3 Infusion System 4- 19
6) Select either YES> or NO>
to purge the system.
7) If YES> is selected,
disconnect the set from the
patient, and press and hold
the PURGE> softkey.
While purging is occurring, the word
PURGING will be displayed.
NOTE: Purging is recommended to
remove system slack when a new
vial is inserted. The maximum
volume delivered during a purge is 3mL.
CUSTOM VIAL
PURGE?
YES
NO
CUSTOM VIAL
DISCONNECT
SET FROM
PATIENT
PRESS AND HOLD
PURGE KEY
PURGE
PREVIOUS
Upon release of the P
URGE> softkey,
the display will ask if the purge is
complete.
8) Select YES> to continue, or
select N
O> to purge again
until complete.
9) Reconnect Set to patient.
CUSTOM VIAL
PURGE
COMPLETE?
YES
NO
430-04684-002
Page 56

4- 20 4) Basic Operation
CUSTOM VIAL
SELECT UNITS
OF MEASURE
GRAMS
MILLI
MICROGRAMS
CUSTOM VIAL
ENTER DRUG
CONCENTRATION
THEN PRESS
ENTER BUTTON
1-100 mcg/mL
micrograms
PREVIOUS
10
(mg)
(mcg)
mcg
mL
10) Select desired Units of
Measure.
For the purposes of this instruction,
Micrograms is selected.
11) Enter desired Drug
Concentration within the
displayed range.
NOTE: Only whole numbers may
be entered when using micrograms
(mcg). If a decimal entry is
attempted, the display will inform
the user that decimals are not
allowed. Press [CLEAR] to zero the
value. Then enter a value within
the displayed range.
ENTER
CUSTOM VIAL
10 mcg/mL
CONFIRM
10 MCG/ML
CONCENTRATION
TO
PHYSICIAN RX
CONFIRM
PREVIOUS
12) Then press .
13) Confirm Concentration
by selecting CONFIRM>.
430-04684-002
Page 57
LifeCare PCA 3 Infusion System 4- 21
14) Set Loading Dose (if
desired) by selecting YES>.
If NO> is selected, you will go directly to
the Select Mode screen. Information on
modes can be found in Section 5.
15) Enter a Loading Dose
within the displayed range.
16) Then press .
ENTER
CUSTOM VIAL
10 mcg/mL
SET LOADING
DOSE?
YES
CUSTOM VIAL
10 mcg/mL
ENTER
LOADING DOSE
THEN PRESS
ENTER BUTTON
1 - 100 mcg
35 mcg
micrograms
PREVIOUS
NO
17) Press button to infuse
programmed Loading Dose.
WARNING
ALWAYS MONITOR THE PCA 3
WHEN DELIVERING MEDICATION
WITH THE DOOR OPEN.
CUSTOM VIAL
10 mcg/mL
PRESS
START BUTTON
TO INFUSE
35 MCG
LOADING DOSE
PREVIOUS
430-04684-002
Page 58

4- 22 4) Basic Operation
CUSTOM VIAL
10 mcg/mL
PRESS
PAUSE BUTTON
TO STOP
25 mcg
micrograms
INFUSING
LOADING DOSE
Example screen displaying Loading
Dose Value as it infuses. Bottom of
screen displays text confirming
Loading Dose is active. Upon
completion, Red LED (above LCD)
displays Dose Delivered.
This will bring you to the Select Mode
screen which is described in the next
section.
430-04684-002
Page 59

LifeCare PCA 3 Infusion System 5- 1
5) Select Mode
5.1 Modes of Delivery
The PCA 3 delivers analgesia in one of three modes:
• PCA ONLY
•CONTINUOUS
• PCA+CONTINUOUS
PROTOCOLS
Pre-programmed settings for the 3 delivery modes, created in the
Service Mode for Hospira prefilled drug vials. For information on
using the Service Mode, contact Hospira Technical Support
Operations at 1-800-241-4002.
NOTE: Protocols not available for Custom Vials.
PCA ONLY
A patient initiated dose can be administered using the patient
pendant when the PCA AVAILABLE message appears. After
completing the dose, the pump enters either the preset
LOCKOUT interval or the DOSE LIMIT REACHED state (if a
dose limit has been entered); further delivery is prohibited in both
of these conditions.
Partial doses can be the result of interrupting delivery by pressing
[START/STOP] (PCA + Cont.), opening the door (PCA Only), loss
of power, reaching the dose limit, emptying the vial, or a
malfunction alarm.
The screen message will alert the user that PCA is not available
and a different audible tone will occur if patient pendant button is
pressed (unless deactivated in Service Mode).
430-04684-002
Page 60

5- 2 5) Select Mode
CONTINUOUS
A programmed continuous infusion is started by pressing the
[START/PAUSE] button after the door is closed and locked. The
patient pendant is disabled in CONTINUOUS mode. Upon
reaching the DOSE LIMIT, if entered, the pump stops drug
delivery and the 4 (or 1)-HR LIMIT REACHED message is
displayed.
PCA+CONTINUOUS
Infusion is started by pressing the [START/PAUSE] button after
the door is closed and locked. A patient initiated PCA dose can
be administered using the patient pendant when the PCA
AVAILABLE message appears. When the patient-initiated dose is
activated, the PCA dose is delivered prior to the CONTINUOUS
infusion rate. After the PCA dose is completed, the pump enters
the LOCKOUT interval. While in the lockout period, the
CONTINUOUS infusion remains in progress, but the patient
initiated dose cannot be activated. If a Dose limit state has
been reached, the pump stops drug delivery.
NOTE: In CONTINUOUS or PCA+CONTINUOUS mode,
The [START/PAUSE] button must be pressed within 30
seconds of locking the door or the pump will alarm.
430-04684-002
Page 61

LifeCare PCA 3 Infusion System 5- 3
5.2 Programming PCA Only
For detailed Startup information including Vial Insertion, Clearing
Settings, Purging, and setting a Loading Dose, see Section 4.
Also refer to Section 4 for information on adjusting system
settings such as contrast and volume.
1) Unlock door and press
button, or load drug vial into
LIFECARE PCA 3
SELF TEST
cradle, to power on the pump.
Upon initial start-up, the selftest begins.
2) Select CONTINUE> to
advance to next programming
screen.
3) Select CONFIRM> to accept the inserted drug or
remove the vial if not correct.
4) Select either YES> or NO> to clear history and
dose settings if pump has been OFF for one hour
or less.
5) Select C
ONFIRM> to confirm choice and
continue.
6) Select either Y
ES> or NO> to purge the system.
7) If Y
ES> is selected, disconnect the set from the
patient, and press and hold the P
URGE> softkey.
430-04684-002
Page 62
5- 4 5) Select Mode
8) Select YES> to continue, or select NO> to purge
again until complete.
9) Reconnect Set to patient.
10) Set Loading Dose (if desired) by selecting
YES>.
11) Enter a Loading Dose within the displayed
range.
12) Then press .
ENTER
13) Press button to infuse programmed
Loading Dose.
MORPHINE
1 mg/mL
SELECT
DELIVERY MODE
PCA ONLY
PCA + CONT.
CONTINUOUS
PROTOCOLS
PREVIOUS
14) From the Select Delivery
Mode screen, select PCA
ONLY>.
430-04684-002
Page 63

LifeCare PCA 3 Infusion System 5- 5
15) Enter the desired PCA
dose using the numeric
keypad. (Value range is
displayed on screen)
C
If value is entered incorrectly, press
to change value.
16) Then press .
ENTER
L
R
MORPHINE
1 mg/mL
ENTER
PCA DOSE
THEN PRESS
ENTER BUTTON
0.1-5 mg
2 mg
milligrams
PREVIOUS
If programming changes need to be made, select PREVIOUS> to
return to the previous screen.
17) Enter a lockout Interval
value. (Value range is
displayed on the screen)
C
If value is entered incorrectly, press
to change value.
18) Then press .
ENTER
L
R
MORPHINE
1 mg/mL
ENTER LOCKOUT
INTERVAL
THEN PRESS
ENTER BUTTON
5-120 min
10 min
minutes
PREVIOUS
If programming changes need to be
made, select P
REVIOUS> to return to
the previous screen.
19) Set a specific dose limit
by selecting YES> and
advancing to the Dose Limit
Enter Value screen. Or select
NO> to choose No Dose Limit.
No Dose Limit will be selected for this
example.
MORPHINE
1 mg/mL
SET A DOSE
LIMIT?
YES
NO
PREVIOUS
430-04684-002
Page 64
5- 6 5) Select Mode
NOTE: See Section 5.6 Dose Limit (1 or 4 hour) for
complete information on this feature.
MORPHINE
1 mg/mL
CONFIRM NO
DOSE LIMIT
CONFIRM
PREVIOUS
MORPHINE
1 mg/mL
PCA ONLY
PCA DOSE
LOCKOUT
4 HOUR LIMIT
CONFIRM
PREVIOUS
2 mg
10 min
NO
20) Select CONFIRM> to
confirm No Dose Limit
selection.
Select PREVIOUS> to return to the
previous screen.
21) Select CONFIRM> to
confirm settings. Or, select
PREVIOUS> to return to the
previous screen.
22) Close and lock door.
Place key in a secure location.
Upon door lock, PCA is
available.
23) Patient presses pendant to initiate PCA dose.
NOTE: If an occlusion condition is detected, the delivery
will stop for 10 seconds. If the occlusion condition still
exists at the 10-second mark, then the Occlusion Alarm
occurs. Otherwise, the delivery is automatically resumed.
Approximately 10 seconds after door is locked, “Door Locked”
message will disappear. After delivery of PCA dose, PCA
LOCKOUT message appears indicating PCA is locked out.
If Patient Pendant is partially pressed, a Pendant Fault message
will appear. This could be corrected by releasing the button.
430-04684-002
Page 65

LifeCare PCA 3 Infusion System 5- 7
When Dose Limit is reached, a message will be displayed
indicating Dose Limit has been reached.
5.3 Continuous Mode
For detailed Startup information including Vial Insertion, Clearing
Settings, Purging, and setting a Loading Dose, see Section 4.
Also refer to Section 4 for information on adjusting system
settings such as contrast and volume.
1) Unlock door and press
button, or load drug vial into
LIFECARE PCA 3
SELF TEST
cradle, to power on the pump.
Upon initial start-up, the selftest begins.
2) Select CONTINUE> to
advance to next programming
screen.
3) Select CONFIRM> to accept
the inserted drug or remove the vial if not correct.
4) Select either Y
ES> or NO> to clear history and
dose settings if pump has been OFF one hour or
less.
5) Select CONFIRM> to confirm choice and
continue.
6) Select either YES> or NO> to purge the system.
430-04684-002
Page 66

5- 8 5) Select Mode
7) If YES> is selected, disconnect the set from the
patient, and press and hold the PURGE> softkey.
8) Select YES> to continue, or select NO> to purge
again until complete.
9) Reconnect Set to patient.
10) Set Loading Dose (if desired) by selecting
YES>.
11) Enter a Loading Dose within the displayed
range.
12) Then press .
ENTER
13) Press button to infuse programmed
Loading Dose.
MORPHINE
1 mg/mL
SELECT
DELIVERY MODE
PCA ONLY
PCA + CONT
CONTINUOUS
PROTOCOLS
PREVIOUS
14) From the Select Mode
screen, select CONTINUOUS>.
430-04684-002
Page 67
LifeCare PCA 3 Infusion System 5- 9
15) Enter a value using the
keypad. (Value range is
displayed on screen)
C
If value is entered incorrectly, press
L
R
to change value.
16) Then press .
ENTER
If programming changes need to be
made, select P
REVIOUS> to return to the previous screen.
17) Set a specific dose limit
by selecting YES> and
advancing to the Dose Limit
Enter Value screen. Or select
NO> to choose No Dose Limit.
No Dose Limit will be selected for this
example.
NOTE: See Section 5.6 Dose Limit
(1 or 4 hour) for complete
information on this feature.
MORPHINE
1 mg/mL
ENTER
CONT. RATE
THEN PRESS
ENTER BUTTON
0.1-20 mg/hr
2
milligrams
PREVIOUS
MORPHINE
1 mg/mL
SET A DOSE
LIMIT?
PREVIOUS
mg
hr
YES
NO
18) Select CONFIRM> to
confirm No Dose Limit
selection.
Select PREVIOUS> to return to the
previous screen.
MORPHINE
1 mg/mL
CONFIRM NO
DOSE LIMIT
CONFIRM
PREVIOUS
430-04684-002
Page 68

5- 10 5) Select Mode
MORPHINE
1 mg/mL
CONTINUOUS
PCA DOSE
LOCKOUT
CONT. RATE
4 HOUR LIMIT
CONFIRM
PREVIOUS
2 mg/hr
NONE
19) Select CONFIRM> to
confirm settings.
Or, select PREVIOUS> to return to the
previous screen.
20) Close and lock door.
Place key in a secure location.
21) Press to begin
therapy.
Approximately 10 seconds after door is locked and is
pressed, “Door Locked” message will disappear.
When Dose Limit is reached, a message will be displayed
indicating Dose Limit has been reached.
5.4 PCA + Continuous Mode
For detailed Startup information including Vial Insertion, Clearing
Settings, Purging, and setting a Loading Dose, see Section 4.
Also refer to Section 4 for information on adjusting system
settings such as contrast and volume.
430-04684-002
Page 69

LifeCare PCA 3 Infusion System 5- 11
1) Unlock door and press
button, or load drug vial into
LIFECARE PCA 3
SELF TEST
cradle, to power on the pump.
Upon initial start-up, the selftest begins.
2) Select CONTINUE> to
advance to next programming
screen.
3) Select CONFIRM> to accept the inserted drug or
remove the vial if not correct.
4) Select either YES> or NO> to clear history and
dose settings if pump has been OFF one hour or
less.
5) Select CONFIRM> to confirm choice and
continue.
6) Select either YES> or NO> to purge the system.
7) If YES> is selected, disconnect the set from the
patient, and press and hold the PURGE> softkey.
8) Select YES> to continue, or select NO> to purge
again until complete.
9) Reconnect Set to patient.
10) Set Loading Dose (if desired) by selecting
ES>.
Y
11) Enter a Loading Dose within the displayed
430-04684-002
Page 70
5- 12 5) Select Mode
range.
12) Then press .
ENTER
13) Press button to infuse programmed
Loading Dose.
MORPHINE
1 mg/mL
SELECT
DELIVERY MODE
PCA ONLY
PCA + CONT
CONTINUOUS
PROTOCOLS
PREVIOUS
MORPHINE
1 mg/mL
ENTER
PCA DOSE
THEN PRESS
ENTER BUTTON
0.1-5 mg
2 mg
milligrams
14) From the Select Mode
screen, select PCA + CONT.>.
15) Enter PCA dose value
using the keypad. (Value
range is displayed on screen)
If value is entered incorrectly, press
to change value.
C
L
R
PREVIOUS
16) Then press .
ENTER
If programming changes need to be
made, select P
REVIOUS> to return to the previous screen.
430-04684-002
Page 71

LifeCare PCA 3 Infusion System 5- 13
17) Enter a Lockout Interval
value. (Value range is
displayed on screen)
C
If value is entered incorrectly, press
L
R
to change value.
18) Then press .
ENTER
If programming changes need to be
made, select P
REVIOUS> to return to the previous screen.
19) Enter a Continuous Rate.
(Value range is displayed on
screen)
C
If value is entered incorrectly, press
to change value.
20) Then press .
ENTER
L
R
MORPHINE
1 mg/mL
ENTER LOCKOUT
INTERVAL
THEN PRESS
ENTER BUTTON
5-120 min
10 min
minutes
PREVIOUS
MORPHINE
1 mg/mL
ENTER
CONT. RATE
THEN PRESS
ENTER BUTTON
0.1-20 mg/hr
milligrams
PREVIOUS
2
mg
hr
430-04684-002
Page 72

5- 14 5) Select Mode
If programming changes need to be made, select PREVIOUS> to
return to the previous screen.
MORPHINE
1 mg/mL
SET A DOSE
LIMIT?
PREVIOUS
MORPHINE
1 mg/mL
ENTER 4 HOUR
DOSE LIMIT
THEN PRESS
ENTER BUTTON
2- 80 mg
40 mg
milligrams
PREVIOUS
YES
NO
21) Set a specific dose limit
by selecting YES> and
advancing to the Dose Limit
Enter Value screen. Or select
NO> to choose No Dose Limit.
Setting a specific Dose Limit will be
selected for this example.
NOTE: See Section 5.6 Dose Limit
(1 or 4 hour) for complete
information on this feature.
22) Enter the Dose Limit
value using the numeric
keypad (the range is
displayed on the screen).
C
If value is entered incorrectly, press
to change value.
23) Then press .
ENTER
L
R
If programming changes need to be made, select PREVIOUS> to
return to the previous screen.
430-04684-002
Page 73

LifeCare PCA 3 Infusion System 5- 15
24) Select CONFIRM> to
confirm settings.
Or, select PREVIOUS> to return to the
previous screen.
25) Close and lock door.
Place key in a secure location.
MORPHINE
1 mg/mL
PCA+CONT
PCA DOSE
LOCKOUT
CONT. RATE
4 HOUR LIMIT
CONFIRM
PREVIOUS
2 mg
10 min
2 mg/hr
40 mg
26) Press to begin
therapy.
Approximately 10 seconds after door is locked and is
pressed, “Door Locked” message will disappear.
430-04684-002
Page 74

5- 16 5) Select Mode
5.5 Protocols
NOTE: Standard Protocols must be established by
hospital through the Service Mode. Protocols can only be
established for Hospira prefilled vials. Only Protocols
associated with the inserted drug vial will be available.
For detailed Startup information including Vial Insertion, Clearing
Settings, Purging, and setting a Loading Dose, see Section 4.
Also refer to Section 4 for information on adjusting system
settings such as contrast and volume.
LIFECARE PCA 3
SELF TEST
1) Unlock door and press
button, or load drug vial into
cradle, to power on the pump.
Upon initial start-up, the selftest begins.
2) Select CONTINUE> to
advance to next programming
screen.
3) Select CONFIRM> to accept the inserted drug or
remove the vial if not correct.
4) Select either YES> or NO> to clear history and
dose settings if pump has been OFF one hour or
less.
5) Select CONFIRM> to confirm choice and
continue.
6) Select either YES> or NO> to purge the system.
430-04684-002
Page 75
LifeCare PCA 3 Infusion System 5- 17
7) If YES> is selected, disconnect the set from the
patient, and press and hold the PURGE> softkey.
8) Select YES> to continue, or select NO> to purge
again until complete.
9) Reconnect Set to patient.
10) Set Loading Dose (if desired) by selecting
YES>.
11) Enter a Loading Dose within the displayed
range.
12) Then press .
ENTER
13) Press button to infuse programmed
Loading Dose.
14) From the Select Mode
screen, select PROTOCOLS>.
MORPHINE
1 mg/mL
SELECT
DELIVERY MODE
PCA ONLY
PCA + CONT.
CONTINUOUS
PROTOCOLS
PREVIOUS
430-04684-002
Page 76
5- 18 5) Select Mode
MORPHINE
PRESS ENTER
TO SELECT
PCA DOSE
LOCKOUT
4HOUR LIMIT
NEXT PROTOCOL
3
MORPHINE
PCA ONLY
PCA DOSE
LOCKOUT
4HOUR LIMIT
10 min
NONE
PREVIOUS#
1 mg/mL
10 min
NONE
CONFIRM
PREVIOUS
5.6 Dose Limit (1 or 4 hour)
2 mg
2 mg
15) Press to accept
ENTER
protocol, or select NEXT
PROTOCOL> and PREVIOUS> to
view other stored protocols if
available.
Press PREVIOUS> to return to the
previous display.
16) Select CONFIRM> to
accept settings of chosen
protocol.
17) Close and lock door.
18) Press button to begin
chosen Protocol.
DOSE LIMIT CALCULATION
The dose limit is a physician prescribed value that serves to limit
the total dosage that can be delivered in any 4 hr (or 1 hr) period.
This optional feature provides added safety to limit the total drug
delivered in all delivery modes.
NOTE: The PCA 3 is factory set for programming a 4 hr
dose limit. However, it can be changed to a 1 hr dose
limit setting by a qualified biomedical person. For the
purpose of simplifying this section, it will be written for 4
hr dose limit programming.
430-04684-002
Page 77

LifeCare PCA 3 Infusion System 5- 19
NOTE: A loading or supplemental loading dose is
included in the 4 hr dose limit calculation ONLY if it is
administered AFTER the 4 hr dose limit has been
programmed. If a loading or supplemental loading dose
is administered BEFORE a 4 hr dose limit has been
programmed, it will NOT be included in the 4 hr dose limit
calculation. The loading and/or supplemental loading
dose(s) is always included in the total for dose delivered.
When the sum of all doses (PCA dose, CONTINUOUS dose, and
any applicable loading or supplemental loading dose) in the
rolling 4 hour period equals or exceeds the 4 hr dose limit, patient
requests for doses are unsuccessful and a "4 HR LIMIT
REACHED" message appears. In all modes, the pump stops
delivery when the 4 hr dose limit is reached, except during
administration and delivery of a supplemental loading dose. A
supplemental loading dose can be delivered anytime during
setup or operation, even if the dose limit has already been
reached (as indicated by a “4 HR LIMIT REACHED” message) or
will be exceeded after delivery.
As the oldest dose (either PCA dose, CONTINUOUS dose, or a
supplemental loading dose) ages out of the 4 hour dose record,
the “4 HR LIMIT REACHED” message will disappear. The pump
will again accept patient initiated dose requests in PCA Only and
PCA+CONTINUOUS modes (assuming the programmed PCA
lockout interval has also elapsed) and resumes infusion at the
continuous rate in the CONTINUOUS and PCA+CONTINUOUS
modes.
NOTE: A loading dose or supplemental loading dose can
be delivered anytime during setup or operation, even if
the dose limit has already been reached or will be
exceeded after delivery.
NOTE: Setting a new dose limit will not erase the
previous dose history.
430-04684-002
Page 78

5- 20 5) Select Mode
PROGRAMMING THE 4 (OR 1) HR DOSE LIMIT
The opportunity to program this feature is presented in two entry
screens. The first screen prompts the clinician to choose whether
or not to set a Dose Limit. Selecting N
No Dose Limit screen. Selecting Y
O> will bring up the Confirm
ES> will bring up the Dose Limit
Enter Value screen, requiring the clinician to enter a value within
the displayed range.
TO PROGRAM A DOSE LIMIT:
MORPHINE
1 mg/mL
SET A DOSE
LIMIT?
1) Select YES> at the Dose
Limit Selection screen.
The display will advance to the Dose
Limit Enter Value screen.
YES
NO
PREVIOUS
MORPHINE
1 mg/mL
ENTER 4 HOUR
DOSE LIMIT
THEN PRESS
ENTER BUTTON
0.5-80 mg
0 mg
milligrams
2) Enter the 4 HR Dose Limit
value using the numeric
keypad (the value range is
displayed on the screen).
NOTE: Entry of “0” for the 4 HR
Dose Limit, using the numeric
keypad, is NOT accepted by the
PREVIOUS
PCA 3. If appropriate, see
instructions for programming NO
Dose Limit on the following page.
3) Then press .
ENTER
430-04684-002
Page 79

LifeCare PCA 3 Infusion System 5- 21
TO PROGRAM NO DOSE LIMIT:
1) Select NO> at the Dose
Limit Selection screen.
The display will advance to the Confirm
No Dose Limit screen.
2) Select CONFIRM> to confirm
the selection of No Dose limit.
NOTE: When NO LIMIT has been
programmed, the message “NO 4
HR LIMIT” will be displayed after
the door has been locked.
MORPHINE
1 mg/mL
SET A DOSE
LIMIT?
PREVIOUS
MORPHINE
1 mg/mL
CONFIRM NO
DOSE LIMIT
CONFIRM
PREVIOUS
YES
NO
430-04684-002
Page 80

5- 22 5) Select Mode
TO CLEAR OR CHANGE DOSE LIMIT
MORPHINE
1 mg/mL
PAUSED
PCA+CONT
LOCK DOOR
TO BEGIN
REVIEW RX
CHANGE RX
CLEAR SHIFT
LOADING DOSE
1) Unlock door while pump is
running.
2) Select CHANGE RX>.
3) Select NEXT> to display
more change options.
4) Select DOSE LIMIT>.
5) Set a specific dose limit by selecting YES> and
advancing to the Dose Limit Enter Value screen.
Or, select NO> to choose No Dose Limit.
No Dose Limit will be selected for this example.
6) Select CONFIRM> to confirm the No Dose Limit
selection.
Or, select PREVIOUS> to return to the previous screen.
7) Press SAVE & EXIT> at the next screen. This will
bring up the Program Review screen.
8) Press C
ONFIRM> to accept new program.
430-04684-002
Page 81

LifeCare PCA 3 Infusion System 5- 23
CLEARING THE HISTORY & RX SETTINGS
To clear the dose limit history, turn the pump off and on, and
press C
AND Rx" screen appears.
ONFIRM> when the "CONFIRM TO CLEAR HISTORY
430-04684-002
Page 82

5- 24 5) Select Mode
5.7 Using Review Screens
REVIEW SCREENS
Prior to locking the pump and removing the key, a review screen
will appear as shown below. As determined by the programmed
mode of delivery, the screen will display the current settings for
the applicable parameters (including PCA Dose, Lockout Interval,
Continuous Rate, and 4 (1) Hr Dose Limit)
.
MORPHINE
1 mg/mL
PCA+CONT
PCA DOSE
2 mg
LOCKOUT
10 min
CONT. RATE
2 mg/hr
4 HOUR LIMIT
NONE
CONFIRM
PREVIOUS
430-04684-002
Page 83

LifeCare PCA 3 Infusion System 5- 25
• Clinicians should review each programmed
parameter and ensure that the displayed program agrees with the physician’s order.
• If all of the programmed parameters AGREE
with the physician’s order, the clinician can
confirm the settings by selecting CONFIRM>.
• If one or more of the programmed parameters
do not agree with the physician’s order, the
clinician should select PREVIOUS> until the
incorrectly programmed parameter(s) is displayed. Depending on the parameter(s) that is
incorrect, the programmed values can be
changed by either entering the new value by
using the numeric keypad and pressing
[ENTER] or selecting the new setting using
the appropriate S
ate parameters have been changed, the
review screen will be presented again. The
clinician should review each setting to
ensure agreement with the physician’s order.
• Once CONFIRM> has been selected, the clini-
cian should close and lock the door.
• Place the key in a secure location.
• Upon locking the door, PCA is available if the
mode is set on either PCA ONLY or PCA +
CONTINUOUS. If mode is set for PCA + CONTINUOUS or CONTINUOUS, therapy will
begin after pressing [START/PAUSE].
OFTKEY>. Once the appropri-
5.8 Changing Settings During Setup
During setup, select PREVIOUS> to return to the previous display
and enter desired setting. Each time P
message display will revert to the previous setting, until the first
setting is displayed.
REVIOUS> is selected, the
430-04684-002
Page 84

5- 26 5) Select Mode
5.9 Stopping Infusion or Turning Pump OFF
STOPPING INFUSION
1) Close slide clamp on PCA administration set.
WARNING
ALWAYS CLOSE SLIDE CLAMP ON PCA
ADMINISTRATION SET BEFORE REMOVING OR
REPLACING SYRINGE, AND BEFORE
DISCONTINUING INFUSION
2) Unlock door.
3) Or, press for Continuous or PCA +
Continuous.
NOTE: If paused longer than two minutes without
pressing an appropriate key, the pump will alarm.
TO TURN PUMP OFF
1) Close slide clamp on PCA administration set.
2) Unlock door.
3) Press button
430-04684-002
Page 85

LifeCare PCA 3 Infusion System 5- 27
5.10 Making Changes After Setup
TO REVIEW CURRENT SETTINGS
WHILE INFUSION IS RUNNING
1) Press button twice.
2) Press to return to main menu.
EXIT
WHILE INFUSION IS STOPPED
1) Unlock door.
2) Select REVIEW RX> to
review all current settings.
3) Press to return to
EXIT
main menu.
4) Close and lock door and
place key in a secure spot.
MORPHINE
1 mg/mL
PAUSED
PCA+CONT
LOCK DOOR
TO BEGIN
REVIEW RX
CHANGE RX
CLEAR SHIFT
LOADING DOSE
MORPHINE
1 mg/mL
PCA+CONT
PCA DOSE
LOCKOUT
CONT. RATE
4 HOUR LIMIT
5) Press to begin
infusion.
PREVIOUS
2 mg
10 min
2 mg/hr
NONE
Or, select PREVIOUS> to return to previous display.
430-04684-002
Page 86

5- 28 5) Select Mode
TO CHANGE SETTINGS
MORPHINE
1 mg/mL
PAUSED
PCA+CONT
LOCK DOOR
TO BEGIN
REVIEW RX
CHANGE RX
CLEAR SHIFT
LOADING DOSE
MORPHINE
1 mg/mL
SELECT SETTING
TO CHANGE
PCA DOSE
LOCKOUT
CONT. RATE
NEXT
SAVE & EXIT
1) Unlock door while pump is
running.
2) Select CHANGE RX> to
change individual settings.
3) Select desired field to
change. (EXAMPLE PCA DOSE>)
Or, select NEXT> to display more
change options, such as Mode of
delivery and Dose Limit.
If Mode of delivery is changed, the
display will prompt you to reprogram
using the same steps as outlined in the
beginning of this section.
The value previously set for the PCA dose will be flashing.
MORPHINE
1 mg/mL
ENTER
PCA DOSE
THEN PRESS
ENTER BUTTON
0.1-5 mg
2 mg
milligrams
PREVIOUS
4) Enter the desired PCA
dose using the numeric
keypad. (Value range is
displayed on screen)
C
If value is entered incorrectly, press
to change value.
5) Then press .
ENTER
L
R
430-04684-002
Page 87

LifeCare PCA 3 Infusion System 5- 29
If programming changes need to be made, select PREVIOUS> to
return to the previous screen.
6) Select SAVE & EXIT> at next screen to confirm
desired changes.
7) Select CONFIRM> to accept
new program.
MORPHINE
1 mg/mL
PCA ONLY
PCA DOSE
LOCKOUT
4HOUR LIMIT
CONFIRM
PREVIOUS
2 mg
10 min
NONE
TO CLEAR SHIFT TOTALS
1) Review & record shift totals using the
button before clearing.
2) Unlock door while pump is
running.
3) Select CLEAR SHIFT> to
display option to clear total
dose delivered.
MORPHINE
1 mg/mL
PAUSED
PCA+CONT
LOCK DOOR
TO BEGIN
REVIEW RX
CHANGE RX
CLEAR SHIFT
LOADING DOSE
430-04684-002
Page 88

5- 30 5) Select Mode
MORPHINE
1 mg/mL
CLEAR SHIFT
TOTALS?
YES
NO
4) Select YES> to clear dose
delivered and return to
previous screen.
NOTE: Selecting YES> will clear
PCA Summary data but does not
clear 4HR dose limit data
5) Or, select NO> to return to
previous screen.
TO CHANGE A VIAL
1) The alarm message “EMPTY SYRINGE” appears along with the
statement “REPLACE SYRINGE”.
2) Close slide clamp on PCA administration set.
3) Press button.
4) Insert key and lock door.
Screen displays infuser is “PAUSED”.
5) Remove old vial by firmly grasping glass vial on both sides and pulling straight out.
6) Load in new vial as shown before. (See Section 4.3)
The Review Confirmation Screen appears.
7) Select CONFIRM>.
8) Select NO> when “Clear History and Rx Settings” is displayed.
9) Select
YES> when “Purge” is displayed.
WARNING
PATIENT MUST BE DISCONNECTED FROM THE PCA
SET BEFORE THE PURGE CYCLE.
10) At this point, you must:
430-04684-002
Page 89

LifeCare PCA 3 Infusion System 5- 31
• disconnect the set from the patient
• release the slide clamp on the PCA administration set
• select & hold the Purge> key until fluid is
seen at the end of the set and no air remains
inside the set
NOTE: Purging is recommended to remove slack when a new vial is
inserted. The system must be primed before purging. The maximum
volume delivered during a purge is 3 mL.
NOTE: Drug delivered during purge cycle is NOT stored in system
memory and will not be displayed.
CAUTION: IN CONTINUOUS
MODES, IF A PURGE IS NOT PERFORMED AFTER A SYRINGE
,
CHANGE
SYSTEM
[START] IS
FLUID
THE
DISCONNECTED
THE PUMP AUTOMATICALLY PERFORMS A SMALL
COMPLIANCE STEP TO REMOVE SLACK WHEN
PRESSED (WITH DOORS LOCKED
IS
NOT NORMALLY DELIVERED TO THE PATIENT DURING
COMPLIANCE STEP, IT IS RECOMMENDED THAT THE SET BE
FROM THE PATIENT DURING THIS OPERATION
AND
PCA+CONTINUOUS
). A
LTHOUGH
.
Upon release of the PURGE> softkey, the display will ask
if the purge is complete.
11 ) S e l e c t YES> to continue, or select NO> to purge again until
complete.
12) Reconnect the set to the patient.
13 ) S e l e c t
YES> to retain the current Rx settings (unless you are
changing the Rx settings).
The Review Confirmation Screen appears.
14) Review the entered parameters, and if correct, select CONFIRM>.
15) Close and lock door to begin infusion. Press the button if in the
Continuous or PCA+Continuous mode.
430-04684-002
Page 90
5- 32 5) Select Mode
TO ADD A SUPPLEMENTAL LOADING DOSE
MORPHINE
1 mg/mL
PAUSED
PCA+CONT
LOCK DOOR
TO BEGIN
REVIEW RX
CHANGE RX
CLEAR SHIFT
LOADING DOSE
MORPHINE
1 mg/mL
ENTER
LOADING DOSE
THEN PRESS
ENTER BUTTON
0.1 - 10 mg
5 mg
milligrams
PREVIOUS
MORPHINE
1 mg/mL
PRESS
START BUTTON
TO INFUSE
5 MG LOADING
DOSE
1) Unlock door while pump is
running.
2) Select LOADING DOSE>.
3) Enter a Loading Dose
within the displayed range.
4) Then press .
ENTER
5) Press to infuse loading
dose.
PREVIOUS
430-04684-002
Page 91
LifeCare PCA 3 Infusion System 5- 33
5.11 Checking History & Settings
1) To Check History or Settings, press button
at any time.
NOTE: Partial boluses can be the result of interrupting
delivery by pressing [START/STOP] (PCA + Cont.),
opening the door (PCA Only), loss of power, reaching the
dose limit, emptying the vial, or a malfunction alarm.
2) Press or button
ENTER
to scroll through history. Or
select PRINT HISTORY> to print
(if connected to printer).
3) Press or button
ENTER
a second time for more
information.
When MORE is displayed, more
information is stored in pump history.
PRESS HISTORY
OR ENTER
BUTTON TO
SCROLL
THROUGH
HISTORY
PRINT HISTORY
MORPHINE
1 mg/mL
PCA+CONT
PCA DOSE
LOCKOUT
CONT. RATE
4 HOUR LIMIT
MORE...
PREVIOUS
0.5 mg
5 min
10 mg/hr
NONE
430-04684-002
Page 92

5- 34 5) Select Mode
TIME : 8:04 PM
DATE : 01/15/01
S/N:12920191
DELIVERED:
4) Continue to press or
ENTER
button for more
information such as:
LOADING DOSE
TOTAL DEL.
MORE...
65 MG
282.6 MG
PREVIOUS
events may be logged.
5) Press to return to the Main Delivery
EXIT
•Last Hour Only information
•Last 24-Hour information
•Event Log
Event Log allows you to view all events
since last Clear History. Up to 400
screen.
5.12 Printer Setup
The PCA3 is configured to communicate with a serial printer or
communications link. The required serial settings are:
• 9600 baud
• 8 bit data
• no parity.
To configure a Seiko Instruments SII DPU-414 Thermal Printer,
the settings are controlled on power-up using two panel control
switches:
• [PAPER FEED]= OFF
• [ON LINE]= ON).
The Seiko printer also has other configuration settings that relate
to the control and formatting of the printer. To set any one feature,
all the features need to be set in a series of yes/no/continue
inputs using just the two controls. This may be a little tedious, but
once set, the printer is ready for use.
430-04684-002
Page 93

LifeCare PCA 3 Infusion System 5- 35
To program the Seiko printer, hold the "ONLINE" button while
turning on the power. The printer will then display (on the paper
tape output) the configuration it has stored in memory, and
prompt the user for input. The print-out of the user settings should
look like the following:
[DIP SW setting mode]
Dip SW-1
1 (OFF) : Input = Serial
2 (ON ) : Printing Speed = High
3 (ON ) : Auto Loading = ON
4 (OFF) : Auto LF = OFF
5 (ON ) : Setting Command = Enable
6 (OFF) : Printing
7 (ON ) : Density
8 (ON ) : = 100 %
Dip SW-2
1 (ON ) : Printing Columns = 40
2 (ON ) : User Font Back-up = ON
3 (ON ) : Character Select = Normal
4 (ON ) : Zero = Normal
5 (ON ) : International
6 (ON ) : Character
7 (ON ) : Set
8 (OFF) : = U.S.A.
Dip SW-3
1 (ON ) : Data Length = 8 bits
2 (ON ) : Parity Setting = No
3 (ON ) : Parity Condition = Odd
4 (ON ) : Busy Control = H/W Busy
5 (OFF) : Buad
6 (ON ) : Rate
7 (ON ) : Select
8 (ON ) : = 9600 bps
Continue ? : Push 'On-line SW'
Write ? : Push 'Paper feed SW"
430-04684-002
Page 94

5- 36 5) Select Mode
If the above is already configured, press the [PAPER FEED], and
the printer will display :
DIP SW settings complete !!
If the above is not displayed
correctly with the PCA3, or may print gibberish. To make any
change, all the settings for that DIP SW need to be made as a
block of entries using the [ONLINE] button for ON, and [PAPER
FEED] button for OFF. Pressing the [ONLINE button at this point
begins the entry process for the first DIP SW. To access DIP SW
2 or 3, all the entries for the earlier settings need to be duplicated
in sequence. Once the desired DIP SW has a complete set,
pressing the [PAPER FEED] button when prompted, finishes the
process.
From power-up, to setup as shown above, required user input is:
1. Press and hold [ONLINE] while turning on power.
Wait for user prompt.
2. Press [ONLINE] to begin setup
The printout should read:
Dip SW-1
The printer is now waiting for a entry for the first position (Input
Method: Serial). This functional setting should be OFF, so:
, the printer may not communicate
3. Press [PAPER FEED] button
The printout should then read:
DIP SW-1
1 (OFF) : Input = Serial
430-04684-002
Page 95

LifeCare PCA 3 Infusion System 5- 37
4. The remainder of the settings are then entered, pressing
[ONLINE] for ON, and [PAPER FEED] for OFF. This is
done sequentially for ALL 24 fields [DIP SW-1(8), 2(8), &
3(8)].
The remainder of settings should be set as follows,
continuing with SW1-2:
430-04684-002
Page 96

5- 38 5) Select Mode
REQUIRED PRINTER SETTINGS TO OPERATE WITH PCA 3
Switch Function Setting Button to Press
SW1-1 Input Method: Serial Off Feed
SW1-2 Printing Speed: High On On line
SW1-3 Auto loading: On On On line
SW1-4 Auto LF: Off Off Feed
SW1-5 DIP SW setting command: Enabled On On line
SW1-6 Printing density: 100% Off Feed
SW1-7 Printing density: 100% On On line
SW1-8 Printing density: 100% On On line
SW2-1 Print Mode: 40 columns On On line
SW2-2 User font back-up: On On On line
SW2-3 Character select: Normal On On line
SW2-4 Zero font: Normal On On line
SW2-5 Int’l Character Set: American On On line
SW2-6 Int’l Character Set: American On On line
SW2-7 Int’l Character Set: American On On line
SW2-8 Int’l Character Set: American Off Feed
SW3-1 Data bit length: 8 bits On On line
SW3-2 Parity: No parity On On line
SW3-3 Parity condition: Odd On On line
SW3-4 Flow control: H/S busy On On line
SW3-5 Baud rate: 9600 bps Of f Feed
SW3-6 Baud rate: 9600 bps On On line
SW3-7 Baud rate: 9600 bps On On line
SW3-8 Baud rate: 9600 bps On On line
Continue ? : Push 'On-line SW'
Write ? : Push 'Paper feed SW"
5. Press FEED
DIP SW setting complete !!
430-04684-002
Page 97

LifeCare PCA 3 Infusion System 5- 39
5.13 Printing Event History Log
The history event log can be printed by connecting the pump to a
Seiko Instruments SII DPU-414 thermal printer, using the
previous instructions. Two custom printer cables are available.
They are not interchangeable.
WARNING
DISCONNECT THE PUMP FROM THE PATIENT
BEFORE CONNECTING THE PUMP TO A PRINTER OR
COMPUTER.
To print from the PCA 3, complete the following steps:
1. Load printer with test paper.
2. Plug in AC adapter.
3. Press and hold ONLINE while turning ON power.
4. Review the printout of configured settings against the
previous table. If they match, you’re ready to print. If they
do not match, reconfigure as explained in the previous
section.
5. Connect the printer to the PCA 3 using a 9-pin male to 9pin female cable. Contact Customer Service for
information on printer connector cables.
6. Print whenever the PCA 3 offers the P
option.
RINT> softkey
430-04684-002
Page 98

5- 40 5) Select Mode
5.14 Downloading to a PC
EQUIPMENT NEEDED
•Pump
• Computer with Windows 3.1 or Windows 95/98/
NT/2000
• Standard Printing Cable
• 25-pin to 9-pin converter
• Null Modem Adapter
PUMP TO WINDOWS 95, 98, NT OR 2000
INITIAL HYPER TERMINAL ACCESS- CREATING A NEW CONNECTION
1. Select the Start menu.
2. Select Programs.
3. Select Accessories.
4. Select HyperTerminal.
5. Double-click on the HyperTerminal icon.
6. If a message box appears indicating that a modem is
necessary for a connection, click NO.
7. In the Connection Description box, enter the name
which to save the settings.
8. Click OK.
9. In the Phone Number box, select Direct to Com 2 from
the Connect Using Drop Down list.
10. Click OK.
11. In the COM Port properties window, set the Bits Per
Second to 9600 and Flow Control to None.
12. Click OK.
13. Select the Propertied icon. (farthest to right)
14. Select the Settings tab.
15. Select the ASCII setup button.
16. Make sure ‘Append line feeds to incoming line ends’ is
not checked.
430-04684-002
Page 99

LifeCare PCA 3 Infusion System 5- 41
17. Click OK in the ASCII setup window.
18. Click OK in the properties window.
19. Select File from the menu bar.
20. Select Save from the file menu.
HYPERTERMINAL ACCESS- USING AN EXISTING CONNECTION
1. Select the Start Menu.
2. Select Programs.
3. Select Accessories.
4. Select HyperTerminal.
5. Double-click on the icon with the name entered in step
#7 above.
PRINTING THE FILE
1. Select Call from the menu bar.
2. Select Connect from the Call menu.
3. Select Transfer from the menu bar.
4. Select Capture Test from the Transfer menu.
5. Type the Path To and the name of the file in which to
save the printout. If the file name already exists, the
newly transferred data will be appended to the end of
the already existing file.
6. Click Start.
7. Select the desired print function from the group.
8. When the transmission of the data has completed, select
Transfer from the menu bar.
9. Select Capture Text from the Transfer menu.
10. Select Stop from the Capture Text menu.
11. Select Call from the menu bar.
12. Select Disconnect from the Call menu.
13. Exit HyperTerminal
14. Pull up the file in your word processor of choice and
print or view as desired.
430-04684-002
Page 100

5- 42 5) Select Mode
PRINT TO WINDOWS 3.1
INITIAL TERMINAL ACCESS- CREATING A NEW CONNECTION
1. Open the Accessories group.
2. Select Terminal from the Accessories group.
3. Select Settings from the menu bar.
4. Select Terminal Preferences from the Settings menu.
5. Make sure CR->CR/LF Inbound is not selected.
6. Click OK.
7. Select Settings from the menu bar.
8. Select Communications from the Settings menu.
9. Make sure Baud Rate is 9600, Data Bits are 8, Stop Bits
1, Parity is none, Xon/Xoff is selected, and COM 1 or 2
is selected.
10. Click OK.
11. Select File from the menu bar.
12. Select Save from the File menu.
13. Enter the name under which to save the settings.
14. Click OK.
TERMINAL ACCESS- USING AN EXISTING CONNECTION
1. Select the Accessories group.
2. Select Terminal
3. From File menu, select Open.
4. Select name of Connection Saved, click OK.
PRINTING THE FILE
1. Select Transfers from the menu bar.
2. Select Receive Text File from the Tranfers menu.
3. Type the Path To and the name of the file in which to
save the printout.
4. Click OK.
5. Select the desired print function from the pump.
6. When the transmission of the data has completed, select
Transfer from the menu bar.
7. Select Stop from the Transfers menu.
430-04684-002
 Loading...