

IInnssttrruuccttiioonn BBooookk
OOHHNNVV117711XX VVeenntteedd TTuummbbllee DDrryyeerr
40001505.qxd 19/08/2004 16:54 Page 1
EEnngglliisshh.. .. .. .. .. .. .. .. .. .. .. .. .. .. .. .. .. .. .. .. .. .. .. .. .. .. .. .. .. .. .. .. .. .. .. .. .. .. .. .. .. .. .. .. .. 22
EEssppaaññooll .. .. .. .. .. .. .. .. .. .. .. .. .. .. .. .. .. .. .. .. .. .. .. .. .. .. .. .. .. .. .. .. .. .. .. .. .. .. .. .. .. .. .. 1188
IInnttrroodduuccttiioonn
. . . . . . . . . . . . . . . . . . . . . . . . . . . . . . . . . . . . . . . . . . . . . . . 3
Delivery information . . . . . . . . . . . . . . . . . . . . . . . . . . . . . . . . . . . . . . . . . . . . . 3
UUnnppaacckkiinngg tthhee PPrroodduucctt
. . . . . . . . . . . . . . . . . . . . . . . . . . . . . . . . . . . 3
SSaaffeettyy rreemmiinnddeerrss
. . . . . . . . . . . . . . . . . . . . . . . . . . . . . . . . . . . . . . . . . . 4
Installation . . . . . . . . . . . . . . . . . . . . . . . . . . . . . . . . . . . . . . . . . . . . . . . . . . . . . 4
Use . . . . . . . . . . . . . . . . . . . . . . . . . . . . . . . . . . . . . . . . . . . . . . . . . . . . . . . . . . . 4
The Laundry . . . . . . . . . . . . . . . . . . . . . . . . . . . . . . . . . . . . . . . . . . . . . . . . . . . . 5
Environmental Issues . . . . . . . . . . . . . . . . . . . . . . . . . . . . . . . . . . . . . . . . . . . . . 5
GIAS Service . . . . . . . . . . . . . . . . . . . . . . . . . . . . . . . . . . . . . . . . . . . . . . . . . . . . 5
IInnssttaallllaattiioonn
. . . . . . . . . . . . . . . . . . . . . . . . . . . . . . . . . . . . . . . . . . . . . . . . . 6
Electrical requirements . . . . . . . . . . . . . . . . . . . . . . . . . . . . . . . . . . . . . . . . . . . 6
Adjusting the feet . . . . . . . . . . . . . . . . . . . . . . . . . . . . . . . . . . . . . . . . . . . . . . . 6
VVeennttiillaattiioonn
. . . . . . . . . . . . . . . . . . . . . . . . . . . . . . . . . . . . . . . . . . . . . . . . . 7
PPrreeppaarriinngg tthhee llooaadd
. . . . . . . . . . . . . . . . . . . . . . . . . . . . . . . . . . . . . . . . 8
Clothes preparation . . . . . . . . . . . . . . . . . . . . . . . . . . . . . . . . . . . . . . . . . . . . . . 8
Sorting the load. . . . . . . . . . . . . . . . . . . . . . . . . . . . . . . . . . . . . . . . . . . . . . . . . 9
DDrryyiinngg aaddvviiccee
. . . . . . . . . . . . . . . . . . . . . . . . . . . . . . . . . . . . . . . . . . . . . 10
Do not tumble dry . . . . . . . . . . . . . . . . . . . . . . . . . . . . . . . . . . . . . . . . . . . . . . 10
Energy saving. . . . . . . . . . . . . . . . . . . . . . . . . . . . . . . . . . . . . . . . . . . . . . . . . . 10
Drying guide . . . . . . . . . . . . . . . . . . . . . . . . . . . . . . . . . . . . . . . . . . . . . . . . . . 10
CCoonnttrroollss aanndd iinnddiiccaattoorrss
. . . . . . . . . . . . . . . . . . . . . . . . . . . . . . . . . 11
DDoooorr aanndd FFiilltteerr
. . . . . . . . . . . . . . . . . . . . . . . . . . . . . . . . . . . . . . . . . . . 12
Opening the door . . . . . . . . . . . . . . . . . . . . . . . . . . . . . . . . . . . . . . . . . . . . . . 12
Filter. . . . . . . . . . . . . . . . . . . . . . . . . . . . . . . . . . . . . . . . . . . . . . . . . . . . . . . . . 12
Filter care indicator . . . . . . . . . . . . . . . . . . . . . . . . . . . . . . . . . . . . . . . . . . . . . 12
OOppeerraattiioonn
. . . . . . . . . . . . . . . . . . . . . . . . . . . . . . . . . . . . . . . . . . . . . . . . . 13
CClleeaanniinngg aanndd RRoouuttiinnee MMaaiinntteennaannccee
. . . . . . . . . . . . . . . . . . . . 14
Cleaning the dryer . . . . . . . . . . . . . . . . . . . . . . . . . . . . . . . . . . . . . . . . . . . . . . 14
Technical specifications . . . . . . . . . . . . . . . . . . . . . . . . . . . . . . . . . . . . . . . . . . 14
TTrroouubblleesshhoooottiinngg
. . . . . . . . . . . . . . . . . . . . . . . . . . . . . . . . . . . . . . . . . . 15
CCuussttoommeerr SSeerrvviiccee
. . . . . . . . . . . . . . . . . . . . . . . . . . . . . . . . . . . . . . . . . 16
Spares. . . . . . . . . . . . . . . . . . . . . . . . . . . . . . . . . . . . . . . . . . . . . . . . . . . . . . . . 16
GIAS Service . . . . . . . . . . . . . . . . . . . . . . . . . . . . . . . . . . . . . . . . . . . . . . . . . . . 16
2
40001505.qxd 19/08/2004 16:54 Page 2
IInnttrroodduuccttiioonn
PPlleeaassee rreeaadd aanndd ffoollllooww tthheessee iinnssttrruuccttiioonnss ccaarreeffuullllyy
aanndd ooppeerraattee tthhee mmaacchhiinnee aaccccoorrddiinnggllyy.. TThhiiss
bbooookklleett pprroovviiddeess iimmppoorrttaanntt gguuiiddeelliinneess ffoorr ssaaffee
uussee,, iinnssttaallllaattiioonn,, mmaaiinntteennaannccee aanndd ssoommee uusseeffuull
aaddvviiccee ffoorr bbeesstt rreessuullttss wwhheenn uussiinngg yyoouurr mmaacchhiinnee..
Keep all documentation in a safe place for future
reference or for any future owners
DDeelliivveerryy iinnffoorrmmaattiioonn
Please check that the following items are
delivered with the appliance:
● Instruction manual
● Guarantee card
● Vent kit and instructions
● Energy label
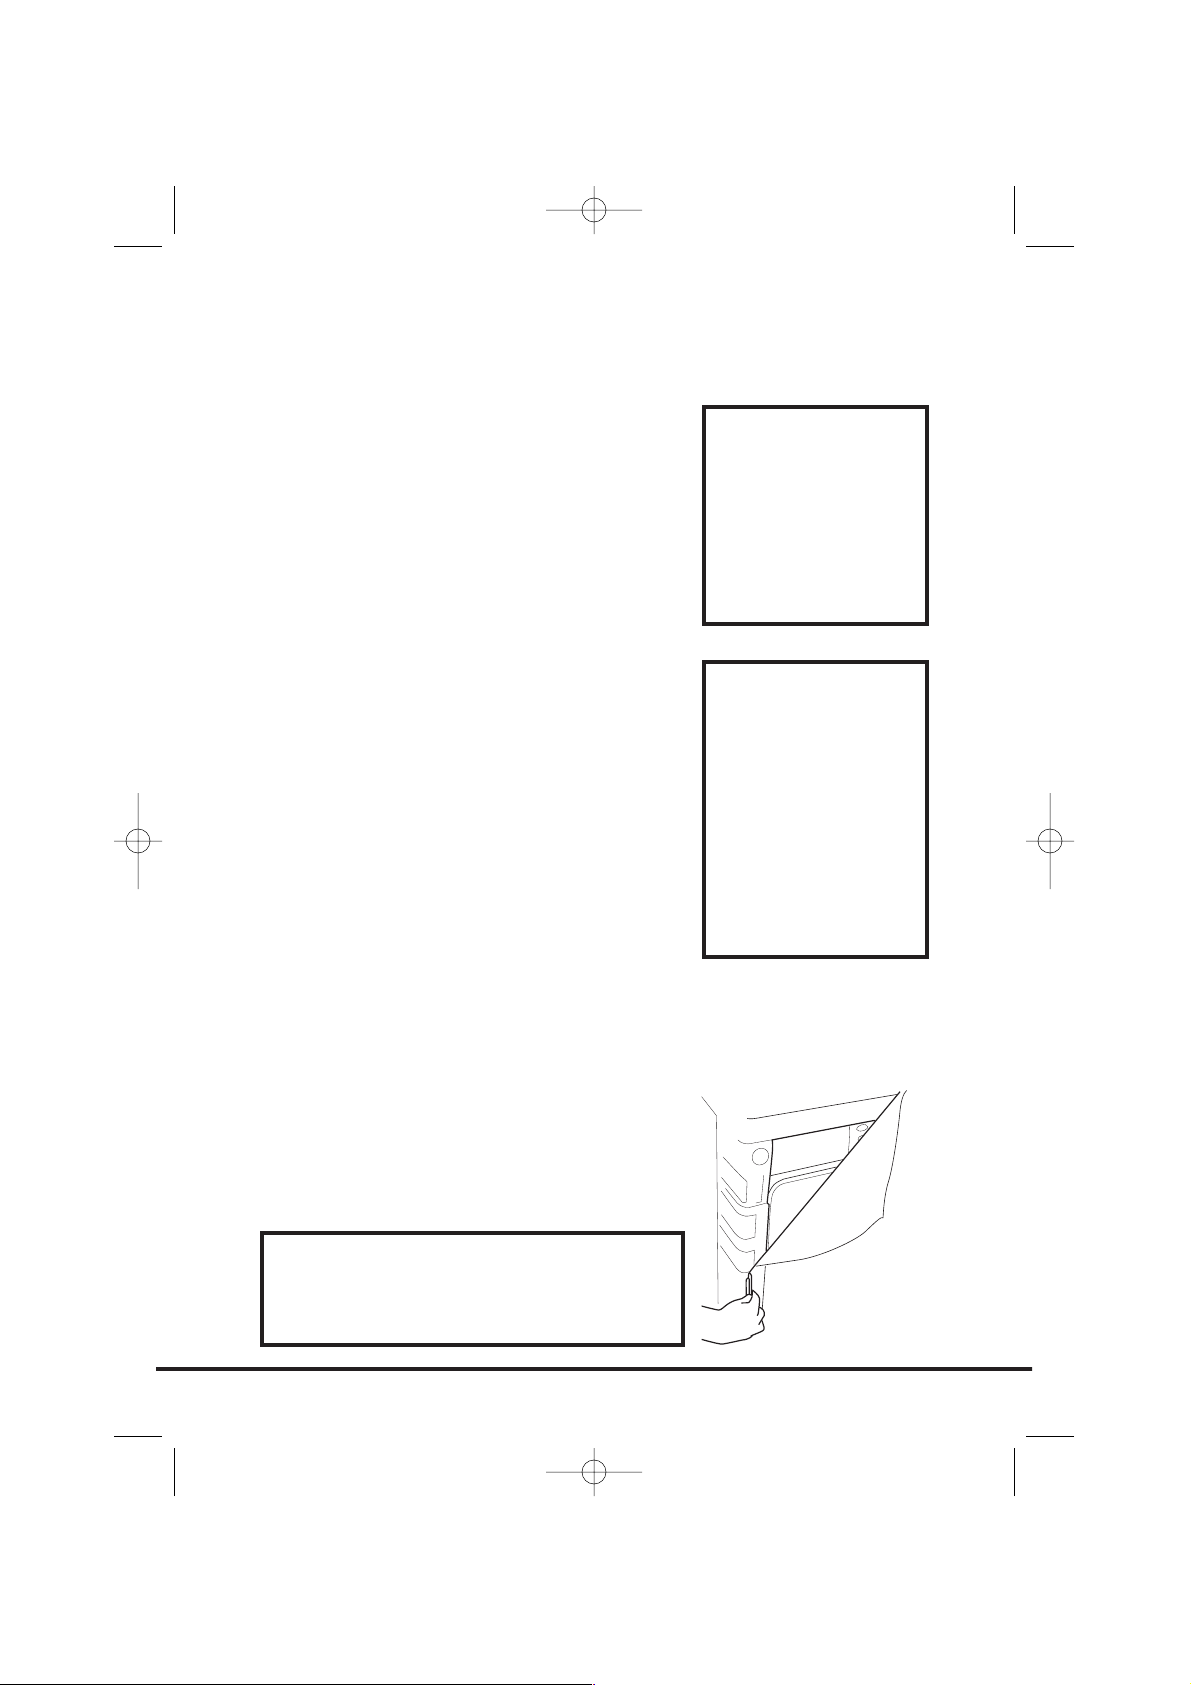
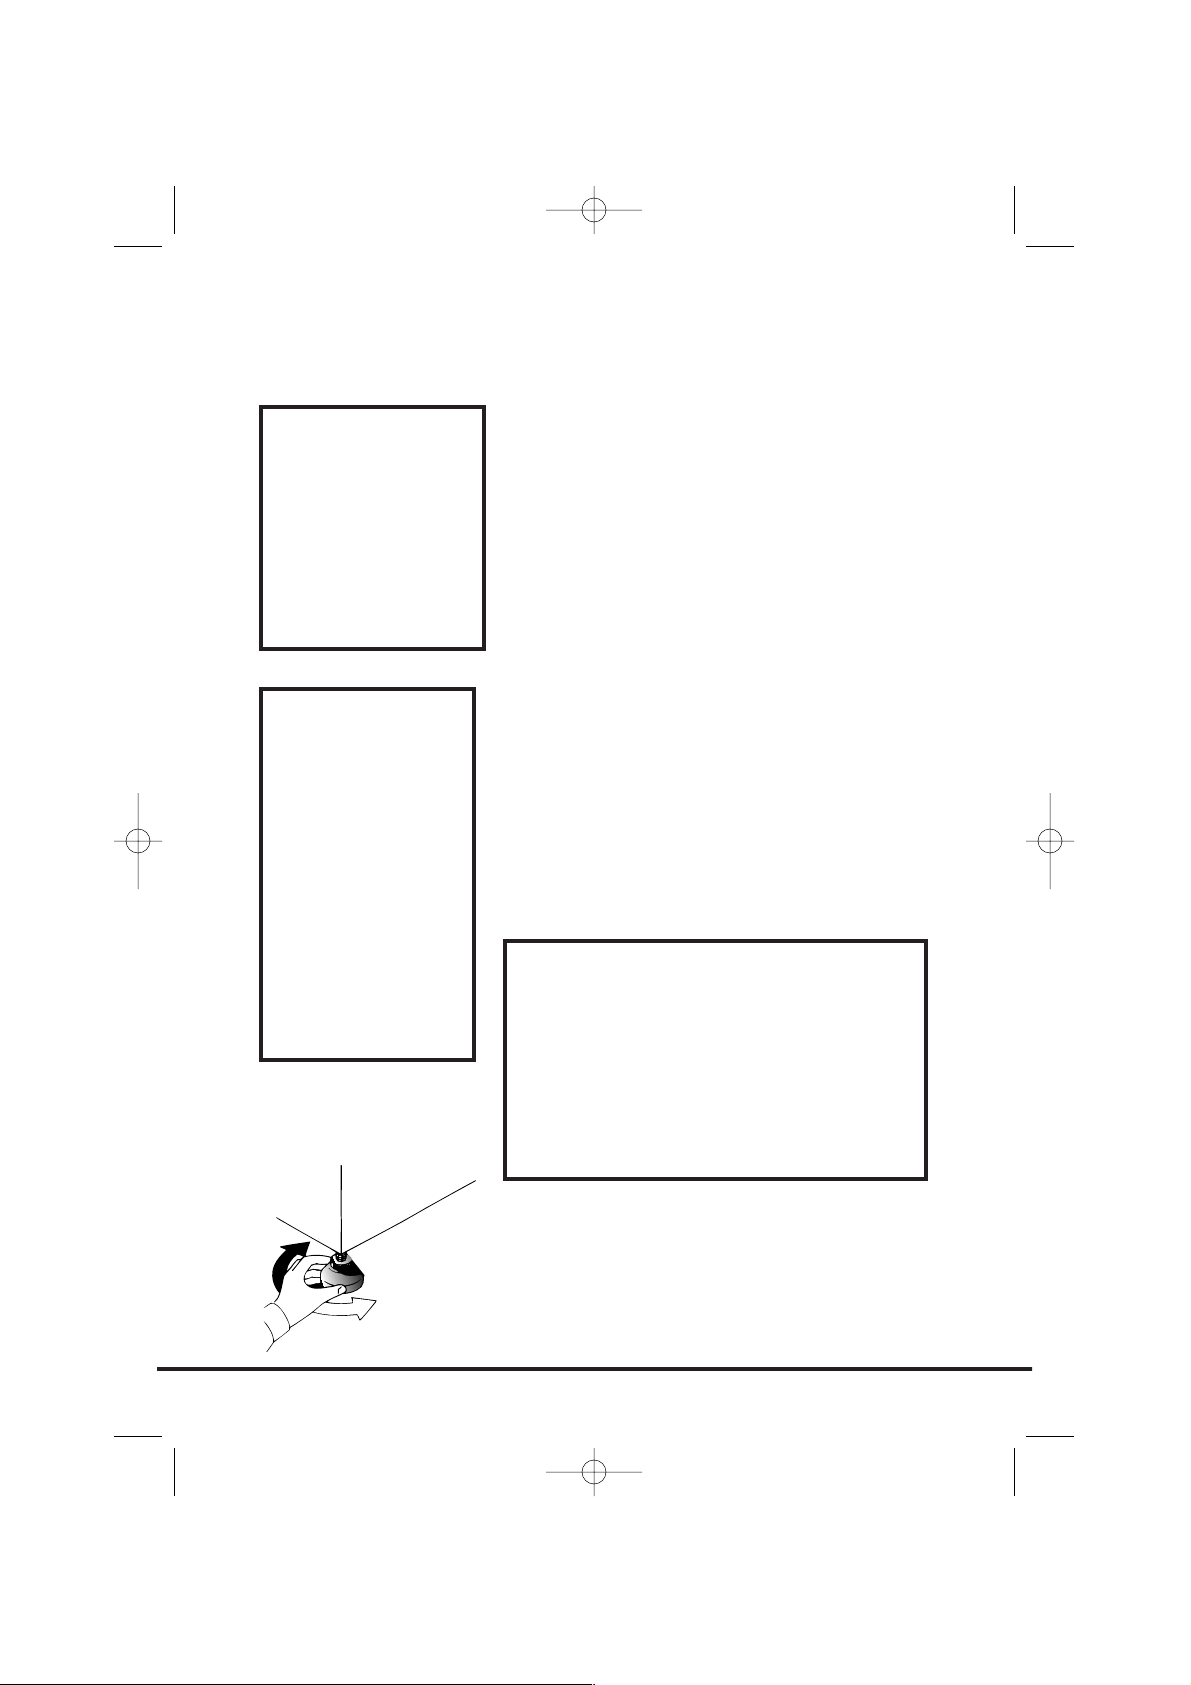
Remove the machine from its packaging close to
the final location of the machine.
11..
Cut carefully around the base of the
packaging and up one corner.
22..
Remove the polythene sleeve and lift the
dryer off the polystyrene base.
3
CChheecckk tthhaatt nnoo
ddaammaaggee hhaass
ooccccuurrrreedd ttoo tthhee
mmaacchhiinnee dduurriinngg
ttrraannssiitt.. IIff iitt hhaass,,
ccaallll ffoorr sseerrvviiccee bbyy
GGIIAASS..
FFaaiilluurree ttoo ccoommppllyy
wwiitthh tthhee aabboovvee
ccaann ccoommpprroommiissee
tthhee ssaaffeettyy ooff tthhee
aapppplliiaannccee.. YYoouu
mmaayy bbee cchhaarrggeedd
ffoorr aa sseerrvviiccee ccaallll
iiff aa pprroobblleemm wwiitthh
yyoouurr mmaacchhiinnee iiss
ccaauusseedd bbyy mmiissuussee..
UUnnppaacckkiinngg tthhee pprroodduucctt
DDiissppoossee ooff tthhee ppaacckkaaggiinngg ssaaffeellyy.. MMaakkee
ssuurree iitt iiss oouutt ooff tthhee rreeaacchh ooff cchhiillddrreenn,,
iitt iiss aa ppootteennttiiaall ssoouurrccee ooff ddaannggeerr..
40001505.qxd 19/08/2004 16:54 Page 3

SSaaffeettyy rreemmiinnddeerrss
IInnssttaallllaattiioonn
● Check that the product has no visible signs of damage before use. If
damaged do not use and please call GIAS Service.
● Do not use adapters, multiple connectors and/or extensions.
● This machine should not be installed in a bathroom or shower room.
● Never install the dryer against curtains and be sure to prevent items from
falling or collecting behind the dryer.
UUssee
●
WWAARRNNIINNGG
Misuse of a tumble dryer may create a fire hazard.
● This machine is solely for domestic use, i.e. to dry household textiles and
garments.
● This machine should only be used for its intended purpose as described in
this manual. Ensure that the instructions for installation and use are fully
understood before operating the appliance.
● Do not touch the appliance when hands or feet are damp or wet.
● Do not lean on the door when loading the machine or use the door to
lift or move the machine.
● Do not allow children to play with the machine or its controls.
●
WWAARRNNIINNGG
Do not use the product if the fluff filter is not in position or is
damaged; fluff could be ignited.
●
WWAARRNNIINNGG
Where the hot surface symbol is located the
temperature rise during operation of the tumble dryer may be in excess
of 60 degrees C.
● Remove the plug from the electricity supply. Always remove the plug
before cleaning the appliance.
● Do not continue to use this machine if it appears to be faulty.
● Lint and fluff must not be allowed to collect on the floor around the
outside of the machine.
● The drum inside may be very hot. Always allow the dryer to complete the
cool down period before removing the laundry.
4
40001505.qxd 19/08/2004 16:54 Page 4
TThhee LLaauunnddrryy
●
WWAARRNNIINNGG
Do not tumble dry fabrics treated with dry cleaning fluids.
●
WWAARRNNIINNGG
Foam rubber materials can, under certain circumstances, when
heated become ignited by spontaneous combustion. Foam plastic, foam
rubber and rubber-like material are not suitable for tumble drying.
Articles made from these materials
MMUUSSTT NNOOTT
be placed in the dryer.
● Always refer to the laundry care labels for directions on suitability for
drying.
● Clothes should be spin dried or thoroughly wrung before they are put
into the tumble dryer. Clothes that are dripping wet should
NNOOTT
be put
into the dryer.
● Lighters and matches must not be left in pockets and
NNEEVVEERR
use
flammable liquids near the machine.
● Glass fibre curtains should
NNEEVVEERR
be put in this machine. Skin irritation
may occur if other garments are contaminated with the glass fibres.
● Garments treated or contaminated with flammable cleaning sprays or
liquids such as petrol, cooking oil or aerosol sprays
MMUUSSTT NNOOTT
be put in
this machine.
EEnnvviirroonnmmeennttaall IIssssuueess
● All packaging materials used are environmentally-friendly and recyclable.
Please help dispose of the packaging via environmentally-friendly means.
Your local council will be able to give you details of current means of
disposal.
● To ensure safety when disposing of an old tumble dryer disconnect the
mains plug from the socket, cut the mains power cable and destroy this
together with the plug. To prevent children shutting themselves in the
machine break the door hinges or the door lock.
GGIIAASS SSeerrvviiccee
● To ensure the continued safe and efficient operation of this appliance we
recommend that any servicing or repairs are only carried out by an
authorised GIAS Service engineer.
5
IIff tthhee aapppplliiaannccee iiss nnoott rruunnnniinngg pprrooppeerrllyy oorr bbrreeaakkss ddoowwnn,,
sswwiittcchh iitt ooffff aanndd ddiissccoonnnneecctt tthhee pplluugg ffrroomm tthhee ssoocckkeett..
CCoonnssuulltt GGIIAASS SSeerrvviiccee ffoorr ppoossssiibbllee rreeppaaiirr..
40001505.qxd 19/08/2004 16:54 Page 5
EElleeccttrriiccaall rreeqquuiirreemmeennttss
Tumble dryers are supplied to operate at a
voltage of 230V, 50 Hz single phase. Check that
the supply circuit is rated to at least 10A.
EElleeccttrriicciittyy ccaann bbee eexxttrreemmeellyy ddaannggeerroouuss..
TThhiiss aapppplliiaannccee mmuusstt bbee eeaarrtthheedd..
TThhee ssoocckkeett oouuttlleett aanndd tthhee pplluugg oonn tthhee aapppplliiaannccee
mmuusstt bbee ooff tthhee ssaammee ttyyppee..
DDoo nnoott uussee mmuullttiippllee aaddaapptteerrss aanndd//oorr eexxtteennssiioonn
lleeaaddss..
TThhee pplluugg sshhoouulldd bbee aacccceessssiibbllee ffoorr ddiissccoonnnneeccttiioonn
aafftteerr tthhee aapppplliiaannccee hhaass bbeeeenn iinnssttaalllleedd..
The wires in the mains lead are coloured in
accordance with the following codes:
BBlluuee NNEEUUTTRRAALL
BBrroowwnn LLIIVVEE
GGrreeeenn aanndd YYeellllooww EEAARRTTHH
CE Appliance complies with European Directive
89/336/EEC, 73/23/EEC and subsequent
amendments.
AAddjjuussttiinngg tthhee ffeeeett
Once the machine is in place the feet should be
adjusted to ensure that the machine is level.
Adjust the four feet to ensure the machine is firm
and level.
6
YYoouu mmaayy bbee
cchhaarrggeedd ffoorr aa
sseerrvviiccee ccaallll iiff aa
pprroobblleemm wwiitthh
yyoouurr mmaacchhiinnee iiss
ccaauusseedd bbyy
iinnccoorrrreecctt
iinnssttaallllaattiioonn..
IIff tthhee mmaaiinnss ccoorrdd
oonn tthhiiss aapppplliiaannccee
iiss ddaammaaggeedd,, iitt
mmuusstt bbee
rreeppllaacceedd bbyy aa
ssppeecciiaall ccoorrdd
wwhhiicchh iiss OONNLLYY
oobbttaaiinnaabbllee ffrroomm
tthhee GGIIAASS ssppaarreess
sseerrvviiccee.. IItt mmuusstt
bbee iinnssttaalllleedd bbyy aa
ccoommppeetteenntt
ppeerrssoonn..
IInnssttaallllaattiioonn
DDoo nnoott pplluugg tthhee mmaacchhiinnee iinn aanndd sswwiittcchh
iitt oonn aatt tthhee mmaaiinnss uunnttiill tthhee iinnssttaallllaattiioonn
iiss ccoommpplleetteedd..
FFoorr yyoouurr ssaaffeettyy,, tthhiiss ddrryyeerr mmuusstt bbee
ccoorrrreeccttllyy iinnssttaalllleedd..
IIff tthheerree iiss aannyy ddoouubbtt aabboouutt iinnssttaallllaattiioonn,,
ccaallll GGIIAASS SSeerrvviiccee ffoorr aaddvviiccee..
40001505.qxd 19/08/2004 16:54 Page 6
Adequate ventilation must be provided in the
room where the tumble dryer is located to
prevent gases from appliances burning other
fuels, including open fires, being drawn into the
room during operation of the tumble dryer.
● Exhaust air must not be discharged into a
flue which is used for exhausting fumes
from appliances burning gas or other fuels.
● Check regularly that the air flowing through
the dryer is not restricted.
● Check the fluff filter after use, and clean, if
necessary.
● The inlet and outlets should be kept free
from obstructions. To ensure adequate
ventilation the space between the bottom
of the machine and the floor must not be
obstructed. There should be a gap of at
least 12mm between the machine and any
obstructions.
● Prevent items from falling or collecting
behind the dryer as these may obstruct the
air inlet and outlet.
●
NNEEVVEERR
install the dryer up against curtains.
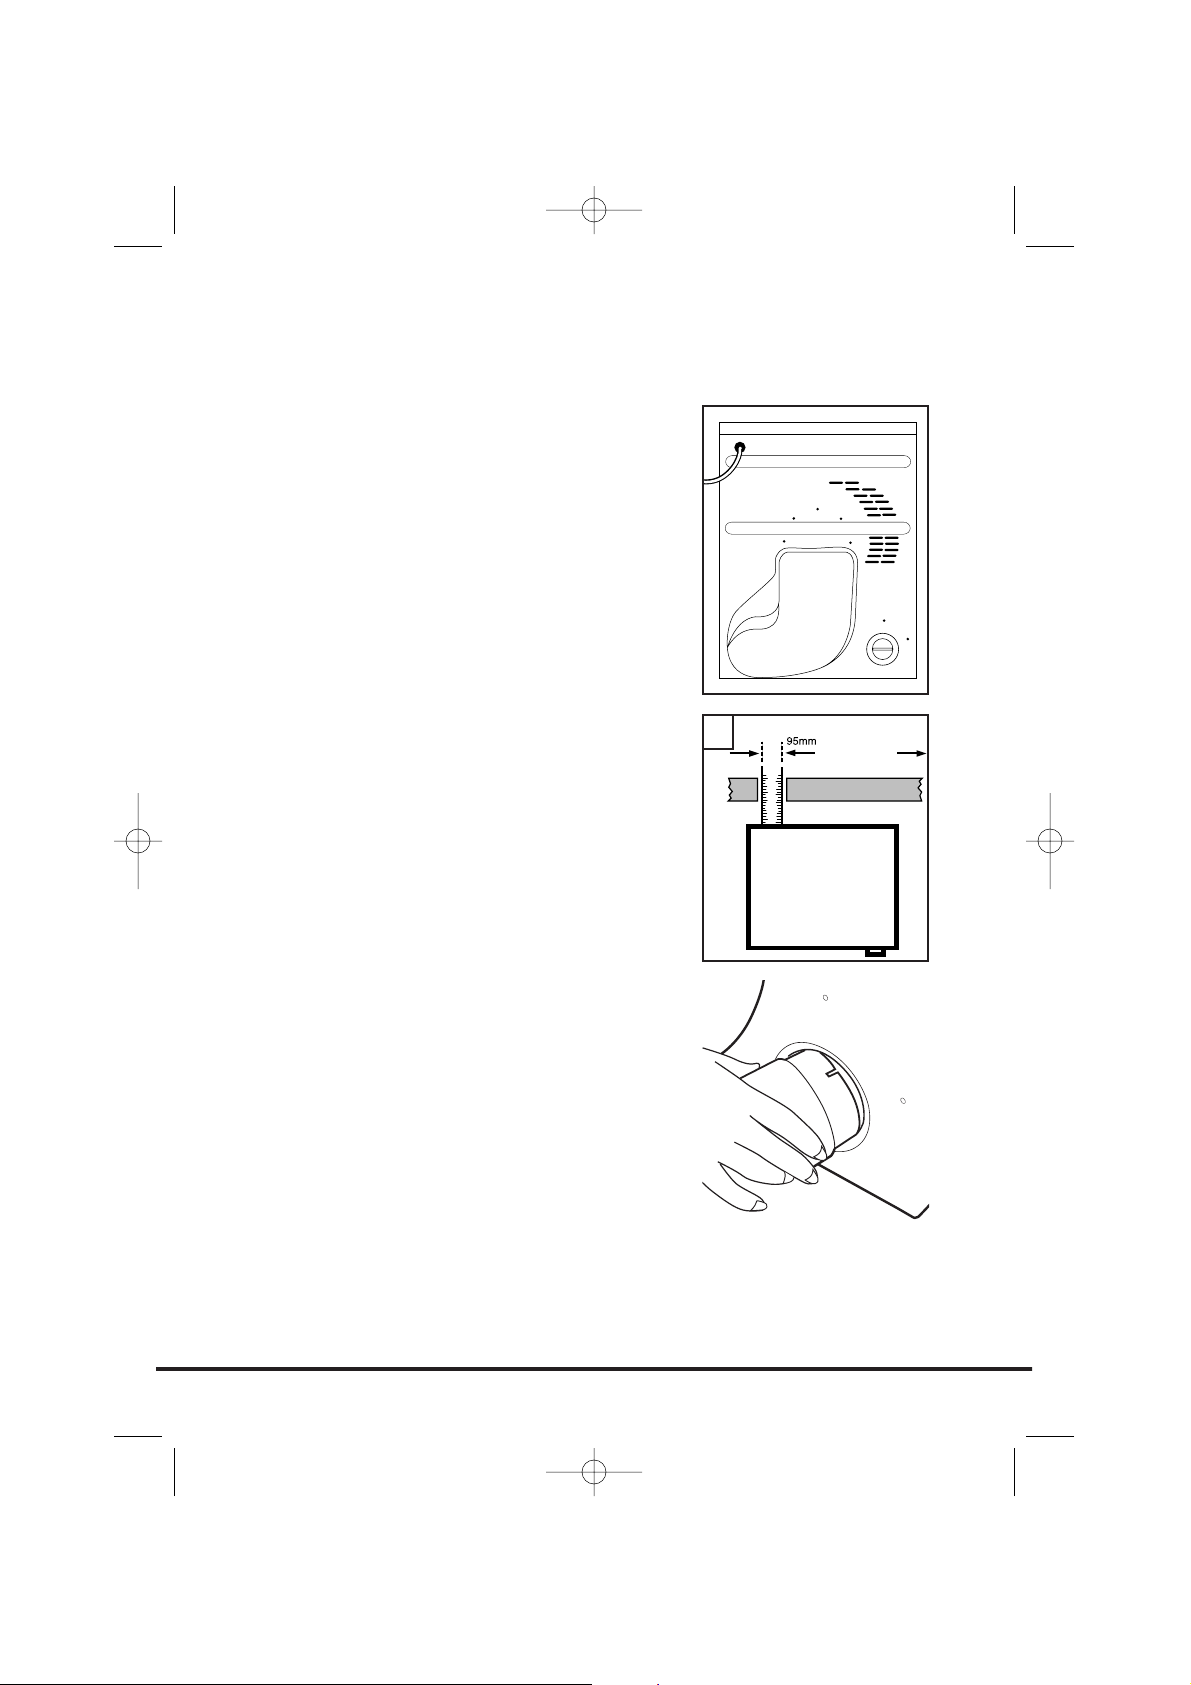
If the dryer is installed under a worktop or builtin, it is essential to use the venting hose to carry
the hot moist air away from the dryer otherwise
re-circulation of the moist air will prevent the
dryer from working efficiently.
The hose is assembled and fitted to the machine
as shown.
The hose may be fitted through a wall or through
an open door or window (Fig. 1). The hose is
95mm (3.75 inches) in diameter and will extend
up to 1.8 metres (6 feet).
Venting hoses longer than 1.8 metres (6 feet) are
not recommended as the dryer performance will
be reduced.
EEnnssuurree tthhaatt tthhee vveennttiinngg hhoossee iiss nnoott
kkiinnkkeedd aass tthhiiss wwiillll pprreevveenntt tthhee ddrryyeerr ffrroomm
wwoorrkkiinngg eeffffiicciieennttllyy..
7
VVeennttiillaattiioonn
WWAALLLL
DDRRYYEERR
1
40001505.qxd 19/08/2004 16:54 Page 7
Before using the tumble dryer for the first time:
● Please read this instruction book thoroughly.
● Remove all items packed inside drum.
● Wipe the inside of the drum and door with
a damp cloth to remove any dust which may
have settled in transit.
CCllootthheess pprreeppaarraattiioonn
Make sure that the laundry you are going to dry
is suitable for drying in a tumble dryer, as shown
by the care symbols on each item.
Check that all fastenings are closed and that
pockets are empty. Turn the articles inside out.
Place clothes loosely in the drum to make sure
that they don't get tangled.
MMaaxxiimmuumm ddrryyiinngg wweeiigghhtt
● Cottons Max. 7.5 kg
● Synthetics Max. 3.5 kg
8
PPrreeppaarriinngg tthhee llooaadd
DDoo nnoott oovveerrllooaadd
tthhee ddrruumm,, llaarrggee
iitteemmss wwhheenn wweett
ccaann eexxcceeeedd tthhee
mmaaxxiimmuumm
aaddmmiissssiibbllee
ccllootthheess llooaadd
((ffoorr eexxaammppllee::
sslleeeeppiinngg bbaaggss,,
dduuvveettss))..
40001505.qxd 19/08/2004 16:54 Page 8
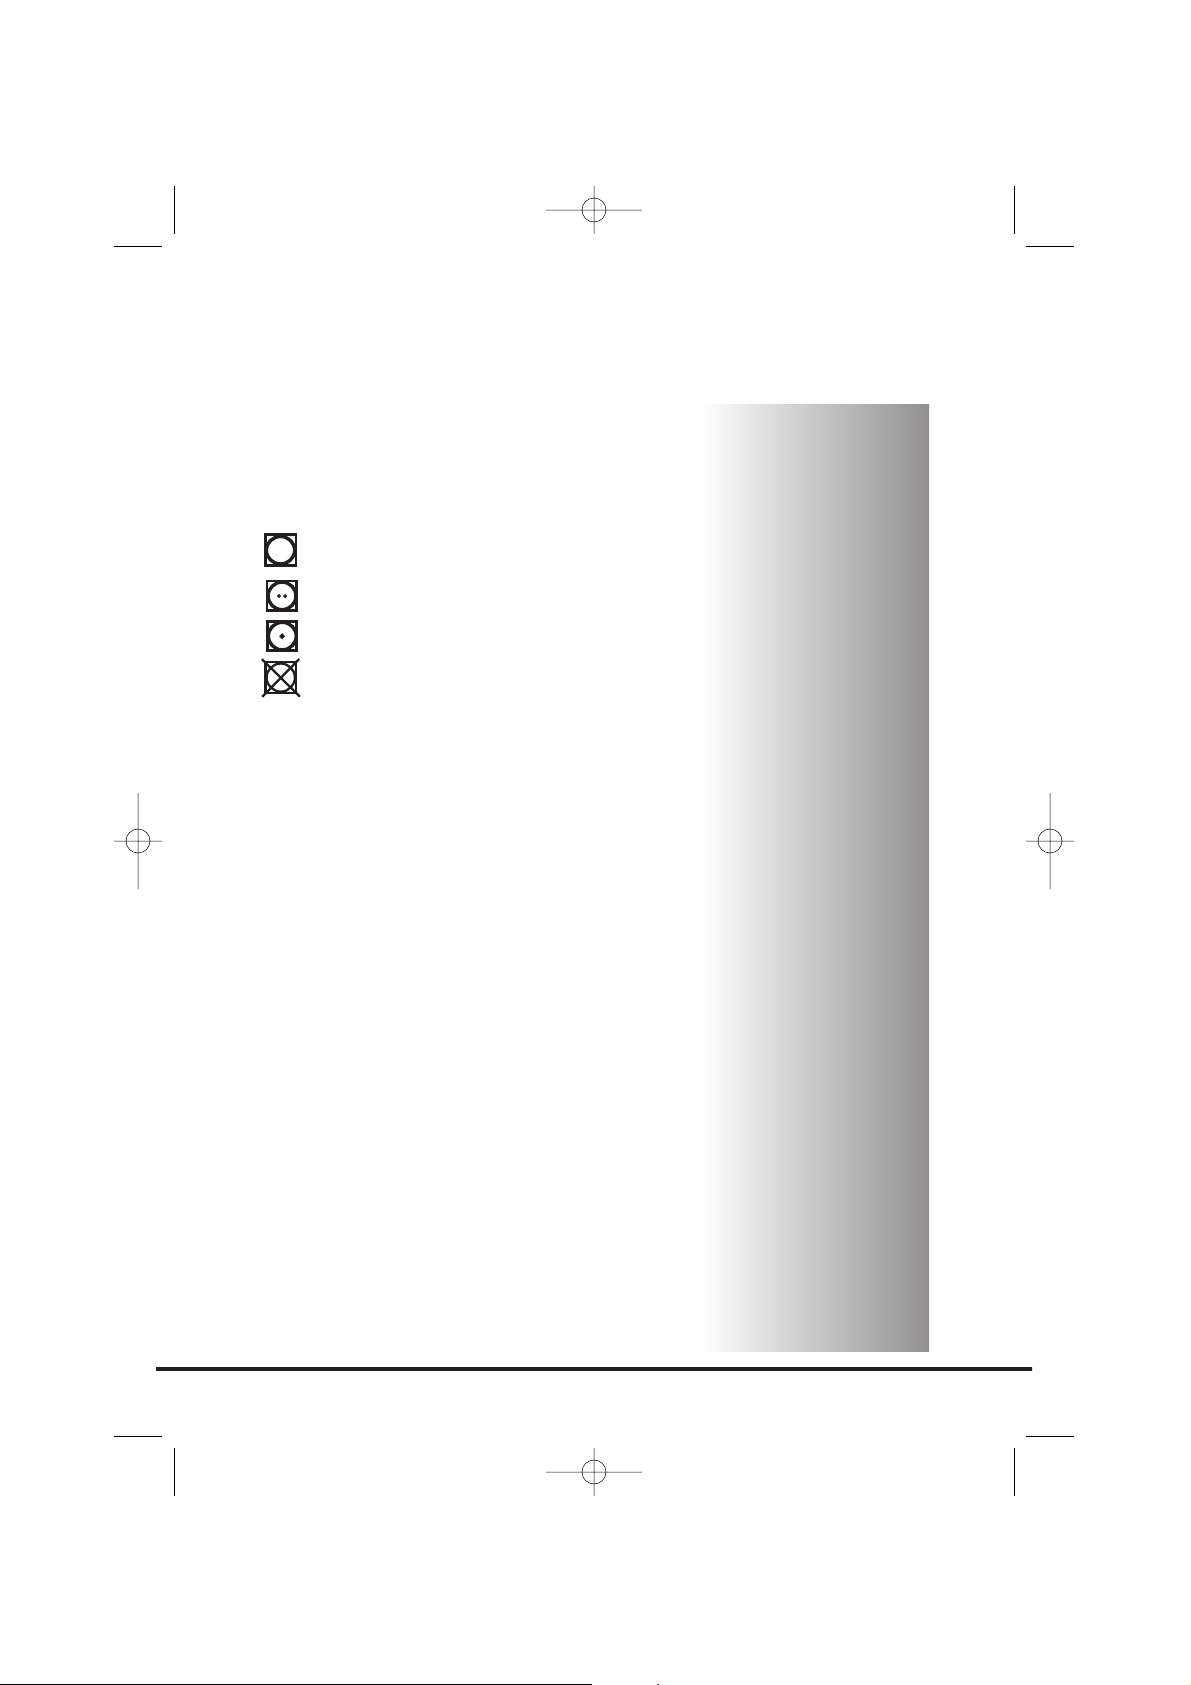
SSoorrtt tthhee llooaadd aass ffoolllloowwss::
●
BByy ccaarree ssyymmbboollss
These can be found on the collar or inside
seam:
Suitable for tumble drying.
Tumble drying at high temperature.
Tumble drying at low temperature only.
Do not tumble dry.
If the item does not have a care label it
must be assumed that it is not suitable
for tumble drying.
●
BByy aammoouunntt aanndd tthhiicckknneessss
Whenever the load is bigger than the dryer
capacity, separate clothes according to
thickness (e.g. towels from thin underwear).
●
BByy ttyyppee ooff ffaabbrriicc
CCoottttoonnss//lliinneenn::
Towels, cotton jersey, bed and
table linen.
SSyynntthheettiiccss::
Blouses, shirts, overalls, etc. made
of polyester or polyamid, as well as for
cotton/synthetic mixes.
●
BByy ddrryyiinngg lleevveell
Sort into: iron dry, cupboard dry, etc. For
delicate articles press the Delicados
Sintéticos button to select low drying
temperature.
9
40001505.qxd 19/08/2004 16:54 Page 9
DDoo nnoott ttuummbbllee ddrryy::
Woollens, silk, delicate fabrics, nylon stockings,
delicate embroidery, fabrics with metallic
decorations, garments with PVC or leather
trimmings, training shoes, bulky items such as
sleeping bags, etc.
EEnneerrggyy ssaavviinngg
Only put into the tumble dryer laundry which has
been thoroughly wrung or spin-dried. The drier
the laundry the shorter the drying time thus
saving electricity.
AALLWWAAYYSS
● Try to dry the maximum weight of laundry,
this will save time and electricity.
● Check that the filter is clean before every
drying cycle.
NNEEVVEERR
● Exceed the maximum weight, this will waste
time and electricity.
● Put dripping wet items into the tumble
dryer, this may damage the appliance.
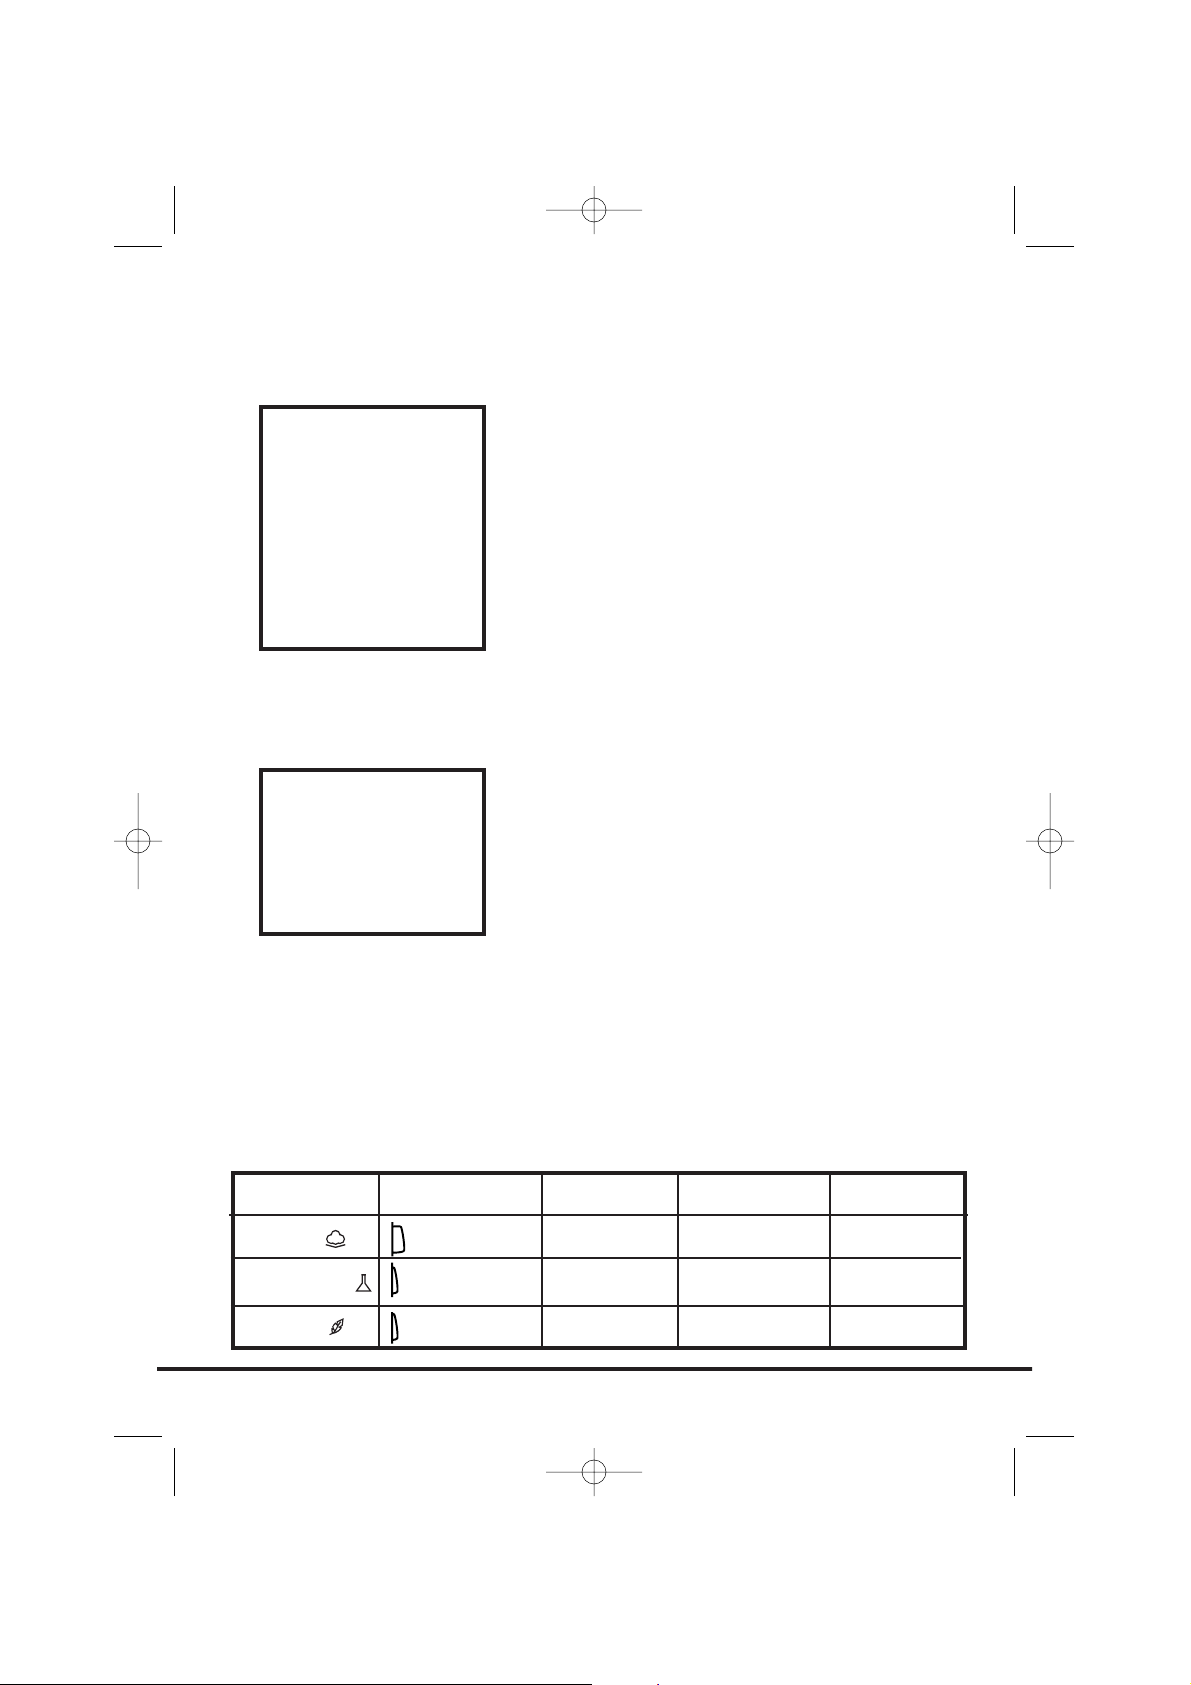
DDrryyiinngg gguuiiddee
The table shows approximate drying times,
depending on the type of fabric and dampness of
the clothes.
10
DDrryyiinngg aaddvviiccee
IIMMPPOORRTTAANNTT:: DDoo
nnoott ddrryy aarrttiicclleess
wwhhiicchh hhaavvee bbeeeenn
ttrreeaatteedd wwiitthh aa
ddrryy cclleeaanniinngg fflluuiidd
oorr rruubbbbeerr ccllootthheess
((ddaannggeerr ooff ffiirree oorr
eexxpplloossiioonn))..
DDuurriinngg tthhee llaasstt
1155 mmiinnuutteess tthhee
llooaadd iiss aallwwaayyss
ttuummbblleedd iinn
ccooooll aaiirr..
FFaabbrriicc
COTTON
SYNTHETICS
ACRYLIC
HHEEAATT SSEETTTTIINNGG
HIGH
LOW
LOW
HHEEAAVVYY LLOOAADD
140-165 min
–
–
MMEEDDIIUUMM LLOOAADD
70-80 min
70-80 min
50-65 min
LLIIGGHHTT LLOOAADD
50-65 min
40-55 min
30-40 min
40001505.qxd 19/08/2004 16:54 Page 10
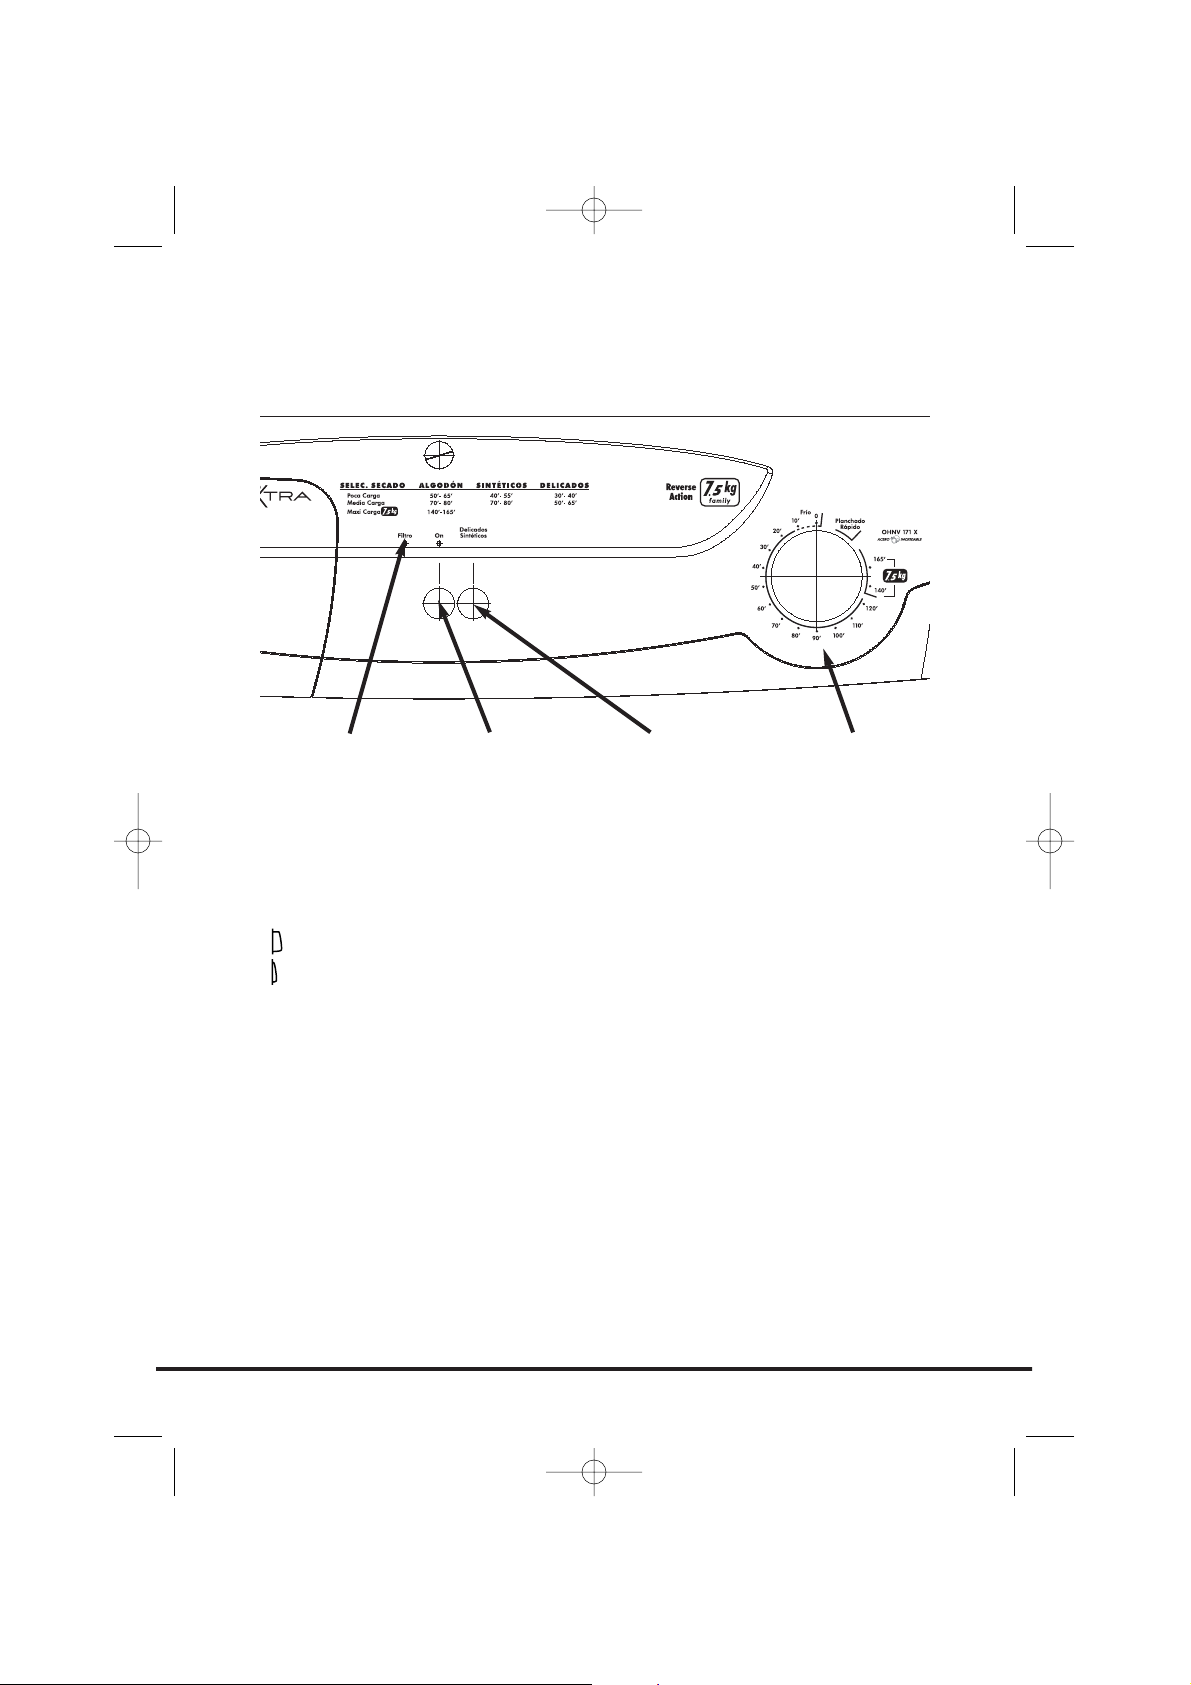
CCoonnttrrooll ppaanneell aanndd iinnddiiccaattoorr lliigghhttss
''OONN'' BBuuttttoonn aanndd IInnddiiccaattoorr
– press to switch on, the indicator will light.
''AACCRRYYLLIICCSS//SSYYNNTTHHEETTIICCSS'' BBuuttttoonn ((DDeelliiccaaddooss SSiinnttééttiiccooss))
– press to reduce the
heat level for delicate items, press again to select high temperature.
HIGH heat setting
LOW heat setting
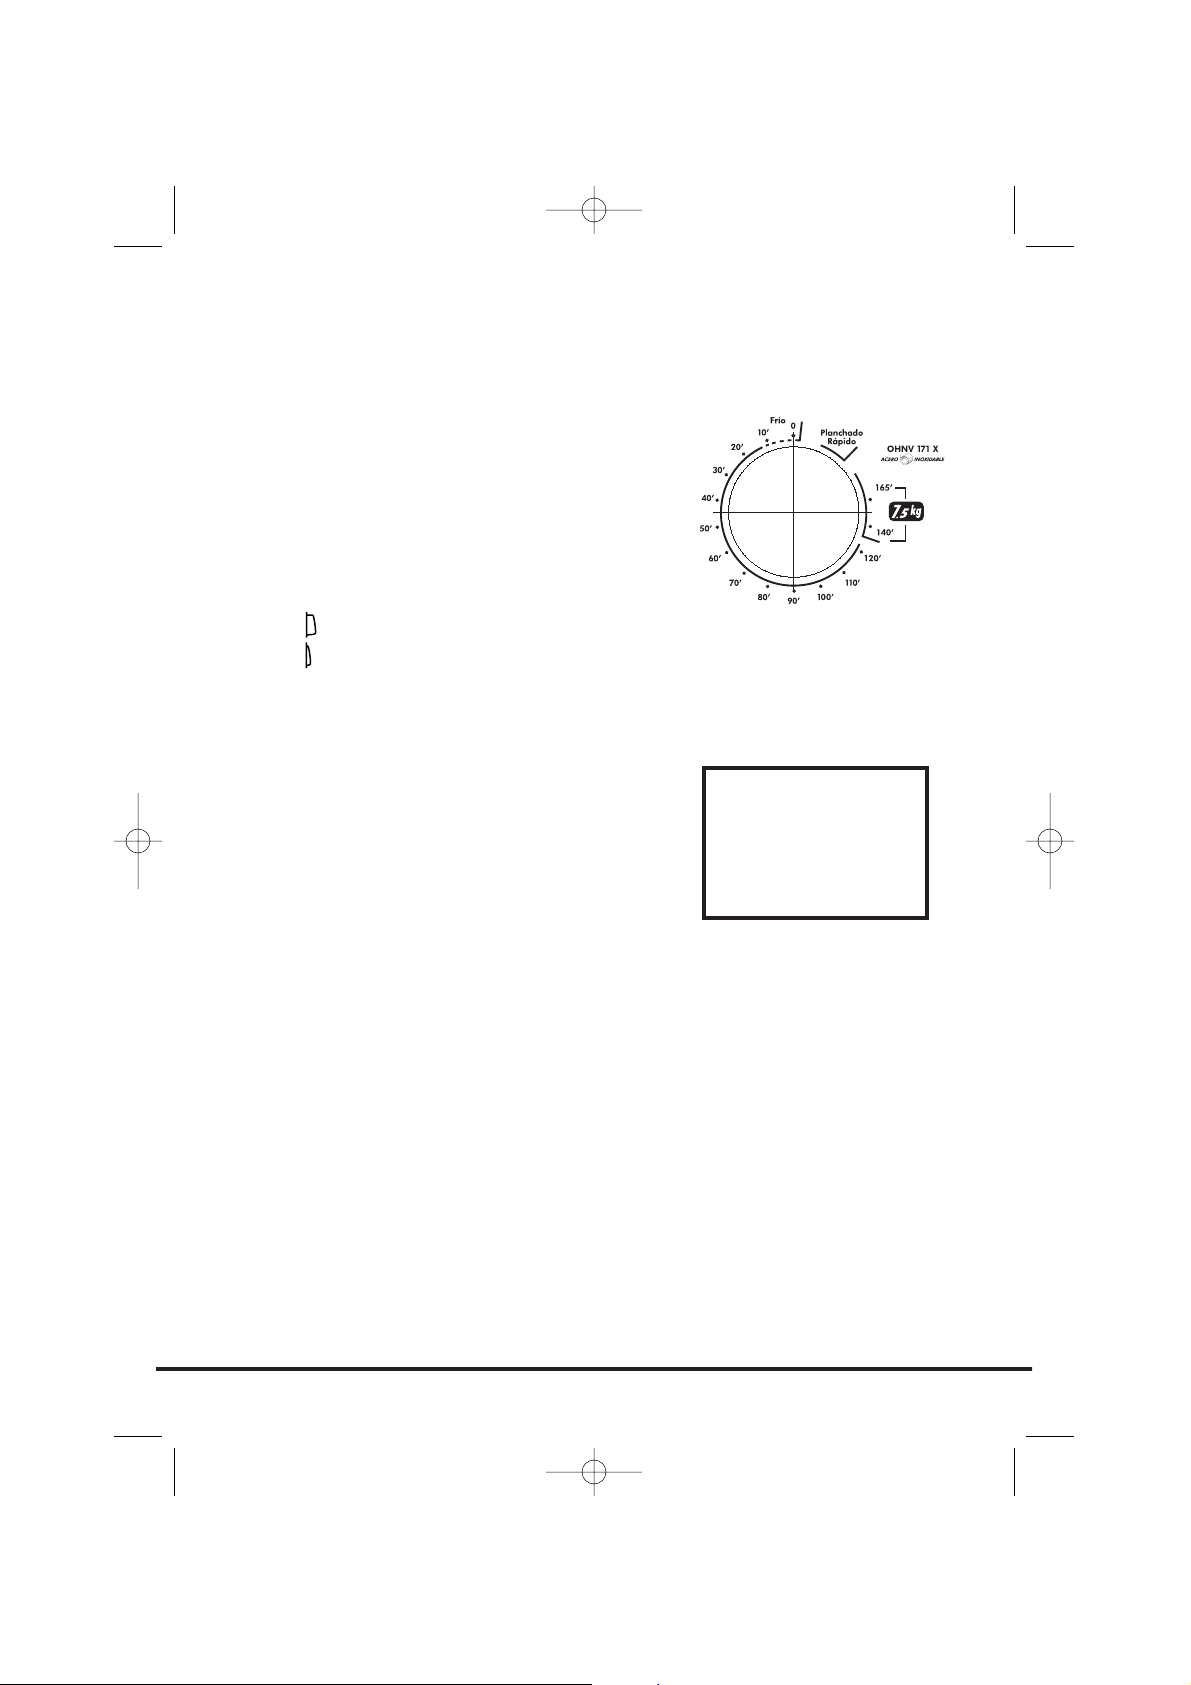
''DDRRYYIINNGG TTIIMMEE'' SSeelleeccttoorr
– selects the drying time or the Fast Iron option
(Planchado Rápido).
''FFIILLTTEERR CCAARREE'' IInnddiiccaattoorr ((FFiillttrroo))
– lights when the filter needs cleaning.
11
CCoonnttrroollss aanndd iinnddiiccaattoorrss
ACRYLICS/SYNTHETICS
BUTTON
ON
BUTTON
FILTER CARE
INDICATOR
DRYING TIME
SELECTOR
40001505.qxd 19/08/2004 16:54 Page 11

OOppeenniinngg tthhee ddoooorr
Pull on handle to open the door.
To restart the dryer, close the door and press On.
FFiilltteerr
IIMMPPOORRTTAANNTT:: TToo mmaaiinnttaaiinn tthhee eeffffiicciieennccyy ooff tthhee
ddrryyeerr cchheecckk tthhaatt tthhee fflluuffff ffiilltteerr iiss cclleeaann bbeeffoorree
eeaacchh ddrryyiinngg ccyyccllee..
11..
Pull the filter upwards.
22..
Open filter as shown.
33..
Gently remove lint using a soft brush or
your fingertips.
44..
Snap the filter together and push back into
place.
FFiilltteerr CCaarree IInnddiiccaattoorr
Filtro lights when the filter needs cleaning.
IIff tthhee llaauunnddrryy iiss nnoott ddrryyiinngg cchheecckk tthhaatt tthhee ffiilltteerr iiss
nnoott ccllooggggeedd.. TThhee iinnddiiccaattoorr wwiillll aallssoo lliigghhtt wwhheenn
tthhee vveennttiinngg hhoossee iiss bblloocckkeedd oorr kkiinnkkeedd..
12
DDoooorr aanndd FFiilltteerr
WWAARRNNIINNGG!!
WWhheenn tthhee ttuummbbllee ddrryyeerr iiss iinn uussee tthhee
ddrruumm aanndd ddoooorr mmaayy bbee VVEERRYY HHOOTT
40001505.qxd 19/08/2004 16:54 Page 12
Refer to the Drying guide table or the fabric
labels to select the most suitable programme.
● Open the door and load the drum with
laundry. Ensure that garments do not hinder
closure of the door.
● If drying delicate items press the Delicados
Sintéticos button to reduce the heat level.
Press again on completion, to select high
temperature.
HIGH heat setting
LOW heat setting
● Turn the 'DRYING TIME' Selector until the
required drying time aligns with the dial.
● The Planchado Rápido programme provides
a conditioning and anti-crease function. The
dryer will heat the load for 8 minutes
followed by a 2 minute cool down period
and is especially good for garments which
may have been left for some time prior to
ironing, in a linen basket for example.
Garments may also become stiffened when
dried outside on a washing line or inside on
radiators. This process relaxes the creases in
the fabric making ironing quicker and easier.
● Gently close the door pushing it slowly until
you hear the door 'click' shut.
● Press the On button. The indicator will light
and the drying cycle begins.
● The load is dried by tumbling in
thermostatically controlled warm air. Cool
air (Frío) is used for the last 15 minutes to
reduce creasing and cool the load ready for
handling.
● When the program is fully completed the
drum will stop rotating and the dial will
point to 0.
● Open the door and remove the load.
● Clean the filter after every drying cycle to
ensure maximum dryer efficiency.
13
OOppeerraattiioonn
WWAARRNNIINNGG!!
TThhee ddrruumm,, ddoooorr
aanndd llooaadd mmaayy bbee
vveerryy hhoott..
40001505.qxd 19/08/2004 16:54 Page 13

CClleeaanniinngg tthhee ddrryyeerr
● Clean the filter after every drying cycle.
● After each period of use, wipe the inside of
the drum and leave the door open for a
while to allow circulation of air to dry it.
● Wipe the outside of the machine and the
door with a soft cloth.
●
DDOO NNOOTT
use abrasive pads or cleaning
agents.
● To prevent the door sticking or the build up
of fluff periodically clean the inner door and
gasket with a damp cloth.
TTeecchhnniiccaall ssppeecciiffiiccaattiioonnss
Drum capacity 115 litres
Maximum load 7.5 kg
Height 85cm
Width 60cm
Depth 60cm
Energy Label Band C
14
IIMMPPOORRTTAANNTT
AAllwwaayyss sswwiittcchh ooffff
aanndd rreemmoovvee tthhee
pplluugg ffrroomm tthhee
eelleeccttrriicciittyy ssuuppppllyy
bbeeffoorree cclleeaanniinngg
tthhiiss aapppplliiaannccee..
FFoorr eelleeccttrriiccaall ddaattaa
rreeffeerr ttoo tthhee
rraattiinngg llaabbeell oonn
tthhee ffrroonntt ooff tthhee
ddrryyeerr ccaabbiinneett
((wwiitthh tthhee ddoooorr
ooppeenn))..
CClleeaanniinngg aanndd RRoouuttiinnee
MMaaiinntteennaannccee
40001505.qxd 19/08/2004 17:01 Page 14

WWhhaatt mmiigghhtt bbee tthhee ccaauussee ooff......
DDeeffeeccttss yyoouu ccaann rreemmeeddyy yyoouurrsseellff
Before calling GIAS Service for technical advice please run through the
following checklist. A charge will be made if the machine is found to be
working or has been installed incorrectly or used incorrectly. If the problem
persists after completing the recommended checks, please call GIAS Service,
they may be able to assist you over the telephone.
DDrryyiinngg ttiimmee iiss ttoooo lloonngg//ccllootthheess aarree nnoott ddrryy eennoouugghh……
● Have you selected the correct drying time/programme?
● Were the clothes too wet? Were the clothes thoroughly wrung or spin-
dried?
● Does the filter need cleaning?
● Is the dryer overloaded?
● Is the venting hose kinked or blocked?
● Has the Delicados Sintéticos option been selected from a previous cycle?
TThhee ddrryyeerr ddooeess nnoott ooppeerraattee……
● Is there a working electricity supply to the dryer? Check using another
appliance such as a table lamp.
● Is the plug properly connected to the mains supply?
● Is there a power failure?
● Has the fuse blown?
● Is the door fully closed?
● Is the dryer switched on, both at the mains supply and at the machine?
● Has the drying time or the programme been selected?
● Has the machine been switched on again after opening the door?
TThhee ddrryyeerr iiss nnooiissyy……
● Switch off the dryer and contact GIAS Service for advice.
TThhee FFiilltteerr CCaarree IInnddiiccaattoorr iiss oonn……
● Does the filter need cleaning?
● Is the venting hose kinked or blocked?
15
TTrroouubblleesshhoooottiinngg
40001505.qxd 19/08/2004 16:54 Page 15

Should there still be a problem with your dryer
after completing all the recommended checks,
please call GIAS Service for advice. They may be
able to assist you over the telephone or arrange
for a suitable appointment for an engineer to call
under the terms of your guarantee. However, a
charge may be made if any of the following
applies to your machine:
● Is found to be in working order.
● Has not been installed in accordance with
the installation instructions.
● Has been used incorrectly.
SSppaarreess
AAllwwaayyss uussee ggeennuuiinnee ssppaarreess,, aavvaaiillaabbllee ddiirreecctt ffrroomm
GGIIAASS SSeerrvviiccee..
GGIIAASS SSeerrvviiccee
FFoorr sseerrvviiccee aanndd rreeppaaiirrss ccaallll yyoouurr llooccaall GGIIAASS SSeerrvviiccee
eennggiinneeeerr..
The manufacturer declines all responsibility in the
event of any printing mistakes in this booklet.
The manufacturer also reserves the right to make
appropriate modifications to its products without
changing the essential characteristics.
16
CCuussttoommeerr SSeerrvviiccee
40001505.qxd 19/08/2004 16:54 Page 16

17
40001505.qxd 19/08/2004 16:54 Page 17

IInnttrroodduucccciióónn
. . . . . . . . . . . . . . . . . . . . . . . . . . . . . . . . . . . . . . . . . . . . . . 19
Información de entrega. . . . . . . . . . . . . . . . . . . . . . . . . . . . . . . . . . . . . . . . . . 19
DDeesseemmbbaallaajjee ddeell pprroodduuccttoo
. . . . . . . . . . . . . . . . . . . . . . . . . . . . . . 19
AAddvveerrtteenncciiaass ssoobbrree sseegguurriiddaadd
. . . . . . . . . . . . . . . . . . . . . . . . . . . 20
Instalación . . . . . . . . . . . . . . . . . . . . . . . . . . . . . . . . . . . . . . . . . . . . . . . . . . . . 20
Uso . . . . . . . . . . . . . . . . . . . . . . . . . . . . . . . . . . . . . . . . . . . . . . . . . . . . . . . . . . 20
La colada . . . . . . . . . . . . . . . . . . . . . . . . . . . . . . . . . . . . . . . . . . . . . . . . . . . . . 21
Temas medioambientales. . . . . . . . . . . . . . . . . . . . . . . . . . . . . . . . . . . . . . . . . 21
Servicio técnico de GIAS. . . . . . . . . . . . . . . . . . . . . . . . . . . . . . . . . . . . . . . . . . 21
IInnssttaallaacciióónn
. . . . . . . . . . . . . . . . . . . . . . . . . . . . . . . . . . . . . . . . . . . . . . . . 22
Requisitos eléctricos. . . . . . . . . . . . . . . . . . . . . . . . . . . . . . . . . . . . . . . . . . . . . 22
Ajuste de las patas . . . . . . . . . . . . . . . . . . . . . . . . . . . . . . . . . . . . . . . . . . . . . . 22
VVeennttiillaacciióónn
. . . . . . . . . . . . . . . . . . . . . . . . . . . . . . . . . . . . . . . . . . . . . . . . 23
PPrreeppaarraacciióónn ddeell mmaatteerriiaall ppaarraa sseeccaarr
. . . . . . . . . . . . . . . . . . . . 24
Preparación de la ropa. . . . . . . . . . . . . . . . . . . . . . . . . . . . . . . . . . . . . . . . . . . 24
Clasificación del material para secar . . . . . . . . . . . . . . . . . . . . . . . . . . . . . . . . 25
CCoonnsseejjooss ppaarraa eell sseeccaaddoo
. . . . . . . . . . . . . . . . . . . . . . . . . . . . . . . . . 26
No secar en secadora . . . . . . . . . . . . . . . . . . . . . . . . . . . . . . . . . . . . . . . . . . . . 26
Ahorro de energía . . . . . . . . . . . . . . . . . . . . . . . . . . . . . . . . . . . . . . . . . . . . . . 26
Guía de secado. . . . . . . . . . . . . . . . . . . . . . . . . . . . . . . . . . . . . . . . . . . . . . . . . 26
CCoonnttrroolleess ee iinnddiiccaaddoorreess
. . . . . . . . . . . . . . . . . . . . . . . . . . . . . . . . . . 27
PPuueerrttaa yy ffiillttrroo
. . . . . . . . . . . . . . . . . . . . . . . . . . . . . . . . . . . . . . . . . . . . . 28
Modo de abrir la puerta . . . . . . . . . . . . . . . . . . . . . . . . . . . . . . . . . . . . . . . . . 28
Filtro. . . . . . . . . . . . . . . . . . . . . . . . . . . . . . . . . . . . . . . . . . . . . . . . . . . . . . . . . 28
Control de mantenimiento del filtro . . . . . . . . . . . . . . . . . . . . . . . . . . . . . . . . 28
OOppeerraacciióónn
. . . . . . . . . . . . . . . . . . . . . . . . . . . . . . . . . . . . . . . . . . . . . . . . . 29
LLiimmppiieezzaa yy mmaanntteenniimmiieennttoo ddee rruuttiinnaa
. . . . . . . . . . . . . . . . . . 30
Limpieza de la secadora. . . . . . . . . . . . . . . . . . . . . . . . . . . . . . . . . . . . . . . . . . 30
Especificaciones técnicas . . . . . . . . . . . . . . . . . . . . . . . . . . . . . . . . . . . . . . . . . 30
RReessoolluucciióónn ddee pprroobblleemmaass
. . . . . . . . . . . . . . . . . . . . . . . . . . . . . . . . 31
SSeerrvviicciioo ddee aatteenncciióónn aall cclliieennttee
. . . . . . . . . . . . . . . . . . . . . . . . . . 32
Servicio de recambios. . . . . . . . . . . . . . . . . . . . . . . . . . . . . . . . . . . . . . . . . . . . 32
Servicio técnico de GIAS. . . . . . . . . . . . . . . . . . . . . . . . . . . . . . . . . . . . . . . . . . 32
18
40001505SPA.qxd 19/08/2004 16:53 Page 18

IInnttrroodduucccciióónn
PPoorr ffaavvoorr lleeaa ccuuiiddaaddoossaammeennttee eessttaass iinnssttrruucccciioonneess yy
uuttiilliiccee llaa mmááqquuiinnaa sseeggúúnn ssuuss iinnddiiccaacciioonneess.. EEssttee ffoolllleettoo
pprreesseennttaa ddiirreeccttrriicceess iimmppoorrttaanntteess ppaarraa uussoo sseegguurroo,,
iinnssttaallaacciióónn yy mmaanntteenniimmiieennttoo,, yy aallgguunnooss ccoonnsseejjooss ppaarraa
oobbtteenneerr llooss mmeejjoorreess rreessuullttaaddooss ddee ssuu sseeccaaddoorraa..
Conserve toda la documentación en un lugar seguro
para referencia futura o para los dueños futuros
IInnffoorrmmaacciióónn ddee eennttrreeggaa
Por favor verifique que los siguientes artículos hayan
sido entregados con el electrodoméstico:
● Manual de instrucciones
● Tarjeta de garantía
● Kit e instrucciones de ventilación
● Etiqueta de energía
Desembale la secadora en un lugar cercano al de su
instalación definitiva.
11..
Corte con cuidado la base del embalaje y levante
una de las esquinas.
22..
Retire la funda de plástico y saque la secadora de
la base de poliestireno.
19
VVeerriiffiiqquuee qquuee nnoo ssee
hhaayyaann pprroodduucciiddoo
ddaaññooss aall
eelleeccttrrooddoommééssttiiccoo
dduurraannttee eell ttrraannssppoorrttee..
DDee hhaabbeerrllooss,, llllaammee aall
SSeerrvviicciioo TTééccnniiccoo ddee
GGIIAASS..
SSii nnoo ssee ccuummpplleenn llooss
rreeqquuiissiittooss ddeessccrriittooss
aanntteerriioorrmmeennttee,, eess
ppoossiibbllee qquuee ssee
ppeerrjjuuddiiqquuee llaa
sseegguurriiddaadd ddeell
eelleeccttrrooddoommééssttiiccoo.. EEss
ppoossiibbllee qquuee ssee llee ccoobbrree
uunnaa llllaammaaddaa aall sseerrvviicciioo
ttééccnniiccoo ssii eell pprroobblleemmaa
ccoonn eell eelleeccttrrooddoommééssttiiccoo
eess eell rreessuullttaaddoo ddee uunn
uussoo iinnccoorrrreeccttoo..
DDeesseemmbbaallaajjee ddeell pprroodduuccttoo
DDeesshháággaassee ddee llooss mmaatteerriiaalleess ddee eemmbbaallaajjee ddee
ffoorrmmaa sseegguurraa.. AAsseeggúúrreessee ddee qquuee eessttéénn ffuueerraa ddeell
aallccaannccee ddee llooss nniiññooss,, ddaaddoo qquuee eess uunnaa ffuueennttee
ppootteenncciiaall ddee ppeelliiggrroo..
40001505SPA.qxd 19/08/2004 16:54 Page 19

AAddvveerrtteenncciiaass ssoobbrree
sseegguurriiddaadd
IInnssttaallaacciióónn
● Verifique que el producto no tenga daños visibles antes de usarlo. En caso de
presentar algún daño, no lo use y póngase en contacto con el Servicio técnico de
GIAS.
● No utilice adaptadores, conectores múltiples ni alargaderas.
● No se debe instalar esta máquina en un cuarto de baño ni en una sala de ducha.
● Nunca instale la secadora junto a cortinas, y procure que no caigan objetos ni se
acumule nada detrás de la secadora.
UUssoo
●
AADDVVEERRTTEENNCCIIAA
El uso incorrecto de una secadora puede provocar riesgo de
incendio.
● Esta máquina está diseñada para ser utilizada en el hogar, es decir, para secar
tejidos y prendas de uso diario.
● Esta máquina debe usarse solamente para el propósito para el cual fue diseñada.
Las instrucciones para la instalación y el uso deben comprenderse cabalmente
antes de hacer funcionar el electrodoméstico.
● No toque el electrodoméstico cuando tenga las manos o los pies mojados o
húmedos.
● No se apoye en la puerta al cargar la secadora ni utilice la puerta para levantar o
mover la máquina.
● No permita a los niños jugar con la máquina ni los mandos.
●
AADDVVEERRTTEENNCCIIAA
No use el producto si el filtro de pelusa no está en su lugar o si está
dañado, ya que la pelusa podría arder.
●
AADDVVEERRTTEENNCCIIAA
En el lugar donde aparezca el símbolo de superficie caliente ,
el incremento de temperatura durante la operación de la secadora puede exceder
los 60 grados centígrados.
● Desconecte el enchufe de la red del suministro eléctrico. Siempre debe
desenchufar la máquina antes de limpiarla.
● No siga usando esta máquina si pareciera tener algún desperfecto.
● No hay que dejar que se acumulen lanilla y pelusas en el suelo alrededor de la
máquina.
● El tambor del interior puede calentarse mucho. Antes de retirar la ropa de la
máquina, siempre deje que ésta termine de enfriarse.
20
40001505SPA.qxd 19/08/2004 16:54 Page 20

LLaa ccoollaaddaa
●
AADDVVEERRTTEENNCCIIAA
No debe usarse para secar tejidos tratados con líquidos para
limpiado en seco.
●
AADDVVEERRTTEENNCCIIAA
Los materiales de goma de espuma, en algunas circunstancias,
pueden arder por combustión espontánea si se calientan. Espuma plástica, goma
de espuma, y materiales semejantes a la goma no son apropiados para secarse en
secadora.
NNOO HHAAYY QQUUEE
introducir en la secadora piezas hechas de estos
materiales.
● Consulte siempre las etiquetas sobre lavado de las prendas para conocer si se
pueden secar en secadora.
● Antes de introducir ropa en la secadora, aquélla debe centrifugarse o estrujarse
bien. Prendas que escurren agua
NNOO
deben introducirse en la secadora.
● Deben sacarse de los bolsillos encendedores y cerillas, y no se debe
NNUUNNCCAA
usar
líquidos inflamables cerca de la máquina.
● No se debe
NNUUNNCCAA
introducir cortinas de fibra de vidrio en esta máquina. Puede
producirse irritación de la piel si otras prendas se contaminan con fibras de vidrio.
● Las prendas tratadas o contaminadas con productos de limpieza inflamables o
líquidos tales como gasolina, aceite para cocinar o aerosoles
NNOO DDEEBBEENN
colocarse
en esta máquina.
TTeemmaass mmeeddiiooaammbbiieennttaalleess
● Todos los materiales de embalaje utilizados son ecológicos y reciclables. Por favor
deshágase de los materiales de embalaje por medios ecológicos. Su ayuntamiento
podrá informarle de los medios actuales de desecho.
● Por razones de seguridad cuando se deseche una secadora, desenchufe el cable
eléctrico de la toma general, corte el cable y destrúyalo junto con el enchufe. Para
evitar que los niños se queden encerrados en la máquina, rompa las bisagras o la
cerradura de la puerta.
SSeerrvviicciioo ttééccnniiccoo ddee GGIIAASS
● Para la operación segura y eficiente de esta máquina, recomendamos que todo
mantenimiento o reparación sea ejecutado únicamente por un ingeniero
autorizado del Servicio técnico de GIAS
21
SSii eell eelleeccttrrooddoommééssttiiccoo nnoo ffuunncciioonnaa ccoorrrreeccttaammeennttee oo ssee aavveerrííaa,,
aappáágguueelloo yy ddeessccoonneeccttee eell eenncchhuuffee ddee llaa ttoommaa ddee ccoorrrriieennttee..
CCoonnssuullttee aall SSeerrvviicciioo ttééccnniiccoo ddee GGIIAASS ppaarraa llaa ppoossiibbllee rreeppaarraacciióónn..
40001505SPA.qxd 19/08/2004 16:54 Page 21

RReeqquuiissiittooss eellééccttrriiccooss
Las secadoras están preparadas para funcionar con un
voltaje monofásico de 230 V, a 50 Hz. Verifique que el
circuito de suministro tenga una corriente nominal de al
menos 10 A.
LLaa eelleeccttrriicciiddaadd ppuueeddee sseerr mmuuyy ppeelliiggrroossaa..
EEss iimmpprreesscciinnddiibbllee qquuee eessttaa mmááqquuiinnaa tteennggaa ccoonneexxiióónn aa
ttiieerrrraa..
LLaa ttoommaa ddee ccoorrrriieennttee yy eell eenncchhuuffee ddeell eelleeccttrrooddoommééssttiiccoo
ddeebbeenn sseerr ddeell mmiissmmoo ttiippoo..
NNoo uuttiilliiccee aaddaappttaaddoorreess mmúúllttiipplleess nnii aallaarrggaaddeerraass..
DDeessppuuééss ddee hhaabbeerrssee iinnssttaallaaddoo llaa mmááqquuiinnaa,, eell eenncchhuuffee
ddeebbee qquueeddaarr eenn uunnaa ppoossiicciióónn ffáácciill ddee aallccaannzzaarr eenn eell
mmoommeennttoo ddee ddeessccoonneeccttaarrlloo..
Los conductores del cable de conexión eléctrica son de
diferentes colores, según la codificación siguiente:
AAzzuull NNEEUUTTRROO
MMaarrrróónn CCOONN CCOORRRRIIEENNTTEE
VVeerrddee yy aammaarriilllloo CCOONNEEXXIIÓÓNN AA TTIIEERRRRAA
Este electrodoméstico CE cumple la Directiva europea
89/336/EEC, 73/23/EEC y sus enmiendas subsiguientes.
AAjjuussttee ddee llaass ppaattaass
Una vez que la máquina esté en su sitio, las patas deben
ajustarse para asegurarse de que esté nivelada.
Ajuste las cuatro patas para garantizar que la máquina
esté firme y nivelada.
22
EEss ppoossiibbllee qquuee ssee llee
ccoobbrree uunnaa llllaammaaddaa
aall sseerrvviicciioo ttééccnniiccoo ssii
eell pprroobblleemmaa ccoonn eell
eelleeccttrrooddoommééssttiiccoo
eess eell rreessuullttaaddoo ddee
uunnaa iinnssttaallaacciióónn
iinnccoorrrreeccttaa..
SSii ssee ddaaññaarraa eell
ccaabbllee eellééccttrriiccoo ddee
eessttaa mmááqquuiinnaa,,
ddeebbee
rreeeemmppllaazzaarrssee ccoonn
uunn ccaabbllee eessppeecciiaall
qquuee ssee ppuueeddee
oobbtteenneerr
ÚÚNNIICCAAMMEENNTTEE ddeell
SSeerrvviicciioo ddee
rreeccaammbbiiooss ddee
GGIIAASS.. UUnnaa ppeerrssoonnaa
ccaappaacciittaaddaa ddeebbee
eennccaarrggaarrssee ddee llaa
iinnssttaallaacciióónn..
IInnssttaallaacciióónn
NNoo eenncchhuuffee eell eelleeccttrrooddoommééssttiiccoo nnii lloo
eenncciieennddaa ccoonneeccttaaddoo aa llaa rreedd eellééccttrriiccaa hhaassttaa
qquuee ssee hhaayyaa ccoommpplleettaaddoo llaa iinnssttaallaacciióónn..
PPaarraa ssuu pprrootteecccciióónn,, hhaayy qquuee iinnssttaallaarr eessttaa
sseeccaaddoorraa ccoorrrreeccttaammeennttee..
EEnn ccaassoo ddee aallgguunnaa dduuddaa aacceerrccaa ddee llaa
iinnssttaallaacciióónn,, llllaammee aall SSeerrvviicciioo GGIIAASS ddee
AAtteenncciióónn aall CClliieennttee ppaarraa oobbtteenneerr aasseessoorrííaa..
40001505SPA.qxd 19/08/2004 16:54 Page 22

Debe suministrarse ventilación adecuada en la sala
donde esté ubicada la secadora para evitar que los
gases de aparatos que quemen otros combustibles,
incluyendo llamas abiertas, ingresen en la sala cuando
se está usando la secadora.
● El aire extraído no debe descargarse dentro de un
conducto que sea utilizado para expulsar humos
de aparatos que quemen gas u otros
combustibles.
● Compruebe periódicamente que no esté obstruido
el paso de la corriente de aire a través de la
secadora.
● Después de usar la máquina, revise el filtro de
polvo y límpielo si es necesario.
● Las tomas y salidas de aire deben mantenerse
libres de todo obstáculo. Para que haya suficiente
ventilación, no debe haber ningún obstáculo en el
espacio que se encuentra entre el fondo de la
máquina y el suelo. Debería haber una separación
de por lo menos 12 mm entre la máquina y
cualquier obstáculo.
● Procure que no caigan objetos ni se acumulen
detrás de la máquina, ya que éstos pueden tapar
la entrada y salida de aire.
●
NNUUNNCCAA
instale la secadora junto a cortinas.
Si la secadora se instala debajo de una encimera o es
empotrada, es imprescindible que se use la manguera
de ventilación para sacar el aire húmedo de la secadora,
porque de otra manera la recirculación del aire húmedo
impedirá que la secadora funcione eficientemente.
La manguera se ensambla e instala en la máquina de la
manera señalada.
Se puede instalar la manguera de tal manera que pase
por una pared o por una puerta o ventana abierta
(fig. 1). La manguera tiene un diámetro de 95 mm
(3,75 pulgadas) y se puede extender hasta 1,8 metros
(6 pies).
No se recomienda usar mangueras de más de 1,8 metros
(6 pies) de longitud porque se disminuirá el rendimiento
de la secadora.
CCuuiiddee qquuee llaa mmaanngguueerraa ddee vveennttiillaacciióónn
nnoo ssee ddoobbllee,, ppoorrqquuee ddee sseerr aassíí iimmppeeddiirráá eell
ffuunncciioonnaammiieennttoo eeffiicciieennttee ddee llaa sseeccaaddoorraa..
23
VVeennttiillaacciióónn
PPAARREEDD
SSEECCAADDOORRAA
1
40001505SPA.qxd 19/08/2004 16:54 Page 23

Antes de usar por primera vez la secadora:
● Por favor lea con atención las instrucciones de
este manual.
● Retire todos los artículos que haya guardado en el
interior del tambor.
● Con un trapo húmedo, limpie el interior del
tambor y de la puerta para quitar el polvo que
pueda haberse depositado durante el traslado.
PPrreeppaarraacciióónn ddee llaa rrooppaa
Compruebe que los artículos que propone secar sean
apropiados para secadora, de acuerdo a los símbolos
sobre cuidado que lleve cada artículo.
Compruebe que todos los cierres estén cerrados, y que
no quede nada en los bolsillos. Ponga los artículos al
revés. Coloque la ropa en el tambor, sin presionarla,
para asegurar que no se enrede.
PPeessoo mmááxxiimmoo ddeell
mmaatteerriiaall
● Piezas de algodón máx. 7,5 kg
● Piezas de fibras sintéticas máx. 3,5 kg
24
PPrreeppaarraacciióónn ddeell mmaatteerriiaall
ppaarraa sseeccaarr
NNoo ccaarrgguuee eell
ttaammbboorr eenn eexxcceessoo;;
llooss aarrttííccuullooss
ggrraannddeess,, aall
hhuummeeddeecceerrssee,,
ppuueeddeenn ssuuppeerraarr llaa
ccaarrggaa ddee rrooppaa
mmááxxiimmaa aaddmmiissiibbllee
((ppoorr eejjeemmpplloo:: ssaaccooss
ddee ddoorrmmiirr,,
eeddrreeddoonneess))..
40001505SPA.qxd 19/08/2004 16:54 Page 24

CCllaassiiffiiqquuee llooss aarrttííccuullooss
qquuee ssee vvaann aa sseeccaarr ddee llaa
ssiigguuiieennttee mmaanneerraa::
●
SSeeggúúnn llooss ssíímmbboollooss ddee ccuuiiddaaddoo
Se encuentran en el cuello o en la costura interior:
Apropiado para secadora.
Usar secadora a alta temperatura.
Usar secadora solamente a baja temperatura.
No secar en secadora.
Si el artículo no tiene etiqueta de lavado, se
debe presuponer que no es apropiado para
secadora.
●
SSeeggúúnn llaa ccaannttiiddaadd yy eell ggrroossoorr
Cuando la cantidad del material para secar sea
mayor que la capacidad de la secadora, separe la
ropa de acuerdo a su espesor (por ej. separe las
toallas de la ropa interior delgada).
●
SSeeggúúnn eell ttiippoo ddee tteellaa
AAllggooddóónn//hhiilloo::
Toallas, jerseys de algodón, ropa de
cama y mantelería.
FFiibbrraass ssiinnttééttiiccaass::
Blusas, camisas, monos, etc.
hechos de poliéster o poliamida, y también para
mezclas de algodón/fibras sintéticas.
●
SSeeggúúnn eell ggrraaddoo ddee sseeccaaddoo
Clasificar los artículos según como tienen que
quedar: listos para planchar, listos para guardar,
etc. Para prendas delicadas, presione el botón
Delicados Sintéticos para seleccionar una
temperatura más baja de secado.
25
40001505SPA.qxd 19/08/2004 16:54 Page 25

NNoo sseeccaarr eenn sseeccaaddoorraa::
Prendas de lana, seda, telas delicadas, medias de nylon,
bordados delicados, tela con adornos metálicos, prendas
con guarniciones de PVC o de cuero, zapatillas de
deporte, piezas voluminosas como sacos de dormir, etc.
AAhhoorrrroo ddee eenneerrggííaa
Se deben poner en la secadora solamente artículos que
se hayan estrujado bien o que se hayan centrifugado
para quitar el agua. A menos humedad que tengan las
prendas que se han de secar, más corto será el tiempo
de secado, lo cual ahorrará energía eléctrica.
SSIIEEMMPPRREE
● Procure secar el máximo peso permitido de
artículos, para economizar tiempo y energía.
● Compruebe que el filtro esté limpio antes de
iniciar el ciclo de secado.
NNUUNNCCAA
● Debe excederse del peso máximo, porque de
hacerlo así se malgasta tiempo y energía eléctrica.
● Introduzca en la secadora artículos que chorreen
agua, porque se puede dañar el aparato.
GGuuííaa ddee sseeccaaddoo
En la tabla se señala el tiempo aproximado de secado,
según el tipo de tela y la humedad de la ropa.
26
CCoonnsseejjooss ppaarraa eell sseeccaaddoo
IIMMPPOORRTTAANNTTEE:: NNoo
uussaarr llaa sseeccaaddoorraa
ppaarraa aarrttííccuullooss qquuee
ssee hhaayyaann ttrraattaaddoo
ccoonn llííqquuiiddooss ppaarraa
lliimmppiiaaddoo eenn sseeccoo nnii
ppaarraa pprreennddaass ddee
ggoommaa ((ppeelliiggrroo ddee
iinncceennddiioo oo ddee
eexxpplloossiióónn))..
DDuurraannttee llooss úúllttiimmooss
1155 mmiinnuuttooss,, llaass
ppiieezzaass ssiieemmpprree
ggiirraann eenn aaiirree ffrrííoo..
TTeejjiiddoo
ALGODÓN
FIBRAS SINTÉTICAS
FIBRAS ACRÍLICAS
TTEEMMPPEERRAATTUURRAA
SSEELLEECCCCIIOONNAADDAA
ALTA
BAJA
BAJA
PPEESSAADDOO
140-165 Mín
–
–
MMEEDDIIAANNOO
70-80 Mín
70-80 Mín
50-65 Mín
LLIIGGEERROO
50-65 Mín
40-55 Mín
30-40 Mín
40001505SPA.qxd 19/08/2004 16:54 Page 26

PPaanneell ddee ccoonnttrrooll yy lluucceess ddee aavviissoo
BBoottóónn ‘‘OONN’’ ee iinnddiiccaaddoorr
– presione para activar la máquina, y se iluminará el indicador .
Botón
‘‘DDeelliiccaaddooss SSiinnttééttiiccooss’’
– presione para bajar la temperatura para piezas delicadas, y
presione nuevamente para seleccionar temperatura alta.
Temperatura seleccionada ALTA
Temperatura seleccionada BAJA
SSeelleeccttoorr ddeell ‘‘TTIIEEMMPPOO DDEE SSEECCAADDOO’’
– se selecciona el tiempo de secado o la opción
Planchado Rápido.
IInnddiiccaaddoorr ‘‘CCUUIIDDAADDOO DDEELL FFIILLTTRROO’’ ((FFiillttrroo))
– se ilumina cuando hay que limpiar el filtro.
27
CCoonnttrroolleess ee iinnddiiccaaddoorreess
BOTÓN DELICADOS
SINTÉTICOS
BOTÓN ON
(ENCENDIDO)
CONTROL DE
MANTENIMIENTO
DEL FILTRO
SELECTOR DEL
TIEMPO DE
SECADO
40001505SPA.qxd 19/08/2004 16:54 Page 27

MMooddoo ddee aabbrriirr llaa ppuueerrttaa
Tire de la palanca para abrir la puerta.
Para poner la secadora en marcha nuevamente, cierre la
puerta y presione On.
FFiillttrroo
IIMMPPOORRTTAANNTTEE:: PPaarraa mmaanntteenneerr llaa sseeccaaddoorraa eenn ccoonnddiicciioonneess
ddee ffuunncciioonnaammiieennttoo eeffiicciieennttee,, ccoommpprruueebbee qquuee eell ffiillttrroo ddee
ppoollvvoo eessttéé lliimmppiioo aanntteess ddee ccaaddaa cciicclloo ddee sseeccaaddoo..
11..
Tire del filtro hacia arriba.
22..
Abra el filtro de la manera señalada.
33..
Saque las pelusas usando un cepillo suave o con la
punta de los dedos.
44..
Rearme el filtro, acoplándolo con un golpe seco, y
empújelo nuevamente a su sitio.
EEll ccoonnttrrooll ddee
mmaanntteenniimmiieennttoo ddeell ffiillttrroo
Filtro se ilumina cuando hay que limpiar el filtro.
SSii llaass ppiieezzaass ppaarraa sseeccaarr nnoo ssee sseeccaann,, vveerriiffiiqquuee qquuee nnoo ssee
hhaayyaa ttaappaaddoo eell ffiillttrroo.. EEll iinnddiiccaaddoorr ttaammbbiiéénn ssee iilluummiinnaa
ccuuaannddoo llaa mmaanngguueerraa ddee vveennttiillaacciióónn eessttáá ttaappaaddaa oo
eennrroossccaaddaa..
28
PPuueerrttaa yy ffiillttrroo
¡¡AAVVIISSOO!!
CCuuaannddoo llaa sseeccaaddoorraa eessttáá eenn uussoo,, ppuueeddee
qquuee eell ttaammbboorr yy llaa ppuueerrttaa SSEE CCAALLIIEENNTTEENN
MMUUCCHHOO
40001505SPA.qxd 19/08/2004 16:54 Page 28

Consulte la tabla de la guía de secado o las etiquetas de
cuidado para seleccionar el programa más adecuado.
● Abra la puerta e introduzca la ropa en el tambor,
cuidando de que aquélla no estorbe al cerrar la
puerta.
● Para secar piezas delicadas, presione el botón
Delicados Sintéticos para bajar la temperatura.
Pulse el botón de nuevo al terminar, para
seleccionar temperatura alta.
Temperatura seleccionada ALTA
Temperatura seleccionada BAJA
● Haga girar el selector ‘TIEMPO DE SECADO’ hasta
que el tiempo de secado requerido coincida con el
dial.
● El programa Planchado Rápido proporciona una
función de acondicionamiento y antiarrugas. La
secadora calienta las piezas para secar durante 8
minutos, seguido por un período de enfriamiento
de 2 minutos, y es especialmente apropiado para
ropa que pueda haberse dejado por algún tiempo
antes de plancharla, en una canasta de la ropa,
por ejemplo. Cuando se ha secado la ropa afuera
en una cuerda o en radiadores, dentro de la casa,
también a veces se pone rígida. Esta función
afloja las arrugas de la ropa, por lo cual se hace
más fácil y más rápido el trabajo de planchar.
● Cierre la puerta suavemente, empujándola
lentamente hasta que oiga un ruido de ‘clic’.
● Presione el botón On. Se iluminará el indicador y
empieza el ciclo de secado.
● La ropa se seca al dar vueltas en aire caliente
controlado por termostato. Durante los últimos 15
minutos, se usa aire frío para reducir el arrugado
de la ropa y enfriarla para que se pueda
manipular.
● Al finalizarse todo el programa, el tambor deja de
girar y el dial señala 0.
● Abra la puerta y saque la ropa.
● Para que la secadora funcione con óptima
eficiencia, se debe limpiar el filtro después de
cada ciclo de secado.
29
OOppeerraacciióónn
¡¡AAVVIISSOO!!
EEll ttaammbboorr,, llaa
ppuueerrttaa yy llaass ppiieezzaass
qquuee ssee hhaann sseeccaaddoo
ppuueeddeenn eessttaarr mmuuyy
ccaalliieenntteess..
40001505SPA.qxd 19/08/2004 16:54 Page 29

LLiimmppiieezzaa ddee llaa sseeccaaddoorraa
● Limpie el filtro después de cada ciclo de secado.
● Cada vez, después de usar la secadora, pase un
trapo por el interior del tambor y deje la puerta
abierta por un rato para permitir que circule el
aire para secarla.
● Con un trapo suave, limpie la parte exterior de la
máquina y la puerta.
●
NNOO
use almohadillas abrasivas ni productos
químicos de limpieza.
● Para evitar que la puerta quede pegada o que se
acumule pelusa, se debe limpiar la puerta interna
y la junta con un trapo húmedo.
EEssppeecciiffiiccaacciioonneess ttééccnniiccaass
Capacidad del tambor 115 litros
Peso máximo que se puede secar 7,5 kg
Altura 85 cm
Ancho 60 cm
Profundidad 60 cm
Categoría de consumo de energía C
30
IIMMPPOORRTTAANNTTEE
AAnntteess ddee lliimmppiiaarr
eessttaa mmááqquuiinnaa,,
ssiieemmpprree ddeebbee
aappaaggaarrllaa yy rreettiirraarr
eell eenncchhuuffee ddee llaa
rreedd ddeell ssuummiinniissttrroo
eellééccttrriiccoo..
PPaarraa ddaattooss
rreeffeerreenntteess aa
eenneerrggííaa eellééccttrriiccaa,,
rreeffiiéérraassee aa llaa
eettiiqquueettaa ddee
hhoommoollooggaacciióónn qquuee
ssee eennccuueennttrraa eenn llaa
ppaarrttee ddeellaanntteerraa ddee
llaa sseeccaaddoorraa ((ccoonn llaa
ppuueerrttaa aabbiieerrttaa))..
LLiimmppiieezzaa yy mmaanntteenniimmiieennttoo
ddee rruuttiinnaa
40001505SPA.qxd 19/08/2004 17:02 Page 30

CCaauussaa ppoossiibbllee ddee......
DDeeffeeccttooss qquuee ppuueeddee ssoolluucciioonnaarr uusstteedd mmiissmmoo
Antes de llamar al Servicio técnico de GIAS para obtener asesoramiento técnico, lea
detenidamente la siguiente lista. Se cobrará el servicio técnico si resulta que la máquina
funciona correctamente, o si ha sido instalada o utilizada incorrectamente. Si el
problema continúa después de completar la verificación recomendada, por favor llame
al Servicio técnico de GIAS para recibir asistencia telefónica.
EEll ttiieemmppoo ddee sseeccaaddoo eess eexxcceessiivvaammeennttee llaarrggoo//llaa rrooppaa nnoo
ssee sseeccaa ssuuffiicciieenntteemmeennttee……
● ¿Ha seleccionado el tiempo de secado/programa correcto?
● ¿Estaba la ropa demasiado mojada? ¿La ropa fue bien estrujada o centrifugada?
● ¿Hace falta limpiar el filtro?
● ¿Se ha sobrecargado la secadora?
● ¿Está enroscada o tapada la manguera de ventilación?
● ¿Se tiene todavía seleccionada la opción Delicados Sintéticos de un ciclo anterior?
LLaa sseeccaaddoorraa nnoo ffuunncciioonnaa……
● ¿Está funcionando el suministro de electricidad hacia la secadora? Compruébelo
con otro aparato como una lámpara de mesa.
● ¿El enchufe está correctamente conectado al suministro de la red?
● ¿Se ha cortado la electricidad?
● ¿Se ha quemado el fusible?
● ¿La puerta está completamente cerrada?
● ¿La secadora está encendida, tanto en el suministro de electricidad como en la
máquina?
● ¿Se ha seleccionado el programa o el tiempo de secado?
● ¿Se ha encendido la máquina después de abrir la puerta?
LLaa sseeccaaddoorraa hhaaccee mmuucchhoo rruuiiddoo……
● Apague la secadora y póngase en contacto con el Servicio técnico de GIAS para
obtener asesoría.
EEll ccoonnttrrooll ddee mmaanntteenniimmiieennttoo ddeell ffiillttrroo eessttáá
eenncceennddiiddoo……
● ¿Hace falta limpiar el filtro?
● ¿Está enroscada o tapada la manguera de ventilación?
31
RReessoolluucciióónn ddee pprroobblleemmaass
40001505SPA.qxd 19/08/2004 16:54 Page 31
Si después de revisar todos los aspectos recomendados
persistiera algún problema con la secadora, llame al
Servicio GIAS de Atención al Cliente para obtener
asesoría. Es posible que le puedan asesorar por teléfono
o bien convenir una hora apropiada para que le visite
un ingeniero bajo los términos de la garantía. Sin
embargo, es posible que se le cobre si alguna de las
situaciones siguientes es aplicable a su máquina:
● Si se halla en buen estado de funcionamiento.
● Si no se ha realizado la instalación de acuerdo a
las instrucciones.
● Si se ha usado incorrectamente.
SSeerrvviicciioo ddee rreeccaammbbiiooss
UUttiilliiccee ssiieemmpprree rreeccaammbbiiooss aauuttéénnttiiccooss,, qquuee ssee ppuueeddeenn
ccoonnsseegguuiirr aa ttrraavvééss ddeell SSeerrvviicciioo ttééccnniiccoo ddee GGIIAASS..
SSeerrvviicciioo ttééccnniiccoo ddee GGIIAASS
PPaarraa mmaanntteenniimmiieennttoo yy rreeppaarraacciioonneess,, llllaammee aall iinnggeenniieerroo
ddeell SSeerrvviicciioo ttééccnniiccoo ddee GGIIAASS llooccaall..
El fabricante no se hace responsable de los errores de
imprenta que puedan existir en este folleto. El
fabricante también se reserva el derecho de efectuar
modificaciones a sus productos sin cambiar las
características esenciales.
32
SSeerrvviicciioo ddee aatteenncciióónn aall cclliieennttee
40001505SPA.qxd 19/08/2004 16:54 Page 32


40001505
40001505.qxd 19/08/2004 16:54 Page 18
 Loading...