

Honeywell TG509F, TG509G Installation Instructions Manual
TG509F,G V ersaguard™ Universal
Thermostat Guards
INSTALLATION INSTRUCTIONS
APPLICATION
The TG509F,G Versaguard™ Universal Thermostat
Guards cover and protect pneumatic wall thermostats
against tampering, damage and unauthorized adjustment
of thermostat settings. These mini-sized guards provide
coverage for smaller-sized pneumatic thermostats while
still allowing easy access for thermostat calibration. By
using an allen wrench (included), the thermostat cover can
be removed while the ring base remains in place. The
miniguards do not have wallplates, but can be used for
new and existing applications. See Table 1 for applications.
The guards are ideal for high-traffic areas such as offices,
lobbies, supermarkets, restaurants, clinics, and hospitals.
The TG509 includes a smoke-colored transparent or taupe
opaque polycarbonate cover and ring base, four anchors
and screws, and tumbler lock with two keys. Provision for
Honeywell logo (included) or OEM logo on guard cover.
Table 1. TG509 Thermostat Guard Applications.
Robert Shaw
Honeywell Johnson Powers Original Uniline
TP970 T4002 TH192 T12 2211
TP971 T4100 TH193 T13 2212
TP972 T4506 TH194 T18 2214
TP973 T4756 TT184 T19 2216
TP974 T5002 T23 2218
T7660 T27
TP9600
Series
T32
T33
T34
T35
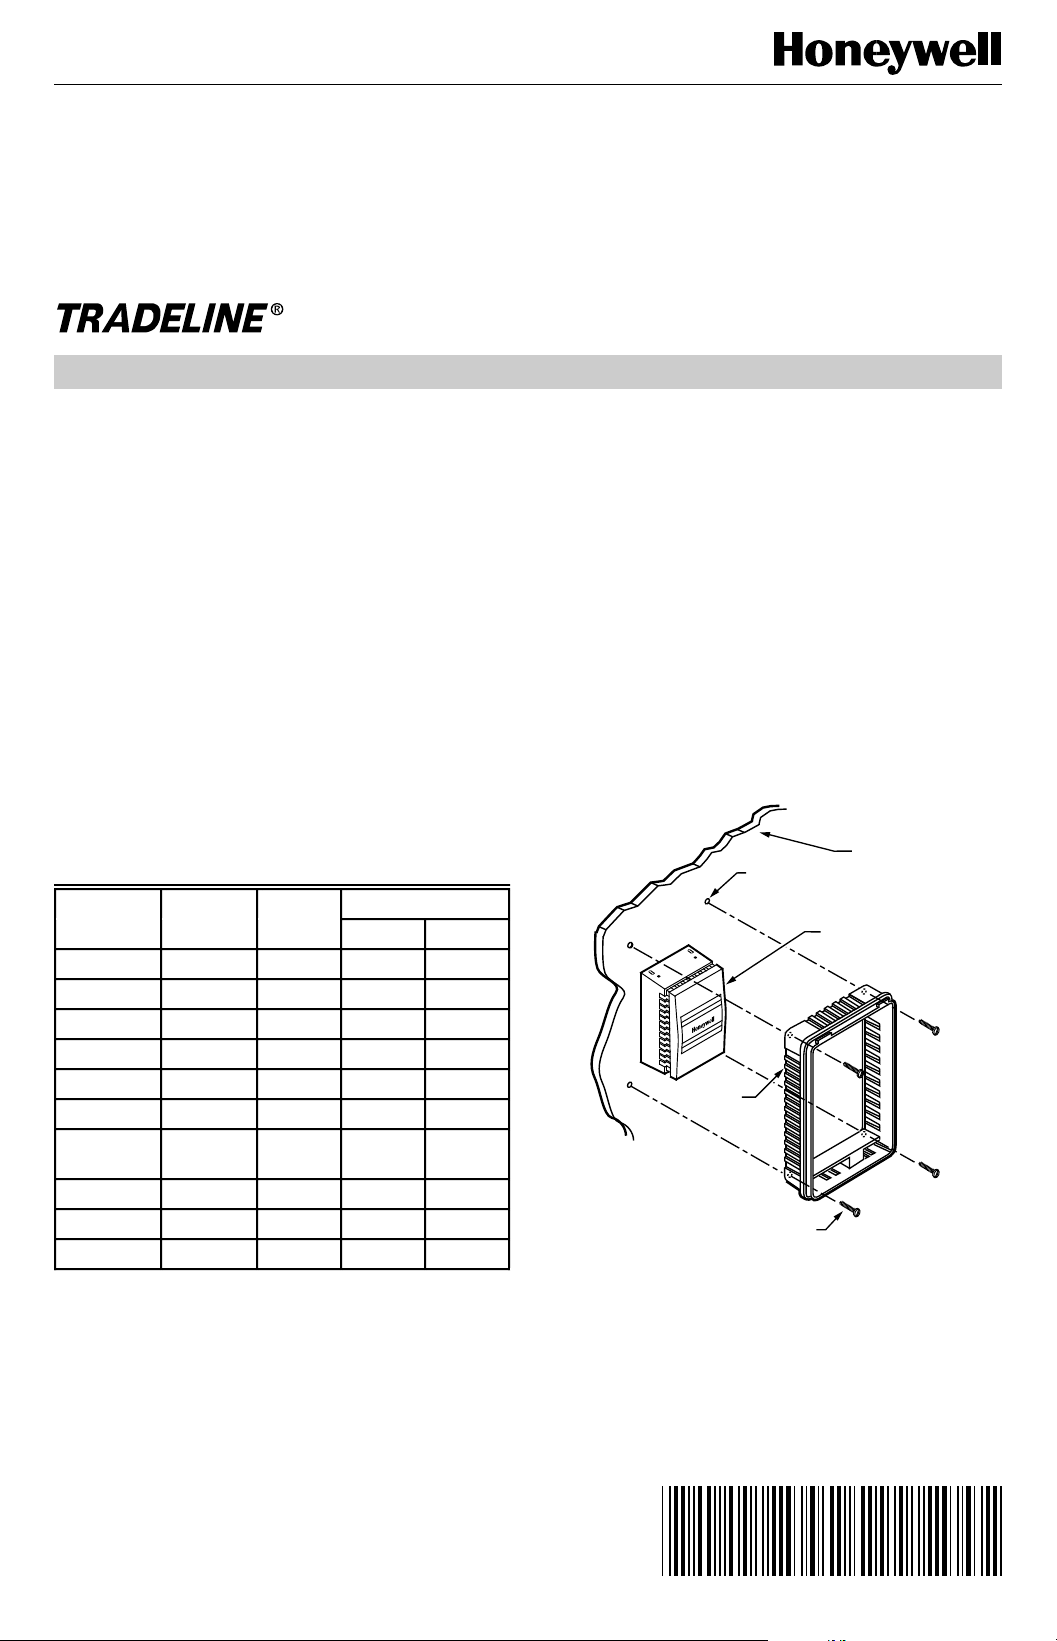
Mounting
The Versaguard™ Universal Thermostat Guard can be
installed without removing the thermostat from the wall.
Mount Thermostat Guard
A Place the ring base over the thermostat and/or
adaptor plate on the wall. Align the ring base with
the thermostat and level approximately.
B Mark the four mounting holes.
NOTE: Do not use the four brass colored screws
C Mount the ring base on the wall using the four no. 6
sheet metal screws and the four anchors provided.
See Fig. 1.
for mounting. The brass colored screws
are intended only for models with
wallplates.
WALL
MOUNTING
HOLES (4)
THERMOSTAT
0
9
0
8
0
7
0
0
6
6
0
9
0
8
0
7
0
6
RING BASE
MOUNTING SCREWS (4)
M15008
Fig. 1. Mount ring base.
INSTALLATION
When Installing this Product…
1. Read these instructions carefully. Failure to follow
them could damage the product.
2. Check the dimensions given in the instructions and
on the product to make sure the product is suitable
for your application.
®U.S. Registered Trademark
Copyright © 1997 Honeywell Inc. • All Rights Reserved
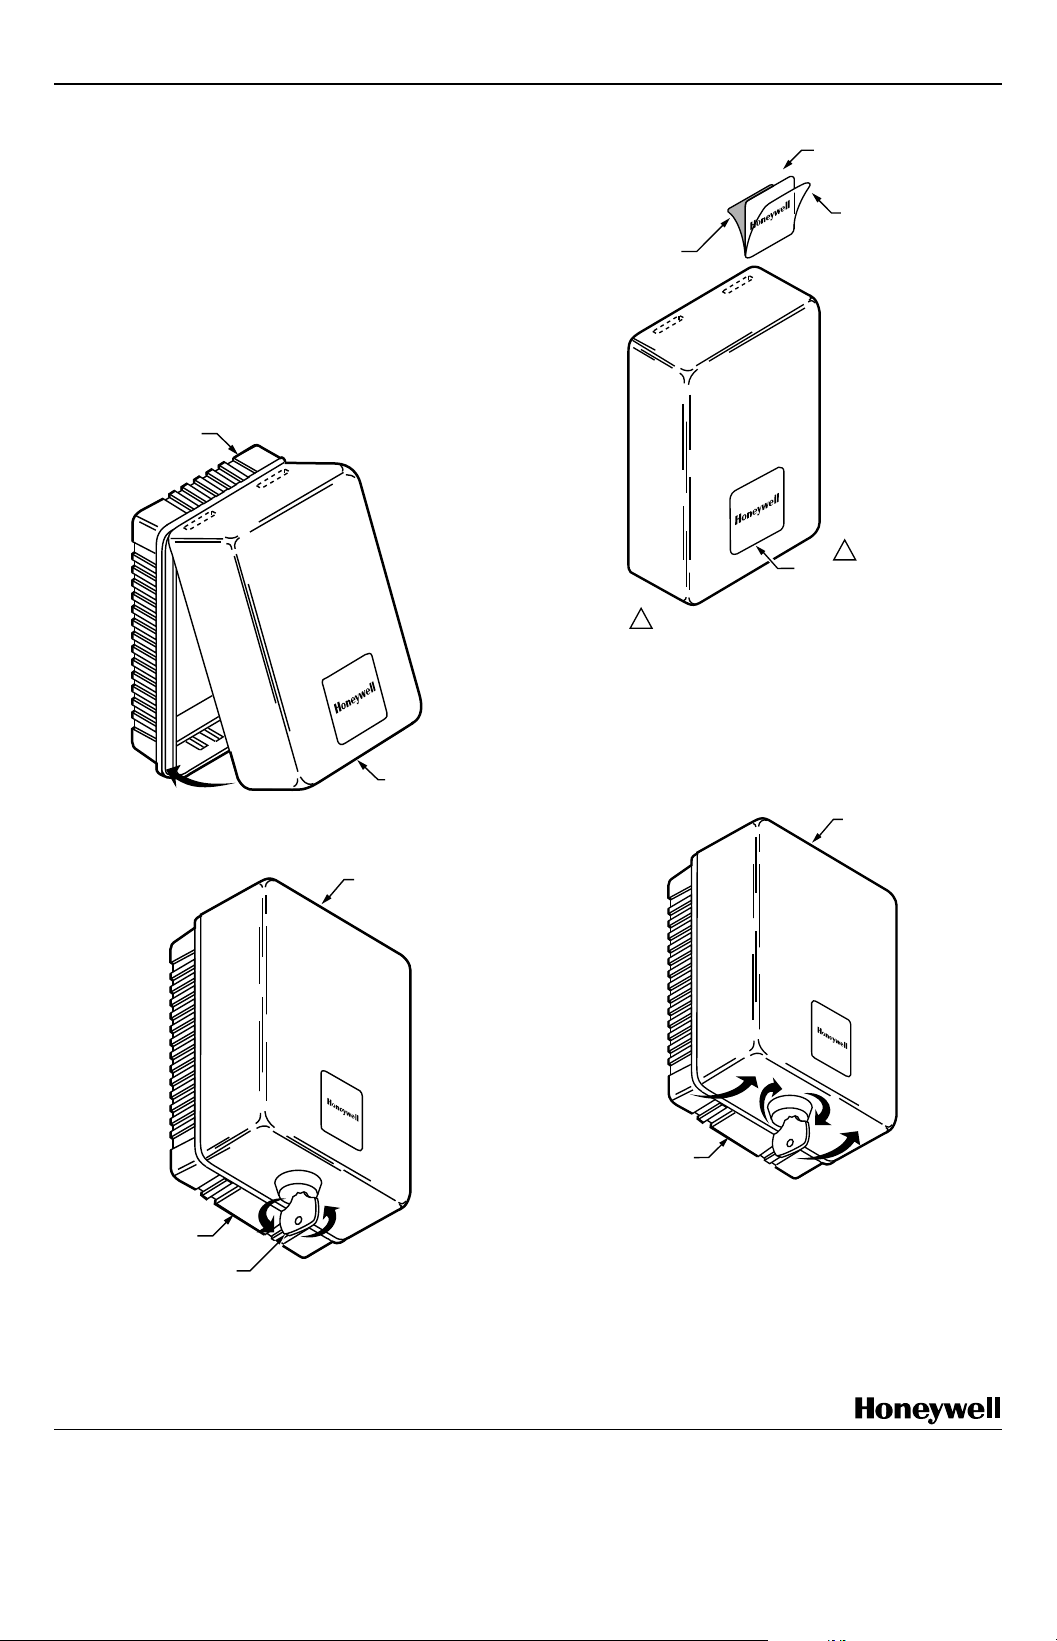
D Mount the guard cover by placing the hinged edge
of the guard cover on the ring base and swinging it
down (vertical mounting) or to the side (horizontal
mounting) until the guard cover is in place against
the ring base. See Fig. 2.
E Lock the thermostat guard by turning the key
counterclockwise. See Fig. 3. The key can be
removed only in the locked position.
69-1008-1
TG509F,G VERSAGUARD™ UNIVERSAL THERMOSTAT GUARDS
F Remove the paper backing and clear protective
cover from the monogram included. Place the
monogram in the recessed area on the guard cover.
See Fig. 4.
NOTE: The thermostat guard is shipped with an
allen wrench secured in the top notch of
the ring base. When thermostat calibration
is needed, remove the Versaguard™ cover
and use the wrench to remove the top two
allen screws in the thermostat cover. This
allows servicing of the thermostat while the
ring base is in place.
RING BASE
MONOGRAM
REMOVE
PAPER
BACKING
1 TURN MONOGRAM 90 DEGREES
ON VERTICALLY MOUNTED GUARDS.
REMOVE
CLEAR
PROTECTIVE
COVER
1
PLACE MONOGRAM
IN RECESSED AREA
ON GUARD COVER
M15011
Fig. 4. Apply monogram to thermostat guard.
Fig. 2. Mount guard cover.
RING BASE
KEY
COVER
M15009
COVER
M15010
Remove Thermostat Guard
Remove the thermostat guard cover by inserting the key
provided and turning the key clockwise until the locking
mechanism is disengaged. See Fig. 5.
COVER
RING BASE
M15012A
Fig. 5. Remove thermostat guard cover.
CHECKOUT
Fig. 3. Lock thermostat guard.
Home and Building Control
Honeywell Inc.
Honeywell Plaza
P.O. Box 524
Minneapolis, MN 55408-0524
69-1008—1
69-1008—1 J.S. 1-97 Printed in U.S.A
Before leaving the installation, refer to the applicable
instructions to check the operation of the thermostat and
ensure that the guard is in the locked position.
Home and Building Control
Honeywell Limited-Honeywell Limitée
155 Gordon Baker Road
North York, Ontario
M2H 2C9
2
Helping You Control Your World
®
 Loading...