

Page 1
OWNER'S MANUAL
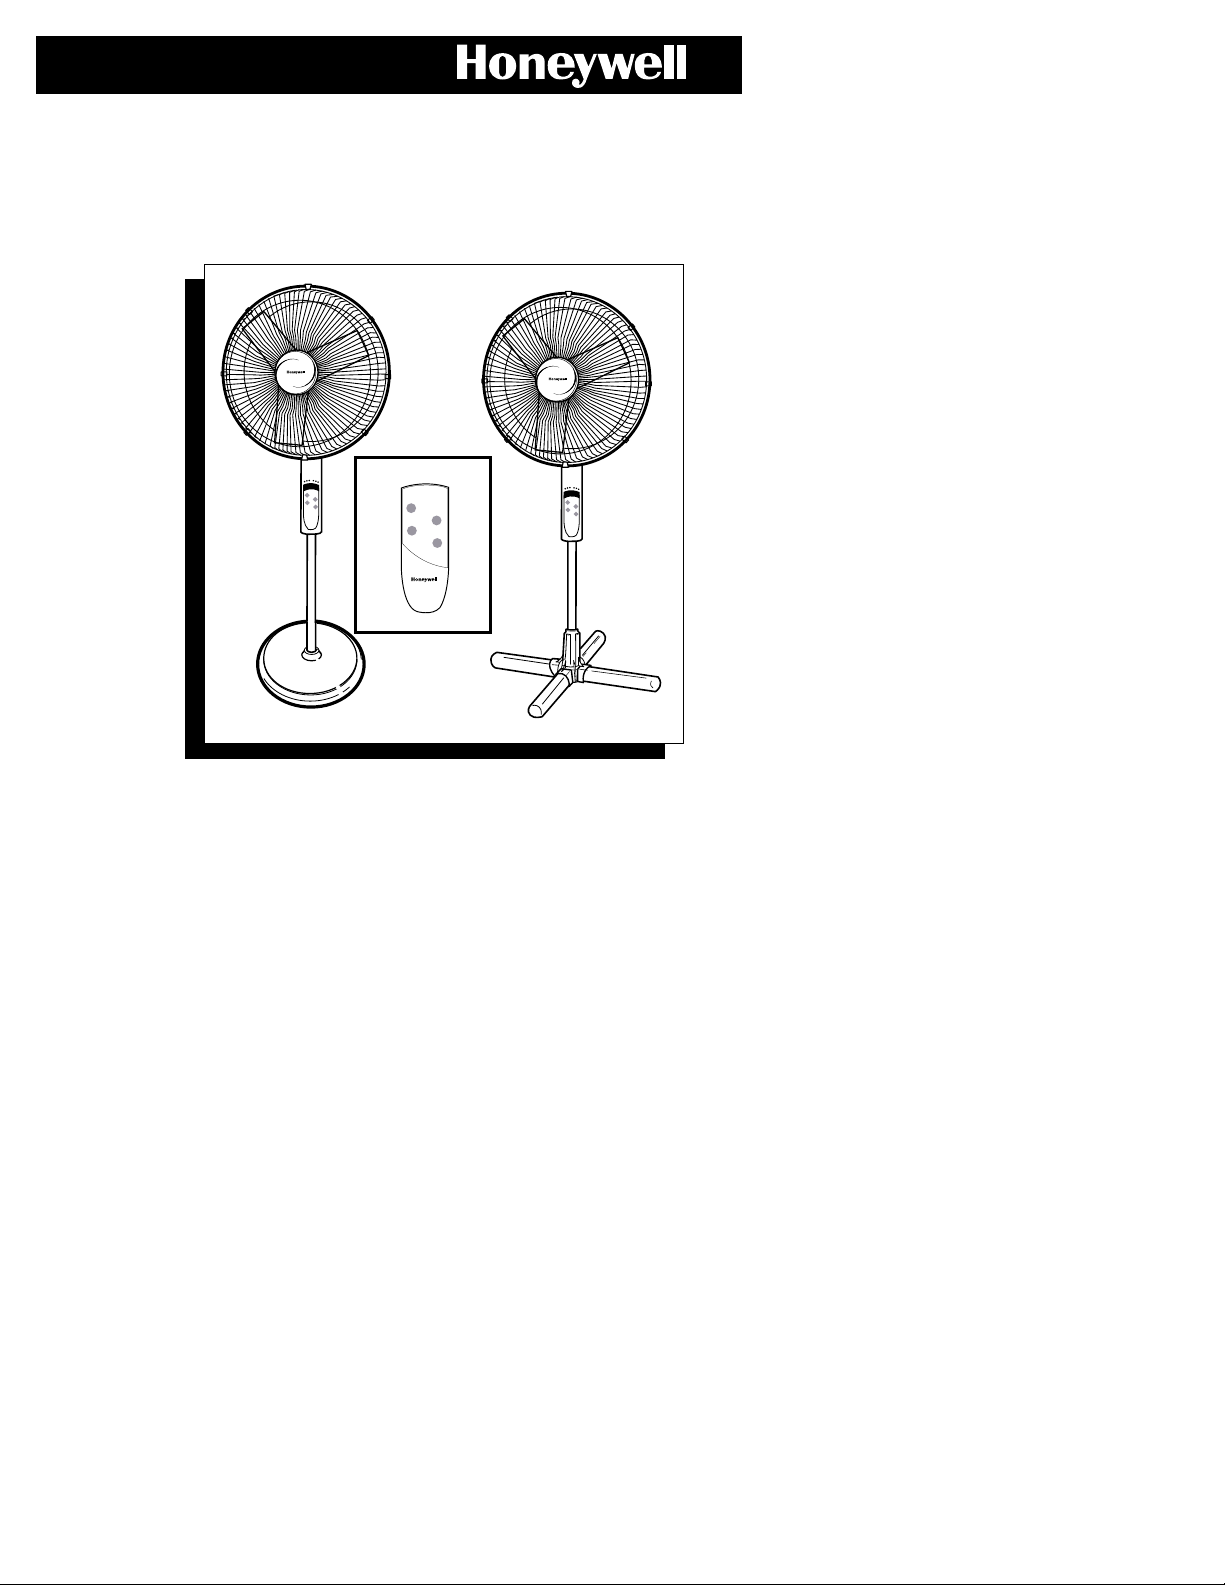
16" REMOTE CONTROL
STAND FAN
Model HS-160R Series
Model HS-300 Series
and 18” REMOTE CONTROL STAND FAN
Model HS-400 Series
SPEED
TIMER
8L
4
M
2
H
BREEZE
SPEED
TIMER
OFF
BREEZE
ON/SPEED
TIMER
OFF
SPEED
TIMER
8L
4
M
2
H
BREEZE
SPEED
TIMER
OFF
Page 2

IMPORTANT SAFETY
INSTRUCTIONS
READ AND SAVE THESE SAFETY
INSTRUCTIONS BEFORE USING
THIS FAN
When using electrical appliances, basic
precautions should always be followed to reduce
the risk of fire, electric shock, and injury to
persons, including the following:
1. Use this fan only as described in this manual. Other use not recommended
may cause fire, electric shock or injury to persons.
2. This product is intended for household use ONLY and not for commercial,
industrial or outdoor use.
3. To protect against electric shock, do not place fan in window, immerse unit,
plug or cord in water or spray with liquids.
4. This appliance has a polarized plug (one blade is wider than the other). To
reduce the risk of shock, this plug is intended to fit only one way in a
polarized outlet. If the plug does not fit fully in the outlet, reverse the plug. If
it still does not fit, contact a qualified electrician.
DO NOT attempt to defeat
this safety feature.
5. Close supervision is necessary when any appliance is used by or near children.
6. Turn the fan to the OFF position and unplug the fan from the outlet when not
in use, when moving the fan from one location to another and before cleaning.
7. To disconnect the fan, first turn control to the OFF position, grip the plug and
pull it from the wall outlet. Never pull by the cord.
8. Do not operate the fan in the presence of explosive and/or flammable fumes.
9. Do not place the fan or any parts near an open flame, cooking or other
heating appliance.
10. Do not operate the fan with a damaged cord or plug or if the product
malfunctions, is dropped or damaged in any manner (see warranty).
11. Avoid contact with moving fan parts.
12. The use of attachments not recommended by the manufacturer may be
hazardous.
13. Place the fan on a dry level sur face.
14. Do not hang or mount fan on a wall or ceiling.
15. Do not operate if the fan housing is removed or damaged.
16. A loose fit between the AC outlet (receptacle) and plug may cause
overheating and a distortion of the plug. Contact a qualified electrician to
replace loose or worn outlet.
WARNING: To Reduce The Risk of Fire or Electric Shock, Do Not Use
This Fan With Any Solid-State Speed Control Device.
Page 3
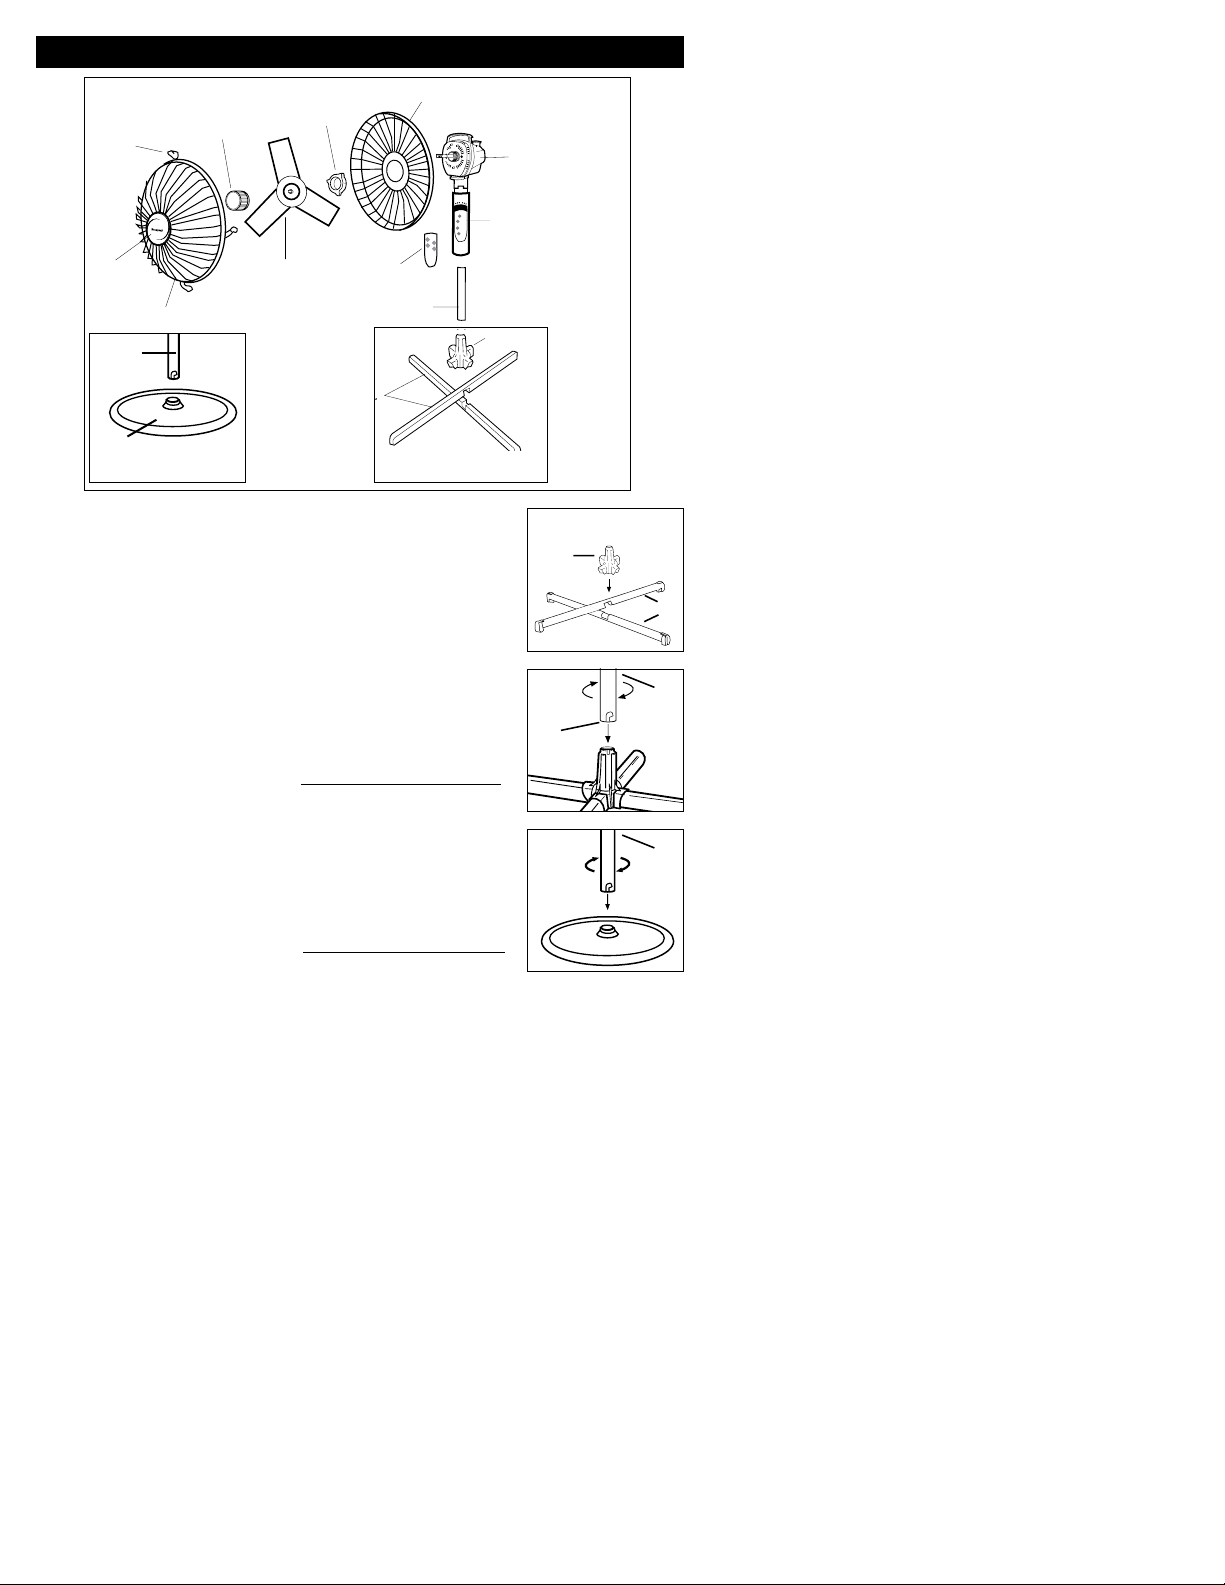
First look to see if your fan has a cross base or a round
base, and then follow the base assembly instructions for the
fan you have.
FOR CROSS BASE
• Place Base Extensions (A) as illustrated and push down
hard to snap Base Connector (B) firmly onto Base
Extensions (A) (Fig. 1).
• Insert the Metal Pole (C) into the Base by lining up the
recessed slot in the Pole to the raised dot on the Base
Connector and push in. Be sure that the Pole is fully
seated. Hold the Base firmly and twist the Pole
CLOCKWISE 90° until it stops. DO NOT OVER-TIGHTEN
(Fig. 2).
FOR ROUND BASE
• Insert the Metal Pole (C) into the Base by lining up the
recessed slot in the Pole to the raised dot on the inside of
Base and push in (Fig. 3). Be sure that the Pole is fully
seated. Hold the Base firmly and twist the Pole
CLOCKWISE 90˚ until it stops. DO NOT OVER-TIGHTEN
.
CLIPS
(G)
BLADE KNOB (F)
REAR GRILLE (E)
BASE EXTENSIONS
(A)
GRILLE
HUB
FRONT GRILLE
FAN BLADE
REAR GRILLE
MOUNTING
NUT (D)
METAL
POLE (C)
BASE
CONNECTOR (B)
MOTOR HOUSING
MANUAL CONTROL
PANEL
REMOTE CONTROL
ASSEMBLY INSTRUCTIONS
Fig. 1
Fig. 2
C
B
A
RECESSED
SLOT
Fig. 3
C
RECESSED
SLOT
METAL
POLE
BASE
ROUND BASE
CROSS BASE
TIMER
8L
4
2
TIMER
SPEED
BREEZE
SPEED
TIMER
OFF
SPEED
M
H
BREEZE
OFF
Page 4

ATTACHING THE MANUAL CONTROL PANEL FOR ALL FANS
• Line up the three (3) tabs of the metal pole with the three (3) slots of the
Manual Control Panel and slide together, rotating it until it
locks (Fig. 4). The pole will no longer turn. Be sure to
tighten the knob on the back of the Manual Control Panel.
• At this point please insert the two (2) AAA batteries into
your remote control and slide it into the neck of the Manual
Control Panel.
COMPLETING THE ASSEMBLY
• Remove the Rear Grille Mounting Nut (D). Place the Rear Grille (E) onto the
Motor Housing by making sure the three (3) holes of the Rear Grille fit over the
three (3) bumps on the Motor Housing. Tighten the Rear Grille Mounting Nut
CLOCKWISE (Fig. 5).
• Push the Fan Blade onto the Motor Shaft, lining up the blade with the D-shape
on the Motor Shaft’s end. Tighten the Blade Knob (F) by turning it
COUNTER-CLOCKWISE (Fig. 6).
• Properly align the Front Grille and hook the top Grille clip (G) onto the Rear
Grille (Fig. 7).
• Fasten the built in clips around the Front Grille onto the Rear Grille (Fig. 8).
NOTE: The tilt angle of the Motor Assembly can be changed by simply tilting the
Motor up or down once the fan is completely assembled.
Fig. 4
Fig. 6Fig. 5
E
D
Fig. 7
G
Fig. 8
F
OPERATION
• Place your fan on a level and dry surface.
• Plug the power cord into a 120 Volt AC wall outlet.
• To turn fan on press the “ON/SPEED” button one time.
• When fan is on it will start in low speed. Press button again while on low speed
and fan will switch to medium speed. While on medium press “ON/SPEED”
button and fan will switch to high speed.
• When your fan is on high speed, pressing the “ON/SPEED” button will return
your fan to low speed.
1
2
Page 5
Breeze: To activate the breeze feature, press the “BREEZE” button once on your
remote control or on the control panel on the fan. Your fan will now speed up
and slow down to simulate outdoor air-flow. This feature can be used when your
fan is on any speed setting. While using the fan in “BREEZE” mode, if you want
to return to standard fan speed operation, press the “BREEZE” button once. Your
fan will no longer cycle through its outdoor wind function.
Timer: You can set your fan to conveniently turn itself off within two, four or
eight hours.
• This feature operates similar to the speed setting function. To use this feature
press the “TIMER” button.
• The time you have set will be displayed by the illuminated green light on the
fan control panel.
From Any Speed Setting:
1 press = 2 hours - light glows under 2
2 press = 4 hours - light glows under 4
3 press = 8 hours - light glows under 8
NOTE: If you shut off your fan in “Breeze” mode, the next time you
turn your fan on it will be in “Breeze” Mode. If your fan shuts
itself off as a result of “Timer” mode running out, the next time
you turn your fan on it will default to the last used speed setting.
FEATURES
• You will see a red light illuminated on the control panel of
the fan showing you what speed your fan is on (Fig. 9).
• To stop the oscillation feature, pull up hard on the
Oscillation Control Knob until you feel two clicks. To
restart oscillation feature press button down (Fig. 10).
• Tilt the fan head to desired angle.
• To turn the fan off press the “OFF” button.
NOTE: Once your fan is off, the next time you turn
it on it will automatically default to the last used
speed setting. You can then adjust the speed as
desired.
OPERATION (cont.)
Fig. 9
Fig. 10
illuminated
for “LOW “
speed
OSCILLATION
CONTROL KNOB
TIMER
2
BREEZE
TIMER
8L
4
M
H
ON/SPEED
OFF
ON/SPEED
Page 6
• Turn the fan to the off position and unplug the fan before cleaning.
• Use only a soft, damp cloth to gently wipe the fan clean.
• DO NOT immerse the fan in water and never allow water to drip into the
motor housing.
• DO NOT use gasoline, paint thinner or other chemicals to clean the fan.
REMOVAL OF THE FRONT GRILLE FOR CLEANING
• Release the Front Grille clips from around the Rear Grille and remove the Front Grille.
• Unscrew the Blade Knob by turning it CLOCKWISE.
• Pull the Fan Blade away from the Motor Housing.
• Gently wipe the Fan Blade and Grilles.
• Re-assemble the fan by following the ASSEMBLY INSTRUCTIONS.
TO STORE YOUR FAN
Store your fan covered in a cool, dry place.
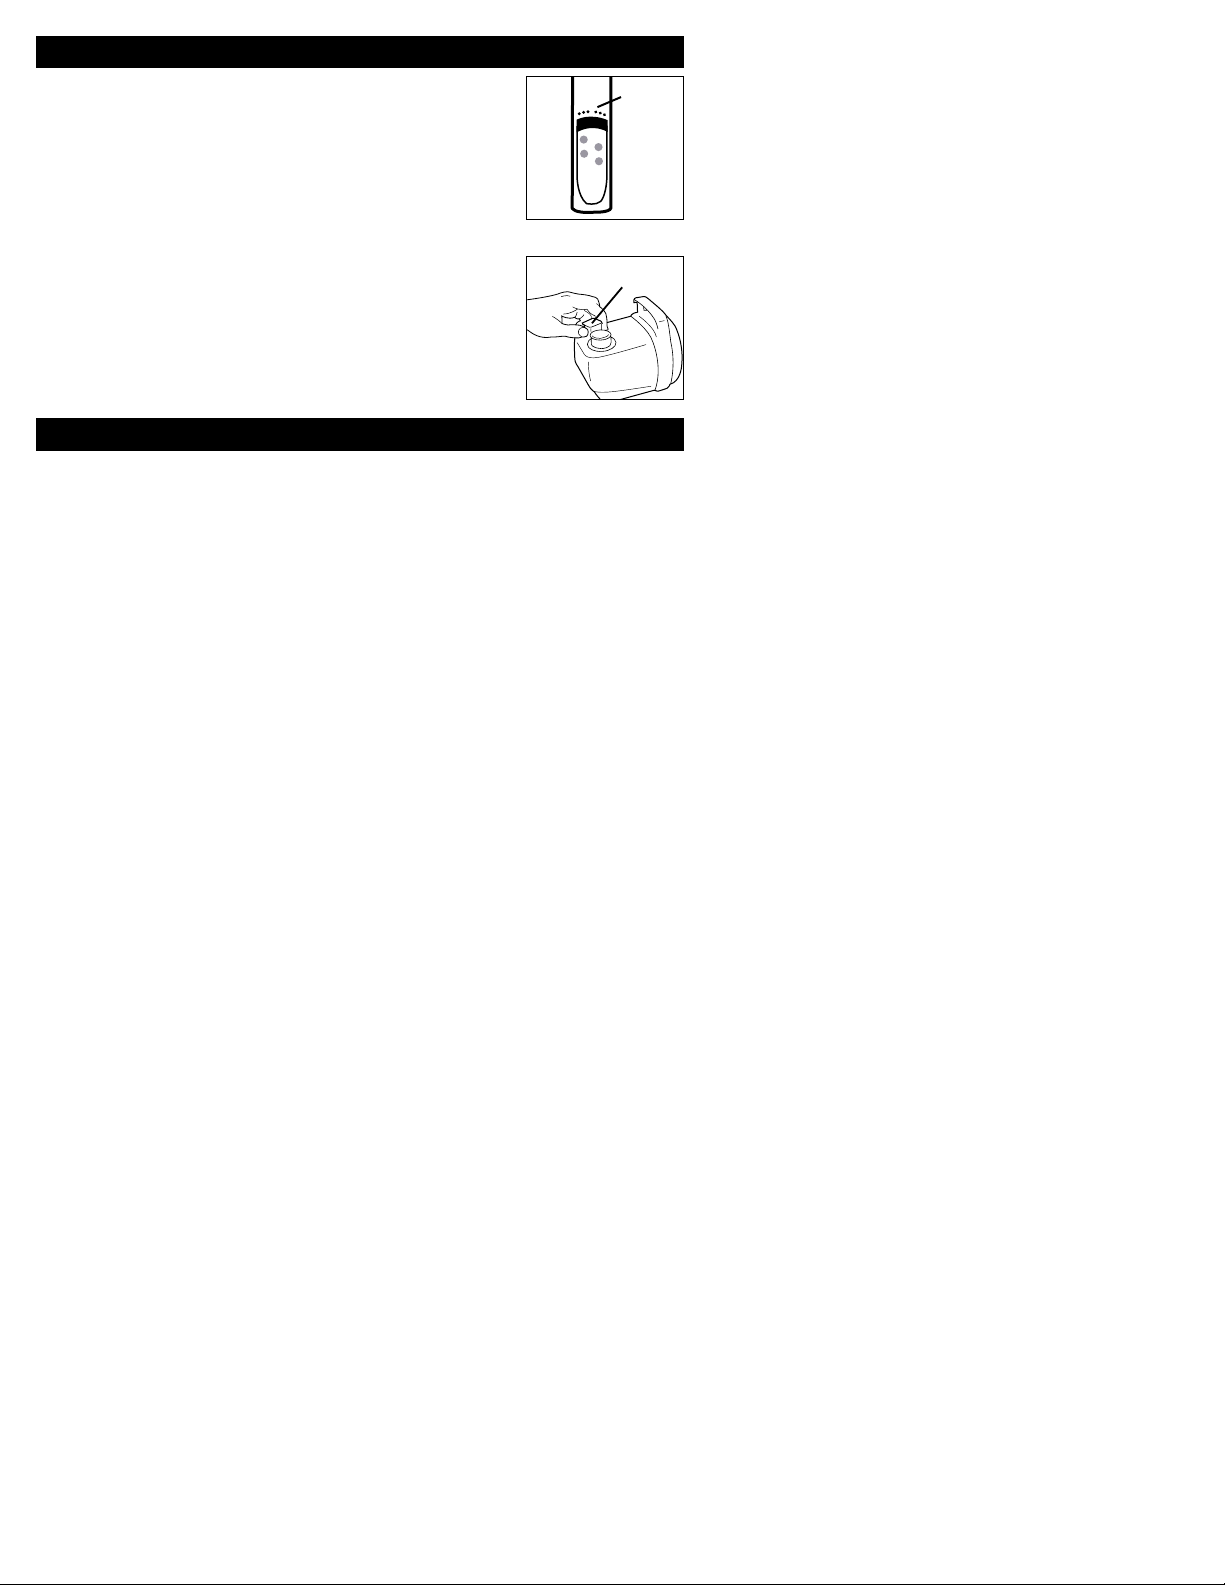
The remote control can be used up to 26 feet (8M) away
from the fan. Be sure to point remote directly at the front of
the fan to ensure a proper response.
• To remove remote from the fan, slide it up and lift it off the
front panel. To place remote back on the fan, slide it down
the track around the fan’s control panel and press gently to
snap in place.
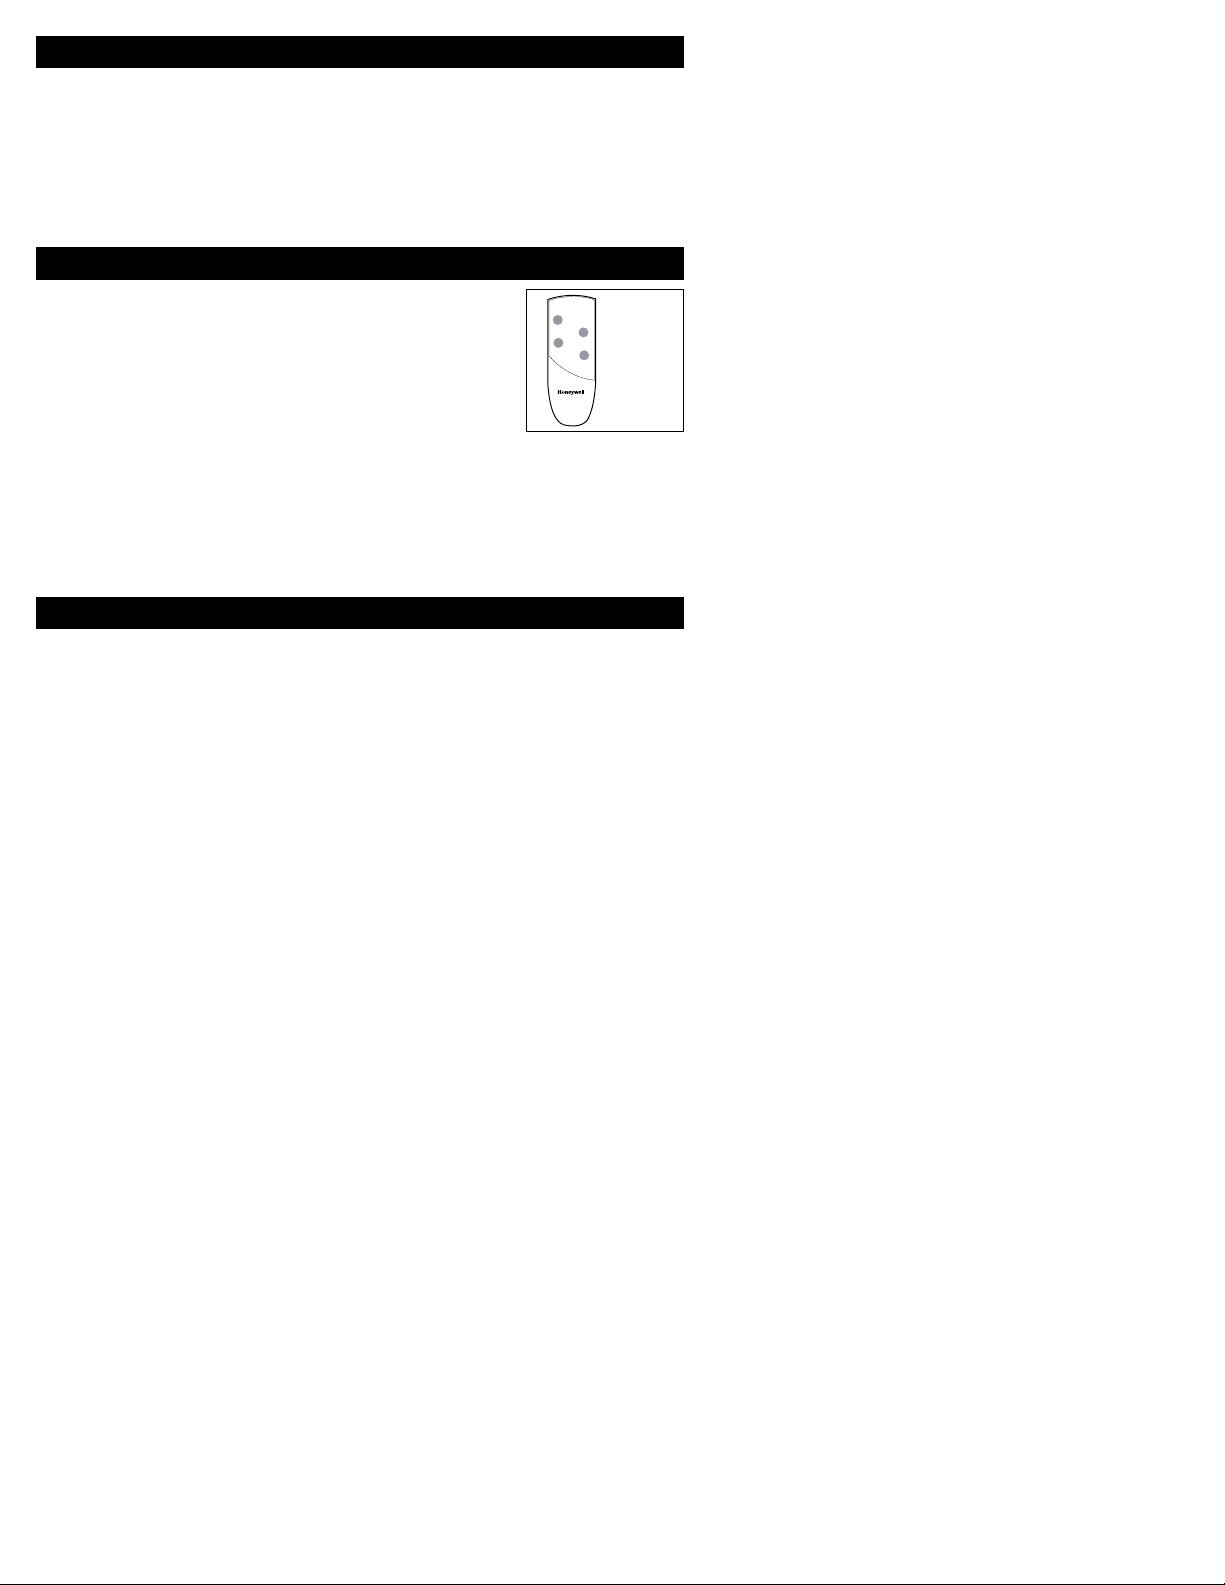
• The button on the remote will respond in the same manner as the buttons on
the fan. To review these features see “operation” and “features” por tion of the
owners manual.
• You will hear a “beep” from the fan and see illuminated lights on the fan
control panel while using the remote. This shows you that the remote is
working.
REMOTE
CLEANING AND STORAGE
uses 2 AAA
batteries
(included)
FEATURES (cont.)
Feature Combination
• You can use “BREEZE” mode and “TIMER” mode at the same time!
• If you enjoy the soothing effects of “BREEZE” mode, but don’t want to leave
your fan running all night, from any speed setting simply select “BREEZE” then
choose either 2, 4 or 8 hour time setting by pressing the “TIMER” button.
• At the end of your time setting, the fan automatically turns itself off!
BREEZE
ON/SPEED
TIMER
OFF
Page 7

To speak with a customer ser vice representative, or place an order, please call
our Consumer Relations Center, toll-free, at: 1-800-332-1110. Orders may be
placed 24 hours a day, seven days a week with Master Card, Visa or Discover.
Item HS-160R Part No. US Price CAN Price
Rear Grille Mounting Nut HS-160R-2 $ 3.00 4,50 $
Blade Knob HS-160R-4 $ 3.00 4,50 $
Remote HS-160R-14 $ 20.00 29,40 $
To order by mail, please include $4.50 US/$6.10 CAN for shipping and
handling and make check or money order payable to Honeywell Consumer
Products Business. Massachusetts residents add 5% sales tax. Canadian residents
please add 7% GST plus applicable provincial sales tax. Mail to:
Consumer Relations
Honeywell Consumer Products Business
250 Turnpike Road
Southborough, MA 01772
Note: Honeywell Consumer Products Business can not ship to P.O. Box numbers
Thank you for purchasing a Honeywell fan. For more information about
Honeywell visit us at www
.honeywell.com/yourhome
Q: How do I turn the fan on?
A: To turn the fan on press the “ON/SPEED” button. From OFF press once for
low operation, twice for medium, three times for high.
Q: My fan is slowing down and speeding up, is there something wrong?
A: No, you have the fan set to “Breeze”. To turn this feature off press the
“BREEZE” button once. The fan should now operate normally.
Q: What happens if I have two of the same model Honeywell Remote Control
fans and two remotes?
A: If both fans are the same model Honeywell Remote Control Stand Fans, then
both remotes should work on either fan.
TROUBLE SHOOTING GUIDE
CONSUMER RELATIONS / REPLACEMENT PARTS
Page 8

©2000 All rights reserved. Honeywell F1075.00
P/N 035-00371-000 Rev. 2 10/00
Artwork 043-50098-000 Rev. 2
5 YEAR LIMITED WARRANTY
You should first read all instructions before attempting to use this product.
The enclosed Customer Response card should be filled out and
returned within 7 days of purchase.
A.
This 5 year limited warranty applies to repair or replacement of product
found to be defective in material or workmanship. This warranty does not
apply to damage resulting from commercial, abusive, unreasonable use or
supplemental damage. Defects that are the result of normal wear and tear will
not be considered manufacturing defects under this warranty.
HONEYWELL
IS NOT LIABLE FOR INCIDENTAL OR CONSEQUENTIAL DAMAGES
OF ANY NATURE. ANY IMPLIED WARRANTY OF MERCHANTABILITY
OR FITNESS FOR A PARTICULAR PURPOSE ON THIS PRODUCT IS
LIMITED IN DURATION TO THE DURATION OF THIS WARRANTY.
Some jurisdictions do not allow the exclusion or limitation of incidental or
consequential damages or limitations on how long an implied warranty lasts,
so the above limitations or exclusions may not apply to you. This warranty
gives you specific legal rights, and you also may have other rights which vary
from jurisdiction to jurisdiction. This warranty applies only to the original
purchaser of this product from the original date of purchase.
B. At its option, Honeywell will repair or replace this product if it is found to be
defective in material or workmanship. Defective product should be returned to
the place of purchase in accordance with store policy. Thereafter, while within
the warranty period defective product may be returned to Honeywell.
C. This warranty does not cover damage resulting from any unauthorized
attempts to repair or from any use not in accordance with the instruction
manual.
D. Return defective product to Honeywell Consumer Products with a brief
description of the problem. Include proof of purchase and a $10 US/ $14.70
CAN check or money order for handling, return packing and shipping
charges. Please include your name, address and a daytime phone number. You
must prepay shipping charges. Send to:
Honeywell
Attn: Returns Department
4755 Southpoint Drive
Memphis, TN 38118
USA
Page 9

GUIDE D’UTILISATION
VENTILATEUR SUR PIED DE 40 CM (16 PO)
À TÉLÉCOMMANDE
Série de modèles HS-160R
Série de modèles HS-300
et VENTILATEUR SUR PIED DE 46 cm (18 po)
À TÉLÉCOMMANDE
Série de modèles HS-400
SPEED
TIMER
8L
4
M
2
H
BREEZE
SPEED
TIMER
OFF
BREEZE
ON/SPEED
TIMER
OFF
SPEED
TIMER
8L
4
M
2
H
BREEZE
SPEED
TIMER
OFF
Page 10

IMPORTANTES
INSTRUC TIONS DE
SÉCURITÉ
PRIÈRE DE LIRE ET DE CONSERVER CES
INSTRUCTIONS DE SÉCURITÉ AVANT
D’UTILISER LE VENTILATEUR.
L'utilisation d'appareils électriques nécessite des précautions
élémentaires afin de réduire les risques d'incendie, de
choc électrique ou de blessures. Parmi les précautions à
observer, on compte les suivantes :
1. Utiliser uniquement ce ventilateur conformément aux directives contenues dans le
présent guide d'utilisation. Tout autre usage non recommandé par le fabricant pourrait
être cause d'incendie, de choc électrique ou de blessures.
2. Ce produit est conçu pour un usage domestique UNIQUEMENT, et non pour une
utilisation commerciale, industrielle ou en plein air.
3. Afin de prévenir les chocs électriques, éviter de placer le ventilateur dans une fenêtre,
d’immerger l’appareil, son cordon d’alimentation ou sa fiche dans l’eau ou de
vaporiser du liquide sur l’appareil.
4. Ce produit est équipé d'une fiche polarisée (fiche dont l'une des lames est plus large
que l'autre). Afin de réduire le risque de choc électrique, cette fiche ne peut être
insérée que d'une seule manière dans la prise de courant polarisée. Si la fiche ne
pénètre pas complètement dans la prise, tourner la fiche. Si la fiche ne s'insère toujours
pas dans la prise, communiquer avec un électricien. ÉVITER de contourner le
dispositif de sécurité que constitue la fiche polarisée.
5. Une étroite sur veillance est recommandée au moment d'utiliser tout appareil en
présence d'enfants.
6. Régler le ventilateur à la position OFF et le débrancher quand il ne sert pas ou avant de
le déplacer ou de le nettoyer.
7. Pour débrancher l'appareil, le régler à la position OFF, puis enlever la fiche de la
prise de courant. Ne jamais tirer sur le cordon d’alimentation.
8. Éviter de faire fonctionner l'appareil en présence de vapeurs explosives ou inflammables.
9. Éviter de placer le ventilateur ou des pièces du ventilateur à proximité d’une flamme ou
d’un appareil de cuisson ou de chauffage.
10.Éviter d'utiliser le ventilateur si la fiche ou le cordon d'alimentation est endommagé.
Éviter également d'utiliser l'appareil si celui-ci a montré des signes de mauvais
fonctionnement, si on l'a laissé tomber ou s'il a été endommagé de quelque façon que
ce soit (consulter la garantie);.
11.Éviter tout contact avec des pièces mobiles du ventilateur.
12.L’utilisation d’accessoires non recommandés par le fabricant peut entraîner un danger.
13.Toujours placer l’appareil sur une surface sèche et bien horizontale.
14.Éviter de suspendre ou fixer le ventilateur au mur ou au plafond.
15.Éviter de faire fonctionner le ventilateur si son boîtier a été enlevé ou endommagé.
16.Une connexion trop lâche de la fiche dans la prise de courant c.a. peut entraîner une
surchauffe et une déformation de la fiche. Contacter un électricien pour faire remplacer
la prise de courant lâche ou usée.
MISE EN GARDE : Afin de réduire le risque d’incendie ou de choc électrique,
éviter d’utiliser une commande de vitesse transistorisée avec le ventilateur.
Page 11

ATTACHES
(G)
BOUTON DE
PALES (F)
GRILLE ARRIÈRE (E)
BARRES D’APPUI
(A)
MOYEU
DE LA
GRILLE
GRILLE AVANT
MODULE
DE PALES
ÉCROU DE MONTAGE DE LAGRILLE
ARRIÈRE (D)
POTEAU
MÉTALLIQUE (C)
CONNECTEUR DE
LA BASE (B)
BOÎTIER DU
MOTEUR
PANNEAU DE
COMMANDES
MANUELLES
TÉLÉCOMMANDE
INSTRUCTIONS D'ASSEMBLAGE
POTEAU
MÉTALLIQUE
BASE
BASE CIRCULAIRE
BASE CROISÉE
Vérifier d’abord si la base du ventilateur est circulaire ou croisée
et suivre les instructions d’assemblage se rapportant au modèle
du ventilateur.
POUR UNE BASE CROISÉE
• Placer les barres d’appui (A) comme l’indique le dessin et
appuyer fermement sur le connecteur de la base (B) pour le
fixer aux barres d’appui (A) (Fig. 1).
• Insérer le poteau de métal (C) dans la base en alignant la
rainure encastrée du poteau avec le point soulevé situé sur le
connecteur de la base et en poussant. S’assurer que le poteau
est bien maintenu en place. Tenir la base fermement et tour ner
le poteau de 90 degrés DANS LE SENS DES AIGUILLES
D’UNE MONTRE jusqu’à ce qu’il se bloque. ÉVITER DE TROP
SERRER (Fig. 2).
POUR UNE BASE CIRCULAIRE
• Insérer le poteau de métal (C) dans la base en alignant la
rainure encastrée du poteau avec le point soulevé situé à
l’intérieur de la base et en poussant (Fig. 3). S’assurer que le
poteau est bien maintenu en place. Tenir la base fermement et
tourner le poteau de 90 degrés DANS LE SENS DES
AIGUILLES D’UNE MONTRE jusqu’à ce qu’il se bloque.
ÉVITER DE TROP SERRER.
Fig. 1
B
A
RAINURE
ENCASTRÉE
RAINURE
ENCASTRÉE
Fig. 3
Fig. 2
C
C
TIMER
8L
4
2
TIMER
SPEED
BREEZE
SPEED
TIMER
OFF
SPEED
M
H
BREEZE
OFF
Page 12

INSTALLATION DU PANNEAU DE COMMANDES MANUELLES
(TOUS LES MODÈLES)
• Aligner les trois (3) languettes situées sur le poteau de métal
avec les trois (3) rainures situées sur le panneau de comman
des manuelles et emboîter en tournant jusqu’à ce que le tout se
bloque en place (Fig. 4). Le poteau ne tournera plus.
S’assurer de serrer le bouton situé au dos du panneau de
commandes manuelles.
• Insérer les deux (2) piles AAA dans la télécommande et
insérer celle-ci dans le panneau de commandes manuelles.
FIN DE L’ASSEMBLAGE
• Enlever l’écrou de montage de la grille arrière (D). Placer la grille arrière (E) sur le
boîtier du moteur en s’assurant d’insérer les trois (3) bosses situées sur le boîtier du
moteur dans les trois (3) trous de la grille arrière. Serrer l’écrou de montage de la
grille arrière en le tournant DANS LE SENS DES AIGUILLES D’UNE MONTRE (Fig. 5).
• Pousser le module des pales sur l’axe du moteur, en alignant le module avec la
partie en «D» située à l’extrémité de l’axe du moteur. Serrer le bouton (F) retenant
le module des pales en le tournant dans le SENS CONTRAIRE DES AIGUILLES
D’UNE MONTRE (Fig. 6).
• Placer la grille avant sur la grille arrière et attacher l’agrafe supérieure (G) à la
grille arrière (Fig. 7).
• Fixer les agrafes intégrées au rebord de la grille avant sur la grille arrière (Fig. 8).
REMARQUE : Pour changer l’angle d’inclinaison du module du moteur, il suffit
d’incliner ce module selon l’angle désiré, une fois que le ventilateur a été
complètement assemblé.
Fig. 4
Fig. 6Fig. 5
E
D
Fig. 7
G
Fig. 8
F
FONCTIONNEMENT
• Placer le ventilateur sur une surface sèche et bien horizontale.
• Brancher le cordon d’alimentation dans une prise de courant polarisée de 120 volts C.A.
• Pour mettre le ventilateur en marche, appuyer une fois sur le bouton «ON / SPEED».
• Le ventilateur tourne d’abord à la vitesse la plus faible. Appuyer une deuxième fois sur
le bouton pour passer à la vitesse moyenne. Lorsque le ventilateur tourne à la vitesse
moyenne, appuyer sur le bouton «ON / SPEED» pour passer à la vitesse maximale.
• En appuyant sur le bouton «ON / SPEED» lorsque le ventilateur fonctionne à vitesse
maximale, on revient au fonctionnement en vitesse faible.
1
2
Page 13

Brise: Pour actionner la fonction «Brise», appuyer une fois sur le bouton «BREEZE» de
la télécommande ou du panneau de commandes. La vitesse du ventilateur augmentera
alors, puis diminuera, pour simuler la brise extérieure. On peut utiliser la fonction
«Brise» à n’importe quelle vitesse. Pour arrêter la fonction «Brise», appuyer une fois
sur le bouton «BREEZE».
Minuterie: On peut régler le ventilateur de sorte qu’il cesse de fonctionner après
deux, quatre ou huit heures.
• Cette fonction est actionnée de la même façon que le réglage de la vitesse. Pour
utiliser cette fonction, appuyer sur le bouton de la minuterie.
• Le temps sélectionné est affichée par le voyant ver t allumé sur le panneau de
commandes du ventilateur.
À partir de n’importe quelle vitesse :
Appuyer 1 fois = 2 heures - le voyant s’allume sous le chiffre 2
Appuyer 2 fois = 4 heures - le voyant s’allume sous le chiffre 4
Appuyer 3 fois = 8 heures - le voyant s’allume sous le chiffre 8
REMARQUE : Si le ventilateur est en mode «Brise» lorsqu’on l’éteint, il
sera encore en mode «Brise» quand on le remettra en marche. Si la
minuterie coupe le fonctionnement du ventilateur, lorsque celui-ci sera
remis en marche, il fonctionnera à la dernière vitesse utilisée.
CARACTÉRISTIQUES
• Un voyant de couleur rouge allumé sur le panneau de
commandes indique à quelle vitesse le ventilateur tourne (Fig. 9).
• Pour arrêter le mécanisme d’oscillation, tirer fermement le
bouton de contrôle du mécanisme d’oscillation. Deux déclics
se produiront. Pour actionner de nouveau le mécanisme
d’oscillation, appuyer sur le bouton du mécanisme (Fig. 10).
• Incliner la tête du ventilateur à l’angle désiré.
• Pour couper le fonctionnement du ventilateur, appuyer sur le bouton «OFF».
REMARQUE : Quand on remet le ventilateur en
marche, celui-ci fonctionne automatiquement à la
dernière vitesse utilisée. On peut ensuite régler
l’appareil à la vitesse voulue.
FONCTIONNEMENT (suite)
Fig. 9
Fig. 10
Voyant
allumé en
position
«LOW»
(vitesse
faible)
BOUTON DE
CONTRÔLE DU
MÉCANISME
D’OSCILLATION
TIMER
8L
4
M
2
H
BREEZE
ON/SPEED
TIMER
OFF
ON/SPEED
Page 14

• Régler le ventilateur à la position OFF et le débrancher avant de la nettoyer.
• Essuyer le ventilateur avec un linge doux et humide.
• ÉVITER de plonger le ventilateur dans l’eau ou de laisser de l’eau s’infiltrer dans le
boîtier du moteur.
• ÉVITER d’utiliser de l’essence, du diluant pour peintures ou un autre produit
chimique pour nettoyer le ventilateur.
DÉMONTAGE DE LA GRILLE AVANT EN VUE DU NETTOYAGE
• Défaire les attaches retenant la grille avant à la grille arrière et enlever la grille avant.
• Dévisser le bouton de pales en le tournant DANS LE SENS DES AIGUILLES
D’UNE MONTRE.
• Séparer le module de pales du boîtier du moteur.
• Essuyer doucement les pales et les grilles du ventilateur.
• Assembler le ventilateur en suivant les INSTRUCTIONS D’ASSEMBLAGE.
ENTREPOSAGE
Ranger le ventilateur (couvert) dans un endroit frais et sec.
La télécommande peut être utilisée jusqu’à une distance de 8 m
(26 pieds) du ventilateur. S’assurer de pointer la télécommande
directement vers le devant du ventilateur, afin d’obtenir un bon
fonctionnement.
• Pour détacher la télécommande du ventilateur, la faire glisser
vers le haut et la détacher du panneau frontal. Pour la
remettre en place sur le ventilateur, la faire glisser vers le bas
dans la rainure située sur le panneau de commandes et
appuyer doucement jusqu’à ce que l’attache s’enclenche.
• Les boutons situés sur la télécommande ont les mêmes fonctions que ceux qui sont
sur le ventilateur. Pour connaître ces fonctions, consulter les sections
«Fonctionnement» et «Caractéristiques» du guide d’utilisation.
• Lorsque la télécommande est utilisée, le ventilateur émet un «bip», et les voyants du
panneau de commandes s’allument pour indiquer que la télécommande fonctionne.
TÉLÉCOMMANDE
NETTOYAGE ET ENTREPOSAGE
Fonctionne
avec 2 piles
AAA
(fournies)
CARACTÉRISTIQUES (suite)
Combinaison des modes
• On peut utiliser simultanément les modes «Brise» et «Minuterie»!
• Si l’on souhaite profiter des effets rafraîchissants du mode «Brise», mais qu’on ne
veut pas laisser fonctionner le ventilateur pendant toute la nuit, il suffit de
sélectionner le mode «Brise» (à partir de n’importe quelle vitesse) et de choisir une
durée de fonctionnement de 2, 4 ou 8 heures en appuyant sur le bouton de la
minuterie.
• À la fin de la période préréglée, le ventilateur s’arrête automatiquement!
BREEZE
ON/SPEED
TIMER
OFF
Page 15

Pour parler avec un représentant du service à la clientèle ou pour passer une
commande, téléphoner sans frais à notre Service à la clientèle en composant le 1
800 332-1110. Nous prenons les commandes par carte MasterCard, Visa ou
Discover 24 heures sur 24, 7 jours sur 7.
Article N˚ sw pièce HS-160R Prix US Prix can.
Écrou de montage de la grille arrière HS-160R-2 3,00 $ 4,50 $
Bouton de pales HS-160R-4 3,00 $ 4,50 $
Télécommande HS-160R-14 20,00 $ 29,40 $
Pour commander par la poste, prière d’inclure un chèque ou un mandat-poste de
4,50 $ US / 6,10 $ can. à l’ordre de Honeywell Consumer Products Business, pour
les frais d’expédition et de manutention. Les résidants du Massachusetts sont priés
d’ajouter 5 p. 100 de taxe de vente. Les résidants canadiens sont priés d’ajouter 7 p.
100 de TPS, ainsi que les taxes de ventes provinciales applicables. Poster à:
Consumer Relations
Honeywell Consumer Products Business
250 Turnpike Road
Southborough, MA 01772 USA
Remarque : Honeywell Consumer Products Business ne peut livrer de la marchandise à
un numéro de boîte postale.
Merci d’avoir acheté un ventilateur Honeywell. Pour en savoir plus sur Honeywell,
visitez notre site Web à www
.honeywell.com/yourhome.
Q: Comment mettre en marche le ventilateur?
R: Pour mettre le ventilateur en marche, appuyer sur le bouton «ON / SPEED».
Quand le ventilateur est arrêté, appuyer une fois pour le fonctionnement en vitesse
lente, deux fois pour la vitesse moyenne et trois fois pour la vitesse maximale.
Q: Le ventilateur ralentit, puis accélère. Est-ce un signe de mauvais fonctionnement?
R: Non. Le ventilateur a tout simplement été réglé à la fonction «Brise» (BREEZE). Pour
désactiver cette fonction, appuyer une fois sur le bouton «BREEZE». Le ventilateur
devrait maintenant fonctionner normalement.
Q: Que se passe-t-il si j’ai deux ventilateurs Honeywell à télécommande de même
modèle et deux télécommandes?
R: Si les deux appareils sont des ventilateurs sur pied Honeywell à télécommande de
même modèle, les deux télécommandes devraient fonctionner avec l’un ou l’autre des
ventilateurs.
GUIDE DE DÉPANNAGE
SERVICE À LA CLIENTÈLE / PIÈCES DE RECHANGE
Page 16

©2000 Tous droits réservés. . Honeywell F1075.00
P/N 035-00371-000 Rev. 2 10/00
Illustrations 043-50098-000 Rev. 2
GARANTIE LIMITÉE DE 5 ANS
Prière de lire toutes les instructions avant de tenter d'utiliser ce produit.
La carte ci-jointe doit être remplie et retournée dans les 7 jours
suivant l'achat.
A. Cette garantie limitée de 5 ans s'applique à la réparation ou au remplacement
d'un produit comportant un vice de matière ou de main-d’œuvre. Cette garantie ne
s'applique pas aux dégâts découlant d'un usage commercial, abusif ou
déraisonnable, ni aux dégâts supplémentaires. Les défaillances résultant de l’usure
normale ne sont pas considérées comme des vices de fabrication en vertu de la
présente garantie.
HONEYWELL N'EST NULLEMENT RESPONSABLE POUR
LES DOMMAGES FORTUITS OU INDIRECTS, QUELS QU'ILS SOIENT.
TOUTE GARANTIE IMPLICITE DE QUALITÉ MARCHANDE ET DE
CONVENANCE RELATIVE À CE PRODUIT A LA MÊME DURÉE LIMITE
QUE LA PRÉSENTE GARANTIE.
Dans certaines régions, on ne permet pas l’exclusion ou la limitation des
dommages fortuits ou indirects, ni les limites de durée applicables à une garantie
implicite; par conséquent, il est possible que ces limitations ou exclusions ne
s’appliquent pas dans votre cas. Cette garantie vous confère des droits précis,
reconnus par la loi. Ces droits diffèrent d’une région à l’autre, et il est possible que
vous en ayez d’autres. Cette garantie s'applique uniquement à l'acheteur initial de
ce produit, à compter de la date de l’achat initial.
B. À sa discrétion, Honeywell réparera ou remplacera ce produit si l'on constate
qu'il comporte un vice de matière ou de main-d’œuvre. Tout produit défectueux
devrait être retourné à l’endroit où il a été acheté, conformément à la politique du
magasin. Par la suite, tout produit défectueux dont la garantie est toujours valide
peut être retourné à Honeywell.
C. Cette garantie ne couvre pas les dommages découlant des tentatives de
réparation non autorisées ou de toute utilisation non conforme au présent manuel.
D. Retourner tout produit défectueux à Honeywell Consumer Products, accompagné
d'une brève description du problème. Inclure une preuve d'achat et un chèque ou
un mandat-poste de 10,00 $ US / 14,70 $ can. pour les frais de manutention,
d'emballage de retour et d'expédition. Prière d’indiquer nom, adresse et numéro
de téléphone durant la journée. Les frais d'expédition doivent être payés
à l'avance. Adresser à :
Honeywell
Attn: Returns Department
4755 Southpoint Drive
Memphis, TN 38118 USA
Page 17

MANUAL DE PROPIETARIO
VENTILADOR RECTO DE
CONTROL REMOTO DE 16"
Serie de modelo HS-160R
Serie de modelo HS-300
Y VENTILADOR RECTO DE CONTROL REMOTO DE 18"
Serie de modelo HS-400
SPEED
TIMER
8L
4
M
2
H
BREEZE
SPEED
TIMER
OFF
BREEZE
ON/SPEED
TIMER
OFF
SPEED
TIMER
8L
4
M
2
H
BREEZE
SPEED
TIMER
OFF
Page 18

INSTRUCCIONES
IMPORTANTES
DE SEGURI
DAD
LEA EST AS INSTRUCCIONES IMPORTANTES DE
SEGURIDAD ANTES DE USAR ESTE VENTILADOR
Y GUÁRDELAS PARA LA REFERENCIA FUTURA
Siempre que utilice artefactos eléctricos, debe seguir
precauciones básicas de seguridad para reducir el riesgo de
incendio, choques eléctricos, y lesiones personales,
incluyendo las siguientes :
1. Use este ventilador solamente como se instruye en este manual. Cualquier otro uso no
recomendado puede ocasionar incendios, choques eléctricos o lesiones personales.
2. Este producto está diseñado para utilizarse SOLAMENTE bajo techo, y no para el uso
comercial, industrial, o a la intemperie.
3. Para evitar choques eléctricos, no coloque el ventilador en una ventana, ni sumerja la
unidad, el enchufe o el cable en agua. No lo rocíe con ninguno líquido.
4. Este ventilador viene equipado con un enchufe polarizado (una hoja es más ancha que
la otra). Para evitar el riesgo de choque eléctrico, este enchufe podrá introducirse en
cualquier tomacorriente polarizado en un sólo sentido. Si no puede introducir el
enchufe en el tomacorriente, pruebe inviertiendo la posición del enchufe. Si aún así el
enchufe no pudiera encajar, póngase en contacto con un electricista calificado.
NO TRATE de anular la característica de seguridad.
5. Ejerza supervisión estricta cuándo sea necesario usar cualquier artefacto eléctrico por o
cerca de niños.
6. Gire el ventilador a la posición de OFF (APAGADO) y desenchufe el ventilador del
tomacorriente mientras no esté de uso, al moverlo de un sitio a otro, y antes de limpiarlo.
7. Para desconectar el ventilador, al principio gire el control de mando a la posición de
OFF (APAGADO), tome el enchufe y arránquelo del tomacorriente de pared.
Nunca arranque por el cable.
8. No opere el ventilador en presencia de gases explosivos y/o combustibles.
9. No coloque el ventilador, ni ninguna de sus piezas cerca de un fuego expuesto, ni
cualquier otro artefacto de calefacción o de cocina.
10. No opere el ventilador si el cable o el enchufe están averiados, si el producto funcione
mal, o después que haya sufrido alguna caída o avería de cualquier clase
(véase la garantía).
11. No póngase en contacto con piezas móviles del ventilador.
12. El uso de fijaciones no recomendados por el fabricante podría ser peligroso.
13. Situe el ventilador en una superficie plana y seca.
14. No trate de colgar o fijar el ventilador en un techo, ni una pared.
15. No opere el ventilador si la caja del motor está quitada o averiada.
16. El enchufe puede calentarse excesivamente o resulta averiado si la conexión entre el
tomacorriente de CA (recipiente) y el enchufe está floja. Póngase en contacto con un
electicista calificado para que reemplace el tomacorriente flojo o gastado.
ATENCIÓN: Para Reducir El Riesgo de Incendio o Choque Eléctrico, No Use
Este Ventilador Con Ningún Instrumento de Regulación de Velocidad de
Estado Sólido.
Page 19

En el primer lugar, busque a ver si el ventilador suyo tiene base
transversal o base redonda, y después sigue las instrucciones de
montaje de la base para el ventilador que usted tiene.
PARA LA BASE TRANSVERSAL
• Situe las Extensions de la Base (A) como se muestra y apriete
hacia abajo para encajar el Conector de la Base firmamente
encima de las Extensions de la Base (A) (Fig. 1).
• Introduzca el Palo de Metal (C) por dentro de la Base por
poner la ranura apartada en el Palo en conformidad con el
punto en relieve situado en el Conector de la Base y empuje
hacia el interior. Asegúrese que el Palo está completamente
encerrado. Agarre bien en la Base y gire el Palo 90° EN EL
SENTIDO DE LAS MANECILLAS DEL RELOJ hasta que pare.
NO SE LO APRIETE EXCESIV
AMENTE. (Fig. 2).
PARA LA BASE REDONDA
• Introduzca el Palo de Metal (C) por dentro de la Base por
poner la ranura apartada en el Palo en conformidad con el
punto en relieve situado por dentro de la Base y empuje hacia
el interior (Fig. 3). Asegúrese que el Palo está completamente
encerrado. Agarre bien la Base y gire el Palo 90° EN EL
SENTIDO DE LAS MANECILLAS DEL RELOJ hasta que pare.
NO SE LO APRIETE EXCESIV
AMENTE.
PRENDEDORES
(G)
BULTO DE
LA PALA(F)
REJA TRASERA (E)
EXTENSIONES DE
LA BASE (A)
CUBO DE
LA REJA
REJA DELANTERA
PALADEL
VENTILADOR
TUERCA DE MONTAJE DE LAREJA
TRASERA (D)
PALO DE
METAL(C)
CONECTOR
DE LA BASE (B)
CAJA DEL MOTOR
TABLERO DE
CONTROL MANUAL
CONTROL REMOTO
INSTRUCCIONES DE MONTAJE
Fig. 1
Fig. 2
C
B
A
RANURA
APARTADA
Fig. 3
C
RANURA
APARTADA
PALO DE
METAL
BASE
BASE REDONDA
BASE TRANSVERSAL
BREEZE
SPEED
TIMER
OFF
SPEED
TIMER
8L
4
M
2
H
BREEZE
TIMER
SPEED
OFF
Page 20

CÓMO FIJAR EL TABLERO DE CONTROL MANUAL PARA TODOS
LOS VENTILADORES
• Ponga las tres (3) orejas del palo de metal en conformidad
con las tres (3) ranuras en el Tablero de Control Manual hága
los resbalar hasta que se junten, hacerlo girar hasta que trabe
(Fig. 4). En esta posición no se puede girar más el palo.
Asegúrese apretar bien el bulto que está situado en la parte
posterior del Tablero de Control Manual.
• En este momento, sír vase introducir las dos baterías (2) AAA
por dentro del control remoto suyo y hágalo resbalar por
dentro del cuello del Tablero de Control Manual.
CÓMO CONCLUIR CON EL MONTAJE
• aque la Tuerca de Montaje de la Reja Trasera (D). Coloque la Reja Trasera (E) por
encima de la Caja del Motor por asegurarse que los tres (3) huecos en la Reja
Trasera caen por encima de los tres (3) topetones en la Caja del Motor. Apriete
bien la Tuerca de Montaje de la Reja Trasera EN EL SENTIDO DE LAS
MANECILLAS DEL RELOJ (Fig. 5).
• Empuje la Pala del Ventilador por encima del Eje del Motor por poner la pala en
conformidad con la configuración de D que está situado en el extremo del Eje del
Motor. Apriete bien el Bulto de la Pala (F) por girarlo EN EL SENTIDO
CONTRÁRIO DE LAS MANECILLAS DEL RELOJ (Fig. 6).
• Ponga propiamente en línea la Reja Delantera y enganche el prendedor de arriba
de la Reja (G) por encima de la Reja Trasera (Fig. 7).
• Fije los prendedores empotrados, que están situados alrededor de la Reja
Delantera, por encima de la Reja Trasera (Fig. 8).
NOTA: Se puede cambiar el ángulo de inclinación del Montaje del Motor por
fácilmente hacer inclinar el Motor hacia arriba o abajo una vez que el ventilador
esté completamente montado.
Fig. 4
Fig. 6Fig. 5
E
D
Fig. 7
G
Fig. 8
F
FUNCIONAMIENTO
• Situe el ventilador suyo en una super ficie seca y plana.
• Enchufe el cable de alimentación por dentro de un tomacorriente de pared de 120Vca.
• Para hacer encender el ventilador, haga presión por abajo una vez en el botón
ON/OFF (ENCENDIDO/APAGADO).
• Cuando el ventilador esté encendido, comenzará a funcionar en la velocidad baja.
Apriete el botón de nuevo mientras que esté en la velocidad baja y el ventilador cam
biará a la velocidad media. Mientras que esté en la velocidad media, apriete el botón
ON/SPEED (ENCENDIDO/VELOCIDAD) y el ventilador cambiará a la velocidad alta.
1
2
Page 21

Brisa: Para activar la característica de la brisa, apriete una vez en el botón
"BREEZE" (BRISA) que está situado en el control remoto suyo o en el tablero de
control en el ventilador. Ahora el ventilador suyo se acelerará y disminuirá la
velocidad para fingir el corriente de aire de puertas afuera. Se puede usar esta
característica mientras que el ventilador suyo esté fijado en cualquiera de las
velocidades. Si quiere regresar al funcionamiento normal de la velocidad del
ventilador mientras que esté funcionando el ventilador en el modo "BREEZE" (BRISA)
apriete en el botón "BREEZE" (BRISA) una vez. El ventilador suyo no pasará un ciclo
más de la función de brisa de puertas afuera.
Reloj: Cuando guste se puede fijar el ventilador suyo para apagarse
automaticamente dentro de un tiempo de dos, cuatro, o ocho horas.
• Esta característica funciona en la misma manera que la función de configuración de
velocidad. Para usar esta característica, apriete en el botón "TIMER" (RELOJ).
• La hora que usted ha seleccionado se la mostrará por la luz encendida de color
verde en el tablero de control de ventilador.
Desde Cualquiera Configuración de Velocidad:
Apretar una vez (1) = 2 horas = la luz brilla debajo del número 2
Apretar dos veces (2) = 4 horas = la luz brilla debajo del número 4
Apretar tres veces (3) = 8 horas = la luz brilla debajo del número 8
NOTA: Si apague el ventilador suyo mientras que esté en el modo
"BREEZE" (BRISA), la próxima vez que encienda su ventilador, estar á
en el modo "BREEZE" (BRISA). Si el ventilador suyo se apague
automaticamente por causa de acabar el modo "TIMER" (RELOJ), la
próxima vez que encienda el ventilador suyo, configurará en la
última velocidad que usaba.
CARACTERÍSTICAS
• Mientras el ventilador esté fijado en la velocidad alta, apretar el
botón ON/SPEED (ENCENDIDO/VELOCIDAD) devolverá el
ventilador a la velocidad baja.
• Uste verá iluminada una luz roja en el tablero de control
del ventilador para mostrarle la velocidad actual de su
ventilador. (Fig. 9).
• Para hacer parar la característica de oscilación, arranque
fuertemente en el Botón de Control de Oscilación hasta que se
sienta dos golpecitos. Para volver a encender la característica
de oscilación, apriete el botón hacia abajo (Fig. 10).
• Incline la cabeza del ventilador hasta el ángulo deseado.
• Para apagar el ventilador, apriete en el botón de
"OFF" (APAGADO).
NOTA: Una vez que esté apagado el ventilador suyo,
el próximo vez que lo encenderá, el ventilador
configurará automaticamente en la última velocidad
que usaba. Después podra fijar la velocidad como usted desea.
FUNCIONAMIENTO (a continuación)
Fig. 9
Fig. 10
iluminada
para la
velocidad
baja
Botón de Control
de Oscilación
TIMER
8L
4
M
2
H
BREEZE
ON/SPEED
TIMER
OFF
ON/SPEED
Page 22

• Gire el ventilador a la posición de OFF (APAGADO) y desenchufe el
ventilador antes de limpiarlo.
• Use sólo un trapo muelle y húmedo para enjugar el ventilador con cariño.
• NO SUMERJA el ventilador en agua y nunca permita que entre agua por dentro de
la caja del motor.
• NO USE gasolina, diluente de pintura, ni cualquier otro químico para limpiar
el ventilador.
SACAR LA REJA DELANTERA PARA LA LIMPIEZA
• Suelte los prendedores de la Reja Delantera desde el alrededor de la Reja Trasera y saque
la Reja Delantera.
• Destornille el Bulto de la Pala por girarlo EN EL SENTIDO DE LAS MANECILLAS
DEL RELOJ.
• Saque la Pala del Ventilador de la Caja del Motor.
• Enjuegue las Palas del ventilador y Rejas de manera suavemente.
• Vuelva a montar el ventilador por seguir las INSTRUCCIONES DEL MONTAJE.
CÓMO ALMACENAR EL VENTILADOR SUYO
Cubra el ventilador y lo almacene en un lugar fresco y seco.
Se puede usar el control remote hasta una distancia de 26 pies
(8 m) del ventilador. Asegúrese señalar el remoto directamente
al frente del ventilador para asegurar una respuesta apropiada.
• Para sacar el remoto del ventilador, resbálelo hacia arriba y
sáquelo del tablero delantero. Para devuelva el remoto en el
ventilador, resbálelo hacia abajo en la huella alrededor del
tablero de control de ventilador y apriete suavemente para
fijarlo en su lugar apropiado.
• El botón en el remoto responderá en la misma manera que los botones en el
ventilador. Para revisar estas características, véase las secciones de "operation"
(funcionamiento) y "characteristics" (características) del manual de propietario.
• Escuchará salir un "sonido cor to"del ventilador y verá las luces iluminadas en el
tablero de control de ventilador mientras que se use el remoto. Esto le muestra que
está funcionando el remoto.
CONTROL REMOTO
LIMPIEZA Y ALMACENAMIENTO
usa 2
batterias
AAA
(incluidas)
CARACTERÍSTICAS (a continuación)
La Combinación de la Característica
• Se puede usar los modos "BREEZE" (BRISA) y "TIMER" (RELOJ) al mismo tiempo.
• Si usted disfrute de los efectos calmantes del modo "BREEZE" (BRISA) pero no
quiere quedar funcionar el ventilador suyo por la noche entera, desde cualquiera
de las configuraciones de velocidad, simplemente seleccione "BREEZE" (BRISA) y
después, seleccione 2, 4, u 8 horas de configuración de tiempo por apretar el
botón "TIMER" (RELOJ).
• Al fin de su configuración de tiempo se apagará automaticamente el ventilador.
BREEZE
ON/SPEED
TIMER
OFF
Page 23

Para comunicarse con un representante de servicio al cliente, o hacerse un
pedido, sírvase llamar sin costo a nuestra Consumer Relations Center, (Centro de
Relaciones de Consumo): 1-800-332-1110. Se puede hacer pedidos 24 horas
por día, siete días a la semana con Mastercard, Visa, o Discover.
Pieza HS-160R N° de Pieza Precio USD Precio CDN
Tuerca de Montaje de la Reja Trasera HS-160R-2 $ 3.00 $ 4.50
Bulto de la Pala HS-160R-4 $ 3.00 $ 4.50
Remoto HS-160R-14 $ 20.00 $ 29.40
Para hacer pedidos por correo, sírvase incluir $4.50USD/$610CDN para cubrir
los gastos de manejo y despacho y haga un cheque o una orden de pago
pagable a Honeywell Consumer Products Business. Los residentes de
Massachusetts añada 5% impuesto de compraventa. Los residentes Canadienses
sírvase añadir 7% GST (impuesto de bienes y ser vicios) más los impuestos de
compraventa provinciales pertinentes. Énvielo a:
Consumer Relations
Honeywell Consumer Products Business
250 Turnpike Road
Southborough, MA 01772
Nota: Honeywell Consumer Products Business no se puede despachar a números
de P.O. Box.
Gracias por comprar un ventilador de Honeywell. Para más información sobre
Honeywell, visítenos a www
.honeywell.com/yourhome
P: Cómo enciendo el ventilador?
R: Para encender el ventilador, apriete en el botón ON/SPEED
(ENCENDIDO/VELOCIDAD).
En el modo OFF (APAGADO) apriete una vez para
el funcionamiento bajo, dos veces para el medio, tres veces para el alto.
P: El ventilador mío está acelerándose y disminuiéndose, hay algo de malo?
R: No, usted tiene fijado su ventilador en "BREEZE" (BRISA). Para apagar esta
característica, apriete el botón BREEZE (BRISA) una vez. Ahora el ventilador debería
funcionar normalmente.
P: Qué pasa si yo tengo dos de los mismos modelos de los Ventiladores de Remoto
Control Honeywell y dos remotos?
R: Si los dos ventiladores son del mismo modelo de los Ventiladores Recto de
Control Remoto Honeywell, debería funcionar ambos remotos en uno o otro de
los ventiladores.
GUIA DE SOLUCIÓN DE PROBLEMAS
RELACIONES DE CONSUMO / PIEZAS DE REPUESTO
Page 24

©2000 Todos los derechos reservados. Honeywell F1075.00
P/N 035-00371-000 Rev. 2 10/00
Ilustración 043-50098-000 Rev. 2
GARANTÍA LIMITADA POR 5 AÑOS
Sírvase leer todas las instrucciones antes de intentar usar este producto.
Cerciórese de rellenar y devolvernos la tarjeta adjunta de Respuesto de
Clientes dentro de los siete días posteriores a la compra.
A.
Esta garantía por cinco años limitada se aplica a la reparación o el reemplazo de
algún producto defectuoso en los materiales o en la mano de obra. Esta garantía no
cubre los daños que resulten por maltrato, usos comerciales o irrazonables o por daños
suplementarios. Aquellos defectos que resultan del uso y desgaste normal no se
considerarán como defectos de fabricación según esta garantía. Antes de intentar usar
este producto debería usted leer el manual de instrucciones.
HONEYWELL NO ES
RESPONSIBLE DE DAÑOS CONSECUENCIALES O INCIDENTALES DE
NINGUNA NATURALEZA. CUALQUIER GARANTÍA IMPLÍCITA INCLUYENDO
LA DE COMERCIALIZACIÓN O ADAPTABILIDAD PARA CUALQUIER
PROPÓSITO EN PARTICULAR ESTÁ LIMITADA EN DURACIÓN A LA
DURACIÓN DE ESTA GARANTÍA.
Algunas jurisdicciones no permiten exclusiones o limitaciones por daños incidentales o
consecuenciales, así como limitaciones del plazo de vigencia de una garantía implícita,
de modo que las limitaciones o exclusiones mencionadas anteriormente pudieren no ser
aplicables a usted. Esta garantía le ofrece ciertos derechos legales específicos y used
pudiera tener también otros derechos que varían de una jurisdicción a otra. Esta
garantía es aplicable únicamente al comprador original de este producto.
B. Honeywell reparará o reemplazará este producto a su opción, si el producto se
hubiera encontrado defectuoso en los materiales o en la mano de obra. Los productos
defectuosos deberán ser devueltos al sitio en donde lo compró, de acuerdo con la
política de la tienda. En consecuencia, mientras se encuentre dentro del período de
garantía, cualquier producto defectuoso deberá ser devuelto a Honeywell.
C. Esta garantía no ampara los daños que resultaren de intentos no autorizados para la
reparación o de cualquier uso en desacuerdo con este manual.
D. Los productos defectuosos deberán ser devueltos a Honeywell Consumer Products y
incluya una descripción breve del problema. Incluya una prueba de la compra y
$10.00USD/$14.70CAN en cheque o orden de pago para cubrir los gastos de manejo,
empaque y despacho. Sírvase incluir su nombre, dirección, y un número de teléfono de
día. Los gastos de despacho deberán ser pagados de antemano por usted. Énvielo a:
Honeywell
Attention: Returns Department
4755 Southpoint Drive
Memphis, TN 38118
USA
 Loading...