

Honeywell HS-120, HS-120C User Manual
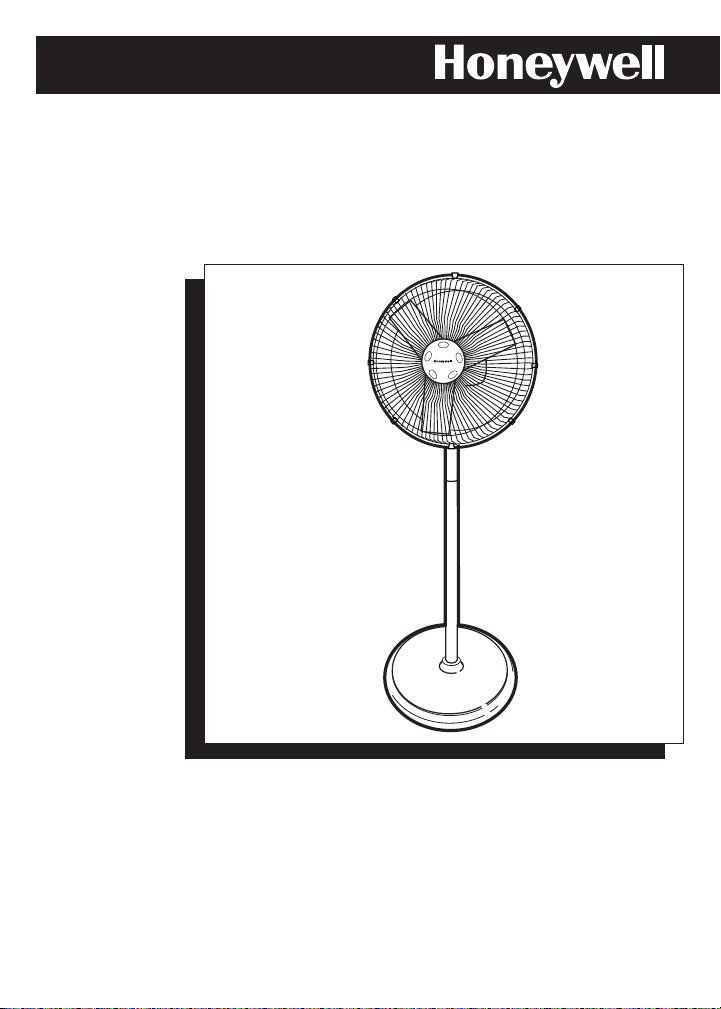
OWNER’S MANUAL
12" ( 30 CM) TURBO
TM
4 WAY FAN
12" ( 30 CM) TECH
TM
4 WAY FAN
Model HS-120 Series
Model HS-120C Series

INSTRUCTIONS F0R USE AND CARE
READ AND SAVE THESE
IMPORTANT SAFETY
INSTRUCTIONS BEFORE
USING THIS FAN.
When using electrical
appliances, basic
precautions should
always be followed
to reduce the risk of fire,
electric shock, and injury
to persons, including
the following:
1.
Use this fan only
as described in this
manual. Other use not
recommended may
cause fire, electric shock
or injury to persons.
2. This product is
intended for household
use
ONLY and not for
commercial, industrial or
outdoor use.
3. To protect against
electric shock, do not
place fan in window,
immerse unit, plug or
cord in water or spray
with liquids.
4. This appliance has a
polarized plug (one blade
is wider than the other).
To reduce the risk of
shock, this plug is
intended to fit only one
way in a polarized outlet.
If the plug does not fit
fully in the outlet, reverse
the plug. If it still does not
fit, contact a qualified
electrician.
DO NOT
attempt to defeat this
safety feature.
5. Close supervision is
necessary when any
appliance is used by or
near children.
6. Turn the fan to the OFF
position and unplug
the fan from the outlet
when not in use, when
moving the fan from one
location to another and
before cleaning.
7. To disconnect the fan,
grip the plug and pull it
from the wall outlet.
Never pull by the cord.
8. Do not operate the
fan in the presence
of explosive and/or
flammable fumes.
9. Do not place the fan
or any parts near an
open flame, cooking or
other heating appliance.
10. Do not operate the
fan with a damaged
cord or plug, if the
product malfunctions
or is dropped or
damaged in any manner.
(see warranty)
11. Avoid contact with
moving fan parts.
12. The use of
attachments not
recommended by
the manufacturer may
be hazardous.
13. Place the fan on a dry
level surface.
14. Do not hang or mount
fan on a wall or ceiling.
15. Do not operate if the
fan housing is removed
or damaged.
16. A loose fit between
the AC outlet (receptacle)
and plug may cause
overheating and a
distortion of the plug.
Contact a qualified
electrician to replace
loose or worn outlet.
WARNING: To Reduce
The Risk of Fire or
Electric Shock, Do Not
Use This Fan With Any
Solid-State Speed
Control Device.
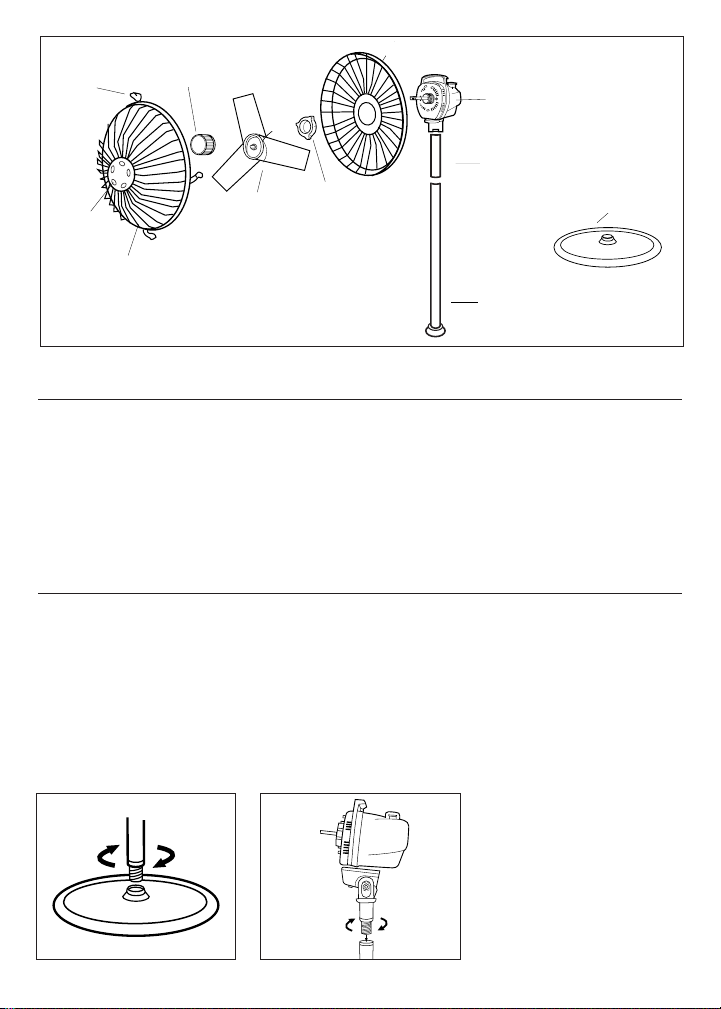
STAND FAN ASSEMBLY INSTRUCTIONS
• Insert the long Metal
Pole into the Base and
tighten it by turning
either the Pole or the
Base (Fig. 1).
• Insert and tighten the
short Metal Pole into the
Base/Pole Assembly
(Fig.1).
• Place the Motor
Assembly into the shorter
Fig. 1 Fig. 2
Fan Pole and tighten by
turning the Motor
Assembly clockwise
(Fig. 2). Go to grille
assembly instructions.
This fan can be converted into two heights by selecting different size
poles to assemble.
1. Stand fan = use both short and long pole
2. Table fan = use only short pole
ASSEMBLY INSTRUCTIONS
BLADE KNOB
REAR GRILLE
BASE
FAN BLADE
REAR GRILLE
MOUNTING
NUT
FRONT GRILLE
GRILLE HUB
CLIPS
MOTOR
HOUSING
SHORT
METAL POLE
LONG
METAL POLE

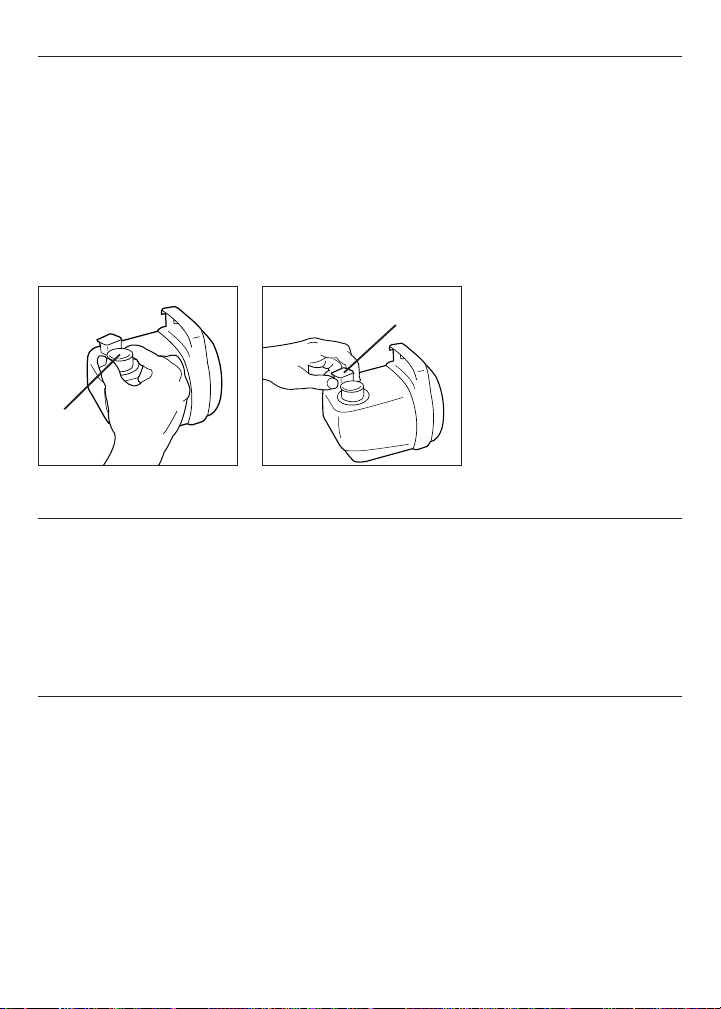
GRILLE ASSEMBLY INSTRUCTIONS
• Remove the Rear Grille
Mounting Nut from the
Motor. Place the Rear
Grille onto the Motor
Housing, making sure the
three holes of the Rear
Grille fit over the three
matching prongs on the
Motor Housing. Tighten
the Rear Grille Mounting
Nut CLOCKWISE (Fig. 4).
Fig. 5
BLADE KNOB
MOTOR
ASSEMBLY
Fig. 6
• Raise the built in caps
around the front grille
fasten the caps onto rear
grille (Fig.7).
• To change the tilt angle
of the fan, simply tilt the
Motor Assembly to the
angle desired.
NOTE: This will only
work when fan is
fully assembled
• Push the Fan Blade
onto the Motor Shaft,
lining up the center
of the blade with the
D-shape on the Motor
Shaft. Tighten the Blade
Knob by turning it
COUNTER CLOCKWISE
(Fig. 5).
• Align the front grille and
hook the top grille clip
onto the rear grille
(Fig. 6).
Fig. 4
MOUNTING NUT
REAR GRILLE
Fig. 7
TABLE FAN ASSEMBLY INSTRUCTIONS
• Insert the short Metal
Pole into the Base and
tighten it by turning
either the Pole or the
Base (Fig. 1).
• Place the Motor
Assembly into the short
Fan Pole and tighten
(Fig.2) by turning the
Motor Assembly
Clockwise (Fig. 3).
• Go to grille assembly
instructions
Fig. 3
MOTOR
ASSEMBLY
SHORT
POLE
BASE
OPERATION
• Place your fan on a
level and dry surface.
• Plug the power cord
into a 120 volt wall outlet.
• To operate the Child
Resistant switch, push in
and turn the Speed
Control Knob (Fig. 8).
• To stop the oscillating
feature, pull up hard on
the Oscillation Control
Knob. You will feel two
clicks before oscillation
stops (Fig. 9).
• To re-start oscillation
push down on oscillation
knob.
USING YOUR FAN AS AN AIR CIRCULATOR
• Turn the Speed Control
Knob to OFF.
• Tilt the fan motor
assembly back so that
the front grille of the fan
is facing the ceiling.
•
DO NOT USE
OSCILLATION FEATURE
IN THE AIR CIRCULATOR
POSITION.
• Turn the Speed Control
Knob to your desired
speed.
CLEANING AND STORAGE
• Turn the fan to the OFF
position and unplug the
fan before cleaning.
• Remove the Front Grille.
• Unscrew the
Blade Knob by
turning it CLOCKWISE.
• Pull the Fan Blade away
from the Motor Housing.
• Clean the Fan Blade
and grilles with a soft,
damp cloth.
• DO NOT immerse the
fan in water and never
allow water to enter the
Motor Housing.
• DO NOT use gasoline,
paint thinner or other
chemicals to clean
the fan.
• To store, disassemble
and clean the fan
carefully as instructed
and store it in its original
box. You may leave the
fan assembled and
covered to protect it from
dust. Store the fan in a
cool, dry place.
Fig. 8 Fig. 9
PUSH
IN AND
TURN
OSCILLATION
CONTROL KNOB

CONSUMER RELATIONS/REPLACEMENT PARTS
To speak with a customer service representative or place an order please call our consumer
relations center, toll free at 1-800-332-1110. Orders may be placed 24 hours a day, seven days a
week with Master Card, Visa or Discover.
To order by mail, Please include $4.50 US/$6.10 CAN for shipping and handling and make check or
money order payable to Honeywell Consumer Products Business. Massachusetts residents add 5%
sales tax, Canadian residents add 7% GST plus applicable provincial sales tax.
Mail to:
Consumer Relations
Honeywell Consumer Products Business
250 Turnpike Rd.
Southborough MA 01772
USA
NOTE: Honeywell can not ship to P.O. boxes.
Thank you for purchasing a Honeywell fan. For more information about Honeywell
visit us at www.honeywell.com
Please specify fan colour and model number.
Item HS-122 Part # Price US Price CAN
Front & Rear Grille HS-122-1 $8.00 $11.75
Rear Grille HS-122-2 $3.00 $4.50
Mounting Nut
Fan Blade HS-122-4 $10.00 $14.70
Blade Knob HS-122-5 $3.00 $4.50
Base HS-122-10 $10.00 $14.70
Metal Pole-Short HS-122-11 $5.00 $7.40
Metal Pole- Long HS-122-12 $5.00 $7.40
Motor Assembly HS-122-13 $12.00 $17.70

5 YEAR LIMITED WARRANTY
©1999 All rights reserved. Honeywell Inc. F1028.99
P/N 035-00372-000 Rev 1
artwork # 043-50099-000
You should first read
all instructions before
attempting to use
this product.
The enclosed Customer
Response card should
be filled out and
returned within 7 days
of purchase.
A
. This 5 year limited
warranty applies to
repair or replacement of
product found to be
defective in material or
workmanship. This
warranty does not apply
to damage resulting from
commercial, abusive,
unreasonable use or
supplemental damage.
Defects that are the
result of normal wear
and tear will not be
considered
manufacturing defects
under this warranty.
HONEYWELL IS NOT
LIABLE FOR INCIDENTAL
OR CONSEQUENTIAL
DAMAGES OF ANY
NATURE. ANY IMPLIED
WARRANTY OF
MERCHANTABILITY
OR FITNESS FOR A
PARTICULAR PURPOSE
ON THIS PRODUCT IS
LIMITED IN DURATION
TO THE DURATION OF
THIS WARRANTY
.
Some jurisdictions do not
allow the exclusion or
limitation of incidental or
consequential damages
or limitations on how
long an implied warranty
lasts, so the above
limitations or exclusions
may not apply to you.
This warranty gives you
specific legal rights, and
you also may have other
rights which vary from
jurisdiction to
jurisdiction. This
warranty applies only to
the original purchaser of
this product from the
original date of purchase.
B. At its option, Honeywell
will repair or replace this
product if it is found to
be defective in material
or workmanship.
Defective product should
be returned to the
place of purchase
in accordance with
store policy. Thereafter,
while within the warranty
period defective
product may be
returned to Honeywell.
C. This warranty does not
cover damage resulting
from any unauthorized
attempts to repair or
from any use not in
accordance with the
instruction manual.
D. Return defective
product to Honeywell
Consumer Products with
a brief description of the
problem. Include proof
of purchase and a
$14.70 CAN./$10 US
check or money order
for handling, return
packing and shipping
charges. Please include
your name, address and
a daytime phone number.
You must prepay shipping
charges. Send to:
Honeywell
Attn: Returns Department
4755 Southpoint Drive
Memphis, TN 38118
USA
 Loading...