

Page 1
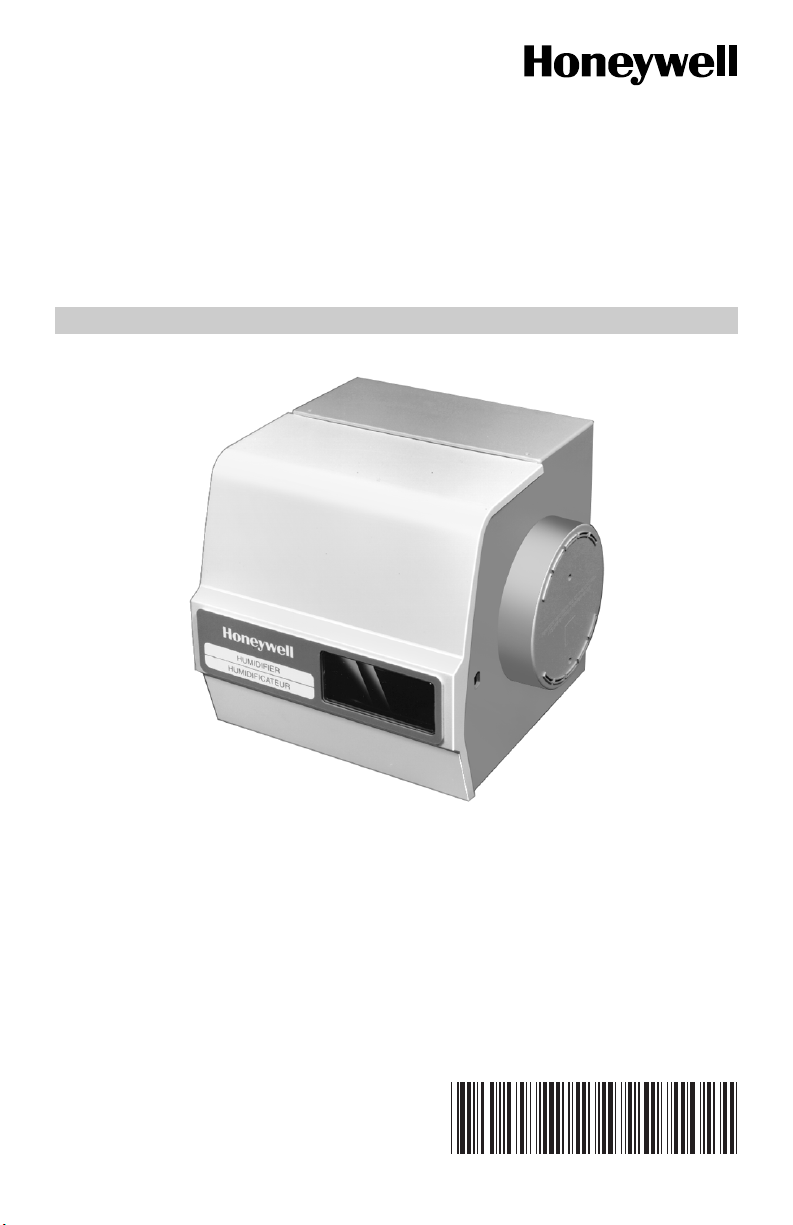
HE120 By-pass
Drum Humidifier
OWNER’S GUIDE
Contents
How Your Humidifier Works .................................................................................... 3
Operating Your Humidifier ...................................................................................... 3
Maintaining Your Humidifier .................................................................................... 4
Checking Your Humidifier Operation ...................................................................... 7
Troubleshooting Your Humidifier ............................................................................. 7
69-1110-2
Page 2

HE120 BY-PASS DRUM HUMIDIFIER
WELCOME...
to the comfortable world of humidified air. With your Honeywell humidifier you will
notice a decrease in dry skin. You’ve also taken the first step to stopping the “zapping”
created by walking on your carpet and touching your TV, computer, metal door knob or
your pet. You can even put away your glue bottle because your furniture and
woodwork will stop drying out. Congratulations! You have just made a great investment
in your home comfort.
American Lung Association® Health House® Program and Honeywell Working Together For Better Air
Did you know that the average person breathes 3400 gallons(12,870 liters) of air each
day * and spends 90% of that day inside?**
Indoor air quality products from Honeywell are designed to help make your home more
comfortable—from zoning products that allow you to control the temperature in
individual areas of the home to humidifiers and comfort control centers that help
balance the moisture content of your indoor air.
Honeywell is proud to be a partner of the American Lung Association® Health House®
program that provides guidelines for constructing homes with improved air quality and
ventilation.
For more information on ways to improve the air inside your home, please visit the
Health House web site at:
www.healthhouse.org
and the American Lung Association web site at: ww.lungusa.org
The American Lung Association and its Health House program do not endorse
products.
For more information about Honeywell Indoor Air Quality products, visit:
www.honeywell.com/yourhome
or call:1-800-345-6770 x531
*EPA National Air Quality 1999 Status & Trends.
**Indoor Air Pollution, An Introduction for Health Professionals, EPA, US Government
Printing Office #1994-523-217/81322.
IMPORTANT
69-1110—2 2
Please read these instructions and keep them in your records.
Page 3
HE120 BY-PASS DRUM HUMIDIFIER
HOW YOUR HUMIDIFIER WORKS
Your Honeywell humidifier uses the principle that vapor (evaporated water) is created
when warm air blows over a water soaked area. As the vapor circulates, the relative
humidity rises.
Your humidity control monitors the relative humidity and activates the humidifier
accordingly. The humidifier has a water supply that disburses water evenly over a
humidifier pad. The warm dry air from the furnace passes over the humidifier pad and
picks up the moist air to circulate it through your home.
Humidified air feels warmer and more comfortable so you may be able to lower your
thermostat heating setpoint and save money on your heating fuel bills. The end result
is that your humidifier gives you a comfortable environment that is also energy
efficient.
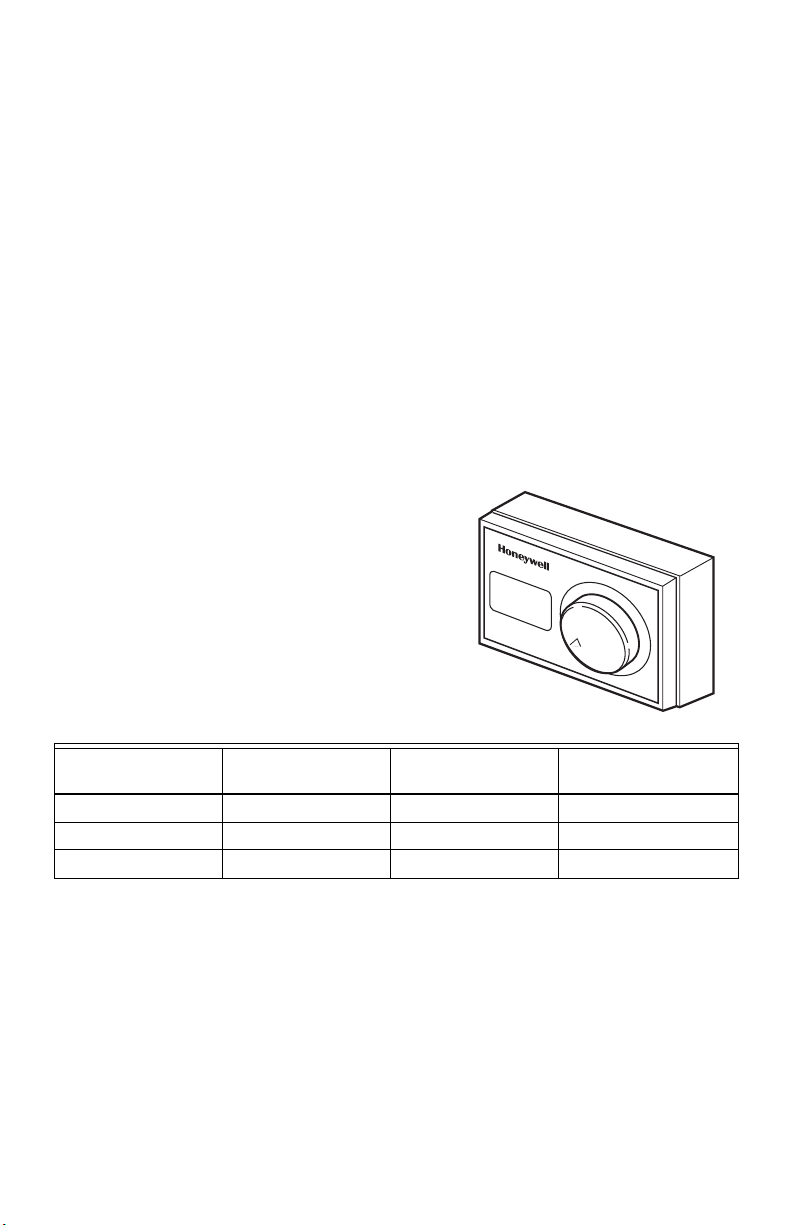
OPERATING YOUR HUMIDIFIER
Your HE120 Honeywell humidifier is controlled by
the Humidity Control that is installed either on the
return air duct or on an interior wall in your living
area. Choose the humidity control setting using the
combination relative humidity/outdoor temperature
setting scale on your humidity control. Match the
dial setting to the outdoor temperature for
optimizing the humidity level while reducing the
moisture condensation on your windows. The table
below can also be used to adjust the humidity
control to the recommended setting.
M13608
At Outside
Tem per atu re
-20°F (-29°C) Low +10°F (-12°C) Med
-10°F (-23°C) Low +20°F (-7°C) High
0°F (-18°C) Med Above 20° (-7°C) High
NOTE: As the outside temperature drops, the recommended humidity control setting
is lowered to accommodate for the effects of dewpoint. These settings should
reduce the accumulation of moisture and ice on your windows and in other
areas of your home.
Some indoor activities such as cooking, showering and clothes drying can cause
excessive levels of humidity and start the accumulation of moisture on your windows.
NOTE: If this condition persists for more than a few hours, set the humidity control to
the lowest setting to turn off the humidifier. If the condition does not improve,
ventilate your home to remove the moisture.
Recommended
Setting
3 69-1110—2
At Outside
Temperature
Recommended
Setting
Page 4

HE120 BY-PASS DRUM HUMIDIFIER
MAINTAINING YOUR HUMIDIFIER
A regular maintenance program prolongs the life of your humidifier and provides a
more comfortable home. The frequency of cleaning will depend on the condition of
your water.
You can use either hard or soft water in your humidifier, but hard water mineral
deposits are more difficult to clean than soft water deposits.
Cleaning Humidifier (Every 1 to 3 Months Depending on Water Quality)
CAUTION
Voltage Hazard.
Can cause electrical shock
and equipment damage.
Disconnect power and shut off water supply before installing or servicing.
IMPORTANT
Use the following steps to clean your Honeywell humidifier:
NOTE: You will encounter some resistance when removing the drum shaft until you
Never oil any part of the humidifier.
1. Disconnect the power and turn off the humidifier water supply.
2. Remove the humidifier cover by lifting the bottom of the cover upward.
3. Lift up the drum shaft from the bearing end and slide it out of the motor coupling
to remove the drum assembly. See Fig. 1.
hear an audible click.
4. Remove the drum from the assembly.
69-1110—2 4
Page 5

HE120 BY-PASS DRUM HUMIDIFIER
COVER
WATER PAN
BEARING END OF
DRUM SHAFT
HUMIDIFIER
HOUSING
WATER VALVE
OPENING
DRUM ASSEMBLY
M12252
Fig. 1. Removing Drive Assembly
5. Grasp the rubber valve seat between your thumb and forefinger and lift it upward
to remove the valve seat from the valve. The seat is located inside the humidifier
housing at the water valve opening. See Fig. 2.
LIFT THE RUBBER VALVE SEAT UPWARD
TO REMOVE IT FROM THE VALVE
M13617
Fig. 2. Float Valve Assembly
6. Raise up the float and remove the water pan.
7. Refer to the drawing to disassemble the drum. See Fig. 3.
5 69-1110—2
Page 6

HE120 BY-PASS DRUM HUMIDIFIER
OPEN
DRUM END
SQUEEZE
SLIGHTLY
TO INSTALL
PAD
TINNERMAN
DRUM SHAFT
CLOSED DRUM END
M13609
METAL TABS
Fig. 3. Drum Assembly
8. Clean all humidifier parts in a 50% solution of vinegar (or a humidifier cleaner)
and water. Soak overnight to remove stubborn deposits.
NOTE: Replace humidifier pad yearly with the new Honeywell Drum Humidifier Pad
(Part no. HC12A1015). The actual frequency depends on the quality of the
water used.
9. After the humidifier components are clean, reassemble the humidifier by reversing the order of steps 1 through 7.
NOTE: Be sure that the drum shaft is completely seated, listen for the click.
10. Verify the humidifier operation by following the steps in the Checking Your
Humidifier Operation section.
Start of Humidification Season
Replace the humidifier pad with a new Honeywell Drum Humidifier Pad (Part no.
HC12A1015) at the beginning of the heating season. Follow the cleaning instructions
to replace the pad and check for proper operation.
End of Humidification Season
Clean the humidifier and shut it off at the end of the heating season. Follow the
cleaning instructions, steps 1 through 9, to shut down the device for the season.
IMPORTANT
Be sure the humidifier power is off and the humidifier water pan is empty.
69-1110—2 6
Page 7

HE120 BY-PASS DRUM HUMIDIFIER
Vacation
When leaving on vacation, turn off the humidifier water supply and your humidity
control. Turn on the humidifier water supply and reset your humidity control when you
return.
CHECKING YOUR HUMIDIFIER OPERATION
After winter startup or maintenance, use the following steps to check the humidifier
operation:
1. Turn on the humidifier power and water supply.
2. Open By-pass Damper (if installed).
3. Check the water level in the humidifier water pan; water level setting should be
1-3/8 in.
NOTE: Turn the valve adjustment screw, located on the water valve inside the humid-
ifier, clockwise to lower the water level and counter clockwise to raise it.
4. Turn the Humidity Control to the highest setting.
5. Check that the humidifier pad is rotating.
6. Reset the thermostat and Humidity Control to a comfortable setting.
TROUBLESHOOTING YOUR HUMIDIFIER
Problem What To Look For What To Do
Low humidity Furnace blower not
operating.
Rapid air changes.
Drafts (cold air is dry
and is an added load
to the humidifier).
High humidity Condensation on
walls.
Heavy condensation
on windows.
• Reset circuit breaker or check for blown fuse.
• Check that the furnace power is on.
• Check all external wiring connections.
• Check the humidity control setting.
• Call a professional heating contractor.
• Keep doors and windows closed.
• Close fireplace damper when not in use.
• Keep exhaust fan running time to a
minimum.
• Seal around doors and windows.
• Turn off the humidity control and water until
condensation is completely evaporated.
• Turn humidity control down low enough to
eliminate condensation caused by moisture
from bathing, mopping, cooking, etc. If
moisture persists, more ventilation is
needed.
7 69-1110—2
Page 8

LIMITED WARRANTY
Honeywell warrants this product to be free from defects in the workmanship or materials, under
normal use and service, for a period of one (1) year from the date of purchase by the consumer.
If, at any time during the warranty period, the product is defective or malfunctions, Honeywell
shall repair or replace it (at Honeywell’s option) within a reasonable period of time.
If the product is defective, return it, with a bill of sale or other dated proof of purchase, to the
retailer from which you purchased it.
This warranty does not cover removal or reinstallation costs. This warranty shall not apply if it is
shown by Honeywell that the defect or malfunction was caused by damage which occurred while
the product was in the possession of a consumer.
Honeywell’s sole responsibility shall be to repair or replace the product within the terms stated
above. HONEYWELL SHALL NOT BE LIABLE FOR ANY LOSS OR DAMAGE OF ANY KIND,
INCLUDING ANY INCIDENTAL OR CONSEQUENTIAL DAMAGES RESULTING, DIRECTLY OR
INDIRECTLY, FROM ANY BREACH OF ANY WARRANTY, EXPRESS OR IMPLIED, OR ANY
OTHER FAILURE OF THIS PRODUCT. Some states do not allow the exclusion or limitation of
incidental or consequential damages, so this limitation may not apply to you.
THIS WARRANTY IS THE ONLY EXPRESS WARRANTY HONEYWELL MAKES ON THIS
PRODUCT. THE DURATION OF ANY IMPLIED WARRANTIES, INCLUDING THE
WARRANTIES OF MERCHANTABILITY AND FITNESS FOR A PARTICULAR PURPOSE, IS
HEREBY LIMITED TO THE ONE YEAR DURATION OF THIS WARRANTY. Some states do not
allow limitations on how long an implied warranty lasts, so the above limitation may not apply to
you.
This warranty gives you specific legal rights, and you may have other rights which vary from state
to state.
If you have any questions concerning this warranty, please write Honeywell Customer Relations,
1985 Douglas Dr. N MN10-1461, Golden Valley, MN 55422 or call 1-800-468-1502, MondayFriday, 7:00 a.m. to 5:30 p.m., Central time. In Canada, write Honeywell Limited/Honeywell
Limitée, 35 Dynamic Dr., ON15, Scarborough, Ontario M1V4Z.
Automation and Control Solutions
Honeywell International Inc. Honeywell Limited-Honeywell Limitée
1985 Douglas Drive North 35 Dynamic Drive
Golden Valley, MN 55422 Scarborough, Ontario M1V 4Z9
yourhome.honeywell.com
® U.S. Registered Trademark
© 2005 Honeywell International Inc.
69-1110—2 C.H. Rev. 08-05
 Loading...