

Installation and Operation Guide
Portable, Wired & Wireless Doorbell
English
German
French
Dutch
Spanish
Portuguese
Italian
DC915/7XX
DW915XX
A1
A2
B1
B2
AC1
AC2
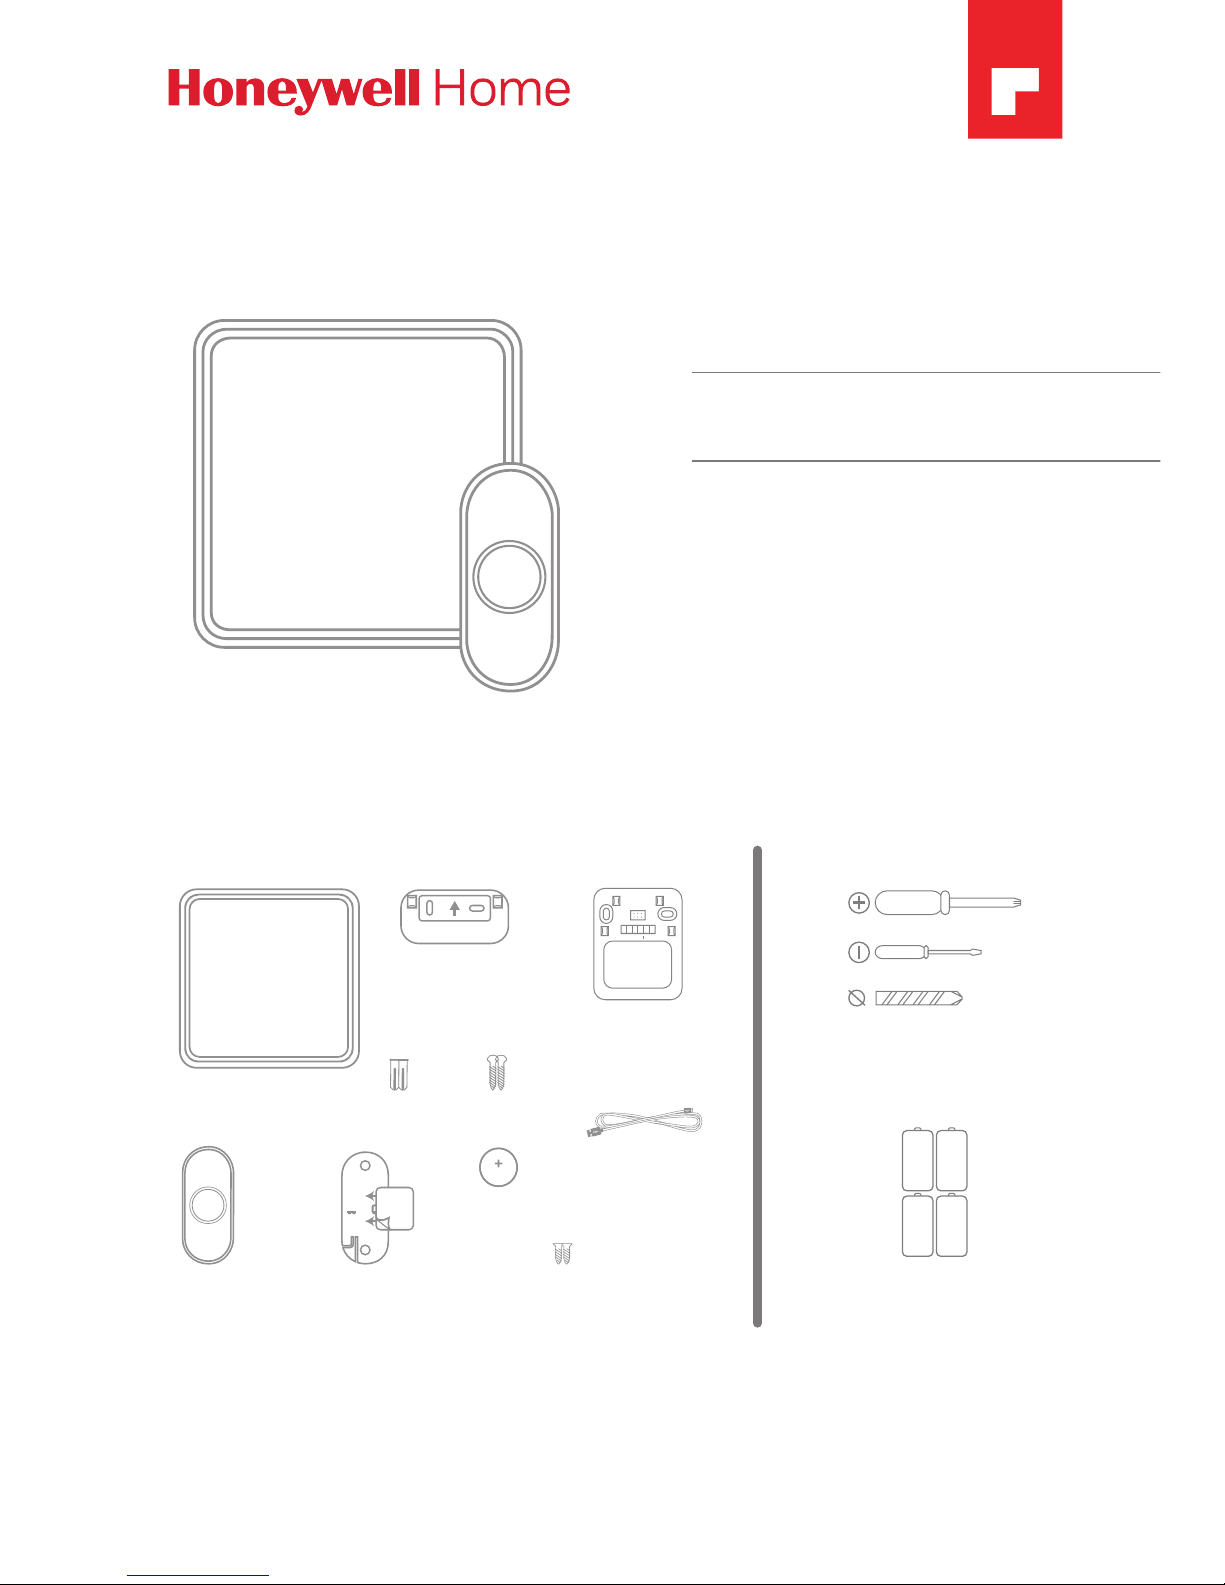
Preparation
Doorbell
Push
Button
Wall
Anchors
Round Head
Screws
Flat Head
Screws
Phillips Screwdriver
Standard Screwdriver
Drill and 1/4 in. (6 mm) Drill Bit
4 C Alkaline Batteries
Doorbell Wall
Mounting Bracket for
DC91X Models Only
Push Button Mounting
Bracket and Adhesive Pad
For installation, you will need
Content will vary according to your kit
The push button supplied with this kit is pre-programmed to operate with the doorbell.
If it is not, see “Connect a Push Button” on page 8. Push button model and
contents may vary from those shown above.
CR2032
Battery
USB Cable
DC 917
Models Only
Doorbell Wall
Mounting Bracket for
DW915 Models Only
2
Overview
Just follow these simple steps:
1. Install batteries.
2. Set up the doorbell and your preferences.
3. Install the doorbell and the push button.
Safety
Before proceeding with the installation, please note the following safety
warnings:
• Always follow the manufacturer’s advice when using power tools and wear
suitable protective equipment (e.g. safety goggles) when drilling holes, etc.
• Before drilling holes in walls, check for hidden electricity cables and water
pipes. The use of a cable/pipe locator is advisable if in doubt.
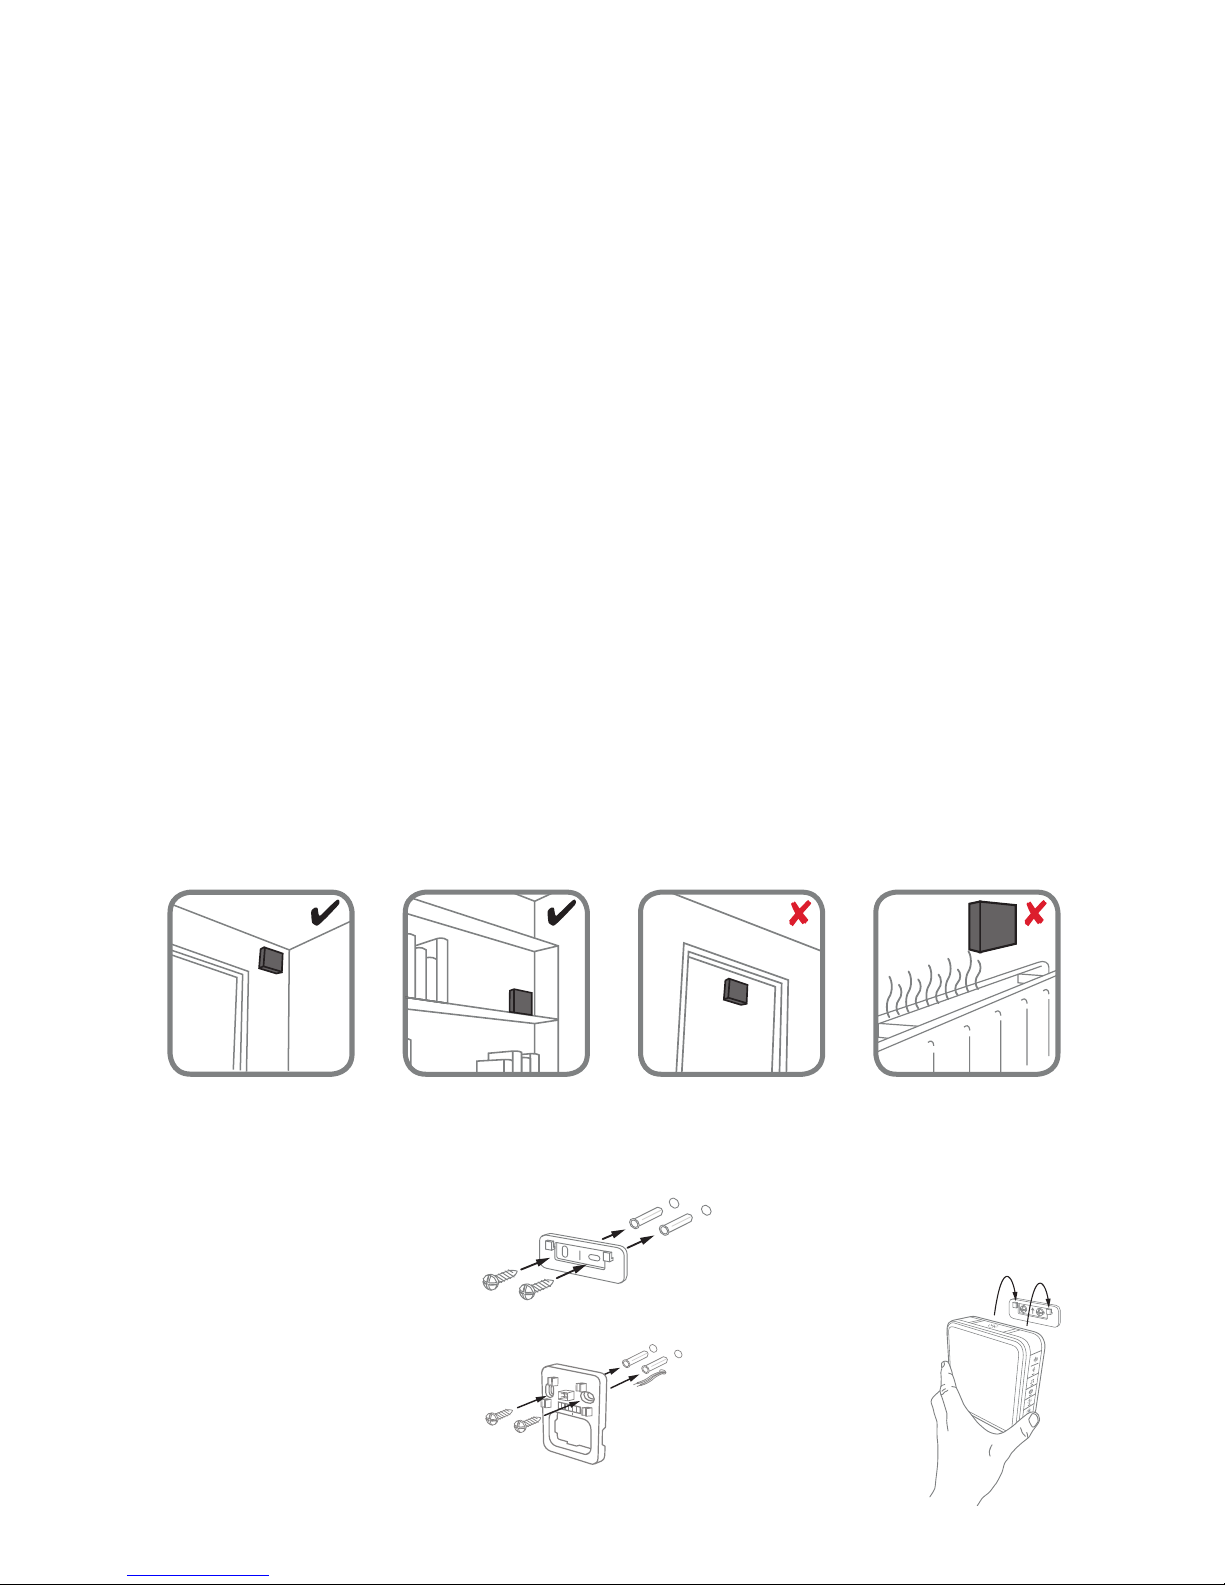
Install Doorbell
If you are not mounting the doorbell to the wall, place it where you want it.
1. Screw the doorbell
wall mounting bracket
to the wall using the
screws and anchors
included (if necessary).
Drill 1/4 inch holes for
the anchors.
2. Hang the doorbell on
the mounting bracket.
Installation
Choose a location that is not near a heat source or on something that moves
(like a door). For non-mounting locations, choose a place where the doorbell
will be easy to see and hear.
For DC9XX models
A1
A2
B1
B2
AC1
AC2
For DW9XX model
3
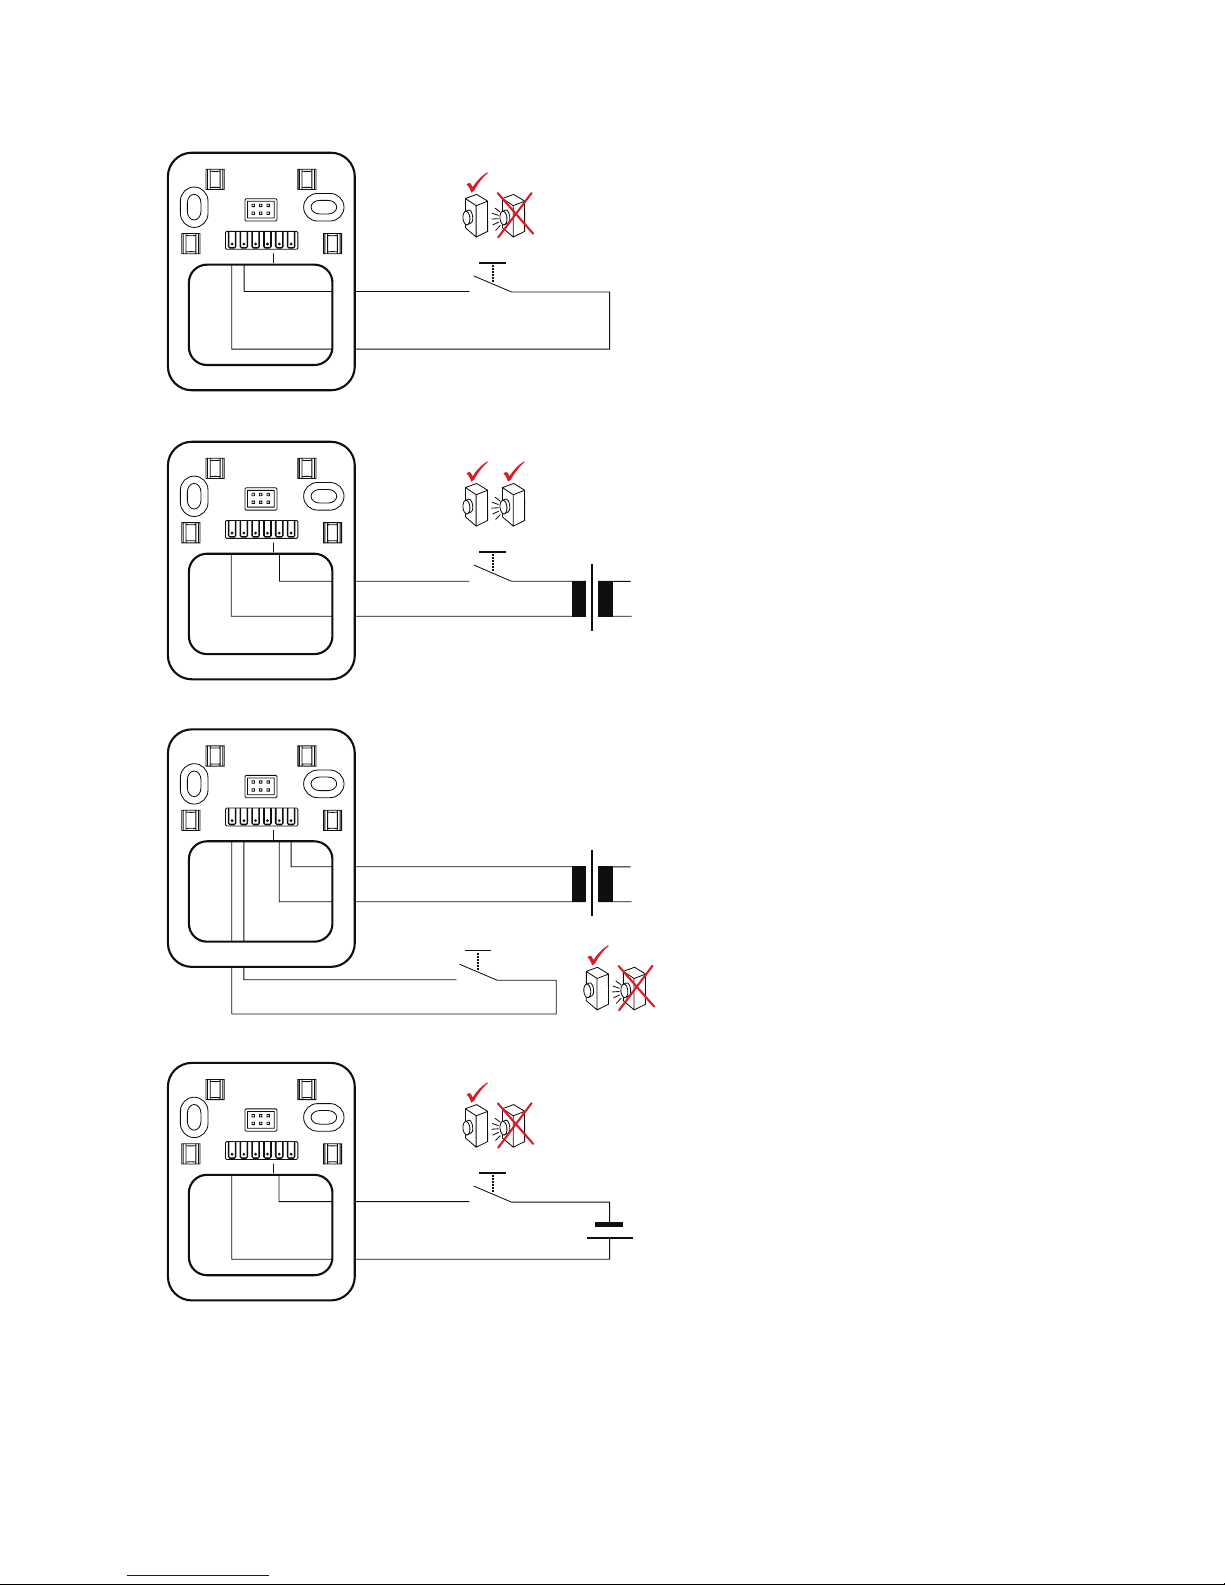
Wiring Diagrams (DW9XX Models Only)
• Potential-free connection of a
wired doorbell button
• A second wired doorbell button
(terminals B1 & B2) can be
connected
• DCP917, DW915 battery/batteries
must be inserted
• Wireless expansion of a wired
doorbell/intercom system
• A second wired doorbell button
(terminals B1 & B2) can be
connected
• Replacement of the existing
doorbell system with DW915/
DW315
• DCP917, DW915 battery/batteries
must be inserted
• Direct connection of a power
supply (for DW9../DW3.. only)
• A second wired doorbell button
(terminals B1 & B2) can be
connected
• Batteries for DW915 not required
• Wireless expansion of a wired
battery-powered chime (note the
polarity)
• DCP917, DW915 battery/batteries
must be inserted
A1
AC1
B2
B1
A2
AC2
A1
AC1
B2
B1
A2
AC2
A1
AC1
B2
B1
A2
AC2
-
+
A1
AC1
B2
B1
A2
AC2
8-16 VAC
8-16 VAC
230 V
230 V
 Loading...