

Page 1
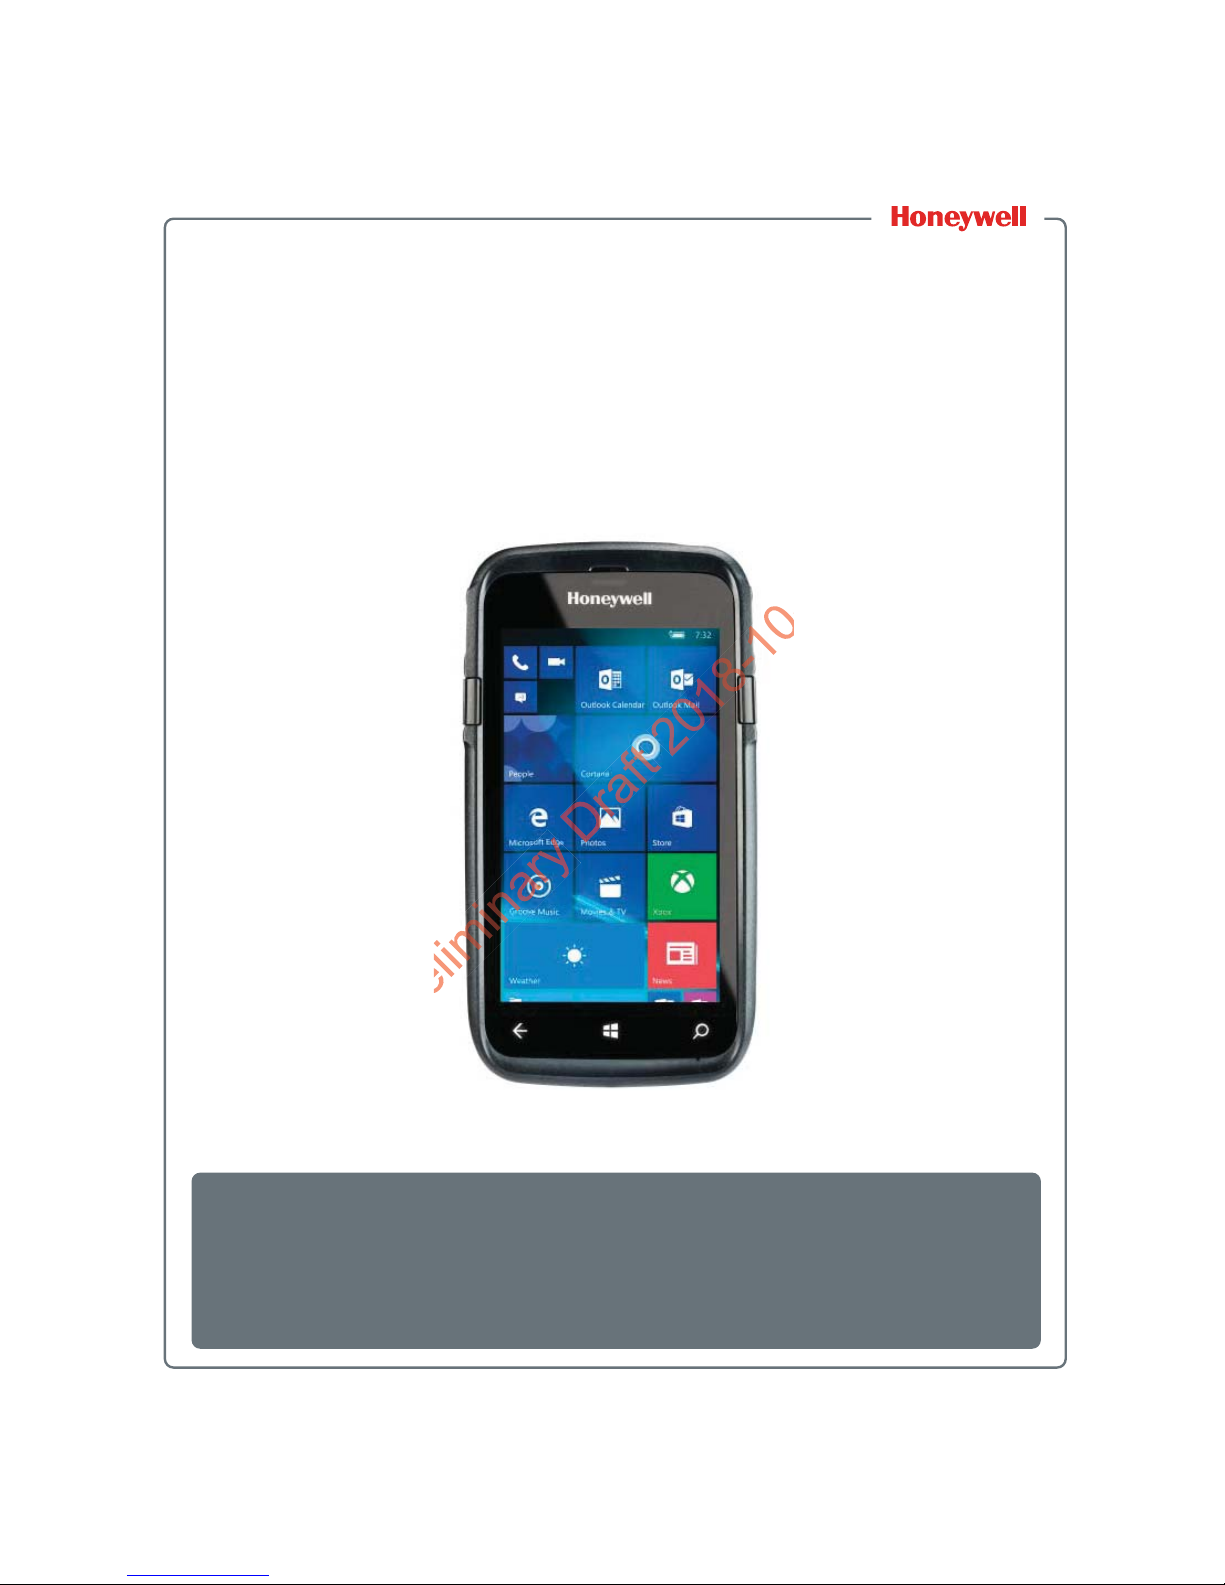
Dolphin CT50
Preli
Mobile Computer
with Windows® 10 IoT Mobile Enterprise
User Guide
Page 2

Disclaimer
Preliminary
smpat
ell Internal Intern
ual may
al may
SIG, I
Honeywell International Inc. (“HII”) reserves the right to make changes in specifications and
other information contained in this document without prior notice, and the reader should in all
cases consult HII to determine whether any such changes have been made. The information
in this publication does not represent a commitment on the part of HII.
HII shall not be liable for technical or editorial errors or omissions contained herein; nor for
incidental or consequential damages resulting from the furnishing, performance, or use of
this material. HII disclaims all responsibility for the selection and use of software and/or
hardware to achieve intended results.
This document contains proprietary information that is protected by copyright. All rights are
reserved. No part of this document may be photocopied, reproduced, or translated into
another language without the prior written consent of HII.
Trademarks
Microsoft, Windows, Windows 10 IoT Mobile Enterprise, Microsoft Edge, Windows Phone,
and the Windows logo are registered trademarks of Microsoft Corporation in the United
States and/or other countries.
Mac is a trademark of Apple Inc.
The Bluetooth trademarks are owned by Bluetooth SIG, Inc., U.S.A. and licensed to
Honeywell.
Other product names mentioned in this manual may be trademarks or registered trademarks
of their respective companies and are the property of their respective owners.
Patents
For patent information, see www.hsmpats.com.
Copyright © 2017 Honeywell International Inc. All rights reserved.
ii Dolphin CT50 Mobile Computer with Windows 10 IoT Mobile Enterprise User Guide
Page 3

Contents
. . . . . . .
. . . .
or Off . . .or Off .
. . . . . .
. . . . .
Time.
Time.
. . . . . .
. . . .
. . . . . . . . . . . .
. . . . . . .. . . . .
. . . . . . . . . .
. . . . . . . . . . .
. . . . . . . . . . . .
. . . . . . .
. . . . .
on . . .
Customer Support . . . . . . . . . . . . . . . . . . . . . . . . . . . . . . . . . . . . . . . . . . . . . . . . . . vii
Product Service and Repair . . . . . . . . . . . . . . . . . . . . . . . . . . . . . vii
Limited Warranty . . . . . . . . . . . . . . . . . . . . . . . . . . . . . . . . . . . . . . vii
Send Feedback . . . . . . . . . . . . . . . . . . . . . . . . . . . . . . . . . . . . . . . viii
Hearing Aid Compatibility (HAC) . . . . . . . . . . . . . . . . . . . . . . . . . . viii
About the Computer Features . . . . . . . . . . . . . . . . . . . . . . . . . . . . . . . . 1
1
About the Dolphin CT50 Mobile Computer . . . . . . . . . . . . . . . . . . . . . . . . . . . . . . . . 2
About the Battery . . . . . . . . . . . . . . . . . . . . . . . . . . . . . . . . . . . . . . . . . . . . . . . . . . . 6
Charge the Battery . . . . . . . . . . . . . . . . . . . . . . . . . . . . . . . . . . . . . . . . . . . . 6
Dolphin CT50 Non-Incendive . . . . . . . . . . . . . . . . . . . . . . . . . . . . . 6
All Other Versions . . . . . . . . . . . . . . . . . . . . . . . . . . . . . . . . . . . . . . 6
Charge Before Use . . . . . . . . . . . . . . . . . . . . . . . . . . . . . . . . . . . . . 7
Change the Battery . . . . . . . . . . . . . . . . . . . . . . . . . . . . . . . . . . . . . . . . . . . 7
About the Battery Status LED . . . . . . . . . . . . . . . . . . . . . . . . . . . . . . . . . . 10
Check the Battery Settings. . . . . . . . . . . . . . . . . . . . . . . . . . . . . . . . . . . . . 11
About Battery Life and Conservation . . . . . . . . . . . . . . . . . . . . . . . . . . . . . 12
Battery Recommendations and Safety Precautions. . . . . . . . . . . . . . . . . . 13
Enable Airplane Mode . . . . . . . . . . . . . . . . . . . . . . . . . . . . . . . . . . . . . . . . 14
Contents
Power On the CT50 for the First Time. . . . . . . . . . . . . . . . . . . . . . . . . . . . . . . . . . . 15
Turn the Power On or Off . . . . . . . . . . . . . . . . . . . . . . . . . . . . . . . . . . . . . . . . . . . . 15
Turn Sleep Mode On or Off . . . . . . . . . . . . . . . . . . . . . . . . . . . . . . . . . . . . . . . . . . . 15
Unlock the Screen . . . . . . . . . . . . . . . . . . . . . . . . . . . . . . . . . . . . . . . . . . . . . . . . . . 16
Set a PIN to Protect the Computer . . . . . . . . . . . . . . . . . . . . . . . . . . . . . . . . . . . . . 16
Use Gloves with the Touch Screen . . . . . . . . . . . . . . . . . . . . . . . . . . . . . . . . . . . . . 17
About the Good Read LED . . . . . . . . . . . . . . . . . . . . . . . . . . . . . . . . . . . . . . . . . . . 17
Configure the Screen Backlight. . . . . . . . . . . . . . . . . . . . . . . . . . . . . . . . . . . . . . . . 18
About the Audio Features . . . . . . . . . . . . . . . . . . . . . . . . . . . . . . . . . . . . . . . . . . . . 18
Adjust Ringer and Notification Volume . . . . . . . . . . . . . . . . . . . . . . . . . . . . 18
Audio Settings . . . . . . . . . . . . . . . . . . . . . . . . . . . . . . . . . . . . . . . . . . . . . . 19
Insert a microSD Card. . . . . . . . . . . . . . . . . . . . . . . . . . . . . . . . . . . . . . . . . . . . . . . 20
Dolphin CT50 Mobile Computer with Windows 10 IoT Mobile Enterprise User Guide iii
Page 4

Contents
Preliminary
. . . .
.
. . . . . . .
. . . .
stom
. . .
. . .
. . . . . . . . . . . .
. . . . . . .
. . . . . .. . . . .
. . . . . . . . . .
. . . . . . . . . .
. . . . . . . . . . . .
. . . . . . . . . . . .
. .
How to Transfer Files. . . . . . . . . . . . . . . . . . . . . . . . . . . . . . . . . . . . . . . . . . . . . . . . 22
Transfer Files with Windows Phone App . . . . . . . . . . . . . . . . . . . . . . . . . . 23
Transfer Files with File Explorer or Windows Explorer . . . . . . . . . . . . . . . . 23
Accessories for the CT50 . . . . . . . . . . . . . . . . . . . . . . . . . . . . . . . . . . . . . . . . . . . . 24
About the User Interface and Applications . . . . . . . . . . . . . . . . 27
2
About the User Interface . . . . . . . . . . . . . . . . . . . . . . . . . . . . . . . . . . . . . . . . . . . . . 28
Honeywell Applications on the Computer . . . . . . . . . . . . . . . . . . . . . . . . . . . . . . . . 34
About the Scanner . . . . . . . . . . . . . . . . . . . . . . . . . . . . . . . . . . . . . . . . . . . . 35
About the Start Screen . . . . . . . . . . . . . . . . . . . . . . . . . . . . . . . . . . . . . . . . 28
About Status Bar Icons. . . . . . . . . . . . . . . . . . . . . . . . . . . . . . . . . . . . . . . . 29
Navigation and Function Buttons . . . . . . . . . . . . . . . . . . . . . . . . . . . . . . . . 29
About Screen Gestures . . . . . . . . . . . . . . . . . . . . . . . . . . . . . . . . . . . . . . . 30
View Action Center. . . . . . . . . . . . . . . . . . . . . . . . . . . . . . . . . . . . . . . . . . . 31
Customize the Start Screen . . . . . . . . . . . . . . . . . . . . . . . . . . . . . . . . . . . . 32
Set the Date, Time, or Time Zone . . . . . . . . . . . . . . . . . . . . . . . . . . . . . . . 32
View Software Information . . . . . . . . . . . . . . . . . . . . . . . . . . . . . . . . . . . . . 33
View Hardware Information . . . . . . . . . . . . . . . . . . . . . . . . . . . . . . . . . . . . 33
3
About the Scanner . . . . . . . . . . . . . . . . . . . . . . . . . . . . . . . . . . . . . . . . . . . . . . . . . 36
About ScanDemoW10. . . . . . . . . . . . . . . . . . . . . . . . . . . . . . . . . . . . . . . . . . . . . . . 36
Scan a Bar Code . . . . . . . . . . . . . . . . . . . . . . . . . . . . . . . . . . . . . . . . . . . . 36
About the Scanner Settings . . . . . . . . . . . . . . . . . . . . . . . . . . . . . . . . . . . . 37
Scan Settings . . . . . . . . . . . . . . . . . . . . . . . . . . . . . . . . . . . . . . . . 37
Symbology Settings. . . . . . . . . . . . . . . . . . . . . . . . . . . . . . . . . . . . 38
Profile Settings for ScanDemoW10. . . . . . . . . . . . . . . . . . . . . . . . 38
About the Wedge Mode Profile . . . . . . . . . . . . . . . . . . . . . . . . . . . . . . . . . . . . . . . . 39
Create a Custom Profile . . . . . . . . . . . . . . . . . . . . . . . . . . . . . . . . . . . . . . . . . . . . . 41
Custom Profile Example. . . . . . . . . . . . . . . . . . . . . . . . . . . . . . . . . . . . . . . 42
Available Profile Commands . . . . . . . . . . . . . . . . . . . . . . . . . . . . . . . . . . . 43
Use the Phone . . . . . . . . . . . . . . . . . . . . . . . . . . . . . . . . . . . . . . . . . . . . . . . . . 49
4
About the Phone . . . . . . . . . . . . . . . . . . . . . . . . . . . . . . . . . . . . . . . . . . . . . . . . . . . 50
Activate the UMTS Phone . . . . . . . . . . . . . . . . . . . . . . . . . . . . . . . . . . . . . 50
Activate the CDMA Phone . . . . . . . . . . . . . . . . . . . . . . . . . . . . . . . . . . . . . 53
Make a Phone Call . . . . . . . . . . . . . . . . . . . . . . . . . . . . . . . . . . . . . . . . . . . 53
Answer the Phone . . . . . . . . . . . . . . . . . . . . . . . . . . . . . . . . . . . . . . . . . . . 53
iv Dolphin CT50 Mobile Computer with Windows 10 IoT Mobile Enterprise User Guide
Page 5

Make an Emergency Phone Call. . . . . . . . . . . . . . . . . . . . . . . . . . . . . . . . . . . . . . . 53
min
ernet N
Security .Security
. . . . .
. . . .
SettinSett
. . . . . .
. . . .
. . . . . . . . . .
. . . . . . .. . . . .
. . . . . . .. . . . .
Use the Camera. . . . . . . . . . . . . . . . . . . . . . . . . . . . . . . . . . . . . . . . . . . . . . . . 55
5
About the Color Camera . . . . . . . . . . . . . . . . . . . . . . . . . . . . . . . . . . . . . . . . . . . . . 56
Adjust the Camera and Video Settings . . . . . . . . . . . . . . . . . . . . . . . . . . . . . . . . . . 56
How to Zoom . . . . . . . . . . . . . . . . . . . . . . . . . . . . . . . . . . . . . . . . . . . . . . . 56
Change Photo Settings . . . . . . . . . . . . . . . . . . . . . . . . . . . . . . . . . . . . . . . 56
Change Video Settings. . . . . . . . . . . . . . . . . . . . . . . . . . . . . . . . . . . . . . . . 57
Take a Photo . . . . . . . . . . . . . . . . . . . . . . . . . . . . . . . . . . . . . . . . . . . . . . . . . . . . . . 57
Record a Video . . . . . . . . . . . . . . . . . . . . . . . . . . . . . . . . . . . . . . . . . . . . . . . . . . . . 57
Configure the Computer. . . . . . . . . . . . . . . . . . . . . . . . . . . . . . . . . . . . . . 59
6
How to Configure the Computer . . . . . . . . . . . . . . . . . . . . . . . . . . . . . . . . . . . . . . . 60
Start the Settings App . . . . . . . . . . . . . . . . . . . . . . . . . . . . . . . . . . . . . . . . 60
About the Structure of the Settings App . . . . . . . . . . . . . . . . . . . . . . . . . . . 61
Contents
About Network Communications . . . . . . . . . . . . . . . . . . . . . . . . . . . . . . . . . . . . . . . 62
About Wireless Security . . . . . . . . . . . . . . . . . . . . . . . . . . . . . . . . . . . . . . . . . . . . . 65
About Certificates . . . . . . . . . . . . . . . . . . . . . . . . . . . . . . . . . . . . . . . . . . . . . . . . . . 66
About Bluetooth Communications . . . . . . . . . . . . . . . . . . . . . . . . . . . . . . . . . . . . . . 67
About Serial and USB Communications . . . . . . . . . . . . . . . . . . . . . . . . . . . . . . . . . 68
About Near Field Communication (NFC). . . . . . . . . . . . . . . . . . . . . . . . . . . . . . . . . 68
Dolphin CT50 Mobile Computer with Windows 10 IoT Mobile Enterprise User Guide v
Connect to a Wi-Fi Network . . . . . . . . . . . . . . . . . . . . . . . . . . . . . . . . . . . . 62
Connect to a Hidden Wi-Fi Network . . . . . . . . . . . . . . . . . . . . . . . 63
Modify Channel Settings . . . . . . . . . . . . . . . . . . . . . . . . . . . . . . . . 64
Change Roaming Settings . . . . . . . . . . . . . . . . . . . . . . . . . . . . . . 64
Connect to an Ethernet Network . . . . . . . . . . . . . . . . . . . . . . . . . . . . . . . . 64
How to Connect to Virtual Private Networks . . . . . . . . . . . . . . . . . . . . . . . 64
Add a VPN Profile . . . . . . . . . . . . . . . . . . . . . . . . . . . . . . . . . . . . . 65
Install a Certificate with Microsoft Edge . . . . . . . . . . . . . . . . . . . . . . . . . . . 66
Install a Certificate with Email . . . . . . . . . . . . . . . . . . . . . . . . . . . . . . . . . . 66
How to Install a Certificate with MDM . . . . . . . . . . . . . . . . . . . . . . . . . . . . 66
Connect a Bluetooth Device . . . . . . . . . . . . . . . . . . . . . . . . . . . . . . . . . . . . 67
Disconnect a Paired Device . . . . . . . . . . . . . . . . . . . . . . . . . . . . . . . . . . . . 67
Page 6

Contents
Preliminary
ions.
ons
. . . . .
. . . .
. . . . . . .
. . . . .
. . . . . . .. . . . . .
. . . . . . .. . . . . .
. . . . . .. . . . .
Manage and Maintain the CT50. . . . . . . . . . . . . . . . . . . . . . . . . . . . . . 69
7
Update the CT50 Software . . . . . . . . . . . . . . . . . . . . . . . . . . . . . . . . . . . . . . . . . . . 70
Test a Network Connection . . . . . . . . . . . . . . . . . . . . . . . . . . . . . . . . . . . . . . . . . . . 70
View Network Adapter Information . . . . . . . . . . . . . . . . . . . . . . . . . . . . . . . . . . . . . 71
Change How Data Packets are Routed. . . . . . . . . . . . . . . . . . . . . . . . . . . . . . . . . . 72
How to Restart the Computer . . . . . . . . . . . . . . . . . . . . . . . . . . . . . . . . . . . . . . . . . 72
Clean the Computer . . . . . . . . . . . . . . . . . . . . . . . . . . . . . . . . . . . . . . . . . . . . . . . . 76
Restart the Computer. . . . . . . . . . . . . . . . . . . . . . . . . . . . . . . . . . . . . . . . . 73
Clean Boot the Computer. . . . . . . . . . . . . . . . . . . . . . . . . . . . . . . . . . . . . . 74
Reset the Computer to Factory Default State. . . . . . . . . . . . . . . . . . . . . . . 75
Specifications. . . . . . . . . . . . . . . . . . . . . . . . . . . . . . . . . . . . . . . . . . . . . . . . . 77
A
Physical and Environmental Specifications. . . . . . . . . . . . . . . . . . . . . . . . . . . . . . . 78
vi Dolphin CT50 Mobile Computer with Windows 10 IoT Mobile Enterprise User Guide
Page 7

Customer Support
e
Auth
AvertiAver
c. pro
c. pr
back,
back,
ts.ts.
Rep
If you need assistance installing or troubleshooting your product, contact
us by using one of these methods:
Knowledge Base: www.hsmknowledgebase.com
Our Knowledge Base provides thousands of immediate solutions. If the
Knowledge Base does not help you solve your problem, log into the
Technical Support Portal to submit your problem or ask your question.
Technical Support Portal: www.hsmsupportportal.com
Log into the Technical Support Portal to search our Knowledge Base,
submit your problem or question, request a call back, or provide
feedback. When filling out one of the forms, provide as much detail as
possible. You can even include attachments.
Telephone: www.honeywellaidc.com/locations
For our latest contact information, please check our website.
Product Service and Repair
Honeywell International Inc. provides service for all of its products
through service centers throughout the world. To find your service
center, go to www.honeywellaidc.com and select Support > Contact
Support > Service and Repair. Contact your service center to obtain a
Return Material Authorization number (RMA #) before you return the
product.
To obtain warranty or non-warranty service, return your product to
Honeywell (postage paid) with a copy of the dated purchase record.
Warning: Explosion Hazard - Substitution of components may
impair suitability for Division 2 Class I, II, III locations.
Avertissement : Risque d’explosion - Le remplacement de
composants risque de compromettre l’adaptation du produit aux
sites de division 2 catégorie I, II, III.
Customer Support
Limited Warranty
For warranty information, go to www.honeywellaidc.com and click
Resources > Warranty.
Dolphin CT50 Mobile Computer with Windows 10 IoT Mobile Enterprise User Guide vii
Page 8

Customer Support
Preliminary Draft 2018-10-15
dio freq
ss handses hand
These rThes
level
Send Feedback
Your feedback is crucial to the continual improvement of our
documentation. To provide feedback about this manual, please contact
the Technical Communications department directly at
ACSHSMTechnicalCommunications@honeywell.com.
Hearing Aid Compatibility (HAC)
Device Listings
The standard for compatibility of digital wireless devices with hearing
aids is set forth in American National Standards Institute (ANSI)
standard C63.19. ANSI C63.19 contains these two sets of standards:
• An “M” rating from M1 to M4 for reduced radio frequency (RF)
interference to enable acoustic coupling with hearing aids that do not
operate in t-coil mode.
• A “T” rating from T1 to T4 to enable inductive coupling with hearing
aids operating in t-coil mode.
A digital wireless handset is considered hearing aid compatible for
acoustic coupling if it meets at least an “M3” rating under the ANSI
standard. A digital wireless handset is considered hearing aid
compatible for inductive coupling if it meets at least a “T3” rating under
the ANSI standard
M-Ratings: Devices rated M3 or M4 meet FCC requirements and are
likely to generate less interference with hearing devices than devices
that are not labeled. M4 is the superior/higher of the two ratings.
T-Ratings: Devices rated T3 or T4 meet FCC requirements and are likely
to be more usable with a hearing device’s t-coil than unrated devices. T4
is the superior/higher of the two ratings.
These ratings are not guaranteed. Results will vary depending on the
level of immunity of your hearing device and the degree of your hearing
loss. If your hearing device happens to be vulnerable to interference, you
may not be able to use a rated device successfully. Trying out the device
with your hearing device is the best way to evaluate it for your personal
needs.
.
viii Dolphin CT50 Mobile Computer with Windows 10 IoT Mobile Enterprise User Guide
Page 9

Customer Support
Prelimi
d
use with
se wit
in these dn thes
ids. It is imids. It is
When some wireless devices are used near some hearing devices such
as hearing aids and implants, users may detect a buzzing or humming
noise. Some hearing devices are more immune than others to this
interference noise. Wireless devices may also vary in the amount of
interference they generate. The more immune the hearing aid device is,
the less likely one is to experience interference noise from the wireless
device.
Hearing aid devices may also be rated. Adding the ratings of the hearing
aid and the device can predict the usability of the two devices together:
• Any combined rating equal to or greater than six offers the best use.
• Any combined rating equal to five is considered normal use.
These models have been tested and rated for use with hearing aids for
some of the wireless technologies that they use. However, there may be
some newer wireless technologies used in these devices that have not
been tested yet for use with hearing aids. It is important to try the
different features of these devices thoroughly and in different locations,
using your hearing aid or cochlear implant, to determine if you hear any
interfering noise. Consult your service provider or the manufacturer of
the device for information on hearing aid compatibility. If you have
questions about return or exchange policies, consult your service
provider or device retailer.
The following devices are currently offered:
C63.19
Model Name HAC Rating Air-Interface
CT50LFN
Dolphin CT50 Mobile Computer with Windows 10 IoT Mobile Enterprise User Guide ix
M3 / T
GSM / WCDMA
,4%7I&I
Version
2011
Page 10

Customer Support
Preliminary Draft 2018-10-15
x Dolphin CT50 Mobile Computer with Windows 10 IoT Mobile Enterprise User Guide
Page 11

1
Preliminary Draft 2018-10-15
0 Mob
About the Computer Features
This chapter introduces the Dolphin CT50 Mobile
Computer with Windows
operating system. Use this chapter to learn about the basic
computer features, functions, and accessories.
®
10 IoT Mobile Enterprise
1
Page 12

Chapter 1 — About the Computer Features
Preliminary Draft 2018-10-15
le com
imager wimager w
LTE/UMTLTE/UM
About the Dolphin CT50 Mobile Computer
The Honeywell Dolphin CT50 Mobile Computer is an enterprise-focused
smartphone that uses the Windows 10 IoT Mobile Enterprise operating
system to provide reliable and secure management of corporate data
and wireless communications. The CT50 offers key features such as a
large display, long-lasting battery, bar code imager, and rugged
durability.
Honeywell offers a non-incendive (NI) version of the CT50 for use in
hazardous environments. The NI version of the CT50 has yellow scan
buttons.
Throughout this manual, all versions of the mobile computer are referred
to as the CT50 unless information is specific to a particular model.
The Dolphin CT50 features:
• Windows 10 IoT Mobile Enterprise operating system
• 2 GB DRAM, 16 GB flash memory
• Large, sunlight-readable display with responsive multi-touch screen
• High performance 2D imager with ergonomic scan trigger keys
• Software-definable LTE/UMTS or CDMA/EVDO wireless WWAN
radio for high speed data and quality voice support across all network
technologies
• IEEE 802.11a/b/g/n radio
• Bluetooth radio
• NFC technology for short-range wireless data exchange
• Value-added software components supporting specialized imaging
and OCR functions
• Rugged specifications with IP67 sealing
• Customer-accessible microSD™ slot for removable memory cards
(up to 32 GB)
• Integrated GPS receiver (with WWAN radio option)
• 8-megapixel color camera
• Receiver Category 3 in accordance with EN 300 440-1
• Non-incendive version certified to Class I, II, III, Division 2, Groups A-
G, -20 °C to +50 °C, T4A
2 Dolphin CT50 Mobile Computer with Windows 10 IoT Mobile Enterprise User Guide
Page 13

Scan buttons
Preliminary D
cendive vendive
Chapter 1 — About the Computer Features
Volume buttons
Touch panel
Navigation panel
Microphone
Front View of the CT50
The non-incendive version of the CT50 is identified by yellow scan
buttons.
Dolphin CT50 Mobile Computer with Windows 10 IoT Mobile Enterprise User Guide 3
Page 14

Chapter 1 — About the Computer Features
Power button
Battery status LED
Scanner window
Preliminary Draft 201
Top View of the CT50
4 Dolphin CT50 Mobile Computer with Windows 10 IoT Mobile Enterprise User Guide
Page 15

Chapter 1 — About the Computer Features
Camera
button
Battery door
latch
microSIM and microSD door
Battery
Preliminar
8-10-15
1
1
8-10
8-10
8
Dolphin CT50 Mobile Computer with Windows 10 IoT Mobile Enterprise User Guide 5
Back View of the CT50
Page 16

Chapter 1 — About the Computer Features
elleme
llem
ck mu
battebatte
pres
pres
not dis
DisposeDispose
of Honeof Hon
batterybattery
About the Battery
The CT50 uses a rechargeable 3.6 Vdc Li-ion battery as its main power
source. The battery has a 14.6 watt-hour capacity. Several factors
determine the life of your battery, such as display brightness, display
timeout, input device, extreme temperature, and your usage.
Honeywell recommends that you keep the battery charged at all times to
prevent data loss. When you change the battery, the computer
automatically goes into a power-off state.
Contact your local sales representative for replacement batteries.
Caution: The battery used in this device may present a fire or
chemical burn hazard if it is mistreated. Do not disassemble it, heat
it above 100 °C (212 °F), or incinerate it. Dispose of used batteries
promptly. Keep away from children.
Caution: We recommend the use of Honeywell Li-ion battery packs.
The use of any non-Honeywell battery may result in damage not
covered by the warranty.
Warning: The battery pack must not be removed or installed while
in a potentially hazardous location.
Avertissement : La batterie ne doit pas être retirée ni installée dans
un site potentiellement dangereux.
Charge the Battery
Dolphin CT50 Non-Incendive
Warning: Explosion Hazard - Batteries must only be changed or
charged in an area known to be non-hazardous. Use ONLY
Honeywell CT50 battery Model 318-055-001.
Risque d’explosion - Les batteries doivent uniquement être
remplacées ou rechargées dans un endroit non dangereux. Utilisez
UNIQUEMENT Honeywell CT50 batterie modèle 318-055-001.
All Other Versions
All other versions of the Dolphin CT50 use battery model CT50-BTSC,
part number 318-055-001.
6 Dolphin CT50 Mobile Computer with Windows 10 IoT Mobile Enterprise User Guide
Page 17

Charge Before Use
th
ashi
Make sure you fully charge the battery before you use your computer.
You can charge the battery before or after you install it in the computer. It
takes about 6 hours for the battery to fully charge in any of the
accessories
• Insert the battery into a Quad Battery Charger or the battery well of
an eHomeBase.
or
• Insert the computer with the battery installed into an eHomeBase,
ChargeBase, NetBase, Quad Battery Charger, USB Adapter, or
Vehicle Power Adapter.
Change the Battery
If your battery power is low, you need to either charge the battery in the
computer, or replace it with a charged battery.
Caution: Make sure you completely power off the computer before
changing the battery. Failure to completely power off the computer
can result in the computer crashing and the possibility of having to
reinstall the firmware.
1 Save your files and close any open applications.
2 Press and hold the Power button. This screen appears:
Chapter 1 — About the Computer Features
Dolphin CT50 Mobile Computer with Windows 10 IoT Mobile Enterprise User Guide 7
Page 18

Chapter 1 — About the Computer Features
Preliminary
db
3 Swipe down toward the bottom of the screen to power off the CT50.
The word “Goodbye” appears on the screen as the computer powers
off.
8 Dolphin CT50 Mobile Computer with Windows 10 IoT Mobile Enterprise User Guide
Page 19

Chapter 1 — About the Computer Features
Pre
re
ck and
4 Disconnect the handstrap from the bottom of the computer.
5 Press in on the door lock and slide the battery door toward the
bottom of the computer to unlock the door.
Dolphin CT50 Mobile Computer with Windows 10 IoT Mobile Enterprise User Guide 9
Page 20

Chapter 1 — About the Computer Features
Battery status LED
u
atus LE
Prelimin
Prelimi
Prelimi
s LE
s LE
ck and s
6 Lift up on the edge of the battery and remove it from the computer.
7 Insert the charged battery into the computer.
8 Press down on each corner of the battery to make sure it is fully
seated in the computer.
9 Press in on battery door lock and slide the battery door into the
locked position.
10 Replace the handstrap.
About the Battery Status LED
The Battery status LED in the upper right corner of the computer
indicates the charging status of the battery.
10 Dolphin CT50 Mobile Computer with Windows 10 IoT Mobile Enterprise User Guide
Page 21

Chapter 1 — About the Computer Features
Preliminary
ettin
m
e batte
e batt
missingmissing
Battery Status LED Descriptions
LED State Description
Steady green The computer is connected to a charger and the
battery is more than 95% charged.
Blinking green The computer is connected to a charger and the
battery level is between 61% and 95% charged.
Steady amber The computer is connected to a charger and the
battery level is between 0% and 60% charged.
Blinking red There is a battery error or the computer is not
connected to a charger and the battery level is below
15% charged.
If there is a battery error, the battery may not be
charging because it is missing, faulty, or outside the
allowable charging temperature range. If it is outside
the charging temperature range, charging will resume
when the battery temperature returns to the
acceptable range of 0 °C to 45 °C (32 °F to 113 °F).
Off The computer is not connected to external power, the
battery is operating normally, and the battery level is
above 15% charged.
Check the Battery Settings
In addition to the Battery status LED, you can get battery information
from the Battery Saver app.
1 Scroll to the bottom of the main screen and tap All apps > Settings
> System > Battery Saver.
2 If the battery is not charging, tap the toggle to turn on the Battery
Saver.
3 Ta p Battery saver settings.
4 From the setting screen, you can set these options:
• Turn battery saver on automatically if my battery falls below:
When enabled, turns the Battery Saver features on when the
battery charge level drops below the level selected with the slider.
The default is 20%.
Dolphin CT50 Mobile Computer with Windows 10 IoT Mobile Enterprise User Guide 11
Page 22

Chapter 1 — About the Computer Features
• Always allowed: You can enable some apps to run in the
background even when the battery saver is turned on. To add
apps, tap , choose an app from the list, and tap Add.
About Battery Life and Conservation
If you store the batteries outside of the computer for long periods of time,
they slowly discharge. Honeywell recommends storing the battery in a
charger to maintain battery performance.
Battery Conservation Tips
When You Want to: Do this to Save Battery Power:
Use the computer and
the low battery status
icon appears or the
battery status LED
turns on.
12 Dolphin CT50 Mobile Computer with Windows 10 IoT Mobile Enterprise User Guide
• Connect the computer to an external power
source.
• Press and hold the Power button, and then
swipe toward the bottom of the screen to
power off the computer. After the computer
turns off, remove the battery and insert a
fully charged battery.
Page 23

Chapter 1 — About the Computer Features
Preliminary
e batter
re
.
re the bae the ba
the ba
Battery Conservation Tips (continued)
When You Want to: Do this to Save Battery Power:
Stop using the
computer for 5 minutes
or more.
Store the computer for
more than a day.
Store the battery
outside of the
computer.
Make sure that the low battery status icon is not
on the screen and that the battery status LED
is not on. Press the Power button to suspend
the computer.
• If you are storing the computer for a few
days (such as over the weekend), install a
charged battery or connect the computer to
a power source.
• If you are storing the computer for a longer
period of time, remove and charge the
battery. When the battery is done charging,
store both the battery and the computer is a
cool location.
• If you store the battery for several months,
recharge the battery periodically to keep it at
peak performance.
Store the batteries in a charger.
Battery Recommendations and Safety Precautions
• Charge the battery before use. Battery ships with a partial charge
only.
• See “Charge the Battery” on page 6 for approved charging
methods. Use of this battery in other devices could result in damage
to the device or battery.
• The temperature range for charging this battery is 0 °C to 45 °C
(32 °F to 113 °F). Do not charge this battery outside of this range. For
maximum battery life, charge at 23 °C (73 °F).
• Do not store the battery at temperatures above 60 °C (140 °F), such
as inside a car on a hot day or in direct sunlight. Storage above 60 °C
(140 °F) may damage the battery.
• Avoid dropping the battery or computer. If you suspect that the
battery or computer is damaged, send it to a Honeywell service
center for inspection.
Dolphin CT50 Mobile Computer with Windows 10 IoT Mobile Enterprise User Guide 13
Page 24

Chapter 1 — About the Computer Features
Preliminary
eed to co
ed to
ren sh
fore
fore
• Replace this battery only with another CT50 battery as identified
below. These batteries have been tested in accordance with
applicable safety standards. Contact your Honeywell sales
representative or distributor if this battery is no longer available.
• For the non-incendive version of the CT50, use battery p/n 318-
055-003.
• For all other versions of the CT50, use battery model CT50-
BTSC, p/n 318-055-001.
• Discarded batteries may create a safety hazard. Before disposal,
cover the battery contacts with electrical insulating tape.
• Do not modify the battery or attempt to insert foreign objects into it.
• Do not solder directly to the battery contacts.
• Do not short circuit the battery, and keep it away from metallic items.
• Do not drop the battery or apply mechanical shocks or pressure to it.
• Do not disassemble or open, crush, bend or deform, puncture, shred
or burn the battery.
• Do not immerse the battery in water or get the battery wet.
• Battery usage by children should be supervised.
Enable Airplane Mode
If you do not need to connect to any wireless networks, you can enable
Airplane mode to turn off all the radios and save battery power.
1 Swipe down from the top of the screen to view the Action Center.
2 Touch Airplane Mode to turn it on. The Airplane Mode icon appears
in the status bar.
14 Dolphin CT50 Mobile Computer with Windows 10 IoT Mobile Enterprise User Guide
Page 25

Chapter 1 — About the Computer Features
Preliminary
e s
screen do
creen d
Power On the CT50 for the First Time
1 Press the Power button.
2 From the Welcome screen, select your language and then tap Next.
3 Select your region and then tap Next.
4 Ta p Cancel to skip the advanced provisioning options.
5 Follow the onscreen prompts to finish setting up the computer.
To learn more about what you can do with a Microsoft account, go to
https://account.microsoft.com/about.
Turn the Power On or Off
Note: You should always power off the computer before removing the
battery.
To turn the computer on:
• Press and release the Power button.
To turn the computer off:
1 Press and hold the Power button until “slide down to power off”
appears on the screen.
2 Slide the screen down until the image disappears and “Goodbye”
appears on the screen.
Turn Sleep Mode On or Off
To save battery power, the touch panel display dims, and then turns off
after a period of inactivity. If the display stays off longer than the set time
limit, the terminal enters sleep mode or it suspends.
To turn Sleep Mode on:
• Press and release the Power button.
To wake the terminal from sleep mode and unlock the screen:
1 Press and release the Power button.
2 Swipe up from the bottom of the screen to unlock the computer.
Dolphin CT50 Mobile Computer with Windows 10 IoT Mobile Enterprise User Guide 15
Page 26

Chapter 1 — About the Computer Features
Unlock the Screen
Every time you power on the computer, you will need to unlock it.
• Swipe up from the bottom of the screen to unlock it.
Set a PIN to Protect the Computer
After you start using the computer, you should set a PIN to secure apps
and data on the computer.
1 Ta p All Apps > Settings > Accounts > Sign-in options.
2 Ta p Add.
3 Type your PIN in the New PIN text box.
4 Type your PIN again in the Confirm PIN text box.
5 Ta p OK.
6 From the Require sign-in drop-down list, select the amount of time for
you to be away before Windows requires you to sign back in again.
7 Exit the Settings app.
16 Dolphin CT50 Mobile Computer with Windows 10 IoT Mobile Enterprise User Guide
Page 27

Chapter 1 — About the Computer Features
Prelimin
Use Gloves with the Touch Screen
You can use many off-the-shelf gloves, including leather, when operating
the touch screen on the computer. The gloves can be up to 2 mm (0.08
inches) thick. Use this procedure to set the touch screen to “glove mode.”
1 Press the flat part of the gloved finger to the touch screen.
You want to have approximately 13 mm (0.51 inch) surface area
touching the screen, almost as if taking a fingerprint.
2 Tap the screen subsequently to use it with your gloved hands.
3 Exit “glove mode” by tapping the screen with your bare finger.
About the Good Read LED
The Good Read LED indicates the status of the scanner. For more
information on how to scan bar codes, see “Scan a Bar Code” on
page 36.
Good Read LED Descriptions
LED Color Description
Green Good read of a bar code.
Blinking green The data collection engine is processing or starting up.
Dolphin CT50 Mobile Computer with Windows 10 IoT Mobile Enterprise User Guide 17
Page 28

Chapter 1 — About the Computer Features
Preliminary
the v
e
+ Noti
ion
the volume volu
to
to
Configure the Screen Backlight
The display has an ambient light sensor that automatically adjusts
the backlight intensity to conserve power and ensure the display is
readable. You can set the backlight intensity level as needed for
your environment.
1 Ta p All Apps > Settings > System > Display.
2 Tap the toggle box to turn Automatically adjust display brightness On
or Off.
If Automatic Adjust is turned off, use the slider to set the Brightness
level.
About the Audio Features
The CT50 has a speaker, a microphone, and several software tools for
configuring the volume of sounds.
Adjust Ringer and Notification Volume
You can quickly adjust the volume of ringtone and notification sounds by
using the side volume buttons.
1 Press one of the volume buttons on the right side of the computer.
The Ringer + Notifications volume appears at the top of the screen.
2 Press the volume buttons or adjust the slider to change the volume.
18 Dolphin CT50 Mobile Computer with Windows 10 IoT Mobile Enterprise User Guide
Page 29

Audio Settings
etting
Use the Settings app to configure the audio and sound settings.
• Ta p All Apps > Settings > Personalization > Sounds.
Chapter 1 — About the Computer Features
Audio and Sound Settings
Setting Description
Ringtone Select a ringtone.
Vibrate Turns vibrate mode on or off.
Reminders Select which app you want to notify you when you
have a reminder.
Key press Select to enable audio tones when you press a key.
Lock and unlock Select to enable audio tones when you lock or unlock
an app.
Camera shutter Select to enable audio tones when you press the
camera icon.
System alerts Select to enable audio tones when the system sends
you an alert.
Dolphin CT50 Mobile Computer with Windows 10 IoT Mobile Enterprise User Guide 19
Page 30

Chapter 1 — About the Computer Features
Pre
relim
im
m
f the c
8
8
Insert a microSD Card
You can use a microSD card to increase file storage capacity or to install
software. Honeywell recommends the use of Single Level Cell (SLC)
industrial grade microSD or microSDHC memory cards with the CT50
computer for maximum performance and durability.
Note: Format memory card before initial use.
1 Power off the computer.
2 Disconnect the handstrap from the bottom of the computer.
20 Dolphin CT50 Mobile Computer with Windows 10 IoT Mobile Enterprise User Guide
Page 31

Chapter 1 — About the Computer Features
3 Press in on the door lock and slide the battery door toward the
bottom of the computer to unlock the door.
4 Lift up on the edge of the battery and remove it from the computer.
5 Press down on the SD card door and slide it toward the top of the
computer to open it.
Dolphin CT50 Mobile Computer with Windows 10 IoT Mobile Enterprise User Guide 21
Page 32

Chapter 1 — About the Computer Features
File
Fil
6 Insert the SD card into the door.
7 Press down on the SD card door and slide the door toward the
bottom of the computer to lock it.
8 Press down on each corner of the battery to make sure it is fully
seated in the computer.
9 Press in on battery door lock and slide the battery door into the
locked position.
10 Replace the handstrap.
How to Transfer Files
You can transfer files between your desktop PC and the CT50 with the
HomeBase (and standard USB cable) or the USB adapter. When the
computer is connected through USB, you can browse to it and drag-anddrop to move files back and forth to a PC.
You can transfer files with:
• the Windows Phone app.
• File Explorer or Windows Explorer.
Note: The CT50 supports Hi-Speed USB communications (USB 2.0)
with a maximum data transfer rate of 480 Mbps.
22 Dolphin CT50 Mobile Computer with Windows 10 IoT Mobile Enterprise User Guide
Page 33

Chapter 1 — About the Computer Features
Preliminary
T5
.
dows Expows E
Transfer Files with Windows Phone App
1 Connect the CT50 to your PC through a USB accessory and cable
connection.
2 On the CT50, when asked if you want to use the USB data
connection, tap yes.
If you are using Windows 10, open the Phone Companion app from
Start > All apps on your PC. If you are using Windows 8, the
Windows Phone app automatically opens when you connect the
terminal to your PC. If you are using Windows 7 or a Mac, go to
www.windowsphone.com to download and install the Windows
Phone app for desktop or Mac.
3 In the Phone Companion app, select Windows as your computer
platform and then set your sync preferences.
In the Windows Phone app, set your phone name and sync
preferences.
The default phone name is “Windows Phone.” If you want to change
your phone name in the future, go to All Apps > Settings > System
> About.
Transfer Files with File Explorer or Windows Explorer
1 Connect the CT50 to your PC through a USB accessory and cable
connection.
2 Depending on the Windows operating system, open File Explorer or
Windows Explorer.
3 Under Computer, click Windows Phone.
4 You can now copy, delete, or move files or folders between the
computer and the PC or the microSD card installed in the computer
as you would with any other storage drive (for example, cut and paste
or drag and drop).
Dolphin CT50 Mobile Computer with Windows 10 IoT Mobile Enterprise User Guide 23
Page 34

Chapter 1 — About the Computer Features
its ba
purchasurchas
shifts.shifts.
Accessories for the CT50
The CT50 ships with a battery. All other accessories are ordered and
shipped separately. For help, contact your local sales representative.
CT50 Accessories and Descriptions
Accessory Description
CT50 Battery
(Model CT50-BTSC)
(P/N 318-055-001)
CT50 Battery, nonincendive
(P/N 318-055-003)
Ethernet HomeBase
(Model CT50-EB)
HomeBase
(Model CT50-HB)
ChargeBase
(Model CT50-CB)
NetBase
(Model CT50-NB)
Vehicle Power Adapter
(Model CT50-MC)
The battery provides hours of power to the
CT50. You may want to purchase spare
battery packs for longer shifts. Not for use
with the non-incendive version of the CT50.
The battery provides hours of power to the
non-incendive version of the CT50NI. You
may want to purchase spare battery packs
for longer shifts.
Use the Ethernet HomeBase to hold a CT50
with its battery installed, charge a spare
battery pack, charge the main battery pack,
and provide power to the mobile computer.
The dock has a USB client connector as well
as an Ethernet connector.
Use the HomeBase to hold a CT50 with its
battery installed, charge a spare battery
pack, charge the main battery pack, and
provide power to the mobile computer. The
HomeBase has a USB client connector.
The CT50 ChargeBase is a 4-slot charging
cradle that can power four computers, and
charge their main batteries in 6 hours.
The Net Base enables up to four CT50
computers to communicate with a host
device over an Ethernet network. The Net
Base also provides a second RJ45 Ethernet
port for connection to an additional device
such as a printer, workstation, or another Net
Base.
Use the vehicle power adapter to charge the
battery installed in the CT50 from the
accessory port in your vehicle.
24 Dolphin CT50 Mobile Computer with Windows 10 IoT Mobile Enterprise User Guide
Page 35

Chapter 1 — About the Computer Features
Preliminary
and othand oth
n lab
CT50 Accessories and Descriptions (continued)
Accessory Description
Vehicle D o ck
(Model CT50-MB)
Quad Charger
(Model CT50-QBC)
USB Adapter
(Model CT50-USB)
Non-Dockable Scan
Handle
DEX Adapter
(Model DEX-BLE-1)
Holster Use the holster to carry the CT50 hands-free
Use the vehicle docks to hold and charge the
CT50 while using it on a vehicle.
Use the quad charger to charge up to 4
batteries.
Use this snap-on adapter to provide USB
host and client communications through the
CT50.
Attach to a CT50 to have an easy way to grip
the computer and scan labels.
Use the DEX adapter to easily connect to
direct store delivery (DSD) receiving systems
including DEX/UCS store systems, vending
machines, and other retail equipment.
in the work environment. You can choose
between three different holsters.
Dolphin CT50 Mobile Computer with Windows 10 IoT Mobile Enterprise User Guide 25
Page 36

Chapter 1 — About the Computer Features
Preliminary
26 Dolphin CT50 Mobile Computer with Windows 10 IoT Mobile Enterprise User Guide
Page 37

2
Preliminary
You canYou c
About the User Interface and
Applications
Use this chapter to learn about the Windows user interface
and how to interact with the screen. You can also use this
chapter to learn about the Honeywell applications on the
computer.
27
Page 38

Chapter 2 — About the User Interface and Applications
Status bar
Start screen
tatus
About the User Interface
The Windows 10 IoT Mobile Enterprise operating system provides a
touch-friendly and easy to navigate user interface.
About the Start Screen
When you turn on the mobile computer, the Home screen is the first
screen that appears after language provisioning is complete. The Status
bar contains icons to the left tell you current wireless and network
connection state. The status icons to the right show you the date, time,
and the battery level.
28 Dolphin CT50 Mobile Computer with Windows 10 IoT Mobile Enterprise User Guide
Page 39

About Status Bar Icons
comput
arged
h full s
on.on.
Status and notification icons show you the current status of your
network, the battery, notifications, and the sounds.
Common Status and Notification Icons
Icon Description
An app or service is using computer location information.
Unread notification.
Wi-Fi network connection is active with full signal strength.
The computer is paired and connected with a Bluetooth
device.
Vibrate mode is turned on.
Battery is fully charged.
Chapter 2 — About the User Interface and Applications
Battery saver mode is turned on.
The computer is connected to external power. When the
battery is charging, the battery charge and external power
icons alternate.
Airplane mode is turned on.
Navigation and Function Buttons
There are navigation and function buttons below the Status screen on
the front panel of the computer and on the right side of the computer.
Navigation and Function Buttons
Button Description Function
Back Returns you to the previous screen.
Home Returns you to the Start screen.
Dolphin CT50 Mobile Computer with Windows 10 IoT Mobile Enterprise User Guide 29
Page 40

Chapter 2 — About the User Interface and Applications
Preliminary
your
or exam
and h
hold a
hold a
e screene scre
Navigation and Function Buttons (continued)
Button Description Function
Search Starts a search on the computer or the
Volume Raises or lowers the volume of the
About Screen Gestures
Use your fingers or the stylus to manipulate icons, buttons, menus, the
onscreen keyboard, and other items on the screen.
• To select or activate something, tap it.
• To type something, such as a name or password, touch where you
want to type. A keyboard appears that lets you type into the field.
Other common gestures include:
• Touch and hold: Touch and hold an item by touching it and lifting your
finger until an action occurs.
• Drag: Touch and hold an item for a moment. Without lifting your
finger, move your finger on the screen until you reach the target
position. For example, you can drag to reposition shortcuts on the
Home screen.
• Swipe or slide: Quickly move your finger across the screen, without
pausing when you first touch. For example, you can slide a Home
screen left or right to view the other Home screens.
• Double-tap: Tap quickly twice on a web page, map, or other screen to
zoom in. Double-tap again to zoom out.
• Pinch: In some apps, you can zoom in and out by placing two fingers
on the screen at once and pinching them together (to zoom out) or
spreading them apart (to zoom in).
internet.
speaker.
30 Dolphin CT50 Mobile Computer with Windows 10 IoT Mobile Enterprise User Guide
 Loading...