

Honda P/N 08A03-5B1-050 Installation Instructions Manual

Accessory Application Publications No.
INSTALLATION
INSTRUCTIONS
PARTS LIST
Cassette Player (sold separately):
P/N 08A03-5B1-050
Cassette player
Owner’s Man ual
7 Washer-screws, 5 x 8 mm
(2 not used)
IN-DASH CD CHANGER/
CASSETTE PLAYER
ELEMENT (LX)
In-Dash CD Changer (sold separately):
P/N 08A06-3B1-300
In-Dash CD changer
Owner’s man ual
6 Washer-screws, 5 x 8 mm
(2 not used)
Issue Date
OCT 2003
Wire tie (not used)
Harness clip
Washer-screw, 4 x 6 mm
Wire tie (not used)
Harness clip
Adhesive strips
(1 not used)
TOOLS AND SUPPLIES REQUIRED
Phillips screwdriver
Small flat-tip screwdriver
Isopropyl alcohol
Shop towel
10 mm Combination wrench
© 2003 American Honda Motor Co., Inc - All Rights Reserved. 1 of 5
08B06-SCV-1A00-91
INSTALLATION
Customer information: The inf ormation in this
installation instruction is intended for use only by
skilled technicians who have the proper tools,
equipment, and training to correctly and safely add
equipment to your vehicle. These procedures
should not be attempted by “do-it-yourself ers .”
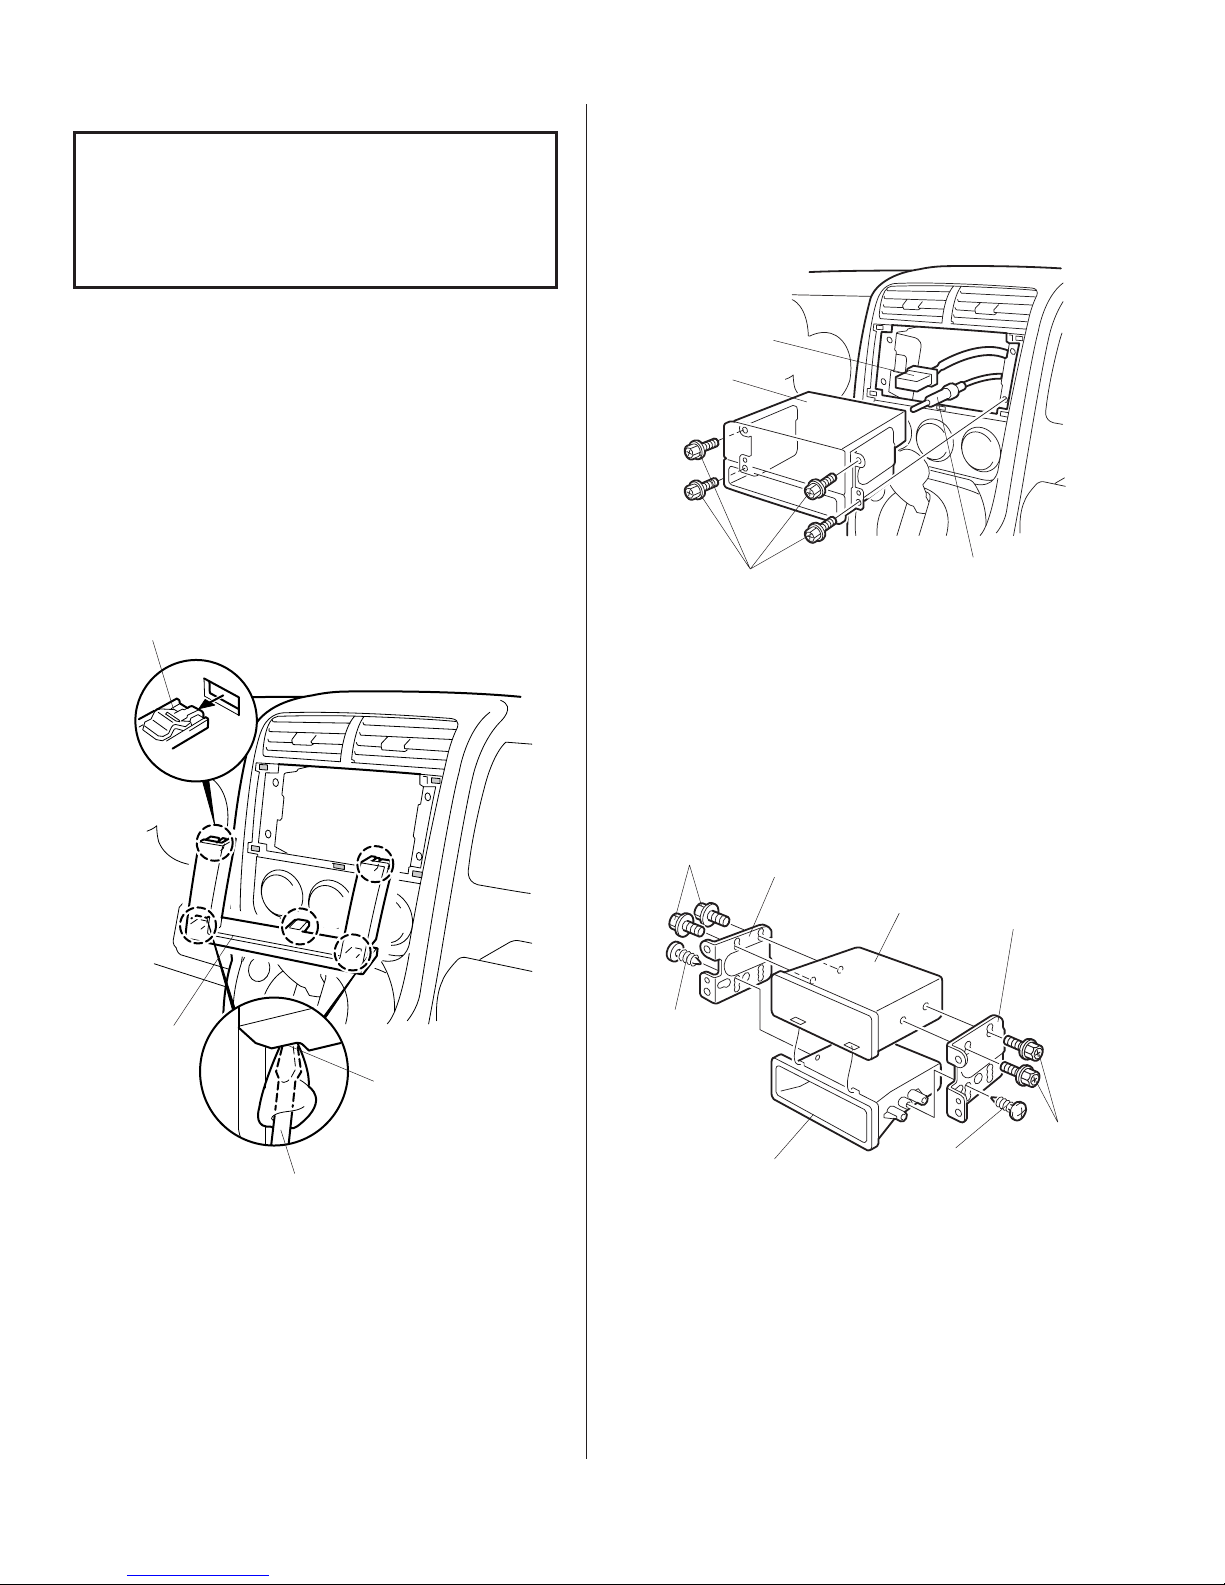
4. Remove the four w asher-screws f astening the
audio unit to the instrument panel and pull the
audio unit out. Unplug the v ehicle connector and
antenna lead from the rear of the audio unit and
remove the audio unit.
1. Make sure you hav e the anti-theft code for the
radio, then write down the frequencies f or the
preset buttons.
2 . Disconnect the negative cable from the battery.
Removing the Parts
3. Wrap the shop towel to the top of the flat-tip
screwdriver , and insert it to grooves in the audio
panel. Pull the audio panel out to w ard y ou to
release the five clips and remove the audio panel.
Take care not to damage the clips.
CLIPS (5)
VEHICLE
CONNECTOR
AUDIO
UNIT
2828211K
WASHER-SCREW
(Reuse.)
ANTENNA
LEAD
5. Remove the four scre ws and two self-tapping
screws fastening the right and left brack ets to the
audio unit and pocket, and separate the pock et
from the audio unit. Save the pocket, screws and
brackets for your customer.
WASHERSCREW
(Reuse.)
LEFT
BRACKET
AUDIO UNIT
RIGHT
BRACKET
SELF-
AUDIO
PANEL
GROOVES IN
AUDIO PANEL
2624042K
FLAT-TIP
SCREWDRIVER
TAPPING
SCREW
POCKET
(Not reused.)
SELFTAPPING
SCREW
2 of 5 © 2003 American Honda Motor Co., Inc - All Rights Reserved.
WASHERSCREW
(Reuse.)
2626010K
 Loading...