

Page 1

– 1 –
ENGLISH
SPLIT TYPE AIR CONDITIONER
INDOOR UNIT
INDOOR UNIT
MODEL
RAD-18NH7
RAD-25NH7
RAD-35NH7
RAD-50NH7
Instruction manual Page 1~20
To obtain the best performance and ensure years of trouble
free use, please read this instruction manual completely.
Bedlenungsanleitung Suite 21~40
Bitte lesen Sie diese Bedienungsanleitung aufmerksam
durch, um durch richtige Bedienung jahrelangen und
störungsfreien Betrieb zu gewährleisten.
Mode d’emploi Page 41~60
Des performances optimales et un fonctionnement à long
terme seront assurés en appliquant les présentes
instructions après avoir entièrement lu ce mode d’emploi.
Manuale di istruzioni Pag. 61~80
Per garantire la migliore prestazione e la più lunga
durataleggere attentamente e al completo le seguanti
istruzioni.
Manual de instrucciones Página 81~100
Para obtener el mejor funcionamiento y asegurar años de
uso libre de problemas, lea cuidadosamente este manual
de instrucciones.
Manual de instruções Página 101~120
A fim de obter um bom funcionamento e de garantir uma
utilização sem falhas durante muitos anos, é favor ler este
manual de instruções completamente.
O‰ЛБ›В˜ XВИЪИЫМФ‡ ™ÂÏ›‰· 121~140
°И· ЩЛУ О·П‡ЩВЪЛ ‰˘У·Щ‹ ·fi‰ФЫЛ О·И ЩЛУ М·ОЪФ¯ЪfiУИ·
О·И ¯ˆЪ›˜ ЪФ‚П‹М·Щ· ¯Ъ‹ЫЛ ЩЛ˜ Ы˘ЫОВ˘‹˜ ·˘Щ‹˜,
·Ъ·О·ПФ‡МВ ‰И·‚¿ЫЩВ П‹Ъˆ˜ ЩИ˜ Ф‰ЛБ›В˜ ¯ВИЪИЫМФ‡ ЩЛ˜.
Инструкция по эксплуатации
стр. 141~160
Для обеспечения наилучших эксплуатационных
характеристик и многолетней безотказной работы
оборудования необходимо ознакомиться с данной
Инструкцией по эксплуатации.
RAD-18NH7
RAD-25NH7
RAD-35NH7
RAD-50NH7
Page 2
– 2 –
!
SAFETY PRECAUTION
●
Please read the “Safety Precaution” carefully before operating the unit to ensure correct usage of the unit.
●
Pay special attention to signs of “ Warning” and “ Caution”. The “Warning” section contains matters which,
if not observed strictly, may cause death or serious injury. The “Caution” section contains matters which may
result in serious consequences if not observed properly. Please observe all instructions strictly to ensure safety.
●
The sign indicate the following meanings.
●
Please keep this manual after reading.
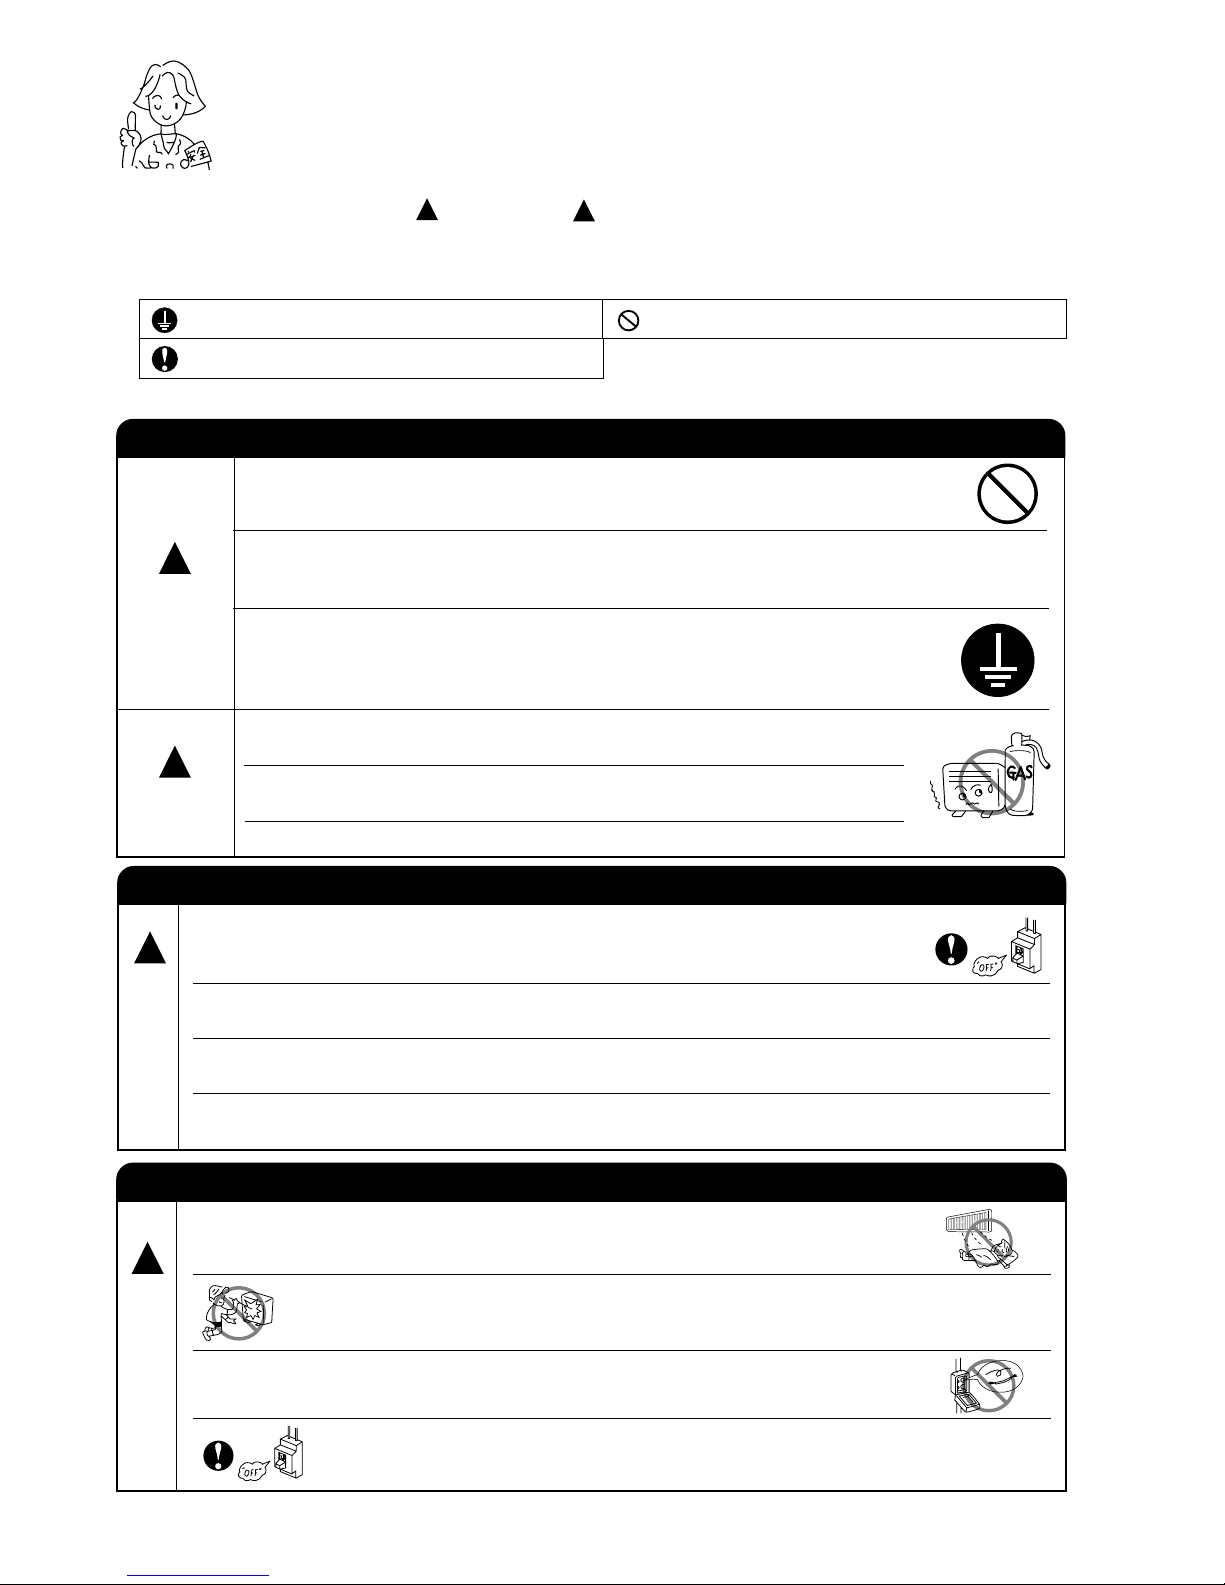
WARNING
PRECAUTIONS DURING INSTALLATION
●
Do not reconstruct the unit.
Water leakage, fault, short circuit or fire may occur if you reconstruct the
unit by yourself.
●
Please ask your sales agent or qualified technician for the installation of
your unit. Water leakage, short circuit or fire may occur if you install the unit
by yourself.
●
Please use earth line.
Do not place the earth line near water or gas pipes, lightning-conductor, or
the earth line of telephone. Improper installation of earth line may cause
electric shock.
●
A circuit breaker should be installed depending on the mounting site of the
unit. Without a circuit breaker, the danger of electric shock exists.
●
Do not install near location where there is flammable gas. The outdoor unit
may catch fire if flammable gas leaks around it.
●
Please ensure smooth flow of water when installing the drain hose.
CAUTION
!
!
PRECAUTIONS DURING SHIFTING OR MAINTENANCE
PRECAUTIONS DURING OPERATION
●
Avoid an extended period of direct air flow for your health.
W
A
R
N
I
N
G
!
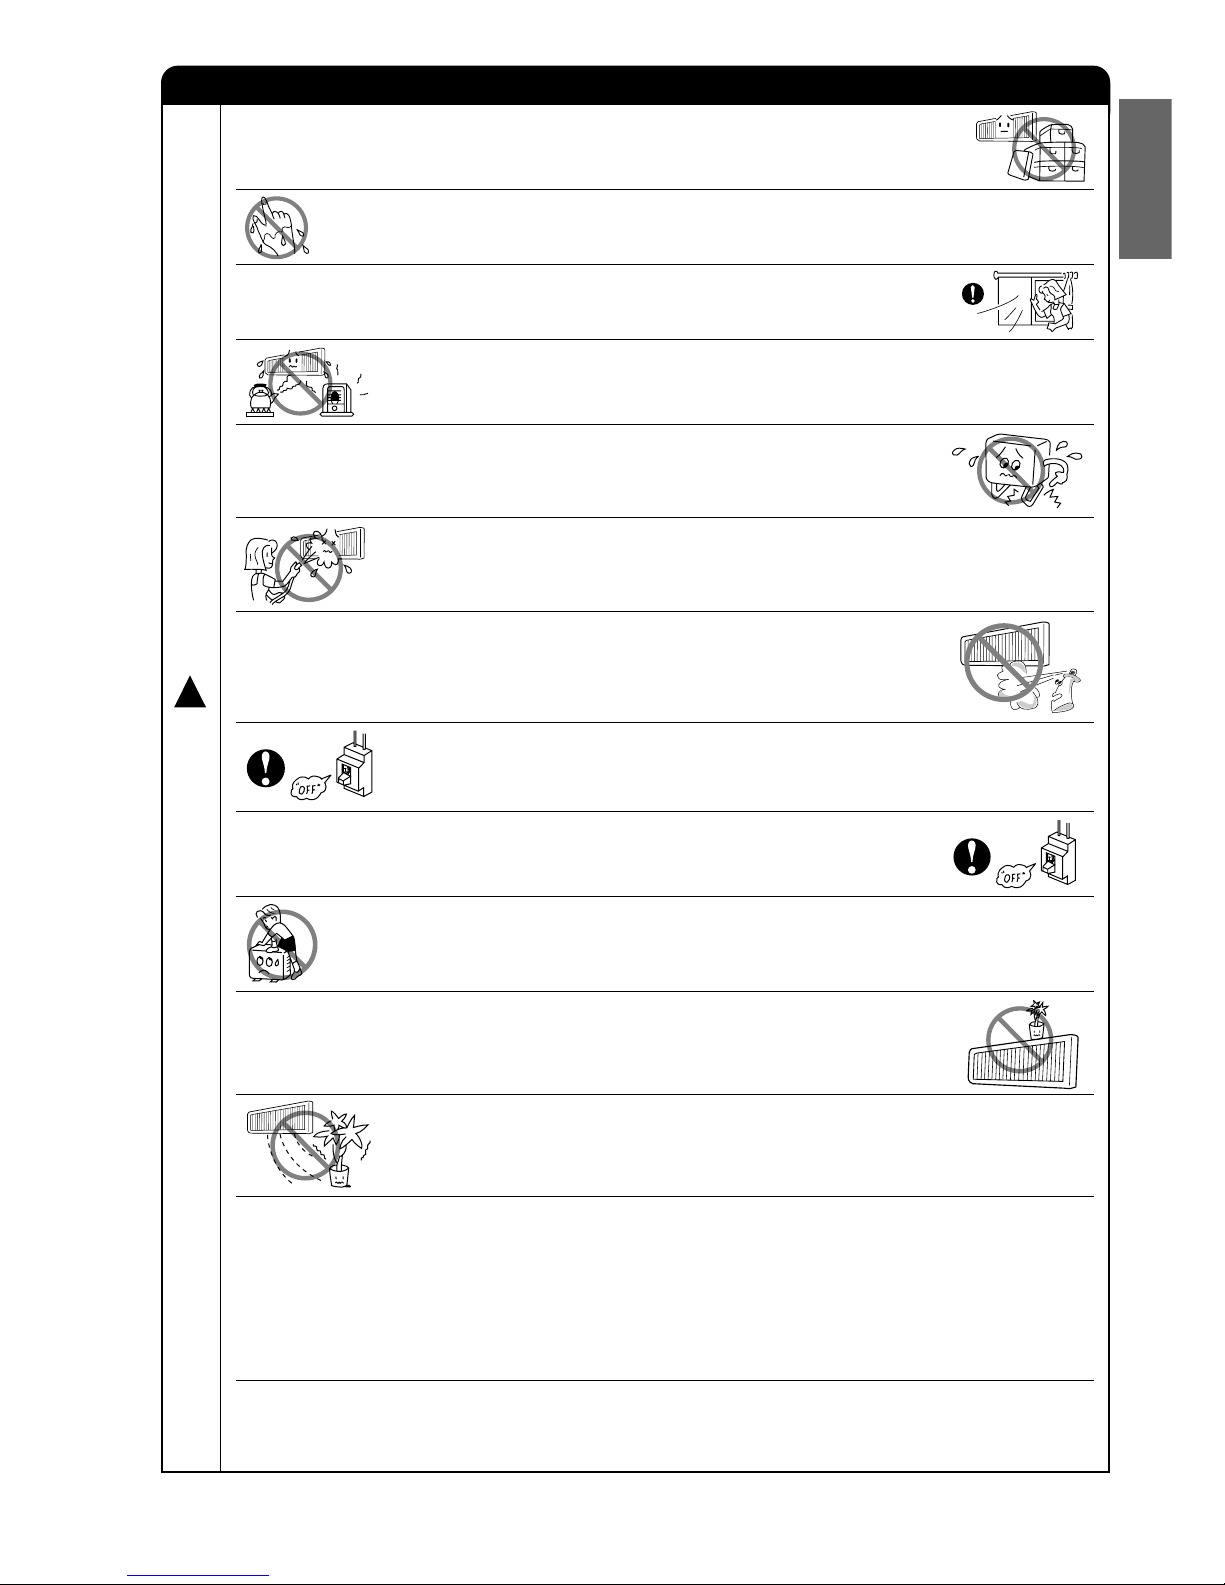
●
Should abnormal situation arises (like burning smell), please stop operating the unit
and turn off the circuit breaker. Contact your agent. Fault, short circuit or fire may
occur if you continue to operate the unit under abnormal situation.
●
Please contact your agent for maintenance. Improper self maintenance may cause
electric shock and fire.
●
Please contact your agent if you need to remove and reinstall the unit. Electric
shock or fire may occur if you remove and reinstall the unit yourself improperly.
●
If the supply cord is damaged, it must be replaced by the special cord obtainable
at authorized service/parts centers.
●
Do not insert a finger, a rod or other objects into the air outlet or inlet. As the
fan is rotating at a high speed, it will cause injury. Before cleaning, be sure
to stop the operation and turn the breaker OFF.
●
During thunder storm, disconnect and turn off the circuit breaker.
●
Do not use any conductor as fuse wire, this could cause fatal accident.
!
Make sure to connect earth line.
Indicates the instructions that must be followed.
The sign in the figure indicates prohibition.
W
A
R
N
I
N
G
!
Page 3
– 3 –
ENGLISH
PRECAUTIONS DURING OPERATION
●
Do not attempt to operate the unit with wet hands, this could cause fatal
accident.
●
When operating the unit with burning equipments, regularly ventilate the
room to avoid oxygen insufficiency.
●
Do not direct the cool air coming out from the air-conditioner panel to face
household heating apparatus as this may affect the working of apparatus
such as the electric kettle, oven etc.
●
Do not place plants directly under the air flow as it is bad for the plants.
●
Please ensure that outdoor mounting frame is always stable, firm and
without defect. If not, the outdoor unit may collapse and cause danger.
●
Do not splash or direct water to the body of the unit when cleaning it as this
may cause short circuit.
●
When operating the unit with the door and windows opened, (the room humidity is always above
80%) and with the air deflector facing down or moving automatically for a long period of time,
water will condense on the air deflector and drips down occasionally. This will wet your furniture.
Therefore, do not operate under such condition for a long time.
●
If the amount of heat in the room is above the cooling or heating capability of the unit (for
example: more people entering the room, using heating equipments and etc.), the preset room
temperature cannot be achieved.
●
This appliance is not intended for use by young children or infirm persons unless they have been
adequately supervised by a responsible person to ensure that they can use the appliance safely.
●
Young children should be supervised to ensure that they do not play with the appliance.
●
Do not climb on the outdoor unit or put objects on it.
●
Please switch off the unit and turn off the circuit breaker during cleaning, the
high-speed fan inside the unit may cause danger.
●
Turn off the circuit breaker if the unit is not to be operated for a long period.
C
A
U
T
I
O
N
!
●
The product shall be operated under the manufacturer specification and
not for any other intended use.
●
Do not put water container (like vase) on the indoor unit to avoid water
dripping into the unit. Dripping water will damage the insulator inside the unit
and causes short-circuit.
●
Do not use any aerosol or hair sprays near the indoor unit. This chemical
can adhere on heat exchanger fin and blocked the evaporation water flow
to drain pan. The water will drop on tangential fan and cause water splashing
out from indoor unit.
Page 4
– 4 –
MULTI-AIR CONDITIONER
With this multi-air conditioner, several indoor units can be connected to one outdoor unit to be driven. You
can operate the required number of indoor units.
Combination of Operations:
● You cannot operate the indoor units in
the following combinations.
● The indoor unit which is switched on first continues
to operate, but other indoor units which is switched
on later does not operate while the lamp lights.
● To re-start an indoor unit which was operated later,
stop the indoor unit which was operated first or
later and reset the type of operation, then perform
operation again.
One unit
Heating
Other unit
Cooling
Dehumidifying
Circulating (fan)
Adjusting the Number of Indoor
Units:
Decrease the number of
indoor units to be operated
especially when it is very
hot or cold or when you
want to reach the present
temperature quickly.
Stopped Indoor Units:
When an indoor unit is operated in the
cooling, heating or dehumidifying mode in
the room, the sound of refrigerant flow may
be heard from a stopped indoor unit or a
stopped indoor unit may become warm.
This is because the indoor unit returns
refrigerant to the outdoor unit to be ready
for operation.
When operation mode is selected:
● When heating operation is automatically selected for the first indoor unit, the next indoor unit will then
start to heat. Also, if cooling or dehumidifying is automatically selected for the first indoor unit, the next
indoor unit will also start to cool or dehumidify.
During automatic operation:
Page 5

– 5 –
ENGLISH
INDOOR UNIT
NAMES AND FUNCTIONS OF EACH PART
WIDTH (mm)
750
MODEL
RAD-18NH7/RAD-25NH7/RAD-35NH7/RAD-50NH7
HEIGHT (mm)
235
DEPTH (mm)
400
MODEL NAME AND DIMENSIONS
Electrical
box
Air outlet
Filter
Air inlet
Page 6

– 6 –
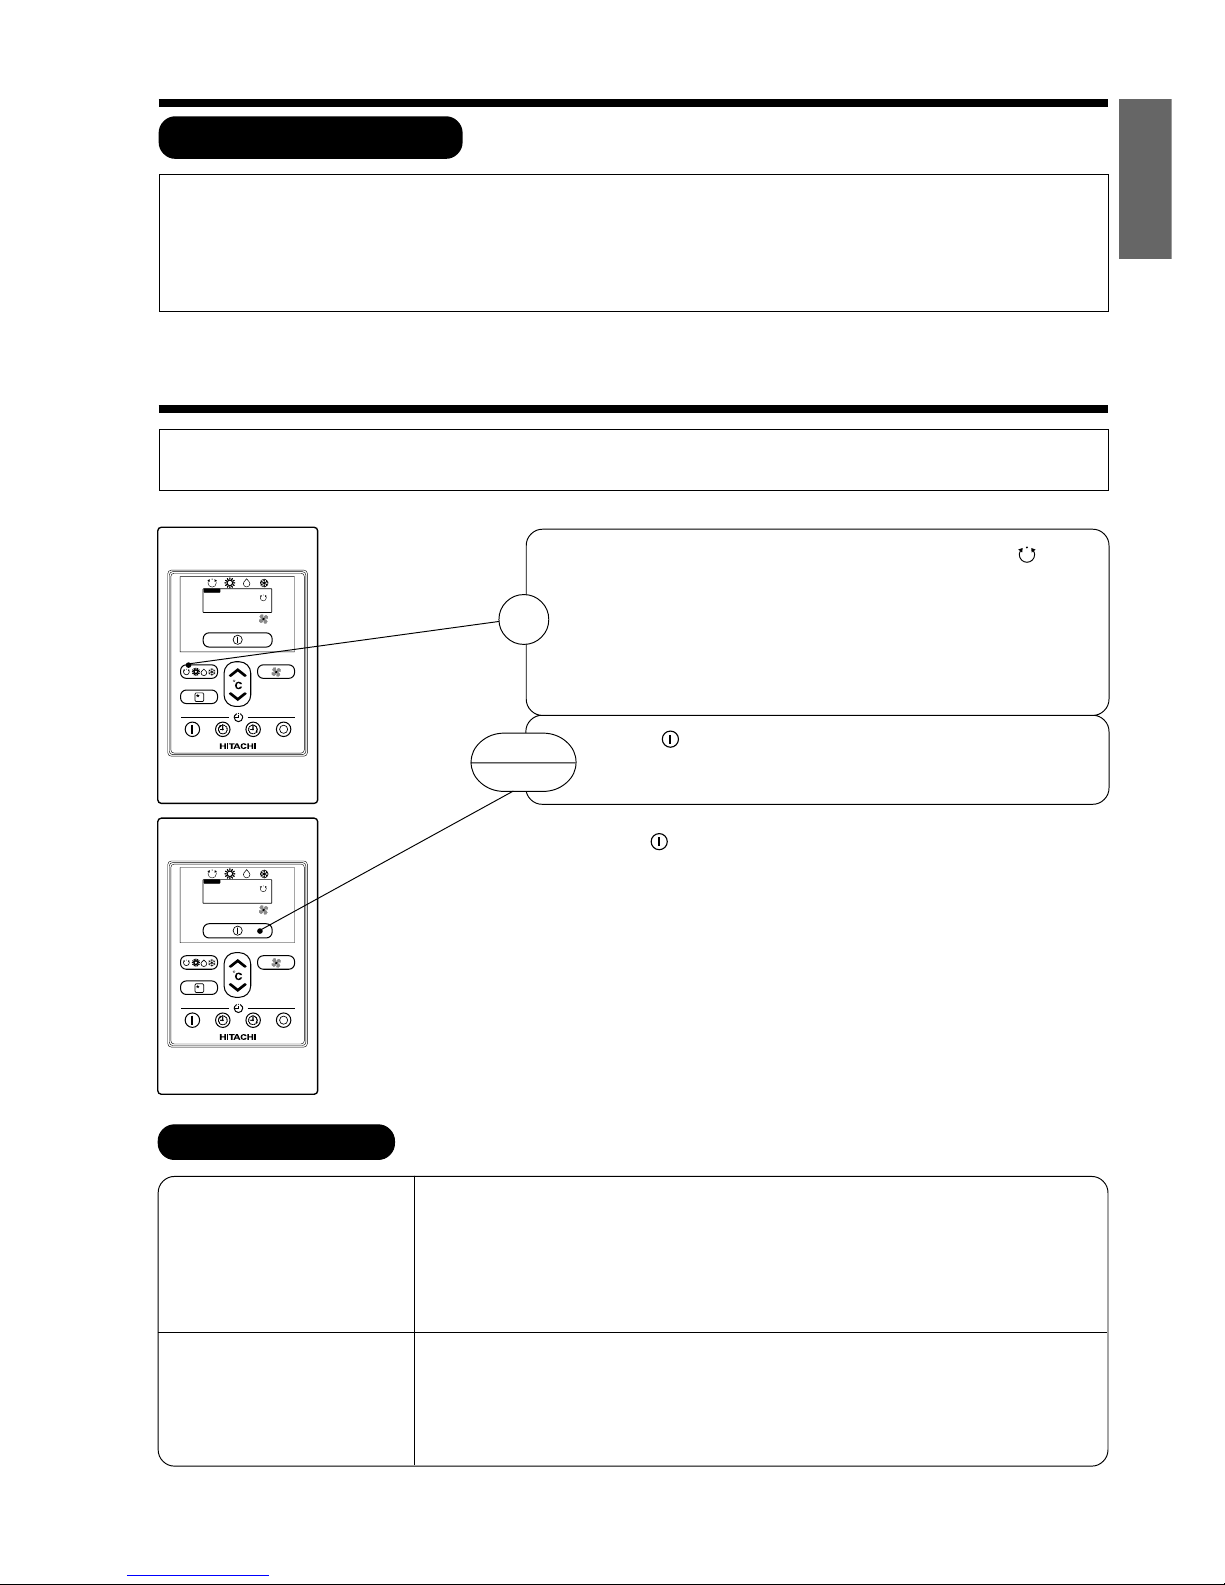
NAMES AND FUNCTIONS OF REMOTE CONTROL UNIT
■ This controls the operation function and timer setting of the room air conditioner.
Hr.
START/STOP Button
12
Use this button to select the
operating mode. Every time you
press it, the mode will change from
(AUTO) to (HEAT) to
(DEHUMIDIFY) and to (COOL)
cyclically.
This determines the fan speed.
Every time you press this button,
the intensity of circulation will
change from (AUTO) to (HI)
to (MED) to (LOW) (This
button allows selecting the optimal
or preferred fan speed for each
operation mode).
Precautions for Use
● Do not put the remote controller in the following places.
● Under direct sunlight.
● In the vicinity of a heater.
● Handle the remote controller carefully. Do not drop it on the floor, and protect it from water.
● Once the outdoor unit stops, it will not restart for about 3 minutes (unless you turn the power
switch off and on or unplug the power cord and plug it in again).
This is to protect the device and does not indicate a failure.
● If you press the FUNCTION selector button during operation, the device may stop for about
3 minutes for protection.
Page 7
– 7 –
ENGLISH
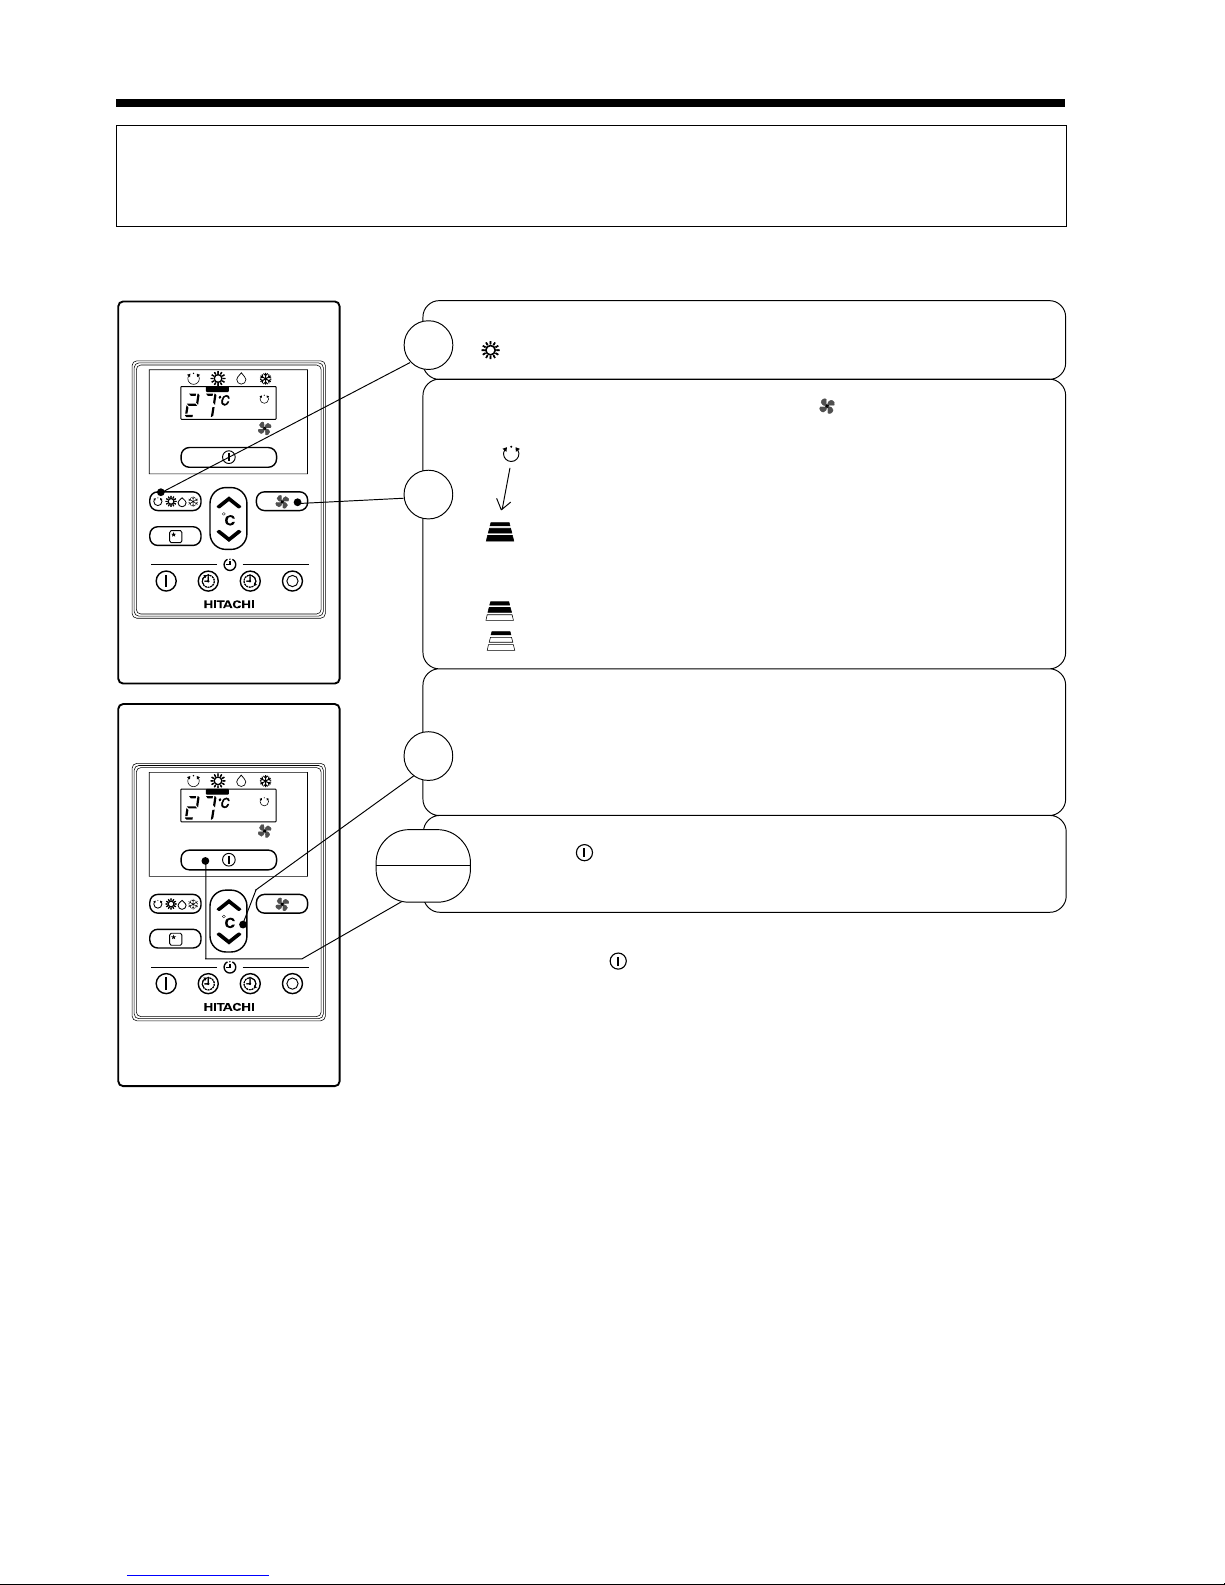
AUTOMATIC OPERATION
The device will automatically determine the mode of operation, HEAT, COOL or DEHUMIDIFY depending on the current room
temperature. The selected mode of operation will change when the room temperature varies.
■ As the settings are stored in memory in the remote controller, you only have
to press the (START/STOP) button next time.
Press the FUNCTION selector so that the display indicates the (AUTO)
mode of operation.
● When AUTO has been selected, the device will automatically determine
the mode of operation, HEAT, COOL or DEHUMIDIFY depending on
the current room temperature. However the mode of operation will
not change when indoor unit connected to multi type outdoor unit.
● If the mode automatically selected by the unit is not satisfactory,
manually change the mode setting (heat, dehumidify, cool or fan).
Press the (START/STOP) button.
Operation starts with a beep.
Press the button again to stop operation.
1
START
STOP
VARIOUS FUNCTIONS
■ Auto Restart Control
● If there is a power failure, operation will be automatically restarted when the power is resumed with previous operation mode.
(As the operation is not stopped by remote controller.)
● If you intend not to continue the operation when the power is resumed, switch off the power supply.
When you switch on the circuit breaker, the operation will be automatically restarted with previous operation mode.
Note: 1. If you do not require Auto Restart Control, please consult your sales agent or OFF by remote control.
2. Auto Restart Control is not available when Timer or Sleep Timer mode is set.
FAN SPEED (AUTO)
.....
When the AUTO fan speed mode is set in the cooling/heating operation:
For the heating operation
● The fan speed will automatically change according to the temperature of
discharged air.
● When the difference of room temperature and setting temperature is large,
fan starts to run at HI speed.
● When the room temperature reaches setting temperature, fan speed changes
to LOW automatically.
● When the difference of room temperature and setting temperature is large,
fan starts to run at HI speed.
● After room temperature reaches the preset temperature, the cooling operation,
which changes the fan speed and room temperature to obtain optimum
conditions for natural healthful cooling will be performed.
For the cooling operation
Page 8
– 8 –
HEATING OPERATION
● Use the device for heating when the outdoor temperature is under 21°C.
When it is too warm (over 21°C), the heating function may not work in order to protect the device.
● In order to keep reliability of the device, please use this device above -15°C of the outdoor temperature.
Press the FUNCTION selector so that the display indicates
(HEAT).
Set the desired FAN SPEED with the (FAN SPEED) button
(the display indicates the setting).
(AUTO): The fan speed is HI at first and varies to
MED or LOW automatically when the preset
temperature has been reached.
(HI) : Economical as the room will become warm
quickly.
But you may feel a chill at the beginning.
(MED) : Fan speed slow.
(LOW) : Fan speed slower.
Set the desired room temperature with the TEMPERATURE
buttons (the display indicates the setting).
The temperature setting and the actual room temperature may
vary somewhat depending on conditions.
Press the (START/STOP) button. Heating operation starts
with a beep. Press the button again to stop operation.
■ As the settings are stored in memory in the remote controller, you only
have to press the (START/STOP) button next time.
1
2
3
START
STOP
Page 9
– 9 –
ENGLISH
DEHUMIDIFYING OPERATION
Use the device for dehumidifying when the room temperature is over 16°C.
When it is under 15°C, the dehumidifying function will not work.
■ Dehumidifying Function
When the room temperature is higher than the temperature setting: The device will dehumidify the room,
reducing the room temperature to the preset level.
When the room temperature is lower than the temperature setting: Dehumidifying will be performed at
the temperature setting slightly lower than the current room temperature, regardless of the temperature
setting. The function will stop (the indoor unit will stop emitting air) as soon as the room temperature
becomes lower than the setting temperature.
Set the desired room temperature with the TEMPERATURE
button (the display indicates the setting).
The range of 20-26˚C is recommended as
the room temperature for dehumidifying.
Press the (START/STOP) button. Dehumidifying operation
starts with a beep. Press the button again to stop operation.
2
■ As the settings are stored in memory in the remote controller, you
only have to press the
(START/STOP) button next time.
START
STOP
Press the FUNCTION selector so that the display indicates
(DEHUMIDIFY).
The FAN SPEED is set at LOW automatically.
The FAN SPEED button does not work.
1
Page 10
– 10 –
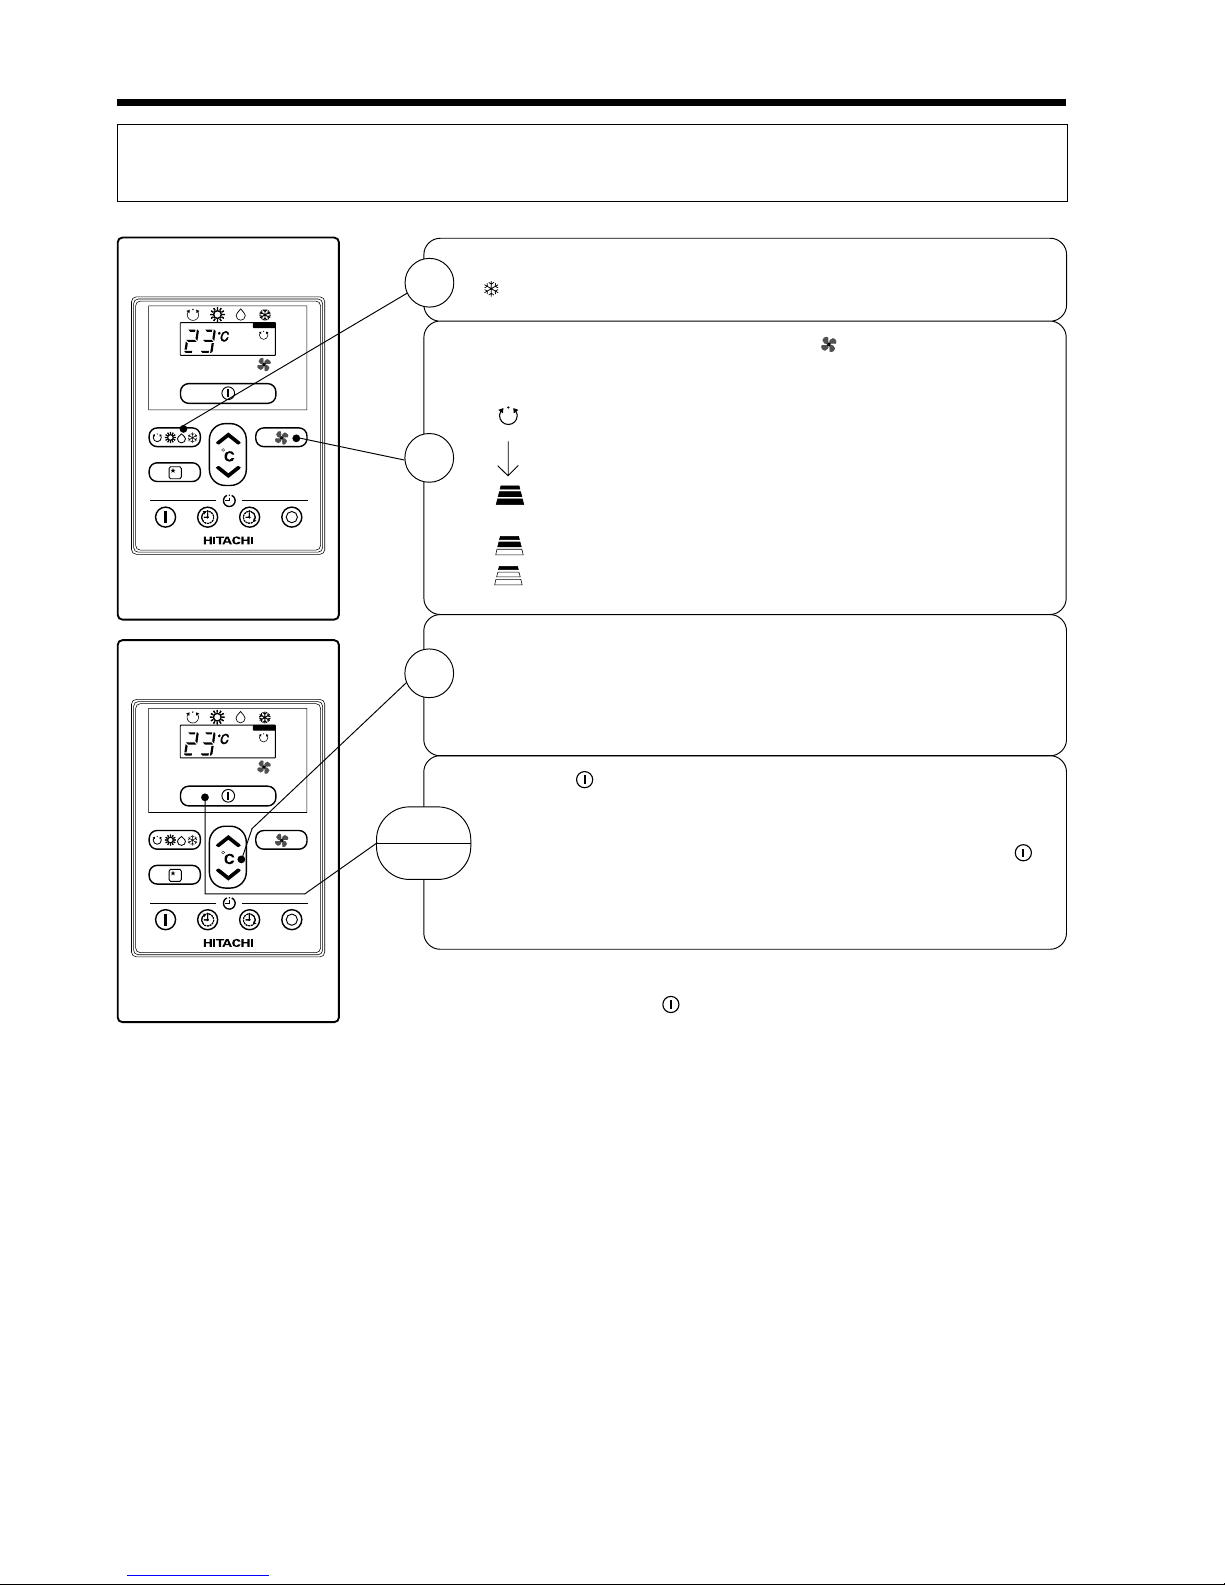
COOLING OPERATION
Use the device for cooling when the outdoor temperature is –10 ~ 43°C.
If indoor humidity is very high (80%), some dew may form on the air outlet grille of the indoor unit.
Press the FUNCTION selector so that the display indicates
(COOL).
Set the desired FAN SPEED with the (FAN SPEED) button
(the display indicates the setting).
(AUTO): The FAN SPEED is HI at first and varies to
MED or LOW automatically when the preset
temperature has been reached.
(HI) : Economical as the room will become cool
quickly.
(MED) : Fan speed slow.
(LOW) : Fan speed slower.
Set the desired room temperature with the TEMPERATURE
button (the display indicates the setting).
The temperature setting and the actual room temperature may
vary some how depending on conditions.
Press the
(START/STOP) button. Cooling operation starts
with a beep. Press the button again to stop operation. The
cooling function does not start if the temperature setting is
higher than the current room temperature (even though the
(OPERATION) lamp lights). The cooling function will start as
soon as you set the temperature below the current room
temperature.
■ As the settings are stored in memory in the remote controller, you
only have to press the
(START/STOP) button next time.
1
2
START
STOP
3
Page 11
– 11 –
ENGLISH
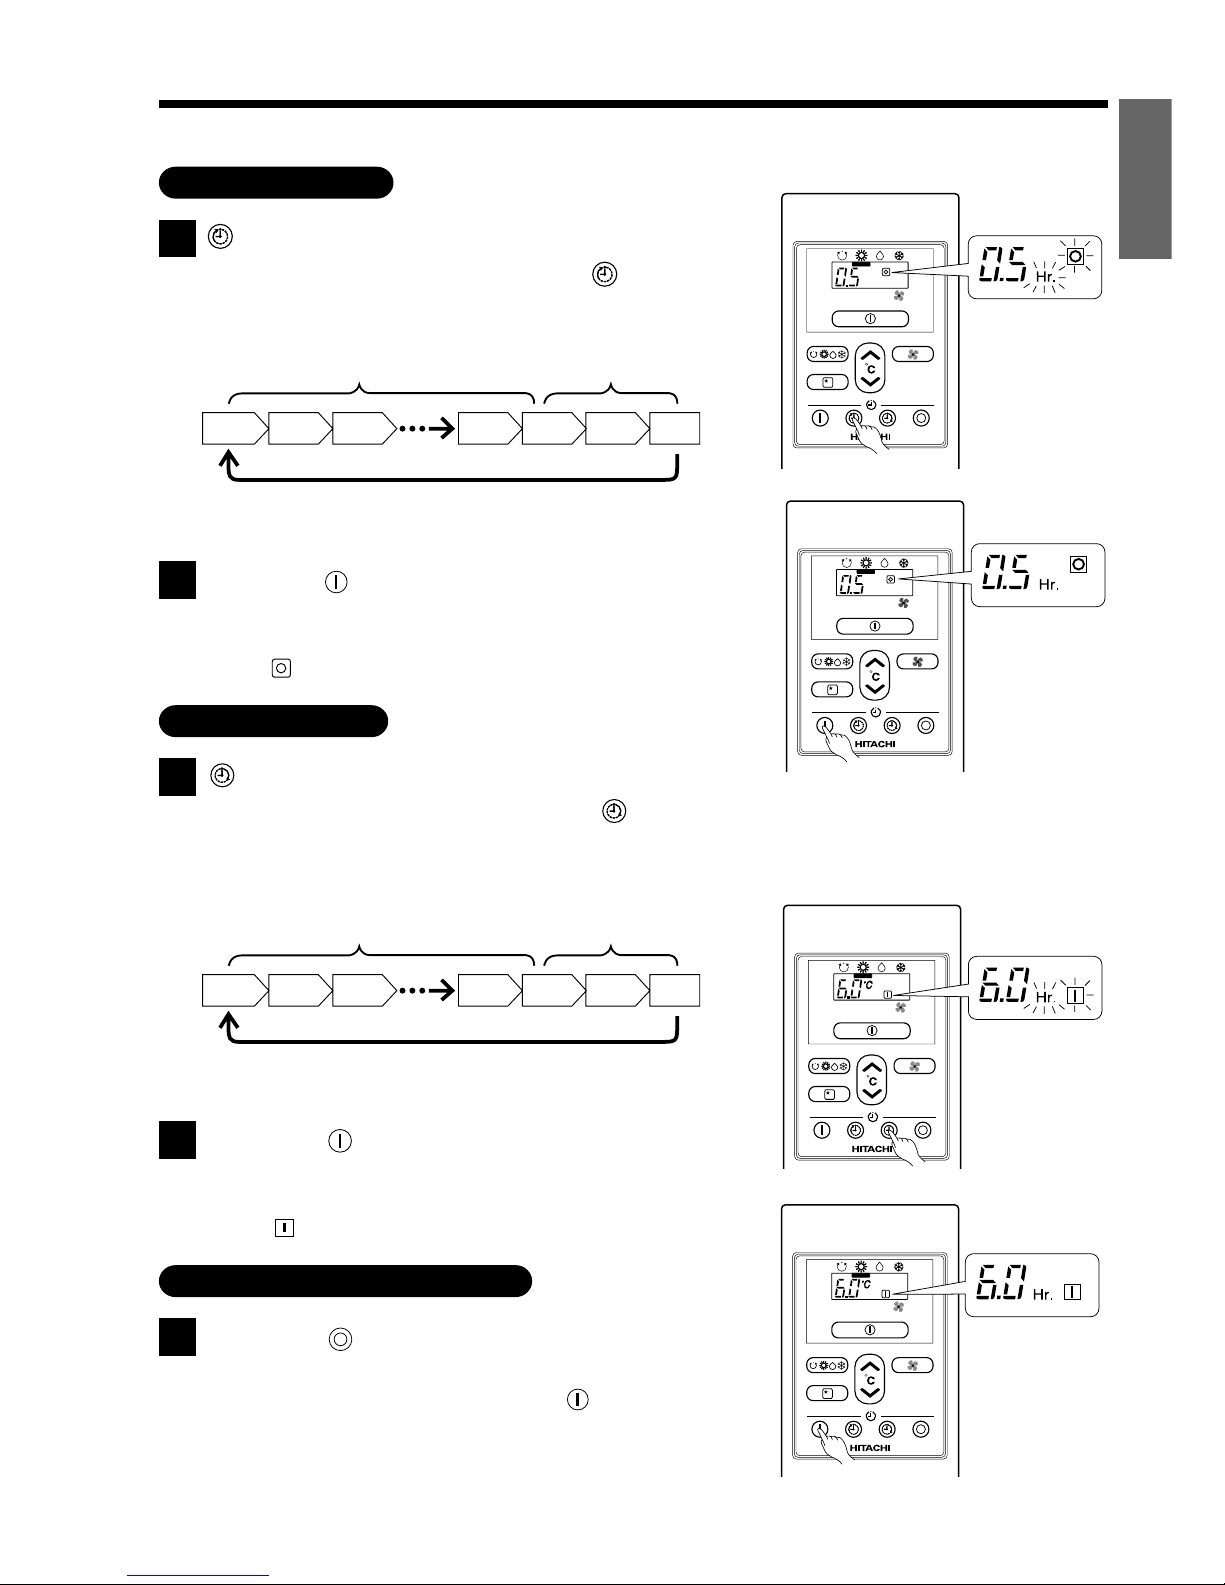
TIMER RESERVATION
■ ON Timer and OFF Timer are available.
1
OFF TIME setting
● Select the OFF TIME by pressing the (OFF)
Button.
● Setting time will change according to the below
sequence when you press the button.
● The value change quicker if you keep pressing the
button.
OFF Timer Reservation
■ Operation stop at setting time
2
Press the (Reserve) button
● OFF TIMER reserved with a signal received sound
“beep”.
● The (OFF) Mark starts lighting instead of blinking.
0.5 1.0 1.5 9.5 10 11 12
0.5 hour interval 1 hour interval
1
ON TIME setting
● Select the ON TIMER by pressing the (ON)
Button.
● At the beginning of setting, time 6 hours was set.
● Setting time will change according to the below
sequence.
● The value change quicker if you keep pressing the
button.
ON Timer Reservation
0.5 1.0 1.5 9.5 10 11 12
0.5 hour interval 1 hour interval
1
Press the (Cancel) button
● As the time settings are stored in remote controller
memory, you only have to press the (Reserve)
button in order to use the same setting next time.
CANCELLATION of Timer Reservation
2
Press the (Reserve) button
● ON TIMER reserved with a signal received sound
“beep”.
● The (ON) Mark starts lighting instead of blinking.
■ Operation will start for setting
temperature at setting time (The starting
time may different depend on the room
temperature and set temperature).
Hr.
Hr.
Hr.
Hr.
Page 12

– 12 –
HOW TO SET THE SLEEP TIMER
Mode
Sleep timer
Indication
1 hour 2 hours 3 hours 7 hours
Sleep timer off
44 44
1
Sleep Timer: The device will continue working for the designated
number of hours and then turn off.
Press the SLEEP button, indoor unit will produce a beep.
The timer information will be displayed on the remote controller.
How to Cancel Reservation
Press the (CANCEL) button. The (RESERVED) sign goes out with a beep.
Example: Setting 3 hours
sleep time.
Hr.
Page 13
– 13 –
ENGLISH
Explanation of the sleep timer
The device will control the FAN SPEED and room temperature
automatically so as to be quiet and good for people’s health.
● If you set the sleep timer after the off or on-timer has been
set, the sleep timer becomes effective instead of the off or
on-timer set earlier.
● You can not set other timer during sleep timer operation.
● After sleep timer time is up and when press sleep button
again, the sleep timer will be set as last setting.
● Sleep timer effective only once.
NOTE
Page 14

– 14 –
CIRCUIT BREAKER
When you do not use the room air conditioner, set the circuit breaker to “OFF”.
HOW TO USE THE AIR CONDITIONER EFFECTIVELY
1. An average room temperature setting is probably the best for you as well as
being economical.
Excessive cooling or heating is not recommended for health reasons. High electricity
bills may also result.
Close the curtains or blinds to prevent heat from flowing into or escaping the room
as well as to make more effective use of electricity.
2. At intervals, the doors and windows should be opened to let fresh air in.
Make sure the room is ventilated when operating the air conditioner
at the same time as other heating appliances.
3. Using the timer is recommended before going to sleep or going out.
4. The following must never be used for cleaning the indoor and outdoor units.
Benzine, thinner and scrub can damage plastic surfaces or coating.
Hot water above 40°C can shrink the filter and deform plastic parts.
5. Do not block the air intake and air outlet.
Do not block the air outlets and intakes of the indoor and outdoor units with curtains
or other obstacles which could degrade air conditioner performance and cause unit
failure.
CAUTION
!
Page 15

– 15 –
ENGLISH
Suitable Room Temperature Install curtain or blinds
Ventilation Effective Usage Of Timer
Do Not Forget To Clean The Air Filter
Please Adjust Suitable Temperature
For Baby And Children
Warning
Freezing temperature
is bad for health and a
waste of electric power.
!
It is possible to
reduce heat
entering the
room through
windows.
At night, please use the “OFF or ON timer
operation mode”, together with your wake up
time in the morning. This will enable you to
enjoy a comfortable room temperature. Please
use the timer effectively.
Dusty air filter will reduce the air volume and
the cooling efficiency. To prevent from wasting
electric energy, please clean the filter every 2
weeks.
Please pay attention to the room temperature
and air flow direction when operating the unit
for baby, children and old folks who have
difficulty in movement.
Caution
Do not close the room for a long period of
time. Occasionally open the door and windows
to allow the
entrance of
fresh air.
!
THE IDEAL WAYS OF OPERATION
Page 16

– 16 –
FOR USER’S INFORMATION
The Air Conditioner And The Heat Source In The Room
Not Operating For A Long Time
When Lightning Occurs
Caution
If the amount of heat in the room is above the cooling
capability of the air conditioner (for example: more
people entering the room, using heating equipments
and etc.), the preset room temperature cannot be
achieved.
!
When the indoor unit is not to be used for a long
period of time, please switch off the power from the
mains. If the power from mains remains “ON”, the
indoor unit still consumes about 8W in the operation
control circuit even if it is in “OFF” mode.
Warning
To protect the whole unit during lightning, please
stop operating the unit and remove the plug from the
socket.
!
OFF
Interference From Electrical Products
Caution
To avoid noise interference, please place the indoor
unit and its remote controller at least 1m away from
electrical products.
!
Inverter-type
fluorescent
lamp.
To prevent
interference,
place at least
1m away.
TV
Page 17

– 17 –
ENGLISH
MAINTENANCE
● Before cleaning, stop unit operation with the remote controller and turn off the circuit breaker.
!
WARNING
1
Pull the filter toward the center until it detached from the holders.
Then take it out from holders
(refer to diagram).
PROCEDURE
● Do not expose the unit to water as it may cause an electric shock.
● For cleaning inside the air conditioner, consult your sales agent.
● Avoid using detergent when cleaning the heat exchanger of the indoor unit. Unit failure may result.
● When cleaning the heat exchanger with a vacuum cleaner, make sure to wear gloves so as not to injure
your hands on the heat exchanger fins.
!
CAUTION
1. AIR FILTER
Clean the air filter, as it removes dust inside the room. Be sure to clean
the filter once every two weeks so as not to consume electricity
unnecessarily.
Holders
Holders
Indoor unit
Pull
2
Remove dust from the filter using a vacuum cleaner. If there is
too much dust, use neutral detergent. After using neutral
detergent, wash with clean water and dry in the shade.
3
Install the filters.
Gently insert back the filter into the holders.
!
CAUTION
● Do not wash with hot water at more than 40°C. The filter may shrink.
● When washing it, shake off moisture completely and dry it in the shade; do not expose it directly to
the sun. The filter may shrink.
● Do not operate the air conditioner with the filter removed. Dust may enter the air conditioner and
cause trouble.
Page 18

– 18 –
1
2
3
REGULAR INSPECTION
PLEASE CHECK THE FOLLOWING POINTS BY QUALIFIED SERVICE PERSONAL EITHER
EVERY HALF YEARLY OR YEARLY. CONTACT YOUR SALES AGENT OR SERVICE SHOP.
Is the earth line disconnected or broken?
Is the mounting frame seriously affected by rust and is the
outdoor unit tilted or unstable?
Is the plug of power line firmly plugged into the socket?
(Please ensure no loose contact between them).
Confirm
AFTER SALE SERVICE AND WARRANTY
WHEN ASKING FOR SERVICE, CHECK THE FOLLOWING POINTS.
When it does not operate
● Is the fuse all right?
● Is the voltage extremely high or low?
● Is the circuit breaker “ON”?
● Was the air filter cleaned?
● Does sunlight fall directly on the outdoor unit?
● Is the air flow of the outdoor unit obstructed?
● Are the doors or windows opened, or is there any source of
heat in the room?
● Is the set temperature suitable?
CONDITION CHECK THE FOLLOWING POINTS
Notes
● In quiet or stop operation, the following phenomena may occassionally occur, but
they are not abnormal for the operation.
(1) Slight flowing noise of refrigerant in the refrigerating cycle.
(2) Slight rubbing noise from the fan casing which is cooled and then gradually
warmed as operation stops.
● The odor will possibly be emitted from the room air conditioner because the
various odor, emitted by smoke, foodstuffs, cosmetics and so on, sticks to it. So
the air filter and the evaporator regularly must be cleaned to reduce the odor.
●
Please contact your sales agent immediately if the air conditioner still fails to operate normally after the above
inspections. Inform your agent of the model of your unit, production number, date of installation. Please also
inform him regarding the fault.
●
Power supply shall be connected at the rated voltage, otherwise the unit will be broken or could not reach the
specified capacity.
When it does not cool well
When it does not hot well
Page 19

– 19 –
ENGLISH
MEMO
.....................................................................................................................................................................................
.....................................................................................................................................................................................
.....................................................................................................................................................................................
.....................................................................................................................................................................................
.....................................................................................................................................................................................
.....................................................................................................................................................................................
.....................................................................................................................................................................................
.....................................................................................................................................................................................
.....................................................................................................................................................................................
.....................................................................................................................................................................................
.....................................................................................................................................................................................
.....................................................................................................................................................................................
.....................................................................................................................................................................................
.....................................................................................................................................................................................
.....................................................................................................................................................................................
.....................................................................................................................................................................................
.....................................................................................................................................................................................
.....................................................................................................................................................................................
.....................................................................................................................................................................................
.....................................................................................................................................................................................
.....................................................................................................................................................................................
.....................................................................................................................................................................................
Please note:
On switching on the equipment, particularly when the room light is dimmed, a slight brightness fluctuation
may occur. This is of no consequence.
The conditions of the local Power Supply Companies are to be observed.
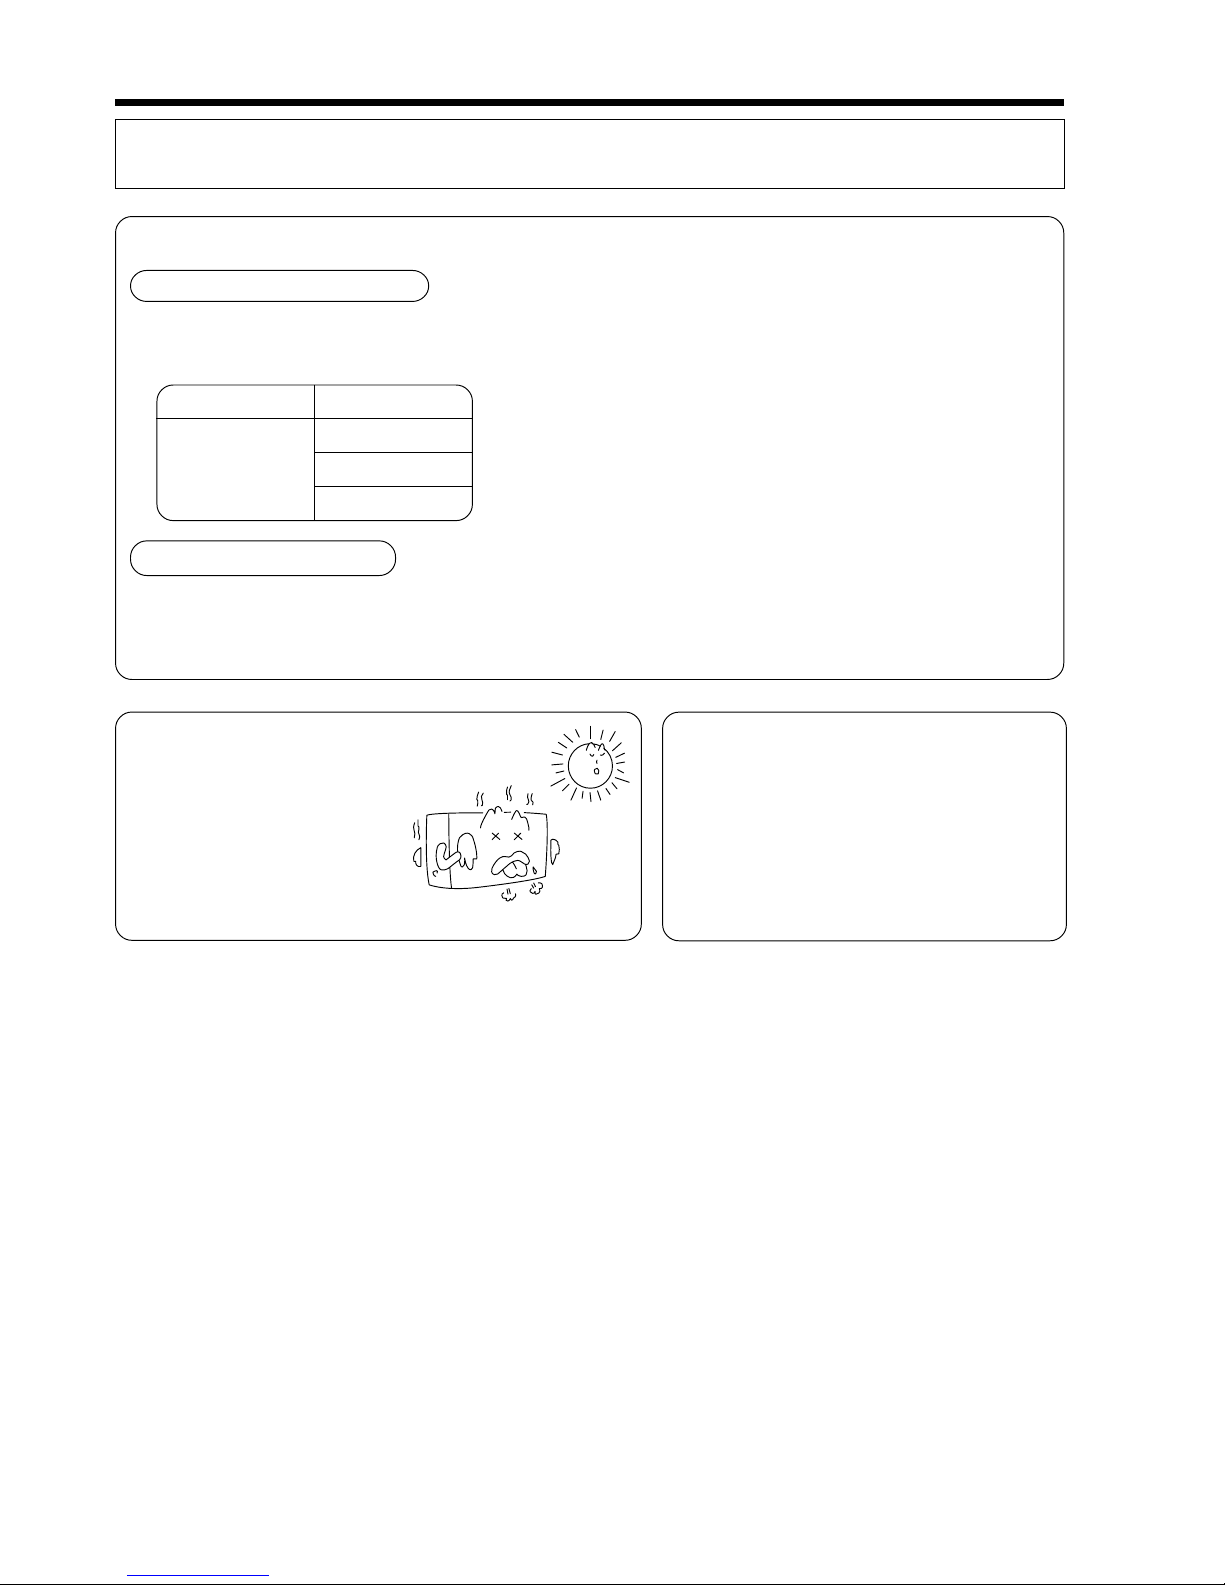
Minimum Maximum Minimum Maximum
Indoor
Dry bulb °C21 32 20 27
Wet bulb °C15 23 12 19
Outdoor
Dry bulb °C21 43 2 21
Wet bulb °C15 26 1 15
Note
● Avoid to use the room air conditioner for cooling operation when the outside temperature is below
21°C (70°F).
The recommended maximum and minimum operating temperatures of the hot and cold sides
should be as below:
Cooling Heating
Page 20

– 20 –
MEMO
.....................................................................................................................................................................................
.....................................................................................................................................................................................
.....................................................................................................................................................................................
.....................................................................................................................................................................................
.....................................................................................................................................................................................
.....................................................................................................................................................................................
.....................................................................................................................................................................................
.....................................................................................................................................................................................
.....................................................................................................................................................................................
.....................................................................................................................................................................................
.....................................................................................................................................................................................
.....................................................................................................................................................................................
.....................................................................................................................................................................................
.....................................................................................................................................................................................
.....................................................................................................................................................................................
.....................................................................................................................................................................................
.....................................................................................................................................................................................
.....................................................................................................................................................................................
.....................................................................................................................................................................................
.....................................................................................................................................................................................
.....................................................................................................................................................................................
.....................................................................................................................................................................................
.....................................................................................................................................................................................
.....................................................................................................................................................................................
.....................................................................................................................................................................................
.....................................................................................................................................................................................
.....................................................................................................................................................................................
.....................................................................................................................................................................................
.....................................................................................................................................................................................
.....................................................................................................................................................................................
.....................................................................................................................................................................................
.....................................................................................................................................................................................
.....................................................................................................................................................................................
.....................................................................................................................................................................................
.....................................................................................................................................................................................
.....................................................................................................................................................................................
.....................................................................................................................................................................................
.....................................................................................................................................................................................
.....................................................................................................................................................................................
Page 21

– 141 –
РУССКИЙ
КОНДИЦИОНЕР ТИПА РАСКОЛА
ВНУТРЕННИЙ БЛОК
МОДЕЛЬ
ВНУТРЕННИЙ БЛОК
RAD-18NH7
RAD-25NH7
RAD-35NH7
RAD-50NH7
Instruction manual Page 1~20
To obtain the best performance and ensure years of trouble
free use, please read this instruction manual completely.
Bedlenungsanleitung Suite 21~40
Bitte lesen Sie diese Bedienungsanleitung aufmerksam
durch, um durch richtige Bedienung jahrelangen und
störungsfreien Betrieb zu gewährleisten.
Mode d’emploi Page 41~60
Des performances optimales et un fonctionnement à long
terme seront assurés en appliquant les présentes
instructions après avoir entièrement lu ce mode d’emploi.
Manuale di istruzioni Pag. 61~80
Per garantire la migliore prestazione e la più lunga
durataleggere attentamente e al completo le seguanti
istruzioni.
Manual de instrucciones Página 81~100
Para obtener el mejor funcionamiento y asegurar años de
uso libre de problemas, lea cuidadosamente este manual
de instrucciones.
Manual de instruções Página 101~120
A fim de obter um bom funcionamento e de garantir uma
utilização sem falhas durante muitos anos, é favor ler este
manual de instruções completamente.
O‰ЛБ›В˜ XВИЪИЫМФ‡ ™ÂÏ›‰· 121~140
°И· ЩЛУ О·П‡ЩВЪЛ ‰˘У·Щ‹ ·fi‰ФЫЛ О·И ЩЛУ М·ОЪФ¯ЪfiУИ·
О·И ¯ˆЪ›˜ ЪФ‚П‹М·Щ· ¯Ъ‹ЫЛ ЩЛ˜ Ы˘ЫОВ˘‹˜ ·˘Щ‹˜,
·Ъ·О·ПФ‡МВ ‰И·‚¿ЫЩВ П‹Ъˆ˜ ЩИ˜ Ф‰ЛБ›В˜ ¯ВИЪИЫМФ‡ ЩЛ˜.
Инструкция по эксплуатации
стр. 141~160
Для обеспечения наилучших эксплуатационных
характеристик и многолетней безотказной работы
оборудования необходимо ознакомиться с данной
Инструкцией по эксплуатации.
RAD-18NH7
RAD-25NH7
RAD-35NH7
RAD-50NH7
Page 22

– 142 –
УКАЗАНИЯ ПО ТЕХНИКЕ БЕЗОПАСНОСТИ
●
Перед эксплуатацией устройства необходимо тщательно изучить данные “Указания по технике безопасности”, утобы обеспечить
правильное использование устройства.
●
Следует обратить особое внимание на указания “ Предупреждение” и “ Осторожно”. Разделы “Предупреждение”
содержат положения, которые при отсутствии их строгого соблюдения могут привести к смертельным случаям или серьезным
повреждениям. Разделы “Осторожно” содержат положения, которые в случае их неправильного выполнения могут вызвать
серьезные последствия. Для обеспечения безопасности необходимо строго выполнять все приведенные инструкции.
●
Символы обозначают следующее:
●
После прочтения данную инструкцию необходимо сохранить.
ПРЕДУПРЕЖДЕНИЕ
ТЕХНИКА БЕЗОПАСНОСТИ ПРИ МОНТАЖЕ
ОСТОРОЖНО
!
!
ТЕХНИКА БЕЗОПАСНОСТИ ПРИ ПЕРЕМЕЩЕНИИ И ТЕХОБСЛУЖИВАНИИ
ТЕХНИКА БЕЗОЛАСНОСТИ В ХОДЕ ЭКСПЛУАТАЦИИ
●
При возникновении неординарной ситуации (такой, как запах горения) прекратите
пользоваться прибором и отключите прерыватель. Обратитесь в Вашу сервисную службу.
Продолжение эксплуатации прибора в неординарной ситуации может привести к поломке,
короткому замыканию или возгоранию.
●
При необходимости технического обслуживания обратитесь в Вашу сервисную службу.
Результатом неквалифицированного технического обслуживания, проведенного
собственными силами, может явиться электрический удар или возгорание.
●
При необходимости демонтажа и повторного монтажа устройства обратитесь в Вашу
сервисную службу. Результатом неквалифицированного демонтажа и повторного
монтажа, проведенного собственными силами, может явиться электрический удар или
возгорание.
●
Если шнур поставкы поврежден, то оно должно быть заменено специальным шнуром
достижимым на утверженные центры service/parts
ПРЕДУПРЕЖДЕНИЕ
!
●
Не вносите изменения в конструкцию устройства.
При попытке самостоятельно внести изменения в конструкцию устройства
может произойтн утечка воды, отказы, короткое замыкание или
воспламенение.
●
Для монтажа устройства необходимо обратиться к Вашему торговому агенту или
к квалифицированному техническому специалисту. Результатом самостоятельного
монтажа устройства может явиться утечка воды, короткое замыкание или пожар.
●
Обязательно использовать заземляющий провод. Запрещается прокладывать
заземляющий провод поблизости от водопроводов и газопроводов, громоотводов,
а также вблизи заземляющих проводов телефонных линий. Неправильное
заземление может привести к электрическому удару.
●
Установка выключателя электроэнергии осуществляется в зависимосуи от
местонахождения устройства. При отсутствии выключателя электроэнергии
существует опасность электрического удара.
●
Запрещается монтаж устройств вблизи мест наличия горючих газов. Возможно
возгорание наружного блока при наличии утечки горючего газа в месте его
расположения.
●
При монтаже шланга отвода воды слвдует обеспечить безпрепятственный поток воды.
П
Р
Е
Д
У
П
Р
Е
Ж
Д
Е
Н
И
Е
!
●
Для сохранения здоровья следует избегать длительное время находиться под действием
воздушного потока.
●
Не введите перст, штанга или другие предметы в выход или вход воздуха. По мере того как
вентилятор вращающ на high speed, оно причинит ушиб. Перед очищать, будьте уверено
остановить деятельность и поворачивает выключатель.
●
Во время грозы выньте штепсель из розетки или выключите прерыватель электроцепи.
!
!
●
Запрещается использовать любые токопроводящие элементы в качестве
плавкого предохранителя, так как это может привест к несчастному спучаю.
Убедитесь, что подклюючено заземление.
Обозначает инструкции, обязательные для выполнения.
Этот символ обозначает запрещенные действия.
Page 23

– 143 –
РУССКИЙ
ТЕХИКА БЕЗОПАСНОСТИ В ХОДЕ ЭКСПЛУАТАЦИИ
●
Зaпрещается работать с изделием мокрыми руками, эуо может привести к
несчастному случаю.
●
Эксплуатация изделия разрешается только в соответствии со спецификацией
изготовителя, использование изделия для любых других целей запрещено.
●
При эксплуатации изделия совместно с устройствами горения необходимо
регулярно проветривать помещение, чтобы избежать явлений недостатка
кислорода.
●
Запрещается направлять струю холодного гоздуха, идущую от панели
кондиционера, непосредственно на находящиеся внутри помещения
нагревательные приборы, так как это может отрицательным образом повлиять
на работу этих приборов, например,электрического котла,печи и т.п.
●
Необходимо обеспечить постоянную стабильность,прочность и
бездефектность монтажной рамы наружнего блока. В противном случае
может произойти падение наружного блока с опасными последствиями.
●
Запрещается попадание брыэг и прямых струй воды на корпус устройства при
его очистке, так как это может вызвать короткое замыкание.
●
Не размещать комнатные растения непосредственно под струей воздуха, так
как это оказывает отрицательное действие на растения.
●
При чистке прнбора сначала выключите его и отключите прерыватель
электроцепи-скоростной вентилятор внутри прибора может представлять
опасность.
●
Выключите прерыватель электроцепи, если прибор не эксплуатируется в течение
длительного времени.
●
Запрещается залезать на наружный блок и ставить на него какие-либо
предметы.
●
Если устройство работает при открытой двери и открытом окне (влажность воздуха в помещении
всегда превышает 80%), и в случае, если воздушный дефлектор направлен вниз или автоматически
перемещается в течении длительного периода времни, на воздушном дефпекторе могут образоваться
капли воды, которые могут падать вниз, Это приведет к намоканию Вашей мебели. В связи с этим
не следует эксплуатировать устройство в подобных условиях в течении длительного времени.
●
Если количество теплоты в помещении превышает охлаждающую способность устройства (например,
при большом количестве людей в помещении, при работающих нагревательных приборах и т.д.),
установленная температура в помещении не может быть достигнута.
●
Этих Приборов не предназначены для использования маленькими детьми или слабыми людьми,
если они соответственно не контролировались ответственным человеком, чтобы гарантировать, что
они могут использовать прибор благополучно.
●
Маленьких детей должны контролироваться, чтобы гарантировать, что они не играют с
прибором.
О
С
Т
О
Р
О
Ж
Н
О
!
●
Запрещается ставить на внутренний блок емкости с водой (например,
цветочные вазы), чтобы предотвратить попадание капель воды в устройство.
Вода может повредить изоляцию внутри устройства, следствием чего станет
короткое замыкание.
●
Не используйте любой аэрозоль или аэрозоли волос около внутренней
единицы. Этот химикат может прилипнуть к пластине обменника высокой
температуры и блокировать поток воды испарения дренирующей поддон.
Вода опустится на тангенциальный вентилятор и способствует разлитию воды
из внутренней единицы.
Page 24

– 144 –
МУЛЬТИСИСТЕМНЫЙ ВОЗДУШНЫЙ КОНДИЦИОНЕР
В данном мультисистемном воздушном кондиционере несколько внутренних блоков могут быть лодключены к
одному наружнему блоку, чтобы быть управляемыми. Таким образом, Вы имеете возможность эксплуатировать
требуемое количество внутренних блоков.
Комбинация рабочих режимов:
● Внутренние блоки не могут работать в
указанных ниже комбинациях режимов
● Внутренний блок, который включается первым, продолжает
работать, но другие внутренние блоки, включенные
впоследствии, при включенном индикаторе не работают.
● Для повторного включения внутреннего блока, который был
включен позднее, следует выключить внутренний блок,
включенный первым или позднее, и переключить его режим
работы, после чего включить блок снова.
Один блок
Нагрев
Другой блок
Охлаждение
Сушка
Циркуляция (вентилятор)
Регулирование Количества Внутренних Блоков:
Количество работающих внутренних блоков
следует снижать в особенности,
когда очень жарко или очень
холодно, либо в случае, если Вы
хотите за короткое время
достичь заданной температуры.
Неработающие Внутренние Блоки:
При работе одного из внутренних блоков в режиме
охлаждения, нагрева или сушки в какомлибо
помещении может случиться, что в неработающем
внутреннем блоке будет слышен шум потока
хладагента, или неработающий внутренний блок начнет
нагреваться. Это обусловлено тем, что поток
хладагента перетекает от внутреннего блока к
наружнему блоку, чтобы обеспечить готовность к
эксплуатации.
Когда режим деятельности выбран:
● Когда деятельность топления автоматически выбрана для первого внутренний блока, следующий внутренний блок
после этого начинает нагреть. Также, если охлаждающ или обезвоживание автоматически выбирает для первого
внутренний блока, то следующий внутренний блок также начнет охладить или обезводить.
Во время автоматической деятельности:
Page 25

– 145 –
РУССКИЙ
НАИМЕНОВАНИЯ И Ф УНКЦИИ КАЖДОГО УЗЛА
750
RAD-18NH7/RAD-25NH7/RAD-35NH7/RAD-50NH7
235
400
ШИРИНА (мм)МОДЕЛЬ ВЫСОТА (мм)
ТОЛЩИНА (мм)
НАИМЕНОВАНИЕ МОДЕЛИ И РАЗМЕСЫ
ВНУТРЕННИЙ БЛОК
Воздушных входных
отверстия
Воздушный выход
Электрокоробка
Page 26

– 146 –
Данный переключатель задает
скорость вращения вентилятора.
При каждом нажатии данного
переключателя интенсивность
вращения снижается в
последовательности
(ABTO) –
(BЫСОКАЯ) – (CPEДНЯЯ)
–
(НИеКАЯ) (Эта кнопка
позволяет выбирать
оптимальную ипи жепаемую
скорость вращения вентилятора
для каждого режима работы.)
Меры безопасности при эксплуатации
● Запрещается помещать пульт дистанционного управления.
● под действие прямых солнечных лучей
● вблизи от нагревательных устройств.
● Обращаться с пультом дистанционного управления осторожно. Не бросать его на пол и не допускать попадания
воды.
● После прекращения работы наружнего блока повторный его запуск в работу возможен лишь спустя примерно
3 минуты (это не распространяется на выключение и включение устройства посредством выключателя
электропитания, а также на случай, если шнур сетевого питания был вынут из розетки, а затем вставлен
обратно.) Данное время задержки предназначено для предохранения устройства и не свидетельствует о
неисправности.
● В случае, если во время работы устройства был задействован переключатель ФУНКЦИЯ, может произойти
прекращение работы устройства примерно на 3 минуты для его предохранения.
НАИМЕНОВАНИЕ ЧАСТЕЙ ПУЛЬТА ДИСТАНЦИОННОГО УПРАВЛЕНИЯ И ИХ ПРЕДНАЗНАЧЕНИЕ
■ Этот пульт управляет работой внутреннего блока кондиционера и задает параметры таймера.
Hr.
153
Переключатель ФУНКЦИЯ
Посредством данного
переключателя производится
выбор рабочего режима.
Каждый раз Вы нажимаете это,
способ изменится от
(ABTO)
к (ВЫСОКАЯ ТЕМПЕРАТУРА)
к
(DEHUMIFY) и к
(ПРОХЛАДНЫЙ) циклически.
Page 27

– 147 –
РУССКИЙ
АВТОМАТИЧЕСКИЙ РЕЖИМ РАБОТЫ
В данном режиме устройство автоматически устанавливает робочий режим-НАГРЕВ, ОХЛАЖДЕНИЕ или Сушка в
зависимости от начальной температуры в помещении. Выбранный режим работы будет изменяться при изменении
комнатной температуры.
■ Tак как установленные значения записываются в память пульта
дистанционного управления, в следующий раз Вам необходимо лишь нажать
клавишу (СТАРТ/СТОП).
Задействовать переключатель ФУНКЦИЯ, чтобы на дисплее появился
символ режима АВТО .
● При выборе режима АВТО (AUTO) устройство автоматически
определяет режим работы, НАГРЕВ, ОХЛАЖДЕНИЕ или Сушка, в
зависимости от температуры в помещении. Однако изменение wll
mode of operation не когда indoor блок соединился к multi блоку
типа напольному.
● Если режим, автоматически выбранный устройством, Вас не
удовлетворяет, установите режим вручную (нагрев, сушка,
охлаждение или вентиляция).
Нажать клавишу (СТАРТ/СТОП).
Кондиционер начнет работать, издав звуковой сигнал.
Для прекращения работы повторно нажать данную клавишу.
1
СТАРТ
СТОП
РАЗЛИЧНЫЕ ФУНКЦИИ
■ Автоматический перезапуск
● Если есть отказ власти, операция автоматически повторно начнется, когда власть возобновляется с предыдущим способом
операции.
(Так как работа не была остановлена по команде с пульта ДУ.)
● Если вы не хотите, чтобы после появления напряжения работа возобновилась, отключите кондиционер от сети. Kогда Вы
выключаете выключатель, способ операции будет автоматически повторно начатый с предыдущего способа операции.
Примечания: 1. Если вы не требуете автоматического управления рестарта, то пожалуйста советуйте с вашим веществом
сбываний или дистанционным управлением.
2. Функция автоматического перезапуска не работает, если установлен режим таймера или таймера сна.
СКОРОСТЬ ВЕНТИЛЯТОРА
.....
При задании режима скорости вращения вентилятора ABTO в
(ABTO) режиме охлаждения/нагрева;
в режиме нагрева
● Скорость вращения вентилятора автоматически регулируется в зависимости
от температуры выходящего потока воздуха.
● Когда разница между комнатной температурой и заданной температурой
велика, вентилятор начинает работать на высокой (HI) скорости.
● Когда температура в помещении доходит до заданной температуры, скорость
вентилятора автоматически изменяется на низкую (LOW).
● Когда разница между комнатной температурой и заданной температурой
велика, вентилятор начинает работать на высокой (HI) скорости.
● После того, как температура в помещении достигнет установленного значения
температуры, будет выполняться режим охлаждения, при котором скорость
вращения вентилятора и температура в помещении регулируются для получения
оптимальных для здоровья условий естественного охлаждения.
в режиме охлаждения
Page 28

– 148 –
РЕЖИМ НАГРЕВА
● Используйте устройство для отопления, когда температура на улице ниже 21°C.
Когда слишком тепло (выше 21°C), функция нагрева может отключаться, чтобы
защитить устройство от повреждения.
● Для того, чтобы устройство работало беэотказно, пожалуйста, используйте его
температуре более -15°C окружающей среды.
Задействовать переключатель ФУНКЦИЯ, чтобы на дисплее
появился символ режима НАГРЕВ .
Посредством клавиши (СКОРОСТЬ ВЕНТИЛЯТОРА)
установить желаемое значение СКОРОСТИ ВЕНТИЛЯТОРА
(установленное значение будет показано на дисплее).
(ABTO) :
CKOPOCTЬ BEHTNЛЯТОРА вначале
устанавливается на режим
ВЫСОКАЯ, а после достижения
установленного значения температуры
автоматически меняется на режим
СРЕДНЯЯ
или
НИЗКАЯ.
(ВЫСОКАЯ) : Экономичный режим, так как
помещение достаточно быстро
нагревается. Однако на начальной
стадии может возникнуть ощущение
холода.
(СРЕДНЯЯ) : Медленное вращение.
(НИЗКАЯ) : Eще более медленное вращение.
С помоНРХ клаВим ТЕМПЕРАТУРА устаноВитС желаемуХ С
помощью клавиш ТЕМПЕРАТУРА установить желаемую
температуру в помещении (установленное значение бтдет
показано на дисплее).
Pеальная температура в помещении может несколько
отличаться от установленного значения температуры в
зависимости от условий.
Нажать клавишу (СТАРТ / СТОП). Кондиционер начнет
работать, издав звуковой сигнал. Для прекращения работы
повторно нажать данную клавишу.
■ Tак как установленные значения записываются в память пульта
дистанционного управления, в следующий раз Вам необходимо
лишь нажать клавишу (СТАРТ/СТОП).
1
2
СТАРТ
СТОП
3
Page 29

– 149 –
РУССКИЙ
РЕЖИМ СУШКИ
Режим сушки следует использовать при температуре в помещении свыше 16°C.
При температуре в помещении ниже 15°C режим сушки не работает.
Задействовать переключатель ФУНКЦИЯ, чтобы на дисплее
появился символ режима (ВЛАЖНОСТЬ).
CKOPOCTЬ BEHTИЛЯTOPA будет автоматически установлена
на режим НИЗКАЯ.
Клавиша CKOPOCTЬ BEHTИЛЯTOPA в данном случае не
работает.
С помоНРХ клаВим ТЕМПЕРАТУРА устаноВитС желаемуХ С
помощью клавиш ТЕМПЕРАТУРА установить желаемую
температуру в помещении (установленное значение бтдет
показано на дисплее).
Для осушения рекомендуется поддерживать
комнатную температуру в диапазоне от 20 до
26°С градусов.
1
■ Функция Cушки
B случае, если температура в помещении превышает установленное значение температуры,
кондиционер осуществит сушку воздуха в помещении, снизив температуру в помещении до
установленного уровня.
В случае, если температура в помещении ниже установленного значения температуры, сушка
воздуха осуществляется при установленном значении температуры несколько ниже текущей
температуры в помещении. Когда температура в помещении станет ниже установленного значения,
работа в данном режиме будет прекращена (внутренний блок перестанет подавать воздух).
СТАРТ
СТОП
Нажмите кнопку (ЅТАRТ/ЅТОР). Начало режима осушения
сопровождается звуковым сигналом. Для остановки работы
нажмите кнопку ещё раз.
2
■ Tак как установленные значения записываются в память пульта
дистанционного управления, в следующий раз Вам необходимо
лишь нажать клавишу (СТАРТ/СТОП).
Page 30

– 150 –
РЕЖИМ ОХПАЖДЕНИЯ
Кондиционер можно использовать для охлаждения воздуха при наружной температуре
–
10~43°C. При высоких значениях влажности (свыше 80%) на выходной решетке воздуха
внутреннего блока может образоваться некоторое количество росы.
3адействовать переключатель ФУНКЦИЯ, чтобы на дисплее
появился символ режима ОХЛАЖДЕНИЕ .
Посредством клавиши (СКОРОСТЬ ВЕНТИЛЯТОРА)
установить желаемое эначение СКОРОСТИ ВЕНТИЛЯТОРА
(установленное значение будет показано на дисплее).
(ABTO) : CKOPOCTЬ BEHTNЛЯТОРА вначале
устанавливается на режим ВЫСОКАЯ, а
после достижения установленного
значения температуры автоматически
меняется на режим СРЕДНЯЯ
или
НИЗКАЯ.
(ВЫСОКАЯ) : Экономичный режим, так как помещение
достаточно быстро охлаждается.
(CPЕДНЯЯ) : Медленное вращение.
(НИеКАЯ) : Eще более медленное вращение.
С помощью клавиш ТЕМПЕРАТУРА установить желаемую
температуру в помещении (установленное значение будет
показано на дисплее).
Реальная температура в помещении может несколько
отличаться от установленного значения температуры в
зависимости от условий.
Нажать клавишу (CTAPT/CTOП). Kондиционер начнет
работать в режиме охлаждения, издав звуковой сигнап. Для
прекращения работы повторно нажать данную клавишу. В
случае, если установленное значение температуры выше
текущей температуры в помещении, функция охлаждения
работать не будет {несмотря на горящую индикаторную
лампу (ЭКСПЛУАТАЦИЯ).} Функция охлаждения будет
задействована после того, как будет установлено значение
температуры ниже текущей температуры в помещении.
■ Так как установленные значения записываются в память пульта
дистанционного управления, в следующий раз Вам необходимо
лишь нажать клавишу (CTAPT/ CTOП).
СТАРТ
СТОП
3
2
1
Page 31

– 151 –
РУССКИЙ
РЕЗЕРВАЦИЯ ВРЕМЕНИ
■ Устройство имеет таймеры ВКЛЮЧЕНИЕ и ОТКЛЮЧЕНИЕ.
1
Установка времени ОТКЛЮЧЕНИЯ
● Нажатием кнопки ОТКЛЮЧЕНИЕ выберите
операцию отключения.
● При нажатии кнопки установка времени будет
меняться следующим образом.
● Параметр будет меняться быстрее, если держать
кнопку нажатой.
Установление таймера ОТКЛЮЧЕНИЕ
2
Нажмите кнопку (РЕЗЕРВ)
● Заказанное время резервируется по звуковому
сигналу.
● Загорается знак (ОТКЛЮЧИТЬ).
0.5 1.0 1.5 9.5 10 11 12
0.5 hour interval 1 hour interval
1
Установка времени ВКЛЮЧЕНИЯ
● Нажатием кнопки (ВКЛЮЧЕНИЕ) выберите
операцию включения.
● Длительность в 6 часов заранее задана.
● Установка параметра времени изменяется
следующим образом.
● Параметр будет меняться быстрее, если держать
кнопку нажатой.
Установления таймера ВКЛЮЧЕНИЕ
0.5 1.0 1.5 9.5 10 11 12
0.5 hour interval 1 hour interval
1
Нажмите кнопку (ОТМЕНА)
● Поскольку заказанное время сохраняется в памяти
дистанционного управления, для получения того же
параметра в следующий раз достаточно просто
нажать кнопку (РЕЗЕРВ).
ОТМЕНА заказанного времени
2
Нажмите кнопку (РЕЗЕРВ)
● Заказанное время включения резервируется по
звуковому сигналу.
● Загорается знак (ВКЛЮЧЕНИЕ).
Интервал в 1 час
Интервал в 0,5 часа
Интервал в 1 час
Интервал в 0,5 часа
■ Работа устройства прекращается в
заказанное время.
■ Работа устройства по поддержанию
заданной температуры начинается в
заказанное время. (Начальное
время может меняться в
зависимости от комнатной
температуры и заданной
температуры).
Hr.
Hr.
Hr.
Hr.
Page 32

– 152 –
УСТАНОВКА ТАЙМЕРА ЗАДЕРЖКИ ОТКЛЮЧЕНИЯ
Режим
Таймер задержки
отключения
4
Таймер задержки отключения: Кондиционер будет
продолжать работать в течение указанного количества часов,
а затем будет отлючен.
Haжатъ кнопку SLEEP, внутренняя единица произведет
звуковой сигнал.. На дисплее пульта дистанционного
управления будет показана информация таймера.
Отмена Резервирования
Нажать клавишу (ОТМЕНА).
Символ (РЕЗЕРВИРОВАНО) исчезнет, лри этом раздастся звуковой сигнал.
Пример: Установка времени
задержки отключения равное
3 часам.
Индикация
1 час 2 часа 3 часа 7 часа
отключение таймером задержки
444
1
Hr.
Page 33

– 153 –
РУССКИЙ
Принцип действия таймера задержки отключения
Кондиционер осуществляет автоматическое регулирование
СКОРОСТИ ВЕНТИЛЯТОРА и температуры в помещении,
чтобы обеспечить тишину и соответствующие условия для
здоровья людей.
● Ecли Bы yстанавливаете таймер сна после того, как
прочъ на-таймере был установлен, coн таймер вступит
в силу вместо прочъ или на-таймере набнр ранее.
● Во время работы таймера задержки отключения
невозможно устанавливать другие таймеры.
● Если после окончания работы таймера задержки
отключения снова нажать кнопку задержки отключения,
таймер задержки отключения будет установлен по
последнему установленному значению.
● Таймер задержки отключения работает только один раз.
ПРИМЕЧАНИЕ
Page 34

– 154 –
ВЫКЛЮЧАТЕЛЬ ПРЕРЫВАТЕЛЬ ЭЛЕКТРОЦЕПИ
Когда вы не используете комнатный кондиционер воздуха, установите выключатель прерыватель
электроцепи в положение “ВЫКЛ”.
КАК ЭФФЕКТИВНО ИСПОЛЬЗОВАТЬ КОНДИЦИОНЕР
1. Среднее значение устанавливаемой температуры, скорее всего, будет для вас
оптимальным, являясь к тому же экономичным.
• Чрезмерные охлаждение или обогрев не рекомендуется, так как это может быть вредно
для здоровья, а также требует значительного потребления электроэнергии.
• Закройте занавески и шторы, чтобы исключить вход теплого воздуха в помещение или
его выход из помещения, а также с целью более экономного расхода электроэнергии.
2. Время от времени следует открывать окна и двери, чтобы впустить свежий воздух.
OCTOPOЖHO
Помещение обязательно должно проветриваться, если кондиционер
работает одновременно с другими обогревательными приборами.
3. Перед тем, как уходить из дому или ложиться спать, рекомендуется использовать
таймер.
4. Ни в коем случае не допускается использование следующих средств для чистки
внутреннего и наружного блоков:
• Бензол, растворитель и применение щетки может повредить пластиковые поверхности
или покрытия.
•Горячая вода температурой свыше 40°C может привести к усадке фильтра и деформации пластиковых частей.
5. Не перекрывайте воздухозаборное и воздуховыпускное отверстия.
• Не перекрывайте воздуховыпускные и воздухозаборные отверстия внутреннего и
наружного блоков занавесками или другими предметами, так как это может ухудшить
производительность кондиционера и привести его к выходу из строя.
Горячий
Холод
Page 35

– 155 –
РУССКИЙ
Температура В Помещении
Использование штор или ставней
Вентиляция
Эффективное использование таймера
Не забывайте чистить воздушный фильтр
Устанавливайте подходящую t° для
грудных младенцев и детей
С их
помощью
можно
снизить
жару,
проникающую
в комнату,
через окна.
Ночью используйте таймеры “Включить”
и “Отключить”, устанавливая их в
зависимости от времени пробуждения. Это
позволит Вам создать самую комфортную
для Вас температуру. Используйте таймер
эффективно.
Пыльный фильтр может уменьшить обьем
воздуха и эффективность охлаждения. Во
избежании лишней траты электроэнергии
производите чистку фильтра каждые 2
недели.
При использовании устройства в
помещениях, где находятся грудные
младенцы, дети или престарелые, то есть
те, кому трудно самим
передвигаться, следите за
состоянием t° и
направлением
выходящего
потока
воздуха.
Осторожно
Не оставляйте помещение закрытым в
течении длительного пориода времени.
Периодически следует открывать дверь и
окна, чтобы обеспечить приток свежего
воздуха.
ИДЕАЛЬНЫЙ СПОСОБ ЭКСПЛУАТАЦИИ
Предупреждение
Холодная
температура в
помещении
неблагоприятно
Воздействует на
здоровье и вызывает
излшнний расход
злектрознергии.
!
!
Page 36

– 156 –
ИНФОРМАЦИЯ ДЛЯ ПОЛЬЗОВАТЕЛЯ
Воздушный Кондиционер и Нагреватель В Одном помещении
Осторожно
Если количество теплоты в ломещении
превышает охлаждающую способность
устройства (например: При большом количестве
людей в помещеии, при работающих
нагревательных приборах и. т.п.), установленная
температура в помещении не может быть
достигнута.
Если кондиционер долго не используется
При молниях
Если комнатный кондиционер долго не
используется, выключите его из сети. При
неотсоединенной сети он продолжает потреблять
около 8W из котрольной цепи, даже будучи
выключенным.
Предупреждение
При молниях, чтобы обезопасить прибор от
повреждений, выключите его и выньте штепсель
из розетки.
Desligar
Выключить
!
!
Люфт от Электрического Шума
Предостережение
Чтобы избегать шумового люфта, пожалуйста
разместите внутреннюю единицу и ее пульт по
крайней мере на расстоянии 1м. от электрических
изделий.
!
TV
Page 37

– 157 –
РУССКИЙ
ОБСЛУЖИВАНИЕ
1. ВОЗДУШНЫЙ ФИЛЬТР
Очищайте воздушный фильтр, когда удаляйте пыль из комнаты.
Чтобы не потреблять напрасно электроэнергию, надо очищать фильтр
один раз в две недели.
ПРОЦЕДУРА
1
С помощью пылесоса удалите пыль из фильтра. Если пыли
очень много, используйте нейтральное моющее средство.
После использования нейтрального моющего средства
промойте фильтр чистой водой и высушите в тени.
2
Установить фильтр на место.
3
OCTOPOЖHO
• Запрещается промывать фильтр горячей водой с температурой свыше 40°C. Может произойти усадка фильтра.
• После промывки полностью стряхнуть капли влаги и высушить фильтр в тени; запрещается подвергать фильтр
прямому воздействию солнечных лучей. Может произойти усадка фильтра.
• Запрещается включать кондиционер без фильтра. Это может привести к попаданию пыли в кондиционер и
возникновению повреждений.
ПPEДУПPEЖДEHИE
•
Перед чисткой выключите блок с помощью пульта ДУ и отключите его от сети с помощью автоматического
выключателя.
OCTOPOЖHO
• Не подвергайте блок воздействию воды, так как это может привести к поражению электрическим током.
• Для чистки кондиционера изнутри обратитесь к вашему поставщику.
• Не пользуйтесь моющими средствами для очистки теплообменника внутреннего блока, так как это может
привести к выходу агрегата из строя.
• При чистке теплообменника с помощью пылесоса необходимо надевать перчатки, чтобы не повредить руки
о ребра теплообменника.
Фильтр
Фильтр
Подставка
Внутренний блок
Подставка
Тянут фильтр к центру, пока это не отделено от держателей.
Тогда возьмите это из держателей (обратитесь к диаграмме).
Мягко вставка назад фильтр в держателей.
Напряжение
Page 38

– 158 –
ПРОФИЛАКТИЧЕСКИЕ ОСМОТРЫ
ПОЖАЛУЙСТА ВЫПОЛНЯЙТЕ НИЖЕПЕРЕЧИСЛЕННЫЕ ПРОВЕРКИ КАЖДЫЕ ПОЛГОДА ИЛИ
ЧАЩЕ. В СЛУЧАЕ КАКИХ-ЛИБО ЗАТРУДНЕНИЙ ОБРАЩАЙТЕСЬ К СПЕЦИЛИСТУ.
1
2
3
Не повреждено заземление?
Крепежные кронштейны наружного блока не корродитованы,
внешний блок закреплен надежно?
Убедитесь
Плотно ли вилка соединена с розеткой?
Убедитесь в наличии прочного контакта между ними.
ГАРАНТИЙНОЕ ОБСЛУЖИВАНИЕ
ПЕРЕД ОБРАШЕНИЕМ К СПЕЦИАЛИСТУ ПРОВЕРЬТЕ НИЖЕПЕРЕЧИСЛЕННЫЕ
УСДОВИЯ ПРОВЕРЬТЕ СЛЕДУЮЩИЕ ПУНКТЫ
● Предохранитель в порядке?
● Напряжение в сети высокое или низкое?
● Выключатель питания или прерыватель электроцепи в
положении “Вкл”?
● Очищался ли фильтр?
● Солнечный свет не падает на блок конденсации?
● Нет ли препятствий вытекающим струям тепла?
● Нет ли в комнате каких-либо источников тепла?
● Установочная температура выставлена нормально?
Когда прибор не
работает
● Если у Вас все-таки возникают какие-либо проблемы в процессе эксплуатации прибора
обращайтесь к Вашему продавцу или квалифицированному специалисту. Сообщайте Вашему
агенту насчеу модели, номера производства и числа установки прибора.
● Используйте только напряжение, указанное для данного кондиционера. В противном случае
устройство может испортиться или не достичь предусмотренной мощностн.
Примечания
● В тихом или операция остановки, следующие явления могут
иногда происходить, но они не неправильными для операции.
(1) Не большой шум в процессе цикла охлаждения.
(2) Шум от работы вентилятора когда он начинает нагреваться
в процессе работы.
● Из-за разных запахов, используемых в комнате, незначительные
посторонние запахи могут возникать при работе прибора. Для
снижения неприятных запахов, воздушный фильтр и испаритель
должны чиститься регулярно.
Когда прибор не надежно
охлаждает Когда прибор
не надежно нагревает
Page 39

– 159 –
РУССКИЙ
Заметьте пожлуйстаа:
При переключении прибора, частично когда свет комнаты смутым, незнаачительное яркое
колебание может создатьсяя. Однако, это не считается ненормальым. Условия Локальной
Электрической Компании должны быть соблюдены.
MEMO
.....................................................................................................................................................................................
.....................................................................................................................................................................................
.....................................................................................................................................................................................
.....................................................................................................................................................................................
.....................................................................................................................................................................................
.....................................................................................................................................................................................
.....................................................................................................................................................................................
.....................................................................................................................................................................................
.....................................................................................................................................................................................
.....................................................................................................................................................................................
.....................................................................................................................................................................................
.....................................................................................................................................................................................
.....................................................................................................................................................................................
.....................................................................................................................................................................................
.....................................................................................................................................................................................
.....................................................................................................................................................................................
.....................................................................................................................................................................................
.....................................................................................................................................................................................
.....................................................................................................................................................................................
.....................................................................................................................................................................................
.....................................................................................................................................................................................
.....................................................................................................................................................................................
.....................................................................................................................................................................................
минимума максимум минимума максимум
Внутренний
сухой шарик °C 21 32 20 27
влажный шарик °C 15 23 12 19
напольно
сухой шарик °C 21 43 2 21
влажный шарик °C 15 26 1 15
Примечание
● Избегите использовать кондиционер комнаты для охлаждая деятельности когда внешняя
температура под 21 ч (70ф).
Порекомендованные максимальные и минимальные температуры горячих и холодных сторон
должны быть как ниже:-
охлаждающ нагрюющ
Page 40

– 160 –
MEMO
.....................................................................................................................................................................................
.....................................................................................................................................................................................
.....................................................................................................................................................................................
.....................................................................................................................................................................................
.....................................................................................................................................................................................
.....................................................................................................................................................................................
.....................................................................................................................................................................................
.....................................................................................................................................................................................
.....................................................................................................................................................................................
.....................................................................................................................................................................................
.....................................................................................................................................................................................
.....................................................................................................................................................................................
.....................................................................................................................................................................................
.....................................................................................................................................................................................
.....................................................................................................................................................................................
.....................................................................................................................................................................................
.....................................................................................................................................................................................
.....................................................................................................................................................................................
.....................................................................................................................................................................................
.....................................................................................................................................................................................
.....................................................................................................................................................................................
.....................................................................................................................................................................................
.....................................................................................................................................................................................
.....................................................................................................................................................................................
.....................................................................................................................................................................................
.....................................................................................................................................................................................
.....................................................................................................................................................................................
.....................................................................................................................................................................................
.....................................................................................................................................................................................
.....................................................................................................................................................................................
.....................................................................................................................................................................................
.....................................................................................................................................................................................
.....................................................................................................................................................................................
.....................................................................................................................................................................................
.....................................................................................................................................................................................
.....................................................................................................................................................................................
.....................................................................................................................................................................................
.....................................................................................................................................................................................
.....................................................................................................................................................................................
Page 41

– 161 –
РУССКИЙ
MEMO
.....................................................................................................................................................................................
.....................................................................................................................................................................................
.....................................................................................................................................................................................
.....................................................................................................................................................................................
.....................................................................................................................................................................................
.....................................................................................................................................................................................
.....................................................................................................................................................................................
.....................................................................................................................................................................................
.....................................................................................................................................................................................
.....................................................................................................................................................................................
.....................................................................................................................................................................................
.....................................................................................................................................................................................
.....................................................................................................................................................................................
.....................................................................................................................................................................................
.....................................................................................................................................................................................
.....................................................................................................................................................................................
.....................................................................................................................................................................................
.....................................................................................................................................................................................
.....................................................................................................................................................................................
.....................................................................................................................................................................................
.....................................................................................................................................................................................
.....................................................................................................................................................................................
.....................................................................................................................................................................................
.....................................................................................................................................................................................
.....................................................................................................................................................................................
.....................................................................................................................................................................................
.....................................................................................................................................................................................
.....................................................................................................................................................................................
.....................................................................................................................................................................................
.....................................................................................................................................................................................
.....................................................................................................................................................................................
.....................................................................................................................................................................................
.....................................................................................................................................................................................
.....................................................................................................................................................................................
.....................................................................................................................................................................................
.....................................................................................................................................................................................
.....................................................................................................................................................................................
.....................................................................................................................................................................................
.....................................................................................................................................................................................
 Loading...