

Page 1
USER'S MANUAL
BEDIENUNGSANLEITUNG
MANUEL UTILISATEUR
MANUALE D'USO
MANUAL DEL USUARIO
BRUKERHÅNDBOK
Colour Plasma Television
Model Name
P42A01
READ THE INSTRUCTIONS INSIDE CAREFULLY.
KEEP THIS USER MANUAL FOR FUTURE REFERENCE
For future reference, record the serial number of your monitor.
SERIAL NO.
This serial number is located on the rear of the monitor.
Downloaded From TV-Manual.com Manuals
Page 2

ENGLISH
USER'S MANUAL
Thank you for purchasing the HITACHI plasma Television.
Please read this user’s manual carefully before operating
this product.
To ensure proper operation, please read and follow ALL
the instructions, especially the “IMPORTANT SAFETY
INSTRUCTIONS” and “SAFETY PRECAUTIONS”.
Please keep this user’s manual for future reference.
Downloaded From TV-Manual.com Manuals
Page 3

2
CONTENTS
IMPORTANT SAFETY INSTRUCTIONS
Read this instruction thoroughly.
Retain this instruction for future reference.
Heed all warnings and cautions to prevent possible danger.
Follow all instructions. Improper handling could cause personal injury and/or serious damage to the unit that may
shorten its service time.
Do not block any ventilation openings.
Install the product in accordance with the manufacture’s instructions.
Before calling for the technical support or service technician, read “Troubleshooting” (
) to determine the
symptoms when problems occur during installation or operation of the product.
If serious problems happen (such as smoke or an abnormal odour from the unit), turn off the Main Power, unplug the
Power Cord, and then, contact your local dealer immediately.
•
•
•
•
•
•
•
•
CONTENTS .......................................................................... 2
IMPORTANT SAFETY INSTRUCTIONS .............................2
INTRODUCTION .................................................................. 3
About This Manual ..............................................................3
Trademark Credits ............................................................... 3
About Software ....................................................................3
Information for users applicable in European
Union countries ...................................................................3
SAFETY PRECAUTIONS ....................................................4
Important For United Kingdom ............................................4
About the Symbols .............................................................. 4
Cleaning and Maintenance .................................................7
ABOUT PLASMA DISPLAY PANEL ...................................8
Image Retention of Plasma Display Panel ...........................8
FEATURES ..........................................................................9
SUPPLIED ACCESSORIES ................................................9
COMPONENT NAMES ......................................................10
Main Unit ...........................................................................10
Remote Control .................................................................11
PREPARATION..................................................................12
Remote Control Batteries Installation ................................ 12
Handling the Remote Control ............................................12
Caution When Moving the Main Unit ................................. 12
Safety Precaution on Main Unit Installation .......................13
Anti-Tumble Measures ......................................................13
CONNECTION ...................................................................14
Terminal Positions .............................................................14
Connecting Procedure ......................................................14
BASIC OPERATION ..........................................................19
Turning on the power ........................................................19
Standby mode ...................................................................19
Auto setup .........................................................................19
Selecting the video input source .......................................19
Basic TV functions............................................................. 20
Stereo reception with the built-in tuner ..............................20
Conceal stored channels ...................................................21
Picture format ....................................................................21
Teletext ..............................................................................22
TV SETUP OPERATION ....................................................23
Guide to using the menu system .......................................23
Video menu (TV mode) .....................................................23
Audio menu (TV mode) .....................................................24
Setup menu ....................................................................... 25
Video menu (PC mode) .....................................................27
Audio menu (PC mode) ..................................................... 27
OTHERS.............................................................................28
DVD Player / STB Selection .............................................. 28
(“DVD” Selection) ..............................................................28
(“SAT” Selection) ..............................................................28
Troubleshooting ................................................................ 29
Specifications ....................................................................30
PRODUCT SPECIFICATIONS ..........................................31
Signal Input .......................................................................31
Recommended Signal List ................................................32
UK Guarantee ...................................................................33
29
Downloaded From TV-Manual.com Manuals
Page 4

3
ENGLISH
Thank you for purchasing the HITACHI plasma Television. We hope that you will enjoy the great performance with this
product.
This plasma Television has been designed to meet the international standards. However, it could cause personal
injuries and property damage if improperly handled. In order to prevent potential danger and obtain maximum benefit
from your set, please observe the following instructions when installing, operating, and cleaning the product.
Keep this manual for future reference, and record the serial number of your set in the space provided on the front cover
page of this manual.
About This Manual
The information in this manual is subject to change without notice.
This manual has been created with extra care. In case that you have any comments or questions regarding this
manual, please contact your local dealer or our Customer Service Centre.
Before operating this set, please fully understand the prerequisite such as specifications or constraints of the
hardware and software. We are not responsible and have no liability for any loss, damage or injury as a result of
misuse.
Reproduction, copying, use, modification, and/or transmission in whole or in part of this manual are prohibited
without any prior written permission.
All other products and company names used in this manual are trademarks or registered trademarks of their
respective owners.
Trademark Credits
VGA and XGA are trademarks of International Business Machines Corporation.
HDMI, the HDMI logo and High-Definition Multimedia Interface are trademarks or registered trademarks of HDMI
Licensing LLC.
The "HD ready" logo is a trademark of EICTA.
Even if no special notation has been made of company or product trademarks, these trademarks have been fully
respected.
About Software
You may not alter, decompile, disassemble, decrypt, or otherwise reverse- engineer the Software installed in this
product, which are prohibited by law.
Information for users applicable in European Union countries
This symbol on the product or on its packaging means that your electrical and electronic equipment should be
disposed at the end of life separately from your household wastes. There are separate collection systems for recycling
in EU.
For more information, please contact the local authority or the dealer where you purchased the product.
•
•
•
•
•
•
•
•
INTRODUCTION
Downloaded From TV-Manual.com Manuals
Page 5
4
The following are the symbols used in this manual and affixed on the unit itself. Please fully understand the meanings of the symbols before reading
the instructions in this section.
WARNING
Never ignore the instruction. There are risks of serious injuries or possible death to the user.
CAUTION
Do not ignore the instruction. There are possibilities of personal injuries and/or property damage.
Other Symbols
The triangle with illustration is intended to alert the users that there are possibilities of fire, explosion, or high
temperature if the product is handled improperly.
Each illustration within the triangle specifies the contents in detail. (The figure on the left is an example.)
The circle with diagonal line and illustration indicates a prohibited action (the symbol to the left indicates that
disassembly is prohibited.)
This symbol indicates a compulsory action.
The contents will be clearly indicated in an illustration or nearby (the symbol to the left indicates that the power plug
should be disconnected from the power outlet).
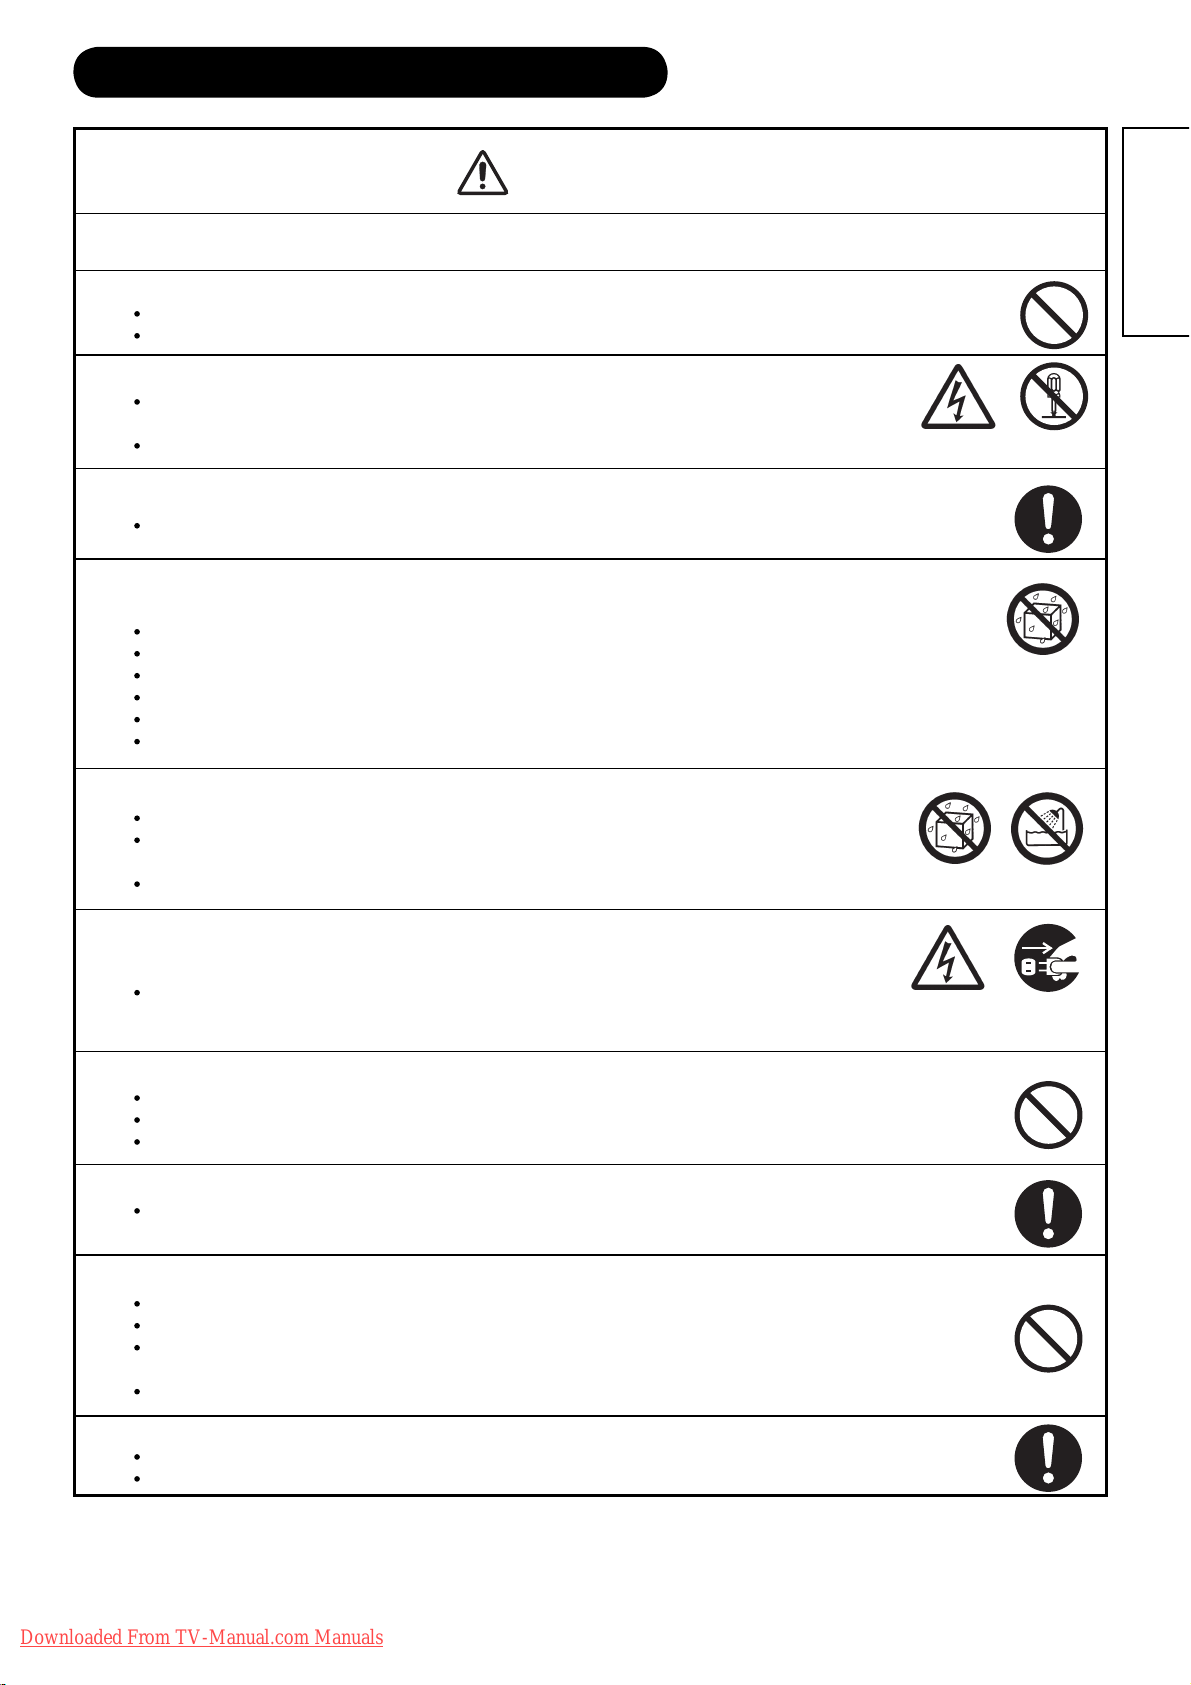
WARNING
There is a risk of fire, electric shock, or serious injury.
Ϯ
Unplug the power cord immediately when serious problems occur.
Serious problems such as
Smoke, abnormal odor or noise is emitted from the product.
No picture, no sound or distorted picture on the display.
Foreign objects (such as water, metals etc.) get inside the unit.
Do not continue using the product under these abnormal conditions.
Turn off the Main Power, unplug the Power Cord, and contact your dealer immediately.
For your safety, never try to repair the product by yourself.
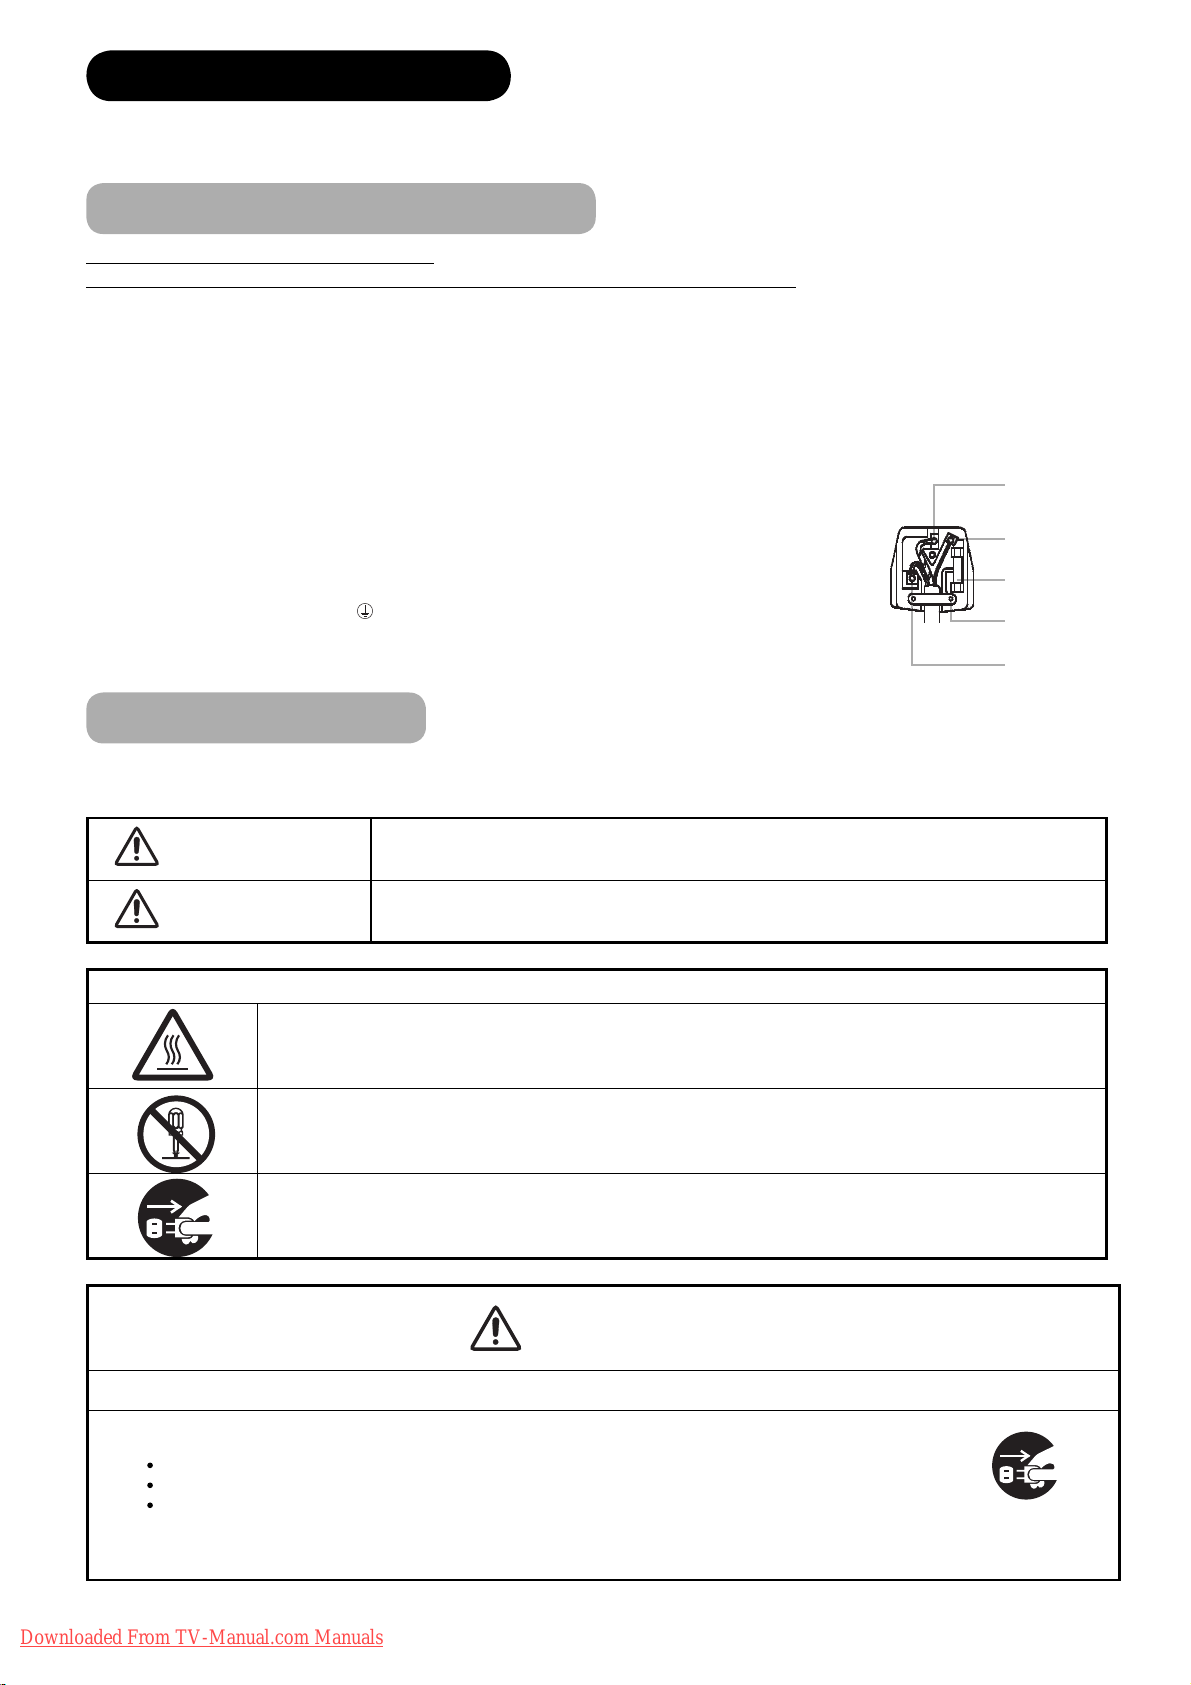
WARNING: THIS EQUIPMENT MUST BE EARTHED
IMPORTANT
The wires in the mains lead are coloured in accordance with the following code :
Green and Yellow = Earth, Blue = Neutral, Brown = Live.
As these colours may not correspond with the coloured markings identifying the terminals in your plug, proceed as
follows:
The wire which is coloured GREEN and YELLOW must be connected to the terminal in the plug which is marked
with the letter E or by the earth symbol
or coloured GREEN or GREEN and YELLOW.
The wire coloured BLUE must be connected to the terminal marked with the letter N or coloured BLUE or BLACK.
The wire coloured BROWN must be connected to the terminal marked with the letter L or coloured BROWN or
RED.
Green & Yellow
to Earth
Blue to Neutral
Brown to Live
Fuse
Cord Clamp
SAFETY PRECAUTIONS
About the Symbols
Disconnect the
plug from the
power outlet.
For your safety, please read the following precautions carefully before using this product. Improper use would cause serious personal injuries and/or
damage to your property or this product.
Important For United Kingdom
IMPORTANT FOR UNITED KINGDOM
WORDING FOR CLASS I EQUIPMENT INSTRUCTION BOOKS AND LABELS
The mains lead on this equipment is supplied with a molded plug incorporating a fuse, the value of which is indicated on the pin face of the plug.
Should the fuse need to be replaced, an ASTA or BSI approved BS 1362 fuse must be used of the same rating. If the fuse cover is detachable never
use the plug with the cover omitted. If a replacement fuse cover is required, ensure it is of the same colour as that visible on the pin face of the plug.
Fuse covers are available from your dealer.
DO NOT cut off the mains plug from this equipment. If the plug fitted is not suitable for the power points in your home or the cable is too short to
reach a power point, then obtain an appropriate safety approved extension lead or consult your dealer.
Should it be necessary to change the mains plugs, this must be carried out by a competent person, preferably a qualified electrician.
If there is no alternative to cutting off the mains plug, ensure that you dispose of it immediately, having first removed the fuse, to avoid a possible
shock hazard by inadvertent connection to the mains supply.
Downloaded From TV-Manual.com Manuals
Page 6
5
ENGLISH
SAFETY PRECAUTIONS (continued)
WARNING
There is a risk of fire, electric shock, or serious injury.
Ϯ
Do not insert liquids or any foreign objects (such as metals or flammable items) inside the unit.
In case it happens, turn off the main power, unplug the Power Cord, and contact your dealer immediately.
Use special caution when younger children are around the unit.
Ϯ
Do not remove cover, or modify the product.
High-voltage components are installed inside of the unit. Removing covers can expose you to high voltage,
electrical shock, and other dangerous conditions.
Contact your local dealer to perform servicing such as inspection, adjustment, or repair work.
Ϯ
Install the unit in a sensible place where it does not expose anyone to danger or injury.
Impact with the edge of the unit could cause injury.
Ϯ
Do not place any objects on top of the unit.
Objects such as
Liquid containers (vase, fish tank, flowerpot, cosmetics or liquid medicine).
If water or any liquid spill onto the unit, it may cause short-circuit and result in fire or electrical shock.
In case that it happens, turn off the Main Power, unplug the Power Cord, and contact your dealer immediately.
Do not place anything heavy on top of the unit.
Do not climb on or hang from the unit.
Do not let your pets get on top of the unit
Ϯ
Do not expose this unit to rain or moisture.
Never use this unit in the bathroom or shower room.
Beware when you use this product outside, especially in rainy, or snowy weather, and at the beach or
waterfront.
When the product gets wet, it could cause fire or electrical shock.
Ϯ
Unplug this unit during lightning storm.
To reduce the risk of electrical shock, do not touch the product when starts lightning.
Ϯ
Do not do anything that may damage the Power Cord.
Do not damage, modify, twist, forcibly bend, heat, or pull excessively the Power Cord.
Do not place heavy objects (including the unit itself) on top of the Power Cord.
If the Power Cord is damaged, contact your dealer for repairs or exchange.
Ϯ
Use only with designated power supply voltage.
To prevent the risk of fire and electrical shock, operate this product only with the power supply voltage indicated on the
unit.
Ϯ
Beware not to drop or have any impact on the unit.
Take extra care while moving the unit.
The plasma display panel is made of glass. In case that it breaks, you may be injured with the broken pieces.
In case that you drop the unit or the cabinet is damaged, turn off the Main Power, unplug the Power Cord and contact your
local dealer immediately.
Continuing use of the product with above conditions would cause fire or electrical shock.
Ϯ
Clean dust or metals on or around the blade of the power plug regulary.
Continuing use of the product with above condition may cause fire or electrical shock.
Always unplug the Power Cord first, and clean the blades with a dry cloth.
Disconnect the
plug from the
power outlet.
Do not
disassemble
Downloaded From TV-Manual.com Manuals
Page 7
6
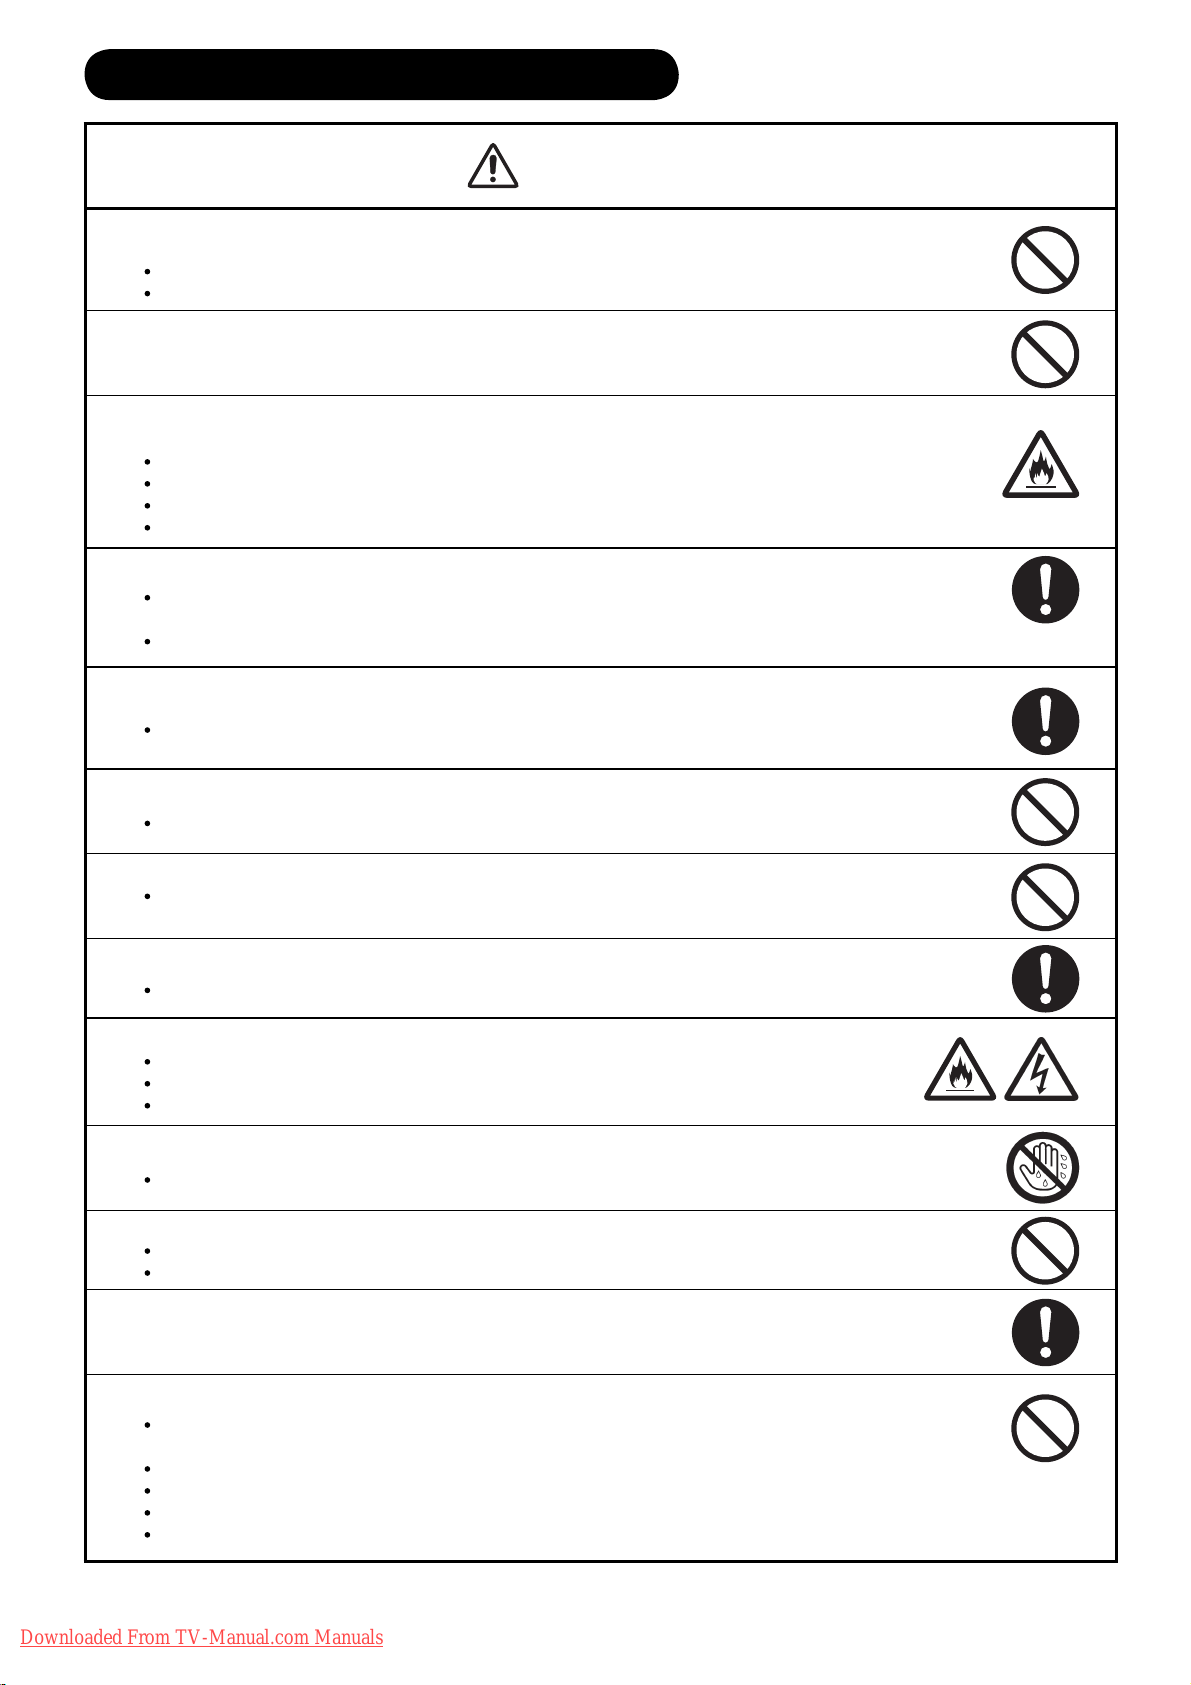
CAUTION
Ϯ
Do not place the unit on an unstable surface.
Unstable places such as
Tilted surface or shaky rack, table, stand or trolly.
If the unit falls down, it could cause personal injury.
Ϯ
Do not place the unit at a dusty place.
It could cause malfunction.
Ϯ
Do not cover or block any ventilation holes on the product.
The unit would overheat, and it could cause fire or damage the product which may shorten its service life.
Install the product in accordance with the instructions in this manual.
Do not place the unit with ventilation side down.
Do not install the unit on the carpet or bedclothes.
Do not cover the unit with table cloth etc.
Ϯ
Be sure to ground the earth cable correctly.
Especially when you use Power Cord adapter, be sure to connect the earth cable to the ground terminal. Incorrect
connection would cause fire or electrical shock.
For your safety, always make sure to unplug the Power Cord before connect or disconnect the earth cable .
Ϯ
Follow the Anti-tumble measures in this manual.
If the unit tumbles over, there is a risk of personal injury and possible death. Also, it would damage the product seriously.
Ϯ
Do not install this product near the medical devices.
To prevent malfunction of the medical devices, do not use this product and medical devices in the same room.
Ϯ
Do not place the CRT-based television near the speakers of the plasma television.
It could cause the partial discoloration or blurring of the image on a CRT-based television.
Please install it away from the speakers of the unit.
Ϯ
Disconnect all of the external connection cables and detach the anti-tumble measures before moving the unit.
It may cause fire, electrical shock, or personal injuries.
Ϯ
Connect the power plug securely.
Improper connection will cause overheating and may result in fire.
Do not touch the blades of the plug while connecting it to the wall socket. It could cause electrical shock.
If the plug is not fitted for the wall socket, contact your dealer for replacement.
Ϯ
Do not handle the Power Cord with wet hands.
It could result in electrical shock.
Ϯ
Do not pull the cord when you unplug the Power Cord.
It may damage the cord and could result in fire or electrical shock.
Hold the plug when disconnecting it.
Ϯ
Unplug the Power Cord when you do not intend to use the product for long periods of time.
Ϯ
Handle the batteries properly.
Improper or incorrect use of the batteries may cause corrosion or battery leakage, which could cause fire, personal injury
or damage to property.
Use only the types of the batteries which are indicated in this manual.
Do not install new batteries with used ones.
Install the batteries correctly by following the polarity (+ and -) indications on the battery compartment.
Do not dispose of the used batteries as domestic waste. Dispose of them in accordance with the local regulations.
Supply connect
the ground wire.
SAFETY PRECAUTIONS (continued)
Downloaded From TV-Manual.com Manuals
Page 8
7
ENGLISH
PRECAUTIONS
Ϯ
Do not install areas where it will be subjected to high temperatures.
It could damage the cabinet or parts of the product.
Do not install near any heat sources such as radiators, heat registers, stoves, or other apparatus that produce heat.
Keep the unit out of direct sunlight. It could increase the temperature of the unit and cause malfunction.
Ϯ
Viewing Advice
The lighting of the environment in which the product is used should be appropriate. Too bright or dark environments are not good for
your eyes.
Take time to relax your eyes occasionally.
When you use this product, view from a distance equal to 3 to 7 times the height of the screen. This is the best viewing distance in
order to protect your eyes against eyestrain.
Adjust the volume to an appropriate level, especially during the night.
Ϯ
When transporting this product:
When the product needs to be transported due to moving or repair, use the carton box and buffer material that came with this
product.
Do not transport this product on its side. It could damage the panel glass or degrade the phosphors of the panel.
Ϯ
Keep radio away from this unit whilst in use.
This unit is designed to meet the international EMI standards due to prevent radio interference. However, the unit may generate
noise in the radio.
If the noise is heard on radio, please try the following actions.
Adjust the direction of the radio antenna in order not to receive the interference from the unit.
Keep the radio away from the unit.
Use coaxial cable for the antenna.
Ϯ
About infrared communication devices:
The infrared communication devices such as cordless microphones or cordless headphones may not operate properly around the unit.
It
is because of communication failure. Please note that this is not malfunction.
Ϯ
When you dispose of this product at the end of its life, follow the regulations in your residential area.
For more information, contact the local authority or the dealer where you purchased the product.
SAFETY PRECAUTIONS (continued)
Cleaning and Maintenance
Please make sure to unplug the power cord before cleaning the unit.
Ϯ
How to clean the plasma panel of the unit.
The panel surface is specially-coated to reduce the reflection and cut infrared radiation; thus, wipe the panel with a lint-free and dry
cloth in order to prevent damage to the coating.
Do not use a chemical cloth or cleaner. Depending on the ingredients, it may cause discoloration and damage on the coating.
Do not wipe with a hard cloth or rub hard. It may hurt the coating.
In case of the greasy dirt such as fingerprint, wipe with a lint-free cloth moistened by a diluted neutral detergent solution, and then wipe
with a soft and dry cloth.
Do not use a spray cleaner. It could remove the coating or cause malfunction by entering inside of the unit.
Ϯ
How to clean the cabinet of the unit.
The following may cause crack, deformation, and paint peeling.
Do not wipe the cabinet with benzene, thinner, and other chemical products.
Do not spray volatile solutions such as insecticide over the cabinet.
Do not leave the cabinet in prolonged contact with plastic or rubber materials.
Do not use a chemical cloth, cleaner or wax. Depending on the ingredients, it may cause crack and deformation.
Use a lint-free cloth to clean the cabinet and control panel of the monitor. In case of the heavy dirt, wipe with a soft cloth moistened by
a diluted neutral detergent solution, and then wipe with a soft and dry cloth.
Never use the following detergents. It could cause crack, discoloration, and scratch.
Acid/alkaline detergent, alcoholic detergent, abrasive cleaner, powder soap, OA cleaner, car wax, glass cleaner, etc.
Downloaded From TV-Manual.com Manuals
Page 9
8
Image Retention of Plasma Display Panel
The plasma display panel has one of characteristics that can result in panel image retention depending on how the
plasma display is used. The following are the common reasons for and effective preventive measures against the
image retention.
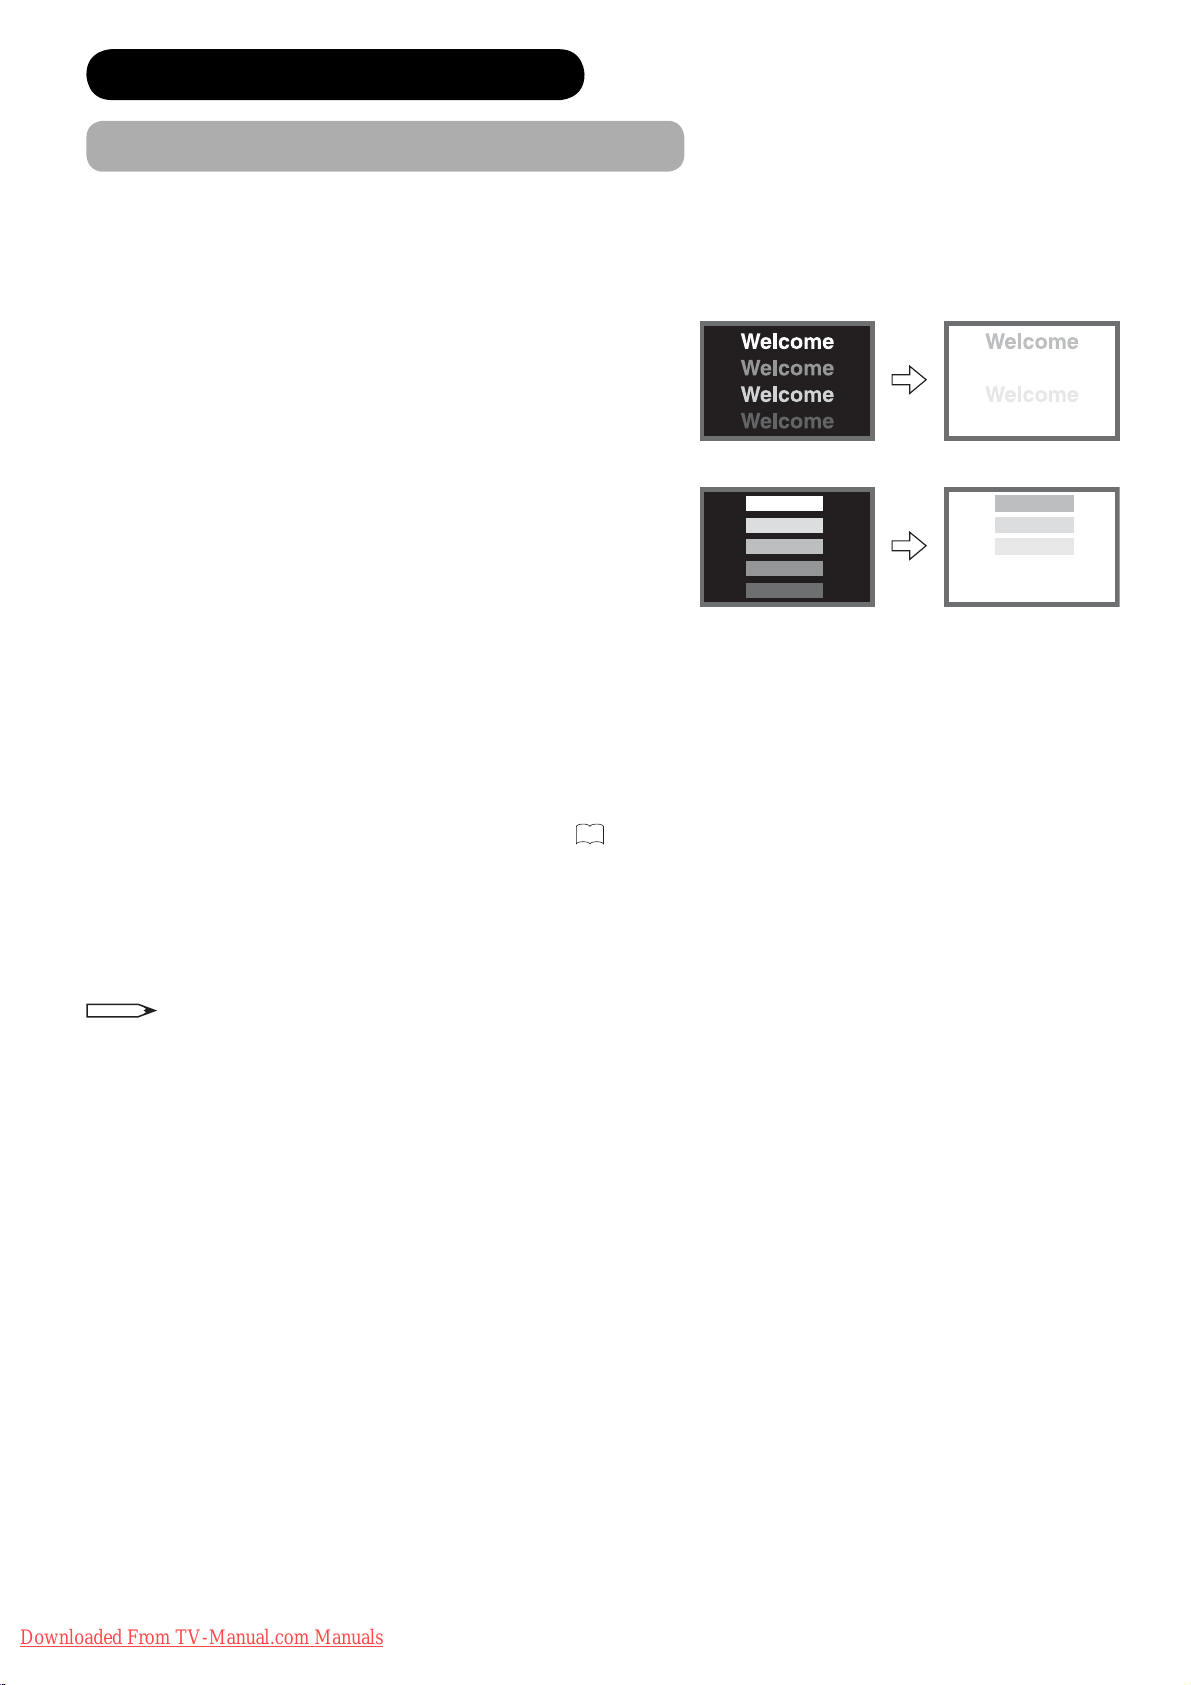
Characteristics of Image Retention
Image retention is caused by partial degrading the phosphors due
to the partial display of character and figure.
ϰ For example, when the characters as shown in Fig. A are
displayed continuously for a long period of time, only the
phosphors (Red/Green/Blue) displaying the characters are
degraded. Consequently, when displaying an all white image on
the entire screen as shown in Fig. a, the marks remaining by the
characters will show colour differences; therefore, note that it is
not burnt remains of the phosphors.
The degree of image retention is proportional to the Brightness
and Display Time for the characters and/or figure
ϰ The brighter the characters and figure, the more phosphor is
degraded. As shown in Fig. B, in case of displaying images that
have different brightness each for a long time, Fig. b shows that
the brighter the image, the more it tends to remain.
* The illustrations are images to explain image retention. The actual manners on the image retention vary depending
on such conditions as operation time and brightness.
Methods to Reduce the Occurrence of Image Retention
We recommend that you use the screen saver functions
26
.
NOTE
The following are common phenomenon which occur when operating the Plasma Display Panel due to structural
reasons.
Please note that they are not malfunctions.
Residual Image
When a still image or menu is displayed on the screen for a short time (about a minute) an then switches to another
image, it may leave an “after-image” on the screen. This residual image will disappear on its own and return to
normalcy. This is not a malfunction.
Panel Surface
The plasma panel displays images by generating discharges internally. This could raise the temperature of the
display surface. In addition do not allow any forceful impact to the surface of the panel because the front filter is
made is a fine-processed tempered glass.
About Screen Driving Sound
The panel of the Plasma TV is composed of extremely fine pixels and these pixels emit light according to received
video signals. This principle may cause you to hear a buzz or electrical hum coming from the TV. This is not a
malfunction.
•
•
•
•
•
ABOUT PLASMA DISPLAY PANEL
[Fig. A] [Fig. a]
[Fig. B] [Fig. b]
Downloaded From TV-Manual.com Manuals
Page 10
9
ENGLISH
FEATURES
Enjoy not only beautiful and high-quality pictures on the display, but also various kinds of useful and convenient
functions in your daily life!
Large-screen and high-definition plasma panel.
High quality sound with deeper, richer and dynamic bass tones.
2 Scart terminals installed.
Accept more digital input devices with 2 HDMI terminals.
Great diversity of connecting terminals to cover wide range of audio-visual equipments.
Enjoy the image from PC with large, high-definition Plasma screen.
Easy-to-use On-Screen Display system operating with Remote control.
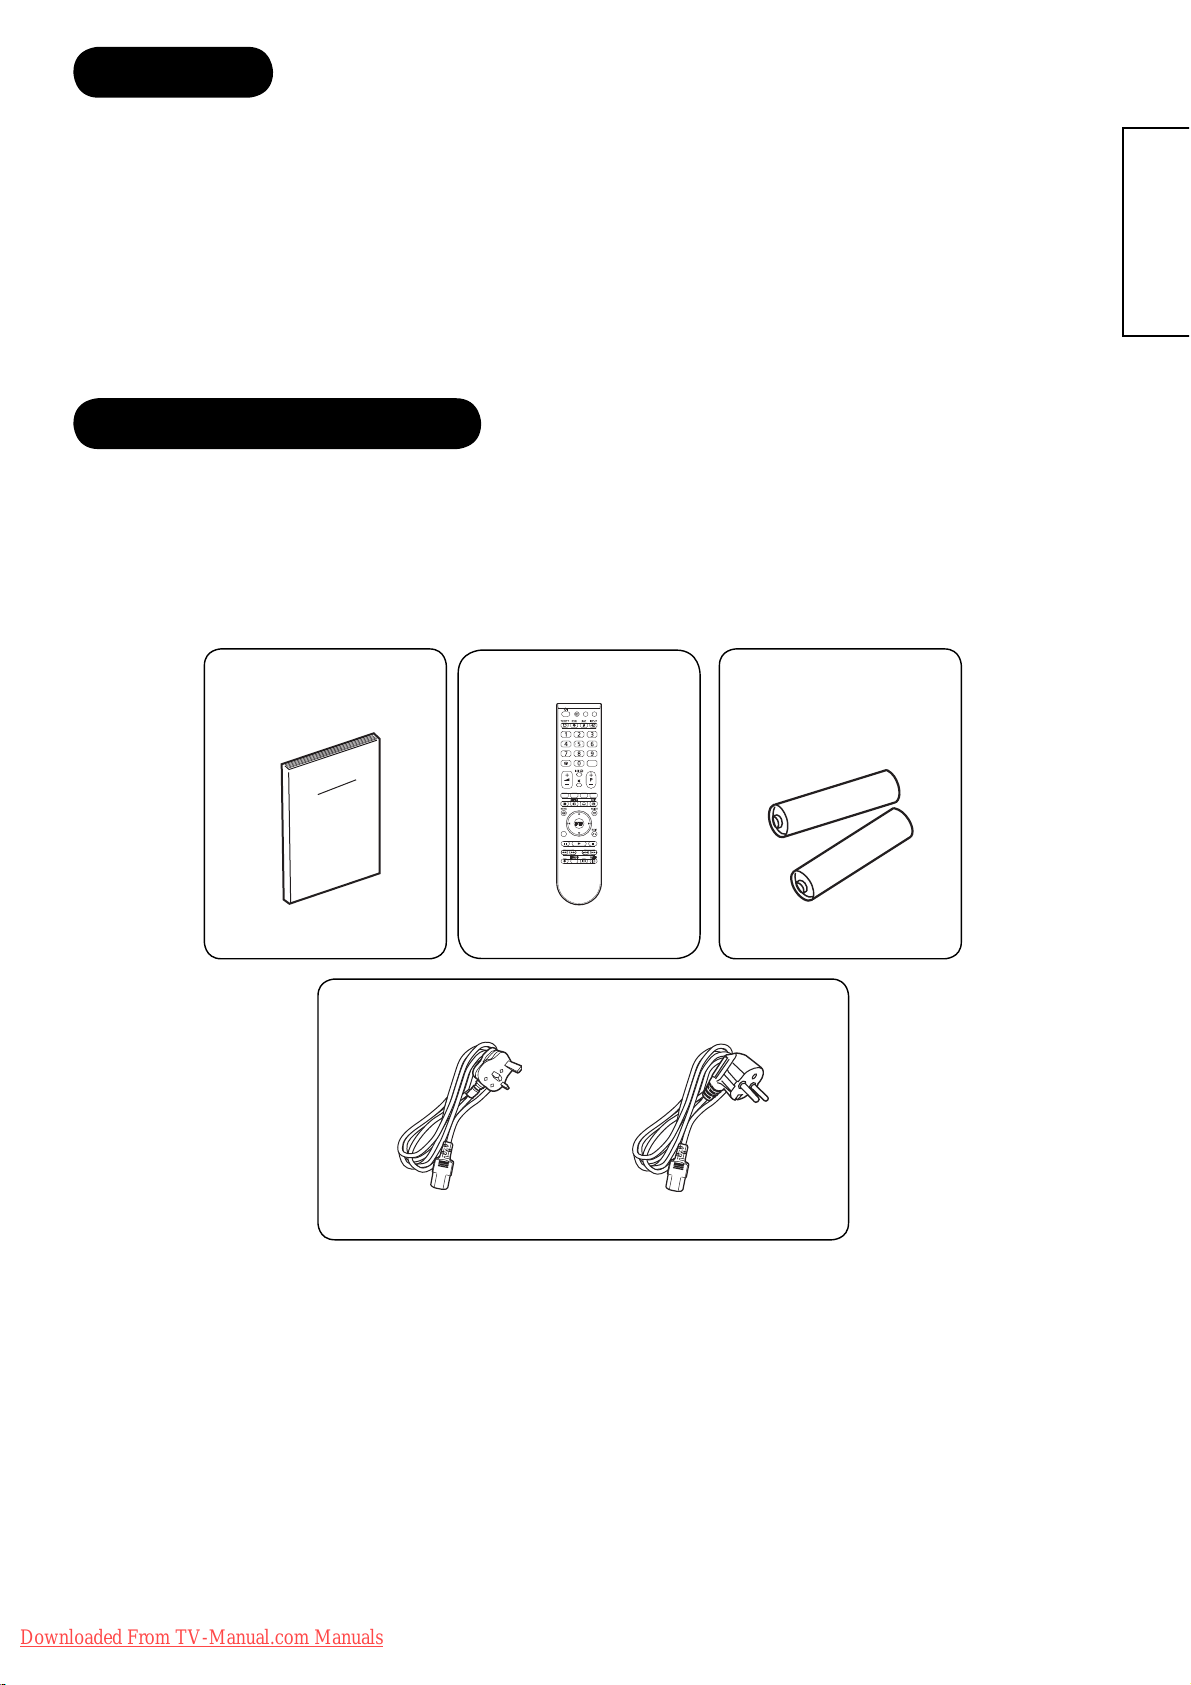
SUPPLIED ACCESSORIES
Check the supplied accessories before installation.
In case of missing or damaged, please contact the dealer immediately.
•
•
•
•
•
•
•
User’s Manual Remote Control AA size batteries
X2
Power Cords
UK only
Except UK
Downloaded From TV-Manual.com Manuals
Page 11
10
COMPONENT NAMES
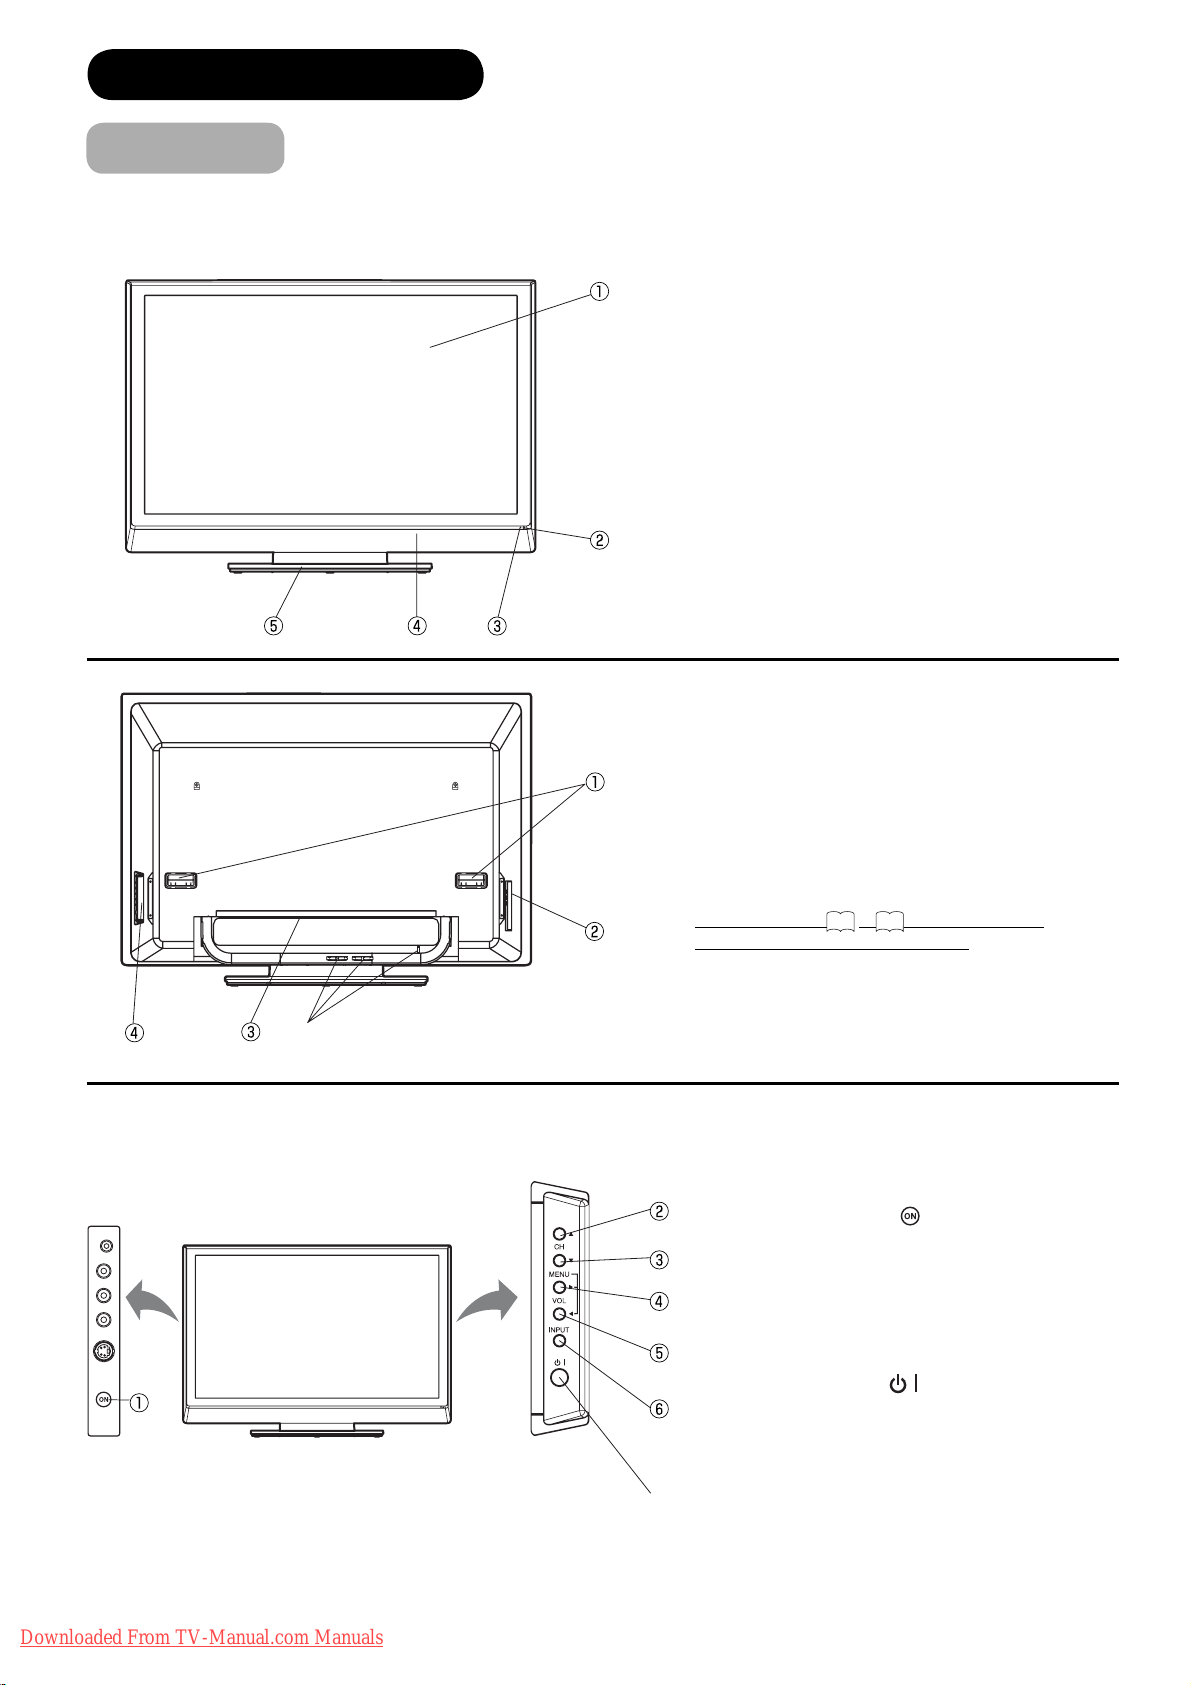
Main Unit
① Panel
② Remote Control Receiver
③ Indicating Lamp
④ Speaker
⑤ Desktop Stand
①
Handgrips
②
Side Input
③ Rear
Input
④
Control Panel (see below for details)
⑤ Cable Clampers
Please refer to
14
~18 for the detailed
information for the connections.
① Main Power Switch (
)
②
Channel UP
③
Channel DOWN
④
Volume UP
⑤
Volume DOWN
⑥
INPUT button
⑦ Sub Power button ( )
To display the menu screen.
Press both VOL
ϵ/϶ buttons at the same time for
more than 1 seconds to display the menu screen.
CH ϳ/ϴ buttons, VOL ϵ/϶ buttons and INPUT (as
ENTER) button can be used to select or enter the
desired setting during the menu screen operations.
Front Panel
⑦
⑤
Downloaded From TV-Manual.com Manuals
Page 12
11
ENGLISH
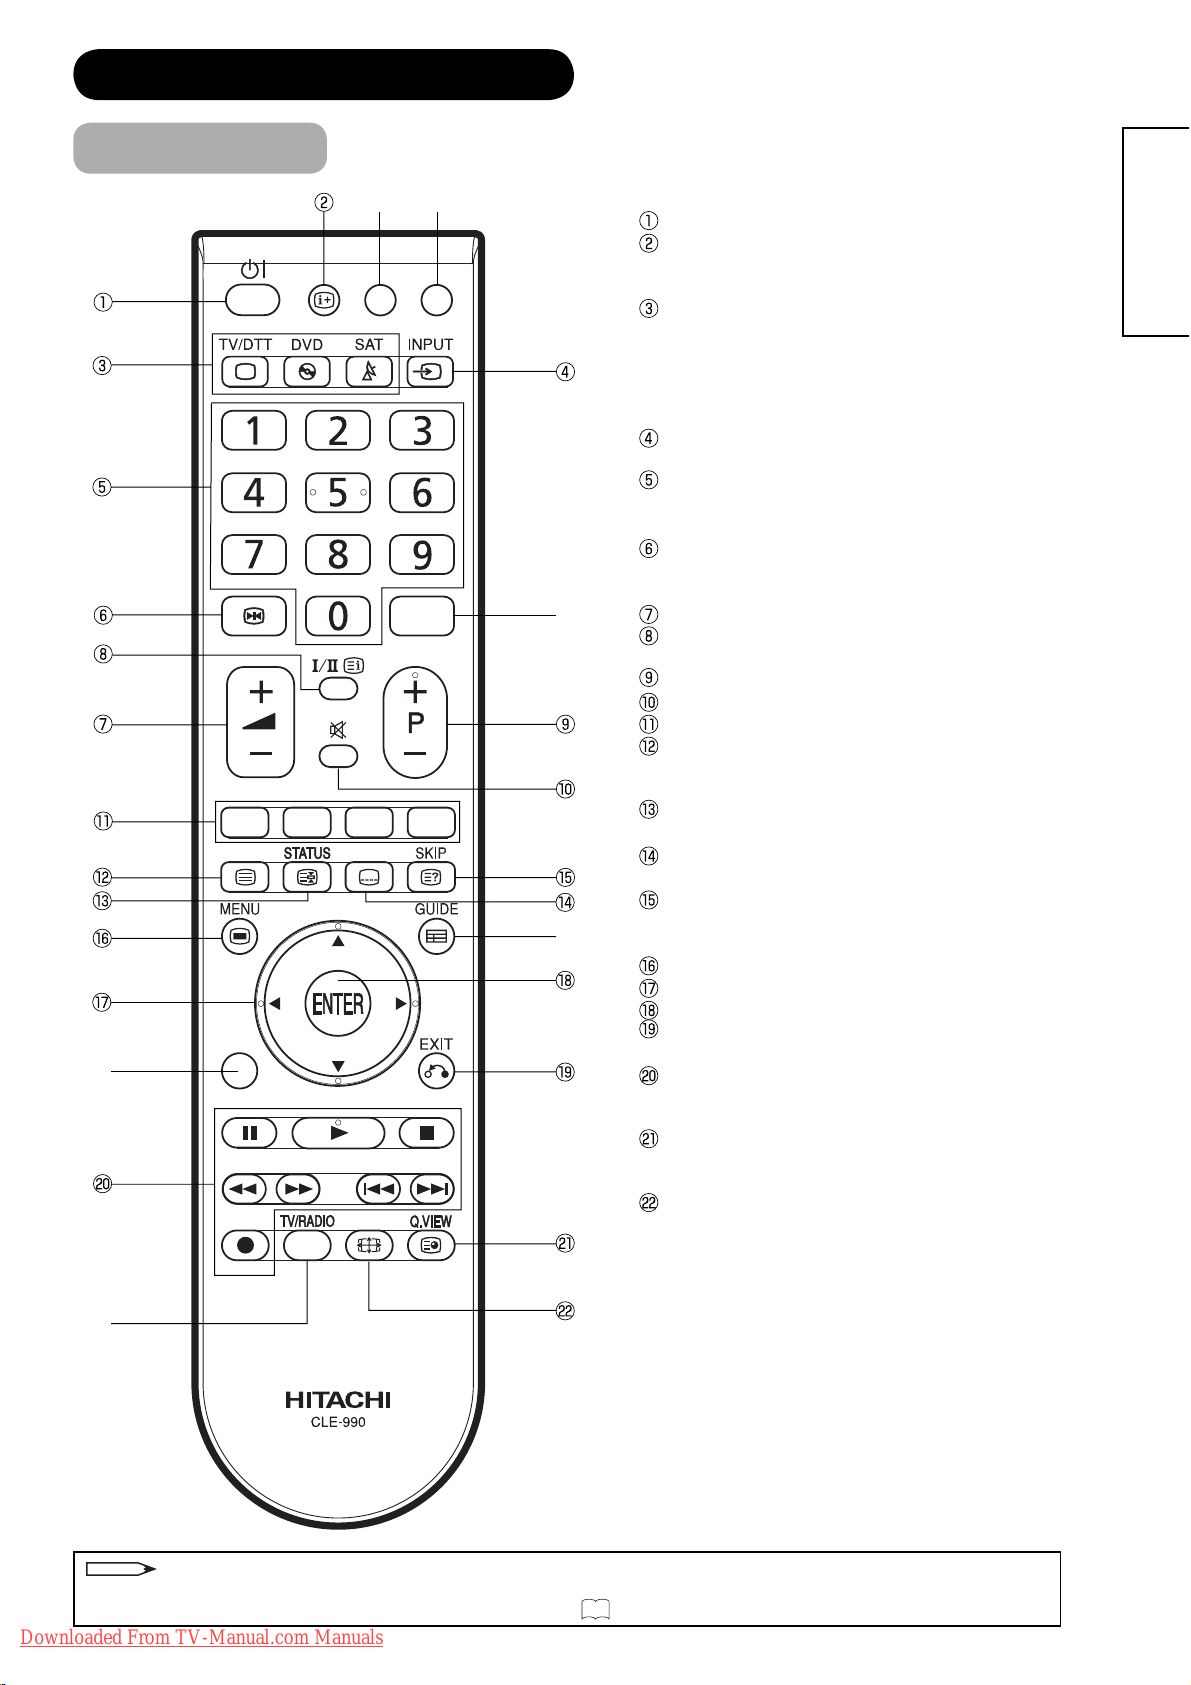
NOTE
Some buttons are only for Teletext mode, and other buttons have different functions in Teletext mode from the use of TV
mode. Those buttons are indicated by [ ]. Refer to "Teletext" on
.
Sub Power
Recall
Pressing this button shows the input signal
status.
Source access buttons (TV, DVD, SAT)
Changes the mode of the Universal Remote
Control to control the device selected.
Normally select TV.
Please ignore “/DTT”. DTT is not related to
this model.
Input Select
Press this button to change input mode.
Programme Select
Press these buttons to select a TV program
directly.
Freeze
Press this button to change the picture to freeze
mode. Press it again to return to normal picture.
Volume Up/Down
CHI/II [Index]
This is exclusively for TV audio A2/NICAM mode.
Channel Up/Down
Mute
[Colour (Red, Green, Yellow, Blue)]
TV/Text [TVÖTextÖTV+TextÖOFF]
This switches between the TV mode and the
Teletext mode.
STATUS [Hold]
Teletext-Timer display/Hold the text page.
[Subtitle]
Displays the Teletext Subtitle directly.
SKIP [Reveal]
Press this button to skip the channel/
Displays hidden information.
MENU
Cursor
ENTER
EXIT
Exit the menu screen.
DVD control buttons
You can use these buttons while operating the selected brand of DVD player function.
Q.VIEW (QUICK VIEW)
Switches between the present channel and the
last selected channel
Zoom
Press this button to change picture size.
*
1
No functioned buttons for this model.
*
2
This button is used only for the setting of pre-
coded function.
COMPONENT NAMES (Continued)
Remote Control
*
1
*
1
*
2
*
1
*
1
*
1
Downloaded From TV-Manual.com Manuals
22
Page 13

12
CAUTION
It could cause corrosion or battery leakage and may result in physical injury and/or
property damage including fire.
Never mix used and new batteries in the device.
Replace all the batteries in a device at the same time.
Remove the batteries if the remote control is not going to be used for an extended period of time.
To avoid possible failure, read the following instructions and handle the remote control
properly.
Do not drop or cause impact to the remote control.
Do not spill water or any liquid on the remote control.
Do not place the remote control on a wet object.
Do not place the remote control under the direct sunlight or near sources of excessive heat.
Caution When Moving the Main Unit
As this product is heavy, whenever it is moved, two people are required to transport it safely.
2. Install the batteries
Install 2 “AA” batteries (included)
making sure the polarities match
the indication inside the
compartment.
3. Close the battery compartment cover.
To close the battery compartment
cover, slide the cover in the
direction of an arrow till it clicks
shut.
Use the remote control within about 5m from
front of the unit’s remote-control sensor and
within 30 degrees on both sides.
Remote Control Batteries Installation Handling the Remote Control
Whenever the unit is moved,
it should be lifted forwards
using the two handgrips
at the back, and the unit
should then be held at the
base on both sides for
stability.
This remote control operates on 2 “AA” batteries.
1. Open the battery compartment cover
Slide open the battery compartment cover on the
backside of the remote control in
the direction of an arrow.
Handgrips
PREPARATION
Within 30
Within 30 degrees
About 3m
degrees
About 3m
About 5m
Downloaded From TV-Manual.com Manuals
Page 14

13
ENGLISH
Read SAFETY PRECAUTIONS ( 4to7) carefully besides this page.
When installing the main unit, be sure to use the specified mount units in order to obtain maximum performance and
maintain the safety.
We assume no responsibility or liability for personal injuries or property damages caused by use of other mount
units or improper installation.
As for the installation instruction, please read each user manual of the mount units: for Wall Mounting, and Ceiling
Mounting.
In case of using Wall or Ceiling Mounting unit, by contacting your local dealer, ask the specified installation
specialist to set up. Never attempt to install it by yourself. It could cause injuries or damages.
Please leave the adequate space around this unit in order
to avoid increasing the internal temperature and keep
safety while using swivel function.
Make sure not to block any ventilation holes.
Do not install the unit in the small space such as inside
the rack, closet or the box.
Leave more than 10cm of clearance from each side of
monitor and 30cm from the top of unit to wall.
Securing to a wall or pillar
Using a commercially available cord, chain, and clamp, secure the set to a wall or pillar.
Securing to ceiling
Using a commercially available cord, chain, and clamp, secure the set to a ceiling.
NOTE
For more information regarding the mounting of the unit, please contact your dealer.
Hitachi shall not be held liable for possible damage or injury caused due to mishandling.
•
•
PREPARATION (continued)
Safety Precaution on Main Unit Installation
Anti-Tumble Measures
Install in a stable place and implement safety measure against overturning.
10cm
or more
30cm
or more
cord or chain
screw
hook
cord or chain
Wall or Pillar
10cm
or more
Cord
or
chain
Clamp
10cm or more*
clamp
Downloaded From TV-Manual.com Manuals
Page 15

14
CONNECTION
Terminal Positions
Rear
①
Power Cord Socket
②
AV1
③
AV2
④
AV3
⑤
COMPONENT IN, AUDIO terminals
⑥
VAR (Variable) AUDIO OUT terminal
⑦
HDMI1, 2 and mini stereo for Audio
⑧
PC Connection terminals
(D-sub 15 pin and mini stereo for
Audio)
⑨
(ANT) Aerial Socket
Side
⑩
AV4
⑪
Headphone Socket
Connecting Procedure
This unit is ready for various kinds of connections. Make a connection in the following steps. Be sure to turn off the
Main Power first when connecting external equipments.
1. Connect Power Cord to the rear panel.
2. Connect Aerial Lead.
3. Connect your external equipments to the unit if any.
4. Connect the Power Plug to the Wall Socket.
1. Connecting Power Cord to the Rear Panel
Connect Power Cord to the unit.
*Make sure not to connect the Power Plug to the Wall Socket
until all connections are completed.
2. Connecting Aerial Lead.
There are two ways to connect Aerial Lead.
When you do not have any other external equipment:
Connect the Aerial Lead directly into the Socket at rear panel.
When you have one or more external devices to connect:
1. Use RF cable to connect between each equipment and
Aerial.
2. Connect the Aerial Lead to an equipment “In” Socket
marked.
3. Connect the RF cable from the equipment “Out” to the other
equipment “In.”
4. Then, connect from the equipment “Out” to “ANT” on this unit
Socket on marked.
[Example: Connecting Aerial
through STB and VCR]
Precautions when connecting the aerial
Please use a coaxial cable which is free from interference to connect the aerial. Avoid using a parallel flat feeder
wire as interference may occur, causing reception to be unstable and stripe noise to appear on the screen.
Avoid using indoor aerial as this may be affected by interference. Please use CATV net or outdoor aerial.
If noise appears in the picture of VHF-Low band channel, please use a double-shielded cable (not provided) for
RF LEADS to reduce the noise.
•
•
•
Antenna
STB
IN
OUT
VCR
IN
OUT
Downloaded From TV-Manual.com Manuals
Page 16

15
ENGLISH
CONNECTION (continued)
3. Examples of other AV equipment that you might connect to this TV
Two video recorder connection (e.g. to duplicate a video tape)
DVD player:
For superior picture quality, set your DVD player to output an RGB signal (refer to your particular DVD player owner’s
manual). Always connect DVD players (and other equipment which can output an RGB signal) to AV1 - only the AV1
SCART socket is compatible with RGB signal. Select AV1 input mode
.
NOTE
S-Video signals can be played back either through the AV2 SCART socket, or the AV4 16. If you wish to use S-Video via the AV2
SCART socket, use an S-Video-to-SCART adaptor (not supplied).
Select ‘MONITOR’ in the ‘AV2 OUTPUT’ option 26.
Select AV1-input mode
. This displays the playback
picture from video recorder 1. While the TV is set up
in this way, you can duplicate a video tape - the AV2
SCART socket will output the picture that is being
shown on the screen (please remember that changing
the channel in this mode will also affect the recording).
Connecting Procedure (continued)
TV (Rear bottom view)
ANT
Satellite aerial
Satellite
receiver
VCR
Aerial
Video recorder
TV
(All illustrated SCART cables and aerial cables are not supplied)
AV 2 AV 1
DVD player
19
Video recorder 2 to AV2
Recording
TV (Rear
bottom view)
Video recorder 1 to AV1
Playback
(All illustrated SCART cables are not supplied)
19
Downloaded From TV-Manual.com Manuals
Page 17

16
CONNECTION (continued)
Connecting Procedure (continued)
Connecting an audio system
This connection allows you to hear the TV sound through external speakers connected to an audio amplifier. To control
the audio through the amplifier, turn on the TV and the amplifier, set the volume of both to a moderate level, and turn
off the TV’s built-in speakers (see "SPEAKERS" in Audio menu
).
Use a stereo RCA/Phono audio lead to connect the Variable Audio Output sockets to a spare input on your hi-fi
amplifier, for example Line-in or AUX (please consult your hi-fi instructions for details).
NOTE
The sound adjustment (bass / treble / balance) controls 24 only affect
the sound through the TV speakers - it does not affect the sound
through the audio output sockets.
Connect to a Video camera or games console
Connect the Video camera (or games console) to the TV unit
using the appropriate RCA / Phono AV leads (or S-Video if
applicable). Select AV4-input mode
.
NOTE
If you have a camcorder with S-video, use an S-video lead instead of a
standard video lead. Do not connect both a standard video lead and
an S-video lead at the same time, or the picture performance will be
unacceptable.
Connecting to a DVD player or other AV device with Component Video outputs
If your DVD player (or other device) has Component Video output sockets, use a suitable set of leads (RCA/Phono)
to connect these to the Component Video inputs on this TV as shown - it can greatly enhance the picture quality and
performance. Please remember that you will also need to connect separate leads (RCA/Phono) for the audio signals.
To view this source, select the COMPONENT input mode
.
Component outputAudio output
Video lead (not supplied)
Audio lead (not supplied)
To COMPONENT IN
TV (Rear bottom view)
NOTE
The Component Video inputs on this unit can accept both interlaced signals (PAL: 576i/ 1080i or NTSC: 480i/1080i) and progressive
signals (PAL: 576p/720p or NTSC: 480p/720p).
DVD player
TV (Left side view)
(AV lead, not supplied)
(S-VIDEO lead, not supplied)
AV output
Video camera
(example)
24
Stereo amplifier
TV (Rear bottom view)
To VAR (variable)
AUDIO OUT
(Audio lead, not supplied)
Audio input
19
19
Downloaded From TV-Manual.com Manuals
YPbPr
Page 18

17
ENGLISH
CONNECTION (continued)
Connecting Procedure (continued)
PC connection
For best results the PC graphics card should be set to 1360 x 768@60Hz. Before connecting your PC please ensure
that it is set to this resolution (or one of the other acceptable resolutions listed below) or you may not be able to see a
picture.
VGA lead
(not supplied)
Use a PC-VGA lead (not supplied) to connect your
PC to this unit. Plug the lead carefully not to break or
bend the contact inside of plug.
Select PC input
Switch on this unit.
Select the PC input mode
.
NOTE
If there is no video signal from the computer when the unit
is in PC mode, “NO SIGNAL” will appear on the TV screen
for approx. 10 seconds.
See
for the PC Monitor Menu.
•
•
Audio lead
(not supplied)
PC
TV (Rear bottom view)
to PC/HDMI-1
AUDIO input
Monitor Display modes
MODE Resolution Refresh rate
VGA 640x400 70Hz
VGA 640x480 60/75Hz
WVGA 848x480 60Hz
SVGA 800x600 60/75Hz
Connecting an HDMI or a DVI device to the HDMI input
The HDMI input receives digital audio and uncompressed video from an HDMI equipped device or uncompressed
digital video from a DVI equipped device. When you connect to a DVI device with a HDMI-to-DVI adapter lead, it only
transfers the video signal, so it is necessary to use separate analogue leads (RCA/Phono type) to transfer the audio
signals. Select the HDMI1 or HDMI2 input mode
.
See “HDMI1” or “HDMI2” in Audio menu on
for the selecting the HDMI audio input source.
or
DVI device
HDMI device
To DVI
output
Audio lead (not supplied)
HDMI - to - DVI adapter lead
(HDMI type A connector)
(not supplied)
HDMI cable (type A connector)
(not supplied)
To HDMI output
TV (Rear
bottom view)
to HDMI-2
AUDIO input
Details of HDMI input signals
HDMI compliant (type A connector), HDCP compliant
Suggested scan rates: PAL: 576i/576p/720p/1080i
NTSC: 480i/480p/720p/1080i
HDMI Audio: 2-channel PCM,32/44.1/48kHz
sampling frequency16/20/24
bits per sample
MODE Resolution Refresh rate
XGA 1024x768 60/75Hz
WXGA 1280x720 60Hz
WXGA 1280x768 60Hz
WXGA 1360x768 60Hz
(according to Graphic card)
NOTE
As well as HDMI-2, you can also use HDMI-1 IN to
connect to DVI equipped device - in this case, you must
connect the audio leads to the PC/HDMI-1 AUDIO IN
sockets.
Some devices may not operate properly with the TV.
HDMI, the HDMI logo and High-Definition Multimedia
Interface are trademarks or registered trademarks of
HDMI Licensing LLC.
This set is classed as “HD-Ready”. This
means that it is capable of displaying HD
(High Definition) signals when connected
to a suitable HD source, such as an HD receiver or
DVD player that has HD capability, via HDMI, DVI, or
Component Video connections.
•
•
19
27
19
24
Downloaded From TV-Manual.com Manuals
Page 19

18
CAUTION
Use only the Power Cord provided.
Do not use a power supply voltage other than that indicated(AC220-240V, 50/60Hz). It may cause fire or electric shock.
For the plasma television, a three-core power cord with a ground terminal is used for efficiency protection. Always be
sure to connect the
Power Cord
to a grounded outlet and make sure that the cord is properly grounded. If you use a
power source converter plug, use an outlet with a ground terminal and screw down the ground line.
Ensure that both ends of power cord are easily accessible.
If you have to change the power cord, please use the certified power cord that meets your region’s safety standard.
•
•
•
•
•
UK only
Except UK
CONNECTION (continued)
Connecting Procedure (continued)
Headphone
Plug headphones with a mini plug (3.5mm) into this socket, located at side of plasma.
4.
Connecting the plug into the wall socket
Connect the Power Cord after completing all other connections.
(The type of plug is different from this drawing for some countries.)
TV (Left view)
TV (Rear bottom view)
Downloaded From TV-Manual.com Manuals
Page 20

19
ENGLISH
When the TV powers on for the first time after purchase, the initial auto installation menu will appear. You can
automatically set language, country and channels in successive operations.
1. Press STANDBY
on the right side of the unit or press (STANDBY) on the remote. The Language select menu will appear
first.
2. Press ϳ/ϴ or ϵ/϶ to select desired language. Then press ENTER.
3. Press ϳ or ϴ to select desired country. Then press ENTER.
4. Check the aerial then press ENTER.
5. Press ϳ or ϴ to select the colour system.
6. Press ENTER to start automatic tuning.
Your TV will now automatically tune in all available channels.
NOTE
Please be patient - the Auto Tuning process can take several minutes to complete.
When the tuning screen disappears and then normal TV screen appears, the Auto
tuning process is complete.
NOTE
The initial auto installation functions only once. If the initial auto installation is not completed, try AUTO TUNING 25.
To cancel the Auto Tuning, press EXIT during the process.
If the received signal for some channels is too weak, the automatic tuning system may not pick them up - in this case you may
need to use manual tuning
.
If you want to reconfigure the country setting, for instance after moving to another country, conduct “AUTO TUNING” from the
Menu again.
•
•
•
•
BASIC OPERATION
Auto setup
Turning on the power
Press on the TV.
The
indicator on the TV changes from red to green.•
Standby mode
Press on the remote control when the TV is on.
The TV enters standby mode and the image on the screen
disappears.
The
indicator on the TV changes from green to red.
You can turn the TV on by pressing
on the remote control
from standby mode, or press CH ϳ/ϴ on the TV or P+/- on the
remote control.
Weak electric power is still consumed even when
is turned
off.
To completely turn off the TV, press
on the TV.
•
•
•
•
•
Press
to view a signal from another device connected to your TV, such as a VCR or DVD player. You
can select each input source depending on which input jacks you used to connect your devices.
To select the video input source, press ϳ/ϴ or the corresponding number button. Then press ENTER
within 6 seconds.
Selecting the video input source
Display status indicator
Off Power off
Red The TV is in standby mode.
Green The TV is on.
NOTE
If you are not going to use this TV for a long period of time, be sure to remove the AC cord from the power outlet.
:SELECT
:SELECT
: END
EXIT
:SET
ENTER
LANGUAGE
English Dansk
Français Norsk
Deutsch Nederlands
Español ǏǸǸdzǺǶǷȉ
Italiano Türkçe
ȥɜɚɚɓɑɒ Português
Svenska Polski
Suomi
25
Downloaded From TV-Manual.com Manuals
SOURCE SELECTION
0.TV
1.AV1
2.AV2
3.AV3
4.AV4
5.COMPONENT
6.HDMI1
7.HDMI2
8.PC
[ 0 - 8 ]: SELECT
:SETENTER
Page 21

20
Basic TV functions
Channel selection
With the 10 Number Buttons.
Example:
No. 2: Press 2. The station stored in the 2nd store position will
appear.
No. 29: Press 2 and within 2 seconds, press 9.
The station
stored in the 29th store position will appear.
Press P + or – to change to the program forward or backward.
The changing takes approx. 2 seconds.
QuickView
Q. VIEW button allows you to go back to the last selected
channel or input source.
Volume adjusting
Press
+ or – to adjust the volume. The volume level
indicator disappears after 4 seconds.
MUTE
Press
. The sound will be cut off. MUTE will display on the
screen for approx. 4 seconds.
The muting can be released by pressing
again or + or –.
•
•
BASIC OPERATION (continued)
Stereo reception with the built-in tuner
The built-in tuner can receive and distinguish NICAM Stereo broadcasts automatically, provided the NICAM setting in
the menu is set to “AUTO”.
NICAM stereo sound reception:
Select NICAM AUTO or OFF (in Audio menu on
24
). Select OFF if you do not want to receive NICAM sound.
When NICAM reception is available, one of the following indications will be displayed.
“NICAM ST” appears for approx. 4 seconds when a NICAM STEREO broadcast signal is
received.
“NICAM
” appears for approx. 4 seconds when a NICAM MONO A broadcast signal is
received.
“NICAM
/ ” appears for approx. 4 seconds when a NICAM MONO A and MONO B
broadcast signal is received.
This will be displayed for approx. 4 seconds when “NICAM OFF” is selected in the menu
screen.
A2 Stereo reception
“STEREO” illuminates for approx. 4 seconds when a STEREO broadcast signal is received.
NOTE
In case of bad reception, the stereo sound also can be disturbed.
Adjusting the NICAM/A2 stereo sound
Pressing
alternates between the two different audio channels (when applicable).
NICAM 2-channel sound
reception
A2 2-channel sound reception
NOTE
Sometimes if reception is poor, the NICAM/A2 stereo sound may not be received correctly. In case of 2 channel sound reception,
you can select the desired sound with
.
DISPLAY
Press
. Channel number, picture size setting, clock (in case
of the TV program which has a Teletext time data), etc. will
appear for approx. 4 seconds.
STATUS
Press STATUS. The clock and program information will appear,
if the information is currently available.
Still picture
Press
to make a still picture. To cancel the still picture, press
again.
NOTE
If the built-in tuner does not receive any signal (e.g. if no aerial
is connected or if the broadcast transmission stops) during
TV operation, this unit will switch to standby after approx. 15
minutes.
Downloaded From TV-Manual.com Manuals
Page 22

21
ENGLISH
BASIC OPERATION (continued)
Conceal stored channels
Picture format
Press , then press ϳ or ϴ to select desired picture format, then press ENTER.
AUTO
Automatically selects the aspect ratio (see note below).
NOTE
In case a screen switches with AUTO operation, the screen may become black for a moment according to
the conditions of a weak-electric-field and an input signal, but it is not a failure.
4:3
It shows a 4:3-picture in original size with grey bands on left and right side.
FULL
Stretches the left and right hand sides of a 4:3 picture horizontally to fill the screen, while leaving
the centre of the picture unstretched.
NOTE
In this mode the picture is geometrically distorted on the left and the right sides of the screen.
PANORAMIC
This mode is used with 16:9 signals from a Digital decoder, a DVD player or other external
source. This uniformly stretches a 4:3 image horizontally to fill the screen (For example, a 16:9
image is often stored “anamorphically” on a DVD, where the 16:9 image is stored as a horizontally
compressed 4:3 image - this mode restores the image to its correct 16:9 proportions).
ZOOM
This mode is used to zoom-in on (expand) 4:3 “letterbox” format pictures (with grey bars at the top
and bottom) so that they fill more of the screen.
NOTE
In the ZOOM mode, part of the picture may be slightly cut off due to the expansion. However, it is possible to scroll the picture up or
down to view the top or bottom part of the picture
.
14:9
This enlarges a 4:3 picture to the 14:9 format.
NOTE
When the Picture format is set to AUTO, the aspect ratio will automatically change according to the Wide Screen Switching (WSS)
signal, if it is available. This may be either transmitted by the broadcasting TV channel, or via a recording from a VCR etc. Any WSS
signal received will only be effective in the AUTO mode - however, some DVD players / Digital Decoders etc. will automatically
switch the aspect ratio via the SCART input (Pin 8 switching), even if AUTO is not selected. In any case if you want to change to a
different aspect ratio to the one selected automatically, you can change it by pressing
.
In PC mode, the Picture format is available only for 16:9 or 4:3 format. (In “WXGA INPUT” and “WVGA INPUT” mode, the Picture
format is not available.)
In HDMI or COMPONENT mode of scanning rate: 720p and 1080i, the Picture format is available only for FULL1, FULL2 and
ZOOM format.
•
•
•
SUBTITLE SUBTITLE
SUBTITLE SUBTITLE
You can conceal certain channels so that when you use the P+ or – buttons they are skipped.
In this case these channels are not deleted - they can be accessed at any time using the 10 Number Buttons.
1
Select the channel to be concealed (i.e. CH29).
Press SKIP. The programme number flashes.
2
Select the next channel to be concealed.
Press SKIP. The programme number flashes.
You can conceal as many channels as you like.
Cancel concealment of channels
Select the concealed channels with the 10 Number Buttons.
The programme number flashes.
Press SKIP. The programme number no longer flashes.
This channel is no longer concealed.
(FULL)
(PANORAMIC)
(ZOOM)
(14:9)
PICTURE SIZE
0.AUTO
1.4:3
2.FULL
3.PANORAMIC
4.ZOOM
5.14:9
[0-5 ] : SELECT
:SETENTER
26
Downloaded From TV-Manual.com Manuals
Page 23

22
Teletext
BASIC OPERATION (continued)
Teletext is sent page by page. This unit is able to automatically store up to 812 pages.
Storage lasts until all pages have been received. The pages can only be accessed when they have been
stored. This can take a moment.
Fastext/TOPtext
Fastext/TOPtext is teletext with a special directory.
On the lower part of the screen there are four different coloured fields (red, green, yellow and blue). These fields lead
directly to the pages shown within. The four coloured buttons on the remote control correspond to the coloured
fields. Press the appropriate coloured button in order to go to the page represented by that particular colour field.
Switch on / off Teletext
Teletext is not transmitted by all channels.
Select a channel that shows teletext.
Press
. You will now see a teletext page (as long as it is available).
Press
again. Teletext and TV picture are shown simultaneously.
Press
again in order to switch off teletext.
Press
again in order to switch on teletext again. The last page which was stored is now shown.
NOTE
You cannot select any other channels as long as teletext is switched on. Switch teletext off when you want to switch over to another
channel.
Select page
Press P + or – until the page you desire appears. Or ... enter the requested page number by using the 10 Number
Buttons.
And if you mistype something, just enter the complete 3-digit wrong page number then enter the desired number
again.
Or ... press one of the coloured teletext buttons so that a page from Fastext/TOPtext is shown.
In order to use Teletext the control codes must be transmitted by the broadcasting authorities - its
operation is, therefore dependent on these codes being transmitted.
Hold pages
Some pages are divided up into subpages by the channel.
Subpages are automatically shown in turn, as they are transmitted. In order to hold the page, press
. Press
again in order to display the next subpage.
Directly select subpages
You can directly select the subpages if required.
Example:
Page 667 from Teletext may comprise 2 subpages. In the right upper corner you
will, for example, see 1/2. That means that page one of 2 subpages is being shown
at the moment.
Press
in order to select subpage 2. Four dashes (– – – –) are shown. Enter 0 0 0 2. It can take a minute before
subpage 0002 appears.
Press
again in order to switch off the subpage feature. You can only select other teletext pages when the subpage
feature is switched off.
Answering quiz questions
Some pages contain quiz questions with concealed answers.
Press
in order to show the answers.
Index page (Page 100)
Press
in order to show page 100 (this is normally the Index page).
Subtitle for Teletext
Press
to display the subtitle or exit the subtitle screen.
Subtitle will not be displayed when the service does not contain the subtitle information.•
667 667 CEEFAX 21.07.03 15:01:38
1/2
Downloaded From TV-Manual.com Manuals
Page 24

23
ENGLISH
TV SETUP OPERATION
Guide to using the menu system
Selected Items Setup hint
PICTURE PREFERENCE
SPORTS Bright and dynamic picture (factory-set)
STANDARD Standard picture quality (factory-set)
MOVIE Movie-like picture setting (factory-set)
MEMORY Your personal preferences
BRIGHTNESS You can adjust the picture to your preference.
CONTRAST
COLOUR
TINT *
1
SHARPNESS
DNR *
2
ON DNR (Digital Noise Reduction) can reduce the roughness of the
picture.
OFF
COLOUR TEMPERATURE
COOL Bluish
NORMAL Neutral
WARM Reddish
BLUE BACK
ON You can set the TV to automatically change to a blue screen and
mute the sound if the signal is weak or absent.
OFF
CINEMA MODE*
3
FILM By setting to FILM automatically identify if it is the movie film and
faithfully reproduces the original film images.
VIDEO
RESET
Select “RESET” to reset PICTURE PREFERENCE, BRIGHTNESS,
CONTRAST, COLOUR, TINT and SHARPNESS to the factory preset
values.
Video menu (TV mode)
NOTE
*1 The “TINT” option can be selected if an NTSC 3.58MHz or NTSC 4.43MHz signal is input through one of the AV sockets, and
NTSC or AUTO has been selected for the AV COLOUR option
.
*
2
In HDMI or COMPONENT (except 480i/576i) mode, the “DNR” option cannot be selected.
*
3
CINEMA MODE is available only for 480i/576i mode.
1
Press TV/DTT to select TV mode.
Please note that “DTT” is not related to this model.
2
Press MENU, the MENU will appear on the screen.
3
Press ϵ or ϶ to view the 3 menu options e.g. Video, Audio,
Setup.
Video
menu
Each setting
option
Short guide
Audio
menu
Setup
menu
Indicates more
options - scroll down
PICTURE PREFERENCE STANDARD
BRIGHTNESS 28
CONTRAST 33
22RUOLOC
0TNIT
SHARPNESS 23
:SELECT
: ADJU ST
: EXIT
MENU
Audio
Setup
Video
4
Press ϳ or ϴ to select whichever item you require.
The function can be activated by pressing ϵ or ϶.
NOTE
Some of the menus have more than one page of items - an arrow
beneath or above the menu items indicates that you can scroll down
or up to select other items.
5
Press EXIT to return to normal screen.
NOTE
If no buttons are pressed for more than approx. 60 seconds, the MENU disappears automatically.
Downloaded From TV-Manual.com Manuals
26
Page 25

24
Selected Items Setup hint
NICAM AUTO The built-in Tuner can detect and receive NICAM stereo broadcasts
automatically.
Select OFF if you do not want to receive NICAM sound.
OFF
BASS You can adjust the sound quality to your preference.
TREBLE
BALANCE
SPEAKERS *
1
ON Use this feature to turn the TV speakers off when you have connected this unit
to an external hi-fi/audio system
.
OFF
HDMI1 HDMI You must choose the appropriate HDMI audio input setting for each
connection, depending on whether the source is equipped with a DVI or HDMI
socket.
DVI
HDMI2 HDMI
DVI
SURROUND ON The SURROUND sound feature processes the audio signal to expand the
listening field wider and deeper to create a ‘pseudo surround-sound’ from the
TV’s speakers. The feature works with stereo signals from TV broadcast or AV
input.
OFF
PERFECT VOLUME ON This will automatically adjust volume so each channel and input has the same
average volume level.
OFF
RESET
Select “RESET” to reset BASS, TREBLE and BALANCE to the factory preset
values.
TV SETUP OPERATION (continued)
Audio menu (TV mode)
NOTE
*1 Make sure the volume control of your audio amplifier is set to a moderate listening level.
Setup
Audio
16
Video
NICAM AUTO
BASS 25
TREBLE 25
BALANCE 0
SPEAKERS ON
HDMI1 HDMI
HDMI2 HDMI
: ADJUST: SELECT
MENU
: EXIT
Downloaded From TV-Manual.com Manuals
Page 26

25
ENGLISH
TV SETUP OPERATION (continued)
Setup menu
Selected Items Setup hint
AUTO TUNING
If you need to restart the automatic tuning
process, use the following procedure.
①
Select AUTO TUNING, then press ϶.
②
Press ϳ or ϴ to select your country, then press ENTER.
③
Press ϳ or ϴ to select the colour system.
④
Press ENTER.
The automatic tuning process will now begin. This may take a few
minutes. So, please be patient.
⑤
When the programme on the screen stops changing and the
sound comes on, the search process is complete.
MANUAL TUNING
Usually the Auto Tuning stores all available
stations in the reception area. If some stations
have poor reception, they may not be stored
- however, you can store these manually if you
wish.
Example: Preset BBC 2 in program position 2.
①
Select MANUAL TUNING, then press ϶.
②
Press ϵ or ϶ to select PAL or SECAM-L. Then press ENTER.
③
Press ϶. The auto search begins. It will stop at each station that
has a good enough reception. Press ϶ again until you receive a
clear BBC2 picture.
The auto search should find the best reception automatically,
so fine tuning is not normally necessary. However if you want to
you can fine tune the reception manually. - When the search has
stopped at a station, press ϳ or ϴ until the desired fine tuning is
achieved.
If you want to stop the search manually, press ϵ or ϶.
Then press ENTER.
④
The channel position number will be highlighted. Press ϳ or ϴ
repeatedly until the number changes to 2. Then press ENTER.
BBC 2 is now stored as channel position 2.
⑤
Repeat steps ② and ④ to preset other TV stations.
•
•
CH ALLOCATION
The Automatic station presetting stores the
stations found in a specific order. This will
normally be the correct order (e.g. BBC1 on
channel 1 etc.), however if it is necessary the
order can be changed. And also the channel
name can be changed if it is necessary.
Channel rename procedure
①
Select CH ALLOCATION, then press ϶.
②
Press ϳ
or ϴ to select channel that you want to rename, then
press ϶.
③
Press ϳ or ϴ to select character, then press ϶. The cursor will
move to the next position. Press ϵ to return to the previous cursor
position.
④
Press ENTER to set the channel name.
Channel sorting procedure
①
Press ϳ or ϴ to select the channel that you want to move, then
press ENTER.
②
Press ϳ or ϴ to select the position that you want to move the
channel to, then press ENTER.
TELETEXT LANGUAGE WEST for Western Europe
EAST for Eastern Europe
LANGUAGE This TV has 15 different languages for menu set up which can be
selected through the On-screen Display.
SLEEP TIMER OFF You can set “SLEEP TIMER” to automatically turn off the TV set.
30
60
90
120
Setup
Audio
Video
AUTO TUNING
MANUAL TUNING
CH ALLOCATION
TELETEXT LANGUAGE WEST
LANGUAGE English
SLEEP TIMER
: ADJUST: SELECT
MENU
: EXIT
Downloaded From TV-Manual.com Manuals
Page 27

26
VERTICAL POSITION *
1
–10~+10 When the ZOOM mode is selected as the picture format, you can
adjust the vertical picture position.
Press ϶ then press ϳ or ϴ to adjust the vertical position of the
picture by up to +10 and downwards by up to -10.
AV2 OUTPUT *
2
TV AV2 will output the channel position that the internal tuner is set to.
MONITOR AV2 will output the picture currently displayed on the TV screen.
AV2 INPUT
AV Composite signal (e.g. from VHS-Video recorder).
S-VIDEO S-Video signal (e.g. from DVD player with S-Video output).
AV COLOUR *
3
AUTO The AV Colour setting only applies when viewing devices connected
to the AV inputs.
PA L
SECAM
NTSC4.43
NTSC3.58
PAL60
AUTO 4:3 DEFAULT *
4
4:3 This option selects the default way that a 4:3 signal is shown - either
as normal “4:3” or expanded in the “PANORAMIC” mode.
PANORAMIC
SIDE PANEL COLOUR
GRAY You can change the color of side bars showing up in 4:3 mode. It is
recommended to set GRAY to reduce image retention.
BLACK
SCREEN SAVER
ON This is one of the initiatives to reduce image retention by moving the
displaying screen slightly at interval.
OFF
INVERSION
The picture is displayed alternately between positive image and
negative image to reduce the risk of phosphor burn-in of the screen.
This function is effective for a still pattern image.
SCREEN WIPE
Press ϶. MENU disappears and the picture showing on the screen
will be replaced with a white screen. The screen will return to normal
when any button is pressed.
RESET TV SETTING Reset all adjustment items to the factory preset values.
TV SETUP OPERATION (continued)
NOTE
*1 You cannot move the picture vertically in any of the other picture format.
*
2
This determines whether the AV2 outputs the signal from the internal tuner or whatever input is shown on the screen.
Please note that AV1 is fixed to the internal tuner. So, you cannot select the output-signal. AV1 always outputs the signal from the
internal tuner.
*
3
PAL is the colour system used in UK, Germany, etc. NTSC 3.58 is used in the USA. PAL 60 is used in the UK by some video
recorders, when playing an NTSC recording on a PAL system TV set.
Different DVD players produce different types of output signal according to the exact model, such as PAL, SECAM, NTSC 4.43,
NTSC 3.58 and PAL 60.
However the best type of signal to use is RGB, so ideally you should select this type of output signal in the DVD player’s menu
system, and connect the DVD player to the TV with a SCART lead.
*
4
AUTO 4:3 DEFAULT is available only for AUTO picture size setting.
*
4
In HDMI or COMPONENT mode, AUTO 4:3 DEFAULT is available only for 480i/576i mode.
Setup menu (continued)
Setup
Audio
Video
VERTICAL POSITION
AV2 OUTPUT TV
AV2 INPUT AV
AV COLOUR AUTO
AUTO 4:3 DEFAULT PANORAMIC
: ADJUST:SELECT
MENU
:RETURN
Downloaded From TV-Manual.com Manuals
Page 28

27
ENGLISH
TV SETUP OPERATION (continued)
Video menu (PC mode)
Selected Items Setup hint
BRIGHTNESS Can be set as you are accustomed to your TV.
CONTRAST
HOR.POSITION To adjust the horizontal and vertical placing of the image.
VER.POSITION
PHASE Eliminates the horizontal (PHASE) and vertical (CLOCK) interfering
lines.
CLOCK
RED Influences the colour balance.
GREEN
BLUE
WXGA INPUT
ON When you input WXGA, set this option to ‘ON’.
OFF
WVGA INPUT
ON When you input WVGA, set this option to ‘ON’.
OFF
RESET
Reset BRIGHTNESS, CONTRAST, RED, GREEN and BLUE to the
factory preset values.
Selected Items Setup hint
BASS You can adjust the sound quality to your preference.
TREBLE
BALANCE
SURROUND
ON Select surround sound feature ON or OFF
24
.
OFF
PERFECT VOLUME
ON This will automatically adjust volume so each channel and input has
the same average volume level.
OFF
RESET
Reset BASS, TREBLE and BALANCE to the factory preset values.
NOTE
The PC mode menu settings are not effective for normal TV-mode or external input mode.
Audio menu (PC mode)
NOTE
The PC mode menu settings are not effective for normal TV-mode or external input mode.
Audio
Video
BRIGHTNESS 25
CONTRAST 25
HOR.POSITION 25
VER.POSITION 25
PHASE 0
CLOCK 0
: ADJUST: SELECT
MENU
: EXIT
Downloaded From TV-Manual.com Manuals
Page 29

28
Others
DVD Player / STB Selection
You can use this remote control to operate DVD Player and Set Top Box of other makers
as well as this set. Press and hold
or button, then press the required 2 buttons
within 10 seconds in order to select the maker as shown below.
Set up hint
Example: HITACHI DVD
1
Press and hold button, then press and buttons within 10 seconds in order.
2
Confirm the setting.
After setting the maker, press the
button on the remote control. If the DVD does
not switch ON, repeat step 1 using other maker types as listed.
(“DVD” Selection)
(“SAT” Selection)
NOTE
Please note that not all models of the listed makers can be operated using this remote control.
*
Maker Button 1 Button 2 Maker Button 1 Button 2
HITACHI-1
SAMSUNG
HITACHI-2 SONY-1
HITACHI-3 SONY-2
FUNAI SONY-3
PIONEER-1 SONY-4
PIONEER-2 SHARP-1
PIONEER-3 SHARP-2
PIONEER-4 RCA
PIONEER-5
MITSUBISHI-1
PIONEER-6 ONKYO-1
PANASONIC-1 ONKYO-2
PANASONIC-2 ONKYO-3
PANASONIC-3 ZENITH
PANASONIC-4 THOMSON
TOSHIBA-1 SHINCO
TOSHIBA-2 SKYWORTH
TOSHIBA-3 BUBUKO
TOSHIBA-4 DENON-1
PHILIPS-1 DENON-2
PHILIPS-2 YAMAHA-1
JVC-1 YAMAHA-2
Maker Button 1 Button 2
VESTEL-1
VESTEL-2
TOSHIBA
DGTECH
PANASONIC
Red
Green
Ye l l o w
Blue
*
Red
Red
Downloaded From TV-Manual.com Manuals
Page 30

29
ENGLISH
Others (continued)
Troubleshooting
Before calling service technician, check the following tables first. If the problem is not be solved with the suggested
procedures, contact your local dealer. For your safety, NEVER try to repair the product by yourself.
Symptom Cause Solution
No standby light. Is your TV plugged in? Plug your TV into main socket
outlet.
No picture, no sound. Is the power for your TV off? Press the Main Power Switch (
) on
the left side of the unit and then press
Sub Power button ( ) on the remote.
Has the fuse in the mains plug
blown? (UK only)
Replace fuse in mains plug.
No reception. Is your TV plugged in? Plug your TV into mains socket
outlet.
Is the aerial connection lead broken or
damaged?
Check all aerial connections for a
damaged wires. If necessary
replace with new cables.
Possible station trouble. Move the aerial away from areas
of possible interference. If you live in a
known poor reception area, try
using an aerial booster to improve the
quality of the signal.
Is the power for your TV off? Press the Main Power Switch (
) on
the left side of the unit and then press
Sub Power button ( ) on the remote.
No sound.
Have you pressed
?
Have you set the volume at
minimum?
Press again or increase the
volume using volume control.
Unable to select channel numbers 8
through to 99.
During automatic tuning your signal
didn’t find enough channels to place
them in numbered positions?
If a television station has been
missed try repeating the automatic
tuning procedure.
Poor or no colour. Aerial or connection lead is not
connected or is damaged.
Adjust the colour.
No Teletext or strange characters or
letters on screen.
Aerial connection is poor or
possible station trouble.
Check aerial connections for broken
wires or try another station.
Remote control does not work or
operates erratically.
Weak or exhausted batteries. Replace the batteries.
Batteries placed in the wrong way. Check that you have put the
batteries in the remote control the
right way around.
Unable to playback video tapes. During automatic tuning your VCR
was not switched on.
Before starting the automatic tuning
make sure that your TV is switched on
and that a tape is playing.
Unable to watch satellite stations. During automatic tuning your
Satellite/Cable box was not
switched on.
Before starting the automatic tuning
make sure that your Satellite/Cable
box is switched on and that a channel
has been selected for example BBC
News 24.
No sound when connecting to
external source via HDMI to HDMI
lead.
No sound when connecting to
external source via HDMI to DVI
lead.
HDMI input mode is set to wrong
option.
Set the input mode for the relevant
HDMI socket to HDMI.
HDMI input mode is set to wrong
option.
Set the input mode for the relevant
HDMI socket to HDMI.
Audio leads have not be connected. Ensure that separate audio leads are
connected to the relevant audio
input socket.
Downloaded From TV-Manual.com Manuals
Page 31

30
System: PAL UK, IR, CCIR, B/G, D/K, I/I, L
Video Colour System: PAL/SECAM/NTSC 3.58/NTSC 4.43/PAL 60
Preset channels: 99
Frequency Range: IreE2~E4, X~Z+2, S1~S10, E5~E12, S11~S41, E21~E69, UHF (863.25MHz)
Power Supply: AC 220~240V, 50/60Hz
Power Consumption: Operation: approx. 320W, Standby: approx. 1W at AC 230V/50Hz
PDP: 42.32” TYPE (107.5 cm visible), 1024 (H) x 1080 (V) Pixel
Terminals: Antenna input: UHF/VHF 75ǣ Din type
AV1: SCART (AV input/output, RGB input, TV output)
AV2: SCART (AV input/output, Y/C input, TV/MONITOR output)
AV3: RCA pin (AV input)
AV4: S-VIDEO (Y/C input), RCA pin (AV input)
COMPONENT: COMPONENT (Y/PB (CB)/PR (CR) input), RCA (Audio input)
HDMI1: HDMI, Ø 3.5 mm jack (Audio input*)
HDMI2: HDMI, Ø 3.5 mm jack (Audio input)
PC: Ø 3.5 mm jack (Audio input*), 15 pin mini D-sub (PC /Component)
OUTPUT: RCA pin (Audio)
Headphones: Ø 3.5 mm jack (Audio output)
* Audio input that share with HDMI1 and PC.
Audio Output power: 10 W x 2 (Max)
Surrounding
temperature:
0°C ~ 40°C (Operation), -20°C ~ 60°C (Storage)
Operating Humidity: Less than 80%RH
Dimensions: 1070 (W) x 310 (D) x 764.5 (H) mm
Weight: approx. 33.6 kg (w/o Accessories)
Accessories: Remote control unit, Batteries (2 x R6/AA), 2 AC cords
Weight and dimensions are approximate. Because we continually strive to improve our products we may change
specifications and designs without prior notice.
Specifications
Others (continued)
Downloaded From TV-Manual.com Manuals
Page 32

31
ENGLISH
PRODUCT SPECIFICATIONS
Signal Input
RGB terminal (D-sub 15-pin connector)
Pin Input signal
1R
2 G or sync on green
3B
4 No connection
5 GND
6 GND
7 GND
8 GND
9 No connection
10 GND
11 No connection
12 No connection
13 H. sync
14 V.sync.
15 No connection
When different kinds of input signals are
simultaneously input to the television via a graphics
board or the like, the television only support H/V
separate sync signal.
S-input connector pin specifications
Pin Input signal
1Y
2 Y-GND
3C
4 C-GND
Frame GND
HDMI connector pin specifications
Pin Input signal Pin Input signal
1 TMDS Data2+ 11 TMDS Clock Shield
2 TMDS Data2 Shield 12 TMDS Clock3 TMDS Data2- 13 CEC
4 TMDS Data 1+ 14 Reserved(N.C. on device)
5 TMDS Data1 Shield 15 SCL
6 TMDS Data1- 16 SDA
7 TMDS Data0+ 17 DDC/CED Ground
8 TMDS Data0 Shield 18 +5V Power
9 TMDS Data0- 19 Hot Plug Detect
10 TMDS Clock+
SCART1 connector pin specifications
SCART2 connector pin specifications
Pin
Input signal
Pin
Input signal
1 AUDIO OUT (RIGHT) 12 NOT USED
2 AUDIO IN (RIGHT) 13 GND
3 AUDIO OUT (LEFT / MONO) 14 GND
4 GND 15 RGB-R IN
5 GND 16 BLANKING SIGNAL
6 AUDIO IN (LEFT / MONO) 17 GND
7 RGB-B IN 18 GND
8
AUDIO VIDEO SW/WIDE SCREEN
19 COMPOSITE VIDEO OUT
9 GND 20 COMPOSITE VIDEO IN
10 NOT USED 21 GND/SHIELD (CHASSIS)
11 RGB-G IN
Pin
Input signal
Pin
Input signal
1 AUDIO OUT (RIGHT) 12 NOT USED
2 AUDIO IN (RIGHT) 13 GND
3 AUDIO OUT (LEFT / MONO) 14 GND
4 GND 15 S.VHS CHROMINANCE IN
5 GND 16 NOT USED
6 AUDIO IN (LEFT / MONO) 17 GND
7 NOT USED 18 GND
8 AUDIO VIDEO SW/WIDE SCREEN 19 COMPOSITE VIDEO OUT
9 GND 20
COMPOSITE VIDEO /S.VHS LUMINANCE IN
10 NOT USED 21 GND/SHIELD (CHASSIS)
11 NOT USED
Downloaded From TV-Manual.com Manuals
Page 33

32
PRODUCT SPECIFICATIONS (continued)
Recommended Signal List
Resolution
Vertical
frequency(Hz)
Horizontal
frequency
(kHz)
VGA
640 × 400 70 31.5
640 × 480 75 37.5
640 × 480 60 31.5
SVGA
800 × 600 60 37.9
800 × 600 75 46.9
WVGA 848 × 480 60 37.9
XGA
1024 × 768 60 48.4
1024 × 768 75 60
WXGA
1280 × 720 60 44.8
1280 × 768 60 47.4/47.8
1360 × 768 60 47.7
Resolution
Vertical
frequency(Hz)
Horizontal
frequency
(kHz)
VGA
640 × 480 60 31.5
640 × 480 60 31.5
480i
720 × 480 60 15.7
720 × 480 60 15.6
480p
720 × 480 60 31.5
720 × 480 60 31.5
576i 720 × 576 50 15.6
576p 720 × 576 50 31.3
720p
1280 × 720 50 37.5
1280 × 720 60 45
1280 × 720 60 45
1080i
1920 × 1080 50 28.1
1920 × 1080 60 33.7
1920 × 1080 60 33.8
With HDMI input
With RGB input
The numerical values of resolutions and frequencies mentioned above are standard.
They may differ from the values when actually displayed.
Downloaded From TV-Manual.com Manuals
Page 34

33
ENGLISH
UK Guarantee
Your Guarantee of Excellence
Thank you for purchasing this Hitachi Television.
In the unlikely event that this product should develop a fault, we undertake to replace or repair any part of the product
which fails due to a manufacturing defect within 12 months of the date of purchase provided that:
i) The product has been installed and used only in accordance with the instructions supplied with the product
ii) The product has not been repaired, maintained, or modified by any person other than an Hitachi authorised
engineer
iii) The product serial number has not been removed or altered
This guarantee does not apply to product acquired second hand or for commercial or communal use
This guarantee does not cover the replacement of exhausted batteries, the adjustment of user controls, or aerial
alignment.
Any parts replaced under this guarantee shall become the property of Hitachi Europe Ltd.
Please note that evidence of the date of purchase will be required before any service under this guarantee is carried
out.
THIS GUARANTEE DOES NOT AFFECT YOUR STATUTORY RIGHTS.
IN ALL CASES OF DIFFICULTY PLEASE CONSULT YOUR HITACHI DEALER
Downloaded From TV-Manual.com Manuals
Page 35

A
B
C
D
3
4
IMPORTANT
Ensure there is at least a 100mm (10cm) gap to the sides,
rear and top of the television if placing into a cabinet or
mounting in a wall. This is to allow for adequate ventilation.
Do not allow soft furnishings, such as curtains to be draped
over the TV whilst in operation.
Never place the TV onto a carpet during normal operation this could obstruct ventilation slots on the base of the TV.
Always place the TV on a flat surface, or if supplied, the stand
accessory.
Switch your TV on, ready to start Auto setup procedure...
Connect the TV plug to the mains socket
Connect the main lead to the Plasma TV.
Connect aerial connection lead to the DIGIBOX(STB) ‘in’ socket marked .
Connect VCR ‘out’ to ANT on Plasma TV socket marked ‘ANT’.
Connect DIGIBOX(STB) ‘out’ to VCR ‘in’ socket marked .
: Failure to observe the following guidelines could result in
serious overheating of your TV, or even, in extreme cases, fire.
European plug
UK plug
Stecker für Europa
Stecker für Großbritannien
insert plug...
...and switch on
insert plug...
Prise européenne
Prise britannique
A
B
C
D
3
4
Schalten Sie Ihr Fernsehgerät ein, um das automatische
Setup beginnen zu können ...
A
B
C
D
3
4
Mettez votre TV sous-tension, prêt à démarrer la
procédure d’auto-installation…
QUICK GUIDE/KURZANLEITUNG/MODE D’EMPLOI ABRÉGÉ/GUIDA DI CONSULTAZIONE
Schließen Sie das Hauptstromkabel am Plasmabildschirm an.
Schließen Sie das Antennenkabel an die mit markierte DIGIBOX
(STB)-Eingangsbuchse an.
Schließen Sie die DIGIBOX (STB)-Ausgangsbuchse an die mit
markierte Eingangsbuchse des Videorekorders an.
Verbinden Sie die Videorekorder-Ausgangsbuchse ‘out, in die mit
markierte Antennenbuchse (ANT) am Plasmabildschirm an.
Spina europea
Spina Regno Unito
A
B
C
D
3
4
Accendete il vostro televisore, pronti ad avviare la
procedura di configurazione automatica...
QUICK GUIDE/KURZANLEITUNG/MODE D’EMPLOI ABRÉGÉ/GUIDA DI CONSULTAZIONEQUICK GUIDE/KURZANLEITUNG/MODE D’EMPLOI ABRÉGÉ/GUIDA DI CONSULTAZIONE
IMPORTANT NOTE : Do not switch your TV on until all external equipment
is connected. If you have a Video Cassette Recorder or a Satellite receiver
connected to this TV, please ensure that they are switched on before
automatic tuning begins. In the case of a VCR, insert a prerecorded tape and
begin playback of your equipment. With a Satellite receiver, select Sky News.
These measures ensure that all your external equipment is tuned in during
the autotune procedure.
To minimize the potential for the occurrence of image retention, reduce the
Brightness and Contrast levels as much as possible without impairing image
quality.
Main Power switch
(on the left of the TV)
Hauptschalter
(an der linken Seite
des Fernsehgerätes)
Bouton d’alimentation
générale (à gauche du TV)
Interruttore di
alimentazione
principale (a sinistra
del televisore)
AUX
VCR T V
IN
OUT
D
A
IN
OUT
IN
OUT
B
C
AV1/TV
AV2/
DECODER
IN
OUT
CBCRY
COMPONENT VIDEO OUT
L
R
HDMI
C
BCR
Y
COMPONENT VIDEO OUT
LR
HDMI
CBCRY
COMPONENT VIDEO OUT
LR
HDMI
CAMCORDER
RF LEADS
TV rear Panel
HDMI LEAD (optional)
HDMI-KABEL (optional)
CÂBLE HDMI (optionnels)
CAVO HDMI (opzionali)
SCART LEADS (optional)
SCART-KABEL (optional)
CÂBLES PÉRITEL (optionnels)
PRESE SCART (opzionali)
SCART LEADS (optional)
SCART-KABEL (optional)
CÂBLES PÉRITEL (optionnels)
PRESE SCART (opzionali)
AERIAL*
ANTENNE*
ANTENNE*
ANTENNA*
S-CABLE
S-KABLE
CÂBLE S
CAVO-S
2 PHONO LEADS
(AUDIO L, AUDIO R) (optional)
1
CAMÉSCOPE
VIDEOCAMERA
CAMCORDER
DIGIBOX (STB)
DIGIBOX (STB)
DIGIBOX (Boîtier adaptateur)
DIGIBOX (STB)
VCR
VIDEOREGISTATORE
VIDEOREKORDER
Magnétoscope
PRESE RF
RF-KABEL
CÂBLES HF
LETTORE DVD
DVD-PLAYER
DVD PLAYER
LECTEUR DE DVD
LETTORE DVD
DVD-PLAYER
DVD PLAYER
LECTEUR DE DVD
LETTORE DVD
DVD-PLAYER
DVD PLAYER
LECTEUR DE DVD
Monitorrückseite
Monitor Pannello posteriore
Panneau arrière du moniteur
Solo Regno Unito
U.K. ONLY
R.U. UNIQUEMENT
Nur Großbritannien
Except UK
Sauf R.U.
Ad eccezione del Regno Unito
Außer Großbritannien
WICHTIGER HINWEIS : Schalten Sie das Fernsehgerät erst ein, wenn alle
externen Geräte angeschlossen sind. Falls ein Videokassettenrekorder oder
Satellitenreceiver an dieses Fernsehgerät angeschlossen ist, sorgen Sie
dafür, dass diese Geräte eingeschaltet werden, bevor die automatische
Kanalsuche beginnt. Im Falle eines Videorekorders setzen Sie ein
bespieltes Band in das Gerät ein, und beginnen Sie dann mit der
Wiedergabe dieses Bandes. Bei einem Satellitenreceiver wählen Sie Sky
News. Auf diese Weise wird sichergestellt, dass alle externen Geräte bei
der automatischen Kanalsuche eingestellt werden.
Die Gefahr einer Bildretention kann reduziert werden, indem die Helligkeitsund Kontraststufen so weit als möglich verringert werden, ohne die
Bildqualität zu beeinträchtigen.
WICHTIG
: Bei Nichtbeachtung der folgenden Anleitungen kann sich das
Fernsehgerät überhitzen und, im Extremfall, sogar einen Brand
auslösen.
Achten Sie darauf, dass ein Freiraum von mindestens 100 mm
(10 cm) an den Seiten, hinter und über dem Fernsehgerät
vorhanden ist, wenn Sie das Gerät in einem Schrank aufstellen
oder an der Wand montieren. Auf diese Weise wird für die
geeignete Belüftung gesorgt.
Hüllen Sie das Fernsehgerät während des Betriebs nicht in weiche
Einrichtungsgegenstände, wie etwa Vorhänge. Stellen Sie das
Fernsehgerät während des normalen Betriebs nie auf einen.
Teppich. Dieser könnte die auf der Unterseite des Fernsehgeräts
befindlichen Belüftungsöffnungen blockieren.
Stellen Sie das Fernsehgerät immer auf einer ebenen Fläche auf
oder, falls vorhanden, auf dem Ständer.
Stecken Sie den Netzstecker des Fernsehgeräts in eine
Wandsteckdose ein
Führen Sie den
Stecker ein …
Führen Sie den
Stecker ein …
...und schalten Sie
den Schalter ein
Connectez la fiche d’alimentation du téléviseur sur une
prise secteur murale
REMARQUE IMPORTANTE : Ne mettez pas votre téléviseur sous tension
tant que tous les appareils extérieurs ne sont pas connectés. Si un
magnétoscope ou un récepteur satellite est connecté à ce téléviseur,
assurez-vous de le mettre sous tension avant de commencer le réglage
automatique. Dans le cas d’un magnétoscope, insérez une cassette
préenregistrée et démarrez sa lecture. Dans le cas d'un récepteur satellite,
choisissez Sky News. Ces mesures permettent d’assurer que votre appareil
extérieur est accordée pendant la procédure de réglage automatique.
Pour réduire le potentiel de rétention d’image, diminuez autant que possible
les niveaux de Luminosité et de Contraste sans que cela n’affecte la qualité
de l’image.
insérez la fiche... insérez la fiche...
...et mettez sous tension
IMPORTANT
: Ne pas observer les directives suivantes peut entraîner une
surchauffe importante de votre téléviseur et même dans les
cas extrêmes, un incendie.
Assurez-vous qu’il y a un espace d’au moins 100 mm (10
cm) sur les côtés, à l’arrière et au-dessus du téléviseur,
s’il est placé dans un meuble ou monté dans un mur. Cela
permet une ventilation correcte.
Ne recouvrez pas le téléviseur d’un tissus tel qu’un rideau
pendant qu'il est en cours de fonctionnement.
Ne placez jamais le téléviseur sur un tapis pendant sont
fonctionnement normal - cela pourrait boucher les fentes
de ventilation situées dessous le téléviseur.
Placez toujours le téléviseur sur une surface plate, ou, s’il
est fourni, sur un socle.
Connectez le câble d'antenne à l’écran à plasma.
Connectez le câble de connexion d’antenne à la prise marquée ‘in’ du
DIGIBOX (boîtier adaptateur).
Connectez la prise marquée ‘out’ du DIGIBOX (boîtier adaptateur) à la
prise marquée ‘in’ du magnétoscope.
Connectez la prise marquée ‘out’ du magnétoscope à la prise marquée
ANT de l’écran à plasma.
English Deutsch Français Italiano
5 PHONO LEADS
(Y, P
B, PR, AUDIO L, AUDIO R) (optional)
5 CAVO AUDIO
(Y, P
B, PR, AUDIO S, AUDIO D) (optional)
5 PHONO-KABEL
(Y, P
B, PR, AUDIO L, AUDIO R) (optional)
5 CÂBLE PHONO
(Y, P
B, PR, AUDIO G, AUDIO D) (optionnels)
Insert the batteries into your handset
2 2 2
Setzen Sie die Batterien in die Fernbedienung ein
2
NOTE
If you are not using any of the devices shown in the diagram above, plug the
aerial directly into the TV.
REMARQUE
HINWEIS
NOTA
Insérez les piles dans votre télécommande
Inserire le batterie nel vostro telecomando
Falls Sie keines der oben dargestellten Geräte verwenden, stecken Sie die
Antenne direkt am Fernseher ein.
Si vous n’utilisez aucun des appareils indiqués sur le schéma ci-dessus,
branchez directement l’antenne sur le TV.
Se non utilizzate nessuno dei dispositivi mostrati nello schema qui sopra,
inserite il cavo dell’antenna direttamente nel televisore.
TV SETUP Installation
TV-Einstellung
Installation du téléviseur
Installazione Setup TV
2 CAVO AUDIO
(AUDIO S, AUDIO D) (optional)
2 PHONO-KABEL
(AUDIO L, AUDIO R) (optional)
2 CÂBLE PHONO
(AUDIO G, AUDIO D) (optionnels)
IMPORTANTE
Collegare il cavo principale allo Schermo al Plasma.
Collegare il cavo del collegamento dell’antenna al DIGIBOX (STB) ‘in’ presa
contrassegnata con .
Collegare il DIGIBOX (STB) ‘out’ al VCR ‘in’ presa contrassegnata con .
Collegare il VCR ‘out’ a ANT sullo Schermo al Plasma presa
contrassegnata con .
: L’inosservanza delle seguenti linee guida potrebbe
provocare un grave surriscaldamento della vostra TV, o
persino, in casi estremi, un incendio.
Assicurarsi che vi sia uno spazio di almeno 100 mm (10
cm) sui lati, sul retro e sulla parte superiore del
televisore se esso è riposto su un mobile o montato a
muro. Ciò permetterà una ventilazione adeguata.
Non permettere che gli arredi morbidi, come per
esempio, le tende, pendano sulla TV mentre essa è in
funzione.
Mai posizionare la TV su un tappeto durante il normale
funzionamento – questo potrebbe ostruire i fori di
ventilazione sulla base della TV.
Posizionare sempre la TV su una superficie piana, o
sull’accessorio di supporto, se in dotazione.
Collegare la spina della TV nella presa elettrica
inserire la spina... inserire la spina......e accendere
J32V0107A SH
Downloaded From TV-Manual.com Manuals
P
NOTA IMPORTANTE : Non accendete la vostra TV finché tutti i dispositivi
esterni non siano collegati. Se avete un Registratore di Cassette Video o un
ricevitore Satellitare collegato alla TV, assicuratevi che siano accesi prima
che inizi la sintonizzazione automatica. Nel caso di un VCR, inserire un
nastro pre-registrato e avviare la riproduzione dell’apparecchio. Con un
ricevitore Satellitare, selezionare Sky News. Questi provvedimenti
garantiscono che tutti i vostri dispositivi esterni siano sintonizzati durante la
procedura di sintonizzazione automatica.
Per minimizzare la possibilità della ritenzione di immagini, ridurre i livelli di
Luminosità e Contrasto il più possibile senza compromettere la qualità
dell'immagine.
Page 36

Handset Controls used for Television Auto setup
This button is used to
move the menu selection
boxleft/right or change
ahighlighted selection.
cursor
left/right
Use this button to
set a highlighted
selection
Use this button to
display the main menu.
This button is used to
move the menu selection
boxup/down or change
ahighlighted selection.
cursor
up/down
Boutons de la télécommande utilisés pour
l’auto-installation du téléviseur
curseur
haut/bas
Comandi Telecomando utilizzati per la
configurazione automatica
Durch Drücken dieser
Taste wird das
Hauptmenü angezeigt.
Cursor
links/rechts
Mit dieser Taste können
Sie die Menü-Wahlbox
nach links/rechts verschieben
oder den hervorgehobenen
Auswahlposten ändern.
Mit dieser Taste können
Sie den hervorgehobenen
Auswahlposten einstellen.
Cursor
aufwärts/abwärts
Mit dieser Taste können
Sie die Menü-Wahlbox nach
aufwärts/abwärts verschieben
oder den hervorgehobenen
Auswahlposten ändern.
Utilisez cette touche
pour afficher
le menu principal.
curseur
gauche/droit
Cette touche est utilisée
pour déplace le cadre de
sélection du menu vers la
gauche/droite ou pour
changer un article mis en
valeur.
Usare questo tasto
per accedere al menu
principale.
Questo tasto si usa per
spostare sinistra/destra la
scatola del menu di
selezione o cambiare una
selezione evidenziata.
Cursore
Sinistra/Destra
Usare questo tasto per
confermare una
selezione evidenziata.
Cursore Su/Giù
Questo tasto viene usato
per spostare su/giù la
casella di selezione del
menu o modificare una
selezione evidenziata.
MENU
ENTER
ENTER
MENU
MENU
ENTER
MENU
ENTER
Fernbedienungstasten für das automatische
Setup des Fernsehgerätes
Start Auto setup procedure
5
When the TV powers on for the first time after purchase, the initial auto installation menu will
appear. You can automatically set language, country and channels in successive operations.
1 Press STANDBY on the right side of the unit or press (STANDBY) on the
remote. The Language select menu will appear first.
2 Press ▲/▼ or ◀/▶ to select desired language.
Then press ENTER.
3 Press ▲ or ▼ to select desired Country.
Then press ENTER.
4 Check the aerial then press ENTER.
5 Press ▲ or ▼ to select the colour system.
Most of Western Europe uses the PAL system but France uses SECAM.
6 Press ENTER to start automatic tuning.
Your TV will now automatically tune in all available channels.
Please be patient - the Auto Tuning process can take several minutes to complete.
When the tuning screen disappears and then normal TV screen appears, the Auto
tuning process is complete.
NOTE
NOTE
NOTA
NOTA
Automatisches Setup beginnen
5
Wenn der TV nach dem Kauf zum ersten Mal eingeschaltet wird, beginnt die anfängliche
Autoinstallation. Sie können automatisch der Reihe nach Sprache, Land und die Kanäle
einstellen.
1 Drücken Sie STANDBY auf der rechten Seite des Geräts oder drücken Sie
(STANDBY) auf der Fernbedienung. Das Sprachenauswahlmenü erscheint zuerst.
2 Mit oder ▲/▼ oder ◀/▶ Sprache wКhlen.
Dann ENTER drücken.
3 Drücken Sie ▲ oder ▼ um Ihr Land auszuwählen.
Drücken Sie anschließend ENTER.
4 Überprüfen Sie den Kabelanschluss oder die
Antenne und drücken Sie anschließend ENTER.
5 Drücken Sie ▲ oder ▼ um das Farbsystem
auszuwählen.
Die meisten westeuropäischen Länder verwenden ein PAL-System, in Frankreich
hingegen ist SECAM im Einsatz.
6 Drücken Sie ENTER, um den automatischen Tuning-Vorgang zu starten.
Ihr Fernsehgerät sucht nun automatisch alle verfügbaren Programme.
Die automatische Speicherung kann einige Minuten dauern.
Sobald der Tuning-Bildschirm ausgeblendet wird und das normale Fernsehbild
erscheint, ist das automatische Tuning abgeschlossen.
HINWEIS
Démarrage de la procédure d’auto-installation
5
L’auto installation initiale a lieu lousque le téléviseur est mis sous tension pour la première
fois après l’achat. Vous pouvez régler automatiquement la langue, le pays et les canaux
par opérations successives.
1 Appuyez sur STANDBY sur le coté droit de l’appareil ou pressez (STANDBY)
sur la télécommande.
Le menu selection de langue apparaît en premier.
2 Presser ▲/▼ ou ◀/▶ pour choisir la langue
désirée. Puis presser ENTER.
3 Appuyez sur ▲ ou ▼ pour sélectioner le pays
souhaité. Appuyez ensuite sur ENTER.
4 Vérifiez l’antenne puis pressez ENTER.
5 Appuyez sur ▲ ou ▼ pour sélectionner le
système de couleur.
La plupart des pays d’Europe de l’ouest utilisent le système PAL, mais la France
utilise le système SECAM.
6 Appuyez sur ENTER pour démarrer la recherche automatique.
Votre téléviseur va maintenant rechercher automatiquement toutes les chaînes
disponibles.
Il faut être patient – le processus de recherche automatique peut prendre
quelques minutes.
Lorsque l’écran de recherche disparaît, et qu’alors l’écran neutre des chaînes
apparaît, le processus de recherche automatique est achevé.
REMARQUE
REMARQUE
Avviamento della procedura di configurazione automatica
5
Quando si accende il televisore per la prima volta dopo l’acquisto avviene
l’autoinstallazione iniziale. È possibile impostare automaticamente la lingua, il paese ed i
canali in operazioni successive.
1 Premere STANDBY sul lato destro dell’unità o premere (STANDBY) sul
telecomando. Comparirà per primo il menu di selezione della Lingua.
2 Premere ▲/▼ o ◀/▶ per selezionare la lingua
desiderate. Quindi premere ENTER.
3 Premere ▲ o ▼ per selezionare il paese
desiderato. Quindi premere ENTER.
4 Controllare l’antenna, quindi premere ENTER.
5 Premere ▲ o ▼ per selezionare il sistema
cromatico.
La maggior parte dei paesi dell’Europa occidentale usano il sistema PAL, ma la
Francia usa il SECAM.
6 Premere ENTER per avviare la sintonia automatica.
Ora il vostro televisore si sintonizzerà su tutti i canali disponibili.
Si prega di attendere – il processo di SINTONIA AUTOMAT. può richiedere diversi
minuti per essere completato.
Quando scompare la schermata di sintonizzazione e compare la schermata
normale del televisore, il processo di Sintonia Automat. è completo.
Utilisez cette touche
pour régler un article
mis en valeur.
Cette touche est utilisée
pour déplace le cadre de
sélection du menu vers le
haut/bas ou pour changer
un article mis en valeur.
HINWEIS
: SEL ECT
: END
EXIT
: SET
ENTER
COUNTRY
UK
IRELAND
FRANCE
BELGIUM
LUXEMBOURG
GERMANY
AUSTRI A
SWITZERLAND
GREECE
: SELECT
: SELECT
EXIT
: SET
ENTER
LANGUAGE
English Dansk
Français Norsk
Deutsch Nederlands
Español Ελληνικά
Italiano Türkçe
Русский Português
Svenska Polski
Suomi
: WAEHLEN
: END E
EXIT
: SET
ENTER
LAND
ENGLAND
IRLAND
FRANKREICH
BELGIEN
LUXEMBURG
DEUTSCHLAND
ÖSTERREICH
SCHWEIZ
GRIECHENLAND
: WAEHLEN
: WAEHLEN
: ENDE
EXIT
: SET
ENTER
SPRACHE
English Dansk
Français Norsk
Deutsch Nederlands
Español Ελληνικά
Italiano Türkçe
Русский Português
Svenska Polski
Suomi
: SEL ECT
: FIN
EXIT
: MARC HE
ENTER
PAYS
UK
IRLANDE
FRANCE
BELGIQUE
LUXEMBOURG
ALLEMAGNE
AUTRICHE
SUISSE
GRÈCE
: SEL ECT
: SELECT
: FIN
EXIT
: MARC HE
ENTER
LANGUE
English Dansk
Français Norsk
Deutsch Nederlands
Español Ελληνικά
Italiano Türkçe
Русский Português
Svenska Polski
Suomi
: SELEZ.
: FINE
EXIT
: ON
ENTER
PAE SE
INGHILTERRA
IRLANDA
FRANCIA
BELGIO
LUSSEMBURGO
GERMANIA
AUSTRI A
SVIZZERA
GRECIA
: SEL EZ.
: SELEZ.
: FINE
EXIT
: ON
ENTER
LINGUA
English Dansk
Français Norsk
Deutsch Nederlands
Español Ελληνικά
Italiano Türkçe
Русский Português
Svenska Polski
Suomi
English Deutsch
Français Italiano
Downloaded From TV-Manual.com Manuals
Page 37

Hitachi Ltd.
Consumer Business Group
Shin-Otemachi Bldg 5f, 2-1, Otemachi 2-Chome,
Chiyoda-Ku, Tokyo 100-0004 Japan
HITACHI EUROPE LTD. HITACHI EUROPE S.A.
Consumer Affairs Department 364, Kifissias Ave. & 1, Delfon Str.
PO Box 3007 152 33 Chalandri
Maidenhead
Athens
Berkshire SL6 8ZE
GREECE
UNITED KINGDOM
Tel: 210 6837200
Tel: 0870 405 4405 Fax: 210 6835694
Email: consumer.mail@hitachi-eu.com
Email: dmgservice.gr@hitachi-eu.com
HITACHI EUROPE GmbH HITACHI EUROPE S.A.
Munich Office Gran Via Carles III, 86 Planta 5ª
Dornacher Strasse 3 Edificios Trade - Torre Este
D-85622 Feldkirchen bei München 08028 Barcelona
GERMANY
SPAIN
Tel: 089-991 80 - 0 Tel: 93 409 2550
Fax: 089 - 991 80 - 224 Fax: 93 491 3513
Hotline: 0180 - 551 25 51 (12ct/min.) Email: atencion.cliente@hitachi-eu.com
Email: dmg-mun.service@hitachi-eu.com
HITACHI EUROPE AB
HITACHI EUROPE S.r.l.
Box 77
Via T. Gulli, 39
S-164 94 KISTA
20147 MILANO
SWEDEN
ITALY
Tel: 08 562 711 00
Servizio Clienti
Tel. 02 38073415
Fax: 08 562 711 11
Email: customerservice.italy@hitachi-eu.com
Email: csgswe@hitachi-eu.com
HITACHI EUROPE S.A.S
HITACHI EUROPE AB
Digital Media Group (Norway Branch Nuf)
Cité Internationale Strandveien 18
94 Quai Charles de Gaulle,
1366 Lysaker
69463 LYON cedex 06
NORWAY
FRANCE
Tel: 67519030
Tel: 04 72 14 29 70 Fax: 67519032
Fax: 04 72 14 29 99 Email csgnor@hitachi-eu.com
Email: france.consommateur@hitachi-eu.com
HITACHI EUROPE AB
HITACHI EUROPE LTD.
Egebækvej 98
Benelux Branche Office 2850 Nærum
Bergensesteenweg 421
DENMARK
1600 Sint-Pieters-Leeuw Tel: 43 43 60 50
BELGIUM
Fax: 43 43 60 51
Tel: 0032/2 363 99 01 Email : csgden@hitachi-eu.com
Fax: 0032/2 363 99 00
Email
: info@hitachi.be
HITACHI EUROPE LTD. HITACHI EUROPE AB
Kodanska 46 Lars Sonckin kaari 16
101 00 Praha 10 FIN-02600 ESPOO
CZECH REPUBLIC FINLAND
Tel: 234 064 514 Tel: 010-8503085
Fax: 234 064 513 Fax: 010-8503086
Email: dmg.eeu@hitachi-eu.com
E-mail: info.finland@hitachi-eu.com
www.hitachidigitalmedia.com
Downloaded From TV-Manual.com Manuals
 Loading...