

Page 1

L37V01E
L37V01EA
L37VP01E
L37V01U
L
37VR1U
L37V01UA
Instructions for use
Notice d'utilisation
Bedienungsanleitung
Istruzioni per l'uso
GB
F
D
I
Downloaded From TV-Manual.com Manuals
Page 2

Contents
Safety Pr ecautions .......................................... 3
IMPORTANTSAFETY INFORMATIONON
OPERATING YOUR TV ................................... 3
DO’s ........................................................ 3
DON’Ts .................................................... 3
1.Power Source ............................................ 4
2.Power Cord ................................................ 4
3. Moisture and Water ................................... 4
4.Cleaning ..................................................... 4
5. Ventilation .................................................. 4
6. Heat and Flames ........................................ 4
7. Lightning .................................................... 4
9. Servicing ................................................... 4
10. Waste Disposal ....................................... 4
11. Disconnect Device ................................... 5
Funzioni ............................................................. 6
Accessories ..................................................... 6
LCD TV Front View .......................................... 7
Rear View and Peripheral Connections ...... 7
Remote Control Buttons ................................ 8
Preparation ....................................................... 9
Before Switching On Your TV ........................ 9
Power Connection ......................................... 9
Connections To The Aerial Input Socket ........ 9
Inserting Batteries In The Remote Control
Handset ......................................................... 9
Handling the Remote Control ......................... 9
Operating Range for the Remote Control ....... 9
Switching The TV ON/OFF ............................. 10
Navigati ng th e Menu System ....................... 10
Initial Settings ................................................ 10
Everyday Operat i on ........................................ 11
Information Banner ....................................... 11
ELECTRONICPROGRAMMEGUIDE(EPG) ...... 11
Displaying The Subtitles .............................. 12
Teletext........................................................ 12
IDTV Menu System ........................................ 12
Channel List ................................................ 12
Navigating the whole channel list .......... 13
Moving the channels in the channel list . 13
Deleting the channels in the channel list 13
Renaming channels ............................... 1 3
Adding locks to channels ...................... 14
Setting Favourites ................................. 14
Installation ................................................... 15
Configuration ............................................... 16
Timers ......................................................... 18
TV Setup ..................................................... 19
Common Interface ....................................... 19
Menu S ys tem ................................................. 20
Picture Menu ............................................... 20
Mode ..................................................... 20
Contrast/Brightness/Sharpness/Colour/
Hue ....................................................... 20
Colour Temp .......................................... 20
Noise Reduction .................................... 20
Film Mode .............................................. 20
Store ..................................................... 20
Reset .................................................... 20
Sound Menu ................................................ 20
Volume .................................................. 20
Equalizer ............................................... 20
Balance ................................................. 20
Headphone............................................ 20
Sound Mode .......................................... 21
AVL ....................................................... 21
Effect .................................................... 21
Dynamic Bass ....................................... 21
3DS ....................................................... 21
SubWoofer ............................................ 21
Store ..................................................... 21
Feature Menu .............................................. 21
SleepTimer ........................................... 21
Child Lock .............................................. 21
Language .............................................. 21
AV-2 Out ............................................... 21
Default Zoom ......................................... 22
Blue Background ................................... 22
Menu Background ................................. 22
Menu Timeout ........................................ 22
Teletext Language ................................. 22
Install Menu ................................................. 22
Program ................................................ 22
Band ..................................................... 22
Channel ................................................. 22
Colour System ....................................... 22
Sound System ....................................... 22
Fine Tune .............................................. 22
Search .................................................. 22
VCR ...................................................... 22
StoreProgram ....................................... 22
Program Menu ............................................. 22
A.P.S. (Auto Programming System)
Country ................................................. 23
Install menu in AV modes ...................... 23
Source menu............................................... 24
PC Mode .......................................................... 24
Installation ................................................... 24
Menu System in PC mode ............................ 24
Sound Menu/Feature Menu ................... 24
PC PictureMenu .................................... 24
PC Picture Position Menu....................... 24
Autoposition .......................................... 24
H (Horizontal) Position ........................... 24
V (Vertical) Position .............................. 24
Dot Clock............................................... 24
Phase .................................................... 24
Sound in PC mode ................................. 24
Downloaded From TV-Manual.com Manuals
English -1-
Page 3

Other Features ............................................... 25
TV Status .................................................... 25
Mute Indicator .............................................. 25
PIP and PAP modes ...................................... 25
PAT ........................................................ 25
AV Modes ................................................... 25
Freeze Picture ............................................. 25
Zoom Modes ............................................... 25
Tele tex t............................................................ 26
Connect Peripheral Equipment ................... 27
High Definition ............................................. 27
Via The Scart .............................................. 27
Via Aerial Input ............................................ 27
Decoder ...................................................... 27
Connect a decoder with an aerial
socket to the TV .................................... 27
Connect a decoder without an aerial
socket to the TV .................................... 27
TV And Video Recorder .............................. 27
Playback NTSC ............................................ 27
Copy Facility ................................................ 27
Camera And Camcorder .............................. 27
To Connect To AV Input ......................... 27
To Connect To S-VHS Input ................... 27
Connect The Decoder To The Video
Recorder ..................................................... 27
Connecting Headphones (optional) ............. 27
Audio Lineout .............................................. 27
Connecting SubWoofer ............................... 27
Tips .................................................................. 28
Care Of The Screen .................................... 28
Poor Picture ................................................. 28
No Picture .................................................... 28
Sound .......................................................... 28
Remote Control ............................................ 28
Peripheral Equipment Connections ........... 29
Aerial Connection .......................................... 29
Specifications ................................................. 30
S-input connector pin specifications ........... 32
HDMI connector pin specific ations .............. 32
SCART connector pin specifications ........... 32
Signal Input .................................................. 32
PC RGB Terminal (D-sub 15-pin connector) 32
Appendix A: PC Input Typical Display
Modes .............................................................. 33
Appendix B: AV and HDMI Signal
Com patibi lity .................................................. 34
Appendix C: Main and PIP-PAP Picture
Com bin ations................................................. 35
Downloaded From TV-Manual.com Manuals
English -2-
Page 4
Safety Precautions
Please read the following recommended safety precautions carefully for your safety.
IMPORTANT SAFETY INFORMATION ON
OPERATING YOUR TV
Do’s and Don’ts
DO’s
This Television has been designed and manufactured to meet international safety standards,
but like any electrical equipment, care must be
taken if you are to obtain the best results and
safety is to be assured.
DO read the operating instructions before you
attempt to use the equipment.
DO consult your dealer if you are in any doubt
about installation, operation or safety of your
equipment.
DO be careful with glass panels or doors on
equipment.
This TV is supplied with a fitted mains plug. This
plug must not be cut off as it may contain a special radio interference filter, the removal of which
could lead to impaired performance. If you wish
to extend the lead, obtain an appropriate safety
approved extension lead or consult your dealer.
Observe t he manufacturers instructions when
connecting extension leads to the TV . Check the
fuse rating on the new plug, this should be fitted
with a 5 Amp fuse which conforms to either ASTA
or BSI (BS1 362) approvals, these are easily
identifiable by either the
you are in any doubt about the installation of an
extension lead, please consult a competent
electrician.
or symbols. If
DON’Ts
DON’T continue to operate the equipment if you
are in any doubt about it working normally, or if it
is damaged in any way switch off, withdraw the
mains plug and consult your dealer.
DON’T place water filled vessels on top of T.V.
cabinets.
DON’T remove any fixed cover as this may expose dang erous voltages.
DON’T leave equipment switched on when it is
unattended unless it is specifically stated that it
is de signed for unattended operation or has a
stand-by mode. Switch off using the switch on
the equipment and make sure your family know
how to do this. Special arrangements may need
to be made for infirm or handicapped people.
DON’T use equipment such as personal stereos
or radios so that you are distracted from the requirements of traffic safety. It is illegal to watch
television whilst driving.
DON’T obstruct the ventilation of the equipment,
for example with curtains or soft furnishings.
Overheating will cause damage and shorten the
life of the equipment.
DON’T use makeshift stands and NEVER fix legs
or stands to the TV with any screws other than
those provided - to ensure complete safety always use the manufacture rs approved stand
with the fixings provided.
DON’T allow electrical equipment to be exposed
to rain or moisture.
ABOVE ALL
• NEVER let anyone, especially children push
anything into holes, slots or any other opening in the case - this could result in a fat al
electric shock.
• NEVER guess or take chances with electrical
equipment of any kind - it is better to be safe
than sorry!
PE Connection to mains
Be sure to ground the connection properly. Connect the ground terminal of TV with the
ground terminal provided at the power outlet using the enclosed power cord. If the
provided plug does not fit your outlet, consult an electrician for replacement of the
obsolete outlet.
Downloaded From TV-Manual.com Manuals
English -3-
urelyconnect
heground wire.
Page 5
1.Power Source
The TV set should be operated only from a 220-240 V
AC, 50 Hz outlet. Ensure that you select the correct
voltage setting for your convenience.
2.Power Cord
• Do not place the set, a piece of furniture, etc. on the
power cord (mains lead) or pinch the cord. Handle
the pow er cord by the plug. Do not pull out the plug by
tugging the cord and never touch the power cord
when your hands are wet as this could cause a short
circuit or electric shock. Never make a knot in the cord
or tie it with other cords. The power cords should be
placed in such a way that they are not likely to be
stepped on. A damaged power cord can cause fire or
give you an electric shock. When it is damaged and
needs to be changed, it should be done by qualified
personnel.
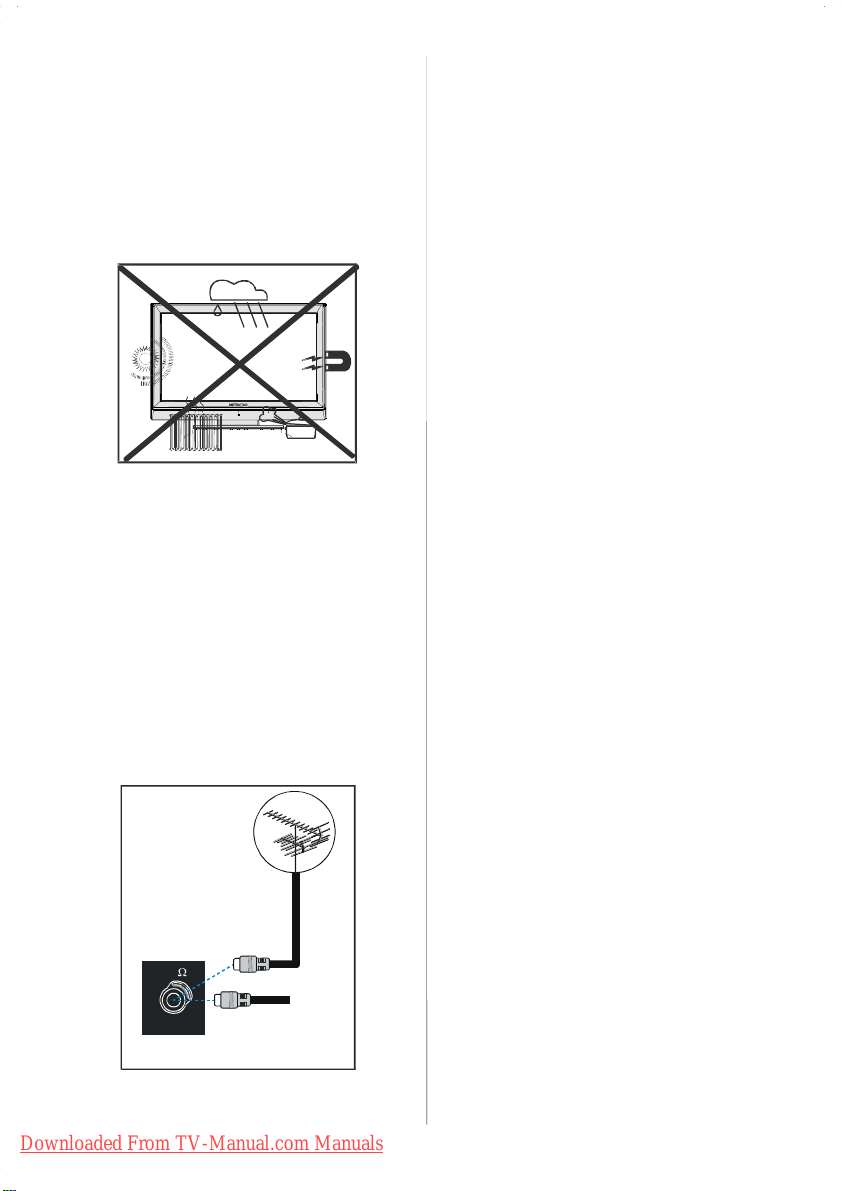
3. Moisture and Water
Do not use this equipment in a hum id and damp place
(avoid the bathroom, the sink in the kitchen, and near
the washing machine). Do not expose this equipment
to rain or water, as this may be dangerous and do not
place objects filled with liquids, such as flower vases,
on top. Avoid from dripping or splashing.
If any solid object or liquid falls into the cabinet, unplug
the TV and have it checked by qualified personnel
before operating it any further.
4.Cleaning
Before cleaning, unplug the TV set from the wall outlet. Do not use liquid or aerosol cleaners. Use soft and
dry cloth.
5. Ventilation
The slots and openings on the TV set are intended for
ventilation and to ensure reliable operation. To prevent overheating, these openings must not be blocked
or covered in anyway.
6. Heat and Fla mes
The set should not be placed near to naked flam es
and sourc es of intense heat, s uch as an electric
heater. Ensure that no naked flame sources, such as
lighted candles, are placed on top of the TV. Batteries
shall not be exposed to excessive heat such as sunshine, fire or the like.
7. Lightning
In case of storm and lightning or when going on holiday, disconnect the power cord from the wall outlet.
8. Replacement Parts
When replacement parts are required, be sure the
service technician has used replacement parts which
are specified by the manufacturer or have the same
specifications as the original one. Unauthorized sub-
Downloaded From TV-Manual.com Manuals
English -4-
stitutions may result in fire, electrical shock, or other
hazards.
9. Servicing
Please refer all servicing to qualified personnel. Do
not remove the cover yourself as this may result in an
electric shock.
10. Waste Disposal
Instructions for waste disposa l:
• Packaging and packaging aids are recyclable and
should principally be recycled. Packaging materials,
such as foil bag, must be kept away from children.
• Battery, including those which are heavy metal-free,
should not be disposed of with household waste.
Please dispose of used battery in an environmentally
sound manner. Find out about the legal regulations
which apply in your area.
• Cold cathode fluoresant lamp in LCD P ANEL contains a small amount of mercury; please follow local
ordinates or regulations for disposal.
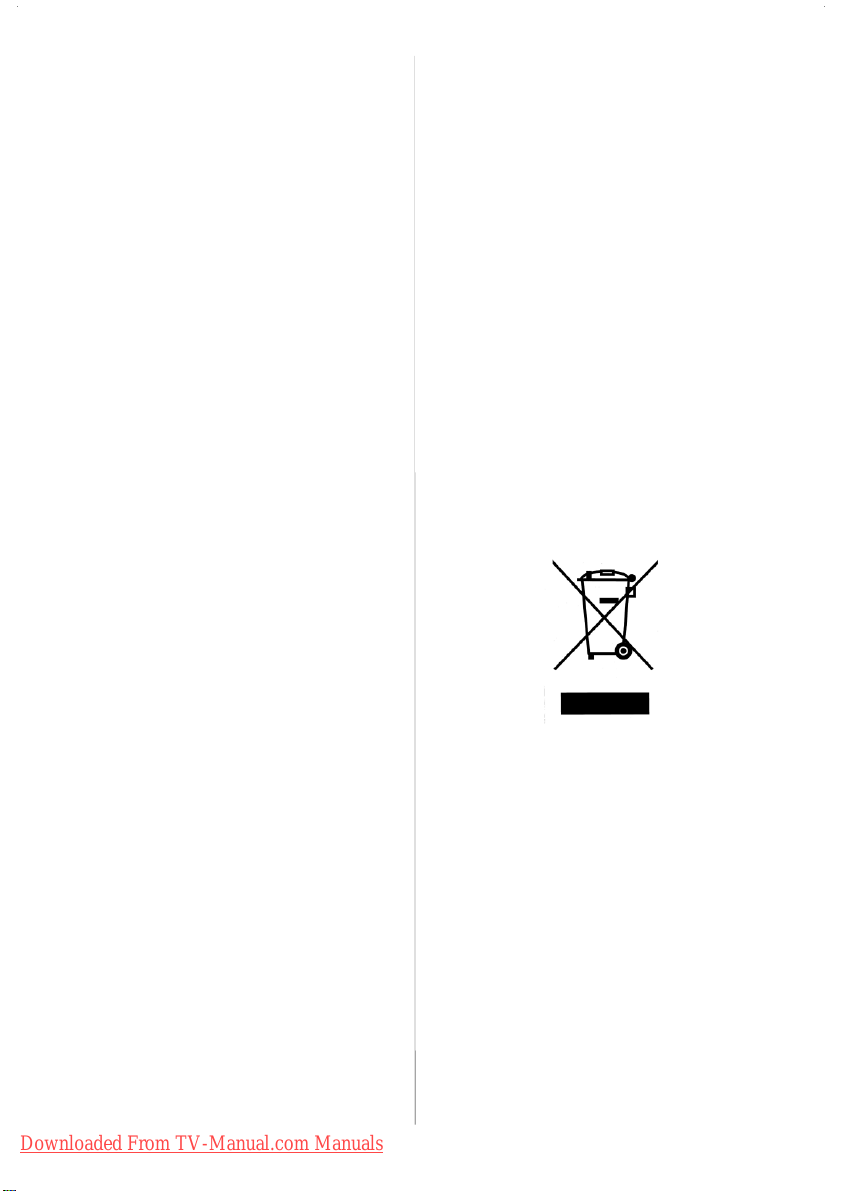
Information for users applicable
in European Union countries
This symbol on the product or on its packaging means
that your electrical and electronic equipment should
be disposed at the end of life separately from your
household wastes. There are separate collection
systems for recycling in EU.
For more information, please contact the local authority or the dealer where you purchased the product.
Page 6
1 1.Disconnec t Device
The m ains plug is used to disconnect TV set from the
mains and therefore it shall remain readily operable.
12. Excessive sound pressure from earphones and
headphones can cause hearing loss.
13. To prevent injury, this device must be securely
attached to the wall in accordance with the installation instructions when mounted to the wall (if the
option is available).
14 Connection to a television
distribution system (Cable TV etc.)
from tuner:
Apparatus connected to the protective earthing of
the building installation through the mains connection
or through other apparatus with a connection to protective earthing - and to a television distribution system using coaxial cable, may in some circumstances
create a fire hazard.
To ground the antenna system properly, be sure that
the cable grounding is connected with the building's
grounding system. Note that the connection should
follow IEC 60364-7-707 and IEC 603646-5-548 standards which require that the grounding should be as
close as possible to the cable connection.
5
VHF/UHF
REAR OF THE TV
CABLE TV
Downloaded From TV-Manual.com Manuals
English -5-
Page 7
Features
• Rem ote controlled colour LCD TV.
• Fully integrated Digital TV (DVB-T)
• Full HD (1920x1080)
• 100 programmes from VHF, UHF bands or cable
channels can be preset.
• It can tune cable channels.
• Controlling the TV is very easy by its menu driven
system.
• It has 2 Scart sockets for external devices (such as
video, video games, audio set, etc.)
• Stereo sound system (German+Nicam)
• Full function Teletext.
• Fastext (1000 pages), TOP text.
• Headphone connection.
• A.P.S. (Automatic Programming System).
• All programmes can be named.
• Forward or backward automatic tuning.
•Sleeptimer.
• Child Lock.
• Automatic sound mute when no transmission.
• NTSC Playback.
• AV in and S-Video in are available.
• It has two HDMI connectors for Digital Video and
Audio. This connection is also designed to accept
High Definition signals.
• It has PIP / PAP / PA T functions.
• AVL (Automatic Volume Limiting)
• When no valid signal is detected, after 5 minutes the
TV switches itself automatically to stand-by mode.
• PLL (Frequency Search)
• PC Input
• Plug&Play for Windows 98, ME, 2000, XP, Vista
• Audio Line Out
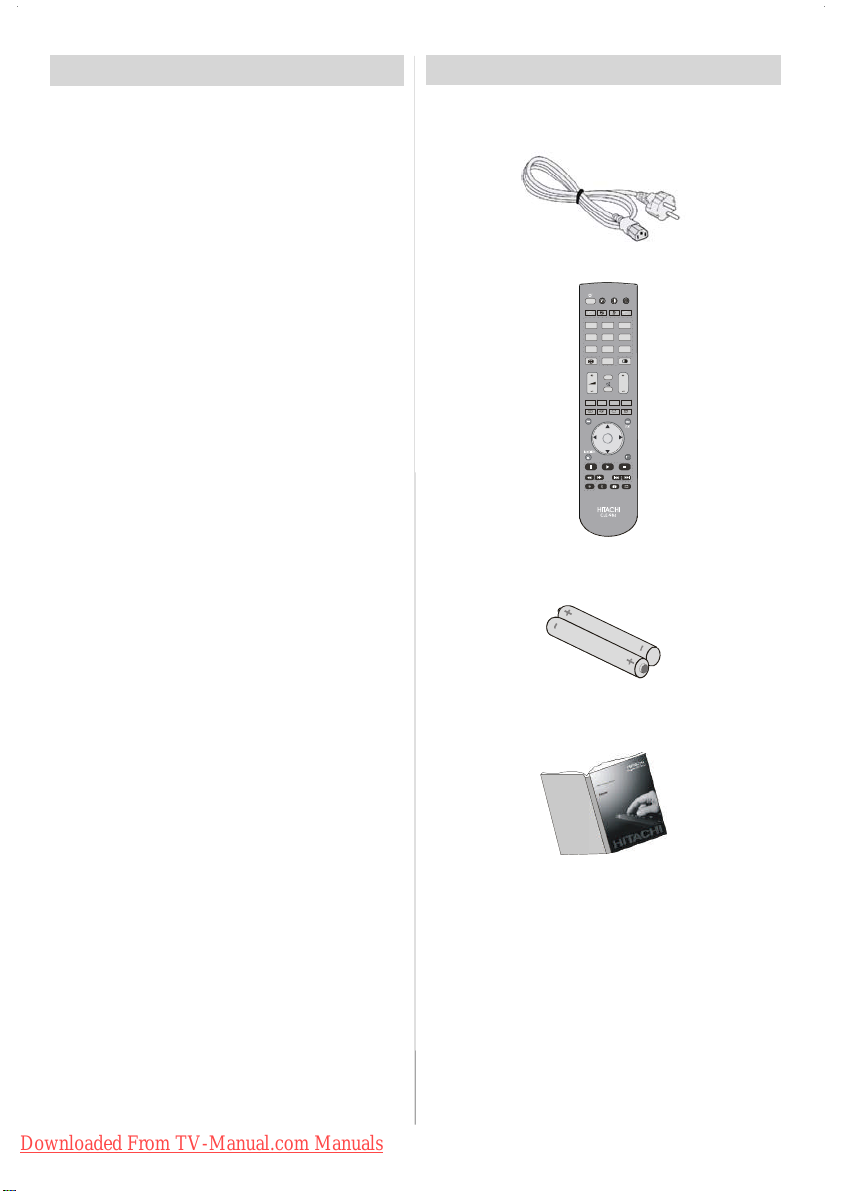
Accessories
Remote Controller
EU Plug
DVD
AV1
1
AV4
4
DMI2
78
0
I/II
MENU GUIDE
K
+
RGB2
CLE-984
Batteries
2XAA
NPUT
SAT
DMI1
Downloaded From TV-Manual.com Manuals
English -6-
Instruction Book
Page 8
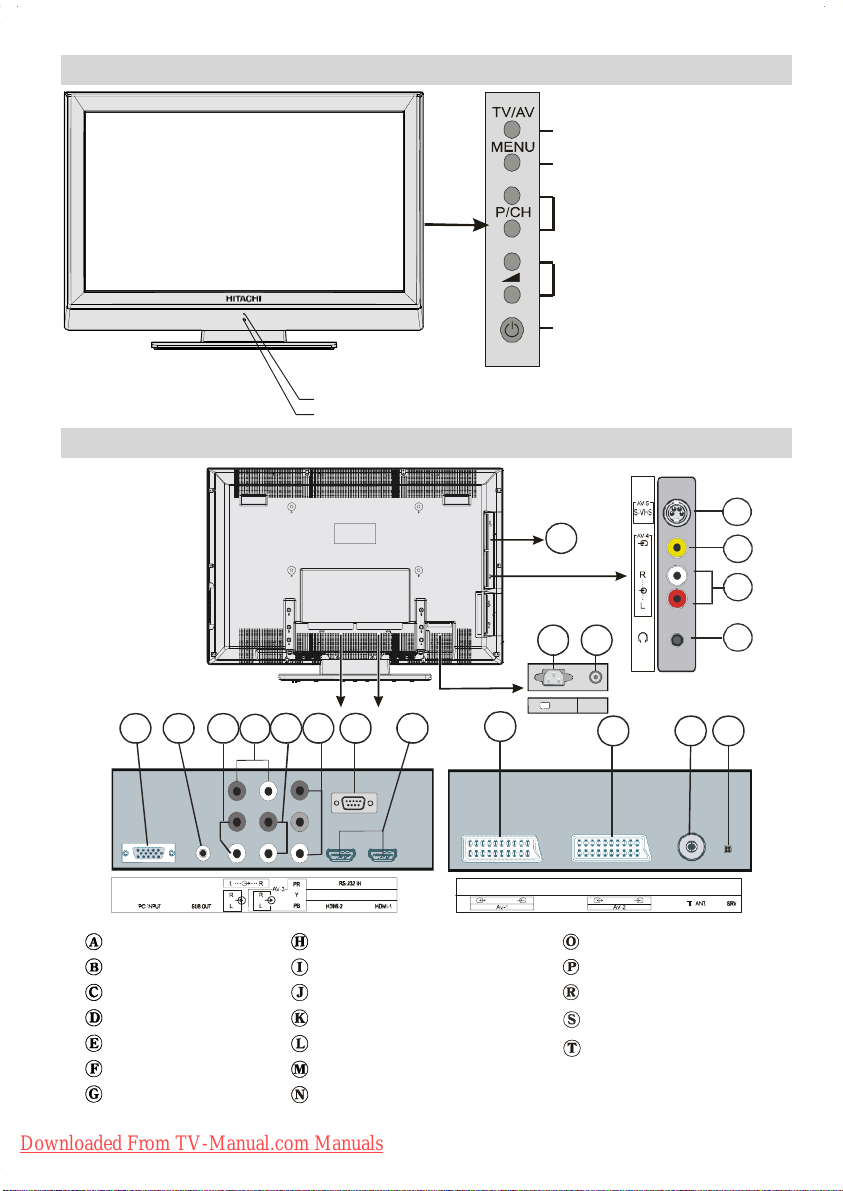
LCD TV Front View
R
OURCE SELECT
MENU BUTTON
ROGRAMME UP/DOWN
VOLUME UP/DOWN
STANDBY BUTTON
Standby LED
IR Receiver
Rear View and Peripheral Connections
D
C
B
I J LK
HE F G
Headphone
Audio Inputss
Video Input
S-VHS Input
VGA Input
Subwoofer Output
PC Audio Inputss
Audio Line Out
Component Audio Inputss
Component Video (YPbPr) Inputs
For se rvice use only
HDMI Inputs
Scart 1
Scart 2
Downloaded From TV-Manual.com Manuals
English -7-
M
-
POWER
AC~50 Hz
N
Aerial
For service use only
Power On/Off Switch
Power Cord Input
CI Slot
P
Page 9
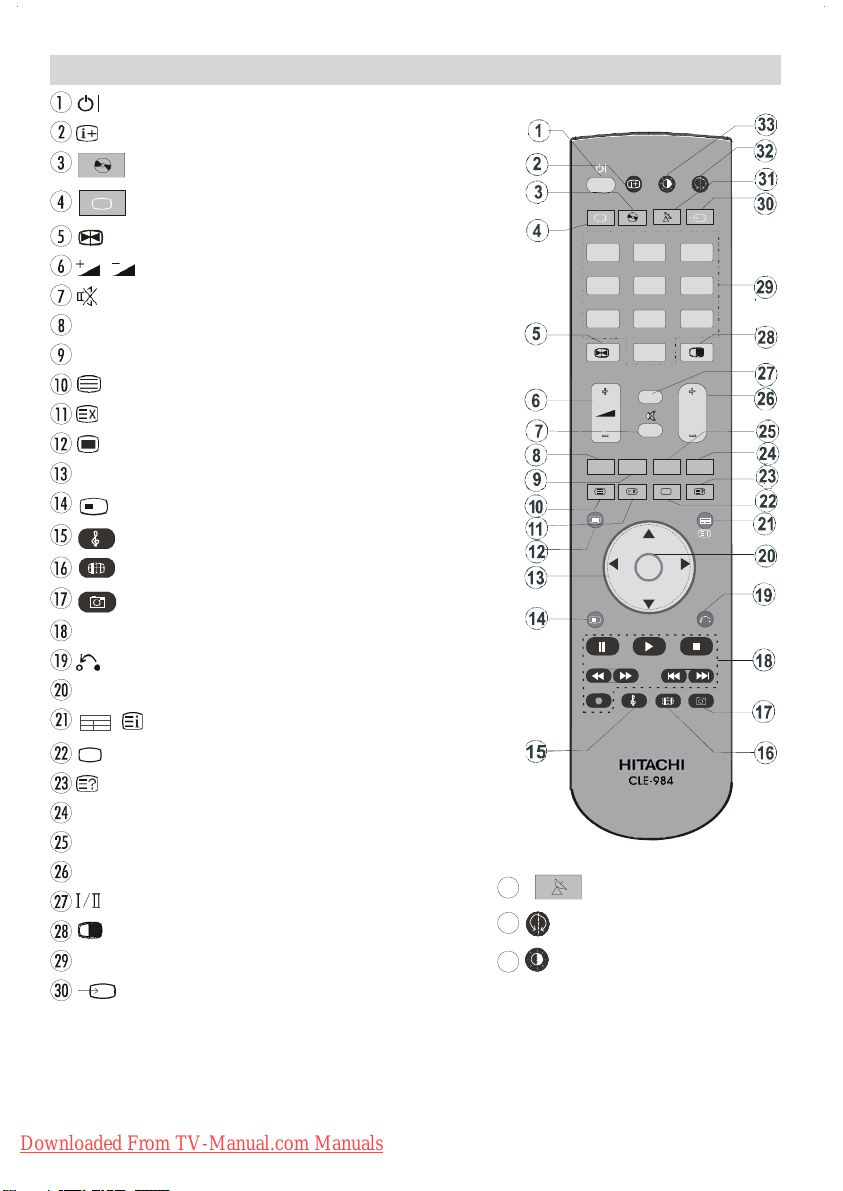
= Stand by On/Offf
OK
=Info
DVD =SelectDVD
Remote Control Buttons
TV/DTT = Selector button for Digital/Analogue mode
= Hold in teletext mode, Freeze picture
/ = Volume Up/ Dow n
=MuteOn/Off
RED (Only use in Teletext mode)
GREEN = Subtitle On/Off in DTV
= Teletext On-Offf
=Time/Teletext&TVTV
=MenuOn/Off
b
/
/_/
= Cursor buttons
+
FUNCTION =Nofunction
= Equalizer Sound Mode
= Aspect ratio
=NoFunction
Control buttons for DVD players/recorders (**)
= Go back to previous menu
OK = Enter
/ / GUIDE = Index Page / Guide for DTT
...
= TXT Subtitle in TV mode; Subpage in teletex t mode.
= Reveal
BLUE (Only use in T ele text mode)
YELLOW = Audio Language On/Off in DTV
P+ / - = Programme Up/ Dow n
= Mono/Stereo - Dual A-B
=PIP,PAPOn-Off/PATAT
0-9= Digit buttons
/ INPUT = INPUT
1
32
33
V/DTT
AV1
12 3
AV4
4
HDMI2
78 9
MENU
FUNCTION
+
RGB2
SATT =SelectSATT
=Nofunction
=Picturemode
DVD SAT INPUT
V3
HDMI1
56
0
I/II
....
GUIDE
RETURN
For source selection, first press INPUT button on the remote controller then source button which you want to
switch.
** These buttons can control most Hitachi DVD Players and Recorders.
Downloaded From TV-Manual.com Manuals
English -8-
Page 10
P
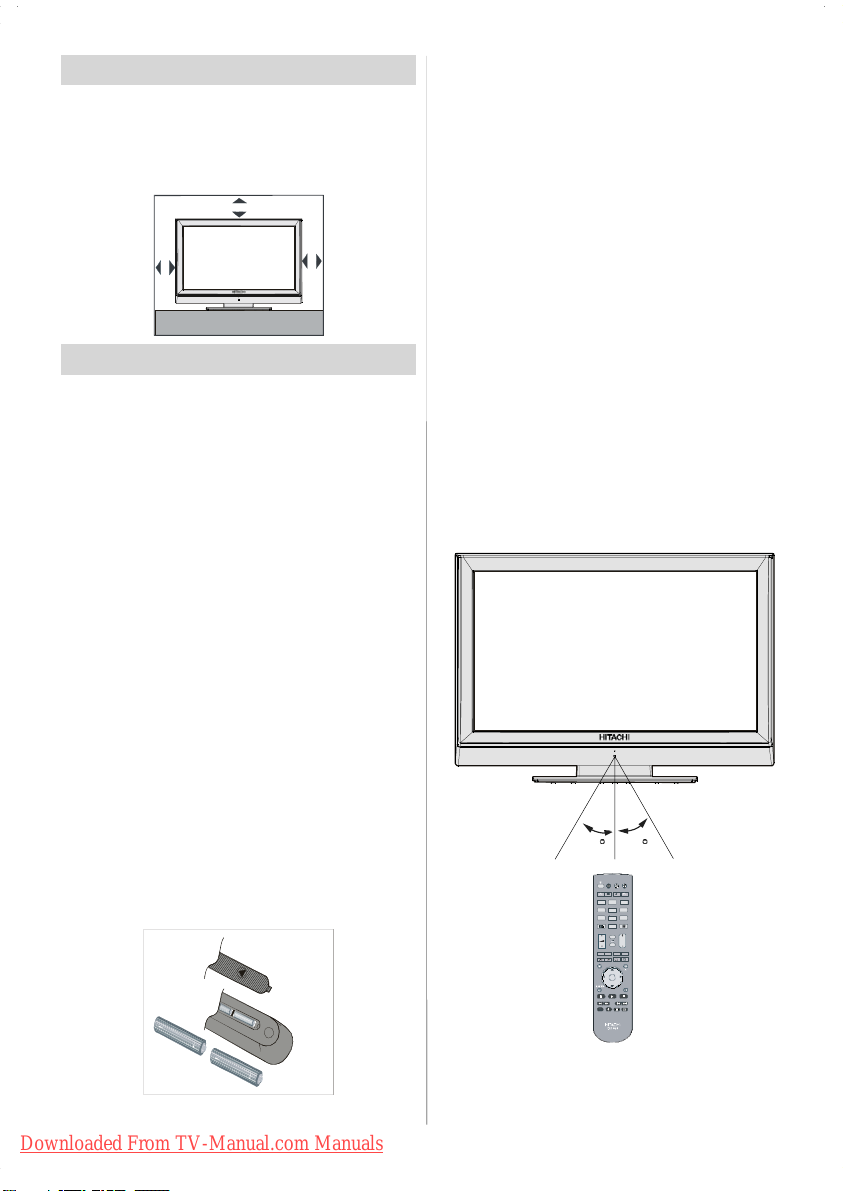
Preparation
For ventilation, leave a space of at least 10 cm free all
around the set. To prevent any fault and unsafe situations, please do not place any objects on top of the
set.
Use this apparatus in moderate climates.
0cm
10cm
10cm
Before Switching On Your TV
Power Connection
IMPORTANT : The TV set is designed to operate on
220-240 AC, 50 Hz.
• After unpacking, allow the TV set to reach the ambient room temperature before you connect the set to
the mains.
Connections To The Aerial Input Socket
• Connect the aerial or cable TV plug to the Aerial input
socket located at the rear of the TV and connect the
cable plug coming out from the TV out socket located on the devices (VCR, DVB etc.) to this socket
as well.
Inserting Batteries In The Remote
Control Handset
WARNING : Remote control is battery included.
A plastic protector i s used to disconnect the batteries in order to prevent the battery life from reducing.
Please remove the plastic protector
before the first use.
• Remove the battery cover located on the back of the
handset by gently pulling backwards from the indicated part.
• Insert two AA/R06 or equivalent type batteries inside. Place the batteries in the right directions and
replace the battery cover.
Handling the Remote Control
• It could cause corrosion or battery leakage and may
result in physical injury and/or property damage including fire.
• Never mix used and new batteries in the device.
• Replace all the batteries in a device at the same time.
• Remove the batteries if the remote control is not
going to be used for an ex tended period of time.
• To avoid possible failure, read the following instructions and handle the remote control properly.
• Do not drop or cause impact to the remote control.
• Do not spill water or any liquid on the remote control.
• Do not place the remote control on a wet object.
• Do not place the remote control under the direct
sunlight or near sources of excessive heat.
NOTE: Remove the battery from remote control
handset when it is not to be used for a long
period. Otherwise it can be damaged due
to any leakage of battery.
Operating Range for the Remote Control
• Point the top of the remote control toward the LCD
TV's remote sensor LED while pressing a button.
030
DVD S AT INPUT
V2V3V3
AV1
12
AV4
45
HDMI2
78
0
I/II
MENU GUIDE
+
+
+
Downloaded From TV-Manual.com Manuals
Remote range is approximately 7m/23ft.
English -9-
Page 11
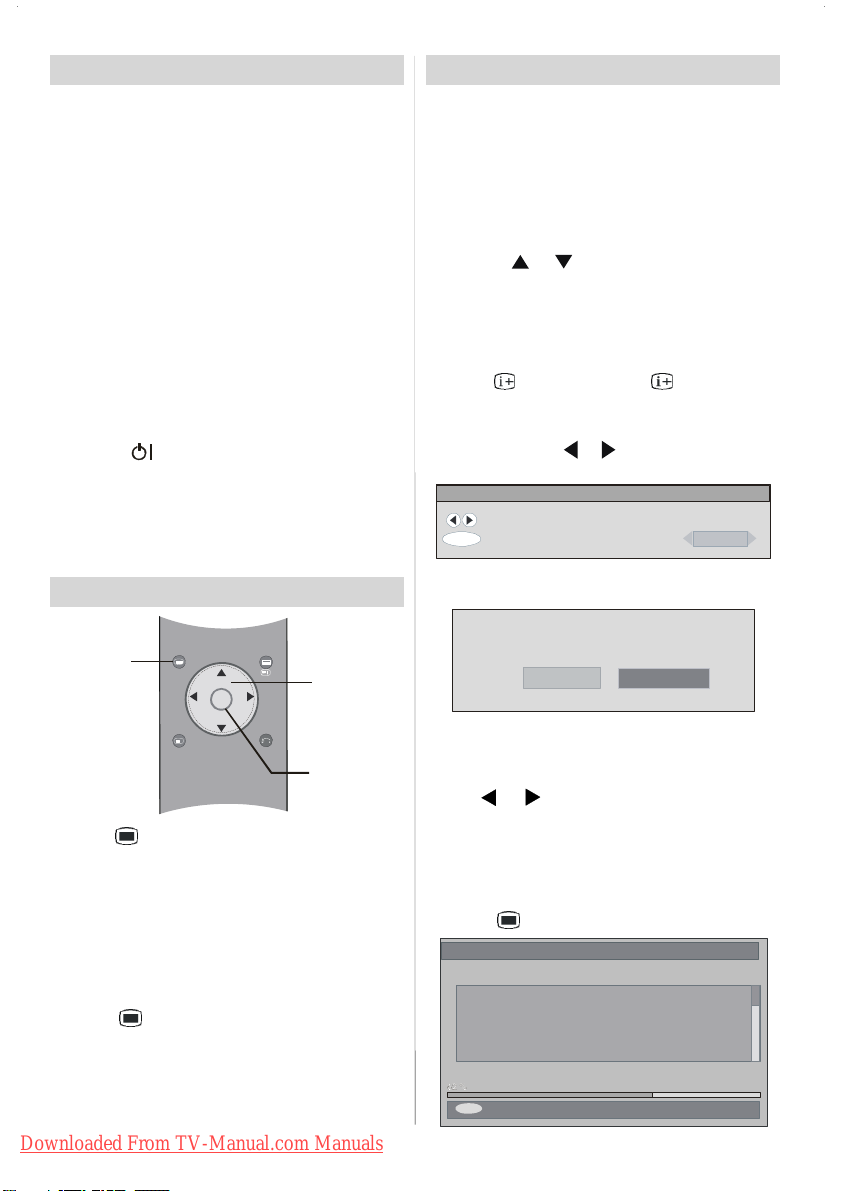
Switching The TV ON/OFF
To switch the TV on:
Your TV will switch on in two steps:
1- Connect the power cord to the system. Press Power
ON/OFF switch. Then the TV switches itself to
stand-by mode (optional).
Note that the TV will always switch to stand-by mode,
if you press POWER ON/OFF button while Child Lock
is set to ON.
2- To switch on the TV from stand-by mode either:
Press a digit button on the remote control so that a
programme number is selected, or Press the "-P/CH"
or "P/CH+" button on the TV or press the P+ or P-
button on the remote con t r ol, so that last mode
switched off is selected.
By either method the TV will switch on.
To switch the TV off:
•Pressthe“ (stand-by)” button on the remote control or On/Off switch on the TV, so the TV will switch
to stand-by mode.
To power down the TV completely, press On/Off switch
or,
Unplug the power cord from the mains socket.
Navigating the Menu Sy stem
Initial Settings
When the TV is turned on for the first time, IDTV is on
first. Because this is the first time that IDTV has been
used, there are no channels stored in the memory.
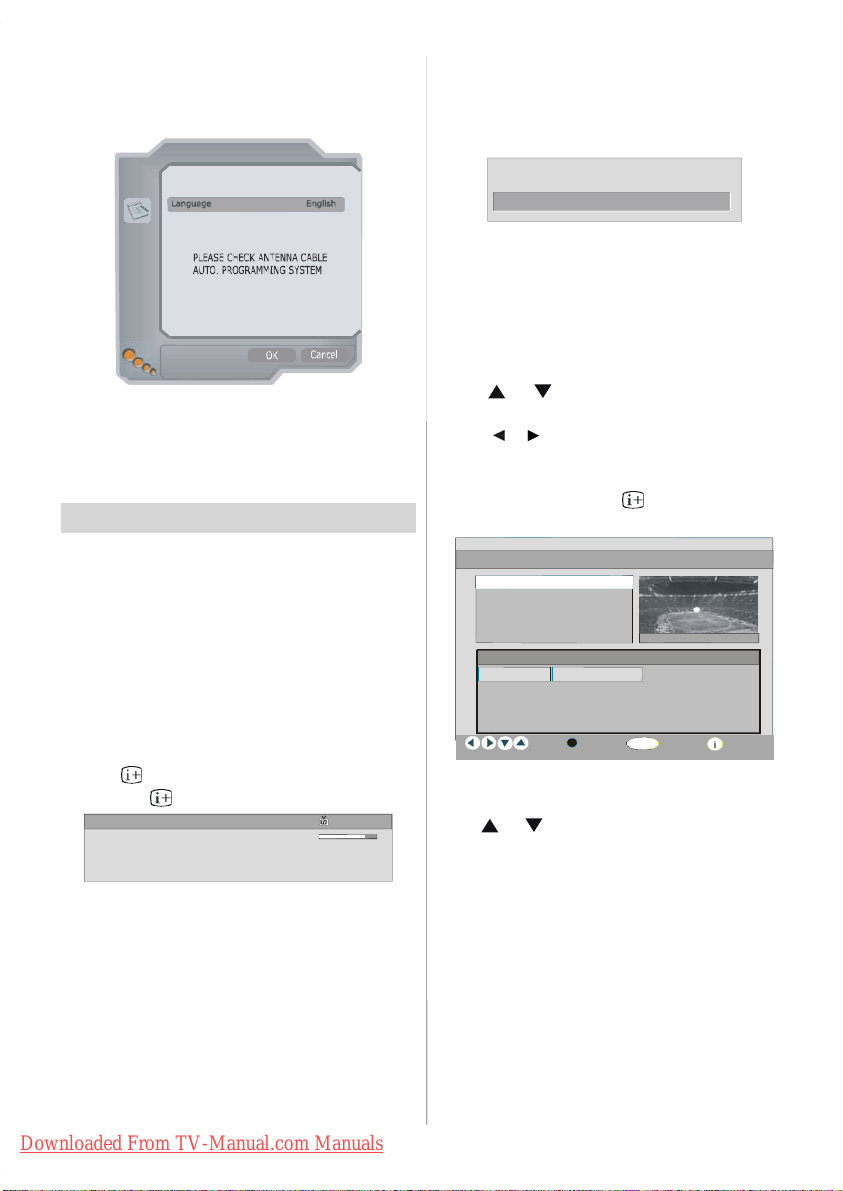
When the TV is turned on for the first time, the menu
for the language selection appears on the screen.
The message “Welcome please select your lan-
guage!” is written in all language options sequentially in the menu on the screen.
By pressing
you want to set and press OK button. In the menu
“Set Language” is written next to “OK” item to indicate
that “Press SELECT button to set the highlighted language option.”
You can get information about the menu usage by
pressing
exit the help menu.
After then, First time Installation Menu will appear on
screen. By pressing
try item you want to set and press OK button.
First time installation
OK
After the First time Installation is set, the following
message appears on the screen.
or buttons highlight the language
button. And press button again to
or buttons, selected coun-
Choose Country
Set co untry and con tinue installation
zech
For Displaying
Menu Options
MENU
+
UIDE
For Navigation
OK
RETURNFUNCTION
To Confirm Choices
1- Press to display the menu.
or
2- Press
3- Use
button to select an icon.
orabutton to highlight. Press
for more
options in analogue TV mode. UseOK in DTV mode
for viewing a submenu.
4- Press
or
buttons to change the settings. Press
OK to set as default.
5- To exit the menu or return from sub-m enu screen,
press
.
These explanations are available for the navigation
of the whole Menu System. To select options that are
explained in the following parts, refer to “Navigating
The Menu System”.
Downloaded From TV-Manual.com Manuals
English -10 -
oyou want to start automatic search?
Yes No
• To start automatic search, select Ye s, to cancel
select No.
• To select an option “Yes or No”, highlight the item by
using
or buttons and press OK button.
The IDTV will automatically tune to the transmission
channels according to selected country standards
looking for digital terrestrial TV broadcasts and displaying the names of channels found. This process
will take about five minutes. To cancel searching, you
can press
Automatic Search
Codec 4:3
Codec 16:9
earchingUHF channels 62. Please wai t.T his will take a few minutes
MENU
button at any time during the process.
Cancel searching
Page 12
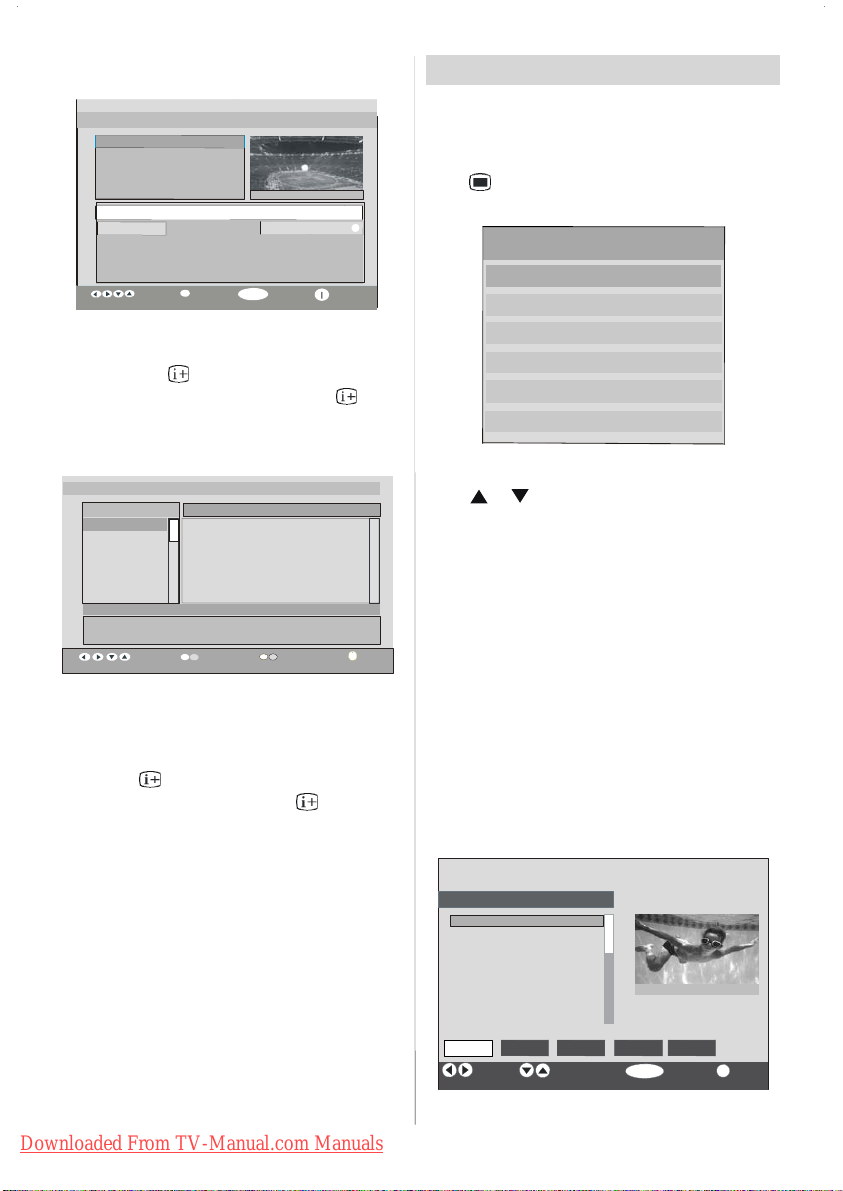
After Automatic Search process is completed, the
y
g
following message asking for analogue channel search
appears on the screen. TV switches to the analogue
TV mode:
AUTO PROGRAM
name and times of the programmeare not available then
“No InformationAvailable” is displayed in the information
banner.
If the selected channel is locked, you must enter the correct
four digit key to view th e channel.
Enter Lock Key
ountr
ext languageWest
UK
Select your Language, Country and Tex t language by
/
and
/
using
buttons. Press OK button to
continue. T o cancel, press BLUE button.
For more information on this process, see “Install
Menu” section.
Everyday Operation
Pressing the TV/DTT button at any time while watching television programmes will switch the TV set between the digital terrestrial television broadcasting
and the analogue broadcasting.
Information Banner
• Whenever you change the channel using the P+or
P-buttons or the number buttons, TV displays the
channel picture along with an information banner at
the bottom of the scre en. This will remain on the
screen for approximately three seconds.
• The information banner can also be displayedbypress-
ing the
Pressing the
The information banner gives a number of facts on the
channel selected and the programme on it:
• The name of the channel is displayed along with its
channel list number and an indication of the strength of
the signal received on this tuning channel.
• The current and next programme information are given
with the start and finish time.
• The current time information is displayed along with
channel name.
Hint
Not all channels broadcast the programme data. If the
Downloaded From TV-Manual.com Manuals
button at any time while watching the TV..
button again removes the banner..
RTL 09:10
CH 48
Now: NEWS
Next: NEWS
Signal :
04:35-11:00
11:00-17:55
ELECTRONICPROGRAMME GUIDE(EPG)
Some, but not all, channels send information about the current and next events. Please note that event information is
updated automatically. If there is no event information data
available for channels, only channel name with “No Infor-
mation Available” banner is displayed.
•PressGUIDEbuttontoviewtheEPG menu.
•Press
Programmes.
•Press
and programme list.
• In EPG Menu, you can easily see the extended help
information by pressing the
this button again you can close this window.
• In the EPG Menu all channelsaredispl ay ed. Thecurr ent
channel is highlighted when you enter the EPG menu.
•Use
press RED or GREEN buttons to make page up/down
scroll for the channels. And press OK button to
watch the highlighted channel.
• If you highlight an event, short event description,
extended event description, start and finish time of
the event are displayed on the screen.
• If you press OK button when a next event is highlighted, a reminder is set f or the highlighted
programme and a clock icon appears across the
highlighted channel line as shown in the following
EPG menu figure.
Programme remi nders is set to signal that a
programme is about to start when you are watching
another channel. If you set reminder to a programme,
English -11 -
or buttons to navigate in Channels or
or buttons to navigate through the channel
button and by pressing
ElectronicProgrammeGuide Wed31/709:13
News 10:00-11.00
ONE
1. ONE Commonwealth … Nachrighten
. BBC TWO Driven CrazyClifford The BigRed Do
. five The Chart Dawson’sCreek
. FIVE The Chart Da wson’s Creek
Navigate Schedule
Watch More
K
or buttons to change the channel. Also
Page 13
then you will be asked for switching to that channel
A
y
Main Menu
OK
when the reminder time is reached.
Electronic Programme Gu ide Wed 31/7 09:13
News 10:00-11.00
1RTL
I
1. ONE Commonwealth … Nachrighten
. BBC TWO Driven Crazy Clifford The Big Red Dog
5. five The Chart Dawson’s Creek
. FIVE The Chart Dawson’s Creek
Schedule
Navigate
Reminder M ore
K
I
•BypressingtheBLUE button you can view the ex-
tended schedule of the programmes.
• By pressing the
help infor mation easily. And by pressing
button you can see the detailed
button
again you can exit Help menu.
By pressing the BLUE button, the following EPG Menu
appears on the screen.
lectronic Programme Guide
BBC ONE TUE 21/4, 20:00-22:00
1. BBC ONE
2. BBC TW O
5. Five
7. BBC Choice
11.DISCOVERY
15.BBC NEWS 24
17.BBCi
No Information Available
Navigate Change Time
dvance Da
Wed 21/4 10:12
ore
•BypressingYELLOW / BLUE button, you can ad-
vance the schedule backward / forw ard of a day.
•BypressingGREEN / RED buttons you can change
the schedule time.
• If you press
information easily. And by pressing
button you can see the detailed help
button again
you can exit Help menu.
Displaying The Subtitles
With Digital terrestrial broadcasting (DVB-T), some
programmes are broadcast with subtitles. Subtitles
can be displayed when watching these programmes.
• Whenever GREEN button is pressed, Subtitle selec-
tion OSD will be displayed on the screen. You can
set Subtitles as ON or OFF. For Subtitle Language
options, refer to “Language Settings” in the “Configuration Menu” section.
TELETEX T
Use of teletext and and its functions are identical to
the analogue text system. Please do refer to the “Analogue teletext” explanations.
IDTV Menu System
The IDTV Menu can only be shown when watching
Digital terrestrial broadcasting. Press the TV/DTT button to turn the IDTV on while TV is in the analogue
mode.
Press
The m enu below appears on the screen:
Channel List
Using or buttons on the remote control in Main
menu, make sure that the first item, Channel List, is
highlighted and press the OK button to display the
Channel List.
The following operations can be performed in this
menu:
1. Navigating the whole list of channels
2. Moving channels*
3. Deleting channels
4. Renaming channels
5. Adding locks to channels
6. Settin g favourites
*Depending on your selection of Country in the
first time install ation, “MOVE” option of the
Channel List may not be visible.
Channel List is the place where the channels are
managed.
button.
Channel List
Installation
Timers
TV Setup
Common Interface
HANNEL LIST
1. BBC ONE
2. BBC TWO
3. ITV 8
4. Channel 4
5. BBC THREE
6. Teletext
7. BBC FOUR
8. Sky Travel
9. UKHistory
10. RTL
Select
elete Edit Name Lock Favourites
Function Select Channel Watch More
1 BBC ONE
Downloaded From TV-Manual.com Manuals
English -12 -
Page 14

Navigating the whole channel list
OK
•Press or keys for selecting the previous or
next channel.
• You can press
or buttons to move page up or
page down.
• T o watch a specific channel, highlight it using
buttons and then press OK button, while the
“Select” item on Channel List menu is highlighted
via using
or buttons.
Moving the channels in the channel list
•Press or buttons to select the channel that
will be moved.
•Press
or buttons to select the ‘’Move’’ item on
Channel List menu.
“Move” is written next to “OK” item to indicate that
press OK to move the highlighted channel to the desired position on the channel list.
HANNEL LIST
1. BBC ONE
2. BBC TWO
3. ITV 8
4. Channel 4
5. BBC THREE
6. Teletext
7. BBC FOUR
8. Sky Travel
9. UKHisto ry
10. RTL
e
c
Function Sel ect
Delete Edit Name Lock FavouritesMove
hannel Move
1 BBC ONE
ELECT
K
i
More
•PressOK button, the selected channel becomes
highlighted.
•Use
or buttons to select the new position of
the channel and press OK button to place the channel to the selected position and return the menu.
Deleting the channels in the channel list
•Press or buttons to select the channel that
will be deleted.
•Press
As seen on Channel List menu, “Delete” is written
next to OK item at the bottom of the screen to indicate
that press OK button to delete the highlighted channel
in the channel list.
or buttons to select the ‘’Delete ’’ item on
Channel List menu.
HANNEL LIST
1. BBC ONE
2. BBC TWO
3. ITV 8
4. Channel 4
5. BBC THREE
6. Teletext
or
7. BBC FOUR
8. Sky Travel
9. UKHistory
10. RTL
Select
elete Edit Name Lock Favourites
Function Select Channel Delete More
1 BBC ONE
Press OK button to delete the highlighted channel in
the channel list. Then the message below appears on
the screen.
The selected service will be permanently deleted, and
favourite list will be turned off. Are you sure?
es No
•Press or buttons to highlight the desired option.
•IfOK button is pressed while “Yes” is highlighted,
the highlighted channel is deleted.
• Selecting “No” cancels the delete operation.
Renaming channels
T o rename a specific channel, the channel must be
highlighted via pressing
highlight the “Edit Name” item by pressing
buttons. Press OK button to activate rename feature.
HANNEL LIST
1. BBC ONE
2. BBC TWO
3. ITV 8
4. Channel 4
5. BBC THREE
6. Teletext
7. BBC FOUR
8. Sky Travel
9. UKHistory
10. RTL
elete Edit Name Lock Fav ourites
elect
Function Select Channel Edit Name More
Now pressing or buttons moves to the previous/next character. Pressing
toggles the current character, i.e., ‘b’ character becomes ‘a’ on
and ‘ c’ on . Pressing the numeric
buttons ‘0...9’ replaces the highlighted character with
the characters printed above the key one by one as
the button is pressed.
or buttons and then
1BBCONE
K
or buttons
or
i
Downloaded From TV-Manual.com Manuals
English -13 -
Page 15

Press the button to cancel the editing or OK button
to save the new name.
Adding locks to channels
Channel Locking provides a password-protected access to channels selected by parents.
In order to lock a channel you should know the Parental Lock passw ord (default value is set to 0000 in the
factory and can only be changed from the Configu-
ration Menu ).
By pressing
or buttons, highlight the channel
to be locked and select the “Lock” option by press-
ing
or buttons.Then press the OK button, a
password box is displayed.
HANNEL LIST
1. BBC ONE
2. BBC TWO
3. ITV 8
4. Channel 4
5. BBC THREE
6. Teletext
7. BBC FOUR
8. Sky Travel
9. UKHistory
10. RTL
Select
elete Edit Name Lock Favourites
Function Select Channel
1BBCONE
ELE
T
K
Lock/Unlock
More
Enter Lock Key
Setting Favourites
You can set various channels as favourites so that
only the favourite channels are navigated. To set a
favourite you should highlight the “ Favourites ”item
at bottom of the Channel List menu.
To s et a favourite you should highlight t he
“Favourites” item at bottom of the Channel List menu,
and then pressing OK key, Edit Favourite Lists menu
appears on the screen.
You can list your favourite channels using List 1, List
2, List 3, List 4 or List 5.
Using 5 lists enables listing channels for diffrerent
categories (sport, music etc.). And by activating the
favourites list number that you want in Favourite
Mode submenu of Configuration menu, you enable
only the channels in the selected list. Configuration
menu is entered from the Main Menu.
CHANNEL LIST
1. BBC ONE
2. BBC TWO
3. ITV 8
4. Channel 4
5. BBC THREE
6. Teletext
7. BBC FOUR
8. Sky Travel
9. UKHistory
List 1 List 2 List 3 List 4 List 5
Select List Select Channel Add/Remove More
ELECT
K
i
How To Add A Channel To A Favourite List:
•Bypressing / buttons, highlight the channel
that you want to add to the favourite list.
• Select the list number by pressing
•Bypressing
button, the highlighted channel is
/ buttons.
added to selected list number .
For each channel, an icon indicates which favourite
list a channel is in. (i.e. In figure above,
icon
indicates that BBC ONE is added to List 1.)
To remove any channel that is added to a
favourite list:
• Highlight the channel that you want to remove from
the favourite list you have added;
• Highlight the list number that the channel will be
removed, and press OK button. The icon indicating
the added list number disappears on the menu.
Note: A channel can be added to more than one
favourite list.
To act i va te Favourites, go to the Configuration menu
and select the list number in Favourite Mode you
want to activate by pressing
or buttons. ToTo
cancel Favourites, set Favourite Mode to Off.
Using
BLUE button to navigate through the
favourite channels:
You can navigate through the favourite channel lists
via pressingBLUE button. For each pressing of BLUE
button, you can navigate through the favourite channels that are top of the each channel list, sequentially.
While a channel list is selected, you can navigate
through the favourite channels in that list by pressing
P+or P-buttons.
On Screen Help Pressing INFO Button
For all menus press button to display the help
information about the menu functions. For Channel
List menu the following message is displayed on the
screen.
Downloaded From TV-Manual.com Manuals
English -14 -
Page 16

ress the SELECT button onyour remote control to tune to the
p
highlighted channel.
Press MENU to exit this screen.
Hint:
Entering More item pressing
button gets
quick and easy use of the all menus in IDTV
displaying information for the highligted menu
item.
Installation
The Installation menu mainly intends to help you for
building a Channel Table in most efficient way.
Main Menu
Channel List
Installation
onfiguration
Timers
TV Setup
Common Interface
This menu includes the following items:
1. Automatic Search
2. Manual Search
3. First Time Installation
Installation
Automatic Search
Manual Search
First Time Installation
Automatic Search:
Automatic search is started by pressing OK button
while Automatic Search item is highlighted.
The following message appears on the screen.
Please check antenna connection. Do you want to start
automatic search? Your
Highlight “Yes” or “No” via using or buttons
and press OK button to select.
If “Yes” is selected, Automatic Search is started.
Selecting “No” cancels Automatic Search.
After search is completed for digital channels, a message asking search for analogue channels appears
on the screen.
revious channel list will be....
Yes No
Do you want to search for
analogue channels?
Yes
No
Highlight “Ye s” and press OK button to searh for
analogue channels.The following menu appears on
the screen for analogue channel search.
AUTO PROGRAM
Select your Language, Country and Tex t language by
/band
using
a
continue. T o cancel, press BLUE button.
PS is running...
/
buttons. Press OK button to
ancel
After APS is finalized, the programme table will appear on the screen. In the programme table you will
see the programme numbers and names assigned to
the programmes.
If you do not a cc ept the locat io ns and / or the
rogramme names, you can change them in aps submenu in the settings menu.
All the services are searched and a channel table is
created automatically.
All channels found are stored in a sorted form with
respect to their channel numbers. Some services
may not appear with the correct channel number. At
the time of printing, not all broadcasters are sending
their channel number information.
Downloaded From TV-Manual.com Manuals
English -15 -
Page 17

Manual Search:
y
In Manual Search, the number of the multiplex is
entered manually and only that multiplex is searched
for the channels. For every valid channel number,
signal level, signal quality and network name are
shown at the bottom of the screen.
In both manual and auto search any ex isting channel
in the database is not re-stored to avoid redundant
duplicates of that channel.
First Time Installation
The user can use this item to load default settings,
which had been loaded to the receiver at the factory.
To install factory settings, highlight “First Time In-
stallation” menu item and press OK button, then you
will be asked to tings. Selecting “Yes” by pressing OK
button while the “Yes” is highlighted and then the
existing channel table will be deleted.
Are you sure you want to delete all channels and
settings for first time installation?
Yes
o
After factory settings is loaded, “FirstTimeInstal-
lation” menu will be displayed.
The menu which is displayed for language selection
appears on the screen at first. By using
or
buttons, select the desired language option, and press
OK button to activate.
After the language is selected, a message asking for
automatic search start appears on the screen.
Do you want to start automatic search?
Yes
o
Highlight “Yes” item by pressing or buttons and
press OK button to start installation. After search is
completed for digital channels, a message asking
search for analogue channels appears on the screen.
Do you want to search for
analogue channels?
Yes
No
Highlight “Ye s ”itembypressing or buttons and
press OK button to searh for analogue channels.The
following menu appears on the screen for analogue
channel search.
AUTO PROGRAM
oun tr
ext languageWest
UK
By pressing or button, adjust the Country item
and press
to highlight Language item. Use or
button to set Language.Use or buttons to
select TXT Language and set it by using
or
buttons. Press OK button to continue.
Configur ation
Press button to display the Main Menu and the
button twice to highlight Configuration, then press OK
button to display the Configuration menu. Press
button to exit the menu.
Main Menu
Channel List
Installation
onfiguration
Timers
TV Setup
Common Interface
The various configuration functions are displayed in
a list, along with a quarter-screen image of the currently selected channel. You can select a function by
highlighting the corresponding menu line using the
or buttons.
Downloaded From TV-Manual.com Manuals
English -16 -
Page 18

Configur ation
guag
Favourite Mode
Channel List
eSettings
Lan
Parental Settings
Time Settings
Receiver Upgrade
hange Favourite Mode More
Off
Tv Only
V.0 .7 (E U)
K
elect Mode
ountry :
MENU
Germany
xit
rte
i
Favourite Mode
This function enables or disables the favourite channel list mode.
or buttons to set Favourite Mode to “List 1,
Use
List 2,..., List 5 or Off”.
Selecting “Off” disables the favourite channel List
mode.
If the “Favourite Mode” is set on via selecting a
channel list number, in normal operating mode pressing P+and P-buttons will only navigate through the
channels that were previously defined as favourites
in the selected channel list.
Channel List
In the Configuration Menu, highlight the Channel List item
by pressing
Use the
or buttons.
or buttons to set the Channel List to
“TV only or Radio only”.
This feature enables navigation only through the selected channel list type.
If “Radio only” is set, you can only navigate through
the Radio channels in the channel list via using P+or
P-buttons.
Language Settings
In the configuration Menu, highlight the Language Set-
tings item by pressing
or buttons. Press OK
and Language Settings sub m enu will be displayed on
the screen:
Audio Language
Digital terrestrial television channels can broadcast
simultaneous sountracks in more than one language.
This function selects which language soundtrack you
will hear when switching to a channel broadcasting
with the multiple soundtracks.
Use
or buttons to cycle through th e language
options.
• Whenever YELLOW button is pressed, Audio Lan-
guage selection OSD will be displayed on the screen.
Subtitle Language
Digital terrestrial television channels can broadcast
with subtitles displayed on-screen for the hard-ofhearing. This function selects the desired subtitle language and enables the automatic display of subtitles
whenever subtitle information is broadcast.
Use
or buttons to cycle through “Off” and
language options.
Parental Settings
Some channels broadcast material which you do not
want younger members of the family to watch. Any
channel can be ‘locked’ so that it cannot be selected
for viewing without first a four-digit PIN code being
entered. I n this way any channel not suitable for
younger viewers can be protected.
This function enables or disables the menu protection
system and allows the PIN code to bechanged. Channel And Menu Protection Lock feature.
Use
or buttons to highlight Parental Settings.
Press OK button to enter Parental Settings Menu. A
box asking for the lock key is displayed.
Enter Lock Key
There is only one key which is set to “0000” initially .
Enter lock key. If wrong Lock key is entered, the following message is displayed on the screen and it is
returned back.
nglish
System Language
Audio Language
Subtitle Language
nglish
nglish
ff
Use or buttons to highlight the menu item that
will be adjusted.
System Language
System Language determines the on-screen menu
language.
or buttons to set the System Language
Use
setting.
Downloaded From TV-Manual.com Manuals
If it is correct, the Parental Settings Menu including
following items is displayed:
Use or buttons to highlight the menu item that
will be adjusted.
English -17 -
Maturity Lock
Set Lock Key
e5
Installation
Page 19

Maturity Lock:
g
Main Menu
Use or buttons to set Maturity Lock to the “Off, Age 4,
Age 5...... .....Age17 or Age 18”. (“Off, Age 4, A ge
5,..., Age 18, above 6 years, Universal viewing (FRA)
or X-rated ESP”.)
Menu Lock:
There you can set/reset locking for the Main Menu or
the Installation Menu to restrict access. If the menu
lock is disabled, there will be free access to the menu
system.
Off: All menus are unlocked.
Main Menu: Main menu is accessible only with the
correct lock key. So the user cannot add, delete, rename, move channels, cannot set timers.
Installation: Installation menu is locked, so the user
cannot add channels.
Changes will be updated after exiting Configuration
Menu.
Set Lock Key:
Also in this menu you can change the lock key and
set/change parental lock mode.
Time Settings
In the configuration Menu, highlight the Time Settings
item by pressing
or buttons. Press OK and
Time Settings sub menu will be displayed on the screen:
Current Time
imeZoneSettin
Time Zo ne
14:26
Auto
GMT +0
onfiguration
Favourite Mode
ChannelList
anguage Settings
arentalSettings
Time Settings
ReceiverUpgrade
OK
Search for Upgrade
Off
Tv Only
V.0 .7 (EU )
ountry:UK
xit
ore
In the configuration menu, highlight the “Receiver
Upgrade” item by pressing
or buttons and
press “OK” button to start upgrade process. The
following menu appears on the screen.
Software Upgrade
Searchingfor upgrade. Ple ase wait,orpress
Search Progress:
MENU to cancel.
After the search progress is completed, the message “
Completed searching for upgrade. No new software was found” appears on the scr een if no new
software is found.
Timers
Display the Main Menu by pressing the button.
Highlight the Timers line by pressing
tons and press OK button to display the Timer menu.
or but-
Use or buttons to highlight the Time Zone
Setting. Time Zone Setting is set using
tons. It can be set to AUTO or MANUAL. When AUTO
is selected, Current Time and Time Zone options will
not be available to be set.
If MANUAL option is selected as the Time Zone Setting, Time Zone could be altered:
•By pressing
Use
or buttons to change the Time Zone be-
or buttons select Time Zone.
tween GMT-12 or GMT+12. Current Time on the top of
the menu list will then change according to the selected Time Zone.
Receiver Upgrade
The IDTV can be upgraded via the configuration menu,
entered from the main menu.
Downloaded From TV-Manual.com Manuals
or but-
English -18 -
Channel List
Installation
Timers
TV Setup
Common Interface
Up to five separate timer events can be set and each
is displayed in the Programme Timers screen, showing the event number, the channel to be selected, the
start time, end time, date and the mode - whether that
event is active (and will be acted on) or not.
Page 20

Programme Timers
o Channel Name S tart End Date M ode
. ITV 1 20:00 21:00 12/0 5/2005 Active
2. BBC ONE 00: 00 00:00 01/ 01/2005 Inactive
3. BBC ONE 00:00 00:00 01/01/2005 In active
4. BBC ONE 00: 00 00:00 01/ 01/2005 Inactive
5. BBC ONE 00: 00 00:00 01/ 01/2005 Inactive
6. BBC ONE 00: 00 00:00 01/ 01/2005 Inactive
Setup”.PressOK button to display TV Setup menu
screen.
Channel List
Installation
10:42
Move/Change
OK
MENU
Exit Edit Timer More
04/07/2005
• To set an event, highlight its m ode button using or
buttons and press OK button to display the timer
entry window.
e:
Name:
Start:
End:
Date:
Mode:
TV
3. ITV
00:00
00:00
03/06/2005
Once
• Here the six settings of channel type, channel name,
start time, end time, date and frequency mode can
be set. You can move freely between each setting
using
• The channel type is set using
or buttons.
or buttons. It
enables displaying only the selected type channels.
• The channel nam e is set using
or buttons to
display the channel which broadca sts the
programme.
• The start time, end time and date are each set with
the number buttons on the remote control in 24-hour
format.
• The frequency mode determines how often the re-
ceiver operates this event and is set with the
buttons to be either Once, Daily,orWeekly.
Hint
f an invalid number for the start or end times
or the date is entered, “Entered time is not
valid” message appears on the menu.
TV Setup
T o be able to go through TV functions, you can use
this item.
The digital TV Setup menu screen is accessed from
the Main Menu. Press the
Main Menu and use
button to display the
or buttons to highlight “TV
Downloaded From TV-Manual.com Manuals
Detailed inform ation for all menu items is in Analogue
TV Menu System section.
Common Interface
•Press button to display the Main Menu and use
the
Interface” line and press OK button.
It is required to subscribe to a pay channel company
to view the pay chan nels of the Digital Terrestrial broadcasting. Obtain the ConditionalAccess Module (CAM)
and the View ing card by subscribing to a pay channel company, then insert those to the Television using
the following procedure.
or
1. Switch off the TV and unplug from the mains.
2. Insert the CAM, then Viewing Card to the slot that is
located in the terminal cover at the left-hand side
of the TV (from front view).
• The CAM should be correctly inserted, it is impossible to insert fully if reversed. The CAM or the TV
terminal may be damaged if the CAM is forcefully
inserted.
3. Connect the TV to the mains supply, switch on and
then wait for few moments until the card is activated.
• Some CAMs may require the following set up. Please
set the CAM by entering the IDTV menu, Common
Interface then pressing OK button.(CAMsetup menu
is not displayed when it is not required.)
English -19 -
Timers
TV Setup
Common Interface
or buttons to highlight the “Common
Channel List
Installation
Timers
TV Setup
Common Interface
Page 21

Menu System
Picture Menu
PICTURE
ode Dynami c
ontrast 63
Bright ness 63
Sharpness 31
olour 99
Colour Temp Normal
Noise Reduction Low
Film Mode Off
Store
Reset
NO SIGNAL
Mode
By pressinga/
button to choose from one of these options: Cinema,
Dynamic and Natural.
Contrast/Brightness/Sharpness/Colour/Hue
By pressinga/
Press
/
Hint: Hue is displayed in picture menu when the TV
receives an NTSC signal.
Colour Temp
By pressinga/
Press
_
/ ` to choose from one of these options:
Cool, Normal and Warm.
Noise Reduction
By pressinga/
Press
/
Low, Medium, High or Off.
Film Mode
Films are recorded at a different number offrames
per second to normal television programmes.
By pressing
/
Press
this feature on when you are watchingfilms to see
thefastmotionscenesclearly.
Store
•Bypressinga/bbutton select Store.
•Press
“Stor ed” will be displayed on the screen.
or OK button to store the adjustments.
button, select Mode.Press
/
button, select the desired Option.
button to set the level.
button select Colour Temp.
button select Noise Reduction.
to choose from one of these options:
/bbutton, select Film Mode.
a
button to set this feature On or Off. Turn
Reset
By pressinga/bbutton, select Reset. Press
or OK button to reset the picture modes to factory
default settings.
/
Sound Menu
SOUND
olume 15
Equ alizer
Balance 0
Headphone
Sound Mo de Mono
VL On
Effect Off
Dynam ic Bass Off
DS Off
Subw oofer Off
Store
Volume
By pres s i nga/
button to change the level of the Volume.
Equalizer
By pressinga/bbutton, select Equalizer.Press
/`or OK button to enter equalizer menu.
In equalizer menu the sound mode can be changed to
User,Music,Movie,Speech,Flatand Classic by
pressing
by
/
/bbutton and increase or decrease the fre-
quency gain by pressing
Press the
NOTE: Equalizer menu settings can be altered only
when the Equalizer Mode is in User.
Balance
By pressinga/
to change the level of the balance.Balance level can
be adjusted between -32 and + 32.
Headphone
By pressinga/bbutton, select Headphone.Press
button to enter hedphone menu.
`
volume
By pressinga/
button to increase hp volume level. Press
ton to decrease hp volume level. Headphone volume level can be adjusted between 0 and 63.
select Vol um e.Press
/
button. Select the desired frequency
button.
_/`
button to return to the previous menu.
select Balance.Pr ess_/`button
button, select Vo lume.Press
but-
Downloaded From TV-Manual.com Manuals
English -20 -
Page 22

balance
By pressinga/bbutton, select Balance.Press
button to increase balance to the right. Press
`
button to decrease balance to the left. Balance level
can be adjusted between -32 and +32.
Press the
button to return to th e previous menu.
Sound Mode
By pressinga/bselect Sound Mode.Press_/
button, you can select Mono, Stereo, Dual I or Dual II
mode, only if the selected channel supports that mode.
AVL
By pressing
set the AVL as on or off.
/
select AV LVL.Press/button to
Effect
By pressinga/bselect Effect.Press ` button to
set Effect as on or off.
Dynamic Bass
Dynamic Bass is used to increase bass effect of
the TV set.
By pressing
pressing
/
button, select Dynamic Bass. By
a
/
button set Dynam ic bass to Low, High
or Off. It is not recommended to select High if listening
at high volume levels.
3DS
By pressinga/
button to set 3DS as on or off.
button select 3DS. Press_/
SubWoofer
It is possible to connect an external, active subwoofer
to the set to give a much deeper bass effect.
By pressing
Subwoofer can be set to On or Off.
a
/
button, select Subwoofer..
Dynamic Bass is not available if Subwoofer is set to
On. Set Subwoofer to On when you connect an external subwoofer to the set.
Store
By pressinga/
Press
or OK button to store the adjustments.
“Stored” will be displayed on the screen.
button select Store.
Feature Me nu
FEAUTURE
leep Timer Off
hild L o ck Off
Language English
AV-2 Out TV/DTT
Default Zoom Full
Blue B a ckground On
Menu B a ckground Translucent
Menu Timeout 60 sec
Teletext Langua ge West
Sleep Timer
By pressinga/
button to set the Sleep Timer.
The timer can be programmed between Off and 120
minutes in steps of 10 minutes.
Child Lock
By pressinga/bselect Child Lock .
/
Press
button to set the Child Lock on or off.Wh e n
on is selected, the TV can only be controlled by the
remote control handset. In this case the control panel
buttons will not work (except for the STANDBY button). Hence, if one of these buttons is pressed, “Child
Lock On” will be displayed on the screen when the
Menu screen is not visible.
Language
By pressinga/
/ ` button to select the language.
Available language options are; English, German,
French, Turkish, Spanish, Danish, Swedish, Dutch,
Italian, Greek, Portuguese, Norwegian, Finnish, Polish, Czech, Hungarian, Russian, Slovak, Slovenian,
Rumanian, Bulgarian, Croatian, Serbian.
AV- 2 O u t
By pressinga/bselect AV-2 Output.Use
button, to set Ext-2 Out to TV/DTT,AV-1,AV-3,AV-4,
HDMI-1, HDMI-2 or PC RGB.
NOTE: Only audio output is available for AV- 3 ,
AV- 6 , AV -7 and PC RGB. The other options have both
audio and video outputs.
If currently watched source is analogue TV, a connected device displays analogue TV source as well.
If this source is set to digital mode, connected device displays digital source. In order to avail this
function, AV-2 Ou t should be set to TV/D TT.
select Sleep Timer.Press
button, select Language .Use
/
/
`
Downloaded From TV-Manual.com Manuals
English -21 -
Page 23

Default Zoom
By pressinga/bbutton, select Default Zoom.
You can se t Default Zoom to Full, Panoramic, 4:3
/
or 14:9 Zoom by pressing
button.
Blue Background
By pressing
Press
off.
/
button, select Blue Background.
_/`
button tosetBlueBackgroundasonor
Menu Background
By pressi ng
ground. You can change menu background to Translucent or Opaque by pressing
/
button, select Menu Back-
button.
_/`
Menu Timeout
By pressinga/bbutton, select Menu Timeout.
Press
/
button to change menu timeout to 15 sec,
30 sec or 60 sec.
T eletext Language
By press ing
guage.Press
guage to West, East, Turk/Gre, Cyrillic or Arabic.
/
button, select Teletext Lan-
_
/ ` button to change Teletext Lan-
Install Menu
INSTALL
Program 1
Band S
Channel 36
Colo ur Syst em AUTO
Sound System BG
Fine Tune 0
Search 423.25
CR Off
Store Program
Colour System
By pressing
Press
_/`
PAL , SECAM or AUTO .
If Sound System is set to I, SECAM is not available
for the Colour System.
NOTE: In EXT mode, you can choose NTSC 3.58,
NTSC 4.43 or PAL60 as well.
/bbutton, select Colour System.
button to change the colour system to
Sound System
By pressinga/
/
Press
button to change the sound system to BG,
I, DK, L or LP.
button, select Sound System.
Fine Tune
By pressing
/
button to adjust the tuning.
/bbutton, select Fine Tune.Press
Search
By pressinga/
button to start program searching.You can also
enter the desired frequency via digit buttons when
search item is highlighted.
button, select Search.Press
VCR
This item can be se en in all modes except YPbPr,
HDMI and PC.
If you want to watch a VCR source from one of these
modes, then it will be better to set VCR mode “on”.
For this, while the cursor is on this item press the
_ /
buttons to set it On.
If you want to watch a DVD , then you must set this
item Off.
Store Program
By pressinga/
Press
or OK button to store the adjustments. “Pro-
gram Stored” will be displayed on the screen.
button, select St ore Program.
Program Menu
/
Program
By pressinga/
/
button to select the program number. You can also
enter a number via digit buttons on the remote control.
There are 100 program storage between 0 and 99.
button, select Program. Press
Band
Band can be selected either C or S by press
button.
Channel
Channel can be changed by
tons.
Downloaded From TV-Manual.com Manuals
/
button or Digit But-
English -22 -
PROGRAM
01 S-16
02 S-16
03 ARD
04 BBC1
05 D
06 CH4
07 BBC2
/
08 C06
09 C09
10 C10
Name
11 C-12
12 C-21
13 C-23
14 C-43
15 C-55
16 C-57
17 C-64
18 C-68
19 S-20
20 S-20
APS
1S-20
2S-33
3S-34
24 S-35
5S-36
6S-40
7 -----
8 -----
9 -----
0 -----
Page 24

By moving the cursor in four directions you can reach
y
y
A
20 programmes in the same page. You can scroll the
pages up or down by pressing the navigation buttons
to see all the programmes in TV mode (except the AV
mode). By cursor action, programme selection is done
automatically.
Name:
T o change the name of a decided programme, select the programme and press the RED button.
The first letter of the selected name will be highlighted. Press
button to select the other letters. By pressing
_/`
the RED button, you can store the name.
/bbutton to change that letter and
a
Insert:
Select the programme which you want to insert by
navigation buttons. Press the GREEN button. By navigation buttons move the selected programme to the
decided programme space and press the GREEN
button again.
Delete:
T o delete a programme, press the YELLOW button.
Pressing the YELLOW button again erases the selected programme from the programme list, and the
programmes below shift one up.
APS (Auto Programming System)
When you press the BLUE button for APS, Auto
Programm ing Syste m Men u will appear on the
Screen.
PS is runn ing...
Cancel
Whenever you press the BLUE button, A.P.S. function stops and Program Table appears on the screen.
If you wait until the end of A.P.S., Program Table is
displayed with the programmes found and located.
Install menu in AV modes
The following screen appears in the install menu:
INSTA LL
olour System AUTO
CR Off
Store Program
PROGRAM
Countr
German
A.P.S. (Auto Programming System) Country
Press_/`button to select your country . If you want
to exit from A.P.S. function, press the BLUE button.
When you press OK or RED button for starting APS,
all stored programs will be erased and the follow ing
screen will be displayed:
Downloaded From TV-Manual.com Manuals
Colour System
By press inga/
pressing
system to PAL, SECAM, PA L60, NTSC 4,43, NTSC
3,58 or AUTO.
VCR
By pressinga/
button, you can set the VCR to ON or OFF.
Store Program
By pressinga/
Press
gram Stored” will be displayed on the screen.
English -23 -
select Colour System. By
/
button, you can change the colour
select VCR. By pressing
/
button, select Store Program.
` or OK button to store the adjustments. “Pro-
Page 25

Source menu
By pressinga/
or OK button. Source menu appears on the
press
screen.
In source menu, highlight a source by pressinga/
b
button and switch to that mode by pressing
OK button. Source options are; TV, AV-1, A V -2, AV-2
S , AV -3, AV -4 , AV-5 , AV- 6 , AV -7, P C R G B and DTT.
button, select th e sixth icon and
SOURCE : TV
TV
AV - 1
AV - 2
AV - 2 S
AV - 3
AV - 4
AV - 6
AV - 7
PC RGB
DTT
TUNER
SCART
SCART
SCART+SVHS
YPbPr
FAV
SVHSAV - 5
HDMI
HDMI
PC Mode
Installation
• Power off both computer and display before making
any connections.
• Set your PC’s resolution correctly before connect-
ing to the TV. See the table on Appendix A on page
33.
• Use 15-pin display cable to connect a PC to the LCD
TV.
Menu System in PC mode
Sound Menu/Feature Menu
The items in these menus are described at Sound &
Feature Menu explained in “Menu System”.
PC Picture Menu
By pressinga/
Picture menu appears on the screen.
Brightness, Contrast and Colour Temperature adjustments in this menu are identical to adjustments defined in TV picture menu in “Analogue TV Menu System”.
PC Picture Position Menu
By pressing
or OK button. PC Picture Position menu ap-
press
pears on the screen.
Downloaded From TV-Manual.com Manuals
button, select the second icon. PC
/
button, select the first icon and
English -24 -
utoposition
H Positio n 9
Posit ion 50
Dot Clock 100
Phase 31
Autoposition
If you shift the picture horizontally or vertically to an
unwanted position, use this item to put the picture into
correct place automatically.
• Select Autoposition item by using
or
Press or OK button.
a
Warning: Auto position adjustment recommended
to be done with the full screen image for
the proper adjustment.
H (Horizontal)Posi t ion
This item shifts the image horizontally to right hand
side or left hand side of the screen.
• Select H Position item by using
•Use
/
button to adjust the value.
a
/
V (Vertical) Position
This item shifts the imag e vertically towards the top or
bottom of the screen.
• Select V Position item by using
/
•Use
button to adjust the value.
/bbutton.
a
Dot Clock
Dot Clock adjustments correct interference that appear as vertical banding in dot intensive presenta t ions
like spreadsheets or paragraphs or text in smaller fonts.
/
•Use
button to adjust the value.
Phase
Depending on the resolution and scan frequency that
you input to the TV Set, you may see a hazy or noisy
picture on the screen. In such a case you can use
this item to get a clear picture by trial and error method.
•Use
/
button to adjust the value.
Sound in PC mode
• Connect the PC’s Audio output to the TV’s PC Audio
In socket with an audio cable.
/bbuttons.
button.
Page 26

Other Features
TV Status
Programme Number, Programme Name,
Sound Indicator and Zoom Mode are displayed
on the screen when a new programme is entered or
button is pressed.
Mute Indicator
It is placed in the upper side of the screen when
enabled.
T o cancel mute, there are two alternatives; the first
one is pressing the
increasing the volume level.
PIPandPAPmodes
Press the button to switch to PIP mode.
At PIP Mode, a small picture (PIP picture) is displayed
on the main picture. Aspect Ratio of the PIP window is
fixed and 4:3.
When PIP Mode is entered, the default active window
is PIP window and the active window is indicated by
a white frame around it. The active window can be
changed by pressing
OSD belongs to active window. The place of the status OSDs are same for both windows.
Press the
At PAP Mode, two pictures with equal sizes are displayed on the screen. Aspect Ratios of the windows
are fixed.
When you switch to PAP Mode, Main window in PIP
Mode is displayed on the right side of the screen. The
active window can be changed by pressing
button.
Press the
NOTE: In all HDMI modes, Pip and PAP are not vis-
ible. In YPbPr 1080i , Pip is not visible.
NOTE: See Appendix C for all PIP/PAT modes.
PAT
In PAT (Picture and Text) mode, picture is splitted into
two and text is displayed near the main picture.
TherearetwowaysavailableforswitchingtoPAT
mode:
•Pressing
TV to PAT mode.
button and the second one is
/`button. The status info
button again to switch PAP mode.
_ /
button again to exit the PAP mode.
button while in teletext will switch the
• While the PAP function is off, pressing
switchtheTVtoPATmode.
twice will
AV M o des
You can switch your TV to AV modes by using related buttons on the remote control.
First, press
on the screen. You can then use; AV 1 , AV 2, AV 3 ,
AV 4, AV 5, HDMI1 or HDMI2 buttons on your remote
control to select the desired source (except being in
teletext).
Note that in PIP/PAP mo de s, pressing
will directly change sources.
button till INPUT OSD is displayed
button
Freeze Picture
You can freeze the picture on the screen by pressing
the OK button. At PIP and PAP layouts, only the main
picture can be frozen.
Zoom Modes
Zoom mode can be changed by pressing the REC
button. You can change the screen size according to
the picture aspect ratio. Select the optimum one from
the following ZOOM modes.
NOTE: InYPBPR and HDMI modes,while in 720 and
1080 resolutions, Full 1 and Full 2 modes
will be visible.
NOTE: When in “Full 1” mode; if picture defects in
top and bottom lines occur because of the
broadcast, switch to “Full 2” mode to avoid. If
such defects in the edges of picture are not
experienced, it is advised that you watch in
“Full 1” mode.
NOTE: You can only choose 4:3 and FULL in PC
mode.
Auto:
When a WSS (Wide Screen Signalling) signal,
which shows the aspect ratio of the picture, is included in the broadcast signal or the signal from an
external device, the TV automatically changes the
ZOOM mode according to the WSS signal.
• When the AUTO mode does not function correctly
due to poor WSS signal quality or when you want to
change the ZOOM mode, change to another ZOOM
mode manually.
Downloaded From TV-Manual.com Manuals
English -25 -
Page 27

Full:
This uniformly stretches the left and right sides of a
normal picture (4:3 aspect ratio) to fill the wide TV
screen.
• For 16:9 aspect ratio pictures that have been
squeezed into a normal picture (4:3 aspect ratio),
use the Fullmodeto restore the picture to its original shape.
4:3
Use to view a normal picture (4:3 aspect ratio) as this
is its original shape.
Panoramic:
This stretches the left and right sides of a normal
picture (4:3 aspect ratio) to fill the screen, without
making the picture appear unnatural.
The top and bottom of the picture are slightly cut off.
14:9 Zoom:
This zooms up the wide picture (14:9 aspect ratio) to
the upper and lower limits of the screen.
Cinema:
This zooms up the wide picture (16:9 aspect ratio) to
the full screen.
Telete xt
Teletext system transmits informartion such as news,
sports and weather on your TV. Note that if the signal
becomes insufficient, some text errors may occur or
the teletext m ode may be quitted.T eletext function
buttons are listed below:
Teletext On/Off
Activates teletext mode when pressed once. Pressing this button again will split the screen into two
windows, one displaying the teletext and the other
displaying the current channel. Press again to exit.
Index
Selects the teletext index page.
Reveal
Shows hidden information(sol ut i on sof games,f o r example).
Hold
Holds a text page when convenient. Press again to resume.
....
Subcode Pages
Selects subcode pages if available when the teletext is
activated .
P+ / P- and numbers (0-9)
Press to select a page.
NOTE: Most TV stations use code 100 for their index
pages.
Coloured buttons (RED/GREEN/YELLOW/BLUE)
Your TV supports both FASTEXT and TOP text systems. When these systems are available, the pages
are divided into groups or topics.
When FASTEXT system is available, sections in a
teletext page will become colour-coded and can be
selected by pressing the coloured buttons. Press a
coloured button that conrresponds with your needs.
The coloured writings will appear, showing you which
coloured buttons to use when TOP text transmission
is present. Pressing P-or P+commands will request
the next or previous page respectively.
16:9 Subtitle:
This zooms up the wide picture (16:9 aspect ratio)
with subtitles to the full scr een.
Downloaded From TV-Manual.com Manuals
English -26 -
Page 28

Connect Peripheral Equipment
High Definition
Your LCD Television is capable of displaying HighDefinition pictures from devices such as a High Definition
Satellite Receiver or DVD Player. These devices must
be connected via the HDMI sockets or Component
Socket. These sockets can accept either 720p or
1080i signals. Also, only HDMI modes accept 1080p
signals.
Via The Scart
The TV has 2 SCART sockets. If you want to connect peripherals (e.g. video, decoder, etc.) which have
Scart sockets to the TV, you can use SCART sockets
of the TV.
NOTE: If an external device is connected via the
Scart sockets, the TV will automatically switch
to AV mode. If both sockets are employed at
the sime time, SCART 1 becomes the preferential.
Via Aerial Input
If the device you want to connect does not have a
Scart socket, you should connect it to the Aerial input
of the TV.
If the VCR is connected via Aerial input, it is
suggested to use Programme 0.
Decoder
If you are subscribed to cable TV offers, the
organisation will supply you a corresponding decoder
unit to allow the programmes to be unscrambled.
For further information consult your dealer.
Connect a decoder with an aerial socket to
the TV
• Connect the aerial cable.
Connect a decoder without an aerial socket t o t he T V
• Connect the decoder to the EXTERNAL socket of
TV with a RCA cable. Through the SCART/RCA
socket of the decoder , you may attain a better display resolution.
TV And Video Recorder
• Connect the aerial cables.
Better picture quality can be obtained if you also connect a Scart cable to SCART sockets.
Playback NTSC
• Connect NTSC VCR player to a Scart socket of theTV.
Then, select the related source from the SOURCE menu.
Copy Facility
Source selection for VCR recording.
• Select Feature menu.
Downloaded From TV-Manual.com Manuals
• Select AV -2 O u t by pressing
• For copying the picture that comes from the tuner,
select AV- 1 .
Camera And Cam corder
T o Connect To AV Input
Connect your camera or camcorder to AV input of the TV.
• Connect your equipment to the TV via VIDEO (yellow),
AUDIO R (red) and AUDIO L (white) inputs. You must
connect the jacks into the input with the same colour.
T o Connect To S-VHS Input
Connect your camera or camcorder S-VHS input of the TV.
• Connect your equipment to the TV via S-VHS inp ut
and audio inputs of AV inputs by using S- VHS cables.
Connect The Decoder To The Video
Recorder
Some video recorders have a special Scart socket
for decoder.
• Connect a Scart cable to the Scart socket of your
decoder and to the special Scart socket of your video
recorder . Refer to the booklet of your video recorder.
Connecting Headphones (optional)
Use the stereo headphone socket of the TV, to connect headphones.
NOTE: If you want to connect more equipment to
Audio Lineout
To connect the external speakers to your TV, use
Line Outs of the TV.
NOTE: While watching HDMI source, Lineout selec-
Connecting SubWoofer
Use SubW oofer Out socket to connect an external,
active subwoofer to the set to give a much deeper
bass effect.
English -27 -
/
button.
a
your TV, consult your dealer.
tion could only be the current source.
Page 29

Tips
Care Of The Screen
Clean the screen with a slightly damp, soft cloth. Do
not use abrasive solvents as they may damage the
TV screen coating layer.
Poor Picture
Have you selected the correct TV system? Is your TV
set or house aerial located too close to non-earthed
audio equipment or neon lights, etc.?
Mountains or high buildings can cause double pictures or ghost images. Sometimes you can improve
the picture quality by changing the direction of the
aerial.
Is the picture or Teletext unrecognisable? Check if
you have entered the correct frequency.
The picture quality may degrade when two peripherals are connected to the TV at the same time. In such
a case, disconnect one of the peripherals.
No Picture
Is the aerial connected properly? Are the plugs connected tightly to the aerial socket? Is the aerial cable
damaged? Are suitable plugs used to connect the
aerial? If you are in doubt, consult your dealer.
No Picture means that your TV is not receiving a
transmission. Have you selected the correct button
on the remote control?Try once more.
Sound
You can not hear any sound. Did you perhaps inter-
rupt the sound, pressing the
Sound is coming from only one of the speakers.Is the
balance set to one extreme? See Sound menu.
Remote Control
Your TV no longer responds to the remote control.
Perhaps the batteries are exhausted. If so you can
still use the local buttons at the bottom of the TV.
button?
Downloaded From TV-Manual.com Manuals
English -28 -
Page 30

Peripheral Equipment Connections
HEADPHONE
AUDIO
UDIO IN
VIDEO IN
(R)(L)
VIDEO
ANT.IN
ANTENNA
Aerial Connection
Outdoor Aerial Connection
Round 75 ohm coaxial cable
CAMCORDER
ATELLITE RECEIVER
IN OUT
N
UT
75
:
Downloaded From TV-Manual.com Manuals
Rear of TV
English -29 -
Page 31

Specificatio n s
DISPLA Y
Size /Diagonal 37" (16:9 Display)
Viewable s ize / Diagonal 82.36 x 46.48 (cm) / 94.57 (c m)
VIDEO STANDA RDS
Video PAL /NTSC/ SECAM
TV Tuner (Analog) PAL/SECAM /B/G D/K K' I/I' L/L'
VHF (B AND I/ III)
UHF (B AND U)
HY PERBA N D
CABLE TV (S1-S20 / S21-S41)
100 PRESET CHA N N ELS
TV Tuner (Digital)
Frequency range 474 - 850 MHz
50-860 MHz (VHF)
Signal lev el -82.3dBm
Transmiss ion standards DVB-T, MPEG-2
Demod u lation COFD M with 2K/8K FFT mode
FEC all DVB modes
Video MP@ML, PAL, 4:3/16:9
Audio MPEG Layer I&II 32/ 44.148kHz
Formats 4:3, Panoramic, 14:9 Zoom, Cinema, 16:9 Subtitle, Auto, Full
AU DI O German + Nicam Stereo
FREQUENCY RANGE PC
Horizontal Frequency: 64 Khz (max)
ertic al Frequency: 75 Hz (max)
Clock Frequency: 108 Mhz (max)
Resolu tions: 1360 x 768 (max )
Formats: 4:3, 16:9
INPUT CONNECTIONS
PC D-SUB 15 (VGA)
VIDEO TV TUNER: IEC 75 Ohms input res istance
SC ART1: C VBS, RGB
SC ART2: C VBS, S
CVB S: 1 x RCA
Y/C (S-Video) MiniDIN
YPb Pr: 3 x R CA
HDM I x 2: M ultimedia Interface
AUDIO SCART1: Audio L/R
SCA RT2 : Audio L/R
Y/C or CVBS: Audio Ph ono L/R
YPbPr: Audio Ph ono L/R
PC: Audio Phono L/R
Downloaded From TV-Manual.com Manuals
English -30-
Page 32

Specificatio n s
RS232 In 9 pin mini D-s ub
OUTPUT CONNECTIONS
Line O ut Audio Phono L/R
Subwoofer 1 x Phono (Mono)
Audio Speaker Output 2x8 W RMS
Synchronization Sync on green, com posite sync with automatic detect ion
Operator Control Keys On/Off, Standby, Vol+, Vol-, Prog +, Prog -, Menu, TV/AV.
OPERA TING CONDIT IONS
Temperature 0°C ~40°C (in operation)
Air Humidity 20%~80% (no c ondensation)
Atmospheric Pr essure 800~1114 HPa
POWER SUPPLY
Voltage Supply 220-240V AC
Mains Frequency 50Hz
Power Cons umption 190W (Max), 1 W (Standby)
DIMENSIONS A ND WEIGHT
Display with stan d D x L x H: 235 x 931 x 681 (mm)
Displaywithoutstand:DxLxH: 125 x 931 x 620 ( mm)
Weight Display: 17.5 kg
Weight St and: 2.9 kg
Weight (net): 20.4 kg
separate H and V sy nc.
Downloaded From TV-Manual.com Manuals
English -31 -
Page 33

Specificatio n s
Signal Input
PC RGB Terminal (D-sub 15-pin connector)
Pin I nput signal
1R
2 G or sy nc on green
3B
4 No connection
5 No connection
6R.GND
7G.GND
8B.GND
9 No connection
10 GND
11 No connection
12 [SDA]
13 H.sync or H/V composit e sy nc
14 V.sync. [V.CLK]
15 [S CL]
S-input connector pin specifications
Pin Input signal
1Y
2Y-GND
3C
4C-GND
Frame GND
• When different kinds of input signals are simultaneously input to the monitor via a graphics
board or the like, the monitor will automatically
select the signals in the following priority order:
Sync signal type P riority
H/V s eparate sy nc. 1
H/V composite sync. 2
sync.on Green * 3
• Even in the case of the recommended signals
shown on the following page, there may be
instances when correct display is not possible. In this case, use H/V separate sync, H/
V composite sync.
HDMI connector pin specifications
Pin Input signal Pin Input signal
1 TMDS Data2+ 11 TMDS Clock Shield
2 TMDS Dat a2 Shi eld 12 TMDS Cloc k3TMDSData2-13 CEC
4 TMDS Data 1+ 14 Reserved (N.C. on device)
5 TMDS Data1 Shield 15 SCL
6 TMDS Dat a1- 16 SDA
7 TMDS Data0+ 17 DDC/CE D Ground
8 TMDS Data0 S hield 18 +5V Power
9 TMDS Dat a0- 19 Hot Plug Detect
10 T MDS Clock+
SCART connector pin specifications
Pin Input si gnal Pin Input signal
1 A UDIO OUT (RIGHT) 12 Not used
2 AUDIO IN (RIG HT ) 13 R GB-R GND
3 AUDIO OUT(LEFT/MONO) 14 GND
4 AUDIO GND 15 RGB-R / S .VHS CHROMINANCE IN
5 RGB-B GND 16 BLANKING SIGNAL
6 AUDIO IN (LEFT/MONO) 17 COMPOSITE VIDEO GND
7 RGB-B IN 18 BLA NK ING S IGNAL GND
8 AUDIO / RGB SWITCH / 16:9 19 COMPOSITE VIDEO OUT
9 RGB-G GND 20 COMPOSITE VIDEO / S .VHS LUMINANCE IN
10 Not used 21 GND / SHIELD (CHASSIS)
11 RGB-G IN
Downloaded From TV-Manual.com Manuals
English -32-
Page 34

Appendix A: PC Input Ty pical Display Modes
The display has a maximum resolution of 1360 x 768, frequency range of 56-85 Hz.
The following table is an illustration of some of the typical video display modes.
M ode Resolution Frequency
Horizontal Vertical Hor.(kHz) Ver.(Hz)
1 640 480 31,5 60
2 640 480 37,9 72
3
4
5 800 600 37,9 60
6 800 600 48,1 72
7
8
9 1024 768 48,4 60
10 1024 768 56,5 70
11
12
13 1280 768 47,8 60
14
640 480 37,5 75
800 600 35,2 56
800 600 46,9 75
800 600 53,7 85
1024 768 60 75
1280 1024 64 60
1360 768 47,7 60
Downloaded From TV-Manual.com Manuals
English -33 -
Page 35

Appendix B: AV and HDMI Signal Compatibility
Source Available
Supported Signals
PAL 50/60
AV- 1
(SCART 1)
NTSC 60
RGB 50
RGB 60
PAL 50/60
AV- 2
(SCART-2)
NTSC 60
S-VHS 50
S-VHS 60
480I 60Hz
480P 60Hz O
576I 50Hz
AV- 3
(YPbPr)
576P 50Hz O
720P 50Hz O
720P 60Hz O
1080I 50Hz O
1080I 60Hz
AV- 4
(FAV)
V-5
(S-Vide o)
PAL 50/60
NTSC 60
PAL 50/60
NTSC 60
480I 60Hz O
480P 60Hz O
576I 60Hz
576P 60Hz O
HDMI1
HDMI2
720P 60Hz
720P 50Hz O
1080I 50Hz
1080I 50Hz O
1080P 50Hz O
1080P 60Hz O
1080P 24 HZ
O
O
O
O
O
O
O
O
O
O
O
O
O
O
O
O
O
O
O
(X: Not Available, O: Available)
Note: In some cases a signal on the LCD TV may not be displayed properly. The problem
may be a inconsistency with standards from the source equipment (DVD, Set-top box, etc…).
If you do expereince such a problem please contact your dealer and als o the m anufacturer
of the source equipment.
Downloaded From TV-Manual.com Manuals
English -34-
Page 36

Appendix C: Main and PIP-PAP Picture Combinations
Main and PIP, PAP picture combinations
MAIN
PIP,PAP
AV-1 AV-1 AV-2 AV-2 AV-3 AV-4 AV-5 HDMI 1 HDM I 2
TUNER
CVBS RGB CVBS SVHS YPBPR CVBS SVHS
PC RGB
TUNER /
OOO OOO
DTV *
AV-1 O
CVBS
AV-1 O
OXOOO OO
RGB
AV – 2 O
CVBS
AV– 2 O
SVHS
OOOXO OO
AV-3 X
YPBPR
AV-4 O
OOOOO OO
CVBS
AV-5 O
SVHS
HDMI 1 X
HDMI2 XXXXXXXX
PCRGB XXXXXXXX X
O
OO
OOOXO
OO
XOOOOOO
XXXXXXX
OOOOOOO
XXXXXXX
N
N
O
O
P
I
P
&
P
A
P
A
V
A
I
L
A
B
L
E
I
F
M
A
I
N
I
S
A
V
-
5
O
P
I
P
O
&
P
A
P
O
A
V
A
O
I
L
A
X
B
L
E
O
I
F
M
O
A
I
N
X
I
S
X
A
V
-
6
(X:Not available, O : A vailable)
* DTV pip-pap options are the sam e as the TUNER input. TV and DTV c annot be in pip-pap mode together.
Addendum to the instruction book.
The following is a key to the AV inputs:
Remote Control Source Menu Input Sockets on the set
TV/DTT TV Not applicable
TV/DTT DTT Not applicable
AV1 AV-1 AV1 (scart 1)
AV2 AV-2 AV2 (scart 2)
* AV-2S (not marked see note below)
AV3 YPbPr (Component) AV3 Y PB PR L R
AV4 FAV AV4
AV5 S-VIDEO S -VHS
HDMI1 HDMI-1 HDMI-1
HDMI2 HDMI-2 HDMI-2
(there is no PC button ) PC PC AUDIO IN
Inputs can be selected by either using the appropriate buttons on the remote control or by selecting an input on
the source menu.
*For AV-2S, select from the menu.
NB. AV -2S can be used by the use of an S-VHS to scart converter plug (not supplied) or a device which has
scart ouput with S-video can be connected
PC can only be selected using the source menu.
Downloaded From TV-Manual.com Manuals
English -35 -
Page 37

UK Guarantee
Your Guarantee of Excellence
Thank you for purchasing this Hitachi Television.
In the unlikely event that this product should develop a fault, we undertake to replace or repair any part of the
product which fails due to a manufacturing defect within 12 months of the date of purchase provided that:
i) The product has been installed and used only in accordance with the instructions supplied with the product
ii) The product has not been repaired, maintained, or modified by any person other than an Hitachi authorised
engineer
iii) The product serial number has not been removed or altered
This guarantee does not apply to product acquired second hand or for commercial or communal use
This guarantee does not cover the replacement of exhausted batteries, the adjustment of user controls, or
aerial alignment.
Any parts replaced under this guarantee shall become the property of Hitachi Europe Ltd.
Please note that evidence of the date of purchase will be required before any service under this guarantee is
carried out.
THIS GUARANT EE DOES NOT AFFECTYOUR STATUT ORY RIGHTS.
IN ALL CASES OF DIFFICULT YPLEASE CONSULTYOU R HITACHI DEALER
Downloaded From TV-Manual.com Manuals
Page 38

QUICK GUIDE
IMPORT ANT - If placing TV into cabinet or alcove, ensure there is at least a 100mm (10cm) gap to the sides,
rear and top of the TV. This is to allow for adequate ventilation during operation. Please read the
main Users Guide for more safety information before installation.
insert the batteries into your handset
+
+
either connect the aerial straight to your TV...
wall
Aerial (RF)
socket
Lead
Rear view
Aerial (RF) Socket
...or connect the aerial through a VCR...
TFT-LCD TV
(RF) connector
lead VCR to TV
wall
Aerial (RF)
• It is recommended that a scart lead should be fitted between your TV and VCR to enhance your picture and sound
quality. Scart leads are essential if you have a stereo TV and VCR and wish to obtain stereo sound from your
equipment. These leads can be purchased from your Hitachi dealer or any good High Street electrical retailer.
socket
Lead
Aerial (RF) Socket VCR
ANT.IN
Optional Scart Lead
TV to VCR
AV-1
AV-2
Aerial (RF) Socket
Downloaded From TV-Manual.com Manuals
VCR
Page 39

...or through a HDMI and YP P products (DVD-RW)BR
TFT-LCD TV
• Scart Lead to
(RF) connector
AV on TV.-1
lead Device to TV
COMPONENT
ANTENNA
ANT.IN
Aerial (RF)
wall
socket
Lead
• High Definition
Your LCD Television is capable of displ aying High De finition pictures from devices such as a High Definition Satelli te Receiver or DVD
Device.These devices must be connected via the HDMI socket or Component Socket. These sockets can accept either 720p or 1080i
signals. Switch to these sources from the “Source Menu”. Also 1080 progressive mode can be available if your TV model s upports Full
HD (Optional).
Y
PB
HDMI OUT
PR
DVD RECORDER
Aerial (RF) Socket
...or through a VCR and satellite decoder.
TFT-LCD TV
RF Lead
from VCR to
Satellite
Aerial
ANT.IN
RF Lead to
Aerial
ANT.IN
Downloaded From TV-Manual.com Manuals
• Scart Lead to
AV on TV.-1
TV VCR
AV-1
AV-2
RF Lead from
VCR to TV
Satellite LNB lead
VCR
Page 40

connect the TV plug to the mains socket
UK plug
insert plug...
...and switchon
European
plug
Plug the
into the TV
Power Cord
mains lead
...
Input
Power on/off
button
switch your TV on
by pressing the On/Off button
NB: When the set is first switched on, the set will be in standby
on the front of the set will illuminate red , P+)
. Press the channel up down (P-
or numeric buttons (1, 2, 3, ...) to operate.
basic functions of remote control
and the indicator
insert plug...
Vol ume U p
Volume Down
To enter the main menu
RGB2
Downloaded From TV-Manual.com Manuals
TV/DTT
DVD S AT INPUT
AV1 AV2 AV3AV3
123
AV4 AV5 HDMI 1
45 6
HDMI2
78 9
0
I/II
....
MENU
OK
+
T o select a program me
number.
Programme Up
P
Programme Down
GUIDE
For navigation of the menus
RETURNFUNCTION
To go back to previous menu
Page 41

important note before starting Auto Setup
If you have a Video Cassette Recorder or a Satellite receiver connected to your TV please
ensure that they are switched on before automatic tuning begins. In the case of a VCR, insert
a pre-recorded tape and begin playback of your equipment. These measures ensure that all
your external equipment is tuned in during the Auto Setup procedure.
start A.P.S. (Auto Programming System)
First time installation
Choose Country
Set countryand continueinstallation
1
When the TV is turned on for the first time, the menu for the language selection
appears on the screen. The message “
language!
” is written in all language options sequentially in the menu on the
screen. By pressing or buttons highlight the language you want to set and
press . After then, will appear on screen. By
OK First time Ins tallation Menu
pressing buttons, select country item you want to set and press button.
_`
Welcome please select your
OKor
OK UK
Do you want to startaut omaticsearch?
Yes No
2
After the First Time Installation is set, the following message appears on the
screen.
To start automatic search, select “ ” to cancel select “ ” This process will
take about five minutes. To cancel searching, you can press “ ” button at any
time during the process.
3
Automatic Search
After process is completed, a message asking for
analogue channel search appears on the screen. To continue Auto Program,
first set the language, country and teletext language by using or button and
then press the or button
4
After APS is finalized, the programme table will appear on the screen. In the
programme list you will see the programme numbers and names assigned to
the programmes.
RED OK
Yes , No .
_`
5
For details, please refer to the section of the instruction book.Install Menu
important note.
Once the TV has found all your local stations, they are then automatically
assigned a programme numberand name, if available from the broadcast.
Automatic Search
Codec4:3
Codec16:9
Searching UHFc hannels62. Please wait.This will takea fewm inutes
MENU
Cancel searching
AUTO PROGRAM
Language English
Country UK
Teletext Language West
PLEASE CHECK ANTENNA CABLE
AUTO. PROGRAMMING SYSTEM
OK Cancel
APS is running...
UK - I
155,25 Mhz
Cancel
Downloaded From TV-Manual.com Manuals
Page 42

Hitachi, Ltd.
Shin-Otemachi Bldg 5f, 2-1, Otemachi 2-Chome,
Consumer Business Group
Chiyoda-Ku, Tokyo 100-0004 Japan
HITACHI EUROPE LTD.
Consumer Affairs Department
PO Box 3007
Maidenhead
Berkshire SL6 8ZE
UNITED KINGDOM
Tel: 0870 405 4405
Email:
consumer.mail@hitachi-eu.com
HITACHI EUROPE GmbH
Munich Office
Dornacher Strasse 3
D-85622 Feldkirchen bei München
GERMANY
Tel: 089-991 80-0
Fax: 089 - 991 80 -224
Hotline: 0180 - 551 25 51 (12ct/min.)
Email:
dmg-mun.service@hitachi-eu.com
HITACHI EUROPE S.r.l.
Via T. Gulli n.39
20147 MILAN
ITALY
Tel: 02 487861
Fax: 02 48786381
Servizio Clienti
Tel. 02 38073415
Email:
customerservice.italy@hitachi-eu.com
HITACHI EUROPE S.A.S
Lyon Office
Digital Media Group
94 Quai Charles de Gaulles, 69006 Lyon
FRANCE
Tel: 04 72 14 29 70
Fax: 04 72 14 29 99
Email:
france.consommateur@hitachi-eu.com
HITACHI EUROPE LTD.
Benelux Branche Office
Bergensesteenweg 421
1600 Sint-Pieters-Leeuw
BELGIUM
TEL : 0032/2 363 99 01
FAX: 0032/2 363 99 00
Email :
info@hitachi.be
HITACHI EUROPE LTD.
Na Sychrove 975/8
101 27 Pr aha 10 Bohdalec
CZECH REPUBLIC
TEL : 267 212 383
FAX: 267 212 385
Email :
dmg.eeu@hitachi-eu.com
HITACHI EUROPE S.A.
364, Kifissias Ave. & 1, Delfon Str.
152 33 Chalandri
Athens
GREECE
Tel: 1-6837200
Fax: 1-6835694
Email:
dmgservice.gr@hitachi-eu.com
HITACHI EUROPE S.A.
Gran Via Carles III, 86 Planta 5ª
Edificios Trade - Torre Este
08028 Barcelona
SPAIN
Tel: 93 409 2550
Fax: 93 491 3513
Email:
atencion.cliente@hitachi-eu.com
HITACHI EUROPE AB
Box 77
S-164 94 KISTA
SWEDEN
Tel: 08 562 711 00
Fax: 08 562 711 11
Email:
csgswe@hitachi-eu.com
HITACHI EUROPE AB
(Norway Branch Nuf)
Strandveien 18
1366 Lysaker
NORWAY
Tel:
67519030
Fax: 67519032
Email:
csgnor@hitachi-eu.com
HITACHI EUROPE AB
Egebækvej 98
2850 Nærum
DENMARK
Tel: 43 43 60 50
Fax: 43 43 60 51
Email:
csgden@hitachi-eu.com
HITACHI EUROPE AB
Lars Sonckin kaari 16
FIN-02600 ESPOO
FINLAND
Tel: 010-8503085
Fax: 010-8503086
info.finland@hitachi-eu.com
Email:
Downloaded From TV-Manual.com Manuals
www.hitachidigitalmedia.com
 Loading...