

Hitachi DIV57 Owner’s Manual
H ITAC H I
DIGITAL$AI"ELUTESYSTEM

A Ax
CAUTION: TO REDUCE THE RISK OF ELECTRIC SHOCK,
DO NOT REMOVE COVER (OR BACK).
NO USER-SERVICEABLE PARTS INSIDE.
REFER SERVICING TO QUALIFIED SERVICE PERSONNEL.
This symbol is hnte_ded to alert the user to
the presence of uninsulated "dangerous
voltage** within the product's enclosure that
may be of significant magnitude to
constitute a risk of electric shock to per son_
This symbol is intend_l to alert the uger to
the presence of important operating and
maint chance (servi_ag) instructions in the
literature accompanying the appliance.
Trademarks and Copyrigh_are contained in
the _eceiver and this manual is copyright © 1995, 1996 by
Hughes Network Systems, Inc. Some features are patent
pending. HNS InsightTM , and A1phaTuneTM are trademarks
of Hughes Network Systems, Inc. QuickTuneTM is a
trademark of Hitachi Home Electronics, Inc. DIRECTV _
and DSS®are registeredwade.marksand Direct"IacketTM is a
trademark of DIRECTV, Inc., a Hughes Electronics
Company. USSB®and Enter_ament Plus® are registered
trademarks of United States Sam!lite Broadcasting
Company, Inc. NFL Sunday Ticket* is a registered
trademarkof the National Foothali League.N'BA League
passsr_ is a service rn_k of NBA Properties, Inc. NHL
Center IceTM is a service mark of the National Hockey
League. ESPN Full CourtTM is a trademark of ESPN
Enterprises, a subsidiary of ESPN, Inc. ESPN® is a
regismred trademark of ESPN, Inc. MLB Extra IrmmgssMis
an official service mark of Maior League Baseball Properties,
Inc. HBO ® and Cinemax_ are registered trademarks of
Home Box Office, a division of Tune Warner
Entertainment Company, LP. ShowfimesM, The Movie
ChannelsM, and FHX _ are service marks of Showdme
Networks ®, Inc. MTV: Music Tdevidon®, VHI Music
First_, and Nickelodeon ®are registered trademarks of M'rV
Networks, a division of V'mcomInternational, Inc. Comedy
Central® is a registered trademark of Comedy Partners.
Lifetime Television® is a registeredtrademark of Lifetime
Entertainment Services. Disney is a copyright of the Walt
Disney Company. The Discovery Channel® is a registered
trademark of The Discovery Networks. CNN ® is a
registered trademarkof Turner Broadcasting System, Inc.
A&E® is a registered trademarkof A&E Tdevisiot_ El is a
registered trademark of El Entertainment Television, Inc.
Other product, corporate names, program titles, network
names, and logns may be the property of other companies,
and are used within this manual and related DSS recdver
software only for explanation to the owner's benefit,
without intent to infringe. This product is the subject of one
or more U.S. or foreign patents pending.
Disclaimer--Every effort has been made to ensure the
correctness and completeness of the material in this
document. No company shall be liable for errors contained
herein. The information in this document is subiect to
change without notice. No warranty of any kind is made
with regard to this material, including, but not limited to, the
implied warranties of merchantability and fitness for a
particnla_ purpose.
Macrovlslon Irlforrl_tion--Tl_s device incorporates an
• anficopy process technology that is protected by U.S.
patents and other intellectual property fights. The anficopy
process is licensed for noncommercial, home" use only.
Reverse engineenng or disassembly is prohibited.
Note on Recording Programming--Most television
programs and films are copyrighted. This means that
someone has ]effalrights governing the reproductionand
distribution of this material. In certain drcumstances,
copyright law may apply to private in-home taping of
copyrighted matemls. In most cases, it is permissible to
record for persoral use, as long as you do not sell the
material. You must act responsibly in this area - check into
the matter if you are unsure.
Some pay-per-view programs may be licensed from
producers as "view only" programs. These are copyrighted
ptograrm and may not be copied or reproduced for any
purpose without the express written perrmssion of the
copyl_ht owner.
DSS Programminff---For subscription information, or
to resolve prohlems related to DSS progranmang, call the
serviceprovxlets, induding DIKECTV at 1-800-DIRECTV
(34%3288)and USSB at 1-800-204-USSB(8772).
Hitachi-brand DSS Hardware and Installation--
To arrange for professional installation of your DSS system,
ask questions, or to resolve problems related to your
Hitachi-brand DSS system, contact your dealer. If additioml
information is needed, please contact Hitachi toli free at 1-
800-477-1212.
Hitadai Home Eleca'onics (America),Inc.
3890 Steve ReynoldsBoniev_d
Norcross, GA 30093
System Model#:
Receiver Model #:
Receiver Serial #:
Access Card #:
IMPORTANT SAFETY INSTRUCTIONS
PERTAINING TO A RISK OF FIRE, ELECTRIC
SHOCK, OR INJURY TO PERSONS
Inadditionto thecarefulattentiondevotedto the qualitystandardsin themanufactureofyour DSSproduct,safetyisa majorfactor
inthe designofeveryinstroznen_However,safetyisyourresponsil;flity,too.
The followinginformationwillhelpto ensureyourenjoymentandproper use of the DSS system.Pleasereadthisinformaaon
carefifllybeforeinstalli_ operatingandusingyourDSSequipment
Installation
1. Read and Follow Instructions--All the sffcty and
operating instr_ctiom shoed be read befure the DSS
productisoperated.Follow alloperatinginsm_rions.
2. Retain Instructions--The safety and operating
instructions should be retained for future reference.
3. Heed'Warnings--Complywith allwarningson the
DSSproductand intheoperatinginstructions.
4. Polarlzatlolr--ThJs DSS product is equipped with a
polarized alternating_t line plug (a plug haxdng one
blade wider than the other). This plug will fit into the power
outlet only one way. This is a safety feature. If you are
unable to insert the plug flatlyinto the oudet, ny reversing
the plug. If the plug fails to fit,contact your decrtidan to
rephce your obsolete outlet. To prevent electric shock, do
not use this polarized plug with an extension cord,
receptacle, or other outlet unless the blades can be fully
inserted without blade exposure. If you need an extension
cord, use a polarized cord.
should never be blocked by phdag the product on a bed,
sofa, rug, or other similarsurface. This product should never
be placed near or over a radiator or heat registex,or in a
built:tn installationsuch as a bookcase or rack unless proper
ventilation isprovided.
9. Attachments--Do not use attachments unless
recommended by the DSS product manufactur_ as they
may cause hazards.
10. Water and Moisture--Do not use this DSS product
near water--fur example, near a bath tub, wash bowl,
kitch_ sink or laundry tub, in awet basement, or near a
swimming pool and the like.
5. Power Sources--Thi_ DSS product should be
operatedonly from the type of power source indicated on
the marking label. If you are not sure of the type of power
supply to you home, consult your DSS dealer or local power
company. For DSS products intended to operate from
battery power, or other sources, refer to the operating
instsuciions.
6, Overloading_Do not overload wall oudcts or
extension cords as this can result in a risk of fire or electric
shock. Overloaded ac outlets, ex'l_a_on cords, flayed power
cords, damaged or cracked wire insulation, and broken plugs
are dangerous. They may result in a shock or fire hazard.
Periodicallyexamine the cord, and ifits appearance indicates
damage or deteriorated insulation, have it replaced byyour
servicetechnician.
7. Power Cord Protection---Power supply cords
should be routed so that they arenot likelyto be walked on
or pinched by items placed on or against them, paying
particular attention to cords at plugs, and the l:_mt where
they exit the DSS product.
8. VentlletiorP-Slots and openings in the case are
provided fur ventilation to ensure reliable operation of the
DSS product and to protect it from overheating.'These
openings must not be blocked or covered. The openings
11. Accessories--Do not phce this DSS product on an
unstable cart, stand,bracket, or table. The DSS product may
fall, causing serious injury to a child or adult as well as
serious damage to the DSS product Any mounting of the
product should follow the manufacturer's instructions.
12. Moving--A DSS product and cart comVmadon
should be moved with care. Quick stops, excessive force,
and uneven surfaces may cause the DSS product and cart to
ov_
13. Satellite Dish Antenna Gruunding_The
outdoor antenoa used to receive satd!ite signals and the
cable used to connect the antenna to the indoor receiving
unit are requared to comply with local instslladon codes and
the approp_te sections of the National E_lecthc Code
(NEC) and inparticular Article 810-15, which covers proper
installationand grounding of television receiving equapmea-tt,
as weUas to Arfide 820_0, wblch spedfies that the satellite
dish cable ground shall be connected to the grounding
system of the building as dose to the pffmt of cable entry as
praedcal. These codes require proper grounding of the metal
structure of the outdoor anmnna and grounding of the
connecting cable at a l_mt where it enters the house (or
other buiJ.din_. If you are having a professional installer
make the installation, the iostaller must observe installation
codes. The "SatelliteAntenna Installation Guide" provided
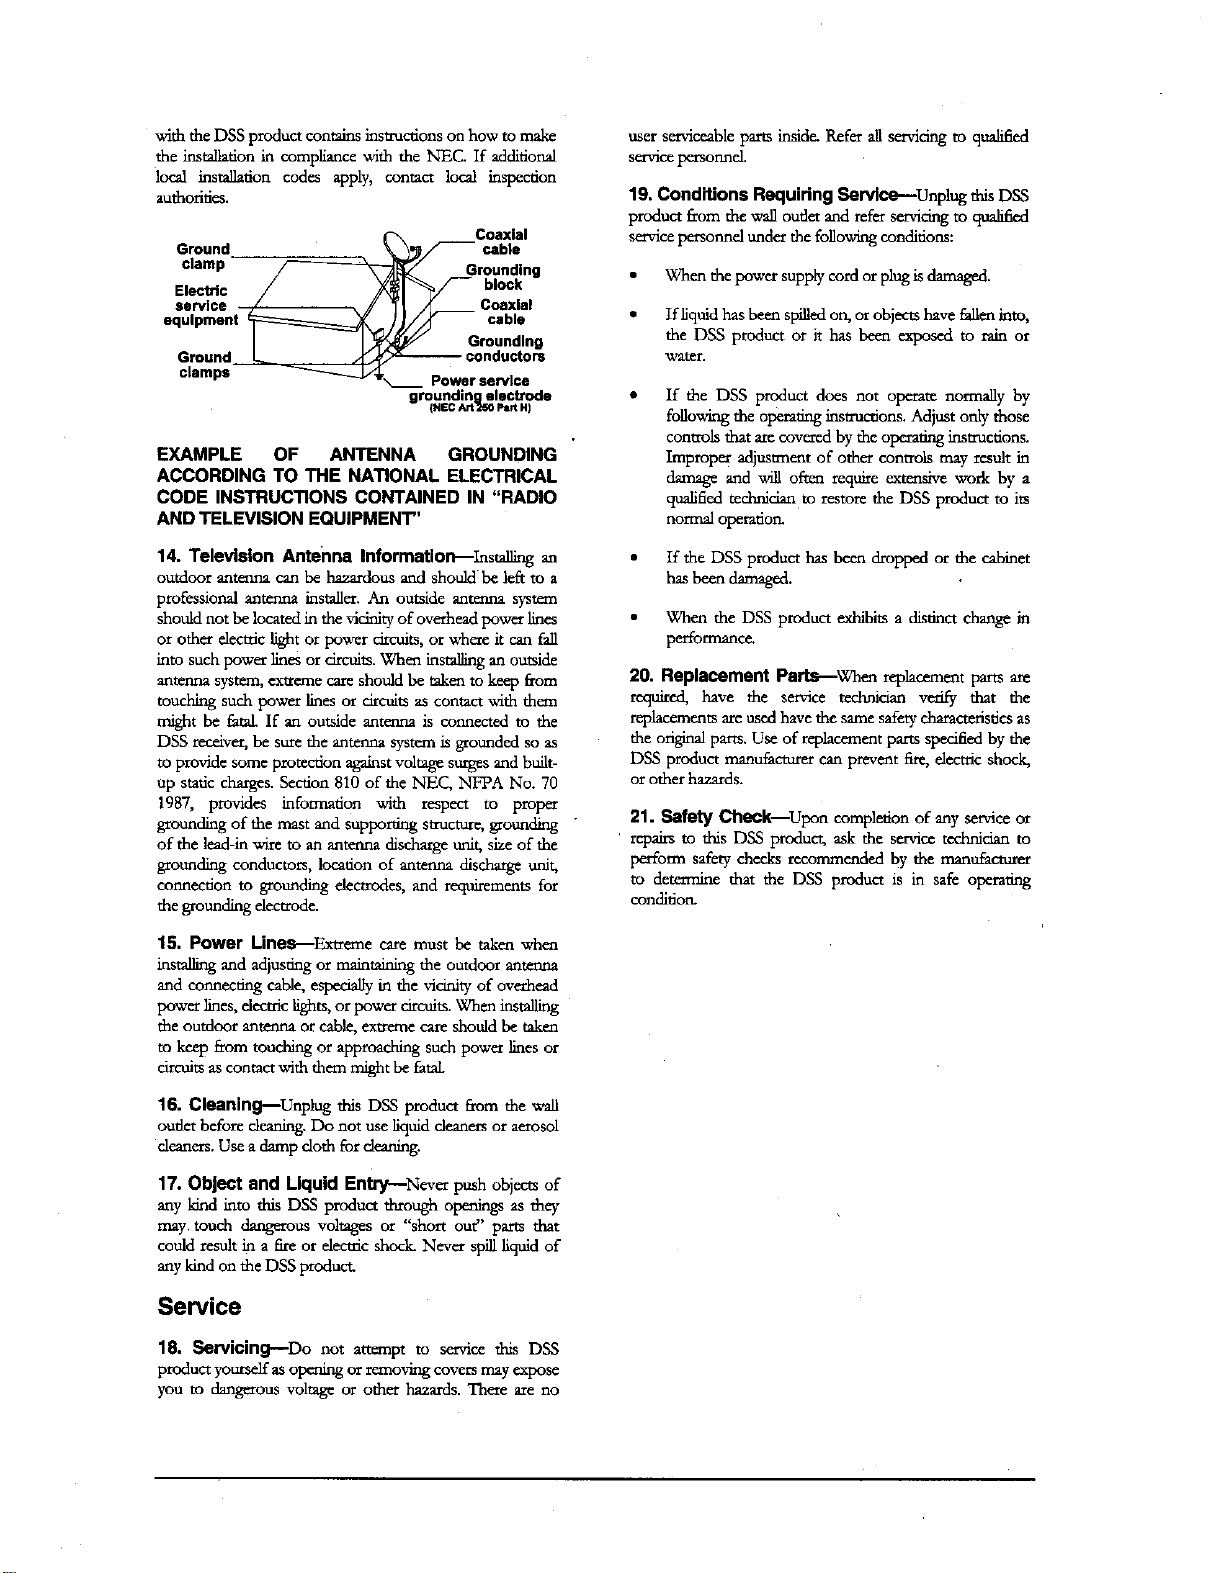
withtheDSSproductcontainsinstructionsonhowtomake
theinstallationincompliancewiththeNEC. If additional
local installation codes apply, contactlocal inspection
authorities.
Ground
Electric
service
equipment
clamp
Ground
clamps
grounclin electrode
EXAMPLE OF ANTENNA GROUNDING
ACCORDING TO THE NATIONAL ELECTRICAL
CODE INSTRUCTIONS CONTAINED IN "RADIO
AND TELEVISION EQUIPMENT"
cable
Grouncllng
block
Coaxial
cable
oaxlal
Groundlng
nductom
Power service
(NECArtg_ PartH)
user serviceable parts inside. Refer all servicing to qualified
servicepetsormel.
19, Conditions Requidng Service--Unplug this DSS
product from the walloutlet and refer servicing to qualified
sexvicepersormel under the followingconditions:
• When the power supply cord or plug is damaged.
• If liquidhas been Sl_flledon, or objects have falleninto,
the DSS product or it has been exposed to rain or
w_tel_
If the DSS product does not operate nomaally by
following the operating insmactions. Adjust only those
controls that axe covered by the operating instructions.
Improper adjustment of other controls may result in
damage and will often require extensive work by a
qualified technician to restore the DSS product to its
normal operation.
14. Television Antenna Informatlon_Ins_d]L_
outdoor anterma can be hazardous and should be left to a
professional antenna installer. An outside antenna system
should not be located in the vicinity of overhead power lines
or other electric light or power circuits, or where it can fall
into such power lines or circuits. When installingan outside
anw.noa system,extreme care should be token to keep from
touctfir_ such power lines or circuits as contact with them
might be fatal. If an outside antenna is connected to the
DSS receiver, be sure the antenna system is grounded so as
to provide some protection againstvoltage surges and built-
up static _s. Section 810 of the NEC, NFPA No. 70
1987, provides information with respect to proper
grounding of the mast and supporting structure, grounding
of the lead-in wire to an antenna discharge unit, size of the
grounding conductors, location of antenna discharge unit,
connection to grounding electrodes, and reqmrements for
the grounding electrode.
15, Power Unes.--Ext_e caremust be taken when
installing and adjusting or maintaining the outdoor antenna
and connecting cable, espedalIy in the vicirfityof overhead
power lines, decuic lights,or power circuits. When installing
the outdoor antenna or cable, exueme care shouldbe taken
to keep from touching or approaching such power lines or
dmfits ascontact with them might be fatal.
16. Cleaning_Unplug this DSS product fi'om the wall
outlet before clemm_. Do not use Iiquid cleaners or aerosol
cleaners. Usea clamp cloth for deanmg.
If the DSSproducthas been droppedor the cal:;met
hasbeen damaged.
• When the DSS product exhil:;ttsa distinct change in
performanc_
20. Replacement Parts_Whe_ rephc_-nent parts are
required, have the service technician verify that the
replacementsare used have the same safety characteristicsas
the cVnginalparts. Use of replacement parts specified by the
DSS product manufacturer can prevent fire, electric shock,
or other hazards.
21. Safety Check--Upon completion of any service or
repairs to this DSS product, ask the service technician to
perfoma safety checks recommended by the manufacturer
to detemame that the DSS product is in safe operating
condition.
17. Object and Liquid Entry---Never push objects of
any kind into this DSS product through openings as they
may. touch dangerous voltages or "short out" parts that
could result in a fire or electric shock. Never si_fllliquid of
any kind on the DSS product.
Service
18. Sorvioinff--Do not attempt to service this DSS
product yomself as operang or removing covers may expose
you to dangerous voltage or other hazards. There axe no
FEDERAL COMUNICATIONS COMMISSION
(FCC) REGULATORY INFORMATION
Federal Communications Commission (FCC)--
The Hitachi-brand DSS system complies with both Part 15
andPart 68 of the FCC rules.
Part 15 compliance--
This equipment has been tested and found to comply with
the limits for a Class B digitaldevice, pursuant to Part 15of
the FCC rules. These limits are designed to provide
reasonable protection against harmful interference in a
residential installation. This equipment generates, uses and
can radiate radio frequ_y energy and, if not installed and
used in accordancewith the instructions, may causeharmful
interference to radio communications.
However, there is no _tee that interfcmence will not
occur in a particular installaton. If this equipment does
cause harmful interference to radio or television reception,
which can be detemtned by removing and applying power
to the equipment, the usex is encouraged to tiy to correct
the interference by one or more of the following measures:
• Reorientor relocate the receiving antenna.
• Increasethe separationbetween the equipment and
thereceivez,
• Connect the equipment into an oudet on a circuit
different from that to whinh the receiver is connected.
detemaned and until mparr has been made. If this is
not done, the telephone company may mmpomfily
disconnect service.
3.
The telephone company may make changes in its
technicaloperations and ptxxedures; if such changes
affect the compatibility or use of this device, the
telephone company is requiredto give adequate notice
of the changes,You willbe advisedof your fight to file
a complaint with the FCC.
zk
If the telephone company requests information on
what equipment is connected to their lines, infoma
them o£
the telephonenumber daisunitis connected to.
the mager equivalence number (REN). The number
can be found on a label located on the bottom of the
equipment.
the UniversalSer_ce Order Code (USOC) jack
required. This equipment requites a USOC RJ11 jack.
the FCC reg_smationnumbez, The number can be
found on a label located on the bottom of dais
eqoipmenr.
• Consult the dealer or an experienced radio/TV
technician for help.
The user may find the following boomer, prepared by the
Federal Communications Commission, helpful: "How to
Idenufy andResolve Radio andTV Interference Problems."
This booklet is availablefrom the U.S. Government Printing
Office, Washington, DC,
To meet FCC requtrements, only peripherals (computer
input/output devices, r_zminals, printers, ercb certified to
comply with the Class B limits may be attached to this
device. Operation with non-certified pefiphezals is Iikelyto
resultin interference to radioand TV reception.
To meetFCC requirements,shieldedcablesare requiredto
cormectthe deviceto a personalcomputer,peripheral,or
othezClassB cerdfieddevice.
Part68compliance---
The FCC has establisbed Part 68 of the FCC Rules,
which perr_t this device to be directly connected to
the telephone network. Slandardized jacksare used for
these connections. This equipment should not be used
on cornlines or party lines.
2. If this device is malfimedoning, it may also be causing
harm to the telephone network; this device should be
disconnected until the source of the problem can be

TABLE OF CONTENTS
A FIRST LOOK AT THE
HITACHI-BRAND DSS SYSTEM ........ 1
Hitachi Brings You the Most Full-Featured Digital
Satellite System ......................................................... 1
What You Should Do First ..................................... 1
How Does All This Work? ..................................... 2
The Components of the Hitachi Digital Satellite
System ........................................................................ 3
The Hitachi Satellite Antenna ................................ 3
The Hitachi Digital Satellite Receiver ................... 3
The Hitachi Remote Control .................................. 5
SETTING UP YOUR HITACHI DIGITAL
SATELLITE SYSTEM...., ..................... 7
Don't Panic--It's Easier Than You Think ............ 7
Installing Batteries in Your Remote Control .........8
Choosing the Best Connection for Your
Entertainment System .............................................. 8
Hook Up the Audio/S-video Signals ...................... 9
Hook Up the Audio/Video Signals ....................... 10
Hook Up the RF Signals ....................................... 10
Hook Up to a Stereo System ................................ i 1
Finishing Up ......................................................... 11
One Spot--22,300 Miles in Space---and You'll
Find It ...................................................................... 15
Determine Where to Point Your Satellite Dish....15
The DISH POINTING MENU ............................. 15
The ZIP CODE and LATITUDE & LONGITUDE
Screens.................................................................. 16
ALIGNMENT RESULT Screen .......................... 16
Connecting the Satellite Dish ................................. 16
Positioning the Satellite Dish ................................. 17
The SIGNAL STRENGTH Screen ...................... 18
Fine Tuning the Antenna Alignment .................... 19
Authorizing Your Service ...................................... 20
WATCHING DSS PROGRAMS ON
THE HITACHI RECEIVER .................. 21
So Many Choices---So Many Ways to Choose.....21
Basic Channel Changing ........................................ 21
The Channel Banner............................................. 21
The Information Banner ....................................... 22
QuickTuneTM ........................................................ 22
AlphaTune TM ........................................................ 22
The Browse Banner .............................................. 23
The Logo Banner ................................ :................. 23
Connecting the VCR Control Cable ..................... 12
Finding the VCR's Remote Control Sensor ......... 12
Now You Can Turn It On ...................................... 12
CONTROLLING THE HITACHI-BRAND
DSS RECEIVER ................................. 13
Now It is Time for You to Take Control.*............. 13
Front Panel vs. Remote Control Keys .................. 13
Basic Navigation ..................................................... 13
POINTING YOUR HITACHI
SATELLITE ANTENNA ..................... 15
Alternate Services ................................................... 24
Alt. Audio .............................................................. 24
Data ...................................................................... 24
The PROGRAM GUIDE ............. .......................... 24
Moving Around the Guide ..................................... 25
Filtering the Guide ................................................. 25
Category ............................................................... 25
Type ...................................................................... 26
List ........................................................................ 26
Guide .................................................................... 26
Class ..................................................................... 26
Getting Program Information ............................... 26
The INFORMATION Screen ................................ 27
Done ..................................................................... 27
View ...................................................................... 27
Schedule ................................................................ 27
Schedule To View ................................................. 28
Cancel Schedule ................................................... 28
Buy $2.99 .............................................................. 28
Buy Options .......................................................... 28
Cancel Purchase ................................................... 28
Times ................................................................ :...29
YOUR HITACHI RECEIVER'S MAIN
MENU ................................................. 31
The Main Menu May Be Considered Your Home
Base .......................................................................... 31
Activities .................................................................. 31
Program Guide ..................................................... 31
Exit To Viewing .................................................... 32
Event Timer .......................................................... 32
Messages ............................................................... 33
READ MAIL ........................................................ 33
Limits and Lists ...................................................... 34
Spending ............................................................... 34
Ratings .................................................................. 34
Fay. Lists .............................................................. 35
Purchased PPVs ...................................................... 35
History .................................................................. 36
Upcoming ............................................................. 36
System ........................... ........................................... 36
Setup Menu ........................................................... 37
Lock ...................................................................... 37
Unlock .................................................................. 37
LOCK OVERRIDE .............................................. 38
PREFERENCES ON YOUR HITACHI
RECEIVER .......................................... 43
Customize Your Hitachi Menus to Appear the
Way You Want ....................................................... 43
Done ..................................................................... 43
On-Screen Guide Width ....... ................................. 43
1V2Hrs. or 2 l-lrs ................................................... 43
Channel Sort Option ...... ....................................... 44
Number or Name .................................................. 44
Multi-Color Guide .................................................. 45
Yes or No ..................................................... _........ 45
Picture Size .............................................................. 45
4:3 or 16:9 ............................................................ 45
Label for Fourth List ............................................. 45
Fay. D or Family .................................................. 45
Receiver ID# ............................................................ 46
DSS 1 or DSS 2 ..................................................... 46
PROGRAMMING YOUR HITACHI
REMOTE CONTROL .......................... 47
Use Your Remote Control to Tame Other A/V
Devices ..................................................................... 47
Programming the Remote Control ....................... 47
Code Scan ............................................. ................ 47
Code Entry .................................................. :......... 48
YOUR HITACHI RECEIVER'S SETUP
MENU .......... ....................................... 39
Use the Setup Menu to Access Installation and
Customizing Features ............................................. 39
Main Menu ........................................................... 39
Preferences ........................................................... 39
Dish Pointing ........................................................ 40
Default Audio ....................................................... 40
System Test ........................................................... 40
Assistance ............................................................. 41
New Access Card .................................................. 41
VCR Setup ............................................................. 41
QuickTune Setup ................................................... 42
Using the Remote Control ..................................... 50
QUESTIONS AND ANSWERS., ......... 51
Questions? Did We Forget to Tell You Something?
*...........°.....*****.*......°o*******.***..**.....oo**.****.*.**.....*........51
INDEX ..................................................................... 53
A FIRST LOOK AT
THE HITACHI-BRAND
DSS ®SYSTEM
Hitachi Brings You the Most
Full-Featured Digital Satellite
System
You did it! You've selected a Hitachi-brand DSS system. This system
provides the most advanced digital video and audio capabilities
available today.
You now have the capability to receive over 200 channels of video programming, CD-quality
audio, and data services. This may seem like magic, but it isn't. It is amazing, though!
What You Should Do First
Your Hitachi digital satellite system is both a compficated technical mirade and an easy to operate
source of entertainment. You should complete the following steps to achieve the greatest
performance from your system:
• Readthe included guides and manuals to familiarize yourself with the system.
• Install your DSS receiver.
• Install your sateilite antenna and cable.
• Align the antenna toward the satellite.
• Arrange for programming from the services providers.
• Sit back and enjoy digital satellite TV!
Page 1

HITACHI DIGITAL SATELLITE SYSTEM OWNER'S MANUAL
How Does All This Work?
I
101°
Longitude
DSS
/
Satellite
uplink
facility
Satellite
antenna
III
Programming Authorizations
from studios
and networks
The DSS network
Many film studios, news organizations and other broadcasters provide their video, audio, and data
services to DIRECTV and USSB uplink centers. These service providers then digitally transmit
the signals 22,300 miles in space to a grouping of three satellites. From there the digital signals are
beamed back to earth where they are received by your satellite dish antenna. The signals then go
into your DSS receiver where they undergo extensive processing to determine if you are
authorized to have access to them. The signals are then reconverted into high quality video and
audio that you can enjoy on your television. The telephone connection is used by your DSS
receiver to report back to the service providers any purchase activity.
Page 2
A FIRST LOOK AT THE HITACHI-BRAND DSS SYSTEM
The Components of the Hitachi
Digital Satellite System
There are three main components of your Hitachi-brand DSS system. They are the satellite
antenna, the DSS receiver, and the remote control Take a few minutes to read about each of
these components.
The Hitachi Satellite Antenna
Reflector
Mounting
LNB
Bracket
Mast
/
LNB Support Arm
Base Plate
The Hitachi satellite antenna/dish
The satellite antenna is the component that receives the digital sigfials. It must be mounted to a
solid outdoor surface that allows a clear view of the southern sky.
Depending on the system model you have chosen the carton _ include an 18-inch steel or
composite reflector, also known as a "dish" At the end of a tubular arm, there is a low noise
block (LNB). Your system vail have either a single LNB or a dual LNB. The single LNB has one
connection, allowing use of a single DSS receiver. The dual LNB has two connections, allowing
use of two DSS receivers or more if you are using a switching distribution box. The mountLng
bracket and b_ise make adjustment easy during installation. Once the dish has been properly
positioned to point to the satellite, you should never need to adjust it again. A companion
document to this manual, Satelh'teAntenna Installation Guide, provides specific information for
installing the Hitachi satellite antenna.
The Hitachi Digital Satellite Receiver
The Hitachi-brand DSS receiver is one of the smallest available. From the front pand keys almost
every feature of yottr Hitachi receiver can be accessed.
Page 3
HITACHI DIGITAL SATELLITE SYSTEM OWNER'S MANUAL
/
HITACHI
The front of the Hitachi digital satellite receiver
Behind the door on the right side of the receiver is your access card. This special card
contains infomaation about your level of service and holds pay-per-view (PPV) purchase
activity. This card should not be removed except to protect your DSS receiver from
unauthorized use or to replace the card when a new one is supplied by your service
provider.
The power key _ is used to turn your DSS receiver on and off. The power light
next to the power key will illuminate when the unitis on. Any off-air signal, such as cable
TV or local programming, connected to the IN FROM ANT jack is passed through to
the OUT TO TV jack when the power is in the off condition.
The information key _ is used to display descriptions of programs and channels on
your TV screen.
At any time, pressing the progmrn guide key _[]_) will initiate the display of the
PROGRAM GUIDE, where you can see a listing of aUavailable programs.
\
r A "
CnRD
The DSS Access Card
The four directional keys, up (A), down (V), left (_), and right ()), are used to move the
highlight around the program guide and menus. They also provide access to the Browse Banner
and the Logo Banner when menus aren't displayed.
The select key _ is used to specify that a highlighted guide or menu selection is the one
desired.
0
The rear of the Hitachi digital satellite receiver
The rear of the Hitachi receiver has numerous jacks for connection to your audio/video
entertainment system. You will also find the power cord permanently connected to the back.
The SATELLITE IN F-type jack is for connecting the cable from your satellite dish to your DSS
receiver. Be sure that you use RG-6 cable only.
/
Page 4
AFIRSTLOOKATTHEHITACHI-BRANDDSSSYSTEM
The IN FROM ANT F-type jack is an input where you can connect the cable from an RF
terrestrial source such as an off-air antenna or cable TV service.
The OUT TO TV F-type jack is an RF output which you may connect to your TV or VCR
(depending on your entertainment system). Note that the CH3/CH4 switch on the upper left
enables you to select the channel for your TV on which the DSS progranammg appears.
The two pairs of phono-type AUDIO output jacks, labeled (L and R) and color coded to indicate
left and fight, can be used for connection to your TV, VCR, or audio system.
The two phono-type composite VIDEO output jacks are color coded in yellow. You may use
either or both of these jacks for connection to your TV or VCIL
The multiple pin S-VIDEO jack is for high quality output of DSS video. You should use this jack
to achieve the dearest picture for your TV or VC1L Only newer high-end TVs, SVHS VCRs and
Hi8 VCRs suppoi't S-video type connections.
The special 15-pin WIDE BAND DATA port is intended for advanced applications such as
broadcast data services when available. Do not attempt to use this connectorudtbouta Hitachi-approved
wideband data cabk.
The VCR CONTROL mini-jack is for connecting the VCR control cable that was included with
your system. With this cable, your Hitachi satellite receiver can interface with most popular VCRs
to record selected programs automatically. See the "Finding the VCR's Remote Control Sensor"
section in Chapter 2, "Setting Up Your Hitachi Digital Satellite System" for proper placement of
the transmitter end of the VCR control cable.
The standard RJ-11 modular PHONE JACK is for connecting your DSS receiver to your phone
line. This phone connection is necessary to access certain program offemags from your service
providers. Any calls generated by the DSS receiver are toll free. The telephone line connection
should not normally interfere with your telepbone operation. If you should need to make a call
while it is calling in a report, simply disconnect the phone line from the DSS receiver.
The Hitachi Remote Control
Your Hitachi remote control can control a lot more than just the DSS receiver. It is what is
known as a universal remote control, meaning that with it you can control many popular
televisions, VCRs, and audio components. What's more is that with this state-of-the-art remote
you have more control of your Hitachi digital satellite receiver than with any other brand available
today!
Before we get into the features, you should know that the Hitachi remote control is available in
two models. One can control components induding DSS, TV, cable boxes (CBL), and VCRs.
The other can control these devices, as well as many amplifiers (AMP), compact disc players, and
laser disc players (DISC).
The remote control uses invisible infrared light to send signals to your components when you
press the keys. You must aim your remote toward your component for it to receive the
command.
Descriptions and details of each individual key wi!l be given throughout this manual as they apply,
although an overview follows.
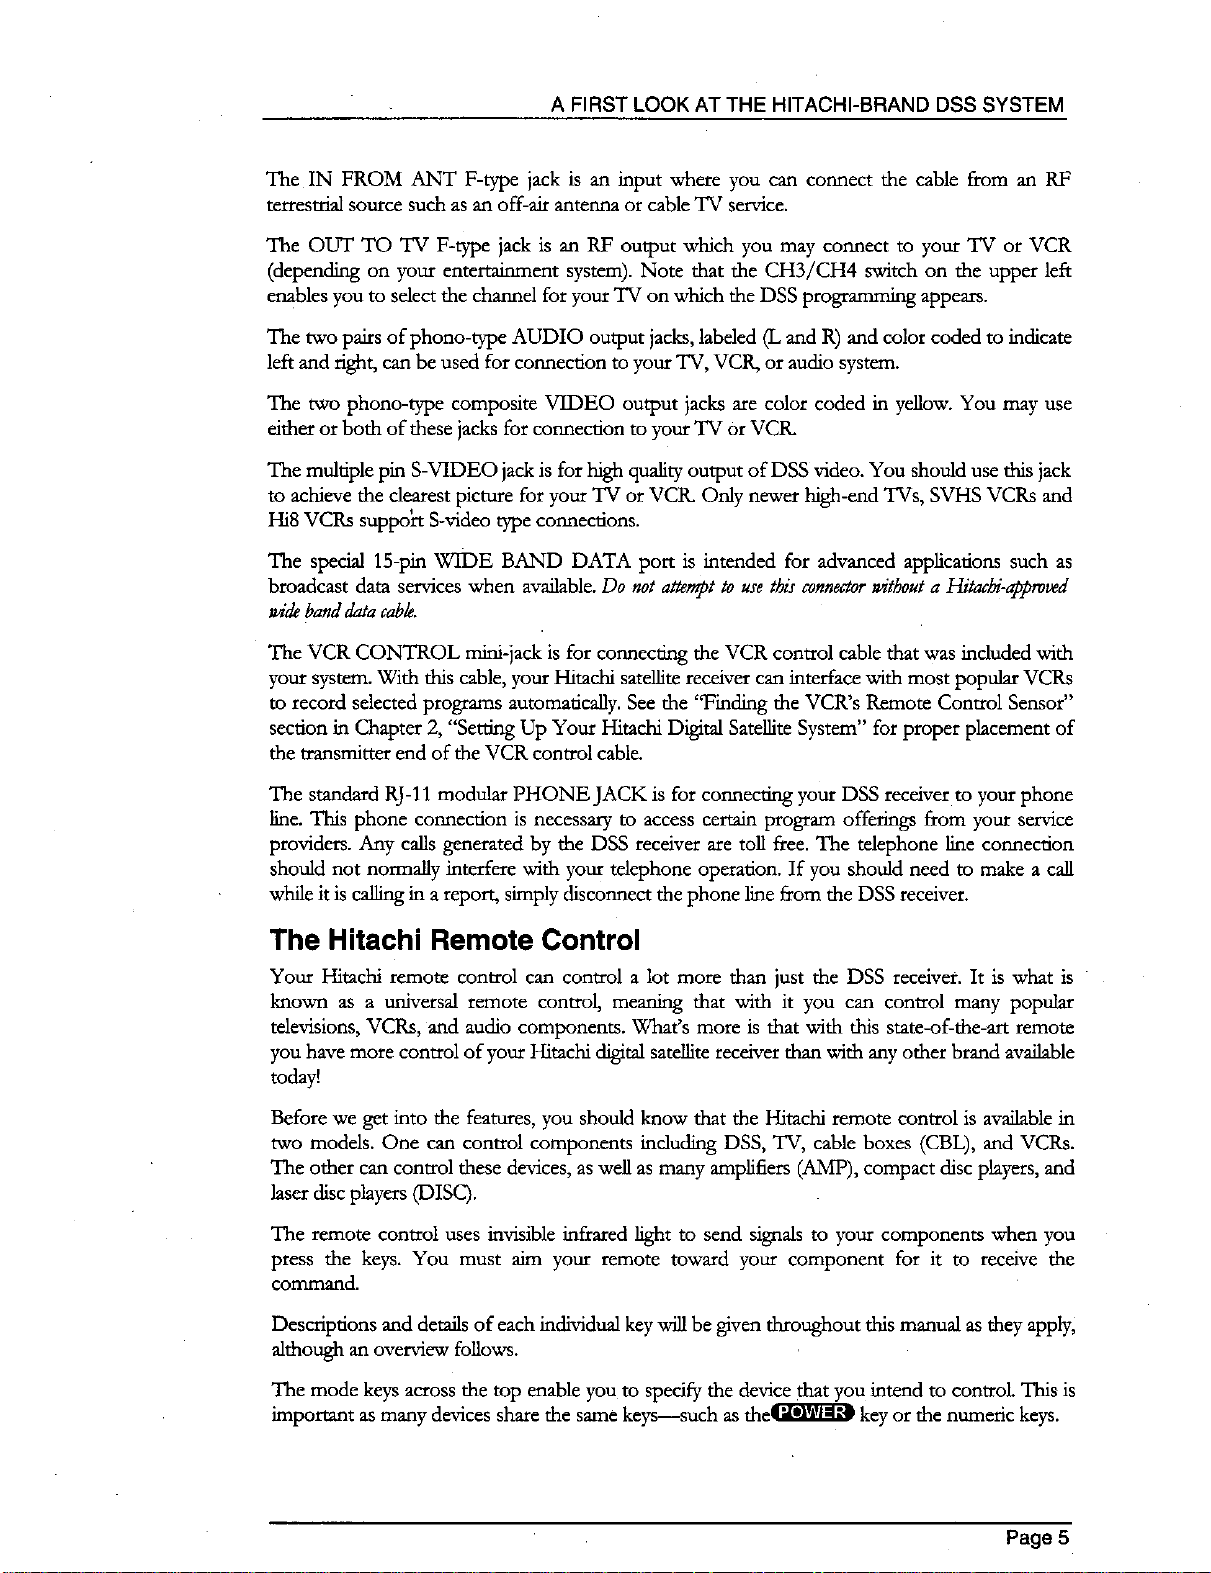
The mode keys across the top enable you to specify the device that you intend to control. This is
important as many devices share the same keys--such as thel["a_R_l_ key or the numeric keys.
Page 5

HITACHIDIGITALSATELLITESYSTEMOWNER'SMANUAL
The windowed keys are labeled through clear keys. There are three
positioned under the dear key simply by sliding the switch on the
side of the remote control. When the switch is in the top position,
the keys are for the Hitachi QuickTune TM feature enabling access to
your nine most preferred channels at the press of a key. When the
switch is in the middle position, the keys are for DSS control
features. When the switch is in the lower position, the keys become
additional mode keys labeled to support VCRs (and possibly
amplifiers labeled AMP and disc players labeled DISC). Note that
the three keys (circle, triangle, and square) at the top of the
windowed DSS page perform no fimcdon and are provided for
features in future DSS products.
The arch of keys immediately below the windowed ke_e
frequently used functions. These keys indude main menu (II__RIB,_,
exit ((_][_), program guide (l_l_), information (1[]_), and
input
The directional pad is four keys in one. Gently rocking this key in a
direction will cause the on-screen highlight to move in the direction
in which it was pressed. The key positions will be referred to in this
manual as _, ), A, and V.
The select key (l_!_) is one of the most important keys.
Pressing the _ key will indicate to your DSS receiver that
you wish to choose the highlighted item. Also, pressing
will initiate the display of the PROGRAM GUIDE when you are
watching DSS prograrrm-fing.
sets of labels, which can be
0
(2D(2D)
The remaining keys are some DSS-specific keys and common
device keys induding numbers, cbannd up and down, etc. The
fimcfions of these keys change depending on the currently selected
device.
Please refer to Chapter 3, "Controlling The Hitachi-brand DSS
Receiver" for more remote control capabilities and Chapter 9,
"]Programming Your Hitachi Remote Control" for reaching your
Hitar.hi remote control about your other audio/video components.
VoL CH
HITACHI
The Hitachi Remote Control
Page 6
SETTING UP YOUR
HITACHI DIGITAL
SATELLITE SYSTEM
Don't Panic--It's Easier Than
You Think
Setting up your new Hitachi digital satellite system is much easier
than assembling a train set or a bicycle. You should be watching DSS
programming in a very short time. t
This chapter provides step-by-step instructions for setting up your Hitachi digital satellite system
and connecting it to your television or entertainment system. As you are reading this now, it is
assumed that you have already opened and unpacked the box.
The receiver carton includes the receiver itself, an Access Card (aLready installed in the receiver
behind the door), a remote control with four AAA batteries, a 6-foot length of coaxial cable, a 25-
foot length of telephone cord, a 6-foot A/V cable, a VCR Control cable, and this manual. Some
models may also include an S-video cable. Contact your dealer if any part is missing or damaged.
Please save all packing materials until the installation of your system is complete in case anything
needs to be returned.
You now need to decide where you want to place your DSS receiver. Avoid installing the receiver
in a location where the power cord or cables could be inadvertently disconnected. Obviously,
choose a place near your TV. The location should also be well ventilated. Do not set electronic
components or other objects (including this manual) on top of the receiver or block its cooling
vents.
If you have not already installed your DSS dish and run the cable to your DSS receiver area, you
should do so now. It is recommended that you have your dish professionally installed. This is due
to safety issues, dectrcal codes, and assurance of a quality installation. If you should choose to
perform the installation yourself, please pay special attention to the precautions in the
front of this manual and refer to the Satellite Antenna Installation Guide that
accompanied your DSS antenna. You may also want to obtain the Hitachi Do-It-YourseffDSS
InstallS'on Kit, sold separately.
Page 7
HITACHIDIGITALSATELLITESYSTEMOWNER'SMANUAL
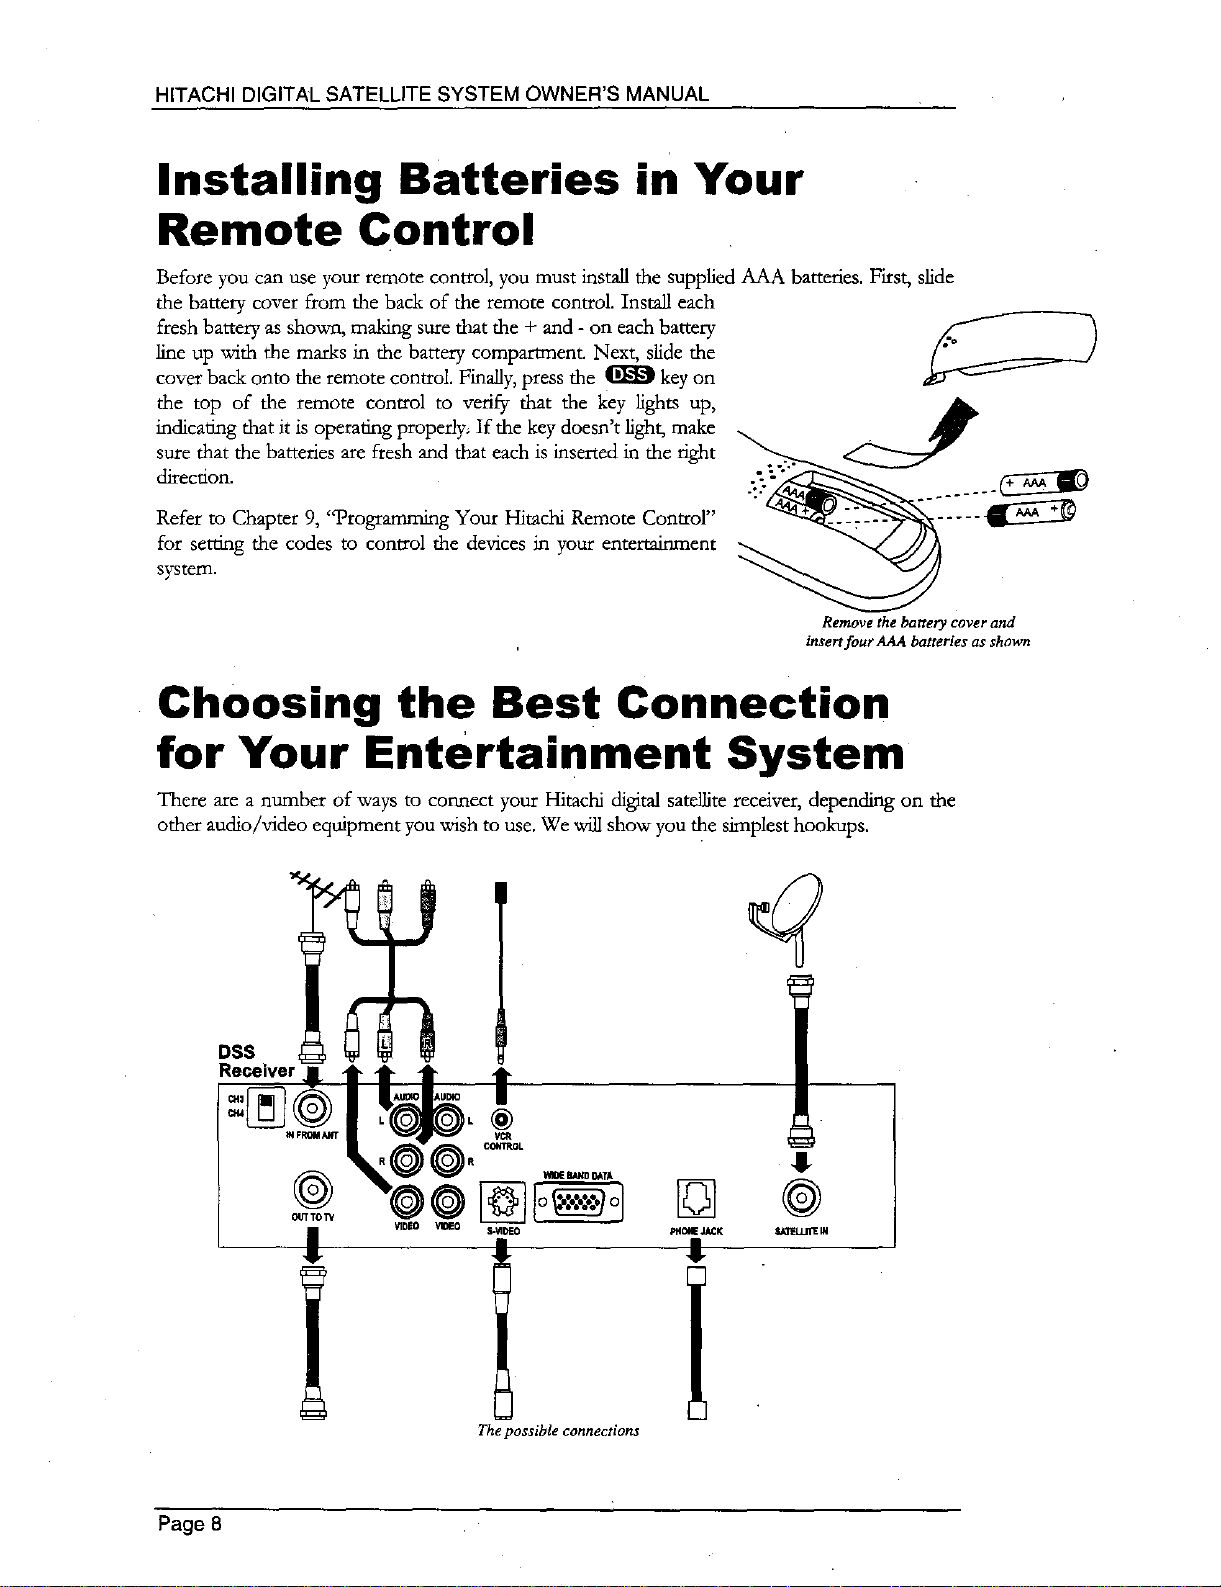
Installing Batteries in Your
Remote Control
Before you can use your remote control, you must install the suppfied AAA batteries. First, slide
the battery cover from the back of the remote control. Install each
fresh battery as shown, making sure that the + and - on each battery
line up with the marks in the battery compartment. Next, slide the
covet" hack onto the remote control. Finally, press the _ key on
the top of the remote control to verify that the key lights up,
indicating that it is operating properly_ If the key doesn't fight, make
sure that the batteries are fresh and that each is inserted in the fight
direction.
Refer to Chapter 9, "Programming Your Hitachi Remote Control"
for setting the codes to control the devices in your entertainment
system.
Remove the battery cover and
insert four AAA batteries as shown
Choosing the Best Connection
for Your Entertainment System
There are a number of ways to connect your Hitachi digital satellite receiver, depending on the
other audio/video equipment you wish to use. We _ show you the simplest hookups.
J
!
Page 8
The possible connections
SETTING UP YOUR HITACHI DIGITAL SATELLITE SYSTEM
Before choosing the best connection for your entertainment system, you should connect the
phone line. This can be done by plugging one end of the provided
telephone cable into the PHONE LINE jack on the back of your
DSS receiver and the other end into a telephone wall jack. If you do
not have a telephone jack within reach, contact your local phone
PHONEJACK
The Phone line and jack
connectors and/or cables. These are available from your dealer or dectrouic hardware stores.
Choose which hookup method to use based on:
• Your TV's and VCR's capabilities
• Your desire to pass local programming through the DSS receiver
• Any other devices you want to include in the system (stereo, second VCR, etc.)
We will guide you through the decision and connection process. But 'first, position yourself or
your equipment so that you are looking at the backs. Note the various input and output
receptacles, their shapes, and how they are labeled. Then read through the rest of this hookup
section before proceeding to an actual hookup.
company to arrange for.a new jack to be installed or reorient your
DSS receiver to be within reach of a telephone wall jack.
To suit specific needs, you may need to purchase additional
Do not turn on tbepo_veryet. Foryour safety,kaueyour DSS receiver,77/,, VCR, and any otherdedcesto be
connectedunpluggedwhik hookingthemup.
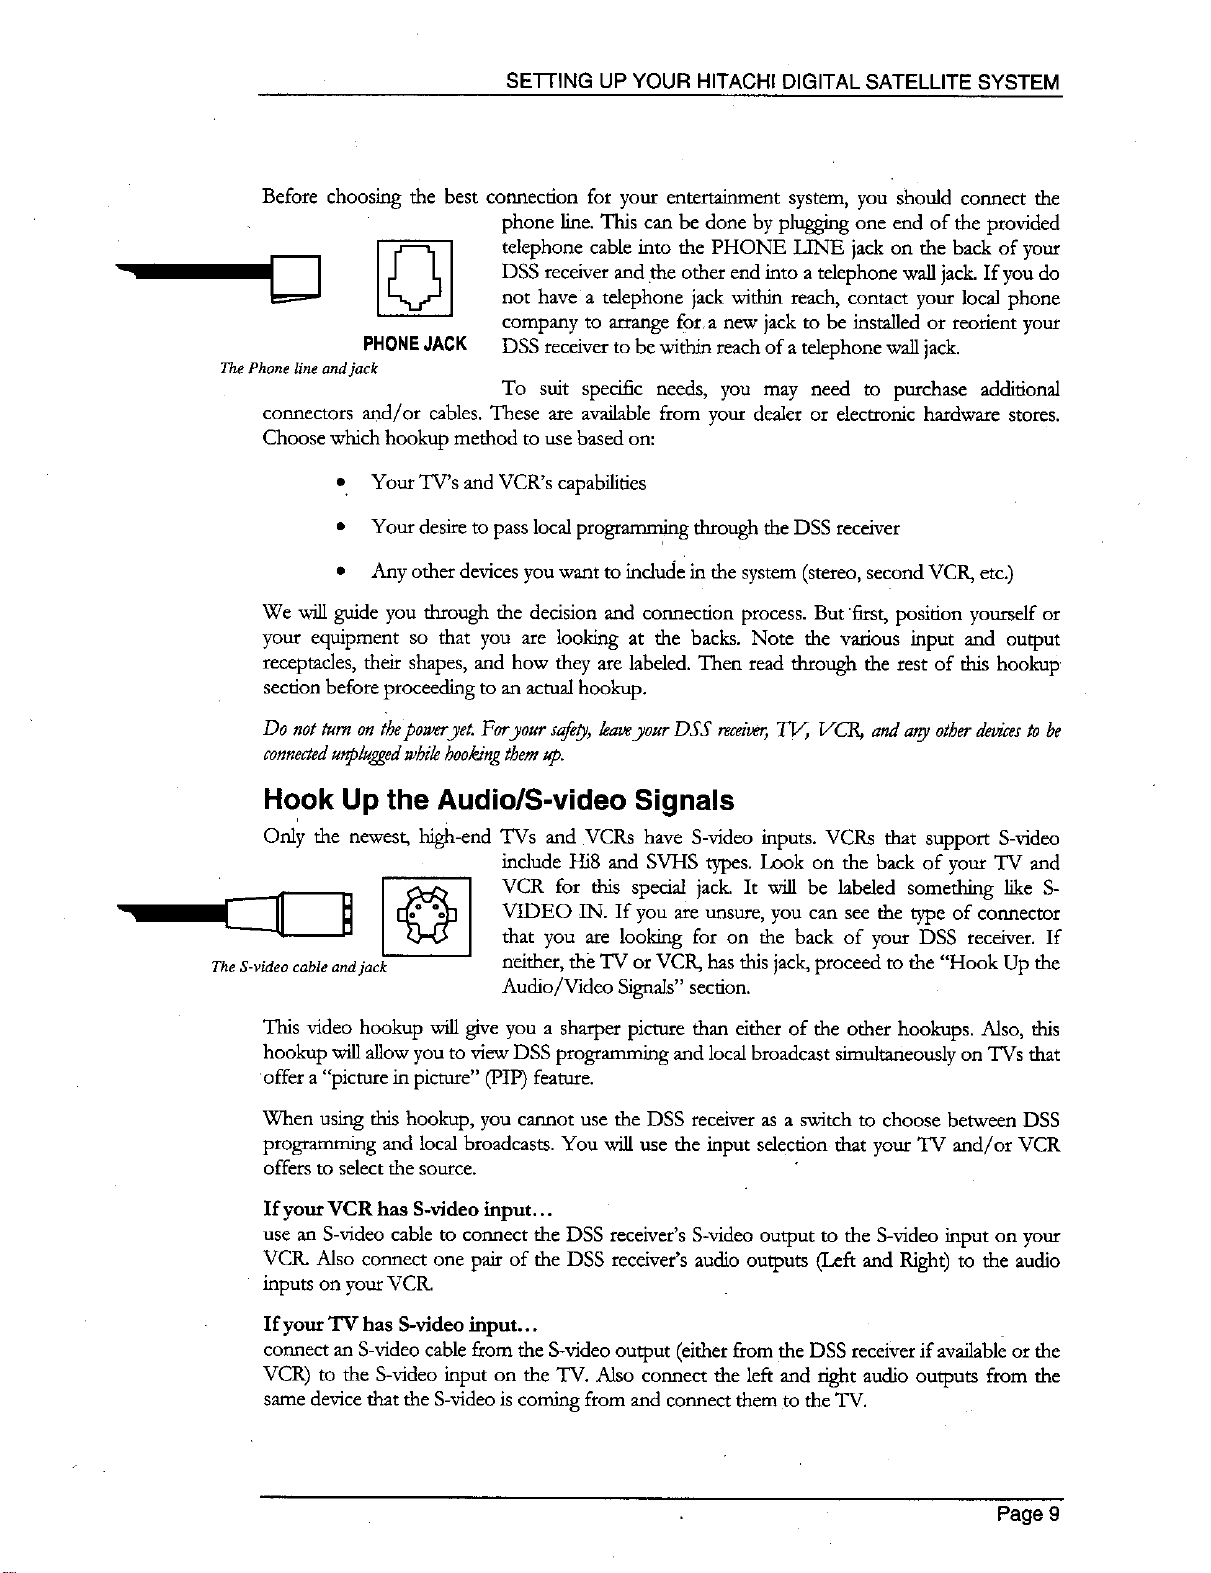
Hook Up the Audio/S-video Signals
Only the newest, high-end TVs and VCRs have S-video inputs. VCRs that support S-video
include Hi8 and SVHS types. Look on the back of your TV and
VCR for this special jack. It will be labeled something like S-
@
The S-video cable and jack
This video hookup will give you a sharper picture than either of the other hookups. Also, this
hookup will allow you to view DSS programming and local broadcast simultaneously on TVs that
offer a "picture in picture" (PIP) feature.
When using this hookup, you cannot use the DSS receiver as a switch to choose between DSS
programming and local broadcasts. You will use the input selection that your TV and/or VCR
offers to select the source.
If your VCR has S-video input...
use an S-video cable to connect the DSS receiver's S-video output to the S-video input on your
VCtL Also connect one pair of the DSS receiver's audio outputs (Left and Right) to the audio
inputs on your VCR.
VIDEO IN. If you are unsure, you can see the type of connector
that you are looking for on the back of your DSS receiver. If
neither, the TV or VCR, has this jack, proceed to the "Hook Up the
Audio/Video Signals" secdon.
If your '.V has S-vldeo input...
connect an S-video cable from the S-video output (either from the DSS receiver if available or the
VCR) to the S-video input on the TV. Also connect the left and fight audio outputs from the
same device that the S-video is coming from and connect them to the TV.
Page 9
HITACHI DIGITAL SATELLITE SYSTEM OWNER'S MANUAL
If you have a stereo system...
you may be able to achieve big speaker sound. See the "Hook Up to a Stereo System" section for
the necessary connections.
If your hookup is complete...
move on to the "Finishing Up" section.
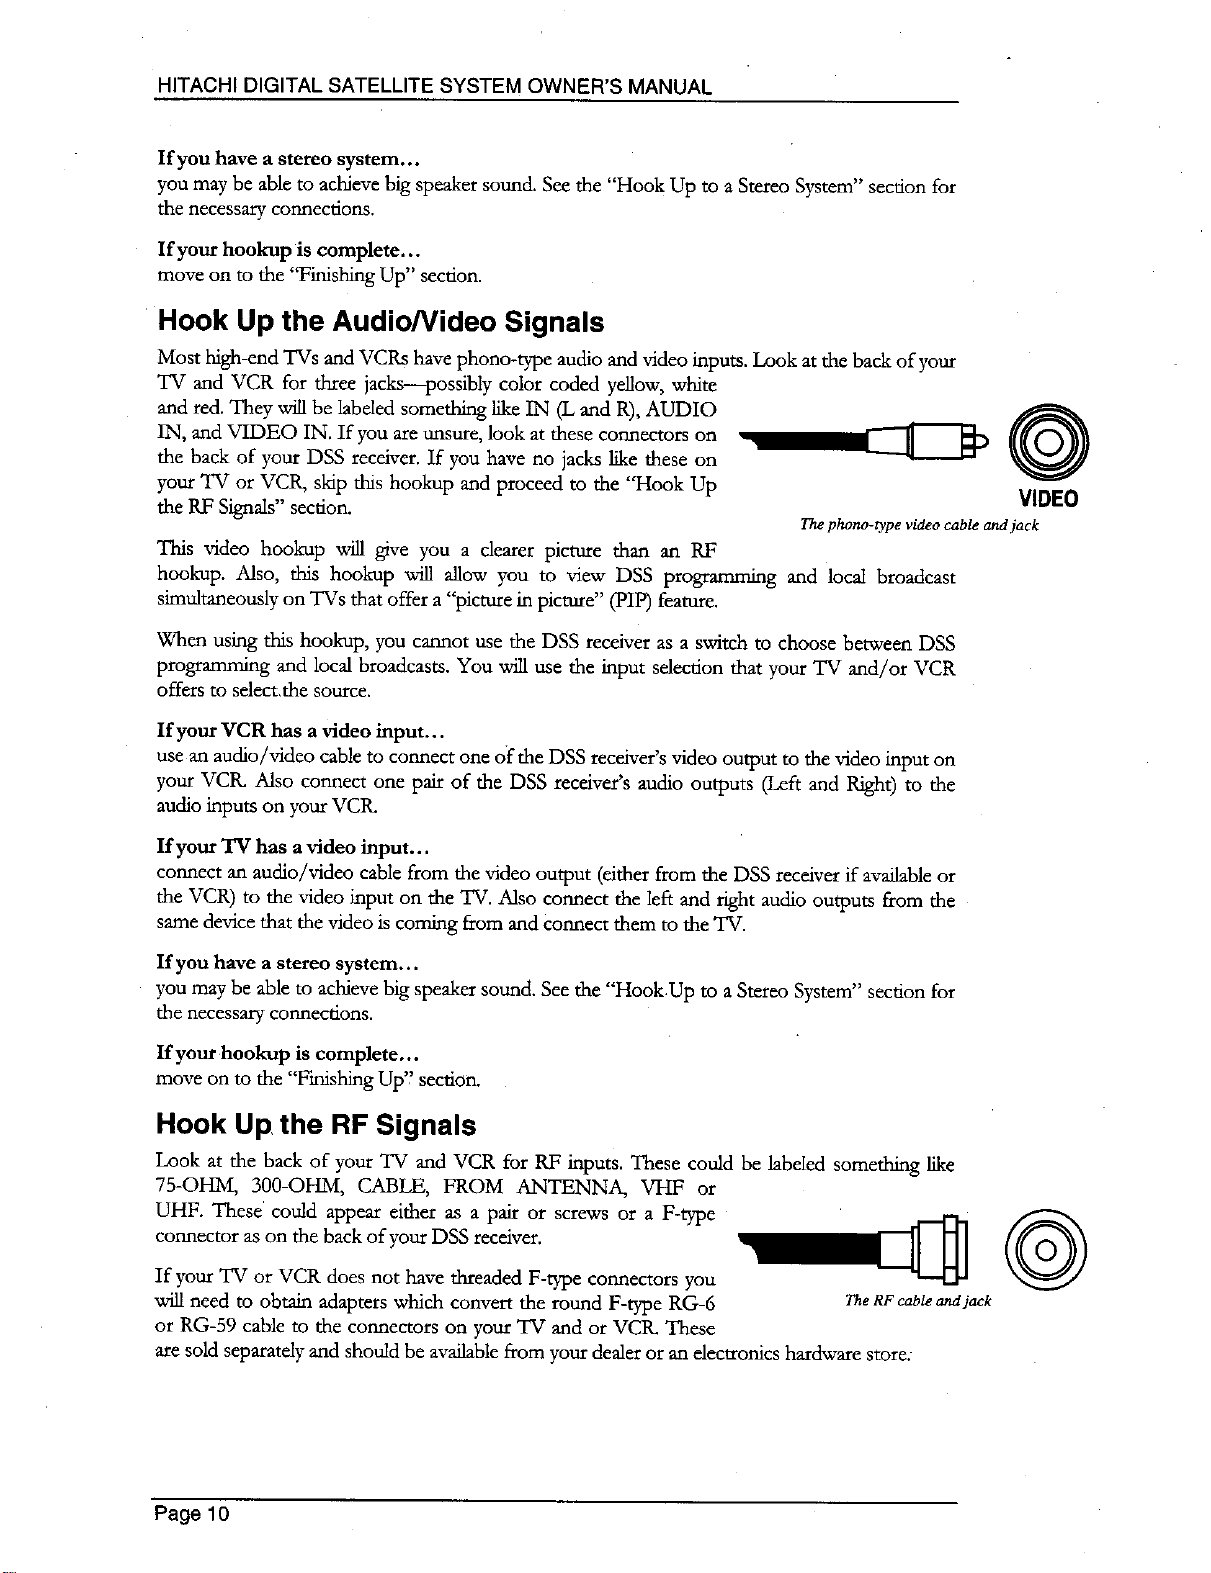
Hook Up the Audio/Video Signals
Most high-end TVs and VCRs have phono-type audio and video inputs. Look at the back of your
TV and VCR for three jacks--possibly color coded yellow, white
and red. They will be labeled something like IN (L and R), AUDIO
IN, and VIDEO IN. If you are unsure, look at these connectors on
the back of your DSS receiver. If you have no jacks like these on
your TV or VCR, skip this hookup and proceed to the "Hook Up
the RF Signals" section.
The phono-type video cable and jack
This video hookup will give you a dearer picture than an RF
hookup. Also, this hookup will allow you to view DSS programming and local broadcast
simultaneously on TVs that offer a "picture in picture" (PIP) feature.
When using this hookup, you cannot use the DSS receiver as a switch to choose between DSS
programming and local broadcasts. You will use the input selection that your TV and/or VCR
offers to select,the source.
@
VIDEO
If your VCR has a video input...
use an audio/video cable to connect one of"the DSS receiver's video output to the video input on
your VCK Also connect one pair of the DSS receiver's audio outputs (Left and Right) to the
audio inputs on your VCtL
If your TV has a video input...
connect an audio/video cable from the video output (either from the DSS receiver if available or
the VCR) to the video input on the TV. Also connect the left and right audio outputs from the
same device that the video is coming from and Connect them to the TV.
If you have a stereo system...
you may be able to achieve big speaker sound. See the "HookUp to a Stereo System" section for
the necessary connections.
If your hookup is complete...
move on to the "Finishing Up" section.
Hook Up, the RF Signals
Look at the back of your TV and VCR for RF inputs. These could be labeled something like
75-OHM, 300-OHM, CABLE, FROM ANTENNA, VHF or
UHF. These could appear either as a pair or screws or a F-type
connector as on the back of your DSS receiver.
If your TV or VCR does not have threaded F-type connectors you
will need to obtain adapters which convert the round F-type RG-6 TheRFcableandjack
or RG-59 cable to the connectors on your TV and or VCK These
are sold separately and should be available from your dealer or an electronics hardware store:
@
Page10
SE'H'ING UP YOUR HITACHI DIGITAL SATELLITE SYSTEM
To connect your VCR...
use a coaxial cable to connect the OUT TO TV from your DSS receiver to the RF input section
on your VCR. This is the first place Where an adapter may be needed if your VCR doesn't have
the F-tH?e connector.
To connect your 'IV...
connect a coaxial cable from the RF output (either from the DSS receiver's OUT TO TV if
available or the VCR) to the RF input on the TV.
Set the channel 3/4 switch on the back of your DSS receiver to the channel that is not broadcast
or has the weakest signal in your area. This WIUbe the channel that you need to set your TV
and/or VCR to for viewing or recording DSS programming.
You can also use your DSS receiver as a switch to select between DSS programming and local
broadcasts. This can be accomplished by pressing the _ key while the remote is in DSS
mode. Also, you must connect your local signal, either from an antenna or cable service, to the
IN FROM ANT on the back of your DSS receiver. If your antenna wire is not RG6 or RG-59
your _ need an adapter as described earlier.
If you have a stereo system...
you may be able to achieve big speaker sound. See the "Hook Up to a Stereo System" section for
the necessary connections.
If your hookup is complete...
move on to the "Finishing Up" section.
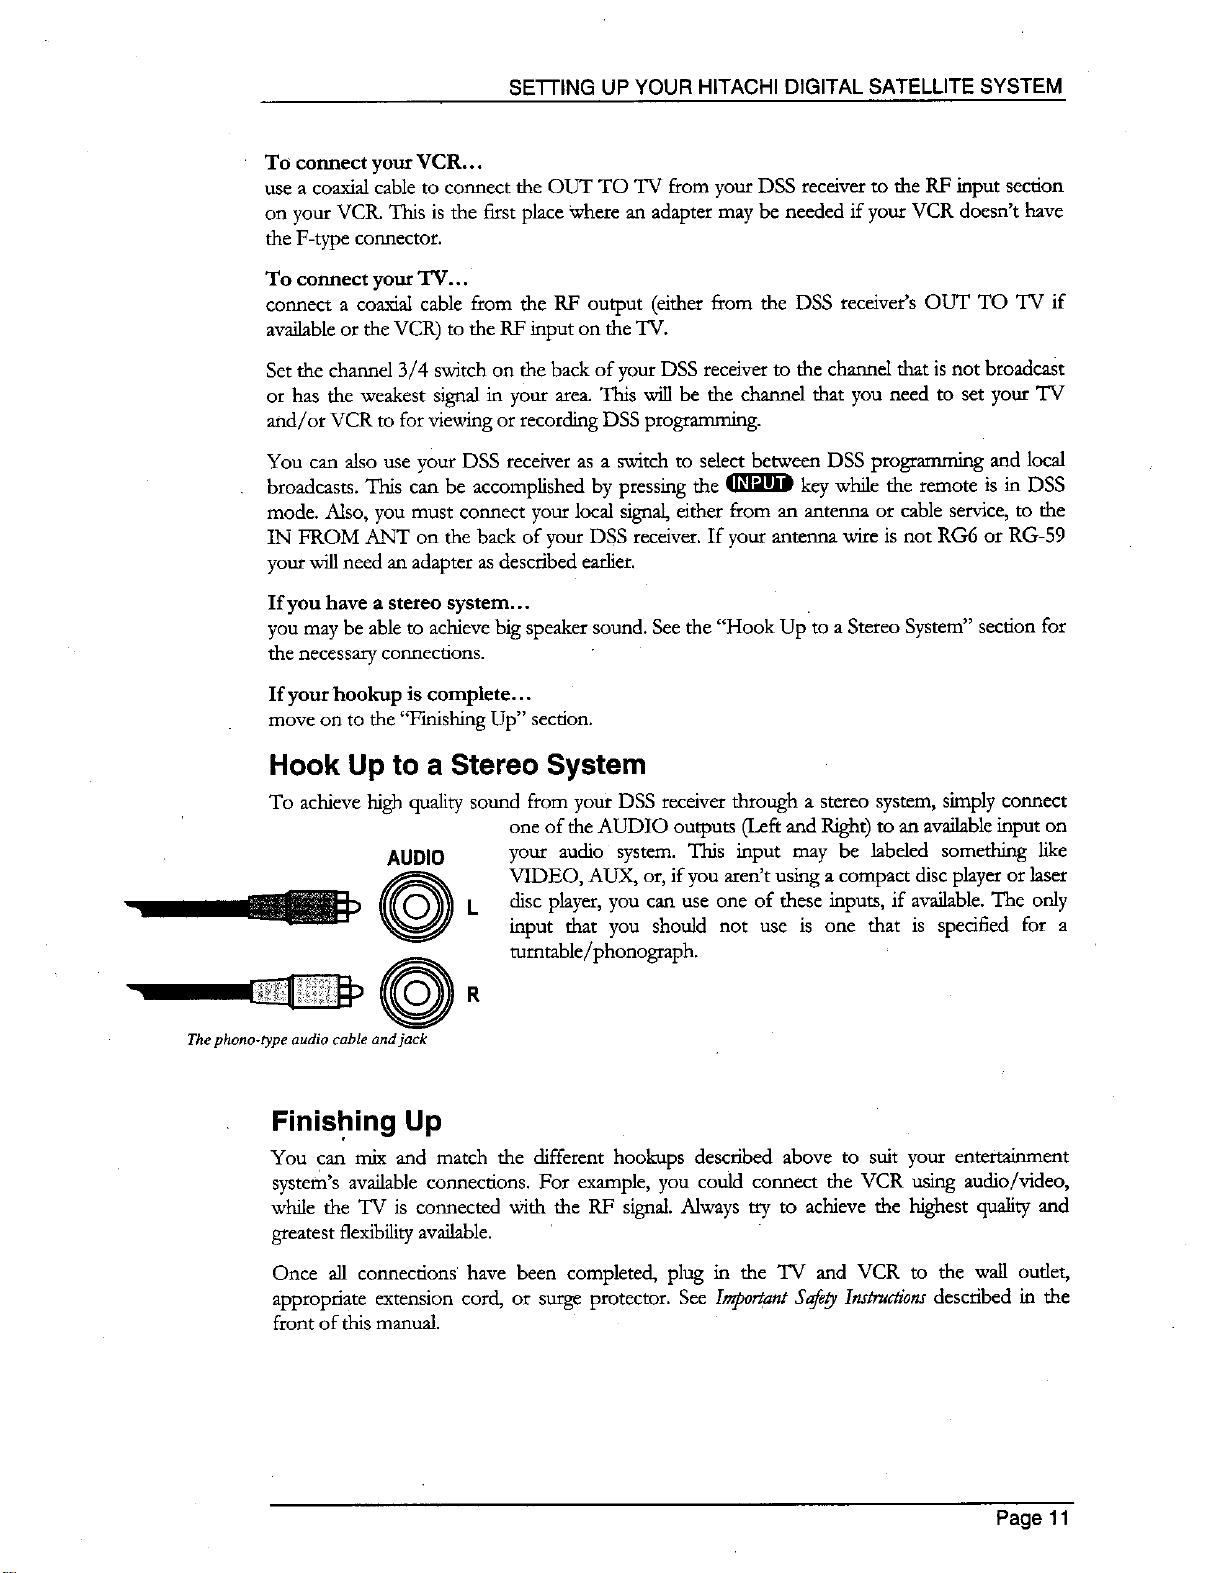
Hook Up to a Stereo System
To achieve high quality sound from your DSS receiver through a stereo system, simply connect
AUDIO
@
@
The phono-type audio cable and jack
Finishing Up
You can mix and match the different hookups described above to suit your entertainment
system's available connections. For example, you could connect the VCR using audio!video,
while the TV is connected with the RF signal. Always try to achieve the highest quality and
greatest flexibility available.
Once all connections have been completed, plug in the TV and VCR to the wall outlet,
appropriate extension cord, or surge protector. See Important Safqy Instructions described in the
front of this manual.
one of the AUDIO outputs (Left and Right) to an available input on
your audio system. This input may be labeled something like
VIDEO, AUX, or, if you aren't using a compact disc player or laser
discplayer,you canuseone oftheseinputs,ifavailable.The only
input that you should not use is one that is specified for a
turntable/phonograph.
R
Page 11
HITACHI DIGITAL SATELLITE SYSTEM OWNER'S MANUAL
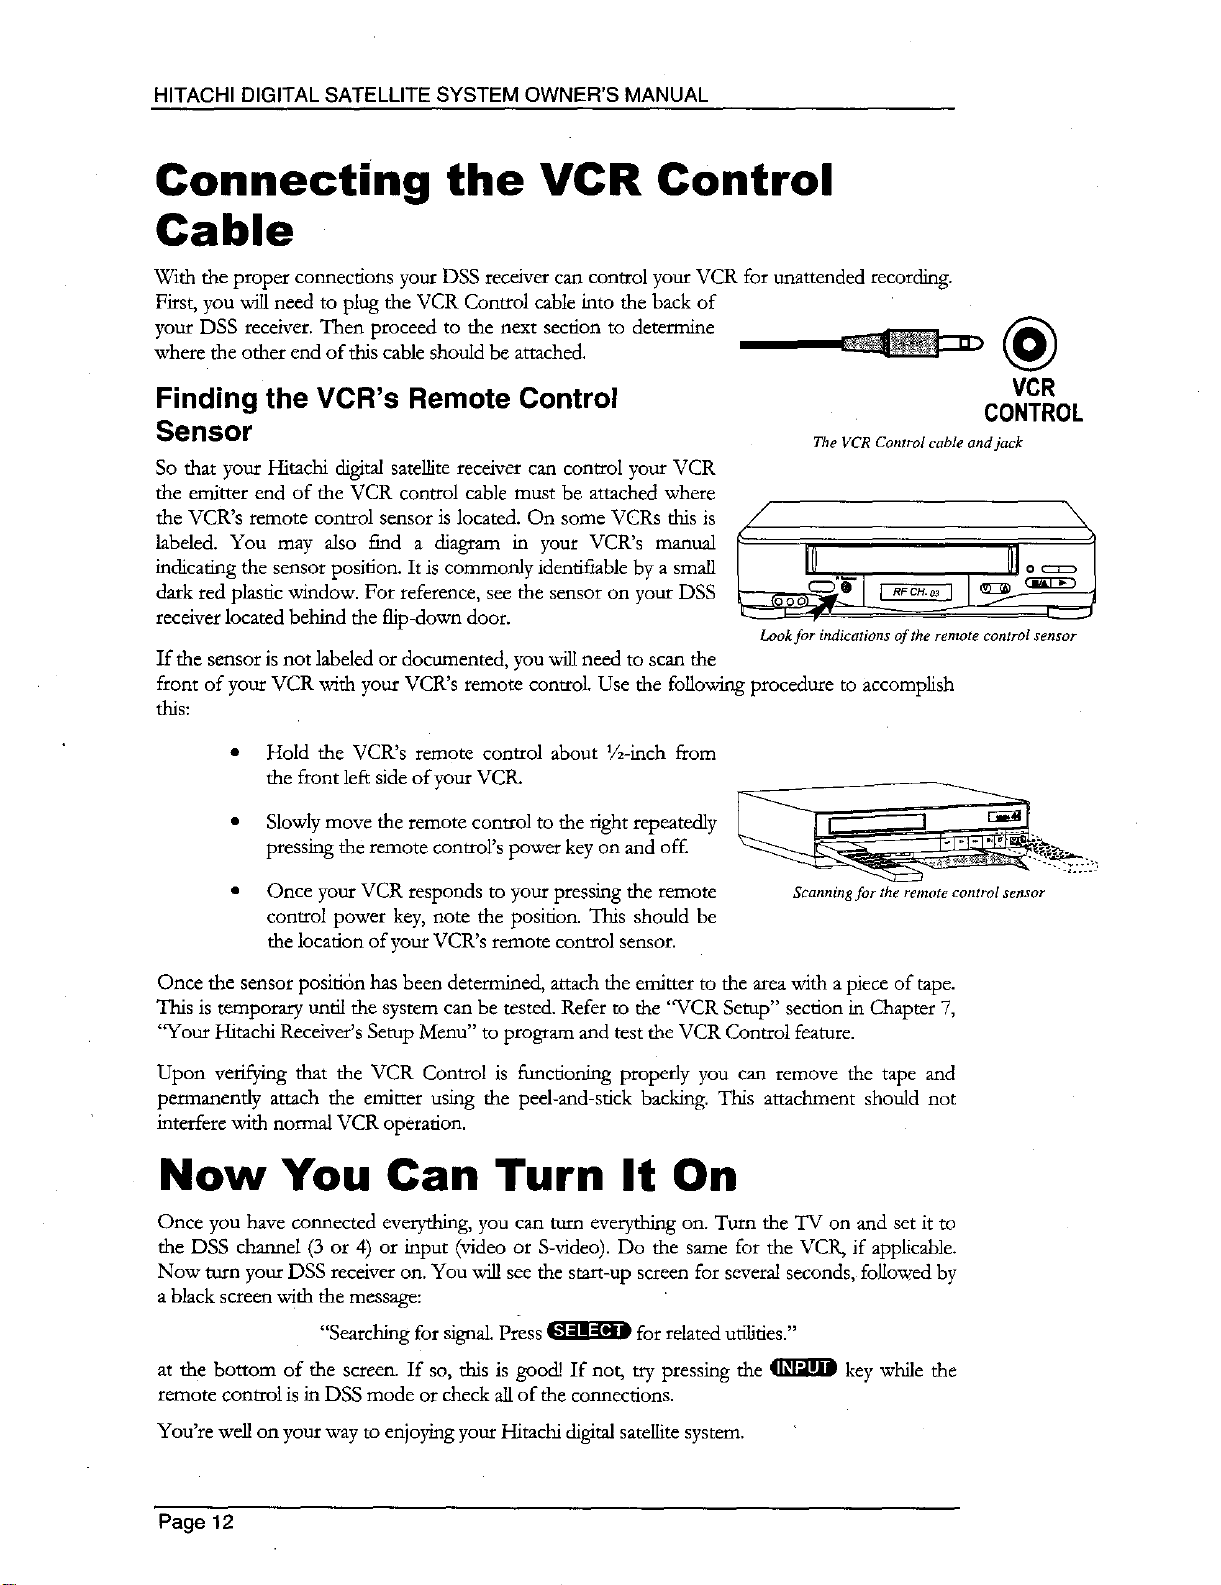
Connecting the VCR Control
Cable
With the proper connections you* DSS receiver can control your VCR for unattended recording.
Ktrst, you will need to plug the VCR Control cable into the back of
your DSS receiver. Then proceed to the next section to determine
where the other end of this cable should be attached.
Finding the VCR's Remote Control
Sensor
So that your Hitachi digital satellite receiver can control your VCR
the emitter end of the VCR control cable must be attached where
the VCR's remote control sensor is located. On some VCRs this is
labeled. You may also find a diagram in your VCR's manual
indicating the sensor position. It is commonly identifiable by a small
dark red plastic window. For reference, see the sensor on your DSS
receiver located behind the flip-down door.
If the sensor is not labded or doctmaented, you will need to scan the
front of your VCR with your VCR's remote control. Use the followirg procedure to accomplish
this:
r O,o 1
The VCR Control cable and jack
Look for indications of the remote control sensor
@
VCR
CONTROL
• Hold the VCR's remote control about 1A-inch from
the front left side of your VC1L
• SlowIy move the remote control to the right repeatedly
pressing the remote control's power key on and off.
• Once your VCR responds to your pressing the remote
control power key, note the position. This should be
the location of your VCR's remote control sensor.
Once the sensor positi6n has been determined, attach the emitter to the area with a piece of tape.
This is temporary until the system can be tested. Refer to the 'WCR Setup" section in Chapter 7,
"Your Hitachi Receiver's Setup Menu" to program and test the VCR Control feature.
Upon verifying that the VCR Control is functioning properly you can remove the tape and
permanently attach the emitter using the peel-and-stick backing. This attachment should not
interfere with normal VCR operation.
Scanning for the remote control sensor
Now You Can Turn It On
Once you have connected everything, you can turn everything on. Turn the TV on and set it to
the DSS channd (3 or 4) or input (video or S-video). Do the same for the VCPs if applicable.
Now turn your DSS receiver on. You will see the start-up screen for several seconds, followed by
a black screen with the message:
"Searching for signal. Press _ for related uflkies."
at the bottom of the screen. If so, this is good! If not, try pressing the _ key while the
remote control is in DSS mode or check all of the connections.
You're well on your way to enjoying your Hitachi digital satellite system.
Page 12
 Loading...