

Page 1

CC330
Digital Camera
Quick Start Guide
Page 2

For more details about the camera operation and troubleshooting, please read the User
Manual located on the CDROM disc included with your camera or visit
http://www.hp.com/support and download it for the camera support page.
Page 3
GETTING READY
For more details about the camera operation and troubleshooting, please read the User
Manual located on the CDROM disc included with your camera or visit
http://www.hp.com/support.
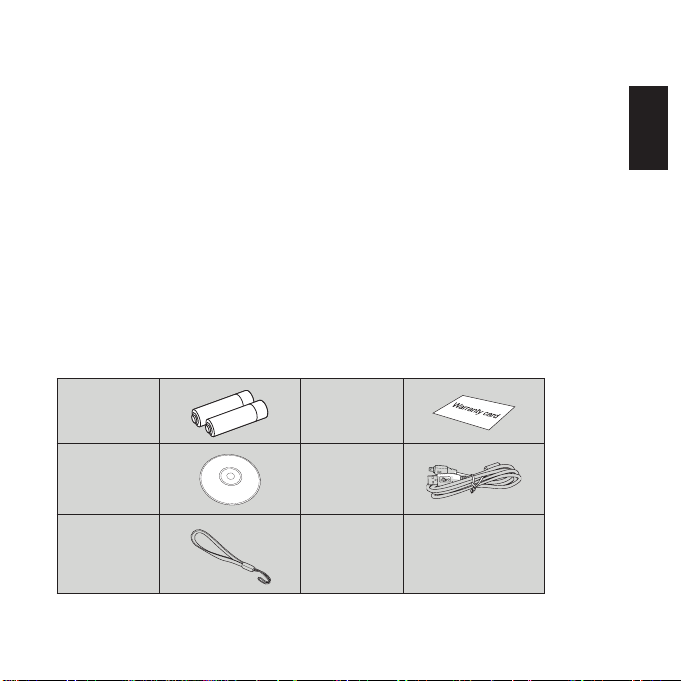
Unpacking
Your package should contain the camera model you purchased along with the following
items. If anything is missing or appears to be damaged, please contact your vendor.
AA-size
Alkaline
Batteries
CD-ROM USB Cable
Wrist Strap
Warranty Card
English
English
Page 4
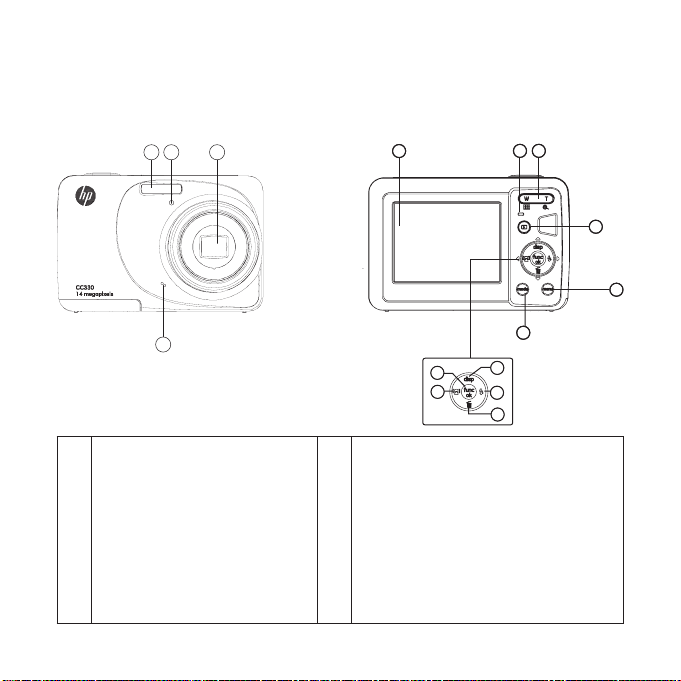
Camera Views
1 2 3
4
Front View
Back View
5
15
14
11
12
13
1 Flash Lamp 9 Menu Button
2 Timer Indicator 10 Mode Selection Button
3 Lens 11 Disp/Up Button
4 Microphone 12 Flash Mode/Right Button
5 LCD Screen 13 Delete Button/Down Button
6 Status Indicator 14 Face Detection/Left Button
7 Zoom Toggle 15 Function/OK Button
8 Playback Button
2 3
76
8
9
10
Page 5

Left / Right View
16
17
Top / Bottom View
16 USB/AV Port 20 Speaker
Wrist Strap 21 Card Slot / Battery Compartment
17
Shutter Button 22 Tripod Socket
18
Power Button
19
English
18
1920
2122
Page 6

Insert the Battery and SD/SDHC Card (Not included)
1. Open the battery compartment.
2.
Insert the enclosed batteries into the battery
slot in the correct direction.
3. Insert an SD/SDHC card (not included) into the
memory card slot as shown.
4. Close the battery compartment.
4 5
Page 7

Setting Date/Time and Language
Setting the Language
1. Use the Up and Down buttons to navigate to the Language
option. then press the Ok or Right button to enter the
Language menu.
English
2. Use the UP/Down/Right/Left buttons to highlight the
desired language.
3.
Press the button to select the option and exit the
Language menu.
Setting the Date and Time
1. Use the Up and Down buttons to navigate to the Date/Time
option, then press the Ok or Right to enter the setting.
Press the Left/Right buttons to highlight each eld and use
2.
the Up/Down buttons to adjust the value.
3. Press the
button to conrm the setting.
Page 8

M
Turning On and Off
Press the Power button to turn the camera on. To turn off the camera, press the Power
button again.
Power Button
Using the Mode Button
The camera provides a convenient mode button that allows you to switch between
different modes with ease. Press the to open the mode options menu. Use the Left/
Right buttons to choose the desired mode and press to conrm. For more details about
the Mode button and the numerous camera modes, please review the User Manual located
on the software CD provided with this product.
Auto mode ASCN mode
Manual mode Scene mode
Panorama mode Movie mode
Portrait
6 7
Page 9

Using Menu Button
The menu button allows you quick access to the camera settings options.
Press the to open the camera settings menu. Press Left/Right buttons to highlight the
desired option, then press the Down button to select this option/menu, and press to
conrm. For more details about the Menu button and the camera settings, please review
the User Manual located on the software CD provided with this product.
1 Photo Setup 5 General Setup
2 Movie Setup 6 Transmission
3 Playback Setup 7 File/Software
4 Display Setup
Taking a picture
1. Hold the camera securely.
Use the Zoom toggle to zoom in and out of the
2.
subject. Press the "T" side of the toggle to zoom
in and press the "W" side of the toggle to zoom out.
Lightly press the shutter button halfway force the camera
3.
to focus on the subject. When properly in focus, a green
bracket will be displayed on the screen. Press the shutter
button fully to take the picture.
English
Page 10

Viewing your picture
1. Press the Playback button to switch to
Playback mode.
Use Left/Right buttons to browse through your
2.
photos.
Using the Delete Button
In Playback mode, press the Down/Delete button to delete
pictures or videos.
To delete pictures or videos:
1. Press
2. Select a picture or video clip you want to delete with the Left/Right buttons.
3. Press the Down/Delete button
4. Select Yes or Back with Up/Down button and press the
button to go to the Playback mode.
and the delete screen appears.
button for conrmation.
8 9
Page 11

Getting Help
Should you have a technical support question or your HP Digital Camera require service
within the warranty period, please contact the original point of purchase or an authorized
HP reseller in your country. If service is not available at those locations, please contact an
HP Branded Product warranty agent from the support contact list provided below. A service
agent will work with you to troubleshoot your issue and if necessary, issue a Return Material
Authorization (RMA) number in order to replace your HP Branded Product. For warranty
claims, you will be required to provide a copy of your original dated sales receipt as proof
of purchase and the issued RMA number. You will be responsible for shipping charges
when shipping the product to the service center. The service agent will provide you with an
address and you will also be responsible for any shipping charges to the warranty service
center. Once your product is received by this service center, a replacement unit will be
shipped back to you typically within 5 business days.
Contact/phone Support:
Language Contact/phone Support:
Chinese
Japanese nippon@hpodd.com
Korean korean@hpodd.com
Deutsch deutsch@hpodd.com
English english@hpodd.com
Español espanol@hpodd.com
Français francais@hpodd.com
Italiano italiano@hpodd.com
Nederlandsk hollands@hpodd.com
Português portugues@hpodd.com
Svenska svensk@hpodd.com
simp.chinese@hpodd.com
trad.chinese@hpodd.com
English
Page 12

Contact/phone Support:
Country Language Number
Europe Region (EMEA)
België Nederlandsk/ Deutsch + 32 2700 1724
Deutschland Deutsch + 49 6950073896
España Español + 34 914533458
France Français + 33 171230454
Ireland English + 353 1850882016
Italia Italiano + 39 269682189
Nederland Nederlandsk + 31 202015093
Schweiz Deutsch/ Français/ Italiano + 41 18009686
UK English + 44 2073652400
North America
United States English 1.866.694.7633
Canada English and French 1.866.694.7633
Country Language City Number
Mexico City 52.55.1204.8185
México Español
Guadalajara 52.33.1031.3872
Monterrey 52.81.1107.2639
Venezuela Español Caracas 58.212.335.4574
Colombia Español Bogota 57.1.508.2325
Perú Español Lima 51.1.705.6232
Chile Español Santiago 56.2.581.4977
Brasil Português Sao Paolo 55.11.5504.6633
Argentina Español Buenos Aires 54.11.6091.2399
10 11
Page 13

English
 Loading...