

Page 1

ITALIANO
ESPAÑOL
PORTUGUES
NEDERLANDS
DEUTSCH
ENGLISH
FRANÇAIS
Hercules USB WiFi Transmitter
User Manual
Contents
1. INTRODUCTION ...............................................................................................................3
2. BOX CONTENTS ..............................................................................................................3
3. MINIMUM SYSTEM REQUIREMENTS............................................................................. 3
4. INSTALLING THE USB WIFI TRANSMITTER................................................................. 4
5. INSTALLING THE DRIVERS............................................................................................ 5
6. HOW CAN I USE WIFI ON MY LAPTOP COMPUTER OR GAME CONSOLE?............. 9
6.1. On a WiFi-equipped computer...................................................................................................... 9
6.2. On a game console or any other WiFi-equipped device.............................................................11
7. HOW CAN I CONTROL ACCESS TO MY WIFI NETWORK? .......................................11
8. SWITCHING OFF OR RE-ENABLING WIRELESS INTERNET SHARING...................16
9. IF YOU HAVE TO CHANGE USB PORTS ..................................................................... 16
10. IF YOU CHANGE YOUR INTERNET SERVICE PROVIDER.........................................19
11. WELCOME TO THE WIRELESS ATTITUDE™! ............................................................ 20
11.1. Computers running Windows XP: Sharing folders or a printer ................................. 20
11.1.1. Windows XP: Using the Network Setup Wizard............................................ 20
11.1.2. Windows XP: Sharing folders........................................................................25
11.1.3. Windows XP: Accessing shared folders............................................................. 26
11.1.4. Windows XP: Sharing a printer .....................................................................26
11.1.5. Windows XP: Modifying a workgroup name .................................................28
11.2. Computers running Windows 2000: Sharing folders or a printer..............................29
11.2.1. Creating a workgroup in Windows 2000 ....................................................... 29
11.2.2. Windows 2000: Sharing folders .................................................................... 30
11.2.3. Windows 2000: Accessing shared folders.............................................................. 30
11.2.4. Windows 2000: Sharing a printer.......................................................................... 30
11.2.5. Windows 2000: Modifying a workgroup name.................................................. 32
11.2.6. Windows 2000: Accessing the shared Internet connection ..........................33
11.3. Computers running Windows Me: Sharing folders or a printer.................................34
User Manual – 1/50
Русский
Page 2

Hercules USB WiFi Transmitter
11.3.1. Windows Me: Using the Home Networking Wizard....................................... 34
11.3.2. Windows Me: Sharing folders........................................................................36
11.3.3. Windows Me: Accessing shared folders...............................................................36
11.3.4. Windows Me: Sharing a printer .....................................................................37
11.3.5. Windows Me: Modifying a workgroup name..................................................39
11.4. Computers running Windows 98 SE: Sharing folders or a printer ............................40
11.4.1. Windows 98 SE: Creating a workgroup.........................................................40
11.4.2. Windows 98 SE: Sharing folders...................................................................40
11.4.3. Windows 98 SE: Accessing shared folders ..............................................................41
11.4.4. Windows 98 SE: Sharing a printer ................................................................ 41
11.4.5. Windows 98 SE: Accessing a shared Internet connection............................ 43
12. UNINSTALLING YOUR HERCULES USB WIFI TRANSMITTER..................................45
13. TECHNICAL SUPPORT..................................................................................................46
14. WARRANTY ....................................................................................................................47
ENVIRONMENTAL PROTECTION RECOMMENDATION .......................................................49
2/50 – User Manual
Page 3

ITALIANO
ESPAÑOL
PORTUGUES
NEDERLANDS
DEUTSCH
ENGLISH
FRANÇAIS
Hercules USB WiFi Transmitter
1. INTRODUCTION
Congratulations on your purchase! With your Hercules USB WiFi Transmitter, you will be able
to share your Internet connection from your PC with other computers or devices and consoles via
WiFi, all without having to make any changes to your existing Internet connection or modem.
You’ll then be able to enjoy all the fun of surfing the Internet and online gaming made possible by
these products.
In this manual you will find detailed information allowing you to configure and use your Hercules
USB WiFi Transmitter.
This manual and any related updates are also available on the www.hercules.com website, under
the Technical Support heading.
2. BOX CONTENTS
- 1 USB WiFi Transmitter
- 1 semi-rigid USB cable
- 1 installation CD-ROM
- This user manual
3. MINIMUM SYSTEM REQUIREMENTS
• Windows® XP Home or Professional Edition
• Intel® Pentium® III / AMD Athlon™ processor or compatible
• 128MB RAM
• Available USB 2.0 or 1.1 port (maximum transfer speed attained with USB 2.0 port only)
• CD-ROM drive
• 50MB free hard disk space
• Internet connection
User Manual – 3/50
Русский
Page 4
Hercules USB WiFi Transmitter
4. INSTALLING THE USB WIFI TRANSMITTER
Do not connect your USB WiFi Transmitter to your computer before inserting the
installation CD-ROM into your drive. Should this occur, click Cancel when prompted by
Windows to install the USB device it has found.
Installation of your USB WiFi Transmitter should only take place on the PC with the Internet
connection. You will be guided step by step by simply following the installation assistant
available on your CD-ROM and described below.
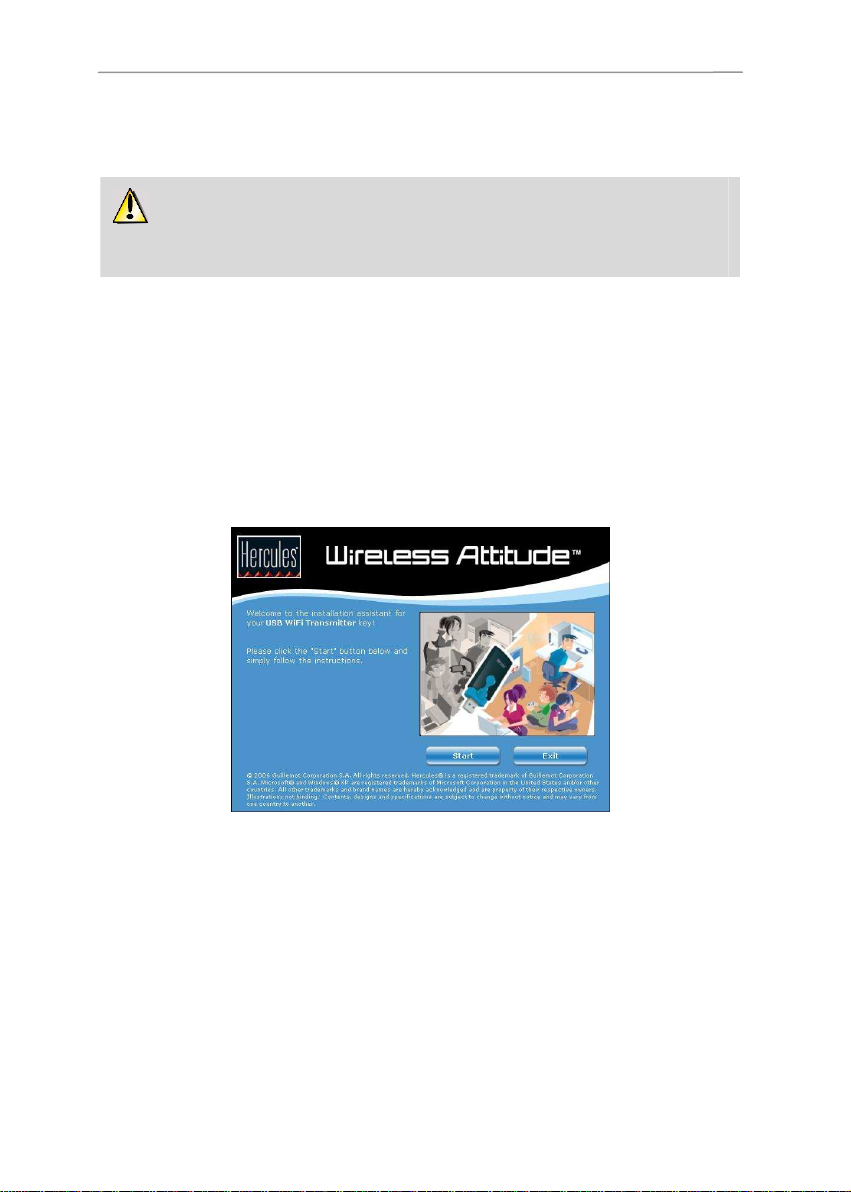
1. Insert the Hercules installation CD-ROM into your computer’s CD-ROM drive.
Note: If you have disabled the Windows auto-run function, or if the user interface does not
appear on-screen, simply launch the Windows Explorer and double-click the CD-ROM icon,
then double-click the file Setup.exe.
The installation assistant’s welcome message is displayed as follows:
2. Click Start.
4/50 – User Manual
Page 5
ITALIANO
ESPAÑOL
PORTUGUES
NEDERLANDS
DEUTSCH
ENGLISH
FRANÇAIS
Hercules USB WiFi Transmitter
5. INSTALLING THE DRIVERS
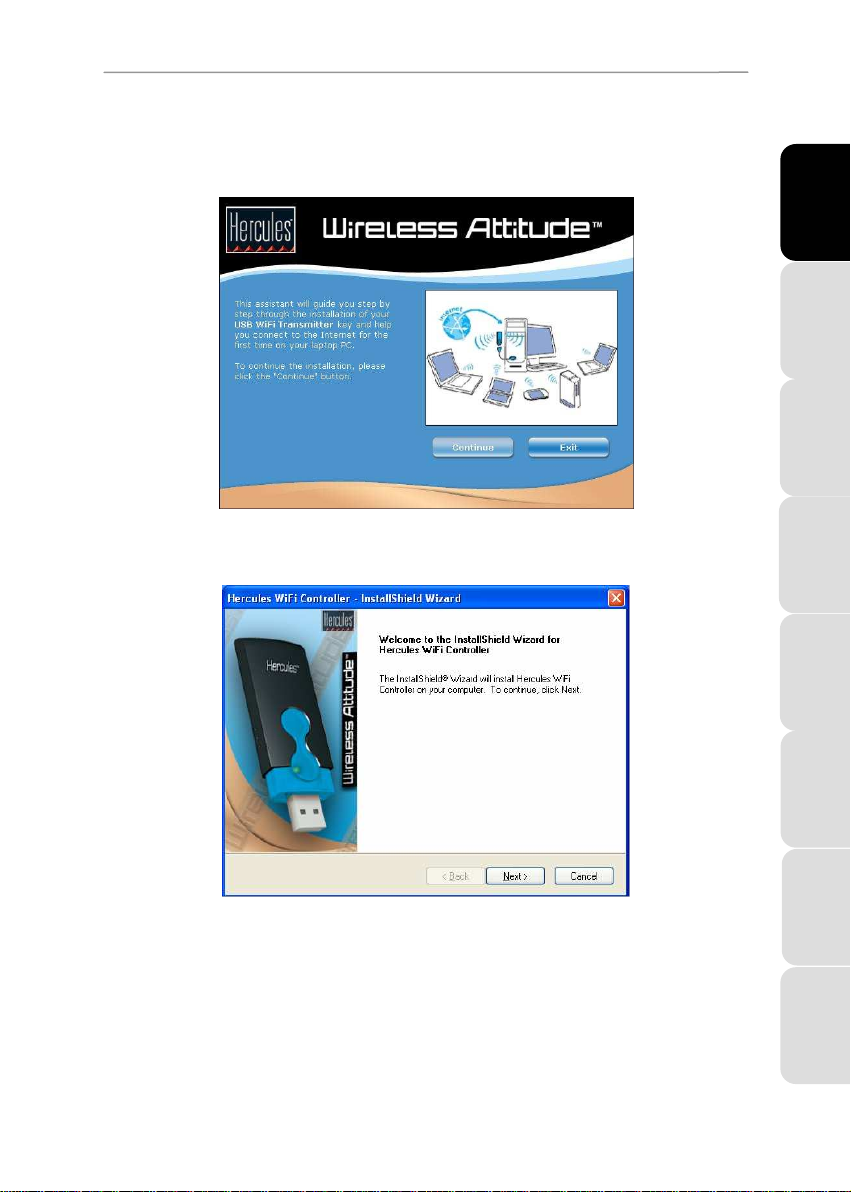
The program then proceeds to driver installation.
1. Click Continue and follow the instructions.
2. Click Continue and follow the instructions.
Русский
User Manual – 5/50
Page 6
Hercules USB WiFi Transmitter
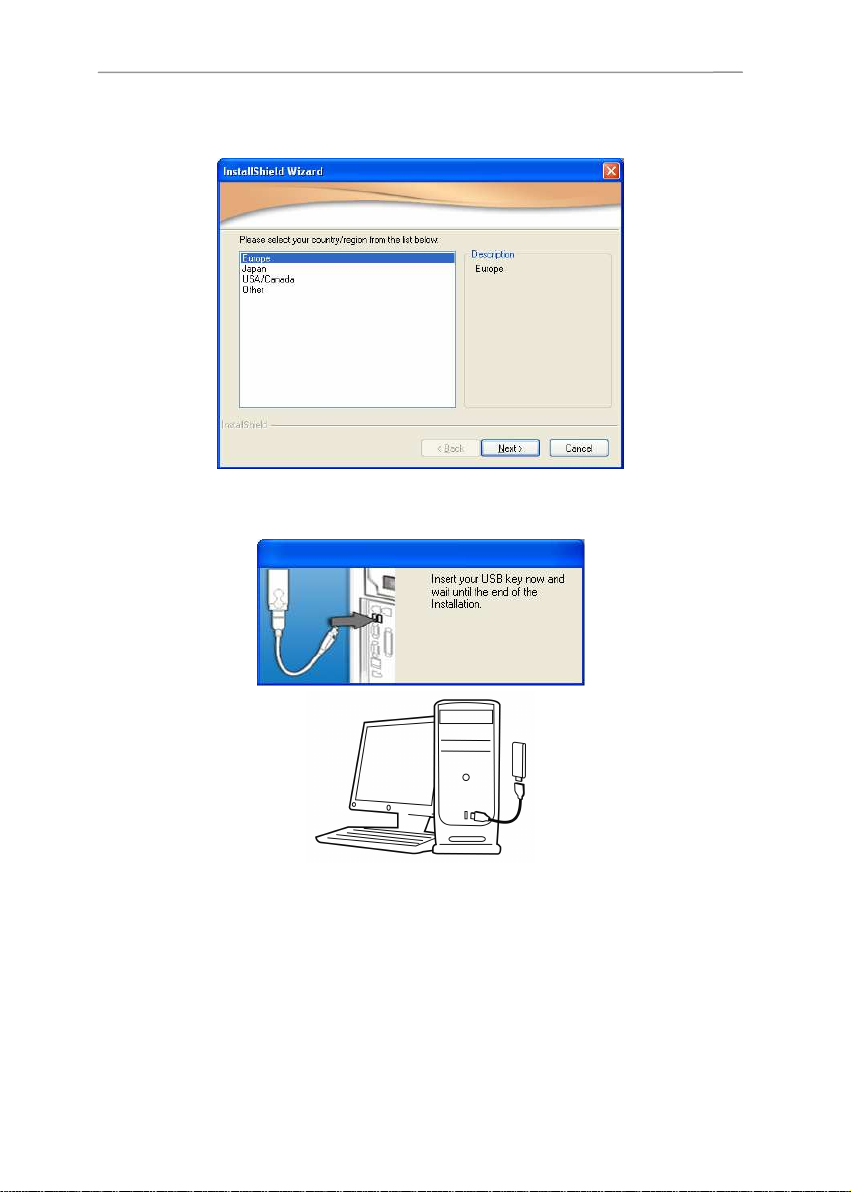
3. Select the region where you will be using your USB WiFi Transmitter and click Next.
4. When prompted to do so by the assistant, connect your USB WiFi Transmitter to a USB
port on your computer.
The semi-rigid cable allows you to better position your transmitter (in a vertical position,
ideally) in order to optimize RF signal transmission.
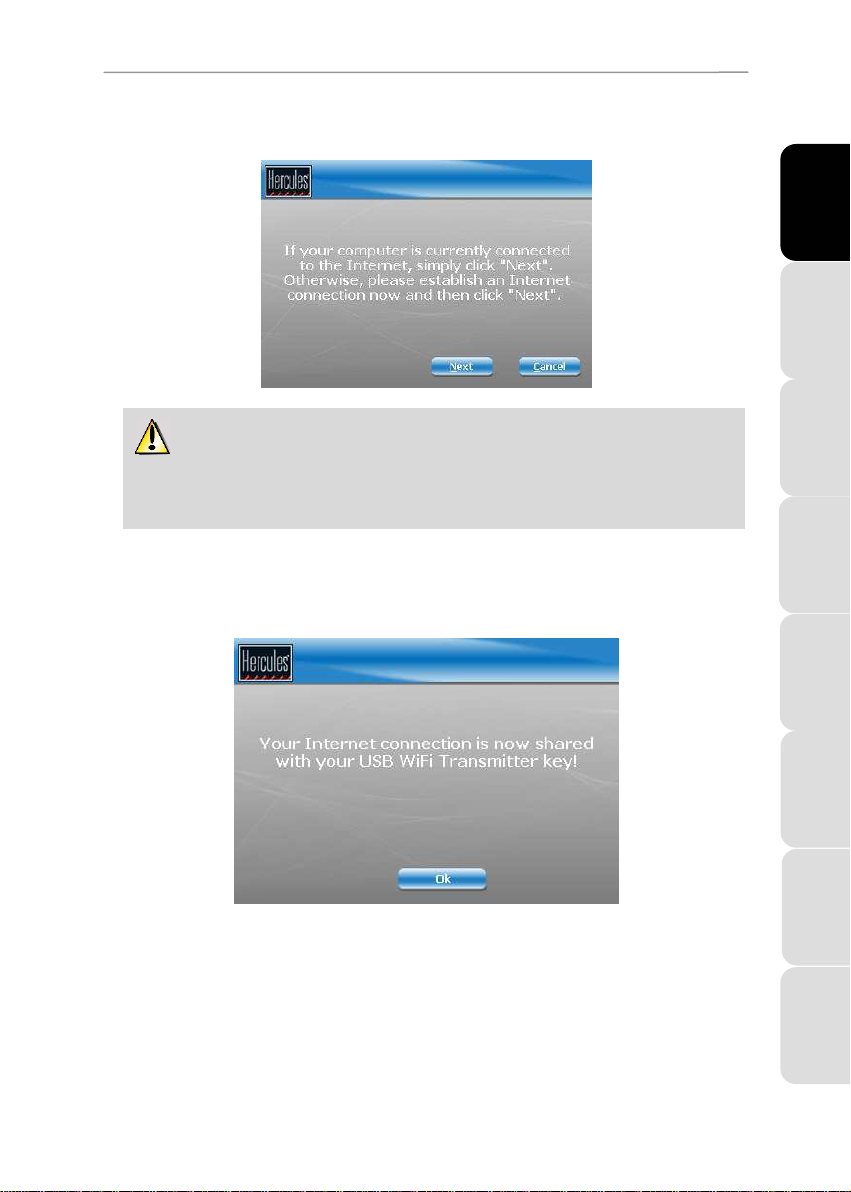
5. The installation assistant prompts you to connect your PC to the Internet if you don’t have a
permanent connection (this is generally the case if you have a low-speed, ADSL USB or ADSL
Ethernet modem).
6/50 – User Manual
Page 7
ITALIANO
ESPAÑOL
PORTUGUES
NEDERLANDS
DEUTSCH
ENGLISH
FRANÇAIS
Hercules USB WiFi Transmitter
6. Once a connection has been established, click Next for the assistant to configure sharing of
your Internet connection with your USB WiFi Transmitter.
If you have a remote-access modem connection (low-speed 56K/RTC, or
Numéris/RNIS), or a broadband connection (cable modem/ADSL USB or ADSL Ethernet
modem), you must first connect your PC to the Internet every time you wish to surf the
Internet or play online on a computer or other device connected via WiFi.
7. Sharing of your Internet connection with your USB WiFi Transmitter is confirmed. Click the OK
button.
Русский
User Manual – 7/50
Page 8
Hercules USB WiFi Transmitter
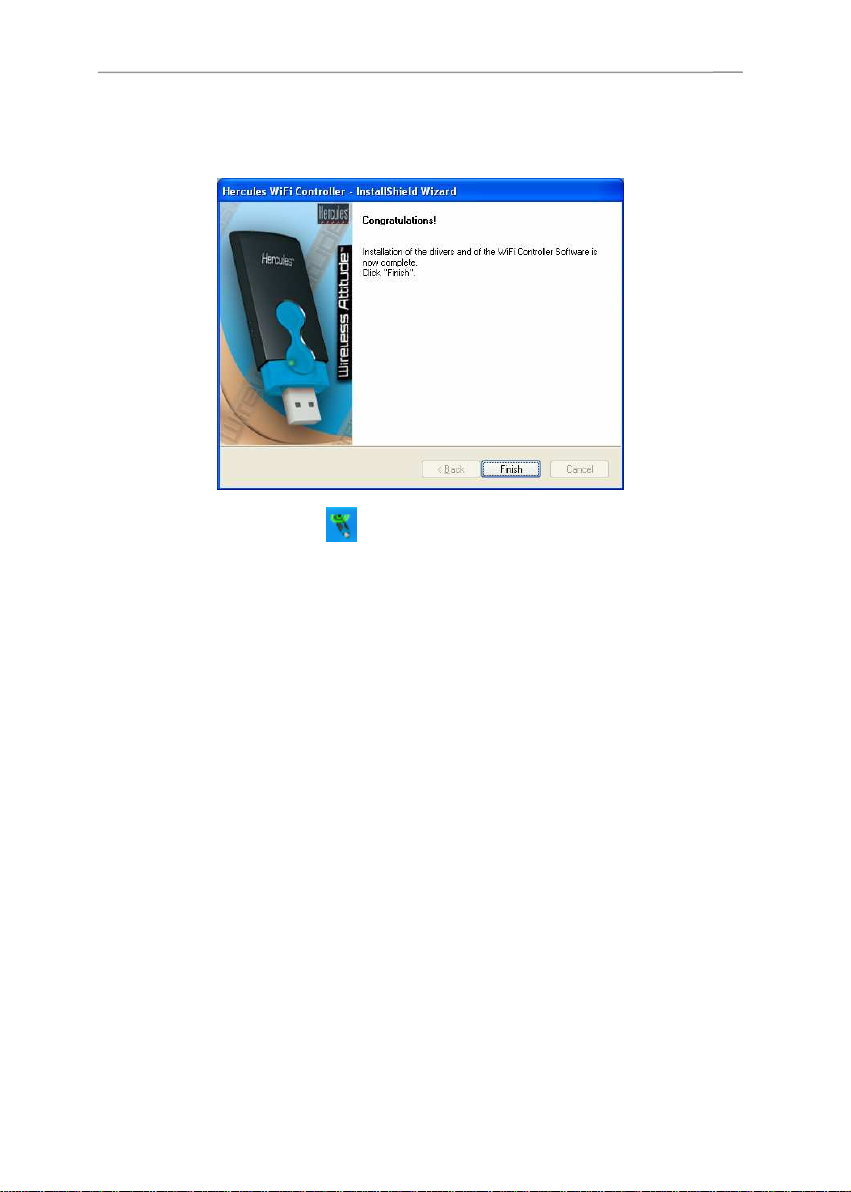
8. Click the Finish button to complete the installation and follow the instructions to find out how
you can enjoy using WiFi with your laptop computer or game console.
Once installation is complete, the icon appears in the taskbar.
8/50 – User Manual
Page 9
ITALIANO
ESPAÑOL
PORTUGUES
NEDERLANDS
DEUTSCH
ENGLISH
FRANÇAIS
Hercules USB WiFi Transmitter
6. HOW CAN I USE WIFI ON MY LAPTOP COMPUTER OR
GAME CONSOLE?
Now that the drivers are installed on your computer and your Internet connection is being shared,
you will be able to access your network and Internet connection via WiFi on another WiFiequipped computer or game console.
6.1. On a WiFi-equipped computer
First off, you must connect your computer to the WiFi network transmitted by your USB WiFi
Transmitter. The name of this WiFi network is Hercules USB.
Proceed as follows to connect your computer to the WiFi network:
A : If your computer uses proprietary software to establish a connection to the WiFi
network (the Hercules WiFi Station software, for example):
Please refer to the software’s documentation for details on how to connect to a WiFi network
and save it in your Favorites, thereby allowing you to connect to it by default.
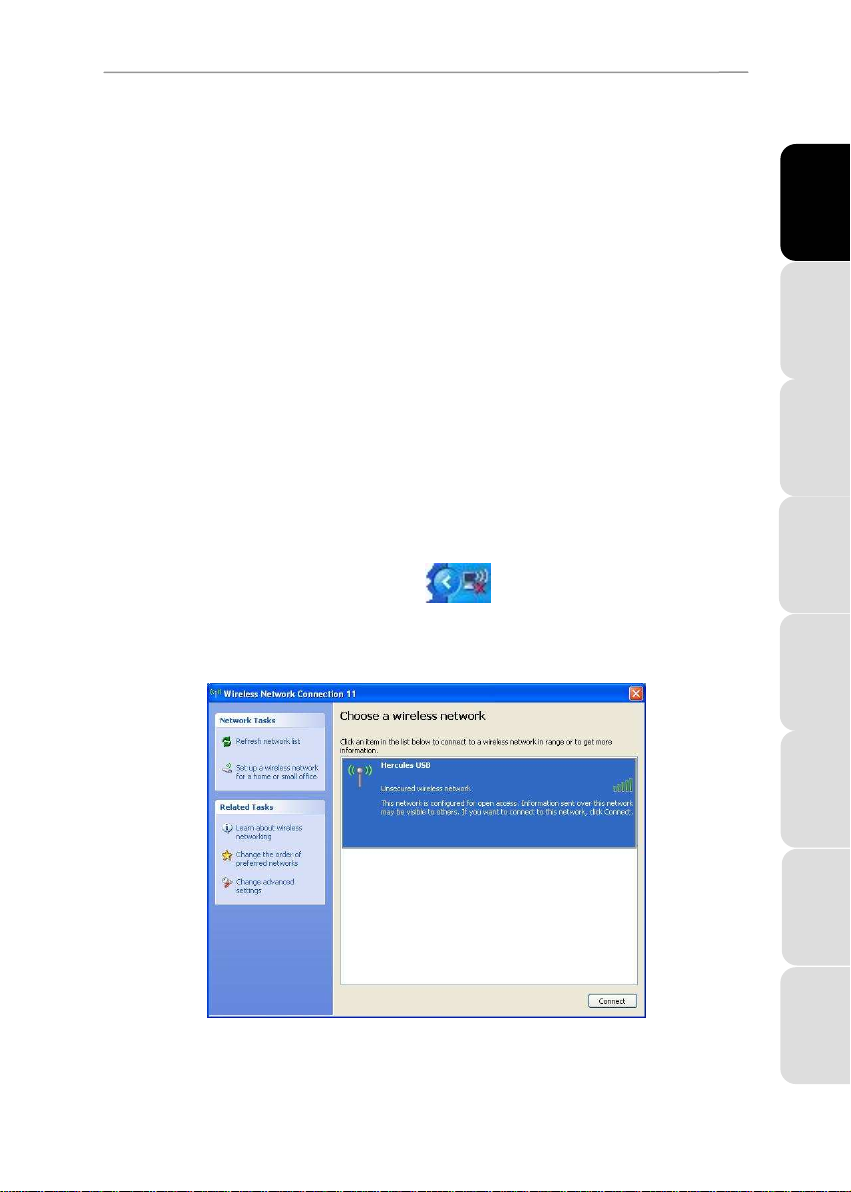
B : If your computer uses the Microsoft Zero Config utility to establish a connection to the
WiFi network:
1. In the Windows system tray, click the Wireless Network Connection icon.
2. In the list of available networks that appears, click Hercules USB, then click the
Connect button.
By default, your wireless network is not secure; the connection will be automatically established
and saved so as to connect automatically each time you restart your computer.
User Manual – 9/50
Русский
Page 10

Hercules USB WiFi Transmitter
If the wireless network is secure, you will be prompted to enter a password (or security
key). This functionality is described in the “How can I control access to my WiFi network?”
section, further along in this manual.
3. You can now verify that the connection to the WiFi network is working properly by
launching your Internet browser.
If the WiFi connection has been established but you are unable to connect to a website
on the Internet, verify that the computer equipped with the USB WiFi Transmitter is
properly connected to the Internet. (If you have a manual connection, don’t forget to
establish a connection yourself.) If necessary, launch the Network Setup Wizard and
select the option This computer connects to the Internet through another computer
on my network or through a residential gateway.
If a firewall is enabled on the PC equipped with the USB WiFi Transmitter, the
computers that connect to the WiFi network cannot disable it, even if their own firewall is
disabled.
For more information, please refer to the FAQs available on the www.hercules.com website,
under the Technical Support heading.
Your USB WiFi Transmitter can also function as a router for all WiFi computers connecting to its
network. These computers can then access shared files and printers on the local area network
thereby created. For more information on this subject, please refer to Chapter 11. Welcome to
the Wireless Attitude™!
6.2. On a game console or any other WiFi-equipped device
1. On your game console or other WiFi-equipped device, enable the WiFi connection.
2. First off, you must connect your console to the WiFi network transmitted by your USB
WiFi Transmitter. The name of this WiFi network is Hercules USB.
You must set up your console for automatic configuration of the IP address and DNS
addresses.
If the Hercules WiFi USB network is not secure, a connection will be established automatically. If
the Hercules WiFi USB network is secure, however, you will be prompted to enter a password (or
security key). This functionality is described in the “How can I control access to my WiFi
network?” section, further along in this manual.
3. You can now verify that the connection to the WiFi network is working properly by
launching your Internet browser or favorite online game.
10/50 – User Manual
Page 11

ITALIANO
ESPAÑOL
PORTUGUES
NEDERLANDS
DEUTSCH
ENGLISH
FRANÇAIS
Hercules USB WiFi Transmitter
7. HOW CAN I CONTROL ACCESS TO MY WIFI NETWORK?
By equipping your computer with the Hercules USB WiFi Transmitter, you not only allow other
users to connect to your computer to use your Internet connection; you also allow them to access
data shared on this same computer. It may therefore be essential for you to ensure that only the
computers or WiFi devices you have expressly authorized to do so are able to access your WiFi
network. Similarly, you may very well find it useful to define a connection’s duration validity,
thereby allowing you to limit the periods during which your child is able to connect to the Internet
on another computer in your WiFi network, for example.
The Hercules WiFi Controller software allows you to filter access to your WiFi network and
select the level of protection (none, medium, strong). Two types of security are available:
• Protection via “Access Control”
This protection consists of saving in WiFi Controller the list of WiFi devices
(computers, consoles) with or without authorization to connect to your WiFi network,
identifying them by what is called their “MAC address”.
WiFi Controller also allows you to define the length of time during which a given WiFi
device is authorized to remain connected to your network.
1. When a WiFi device attempts to access your network, WiFi Controller alerts you
and offers a variety of ways to respond to the connection request:
• Always accept this connection
• Accept this connection for a set period of time (from 15 minutes to several
days)
• Always refuse this connection
2. Make your choice among these options and click Validate my choice now.
Русский
User Manual – 11/50
Page 12

Hercules USB WiFi Transmitter
Entering a connection’s duration validity allows you to limit the time
during which your child is able to connect to the network to play online or surf
the Internet, for example. This type of limitation functions as a
complementary element alongside any parental controls you may also have
enabled.
3. The WiFi user receives confirmation of the connection to your network.
4. You can modify the list of devices authorized to or prohibited from connecting at
any time by clicking the Access control tab.
Use the and arrows to move a device from one list to the other.
To remove a device from a list, select it and click the recycle bin icon. The
device will have to make a new request to access your network the next time it
attempts to connect.
limited authorization time. You can view the Connected device list to find
out how much time remains.
12/50 – User Manual
Devices identified with a small icon in the shape of a clock only have a
Page 13
ITALIANO
ESPAÑOL
PORTUGUES
NEDERLANDS
DEUTSCH
ENGLISH
FRANÇAIS
Hercules USB WiFi Transmitter
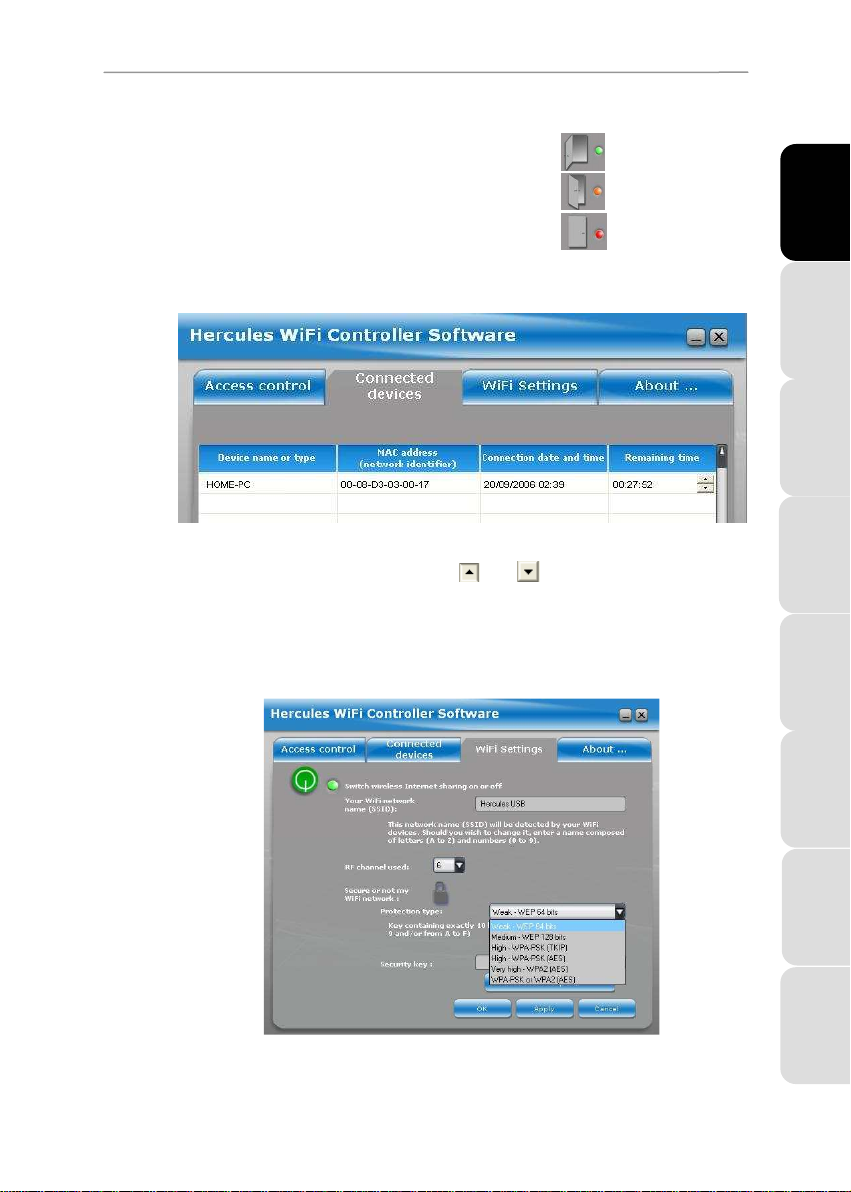
5. You can also toggle between the different levels of access control:
• I don’t want to control the access:
• I want to control the access:
• I want to close the access:
6. To verify which devices are currently connected to your WiFi network and to view
the connections’ duration validity, click the Connected devices tab.
To modify the remaining connection time for a device, position the cursor over
the hours or minutes and click the and arrows. In this way you can
increase or decrease the duration.
• Protection via WEP, WPA or WPA2 security key
This additional protection consists of defining a password which will then be required
of any user wishing to access your WiFi network.
Click the lock icon to select your level of protection according to the compatibility of
your computers or WiFi devices. Next, define a password (or security key).
Русский
User Manual – 13/50
Page 14

Hercules USB WiFi Transmitter
This will then have to be entered on every computer or WiFi device when it first
attempts to connect to your network.
To help you select the best level of security for your network, we invite you to consult
the table below, which sums up the 5 types of security supported by WiFi Manager.
Type Level of security Key used Encryption type
Weak - WEP 64 bits The lowest level of security,
Medium - WEP 128 bits Level of security identical to that of
High - WPA-PSK (TKIP) Latest-generation heightened level
High - WPA-PSK (AES) Latest-generation heightened level
Very High - WPA2
(AES)
WPA or WPA2(AES) Level of security selected by the
whereby single encryption is
carried out on exchanged data.
Each wireless client in the network
must use the same key to decode
the transmission.
WEP 64. Only the key length is
different.
of security, specially designed for
environments such as a small
office or the home, based on a
pre-shared key.
of security, specially designed for
environments such as a small
office or the home, based on a
pre-shared key.
Latest-generation very high level
of security, specially designed for
environments such as a small
office or the home, based on a
pre-shared key.
router according to the maximum
security level supported by
devices on the network.
64-bit (10 character) key in
hexadecimal format.
A hexadecimal key is
composed of numbers 0 to 9
and letters A to F (example:
A123BCD45E for a 64-bit
key).
128-bit (26 character) key in
hexadecimal format.
A hexadecimal key is
composed of numbers 0 to 9
and letters A to F.
Password with a minimum of
8 alphanumeric
characters.
An alphanumeric character
corresponds either to a
number (0-9), or to a letter
(a-z or A-Z).
Password with a minimum of
8 alphanumeric
characters.
An alphanumeric character
corresponds either to a
number (0-9), or to a letter
(a-z or A-Z).
Password with a minimum of
8 alphanumeric
characters.
An alphanumeric character
corresponds either to a
number (0-9), or to a letter
(a-z or A-Z).
Password with a minimum of
8 alphanumeric
characters.
An alphanumeric character
corresponds either to a
number (0-9), or to a letter
(a-z or A-Z).
__
__
TKIP
AES
AES
TKIP or AES
14/50 – User Manual
Page 15
ITALIANO
ESPAÑOL
PORTUGUES
NEDERLANDS
DEUTSCH
ENGLISH
FRANÇAIS
Hercules USB WiFi Transmitter
You must not select a level of security more advanced than that supported by your computers or other
WiFi devices. For example, if your computers or other WiFi devices only support the Weak - WEP 64 bits or
Medium - WEP 128 bits levels, you should not select the High - WPA-PSK or Very High - WPA2 levels.
Generating a key automatically:
If you select protection via WEP key (64 or 128), simply click the Generate a key for me! button
and the software will generate a valid WEP key for you. This key must be entered by any device
wishing to connect to your WiFi network.
• The WiFi Settings tab also allows you to modify the name of your WiFi network and
select the RF channel used:
o Modify the network name:
You can modify the name of your network at any time in the Your WiFi
network name (SSID) field.
o Modify the RF channel:
If many WiFi networks are transmitting in the same area as your own
network, connecting to your network may become more difficult. In order to
avoid this problem, you can select another less-used RF channel.
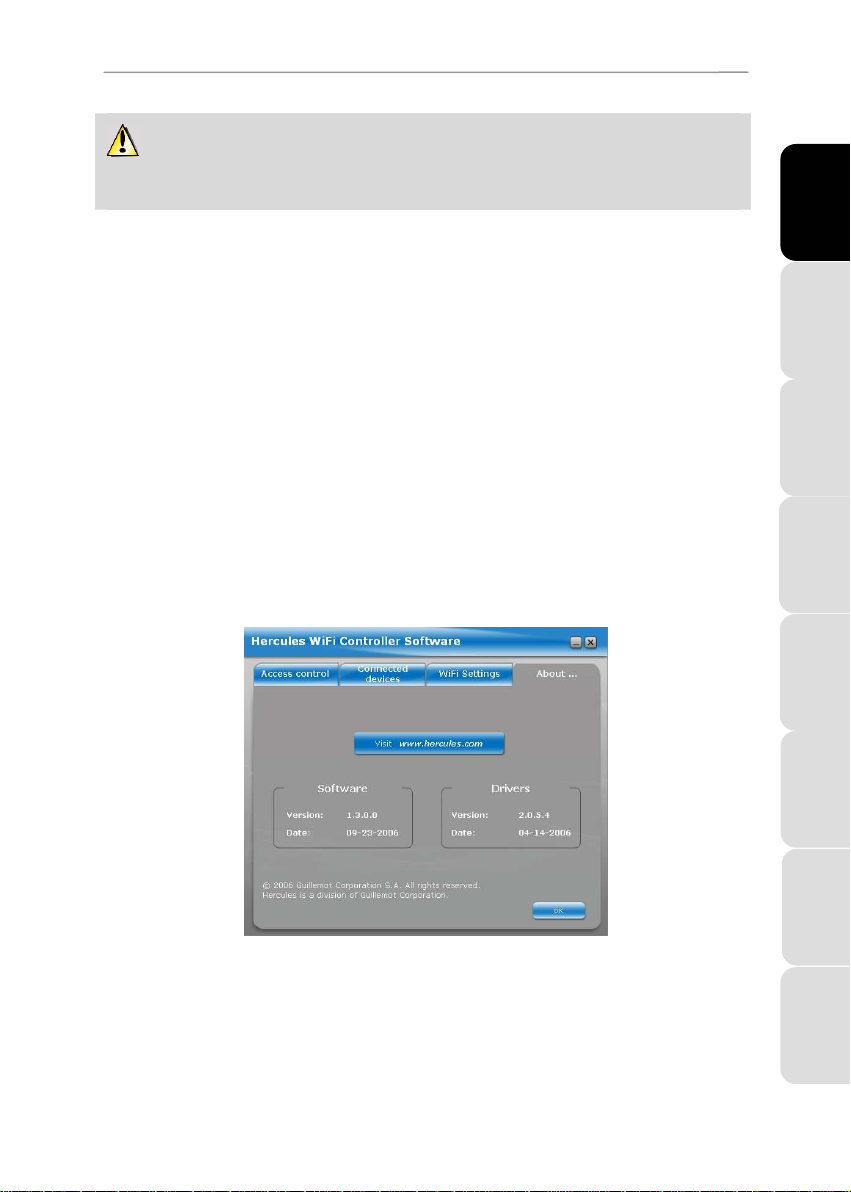
• The About… tab
This window indicates the version number of the software and drivers. This information will be
helpful if you need to contact our technical support service. This window also provides a link to
the www.hercules.com website, where you can find information on new software and driver
versions, as well as FAQs.
Русский
User Manual – 15/50
Page 16

Hercules USB WiFi Transmitter
8. SWITCHING OFF OR RE-ENABLING WIRELESS INTERNET
SHARING
If you no longer wish to share your Internet connection with other computers, you can cut off the
connection by selecting the Switch off wireless Internet sharing option, which can be accessed
by right-clicking the icon in the Windows taskbar.
You can also access this control via the WiFi Settings tab in the Hercules WiFi Controller
software.
You can also unplug the transmitter from its USB port to end Internet sharing.
To re-enable sharing, simply select the Switch on wireless Internet sharing option or plug the
transmitter back into its USB port.
9. IF YOU HAVE TO CHANGE USB PORTS
If you unplug your Hercules USB WiFi Transmitter from its USB port and then plug it into another
USB port on the same computer, Windows will detect the transmitter as a new device. A new
installation procedure is launched:
1. When the Found New Hardware Wizard dialog box appears, select the No, not
this time option and click Next.
16/50 – User Manual
Page 17

ITALIANO
ESPAÑOL
PORTUGUES
NEDERLANDS
DEUTSCH
ENGLISH
FRANÇAIS
Hercules USB WiFi Transmitter
2. In the following dialog box, select the Install the software automatically option
and click Next.
3. Once your Hercules USB WiFi Transmitter has been installed again, click Finish.
Русский
User Manual – 17/50
Page 18

Hercules USB WiFi Transmitter
4. The Hercules WiFi Controller Software asks whether you wish to reestablish
sharing of your Internet connection. Click OK.
5. A message appears to confirm that sharing of your Internet connection is
enabled. Click OK.
This reinstallation procedure only has to be carried out again if you change USB ports once more,
to a port you haven’t used yet with your Hercules USB WiFi Transmitter.
18/50 – User Manual
Page 19

ITALIANO
ESPAÑOL
PORTUGUES
NEDERLANDS
DEUTSCH
ENGLISH
FRANÇAIS
Hercules USB WiFi Transmitter
10. IF YOU CHANGE YOUR INTERNET SERVICE PROVIDER
If you change your Internet service provider, you will have to configure sharing of the connection
again. Click Start – Programs (or All Programs) – Hercules – USB WiFi Transmitter – Share
an Internet connection and follow the on-screen instructions.
Русский
User Manual – 19/50
Page 20

Hercules USB WiFi Transmitter
11. WELCOME TO THE WIRELESS ATTITUDE™!
Now that you have mastered the main functionalities of WiFi Manager, it is time to move on to a few practical
applications. In the following chapters, we will show you how wireless computing is closely linked to userfriendliness and ease of use. Sharing your folders or your printer are some examples of the things we will
help you to do. Enter the world of wireless and join in the Wireless AttitudeTM!
The procedures described in this chapter differ according to the various operating systems
discussed. Please ensure that you refer to the chapters corresponding to your operating system.
11.1. Computers running Windows XP: Sharing folders or a
printer
A simple solution for sharing folders or a printer in Windows XP is to use the Network Setup Wizard. This
Wizard will help you create a real home network.
Note: the access paths mentioned below may vary slightly if you have modified the default display
configuration in Windows XP (meaning the Start menu properties and Control Panel display).
11.1.1. Windows XP: Using the Network Setup Wizard
Proceed as follows for each computer:
1. Click Start/All Programs/Accessories/
Communications/ Network Setup Wizard.
The Network Setup Wizard is launched.
2. Click Next twice.
The window opposite may appear if The Wizard
found disconnected network hardware.
3. If your WiFi Adapter wireless network
connection is not displayed in the list, tick the
Ignore disconnected network hardware
box, then click Next. Otherwise, exit the
Wizard by clicking Cancel and establish the
connection from your network device.
20/50 – User Manual
Page 21

ITALIANO
ESPAÑOL
PORTUGUES
NEDERLANDS
DEUTSCH
ENGLISH
FRANÇAIS
Hercules USB WiFi Transmitter
The window opposite may appear if The Wizard
found a shared Internet connection on the
computer.
4. Select No, let me choose another way to
connect to the Internet, then click Next.
On the computer equipped with the USB WiFi Transmitter:
5. In the Select a connection method window,
select the This computer connects directly
to the Internet. The other computers on my
network connect to the Internet through
this computer option.
6. Click Next, then select the Internet connection
corresponding to your modem. Click Next
again.
7. If your computer has at least three
connections (or network devices), the window
opposite appears. In this case, select the Let
me choose the connections to my network
option, then click Next.
Русский
User Manual – 21/50
Page 22

Hercules USB WiFi Transmitter
8. Among the connections displayed, leave the
box corresponding to your Wireless Network
Connection ticked and deselect the others,
then click Next.
On the computers that will use the shared Internet connection via WiFi:
5. In the Select a connection method window,
select the This computer connects to the
Internet through another computer on my
network or through a residential gateway
option.
6. Click Next.
7. If your computer has at least three
connections (or network devices), the window
opposite appears. In this case, select the
Determine the appropriate connections for
me option.
8. Click Next.
22/50 – User Manual
Page 23

ITALIANO
ESPAÑOL
PORTUGUES
NEDERLANDS
DEUTSCH
ENGLISH
FRANÇAIS
Hercules USB WiFi Transmitter
Proceed as follows for each computer:
9. Enter the computer name and a description, if
required.
Give the computer a name that is unique and
sufficiently distinctive, making it easy to recognize
on the network (my-computer, wifi-computer or
julie, for example).
10. Click Next.
11. Enter the workgroup name (HOME, OFFICE
or HERCULES, for example) and a
description, if required.
The workgroup name must be identical (be sure to
respect the case of letters) for all computers you
wish to link together in a network.
12. Click Next.
13. Verify the configuration settings you have
entered in the window that appears, then click
Next.
The Wizard configures the computer. This may
take a few minutes.
If your network is only composed of computers
running Windows XP:
14. Select the Just finish the wizard option.
If your network is composed of computers running
Windows XP and/or computers running
Windows 98 SE, Me, 2000):
15. You can select the Create a Network Setup
Disk option. This consists of copying this
Wizard onto a storage medium (your choice of
floppy disk or USB key) so that it can be
launched on computers equipped with
operating systems other than Windows XP.
This operation is carried out automatically, once you have selected a medium for saving the Wizard.
Русский
User Manual – 23/50
Page 24

Hercules USB WiFi Transmitter
16. Click Finish to exit the Wizard.
Once the procedure is finished, Windows XP may
prompt you to restart your computer.
You can now access the Internet simply by launching your browser (Internet Explorer or Netscape Navigator).
Sharing folders or a printer, however, requires a few additional operations, but by following the step-by-step
instructions in the next chapters, the subtleties involved will no longer remain a mystery to you.
With some Internet service providers, it may happen that your shared connection is not established
automatically when you launch your Internet browser. If this occurs, you must first establish an Internet
connection on the computer equipped with the modem.
The procedures described in this chapter are specific to Windows XP. For all other questions related
to sharing folders, a printer or an Internet connection, or on using Windows, please refer to the Windows
online help utility.
24/50 – User Manual
Page 25

ITALIANO
ESPAÑOL
PORTUGUES
NEDERLANDS
DEUTSCH
ENGLISH
FRANÇAIS
Hercules USB WiFi Transmitter
11.1.2. Windows XP: Sharing folders
After having configured all of your computers using the Network Setup Wizard, you can now share data
located on different disk drives, as long as the user has authorized access.
1. Select the folder you wish to share, without opening it.
2. Right-click the folder. Select Sharing and Security.
3. In the Network sharing and security section of the
Sharing tab, tick the Share this folder on the network
box.
4. On the Share name line, enter the folder name as it will be
displayed on the network (12 characters maximum to
ensure compatibility with other operating systems).
You can also tick the Allow network users to change my
files box. In this case, the user will be able to read files and
save any changes. If this box is not ticked, the shared files
can only be read, and not changed.
The [Shared folder name] Properties window is divided into two sections. Local sharing and
security only allows for the sharing of files among several users on the same PC. The files are then placed
in a Shared Documents folder. Network sharing and security, however, allows for the sharing of files
among more than one computer.
You can only share the contents of a folder, and not an individual file. We therefore recommend that
you create a folder specifically for this purpose where you will put files to be shared.
5. Click Apply to validate your choices, then click OK to
close the window.
An icon representing a hand beneath the folder indicates that
the folder is now shared.
Русский
User Manual – 25/50
Page 26

Hercules USB WiFi Transmitter
11.1.3. Windows XP: Accessing shared folders
To easily access folders set up for sharing by several computers, it is preferable that the computers belong to
the same workgroup. In Windows XP, the workgroup name has been defined using the Network Setup
Wizard.
1. Click Start/My Computer.
2. Click My Network Places, then click View workgroup
computers.
You directly access the list of computers in your workgroup.
3. Double-click the computer that is sharing the folders you
wish to access.
All shared folders appear.
11.1.4. Windows XP: Sharing a printer
It is possible to put a printer on the network and share it with all computers in the house equipped with a WiFi
adapter.
To access a printer on the network, the printer must be set up for sharing on the computer where it is
connected and installed.
On the computer connected to the printer:
1. Click Start/Control Panel/Printers and Other Hardware/
Printers and Faxes.
2. Right-click the printer and select Sharing.
3. In the Sharing tab, select the Share this printer radio
button and enter a name for your printer.
Give the printer a name that is unique and sufficiently
distinctive, making it easy to recognize (my-printer or home
laser printer, for example). If one of your computers is running
Windows 98 SE, we recommend that the sharing name not
exceed 12 characters (without spaces) in order to ensure its
compatibility with this operating system.
4. Click Apply, then OK.
26/50 – User Manual
Page 27

ITALIANO
ESPAÑOL
PORTUGUES
NEDERLANDS
DEUTSCH
ENGLISH
FRANÇAIS
Hercules USB WiFi Transmitter
On the computers that will use the shared printer via WiFi:
1. Click Start/Control Panel/Printers and Other Hardware/
Printers and Faxes. In the Printer Tasks section, select
Add a printer.
2. The Add Printer Wizard is launched. Click Next.
3. Select the A network printer, or a printer attached to
another computer option, then click Next.
4. In the window that appears, click Next to launch the
search for shared printers.
5. In the list displayed, double-click the computer connected
to the printer.
6. Select the shared printer, then click Next.
7. If you wish, set the shared printer as the default printer,
then click Next.
8. Click Finish to exit the Wizard.
You can now use the network printer thanks to your WiFi
connection. For more information on sharing a printer, please
refer to your printer’s manual.
Русский
User Manual – 27/50
Page 28

Hercules USB WiFi Transmitter
11.1.5. Windows XP: Modifying a workgroup name
It may happen that you need to change the name of your workgroup (advanced users only). To do so,
proceed as follows:
1. Click Start/Control Panel/Performance and
Maintenance/System.
2. In the System Properties window, select the Computer
Name tab.
3. Click the Change… button.
4. In the Computer Name zone, enter a name sufficiently
distinctive that it can easily be recognized in the list of
computers for the workgroup (my-computer, wificomputer or julie, for example).
5. In the Workgroup zone, enter a name for the group
(HOME, OFFICE or HERCULES, for example).
The workgroup name must be identical (be sure to respect the
case of letters) for all computers you wish to link together in a
network.
6. A Windows message indicates that the task has been
carried out successfully and that you must restart the
computer.
7. Repeat this procedure for each computer.
28/50 – User Manual
Page 29

ITALIANO
ESPAÑOL
PORTUGUES
NEDERLANDS
DEUTSCH
ENGLISH
FRANÇAIS
Hercules USB WiFi Transmitter
11.2. Computers running Windows 2000: Sharing folders or a
printer
To create a network of computers, share data or a printer in Windows 2000, it is preferable that the computers
belong to the same workgroup.
11.2.1. Creating a workgroup in Windows 2000
1. Click Start/Settings/Control Panel. Double-click System.
2. In the System Properties window, select the Network
Identification tab.
3. Click the Properties button.
4. In the Computer name zone, enter a name sufficiently
distinctive that it can easily be recognized in the list of
computers for the workgroup (my-computer, wificomputer or julie, for example).
5. In the Workgroup zone, enter a name for the group
(HOME, OFFICE or HERCULES, for example).
The workgroup name must be identical (be sure to respect the
case of letters) for all computers you wish to link together in a
network.
6. Click OK. A Windows message indicates that the task has
been carried out successfully and that you must restart the
computer.
7. Click OK once more.
Русский
User Manual – 29/50
Page 30

Hercules USB WiFi Transmitter
11.2.2. Windows 2000: Sharing folders
1. Select the folder you wish to share, without opening it.
2. Right-click the folder. Select Sharing.
3. In the Sharing tab, select Share this folder.
4. On the Share name line, enter the folder name as it will
be displayed on the network (12 characters maximum to
ensure compatibility with other operating systems).
You can also limit access to the folder by selecting a limited
number of users and the type of access by clicking the
Permissions button.
5. Click Apply, then OK.
11.2.3. Windows 2000: Accessing shared folders
1. Click Start/Programs/Accessories/Windows Explorer.
2. Double-click My Network Places, Entire Network, then
Microsoft Windows Network.
3. Double-click your workgroup.
You access the list of the computers in your workgroup.
4. Double-click the computer that is sharing the folders you
wish to access.
All shared folders appear.
11.2.4. Windows 2000: Sharing a printer
It is possible to put a printer on the network and share it with all computers in the house equipped with a WiFi
adapter.
To access a printer on the network, the printer must be set up for sharing on the computer where it is
connected and installed.
30/50 – User Manual
Page 31

ITALIANO
ESPAÑOL
PORTUGUES
NEDERLANDS
DEUTSCH
ENGLISH
FRANÇAIS
Hercules USB WiFi Transmitter
On the computer connected to the printer:
1. Click Start/Settings/Printers.
2. Right-click the printer and select Sharing….
3. In the Sharing tab, select the Shared as: radio button and
enter a name for your printer.
Give the printer a name that is unique and sufficiently
distinctive, making it easy to recognize (my-printer or home
laser printer, for example). If one of your computers is running
Windows 98 SE, we recommend that the sharing name not
exceed 12 characters (without spaces) in order to ensure its
compatibility with this operating system.
4. Click Apply, then OK.
On the computers that will use the shared printer via WiFi:
1. Click Start/Settings/Printers. Double-click the Add
Printer icon.
2. The Add Printer Wizard is launched. Click Next.
3. Select the Network printer option, then click Next.
4. Click Next to locate the shared printer.
5. In the list displayed, double-click the computer connected
to the printer.
6. Select the shared printer, then click Next.
Русский
User Manual – 31/50
Page 32

Hercules USB WiFi Transmitter
7. If you wish, set the shared printer as the default printer,
then click Next.
8. Click Finish to close the Wizard.
You can now use the network printer thanks to your WiFi
connection. For more information on sharing a printer, please
refer to your printer’s manual.
11.2.5. Windows 2000: Modifying a workgroup name
It may happen that you need to change the name of your workgroup (advanced users only). To do so,
proceed as follows:
1. Click Start/Settings/Control Panel. Double-click
System.
2. In the System Properties window, select the
Network Identification tab.
3. Click the Properties button.
4. In the Computer name zone, enter a name
sufficiently distinctive that it can easily be recognized
in the list of computers for the workgroup (mycomputer, wifi-computer or julie, for example).
5. In the Workgroup zone, enter a name for the group
(HOME, OFFICE or HERCULES, for example).
The workgroup name must be identical (be sure to
respect the case of letters) for all computers you wish to
link together in a network.
6. Click OK. A Windows message indicates that the
task has been carried out successfully and that you
must restart the computer.
7. Repeat this procedure for each computer.
32/50 – User Manual
Page 33

ITALIANO
ESPAÑOL
PORTUGUES
NEDERLANDS
DEUTSCH
ENGLISH
FRANÇAIS
Hercules USB WiFi Transmitter
11.2.6. Windows 2000: Accessing the shared Internet
connection
Proceed as follows for each computer that will use the shared Internet connection via WiFi:
1. Click Start/Settings/Network and Dial-up Connections.
2. Select the connection to the local area network
corresponding to your WiFi device.
3. Right-click the connection and select Properties.
4. In the Local Area Connection Properties window, select
Internet Protocol (TCP/IP).
5. Click Properties.
6. In the Internet Protocol (TCP/IP) Properties window,
select Obtain an IP address automatically and Obtain
DNS server address automatically.
7. Click OK to close the windows.
Windows may prompt you to restart your computer.
To access the Internet, you can now simply launch your
Internet browser.
Русский
User Manual – 33/50
Page 34

Hercules USB WiFi Transmitter
11.3. Computers running Windows Me: Sharing folders or a
printer
A simple solution for sharing folders or a printer in Windows Me is to use the Home Networking Wizard. This
Wizard will help you create a real home network.
11.3.1. Windows Me: Using the Home Networking Wizard
1. Click Start/Programs/Accessories/Communications/
Home Networking Wizard.
The Wizard is launched.
2. Click Next.
If you have already used this Wizard on this
computer, the Setup Options panel appears. Select I want
to edit my Home Networking settings on this computer,
then click Next.
3. In the Internet Connection window, select the A direct
connection to my ISP using the following device:
option.
4. Select your WiFi adapter in the drop-down list, then
click Next.
5. If the Internet Connection Sharing window appears,
select No, I do not want to share my Internet
connection.
6. Click Next.
34/50 – User Manual
Page 35

ITALIANO
ESPAÑOL
PORTUGUES
NEDERLANDS
DEUTSCH
ENGLISH
FRANÇAIS
Hercules USB WiFi Transmitter
7. Enter the computer name.
Give the computer a name that is unique and sufficiently
distinctive, making it easy to recognize in the list of
workgroup computers (my-computer, wifi-computer or julie,
for example).
8. Select the Use this workgroup name option and enter
the workgroup name (HOME, OFFICE or HERCULES,
for example).
The workgroup name must be identical (be sure to respect
the case of letters) for all computers you wish to link
together in a network.
9. Click Next.
10. If you wish, you can enable sharing for the My
Documents folder by ticking the My Documents folder
and folders in it box. In this case, the Wizard will
prompt you to enter a password.
11. If you wish, you can enable sharing of your printer by
selecting it in the list.
12. Click Next.
13. Before completing the procedure, you may copy this
Wizard onto a setup disk so that it can be launched on
computers equipped with operating systems other than
Windows Me. In this case, select the Yes, create a
Home Networking Setup disk option.
This operation is carried out automatically, once you have
selected a medium for saving the Wizard.
14. Click Finish to exit the Wizard.
Once the procedure is finished, Windows Me prompts you
to restart your computer. Once your computer has
restarted, a message invites you to configure your other
computers.
Русский
User Manual – 35/50
Page 36

Hercules USB WiFi Transmitter
11.3.2. Windows Me: Sharing folders
After having configured all of your computers using the Home Networking Wizard, you can now share data
located on different disk drives, as long as the user has authorized access.
1. Select the folder you wish to share, without opening it.
2. Right-click the folder. Select Sharing.
3. In the Sharing tab, select Shared As.
4. On the Share Name line, enter the folder name as it
will be displayed on the network (12 characters
maximum).
You can also limit access to the folder by selecting the
type of access and a password.
If the Sharing tab does not appear, you must
enable file sharing.
1. Click Start/Settings/Control Panel. Double-click
Network.
2. In the Network window, click the File and Print
Sharing… button.
3. Tick the I want to be able to give others access to
my files box.
Windows may prompt you to insert the installation CDROM.
11.3.3. Windows Me: Accessing shared folders
To easily access folders set up for sharing by several computers, it is preferable that the computers belong to
the same workgroup. In Windows Me, the workgroup name has been defined using the Home Networking
Wizard.
1. Click Start/Programs/Windows Explorer.
2. Double-click Network Neighborhood and expand it.
You access the list of the computers in your workgroup.
3. Double-click the computer that is sharing the folders you
wish to access.
All shared folders appear.
36/50 – User Manual
Page 37

ITALIANO
ESPAÑOL
PORTUGUES
NEDERLANDS
DEUTSCH
ENGLISH
FRANÇAIS
Hercules USB WiFi Transmitter
11.3.4. Windows Me: Sharing a printer
It is possible to put a printer on the network and share it with all computers in the house equipped with a WiFi
adapter.
To access a printer on the network, the printer must be set up for sharing on the computer where it is
connected and installed.
On the computer connected to the printer:
1. Click Start/Settings/Printers.
2. Right-click the printer and select Sharing.
3. In the Sharing tab, select the Shared As radio button and
enter a name for your printer.
Give the printer a name that is unique and sufficiently
distinctive, making it easy to recognize (printer or wifi printer,
for example).
4. Click Apply, then OK.
If the Sharing tab does not appear, you must enable file
sharing.
1. Click Start/Settings/Control Panel. Double-click
Network.
2. In the Network window, click the File and Print Sharing…
button.
3. Tick the I want to be able to allow others to print to my
printer(s) box.
Windows may prompt you to restart your computer.
Русский
User Manual – 37/50
Page 38

Hercules USB WiFi Transmitter
On the computers that will use the shared printer via WiFi:
1. Click Start/Settings/Printers. Double-click the Add
Printer icon.
2. The Add Printer Wizard is launched. Click Next.
3. Select the Network printer option, then click Next.
4. Click Browse… to locate the shared printer.
5. In the list displayed, double-click the computer connected
to the printer.
6. Select the shared printer, then click OK.
7. Click Next.
8. If you wish, set the shared printer as the default printer,
then click Next.
9. Click Finish to close the Wizard.
You can now use the network printer thanks to your WiFi
connection. For more information on sharing a printer, please
refer to your printer’s manual.
38/50 – User Manual
Page 39

ITALIANO
ESPAÑOL
PORTUGUES
NEDERLANDS
DEUTSCH
ENGLISH
FRANÇAIS
Hercules USB WiFi Transmitter
11.3.5. Windows Me: Modifying a workgroup name
It may happen that you need to change the name of your workgroup (advanced users only). To do so,
proceed as follows:
1. Click Start/Settings/Control Panel. Double-click
Network.
2. Select the Identification tab.
3. In the Computer name zone, enter a name
sufficiently distinctive that it can easily be recognized
in the list of computers for the workgroup (mycomputer, wifi-computer or julie, for example).
4. In the Workgroup zone, enter a name for the group
(HOME, OFFICE or HERCULES, for example).
The workgroup name must be identical (be sure to
respect the case of letters) for all computers you wish to
link together in a network.
5. Click OK. A Windows message indicates that the
task has been carried out successfully and that you
must restart the computer.
6. Repeat this procedure for each computer.
Русский
User Manual – 39/50
Page 40

Hercules USB WiFi Transmitter
11.4. Computers running Windows 98 SE: Sharing folders or a
printer
To create a network of computers, share data or a printer in Windows 98 SE, it is preferable that the
computers belong to the same workgroup.
11.4.1. Windows 98 SE: Creating a workgroup
1. Click Start/Settings/Control Panel. Double-click
Network.
2. Select the Identification tab.
3. In the Computer name zone, enter a name sufficiently
distinctive that it can easily be recognized in the list of
computers for the workgroup (my-computer, wifi-
computer or julie, for example).
4. In the Workgroup zone, enter a name for the group
(HOME, OFFICE or HERCULES, for example).
The workgroup name must be identical (be sure to respect
the case of letters) for all computers you wish to link
together in a network.
5. Click OK. Windows prompts you to restart your
computer.
6. Repeat this procedure for each computer.
Note: to modify the name of a workgroup, follow the same procedure.
11.4.2. Windows 98 SE: Sharing folders
1. Select the folder you wish to share, without opening it.
2. Right-click the folder. Select Sharing.
3. In the Sharing tab, select Shared As.
4. On the Share Name line, enter the folder name as it
will be displayed on the network (12 characters
maximum).
You can also limit access to the folder by selecting the
type of access and a password.
If the sharing tab does not appear, you must enable
file sharing.
40/50 – User Manual
Page 41

ITALIANO
ESPAÑOL
PORTUGUES
NEDERLANDS
DEUTSCH
ENGLISH
FRANÇAIS
Hercules USB WiFi Transmitter
1. Click Start/Settings/Control Panel. Double-click
Network.
2. In the Network window, click the File and Print
Sharing… button.
3. Tick the I want to be able to give others access to
my files box, then click OK.
4. Click OK to close the window.
Windows may prompt you to insert the installation CDROM and restart the computer.
11.4.3. Windows 98 SE: Accessing shared folders
1. Click Start/Programs/Windows Explorer.
2. Double-click Network Neighborhood and expand it.
You access the list of the computers in your workgroup.
3. Double-click the computer that is sharing the folders you
wish to access.
All shared folders appear.
11.4.4. Windows 98 SE: Sharing a printer
It is possible to put a printer on the network and share it with all computers in the house equipped with a WiFi
adapter.
To access a printer on the network, the printer must be set up for sharing on the computer where it is
connected and installed.
On the computer connected to the printer:
1. Click Start/Settings/Printers.
2. Right-click the printer and select Sharing.
3. In the Sharing tab, select Shared As and enter a name
for your printer.
Give the printer a name that is unique and sufficiently
distinctive, making it easy to recognize (printer or wifi
printer, for example).
4. Click Apply, then OK.
If the Sharing tab does not appear, you must enable
file sharing.
Русский
User Manual – 41/50
Page 42

Hercules USB WiFi Transmitter
1. Click Start/Settings/Control Panel. Double-click
Network.
2. In the Network window, click the File and Print
Sharing… button.
3. Tick the I want to be able to allow others to print to
my printer(s) box.
Windows prompts you to restart your computer.
On the computers that will use the shared printer via WiFi:
1. Click Start/Settings/Printers. Double-click the Add
Printer icon.
2. The Add Printer Wizard is launched. Click Next.
3. Select the Network printer option, then click Next.
4. Click Browse… to locate the shared printer.
5. In the list displayed, double-click the computer connected
to the printer.
6. Select the shared printer, then click OK.
7. Click Next.
8. If you wish, set the shared printer as the default printer,
then click Next.
9. Click Finish to close the Wizard.
You can now use the network printer thanks to your WiFi
connection. For more information on sharing a printer, please
refer to your printer’s manual.
42/50 – User Manual
Page 43

ITALIANO
ESPAÑOL
PORTUGUES
NEDERLANDS
DEUTSCH
ENGLISH
FRANÇAIS
Hercules USB WiFi Transmitter
11.4.5. Windows 98 SE: Accessing a shared Internet connection
Proceed as follows for each computer that will use the shared Internet connection via WiFi:
1. Click Start/Settings/Control Panel. Double-click
Network.
2. In the Configuration tab of the Network window,
select the TCP/IP -> <your WiFi device> component.
3. Click Properties.
4. In the IP Address tab, select Obtain an IP address
automatically.
Русский
User Manual – 43/50
Page 44

Hercules USB WiFi Transmitter
5. In the Gateway tab, if there are gateways installed,
select them and click Remove.
6. Click OK to close the windows.
Windows may prompt you to restart your computer.
To access the Internet, you can now simply launch your
Internet browser.
44/50 – User Manual
Page 45

ITALIANO
ESPAÑOL
PORTUGUES
NEDERLANDS
DEUTSCH
ENGLISH
FRANÇAIS
Hercules USB WiFi Transmitter
12. UNINSTALLING YOUR HERCULES USB WIFI TRANSMITTER
To uninstall your Hercules USB WiFi Transmitter and its software components, simply click Start
– Programs (or All Programs) – Hercules – USB WiFi Transmitter – Uninstall USB WiFi
Transmitter key and follow the on-screen instructions.
You can also uninstall the device and software by clicking Start – Settings – Control Panel –
Add or Remove Programs and selecting it in the list.
Once the Hercules USB WiFi Transmitter and its software components have been uninstalled, the
InstallShield Wizard will prompt you to restart your computer. Unplug your Hercules USB WiFi
Transmitter key from its USB port, select the option of your choice and click Finish.
Русский
User Manual – 45/50
Page 46

Hercules USB WiFi Transmitter
13. TECHNICAL SUPPORT
If you encounter a problem with your product, please go to http://ts.hercules.com and select your
language. From there you will be able to access various utilities (Frequently Asked Questions
(FAQ), the latest versions of drivers and software) that may help to resolve your problem. If the
problem persists, you can contact the Hercules products technical support service (“Technical
Support”):
By email:
In order to take advantage of technical support by email, you must first register online. The
information you provide will help the agents to resolve your problem more quickly.
Click Registration on the left-hand side of the Technical Support page and follow the on-screen
instructions.
If you have already registered, fill in the Username and Password fields and then click Login.
By telephone:
United
Kingdom
United States
Canada
Denmark
Sweden
Finland
08450800942
Charges at local rate
1-866-889-5036
Free
1-866-889-2181
Free
80887690
Free
0200884567
Free
0800 913060
Free
Monday to Friday from Noon to 4pm and 5pm to 10pm
Saturday from 9am to Noon and 1pm to 7pm
Sunday from 9am to Noon and 1pm to 4pm
Monday to Friday from 7am to 11am and from Noon to 5pm
Saturday and Sunday from 7am to Noon
(Eastern Standard Time)
Monday to Friday from 7am to 11am and from Noon to 5pm
Saturday and Sunday from 7am to Noon
(Eastern Standard Time)
Monday to Friday from 1pm to 5pm and 6pm to 11pm (English)
Saturday from 9am to 1pm and 2pm to 8pm
Sunday from 10am to 1pm and 2pm to 5pm
Monday to Friday from 1pm to 5pm and 6pm to 11pm (English)
Saturday from 9am to 1pm and 2pm to 8pm
Sunday from 10am to 1pm and 2pm to 5pm
Monday to Friday from 2pm to 6pm and 7pm to Midnight (English)
Saturday from 10am to 2pm and 3pm to 9pm
Sunday from 11am to 2pm and 3pm to 6pm
46/50 – User Manual
Page 47

ITALIANO
ESPAÑOL
PORTUGUES
NEDERLANDS
DEUTSCH
ENGLISH
FRANÇAIS
Hercules USB WiFi Transmitter
14. WARRANTY
Worldwide, Guillemot Corporation S.A. (“Guillemot”) warrants to the consumer that this Hercules
product will be free from material defects and manufacturing flaws for a period of two (2) years
from the original date of purchase. Should the product appear to be defective during the warranty
period, immediately contact Technical Support, who will indicate the procedure to follow. If the
defect is confirmed, the product must be returned to its place of purchase (or any other location
indicated by Technical Support).
Within the context of this warranty, the consumer’s defective product will, at Technical Support’s
option, be either repaired or replaced. Where authorized by applicable law, the full liability of
Guillemot and its subsidiaries (including for indirect damages) is limited to the repair or
replacement of the Hercules product. The consumer’s legal rights with respect to legislation
applicable to the sale of consumer goods are not affected by this warranty.
This warranty shall not apply: (1) if the product has been modified, opened, altered, or has
suffered damage as a result of inappropriate or abusive use, negligence, an accident, normal
wear, or any other cause not related to a material defect or manufacturing flaw; (2) in the event of
failure to comply with the instructions provided by Technical Support; (3) to software not published
by Guillemot, said software being subject to a specific warranty provided by its publisher.
Русский
User Manual – 47/50
Page 48

Hercules USB WiFi Transmitter
Declaration of conformity with EU directives
This device can be used in: AT, BE, CZ, DK, EE, FI, FR, DE, GR, HU, IE, IT, LU, NL, PL, PT, ES, SE, GB, IS, NO, CH, BG,
RO, TR.
Hereby, GUILLEMOT CORPORATION, Carentoir France, declares that this Hercules USB WiFi Transmitter is in
compliance with the essential requirements and other relevant provisions of Directive 1999/5/EC. The Declaration of
Conformity can be consulted at this website address:
ftp://ftp.hercules.com/wifi/DoC/DoC-eng_Hercules_USB_WiFi_Transmitter.pdf
Hercules is a division of Guillemot Corporation.
This equipment has been tested and found to comply with Directive 1999/5/CE of the European Parliament and of the Council
on radio equipment and telecommunications terminal equipment and the mutual recognition of their conformity. After
assessment, the equipment has been found to comply with the following standards: EN 300.328 (radio), EN 301 489-1, EN
301 489-17 (electromagnetic compatibility) and EN 60950 (safety). This equipment may be used in all European Union
countries and in all countries applying Directive 1999/5/CE, without restriction, with the exception of the following countries:
FRANCE:
When this equipment is used outdoors, output power is limited to within the frequency bands listed below. For more
information, consult the ART website: www.art-telecom.fr.
Location Frequency band (MHz) Power (EIRP)
Indoor (no restrictions) 2400 – 2483.5 100mW (20dBm)
Outdoor 2400 – 2454
2454 – 2483.5
Operation of this equipment in a residential environment may give rise to radio interference; if so, it is incumbent upon the
user to rectify the situation.
ITALY:
This device complies with the National Radio Interface and the requirements of the Frequency Allocation Table. Use of this
wireless product outside of the boundaries of the owner’s property requires a general authorization. For more information,
consult the website www.comunicazioni.it.
CANADIAN USERS:
This class B digital apparatus meets all requirements of the Canadian Interference-Causing Equipment Regulations.
100mW (20dBm)
10mW (10dBm)
FCC Warning
Changes or modifications not expressly approved by the party responsible for compliance could void the user's authority to
operate the equipment or modifications not expressly approved by the party responsible for compliance could void the user's
authority to operate the equipment.
Note: This equipment has been tested and found to comply with the limits for a Class B digital device, pursuant to part 15 of
the FCC Rules. These limits are designed to provide reasonable protection against harmful interference in a residential
installation. This equipment generates, uses and can radiate radio frequency energy and, if not installed and used in
accordance with the instructions, may cause harmful interference to radio communications. However, there is no guarantee
that interference will not occur in a particular installation. If this equipment does cause harmful interference to radio or
television reception, which can be determined by turning the equipment off and on, the user is encouraged to try to correct
the interference by one or more of the following measures:
—Reorient or relocate the receiving antenna.
—Increase the separation between the equipment and receiver.
—Connect the equipment into an outlet on a circuit different from that to which the receiver is connected.
—Consult the dealer or an experienced radio/TV technician for help.
This product complies with FCC 15.247 standard regarding exposure of human beings to radio frequency electromagnetic
energy.
48/50 – User Manual
Page 49

ITALIANO
ESPAÑOL
PORTUGUES
NEDERLANDS
DEUTSCH
ENGLISH
FRANÇAIS
Hercules USB WiFi Transmitter
Copyright - Trademarks
© Guillemot Corporation S.A. 2006. All rights reserved. Hercules® is a registered trademark of
Guillemot Corporation S.A. Windows® and Windows® XP™ are trademarks or registered
trademarks of Microsoft Corporation in the United States and/or other countries. All other
trademarks and brand names are hereby acknowledged and are property of their respective
owners. Illustrations not binding. Contents, designs and specifications are subject to change
without notice and may vary from one country to another.
ENVIRONMENTAL PROTECTION RECOMMENDATION
At the end of its working life, this product should not be disposed of
with standard household waste, but rather dropped off at a collection
point for the disposal of Waste Electrical and Electronic Equipment
(WEEE) for recycling.
This is confirmed by the symbol found on the product, user manual or
packaging.
Depending on their characteristics, the materials may be recycled.
Through recycling and other forms of processing Waste Electrical and
Electronic Equipment, you can make a significant contribution towards
helping to protect the environment.
Please contact your local authorities for information on the collection point nearest you.
Русский
User Manual – 49/50
Page 50

Hercules USB WiFi Transmitter
NOTES:
50/50 – User Manual
 Loading...