

Heatmiser TM4-TS Instruction Manual

Model: TM4-TS
1
Time Clock Series
Model: TM4-TS

Table of Contents
1
2
3-4
5-6
7
8
9
10
11
12
13
13
14
Product Image
Table of Contents
Installation Procedure
LCD Display
Normal Run Mode
Setting the Clock
Holiday
Selecting 5/2 Day or 7 Day Programming
Adjusting the Switching Times
Copy Function
Mode Select
Boost Facility
Wiring Diagram
Model: TM4-TS
2

3
Time Clock Series
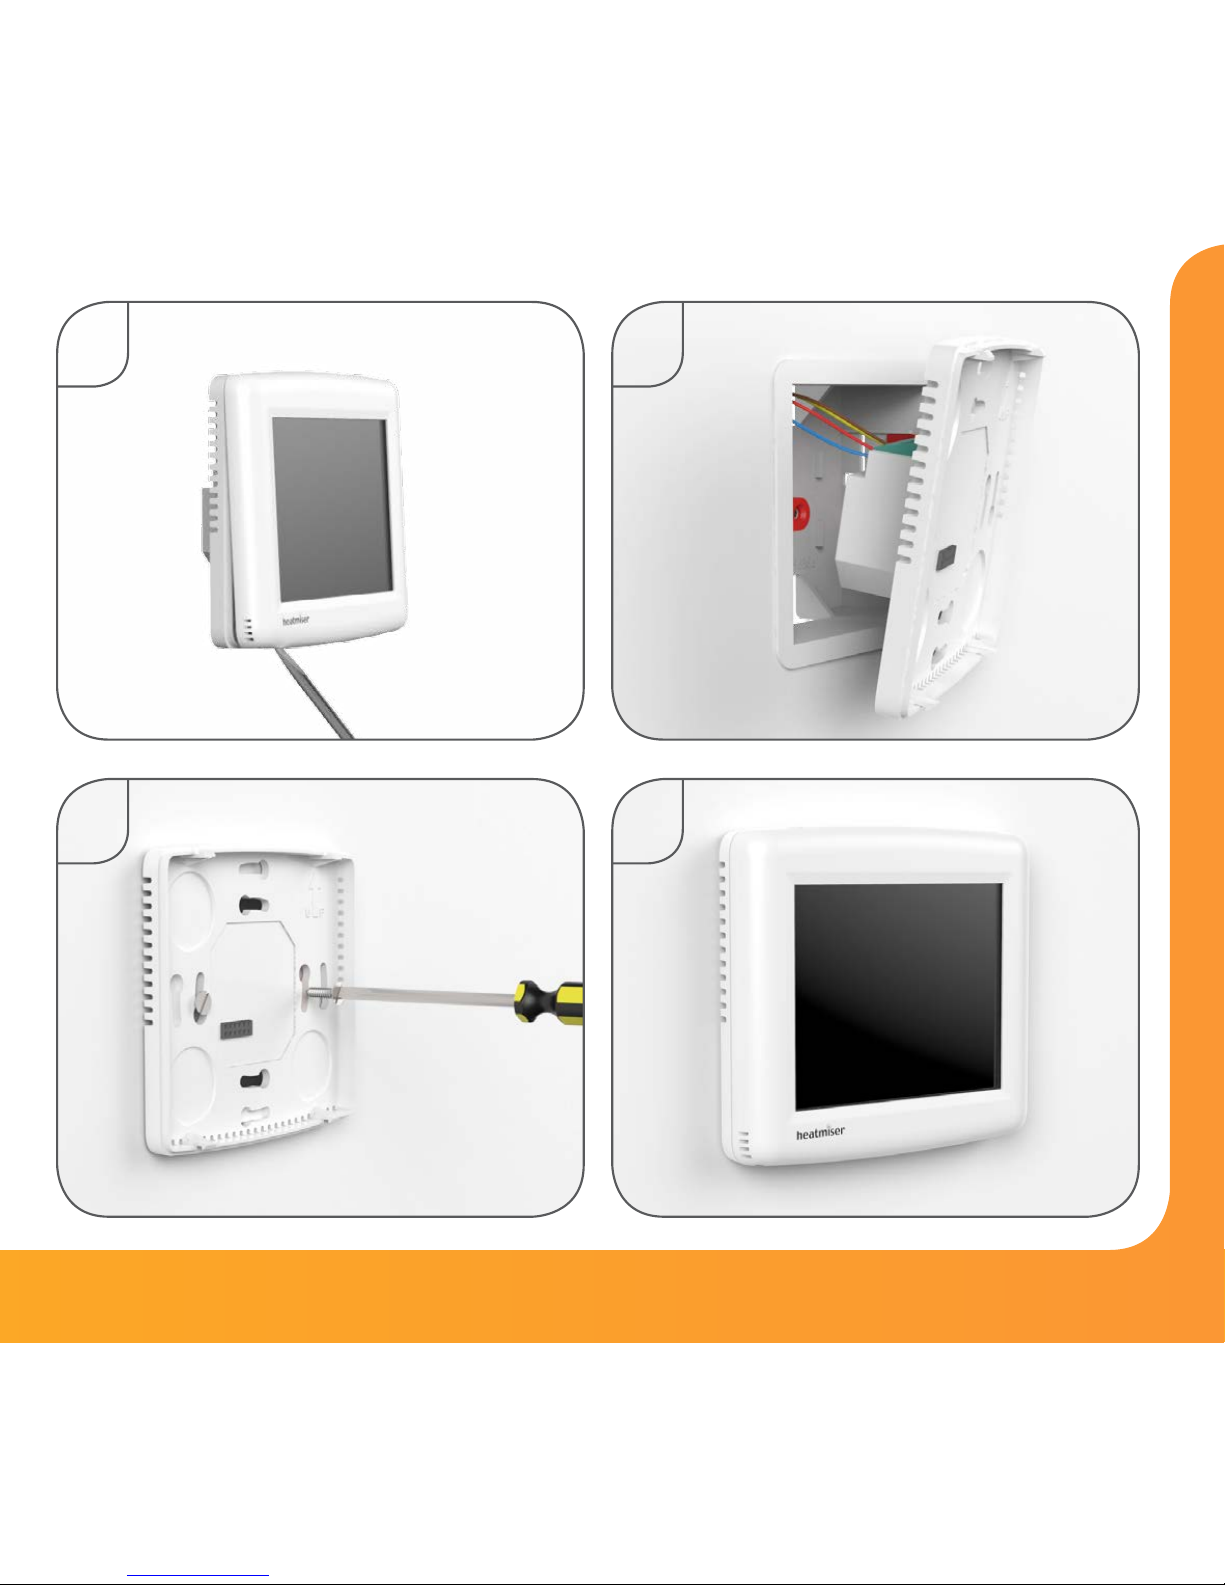
Installation Procedure
This time clock is designed to be flush mounted and requires a back box of 35mm
(minimum depth) to be sunk into the wall prior to installation.
Step 1
Carefully separate the front half of the time clock from the back plate by placing a
small flat head terminal driver into the slots on the bottom face of the time clock.
Step 2
Place the front of the time clock somewhere safe.
Terminate the time clock as shown on the wiring diagram on page 14 of this booklet.
Step 3
Screw the time clock back plate securely into the back box.
Step 4
Clip the front of the time clock on to the back plate.
Do
Mount the time clock at eye level.
Read the instructions fully so you get the best from our product..
Don’t
Do not install near to a direct heat source as this will affect functionality.
Do not push hard on the LCD screen as this may cause irreparable damage.
Model: TM4-TS
4
1 2
3 4
 Loading...