

Heartland HCTMR20A User Instructions

AGA Marvel
1260 E. VanDeinse St.
Greenville MI 48838
Toll free phone: 800-223-3900
Fax: 616-754-9690
www.agamarvel.com
THANK YOU for purchasing this high-quality product. If you should experience a problem not covered
in TROUBLESHOOTING, please visit our website at www.agamarvel.com for additional information. If
you still need assistance, call us at 1-800-223-3900.
You will need your model and serial number, located on the inside wall of the refrigerator compartment.
Classic Model HCTMR20A Refrigerator User Instructions
FINDING INFORMATION AND SAFETY
Table of Contents
Table of contents ................................................................2
Safety .................................................................................2
Unpacking your appliance ..................................................3
Electrical information ..........................................................4
Product dimensions ............................................................5
Installation ..........................................................................6
Removing the doors ...........................................................8
Controls .............................................................................9
Normal operating sounds .................................................10
Care and cleaning ............................................................11
Troubleshooting .................................................................13
Warranty ...........................................................................14
Important Safety Instructions
Warnings and safety instructions appearing in this guide
are not meant to cover all possible conditions and situations that may occur. Common sense, caution, and care
must be exercised when installing, maintaining, or operating this appliance.
Recognize Safety Symbols,
Words, and Labels.
!
WARNING
WARNING-You can be killed or seriously injured if
you do not follow these instructions.
!
CAUTION
CAUTION-Hazards or unsafe practices which could re-
sult in personal injury or property / product damage.
NOTE
CFC/HCFC DISPOSAL
Your old refrigerator may have a cooling system that used
CFCs or HCFCs (chlorouorocarbons or hydrochlorouorocarbons). CFCs and HCFCs are believed to harm stratospheric ozone if released to the atmosphere. Other refrigerants may also cause harm to the environment if released to
the atmosphere.
If you are throwing away your old refrigerator, make sure
the refrigerant is removed for proper disposal by a qualied
technician. If you intentionally release refrigerant, you may
be subject to nes and imprisonment under provisions of
environmental legislation.
!
CAUTION
• Do not store or use gasoline or other ammable liquids
near this or any other appliance. Read product labels
for warnings regarding ammability and other hazards.
• Do not operate the refrigerator in the presence of explosive fumes.
NOTE
NOTE-Important information to help assure a problem
free installation and operation.
!
WARNING
State of California Proposition 65 Warning:
This product contains one or more chemicals known
to the State of California to cause cancer.
!
WARNING
State of California Proposition 65 Warning:
This product contains one or more chemicals known
to the State of California to cause birth defects or
other reproductive harm..
2
UNPACKING YOUR APPLIANCE
!
WARNING
EXCESSIVE WEIGHT HAZARD
Use two or more people to move product.
Failure to do so can result in personal injury.
Remove Interior Packaging
Your appliance has been packed for shipment with all parts
that could be damaged by movement securely fastened.
Remove internal packing materials and any tape holding internal components in place. The owners manual is shipped
inside the product in a plastic bag along with the warranty
registration card, and other accessory items.
Important
Keep your carton and packaging until your appliance has
been thoroughly inspected and found to be in good condition. If there is damage, the packaging will be needed as
proof of damage in transit. Afterwards please dispose of all
items responsibly.
Warranty Registration
It is important you send in your warranty registration card
immediately after taking delivery of your appliance or you
can register online at www.agamarvel.com.
The following information will
be required when registering
your appliance.
Model Number
Serial Number
Date of Purchase
Dealer’s name and address
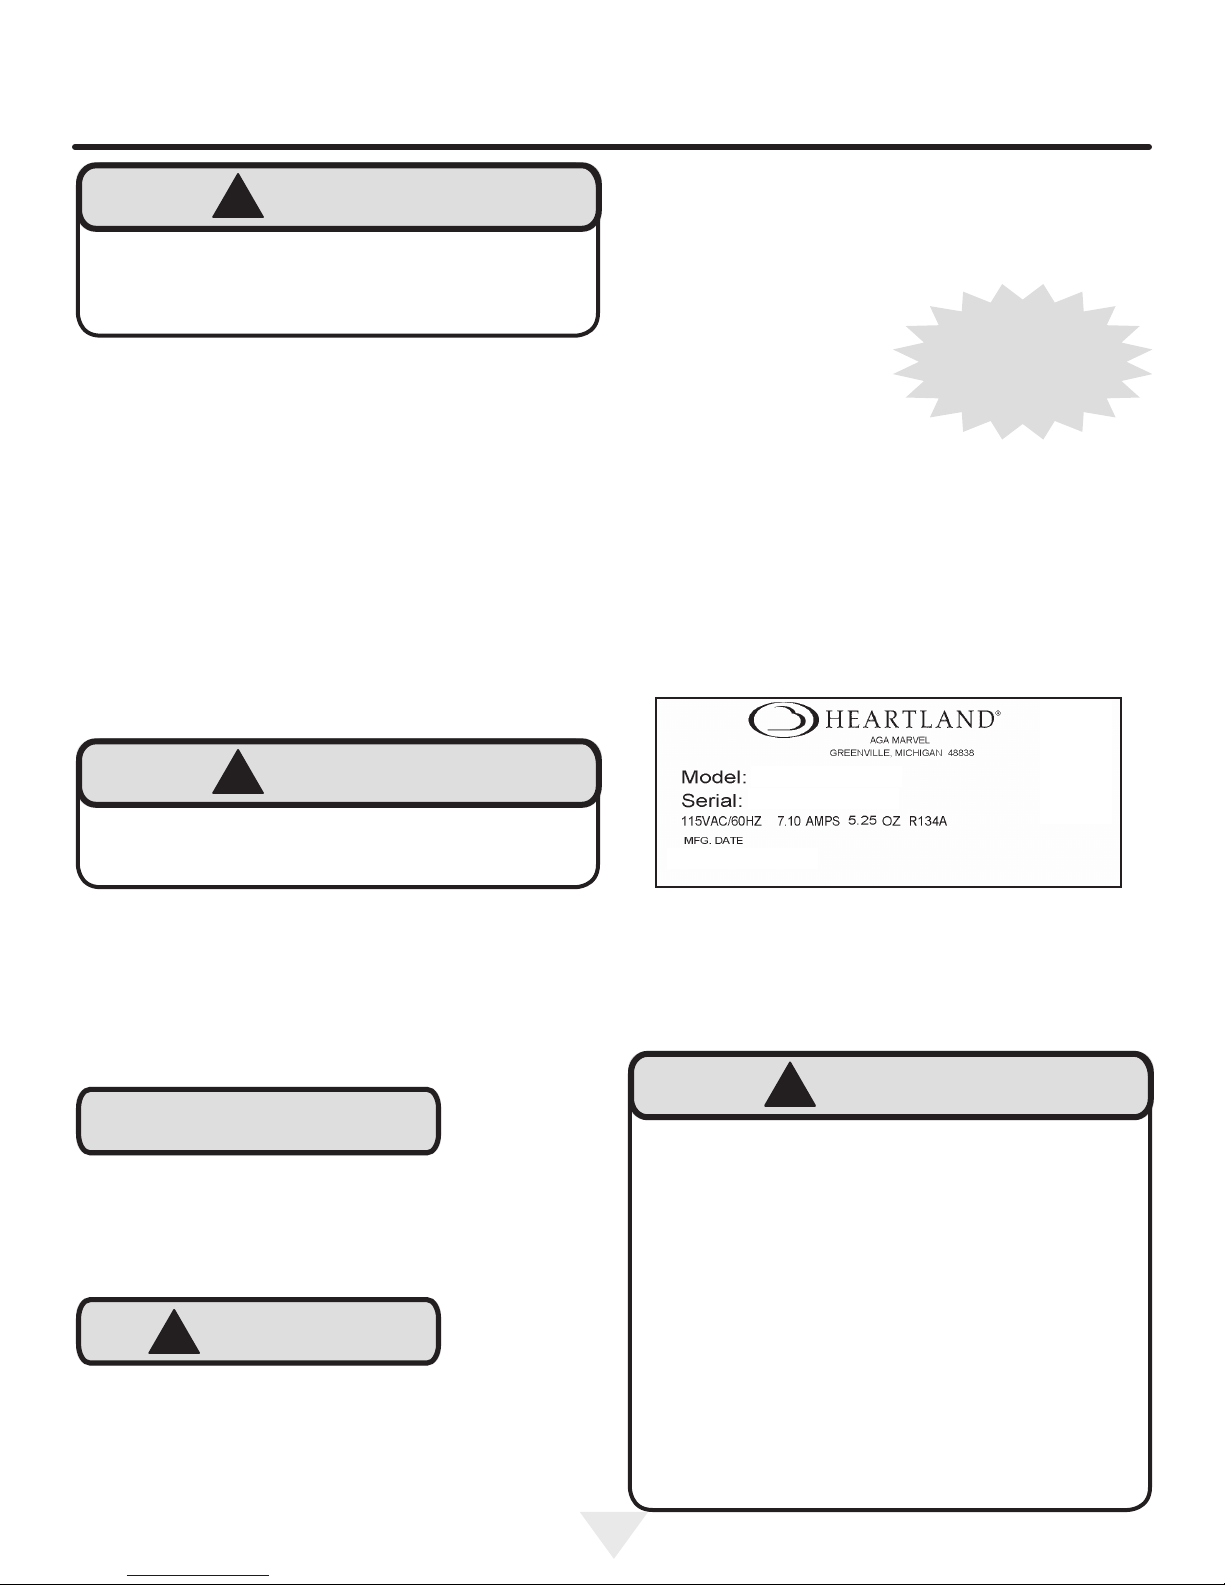
The service number and serial number can be found on the
serial plate which is located inside the right side refrigerator
cabinet on the right side of the cabinet liner. (See gure 1).
Online registration
available at
www.agamarvel.com
!
WARNING
Dispose of the plastic bags which can be a suffocation hazard.
Note to Customer
This merchandise was carefully packed and thoroughly
inspected before leaving our plant. Responsibility for its
safe delivery was assumed by the retailer upon acceptance
of the shipment. Claims for loss or damage sustained in
transit must be made to the retailer.
NOTE
DO NOT RETURN DAMAGED MERCHANDISE TO THE
MANUFACTURER - FILE THE CLAIM WITH THE
RETAILER.
!
CAUTION
Figure 1
!
WARNING
Help Prevent Tragedies
Child entrapment and suffocation are not problems
of the past. Junked or abandoned refrigerators are
still dangerous - even if they sit out for "just a few
hours".
If you are getting rid of your old refrigerator, please
follow the instructions below to help prevent accidents.
If the appliance was shipped, handled, or stored in other
than an upright position for any period of time, allow the appliance to sit upright for a period of at least 24 hours before
plugging in. This will assure oil returns to the compressor.
Plugging the appliance in immediately may cause damage
to internal parts.
Before you throw away your old refrigerator or
freezer:
• Take off the doors or remove the drawers.
• Leave the shelves in place so children may not
easily climb inside.
3

ELECTRICAL INFORMATION
Figure 2
Do not remove
ground prong
Figure 3
Electrical information
!
WARNING
You must follow these guidelines to ensure
that your refrigerator’s safety mechanisms are
operating correctly.
• The refrigerator must be plugged into its own dedicated 115 Volt, 60 Hz, AC-only non-GFCI electric outlet.
The power cord of the appliance is equipped with a
three-prong grounding plug for your protection against
electrical shock hazards. It must be plugged directly
into a properly grounded three-prong receptacle. The
receptacle must be installed in accordance with local
codes and ordinances. Consult a qualied electrician.
Do not use an extension cord or adapter plug.
• If the power cord is damaged, it should be replaced
by the manufacturer, service technician, or a qualied
person.
• Never unplug the refrigerator by pulling on the power
cord. Always grip the plug rmly and pull straight out
from the receptacle to prevent damaging the power
cord.
Figure 4
Grounding type
wall receptacle
NOTE
Turning the Freezer and Fresh Food controls to “OFF” will
disable your refrigerator’s cooling system, but does not
disconnect the power to the light bulb and other electrical
components. To turn off power to your refrigerator you must
unplug the power cord from the electrical outlet.
!
CAUTION
To avoid personal injury or property damage, handle tempered glass shelves carefully. Shelves may break suddenly
if nicked, scratched, or exposed to sudden temperature
change.
• To avoid electrical shock, unplug the refrigerator before
cleaning and before replacing a light bulb or LED light.
• Performance may be affected if the voltage varies by
10% or more. Operating the refrigerator with insufcient
power can damage the compressor. Such damage is
not covered under your warranty.
• Do not plug the unit into an outlet controlled by a wall
switch or pull cord to prevent the refrigerator from being
turned off accidentally.
!
CAUTION
To turn off power to your refrigerator, unplug the power cord
from the wall outlet.
4
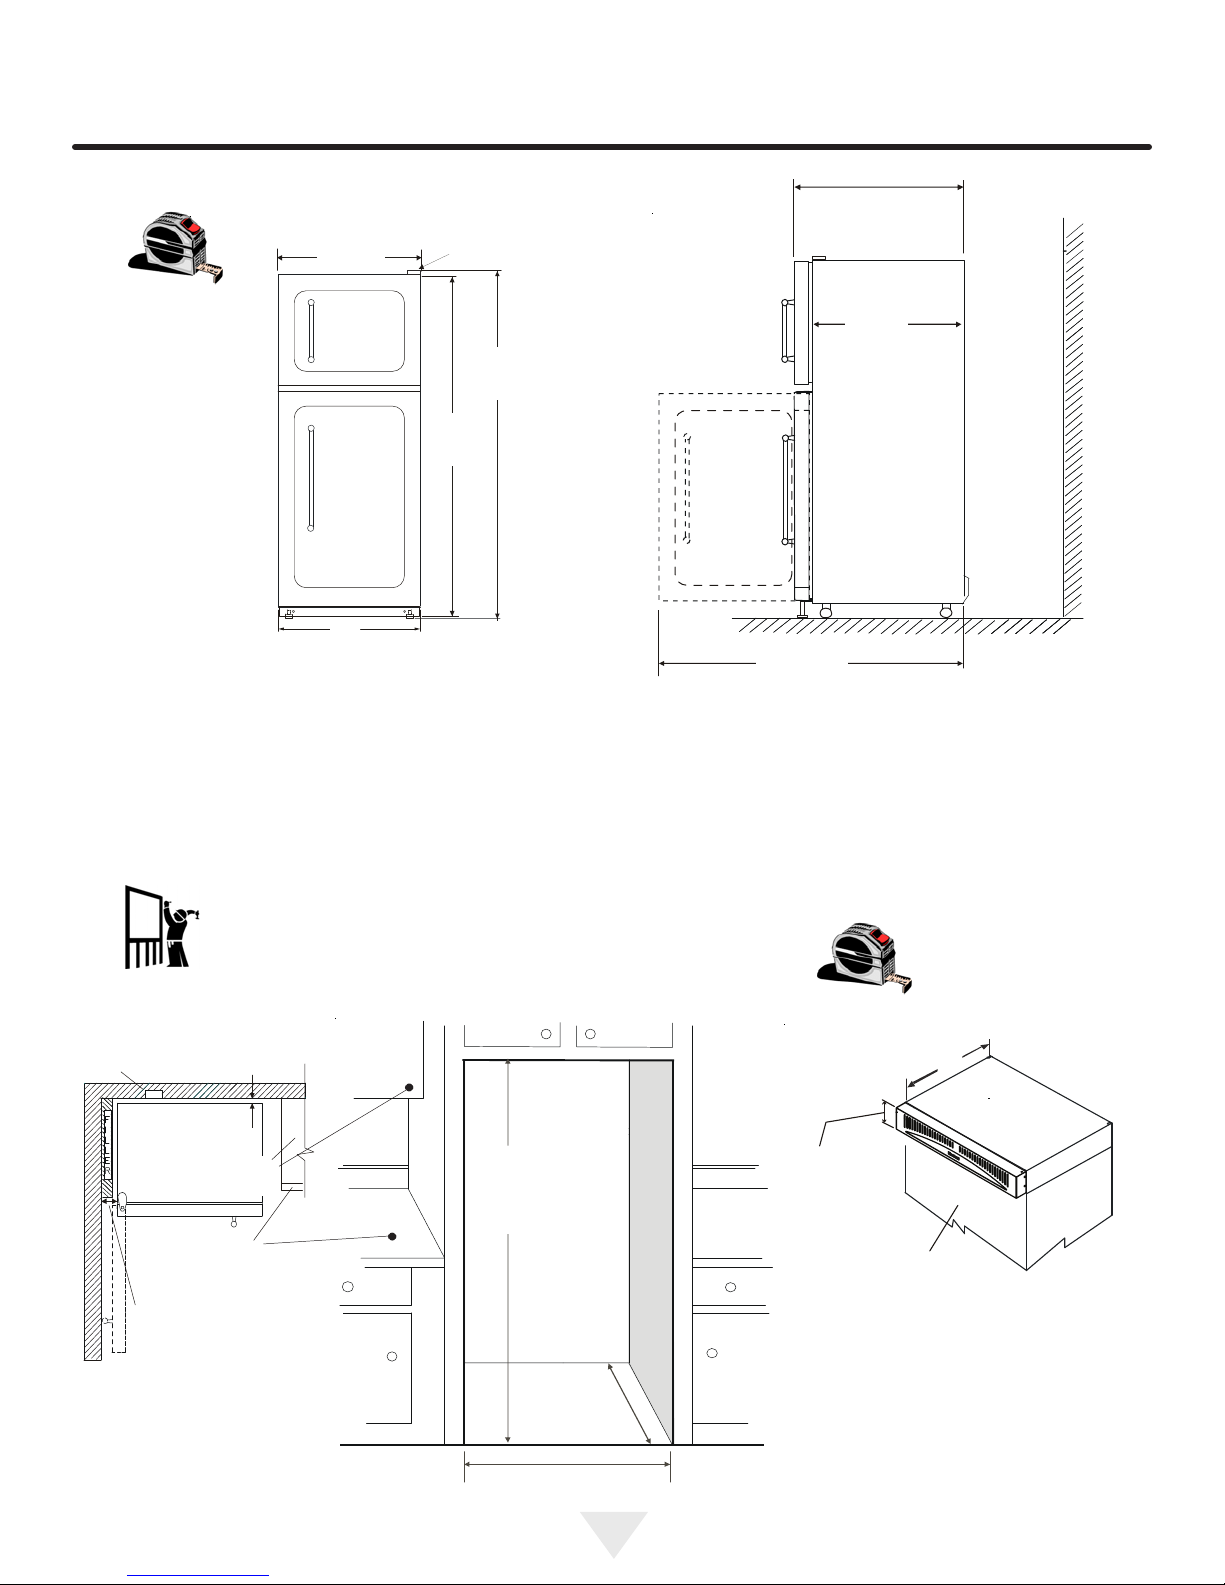
PRODUCT DIMENSIONS
31-3/4”
Measurement
(77 cm)
part
E
Dimensions
Cabinet Width
29-3/4”
(75.6 cm)
30-1/8”
(76.5 cm)
Door width
Hinge
69”
(175.3 cm)
67-7/8”
(172.4 cm)
(80.6 cm)
28-1/2”
(72.4 cm)
58-1/2”
(148.6 cm)
with refrigerator
door open
Rough In
lectrical
Left hand shown
s
3/8” (1 cm)
air gap
24” (61 cm)
cabinet depth
25” (63.5 cm)
counter depth
4” (10 cm) gap
required for proper
door swing
Top View
68-3/4” (174.6 cm)
with-out cowl
74-1/4” (188.6 cm)
with 5-1/2” cowl
28-1/2”
(72 cm)
30”
OPTIONAL COWL
Dimensions
27-1/2”
(70 cm)
5-1/2” (138 mm)
Refrigerator
• Optional 5-1/2” (14 cm) high cowl 39029-color
• Cut-out height of opening will
dependant on installation of cowl
option. See adjacent Figure.
5
INSTALLATION
This Use & Care Guide provides general operating instructions for your model. Use the refrigerator only as instructed
in this Use & Care Guide. Before starting the refrigerator,
follow these important rst steps.
Location
• Choose a place that is near a grounded electrical outlet. Do Not use an extension cord or an adapter plug.
• If possible, place the refrigerator out of direct sunlight
and away from the range, dishwasher or other heat
sources.
• The refrigerator must be installed on a oor that is level
and strong enough to support a fully loaded refrigerator.
!
CAUTION
Do Not install the refrigerator where the temperature will
drop below 55°F (13°C) or rise above 110°F (43°C). The
compressor will not be able to maintain proper temperatures inside the refrigerator. Do Not block the toe grille on
the lower front of your refrigerator. Sufcient air circulation
is essential for the proper operation of your refrigerator.
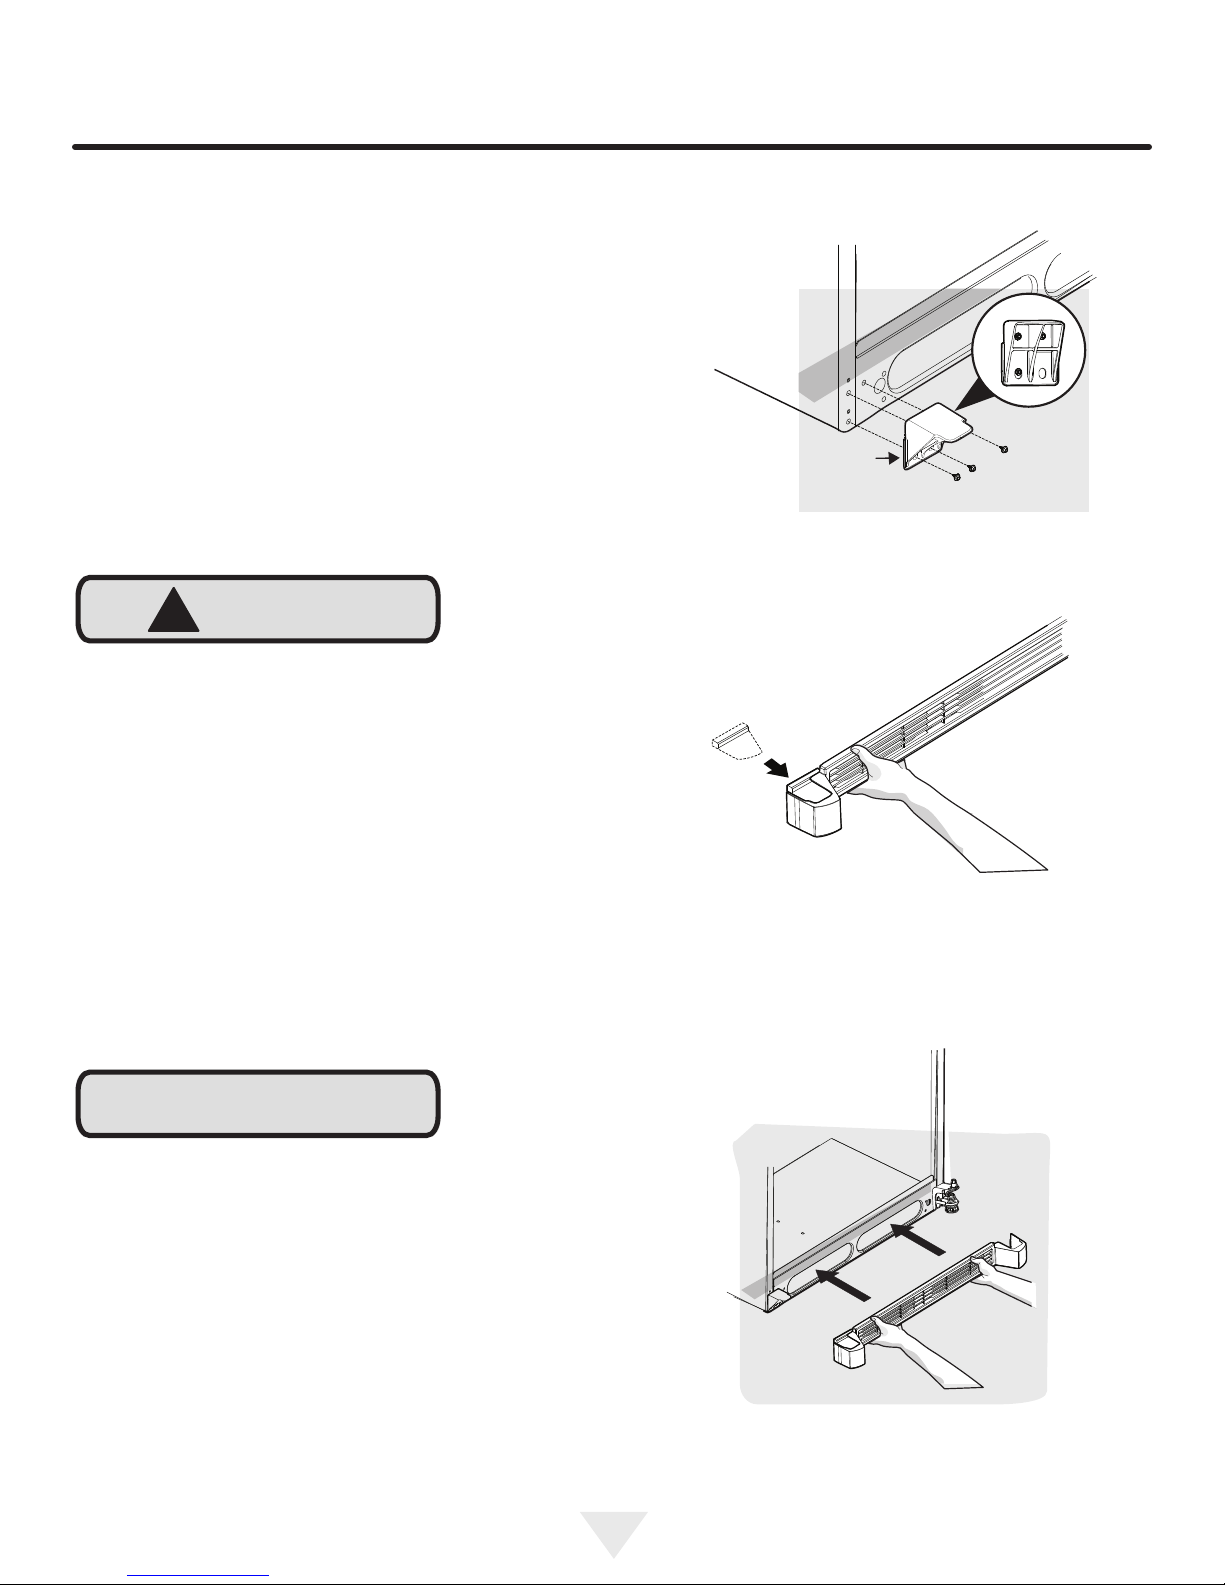
To install the toe grille:
1. Attach toe grille support bracket to cabinet using 3 bolts
supplied.
2. Install left toe grille cover onto slot on left side of toe
grille.
Installation
Installation clearances
• Allow the following clearances for ease of installation,
proper air circulation, and plumbing and electrical connections:
Sides & Top ⅜ inch
Back 1 inch
NOTE
If your refrigerator is placed with the door hinge side
against a wall, you may have to allow additional space so
the door can be opened wider.
Guidelines for nal positioning of your refrigerator:
• All four corners of the cabinet must rest rmly on the
oor.
• The cabinet should be level at the front and rear.
• The sides should tilt ¼-inch (6 mm) from front-to-back
(to ensure that doors close and seal properly).
• Doors should align with each other and be level.
3. Attach toe grille to cabinet.
6
INSTALLATION
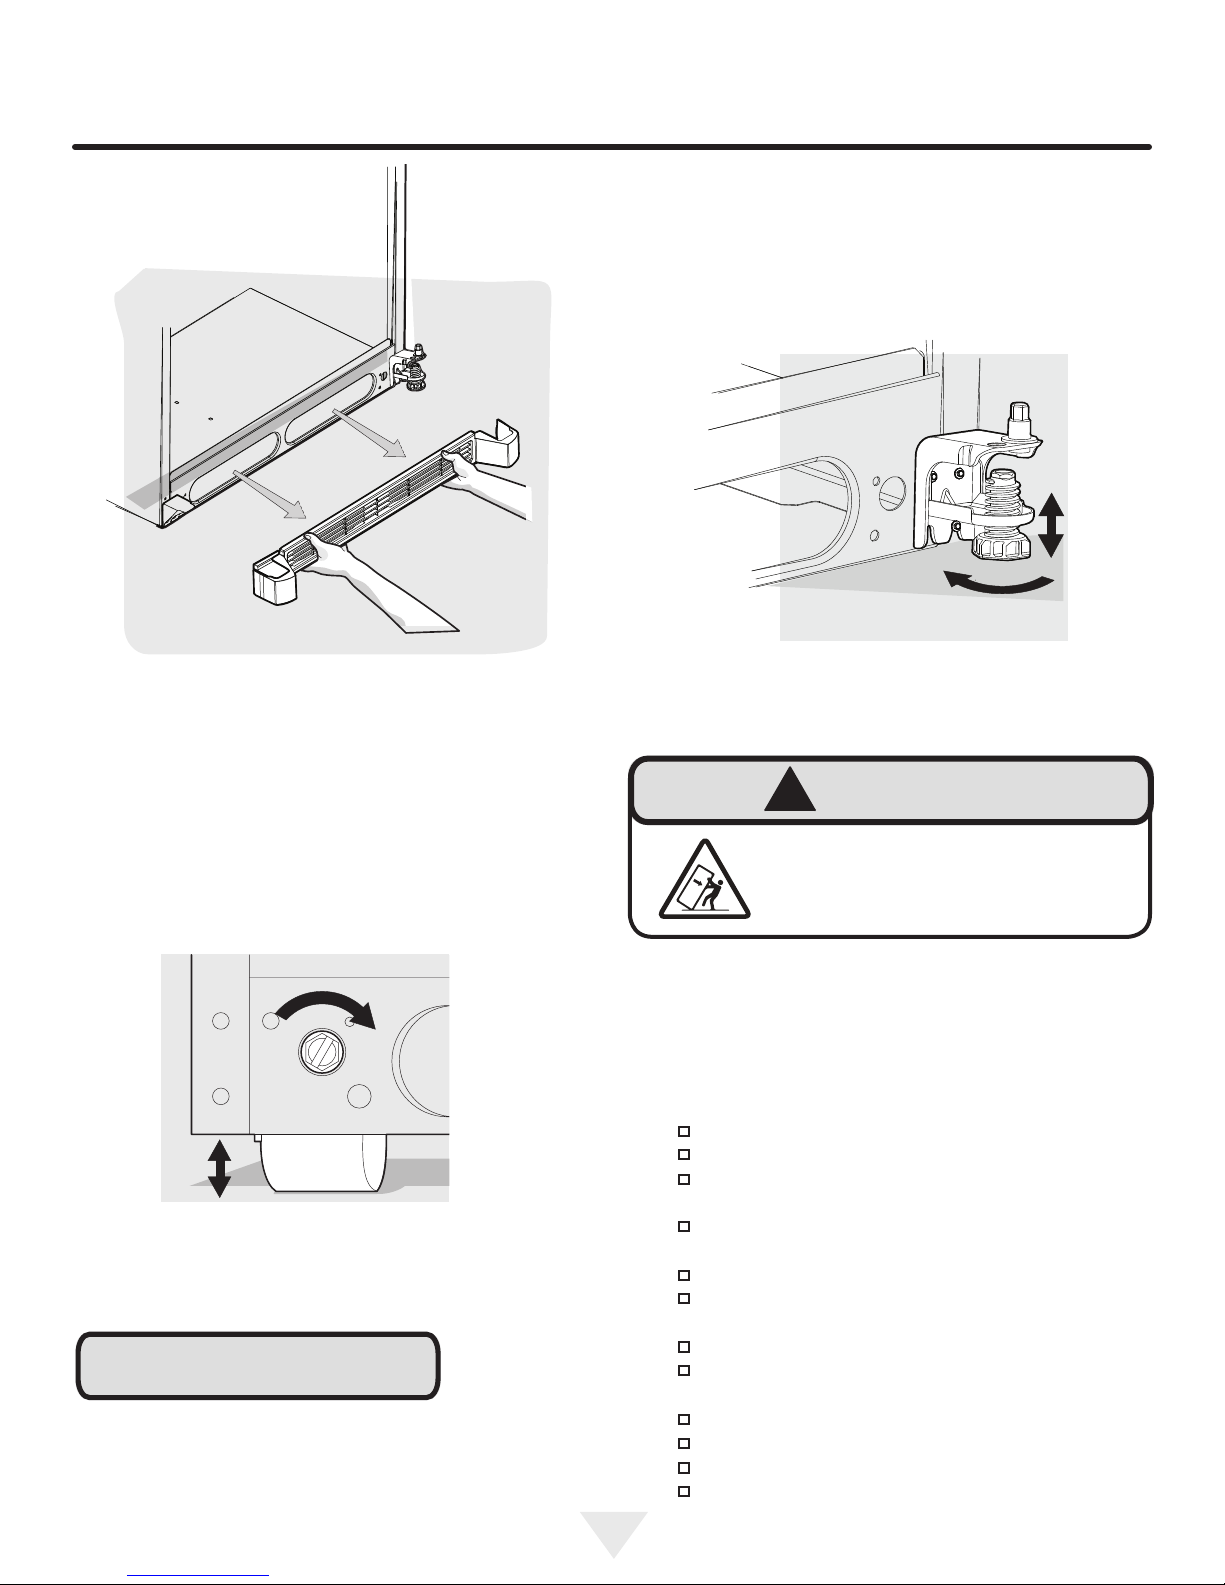
3 Lower the anti-tip bracket leveler clockwise until it
contacts the oor. See Figure 3.
LOWER
Figure 3
To level the cabinet using the front rollers:
1 Remove the toe grille.
2 Use a at-blade screwdriver or ⅜ inch socket
wrench to raise or lower the front rollers (Figure 2).
RAISE
Figure 2
NOTE
Raise the front of the refrigerator enough so the doors
close freely when opened halfway. The refrigerator should
slope ¼ inch to ½ inch from front-to-back. Then level the
refrigerator from side-to-side.
!
WARNING
The anti-tip device must be installed
according to the instructions in your
Use & Care Manual. Failure to do so
will result in injury.
Installation checklist:
Doors
Handles are secure and tight.
Door seals completely to cabinet on all sides.
Freezer door is level across the top.
Leveling
Refrigerator is level, side to side and tilted 1/4"
(6 mm) front-to-back.
Toe grille is properly attached to the refrigerator.
Cabinet is setting solid on all corners.
Electrical Power
House power turned on.
Refrigerator plugged in.
Final Checks
Shipping material removed.
Fresh food and freezer temperatures set.
Crisper humidity controls set.
Registration card sent in.
7
DOOR AND HINGE REMOVAL INSTRUCTIONS
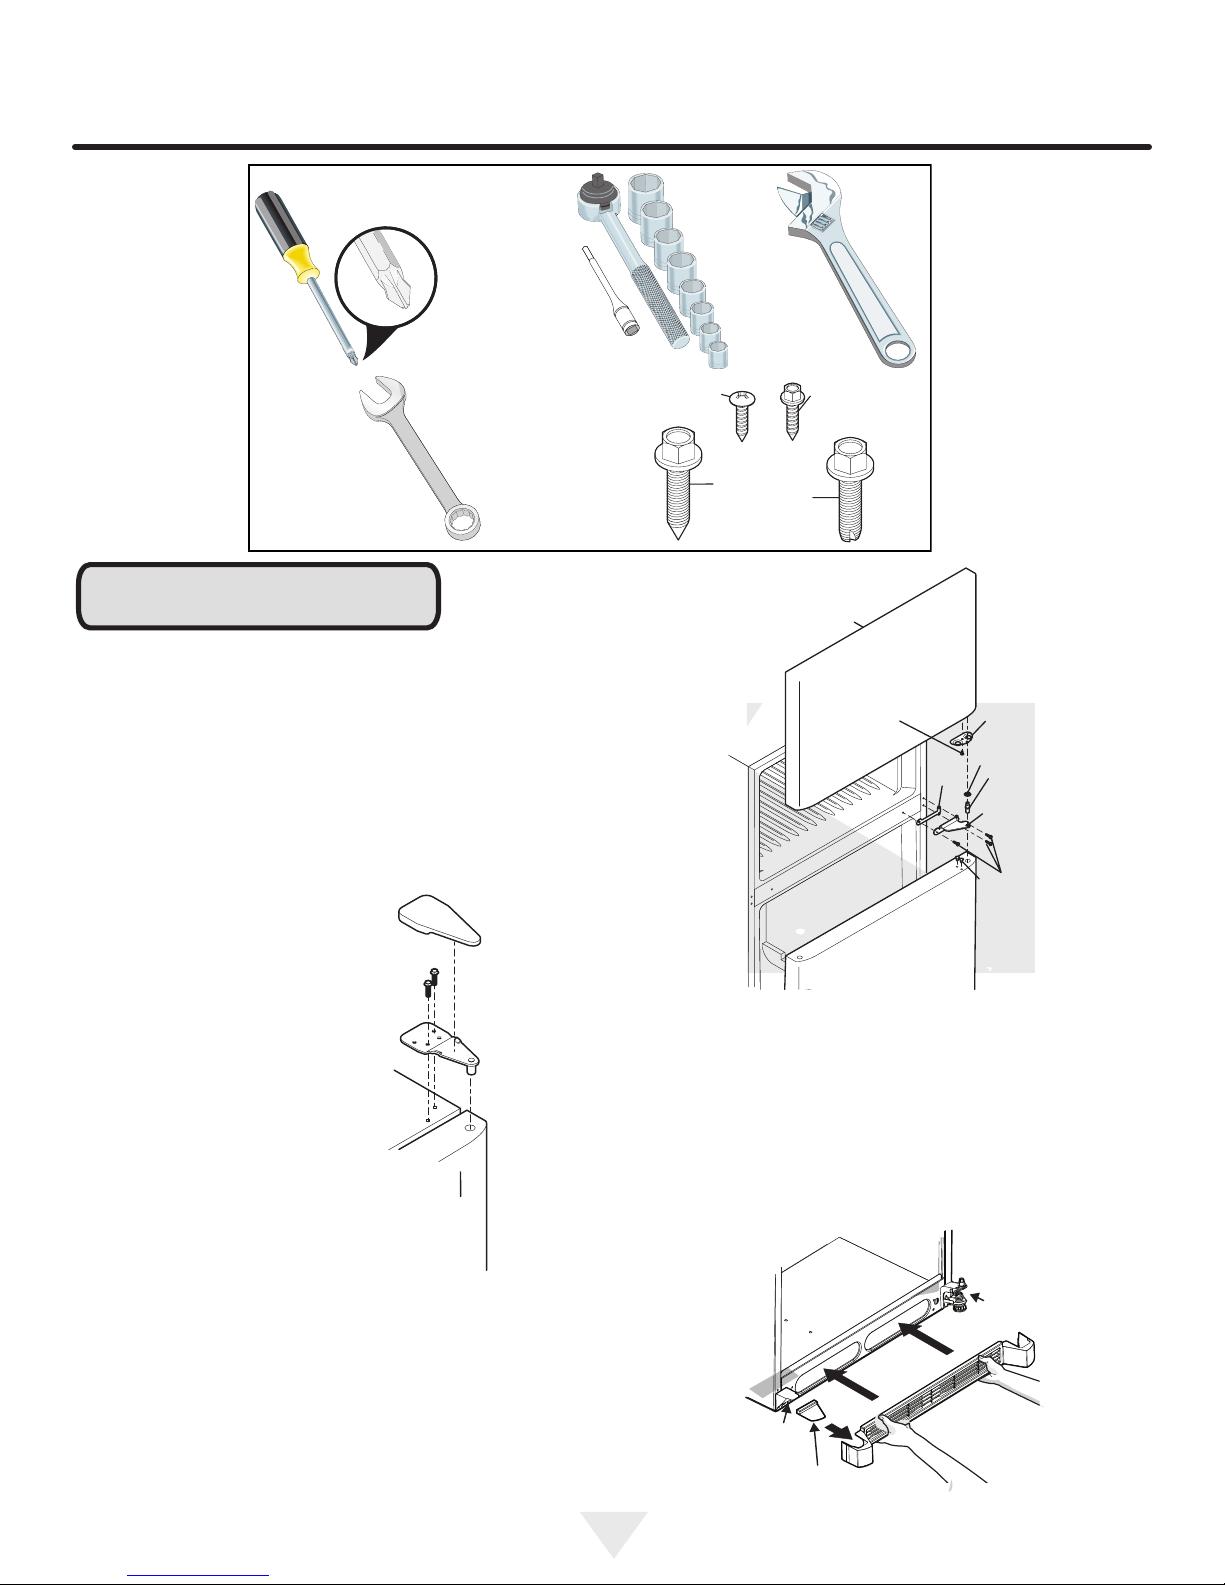
Tools Necessary:
Socket
wrench set
Phillips™ Head
3/8" xed
wrench
NOTE
Before you begin, turn the refrigerator temperature control
to “OFF” and remove the electrical power cord from the wall
outlet. Remove any food from door shelves.
Door removal instructions:
1. Remove toe grille.
2. Remove top hinge cover. Trace around the hinge with a
soft lead pencil. This makes reinstallation easier. Remove
top hinge and lift door off center hinge pin. Set door aside.
Top
3. Unscrew center hinge
pin using adjustable
wrench and save for reassembly. Ensure plastic
washer stays on hinge pin.
hinge
cover
Top
hinge
Adjustable
wrench
Top hinge
cover front
screw
Top
hinge
screw
Bottom
hinge
screw
Top hinge
cover rear
screw
Door
stop
screw
Shim
Door
stop
Washer
Hinge
pin
Center
hinge
Screws
6. Remove the 3 screws from the anti-tip bracket with the
3/8" socket wrench and remove the anti-tip bracket from
the cabinet.
4. Lift refrigerator door off of bottom hinge and set aside.
5. Remove center hinge and shim by removing inside
screw and loosening two outside screws enough to allow
hinge and shim to slide out.
7. Remove the 3 screws from the toe grille support with the
3/8" socket wrench and remove the toe grille support from
the cabinet.
Reassembly is the reverse of the above procedure.
Anti-tip bracket
Toe grille
support
Toe grille
cover
8
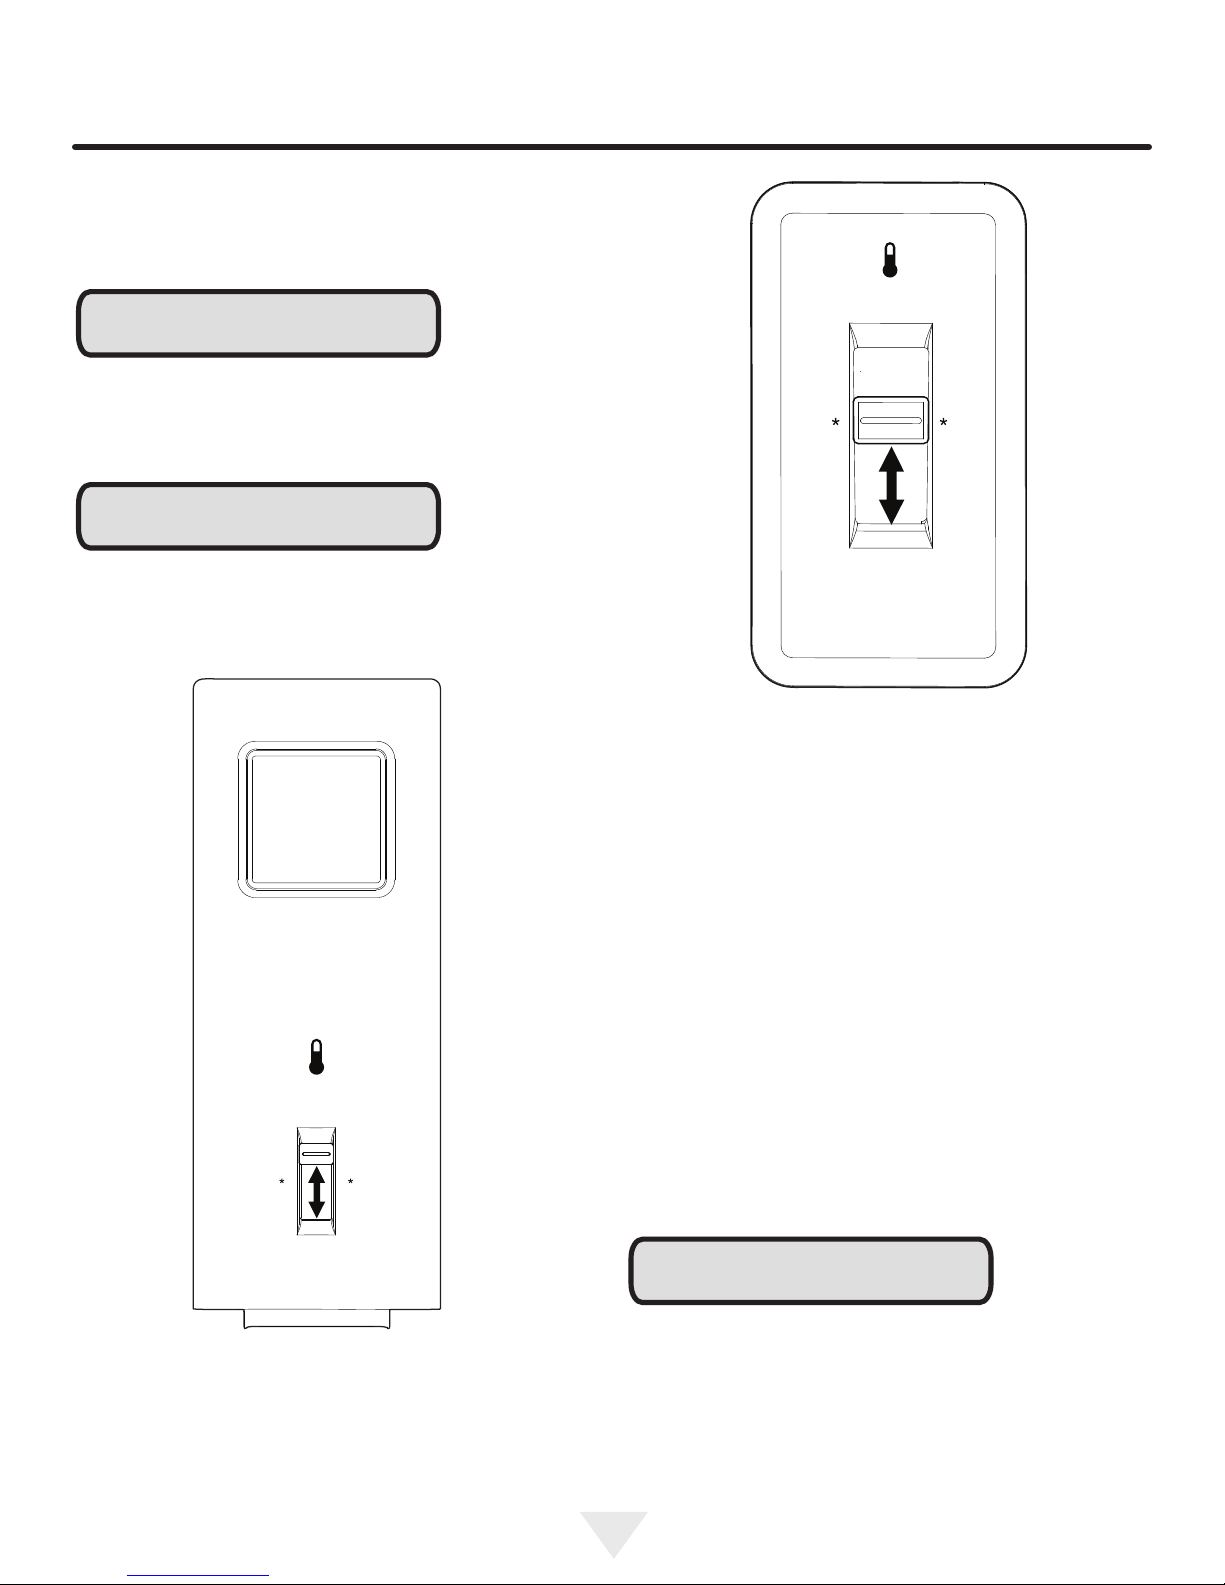
CONTROLS
Cool Down Period
To ensure safe food storage, allow the refrigerator to operate with the doors closed for at least 8 hours before loading
it with food.
NOTE
temperature
When rst turning refrigerator on, adjust the refrigerator
control to (*). This is the recommended initial setting. After
24 hours, adjust the controls as needed.
NOTE
If your unit is in a garage or area where the temperature is
below 55°, adjust the freezer control to the coldest setting.
coldest
cold
off
* recommended
Refrigerator / Freezer Control
(Located on left side wall in refrigerator compartment)
Temperature Adjustment
• Adjust temperature gradually: adjust the knob in small
increments, allowing the temperature to stabilize.
Adjusting the refrigerator/freezer control will change temperatures in both compartments. The auxiliary freezer control can be left at the factory pre-set recommended (*) or
adjusted as desired; it has no effect on electrical power to
the refrigerator.
temperature
garage
* recommended
Auxiliary Freezer Control
(Located on back wall in freezer compartment)
coldest
cold
off
To maintain temperatures, a fan circulates air in the refrigerator and freezer compartments. For good circulation, do
not block cold air vents with food items.
NOTE
Adjusting the refrigerator/freezer temperature control to
“off” turns off the compressor and prevents the refrigerator
from cooling, but does not disconnect the power to the light
bulb and other electrical components. To turn off power to
your refrigerator, you must unplug the power cord from the
wall outlet.
9
NORMAL OPERATING SOUNDS AND SIGHTS
Understanding the sounds you may hear
Your new, high-efciency refrigerator may introduce unfamiliar sounds. These sounds normally indicate your re-
frigerator is operating correctly. Some surfaces on oors,
walls, and kitchen cabinets may make these sounds more
noticeable.
NOTE
Rigid foam insulation is very energy efcient, but is not a
sound insulator.
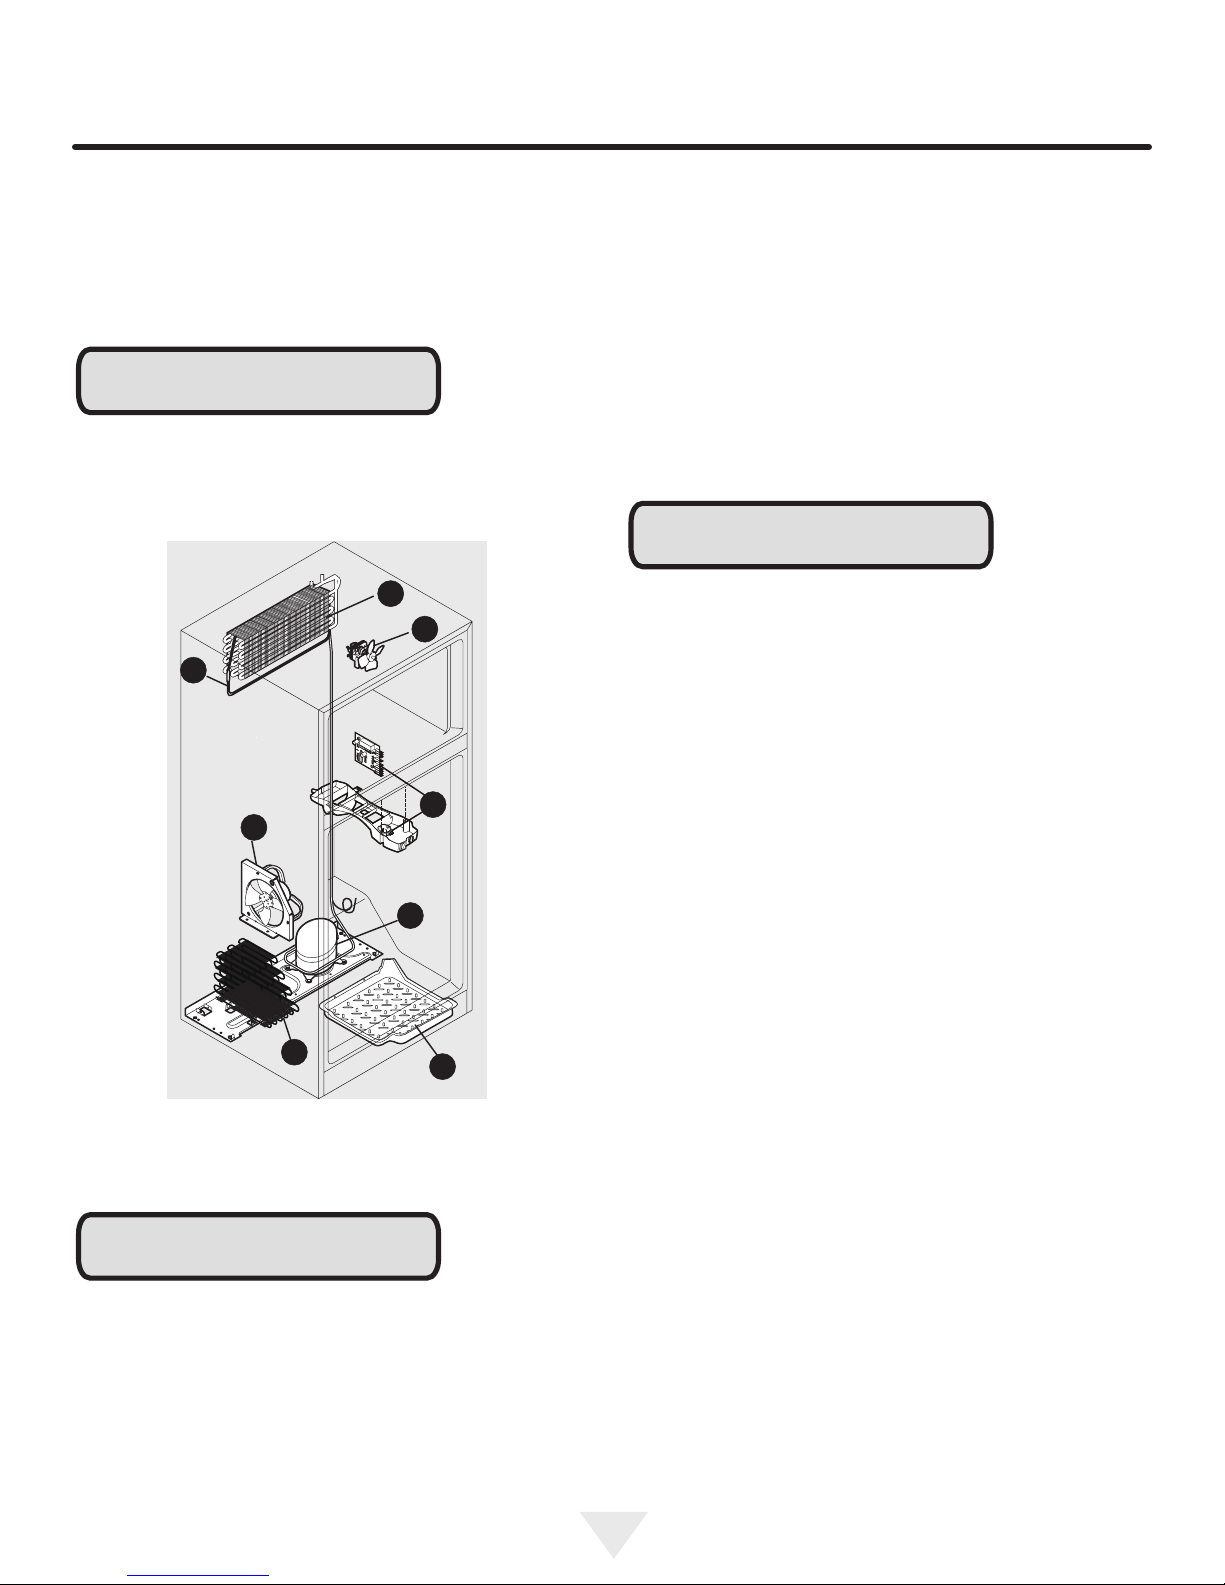
A
B
C
Following is a list of major components in your refrigerator
and the sounds they can cause:
A Evaporator Refrigerant through the evaporator may create a boiling or gurgling sound.
B Evaporator fan You may hear air being forced through
the refrigerator by the evaporator fan.
C Defrost heater During defrost cycles, water dripping onto
the defrost heater may cause a hissing or sizzling sound.
After defrosting, a popping sound may occur.
NOTE
During the automatic defrost cycle, you may notice a red
glow in the vents on the back wall of your freezer compartment. This is normal during the defrost cycle.
D Condenser May create minimal sounds from forced air.
E
F
G
D
H
NOTE
If the Fresh Food door is left open form more than 5 minutes, an alarm will sound. The alarm will sound for 2 minutes and then stop. If the “Door Ajar” condition remains, the
alarm will repeat every 30 minutes for two intervals.
E Electronic defrost control These parts can produce a
snapping or clicking sound when turning the cooling system
on and off.
F Condenser fan You may hear air being forced through the
condenser.
G Compressor Modern, high-efciency compressors run
much faster than in the past. The compressor may have a
high pitched hum or pulsating sound.
H Drain pan (not removable) You may hear water dripping
into the drain pan during the defrost cycle.
After 15 minutes of a “Door Ajar” Condition, the unit will turn
the Fresh Food light off until the door is closed. The door
switch in the Fresh Food can be pressed and released to
reset the alarm and light.
10
CARE AND CLEANING
Protecting your investment
Keeping your refrigerator clean maintains appearance and
prevents odor build-up. Wipe up any spills immediately and
clean the freezer and fresh food compartments at least
twice a year. When cleaning, take the following
precautions:
• Never use CHLORIDE or cleaners with bleach to clean
stainless steel.
• Do not wash any removable parts in a dishwasher.
• Always unplug the electrical power cord from the wall
outlet before cleaning.
• Remove adhesive labels by hand. Do not use razor
blades or other sharp instruments which can scratch
the appliance surface.
• Do not remove the serial plate.
NOTE
If you store or move your refrigerator in freezing temperatures, be sure to completely drain the water supply system.
Failure to do so could result in water leaks when the refrigerator is put back into service. Contact a service representative to perform this operation.
Do not use abrasive cleaners such as window sprays,
scouring cleansers, brushes, ammable uids, cleaning
waxes, concentrated detergents, bleaches or cleansers
containing petroleum products on plastic parts, interior
doors, gaskets or cabinet liners. Do not use paper towels,
metallic scouring pads, or other abrasive cleaning materials
or strong alkaline solutions.
NOTE
If you set your temperature controls to turn off cooling, power to lights and other electrical components will continue
until you unplug the power cord from the wall outlet.
!
CAUTION
• Pull the refrigerator straight out to move it. Shifting it
from side to side may damage ooring. Be careful not
to move the refrigerator beyond the plumbing connections.
• Damp objects stick to cold metal surfaces. Do not touch
refrigerated surfaces with wet or damp hands.
11
CARE AND CLEANING
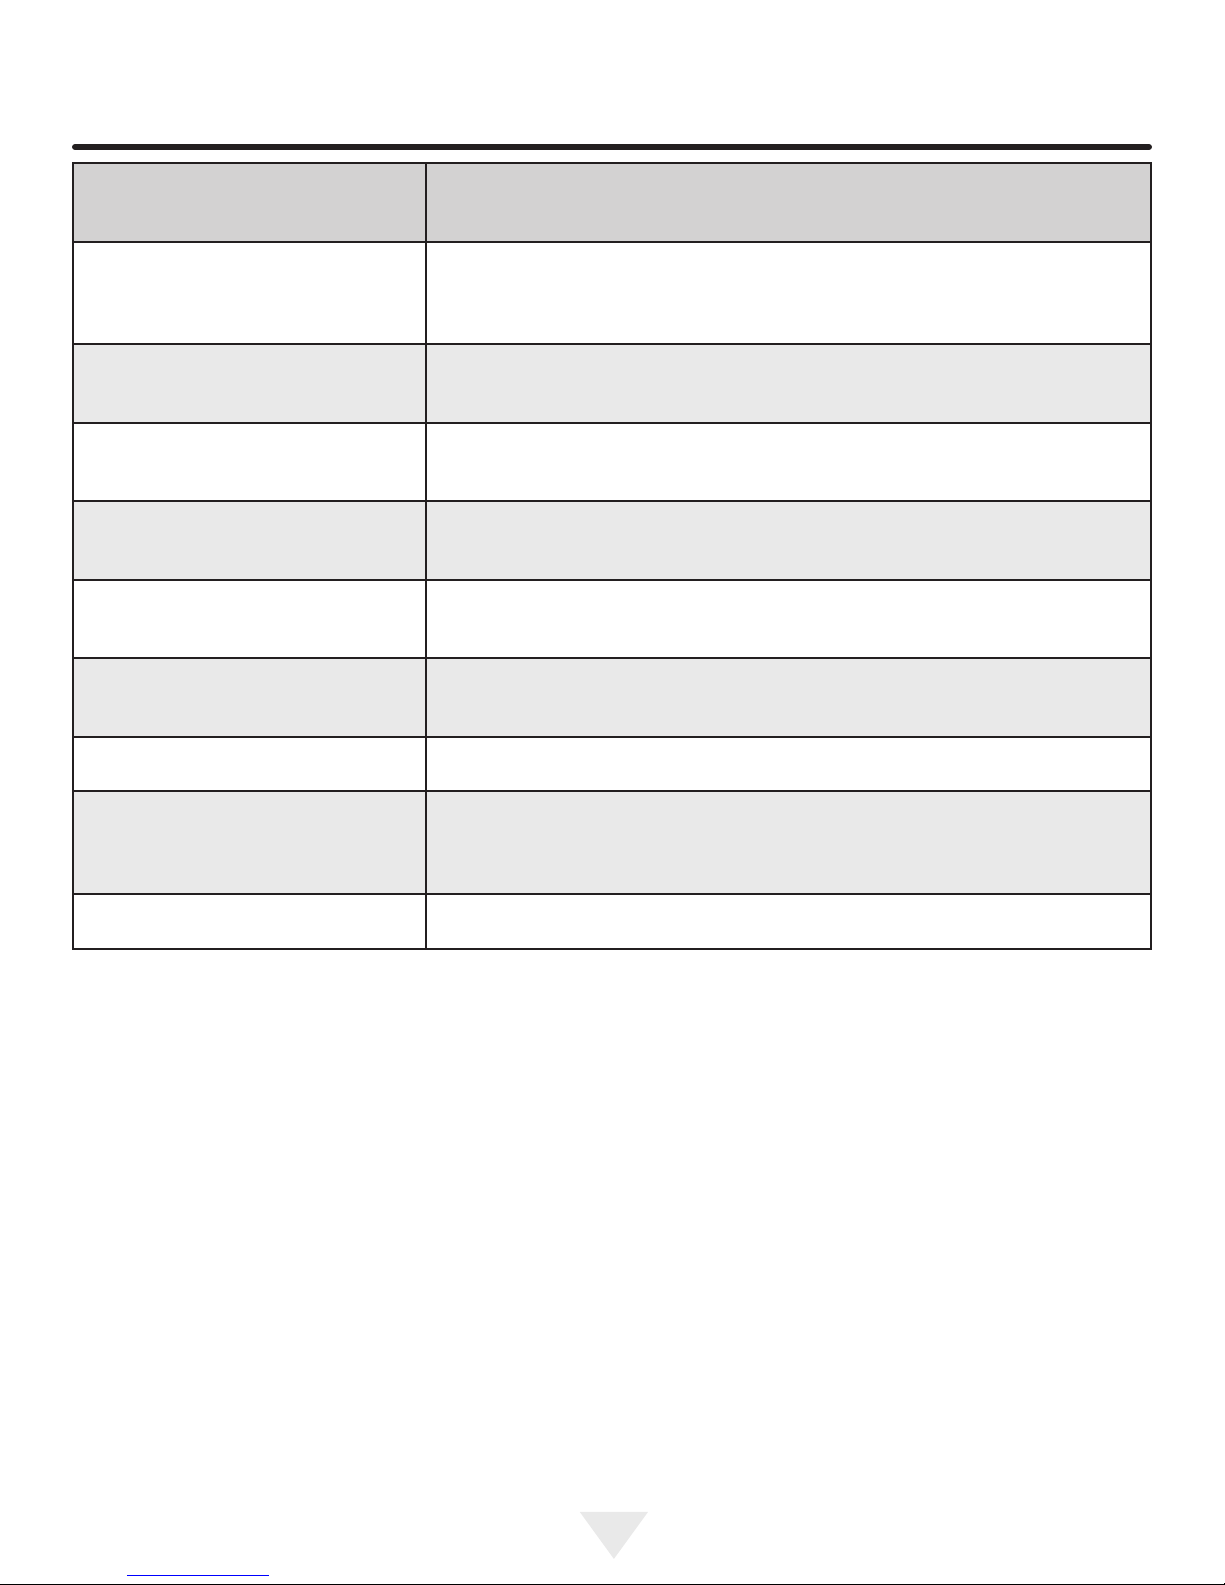
Care and Cleaning Tips
Part What To Use Tips and Precautions
Interior and door liners • Soap and water
• Baking soda and water
Door gaskets • Soap and water Wipe gaskets with a clean soft cloth
Drawers and bins • Soap and water Use a soft cloth to clean drawer runners and tracks
Toe grille • Soap and water
• Mild liquid sprays
• Vacuum attachment
Glass shelves • Soap and water
• Glass cleaner
• Mild liquid sprays
Exterior and handles • Soap and water
• Non abrasive glass cleaner
Exterior and handles
(Stainless steel models)
• Soap and water
• Stainless steel cleaners
Use 2 tablespoons of baking soda in 1 quart of water. Be
sure to wring excess water out of sponge or cloth before
cleaning around controls, light bulb or any electrical part.
Vacuum dust from front of toe grille. Remove toe grille
(see Installation Instructions). Vacuum backside, wipe with
sudsy cloth or sponge. Rinse and dry.
Allow glass to warm to room temperature before immersing in warm water.
Do not use commercial household cleaners containing
ammonia, bleach or alcohol to clean handles. Use a soft
cloth to clean smooth handles. DO NOT use a dry cloth to
clean smooth doors.
Never use CHLORIDE or cleaners with bleach to clean
stainless steel.
Replacing light bulbs • Unplug refrigerator
• Wear gloves
• Remove light cover
• Replace old bulb
• Replace light cover
• Plug in refrigerator
Clean stainless steel front and handles with nonabrasive
soapy water and a dishcloth. Rinse with clean water and
a soft cloth. Use a non-abrasive stainless steel cleaner.
These cleaners can be purchased at most home improvement or major department stores. Always follow manufacturer’s
instructions. Do not use household cleaners containing
ammonia or bleach.
NOTE: Always clean, wipe and dry with the grain to prevent scratching. Wash the rest of the cabinet with warm
water and mild liquid detergent. Rinse
well, and wipe dry with a clean soft cloth.
CAUTION: Wear gloves when replacing light bulbs to
avoid getting cut. Use same wattage when replacing bulb
12
TROUBLESHOOTING
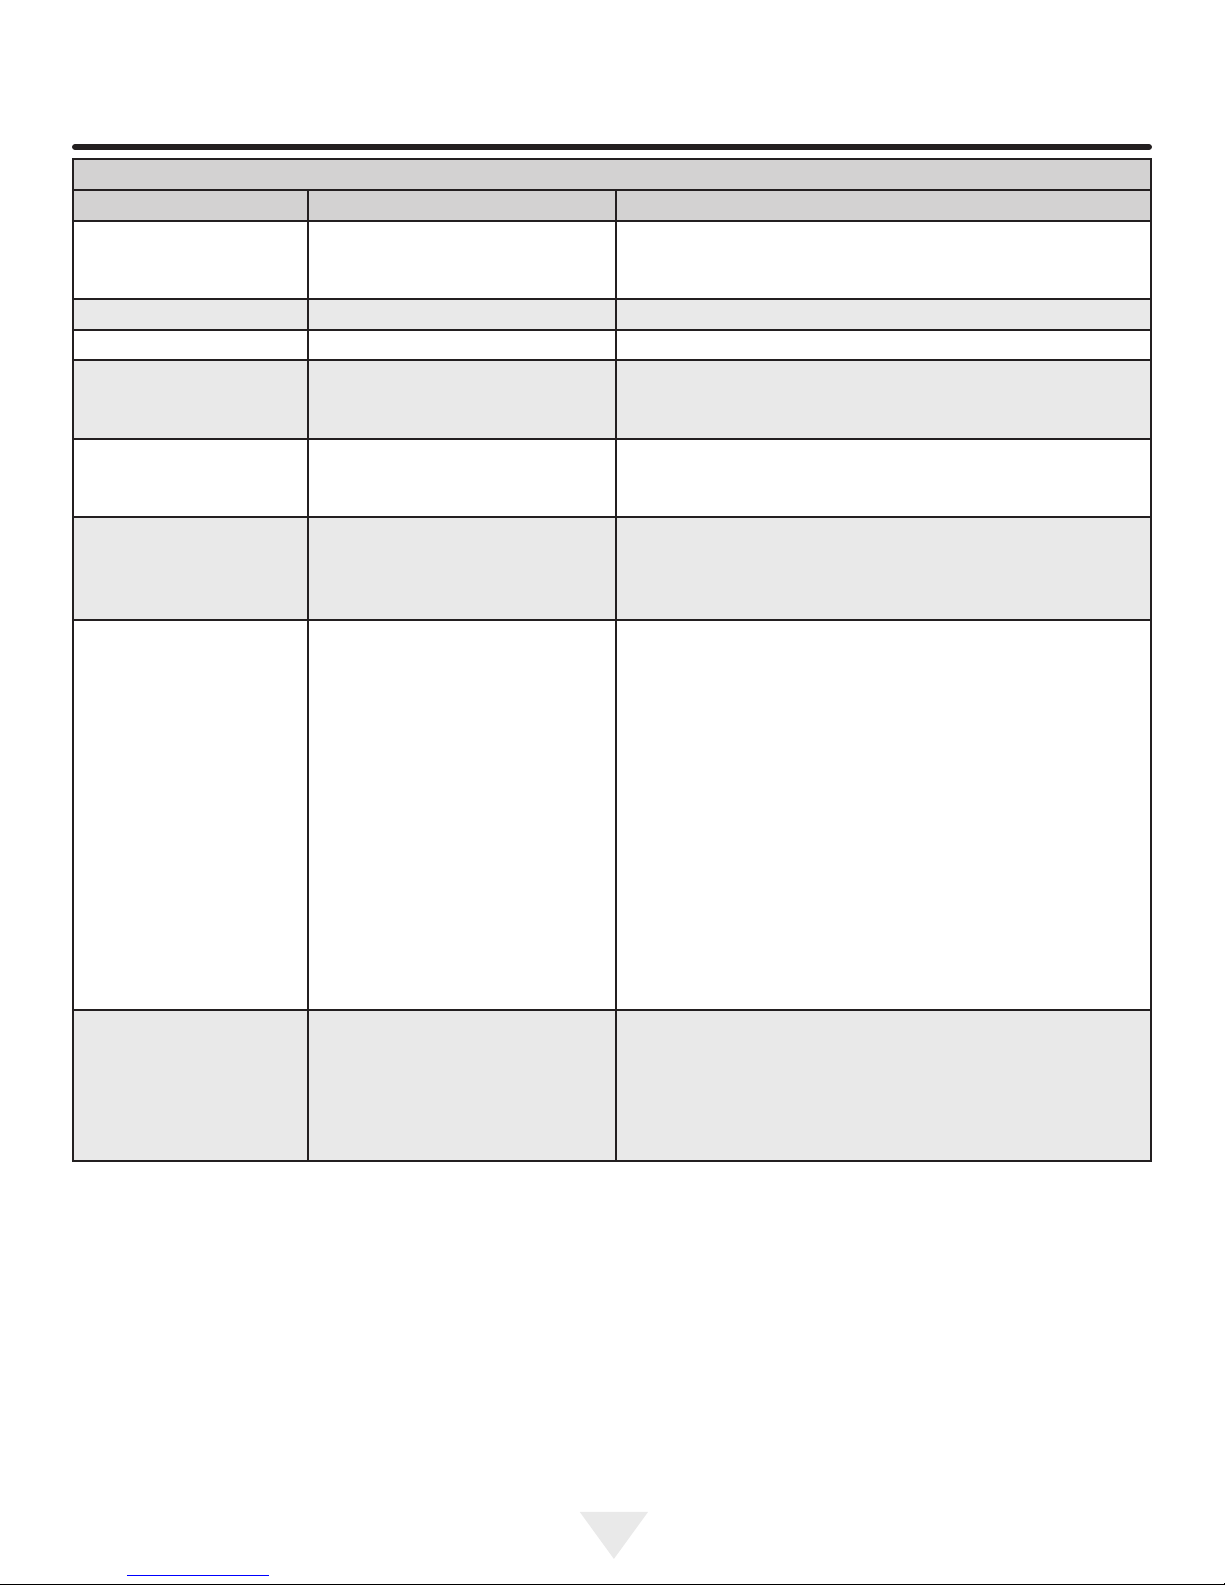
Common Occurences Before calling for service, review this list. It may save you time and expense.
This list includes common occurrences that are not the result of defective workmanship or materials in this appliance.
Refrigerator does not run. • Ensure plug is tightly pushed into electrical outlet.
• Check/replace fuse with a 15 amp time-delay fuse. Reset circuit breaker.
• The refrigerator/freezer control is turned to “OFF”.
• Refrigerator may be in defrost cycle. Wait 20 minutes and check again.
Freezer temperature is colder than
preferred. Refrigerator temperature is
satisfactory.
Refrigerator temperature is too cold.
Freezer temperature is satisfactory.
Freezer temperature is warmer than
preferred. Refrigerator temperature is
satisfactory.
Refrigerator temperature is too warm.
Freezer temperature is satisfactory.
Refrigerator is noisy or vibrates. • The cabinet is not level.
Odors in refrigerator. • Interior needs to be cleaned.
Cabinet light not working. • Replace light bulb.
Refrigerator makes beeping sound. • Close door.
• Set auxiliary freezer control to a warmer setting until freezer temperature is
satisfactory. Allow 24 hours for the temperature to stabilize.
• Set refrigerator/freezer control to a warmer setting. Allow 24 hours for
temperature to stabilize. Then check freezer temperatures and adjust as
needed.
• Set auxiliary freezer control to a colder setting until freezer temperature is
satisfactory. Allow 24 hours for the temperature to stabilize.
• Set refrigerator/freezer control to a colder setting. Allow 24 hours for temperature to stabilize. Then check refrigerator temperatures and adjust as
needed.
• Floor is weak.
• See Normal Operating Sounds and Sights section.
• Foods that produce odors should be covered or wrapped.
• Ensure plug is tightly pushed into electrical outlet.
• Light switch may be stuck. Push in light switch, located on the refrigerator
control box, to release.
• Press light switch.
13

WARRANTY
Entire Product – Limited One Year Warranty
AGA Marvel warrants the replacement or repair of all parts,
of this appliance which prove to be defective in material or
workmanship, with the exception of the painted or porcelain
enamel nish or plated surfaces, for one year from the date
of original purchase. Such parts will be repaired or replaced
at the option of Heartland without charge, subject to the
terms and conditions as set out below.
Limited Warranty - Major Refrigeration Components
Second Through Fifth Year - After the rst year from the
date of original purchase, through the fth year, the manufacturer will repair or replace, at its option, free of charge
for parts and labor only, any part of the sealed refrigeration
system (consisting of the compressor, evaporator, condenser, drier and connecting tubing) and the cabinet liner (exclusive of the door liner) which fail in normal home use. All
other costs, including mileage, transportation, trip charge
and diagnostic charge, if required, shall be the responsibility of the owner.
Limited Warranty - Water Filter-
30 days - From the original retail purchase date, any part of
the water lter cartridge which fails due to a defect in workmanship or materials will be replaced free of charge.
THE WARRANTIES, SET FORTH HEREIN ARE THE
ONLY WARRANTIES EXTENDED BY HEARTLAND. ANY
IMPLIED WARRANTIES, INCLUDING THE IMPLIED
WARRANTY OF MERCHANTABILITY, ARE LIMITED TO
THE DURATION OF THESE EXPRESS WARRANTIES.
IN NO EVENT SHALL HEARTLAND BE LIABLE FOR
ANY CONSEQUENTIAL OR INCIDENTAL DAMAGES OF
EXPENSES RESULTING FROM BREACH OF THESE OR
ANY OTHER WARRANTIES, WHETHER EXPRESSED
OR IMPLIED. Some states do not allow the exclusion or
limitation of consequential damages or limitations on how
long an implied warranty lasts, so the above exclusion or
limitation may not apply to you. Warranty applies to prod-
uct only in the country in which it was purchased.
No person, rm or corporation is authorized to make any
other warranty or assume any other obligation for HEARTLAND. To obtain performance of the warranty, report any
defects to: Your Dealer or Heartland Appliances Service
Representative.
AGA Marvel
1260 E. VanDeinse St.
Greenville MI 48838
What is not covered by this Warranty
1. Customer education or instructions on how to use the
refrigerator/freezer.
2. Any food loss due to product failure. (Warranter is not
be liable for any incidental or consequential damage
including food loss.
3. Any expenses involved in making this appliance readily
accessible for servicing.
4. Transportation, delivery, or subsequent damages.
5. Use commercially or rental use or use other than normal household.
6. Improper installation, misuse, abuse, accident or
alteration, use on wiring not conforming to electrical
codes, low voltage, failure to provide necessary maintenance or other unreasonable use.
7. Parts of service not supplied or designated by the
factory.
8. Accident, re, ood, acts of God.
9. Alteration, or the removal or defacing of the serial plate,
10. The original Bill of Sale, delivery date or serial number
cannot be veried.
11. The product is moved from place of original installation,
and reinstalled without reviewing installation procedures with dealer or manufacturer.
12. Light bulbs
13. If the product is installed outside the normal service
area, any cost of transportation expenses [tolls, ferry
trip charges, or mileage expenses, etc.] involved in the
repair of the product, or the replacement of a defective
part, shall be borne by the customer [owner].
phone: 800-223-3900
fax: 616-754-9690
PLACE OF PURCHASE
DATE OF PURCHASE
SERIAL NUMBER
MODEL NUMBER
14

15
 Loading...