

Health O Meter 2210KL, 2210KL4 User Instructions
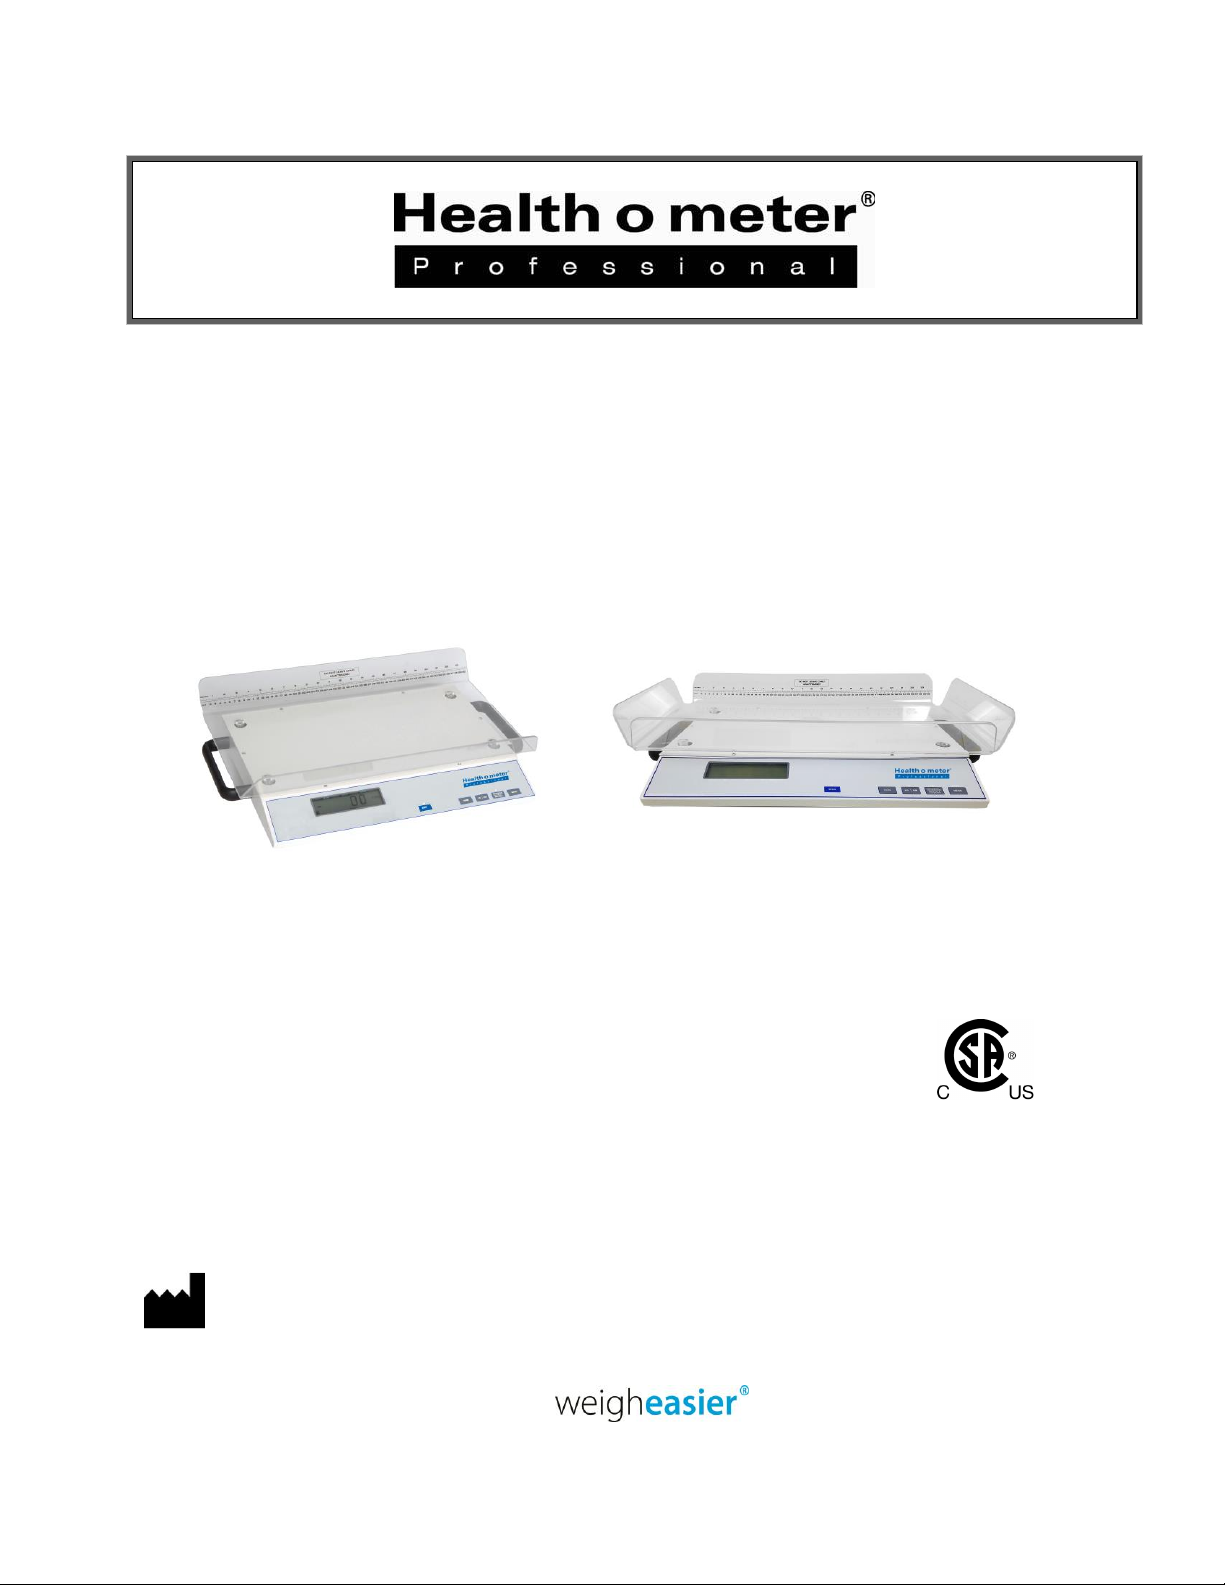
2210KL
2210KL4
Model 2210KL / 2210KL4
High Resolution Digital Neonatal / Pediatric Tray Scale
User Instructions
PELSTAR, LLC 9500 West 55
P/N UM2210KL 2210KL4 Rev20190312_Web
th
St. McCook, IL 60525-7110 USA www.homscales.com
© Pelstar, LLC 2019
1
Model 2210KL / 2210KL4
Thank you for purchasing this Health o meter® Professional product. Please read this manual
carefully, and keep it for easy reference or training.
TABLE OF CONTENTS
Cautions and Warnings ............................................................................................. 3
Specifications for This Scale ..................................................................................... 4
Certifications / Disposal ............................................................................................ 5
Assembly Instructions .............................................................................................. 6
Set Up Instructions .................................................................................................... 8
Operating Instructions ............................................................................................... 11
Calibration ................................................................................................................. 14
Troubleshooting ........................................................................................................ 15
Maintenance ............................................................................................................. 16
Warranty ................................................................................................................... 17
Note: This scale has been factory calibrated, and does not
require calibration prior to use.
Please register your scale for warranty coverage at:
www.homscales.com/product-support/technical-support/product-warranty-registration
For User Instructions updates and revisions please go to:
P/N UM2210KL 2210KL4 Rev20190312_Web
www.homscales.com
2

CAUTIONS AND WARNINGS
INTENDED USE
This Health o meter® Professional neonatal / pediatric scale is intended to be used in a professional
medical environment by trained medical staff. This product was designed to weigh pediatric patients
who are safely positioned on the scale tray. Do not modify the product or use it for anything other than
its intended purpose.
To prevent patient / caregiver injury or damage to your scale, please follow the instructions in
this user manual very carefully.
Do not exceed the weight capacity specified for this scale.
For accurate weighing, this scale must be placed on a flat, stable surface.
For accurate weighing, verify before each use the proper operation according to the
procedure described in this manual.
Do not use in the presence of flammable or explosive materials.
If the scale becomes damaged, it should not be operated until properly serviced.
Do not transport the scale with a patient or object on the scale.
Ensure that the scale does not come in contact with liquids, excessive temperature, or
excessive humidity.
Do not gas sterilize or autoclave the scale.
Scales contain delicate sensors. Do not bang into doors, walls, etc., as damage may result.
Patient Safety
This scale is designed for static weighing of patients only. No scale should be used for patient
transfer.
To prevent patient injury, the patient must be attended throughout the entire weighing event.
When operating the scale with batteries:
If the display indicates low battery, replace the batteries as soon as possible.
When replacing / inserting batteries, be sure to use all new batteries.
In no event whatsoever shall Pelstar, LLC be liable for damages or injuries arising from or connected
with the assembly, use, or misuse of its products.
P/N UM2210KL 2210KL4 Rev20190312_Web
3
SPECIFICATIONS FOR THIS SCALE
Capacity and Resolution
20,000 grams / 20 kg / 45 lb
Resolution: 1 g (to 10,000 g); 5 g (10,001 to 20,000 g); 0.1 oz (0 – 45 lb)
Power Requirements
6 C-Cell Alkaline batteries
Environmental
Operating temperatures: 68°F to 85°F (20°C to 30°C)
Storage temperatures: 14°F to 122°F (-10°C to 50°C)
Maximum Humidity: 95% RH
Physical Dimensions
2-sided Tray:
Width: 24” (610 mm)
Depth: 15 3/8” (391 mm)
Height: 3” (76 mm)
4-sided Tray
Width: 27” (686 mm)
Depth: 15 3/8” (391 mm)
Height: 3” (76 mm)
2210KL Product Footprint
Width: 25 1/2” (648 mm)
Depth: 17 3/8” (441 mm)
Height: 5 3/8” (137 mm)
Weight: 24.4 lb (11 kg)
2210KL4 Product Footprint
Width: 27” (686 mm)
Depth: 17 3/8” (441 mm)
Height: 5 3/8” (137 mm)
Weight: 25.2 lb (11.4 kg)
Proper positioning of battery polarity.
Caution or attention required. Risk of potential danger.
Degree of protection against electrical shock. Type BF.
Direct electrical current.
General
Health o meter® Professional scales use the most sophisticated microprocessor technology
available. Each precision instrument is designed to provide accurate, reliable and repeatable weight
measurements, as well as other features that make the weighing process simple, fast and
convenient.
In order to achieve satisfactory results, the operator must read this manual thoroughly before using
this scale.
If any questions arise regarding this scale or its use, please contact Health o meter® Professional
Scales Customer Service at 1-800-815-6615.
2210KL / 2210KL4 Scale Specifications
DEFINITION OF SYMBOLS
P/N UM2210KL 2210KL4 Rev20190312_Web
4
CERTIFICATIONS / DISPOSAL
Pelstar, LLC has been officially certified as the manufacturer
of Health o meter® Professional medical devices. The Pelstar,
LLC quality assurance system covers the development,
production, sales and service of medical scales and
measuring systems.
This product is tested to and meets the requirements of:
1. CSA C22.2 No. 601-1 M90: Medical Electrical Equipment
Certification Descriptions
Scale Disposal
This Health o meter® Professional scale must be disposed of properly as electronic waste. Follow
the national, regional or local regulations which apply to you for disposal of electronic waste or
batteries. Do not dispose of this device in the domestic waste stream.
P/N UM2210KL 2210KL4 Rev20190312_Web
5

ASSEMBLY INSTRUCTIONS
Before Assembly
Each 2210KL / 2210KL4 neonatal/pediatric tray scale is shipped disassembled in one carton.
Carefully inspect the carton for shipping damage before unpacking. If damage is found, contact your
shipper or a Health o meter® Professional representative immediately at 1-800-815-6615. Claims
must be filed with the shipper as soon as possible after receipt of the package. The following
information details what you will find inside the main carton as you unpack the parts for assembly.
To prevent scratching any components, carefully remove each assembly from the carton and unwrap
the packing materials. Set the carton aside for storage. To avoid damaging the scale parts when
unpacking, do not use a box cutter, knife, scissors, or any sharp object to open the protective inner
packaging.
Parts List
Carton
(1) Scale platform
(1) Acrylic tray
(6) C-cell Alkaline batteries
(1) User instructions
Tools Required
#2 Phillips head screwdriver (not included)
P/N UM2210KL 2210KL4 Rev20190312_Web
6
Remove Scale Cover
Install Tray
Measuring Tape
centered
not centered
ASSEMBLY INSTRUCTIONS (CONT)
The scale is shipped without the required six (6) C-cell batteries installed. The battery compartment
is located underneath the scale cover. Use the following procedure to install the batteries:
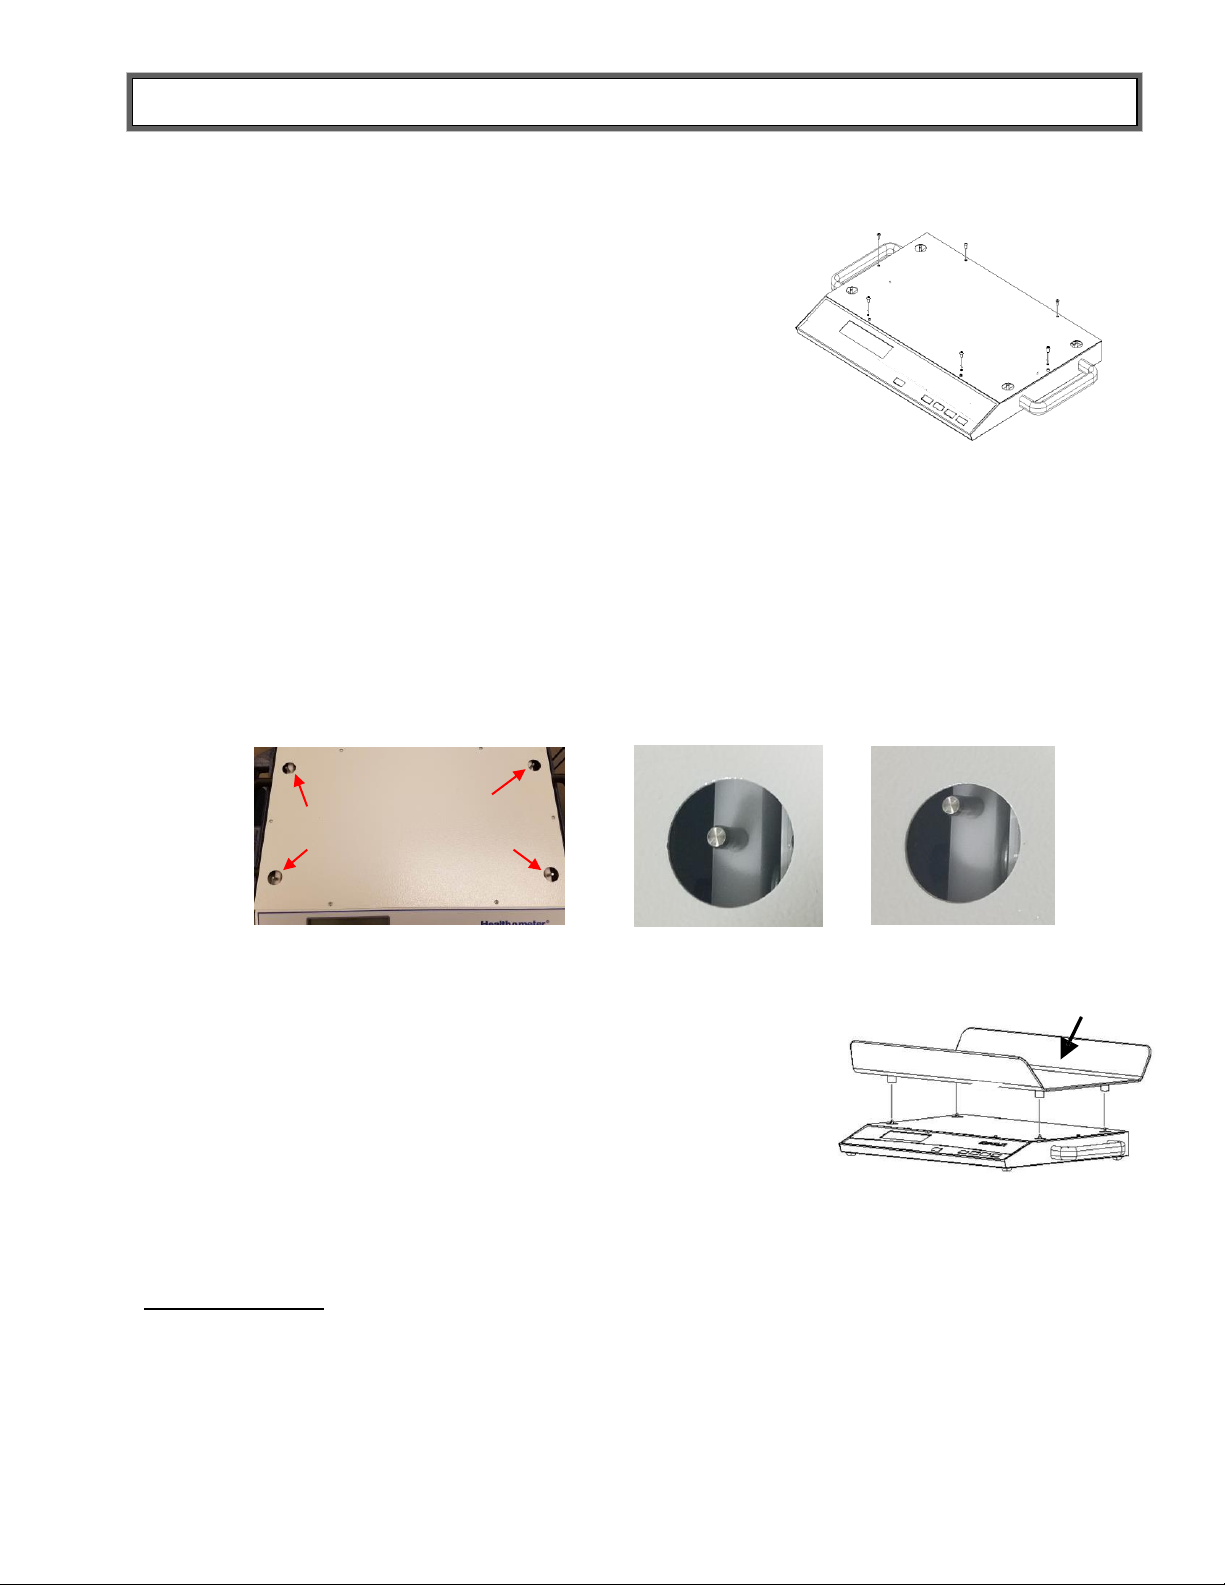
1. Remove the scale top cover by removing the six (6) screws.
IMPORTANT: When setting the cover aside, do not turn or
spin the orientation. The cover only fits properly in one
direction and must be replaced in the same orientation as it
was removed or the tray will not sit properly on the tray
mounting pins.
2. Locate the battery tray (in the rear center of the scale
platform). It has a white cover that is held down with two
screws. Remove the screws and battery cover.
3. Insert new batteries. Note the orientation that is shown
on the bottom of the battery tray.
4. Replace the battery tray cover and screws. Before installing scale cover, press ON/ZERO to ensure
scale turns on.
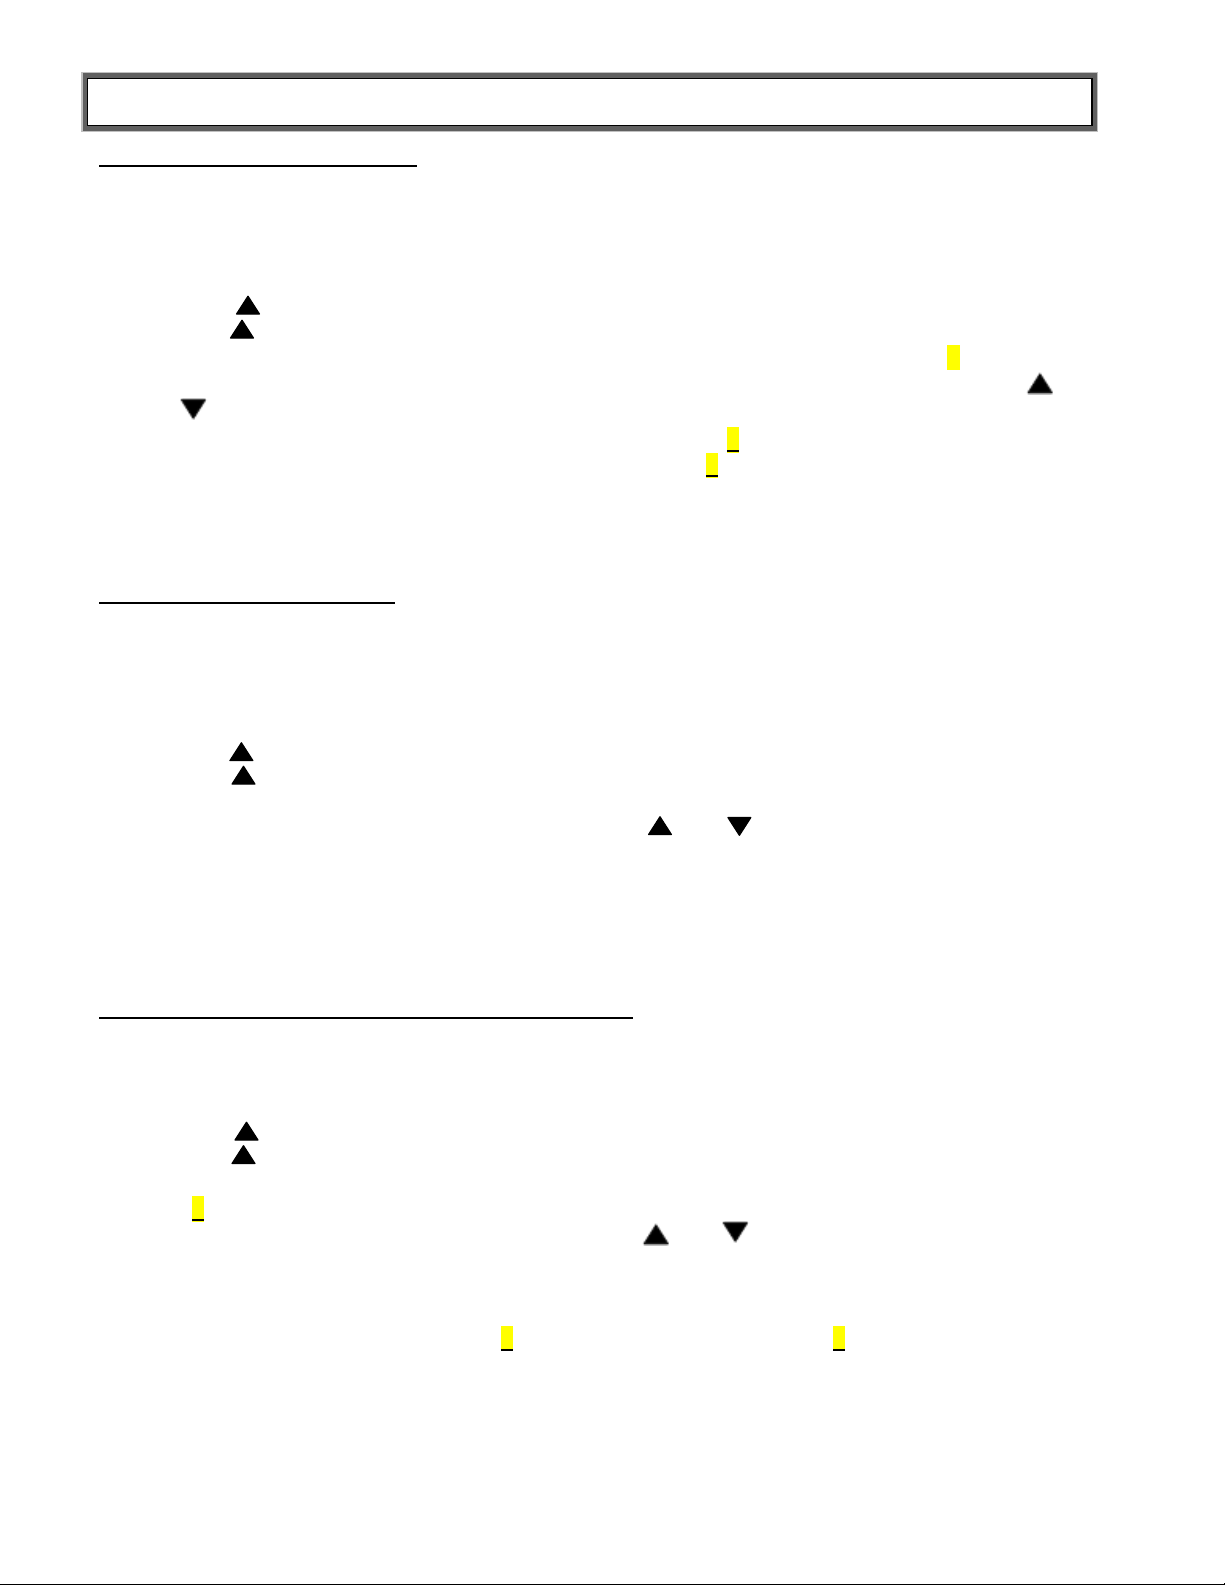
5. Reinstall the scale cover. Start partially inserting the (6) screws. Once cover is centered, tighten
screws fully.Ensure the scale cover is replaced in the same orientation that it was removed. The cover
only fits properly in one direction or the tray will not sit properly on the tray mounting pins. To ensure
the cover is placed in the correct direction, the tray mounting pins should be centered in the cover’s
four circles.
6. Position the scale with the display buttons facing you.
The acrylic tray has a built-in measuring tape. Align the tray
so that the measuring tape is positioned over the back end of the
scale platform.
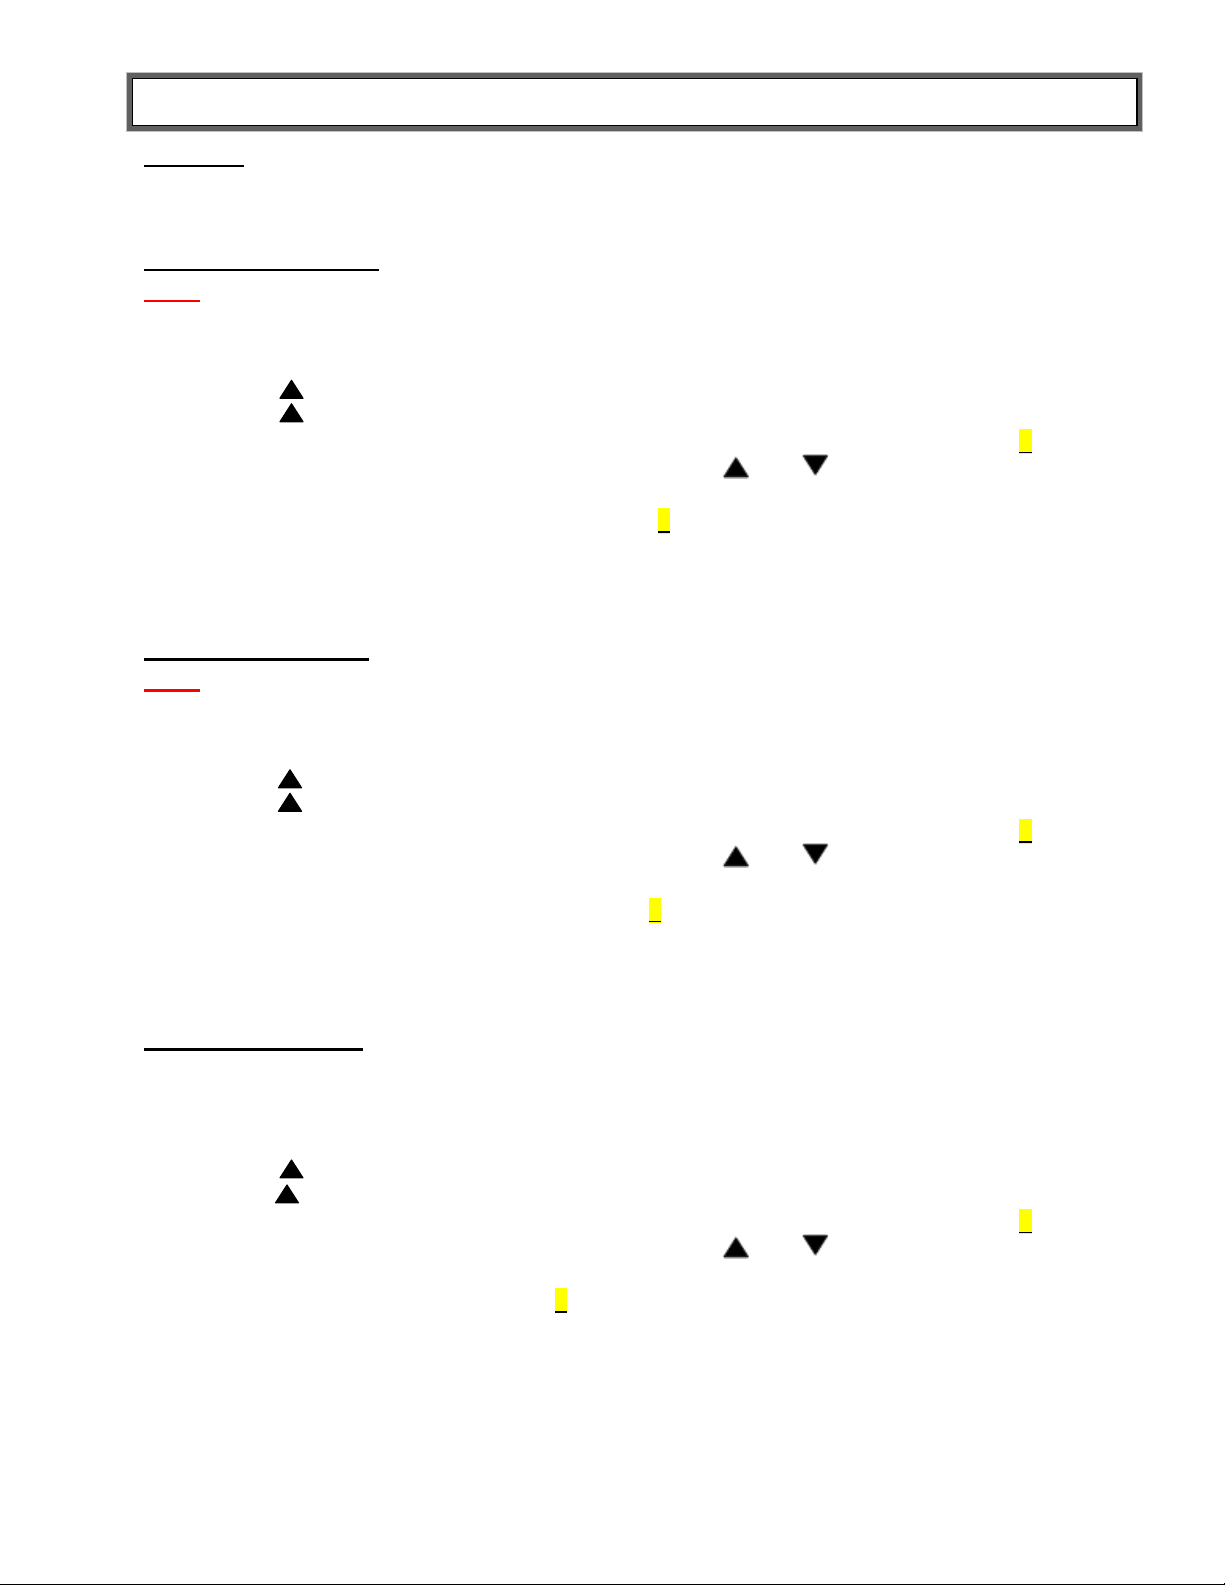
7. Carefully lower the tray onto the four mounting pins on the
scale platform. When the tray is properly aligned with the pins,
gently push down on the tray over each pin until it snaps into its
locked position. When properly positioned, there will be about a
3/8” space between the platform top and the bottom of the tray.
Always lift the scale by the black handles only – never by the tray.
Moving the Scale
The scale should be lifted by the two black handles only.
For your convenience, an optional wheeled cart is available, model # 2210CART.
NOTE: The scale tray should never be used for transporting a baby or objects. The tray
surface must be clear of any objects during transport.
P/N UM2210KL 2210KL4 Rev20190312_Web
7
SET UP INSTRUCTIONS
Activating/Deactivating Sound
A tone sounds whenever a weight is locked or a button is pressed. (Factory setting is “on”) The scale
can be set to stay silent or beep while operating the scale. Follow this procedure to set the preferred
option.
1. Press ON/ZERO and wait for the scale to display “0.0”.
2. Hold down MENU and press RECALL . “Set-0” will be displayed and the “0” will be flashing.
3. Press the button repeatedly until “Set-5” appears. Press ENTER.
Note: the button must be pressed quickly after “Set-0” appears or the scale will return to zero.
4. “11011” will appear on the display. The sound setting is changed with the first digit “11011”.
5. With the first digit flashing on the display, select “1” or “0” for your preferred option. Use the
and buttons to input your desired setting.
a. To keep sounds on, select “1”. Example: Sound on = 11011
b. To turn sound off, select “0”. Example: Sound off = 01011
6. Press ENTER when your selection is complete. Press ENTER to advance to the next
digit / setting. If no other settings need to be changed press ENTER repeatedly until the scale
returns to zero.
Programming Auto-Off Time
The 2210KL / 2210KL4 has been pre-set at the factory to shut down after one minute of inactivity.
This can be changed to any increment (from 12 seconds to 25 minutes) to suit your needs.
1. Press ON/ZERO and wait for the scale to display “0.0”.
2. Hold down MENU and press RECALL. “Set-0” will be displayed and the “0” will be flashing.
3. Press the button repeatedly until “Set-3” appears. Press ENTER.
Note: the button must be pressed quickly after “Set-0” appears or the scale will return to zero.
4. The Auto-Off time currently programmed in the scale will display as minutes and tenths of minutes
(i.e. “03.2”); the far left digit will be flashing. Use the and buttons to set the desired value,
press ENTER to advance to the next digit. For example, setting the time to “00.5” will turn the
scale off after 30 seconds of no use; “02.0” will turn the scale off after 2 minutes; “25.0” will turn
the scale off after 25 minutes.
5. Press ENTER when complete to save and return to normal weighing operation.
Unit of Measure Configuration (LB / GM or LB / KG)
The unit of measure may be displayed in lb / grams (i.e. 2541 gram) or lb / kilograms (2.541 kg).
(Factory setting is pounds / grams) Follow this procedure to set the preferred option.
1. Press ON/ZERO and wait for the scale to display “0.0”.
2. Hold down MENU and press RECALL. “Set-0” will be displayed and the “0” will be flashing.
3. Press the button repeatedly until “Set-5” appears. Press ENTER.
Note: the button must be pressed quickly after “Set-0” appears or the scale will return to zero.
4. “11011” will appear on the display. The unit of measure setting is changed with the fifth digit
“11011”.
5. Press ENTER until the fifth digit is flashing. Use the and buttons to input your desired
setting.
a. To weigh in pounds/kilograms, select “0”.
b. To weigh in pounds / grams select “1”.
Example: LB / KG display = 11010 LB / GM display = 11011
6. Press ENTER when your selection is complete and the scale will return to zero.
P/N UM2210KL 2210KL4 Rev20190312_Web
8
SET UP INSTRUCTIONS (CONT)
Unit Lock
The LB / GM button can be disabled so that the scale will weigh in only the selected unit of measure.
(Factory setting is “unlocked”) Follow these procedures to set the preferred option.
KG Lock Instructions (This feature is not available on models with a date code of 0812 or lower.)
Note: To lock in KG, the scale must be configured LB / KG mode (see pg. 8) and kilograms
must be the selected unit on the display before starting the lock procedure.
1. Press ON/ZERO and wait for the scale to display “0.0”.
2. Hold down MENU and press RECALL. “Set-0” will be displayed and the “0” will be flashing.
3. Press the button repeatedly until “Set-5” appears. Press ENTER.
Note: the button must be pressed quickly after “Set-0” appears or the scale will return to zero.
4. “11010” will appear on the display. The lock setting is changed with the second digit “11010”.
5. Press ENTER until the second digit is flashing. Use the and buttons to input your desired
setting.
To lock into KG select “0”. Example: Locked = 10010
6. Press ENTER when your selection is complete. Press ENTER to advance to the next
digit / setting. If no other settings need to be changed press ENTER repeatedly until the scale
returns to zero.
GM Lock Instructions
Note: To lock in GM, the scale must be configured LB / GM mode (see pg. 8) and grams must
be the selected unit on the display before starting the lock procedure
1. Press ON/ZERO and wait for the scale to display “0.0”.
2. Hold down MENU and press RECALL. “Set-0” will be displayed and the “0” will be flashing.
3. Press the button repeatedly until “Set-5” appears. Press ENTER.
Note: the button must be pressed quickly after “Set-0” appears or the scale will return to zero.
4. “11011” will appear on the display. The lock setting is changed with the second digit “11011”.
5. Press ENTER until the second digit is flashing. Use the and buttons to input your desired
setting.
To lock into GM select “0”. Example: Locked = 10011
6. Press ENTER when your selection is complete. Press ENTER to advance to the next
digit /setting. If no other settings need to be changed press ENTER repeatedly until the scale
returns to zero.
LB Lock Instructions
Note: To lock in LB, pounds must be the selected unit on the display before starting the lock
procedure.
1. Press ON/ZERO and wait for the scale to display “0.0”.
2. Hold down MENU and press RECALL. “Set-0” will be displayed and the “0” will be flashing.
3. Press the button repeatedly until “Set-5” appears. Press ENTER.
Note: the button must be pressed quickly after “Set-0” appears or the scale will return to zero.
4. “11011” will appear on the display. The lock setting is changed with the second digit “11011”.
5. Press ENTER until the second digit is flashing. Use the and buttons to input your desired
setting.
To lock into LB select “0”. Locked = 10011
6. Press ENTER when your selection is complete. Press ENTER to advance to the next
digit / setting. If no other settings need to be changed press ENTER repeatedly until the scale
returns to zero.
P/N UM2210KL 2210KL4 Rev20190312_Web
9
SET UP INSTRUCTIONS (CONT)
Unlock Weight Measuring Unit
1. Press ON/ZERO and wait for the scale to display “0.0”.
2. Hold down MENU and press RECALL. “Set-0” will be displayed and the “0” will be flashing.
3. Press the button repeatedly until “Set-5” appears. Press ENTER.
Note: the button must be pressed quickly after “Set-0” appears or the scale will return to zero.
4. “10010” or “10011”will appear on the display. The lock setting is changed with the second digit
“10011”.
6. Press ENTER until the second digit is flashing. Use the and buttons to input your desired
setting.
To unlock the weight measuring unit select “1”. Unlocked = 11011 or 11010
5. Press ENTER when your selection is complete. Press ENTER to advance to the next
digit / setting. If no other settings need to be changed press ENTER repeatedly until the scale
returns to zero.
P/N UM2210KL 2210KL4 Rev20190312_Web
10
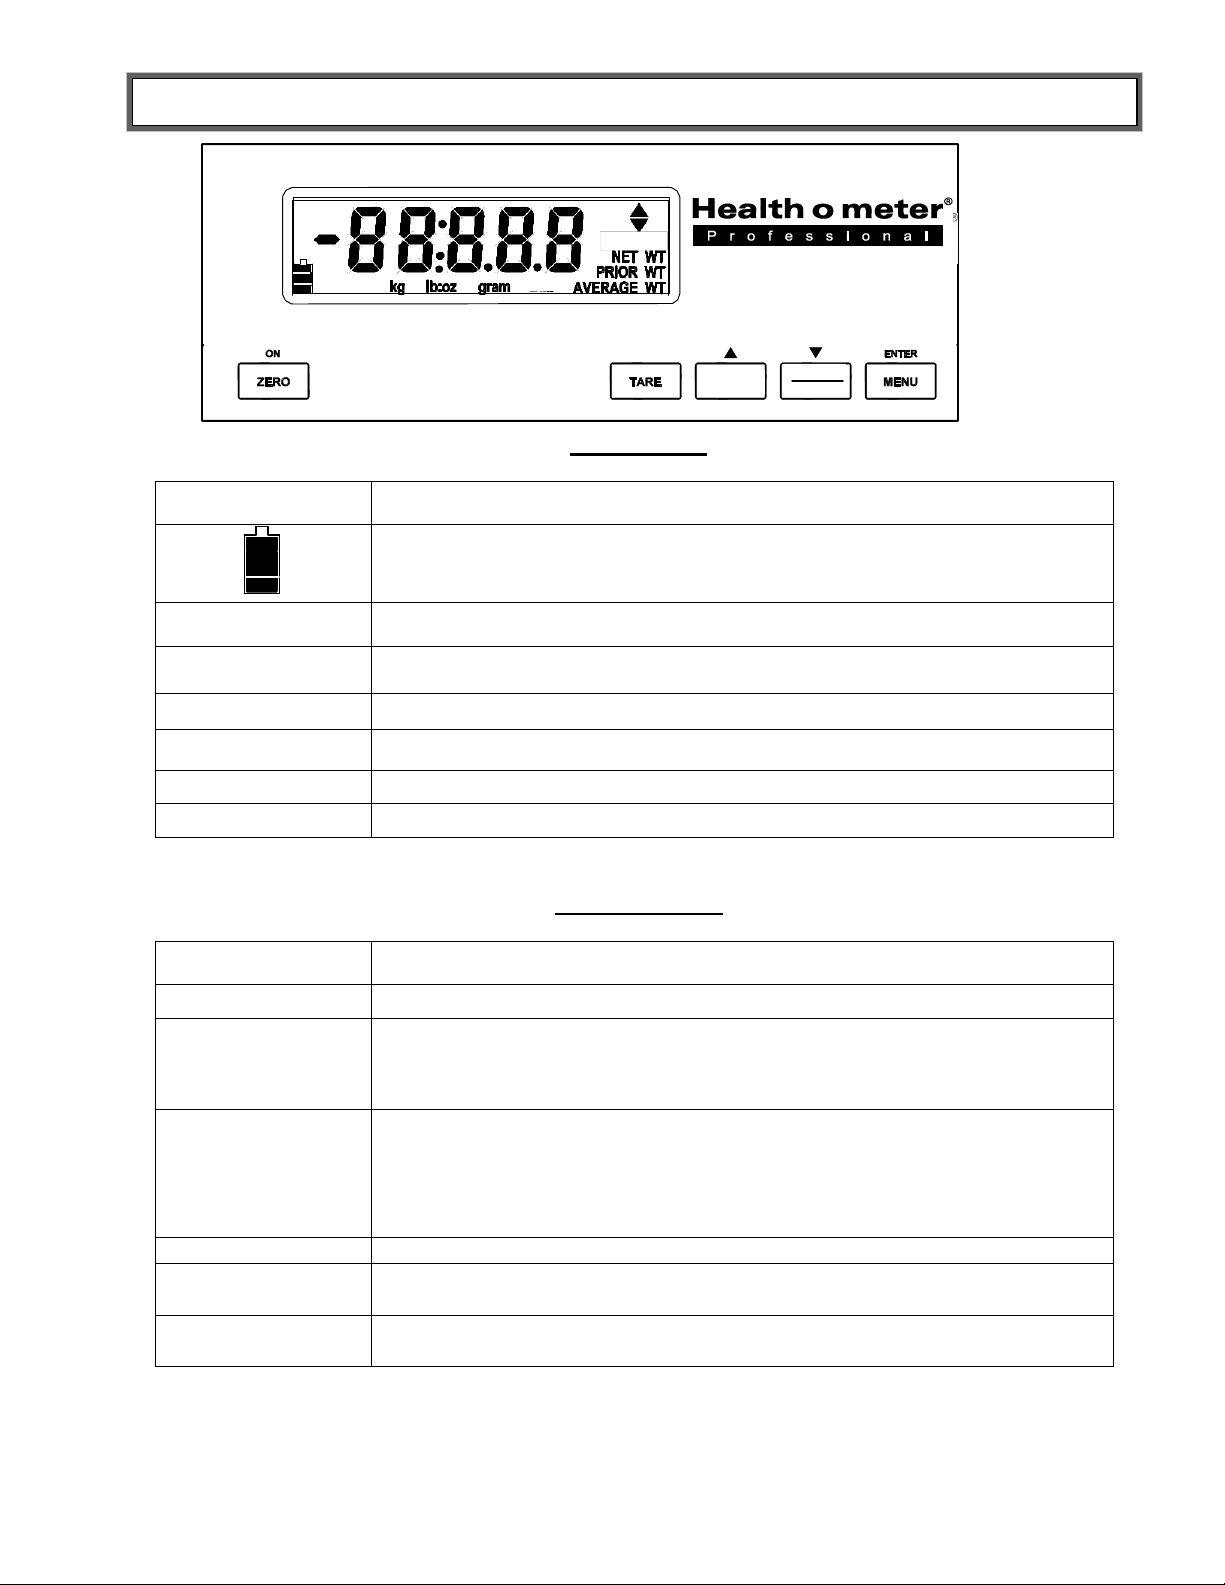
OPERATING INSTRUCTIONS
Icon
Description
Indicates level of battery power remaining.
kg
Indicates weight mode is in kilograms.
lb:oz
Indicates weight mode is in pounds/ounces.
gram
Indicates weight mode is in grams.
NET WT
Is displayed when a weight is tared.
PRIOR WT
Is displayed after a weight measurement.
AVERAGE WT
Is displayed when motion is detected during a weight measurement.
Function
Description
ON/ZERO
Press to turn scale on or reset to zero.
TARE
Used to perform the tare function and deducts the weight of an object on
the tray.
LB/GM
Toggles the unit of measurement between pounds and grams in
LB / GM mode or kilograms and grams in KG / GM mode. See User
Setting Options on page 8 for instructions on changing unit of
measurement mode.
Secondary function is the up arrow and is used for menu selection.
REWEIGH
Allows repeating weighing of the patient without stepping off the scale.
RECALL
Recalls previous weight measurement.
Secondary function is the down arrow and is used for menu selection.
MENU
Used for advanced programming functions.
Secondary function is the ENTER button and is used for menu selection.
LB/GM
RECALL
REWEIGH
Screen Icons
Keypad Buttons
Note that some buttons perform multiple functions.
P/N UM2210KL 2210KL4 Rev20190312_Web
11
 Loading...