

Page 1
Electric Steamer
STM-4G Series
Installation &
Operating Manual
I&W #07.05.188.00
This manual contains important safety information
concerning the maintenance, use and operation of this
product. Failure to follow the instructions contained in this
manual may result in serious injury. If you’re unable to
understand the contents of this manual, please bring it to
the attention of your supervisor. Do not operate this
equipment unless you have read and understood the
contents of this manual.
Este manual contiene importante información sobre
seguridad concerniente al mantenimiento, uso y
operación de este producto. Cualquier falla en el
seguimiento de las instrucciones contenidas en este
manual puede resultar en un serio daño. Si usted no
puede entender el contenido de este manual por
favor pregunte a su supervisor. No opere este
equipo al menos que haya leído y comprendido el
contenido de este manual.
STEAM
MAXMAX
STEAM
STEAMER
START
/STOP
I / O
1
2
3
4
5
AUTO/
MANUAL
Page 2

Form No. STMSM-1007
i
CONTENTS
Important Owner Information........................................i
Introduction ....................................................................i
Important Safety Information.......................................1
Model Description.........................................................3
Specifications................................................................4
Plug Configurations.................................................4
Dimensions..............................................................4
Installation .....................................................................5
Unpacking................................................................5
Location...................................................................5
Plumbing..................................................................5
Set-Up .....................................................................6
Operation .......................................................................8
Control Panel ...........................................................8
Water - Manual Fill..................................................9
Water - Auto Fill .......................................................9
Programming the Buttons 1-5 .................................9
Suitable Containers...............................................10
Operation...............................................................10
Meal Planning Tips................................................14
Blanching...............................................................14
Disinfecting............................................................14
Maintenance ................................................................15
General..................................................................15
Cleaning ................................................................15
Troubleshooting Guide...............................................17
Accessories.................................................................18
Hatco Limited Warranty..............................................19
IMPORTANT OWNER INFORMATION
INTRODUCTION
The Hatco STM-4G Electric Steamer is specially
designed for cooking, reheating, defrosting, and
bottling foods with steam. Inside the sealed cabinet
of the Electric Steamer, steam is allowed to
penetrate foods from all sides, heating foods evenly
and thoroughly. Steam prevents foods from drying
out so food remains moist and juices are not lost.
Cooking with steam brings out the distinct flavor of
the food retaining the food’s true taste. The Electric
Steamer is a healthier cooking alternative to
conventional methods.
Hatco Electric Steamer may also be used to
disinfect containers, kitchen utensils and other
items.
This manual provides the installation, safety and
operating instructions for the Electric Steamer unit.
We recommend all installation, operating and safety
instructions appearing in this manual be read prior to
installation or operation of your Electric Steamer unit.
Safety instructions that appear in this manual after a
warning symbol and the words WARNING or
CAUTION printed in bold face are very important.
WARNING means there is the possibility
of serious personal injury or death to yourself or
others. CAUTION means there is the possibility
of minor or moderate injury. NOTICE signifies the
possibility of equipment or property damage only.
Hatco Electric Steamer units are a product of
extensive research and field testing. The materials
used were selected for maximum durability,
attractive appearance and optimum performance.
Every unit is thoroughly inspected and tested prior
to shipment.
Record the model number, serial number
(identification decal located on the back of the unit),
voltage and purchase date of your unit in the spaces
provided. Please have this information available
when contacting Hatco for service assistance.
Model No. ________________________________
Serial No. ________________________________
Voltage __________________________________
Date of Purchase __________________________
Telephone: (414) 671-6350
Fax: (414) 671-3976
Additional information can be found by visiting our
web site at www.hatcocorp.com
Page 3
Form No. STMSM-1007
1
IMPORTANT SAFETY INFORMATION
IMPORTANT! Read the following important safety information to avoid personal injury
or death, and to avoid damage to the equipment or property.
WARNINGS
To prevent electrical shock or injury, turn the
power switch OFF, disconnect the unit from
the power source and allow to cool before
performing any maintenance.
For safe and proper operation plug unit into
a properly grounded electrical outlet of the
correct voltage, size and plug configuration.
If the plug and receptacle do not match,
contact a qualified electrician to determine
the proper voltage and size. Install the proper
electrical outlet if needed.
This appliance is not jet-proof construction.
To assure safe and proper operation do not
use jet-clean-spray to clean this appliance.
The appliance is not waterproof. To avoid
electrical shock or personal injury, DO NOT
submerge in water. Do not operate if it has
been submerged in water.
To avoid electrical shock or personal injury,
DO NOT insert into the unit a water tank that
is wet on the outside.
To prevent any injury, discontinue use if
power cord is frayed or worn.
To prevent any injury or damage to the unit
do not pull unit by power cord.
If the power supply cord is damaged, it must
be replaced by Hatco, an Authorized Service
Agent, or a person with similar qualifications
to avoid a hazard.
This appliance is not suitable or designed for
operation on ships, airplanes, tourism cars,
or similar locations. A qualified electrician
must evaluate the risk of operation to avoid
personal injury or damage to the appliance.
Hot steam will escape from cabinet when
door is opened and injury may occur if user
comes in contact with steam or inside of
steam oven cabinet wall.
To assure safe and proper operation
additional cleaning may be required
depending upon products being thawed and
local codes applying to sink thawing
techniques.
To avoid the risk of injury, scalding or
damage to the appliance DO NOT heat food
in sealed jars or tins. Pressure will build up
inside them and explode.
The unit must be transported in an upright
position. The water must be drained from the
unit. Failure to do so may result in damage to
the unit or personal injury.
To avoid any injury or damage, the steamer
must only be serviced by qualified
personnel.
If service is required on this unit, contact
your Authorized Hatco Service Agent, or
contact the Hatco Service Department at 414671-6350 or International fax 414-671-3976.
This product has no “user” serviceable
parts. To avoid damage to the unit or injury
to personnel, use only Authorized Hatco
Service Agents and Genuine Hatco
Replacement Parts when service is required.
Genuine Hatco Replacement Parts are
specified to operate safely in the
environments in which they are used. Some
aftermarket or generic replacement parts do
not have the characteristics that will allow
them to operate safely in Hatco equipment. It
is essential to use Hatco Replacement Parts
when repairing Hatco equipment. Failure to
use Hatco Replacement Parts may subject
operators of the equipment to hazardous
electrical voltage, resulting in electrical
shock or burn.
Page 4

Form No. STMSM-1007
2
IMPORTANT SAFETY INFORMATION
CAUTIONS
T o avoid injury or damage to the unit DO NOT
move or relocate the unit while it contains
any food product or water in the tank.
Some exterior surfaces on the unit will get
hot. Use caution when touching these areas
to avoid injury.
To avoid unsafe conditions do not mix
products that may contaminate each other
during thawing process.
For safe and proper operation do not place
food product directly onto bottom of unit.
Use of a perforated pan is recommended for
holding food product.
Do not place anything on top of the unit;
doing so could damage the unit or subject
personnel to possible injury.
Unit is not weatherproof. For safe and proper
operation the unit must be located indoors
where the ambient air temperature is a
minimum of 21°C (70°F) and a maximum of
29°C (85°F).
To avoid the risk of injury, use caution not to
spill hot food contents when removing
containers from unit.
T o avoid any injury or damage locate the unit
at the proper counter height, in an area that
is convenient for use. The location should be
level to prevent the unit or its contents from
accidentally falling, and strong enough to
support the weight of the unit and contents.
Do not fill with water above or beyond the
maximum water line (1 liter) on the water
tank or damage may occur to the unit.
NOTICES
To assure proper operation and to prevent lime
and scale buildup inside the unit, use distilled
water or water that has been treated to prevent
scale build-up.
Ensure the water tank is empty after each days
use to prevent sediment build up in the
appliance.
Do not use harsh chemicals such as bleach or
cleaners containing bleach. Also avoid the use
of scouring pads, hard brushes, or steel wool as
they may damage the surface of the appliance.
Cleaning and sanitizing is recommended at the
end of each days use.
Do not use cleaning products containing
aliphatic compounds as these could cause the
seals to swell.
Use only vinegar or citric acid based descaling
agents or descaling tablets to descale the
appliance.
Use only non-abrasive cleaners with nonabrasive sponges or cloths. Abrasive cleaners
could scratch the finish of your unit marring its
appearance and making it susceptible to soil
accumulation.
Do not use a steam cleaner to clean the outside
of this appliance. Pressurized steam could
cause permanent damage to the surface and
penetrate the electrical components causing the
appliance to short circuit.
Do not store cooked food in appliance for long
periods of time. The moisture in the food can
lead to corrosion in the appliance.
Use only suitable containers that are heat and
steam resistant to 100°C (212°F).
Page 5
Form No. STMSM-1007
3
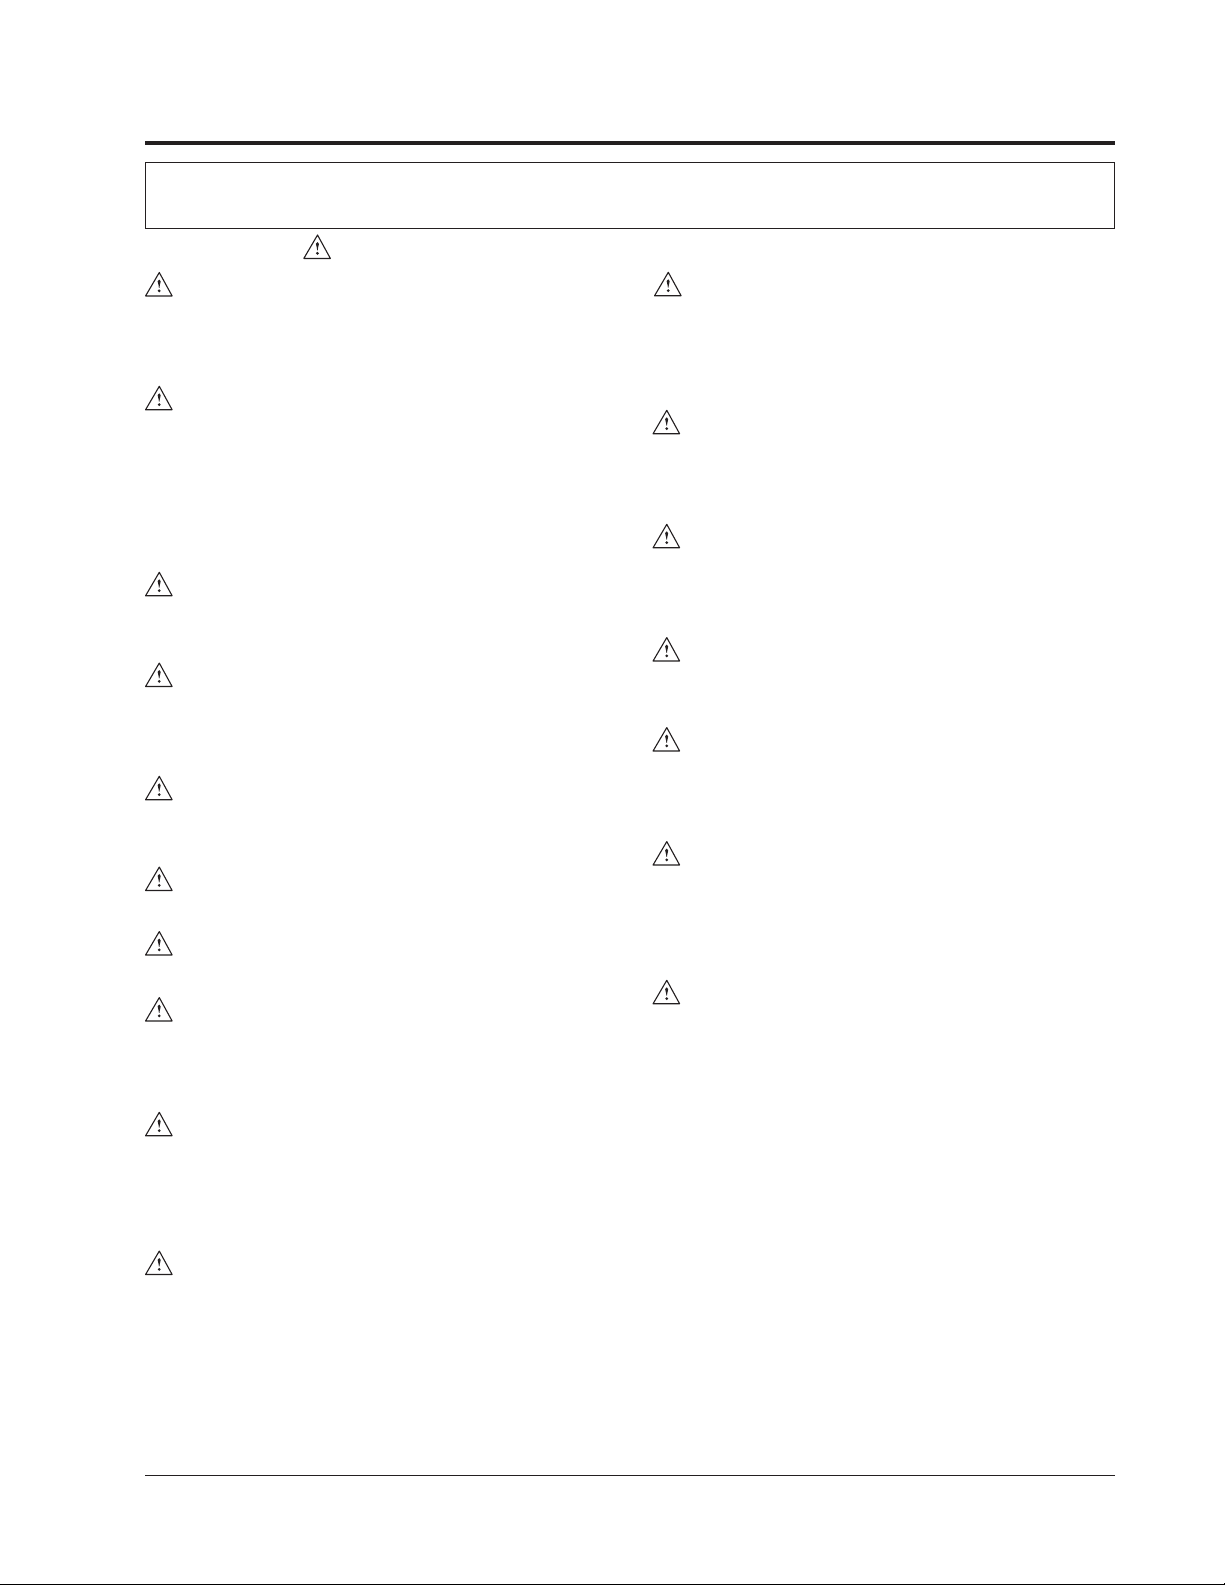
MODEL DESCRIPTION
STM-4G MODEL
Hatco's Electric Steamer produces steam in an
enclosed cabinet for cooking, reheating, defrosting,
or bottling of food products. When the oven door is
closed a seal is formed. The sealed oven cabinet
captures the steam and monitors the cabinet
temperature with an internal thermostat. To avoid
pressure buildup, steam is allowed to exit from the
front upper vents inside the cabinet. Inside the main
cabinet housing are side runners that support
cooking pans or racks, and are easily removed for
cleaning purposes. An independent cavity holds a
removable 1 liter (.3 gal.) water tank, essential for
the steam process. The steam oven has a outer drip
tray to collect condensation that may accumulate on
the door during operation.
The Electric Steamer comes equipped with a
condensation pan to collect excess moisture inside
the cabinet underneath the cooking pan(s), a
stainless steel perforated pan and a metal rack for
holding solid containers. Other pan options are
available.
STEAM
MAXMAX
STEAM
STEAMER
STAR
T
/STOP
I / O
1
2
3
4
5
AUTO/
MAN
UAL
Figure 1. Electric Steamer Model STM-4G
Page 6
Form No. STMSM-1007
4
SPECIFICATIONS
ELECTRICAL SPECIFICATIONS
Voltage Hertz Kilowatts Amps Shipping
(kW) Weight
230V (CE) 50/60 2.0 8.7 21 Kg
DIMENSIONS
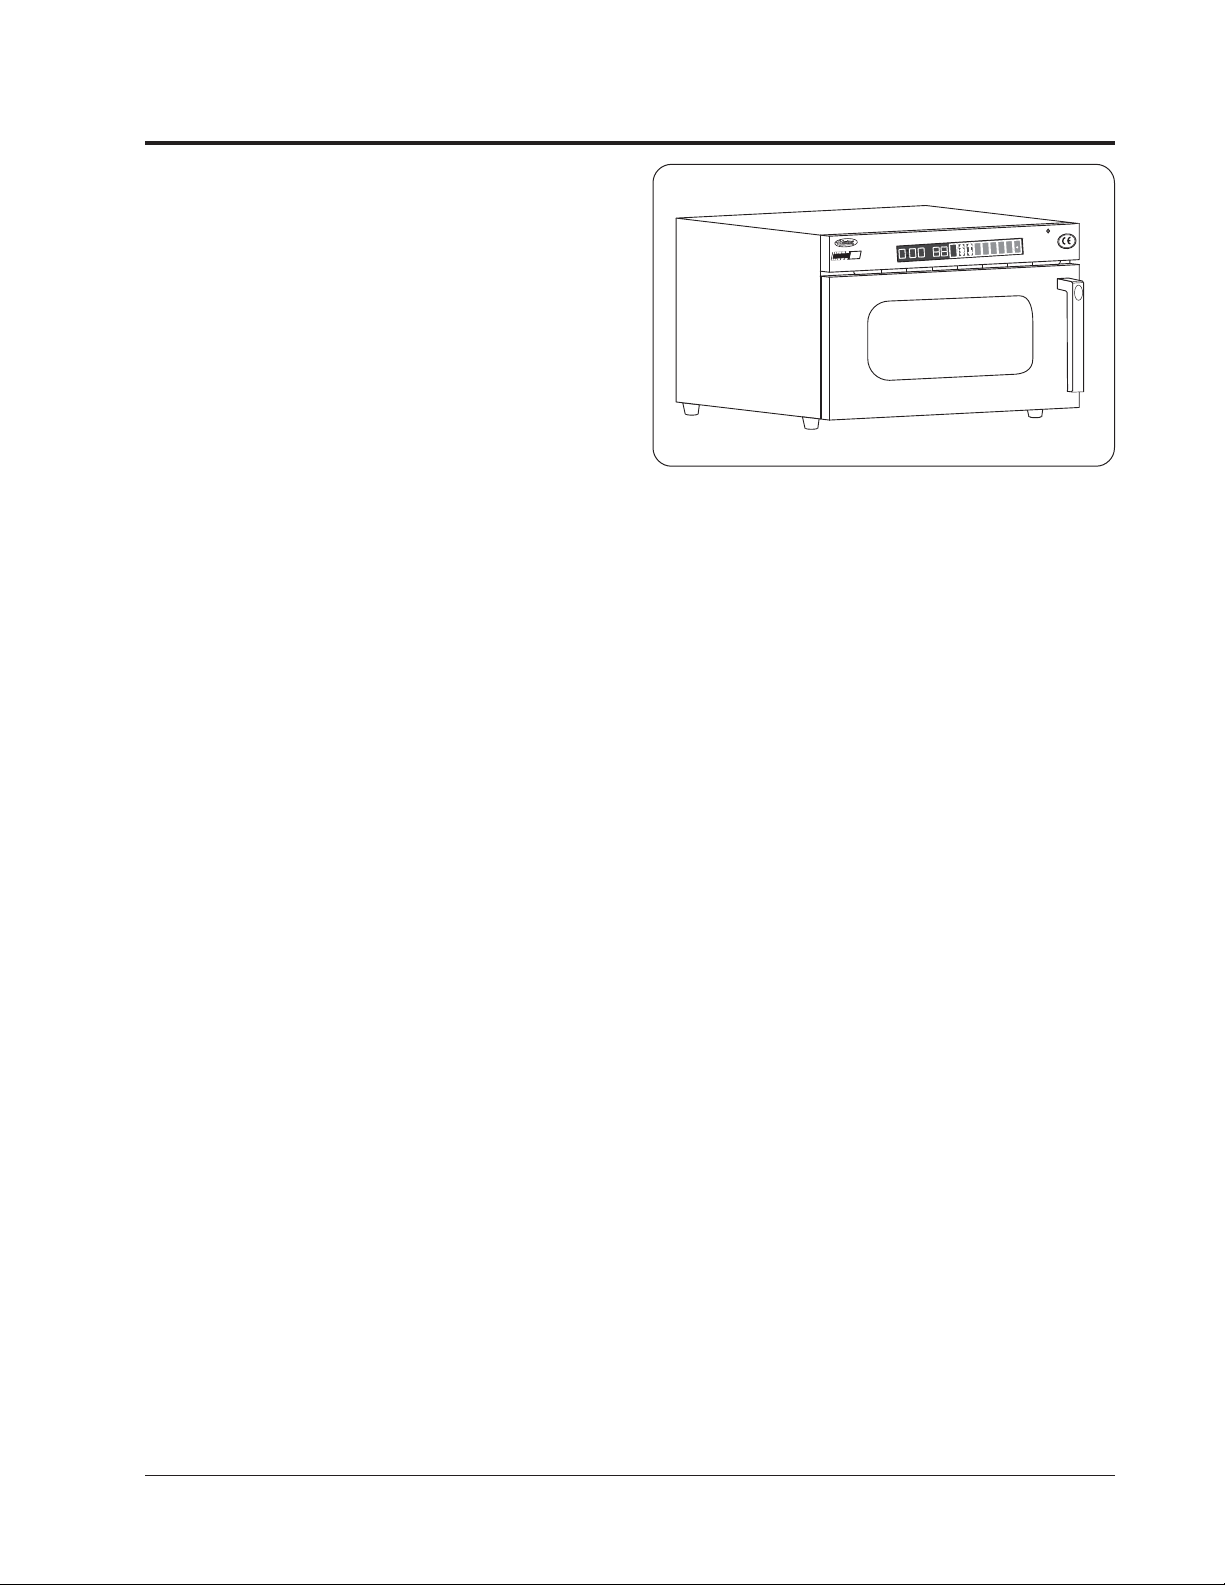
PLUG CONFIGURATIONS
Units are supplied from the factory with an electrical
cord and plug. Plugs are supplied according to the
applications. (See Figure 2.)
WARNING
For safe and proper operation plug unit into a
properly grounded electrical outlet of the
correct voltage, size and plug configuration. If
the plug and receptacle do not match, contact a
qualified electrician to determine the proper
voltage and size. Install the proper electrical
outlet if needed.
Figure 2. Plug Configurations
START
/STOP
I / O
1
2
3
4
5
AUTO/
MANUAL
Width Depth Height
Model (A) (B) (C)
STM-4G 595 mm 460 mm 445 mm
(23½") (18") (17½")
Figure 3. Dimensions
A
B
C
Interior Dimensions:
336 mm (13¼") W x 273 mm (10¾") D x 235 mm (9¼") H
CEE 7/7 Schuko BS 1363
*
*
*Receptacle not supplied by Hatco.
Page 7

Form No. STMSM-1007
5
INSTALLATION
PLUMBING
Water Auto Fill (Recommended for Commercial Use)
The unit is equipped with an Auto Fill feature that
eliminates having to manually fill the water tank.
To use the Auto Fill feature, the valve located at the
rear of the unit must be connected to the closest tap
water supply using the connector pipe included with
the unit.
NOTE: For commercial use, it is recommended to
install the supplied water filter in the water line to
prevent scale buildup.
1. Connect 6 mm (.25") plastic tubing to the inlet
side of the Everpure™ IN-10 water treatment
filter supplied.
2. Connect another piece of 6 mm (.25") tubing
from the outlet of the filter to the inlet water fitting
on the back of the steamer.
UNPACKING
The Electric Steamer is shipped with most
components installed and ready for operation. The
following installation instructions must be performed
before plugging in and operating the unit.
1. Remove unit and information packet from box.
2. Remove all contents from inside the unit.
3. Remove tape and protective film from all
surfaces of unit and contents.
LOCATION
Transport the unit to a suitable location and place on
a flat, level surface.
WARNING
The unit must be transported in an upright
position. The water must be drained from the
unit. Failure to do so may result in damage to the
unit or personal injury.
CAUTION
To avoid any injury or damage locate the unit at
the proper counter height, in an area that is
convenient for use. The location should be level
to prevent the unit or its contents from
accidentally falling, and strong enough to
support the weight of the unit and contents.
WARNING
This appliance is not suitable or designed for
operation on ships, airplanes, tourism cars, or
similar locations. A qualified electrician must
evaluate the risk of operation to avoid personal
injury or damage to the appliance.
CAUTION
To avoid injury or damage to the unit DO NOT
move or relocate the unit while it contains any
food product or water in the tank.
CAUTION
Do not place anything on top of the unit; doing
so could damage the unit or subject personnel
to possible injury.
CAUTION
Unit is not weatherproof. For safe and proper
operation the unit must be located indoors
where the ambient air temperature is a minimum
of 21°C (70°F) and a maximum of 29°C (85°F).
Page 8

8. Remove the water tank by pulling it straight out
of the cabinet. Rinse the water tank and cover
thoroughly using hot water. When rinsing the
water tank for the first time, do not use any
cleaning products. Never use scouring pads or
hard brushes.
Thoroughly dry the inside and outside of the
water tank. Install the cover onto the tank and
place tank into the cavity.
WARNING
To avoid electrical shock or personal injury, DO
NOT insert into the unit a water tank that is wet
on the outside.
9. Plug the electrical cord into the back of the unit.
Plug unit into an electrical outlet of the correct
voltage, size and plug configuration. See
ELECTRICAL SPECIFICATIONS for details.
Form No. STMSM-1007
6
INSTALLATION
SET-UP
The Electric Steamer comes equipped with the
following (See Figure 4):
• two side runners, left and right
• one metal rack
• one stainless steel condensation pan
• one ¼ size perforated stainless steel food pan
(optional different size pans are available, both
perforated and solid)
• one drip tray
• one water drain floating disc and cover
• removable water tank and cover
• one power cord with CEE 7/7 Schuko plug
• one Everpure™ IN-10 water filter/scale control
cartridge
1. Install the white floating disc with the locating pin
positioned in the drain hole in the center bottom
of the cabinet. Install the cover over the disc.
(See Figure 5.)
2. Install the left and right side runners. Make sure
the rear tip of the runner engages the mounting
hole in the back of the cabinet, then slide the
mounting tab over the locating pin and push
down to secure. (See Figure 6.)
3. Insert the rack into the side runners.
4. Place the perforated pan onto the rack or slide it
into the side runners.
5. Place the condensate pan in the bottom of the
cabinet.
6. Connect an 8 mm (.32") plastic tube to the fitting
at the rear of the drip tray for draining water.
Route the tubing to a sink or floor drain.
7. Install the drip tray into the outside bottom of the
cabinet. (See Figure 4.)
Page 9

Form No. STMSM-1007
7
INSTALLATION
START
/STOP
I / O
1
2
3
4
5
AUTO/
MANUAL
Figure 4. Steamer Components
Side Runners
Water Tank
and Cover
Perforated Pan
Rack
Condensation
Pan
Drip Tray
Power Cord
Water Drain Floating
Disc and Cover
Figure 6. Side Runner Installation
START
/STOP
I / O
1
2
3
4
5
AUTO/
MANUAL
Figure 5. Water Drain Floating Disc and Cover
I / O
1
2
3
4
5
AUTO/
MANUAL
Mounting Hole
Locating Pin
Page 10

Form No. STMSM-1007
8
OPERATION
CONTROL PANEL
The Electric Steamer's front control panel digitally
displays the temperature and timer which are set
with separate (+/-) function buttons.
The steam oven has a START/STOP button for the
cook cycle. The START/STOPbutton is also used to
interrupt operation during a set program without
having to turn the unit off (opening and closing the
steam oven door will have the same affect.) The
ON/OFF button controls the power to the Electric
Steamer. The display is illuminated when the unit is
on, and is dark when the unit is off.
• Temperature display shows the internal cabinet
temperature unless the (+/-) Temperature button
was recently pressed.
• Temperature and cook time cannot be changed
during the programmed operation unless the
START/STOP button is pressed.
• When starting a programmed setting, the timer
will not begin to count down until the steam oven
cabinet has reached the programmed
temperature setting.
During the operation of the Electric Steamer the
Temperature display will sometimes show the
following symbols:
• The safety lock symbol will flash in the
temperature display when the oven door is
opened during a set program. (See Figure 7.)
The symbol will disappear when the oven door is
closed.
• When the water level is too low, the low water
symbol will appear in the display (See Figure
8), the unit will beep and the operation will stop.
The water tank will have to be refilled before
continuing to use the steam oven.
• When in the Auto Fill mode, the word AUTO will
appear in the display. (See Figure 7.)
START
/STOP
I / O
1
2
3
4
5
AUTO/
MANUAL
AUTO
Figure 7. Control Panel
Temperature Display
On/Off Button
Safety Lock
Symbol
Timer Increase Button (+) Temperature Increase Button (+)
Timer Decrease Button (-)
Temperature Decrease Button (-)
Start/Stop Button
and Auto/Manual
fill Button
Timer Display
Auto Fill ON Symbol
Low Water
Symbol
Pre-programmed Timer Buttons
Page 11

Form No. STMSM-1007
9
OPERATION
WATER - MANUAL FILL
CAUTION
Do not fill with water above or beyond the
maximum water line (1 liter) on the water tank or
damage may occur to the unit.
NOTICE
To assure proper operation and to prevent lime
and scale buildup inside the unit, use distilled
water or water that has been treated to prevent
scale build-up.
1. Remove and fill water tank to an appropriate
level (1 liter) between the minimum and
maximum water lines located on the water tank.
Use both hands when carrying a full water tank.
(See Figure 8.)
2. Completely dry the outer surface of the water
tank and place water tank fully inside the cavity
until it connects. Take care not to let any water
spill out.
WARNING
To avoid electrical shock or personal injury, DO
NOT insert into the unit a water tank that is wet
on the outside.
3. Wipe away any water that may be on the floating
disc. (See Figure 5.)
WATER - AUTO FILL (RECOMMENDED
FOR COMMERCIAL USE)
NOTE: Auto boiler drain occurs when the power is
switched off. The drain valve will be turned on for 1
minute to drain all the water/descaling agent in the
boiler to the drip pan and drain hose. There may be
some “noise” from the drain valve when the boiler
runs out of water and is empty.
1. Make sure water line is properly connected to the
water supply.
NOTE: A hose is recommended to be connected to
the drip pan for drainage.
2. Open the door, press and hold the Start/Stop
button for two seconds until AUT O appears in the
display. (See Figure 8.) Release the Start/Stop
button and close the door.
NOTE: When the unit is turned on, it will default to
Manual Fill mode. Repeat step 2 to switch to Auto
Fill mode. Once set in Auto mode, the unit will stay
in Auto mode unless it is unplugged from the power
source.
PROGRAMMING THE BUTTONS 1 - 5
The Steamer comes with the following factory
presets:
Button Temperature Minutes
1 95°C 5
2 100°C 6
3 100°C 7
4 100°C 8
5 100°C 9
To reprogram a menu button:
1. Press and hold the I/O Power button for two
seconds to turn the Electric Steamer on. Timer
display will be at 0:00 and the Temperature
display will show the current temperature inside
the cabinet when unit is first turned on.
2. Press the desired Program Menu button (1-5).
3. Press the (+) or (-) Timer buttons until the desired
time is shown on the Timer Display. Pressing and
holding the (+) or (-) Timer button will rapidly
increase or decrease the set time.
4. Press the (+) or (-) Temperature buttons until the
desired temperature is shown on the
Temperature Display. Pressing and holding the
(+) or (-) Temperature button will rapidly increase
or decrease the set temperature.
5. Press the Program button until a beep is heard,
then release the button. The new program is now
saved.
6. Repeat steps 2 - 5 for the other 4 buttons.
NOTE: See charts on pages 12-14 for
recommended cook times and temperatures.
Figure 8. Water Level
Minimum Water Level
Maximum
Water Level
Page 12

Form No. STMSM-1007
10
OPERATION
SUITABLE CONTAINERS
The Electric Steamer comes equipped with one ¼
size perforated stainless steel food pan. Optional
different size pans are available, both perforated
and solid.
CAUTION
To avoid unsafe conditions do not mix products
that may contaminate each other during thawing
process.
NOTICE
Use only suitable containers that are heat and
steam resistant to 100°C (212°F).
When choosing the most suitable container for
particular food products, take into consideration the
following guidelines:
• Perforated pans are ideal for steaming large to
medium vegetables. The perforated pan allows
the steam to encompass the whole vegetable
and cook evenly and thoroughly.
• When using perforated pans, we recommend
placing a solid condensation pan underneath to
catch any dripping condensation.
NOTE: Two perforated pans containing different
foods should not be used at the same time in the
steam oven without being separated by a
condensation pan. The integrity of the food taste
may be jeopardized with moisture dripping from the
pan above.
• Solid shallow pans are recommended for dishes
that are more compact such as casseroles,
bakes, or foods small in size.
• Foods prepared in deeper pans will take longer
to cook.
• Use the metal rack when multiple smaller pans or
bottling is needed.
• All containers must be rated to withstand hot
steam up to 100°C (212°F) temperatures. Heat
resistant glass, ceramics, porcelain, plastic,
stainless steel or enamel dishes are all suitable
containers.
• Containers with thick sides will lengthen or
increase cook times.
• Ensure that at least a 30 mm (1") gap is left
between the upper rim of the container and the
top of the steam oven. This will allow for
sufficient steam to enter into the container.
OPERATION
CAUTION
Some exterior surfaces on the unit will get hot.
Use caution when touching these areas to avoid
injury.
WARNING
To prevent any injury, discontinue use if power
cord is frayed or worn.
WARNING
To prevent any injury or damage to the unit, do
not pull unit by power cord.
WARNING
If the power supply cord is damaged, it must be
replaced by Hatco, an Authorized Service Agent,
or a person with similar qualifications to avoid a
hazard.
WARNING
The appliance is not waterproof. To avoid
electrical shock or personal injury, DO NOT
submerge in water. Do not operate if it has been
submerged in water.
WARNING
T o avoid the risk of injury, scalding or damage to
the appliance DO NOT heat food in sealed jars or
tins. Pressure will build up inside them and
explode.
CAUTION
For safe and proper operation do not place food
product directly onto bottom of unit. Use of a
perforated pan is recommended for holding food
product.
NOTICE
Do not store cooked food in appliance for long
periods of time. The moisture in the food can
lead to corrosion in the appliance.
NOTICE
Use only suitable containers that are heat and
steam resistant to 100°C (212°F).
NOTE: The first time the steam oven is used it will
emit more than a normal amount of steam from the
appliance.
Page 13

Form No. STMSM-1007
11
OPERATION
8. When the Timer display shows 0:00 an audible
tone will sound, signifying the end of a set
cooking program.
9. Using proper hand protection, open steam oven
door and remove cooking containers.
CAUTION
To avoid the risk of injury, use caution not to
spill hot food contents when removing
containers from steam oven.
10.Repeat steps 1-8 to continue to steam, cook,
reheat, defrost or bottle food.
NOTE: To terminate the operation during a steam
cycle, press the Start/Stop button once. To restart
the cycle, press the START/STOP button, then the
desired Menu button, and then the START/STOP
button again.
NOTE: Opening the door during the steam cycle
causes the operation to stop. To resume the steam
cycle, close the door.
11. When finished using the Electric Steamer, press
and hold the I/O power button until the displays
are blank. The steam oven is now off.
Allow unit to cool down before cleaning. Empty any
unused water from the water tank and remove any
excess water from the steamer. Hatco recommends
the Electric Steamer is cleaned and the inside
cabinet is fully dry before closing the oven door after
use. See MAINTENANCE section in this manual for
cleaning and care.
NOTE: The steam oven fan will run for a period of
time after the program has stopped to cool down the
appliance.
1. Press and hold the I/O power button to turn the
unit on. Make sure door is closed.
2. Press the timer and temperature buttons to
achieve the desired settings, or press one of the
pre-programmed Menu buttons (1-5).
3. Prepare foods for cooking while allowing steam
oven to reach the desired cabinet temperature.
4. Open the steam oven door. The programmed
setting will not be lost when the oven door is
opened.
WARNING
Hot steam will escape from cabinet when door is
opened and injury may occur if user comes in
contact with steam or inside of steam oven
cabinet wall.
5. Slide the cooking pan into the side runners of the
steam oven cabinet or slide the metal rack into
the side runners, and place the containers on the
metal rack.
NOTE: Make sure the condensation pan is used in
combination with the perforated pan option.
6. Close the steam oven door. Verify that the safety
lock symbol has disappeared from the
temperature display.
NOTE: After placing the food pans into the steam
oven, the cabinet temperature may decrease before
starting to increase back to the desired set
temperature.
7. Press the STAR T/STOP button to start the cycle.
NOTE: When starting a programmed setting, the
timer will not begin to count down until the steam
oven cabinet has reached the programmed
temperature setting.
Temperature and cook times cannot be changed
during the programmed operation unless the
START/STOP button is pressed.
Page 14

Form No. STMSM-1007
12
OPERATION
STEAMING & COOKING FUNCTION
FOOD TEMP. MINUTES
Vegetables
Cauliflower (florets) 100°C 4-6
Small Broccoli 100°C 12-14
Broccoli 100°C 6-8
Lima-bean 100°C 8-10
Peas 100°C 3-5
Sweet Potato 100°C 20-25
Potatoes (with skin) 100°C 30-35
Carrots (stick) 100°C 6-8
Beetroot (whole) 100°C 10-14
Meat & Sausage
Chicken Breast 100°C 20-25
Chicken, whole 100°C 6-7
Knuckle of Pork 90°C 2-4
German Sausage 100°C 7-9
Veal Escalope 100°C 6-8
Fish
Salmon (fillets) 100°C 4-6
Plaice, fillet 85°C 5-7
Monk Fish 85°C 5-7
FOOD TEMP. MINUTES
Braisings
Macaroni 100°C 25-35
Meatcake 100°C 10-15
Bean
Harlot Founder First 100°C 10-15
Dry Bean Founder First 100°C 22-25
Rice & Sundries
Wheat 100°C 10
Rice 100°C 20
Mixed Balsamic 100°C 16-35
& Wild Rice
Eggs
Cooked Slightly 100°C 3-4
Cooked 100°C 5-6
Cooked Squashily 100°C 8-10
Fruit
Apples/Apples sliced 100°C 3-5
Cherries 100°C 3-4
Rhubarb (halved) 100°C 1-3
NOTE: The above data is only for reference.
Tips on Steaming and Cooking Foods
• Grease suitable containers before using them to
cook fish or egg dishes.
• Foods cooked with steam retain their true
flavors; therefore foods should not be seasoned
until after being cooked.
• Dried foods like pasta or rice must be cooked in
liquid.
REHEATING FUNCTION
FOOD TEMP. MINUTES
Vegetables
Cauliflower (florets) 60°C 2
Runner Beans 60°C 2
Kohlrabi 60°C 2
Carrots 60°C 2
Side Dishes
Dumpling Potatoes (halved) 60°C 3-4
Pasta 60°C 3-4
Rice 60°C 2-3
Fish
Fish Filet 60°C 2-3
Fish Roulade (halved) 60°C 2-3
FOOD TEMP. MINUTES
Meat & Poultry
Chicken Schnitzel 60°C 3-5
Meatballs in Sauce 60°C 3-5
Stew 60°C 3-5
Slice Meaty (15 mm thick) 60°C 3-5
Sliced Roulade 60°C 3-5
Plated Meals
Chicken Fricassee with Rice 60°C 3-5
Roast Pork with Potatoes 60°C 3-4
and Vegetables
Spaghetti with Tomato Sauce 60°C 2-3
Soups & Casseroles
Casseroles 60°C 4-5
Soup 60°C 4-5
Tips on Reheating Foods
• Reheat foods on a flat plate and cover with heat
resistant foil or a deeper plate.
• Sauces that are to be served separately, reheat
them in a covered dish on their own.
Page 15

Form No. STMSM-1007
13
OPERATION
DEFROST FUNCTION
FOODS WEIGHT TEMPERATURE DEFROSTING STANDING TIME
MEAT
Cutlets, Chop, Sausage 1 kg (2 lbs.) 60°C 25-35 15-20
Stew .5 kg (1 lbs.) 50°C 15-20 10-15
Cutlets, Chop, Sausage .5 kg (1 lbs.) 60°C 30-40 10-15
POULTRY
Chicken 1 kg (2 lbs.) 60°C 40 15-20
Chicken Drumsticks .2 kg (.5 lbs.) 60°C 20-25 10-15
Chicken Schnitzel .5 kg (1 lbs.) 60°C 25-30 10-15
FISH & SEAFOOD
Fish Fillets .4 kg (1 lbs.) 60°C 15 10-15
Prawn .3 kg (1 lbs.) 60°C 4-6 5
VEGETABLES
Frozen in a Block .3 kg (1 lbs.) 60°C 20-25 10-15
Frozen in Small Portions .4 kg (1 lbs.) 60°C 15 8-10
FRUIT
Apple Sauce/Stewed Apples .3 kg (1 lbs.) 60°C 20-25 10-15
Berries .3 kg (1 lbs.) 60°C 8-10 10-12
DAIRY PRODUCTS
Cheese .3 kg (1 lbs.) 60°C 20 10
Cream .1 kg (.2 lbs.) 60°C 15 10-15
BAKING
Puff Pastries --- --- 10-12 10-15
Yeast Buns .3 kg (1 lbs.) 60°C 10-15 10-15
Bread --- 100°C 6-7 1-2
Bread Rolls --- 100°C 10-12 10-15
NOTE: The above data is only for reference.
Tips on Defrosting Foods
• The perforated pan is recommended for use in
the defrosting process, especially for all meats.
The condensation pan must be used underneath
the perforated pan to catch the thawing liquids
from the meats above. Defrosted liquids should
be discarded immediately and the container
washed before next use.
• All meat and poultry should be fully defrosted
before cooking.
• Fish does not need to be fully defrosted before
cooking. Defrost so that the surface of the fish is
sufficiently thawed to take seasoning.
• Remove any packaging from frozen foods before
defrosting.
• Do not refreeze food once it has been thawed.
• Halfway through the defrosting time it is
recommended to turn, stir, or separate clumps of
food.
• Allow food to stand at room temperature at the
end of the defrosting time. This standing time is
necessary to ensure that the food is fully
defrosted right through to the core.
• Defrost deep frozen pre-cooked meals according
to the manufacturer's instructions.
• Ensure clumps of frozen foods are broken up first
so that they cook evenly.
Page 16

Form No. STMSM-1007
14
OPERATION
2. Place the dish with the longest cooking duration
in the oven first. Set the timer and temperature
according to that particular food. Refer to
OPERATION and the appropriate food chart.
3. Insert the dish with the second longest cooking
time when the timer display is close to the
cooking duration of that food. Repeat for the next
dish.
At the end of the longest cooking duration all foods
will be complete and ready to serve.
BLANCHING
The steam oven is a convenient way to blanch
vegetables and fruit to prepare them for freezing.
1. Place the prepared vegetables or fruit into a
perforated cooking container.
2. Set a duration of 1 minute and confirm the
selection.
3. After blanching duration is complete. Remove
and plunge the food product into cold water to
ensure rapid cooling.
4. Drain the food product thoroughly and prepare to
freeze.
DISINFECTING
Steam is an excellent source for disinfecting cooking
containers and utensils.
NOTE: Ensure the product to be disinfected is
declared by the manufacturer to be heat resistant up
to 100°C (212°F) before continuing.
1. Place the condensation tray on the lowest side
runner of the steam oven. Insert the metal rack
on the next level above the condensation tray.
2. Dismantle, clean and thoroughly rinse the items
to be disinfected. Place the items on the metal
rack ensuring that they do not touch each other.
This will allow the hot steam to encompass the
items from all sides.
3. Set the timer display to 30 minutes and confirm
the selection.
4. Remove items from the steam oven and dry with
a fresh clean towel. If assembly is required all
components must be completely dry before
reassembling, to keep them germ free.
COOK UNIVERSAL FUNCTION
PRODUCE TEMP. MINUTES**
Fruit
Apples 90°C 50
Applesauce/Stewed Apples 90°C 65
Red/Black Currants 80°C 50
Gooseberries 80°C 55
Fruit with Stones 85°C 55
Vegetables
Beans 100°C 120
Gherkins 90°C* 55
* This temperature is not the same as the recommended
temperature.
** The times in this table are for 1.0 liter (34 oz.) jars. If using
.5 liter (17 oz.) jars, reduce the time by about 15 minutes. If
using .25 liter (8.5 oz.) jars, reduce the time by about 20
minutes.
NOTE: The above data is only for reference.
Tips on Bottling or Canning Foods
• Place the condensation pan on the lowest level
inside the steam oven, and the metal rack on the
next level above the tray.
• Place a maximum of four prepared jars (all the
same size) on the rack, ensuring that they do not
touch one another. This allows steam to
surround the jars on all sides.
• Make use of residual heat by leaving the jars in
the steam oven 30 minutes after it has switched
off.
• Cover the jar or jars with a cloth and allow to cool
for approximately 24 hours.
MEAL PLANNING TIPS
It is very economical and practical to cook a whole
meal at the same time in the Electric Steamer.
Cooking durations will vary according to the type of
foods.
1. Ensure all food pans will fit inside the steam oven
together before proceeding with the steaming
process.
WARNING
Hot steam will escape from cabinet when door is
opened and injury may occur if user comes in
contact with steam or inside of steam oven
cabinet wall.
Page 17

Form No. STMSM-1007
15
MAINTENANCE
GENERAL
The Hatco Electric Steamer ovens are designed for
maximum durability and performance, with minimum
maintenance.
CLEANING
Hatco recommends cleaning the Electric Steamer
after each days use. Allow the steam oven to cool
down to a safe temperature before cleaning.
NOTE: Do not close the door after cleaning until the
inside oven cavity is completely dry.
NOTE: Unplugging the appliance from the power
outlet will erase all menu programs and require
reprogramming of the unit.
WARNING
To ensure safe and proper operation additional
cleaning may be required depending upon
products being thawed and local codes applying
to sink thawing techniques.
WARNING
This appliance is not jet-proof construction. To
assure safe and proper operation do not use jetclean-spray to clean this appliance.
NOTICE
Do not use a steam cleaner to clean the outside
of this appliance. Pressurized steam could
cause permanent damage to the surface and
penetrate the electrical components causing the
appliance to short circuit.
NOTICE
Do not use harsh chemicals such as bleach or
cleaners containing bleach. Also avoid the use
of scouring pads, hard brushes, or steel wool as
they may damage the surface of the appliance.
NOTICE
Cleaning and sanitizing is recommended at the
end of each days use.
NOTICE
Use only non-abrasive cleaners with nonabrasive sponges or cloths. Abrasive cleaners
could scratch the finish of your unit marring its
appearance and making it susceptible to soil
accumulation.
NOTICE
Do not use cleaning products containing
aliphatic compounds as these could cause the
seals to swell.
NOTICE
Ensure the water tank is empty after each days
use to prevent sediment build up in the
appliance.
NOTICE
Use only vinegar or citric acid based descaling
agents or descaling tablets to descale the
appliance.
Oven Interior
Removing the side runners from the inside of the
oven cavity will make cleaning the oven interior
easier.
1. Pull the side runner toward the steam oven
opening, and remove the side runner from the
oven wall. (See Figure 6.)
2. With a mild solution of household dish soap and
water, use a non abrasive sponge or cloth to
wipe the interior clean. Use the same solution to
wipe the side runners, roof seal, drip channel,
inside of the door, and the independent water
cavity. (Side runners may be cleaned in a
dishwasher if available.)
NOTE: If steam oven interior is discolored from bad
water quality, use a proprietary wet cloth and a citric
acid based descaling agent to remove stains.
NOTE: The water drain floating disc and cover will
require use of a periodic cleaning agent to remove
water deposits.
3. Wipe the oven interior with clean water and
thoroughly dry. Ensure no cleaning product
residue is remaining on the steam oven.
NOTE: The door seal can become porous and
cracked over time. If this happens the door
assembly will need to be replaced.
4. Install the left and right side runners. Make sure
the rear tip of each runner engages the mounting
holes in the back of the cabinet, then slide the
mounting tabs over the locating pins and push
down to secure. (See Figure 6.)
Page 18

Form No. STMSM-1007
16
MAINTENANCE
NOTE: Auto boiler drain occurs when the power is
switched off. The drain valve will be turned on for 1
minute to drain all the water/descaling agent in the
boiler to the drip pan and drain hose. There may be
some “noise” from the drain valve when the boiler
runs out of water and is empty.
Oven Exterior
1. With a mild solution of household dish soap and
water, use a non abrasive sponge or cloth to
wipe the exterior clean.
2. Wipe the oven exterior with clean water and
thoroughly dry.
WARNING
If service is required on this unit, contact your
Authorized Hatco Service Agent, or contact the
Hatco Service Department at 414-671-6350 or
International fax 414-671-3976.
WARNING
This product has no “user” serviceable parts. To
avoid damage to the unit or injury
to personnel, use only Authorized Hatco Service
Agents and Genuine Hatco Replacement Parts
when service is required.
WARNING
Genuine Hatco Replacement Parts are specified
to operate safely in the environments in which
they are used. Some aftermarket or generic
replacement parts do not have the
characteristics that will allow them to operate
safely in Hatco equipment. It is essential to use
Hatco Replacement Parts when repairing Hatco
equipment. Failure to use Hatco Replacement
Parts may subject operators of the equipment to
hazardous electrical voltage, resulting in
electrical shock or burn.
Water Container
1. Remove water tank from the water tank cavity.
2. Remove cover from water tank for cleaning
before using the Electric Steamer for the first
time.
3. Rinse the water tank and cover thoroughly by
hand using hot water.
4. Before placing water tank back into the cavity,
wipe outside of water tank until dry.
WARNING
To avoid electrical shock or personal injury, DO
NOT insert into the unit a water tank that is wet
on the outside.
Boiler Cleaning
NOTE: Hatco recommends connecting a hose to the
drip pan for drainage.
NOTE: The amount of mineral content in the water
and how often the unit is operated will dictate how
often the boiler requires cleaning. It is
recommended that home users perform this
procedure monthly and commercial users perform
this procedure weekly . Hard water usage will require
that the boiler be cleaned more frequently.
1. Leave power cord connected to the power supply
and turn the unit off and allow to cool. The boiler
will now begin draining.
2. Remove any pans or racks from the inside.
3. Fill the water tank with proper mixture of citric
acid based descaling agents, or descaling tablets
and water or vinegar to descale appliance.
4. Turn unit On. Start the steam cycle for one
minute at 50°C.
5. When steam starts coming out, immediately
press the Start/Stop button to stop the cycle and
open the door to cool the unit. Descaling agent
will now stay inside the boiler tank. Allow
descaling agent to soak for 15 minutes.
6. Turn the power Off and the boiler will now drain
the descaling agent.
7. Repeat this procedure with water only, until
discharge is clear.
Page 19

Form No. STMSM-1007
17
TROUBLESHOOTING GUIDE
Water tank is filled, power is ON,
but no steam is generated.
Check valve at water tank is
stuck.
Make sure check valve is not stuck.
Water tank not fully seated in cavity.
Symptom
HOME USER
COMMERCIAL USER
ALL USER’S
Probable Cause Corrective Action
WARNING
T o avoid any injury or damage, the steamer must
only be serviced by qualified personnel.
WARNING
To prevent electrical shock or injury, turn the
power switch OFF, disconnect the unit from the
power source and allow to cool before
performing any maintenance.
Plug power cord into unit and
electrical outlet.
Allow the unit to cool down, then
press the Power button to turn the
unit on. If the problem persists,
contact your local Authorized dealer
for service.
Press the I/O Power button to turn
the unit on.
Install floating disc with locating pin
seated properly in the center drain
hole.
Clean cover plate.
Contact your local Authorized dealer
for service.
Turn on water supply.
Straighten connection pipe or replace
it.
Clean the mesh screen.
Push Start button.
Open door, press and hold Start
button for two seconds to switch to
Auto Fill mode.
Unit is connected to water
supply, but no steam is
generated.
“Low water indicator” symbol
is lit.
Water tank is filled, “Low
Water” symbol is lit.
Floating magnet within the
water tank is stuck.
Clean the tank interior or replace the
tank.
No power.
Excessive water
accumulating in the bottom of
the steamer.
Door is closed but the “Safety
Lock” symbol is flashing in
the display.
Water supply is turned off.
The connection pipe is bent
or kinked.
Wire mesh screen at inlet is
clogged.
Steaming cycle has not been
started.
Unit is set in “Manual mode”.
Power cord is not plugged in
to back of unit or electrical
outlet.
Internal thermal fuse tripped.
The unit is not turned on.
Floating disc not installed
properly.
Floating disc cover plate
holes are clogged.
Door sensor is inoperable.
Page 20

Form No. STMSM-1007
18
ACCESSORIES
EVERPURE™ MODEL IN-10 WATER
FILTER
The optional high capacity in-line water filter is NSF
certified for Class 1 taste and odor reduction. When
mounted in the water line, the filter reduces lime
deposits and scale build-up. For cold water usage
only. Hatco part number X03.05.098.00.
1/4 SIZE PERFORATED STAINLESS
STEEL FOOD PAN
¼ size perforated stainless steel food pans are
available for added convenience. (See Figure 9.)
Figure 9. 1/4 Size Perforated Stainless Steel Food Pan
Page 21

Form No. STMSM-1007
19
HATCO LIMITED WARRANTY
1. PRODUCT WARRANTY
Hatco warrants the products that it manufactures
(the “Products”) to be free from defects in
materials and workmanship, under normal
use and service, for a period of one (1) year from
the date of purchase when installed and
maintained in accordance with Hatco’s written
instructions or 18 months from the date of
shipment from Hatco. Buyer must establish the
product’s purchase date by returning Hatco’s
Warranty Registration Card or by other means
satisfactory to Hatco in its sole discretion.
Hatco warrants the following Product components
to be free from defects in materials and
workmanship from the date of purchase (subject
to the foregoing conditions) for the period(s) of
time and on the conditions listed below:
a) One (1) Year Parts and Labor PLUS One
(1) Additional Year Parts-Only Warranty:
Toaster Elements (metal sheathed)
Drawer Warmer Elements (metal sheathed)
Drawer Warmer Drawer Rollers and Slides
Food Warmer Elements (metal sheathed)
Display Warmer Elements (met al sheathed
air heating)
Holding Cabinet Elements (metal sheathed
air heating)
Built-In Heated Well Elements
(metal sheathed)
b) One (1) Year Parts and Labor PLUS Four
(4) Years Parts-Only Warranty on
pro-rated terms that Hatco will explain
at Buyer’s request:
3CS and FR Tanks
c) One (1) Year Parts and Labor PLUS Nine
(9) Years Parts-Only Warranty on:
Electric Booster Heater Tanks
Gas Booster Heater Tanks
THE FOREGOING WARRANTIES ARE
EXCLUSIVE AND IN LIEU OF ANY OTHER
WARRANTY, EXPRESSED OR IMPLIED,
INCLUDING BUT NOT LIMITED TO ANY
IMPLIED WARRANTY OF MERCHANTABILITY
OR FITNESS FOR A PARTICULAR PURPOSE
OR PATENT OR OTHER INTELLECTUAL
PROPERTY RIGHT INFRINGEMENT. Without
limiting the generality of the foregoing, SUCH
WARRANTIES DO NOT COVER: Coated
incandescent light bulbs, fluorescent lights, lamp
warmer heat bulbs, glass components, Product
failure in booster tank, fin tube heat exchanger, or
other water heating equipment, caused
by liming, sediment buildup, chemical attack or
freezing, Product misuse, tampering or
misapplication, improper installation, or application
of improper voltage.
2. LIMITATION OF REMEDIES AND
DAMAGES
Hatco’s liability and Buyer’s exclusive remedy
hereunder will be limited solely, at Hatco’s option,
to repair or replacement by a Hatco-authorized
service agency (other than where Buyer is
located outside of the United States, Canada,
United Kingdom or Australia in which case
Hatco’s liability and Buyer’s exclusive remedy
hereunder will be limited solely to replacement of
part under warranty) with respect to any claim
made within the applicable warranty period
referred to above. Hatco reserves the right to
accept or reject any such claim in whole or in part.
Hatco will not accept the return of any Product
without prior written approval from Hatco, and all
such approved returns shall be made at Buyer’s
sole expense. HATCO WILL NOT BE LIABLE,
UNDER ANY CIRCUMSTANCES, FOR
CONSEQUENTIAL OR INCIDENTAL
DAMAGES, INCLUDING BUT NOT LIMITED TO
LABOR COSTS OR LOST PROFITS
RESUL TING FROM THE USE OF OR INABILITY
TO USE THE PRODUCTS OR FROM THE
PRODUCTS BEING INCORPORATED IN OR
BECOMING A COMPONENT OF ANY OTHER
PRODUCT OR GOODS.
Page 22

Form No. STMSM-1007
20
NOTES
Page 23

Form No. STMSM-1007
21
NOTES
Page 24

Printed in U.S.A. October 2007 Part No. 07.04.419.00 Form No. STMSM-1007
HATCO CORPORATION
P.O. Box 340500, Milwaukee, WI 53234-0500 U.S.A.
Telephone (414) 671-6350
Int’l. Fax (414) 671-3976
www.hatcocorp.com
ASIA HEADQUARTERS
Unit 101, Premier Center, 20 Cheung Shun Street
Cheung Sha Wan, Kowloon, H.K.
Telephone (852) 2991-4121
Fax (852) 2991-4181
hongkong@hatcocorp.com
 Loading...