


840145400
English ........................................ 2
Français ...................................... 12
840145400 ENv02.qxd 12/21/05 3:40 PM Page 1
This appliance is intended for household use only.
The length of the cord used on this appliance was selected to
reduce the hazards of becoming tangled in, or tripping over a longer
cord. If a longer cord is necessary an approved extension cord may
be used. The electrical rating of the extension cord must be equal
to or greater than the rating of the coffeemaker. Care must be
taken to arrange the extension cord so that it will not drape over
the countertop or tabletop where it can be pulled on by children or
accidentally tripped over.
To avoid an electrical circuit overload, do not use another high
wattage appliance on the same circuit with your coffeemaker.
9. Do not use outdoors.
10. Do not let cord hang over edge of table or counter or touch hot
surfaces, including stove.
11. The carafe is designed for use with this coffeemaker. It must
never be used on a range top or in a microwave oven.
12. Do not set a hot carafe on a wet or cold surface.
13. Do not use a cracked carafe or one with loose or weakened
handle.
14. Do not clean carafe with cleansers, steel wool pads, or other
abrasive materials.
15. Be certain carafe lid is securely in place during brew cycle and
when pouring coffee, do not use force when placing lid on carafe.
16. Do not place coffeemaker on or near a hot gas or electric burner
or in a heated oven.
17. To disconnect coffeemaker, turn controls to OFF, then remove
plug from wall outlet.
18. Warning: To reduce the risk of fire or electric shock, do not
remove the bottom cover. No user serviceable parts are inside.
Repair should be done by authorized service personnel only.
19. Do not use appliance for other than intended use.
SAVE THESE INSTRUCTIONS!
OTHER SAFETY INFORMATION
2
When using electrical appliances, basic safety precautions should
always be followed to reduce the risk of fire, electric shock, and/or
injury to persons, including the following:
1. Read all instructions.
2. Do not touch hot surfaces. Use handles or knobs. Care must be
taken, as burns can occur from touching hot parts or from
spilled, hot liquid.
3. To protect against electric shock, do not place cord, plug or
coffeemaker in water or other liquid.
4. Close supervision is necessary when any appliance is used by
or near children.
5. Unplug from outlet when either the coffeemaker or clock is not
in use and before cleaning. Allow to cool before putting on or
taking off parts and before cleaning the appliance.
6. Coffeemaker must be operated on a flat surface away from the
edge of counter to prevent accidental tipping.
7. Do not operate any appliance with a damaged cord or plug, or
after the appliance malfunctions or is dropped or damaged in
any manner. Call our toll-free customer service number for
information on examination, repair, or adjustment.
8. The use of accessory attachments not recommended by
Hamilton Beach/Proctor-Silex, Inc. may cause injuries.
IMPORTANT SAFEGUARDS
3
Shock Hazard
• Do not immerse this appliance in water or other liquid.
• If the plug on this appliance does not fit in your outlet:
- Do not modify the plug.
- Do not use an adaptor.
- Have an electrician replace the obsolete outlet.
WARNING
840145400 ENv02.qxd 12/21/05 3:40 PM Page 2
5
4
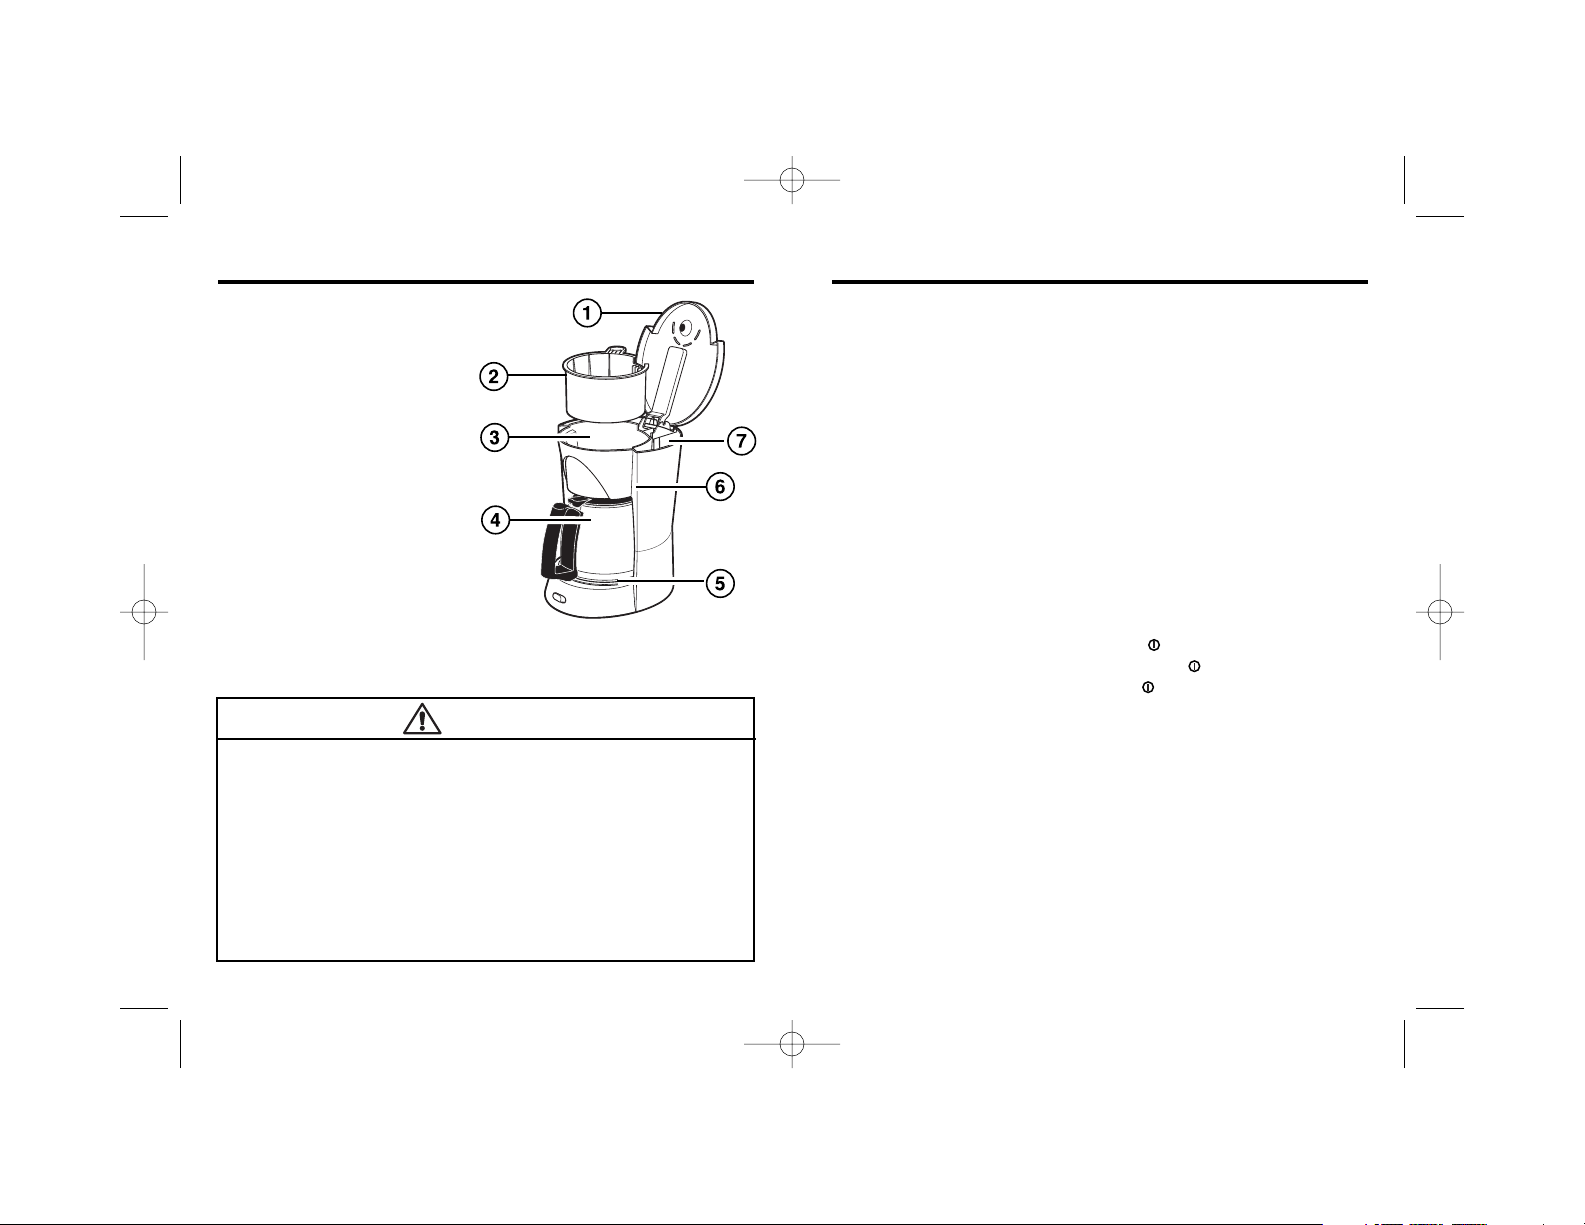
1. Lid
2. Brew Basket
3. Brew Basket Well
4. Carafe
5. Keep-Hot Plate
6. Water Window
7. Reservoir
NOTE: Picture references
major components for all
coffeemakers covered by
these instructions.
To Make Coffee
1. Before first use, clean coffeemaker by following steps
listed in “To Clean the Inside of the Coffeemaker.” Use either
clear water or vinegar. If clock model, read Digital Clock
Timer section.
2. Place brew basket in brew basket well. Insert thumb handle
in the left opening. Ensure brew basket is fully seated.
3. Place a cupcake style paper filter in brew basket.
4. For each cup of coffee being made, place one level
scoop (provided with coffeemaker) or one level tablespoon
of coffee into filter.
5. Fill carafe with the desired amount of cold tap water.
6. Lift lid and pour water from carafe into reservoir.
NOTE: Do not fill past the 12 cup mark (54 ounces).
7. Place carafe, with carafe lid attached, on Keep-Hot Plate.
8. Close lid. Press firmly on lid to ensure that it is completely
closed.
9. For clock models: press ON/OFF button to start.
An illuminated red light on the ON/OFF button indicates
coffeemaker is on. Press ON/OFF again to turn off and
unplug when finished.
Burn Hazard
To avoid hot coffee overflowing from the filter basket:
• When using decaffinated coffee, do not exceed the
coffee manufacturer's recommended serving amount.
• Press firmly on lid to ensure the lid is completely closed.
If a filter basket overflow occurs, unplug the coffeemaker
and allow the coffee in the filter basket to cool before
removing the filter basket.
WARNING
Parts and Features
840145400 ENv02.qxd 12/21/05 3:40 PM Page 4
7
6
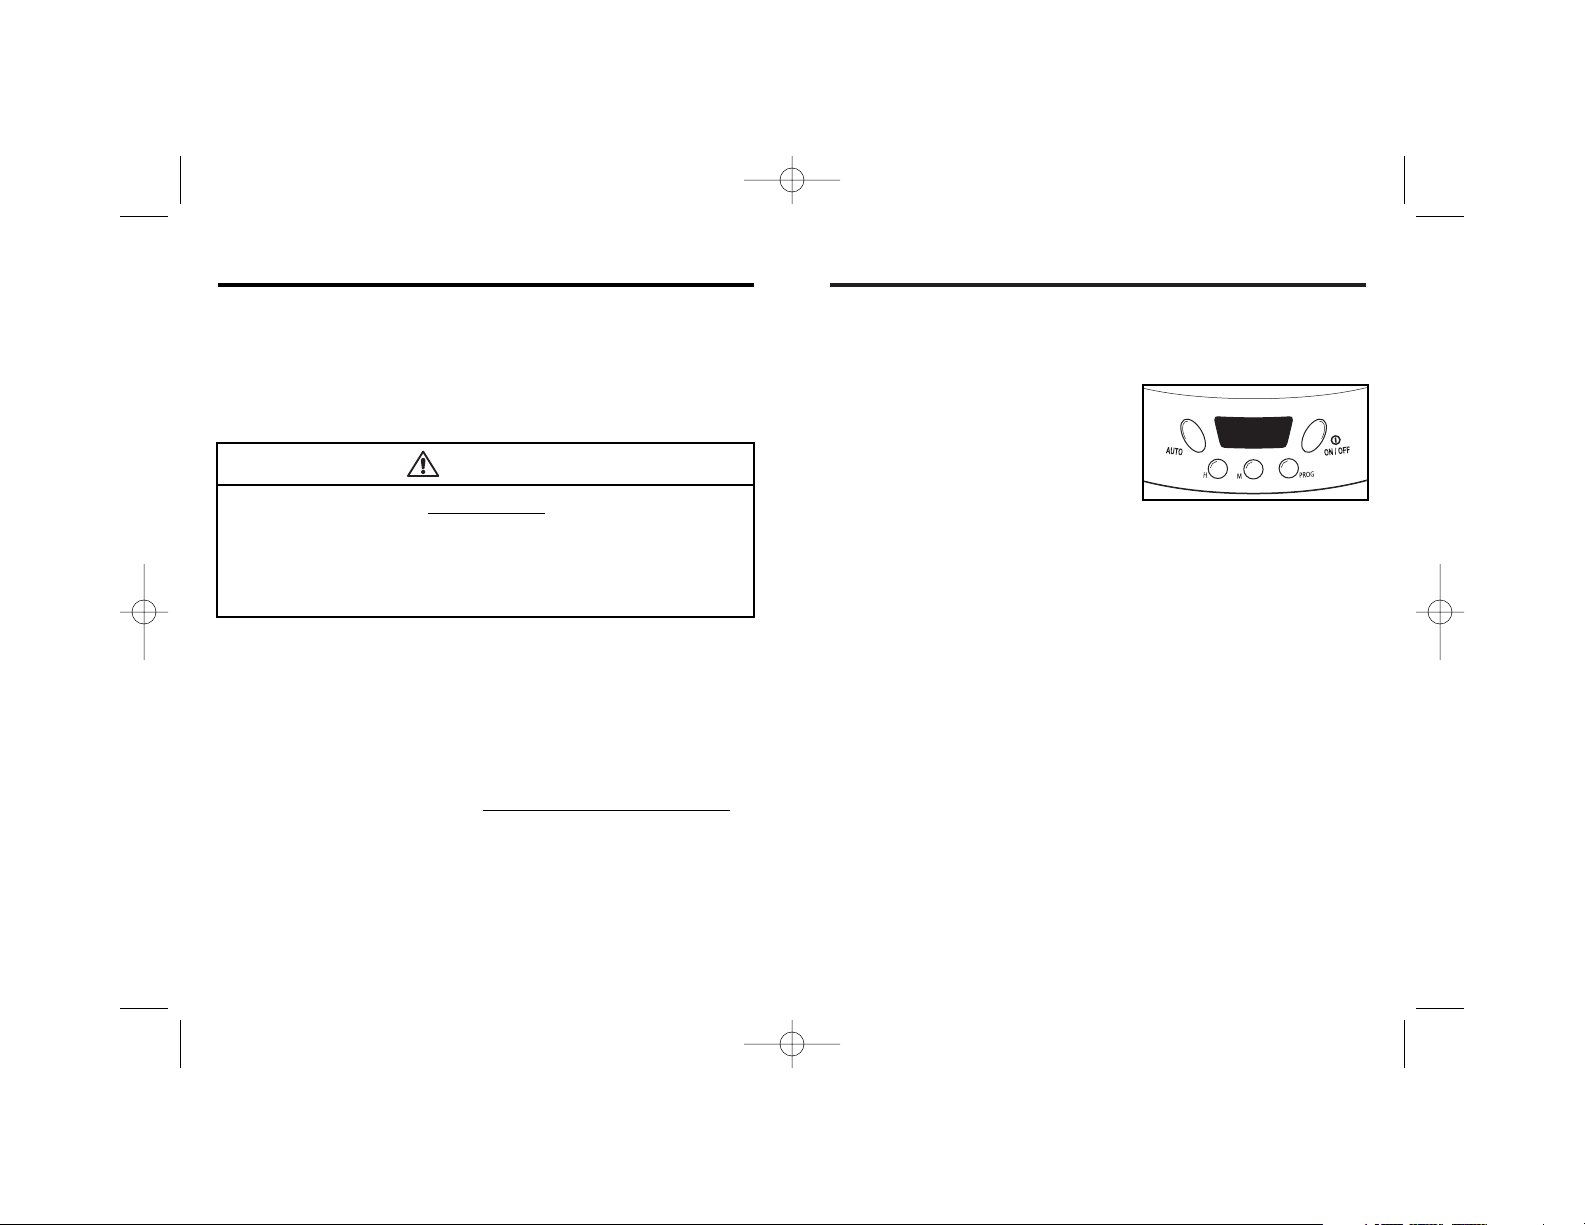
Digital Clock Timer
To Set Clock:
1. Plug in coffeemaker. Numbers on clock will flash until you
set time of day.
2. To set time of day, press H
(hour) button to set current hour.
AM or PM will be displayed.
3. Press M (minute) button until
you reach the current time.
Features
Pause ’N Serve
This feature allows you to pour a cup of coffee before the
entire brew cycle has completed. By removing the carafe,
the flow of coffee will temporarily stop. The flow of coffee
will resume when carafe is returned to the Keep-Hot Plate.
Do not remove carafe more than 20 seconds or brew
basket may overflow.
Brew Strength Selector
This feature allows you to control the strength/flavor of the
coffee. To select from mild to strong flavor, rotate the Brew
Strength Selector Knob, located on top of the coffeemaker,
to desired strength.
Automatic Shutoff
The Automatic Shutoff feature shuts off the Keep-Hot Plate
two hours after brew cycle begins. Always turn coffeemaker
OFF and unplug when finished.
To Set and Use Automatic Brew:
1. Make sure clock is set for correct time of day.
2. Fill coffeemaker with desired amount of water and coffee.
Place carafe with lid on Keep-Hot Plate. Close lid.
3. While holding PROG (program) button, press H and M
buttons until desired brewing time is reached.
4. Once desired brewing time has been reached, release
PROG and current time is displayed.
5. Press AUTO to set coffeemaker to come on automatically
at the desired time.
6. An illuminated green light on the AUTO button indicates
that the brew cycle will begin at the set time.
7. Press AUTO again to cancel automatic brew.
Burn Hazard
Return carafe to Keep-Hot-Plate within 20 seconds. Hot
water continues to flow into the filter basket when this
feature is used. Overflowing coffee and hot water are a
burn hazard.
CAUTION
840145400 ENv02.qxd 12/21/05 3:40 PM Page 6
 Loading...