

Page 1
Cafetera
840159900
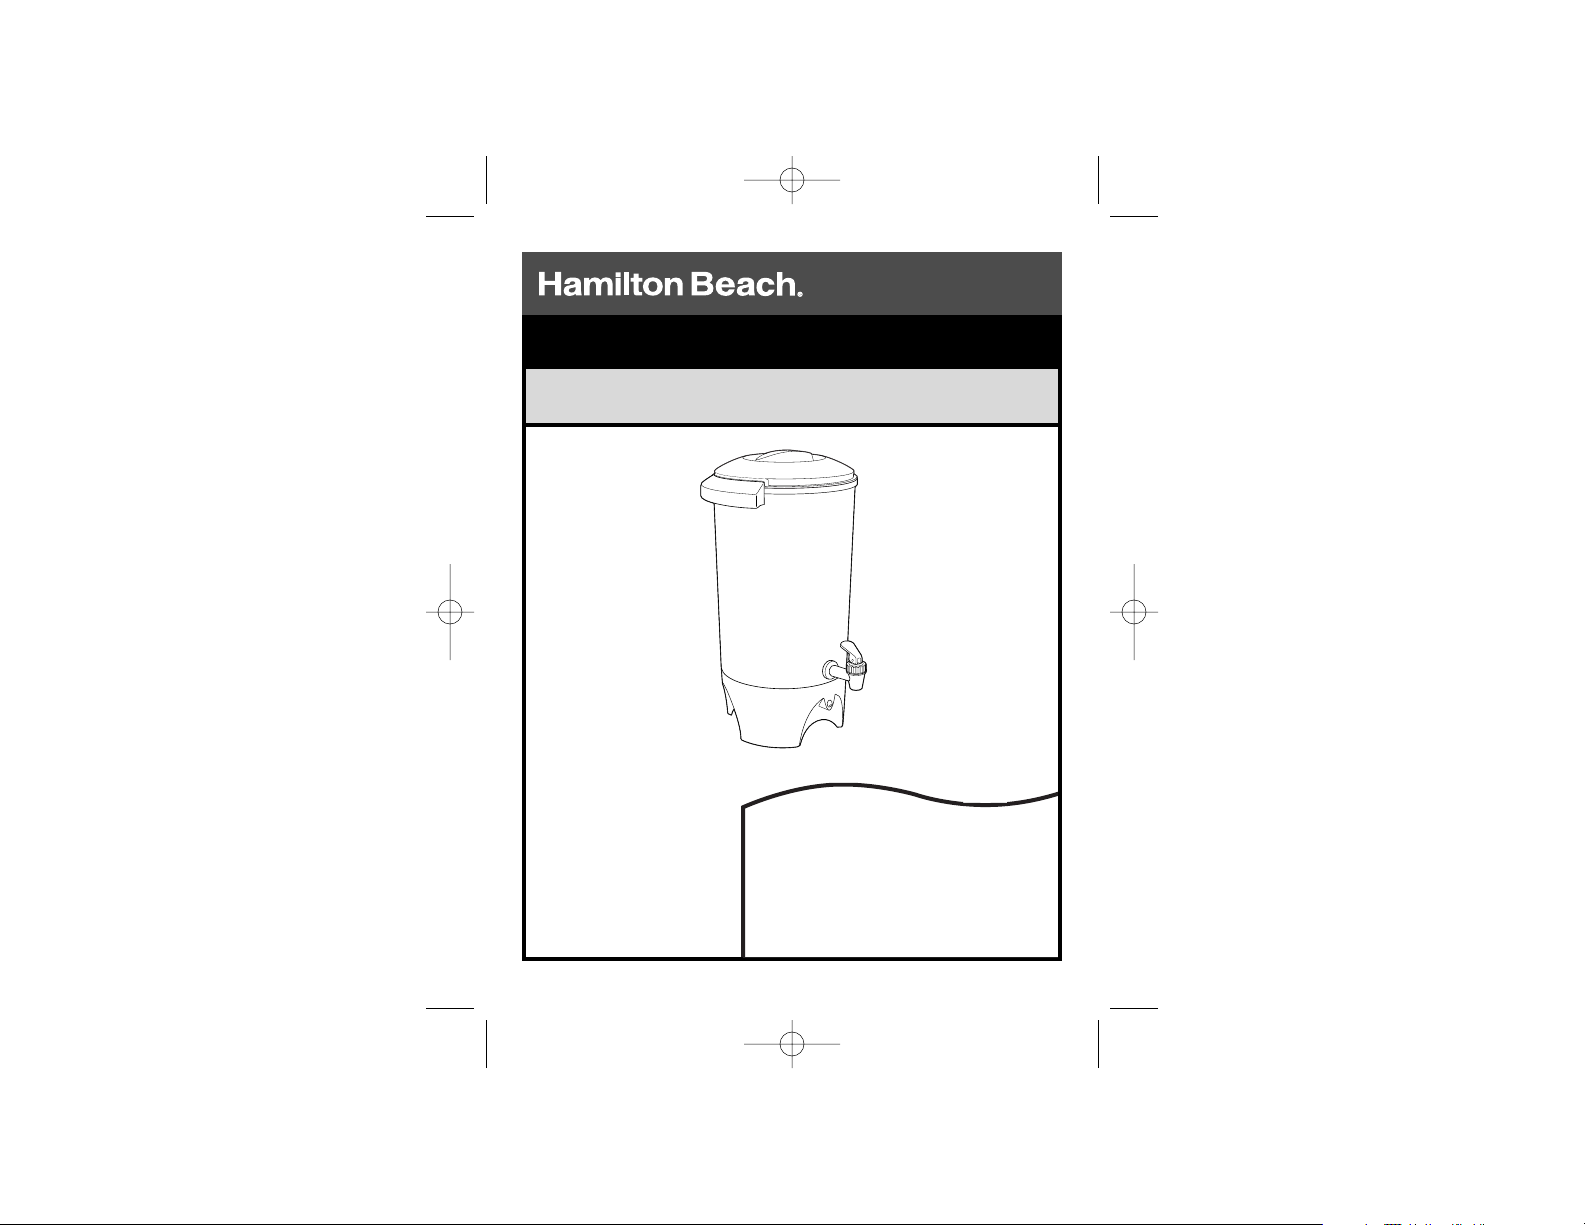
Coffee Urn
English ........................................ 2
USA: 1-800-851-8900
Español ...................................... 9
En México 01-800-71-16-100
Le invitamos a leer cuidadosamente este
instructivo antes de usar su aparato.
READ BEFORE USE
À LIRE AVANT UTILISATION
840159900 Ev02.qxd 3/16/07 10:46 AM Page 1
Page 2

2
This appliance is intended for household use only.
This appliance has a polarized plug (one blade is wider than the other).
To reduce the risk of electric shock, this plug is intended to fit into a
polarized outlet only one way. If the plug does not fit fully into the outlet, reverse the plug. If it still does not fit, contact a qualified electrician.
Do not attempt to modify the plug in any way.
The length of the cord used on this appliance was selected to
reduce the hazards of becoming tangled in, or tripping over a longer
cord. If a longer cord is necessary an approved extension cord may
be used. If your coffee urn has a 3-prong plug, and an extension
cord is used, the extension cord must also be a grounded-type
3-wire cord. The electrical rating of the extension cord must be
equal to or greater than the rating of the coffee urn. Care must be
taken to arrange the extension cord so that it will not drape over the
countertop or tabletop where it can be pulled on by children or
accidentally tripped over.
To avoid an electrical circuit overload, do not use another high
wattage appliance on the same circuit with your coffee urn.
When using electrical appliances, basic safety precautions should
always be followed to reduce the risk of fire, electric shock, and/or
injury to persons, including the following:
1. Read all instructions.
2. Do not touch hot surfaces. Use handles or knobs. Care must be
taken, as burns can occur from touching hot parts or from
spilled, hot liquid.
3. To protect against fire, electric shock, and injury to persons do
not place cord, plug or coffee urn in water or other liquid.
4. Close supervision is necessary when any appliance is used by
or near children.
5. Unplug from outlet when either the coffee urn is not in use and
before cleaning. Allow to cool before putting on or taking off parts
and before cleaning the appliance.
6. Coffee urn must be operated on a flat surface away from the
edge of counter to prevent accidental tipping.
7. Do not operate any appliance with a damaged cord or plug, or
after the appliance malfunctions or is dropped or damaged in
any manner. Call our toll-free customer service number for
information on examination, repair, or adjustment.
8. The use of accessory attachments not recommended by
Hamilton Beach/Proctor-Silex, Inc. may result in fire, electrical
shock or personal injury.
9. Do not use outdoors.
10. Do not let cord hang over edge of table or counter or touch hot
surfaces, including stove.
11. Be certain cover is securely in place during brew cycle and
when serving coffee. Scalding may occur if cover is removed
during brew cycle.
12. Do not place coffee urn on or near a hot gas or electric burner or
in a heated oven.
13. Always attach plug to appliance first, then plug cord into wall
outlet. To disconnect coffee urn, remove plug from wall outlet,
then unplug from coffee urn.
IMPORTANT SAFEGUARDS
14. Warning: To reduce the risk of fire or electric shock, do not
remove the bottom cover. No user serviceable parts are inside.
Repair should be done by authorized service personnel only.
15. Do not use appliance for other than intended use.
SAVE THESE INSTRUCTIONS!
OTHER CONSUMER SAFETY INFORMATION
3
840159900 Ev02.qxd 3/16/07 10:46 AM Page 2
Page 3
5
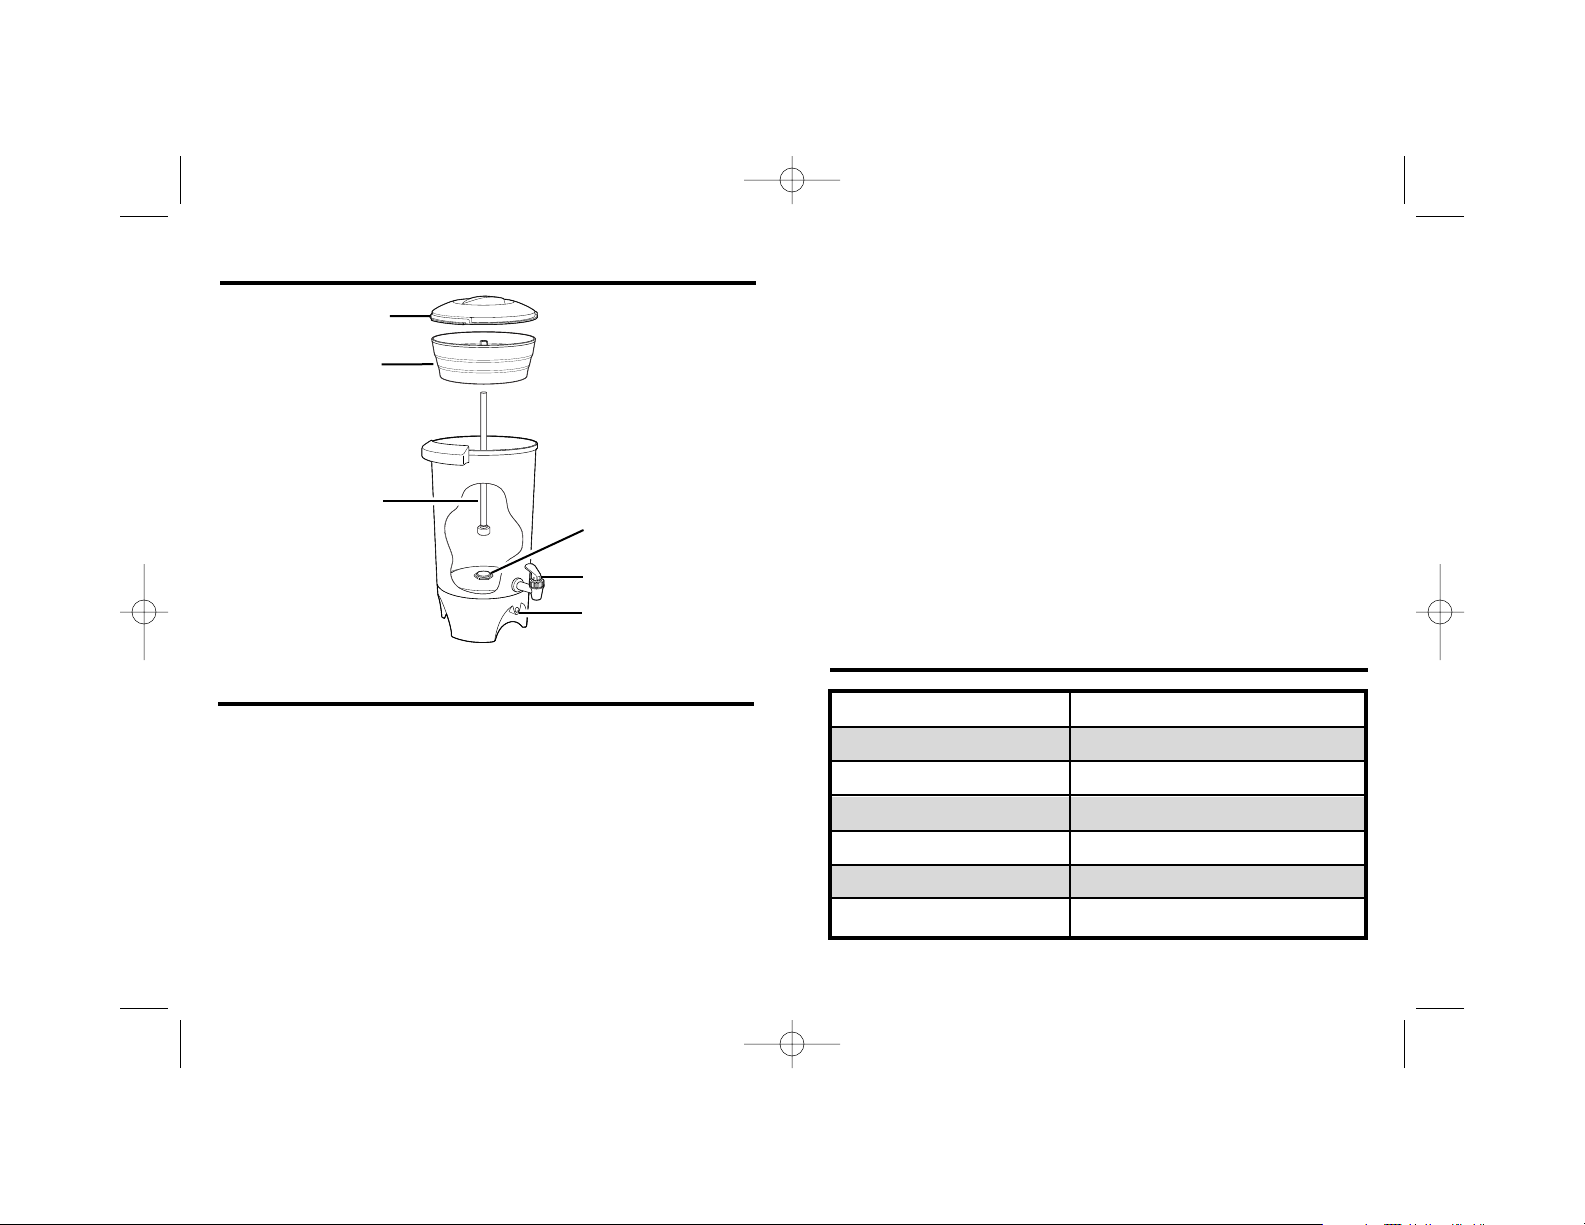
Parts and Features
4
4. Place cover onto coffee urn and turn to lock.
5. Plug cord into the coffee urn then plug the cord into
electrical outlet. The unit automatically turns on.
6. The coffee urn will stop automatically when the coffee has
finished brewing, and the Ready light will glow. Allow about
1 minute per cup for brewing time.
7. Using a hot mitt, remove cover then carefully remove cof-
fee basket with HOT grounds and stem. Replace cover.
8. The coffee urn will remain at serving temperature until it is
unplugged. To serve, place a cup under the serving spout.
Push down and hold the lever until the cup is filled, then
release the lever. For a constant flow, to empty the urn, or
fill a carafe, lift the lever straight up. The lever will stay in
the open position until the lever is pushed down.
9. When finished serving coffee, unplug the coffee urn from
the electrical outlet. Then remove cord from the coffee urn.
Before First Use: Clean the coffee urn by following the steps
in “How To Clean.”
1. To make coffee, remove cover, coffee basket and stem. Fill
coffee urn with cold water to desired level as indicated by
numbered servings on inside of urn.
2. Place stem into coffee basket. Then holding the center
post of the coffee basket place large end of stem into
heating unit well.
3. Measure ground coffee into coffee basket. Avoid getting
ground coffee in the stem. Refer to the Coffee Making
Chart that follows. Spread coffee evenly in basket.
Coffee Making Chart
To Make Coffee
Water Level
42 cups
36 cups
30 cups
24 cups
18 cups
12 cups
Amount of Ground Coffee
2
1
⁄2 cups
21⁄4 cups
13⁄4 cups
11⁄2 cups
1 cup
3
⁄4 cup
Cover
Coffee Basket
Stem
Heating Unit Well
Serving Spout
Ready Light
840159900 Ev02.qxd 3/16/07 10:46 AM Page 4
Page 4

7
6
To Heat Water
Use heated water to make instant coffee, hot cocoa, or tea.
1. To heat water, remove cover, coffee basket and stem.
Fill coffee urn with cold water to desired level as indicated
by numbered servings on inside of coffee urn.
2. Place stem into coffee basket then place large end of stem
into heating unit well. (Using the stem and basket will
speed heating time.)
3. Place cover onto coffee urn and turn to lock. Plug in coffee
urn and let go through complete perk cycle. Water is hot
when the Ready light glows.
How To Clean
1. After each use, unplug cord from outlet then remove cord
from coffee urn. Let cool before cleaning. WARNING! Burn
Hazard. Allow urn and coffee to cool before cleaning.
2. Remove cover, coffee basket and stem. Wash in hot soapy
water. Rinse and dry. These parts can also be placed in
dishwasher. WARNING! Electrical Shock Hazard. Do not
immerse cord, plug or urn in water or any other liquid.
3. Fill the coffee urn half full with hot water. Add a drop of
liquid dishwashing detergent and wash the inside of the
coffee urn. Use a scouring pad and clean the inside of the
heating unit well. This part must be properly cleaned to
maintain the proper operation of the coffee urn.
NOTE: We recommend using coffee that has been ground
specifically for use in a percolator-type coffee maker.
However, coffee marked “For All Coffee Makers” is acceptable.
If using a coffee grinder and whole beans, percolator coffee
should be a coarse grind. A finely ground coffee may cause
the coffee basket to overflow.
4. Drain the soapy water then fill the coffee urn with hot water
to rinse. Open serving spout and let hot water flow through
to clean the spout. Repeat with another hot water rinse
then dry.
5. Clean outside of coffee urn with a damp cloth. Do not use
abrasive scouring pads or cleansers.
To Remove Mineral Deposits
and Build-Up
If the coffee urn is used daily follow these instructions every
other week. Fill the coffee urn with 1 quart cold water and
1 quart white vinegar. Assemble with stem, coffee basket,
and cover.
Plug in and let go through the perk cycle. When perking has
stopped let sit another 15 minutes. Unplug and drain the
coffee urn. Let cool then clean according to “How To Clean.”
To Remove Discoloration
To lighten discolored metal inside the coffee urn, fill the urn to
the 42 cup level. Assemble with stem and coffee basket.
Place 2 tablespoons plus 1 teaspoon cream of tartar into
basket (found in the spice section of supermarket). Place
cover onto coffee urn.
Plug in and let go through the perk cycle. When perking has
stopped let sit another 15 minutes. Unplug and drain the
coffee urn. Let cool then clean according to “How To Clean.”
840159900 Ev02.qxd 3/16/07 10:46 AM Page 6
Page 5

8
Customer Service
If you have a question about your appliance, call our toll-free
customer service number. Before calling, please note the model,
type, and series numbers and fill in that information below. These
numbers can be found on the bottom of your appliance. This
information will help us answer your question much more quickly.
MODEL:_____________ TYPE:_____________ SERIES: _____________
This warranty applies to product purchased in the U.S.
LIMITED WARRANTY
This product is warranted to be free from defects in material and workmanship for a
period of one (1) year from the date of original purchase, except as noted below.
During this period, we will repair or replace this product, at our option, at no cost. THE
FOREGOING WARRANTY IS IN LIEU OF ANY OTHER WARRANTY OR CONDITION,
WHETHER EXPRESS OR IMPLIED, WRITTEN OR ORAL INCLUDING, WITHOUT
LIMITATION, ANY STATUTORY WARRANTY OR CONDITION OF MERCHANTABILITY
OR FITNESS FOR A PARTICULAR PURPOSE. ANY LIABILITY IS EXPRESSLY
LIMITED TO AN AMOUNT EQUAL TO THE PURCHASE PRICE PAID, AND ALL
CLAIMS FOR SPECIAL, INCIDENTAL AND CONSEQUENTIAL DAMAGES ARE
HEREBY EXCLUDED. There is no warranty with respect to the following, which may
be supplied with this product, including without limitation: glass parts, glass
containers, cutter/strainers, blades, seals, gaskets, clutches, motor brushes, and/or
agitators, etc. This warranty extends only to the original consumer purchaser and does
not cover a defect resulting from abuse, misuse, neglect including failure to clean
product regularly in accordance with manufacturer’s instructions, use for commercial
purposes, or any use not in conformity with the printed directions. This warranty gives
you specific legal rights, and you may also have other legal rights which vary from
state to state, or province to province. Some states or provinces do not allow
limitations on implied warranties or special, incidental or consequential damages, so
the foregoing limitations may not apply to you.
If you have a claim under this warranty, DO NOT RETURN THE APPLIANCE TO THE
STORE! Please call our CUSTOMER SERVICE NUMBER. (For faster service please
have model, series, and type numbers ready for operator to assist you.)
CUSTOMER SERVICE NUMBER
In the U.S. 1-800-851-8900
hamiltonbeach.com
KEEP THIS NUMBER FOR FUTURE REFERENCE!
840159900 Ev02.qxd 3/16/07 10:46 AM Page 8
Page 6

9
SALVAGUARDIAS IMPORTANTES
Cuando use aparatos eléctricos, es importante seguir todas las precauciones de seguridad básicas para reducir el riesgo de incendio, choque
eléctrico y/o lesiones personales, que incluyen lo siguiente:
1. Lea todas las instrucciones.
2. Verifique que el voltaje de su instalación corresponda con el del pro-
ducto.
3. No toque superficies calientes. Use los mangos o las perillas. Es
importante tener cuidado ya que pueden ocurrir quemaduras al tocar
partes calientes o como resultado del derrame de líquido caliente.
4. Para protegerse contra incendio, choque eléctrico y heridas person-
ales, no sumerja el cordón, el enchufe o la cafetera en agua ni en
ningún otro líquido.
5. Se requiere una supervisión rigurosa cuando niños utilicen aparatos o
cuando éstos se estén utilizando cerca de niños.
6. Desenchufe la cafetera del tomacorriente cuando no la esté usando
y antes de la limpieza. Deje que se enfríe antes de colocar o sacar
alguna pieza, y antes de limpiar el aparato.
7. La cafetera eléctrica debe ser operada sobre una superficie plana
lejos del borde de la mesera o mostrador para evitar que se vuelque
accidentalmente.
8. No opere ningún aparato electrodoméstico si el cordón o el enchufe
están averiados, después de un mal funcionamiento del aparato, o si
éste se ha caído o averiado de alguna forma. Llame a nuestro
número de llamada gratis de servicio al cliente, para obtener información sobre el examen, la reparación o el ajuste eléctrico o mecánico.
9. El uso de accesorios no recomendados por el fabricante del aparato
puede causar incendios, choques eléctricos o heridas personales.
10. No lo use al aire libre.
11. No deje que el cordón cuelgue sobre el borde de una mesa o de
un mostrador, o que toque alguna superficie caliente, incluyendo
la superficie de una estufa.
12. Asegúrese de que la tapa encaja firmemente en su lugar durante el
ciclo de preparación y cuando sirva café. Pueden ocurrir
escaldaduras si se quita la tapa durante el ciclo de preparación.
13. No coloque la cafetera sobre o cerca de un quemador a gas o
eléctrico caliente ni en un horno calentado.
840159900 SPv01.qxd 3/16/07 10:46 AM Page 9
Page 7

11
Piezas y caracteristicas
Antes de usarla por primera vez: Limpie la cafetera,
siguiendo los pasos indicados en "Cómo limpiar".
1. Para preparar el café, saque la tapa, la canastilla del café y
el caño. Llene la cafetera con agua fría al nivel deseado,
según el número de porciones indicadas en el interior de la
misma.
2. Coloque el caño en la canastilla del café. Luego, sosteniendo
la varilla del centro de la canastilla del café, coloque el
extremo grande del caño dentro de la cavidad de la unidad
térmica.
Cómo preparar el café
10
¡
GUARDE ESTAS INSTRUCCIONES!
14. Siempre enchufe primero el cordón al aparato, y luego enchufe
el cordón en el tomacorriente. Para desconectar la cafetera, quite el
enchufe del tomacorriente y luego desenchufe el cordón de la
cafetera.
15. Precaución: Para reducir el riesgo de incendio o choque eléctrico, no
retire la cubierta inferior. El interior del aparato no contiene piezas que
pueda reparar el usuario. Las reparaciones deberán ser realizadas
solamente por personal de servicio autorizado.
16. No use el aparato para ningún otro fin que no sea el indicado.
INFORMACIÓN ADICIONAL PARA LA SEGURIDAD DEL CONSUMIDOR
Este aparato ha sido diseñado solamente para uso doméstico.
Este artefacto cuenta con un enchufe polarizado (una pata más
ancha que la otra). Para reducir el riesgo de descarga eléctrica, este
enchufe debe colocarse en un tomacorriente polarizado sólo de una
manera. Si el enchufe no calza completamente en el tomacorriente,
invierta el enchufe. Si aún así no calza, contacte a un electricista
calificado. No intente modificar el enchufe de ninguna manera.
El largo del cable que se usa en este aparato fue seleccionado para
reducir el peligro de que alguien se enganche o tropiece con un
cable más largo. Si es necesario usar un cable más largo, se
podrá usar un cable de alargue aprobado. La clasificación eléctrica
nominal del cable de alargue debe ser igual o mayor que la
clasificación nominal de la cafetera. Es importante tener cuidado de
colocar el cable de alargue para que no se pliegue sobre el
mostrador o la mesera en donde niños puedan tirar del mismo o
tropezarse accidentalmente.
Para evitar una sobrecarga del circuito eléctrico, no use ningún otro
aparato electrodoméstico de alto vataje en el mismo circuito que su
cafetera.
Tapa
Canastilla del
café
Varilla
Cavidad de la
unidad térmica
Pico para servir
Luz de listo
840159900 SPv01.qxd 3/16/07 10:46 AM Page 10
Page 8

13
Nivel del agua
42 tazas (10,5 L)
36 tazas (9 L)
30 tazas (7,5 L)
24 tazas (6 L)
18 tazas (4,5 L)
12 tazas (3 L)
Tabla de preparación del café
Cantidad de café molido
21⁄2 tazas (625 ml)
21⁄4 tazas (562,5 ml)
13⁄4 tazas (437,5 ml)
11⁄2 tazas (375 ml)
1 taza 250 ml)
3
⁄4 taza 175 ml)
Para calentar agua
Use agua caliente para hacer café instantáneo, cocoa caliente
o té.
NOTA: No guarde la unidad si le queda agua adentro.
1. Para calentar el agua, saque la tapa, la canastilla del café y la
varilla. Llene la cafetera con agua fría al nivel deseado, según
el número de porciones indicadas en el interior de la misma.
2. Coloque la varilla en la canastilla del café y luego coloque el
extremo grande del mismo dentro de la cavidad de la
unidad térmica. (El uso de la varilla y de la canastilla acelerará el calentamiento).
3. Coloque la tapa en la cafetera y hágala girar para trabarla.
Enchufe la cafetera y permita que pase por un ciclo
completo de filtración. El agua estará caliente cuando
se ilumine la luz de listo.
NOTA: Recomendamos usar café que ha sido molido especialmente para ser usado en una cafetera de tipo filtradora.
Sin embargo, es aceptable el café que esté marcado como
“Para usar en todas las cafeteras”. Si usa un molinillo de café
y granos enteros, el café para cafetera deberá ser molido
grueso. Un café que esté molido muy fino puede hacer que
se desborde la canastilla del café.
12
3. Vierta la medida correspondiente de café molido en la
canastilla del café. Trate de no dejar caer café molido en
el caño. Consulte la Tabla de Preparación del Café que
aparece a continuación. Distribuya el café en forma
uniforme dentro de la canastilla.
4. Coloque la tapa en la cafetera y hágala girar para trabarla.
5. Enchufe el cordón eléctrico en la cafetera y luego
enchúfelo en el tomacorriente. La unidad se encenderá
automáticamente.
6. La cafetera se detendrá automáticamente cuando el café
esté preparado y la luz de Listo se iluminará. Espere
alrededor de 1 minuto por taza como tiempo de
preparación.
7. Usando un guante de cocina, retire la tapa y saque con
cautela la canastilla del café con los granos CALIENTES
y el caño. Vuelva a colocar la tapa.
8. La cafetera permanecerá a la temperatura correcta para
servir hasta que la desenchufe. Para servir, coloque una
taza debajo del pico de servir. Oprima y sostenga la palanca
hacia abajo hasta que haya llenado la taza y luego suelte la
palanca. Si desea obtener un flujo continuo, para vaciar la
cafetera o llenar una jarra, levante la palanca completamente hacia arriba. La palanca permanecerá en la posición
abierta hasta que la empuje nuevamente hacia abajo.
9. Cuando termine de servir el café, desenchufe la cafetera del
tomacorriente. Luego saque el cordón eléctrico de la
cafetera.
840159900 SPv01.qxd 3/16/07 10:46 AM Page 12
Page 9

15
Para eliminar las manchas
Para aclarar el metal manchado dentro de la cafetera, llénela
hasta el nivel para 42 tazas (10,5 L). Coloque la varilla y la
canastilla del café. Vierta 2 cucharadas y 1 cucharadita (35 ml)
de crémor tártaro en la canastilla (se encuentra en la sección
de especias del supermercado). Coloque la tapa en la
cafetera.
Enchúfela y permita que pase por un ciclo de filtración.
Espere otros 15 minutos después de que haya dejado de filtrar. Desenchufe la cafetera y drene el líquido. Deje que se
enfríe y límpiela según lo indicado en la sección "Limpieza".
14
Limpieza
1. Después de cada uso, desenchufe el cable del tomaco-
rriente y luego saque el cable de la cafetera. Deje que se
enfríe antes de limpiarla. ¡ADVERTENCIA! Peligro de que-
maduras. Deje que la cafetera y el café se enfríen antes de
limpiar.
2. Saque la tapa, la canastilla del café y la varilla. Lávelas en
agua caliente y jabonosa. Enjuague y seque. Estas piezas
también se pueden colocar en el lavavajillas. No coloque la
cafetera en el lavavajillas. ¡ADVERTENCIA ! Peligro de
descarga eléctrica. No sumerja el cable, el enchufe, ou la
cafetera en agua o en cualquier otro líquido.
3. Llene la cafetera hasta la mitad con agua caliente. Agregue
una gota de detergente líquido para lavar la vajilla y lave el
interior de la cafetera. Use una esponjilla y limpie el interior
de la cavidad de la unidad térmica. Es importante limpiar
bien esta parte para asegurar un funcionamiento correcto
de la cafetera.
4. Drene el agua jabonosa y luego llene la cafetera con agua
caliente para enjuagarla. Abra el pico de servir y deje correr
el agua caliente para limpiar el pico. Repita este procedimiento
con otro enjuague de agua caliente y luego seque.
5. Limpie el exterior de la cafetera con un paño húmedo.
No use esponjillas ni productos de limpieza abrasivos.
Para eliminar los depósitos minerales
acumulados
Si la cafetera se usa a diario, siga estas instrucciones cada
dos semanas. Llene la cafetera con 1 litro de agua fría y un
litro de vinagre blanco. Coloque la varilla, la canastilla del
café y la tapa.
Enchufe la cafetera y permita que pase por un ciclo de
filtración. Espere otros 15 minutos después de que haya
dejado de filtrar. Desenchufe la cafetera y drene el líquido.
Deje que se enfríe y límpiela según lo indicado en la sección
"Limpieza".
840159900 SPv01.qxd 3/16/07 10:46 AM Page 14
Page 10

17
16
Grupo HB PS, S.A. de C.V.
Monte Elbruz No. 124 Int. 601
Col. Palmitas Polanco
México, D.F. C.P. 11560
Tel. 52 82 31 05 y 52 82 31 06
Fax. 52 82 3167
PRODUCTO:
MARCA:
Hamilton Beach: ❏
Proctor-Silex: ❏
MODELO:
Hamilton Beach/Proctor-Silex cuenta con una Red de Centros de Servicio Autorizada,
por favor consulte en la lista anexa el nombre y dirección de los establecimientos en
la República Mexicana en donde usted podrá hacer efectiva la garantía, obtener
partes, componentes, consumibles y accesorios; así como también obtener servicio
para productos fuera de garantía.
Para mayor información llame sin costo:
Centro de Atención al consumidor: 01 800 71 16 100
Grupo HB PS, S.A. de C.V. le otorga a partir de la fecha de compra:
GARANTÍA DE 1 AÑO.
• Esta garantía ampara, todas las piezas y componentes del producto que resulten con
defecto de fabricación incluyendo la mano de obra.
•
Grupo HB PS,
S.A. de C.V. se obliga a reemplazar, reparar o reponer, cualquier pieza o
componente defectuoso; proporcionar la mano de obra necesaria para su diagnóstico y
reparación, todo lo anterior sin costo adicional para el consumidor.
• Esta garantía incluye los gastos de transportación del producto que deriven de su
cumplimiento dentro de su red de servicio.
LIMITACIONES
• Esta garantía no ampara el reemplazo de piezas deterioradas por uso o por desgaste
normal, como son: cuchillas, vasos, jarras, filtros, etc.
• Grupo HB PS, S.A. de C.V. no se hace responsable por los accidentes producidos a
consecuencia de una instalación eléctrica defectuosa, ausencia de toma de tierra, clavija
de enchufe en mal estado, etc.
COBERTURA
EXCEPCIONES
Esta garantía no será efectiva en los siguientes casos:
a) Cuando el producto se hubiese utlizado en condiciones distintas a las normales.
(Uso industrial, semi-industrial o comercial.)
PÓLIZA DE GARANTÍA
b) Cuando el producto no hubiese sido operado de acuerdo con el instructivo de uso.
c) Cuando el producto hubiese sido alterado o reparado por personas no autorizadas
por Grupo HB PS, S.A. de C.V. el fabricante nacional, importador o comercializador
responsable respectivo.
El consumidor puede solicitar que se haga efectiva la garantía ante la propia casa comercial
donde adquirió su producto, siempre y cuando Grupo HB PS, S.A. de C.V. no cuente con
talleres de servicio.
EXCEPCIONES (continuación)
PROCEDIMIENTO PARA HACER EFECTIVA LA GARANTÍA
• Para hacer efectiva la garantía no deben exigirse mayores requisitos que la presentación
del producto y la póliza correspondiente, debidamente sellada por el establecimiento que
lo vendió.
• Para hacer efectiva la garantía, lleve su aparato al Centro de Servicio Autorizado más
cercano a su domicilio (consulte la lista anexa).
• Si no existe Centro de Servicio Autorizado en su localidad siga las siguientes instrucciones:
1. Empaque su producto adecuadamente para que no se dañe durante el translado.
2. Anote claramente sus datos y los del Centro de Servicio al que está enviando el
producto.
3. No incluya partes sueltas ni accesorios para evitar su pérdida.
• El tiempo de reparación, en ningún caso será mayor de 30 días naturales contados a
partir de la fecha de recepción del producto en nuestros Centros de Servicio Autorizados.
• En caso de que el producto haya sido reparado o sometido a mantenimiento y el mismo
presente deficiencias imputables al autor de la reparación o del mantenimiento dentro de
los treinta días naturales posteriores a la entrega del producto al consumidor, éste tendrá
derecho a que sea reparado o mantenido de nuevo sin costo alguno. Si el plazo de la
garantía es superior a los treinta días naturales, se estará a dicho plazo.
• El tiempo que duren las reparaciones efectuadas al amparo de la garantía no es computable dentro del plazo de la misma. Cuando el bien haya sido reparado se iniciará la
garantía respecto de las piezas repuestas y continuará con relación al resto. En el caso de
reposición del bien deberá renovarse el plazo de la garantía.
FECHA DE
ENTREGA
SELLO DEL
VENDEDOR
QUEJAS Y SUGERENCIAS
DÍA___ MES___ AÑO___
Si desea hacer comentarios o sugerencias con
respecto a nuestro servicio o tiene alguna queja
derivada de la atención recibida en alguno de
nuestros Centros de Servicio Autorizados, por
favor dirigirse a:
Grupo HB PS, S.A. de C.V.
(DIMALSA)
Prol. Av. La Joya s/n. Esq. Av. San Antonio
Col. El Infiernillo C.P. 54878
Cuautitlán, Edo de México
Tel. (55) 58 99 62 42
Fax. (55) 58 70 64 42 y (55) 26 20 21 02
840159900 SPv01.qxd 3/16/07 10:46 AM Page 16
Page 11

19
18
RED DE CENTROS DE SERVICIO AUTORIZADA
GRUPO HB PS, S.A. DE C.V.
Distrito Federal
ELECTRODOMÉSTICOS
Av. Plutarco Elias Cailes
No. 1499
Zacahuitzco MEXICO 09490 D.F.
Tel: 01 55 5235 2323
Fax: 01 55 5243 1397
CASA GARCIA
Av. Patriotismo No. 875-B
Mixcoac MEXICO 03910 D.F.
Tel: 01 55 5563 8723
Fax: 01 55 5615 1856
Jalisco
REF. ECONÓMICAS DE
OCCIDENTE, S.A. DE C.V.
Garibaldi No. 1450
Ladrón de Guevara
GUADALAJARA 44660 Jal.
Tel: 01 33 3825 3480
Fax: 01 33 3826 1914
Chihuahua
DISTRIBUIDORA TURMIX
Av. Paseo Triunfo de la Rep.
No. 5289 Local 2 A.
Int. Hipermart
Alamos de San Lorenzo
CD. JUAREZ 32340 Chih.
Tel: 01 656 617 8030
Fax: 01 656 617 8030
Nuevo Leon
FERNANDO SEPULVEDA
REFACCIONES
Ruperto Martínez No. 238 Ote.
Centro MONTERREY, 64000 N.L.
Tel: 01 81 8343 6700
Fax: 01 81 8344 0486
840159900 SPv01.qxd 3/16/07 10:46 AM Page 18
Page 12

3/07
840159900
Modelo:
40515
Características Eléctricas:
120V~ 60 Hz 1090W
Tipo:
A29
Los números de modelo también pueden
estar seguidos del sufijo “MX”.
840159900 SPv01.qxd 3/16/07 10:46 AM Page 20
 Loading...