

Page 1
Wetterstation
00
136294
176930
Color EdgeWeather Station
Operating Instructions
Bedienungsanleitung
Mode d‘emploi
Instrucciones de uso
Руководство по эксплуатации
Istruzioni per l‘uso
Οδηγίες χρήσης
Instrukcja obsługi
Návod kpoužití
Návod na použitie
Manual de utilizare
GB
D
F
E
RUS
I
GR
PL
CZ
SK
RO
Page 2
1
2
4
3
9
8
11
12
13
18
19
20
5
6
7
10
15
16
17
14
21
22
23
24
25
A
B
26
29
27
30
28
Page 3
G Operating instruction
Controls and Displays
ABase station
1. Weather trend display
2. Trend display of the barometer
3. Outdoor temperatureand humidity
4. Channel display
5. Sensor radio symbol
6. Battery capacity of sensor
7. Display of outdoor temperaturetrend
8. Indoor temperatureand humidity
9. Battery capacity of weather station
10. Display of indoor temperaturetrend
11. Time
12. DCF radio symbol
13. Summer time
14. Weekday
15. Alarm symbol
16. Date
17. Moon phase
18. SNOOZE button
=interrupts the alarm
19. UP button
=raisesthe setting/switches between °C and °F
20. SET button
=settings/conrms the setting
21. LIGHT button
=activates the backlight
22. DOWN button
=lowers the setting/switches the channel
23. ALARM button
=display/setting/activates alarm mode
24. Battery compartment
25. Power supply unit
BMeasuring station
26. Status LED
27. Recess for wall mounting
28. Battery compartment
29. TX button
30. TX channel slide switch
Thank you for choosing aHama product.
Take your time and read the following instructions and information completely.Please keep these
instructions in asafe place for futurereference. If you sell the device, please pass these operating
instructions on to the new owner.
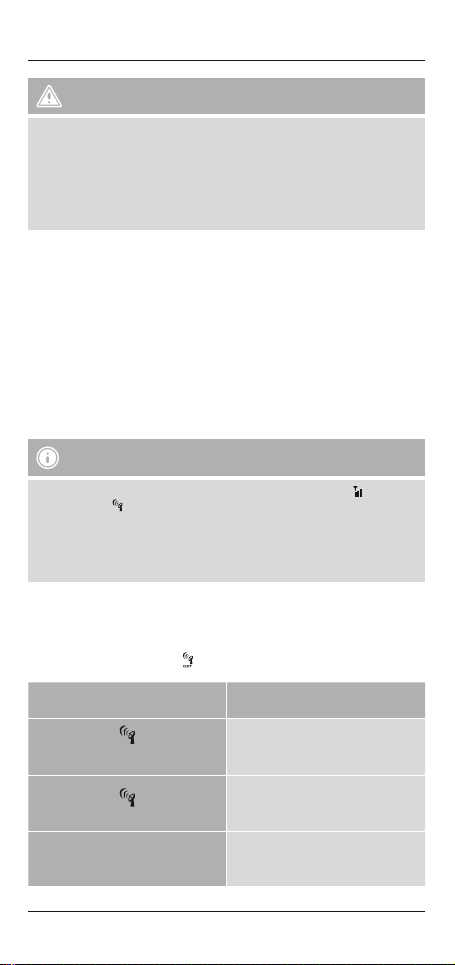
1. Explanation of Warning Symbols and Notes
Warning
This symbol is used to indicate safety instructions or to draw your attention to specic hazards
and risks.
Note
This symbol is used to indicate additional information or important notes.
2
Page 4
2. Package Contents
•Color Edge weather station
(base station for indoors/measuring station for outdoors)
•3AAA batteries
•2AA batteries
•These operating instructions
3. Safety Notes
•The product is intended for private, non-commercial use only.
•Donot operate the product outside the power limits given in the specications.
•Donot use the product in moist environments and avoid splashes.
•Donot use the product in the immediate vicinity of heaters or other heat sources or in direct
sunlight.
•Donot use the product in areas wherethe use of electronic devices is not permitted.
•Donot place the product near interference elds, metal frames, computers, TVs, etc. Electronic
devices and window frames can negatively affect the product’sfunctionality.
•Donot drop the product and do not expose it to any major shocks.
•Donot open the device or continue to operate it if it becomes damaged.
•Donot attempt to service or repair the product yourself.Leave any and all service work to qualied
experts.
•Keep the packaging material out of the reach of children due to the risk of suffocation.
•Dispose of packaging material immediately according to locally applicable regulations.
•Donot modify the product in any way.Doing so voids the warranty.
Warning –Batteries
•Immediately remove and dispose of dead batteries from the product.
•Only use batteries (or rechargeable batteries) that match the specied type.
•Donot mix old and new batteries or batteries of adifferent type or make.
•When inserting batteries, note the correct polarity (+ and -markings) and insert the batteries
accordingly.Failure to do so could result in the batteries leaking or exploding.
•Donot overcharge batteries.
•Keep batteries out of the reach of children.
•Donot short circuit the batteries/rechargeable batteries and keep them away from uncoated
metal objects.
•Outdoor temperatures below 0°C/32°F can reduce the battery performance of the sensor and
lead to ineciency in wireless transmission.
•Declining battery capacity can result in reception and transmission diculties, and it may
become dicult to read the display.
4. Getting Started
4.1 Insert batteries
Note
Beforeuse, ensureyou insert the batteries in the measuring station rst and then in the base
station.
Measuring station
•Open the battery compartment (28) and remove the contact breaker.
•Then close the battery compartment cover.
•The status LED lights up.
Base station
•Open the battery compartment (24) and remove the contact breaker.
•Then close the battery compartment cover.
3
Page 5
4.2 Replacing the batteries
Note –Replacing the batteries
•Note that the stations have to be resynchronised each time after you change the batteries in the
measuring or base station.
•Todothis, remove the batteries from the other station and then reinsert them, or change them
as required.
Measuring station
•Ifthe symbol is displayed (next to ‘OUTDOOR’), replace the two AA batteries of the measuring
station with two new ones.
•Open the battery compartment (28), remove and properly dispose of the dead batteries and insert
two new AA batteries with the correct polarity.Then close the battery compartment cover.
Base station
•Ifthe symbol is displayed (next to ‘INDOOR’), replace the three AAA batteries in the base device
with new ones.
•Open the battery compartment (24), remove and properly dispose of the dead batteries and insert
three new AAA batteries with the correct polarity.Then close the battery compartment cover (24).
5. Installation
Note –Installation
•Werecommend initially placing the base and measuring stations in the intended locations
without installing them and making all the settings described in 6. Operation –todo.
•Only install the stations once the appropriate settings have been made and astable wireless
connection is established.
Note
•The wireless transmission range between the measuring station and base station is up to 30 m
in open spaces.
•Beforeinstallation, ensurethat wireless transmission will not be disrupted by interference or
obstacles like buildings, trees, vehicles, high-voltage lines, etc.
•Toavoid transmission interference, do not operate adjacent wireless devices on the same
frequency (433 MHz).
•Beforethe nal installation, ensurethat thereissucient reception between the intended
installation locations.
•When installing the measuring station, ensurethat it is protected from direct sunlight and rain.
•The international standardheight for measuring air temperatureis1.25m(4ft) above ground.
Warning
•Buy special or suitable installation material from aspecialised dealer for wall-mounting.
•Ensurethat no faulty or damaged parts areinstalled.
•Never apply force during installation. This could damage the product.
•Beforeinstallation, ensurethat the chosen wall is suitable for the weight to be mounted, and
make surethat thereare no electrical wires, water,gas or other lines at the installation site
on the wall.
5.1 Base station
•Use the base to position the base station on alevel surface.
4
Page 6
5.2 Measuring station
•You can also position the measuring station on aleveloutdoor surface.
•Werecommend installing the measuring station securely on an outdoor wall using the recess (27).
•Install an anchor,screw,nail, etc. in the wall of your choice.
•Hang up the base/measuring station using the opening (27) intended for this purpose.
6. Operation
6.1 Connection to the measuring station
•When the batteries have been inserted, the base station automatically searches for aconnection to
the measuring station and to the radio signal.
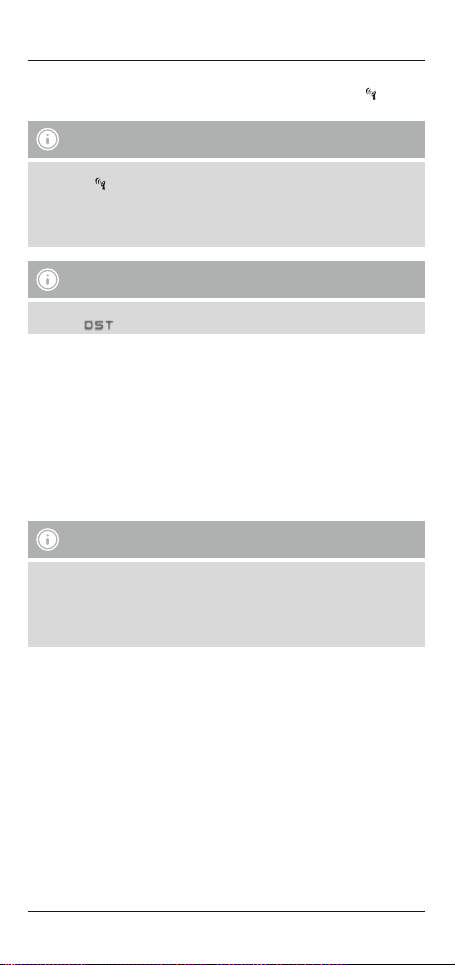
Note
•The respective symbols will ash during the connection attempts: connection to the
measuring station,
•Donot press any buttons during setup. Otherwise, values may not be transmitted correctly and
thereisarisk of value errors and inaccuracies.
•Donot change the location of the base station during the search processes.
•The process is completed when the indoor (8) and outdoor (3) measurement data is displayed.
6.2 Basic and manual settings
Automatic setting using the DCF signal
When the base station has been switched on for the rst time and successful transmission has been
established between the base station and the measuring station, the clock will automatically search for
the DCF signal. During the search, the radio symbol ashes.
connection to the DCF signal
Display Search for the DCF signal
Flashing display
Manual entry not possible!
Constant display
No display Inactive
•Ifthe station still does not receive asignal, press and hold the UP button (19) for approximately 3
seconds to start the manual search for the DCF signal. The radio symbol starts to ash.
Note –Time settings
•The search process can take up to 7minutes. If it fails, the radio symbol willgo out.
•Inthe meantime, however,you can set the time and the date manually.
•The clock automatically continues to search for the DCF signal on adaily basis (at 1amand 5
am). If the signal is received successfully,the manually set time and date areoverwritten.
Note –Summer time
The clock automatically switches to summer time. appears on the display as long as summer
time is activated.
Active
Successful –
signal is being received
5
Page 7
Manual settings
•Press and hold the SET button (20) for approximately 3seconds to make the following settings one
after the other:
•Time zone (from -12to+12 hours CET)
•Hour
•Minute
•Year
•Month
•Day
•Unit of atmospheric pressure(hPaorinHg)
•Press the UP button (19) or DOWN button (22) to select your setting. Press the SET button (20) to
conrm your entries.
Note –Time zone
•The DCF signal can be received over long distances, but always transmits the current Central
European Time in Germany.Make sureyou account for the time difference in countries in other
time zones.
•Ifyou areinMoscow,the time is 3hours later than in Germany.This means that you should set
+3 for the time zone. The clock then sets the time automatically to 3hours ahead after receiving
the DCF signal or according to the manually set time.
Alarm
•Press and hold the ALARM button (23) for approximately 3seconds to set the time of the alarm
displayed. The hours display begins to ash.
•Press the UP button (19) or DOWN button (22) to select the hour for the alarm time and conrm
your selection by pressing the ALARM button (23).
•Repeat the process to set the minutes for the alarm time.
•Repeat the entireprocess to set the second alarm.
•Press the ALARM button (23) once to display the alarm time. Press the ALARM button (23) once
moretoactivate the alarm.
•Press the ALARM button (23) athirdtime to deactivate the alarm.
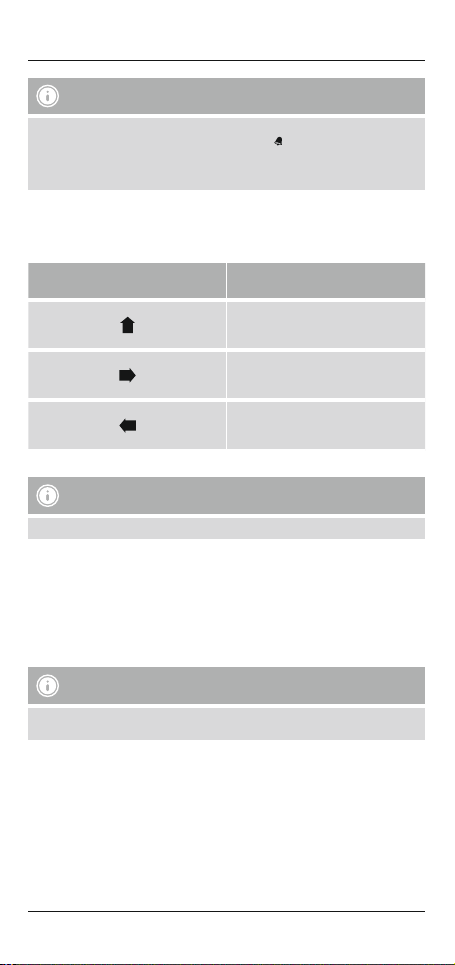
•Ifthe alarm is triggered, the alarm symbol is displayed and an alarm will sound.
•Press UP (19), DOWN (22), SET (20) or ALARM to stop the alarm.
Note –Snooze function
•While the alarm signal is sounding, press the SNOOZE button (18) or LIGHT button (21) to
activate the snooze function. The icon begins to ash on the display.The alarm signal will stop
for approximately 10 minutes, after which it will sound again.
•Press UP (19), DOWN,(22), SET (20) or ALARM to stop the snooze function and the alarm.
Temperature (Celsius/Fahrenheit)
•Press the UP button (19) to switch between °C and °F for the temperaturedisplay.
•The weather station indicates atrend as to how the values for the indoor and outdoor temperature
arelikely to develop over the next few hours.
Display Trend
Increasing
Constant
Decreasing
6
Page 8
Atmospheric pressure (hPA/inHg)
Note
Like all measurement values, atmospheric pressureissubject to acertain measurement tolerance.
•Press and hold the Set button (20) until the time begins to ash.
•Press the Set button (20) repeatedly until hPAorinHG appears on the display.
•Press the UP button (19) or DOWN button (22) to change the unit to inHG or hPA.
•The weather station gives acurrent value trend for atmospheric pressure.
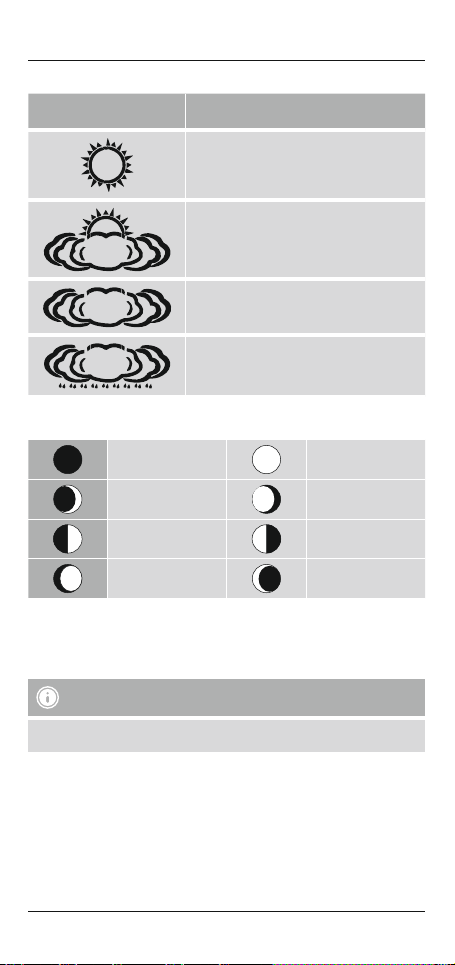
6.3 Weather trend display
Based on changes in the atmospheric pressureand the data saved, the base station is able to make
weather forecasts for the next 12 to 24 hours.
Note –Weather trend display
The weather forecast function is not available during the rst few hours of operation because it requires
data that is collected during operation.
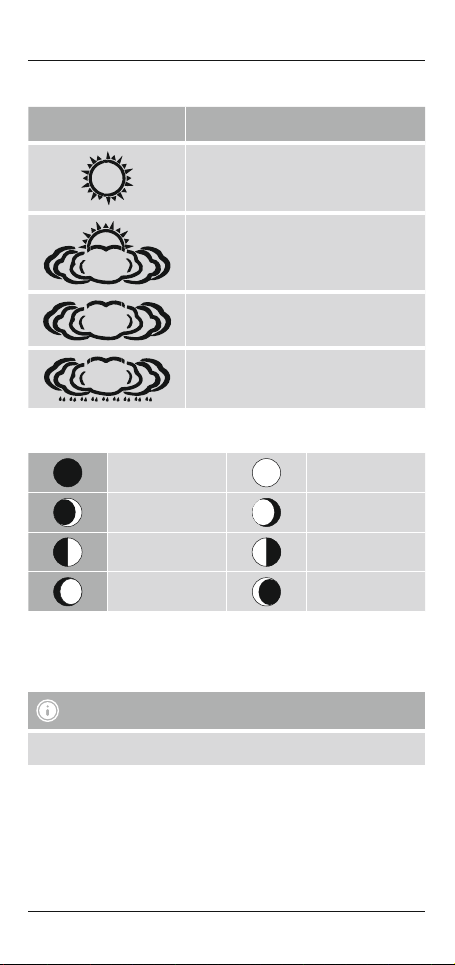
The weather trend and the current weather aredisplayed using four different symbols (1):
Symbol Weather
Sunny
Slightly cloudy
Cloudy
Rainy
6.4 Moon phases
The base station displays the current moon phase with the following symbols:
New Moon Full Moon
Waxing Crescent Waning Gibbous
First quarter Last quarter
Waxing Gibbous Waning Crescent
7
Page 9

6.5 Backlight
•Ifyou press the SNOOZE button (18) or LIGHT button (21) in battery operation, the display will
light up for approximately 10 seconds.
•Byrepeatedly pressing the SNOOZE button (18) or LIGHT button (21) in mains operation, you can
specify the brightness level of the lighting and turn it off.
Note –Permanent backlightmode
Permanent backlight mode is only possible when the base station is plugged into mains power.
Power supply unit is not included in delivery.
7. Care and Maintenance
Only clean this product with aslightlydamp, lint-free cloth and do not use aggressive cleaning agents.
Make surethat water does not get into the product.
8. Warranty Disclaimer
Hama GmbH &CoKG assumes no liability and provides no warranty for damage resulting from
improper installation/mounting, improper use of the product or from failuretoobserve the operating
instructions and/or safety notes.
9. Service and Support
Please contact Hama Product Consulting if you have any questions about this product.
Hotline: +49 9091 502-115 (German/English)
Further support information can be found here:
www.hama.com
8
Page 10
10. Technical Data
Power supply
Base station Measuring station
4.5 V
3xAAA batteries
Additional power supply via
power supply unit is possible:
Output 4.5 V, minimum 100 mA
We recommend using AA lithium
batteries for the outdoor sensors
when outdoor temperatures are
3.0 V
2xAAbatteries
below 0°C/32°F.
Measuring range:
Temperature
Measuring range:
Humidity
DCF radio-controlled clock YesNo
Alarm function YesNo
Max. number of measuring
stations
Frequency 433 MHz
Range ≤30m
11.
Recycling Information
Note on environmental protection
After theimplementation of theEuropean Directive2012/19/EUand2006/66/EU in thenational
legal system, thefollowing applies: Electric andelectronicdevices as wellasbatteries must not
be disposed of with householdwaste. Consumers areobliged by lawtoreturn electricaland
electronic devicesaswellasbatteriesatthe endoftheir service livestothe publiccollecting
points set up for this purpose or point of sale. Details to this aredened by thenational law of
the respectivecountry.Thissymbol on the product, the instruction manual or thepackage indicates that a
productissubject to theseregulations.Byrecycling,reusing thematerials or otherformsofutilisingold
devices/batteries, you aremaking an important contribution to protecting our environment.
12.
Declaration of Conformity
Hereby, Hama GmbH&Co KG declares that the radio equipment type[00136294, 00176930]isin
compliance with Directive2014/53/EU.The fulltextoftheEU declarationofconformity is available
at the following internet address: www.hama.com -> 00136294, 00176930 ->Downloads.
Maximum radio-frequency power transmitted 4,487 µW
0°C –50°C
32°F –122°F
20 -99% 20 –99%
3
Additional sensor 176933
:
-40°C –+60°C
-40°F -+140°F
9
Page 11
D Bedienungsanleitung
Bedienungselemente und Anzeigen
ABasisstation
1. Wettertrendanzeige
2. Trendanzeige des Barometers
3. Außentemperatur und -luftfeuchtigkeit
4. Kanalanzeige
5. Sensor-Funksymbol
6. Batteriekapazität des Sensors
7. Trendanzeige der Außentemperatur
8. Innentemperatur und -luftfeuchtigkeit
9. Batteriekapazität der Wetterstation
10. Trendanzeige der Innentemperatur
11. Uhrzeit
12. DCF-Funksymbol
13. Sommerzeit
14. Wochentag
15. Alarmsymbol
16. Datum
17. Mondphase
18. SNOOZE-Taste
=Unterbrechung des Wecksignals
19. UP-Taste
=Erhöhung des Einstellungswertes/Wechsel zwischen °C und F
20. SET-Taste
=Einstellungen/Bestätigung des Einstellungswertes
21. LIGHT-Taste
=Aktivierung Hintergrundbeleuchtung /Unterbrechung des Wecksignals
22. DOWN-Taste
=Verringerung des Einstellungswertes /Wechsel des Kanals
23. ALARM-Taste
=Anzeige/Einstellung/Aktivierung Alarmmodus
24. Batteriefach
25. Netzteilanschluss
BMessstation
26. Status LED
27. Aussparung für Wandmontage
28. Batteriefach
29. TX-Taste
30. TX-Kanalschiebeschalter
Vielen Dank, dass Sie sich für ein Hama Produkt entschieden haben!
Nehmen Sie sich Zeit und lesen Sie die folgenden Anweisungen und Hinweise zunächst ganz durch.
Bewahren Sie diese Bedienungsanleitung anschließend an einem sicheren Ort auf,umbei Bedarf darin
nachschlagen zu können. Sollten Sie das Gerät veräußern, geben Sie diese Bedienungsanleitung an den
neuen Eigentümer weiter.
1. Erklärung von Warnsymbolen und Hinweisen
Warnung
Wirdverwendet, um Sicherheitshinweise zu kennzeichnen oder um Aufmerksamkeit auf besondere
Gefahren und Risiken zu lenken.
Hinweis
Wirdverwendet, um zusätzlich Informationen oder wichtige Hinweise zu kennzeichnen.
10
Page 12
2. Packungsinhalt
•Wetterstation Color Edge (Basisstation für den Innenbereich /Messstation für den Außenbereich)
•3AAA-Batterien
•2AA-Batterien
•diese Bedienungsanleitung
3. Sicherheitshinweise
•Das Produkt ist für den privaten, nicht-gewerblichen Haushaltsgebrauch vorgesehen.
•Betreiben Sie das Produkt nicht außerhalbseiner in den technischen Daten angegebenen
Leistungsgrenzen.
•Verwenden Sie das Produkt nicht in einer feuchten Umgebung und vermeiden Sie Spritzwasser.
•Betreiben Sie das Produkt nicht in unmittelbarer Nähe der Heizung, anderer Hitzequellen oder in
direkter Sonneneinstrahlung.
•Benutzen Sie das Produkt nicht in Bereichen, in denen elektronische Produkte nicht erlaubt sind.
•Positionieren Sie das Produkt nicht in der Nähe von Störfeldern, Metallrahmen, Computern und
Fernsehern etc. Elektronische Geräte sowie Fensterrahmen beeinträchtigen die Funktion des
Produktes negativ.
•Lassen Sie das Produkt nicht fallen und setzen Sie es keinen heftigen Erschütterungen aus.
•Öffnen Sie das Produkt nicht und betreiben Sie es bei Beschädigungen nicht weiter.
•Versuchen Sie nicht, das Produkt selbst zu warten oder zu reparieren. Überlassen Sie jegliche
Wartungsarbeit dem zuständigen Fachpersonal.
•Halten Sie Kinder unbedingt von dem Verpackungsmaterial fern, es besteht Erstickungsgefahr.
•Entsorgen Sie das Verpackungsmaterial sofort gemäß den örtlich gültigen Entsorgungsvorschriften.
•Nehmen Sie keine Veränderungen am Produkt vor.Dadurch verlieren sie jegliche
Gewährleistungsansprüche.
Warnung -Batterien
•Entfernen und entsorgen Sie verbrauchte Batterien unverzüglich aus dem Produkt.
•Verwenden Sie ausschließlich Akkus (oder Batterien), die dem angegebenen Typentsprechen.
•Mischen Sie alte und neue Batterien nicht, sowie Batterien unterschiedlichen Ty ps oder
Herstellers.
•Beachten Sie unbedingt die korrekte Polarität (Beschriftung +und -) der Batterien und legen
Sie diese entsprechend ein. Bei Nichtbeachtung besteht die Gefahr des Auslaufens oder einer
Explosion der Batterien.
•Laden Sie Batterien nicht.
•Bewahren Sie Batterien außerhalb der Reichweite von Kindern auf.
•Schließen Sie Akkus/Batterien nicht kurz und halten Sie sie von blanken Metallgegenständen
fern.
•Außentemperaturen unter °0C/ 32°F können die Batterieleistung des Sensors stark
beeinträchtigen und zu Schwächen bei der Funkübertragung führen.
•Abnehmende Kapazität der Batterien kann zu Empfangs- und Sendeschwierigkeiten führen und
das Ablesen des Displays erschweren.
4. Inbetriebnahme
4.1 Batterien einlegen
Hinweis
Beachten Sie, dass Sie bei der Inbetriebnahme immer zuerst die Batterien in die Messstation, und
dann in die Basisstation einlegen.
Messstation
•Öffnen Sie das Batteriefach (28) und entfernen Sie den Kontaktunterbrecher.
•Schließen Sie die Batteriefachabdeckung anschließend.
•Die Status LED leuchtet auf.
11
Page 13
Basisstation
•Öffnen Sie das Batteriefach (24) und entfernen Sie den Kontaktunterbrecher.
•Schließen Sie die Batteriefachabdeckung anschließend.
4.2 Batterien wechseln
Hinweis –Batteriewechsel
•Beachten Sie, dass Sie nach jedem Batteriewechsel an Mess- oder Basisstation eine neue
Synchronisation der Stationen erfolgen muss.
•Nehmen Sie dazu die Batterien der anderen Station heraus und setzen sie erneut ein oder
wechseln Sie diese bei Bedarf ebenfalls aus.
Messstation
•Wenn das Symbol (neben „OUTDOOR“) angezeigt wird, ersetzen Sie die zwei AA-Batterien der
Messstation durch 2neue Batterien.
•Öffnen Sie das Batteriefach (28), entnehmen und entsorgen Sie die verbrauchten Batterien
und legen Sie zwei neue AA-Batterien polrichtig ein. Schließen Sie die Batteriefachabdeckung
anschließend.
Basisstation
•Wenn das Symbol (neben „INDOOR“) angezeigt wird, ersetzen Sie die drei AAA-Batterien im
Basisgerät durch neue Batterien.
•Öffnen Sie das Batteriefach (24), entnehmen und entsorgen Sie die verbrauchten Batterien und
legen Sie drei neue AAA-Batterien polrichtig ein. Schließen Sie die Batteriefachabdeckung (24)
anschließend.
5. Montage
Hinweis –Montage
•Eswirdempfohlen, die Basis- und Messstation zunächst an den gewünschten Aufstellorten
ohne Montage zu platzieren und alle Einstellungen -wie in 6. Betrieb beschrieben –
vorzunehmen.
•Montieren Sie erst nach korrekter Einstellung und stabiler Funkverbindung die Station/en.
Hinweis
•Die Reichweite der Funkübertragung zwischen der Mess- und Basisstation beträgt im freien
Gelände bis zu 30m.
•Achten Sie vor der Montage darauf,dass die Funkübertragung nicht durch Störsignale oder
Hindernisse wie Gebäude, Bäume, Fahrzeuge, Hochspannungsleitungen, u.a. beeinusst wird.
•Betreiben Sie benachbarte Drahtlos-Geräte nicht mit der gleichen Frequenz (433 MHz), um
Übertragungsstörungen zu vermeiden.
•Stellen Sie vor der endgültigen Montage sicher,dass zwischen den gewünschten Aufstellorten
ausreichender Empfang besteht.
•Achten Sie bei der Montage der Messstation darauf,dass diese vor direkter Sonne und Regen
geschützt positioniert ist.
•Die internationale Standardhöhe für die Messung der Lufttemperatur beträgt 1,25 m(4ft)
über Grund.
12
Page 14
Warnung
•Besorgen Sie sich spezielles bzw.geeignetes Montagematerial im Fachhandel für die Montage
an der vorgesehenen Wand.
•Stellen Sie sicher,dass keine fehlerhaften oder beschädigten Te ile montiert werden.
•Wenden Sie bei der Montage niemals Gewalt oder hohe Kräfte an. Diese können das Produkt
beschädigen.
•Prüfen Sie vor Montage die Eignung der vorgesehenen Wand für das anzubringende Gewicht
und vergewissern Sie sich, dass sich an der Montagestelle in der Wand keine elektrischen
Leitungen, Wasser-, Gas- oder sonstige Leitungen benden.
5.1 Basisstation
•Stellen Sie die Basisstation mithilfe des Standfußes auf einer ebenen Fläche auf.
5.2 Messstation
•Die Messstation können Sie ebenfalls auf einer ebenen Fläche im Außenbereich aufstellen.
•Eswirdempfohlen, die Messstation sicher und fest an einer Außenwand mithilfe der Aussparung
(27) zu montieren.
•Befestigen Sie Dübel, Schraube, Nagel, etc. in der dafür vorgesehenen Wand.
•Hängen Sie die Basis-/ Messstation mit der dafür vorgesehenen Aussparung (27) daran ein.
6. Betrieb
6.1 Verbindung zur Messstation
•Nach dem Einlegen der Batterien sucht die Basisstation automatisch nach einer Verbindung zur
Messstation und zum Funksignal.
Hinweis
•Während der Verbindungsversuche blinken jeweils die dazugehörigen Symbole: Verbindung
zur Messstation, Verbindung zum DCF-Signal
•Vermeiden Sie in dieser Zeit jegliche Betätigung der Tasten! Andernfalls können Fehler und
Ungenauigkeiten bei den Werten und deren Übertragung entstehen.
•Verändern Sie während der Suchvorgänge nicht den Standort der Basisstation.
•Der Vorgang ist beendet, sobald die Messdaten für Innen- (8) und Außenbereich (3) angezeigt
werden.
6.2 Grundeinstellungen und manuelle Einstellungen
Automatische Einstellung nach DCF-Signal
•Nach dem ersten Einschalten der Basisstation und erfolgreicher Übertragung zwischen Basisund Messstation, beginnt die Uhr automatisch die Suche nach dem DCF-Signal. Während des
Suchvorgangs blinkt das Funksymbol
auf.
Anzeige Suche nach DCF-Signal
Blinkende Anzeige
Keine manuelle Eingabe möglich!
Dauerhafte Anzeige
Keine Anzeige Inaktiv
Aktiv
Erfolgreich –
Signal wirdempfangen
13
Page 15
•Wirdwiederholt kein Signal empfangen, drücken und halten Sie die UP-Taste (19) für ca. 3
Sekunden, um die manuelle Suche nach dem DCF-Signal zu starten. Das Funksymbol beginnt
zu blinken.
Hinweis –Uhrzeiteinstellung
•Der Suchvorgang kann bis zu 7Minuten dauern. Falls dieser fehlschlägt, erlischt das
Funksymbol .
•Sie können währenddessen eine manuelle Einstellung von Uhrzeit und Datum vornehmen.
•Die Uhr sucht automatisch weiterhin täglich (zwischen 01.00 –05.00 Uhr) nach dem DCFSignal. Bei erfolgreichem Signalempfang werden die manuell eingestellte Uhrzeit und das
Datum überschrieben.
Hinweis –Sommerzeit
Die Uhrzeit stellt sich automatisch auf die Sommerzeit um. Solange die Sommerzeit aktiv ist, wirdauf
dem Display
Manuelle Einstellungen
•Drücken und halten Sie die SET -Taste (20)für ca. 3Sekunden,um folgende Einstellungen
nacheinander vorzunehmen:
•Zeitzone (12- oder 24-Stundenformat)
•Stunde
•Minute
•Jahr
•Monat
•Tag
•Einheit des Luftdrucks (hPaoder inHg)
•Drücken Sie die UP-Taste (19) bzw. DOWN –Taste(22), um IhreEinstellung zu wählen. Durch die
SET –Taste (20)bestätigen Sie IhreEingabe.
•Das DCF-Signal kann weitläug empfangen werden, entspricht jedoch immer der MEZ,
die in Deutschland gilt. Beachten Sie daher,dass Sie in Ländern mit anderer Zeitzone die
Zeitverschiebung beachten.
•Benden Sie sich in Moskau, ist es dort bereits 3Stunden später als in Deutschland. Stellen Sie
daher bei der Zeitzone +3 ein. Die Uhr stellt sich dann immer nach Empfang des DCF-Signals
bzw.inBezug auf die manuell eingestellte Uhrzeit automatisch 3Stunden weiter.
angezeigt.
Hinweis –Zeitzone
Wecker
•Drücken und halten Sie die ALARM -Taste(23) für ca. 3Sekunden, um die Weckzeit des
angezeigten Alarms einzustellen. Die Stundenanzeige beginnt zu blinken.
•Drücken Sie die UP-Taste (19) bzw. DOWN –Taste (22),umdie Stunden der Weckzeit einzustellen
und bestätigen Sie IhreAuswahl durch Drücken der ALARM-Taste (23). Die Minutenanzeige beginnt
zu blinken.
•Wiederholen Sie diesen Vorgang für die Minuten der Weckzeit.
•Drücken Sie die ALARM –Taste(23) einmal, wirddie Weckzeit angezeigt. Drücken Sie die ALARM
–Taste (23) ein weiteres Mal, um den Alarm zu aktivieren.
•Drücken Sie die ALARM –Taste(23) ein drittes Mal, wirdder Alarm deaktiviert.
•Wirdder Wecker entsprechend ausgelöst, erscheint das Alarmsymbol und ein Wecksignal ertönt.
•Drücken Sie UP (19), DOWN (22), SET (20) oder ALARM (23), um den Alarm zu beenden.
14
Page 16
Hinweis –Schlummerfunktion
•Drücken Sie während des Wecksignals die SNOOZE-Taste (18) oder LIGHT -Taste (21),umdie
Schlummerfunktion zu aktivieren. Auf dem Display beginnt zu blinken. Das Wecksignal wird
für ca. 10 Minuten unterbrochen und dann erneut ausgelöst.
•Drücken Sie UP (19), DOWN (22), SET (20) oder ALARM (23), um die Schlummerfunktion und
damit den Alarm zu beenden.
Temperatur (Celsius/Fahrenheit)
•Drücken Sie die UP –Taste (19), um bei der Te mperaturanzeige zwischen °C und °F zu wechseln.
•Die Wetterstation gibt für Innen- und Außentemperatur eine Tendenz an, wie sich diese Werte
wahrscheinlich für die nächsten Stunden entwickeln werden.
Anzeige Tendenz
Steigend
Beständig
Fallend
Luftdruck (hPA/inHg)
Hinweis
Wie alle Messwerte unterliegt der Luftdruck einer gewissen Messtoleranz.
•Drücken und halten Sie die SET-Taste (20), bis die Uhrzeit beginnt zu blinken.
•Drücken Sie wiederholt die SET-Taste (20), bis im Display hPAbzw.inHG erscheint.
•Drücken Sie die UP-Taste (19) bzw. DOWN-Taste (22), um die Einheit zu inHG bzw.hPA zuändern.
•Die Wetterstation gibt für den Luftdruck eine Te ndenz an, wie sich der Wert ungefähr momentan
verhält.
6.3 Wettertrendanzeige
•Anhand von atmosphärischen Luftdruckveränderungen und der gespeicherten Daten kann die
Basisstation Angaben zu der Wetteraussicht für die kommenden 12 bis 24 Stunden machen.
Hinweis –Wettertrendanzeige
In den ersten Stunden des Betriebs ist die Wettervorhersage aufgrund von fehlenden Daten, die
erst im Laufe des Betriebs gespeichert werden, nicht möglich.
15
Page 17
Die Wettertrendanzeige und das aktuelle Wetter werden durch vier verschiedene Symbole (1)
dargestellt:
Symbol Wetter
Sonnig
Leicht bewölkt
Bewölkt
Regnerisch
6.4 Mondphasen
Die Basisstation zeigt Ihnen die tagesaktuelle Mondphase durch folgende Symbole an:
Neumond Volllmond
Zunehmender Mond Abnehmender Vollmond
Halbmond (erstes Viertel) Halbmond (letztes Viertel)
Zunehmender Halbmond
6.5 Hintergrundbeleuchtung
•Drücken Sie die SNOOZE-Taste (18) bzw. LIGHT-Taste (21) im Batteriebetrieb, wirddas Display für
ca. 10 Sekunden beleuchtet.
•Durch wiederholtes Drücken der SNOOZE-(18) bzw. LIGHT-Taste (21) im Netzbetrieb, können Sie
die Helligkeitsstufe der Beleuchtung bestimmen und diese ausschalten.
Hinweis –kontinuierliche Hintergrundbeleuchtung
Eine dauerhafte Beleuchtung des Displays ist nur bei Betrieb der Basisstation über das Netzteil
möglich. Netzteil nicht im Lieferumfang enthalten.
7. Wartung und Pflege
Reinigen Sie dieses Produkt nur mit einem fusselfreien, leicht feuchten Tu ch und verwenden Sie keine
aggressiven Reiniger.Achten Sie darauf,dass kein Wasser in das Produkt eindringt. Tauchen Sie die
Wetterstation bzw.den Sensor niemals in Wasser ein. Vermeiden Sie Spritzwasser.
8. Haftungsausschluss
Die Hama GmbH &CoKG übernimmt keinerlei Haftung oder Gewährleistung für Schäden, die aus
unsachgemäßer Installation, Montage und unsachgemäßem Gebrauch des Produktes oder einer
Nichtbeachtung der Bedienungsanleitung und/oder der Sicherheitshinweise resultieren.
Abnehmender Mond
16
Page 18
9. Service und Support
Bitte wenden Sie sich bei Fragen zum Produkt gerne an die Hama-Produktberatung.
Hotline: +49 9091 502-115 (Deu/Eng)
WeitereSupportinformationen nden sie hier:
www.hama.com
10. Technische Daten
Basisstation Messstation
Stromversorgung
4,5 V
3xAAA Batterie
Zusätzliche Versorgung über
Netzteil möglich:
Output 4,5 V, mind. 100 mA
2xAABatterie
Bei Außentemperaturen unterhalb
von 0°C/ 32°F werden für die
Außensensoren Lithium-Batterien
der Größe AA empfohlen.
3,0 V
Messbereich
Temperatur
Messbereich
Luftfeuchtigkeit
DCF-Funkuhr Ja Nein
Weckfunktion Ja Nein
Max. Anzahl Messstationen
Frequenz 433 MHz
Reichweite ≤30m
0°C –50°C
32°F –122°F
20 -99% 20 –99%
3
Zusätzlicher Sensor 176933
-40°C –+60°C
-40°F -+140°F
17
Page 19
11. Entsorgungshinweise
Hinweis zum Umweltschutz:
Ab dem Zeitpunkt der Umsetzung der europäischen Richtlinien 2012/19/EU und 2006/66/
EG in nationales Recht gilt folgendes: Elektrische und elektronische Geräte sowie Batterien
dürfen nicht mit dem Hausmüll entsorgt werden. Der Verbraucher ist gesetzlich verpichtet,
elektrische und elektronische Geräte sowie Batterien am Ende ihrer Lebensdauer an den
dafür eingerichteten, öffentlichen Sammelstellen oder an die Verkaufsstelle zurückzugeben.
Einzelheiten dazu regelt das jeweilige Landesrecht. Das Symbol auf dem Produkt, der
Gebrauchsanleitung oder der Verpackung weist auf diese Bestimmungen hin. Mit der
Wiederverwertung, der stoichen Verwertung oder anderen Formen der Verwertung von Altgeräten/
Batterien leisten Sie einen wichtigen Beitrag zum Schutz unserer Umwelt.
12. Konformitätserklärung
Hiermit erklärt die Hama GmbH &CoKG,dass der Funkanlagentyp [00136294,
00176930]der Richtlinie 2014/53/EU entspricht. Der vollständige Text der
EU-Konformitätserklärung ist unter der folgenden Internetadresse verfügbar:
www.hama.com-> 00136294, 00176930 -> Downloads.
Abgestrahlte maximale Sendeleistung 4,487 µW
18
Page 20
F Mode d‘emploi
Elementos de manejo eindicadores
AEstación base
1. Achage de la tendance météorologique
2. Achage de la tendance barométrique
3. Températureextérieureethumidité de l'air
4. Achage du canal
5. Symbole radio du capteur
6. Capacité de la batterie du capteur
7. Achage de la tendance de la températureextérieure
8. Températureintérieureethumidité de l'air
9. Capacité de la batterie de la station météo
10. Achage de la tendance pour la températureintérieure
11. Heure
12. Symbole radio du signal DCF
13. Heured'été
14. Jour de la semaine
15. Symbole alarme
16. Date
17. Phase lunaire
18. To uche SNOOZE
=interruption de la sonnerie
19. To uche UP
=augmentation de la valeur en cours de réglage /commutation entre°Cet°F
20. To uche SET
=réglage /conrmation de la valeur sélectionnée
21. To uche LIGHT
=allumage du rétroéclairage
22. To uche DOWN
=diminution de la valeur en cours de réglage /changement de canal
23. To uche ALARME
=achage /réglage /activation du mode alarme
24. Compartiment àpiles
25. Connexion au bloc secteur
B
Estación de medición
26. LED d’état
27. Fente pour installation murale
28. Compartiment àpiles
29. To uche TX
30. Sélecteur de canal TX
Nous vous remercions d’avoir choisi un produit Hama.
Veuillez prendreletemps de lirel‘ensemble des remarques et consignes suivantes. Ve uillez conserver
ce mode d‘emploi àportée de main an de pouvoir le consulter en cas de besoin. Transmettez-le au
nouveau propriétaireavec l’appareil le cas échéant.
1. Explication des symboles d‘avertissement et des remarques
Avertissement
Ce symbole est utilisé pour indiquer des consignes de sécurité ou pour attirer votreattention sur
des dangers et risques particuliers.
Remarque
Ce symbole est utilisé pour indiquer des informations supplémentaires ou des remarques
importantes.
19
Page 21
2. Contenu de l‘emballage
•Station météo Color Edge (station de base pour l‘intérieur /station de mesurepour l‘extérieur)
•3piles AAA
•2piles AA
•Mode d‘emploi
3. Consignes de sécurité
•Ceproduit est destiné àune installation domestique non commerciale.
•N‘utilisez pas le produit en dehors des limites de puissance indiquées dans les caractéristiques
techniques.
•N‘utilisez pas le produit dans un environnement humide et évitez toute projection d‘eau.
•Évitez d’utiliser le produit àproximité immédiate d‘un chauffage, d’autres sources de chaleur ou
exposé aux rayons directs du soleil.
•N‘utilisez pas le produit dans les zones dans lesquelles l‘utilisation d‘appareils électroniques est
interdite.
•Neplacez pas le produit àproximité de champs parasites, de cadres métalliques, d‘ordinateurs,
de téléviseurs, etc. Les appareils électroniques ainsi que les cadres de fenêtreont une inuence
négative sur le fonctionnement du produit.
•Protégez le produit des secousses violentes et évitez tout choc ou toute chute.
•Netentez pas d‘ouvrir le produit en cas de détérioration et cessez de l’utiliser.
•Netentez pas de réparer l’appareil vous-même ni d’effectuer des travaux d’entretien. Déléguez tous
travaux d‘entretien àdes techniciens qualiés.
•Tenezles emballages d‘appareils hors de portée des enfants, risque d‘étouffement.
•Recyclez les matériaux d’emballage conformément aux prescriptions locales en vigueur.
•N’apportez aucune modication àl’appareil. Des modications vous feraient perdrevos droits de
garantie.
Avertissement concernant les piles
•Retirez les piles usagées immédiatement du produit pour les recycler.
•Utilisez exclusivement des batteries (ou des piles) du type indiqué.
•N’utilisez pas simultanément des piles usagées et des piles neuves ou des piles de différents
types.
•Respectez impérativement la polarité des batteries (indications +et-)lors de leur insertion dans
le boîtier.Risques d‘écoulement et d‘explosion des batteries si tel n‘est pas le cas.
•Netentez pas de recharger les piles, risque d‘explosion.
•Conservez les piles hors de portée des enfants.
•Necourt-circuitez pas les batteries/piles et éloignez-les des objets métalliques.
•Une températureextérieureinférieureà0°C /32°F est susceptible d’affecter fortement les
performance des piles du capteur et diminuer la transmission radio.
•Une baisse de capacité des piles est susceptible de provoquer des dicultés de réception et
d’émission des données ainsi que la lectureàl’écran.
4. Mise en service
4.1 Insertion des piles
Remarque
Lors de la premièremise en service, insérez tout d’abordles piles dans la station de mesure, puis
dans la station de base.
Station de mesure
•Ouvrez le compartiment àpiles (28) et retirez le lm de protection.
•Refermez le couvercle du compartiment àpiles.
•LaLED d’état s’allume.
Station de base
•Ouvrez le compartiment àpiles (24) et retirez le lm de protection.
•Refermez le couvercle du compartiment àpiles.
20
Page 22
4.2 Remplacement des piles
Remarqueconcernant le remplacement despiles
•Veuillez noter que vous devrez effectuer une nouvelle synchronisation des deux stations après
chaque remplacement de piles de la station de base ou de la station de mesure.
•Lors d’un remplacement de piles d’une station, retirez également les piles de l’autrestation, puis
réinsérez-les ou remplacez ces dernières en fonction de leur niveau de charge.
Station de mesure
•Remplacez les
symbole apparaît àl’écran (à côté de l’indication «OUTDOOR »).
•Ouvrez le compartiment àpiles (28), retirez et éliminez les piles déchargées, puis insérez deux piles
LR6/AA neuves en respectant les indications de polarité. Refermez le couvercle du compartiment
àpiles.
Station de base
•Remplacez les trois piles LR03/AA de la station de base par des piles neuves lorsque ce symbole
apparaît àl’écran (à côté de l’indication «INTÉRIEUR »).
•Ouvrez le compartiment àpiles (24), retirez et éliminez les piles usagées, puis insérez trois piles
LR03AAA neuves en respectant les indications de polarité. Refermez le couvercle du compartiment
àpiles (24).
5. Installation
•Nous vous recommandons de positionner la station de base et la station de mesuredans les
•Procédez ensuite àl‘installationde la/des station(s) après avoir effectué les réglages et obtenu
•Laportée de la transmission radio entrelastation de base et la station de mesureest de 30 m
•Veuillez contrôler,avant l‘installation, que la transmission radio ne soit pas altérée par des
•N’utilisez pas d’autres appareils sans l dans le même secteur sur la même fréquence (433 MHz)
•Veuillez contrôler,avant l‘installation dénitive, la bonne qualité de la réception entreles deux
•Avant l’installation dénitive, veuillez également garantir une bonne protection de la station de
•Lahauteur standardinternationale de mesurepour la températuredel‘air est de 1,25 m(4ft)
deux piles LR6/AA de la station de mesurepar deux piles neuves lorsque ce
Remarque concernant l‘installation
endroits envisagés sans effectuer le montage, puis d‘effectuer tous les réglages décrits au
chapitre 6. Fonctionnement.
une connexion radio stable.
Remarque
dans un espace dégagé..
interférences ou des obstacles tels que bâtiments, arbres, véhicules, lignes haute tension, etc.
an d’éviter les perturbations.
emplacements prévus pour les stations.
mesuredel‘ensoleillement direct et de la pluie.
au-dessus du sol.
21
Page 23
Avertissement
•Envue de l‘installation, procurez-vous le matériel d‘installation adéquat pour le mur concerné
dans un commerce spécialisé.
•Veuillez contrôler que l‘emballage ne contienne aucune pièce erronée ni endommagée.
•N‘appliquez en aucun cas une force excessive lors de l‘installation. Une force excessive est
susceptible d‘endommager le produit.
•Avant l‘installation, vériez que le mur prévu pour recevoir la station dispose d‘une force
portante susante et qu‘aucune conduite d‘électricité, d‘eau, de gaz ni aucune autreconduite
ne passe dans cette partie de la cloison.
5.1 Station de base
•Placez la station de base sur une surface plane àl‘aide de son pied.
5.2 Station de mesure
•Vous pouvez également placer la station de mesureàl‘extérieur,sur une surface plane, àl‘aide de
son pied
•Nous vous recommandons d‘installer solidement la station de mesureàune paroi extérieureàl’aide
de la fente (27).
•Fixez cheville, vis, clou, etc. dans la paroi prévue pour recevoir l‘installation.
•Suspendez la station de base /demesureàl‘aide de la fente (27) prévue àcet effet.
6. Fonctionnement
6.1 Connexion vers la station de mesure
•Une fois les piles insérées, la station de base recherche automatiquement la connexion àlastation
de mesureetausignal radio.
Remarque
•Les symboles concernés clignotent pendant les tentatives de connexion : connexion àla
station de mesure, connexion au signal DCF
•N'appuyez sur aucune touche pendant cette phase ;des erreurs, des mesures inexactes ou une
mauvaise transmission pourraient en résulter.
•Nemodiez pas l’emplacement de la station de base au cours des procédures de recherche.
•Laconguration est terminée dès que les valeurs mesurées pour la zone intérieure(8) et pour la
zone extérieure(3) apparaissent àl'écran.
6.2 Réglages de base et paramétrage manuel
Réglage automatique sur la base du signal horaire DCF
•L'horloge recherche automatiquement le signal DCF après la premièremise sous tension de la
station de base et en présence d’une bonne transmission entrelastation de base et la station de
mesure. Le symbole radio
clignote pendant la recherche.
Achage Recherche du signal DCF
Achage clignotant
Aucune saisie manuelle possible.
Achage permanent
Aucun achage Inactif
22
Actif
Recherche aboutie –
réception du signal
Page 24
•Encas de nouvel échec de réception, appuyez sur la touche UP (19) pendant environ 3secondes
an de lancer une recherche manuelle du signal DCF.Lesymbole radio se met àclignoter.
Remarque concernant le réglagede l'heure
•Laprocédurederecherchepeut durer jusqu’à 7minutes. Le symbole radio s’éteint en cas
d’échec de la recherche .
•Vous pouvez régler l'heureetladate manuellement.
•L’horloge continue de rechercher quotidiennement (à 01h00 et 05h00) le signal DCF.Les
réglages manuels de l'heureetdeladate seront corrigés dès que la station reçoit correctement
le signal radio.
Remarque concernant l‘heured‘été
•Leréveil s‘adapte automatiquement àl‘heured‘été. apparaît àl’écran pendant la durée
de l’heured’été.
Réglages manuels
•Appuyez sur la touche SET (20) pendant environ 3secondes an d'effectuer successivement les
réglages suivants :
•Fuseau horaire(de -12à+12 heures CET)
•Heure
•Minute
•Année
•Mois
•Jour
•Unité de pression atmosphérique (hPaouinHg)
•Appuyez sur la touche UP (19) ou sur la touche DOWN (22) an de sélectionner votreréglage.
Conrmez votresaisie àl’aide de la touche SET (20).
Remarque concernant les fuseauxhoraires
•Ilest possible de recevoir le signal horaireàgrande distance ;cesignal ne correspond toutefois
pas toujours àGMT +1,l‘heureenvigueur en Allemagne. Veuillez donc noter qu‘un décalage
horairedoit êtreadopté dans les pays situés dans un autrefuseau horaire.
•Sivous vous trouvez, par exemple, àMoscou, le décalage horaireentreMoscou et l‘Allemagne
est de 3heures (l‘heuredeMoscou est en avance). Réglez donc le fuseau horairesur +3.
L‘horloge s‘adapteraalors automatiquement àl‘heurecaptée par le signal horaireDCF (ou à
l‘heureréglée manuellement) et lui ajoutera3heures.
Réveil
•Appuyez sur la touche ALARM (23) pendant environ 3secondes an de régler l’heurederéveil de
l’alarme sélectionnée. Les chiffres de l'heuresemettent àclignoter.
•Appuyez sur la touche UP (19) ou sur la touche DOWN (22) an de régler les heures de l'heurede
réveil, puis conrmez votresélection en appuyant sur la touche ALARM (23).
•Répétez cette procédurepour les minutes de l'heurederéveil.
•Appuyez une fois sur la touche ALARM (23) :l’heurederéveil apparaît àl’écran. Appuyez une
nouvelle fois sur la touche ALARM (23) an d’activer l’alarme.
•Appuyez sur la touche ALARM (23) une troisième fois pour désactiver l’alarme.
•Lors du déclenchement de l'alarme de réveil, le symbole d'alarme apparaît et une sonnerie retentit.
•Appuyez sur les touches UP (19), DOWN (22), SET (20) ou ALARM an d’arrêter l’alarme.
23
Page 25
Remarque concernant la fonctionde répétition de l'alarme
•Appuyez sur la touche SNOOZE (18) ou la touche LIGHT (21) pendant la sonnerie an d'activer
la fonction de répétition de l’alarme. se met àclignoter àl’écran. La sonnerie s'interrompt
pendant env.10minutes, puis retentit ànouveau.
•Appuyez sur les touches UP (19), DOWN (22), SET (20) ou ALARM an d'arrêter la fonction de
répétition de l’alarme, et donc l'alarme.
Température (Celsius/Fahrenheit)
•Appuyez sur la touche UP (19) an de sélectionner l’achage de la températureendegrés Celsius
(°C) ou Fahrenheit (°F).
•Lastation météo indique une tendance d’évolution de la températureextérieureetdelatempérature
ambiante pour les prochaines heures.
Achage Tendance
hausse
stable
baisse
Pression atmosphérique (hPA /inHg)
Remarque
Comme c’est le cas pour toutes les valeurs mesurées, la pression atmosphérique est soumise àune
certaine tolérance de mesure.
•Appuyez sur la touche SET (20) et maintenez-la enfoncée jusqu’à ce que l’achage de l’heurese
mette àclignoter.
•Appuyez de plusieurs fois sur la touche SET (20) jusqu’à ce que hPAouinHG apparaisse àl’écran.
•Appuyez sur la touche UP (19) ou sur la touche DOWN (22) an de modier l’unité en inHG ou
en hPA.
•Lastation météo indique une tendance de l’évolution actuelle de la pression atmosphérique.
6.3 Affichage de la tendance météorologique
•Lastation de base peut acher des prévisions météo pour les prochaines 12 à24heures sur la base
des variations de la pression atmosphérique et des données en mémoire.
Remarque concernant l’achage dela tendance météorologique
Dans les premières heures suivant la mise en service, la station n'est pas capable d'acher de
prévisions météorologiques en raison du manque de données qui seront enregistrées pendant le
fonctionnement ultérieur de la station.
24
Page 26
La tendance météo ainsi que la météo actuelle sont achées àl'aidede quatresymboles différents (1) :
Symbole Temps
ensoleillé
peu nuageux
nuageux
pluvieux
6.4 Phases lunaires
La station de base ache la phase lunaireactuelle àl’aide des symboles suivants :
Nouvelle lune Pleine lune
Lune croissante Pleine lune décroissante
Demi-lune
(premier quartier)
Demi-lune croissante Lune décroissante
6.5 Rétroéclairage
•Appuyez sur la touche SNOOZE (18) ou sur la touche LIGHT (21) lors du fonctionnement sur pile :
l'écran s’allume pendant environ 10 secondes.
•Vous pouvez dénir le degré de luminosité de l’éclairage et l’éteindreenappuyant plusieurs fois sur
la touche SNOOZE (18) ou LIGHT (21) d’un appareil branché sur le secteur.
Remarque concernant le rétroéclairage permanent
Un éclairage permanent de l’écran est possible uniquement sur une station de base branchée sur le
secteur.Lebloc secteur n’est pas compris dans le matériel livré.
7. Soins et entretien
Nettoyez la balance uniquement àl’aide d’un chiffon non breux légèrement humide ;évitez tout
détergent agressif.Veillez àcequ’aucun liquide ne pénètredans le produit.
8. Exclusion de garantie
La société Hama GmbH &CoKG décline toute responsabilité en cas de dommages provoqués par une
installation, un montage ou une utilisation non conformes du produit ou encoreprovoqués par un non
respect des consignes du mode d‘emploi et/ou des consignes de sécurité.
Demi-lune
(dernier quartier)
25
Page 27
9. Service et assistance
En cas de question concernant le produit, veuillez vous adresser au service de conseil produits de Hama.
Ligne téléphonique directe :+49 9091 502-115 (allemand/anglais)
Vous trouverez ici de plus amples informations concernant l‘assistance :www.hama.com
10. Caractéristiques techniques
Station de base Station de mesure
3,0 V
2piles LR6/AA
Alimentation en électricité
4,5 V
3piles LR03/AAA
L’alimentation est également
possible au moyen d’un bloc
secteur :
sortie 4,5 V, 100 mA au minimum
Nous vous recommandons
d’utiliser,pour les capteurs
extérieurs, des piles LR6/AA au
lithium en cas de températures
extérieures inférieures
à0°C /32°F.
Plage de mesure
Température
Plage de mesure
Humidité de l'air
Horloge radio-pilotée DCF Oui Non
Fonction de réveil Oui Non
Nombremaxi de stations de
mesure
Fréquence 433 MHz
Portée ≤30m
0°C –50°C
32°F –122°F
20 -99% 20 –99%
Capteur supplémentaire176933
3
-40°C –+60°C
-40°F -+140°F
26
Page 28

11.
Consignes de recyclage
Remarques concernant la protection de l’environnement
Ab dem Zeitpunkt der Umsetzung der europäischen Richtlinien 2012/19/EU und 2006/66/
EG in nationales Recht gilt folgendes: Elektrische und elektronische Geräte sowie Batterien
dürfen nicht mit dem Hausmüll entsorgt werden. Der Ve rbraucher ist gesetzlich
verpichtet, elektrische und elektronische Geräte sowie Batterien am Ende ihrer
Lebensdauer an den dafür eingerichteten, öffentlichen Sammelstellen oder an die
Verkaufsstelle zurückzugeben. Einzelheiten dazu regelt das jeweilige Landesrecht. Das Symbol auf dem
Produkt, der Gebrauchsanleitung oder der Verpackung weist auf diese Bestimmungen hin. Mit der
Wiederverwertung, der stoichen Verwertung oder anderen Formen der Verwertung von Altgeräten/
Batterien leisten Sie einen wichtigen Beitrag zum Schutz unserer Umwelt.
12. Déclaration de conformité
Le soussigné, Hama GmbH &CoKG,déclareque l‘équipement radioélectrique du type
[00136294, 00176930] est conforme àladirective 2014/53/UE. Le texte complet de la
déclaration UE de conformité est disponible àl‘a dresse internet suivante:
www.hama.com-> 00136294, 00176930 -> Downloads.
Puissance de radiofréquence maximale 4,487 µW
:
27
Page 29
E Instrucciones de uso
Elementos de manejo eindicadores
AEstación base
1. Visualización de la tendencia del tiempo
2. Visualización de la tendencia del barómetro
3. Temperaturaexterior yhumedad del aire
4. Visualización del canal
5. Símbolo de radiofrecuencia del sensor
6. Capacidad de la pila del sensor
7. Visualización de la tendencia de la temperaturaexterior
8. Temperaturainterior yhumedad del aire
9. Capacidad de la pila de la estación meteorológica
10. Visualización de la temperaturainterior
11. Hora
12. Símbolo de radiofrecuencia DFC
13. Horario de verano
14. Día de la semana
15. Símbolo de alarma
16. Fecha
17. Fase lunar
18. Te cla SNOOZE
=interrupción de la señal del despertador
19. Te cla UP
=aumento del valor de ajuste/conmutación entre°CyF
20. Te cla SET
=ajustes/conrmación del valor de ajuste
21. Te cla LIGHT
=activación de la retroiluminación
22. Te cla DOWN
=disminución del valor de ajuste/cambio del canal
23. Te cla ALARM
=visualización/ajuste/activación modo de alarma
24. Compartimento parapilas
25. Conexión paralafuente de alimentación
BEstación de medición
26. LED de estado
27. Aberturaparaelmontaje en pared
28. Compartimento parapilas
29. Te cla TX
30. Interruptor corredizo canal TX
Le agradecemos que se haya decidido por un producto de Hama.
Tómese tiempo yléase primerolas siguientes instrucciones eindicaciones. Después, guarde estas
instrucciones de manejo en un lugar seguroparapoder consultarlas cuando sea necesario. Si vende el
aparato, entregue estas instrucciones de manejo al nuevo propietario.
1. Explicación de los símbolos de aviso ydelas indicaciones
Aviso
Se utiliza paracaracterizar las indicaciones de seguridad oparallamar la atención sobrepeligros
yriesgos especiales.
Nota
Se utiliza paracaracterizar informaciones adicionales oindicaciones importantes.
28
Page 30
2. Contenu de l‘emballage
•Estación meteorológica Color Edge
(Estación base parainterior/estación de medición paraelexterior)
•3pilas AAA
•2pilas AA
•Estas instrucciones de manejo
3. Instrucciones de seguridad
•Elproducto es paraelusodoméstico privado, no comercial.
•Noopereelproducto fueradelos límites de potencia indicados en los datos técnicos.
•Noutilice el producto en entornos húmedos yeviteel contacto con las salpicaduras de agua.
•Noopereelproducto en las inmediaciones de la calefacción, de otras fuentes de calor obajo la
radiación directa del sol.
•Noutilice el producto en áreas donde no se permitan aparatos electrónicos.
•Noposicione el producto en las proximidades de campos de interferencia, marcos de metal,
ordenadores, televisores, etc. Losdispositivos electrónicos ylosmarcos de las ventanas afectan
negativamente al funcionamiento del producto.
•Nodeje caer el producto ni lo someta asacudidas fuertes.
•Noabraelproducto ynolosiga operando de presentar deterioros.
•Nointente mantener oreparar el aparato por cuenta propia. Encomiende cualquier trabajo de
mantenimiento al personal especializado competente.
•Mantenga el material de embalaje fueradel alcance de los niños, existe peligrodeasxia.
•Deseche el material de embalaje en conformidad con las disposiciones locales sobreeldesecho
vigentes.
•Norealice cambios en el aparato. Esto conllevaría la pérdida de todos los derechos de la garantía.
Aviso –Pilas
•Retireydeseche de inmediato las pilas gastadas del producto.
•Utilice exclusivamente pilas recargables (o pilas) que sean del mismo tipo.
•Nomezcle pilas viejas ynuevas, ni tampoco pilas de tipos ofabricantes diferentes.
•Observe siemprelacorrecta polaridad (inscripciones +y-) de las pilas recargables ycoloque
éstas de la forma que corresponda. La no observación de lo anterior conlleva el riesgo de
derrame oexplosión de las pilas recargables.
•Nocargue las pilas, existe peligrodeexplosión.
•Mantenga las pilas fueradel alcance de los niños.
•Nocortocircuite las pilas recargables/baterías ymanténgalas alejadas de objetos metálicos.
•Las temperaturas exteriores inferiores a0°C/32 °F pueden afectar de forma considerable al
rendimiento de la pila del sensor yprovocar el deteriorodelatransmisión por radio.
•Eldeteriorodelacapacidad de las pilas puede provocar problemas en la recepción ylaemisión
ydicultar la lecturadelapantalla.
4. Puesta en funcionamiento
4.1 Colocación de pilas
Nota
En la puesta en funcionamiento, es importante que coloque las pilas en la estación de medición,
en primer lugar,y,seguidamente, en la estación base.
Estación de medición
•Abraelcompartimento parapilas (28) yretireelseparador de contacto.
•Seguidamente, cierrelacubiertadel compartimento parapilas.
•ElLED de estado se ilumina.
Estación base
•Abraelcompartimento parapilas (24) yretireelseparador de contacto.
•Seguidamente, cierrelacubiertadel compartimento parapilas.
29
Page 31

4.2 Cambio de pilas
Nota – Cambio de pilas
•Tenga en cuenta que es necesaria una resincronización tras realizar un cambio de pilas en la estación
de medición obase.
•Paraello, retirelas pilas de la otraestación yvuelva acolocarlas o, de ser necesario, proceda a
sustituirlas.
Estación de medición
•Sisevisualiza el
medición por 2pilas nuevas.
•Abraelcompartimento de pilas (28), retireydeseche las pilas gastadas ycoloque dos pilas AA
nuevas atendiendo alacorrecta polaridad de las mismas. Seguidamente, cierrelacubierta del
compartimento parapilas.
Estación base
•Sisevisualiza el símbolo (junto a«INDOOR»), sustituya las tres pilas AAA de la unidad base por
pilas nuevas.
•Abraelcompartimento de pilas (24), retireydeseche las pilas gastadas ycoloque tres pilas AAA
nuevas atendiendo alapolaridad correcta. Cierrelacubiertadel compartimento de pilas (24) a
continuación.
5. Montaje
•Serecomiendacolocar primero, sin montar,laestación de base ylaestación de medición, en
los lugares de instalación deseados yllevaracabotodos los ajustes tal ycomo se describe en
6. Funcionamiento.
•Proceda amontar la(s) estación(es) únicamente cuando haya podido realizar correctamente los
ajustes ycuente con una conexión inalámbrica estable.
•Elalcance de la transmisión por radio entrelaestación base ylaestación de medición al aire
libreesdehasta 30 m.
•Antes de proceder al montaje, preste atención aque la transmisión por radio no se vea inuida,
entreotros, por interferencias uobstáculos tales como edicios, árboles, vehículos olíneas de
alta tensión.
•Nooperelos dispositivos inalámbricos cercanos con la misma frecuencia (433 MHz) paraevitar
interferencias en la transmisión.
•Antes de proceder al montaje denitivo, asegúrese de que cuenta con recepción suciente entre
los lugares de instalación deseados.
•Almontar la estación de medición, procuresituarla de maneraque quede protegida de la
radiación directa del sol ydelalluvia.
•Laalturaestándar internacional paralamedición de la temperaturadel aireesde1,25 m(4
pies) sobreelsuelo.
símbolo (junto a«OUTDOOR»), sustituya las dos pilas AA de la estación de
Nota –Montaje
Nota
30
Page 32

Aviso
•Adquieramaterial de montaje especial oadecuado en un comercio especializado parael
montaje en la pared prevista.
•Compruebe que no haya piezas deterioradas odefectuosas.
•Noejerza nunca fuerza durante el montaje. El producto podría verse dañado.
•Antes de empezar con el montaje, compruebe que la pared puede soportar el peso que se va a
montar yasegúrese de que por el punto de montaje de la pared no pasan cables eléctricos ni
tuberías de agua, gas odeotrotipo.
5.1 Estación base
•Coloque la estación base sobreuna supercie plana utilizando el pie.
5.2 Estación de medición
•Igualmente, puede colocar la estación de medición sobreuna supercie plana en el exterior.
•Serecomiendajar la estación de medición auna pared exterior de forma segurayable utilizando
la abertura(27).
•Fije el taco, el tornillo, el clavo, etc., en la pared prevista.
•Cuelgue la estación base/de medición utilizando la aberturaprevista paraello (27).
6. Funcionamiento
6.1 Conexión con la estación de medición
•Una vez colocadas las pilas, la estación base busca automáticamente una conexión con la estación
de medición ylaseñal de radiofrecuencia.
Nota
•Durantelos intentos de conexión, parpadean los símbolos correspondientes en cada caso:
Conexión con la estación de medición, conexión con la señal de DCF
•Nopulse ninguna tecla mientras dureelajuste. De lo contrario, pueden producirse fallos o
imprecisiones en los valores ysutransmisión.
•Durante los procesos de búsqueda, no modique la ubicación de la estación base.
•Elproceso naliza en cuanto se visualizan los valores de medición registrados parainterior (8)
yexterior (3).
6.2 Ajustes básicos yajustes manuales
Ajuste automático según la señal DCF
•Sinoserecibieraseñal repetidamente, pulse ymantenga pulsada la tecla UP (19) durante aprox.
3segundos parainiciar la búsqueda manual de la señal DCF.Elsímbolo de radiofrecuencia
comienza aparpadear.
Visualización Búsqueda de señal DCF
Parpadea
No es posible la introducción manual
Visualización constante
Sin visualización Inactiva
Activa
Correcta –
Se recibe la señal
31
Page 33

Si no se recibieraseñal repetidamente, pulse ymantenga pulsada la tecla UP (19) durante aprox. 3
segundos parainiciar la búsqueda manual de la señal DCF.Elsímbolo de radiofrecuencia comienza
aparpadear.
Nota –Ajuste de hora
•Elproceso de búsqueda puede durar hasta 7minutos. Si falla, el símbolo de radiofrecuencia
se apaga .
•Mientras tanto, puede realizar un ajuste manual de la horaylafecha.
•Encualquier caso, el reloj sigue buscando la señal de radiofrecuencia diariamente (01:00
y05:00 horas). En caso de recibirse la señal correctamente, la horaylafecha ajustadas se
sobrescriben.
Nota –Horario de verano
•Lahoraseajusta automáticamente al horario de verano. Durante el horario de verano se muestra
en la pantalla.
Ajustes manuales
•Pulse ymantenga pulsada la tecla SET (20) durante aprox. 3segundos pararealizar los siguientes
ajustes, consecutivamente:
•Zona horaria (de -12-+12 horas HCE)
•Horas
•Minutos
•Año
•Mes
•Día
•Unidad de la presión atmosférica (hPaoinHg)
•Pulse la tecla UP (19) o DOWN (22) paraseleccionar su ajuste. Con la tecla SET (20) conrma lo
introducido.
Nota –Zona horaria
•Laseñal DCF puede recibirse agrandistancia,correspondiéndose siemprecon la HCE vigente
en Alemania. Porello, tenga en cuenta la posible diferencia horaria en países situados en otra
zona horaria.
•SiseencuentraenMoscú, la diferencia es de 3horas de adelanto con respecto aAlemania. Por
ello, debe ajustar la zona horaria +3. Se sumarán automáticamente 3horas alahorarecibida o
ajustada manualmente tras la recepción de la señal DCF.
Despertador
•Pulse ymantenga pulsada la tecla ALARM (23) durante aprox. 3segundos paraajustar la horade
alarma de la alarma visualizada. La visualización de las horas empieza aparpadear.
•Pulse la tecla UP (19) olatecla DOWN (22) paraseleccionar las horas de la horadealarma y
conrme la selección pulsando la tecla ALARM (23).
•Repita este proceso paralos minutos de la horadealarma del despertador.
•Sipulsa la tecla ALARM (23) una vez, se visualiza la horadealarma. Pulse la tecla ALARM (23)
una vez más paraactivar la alarma.
•Pulse la tecla ALARM (23) por terceravez paradesactivar la alarma.
•Siseactiva el despertador como corresponde, el símbolo de alarma comienza aparpadear ysuena
una señal de despertador.
•Pulse UP (19), DOWN (22), SET (20) o ALARM paranalizar la alarma.
32
Page 34

Nota –Función derepetición de alarma
•Pulse, mientras suena la señal de alarma, la tecla SNOOZE (18) olatecla LIGHT (21) para
activar la función de repetición de alarma. En la pantalla comienza aparpadear .Laseñal
de alarma se interrumpe durante aprox. 10 minutos, disparándose acontinuación de forma
automática.
•Pulse UP (19), DOWN,(22), SET (20) o ALARM paracancelar la función de repetición de
alarma y, con ello, la alarma.
Temperatura (Celsius/Fahrenheit)
•Pulse la tecla UP (19) paraconmutar entre°Cy°F en la visualización de la temperatura.
•Laestación meteorológica indica la tendencia que podrían mostrar los valores de la temperatura
interior yexterior en las siguientes horas.
Visualización Tendencia
En aumento
Constante
En descenso
Presión atmosférica (hPA/inHg)
Nota
•Como todos los valores de medición, la presión atmosférica está sujeta acierta tolerancia en
la medición.
•Pulse ymantenga pulsada la tecla SET (20) hasta que la horacomience aparpadear.
•Pulse repetidamente la tecla SET (20) hasta que se muestrehPA oinHG en la pantalla.
•Pulse la tecla UP (19) o DOWN (22) paracambiar la unidad ainHG obien hPA.
•Laestación meteorológica indica una tendencia paralapresión atmosférica, el comportamiento
momentáneo aproximado del valor.
6.3 Pronóstico del tiempo
•Laestación base da información sobreelpronóstico del tiempo paralas siguientes 12 a24horas
basándose en las variaciones registradas en la presión atmosférica ylos datos almacenados.
Nota –Pronóstico del tiempo
El pronóstico del tiempo no es posible en las primeras horas de funcionamiento al no contar la
estación con los datos necesarios, que se almacenan alolargo del funcionamiento.
33
Page 35

La visualización de la tendencia del tiempo yeltiempo actual se indican mediante cuatrosímbolos
diferentes (1):
Símbolo Tiempo
Soleado
Parcialmente nuboso
Nuboso
Lluvioso
6.4 Fases lunares
La estación base le muestralafase lunar del día actual mediante los siguientes símbolos:
Luna nueva Luna llena
Cuarto creciente Luna menguante
Primer cuarto Último cuarto
Luna creciente
6.5 Retroiluminación
•Sipulsa la tecla SNOOZE (18) olatecla LIGHT (21) en el modo apilas, la pantalla se ilumina
durante aprox. 10 segundos.
•Pulsando repetidamente la tecla SNOOZE (18) olatecla LIGHT (21) en el modo con fuente de
alimentación, puede determinar el grado de brillo de la iluminación yapagarla.
Nota –Retroiluminación continua
La iluminación permanente de la pantalla solo es posible cuando la estación base funciona
conectada alafuente de alimentación. Fuente de alimentación no incluida en el volumen de
suministro.
7. Mantenimiento ycuidado
Limpie este producto sólo con un paño ligeramente humedecido que no deje pelusas ynoutilice
detergentes agresivos.
Asegúrese de que no entreagua en el producto. Nunca sumerja en agua la estación meteorológica oel
sensor.Evite las salpicaduras.
Cuarto menguante
34
Page 36

8. Exclusión de responsabilidad
Hama GmbH &CoKG no se responsabiliza ni concede garantía por los daños que surjan por una
instalación, montaje omanejo incorrectos del producto opor la no observación de las instrucciones de
manejo y/o de las instrucciones de seguridad.
9. Servicio ysoporte
Si tiene que hacer alguna consulta sobreelproducto,diríjase al asesoramiento de productos Hama.
Línea directa: +49 9091 502-115 (Alemán/Inglés)
Encontrar más información de soporte aquí:
www.hama.com
10. Datos técnicos
Estación base Estación de medición
3,0 V
2pilas AA
Alimentación de corriente
4,5 V
3pilas AAA
Posibilidad de alimentación
adicional mediante fuente de
alimentación:
Salida 4,5 V, mín. 100 mA
En caso de temperaturas
exteriores inferiores a0°C/32 °F
se recomiendan baterías de litio
tamaño AA paralos sensores
exteriores.
Rango de medición
Temperatura
Rango de medición
Humedad del aire
Radiorreloj DCF Sí No
Función de despertador Sí No
Máx. númerodeestacionesde
medición
Frecuencia 433 MHz
Alcance ≤30m
0°C –50°C
32°F –122°F
20 -99% 20 –99%
3
Sensor adicional 176933
-40°C –+60°C
-40°F -+140°F
35
Page 37

11.
Instrucciones para desecho yreciclaje
Nota sobrelaprotección medioambiental:
Después de la puesta en marcha de la directiva Europea 2012/19/EU y2006/66/EU en el
sistema legislativo nacional, se aplicaralosiguiente: Losaparatos eléctricos yelectrónicos,
así como las baterías, no se deben evacuar en la basuradoméstica. El usuario está
legalmente obligado allevar los aparatos eléctricos yelectrónicos, así como pilas ypilas
recargables, al nal de su vida útil alos puntos de recogida comunales oadevolverlos al
lugar donde los adquirió. Losdetalles quedaran denidos por la ley de cada país. El símbolo en el
producto, en las instrucciones de uso oenelembalaje hace referencia aello. Gracias al reciclaje, al
reciclaje del material oaotras formas de reciclaje de aparatos/pilas usados, contribuye Usted de forma
importante alaprotección de nuestromedio ambiente.
12.
Declaración de conformidad
Porlapresente, Hama GmbH &CoKG,declaraque el tipo de equipo radioeléctrico
[00136294, 00176930] es conforme con la Directiva 2014/53/UE. El texto completo de la
declaración UE de conformidad está disponible en la dirección Internet siguiente:
www.hama.com-> 00136294, 00176930 -> Downloads.
Potencia máxima de radiofrecuencia 4,487 µW
36
Page 38

R Руководство по эксплуатации
Органы управления ииндикации
AОсновной блок
1. Индикаторпрогноза погоды
2. Индикация динамики изменения барометра
3. Режим индикации наружной температуры ивлажности воздуха
4. Канал
5. Значок радиосигнала датчика
6. Емкость батареи датчика
7. Динамика изменения наружной температуры
8. Режим индикации температуры ивлажности воздуха впомещении
9. Емкость батареи метеостанции
10. Индикация температуры впомещении
11. Время
12. Значок радиосигнала DCF
13. Индикация летнеговремени
14. День недели
15. Значок будильника
16. Дата
17. Фаза Луны
18. Кнопка SNOOZE
=отключение сигнала будильника
19. Кнопка UP
=увеличение настраиваемогозначения /переключениемежду °C и°F
20. Кнопка SET
=настройка/подтверждение ввода значения параметра
21. Кнопка LIGHT
=включение подсветки
22. Кнопка DOWN
=уменьшение настраиваемогозначения /сменаканала
23. Кнопка ALARM
=индикация/настройка/включение режима будильника
24. Отсекбатарей
25. Разъем питания
BБлок внешнего датчика
26. Светодиодный индикаторсостояния
27. Паз для настенногомонтажа
28. Отсекбатарей
29. Кнопка ТХ
30. Ползунковый переключатель каналов ТХ
Благодарим за покупку изделия фирмы Hama.
внимательно ознакомьтесь снастоящей инструкцией. Храните инструкцию внадежном месте
для справок вбудущем. Вслучае передачи изделия другому лицу приложите иэту инструкцию.
1. Предупредительные пиктограммы иинструкции
Внимание
Данным значком отмечены инструкции, несоблюдение которых можетпривести копасной
ситуации.
Примечание
Дополнительная или важная информация.
37
Page 39

2. Contenu de l‘emballage
•Метеорологический прибор Color Edge
(основной блок для контроля воздуха внутри помещения, блок датчика внешних
атмосферных условий)
•3батареи ААА
•2батарея АА
•Настоящая инструкция
3. Техника безопасности
•Изделие предназначено толькодля домашнегоприменения.
•Соблюдатьтехнические характеристики.
•Беречь от влаги ибрызг.
•Неэксплуатировать внепосредственнойблизости снагревательными приборами иберечь от
прямых солнечных лучей
•Неприменять взапретных зонах.
•Неразмещать рядом смагнитными полями, металлическими рамками, компьютерами,
окнами ит.д. Электронные приборы иоконныерамы негативно сказываютсянаработе
изделия.
•Неронять. Беречь от сильных ударов.
•Изделие не открывать. Запрещается эксплуатировать неисправное изделие.
•Запрещается самостоятельно ремонтировать устройство. Ремонт разрешается производить
толькоквалифицированному персоналу.
•Упаковку не давать детям: опасность асфиксии.
•Утилизировать упаковку всоответствии сместными нормами.
•Запрещается вносить изменения вконструкцию. Впротивном случае гарантийные
обязательства аннулируются.
Внимание –Техникабезопасности
•Израсходованные батареи немедленно удалять из прибора иутилизировать.
•Разрешается применять аккумуляторы толькоуказанноготипа.
•Неприменять различные типы или новые истарые батареи вместе.
•Загружая батареи, соблюдайте полярность (+ и-). Несоблюдение полярности можетстать
причиной взрыва батарей.
•Запрещается заряжать обычные батареи. Опасность взрыва!
•Батареи хранить вбезопасном месте инедавать детям.
•Незакорачивать контакты батарей. Не хранить рядом сметаллическими объектами.
•Наружная температура ниже0°C/32° Fможетсущественно снизить емкость батарей
датчика ипривести кослаблению радиопередачи.
•Снижение емкости батарей можетзатруднить прием ипередачу, атакже ухудшить
качество изображения на дисплее.
4. Ввод вэксплуатацию
4.1 Загрузка батарей /питание
Примечание
При вводе вэксплуатацию всегда сначала вставляйте батареи вблок наружногодатчика, а
затем восновной блок.
Блок внешнего датчика
•Откройте отсекбатарей (28) иудалите изолятор.
•Затем закройте крышку отсека батарей.
•Светодиодный индикаторсостояния загорается.
Основной блок
•Откройте отсекбатарей (24) иудалите изолятор.
•Затем закройте крышку отсека батарей.
38
Page 40

4.2 Замена батарей
Инструкция -Замена батарей
•После замены батарей основногоблокаиблока внешнегодатчика необходимо заново
выполнить синхронизацию блоков.
•Для этого необходимо удалить батареи втом числе из другогоблока,азатем снова
загрузить их вотсекбатарей.
Блок внешнего датчика
•Если отображается значок (рядом снадписью OUTDOOR (наружная)), замените две батареи
AA блока внешнегодатчика двумя новыми батареями.
•Откройте отсекбатарей (28), удалите иутилизируйте старые батареи. Вставьте две новые
батареи АА, соблюдая полярность. Затем закройте крышку отсека батарей.
Основной блок
•Если отображается значок (рядом снадписью INDOOR (в помещении)), замените три
батареи AАA основногоблока новыми батареями.
•Откройте отсекбатарей (24), удалите иутилизируйте старые батареи. Вставьте три новые
батареи ААА, соблюдая полярность. Затем закройте крышку отсека батарей (24).
5. Монтаж
Примечание –Монтаж
•Перед тем как монтировать блоки, рекомендуется сначала завершить настройки вместах
будущей установки (см. 6. Вводвэксплуатацию иработа).
•Монтаж следует производить после того,как правильные настройки обеспечатнадежную
радиосвязь между блоками.
Примечание
•Максимально допустимое расстояние между основным блоком иблоком внешнего
датчика составляет 30 метров.
•Монтируя блоки, следует учесть, чторазличные препятствия (стены, деревья, автомобили,
высоковольтные линии идр.) создаютпомехи радиосвязи между блоками.
•Воизбежание помех не включайте поблизости беспроводные устройства, работающие на
тойжечастоте(433 МГц).
•Перед окончательным монтажом убедитесь, чтовместах расположения блоков
обеспечивается устойчивая радиосвязь.
•Блок внешнегодатчика должен размещаться вместе, защищенном от воздействия
прямых солнечных лучей иосадков.
•Международный стандартвысоты для измерения влажности воздуха составляет 1,25
метра (4 фута) над землей.
Внимание
•Получить специальное или подходящую установку вмагазинах для монтажа на
поставленном стене.
•Перед началом эксплуатации убедитесь вотсутствии дефектных или поврежденных
деталей.
•При монтаженеприменять чрезмерных усилий. Впротивном случае можно повредить
устройство.
•Убедитесь, чтостена подходит для монтажа. Встене на месте монтажа не должно быть
электрической проводки, газопровода, водопровода идругих трубопроводов.
39
Page 41

5.1 Основной блок
•Спомощью подставки установите основной блок на ровную поверхность.
5.2 Блок внешнего датчика
•Блок внешнегодатчика можно разместить на улице на ровной поверхности.
•Внешний блок рекомендуется монтировать на стене спомощью паза (27).
•Спомощью дюбеля закрепите шуруп на стене.
•Подвесьте основной блок /блок внешнегодатчика спомощью соответствующегопаза (27).
6. Эксплуатация
6.1 Соединение сблоком внешнего датчика
•После загрузки батарей основной блок начинает автоматический поиск сигнала внешнего
датчика ирадиосигнала.
Примечание
•Вовремя поиска соединения мигаютсоответствующие символы:
внешнегодатчика, соединение ссигналом DCF
•Втечение этого времени не нажимайте кнопки устройства! Впротивном случае может
возникнуть сбой точной настройки значений ипередачи сигнала.
•Вовремя поиска сигнала не изменяйте местоположение основногоблока.
•Автоматическая настройка завершена, когданадисплееначнут отображаться данные
измерения внутри помещения (8) ивне помещения (3).
6.2 Основные параметры иручные настройки
Автоматический прием радиосигнала DCF
•После первоговключения основногоблока иустановки радиосвязи сблоком внешнего
датчика часы прибора автоматически начинаютпоиск радиосигнала точноговремени (DCF).
Во время поиска на дисплее мигает символрадиосигнала
Индикация Поиск сигнала DCF
Соединение сблоком
.
Индикатормигает
Ручной вводневозможен!
Горит непрерывно
Нет индикации Неактивно
•Если сигнал не удается принять автоматически, нажмите иок. 3секунд удерживайте кнопку
UP (19), чтобы включить поиск радиосигнала DCF вручную. Значок радиосигнала мигает.
Примечание —настройкавремени
•Этот процессможет длиться до 7минут. Если поиск не дал результатов, символ
радиосигнала гаснет .
•При необходимости часы икалендарь можно настроить вручную.
•Поиск радиосигнала DCF осуществляется каждые сутки (между 01:00 и05:00). При
успешном приеме радиосигнала введенные вручную значения времени идаты
заменяются.
Активно
Успешно завершено —
сигнал принимается
40
Page 42

Инструкция —индикация летнеговремени
Переключение на летнее время происходит автоматически. Во время индикации летнеговремени
на дисплее отображается
Настройка вручную
•Нажмите иоколо3секунд удерживайте кнопку SET (20), чтобы настроить параметры в
следующем порядке:
•часовой пояс (от-12 до+12 часов от среднеевропейскоговремени);
•часы;
•минуты;
•год;
•месяц;
•день;
•единица измерения давления воздуха (ГПа или дюймы рт.столба).
•Для выбора настройки нажмите кнопку UP (19) или DOWN (22). Подтвердите введенное
значение спомощью кнопки SET (20).
Примечание —часовые пояса
•Радиосигнал точноговремени DCF соответствует среднеевропейскому времени, которое
действительно для Ге рмании. Если часы эксплуатируютсявдругом часовом поясе, то их
необходимо настроить соответствующим образом.
•Например, разница во времени между Москвой иБерлином составляет 3часа. ВМоскве,
таким образом, необходимо сделать поправку в+3часа. Вэтомслучае кпоказателю
времени (установленному автоматически по радиосигналу DCF или вручную) часы
автоматически будут прибавлять 3часа.
Будильник
•Нажмите иоколо3секунд удерживайте кнопку ALARM (23), чтобы настроить время
срабатывания будильника. Начнет мигатьзначение часа.
•Кнопкой UP (19) или DOWN (22) установите значение времени активации будильника, затем
нажмите кнопку ALARM (23), чтобы подтвердить настройку.
•Повторите процедуру для настройки минут.
•Нажмите кнопку ALARM (23) один раз, чтобы отобразить настройку будильника. Нажмите
кнопку ALARM (23) второй раз, чтобы активировать будильник.
•Нажмите кнопку ALARM (23) третий раз, чтобы отключить будильник.
•При срабатывании будильника мигает значок будильника, иподается звуковой сигнал.
•Нажмите кнопку UP (19), DOWN (22), SET (20) или ALARM,чтобы выключить звук сигнала.
Примечание —функция автоповтора сигнала будильника
•Вовремя подачи сигнала будильника нажмите кнопку SNOOZE (18) или LIGHT (21),
чтобы включить функцию автоповтора сигнала. На дисплее мигает индикация .Подача
сигнала прерывается на 10 минут, после чегосигнал подается снова.
•Чтобы отключить функцию автоповтора сигнала будильника исам сигнал, нажмите
кнопку UP (19), DOWN,(22), SET (20) или ALARM.
Температура (по Цельсию /поФаренгейту)
•Кнопкой UP (19) выберите единицу измерения температуры (°C или °F).
•Прибор отображает прогноз изменений погодынанесколькочасов для наружной
температуры итемпературы впомещении.
.
41
Page 43

Индикация Динамика изменений
Повышается
Стабильно
Понижается
Давление воздуха (ГПа /дюймы рт. столба)
Примечание
•Как ивсе измеренные значения, давление воздуха имеет определенный допуск.
•Нажмите иудерживайте кнопку SET (20), пока индикация времени не начнет мигать.
•Повторно нажимайте кнопку SET (20), пока на дисплее не отобразится hPA(ГПа) или inHG
(дюймы рт.столба).
•Спомощью кнопок UP (19) или DOWN (22), выберите единицу измерения давления воздуха
hPA(ГПа) или inHG (дюймы рт.столба).
•Метеостанция показываеттенденциюизменениядавления воздуха на основетекущихизмерений.
6.3 Прогноз погоды
•Наоснове изменений атмосферногодавления исохраненных данных прибор прогнозирует
погодунапериодот12до24часов.
Инструкция —Прогноз погоды
Впервые часы после ввода вэксплуатацию функция прогноза погодынеработает из-за
отсутствия необходимых данных, которые сохраняютсятолькововремя эксплуатации.
Прогноз погодыитекущая погодаотображаютсяспомощью четырех значков (1):
Значок Погода
Ясно
Переменная облачность
Пасмурно
Дождь
42
Page 44

6.4 Фазы Луны
На основном блокеотображаютсяфазы Луны для соответствующих суток. Значки:
новолуние полнолуние
растущий месяц стареющий полумесяц
первая четверть последняя четверть
растущий полумесяц стареющий месяц
6.5 Подсветка
•При нажатии кнопки SNOOZE (18) или LIGHT (21) приблизительно на 10 секунд включается
подсветка дисплея.
•При повторном нажатии кнопки SNOOZE (18) или LIGHT (21) врежиме работы от сети можно
настроить яркость подсветки, атакжевыключить ее.
Примечание —постоянная фоновая подсветка
Постоянная подсветка дисплея возможна толькопри питании основногоблокаотблока
питания. Блок питания не входит вкомплект поставки.
7. Уход итехническое обслуживание
Чистку изделия производить толькобезворсовой слегка влажной салфеткой. Запрещается
применять агрессивные чистящие средства.
Следите за тем, чтобы вустройство не попала вода.
Не погружайте метеостанцию или датчик вводу. Защищайте от брызг воды.
8. Отказ от гарантийных обязательств
Компания Hama GmbH &CoKGненесет ответственность за ущерб, возникший вследствие
неправильногомонтажа, подключения ииспользования изделия не по назначению, атакже
вследствие несоблюдения инструкции по эксплуатации итехники безопасности.
9. Отдел техобслуживания
По вопросам ремонтаили замены неисправных изделий обращайтесь кпродавцу или в
сервисную службукомпании Hama.
Горячая линия отдела техобслуживания:
+49 9091 502-115 (немецкий, английский)
Подробнее смотрите здесь: www.hama.com
43
Page 45

10. Технические характеристики
Питание
Основной блок Блок внешнегодатчика
2батареи АА
4,5 В
3батареи ААА
Возможно дополнительное
питание спомощью блока
питания:
4,5 В, не менее 100 мА
При наружной температуре
ниже0°C/32° Fвовнешних
датчиках рекомендуется
использовать литиевые
батареи AA.
3,0 В
Диапазон измерения
Температура
Диапазон измерения
Влажность воздуха
Часыскоррекцией по
радиосигналуточного времени
Функция будильника Да Нет
Макс. кол-во
внешних датчиков
Частота 433 МГц
Дальность действия ≤30м
от 0до50° C
от 32 до 122° F
от 20 до 99% от 20 до 99%
Да Нет
Дополнительный датчик 176933
3
от -40 о+60°C
от -40 до +140° F
44
Page 46

11.
Инструкции по утилизации
Охрана окружающей среды:
Смоментапереходанациональногозаконодательства на европейские нормативы
2012/19/EU и2006/66/EUдействительно следующее: Электрические иэлектронные
приборы, атакжебатареи запрещается утилизировать собычным мусором.
Потребитель, согласно закону, обязан утилизировать электрические иэлектронные
приборы, атакжебатареи иаккумуляторы после их использования вспециально
предназначенных для этого пунктах сбора, либо впунктах продажи. Детальнаярегламентация
этих требований осуществляется соответствующим местным законодательством. Необходимость
соблюдения данных предписаний обозначается особым значком на изделии, инструкции по
эксплуатации или упаковке. При переработке, повторном использовании материалов или при
другой форме утилизации бывших вупотреблении приборов Вы помогаете охране окружающей
среды. Всоответствии спредписаниями по обращению сбатареями, вГермании
вышеназванные нормативы действуютдля утилизации батарей иаккумуляторов.
12.
Декларация производителя
Настоящим компания Hama GmbH &CoKGзаявляет, чторадиооборудование типа
[00136294, 00176930] отвечает требованиям директивы 2014/53/ЕС. Сполным
текстом декларации осоответствии требованиям ЕС можно ознакомиться здесь:
www.hama.com-> 00136294, 00176930 -> Downloads.
Максимальная излучаемая мощность 4,487 µW
45
Page 47

I Istruzioni per l‘uso
Elementi di comando eindicazioni
AStazione base
1. Visualizzazione trend meteo
2. Visualizzazione trend barometro
3. Temperaturaesterna eumidità dell’aria
4. Indicazione canale
5. Simbolo radio sensore
6. Autonomia batteria sensore
7. Visualizzazione temperaturaesterna
8. Temperaturainterna eumidità dell’aria
9. Autonomia batteria della stazione meteo
10. Visualizzazione trend della temperaturainterna
11. Ora
12. Simbolo radio DCF
13. Oralegale
14. Giorno della settimana
15. Simbolo sveglia
16. Data
17. Fase lunare
18. Ta sto SNOOZE
=Interruzione del segnale di sveglia
19. Ta sto UP
=Aumento del valoreimpostazione/cambio da °C eF
20. Ta sto SET
=Impostazioni /conferma del valored'impostazione
21. Ta sto LIGHT
=Attivazione della retroilluminazione
22. Ta sto DOWN
=Riduzione del valoreimpostazione/cambio del canale
23. Ta sto ALARM
=Display/Impostazione/Attivazione modalità allarme
24. Vano batterie
25. Attacco alimentatore
BStazione di misurazione
26. LED di stato
27. Foro per montaggio aparete
28. Vano batterie
29. Ta sto TX
30. Levetta canale TX
Grazie per avereacquistato un prodotto Hama!
Prima della messa in esercizio, leggete attentamente le seguenti istruzioni eavvertenze, quindi
conservatele in un luogo sicuroper una eventuale consultazione. In caso di cessione dell‘apparecchio,
consegnate anche le presenti istruzioni al nuovo proprietario.
1. Spiegazione dei simboli di avvertimento edelle indicazioni
Attenzione
Viene utilizzato per contrassegnareleindicazioni di sicurezza oppureper rivolgerel‘attenzione
verso particolari rischi epericoli.
Avvertenza
Viene utilizzato per contrassegnareinformazioni supplementari oindicazioni importanti.
46
Page 48

2. Contenu de l‘emballage
•stazione meteo Color Edge (stazione base per interni /stazione di misurazione per esterni)
•3batterie AAA
•2batterie AA
•Queste istruzioni per l’uso
3. Indicazioni di sicurezza:
•Ilprodotto èconcepito per l’uso domestico privato, non commerciale.
•Non mettereinesercizio il prodotto al di fuori dei suoi limiti di rendimento indicati nei dati tecnici.
•Non usareilprodottoin ambienti umidi ed evitareilcontatto con gli spruzzi.
•Evitaredimettereinesercizio il prodotto in prossimità di riscaldamento, altrefonti di caloreola
luce diretta del sole.
•Non utilizzareilprodottoin zone in cui non sono ammesse le apparecchiatureelettroniche.
•Non posizionareilprodottonelle vicinanze di campi di disturbo, telai metallici, computer,televisori
ecc. Gli apparecchi elettronici egli inssi delle nestrecompromettono il funzionamento del
prodotto.
•Non farecadereilprodotto enon sottoporlo aforti scossoni!
•Non aprireilprodottoenonutilizzarlo più se danneggiato.
•Non tentarediaggiustareoripararel’apparecchio da soli. Fare eseguirequalsiasi lavorodi
riparazione al personale specializzato competente.
•Tenerel’imballo fuori dalla portata dei bambini, pericolo di soffocamento!
•Smaltireimmediatamente il materiale d‘imballaggio attenendosi alle prescrizioni locali vigenti.
•Non apportaremodiche all’apparecchio per evitarediperdereidiritti di garanzia.
Avvertenza –Batterie
•Rimuovereesmaltireimmediatamente le batterie scariche.
•Utilizzareunicamente accumulatori (o batterie) conformi al tipo indicato.
•Non utilizzarebatterie di tipi ocostruttori diversi, né mischiarebatterie vecchie enuove.
•Osservaresemprelacorretta polarità (dicitura+e-) delle batterie einserirle di conseguenza. La
mancata osservanza comporta la perdita di potenza oilrischio di esplosione delle batterie.
•Non ricaricarelebatterie,pericolo di esplosioni.
•Conservarelebatterie al di fuori della portata dei bambini.
•Non cortocircuitarelebatterie etenerle lontano da oggetti metallici.
•Temperatureesterne al di sotto di °0C/ 32°F possono comprometterefortemente il rendimento
delle batterie del sensoreequindi indebolirelatrasmissione radio.
•Lariduzione dell’autonomia delle batterie può causareproblemi di ricezione etrasmissione,
compromettendo la corretta letturadei valori sul display.
4. Messa in esercizio
4.1 Inserimento delle batterie /alimentazione elettrica
Nota
Permettereinservizio l‘apparecchio, inseriresempreprima le batterie nella stazione di misura,
quindi nella stazione base.
Stazione di misurazione
•Aprireilvano batterie (28) erimuoverel’interruttoredicontatto.
•Quindi chiudereilcoperchio del vano batterie.
•IlLED di stato si accende.
Stazione base
•Aprireilvano batterie (24) erimuoverel’interruttoredicontatto.
•Quindi chiudereilcoperchio del vano batterie.
47
Page 49

4.2 Sostituzione delle batterie
Avvertenza – sostituzione delle batterie
•Accertarsi che dopo ogni sostituzione delle batterie sulla stazione di misurazione osulla stazione
base avvenga una nuova sincronizzazione delle stazioni.
•Estrarreanche le batterie dall‘altrastazione einserirle nuovamente o, se necessario, sostituirle.
Stazione di misurazione
•Quando viene visualizzato il simbolo (accanto “OUTDOOR”), sostituirele2batterie AA della
stazione di misurazione con delle batterie nuove.
•Aprireilvano batterie (28), rimuovereesmaltirelebatterie usate einserireledue batterie AA nuove
con la polarità corretta. Quindi chiudereilcoperchio del vano batterie.
Stazione base
•Quando viene visualizzato il simbolo (accanto “INDOOR”), sostituireletre batterie AAA
dell’apparecchio base con batterie nuove.
•Aprireilvano batterie (24), rimuovereesmaltirelebatterie usate einseriretre nuove batterie AAA
nuove con la polarità corretta. Quindi chiudereilcoperchio del vano batterie (24).
5. Montaggio
Nota –Montaggio
•Siconsiglia di collocarelastazionebase edimisuranel luogo di montaggio desiderato senza
montarla edieffettuaretutte le impostazioni come descritto al capitolo
6. Esercizio.
•Montarela/le stazioni solo dopo avereeffettuato l‘impostazione corretta euncollegamento
radio stabile.
Nota
•Laportata della trasmissione radio tralastazione base edimisurazione all‘aperto èdimax.
30m.
•Prima del montaggio prestareattenzione che la trasmissione radio non venga impedita da
segnali di disturbo oostacoli come edici, alberi, veicoli, linee di alta tensione ecc.
•Far funzionareidispositivi wireless limitro non sulla stessa frequenza (433 MHz) per evitare
eventuali interferenze.
•Prima del montaggio denitivo, accertarsi che trailuoghi di montaggio desiderati vi sia una
ricezione suciente.
•Durante il montaggio della stazione di misurazione, accertarsi che il luogo d‘installazione sia
protetto dalla luce diretta del sole edalla pioggia.
•L‘altezza standardinternazionale per la misurazione della temperaturadell‘aria èpari a1,25 m
(4 ft) dal suolo.
Attenzione
•Procurarsi il materiale di installazione idoneo per il montaggio alla parete prevista presso i
rivenditori specializzati.
•Vericareche non vengano montati pezzi difettosi odanneggiati.
•Non usaretroppa forza, né violenza durante il montaggio per evitaredidanneggiareilprodotto.
•Prima di procederealmontaggio, vericareche la parete sia idonea per il peso da montaree
accertarsi che nel punto della parete dove si desideraappenderel’apparecchio non vi siano cavi
elettrici, né tubazioni di acqua, gas oaltro.
48
Page 50
5.1 Stazione base
•Posizionarelastazione base con il piedino di sostegno su una supercie piana.
5.2 Stazione di misurazione
•Anche la stazione di misurazione si può posizionaresuuna supercie piana all‘esterno.
•Siconsiglia di montarelastazionedi misurazione in modo sicuroestabile su una parete esterna
mediante l’apposito foro(27).
•Fissaretasselli, viti, chiodi ecc. alla parete prevista.
•Agganciarelastazione base/di misurazione con il foroprevisto (27).
6. Funzionamento
6.1 Connessione alla stazione di misurazione
•Dopo avereinserito le batterie, la stazione base ricerca automaticamente la connessione alla
stazione di misurazione.
Nota
•Durante il tentativo di collegamento lampeggiano irispettivi simboli:
stazione di misurazione, Collegamento con il segnale DCF
•Evitaredipremerequalsiasi tasto in questo lasso di tempo! Diversamente si possono manifestare
errori eimprecisioni dei valori edella lorotrasmissione.
•Durante la proceduradiricerca non modicarelaposizione della stazione.
•Laproceduraèconclusa non appena vengono visualizzati idati di misurazione per l'interno (8)
el'esterno (3).
6.2 Impostazioni di base emanuali
Impostazione automatica secondo il segnale DCF
•Dopo la prima accensione della stazione base elatrasmissione trastazione base edimisurazione,
l‘orologio inizia automaticamente acercareunsegnale DCF.Durante il processo di ricerca, il simbolo
lampeggia.
radio
Display Ricerca del segnale DCF
Collegamento con la
Indicazione lampeggiante
Immissione manuale non possibile!
Indicazione ssa
Nessuna indicazione Non attivo
•Seper diverse volte non viene ricevuto alcun segnale, tenerepremuto il tasto UP (19) per ca. 3
secondi, per avviarelaricerca manuale del segnale DCF.Ilsimbolo radio inizia alampeggiare.
Nota –Impostazione dell'ora
•Questo procedimento può durareno a7minuti. Se questo non processo non riesce, il simbolo
radio scompare .
•Inquesto lasso di tempo si può effettuareun'impostazione manuale di oraedata.
•L'orologio continua acercareautomaticamente ogni giorno (ore01:00 e05:00) il segnale
DCF.Seiltentativo di ricezione ha successo, l'oraeladata impostate manualmente vengono
sovrascritte.
Attivo
Riuscita -
Il segnale viene ricevuto
49
Page 51

Nota –Ora legale
L‘orasiregola automaticamente sull‘oralegale. Finché èattiva l’oralegale, sul display appare .
Impostazioni manuali
•Tenerepremuto il tasto SET (20) per ca. 3secondi per effettuareinsequenza le seguenti
impostazioni:
•Fuso orario (da -12a+12 oreMEZ)
•Ore
•Minuti
•Anno
•Mese
•Giorno
•Unità della pressione atmosferica (hPaoppureinHg)
•Premereiltasto UP (19) o DOWN (22) per selezionarel’impostazione. Con il tasto SET (20)
confermarel’impostazione.
Nota –Fuso orario
•Ilsegnale DCF può esserericevuto in tutto il mondo ma corrisponde semprealCET vigente in
Germania. Nei paesi con altri fusi orari deve essereconsiderata la variazione dell‘ora.
•Secisitrova aMosca, dove l‘oraèspostata in avanti di 3ore rispetto alla Germania, occorre
impostareilfuso orario +3. Dopo la ricezione del segnale DCF odell‘impostazione manuale,
l‘orologio si porta quindi sempreautomaticamente 3ore avanti.
Sveglia
•Tenerepremuto il tasto ALARM (23) per ca. 3secondi per impostarel’orario della sveglia
visualizzato. Le cifredelle oreiniziano alampeggiare.
•Premereiltasto UP (19) oppureiltasto DOWN (22) per selezionareleoredella sveglia econfermare
la selezione corrispondente premendo il tasto ALARM (23).
•Premereuna volta il tasto ALARM (23) per visualizzarel’orario della sveglia. •Premereancorauna
volta il tasto ALARM (23), per attivarelasveglia.
•Premereuna terza volta il tasto ALARM (23), per disattivarelasveglia.
•Sesiattiva la sveglia, il simbolo corrispondente inizia alampeggiareeviene emesso un segnale
di sveglia.
•Premereitasti UP (22), DOWN (19), SET (20) oppure ALARM (23) per chiuderel’allarme
Avvertenza -Funzione di snooze
•Quando suona la sveglia, premereiltasto SNOOZE (18) oppure LIGHT (21) per attivarela
funzione snooze. Sul display inizia a lampeggiare. La sveglia viene disattivata per 10 minuti,
quindi suona nuovamente.
•Premereitasti UP (19), DOWN (22), SET (20) oppure ALARM (23) per chiuderelafunzione
snooze equindi l’allarme.
Temperatura (Celsius/Fahrenheit)
•Premereiltasto UP (19) per commutaretra °C e°Fdurante la visualizzazione della temperatura.
•Lastazione meteo visualizza temperaturaesterna, temperaturaambiente etrend che fornisce
un’indicazione sui possibile sviluppi nelle oresuccessive.
50
Page 52

Display Tendenza
In aumento
Costante
In diminuzione
Pressione atmosferica (hPA/inHg)
Nota
Così come gli altri valori, anche quelli relativi alla pressione atmosferica hanno una determinata
tolleranza.
•Premereemantenerepremuto il tasto SET (20) in modo che l’orainizi alampeggiare.
•Premereancorauna volta il tasto SET (20) in modo che il display visualizzi hPaoppureinHg.
•Premereiltasto UP (19) oppure DOWN (22) per modicarel’unità in inHg oppurehPa.
•Lastazione meteo fornisce per la pressione atmosferica un trend relativo al comportamento previsto
di questo valore.
6.3 Visualizzazione trend meteo
•Sulla base delle variazioni della pressione atmosferica edei dati raccolti, la stazione base può
effettuareleprevisioni del tempo per le 12-24 oresuccessive.
Nota –previsioni del tempo
Nelle prime orediesercizio non èpossibile effettuareprevisioni del tempo, acausa della mancanza
di dati che vengono memorizzati solo durante il funzionamento.
Le previsioni del tempo elecondizioni meteo attuali vengono rappresentate con quattrosimboli diversi (1):
Simbolo Meteo
Sole
Poco nuvoloso
Nuvoloso
Pioggia
51
Page 53

6.4 Fasi lunari
La stazione base mostralafase lunareattuale con iseguenti simboli:
Luna nuova Luna piena
Falce lunarecrescente Mezza luna
Primo quarto Ultimo quarto calante
Mezza luna crescente Falce lunarecalante
6.5 Retroilluminazione
•Premereiltasto SNOOZE (18) oppure LIGHT (21) in modalità batteria per illuminareildisplay per
10 secondi.
•Premendo ripetutamente itastiSNOOZE (18) e LIGHT (21) con l’alimentazione di rete si può
modicareillivello di luminosità della retroilluminazione oppurelasipuò disattivare.
Nota -Retroilluminazione continua
L'illuminazione permanente del display èpossibile solo quando la stazione base viene fatta
funzionarecon l'alimentatore. Alimentatorenon in dotazione.
7. Cura emanutenzione
Pulireilprodotto unicamente con un panno che non lascia pelucchi eappena inumidito enon ricorrere
adetergenti aggressivi. Fare attenzione anon farepenetrareacqua nel prodotto. Non immergeremai
nell’acqua la stazione meteo ed il sensore. Evitarespruzzi d’acqua.
8. Esclusione di garanzia
Hama GmbH &CoKG non si assume alcuna responsabilità per idanni derivati dal montaggio o
l‘utilizzo scorretto del prodotto, nonché dalla mancata osservanza delle istruzioni per l‘uso e/o delle
indicazioni di sicurezza.
9. Assistenza esupporto
In casodidomande sulprodotto,rivolgersi alla Consulenza prodotto Hama.
Hotline: +499091 502-115(ted./ing.)
Ulterioriinformazionisulsupportosono disponibili qui:
www.hama.com
52
Page 54

10. Dati tecnici
Alimentazione elettrica
Stazione base Stazione di misurazione
4,5 V
3xbatterie AAA
Alimentazione supplementare
possibile tramite alimentatore:
Uscita 4,5 V, min. 100 mA
Con temperatureesterne al di
sotto di 0°C/ 32°F si consigliano
per isensori esterni batterie al
3,0 V
2xbatterie AA
litio di tipo AAA.
Campo di misurazione
Temperatura
Campo di misurazione
Umidità dell’aria
Segnale orario via radio DCF Sì No
Funzione di sveglia Sì No
Max. Numerostazioni di
misurazione
Frequenza 433 MHz
Portata ≤30m
0°C –50°C
32°F –122°F
20 -99% 20 –99%
Sensore176933 supplementare
3
-40°C –+60°C
-40°F -+140°F
53
Page 55

11.
Indicazioni di smaltimento
Informazioni per protezione ambientale:
Dopo l’implementazione della Direttiva Europea 2012/19/EU e2006/66/EU nel sistema
legale nazionale, ci sono le seguenti applicazioni: Le apparecchiatureelettriche ed
elettroniche elebatterienon devono esseresmaltite con iriuti domestici. Iconsumatori
sono obbligati dalla legge arestituireIdispositivi elettrici ed elettronici elebatterie alla
ne della lorovita utile ai punti di raccolta pubblici preposti per questo scopo onei punti
vendita. Dettagli di quanto riportato sono deniti dalle leggi nazionali di ogni stato. Questo simbolo sul
prodotto, sul manuale d’istruzioni osull’imballo indicano che questo prodotto èsoggetto aqueste
regole. Riciclando, ri-utilizzando imateriali outilizzando sotto altraforma ivecchi prodotti/le batterie,
darete un importante contributo alla protezione dell’ambiente.
12.
Dichiarazione di conformità
Il fabbricante, Hama GmbH &CoKG,dichiarache il tipo di apparecchiaturaradio
[00136294, 00176930] èconformealla direttiva 2014/53/UE. Il testo completo della
dichiarazione di conformità UE èdisponibile al seguente indirizzo Internet:
www.hama.com->00136294, 00176930 ->Downloads.
Massima potenza aradiofrequenza trasmessa 4,487 µW
54
Page 56

J Οδηγίες χρήσης
Ρυθμίσεις και Ενδείξεις
AΚεντρική Μονάδα
1. Τάση καιρού
2. Τάση βαρόμετρου
3. Εξωτερική θερμοκρασία καιυγρασία
4. Κανάλι (Channel)
5. Σύμβολο ραδιοσήματος
6. Κατάσταση της μπαταρίας τουαισθητήρα
7. Τάση εξωτερικής θερμοκρασίας
8. Εσωτερική θερμοκρασία καιυγρασία
9. Κατάσταση της μπαταρίας της κεντρικής μονάδας
10. Τά ση της εσωτερικής θερμοκρασίας
11. Ώρα
12. DCF σήμα
13. Καλοκαιρινή ώρα
14. Ημέρα
15. Σύμβολο για το ξυπνητήρι
16. Ημερομηνία
17. Φάση σελήνης
18. Πλήκτρο SNOOZE
=Διακόπτει το ξυπνητήρι
19. Πλήκτρο UP
=Ρυθμίσεις προς τα πάνω /αλλάζει τη θερμοκρασία μεταξύ οC καιοF
20.Πλήκτρο SET
=Ρυθμίσεις/επιβεβαιώνει τη ρύθμιση
21. Πλήκτρο LIGHT
=Ενεργοποιεί τονφωτισμό"
22. Πλήκτρο DOWN
=Ρυθμίσεις προς τα κάτω /αλλάζει το κανάλι
23. Πλήκτρο ALARM
=ένδειξη /ρύθμιση /ενεργοποίηση για το ξυπνητήρι
24. Χώρος για τις μπαταρίες
25. Μονάδα παροχής ρεύματος
BΣταθμός Μέτρησης
26. LED κατάστασης
27. Εσοχήγια κρέμασμα στον τοίχο
28. Χώρος για μπαταρίες
29. Πλήκτρο TX
30. Διακόπτης TX καναλιού"
Σας ευχαριστούμε για την αγορά αυτού τουπροϊόντος. της Hama!
Διαβάστε προσεκτικάτις παρακάτω οδηγίες καιυποδείξεις. Στη συνέχεια, φυλάξτε αυτότοεγχειρίδιο σε
ασφαλές μέρος για μελλοντική χρήση. Σε περίπτωση που πουλήσετε της συσκευή, παραδώστε αυτότο
εγχειρίδιο στον επόμενοαγοραστή.
1. Επεξήγηση Συμβόλων Προειδοποίησης και Σημειώσεων
Προειδοποίηση
Αυτό το σύμβολο χρησιμοποιείται για να υποδείξει οδηγίες ασφαλείας ήναεπιστήσει την προσοχή
σε συγκεκριμένους κινδύνους.
Σημείωση
Αυτό το σύμβολο χρησιμοποιείται για να υποδείξεις, πρόσθετες πληροφορίες ήσημαντικές
σημειώσεις.
55
Page 57

2. Περιεχόμενα Συσκευασίας
•Color Edge Weather Station (Κεντρική Μονάδα /εξωτερικός σταθμός μέτρησης)
•3ΑΑΑ μπαταρίες
•2ΑΑ μπαταρίες
•Αυτές οι οδηγίες χρήσης
3. Σημειώσεις Ασφαλείας
•Τοπροϊόν προορίζεται για προσωπική καιόχι γιαεπαγγελματική χρήση.
•Μην χρησιμοποιείτε το προϊόν εκτός ορίων ρεύματος που δίνονται στις προδιαγραφές.
•Μην χρησιμοποιείτε το προϊόν σε υγρό περιβάλλον καιαποφύγετετις πιτσιλιές.
•Μην χρησιμοποιείτε το προϊόν κοντάσεθερμοπομπούς ήάλλες πηγές θερμότητας ήστονήλιο.
•Μην χρησιμοποιείτε το προϊόν σε μέρη που δεν επιτρέπεται ηχρήση ηλεκτρονικών συσκευών.
•Μην τοποθετείτε το προϊόν κοντάσεπεριοχέςμεπαρεμβολές, μεταλλικάπλαίσια, υπολογιστές, TVs,
κτλ. Οι ηλεκτρονικές συσκευές μπορεί να επηρεάσουν αρνητικάτηλειτουργία του.
•Μην πετάτε το προϊόν καιμην το τραντάζετε.
•Μην ανοίγετε το προϊόν ήμην εξακολουθείτε να το λειτουργείτε αν έχει υποστεί ζη μιές.
•Μην επιχειρείτε επισκευές μόνοι σας. Αφήστε τες σε ειδικούς.
•Κρατήστε τα υλικάτις συσκευασίας μακριά από παιδιά καθώς υπάρχεικίνδυνοςκατάποσης.
•Απορρίψτε τα υλικάτης συσκευασίας σύμφωναμετους τοπικούς κανονισμούς.
•Μην τροποποιείτε το προϊόν με κανέναν τρόπο. Αυτό ακυρώνει την εγγύηση
Προειδοποίηση-Μπαταρίες
•Απομακρύνετε άμεσα τις άδειες μπαταρίες από το προϊόν καιπετάξτε τες.
•Χρησιμοποιείτε μόνομπαταρίες (ή επαναφορτιζόμενες μπαταρίες) ίδιου τύπου.
•Μην μπερδεύετε παλιές καικαινούργιες μπαταρίες ήμπαταρίες άλλου τύπου.
•Ότανεισάγετε μπαταρίες ελέγξτε την σωστή πολικότητα(+και -) καιτοποθετήστε τες αναλόγως.
Αν δεν το κάνετε μπορεί να προκληθεί διαρροή ήακόμη καιέκρηξη.
•Μην υπερφορτίζετε τις μπαταρίες
•Κρατήστε τις μπαταρίες μακριά από παιδιά
•Μην βραχυκυκλώνετε τις μπαταρίες/επαναφορτιζόμενες μπαταρίες καικρατήστε τες μακριά από
ακάλυπταμεταλλικάαντικείμενα.
•Ότανηεξωτερική θερμοκρασία είναι κάτω από 0οC/32οF μπορεί να μειώσει τη λειτουργία της
μπαταρίας τουαισθητήρα καιναπροκαλέσει ανεπάρκεια στην ασύρματη μετάδοση.
•Οιδυσκολίες στη λήψη καιμετάδοσητου σήματος μπορεί να προκαλέσουν μείωση της
μπαταρίας.
4. Ξεκινώντας
4.1Εισάγοντας τις μπαταρίες
Σημείωση
Πριν τη χρήση, βεβαιωθείτε ότι έχετε βάλει τις μπαταρίες στον σταθμό μέτρησης καιτην κεντρική
μονάδα
Σταθμός Μέτρησης
•Ανοίξτε το κάλυμμα για τις μπαταρίες (28) καιβγάλτε τονδιακόπτη επαφής
•Έπειτακλείστε το κάλυμμα των μπαταριών
•ΤοLED ανάβει.
56
Page 58

Κεντρική Μονάδα
•Ανοίξτε το κάλυμμα για τις μπαταρίες (24) καιμετακινήστε τονδιακόπτη επαφής
•Έπειτακλείστε το κάλυμμα
4.2 Αντικαθιστώντας τις μπαταρίες
Σημείωση –Αντικαθιστώντας τις μπαταρίες
•Σημειώστε ότι ησυσκευή θα πρέπει να επανασυγχρονίζεται κάθε φορά που θα αλλάζετε τις
μπαταρίες στην κεντρική μονάδα ήτον σταθμό μέτρησης
•Για να το κάνετε αυτόβγάλτε τις μπαταρίες από τονάλλον σταθμό καιβάλτετες ξανάήαλλάξτε
τες όπως προβλέπεται.
Σταθμός Μέτρησης
•Αντοσύμβολο εμφανιστεί (δίπλααπό το “OUTDOOR”) αντικαταστήστε τις δυο ΑΑ μπαταρίες του
σταθμού μέτρησης με δυο καινούργιες.
•Ανοίξτε το κάλυμμα για τις μπαταρίες (28) βγάλτε τες, πετάξτε τες όπως προβλέπεται καιεισάγετε
δυο νέες ΑΑ μπαταρίες με της σωστή πολικότητα. Έπειτακλείστε το κάλυμμα (28).
Κεντρική Μονάδα
•Αντοσύμβολο εμφανιστεί (δίπλααπό το “INDOOR”) αντικαταστήστε τις τρεις ΑΑΑ μπαταρίες
της κεντρικής μονάδας με καινούργιες.
•Ανοίξτε το κάλυμμα για τις μπαταρίες (24) βγάλτε τες, πετάξτε τες όπως προβλέπεται καιεισάγετε
τρεις νέες ΑΑΑ μπαταρίες με της σωστή πολικότητα. Έπειτακλείστε το κάλυμμα (24).
5. Εγκατάσταση
Σημείωση –Εγκατάσταση
•Προτείνεται πρώτανατοποθετήσετε την κεντρική μονάδα καιτον σταθμό μέτρησης στις
επιθυμητές θέσεις χωρίς να τις εγκαταστήσετε καινακάνετε όλες τις ρυθμίσεις που
περιγράφονται στην παράγραφο 6. Λειτουργία.
•Εγκαταστήστε το σταθμό μόνοότανέχουν γίνει όλες οι απαραίτητες ρυθμίσεις καιέχειμπει σε
σταθερή ασύρματη σύνδεση.
Σημείωση
•Τοεύρος της ασύρματης μετάδοσης μεταξύ κεντρικής μονάδας καισταθμού μέτρησης είναι μέχρι
30m σε ανοιχτόχώρο
•Πριν την εγκατάσταση βεβαιωθείτε ότι δεν επηρεάζεται ημετάδοση από παρεμβολές ήεμπόδια
όπως κτήρια, δέντρα, οχήματα, γραμμές ρεύματος
•Για να αποφύγετε παρεμβολές στη μετάδοση, μην λειτουργείτε κοντινές ασύρματες συσκευές
στην ίδια συχνότητα(433MHz)
•Πριν την τελική εγκατάσταση, βεβαιωθείτε ότι γίνεται επαρκής λήψη τουσήματος μεταξύ των
τοποθεσιών που έχουν εγκατασταθεί οι συσκευές.
•Όταντοποθετείτε τονσταθμό μέτρησης σιγουρευτείτε ότι προστατεύεται από το φως τουήλιου
καιτηβροχή.
•Ταδιεθνή πρότυπα για το ύψος της μέτρησης της θερμοκρασίας τουαέρα είναι 1.25m (4 πόδια)
πάνω από το έδαφος.
57
Page 59

Προειδοποίηση
•Αγοράστε κατάλληλαυλικά εγκατάστασης από ειδικάμαγαζιά.
•Σιγουρευτείτε ότι δεν έχουν τοποθετηθεί ελλαττωματικάήκατεστραμμέναυλικά.
•Μην ασκείτε πίεσηκατάτηδιάρκειατης εγκατάστασης. Αυτό μπορείναπροκαλέσει ζημιά στη
συσκευή.
•Πριν την εγκατάσταση βεβαιωθείτε ότιοεπιλεγμένος τοίχος είναι κατάλληλος γιατοβάρος της
συσκευής καιότι δεν περνούν ηλεκτρικές γραμμές, γραμμές νερού, αερίου ήάλλες γραμμές
από το σημείο.
5.1 Κεντρική Μονάδα
•Χρησιμοποιήστε τη βάσηγια να τοποθετήσετε την κεντρικήμονάδασεμια επίπεδηεπιφάνεια.
5.2 Σταθμός Μέτρησης
•Μπορείτεεπίσης να τοποθετήσετε το σταθμό μέτρησης σε μιαεπίπεδη επιφάνεια
•Προτείνεταινατοποθετήσετετοσταθμόμέτρησης με ασφάλεια σε έναν τοίχοχρησιμοποιώντας
την εσοχή(27).
•Τοποθετήστε μια βίδαένα καρφί, κτλ στον τοίχοτης επιλογής σας.
•Κρεμάστε το σταθμό μέτρησης απότην εσοχή(27) που προορίζεται γι’αυτότοσκοπό.
6. Λειτουργία
6.1 Σύνδεση στον Σταθμό Μέτρησης
•Ότανοιμπαταρίες μπουν ηκεντρική μονάδα αυτόματααναζητά για σύνδεση με το σταθμό μέτρησης
καιτοραδιαοσήμα.
Σημείωση
•Τααντίστοιχασύμβολα αναβοσβήνουν κατά τις προσπάθειες σύνδεσης: σύνδεση με το
σταθμό μέτρησης, σύνδεσημετοDCF σήμα
•Μην πατάτε κανένακουμπί κατά τη διάρκεια τουστησίματος. Αν γίνει αυτόμπορεί να μη γίνει
σωστή σύνδεση καιοιτιμές να μην μεταδοθούνσωστά.
•Μην αλλάζετε την τοποθεσία της κεντρικήςμονάδας κατά τη διάρκεια της αναζήτησης.
•Ηδιαδικασία έχει ολοκληρωθεί όταν τα δεδομένατων εσωτερικών (8) καιεξωτερικών (3)
μετρήσεωνεμφανιστούν στην οθόνη.
6.2 Βασικές καιΧειροκίνητες Ρυθμίσεις
Αυτόματη ρύθμιση χρησιμοποιώνταςτοDCF σήμα
•Ότανηκεντρική μονάδα ανοίξει γιαπρώτηφοράκα ιησύνδεσημεταξύ μονάδας καισταθμού
μέτρησης γίνει με επιτυχία το ρολόιαυτόματαθααναζητήσειγια το DCF σήμα. Κατά τη διάρκεια
της αναζήτησης το σύμβολο τουραδιοσήματος αναβοσβήνει.
Ένδειξη Αναζήτηση για το DCF Σήμα
Ένδειξη αναβοσβήνει. Δεν είναι δυνατή η
χειροκίνητη καταχώρηση
Σταθερή Ένδειξη
Καμία ΈνδειξηΑδρανής
58
Ενεργή
Επιτυχής –
Έχει γίνει λήψη τουσήματος
Page 60

•Ανοσταθμός εξακολουθεί να μην λαμβάνει σήμα, πατήστε καικρατήστε το πλήκτρο UP (19) για
περίπου 3δευτερόλεπταγια να ξεκινήσει ηχειροκίνητη αναζήτηση τουDCF σήματος. Το σύμβολο
τουραδιοσήματος αρχίζει να αναβοσβήνει .
Σημείωση -Ρυθμίσεις Ώρας
•Ηδιαδικασία αναζήτησης μπορεί να πάρει μέχρι 7λεπτά. Αν αποτύχει το ραδιοσήμα
εξαφανίζεται.
•Στο μεταξύ όμως μπορείτε να βάλετε την ώρα καιτην ημερομηνίαχειροκίνητα.
•Τορολόι αυτόματαεξακολουθεί να αναζητάει το DCF σήμα σε καθημερινή βάση (στις 1πμ
και5πμ) αν γίνει επιτυχής λήψη τουσήματος ηρυθμισμένη χειροκίνηταώρα καιημέρα θα
αντικατασταθούν.
Σημείωση -Καλοκαιρινή Ώρα
Το ρολόιαυτόματα μπαίνει σε καλοκαιρινή ώρα. Το σύμβολο εμφανίζεται στην οθόνη όσοη
καλοκαιρινή ώρα είναι ενεργοποιημένη..
Χειροκίνητες Ρυθμίσεις
•Πατήστε καικρατήστε το πλήκτρο SET (20) για περίπου 3δευτερόλεπταγια να κάνετε τις ακόλουθες
ρυθμίσεις τη μια μετάτην άλλη:
•Time zone (Ζώνη ώρας) (από -1 2έως +12 ώρες)
•Hour (Ώρα)
•Minute (Λεπτά)
•Year (Χρονολογία)
•Month (Μήνας)
•Day (Ημέρα)
•Μονάδα ατμοσφαιρικής πίεσης (hPaήinHg)
•Πατήστε το πλήκτρο UP (19) ήτοDOWN (22) για να κάνετε τις ρυθμίσεις που θέλετε. Πατήστε το
πλήκτρο SET (20) για να επιβεβαιώστε την επιλογή σας.
Σημείωση -Ζώνη Ώρας
•ToDCF σήμα μπορεί να ληφθεί σε μεγάλες αποστάσεις αλλάπάνταμεταδίδει την τρέχουσα ώρα
Κεντρικής Ευρώπης στη Γερμανία. Βεβαιωθείτε ότι λαμβάνετε υπόψιν σας τη διαφορά ώρας σε
χώρες που βρίσκονται σε άλλη ζώ νη ώρας.
•Ανείστεστη Μόσχα, ηώρα είναι 3ώρες αργότερα από την ώρα Γε ρμανίας. Αυτό σημαίνει ότι
πρέπει να βάλετε το +3 στη ζώνη ώρας. Το ρολόιτότε μπαίνει αυτόματατρεις ώρες μπροστά
αφού λάβει το DCF σήμα ήσύμφωναμετην ώρα που έχει μπει χειροκίνητα.
Ξυπνητήρι
•Πατήστε το πλήκτρο ALARM (23) για περίπου 3δευτερόλεπταγια να ρυθμίσετε την ώρα για το
ξυπνητήρι. Ηένδειξη της ώρας αρχίζει να αναβοσβήνει.
•Πατήστε το πλήκτρο UP (19) ήτοDOWN (22) για να επιλέξετε την ώρα για το ξυπνητήρι και
επιβεβαιώστε την επιλογή σας πατώντας το πλήκτρο ALARM (23).
•Επαναλάβετε τη διαδικασία για να βάλετε τα λεπτάγια το ξυπνητήρι.
•Πατήστε το πλήκτρο ALARM (23) μια φορά για να δείτε την ώρα για το ξυπνητήρι. Πατήστε άλλη μια
φορά το ALARM (23) για να το ενεργοποιήσετε.
•Πατήστε το πλήκτρο ALARMA (23) τρίτη φορά για απενεργοποίηση.
•Όταντοξυπνητήρι είναι ενεργό το σύμβολό τουεμφανίζεται καιμια ειδοποίηση ακούγεται.
•Πατήστε UP (19), DOWN (22), SET (20) ή ALARM για να σταματήσει.
59
Page 61

Σημείωση –Λειτουργία Snooze
•Ενώ το ξυπνητήρι χτυπάει, πατήστε το SNOOZE (18) ήτοLIGHT (21) για να ενεργοποιήσετε
τη λειτουργία snooze. Το εικονίδιο αρχίζει να αναβοσβήνει στην οθόνη. Το ξυπνητήρι θα
σταματήσει για περίπου 10 λεπτάκιέπειταθαξεκινήσει πάλι.
••Πατήστε UP (19), DOWN (22), SET (20) ή ALARM για να σταματήσετε τη λειτουργία snooze
καιτοξυπνητήρι.
Θερμοκρασία (Celsius/Fahrenheit)
•Πατήστε το πλήκτρο UP (19) για να αλλάξετε την ένδειξη της θερμοκρασίας από oC σε oF.
•Ομετεωρολογικός σταθμός δείχνει την τάση πώς οι τιμές της εσωτερικής καιεξωτερικής
θερμοκρασίας είναι πιθανόν να κυμανθούν τις επόμενες ώρες.
Ένδειξη Τάση
Αυξανόμενη
Σταθερή
Μειωμένη
Ατμοσφαιρική Πίεση (hPA/inHg)
Σημείωση
Όπως όλες οι τιμές καιημέτρηση της ατμοσφαιρικής πίεσης είναι αντικείμενοορισμένης ανοχής
•Πατήστε καικρατήστε το πλήκτρο SET (20) μέχρι ηώρανα αρχίσει να αναβοσβήνει.
•Πατήστε το πλήκτρο SET (20) επαναλαμβανόμεναμέχρι το hPAήτο inHG εμφανιστεί στην οθόνη.
•Πατήστε το πλήκτρο UP (19) ήτοDOWN (22) για να αλλάξετε τη μέτρηση μεταξύ inHG καιhPA.
•Ομετεωρολογικός σταθμός δίνει μια τρέχουσα τάση για την ατμοσφαιρική πίεση.
6.3 Ένδειξη Τάσης του Καιρού
•Βασιζόμενος σε αλλαγές της ατμοσφαιρικής πίεσης καιτωνδεδομένων που έχουν αποθηκευτεί, ο
μετεωρολογικός σταθμός προβλέπει τονκαιρό για τις επόμενες 12 με 24 ώρες.
Σημείωση –Ένδειξη Τάσης τουΚαιρού
Ηπρόγνωση τουκαιρού δεν είναι διαθέσιμη τις πρώτες ώρες της λειτουργίας της συσκευής επειδή
απαιτούνται δεδομέναπου συλλέγονται κατά τη λειτουργία.
Ητάση τουκαιρού καιοτρέχον καιρός εμφανίζονται με τέσσερα διαφορετικάσύμβολα (1).
Σύμβολο Καιρός
Αίθριος
60
Page 62

Ελαφρώς Νεφελώδης
Νεφελώδηςt
Βροχερός
6.4 Φάση Σελήνης
Ηκεντρική μονάδα δείχνει την τρέχουσα φάση σελήνης με τα ακόλουθα σύμβολα:
Νέα Σελήνη Πανσέληνος
Φθίνουσα Σελήνη Φθίνουσα Πανσέληνος
Ημισέληνο(ΠρώτοΤέταρτο) Τελευταίο Τέταρτο
Αύξουσα Αμφίκυρτος
6.5 Φωτισμός
•Ανπατήσετε το πλήκτρο SNOOZE (18) ήτοLIGHT (21) ηοθόνη θα ανάψει για περίπου 10
δευτερόλεπτα.
•Μεεπαναλαμβανόμενοπάτημα του SNOOZE (18) ήτου LIGHT (21) σε κύρια λειτουργία, μπορείτε
να ορίσετε την ένταση τουφωτισμού ήνατον κλείσετε.
Σημείωση -ΜόνιμοςΦωτισμός
Ομόνιμος φωτισμός είναι πιθανός μόνοανηκεντρική μονάδα είναι συνδεδεμένη με το ρεύμα. Η
μονάδα παροχής ρεύματος δεν συμπεριλαμβάνεται στη συσκευασία.
7. Φροντίδα και Καθαρισμός
Καθαρίστε το προϊόν μόνομεέναελαφρώς βρεγμένο, χωρίς χνούδιπανί καιμην χρησιμοποιείτε
επιθετικάκαθαριστικά.Βεβαιωθείτε ότι το νερό δεν εισχωρεί στοπροϊόν.
8. Εγγύηση
ΗHama GmbH &CoKG δεν λαμβάνει καμία ευθύνη καιδεν παρέχει εγγύηση για ζη μιές που
προκλήθηκαν από ακατάλληλη τοποθέτηση ήχρήση ήμητήρηση των οδηγιών λειτουργίας ήτων
σημειώσεων ασφαλείας.
9. Service και Υποστήριξη
Παρακαλούμε επικοινωνήστε με το τμήμα εξυπηρέτησης της Hama αν έχετε ερωτήσεις για το προϊόν.
Γραμμή: +49 9091502-115 (Γερμανικά/Αγγλικά)
Επιπλέον πληροφορίες υποστήριξης μπορείτε να βρείτε εδώ:
www.hama.com
Φθίνουσα Σελήνη
61
Page 63

10. Τεχνικά Χαρακτηριστικά
Παροχή ρεύματος
Κεντρική Μονάδα Σταθμός Μέτρησης
3.0 V, 2xAA μπαταρίες
4.5 V,
3χ ΑΑΑ μπαταρίες
Επιπλέον παροχή ρεύματος
μέσω μονάδαςείναι πιθανή: 4.5V
minimum 100mA
Προτείνεται ηχρήση ΑΑ
μπαταριών λιθίου για τον
εξωτερικόαισθητήρα, όταν η
εξωτερική θερμοκρασία είναι κάτω
από 0oC/32oF
Εύρος μέτρησης
Θερμοκρασίας
Εύρος μέτρησης
Υγρασίας
DCF ραδιοελεγχόμενορολόι Ναι Όχι
Λειτουργίες Ειδοποίησης Ναι Όχι
Μέγιστος αριθμός Σταθμών
Μέτρησης
Συχνότητα433 MHz
Εμβέλεια ≤30
11. Πληροφορίες Ανακύκλωσης
Σημείωση για την προστασία περιβάλλοντος
Απότηστιγμή που ηΕυρωπαϊκή Οδηγία 2012/19/EU και2006/66/EE ενσωματώνεται στοεθνικό
δίκαιο ισχύουν τα εξής: Οι ηλεκτρικές καιοιηλεκτρονικές συσκευές καθώς καιοιμπαταρίες δεν
επιτρέπεται να πετιούνται σταοικιακάαπορρίμματα. Οι καταναλωτές υποχρεούνται από τοννόμο
να επιστρέφουν τις ηλεκτρικές καιηλεκτρονικέςσυσκευές καθώς καιτις μπαταρίες στοτέλος της
ζωής τους σταδημόσια σημεία περισυλλογής που έχουν δημιουργηθεί γι’ αυτότοσκοπό ήστα
σημεία πώλησης. Οι λεπτομέρειες ρυθμίζονται στη σχετική νομοθεσία. Το σύμβολο πάνω στοπροϊόν, στο
εγχειρίδιο χρήσης ήστη συσκευασία παραπέμπει σε αυτές τις διατάξεις. Με την ανακύκλωση,
επαναχρησιμοποίηση των υλικών ήμεάλλες μορφές χρησιμοποίησης παλιών συσκευών /Μπαταριών
συνεισφέρετε σημαντικάστην προστασία τουπεριβάλλοντος. Στη Γε ρμανία ισχύουν αντίστοιχαοιπαραπάνω
κανόνες απόρριψης σύμφωναμετον κανονισμό για μπαταρίες καισυσσωρευτές.
12. Δήλωση συμμόρφωσης
Με την παρούσα ο/η Hama GmbH &CoKG,δηλώνει ότι οραδιοεξοπλισμός [00136294,
00176930] πληροί την οδηγία 2014/53/ΕΕ. Το πλήρες κείμενοτης δήλωσης
συμμόρφωσης ΕΕ διατίθεται στην ακόλουθη ιστοσελίδα στοδιαδίκτυο:
www.hama.com-> 00136294, 00176930 -> Downloads.
Μέγιαστη Ισχύς ραδιοσυχνοτήτων που μεταδίδεται 4,487 µW
0oC-50 oC
32oF-122 oF
20-99% 20 –99%
Επιπλέον Σταθμοί 176933
3
-40oC -+60 oC
-40oF -+140 oF
62
Page 64

P Instrukcja obsługi
Elementy obsługi isygnalizacji
AStacja bazowa
1. Wskaźnik tendencji pogodowych
2. Wskaźnik tendencji ciśnienia
3. Temperaturaiwilgotność powietrza na zewnątrz
4. Wskaźnik kanałów
5. Symbol czujnika radiowego
6. Poziom naładowania baterii czujnika
7. Wskaźnik tendencji temperatury zewnętrznej
8. Temperaturaiwilgotność powietrza wewnątrz
9. Poziom naładowania stacji pogodowej
10. Wskaźnik tendencji temperatury wewnętrznej
11. Godzina
12. Symbol sygnału radiowego DCF
13. Czas letni
14. Dzień tygodnia
15. Symbol alarmowy
16. Data
17. Faza księżyca
18. Przycisk drzemki SNOOZE
=przerwanie sygnału budzenia
19. Przycisk UP
=zwiększanie ustawionej wartości/przełączanie między jednostkami miary temperatury °C i°F
20. Przycisk SET
=ustawienia/potwierdzanie ustawionej wartości
21. Przycisk LIGHT
=włączenie podświetlenia
22. Przycisk DOWN
=zwiększanie ustawionej wartości/zmiana kanału
23. Przycisk ALARM
=wyświetlanie/ustawianie/włączanie trybu alarmowego
24. Schowek na baterie
25. Wejście na zasilacz
BStacja pomiarowa
26. Dioda LED stanu
27. Otwór do mocowania na ścianie
28. Schowek na baterie
29. Przycisk TX
30. Suwak TX do zmiany kanału
Dziękujemy za zakup naszego produktu!
Przed pierwszym użyciem należy dokładnie przeczytać instrukcję obsługi. Instrukcję należy przechować,
gdyż może być jeszcze potrzebna.
1. Objaśnienie symboli ostrzegawczych iwskazówek
Ostrzeżenie
Używane wcelu zwrócenia uwagi na szczególne niebezpieczeństwo lub ryzyko.
Wskazówki
Używane wcelu zwrócenia uwagi na szczególnie przydatne informacje.
63
Page 65

2. Zawartość opakowania
•Stacja pogodowa Color Edge
(stacja bazowa do stosowania wewnątrz /stacjapomiarowa do stosowania na zewnątrz)
•3baterie AAA
•2baterie AA
•niniejsza instrukcja obsługi
3. Wskazówki bezpieczeństwa
•Produkt jest przeznaczony do prywatnego, niekomercyjnego użytku domowego.
•Nie stosować produktu poza zakresem mocy podanym wdanych technicznych.
•Nie stosować produktu wwilgotnym otoczeniu ichronić go przed bryzgami wody.
•Nie używać produktu wbezpośredniej bliskości ogrzewania, innych źródeł ciepła ani nie wystawiać
go na bezpośrednie promieniowanie słoneczne.
•Nie używać produktu wmiejscach, gdzie nie jest dozwolone stosowanie urządzeń elektronicznych.
•Nie ustawiać produktu wpobliżu miejsc wywołujących zakłócenia, metalowych ram, komputerów,
telewizorów itp. Urządzenia elektroniczne ifutryny okienne wpływają negatywnie na działanie
produktu.
•Chronić produkt przed upadkiem isilnymi wstrząsami.
•Nie otwierać produktu inie używać go, gdy jest uszkodzony.
•Nie próbować naprawiać samodzielnie urządzenia. Prace serwisowe zlecać wykwalikowanemu
personelowi fachowemu.
•Materiały opakowaniowe trzymać koniecznie zdala od dzieci, istnieje niebezpieczeństwo uduszenia.
•Materiały opakowaniowe należy natychmiast poddać utylizacji zgodnie zobowiązującymi przepisami
miejscowymi.
•Nie modykować urządzenia. Prowadzi to do utraty wszelkich roszczeń ztytułu gwarancji.
Ostrzeżenie -baterie
•Natychmiast usunąć zproduktu zużyte baterie ipoddać je utylizacji.
•Używać wyłącznie akumulatorów (lub baterii) odpowiadających podanemu typowi.
•Nie mieszać starych inowych baterii ani baterii różnych typów lub producentów.
•Wkładając akumulatory,zwrócić koniecznie uwagę na właściwe podłączenie biegunów (znak +i
-). Nieprzestrzeganie grozi wyciekiem lub wybuchem akumulatora.
•Nie ładować baterii, istnieje niebezpieczeństwo wybuchu.
•Przechowywać baterie poza zasięgiem dzieci.
•Nie zwierać akumulatorów /baterii oraz trzymać je zdala od odkrytych przedmiotów
metalowych.
•Temperatury zewnętrzne poniżej 0°C/32°F mogą wznacznym stopniu osłabić działanie baterii i
spowodować utrudnienia wtransmisji radiowej.
•Zmniejszający się poziom naładowania baterii może prowadzić do utrudnień wnadawaniu i
odbieraniu oraz mieć negatywny wpływ na czytelność wyświetlacza.
4. Uruchamianie
4.1 Wkładanie baterii /zasilanie elektryczne
Wskazówka
Przed uruchomieniem należy pamiętać, aby zawsze włożyć najpierw baterie do stacji pomiarowej,
anastępnie do stacji bazowej.
Stacja pomiarowa
•Otworzyć schowek na baterie (28) iusunąćprzerywacz stykowy.
•Następnie zamknąć pokrywę schowka na baterie.
•Zaświeci się dioda LED stanu.
Stacja bazowa
•Otworzyć schowek na baterie (24) iusunąćprzerywacz stykowy.
•Następnie zamknąć pokrywę schowka na baterie.
64
Page 66

4.2 Wymiana baterii
Wskazówka –wymiana baterii
•Należy pamiętać, że po każdej wymianie baterii wstacji pomiarowej lub bazowej konieczna jest
ponowna synchronizacja obu stacji.
•Wtym celu wyjąć baterie zdrugiej stacji iponownie je włożyć lub wrazie potrzeby także
wymienić.
Stacja pomiarowa
•Jeżeli wyświetlany jest symbol (obok „OUTDOOR”), należy wymienić 2baterie typu AA stacji
pomiarowej na 2nowe baterie.
•Otworzyć schowek na baterie (28), wyjąć izutylizować zużyte baterie iwłożyć dwie nowe baterie
typu AA zgodnie zoznaczeniem biegunów.Następnie zamknąć pokrywę schowka na baterie.
Stacja bazowa
•Jeżeli wyświetlany jest symbol (obok „INDDOR”), należy wymienić 3baterie typu AAA stacji
bazowej na nowe.
•Otworzyć schowek na baterie (24), wyjąć izutylizować zużyte baterie iwłożyć trzy nowe baterie typu
AAA zgodnie zoznaczeniem biegunów.Następnie zamknąć pokrywę schowka na baterie (24).
5. Montaż
Wskazówka -montaż
•Zaleca się ustawić najpierw wwybranym miejscu stację bazową istację pomiarową bez montażu
iskongurować wszystkie ustawienia –jak opisano wpunkcie 6. Obsługa.
•Zamontować stacje dopieropoprawidłowej konguracji ustawień iznalezieniu stabilnej
łączności radiowej.
Wskazówka
•Zasięg transmisji radiowej między stacją pomiarową astacją bazową wynosi na otwartym
terenie maks. 30 m.
•Przed montażem zwrócić uwagę, aby żadne sygnały zakłócające lub przeszkody,takie jak
budynki, drzewa, pojazdy,linie wysokiego napięcia itp., nie wpływały na transmisję radiową.
•Wcelu uniknięcia zakłóceń wtransmisji nie używać pobliskich urządzeń bezprzewodowych na
tej samej częstotliwości (433 MHz).
•Przed ostatecznym montażem upewnić się, że między wybranymi miejscami ustawienia
występuje dostateczny odbiór radiowy.
•Podczas montażu stacji pomiarowej należy pamiętać, aby zamontować ją wmiejscu
zabezpieczonym przed bezpośrednim promieniowaniem słonecznym ideszczem.
•Międzynarodowa standardowa wysokość dla pomiaru temperatury powietrza wynosi 1,25 m(4
stopy) nad ziemią.
Ostrzeżenie
•Nabyć wspecjalistycznym sklepie odpowiednie materiały montażowe do montażu na
przewidzianej ścianie.
•Sprawdzić, czy nie są montowane wadliwe bądź uszkodzone części.
•Podczas montażu nigdy nie wywierać nadmiernej siły.Może to spowodować uszkodzenie
produktu.
•Przed montażem sprawdzić, czy przewidziana ściana jest odporna na przyjęcie ciężaru
mocowanego produktu, iupewnić się, że wmiejscu montażu na ścianie nie są zainstalowane
przewody elektryczne, wodne, gazowe bądź inne przewody.
65
Page 67

5.1 Stacja bazowa
•Zapomocą podpórki ustawić stację bazową na równym podłożu.
5.2 Stacja pomiarowa
•Stację pomiarową można także ustawić na równym podłożu na zewnątrz.
•Zaleca się stabilne itrwałe zamontowanie stacji pomiarowej na ścianie zewnętrznej za pomocą
otworu (27).
•Zamocować kołki rozporowe, śruby,gwoździe itp. na ścianie, na której planowany jest montaż.
•Naprzeznaczonym do tego celu otworze (27) zawiesić stację bazową /stację pomiarową.
6. Obsługa
6.1 Połączenie ze stacją pomiarową
•Powłożeniubaterii stacja bazowa automatycznie wyszukuje połączenie ze stacją pomiarową i
sygnałem radiowym.
Wskazówka
•Podczas prób nawiązania połączenia świecą się odpowiednie symbole:
pomiarową, połączenie zsygnałem DCF
•Nie naciskać wtym czasie żadnych przycisków! Wprzeciwnym razie mogą wystąpić
niedokładności ibłędy wwartościach iich transmisji.
•Podczas aktywnych procesów wyszukiwania nie zmieniać miejsca ustawienia stacji bazowej.
•Proces jest zakończony,gdy wyświetlane są zmierzone dane dla pomieszczenia (8) inazewnątrz
(3).
6.2 Ustawienia podstawowe ikonfiguracja ręczna
Automatyczne ustawianie wg sygnału czasowego DCF
•Popierwszymwłączeniu stacji bazowej iudanej transmisji sygnałów między stacją bazową istacją
pomiarową, zegar automatycznie rozpoczyna wyszukiwanie radiowego sygnału czasowego DCF.
Podczas wyszukiwania symbol sygnału radiowego
Wskaźnik Wyszukiwanie sygnału czasowego DCF
zaczyna migać.
połączenie ze stacją
Migający wskaźnik
Brak możliwości ręcznego wprowadzania!
Wskaźnik świecący światłem stałym
Brak wskaźnika Nieaktywne
•Jeżeli sygnał ponownie nie zostanie odebrany,nacisnąć itrzymać wciśnięty przez ok. 3sekundy
przycisk UP (19), aby rozpocząć ręczne wyszukiwanie radiowego sygnału czasowego DCF.Zaczyna
migać symbol sygnału radiowego .
Wskazówka –ustawianie czasu
•Proces wyszukiwania może potrwać do 7minut. Jeśli nie zostanie pomyślnie zakończony,
wówczas gaśnie symbol radiowy .
•Wtym czasie można ręcznie ustawić godzinę idatę.
•Zegar będzie codziennie (o godz. 01:00 i05:00) automatycznie szukał sygnału DCF.Po
pomyślnym odbiorze sygnału ręcznie ustawiona godzina idata są nadpisywane.
Proces powiódł się –sygnał jest odbierany
Aktywne
66
Page 68

Wskazówka –czas letni
Czas zegarajest automatycznie przestawiany na czas letni. Gdy czas letni jest aktywny,naekranie
wyświetlany jest symbol
Ustawienia ręczne
•Nacisnąć itrzymać wciśnięty przez ok. 3sekundy przycisk SET (20) ,aby po kolei dokonać
poniższych ustawień:
•Strefa czasowa (od -12–+12 godzin CET)
•Godzina
•Minuta
•Rok
•Miesiąc
•Dzień
•Jednostka ciśnienia powietrza (hPalub inHg)
Aby wybrać ustawienie, wcisnąć przycisk UP (19) lub DOWN (22). Przyciskiem SET (20) należy
potwierdzić wybór.
Wskazówka –strefa czasowa
•Sygnał czasowy DCF może być odbierany na bardzo rozległym obszarze, jednakże odpowiada
on zawsze stree czasu środkowoeuropejskiego (CET) obowiązującego wNiemczech. Należy
pamiętać, aby wkrajach oinnej stree czasowej uwzględnić przesunięcie czasowe.
•Np. wMoskwie jest 3godziny później niż wNiemczech.Przy stree czasowej należy wtedy
ustawić wartość +3. Po odbiorze sygnału czasowego DCF lub wstosunku do ręcznie
ustawionego czasu zegara, zegar ustawia się wtedy zawsze automatycznie na godzinę o3
godziny późniejszą.
Budzik
•Nacisnąć itrzymać wciśnięty przez ok. 3sekundy przycisk ALARM (23), aby ustawić czas budzenia
wyświetlonego alarmu. Zaczyna migać wskazanie godzin.
•Nacisnąć przycisk UP (19) lub DOWN (22), aby wybrać godzinę czasu budzenia, ipotwierdzić wybór
naciskając przycisk ALARM (23).
•Powtórzyć powyższe czynności, aby ustawić minuty.
•Pojednokrotnym wciśnięciu przycisku ALARM (23) wyświetlony zostanie czas budzika. Ponowne
wciśnięcie przycisku ALARM (23) powoduje aktywowanie alarmu.
•Wciśnięcie przycisku ALARM (23) po raztrzeci powoduje dezaktywację alarmu.
•Włączenie budzika sygnalizuje pojawienie się symbolu alarmu irozlegający się sygnał akustyczny.
•Wcelu zakończenia alarmu wcisnąć przycisk UP (19), DOWN (22), SET (20) lub ALARM (23).
Wskazówka –funkcja drzemki
•Wtrakcie sygnału alarmowego nacisnąć przycisk SNOOZE (18) lub LIGHT (21), aby włączyć
funkcję drzemki. Na ekranie zaczyna migać .Sygnał budzenia jest przerywany na ok. 10
minut, anastępnie ponownie wyzwalany.
•Aby zakończyć funkcję drzemki itym samym funkcję alarmową, nacisnąć przycisk UP (19),
DOWN,(22), SET (20) lub ALARM (23).
Temperatura (Celsjusza/Fahrenheita)
•Nacisnąć przycisk UP (19) ,aby przełączyć między jednostkami miary temperatury °C i°F.
•Stacja pogodowa wskazuje tendencję prawdopodobnych zmian temperatury na zewnątrz iwewnątrz
wciągu najbliższych godzin.
.
67
Page 69

Wskaźnik Tendencja
Rosnąca
Stała
Opadająca
Ciśnienie powietrza (hPa/inHg)
Wskazówka
•Tak jak wszystkie wartości pomiarowe, również ciśnienie powietrza podlega obowiązującej
tolerancji pomiaru.
•Wcisnąć iprzytrzymać przycisk SET (20), aż godzina zacznie migać.
•Wcisnąć ponownie przycisk SET (20), aż na wyświetlaczu pojawi się hPalub inHg.
•Wcisnąć przycisk UP (19) lub DOWN (22), aby zmienić jednostkę na inHg lub hPa.
•Stacja pogodowa podaje tendencję ciśnienia powietrza wskazującaktualne, przybliżone zachowaniewartości.
6.3 Wskaźnik tendencji pogodowych
•Napodstawie wahań ciśnienia atmosferycznego izapisanych danych stacja bazowa podaje
prognozę pogody na najbliższe 12-24 godziny.b
Wskazówka –prognoza pogody
Wpierwszych godzinach użytkowania nie jest możliwe prognozowanie pogody ze względu na
brakujące dane, któresązapisywane dopieropopewnym czasie
Wskaźnik tendencji pogodowych iaktualny stan pogody przedstawiane są za pomocą czterech różnych
symboli (1):
Symbol Pogoda
Słonecznie
Lekkie zachmurzenie
Pochmurnie
Deszczowo
68
Page 70

6.4 Fazy księżyca
Stacja bazowa wskazuje aktualną fazę księżyca za pomocą następujących symboli:
Nów Przybywaj. Pełnia księżyca
Przybywaj. półksiężyc Ubywaj. półksiężyc
Pierwsza kwadra Ostatnia kwadra
półksiężyc ubywaj. półksiężyc
6.5 Podświetlenie ekranu
•Naciśnięcie przycisku SNOOZE (18) lub LIGHT (21) przy zasilaniu bateryjnym podświetla ekran
przez ok. 10 sekund.
•Ponowne wciśnięcie przycisku SNOOZE (18) lub LIGHT (21) przy zasilaniu sieciowym pozwala na
ustawienie stopnia jasności podświetlenia iwyłączenie go.
Wskazówka
•Zasilacz nie jest objęty zakresem dostawy.
7. Czyszczenie
Czyścić produkt tylko przy użyciu niestrzępiącej się, lekko zwilżonej szmatki inie stosować agresywnych
detergentów.
Uważać, aby do wnętrza produktu nie wniknęła woda. Nigdy nie zanurzać stacji pogodowej ani
czujnika wwodzie. Chronić przed pryskającą wodą.
8. Wyłączenie odpowiedzialności
Hama GmbH &CoKG nie udziela gwarancji ani nie odpowiada za szkody wskutek niewłaściwej
instalacji, montażu oraz nieprawidłowego stosowania produktu lub nieprzestrzegania instrukcji obsługi
i/lub wskazówek bezpieczeństwa.
9. Serwis ipomoc techniczna
Wrazie pytań dotyczących produktu prosimy zwrócić się do infolinii Hama.
Gorąca linia: +49 9091 502-115 (niem./ang.)
Dodatkowe informacje są dostępne na stronie: www.hama.com
69
Page 71

10. Dane techniczne
Zasilanie elektryczne
Stacja bazowa Stacja pomiarowa
4,5 V
3baterie typu AAA
Dodatkowe zasilanie możliwe jest
za pomocą zasilacza sieciowego:
wyjście 4,5 V, min. 100 mA
zewnętrznych poniżej 0°C/32°F
czujnikach zewnętrznych baterii
3,0 V
2baterie typu AA
Wprzypadku temperatur
zaleca się zastosowanie w
litowych typu AA.
Zakres pomiarowy
temperatury
Zakres pomiarowy
wilgotności powietrza
Zegar radiowy DCF Sì No
Funkcja budzenia Sì No
Maks. liczba stacji
pomiarowych
Częstotliwość 433 MHz
Zasięg ≤30m
11.
Informacje dotycząca recyklingu
Wskazówki dotyczące ochrony środowiska:
Od czasu wprowadzenia europejskiej dyrektywy 2012/19/EU i2006/66/EU do prawa
narodowego obowiązują następujące ustalenia: Urządzeń elektrycznych, elektronicznych
oraz baterii jednorazowych nie należy wyrzucać razem zcodziennymi odpadami
domowymi! Użytkownik zobowiązany prawnie do odniesienia zepsutych, zniszczonych lub
niepotrzebnych urządzeń elektrycznych ielektronicznych do punktu zbiórki lub do
sprzedawcy.Szczegółowe kwestie regulują przepisy prawne danego kraju. Informuje otym symbol
przekreślonego kosza umieszczony na opakowaniu. Segregując odpady pomagasz chronić środowisko!
12.
Deklaracja zgodności
Hama GmbH &CoKG niniejszym oświadcza, że typ urządzenia radiowego [00136294,
00176930] jest zgodny zdyrektywą 2014/53/UE. Pełny tekst deklaracji zgodności UE jest
dostępny pod następującym adresem internetowym:
www.hama.com->00136294, 00176930 ->Downloads.
Maksymalna moc transmisji 4,487 µW
0°C –50°C
32°F –122°F
20 -99%20–99%
Dodatkowy czujnik 176933
3
-40°C –+60°C
-40°F -+140°F
70
Page 72

C Návod kpoužití
Ovládací prvky aindikace
AZákladní stanice
1. Zobrazení tendence počasí
2. Zobrazení tendence na barometru
3. Venkovní teplota avlhkost vzduchu
4. Zobrazení kanálu
5. Symbol bezdrátového senzoru
6. Kapacita baterií senzoru
7. Zobrazení vývoje venkovní teploty
8. Vnitřní teplota avlhkost vzduchu
9. Kapacita baterií meteorologické stanice
10. Zobrazení vývoje vnitřní teploty
11. Čas
12. Symbol rádiového signálu DCF
13. Letní čas
14. Den vtýdnu
15. Symbol alarmu
16. Datum
17. Fáze měsíce
18. Tlačítko SNOOZE
=přerušení signálu buzení
19. Tlačítko UP
=zvýšení nastavené hodnoty/přechod z°CnaF
20. Tlačítko SET
=nastavení/potvrzení hodnoty nastavení
21. Tlačítko LIGHT
=aktivace podsvícení
22. Tlačítko DOWN
=snížení nastavené hodnoty/změna kanálu
23. Tlačítko ALARM
=zobrazení/nastavení/aktivace režimu alarmu
24. Přihrádka na baterie
25. Napájecí konektor
BMěřicí stanice
26. Stavová LED dioda
27. Otvor pronástěnnou montáž
28. Přihrádka na baterie
29. Tlačítko TX
30. Posuvný přepínač TX kanálů
Děkujeme, že jste si vybrali výrobek Hama.
Přečtěte si, prosím, všechny následující pokyny ainformace. Uchovejte tento text propřípadné budoucí
použití. Pokud výrobek prodáte, předejte tento text novému majiteli.
1. Vysvětlení výstražných symbolů apokynů
Upozornění
Tento symbol označuje bezpečnostní upozornění, které poukazuje na určitá rizika anebezpečí.
Poznámka
Tento symbol označuje dodatečné informace nebo důležité poznámky.
71
Page 73

2. Obsah balení
•Meteorologická stanice Color Edge
(základní stanice po vnitřní prostory/měřicí stanice provenkovní prostory)
•3baterie typu AAA
•2baterie typu AA
•tento návod kobsluze
3. Bezpečnostní pokyny
•Výrobek je určen propoužití vsoukromých domácnostech.
•Přístroj neprovozujte mimo meze výkonu uvedené vtechnických údajích.
•Výrobek nepoužívejte ve vlhkém prostředí azabraňte působení stříkající vody.
•Výrobek nepoužívejte vbezprostřední blízkosti zdrojů tepla, ani nevystavujte působení přímého
slunečního záření.
•Výrobek nepoužívejte na místech, kde je používání elektronických zařízení zakázáno.
•Výrobek neumisťujte do blízkosti zdrojů rušení, kovových rámů, počítačů, televizorů atd. Elektronická
zařízení akovové rámy oken mohou negativně ovlivnit fungování výrobku.
•Výrobek chraňte před pádem avelkými otřesy.
•Výrobek neotvírejte avpřípadě poškození již dále nepoužívejte.
•Dovýrobku nezasahujte aneopravujte ho. Veškeré úkony údržby přenechejte příslušnému
odbornému personálu.
•Obalový materiál odložte mimo dosahu dětí, hrozí riziko udušení.
•Vybité baterie bez odkladu vyměňte azlikvidujte dle platných předpisů.
•Výrobek žádným způsobem neupravujte, ztratíte tím nárok na záruku.
Upozornění –baterie
•Vybité baterie bez odkladu vyměňte azlikvidujtedle platných předpisů.
•Používejte výhradně akumulátory (nebo baterie) odpovídající udanému typu.
•Pro napájení tohoto výrobku nekombinujte staré anové baterie, ani různé typy aznačky baterií
•Při vkládání baterií vždy dbejte na správnou polaritu (+ a-). Při nesprávné polaritě hrozí
nebezpečí vytečení baterií nebo exploze.
•Baterie nenabíjejte, hrozí nebezpečí výbuchu.
•Baterie uchovávejte mimo dosah dětí.
•Akumulátory/baterie nezkratujte azabraňte jejich umístění vblízkosti neizolovaných kovových
předmětů.
•Venkovní teploty nižší než 0°C/ 32 °F mohou značně omezit výkon baterií senzoru azeslabit
rádiový přenos.
•Klesající kapacita baterií může vést kproblémůmspříjmem avysíláním aztížit čitelnost displeje.
4. Uvedení do provozu
4.1 Vložení baterií/napájení el. proudem
Poznámka
Dbejte na to, že při uvádění do provozu musí být vždy nejprve vloženy baterie do měřicí stanice a
poté do základní stanice.
Měřicí stanice
•Otevřete přihrádku na baterie (28) aodstraňte přerušení kontaktu.
•Poté uzavřete kryt přihrádky na baterie.
•Stavová dioda LED se rozsvítí.
Základní stanice
•Otevřete přihrádku na baterie (24) aodstraňte přerušení kontaktu.
•Poté uzavřete kryt přihrádky na baterie.
72
Page 74

4.2 Výměna baterií
Poznámka –výměna baterie
•Dbejte na to, že po každé výměně baterií uměřicí nebo základní stanice je třeba provést novou
synchronizaci stanic.
•Zatímto účelem vyjměte baterie izdruhé stanice aznovu je vložte zpět nebo je vpřípadě
potřeby také vyměňte.
Měřicí stanice
•Zobrazí-li se symbol (vedle „OUTDOOR“), vyměňte obě baterie typu AA vměřicí stanici za 2nové
baterie.
•Otevřete přihrádku na baterie (28), vyjměte azlikvidujte vybité baterie asesprávným pólováním
vložte dvě nové baterie typu AA. Poté uzavřete kryt přihrádky na baterie.
Základní stanice
•Zobrazí-li se symbol (vedle „INDOOR“), nahraďte tři baterie typu AAA vzákladní stanici novými
bateriemi.
•Otevřete přihrádku na baterie (24), vyjměte azlikvidujte vybité baterie avložte tři nové baterie typu
AAA správně podle pólů. Následně uzavřete kryt přihrádky na baterie (24).
5. Montáž
Poznámka –montáž
•Doporučujeme základní aměřicí stanici nejprve umístit na požadovaném místě instalace bez
montáže aprovést všechna nastavení -jakje popsáno vkapitole 6. Provoz popis –provedení.
•Stanici/stanice montujte až po správném nastavení apři stabilním rádiovém spojení.
Poznámka
•Dosah rádiového přenosu mezi měřicí azákladnístanicí je na volném prostranství až 30 m.
•Předmontáží dbejte na to, aby nebyl rádiový přenos ovlivněn rušivými signály nebo překážkami,
jako jsou budovy,stromy,vozidla, vedení vysokého napětí apod.
•Nepoužívejte sousední bezdrátová zařízení se stejnou frekvencí (433 MHz), zamezíte tak
poruchám přenosu.
•Předkonečnou montáží se ujistěte, zda je mezi požadovanými místy instalace dostatečný příjem.
•Měřicí stanici namontujte na místě chráněném před přímým sluncem adeštěm.
•Mezinárodní standardní výška proměření teploty vzduchu je 1,25 m(4stopy) nad povrchem.
Upozornění
•Speciální resp. vhodný montážní materiál promontáž na určené zdi zakupte ve specializované
prodejně.
•Zajistěte, aby nedošlo kmontáži vadných nebo poškozených dílů.
•Při montáži nikdy nepoužívejte násilí nebo hrubou sílu. Mohlo by dojít kpoškození přístroje.
•Předmontáží zkontrolujte, zda zeď, na které chcete držák umístit, vykazuje dostatečnou nosnost
proinstalovaný přístroj, aujistěte se, že se na místě montáže ve zdi nenachází elektrické kabely,
vodní, plynová nebo jiná vedení.
5.1 Základní stanice
•Zapomoci stavěcí nožky postavte základní stanici na rovnou plochu.
73
Page 75

5.2 Měřicí stanice
•Měřicí stanici můžete taktéž umístit na rovné ploše ve venkovním prostoru.
•Doporučujeme měřicí stanici bezpečně apevně namontovat na venkovní zeď pomocí otvoru (27).
•Upevněte hmoždinku, šroub, hřebík apod. vurčené zdi.
•Zavěste na ni základní/měřicí stanici za otvor ktomu určený (27).
6. Provoz
6.1 Spojení směřicí stanicí
•Povloženíbaterií základní stanice automaticky vyhledá spojení směřicí stanicí arádiovým signálem.
Poznámka
•Běhempokusů ospojení vždy blikají příslušné symboly: spojení směřicí stanicí, spojení s
rádiovým signálem DCF
•Během této doby se nedotýkejte žádných tlačítek! Jinak může uhodnot ajejich přenosu dojít k
chybám anepřesnostem.
•Během vyhledávání neměňte stanoviště základní stanice.
•Proces je ukončen, jakmile se zobrazí naměřená data provnitřní (8) avenkovní oblast (3).
6.2 Základní nastavení amanuální nastavení
Automatické nastavení podle signálu DCF
•Poprvnímzapnutí základní stanice aúspěšném přenosu mezi základní aměřicí stanicí zahájí hodiny
automaticky vyhledávání signálu DCF.Během vyhledávání bliká rádiový symbol .
Indikace Vyhledávání signálu DCF
Blikající indikace
Nelze zadat ručně!
Trvalá indikace
Žádná indikace neaktivní
•Pokud opakovaně nedojde kpříjmu signálu, stiskněte apodobu cca 3sekund držte stisknuté
tlačítko UP (19) prospuštění manuálního hledání signálu DCF.Začne blikat symbol prorádiový
.
signál
Poznámka –nastavení hodin
•Vyhledávání může trvat až 7minut. Pokud se nezdaří, zhasne symbol prorádiový signál .
•Mezitím můžete provést manuální nastavení času adata.
•Hodiny automaticky pak každý den (v 01:00 a05:00 hodin) vyhledávají signál DCF.Vpřípadě
úspěšného příjmu signálu se manuálně nastavený hodinový čas adatum přepíší.
Poznámka –letní čas
Hodinový čas se automaticky přepne na letní čas. Vdobě letního času je na displeji zobrazeno .
aktivní
Úspěšné –
příjem signálu
74
Page 76

Manuální nastavení
•Stiskněte apřidržte tlačítko SET (20) stisknuté cca 3sekundy propostupné provedení následujících
nastavení:
•Časové pásmo (od –12 do +12 hodin SEČ)
•Hodina
•Minuta
•Rok
•Měsíc
•Den
•Jednotka tlaku vzduchu (hPanebo inHg)
•Stiskněte tlačítko UP (19) nebo DOWN (22) provýběr nastavení. Tlačítkem SET (20) zadání
potvrďte.
Poznámka –časové pásmo
•Signál DCF může být přijímán ve velkém rozsahu, ale vždy odpovídá SEČ, který platí vNěmecku.
Zohledněte proto časový posun vzemích sjiným časovým pásmem.
•Pokud se nacházíte vMoskvě, pak je tam o3hodiny více než vNěmecku. Proto učasového
pásma nastavte +3. Hodiny pak vždy po příjmu signálu DCF resp. podle manuálně nastaveného
hodinového času automaticky nastaví o3hodiny více.
Budík
•Pro nastavení doby buzení zobrazeného alarmu stiskněte adržte stisknuté tlačítko ALARM (23) po
dobu cca 3sekund. Začne blikat zobrazení hodin.
•Stiskněte tlačítko UP (19) nebo DOWN (22) pronastavení času buzení apotvrďte výběr stisknutím
tlačítka ALARM (23).
•Tento postup opakujte prominuty doby buzení.
•Stisknete-li tlačítko ALARM (23) jednou, zobrazí se čas buzení. Stisknete-li tlačítko ALARM (23)
podruhé, alarm se aktivuje.
•Stisknete-li tlačítko ALARM (23) potřetí, alarm se deaktivuje.
•Pokud se budík odpovídajícím způsobem spustí, zobrazí se symbol alarmu azazní signál buzení.
•Stiskněte tlačítko UP (19), DOWN (22), SET (20) nebo ALARM (23) proukončení alarmu.
Poznámka –funkce podřimování
•Během signálu buzení stiskněte tlačítko SNOOZE (18) nebo LIGHT (21) proaktivaci funkce
podřimování. Na displeji začne blikat .Signál buzení se přeruší na cca 10 minut, apoté se
znovu spustí.
•Pro ukončení funkce podřimování atím také alarmu stiskněte tlačítko UP (19), DOWN,(22),
SET (20) nebo ALARM (23).
Teplota (Celsius/Fahrenheit)
•Stiskněte tlačítko UP (19) prozměnu jednotek °C a°Fuzobrazení teploty.
•Meteorologická stanice uvádí tendenci pravděpodobného vývoje vnitřní avenkovní teploty v
následujících hodinách.
Indikace Tendence
Stoupající
Stálá
Klesající
75
Page 77

Tlak vzduchu (hPA/inHg)
Poznámka
Stejně jako všechny měřené hodnoty podléhá tlak vzduchu určité toleranci měření.
•Stiskněte apřidržte tlačítko SET (20), dokud nezačne čas blikat.
•Stiskněte znovu tlačítko SET (20), dokud se na displeji nezobrazí hPA, resp. inHG.
•Stiskněte tlačítko UP (19) nebo DOWN (22) prozměnu jednotek inHG, resp. hPA.
•Meteorologická stanice uvádí protlak vzduchu tendenci podle toho, jak se hodnota vdanou chvíli
přibližně chová.
6.3 Zobrazení tendence počasí
•Nazákladě atmosférických změn tlaku vzduchu auložených dat může základní stanice nabízet údaje
opředpovědi počasí na příštích 12 až 24 hodin.
Poznámka –předpověď počasí
Vprvních hodinách provozu není zdůvodu chybějících dat předpověď počasí možná, tato data jsou
ukládána teprve vprůběhu provozu.
Předpověď tendence počasí aaktuální počasí jsou zobrazeny pomocí čtyř různých symbolů (1):
Symbol Počasí
Slunečno
Mírně zataženo
Zataženo
Déšť
6.4 Fáze měsíce
Základní stanice ukazuje každý den aktuální fázi měsíce pomocí následujících symbolů:
nov spln
ubúdajúci
polmesiac
prvá štvrť
narastajúci
mesiac
76
ubúdajúci
mesiac
posledná
štvrť
ubúdajúci
polmesiac
Page 78

6.5 Podsvícení
•Stisknete-li tlačítko SNOOZE (18), resp. LIGHT (21) během provozu na baterie, rozsvítí se displej
na cca 10 sekund.
•Opakovaným stisknutím tlačítka SNOOZE (18), resp. LIGHT (21) při napájení ze sítě můžete nastavit
stupeň jasu podsvícení nebo podsvícení vypnout.
Poznámka –trvalé podsvícení
•Trvalé podsvícení displeje je možné pouze tehdy,pokud je základní stanice napájena zelektrické
sítě. Napájecí zdroj není součástí dodávky.
7. Údržba ačištění
Tento výrobek čistěte pouze mírně navlhčeným hadříkem nepouštějícím vlákna anepoužívejteagresivní
čisticí prostředky.
Dbejte na to, aby se do výrobku nedostala voda. Meteorologickou stanici resp. senzor nikdy nevnořujte
do vody.Vyhýbejte se stříkající vodě.
8. Vyloučení záruky
Hama GmbH &CoKG nepřebírá žádnou odpovědnost nebo záruku za škody vzniklé neodbornou
instalací, montáží nebo neodborným použitím výrobku nebo nedodržováním návodu kpoužití a/nebo
bezpečnostních pokynů.
9. Servis apodporaervice und Support
Máte otázky kproduktu ?Obraťte na na poradenské oddělení Hama.
Horká linka: +49 9091 502-115 (německy/anglicky)
Další podpůrné informace naleznete na adrese: www.hama.com
77
Page 79

10. Technické údaje
Napájení
Základní stanice Měřicí stanice
4,5 V
3x baterie typu AAA
Možné dodatečné napájení přes
napájecí zdroj:
Výstup 4,5 V, min. 100 mA
Při venkovních teplotách pod 0
°C/32 °F doporučujeme použít pro
venkovní snímače lithiové baterie
3,0 V
2xbaterie typu AA
typu AA.
Rozsah měření
Teplota
Rozsah měření
Vlhkost vzduchu
Rádiové hodiny DCF Ano Ne
Funkce buzení Ano Ne
Max. počet měřících stanic
Frekvence 433 MHz
Dosah ≤30m
11.
Pokyny klikvidaci
Ochrana životního prostředí:
Evropská směrnice 2012/19/EU a2006/66/EU ustanovujete následující: Elektrická a
elektronická zařízení stejně jako baterie nepatří do domovního odpadu. Spotřebitel se
zavazuje odevzdat všechna zařízení abaterie po uplynutí jejich životnosti do příslušných
sběren. Podrobnosti stanoví zákon příšlušné země. Symbol na produktu, návod kobsluze
nebo balení na toto poukazuje. Recyklací ajinými způsoby zužitkování přispíváte kochraně
životního prostředí.
12.
Prohlášení oshodě
Tímto Hama GmbH &CoKG prohlašuje, že typ rádiového zařízení [00136294, 00176930]
je vsouladu se směrnicí 2014/53/EU.Úplné znění EU prohlášení oshodě je kdispozici na
této internetové adrese: www.hama.com-> 00136294, 00176930 -> Downloads.
Maximální radiofrekvenční výkon vysílaný 4,487 µW
0°C –50°C
32°F –122°F
20 -99% 20 –99%
Dodatečný snímač 176933
3
-40°C –+60°C
-40°F -+140°F
78
Page 80

Q Návod na použitie
Ovládacie prvky aindikácie
AZákladňová stanica
1. Indikácia trendu počasia
2. Indikácia trendu barometra
3. Vonkajšia teplota avlhkosť vzduchu
4. Indikácia kanálov
5. Symbol rádiového spojenia senzora
6. Kapacita batérie senzora
7. Indikácia trendu vonkajšej teploty
8. Vnútorná teplota avlhkosť vzduchu
9. Kapacita batérie meteorologickej stanice
10. Indikácia trendu vnútornej teploty
11. Čas
12. Symbol rádiového signálu DCF
13. Letný čas
14. Deň vtýždni
15. Symbol alarmu
16. Dátum
17. Fáza mesiaca
18. Tlačidlo SNOOZE
=prerušenie signálu budenia
19. Tlačidlo UP
=zvýšenie nastavenej hodnoty/prepínanie medzi °C a°F
20. Tlačidlo SET
=nastavenia/potvrdenie nastavenej hodnoty
21. Tlačidlo LIGHT
=aktivácia podsvietenia displeja
22. Tlačidlo DOWN
=zníženie nastavenej hodnoty/zmena kanála
23. Tlačidlo ALARM
=zobrazenie/nastavenie/aktivácia režimu budenia
24. Priehradka na batérie
25. Prípojka napájacieho zdroja
BMeracia stanica
26. Stavová LED
27. Vybranie prenástennú montáž
28. Priehradka na batérie
29. Tlačidlo TX
30. Posuvný spínač na prepínanie kanála TX
Ďakujeme, že ste sa rozhodli prevýrobok Hama.
Prečítajte si všetky nasledujúce pokyny ainformácie. Uchovajte tento návod na použitie preprípadné
budúce použitie. Pokiaľ výrobok predáte, dajte tento návod novému majiteľovi.
1. Vysvetlenie výstražných symbolov aupozornení
Upozornenie
Tento symbol označuje bezpečnostné upozornenie, ktoré poukazuje na určité riziká
anebezpečenstva.
Poznámka
Tento symbol označuje dodatočné informácie, alebo dôležité poznámky.
79
Page 81

2. Obsah balenia
•Meteostanica Color Edge
•3batérie typu AAA
•2batérie typu AA
•Tento návod na obsluhu
3. Bezpečnostné pokyny
•Výrobok je určený len na súkromné použitie.
•Výrobok neprevádzkujte mimo medze výkonu uvedených vtechnických údajoch.
•Výrobok nepoužívajte vo vlhkom prostredí achráňte ho pred oprskaním.
•Výrobok nepoužívajte vbezprostrednej blízkosti zdrojov tepla, ani nevystavujte pôsobeniu priameho
slnečného žiarenia.
•Výrobok nepoužívajte na miestach, kde je používanie elektronických zariadení zakázané.
•Výrobok neumiestňujte do blízkosti zdrojov rušenia, kovových rámov,počítačov,televízorov atď.
Elektronické zariadenia akovové rámy okien môžu negatívne ovplyvniť fungovanie výrobku.
•Výrobok chráňte pred pádmi aveľkými otrasmi.
•Výrobok neotvárajte avprípade poškodenia ho ďalej nepoužívajte.
•Dovýrobku nezasahujte aneopravujte ho. Akékoľvek úkony údržby prenechajte príslušnému
odbornému personálu.
•Obalový materiál odložte mimo dosahu detí, hrozí riziko udusenia.
•Obalový materiál zlikvidujte podľaplatných predpisov olikvidácii.
•Výrobok žiadnym spôsobom neupravujte, stratíte tým nárok na záruku.
Výstraha –batérie
•Vybité batérie bezodkladne vymeňte azlikvidujte podľaplatných predpisov.
•Používajte výhradne akumulátory (alebo batérie) zodpovedajúce udanému typu.
•Nanapájanie tohto výrobku nekombinujte staré anové batérie, ani rôzne typy aznačky batérií.
•Pri vkladaní batérií vždy dbajte na správnu polaritu (+ a-). Pri nesprávnej polarite hrozí
nebezpečenstvo vytečenia batérií alebo explózie.
•Batérie nenabíjajte, hrozí nebezpečenstvo výbuchu.
•Batérie uchovávajte mimo dosahu detí.
•Akumulátory/batérie neskratujte azabráňte ich umiestneniu vblízkosti neizolovaných kovových
predmetov.
•Vonkajšie teploty nižšie ako 0°C/ 32 °F môžu výrazne ovplyvniť výkon batérií senzoraaviesť k
oslabeniu rádiového prenosu.
•Klesajúca kapacita batérií môže viesť kťažkostiampri príjme avysielaní azhoršiť odčítanie
displeja.
4. Uvedenie do prevádzky
4.1 Vloženie batérií /Napájanie
(základná stanica do interiéru /meracia stanica do exteriéru)
Poznámka
Batérie vložte najprv do bezdrôtového senzoraaažpotom do základne.
Meracia stanica
•Otvorte batériovú priehradku (28) aodstráňte prerušovač kontaktov.
•Zatvorte potom kryt batériovej priehradky.
•Stavová LED sa rozsvieti.
Základňová stanica
•Otvorte batériovú priehradku (24) aodstráňte prerušovač kontaktov.
•Zatvorte potom kryt batériovej priehradky.
80
Page 82

4.2 Výmena batérií
Poznámka –výmena batérie
•Myslite na to, že po každej výmene batérií vmeracej alebo základnej stanici musíte stanice
nanovo zosynchronizovať.
•Vyberte ktomu batérie druhej stanice aopäť ich vložte alebo vprípade potreby ich tiež vymeňte.
Meracia stanica
•Aksazobrazí symbol (vedľa„OUTDOOR“), vymeňte obe batérie typu AA vmeracej stanici za 2
nové batérie.
•Otvorte batériovú priehradku (28), vyberte azlikvidujte opotrebované batérie avložte dve nové
batérie typu AA so správnou polaritou. Zatvorte potom kryt batériovej priehradky.
Základňová stanica
•Aksazobrazí symbol (vedľa„INDOOR“), vymeňte tri batérie typu AAA na základňovej stanici za
nové batérie.
•Otvorte batériovú priehradku (24), vyberte azlikvidujte opotrebované batérie avložte tri nové batérie
typu AAA so správnou polaritou. Zatvorte potom kryt batériovej priehradky (24).
Montáž
5.
Poznámka –montáž
•Odporúčame základnú ameraciu stanicu umiestniť najprv na požadované miesta inštalácie bez
ich montáže avykonať všetky nastavenia -podľapostupu opísaného vodseku6. Prevádzka.
•Stanice namontujte až po správnom nastavení adosiahnutí stabilného rádiového spojenia.
PozUpozornenie námka
•Dosah rádiového prenosu medzi meracou azákladňovou stanicou je na voľnom priestranstve
až 30 m.
•Predmontážou dbajte na to, aby rádiový prenos nebol ovplyvnený rušivými signálmi alebo
prekážkami, ako sú budovy,stromy,vozidlá, vysokonapäťové vedenia atď.
•Aby ste zabránili rušeniu prenosu, neprevádzkujte vedľajšie bezdrôtové zariadenia srovnakou
frekvenciou (433 MHz).
•Preddenitívnou montážou sa ubezpečte, či je medzi požadovanými miestami inštalácie
dostatočný príjem.
•Pri montáži meracej stanice dbajte na to, aby stanica bola umiestnená na takom mieste, kde
nebude vystavená účinkom priameho slnečného žiarenia adažďa.
•Medzinárodná štandardná výška merania teploty vzduchu je 1,25 m(4stopy) nad zemou.
Výstraha
•Pre montáž na určenú stenu si špecializovanej predajni obstarajte špeciálny resp. vhodný
montážny materiál.
•Zabezpečte, aby ste premontáž nepoužili chybné alebo poškodené časti.
•Pri montáži nikdy nepoužívajte násilie alebo veľkú silu. Mohlo by tak dôjsť kpoškodeniu
výrobku.
•Predmontážou bezpodmienečne skontrolujte vhodnosť steny prezavesenie príslušnej hmotnosti
aubezpečte sa, že sa vmieste montáže nenachádza žiadne elektrické, vodovodné, plynové
alebo iné vedenie.
81
Page 83

5.1 Základňová stanica
•Postavte základňovú stanicu so stojanom na rovnú plochu.
5.2 Meracia stanica
•Meraciu stanicu môžete taktiež postaviť na rovnú plochu vexteriéri.
•Odporúčame meraciu stanicu pomocou vybrania (27) bezpečne apevne namontovať na vonkajšiu
stenu.
•Upevnite hmoždinku, skrutku, klinec atď. vpríslušnejstene.
•Zaveste na ne základňovú/meraciu stanicu pomocou na to určeného vybrania (27).
6. Prevádzka
6.1 Spojenie smeracou stanicou
•Povloženíbatérií vyhľadáva základňová stanica automaticky spojenie smeracou stanicou arádiovým
signálom.
Upozornenie
•Počas pokusov ospojenie vždy blikajú príslušné symboly:
spojenie so signálom DCF .
•Počas tejto doby sa nedotýkajte žiadneho tlačidla! Vopačnom prípade by mohlo dôjsť kchybám
anepresnostiam hodnôt aich prenosu.
•Počas vyhľadávania nemeňte polohu základňovej stanice.
•Postup je ukončený, ak sa zobrazia namerané hodnoty preinteriér (8) aexteriér (3).
6.2 Základné amanuálne nastavenia
Automatické nastavenie po príjme signálu DCF
•Poprvomzapnutí základňovej stanice aúspešnom prenose medzi základňovou ameracou stanicou
spustia hodiny automaticky vyhľadávanie signálu DCF.Počas vyhľadávania začne blikať symbol
rádiového signálu
.
Indikácia Vyhľadávanie signálu DCF
spojenie smeracou stanicou,
Blikajúca indikácia
Manuálne zadávanie nie je možné!
Trvalá indikácia
Žiadna indikácia Neaktívne
•Aksaopakovane neprijíma žiadny signál, podržte po dobu asi 3sekúnd stlačené tlačidlo UP (19) na
spustenie manuálneho hľadania signálu DCF.Začne blikať symbol rádiového spojenia .
Upozornenie –nastavenie času
•Vyhľadávanie môže trvať až 7minút. Vprípade neúspechu zhasne symbol rádiového spojenia
.
•Medzitým môžete počas toho manuálne nastaviť čas adátum.
•Hodiny budú denne (01:00 hod. a05:00hod.) naďalej automaticky vyhľadávať signál DCF.Po
úspešnom prijatí signálu sa manuálne nastavené hodnoty času adátumu prestavia.
Aktívne
Úspešné –
Signál sa prijíma
82
Page 84

Upozornenie –letný čas
Čas sa na letný čas prestavuje automaticky.Nadispleji je zobrazený znak počas aktívnej fázy
letného času.
Manuálne nastavenia
•Stlačte apodržte tlačidlo SET (20) na cca 3sekundy,akchcete po sebe vykonať nasledujúce
nastavenia:
•Časové pásmo (od –12 do +12 hodín SEČ)
•Hodina
•Minúta
•Rok
•Mesiac
•Deň
•Jednotka tlaku vzduchu (hPaalebo inHg)
•Akchcete zvoliť svoje nastavenia, stlačte tlačidlo UP (19), resp. tlačidlo DOWN (22). Svoje zadanie
potvrďte tlačidlom SET (20).
Upozornenie –časová zóna
•Jemožný rozsiahly príjem signálu DCF,zodpovedá ale vždy SEČ, ktorý platí vNemecku.
Pamätajte preto na zohľadnenie posunutia času vkrajinách sodlišnou časovou zónou.
•Aksanachádzate Moskve, je tam o3hodiny viac ako vNemecku. Včasovej zóne preto nastavte
+3. Hodiny sa potom vždy po príjme signálu DCF,resp.vzhľadom na manuálne nastavený čas
nastavia automaticky o3hodiny dopredu.
Budík
•Nanastavenie času budenia zobrazovaného alarmu stlačte tlačidlo ALARM (23) apodržte ho cca 3
sekundy stlačené. Začne blikať indikácia hodín.
•Nazvolenie hodín času budenia stlačte tlačidlo UP (19), resp. DOWN (22) avoľbu potvrďte
stlačením tlačidla ALARM (23).
•Celý postup zopakujte na nastavenie druhého alarmu.
•Akstlačíte tlačidlo ALARM (23) raz, zobrazí sa čas budenia. Na aktiváciu budenia stlačte ešte raz
tlačidlo ALARM (23).
•Akstlačíte tlačidlo ALARM (23) tretíkrát, budenie sa deaktivuje.
•Pri príslušnej aktivácii budíka sa objaví symbol alarmu azaznie signál budenia.
•Naukončenie budenia stlačte tlačidlo UP (19), DOWN (22), SET (20) alebo ALARM (23).
Upozornenie –funkcia driemania
•Naaktiváciu funkcie driemania stlačte počas signálu budenia tlačidlo SNOOZE (18) alebo
tlačidlo LIGHT (21). Na displeji začne blikať .Signál budenia sa preruší na približne 10
minút apotom sa znova aktivuje.
•Naukončenie funkcie driemania avypnutie alarmu stlačte tlačidlo UP (19), DOWN,(22),
SET (20) alebo ALARM (23).
Teplota (Celzius/Fahrenheit)
•Akchcete prepnúť medzi zobrazením teploty v°Calebo v°F, stlačte tlačidlo UP (19).
•Meteorologická stanica uvádza prevnútornú avonkajšiu teplotu tendenciu pravdepodobného vývoja
týchto hodnôt vpriebehu nasledujúcich hodín.
83
Page 85

Indikácia Tendencia
Rastúca
Ustálená
Klesajúca
Tlak vzduchu (hPA/inHg)
Upozornenie
•Ako všetky namerané hodnoty,ajtlak vzduchu podlieha istej tolerancii merania.
•Podržte stlačené tlačidlo SET (20), kým nezačne blikať čas.
•Stláčajte opakovane tlačidlo SET (20), kým sa na displeji nezobrazí hPA, resp. inHG.
•Nazmenu hPA, resp. inHG stlačte tlačidlo UP (19), resp. DOWN (22).
•Meteorologická stanica uvádza pretlak vzduchu tendenciu, ako sa táto hodnota pravdepodobne
momentálne správa.
6.3 Indikácia trendu počasia
•Nazáklade zmien atmosférického tlaku auložených údajov je základná stanica schopná poskytnúť
údaje prepredpoveď počasia na nasledujúcich 12 až 24 hodín.
Poznámka –predpoveď počasia
Vpriebehu prvých hodín prevádzky predpoveď počasia nie je možná, nakoľko chýbajú údaje, ktoré
sa uložia až vpriebehu prevádzky.
Predpoveď počasia aaktuálny stav počasia sa znázorňujú štyrmi rôznymi symbolmi (1):
Symbol Počasie
Slnečno
Polooblačno
Oblačno
Daždivo
84
Page 86

6.4 Fázy mesiaca
Základňová stanica znázorňuje aktuálnu fázu mesiaca pomocou nasledovných symbolov:
nov spln
ubúdajúci
polmesiac
prvá štvrť
narastajúci
mesiac
6.5 Podsvietenie
•Akpri napájaní batériami stlačíte tlačidlo SNOOZE (18), resp. LIGHT (21), zapne sa podsvietenie
displeja asi na 10 sekúnd.
•Opakovaným stláčaním tlačidla SNOOZE (18), resp. LIGHT (21) pri napájaní zo siete môžete
nastaviť stupeň jasu podsvietenia alebo podsvietenie vypnúť.
Upozornenie –trvalé podsvietenie displeja
•Trvalé podsvietenie displeja je možné len pri napájaní základňovej stanice cez sieťový adaptér.
Sieťový adaptér netvorí súčasť dodávky.
7. Údržba astarostlivosť
Na čistenie tohto výrobku používajte len navlhčenú utierku, ktorá nepúšťa vlákna anepoužívajte žiadne
agresívne čistiace prostriedky.Dbajte na to, aby do výrobku nevnikla voda. Meteorologickú stanicu,
resp. senzor nikdy neponárajte do vody.Vyhýbajte sa striekajúcej vode.
8. Vylúčenie záruky
Firma Hama GmbH &CoKGneručí/nezodpovedá za škody vyplývajúce zneodbornej inštalácie,
montáže alebo neodborného používania výrobku alebo znerešpektovania návodu na používanie a/
alebo bezpečnostných pokynov.
9. Servis apodpora
Sotázkami týkajúcimi sa výrobku sa prosím obráťte na poradenské oddelenie rmy Hama.
Hotline: +49 9091 502-115 (nem./angl.)
Ďalšie informácie opodporenájdete tu:
www.hama.com
ubúdajúci
mesiac
posledná
štvrť
ubúdajúci
polmesiac
85
Page 87

10. Technické údaje
Napájanie
Základňová stanica Meracia stanica
4,5 V
3xbatéria typu AAA
Možné doplňujúce napájanie cez
sieťový adaptér:
Výstupné napätie 4,5 V, min.
100 mA
Pri vonkajšej teplote nižšej ako
0°C/32 °F odporúčame pre
vonkajšie senzory použiť lítiové
3,0 V
2xbatéria typu AA
batérie typu AA.
Merací rozsah
Teplota
Merací rozsah
vlhkosti vzduchu
Hodiny riadené rádiovým
signálom DCF
Funkcia budenia Áno Nie
Max. počet meracích staníc
Frekvencia 433 MHz
Dosah ≤30m
11.
Pokyny pre likvidáciu
Ochrana životného prostredia:
Európska smernica 2012/19/EU a2006/66/EU stanovuje: Elektrické aelektronické
zariadenia, rovnako ako batérie sa nesmú vyhadzovať do domáceho odpadu. Spotrebiteľ je
zo zákona povinný zlikvidovať elektrické aelektronické zariadenia, rovnako ako batérie na
miesta ktomu určené. Symbolizuje to obrázok vnávode na použitie, alebo na balení
výrobku. Opätovným zužitkovaním alebo inou formou recyklácie starých zariadení/batérií
prispievate kochrane životného prostredia.
12.
Vyhlásenie ozhode
Hama GmbH &CoKG týmto vyhlasuje, že rádiové zariadenie typu [00136294, 00176930]
je vsúlade so smernicou 2014/53/EÚ. Úplné EÚ vyhlásenie ozhode je kdispozícii na tejto
internetovej adrese: www.hama.com ->00136294, 00176930 ->Downloads.
Maximálny vysokofrekvenčný 4,487 µW
0°C –50°C
32°F –122°F
20 -99%20–99%
Áno Nie
Prídavný snímač 176933
3
-40°C –+60°C
-40°F -+140°F
86
Page 88

M Manual de utilizare
Elemente de comandă și afișaje
AStație de bază
1. Așaj prognoză meteo
2. Așaj prognoză barometru
3. Temperatura șiumiditatea exterioareale aerului
4. Așaj canal
5. Senzor simbol radio
6. Capacitate baterie senzor
7. Așaj prognoză temperatură exterioară
8. Temperatura șiumiditatea interioareale aerului
9. Capacitate baterie stație meteo
10. Așaj prognoză temperatură interioară
11. Oră exactă
12. Simbol radio DCF
13. Oră de vară
14. Zi asăptămânii
15. Simbol alarmă
16. Dată
17. Fază lună
18. Ta sta SNOOZE
= Întreruperesemnal deșteptare
19. Ta sta UP
=Mărirevaloaresetare/Alternanță între°CșiF
20. Ta sta SET
=Setări /Conrmarea unei valori setate
21. Ta sta LIGHT
=Activareiluminaredefundal
22. Ta sta DOWN
=Micșorarevaloaresetare/Schimbarecanal
23. Ta sta ALARMĂ
=Așaj /Setare/Activareregimalarmă
24. Compartiment baterii
25. Conector element de rețea
BStație de măsurare
26. LED de statut
27. Decupaj pentru montarepeperete
28. Compartiment baterii
29. Ta sta TX
30. Ta stă glisantă canal TX
Vă mulţumim că aţioptat pentru un produs Hama.
Pentru început vă rugămsăvălăsațipuțin timp șisăcitițicomplet următoarele instrucțiuni șiindicații.
Vă rugămsăpăstraţimanualul de utilizarelaloc sigur pentru oconsultareulterioară în caz de nevoie.
Încaz de înstrăinareaaparatului vă rugămsăpredați șiacest manual noului proprietar.
1. Explicarea simbolurilor de avertizare și indicații
Avertizare
Se folosește la marcarea instrucțiunilor de siguranță sau la concentrarea atenției în caz de pericol
șiriscuri mari.
Instrucțiune
Se folosește pentru marcarea informațiilor șiinstrucțiunilor importante.
87
Page 89

2. Conținutul pachetului
•Staţie meteo Color Edge
(stație de bază pentru zona interioară /stație de măsurarepentru zona exterioară)
•3baterii AAA
•2baterii AA
•acest manual de utilizare
3. Bezpečnostní pokyny
•Produsul este conceput numai pentru utilizareprivatășinu profesională.
•Nuexploataţiprodusul în afaralimitelor de putereindicate în datele tehnice.
•Nufolosițiprodusul în mediu umed șievitațistropirea cu apă.
•Evitaţifolosirea produsului în imediata apropiereasistemului de încălzire, aaltor surse de căldură
sau în radiația solară directă.
•Nufolosiţiprodusul în zone unde nu sunt admise aparate electronice.
•Nuplasațiprodusul în apropieredecâmpuri perturbatoare, rame de metal, calculatoare, televizoare,
etc. Aparatele electronice precum șiramele ferestrelor inuențează negativ funcționarea produsului.
•Nulăsațiprodusul să cadășinuîlsupunețitrepidațiilorputernice.
•Nudeschidețiprodusul șinu-l utilizațiîncontinuareîncaz de deterioare.
•Nuîncercaţisăreparaţisau să depanaţiaparatul. Operaţiile de reparaţii se execută numai de
personal de specialitate.
•Nulăsațicopiii să se joace cu materialul pachetului, prezintă pericol de sufocare.
•Reciclarea materialului pachetului se execută comform normelor locale de salubrizareînvigoare.
•Nuexecutaţimodicări la aparat. Înacest fel pierdeţiorice drept la garanţie.
Avertizare–baterii
• Îndepărtați șisalubrizațiimediat bateriile folosite din produs.
•Utilizaţinumai acumulatoare(sau baterii) corespunzătoaretipulului indicat.
•Nuamestecațibateriile vechi cu cele noi, precum șibaterii de diferite tipuri șiproducători
diferiți.
•Vărugămsărespectațipolaritatea corectă aacumulatoarelor (marcajele + şi-)șiintroduceți-le
conform cu acestea. Încazul nerespectării vă expunețipericoluluiscurgerilor sau exploziei
acumulatoarelor.
•Nuîncărcațibateriile,există pericol de explozie.
•Păstraţibateriile astfel încât să nu e la îndemâna copiilor.
•Nuscurtcircuitațibateriile/acumulatoarele șinule apropiațideobiecte metalice neizolate.
•Temperaturi exterioaresub °0C /32°Fpot afecta masiv puterea bateriei senzorului șiduce la
scăderea capacității de transmitereprin radio.
•Scăderea capacităților bateriilor pot duce la greutățiînrecepție șiemisie șiîngreuna citirea
displayului.
4. Punerea în funcțiune
4.1 Introducerea bateriilor
Instrucțiune
Avețicagrijăca la punerea în funcțiune să introducețimai întâi bateriile în stația de măsurare, iar
pe urmă în stația de bază.
Stație de măsurare
•Deschidețicompartimentul bateriilor (28) șiîndepărtațiîntrerupătorul de contact.
• Închidețicompartimentului bateriilor.
•LED-ul de statul luminează.
Stație de bază
•Deschidețicompartimentul bateriilor (24) șiîndepărtațiîntrerupătorul de contact.
• Închidețicompartimentului bateriilor.
88
Page 90

4.2 Înlocuirea bateriilor
Instrucțiune –înlocuirea bateriilor
•Avețiînvederefaptul că după ecareînlocuireabateriilor stației de măsuraresau ale stației de
bază trebuie efectuată oresincronizare.
•Pentru aceasta, scoatețibateriile celeilalte stații șiintroduceți-le din nou sau dacă este nevoie,
înlocuiți-le șipeacestea.
Stație de măsurarev
•Când este așat simbolul (lângă „OUTDOOR“) înlocuițicele două baterii AA ale stației de
măsurarecubaterii noi.
•Deschidețicompartimentul bateriilor (28), scoateți șisalubrizațibateriile folosite șiintroducețidouă
baterii noi AA cu polaritatea corectă. Închidețicompartimentului bateriilor.
Stație de bază
•Când este așat simbolul (lângă „INDOOR“) înlocuițicele trei baterii AAA ale aparatului de bază
cu baterii noi.
•Deschidețicompartimentul bateriilor (24), scoateți, salubrizațibateriile folosite șiintroducețitrei
baterii AAA noi cu polaritatea corectă. Închidețicompartimentului bateriilor (24).
5. Montajul
Instrucțiune –montaj
•Serecomandă ca stația de bazășistația de măsuraresăe așezate mai întâi pe locurile de
amplasaredorite, fără realizarea montajului, șisăse efectueze toate setările după cum este
descris în secțiunea 6. Funcţionare.
•Montațistația/stațiile numai după setarea corectășioconexiune radio stabilă.
Indicație
•Raza de acțiune atransmisiei radio întrestația de măsurare șistațiade bază este de până la 30
mpeteren deschis.
•Asigurați-vă înaintea montajului ca transmisia radio să nu e inuențată de semnale
perturbatoaresau obstacole precum clădiri, arbori, vehiculele, linii de înaltă tensiune ș.a.
•Pentru evitarea distorsiunilor de transmiterenuutilizațiînapropiereaparate fără r cu aceeași
frecvență (433 MHz)
• Înaintea montajului nal asigurați-vă că recepția este sucientă întrelocurile de plasaredorite.
•Lamontajul stației de măsurareplasarea trebuie să e protejată împotriva acțiunii directe a
soarelui șiploii.
• Înălțimea standardinternațională pentru măsurarea temperaturii aerului este de 1,25 m(4ft)
deasuprasolului.
Avertizare
•Pentru instalare, procurați-vă din comerțul de specialitate materialele speciale, respectiv
adecvate pentru montajul pe peretele prevăzut.
•Asigurați-vă că nu va montată nicio componentă defectă sau deteriorată.
• Întimpul montajului, nu acționaținiciodatăcu brutalitate șinufaceținiciodată uz de forță.
Acestea pot produce deteriorări ale produsului.
• Înainte de montaj, vericațidacă peretele prevăzut este potrivit pentru greutatea respectivă
șiasigurați-vă ca la locul montajului să nu e reelectrice, țevi de apă,gaze sau alte cabluri/
conducte.
89
Page 91

5.1 Stație de bază
•Cuajutorul piciorului suport plasațistația de bază pe osuprafață plană.
5.2 Stație de măsurare
• Șistația de măsuraresepoateplasa pe osuprafață plană în zona exterioară.
•Cuajutorul decupajului (27) se recomandă montarea stației de măsurarestabil șisigur pe un perete
exterior.
•Fixațidiblurile, șuruburile, cuiele etc. în peretele prevăzut în aceste sens.
•Agățațistația de bază /demăsurarecuajutorul decupajului (27).
6. Funcționare
6.1 Conexiune cu stația de măsurare
•După introducerea bateriilor stația de bază caută automat oconexiunecu stația de măsurare și
semnalul radio.
Indicație
• Întimpul căutării conexiunilor simbolurile corespunzătoareluminează intermitent:
cu stația de măsurare, conexiune cu semnalul DCF
•Evitațiorice acționareatastelor în acest interval de timp! Încaz contrar pot apăreaerori sau
inexactitățiale valorilor șitransmisiei acestora.
•Numodicațipoziția stației de bază în timpul proceselor de căutare.
•Prin așarea datele de măsurarepentru interior (8) șiexterior (3) proceduraeste nalizată.
6.2 Setări de bază și setări manuale
Setare automată conform semnalului DCF
•După prima pornireastației de bazășitransmisia reușită întrestația de bazășistația de măsurare,
ceasul începe automat căutarea unui semnal DCF. Întimpul procesului de căutare, simbolul radio
.luminează intermitent
Așaj Căutaresemnal DCF
Conexiune
Așaj intermitent
Introducerea manuală adatelor nu este posibilă!
Așaj permanent
Nicio așareInactiv
•Dacă în mod repetat nu se recepționează nici un semnal, apăsațitasta UP (19) cca 3secunde
pentru ainiția căutarea manuală asemnalului DCF.Simbolul radio începe să lumineze
intermitent.
Indicație –Setareoră exactă
•Procesul de căutarepoate durapână la 7minute. Dacă se ratează căutarea, simbolul radio se
stinge .
•Putețiefectua setarea manuală aoreiexacte șidatei.
•Ceasul caută automat în continuarezilnic (ora01:00 și05:00) semnalul DCF.Când s-a reușit
recepționarea semnalului, oraexactășidata setate manual se sincronizează.
Activ
Succes -
Se recepționează semnal
90
Page 92

Indicație –Oră de vară
Ceasul trece automat la oradevară.Atâta timp cât oradevară este activă,pedisplay se așează
.
Setări manuale
•Pentru aefectua consecutiv următoarele setări apăsațicca 3secunde tasta SET (20):
•Fus orar (de la -12-+12 oreCET)
•Oră
•Minute
•An
•Lună
•Zi
•Unitate presiune aer (hPasau inHg
•Pentru alegeresetărilor apăsațitasta UP (19) respectiv DOWN (22). Cu tasta SET (20) conrmați
datele introduse.
Indicație –Fus orar
•Semnalul DCF poate recepționat pe spații vaste, corespunde însă întotdeauna timpului CET
careeste valabil în Germania. Avețiînvederefaptul că în țările cu alt fus orar trebuie luat în
considerație decalajul orar.
•Dacă vă aațilaMoscova, acolo este deja cu 3ore mai târziu decât în Germania. Deaceea,
setațilafusul orar +3. După recepționarea semnalului DCF,ceasul se reglează automat, în
raport cu oraexactă setată manual, cu 3ore mai târziu.
Ceas deșteptător
•Pentru setarea orei de deșteptarealalarmei așate apăsațicca3secundetasta ALARMĂ (23).
Așajul pentru oreîncepe să lumineze intermitent.
•Pentru setarea orei de deșteptareapăsațitasta UP (19) respectiv DOWN (22) șiconrmațiprin
apăsarea tastei ALARMĂ (23).
•Repetațiacest proces pentru minutele timpului de deșteptare.
•Prin apăsareodată atastei ALARMĂ (23) se așează oradedeșteptare. Pentru activarea alarmei
apăsațiîncă odată tasta ALARMĂ (23).
•Dacă apăsați șiatreia oară tasta ALARMĂ (23) alarma se dezactivează.
•Ladeclanșarea deșteptătorului aparesimbolul alarmei șiseemite un semnal acustic.
•Pentru aîncheia alarma apăsațitasta UP (19), DOWN (22), SET (20) sau ALARMĂ (23).
Indicație -Funcție derepetareaalarmei
•Pentru activarea funcției de repetareaalarmei, apăsațitasta SNOOZE(18) sau LIGHT (21) în
timpul semnalului de deșteptare. Pe display luminează intermitent .Semnalul de deșteptare
se întrerupe pentru cca 10 minute șieste redeclanșat ulterior.
•Pentru aîncheia funcția de repetareaalarmei șiastfel șialarma apăsațitasta UP (19), DOWN
(22), SET (20) sau ALARMĂ.
Temperatură (Celsius /Fahrenheit)
•Pentru aalterna întreîntre°Cși°Flaașarea temperaturii, apăsațitasta UP (19).
•Stația meteo arată tendințatemperaturii exterioare șiinterioare, dezvoltarea probabilă aacestor
valori în următoarele ore.
91
Page 93

Așaj Tendință
Crescătoare
Constantă
Descrescătoare
Presiune aer (hPA /inHg)
Indicație
•Catoate valorile măsurate șipresiunea aerului este prevăzută cu oanumitătoleranță.
•Apăsațitasta SET (20) până când oraexactă începe să lumineze intermitent.
•Apăsațidin nou tasta SET (20) până când pe display aparehPA respectiv inHG.
•Pentru alternanțaunității întreinHG respectiv hPAapăsațitasta UP (19) respectiv DOWN (22).
•Stația meteo oferă otendință pentru presiunea aerului, cum se prezintă aproximativ valoarea
actuală.
6.3 Afișaj prognoză meteo
•Pebazamodicărilor presiunii atmosferice şiadatelor memorate, staţia de bază poate oferi
informaţii cu privirelaprognoza meteo pentru următoarele 12 până la 24 de ore.
Instrucțiune –prognoza meteo
Înprimele oredefuncţionare, nu este posibilă oprognoză meteo din cauza lipsei de date, carevor
memorate abia în cursul funcţionării.
Așaj tendință meteo șivreme actuală vor reprezentate prin patru simboluri diferite (1):
Symbol Vreme
Însorită
Ușor înnorată
Înnorată
Ploioasă
92
Page 94

6.4 Faze lună
Stația de bază așează faza zilnică alunii cuajutorul următoarelor simboluri:
Lună nouă Lună plină
Lună crescătoare Lună descrescătoare
Semilună
(primul pătrar)
Semilună crescătoare
6.5 Iluminat de fundal
•Dacă la funcționarea cu baterii apăsațitastaSNOOZEE (18) respectiv LIGHT (21) displayul este
iluminat pentru cca 10 secunde.
•Dacă la funcționarea cu curent de rețea apăsațirepetat tasta SNOOZE (18) respectiv LIGHT (21)
putețideni șideconecta treapta de luminozitate ailuminării.
Indicație
•Elementul de rețea nu face parte din conținutul pachetului.
7. Întreţinere şi revizie
Curățațiacest produs numai cu ocârpă fără scame, puțin umedășinufolosițidetergențiagresivi.
Avețigrijă să nu intreapăîn produs. Nu introduceținiciodată stația meteo sau senzorul în apă.Evitați
stropirea cu apă.
8. Excludere de garanție
Hama GmbH &CoKG nu îşiasumănici orăspunderesau garanție pentru pagube cauzate de
montarea, instalarea sau folosirea necorespunzătoareaprodusului sau nerespectarea instrucțiunilor de
folosiresau/șiainstrucțiunilor de siguranță.
9. Service și suport
Dacă avețiîntrebări adresaţi-vă la Hama consultanță privind produsul.
Hotline: +49 9091 502-115 (Ger./Ang.)
Alte informații de suport găsițiaici:
www.hama.com
Semilună
(ultimul pătrar)
Lună descrescătoare
93
Page 95

10. Date tehnice
Alimentarecucurent
Stație de bază Stație de măsurare
4,5 V
3xbaterii AAA
Alimentaresuplimentară prin
element de rețea:
Output 4,5 V, cel puțin 100 mA
La temperaturi exterioaresub 0°C/
32°F,pentru senzorii de exterior
se recomandă baterii litiu de
3,0 V
2xbaterii AA
mărime AA.
Domeniu de măsurare
Temperatură
Domeniu de măsurare
Umiditate aer
Ceas radio comandat DCF Da Nu
Funcție de deșteptareDaNu
Numărmaxim stații
de măsurare
Frecvența433 MHz
Rază de acțiune ≤30m
11.
Informații pentru reciclare
Instrucţiuni pentru protecţia mediului înconjurător:
Din momentul aplicării directivelor europene 2012/19/EU şi2006/66/EU în dreptul
național sunt valabile următoarele:
Aparatele electrice şielectronice nu pot salubrizate cu gunoiul menajer.Consumatorul
este obligat conform legii să predea aparatele electrice șielectronicela sfârșitul duratei de
utilizarelalocurile de colectarepublice sau înapoi de unde au fost cumpărate.
Detaliile sunt reglementate de cătrelegislaţia țării respective. Simbolul de pe produs, în instrucţiunile
de utilizaresau pe ambalaj indică aceste reglementări. Prin reciclarea, revaloricarea materialelor sau
alte forme de valoricareaaparatelor scoase din uz aducețiocontribuție importantă la protecția
mediului nostru înconjurător.
12. Declarație de conformitate
Prin prezenta, Hama GmbH &CoKG,declară că tipul de echipamente radio [00136294,
00176930] este în conformitate cu Directiva 2014/53/UE. Te xtul integral al declarației UE
de conformitate este disponibil la următoarea adresă internet:
www.hama.com-> 00136294, 00176930 -> Downloads.
Puterea maximă 4,487 µW
0°C –50°C
32°F –122°F
20 -99% 20 –99%
Senzor suplimentar 176933
3
-40°C –+60°C
-40°F -+140°F
94
Page 96

95
Page 97

Hama GmbH &CoKG
86652 Monheim /Germany
www.hama.com
Alllistedbrands are trademarksofthe correspondingcompanies.Errorsand
omissions excepted,and subjecttotechnicalchanges.Our generalterms of delivery
andpaymentare applied.
00136294_176930/12.17
 Loading...