

Hama uRage SoundZ operation manual
uRage Soundz 2.1 Revolution
00
113766
Operating Instructions
Bedienungsanleitung
Mode d‘emploi
Instrucciones de uso
Руководство по эксплуатации
Istruzioni per l‘uso
Gebruiksaanwijzing
Οδηγίες χρήσης
Instrukcja obsługi
Használati útmutató
Návod kpoužití
Návod na použitie
Manual de instruções
Kullanma kılavuzu
Manual de utilizare
Bruksanvisning
Käyttöohje
Работна инструкция
GB
D
F
E
RUS
I
NL
GR
PL
H
CZ
SK
P
TR
RO
S
FIN
BG

6
14
15
4
5
21 21 6
9
10
11
8
7
MUTE
STBY
RESET
REPEAT
RANDOM
BT
AUX
USB
TREBLE- TREBLE+
12
4
789
VOL+
VOL-
5
BASS+
3
6
SD
BASS-
10
10
0
12
13
3
G Operating instruction
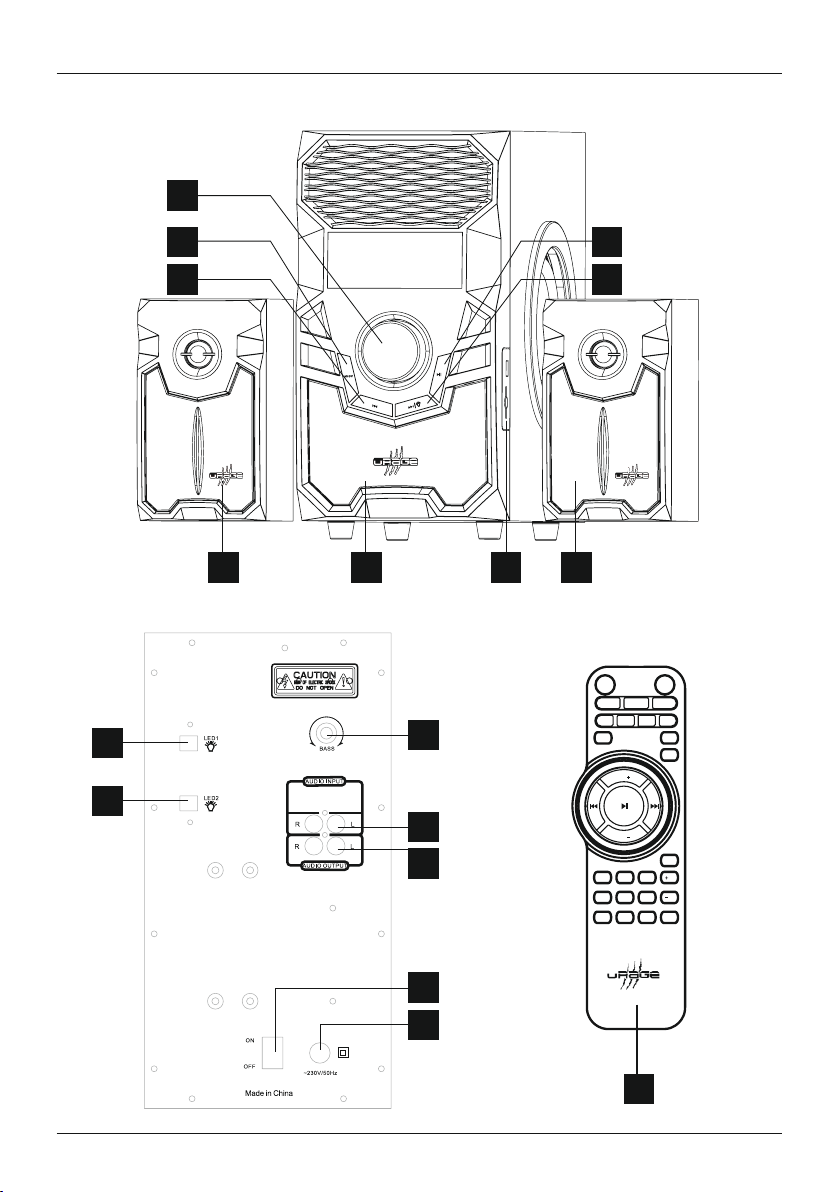
Controls and Displays
Speakers:
1. Subwoofer
2. Satellite speakers
3. Remote control
4. MODE button
5ã :
button, jump backwardone track,
Turning off/on the auto standby function
6. Volume control
::
7ã
Play/Pause button
:
8ã
button, jump forwardone track,
Turning off/on the LED lighting
9. Bass control
10. Stereo audio input RCAright/left
11. Satellite speaker connection right/left
12. ON/OFF,On/Off switch
13. 230 Vmains connection
14. Power LED 1
15. Power LED 2
16. USB/SD slot
Remote control:
STBY –On/Standby switch
MUTE –Mute switch
RANDOM –play random title
REPEAT –repeattitle
RESET –restore system to factory settings
BT –Bluetooth
®
mode
AUX –select AUX/PC connection as audio source
USB –select USB storage medium as audio source
SD –select SD/SDHC cardasaudio source
TREBLE - –decrease treble
TREBLE + –increase treble
TUN- – button has no function on this r
emote control
TUN+ – button has no function on this remote control
VOL +/- –general volume control (master)
::
–Play/Pause button
:
–jump backwardone track
:
–jump forwardone track
BASS- –decrease bass
BASS+ –increase bass
0-9 –track number selection
Thank you for choosing aHama product.
Take your time and read the following instructions and
information completely.Please keep these instructions
in asafe place for futurereference. If you sell the
device, please pass these operating instructions on to
the new owner.
1. Explanation of Warning Symbols and Notes
Risk of electric shock
This symbol indicates product parts energized with
adangerous voltage of sucient magnitude to
constitute arisk of electric shock.
Warning
This symbol is used to indicate safety instructions or
to draw your attention to specichazards and risks.
Note
This symbol is used to indicate additional information
or important notes.
2. Package Contents
• Subwoofer
• 2satellite speakers
• Y- adapter audio cable
• Remote control
• 2AAA batteries
• These operating instructions
3. Safety Notes
• The product is intended for private, non-commercial
use only.
• Protect the product from dirt, moistureand
overheating and us it in dry rooms only.
• As with all electrical devices, this device should be
kept out of the reach of children.
• Do not drop the product and do not expose it to any
major shocks.
• Do not operate the product outside the power limits
given in the specications.
6
• Keep the packaging material out of the reach of
children due to the risk of suffocation.
• Dispose of packaging material immediately according
to locally applicable regulations.
• Do not modify the device in any way.Doing so voids
the warranty.
Risk of electric shock
• Do not open the device or continue to operate it if
it becomes damaged.
• Do not use the product if the AC adapter,adapter
cable or power cable is damaged.
• Do not attempt to service or repair the product
yourself.Leave any and allservice work to qualied
experts.
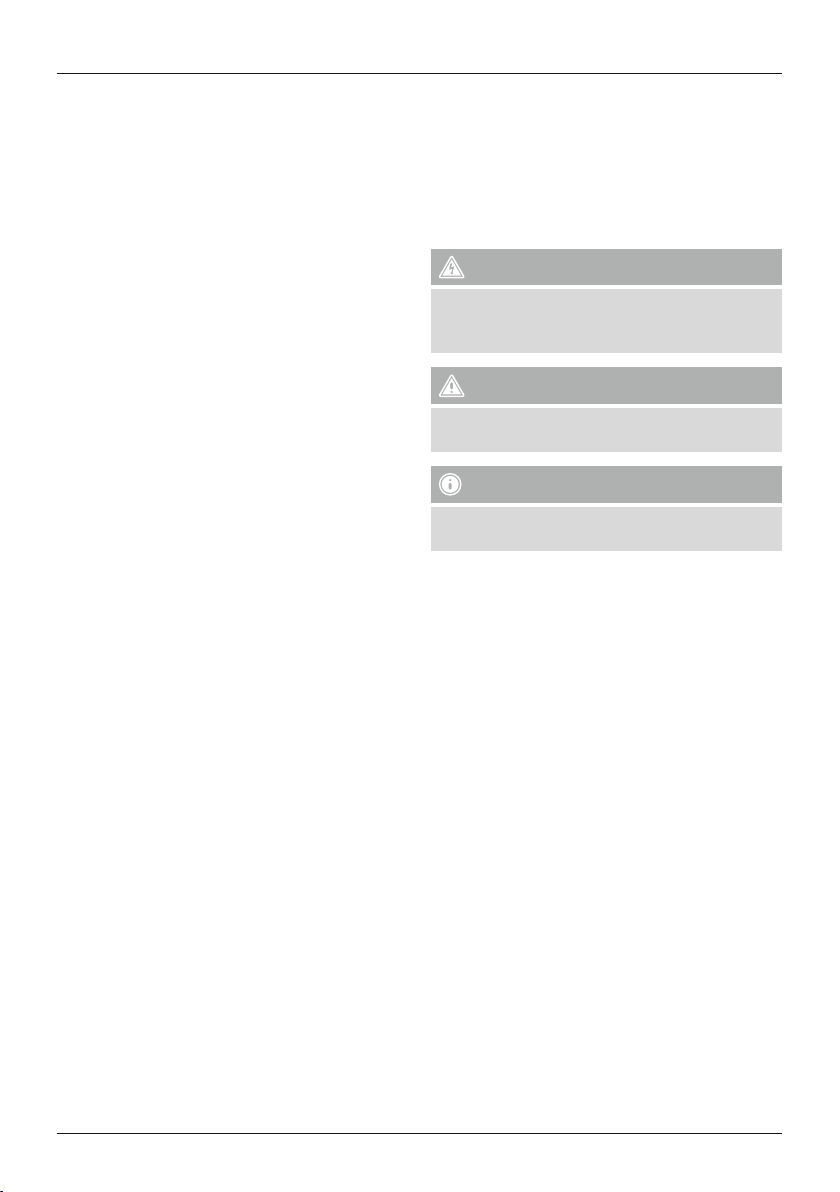
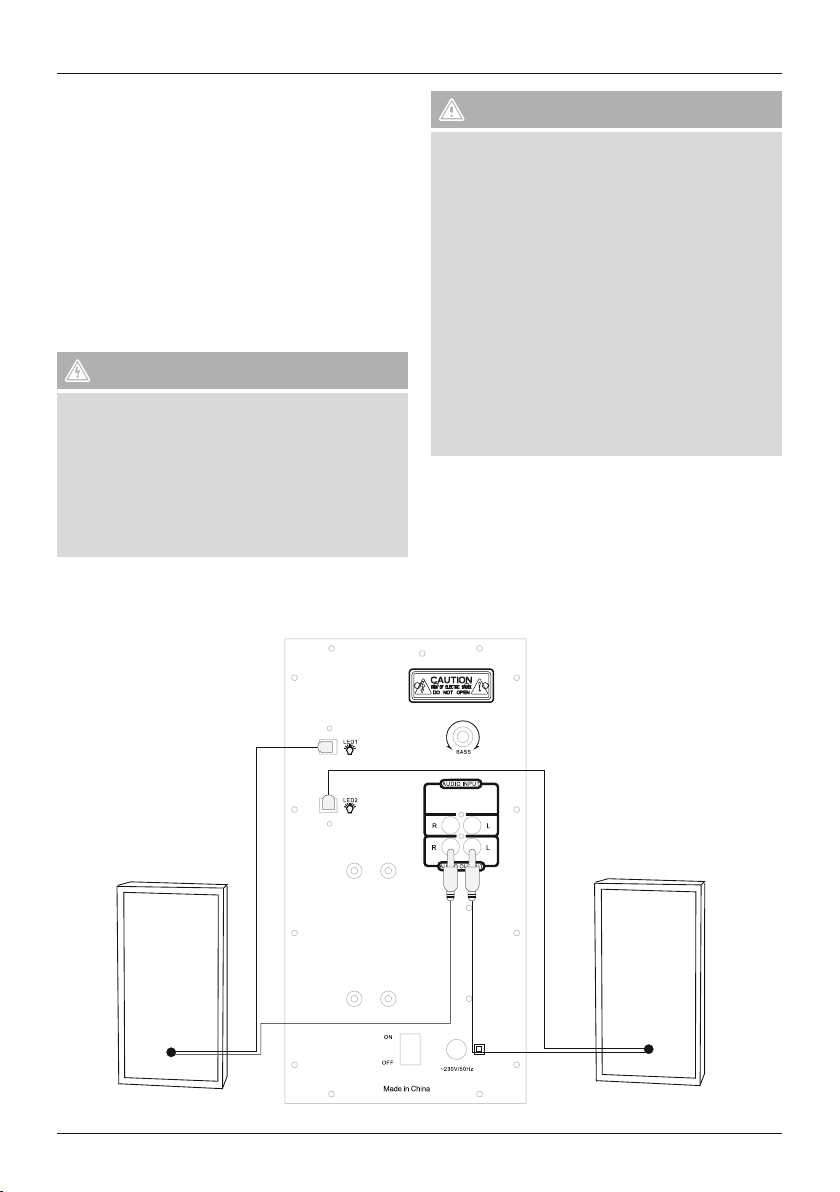
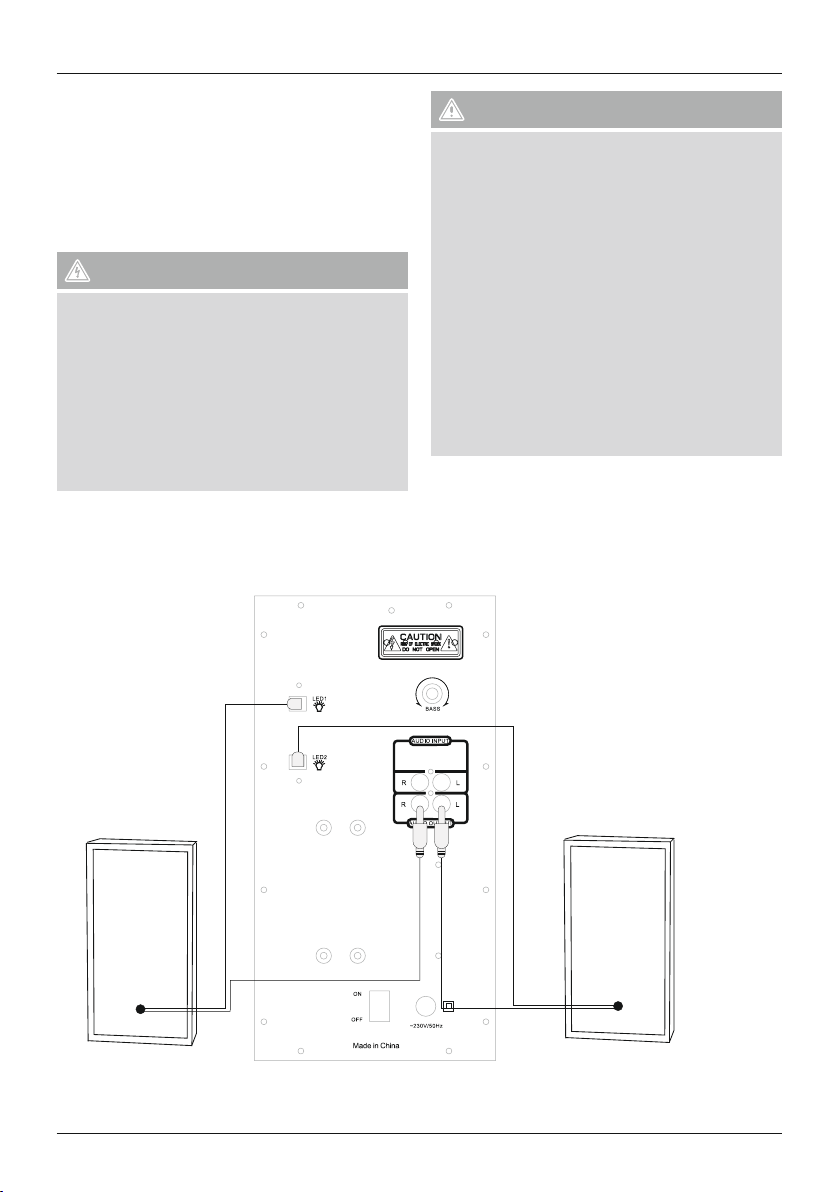
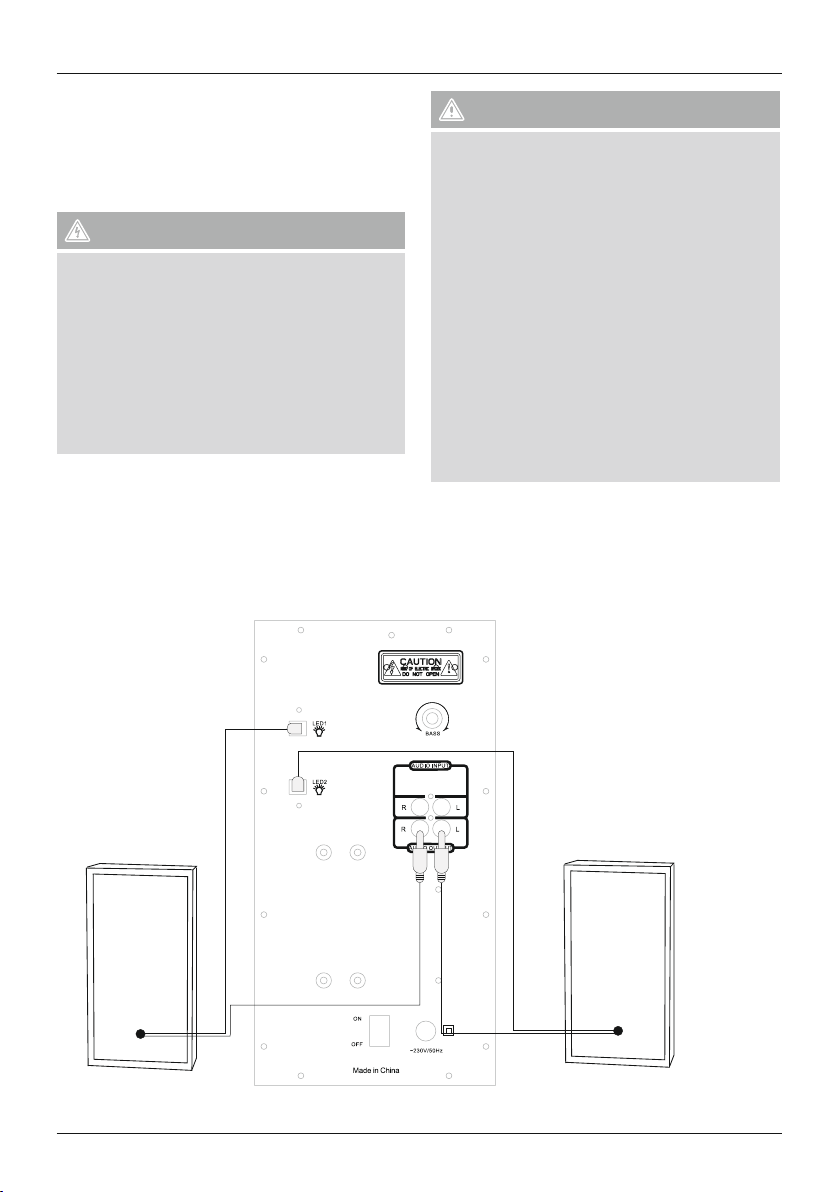
4. Wiring diagram
Warning Batteries
• When inserting batteries, note the correct polarity
(+ and -markings) and insert the batteries
accordingly.Failuretodosocould result in the
batteries leaking or exploding.
• Do not allow children to change batteries without
supervision.
• Remove the batteries from products that arenot
being used for an extended period.
• Do not short-circuit batteries.
• Do not charge batteries.
• Do not throw batteries in a re.
• Keep batteries out of the reach of children.
• Do not mix old and new batteries or batteries of a
different type or make.
7
5. Getting Started
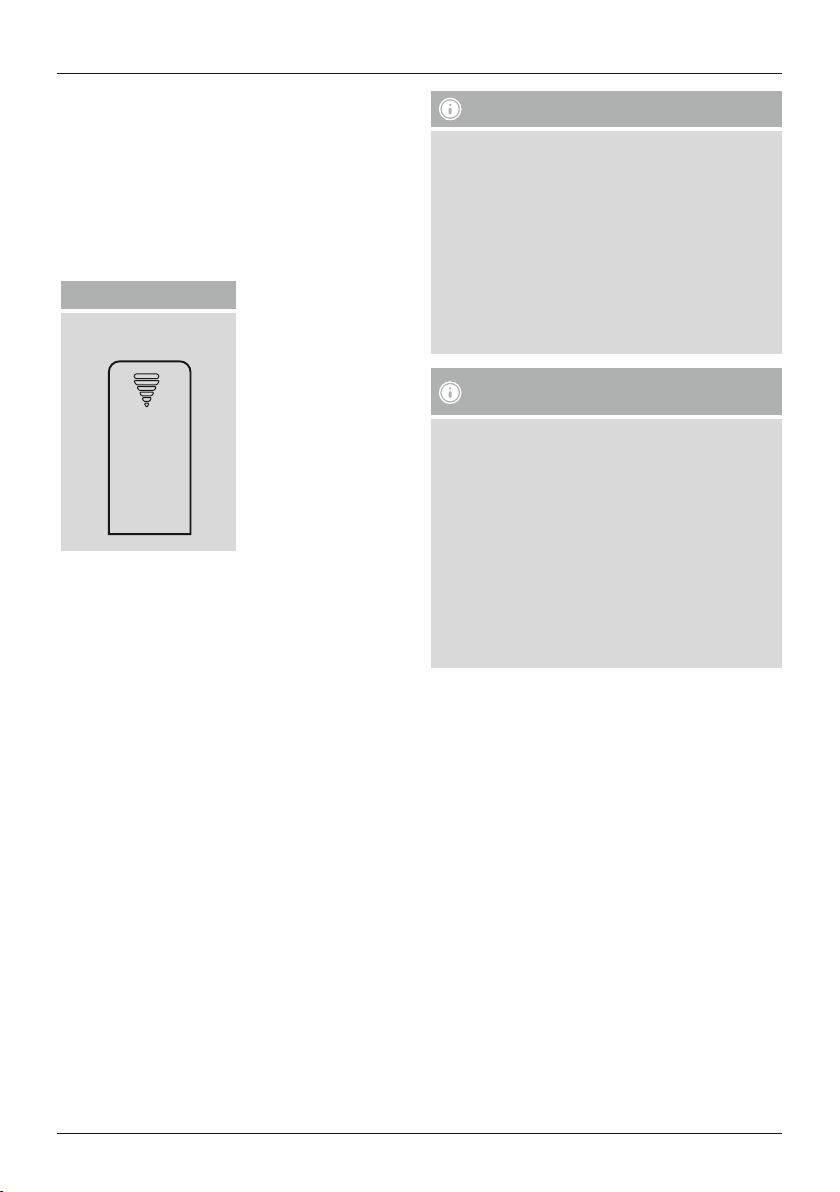
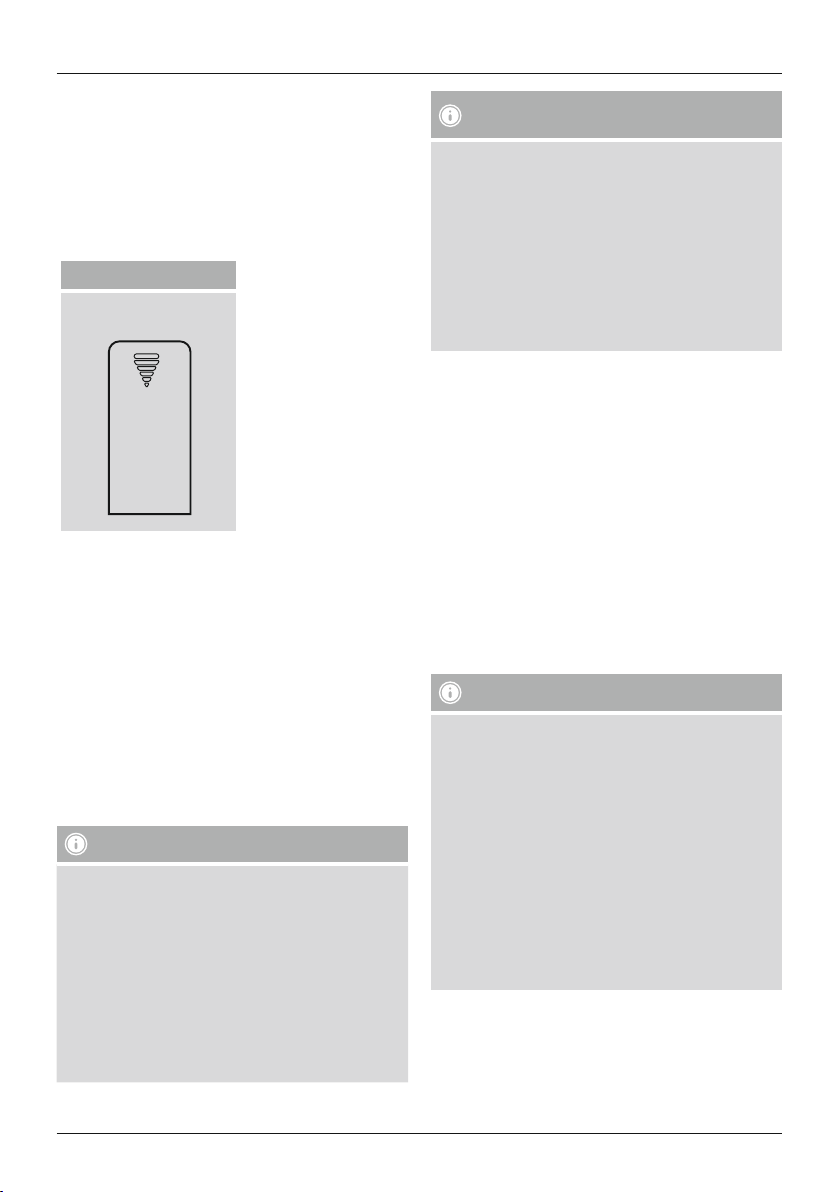
5.1 Remote control
• Open the battery compartment cover.Itislocated on
the rear of the remote control.
• Pull the closing tab back (if present) and lift the cover.
With other models of remote control, it suces to
simply push the casing in the direction indicated.
Sliding cover
Insert the batteries, paying attention to match the
polarities correctly.The correct polarity is indicated
by the plus and minus symbols in the battery
compartment.
5.2 Speaker
• Connect the two satellite speakers with the
corresponding audio outputs at the rear of the
subwoofer,asshown in the wiring diagram Point 4.
• Then connect the corresponding AUX audio input
with the signal source (computer/DVD/Blueray/MP3
player etc.), with the help of one of the enclosed
audio cables.
• Connect the subwoofer’spower supply cable to an
undamaged electrical socket which has been installed
correctly.
Note
• Only connect the product to asocket that has been
approved for the device. The electrical socket must
always be easily accessible.
• When using amult-socket power strip, make sure
that the sum power draw of allthe connected
devices does not exceed its maximum throughput
rating.
• If you will not be using the product for along
period of time, disconnect it from mains power.
Note –Line interference /reception
problems
• In an environment with radio-frequency
disturbances, the sample may malfunction
and could self-recover when the interference
disappears.
• In an environment with conducted disturbances,
the sample may malfunction and could self-recover
when the interference disappears.
5.3 On/off switch /standby
• Turn the speaker system on by turning the on/off
switch ON/OFF at the rear of the subwoofer to ON.
• Turn the speaker system off completely by turning
the on/off switch ON/OFF on the rear side of the
subwoofer to OFF.
• When the speaker system is turned on press
the STBY button on the remote control or the
MODE button on the subwoofer’sfront display for
approximately 3seconds to switch the speaker system
to standby mode.
• Press the STBY button in standby mode on the
remote control or the MODE button on the front
display of the subwoofer to activate the speaker.
Note –Automatic standby
• Please note that the speaker system switches to
standby mode after 15 minutes of no activity (no
audio playback /noother activity).
• Press any button on the remote control or the
subwoofer to re-activate the speaker system.
• The system is shipped from the factory with an
auto standby function. To deactivate this mode,
press button 5onthe front of the subwoofer
system or on the remote control for about 3
seconds. ‘E off’ or ‘E on’ appears in the display.
6. Audio source selection
6.1 AUX playback
• Press the AUX button on the remote control or the
MODE button on the subwoofer several times to
select the AUX connection as the audio source. The
AUX selection is shown on the subwoofer’sdisplay
and signalled by an “AUX” speech message.
8

6.2 Playback using
Bluetooth
®
• Press the BT button on the remote control or the
MODE button on the subwoofer several times to
select
Bluetooth
®
as the audio source. The BLUE
selection is shown on the subwoofer’sdisplay and
signalled by a“Bluetooth” speech message.
6.3 USB/SD playback
• Insert aUSB memory stick or SD/SDHC cardinto the
device.
• Press the USB or SD button on the remote control
or press the MODE button on the subwoofer several
times to select USB/SD as the audio source. The USB/
SD selection is shown on the subwoofer’sdisplay and
signalled by an “USB” speech message.
7. Advanced features
7.1 General and individual volume control
• Press VOL+ or VOL- to increase or decrease the
volume of the system.
Bluetooth
7.2
• Make surethat your
device is on and
• Make surethat the speaker is located within the
Bluetooth
• Open the
device and wait until "Hama" appears in the list of
Bluetooth
• Select "Hama" and wait until the speaker is listed as
connected in the
device.
• If the
®
first connection (pairing)
Bluetooth
Bluetooth
®
range of max. 10 metres.
Bluetooth
®
®
settings on your terminal
devices found.
Bluetooth
®
Bluetooth
has connected successfully BLUE will
®
-capable terminal
®
is activated.
®
settings on your terminal
be shown on the display.
Note
• Check whether your mobile device (MP3 player,
mobile phone, etc.) is
Bluetooth
®
capable.
• If not, you can only use the speaker for playback
using the included audio cable.
• Note that the maximum range for
Bluetooth
®
is
10 metres without obstacles such as walls, people,
etc.
7.3 Numeric keypad 0-9
• Select an audio le on aUSB or SD storage medium.
The selection is only possible on the audio source
active at that time.
7.4 LED backlight
• The system comes with abacklight that is constantly
lit.
• By pressing button 8onthe front of the subwoofer
system or on the remote control, you can turn the
backlight off/on.
8. Care and Maintenance
•Only clean this product with aslightly damp, lint-free
cloth and do not use aggressive cleaning agents.
9. Warranty Disclaimer
Hama GmbH &CoKGassumes no liability and provides
no warranty for damage resulting from improper
installation/mounting, improper use of the product or
from failuretoobserve the operating instructions and/
or safety notes.
10. Service and Support
Please contact Hama Product Consulting if you have
any questions about this product.
Hotline: +49 9091 502-115 (German/English)
Further support information can be found here:
www.hama.com
9

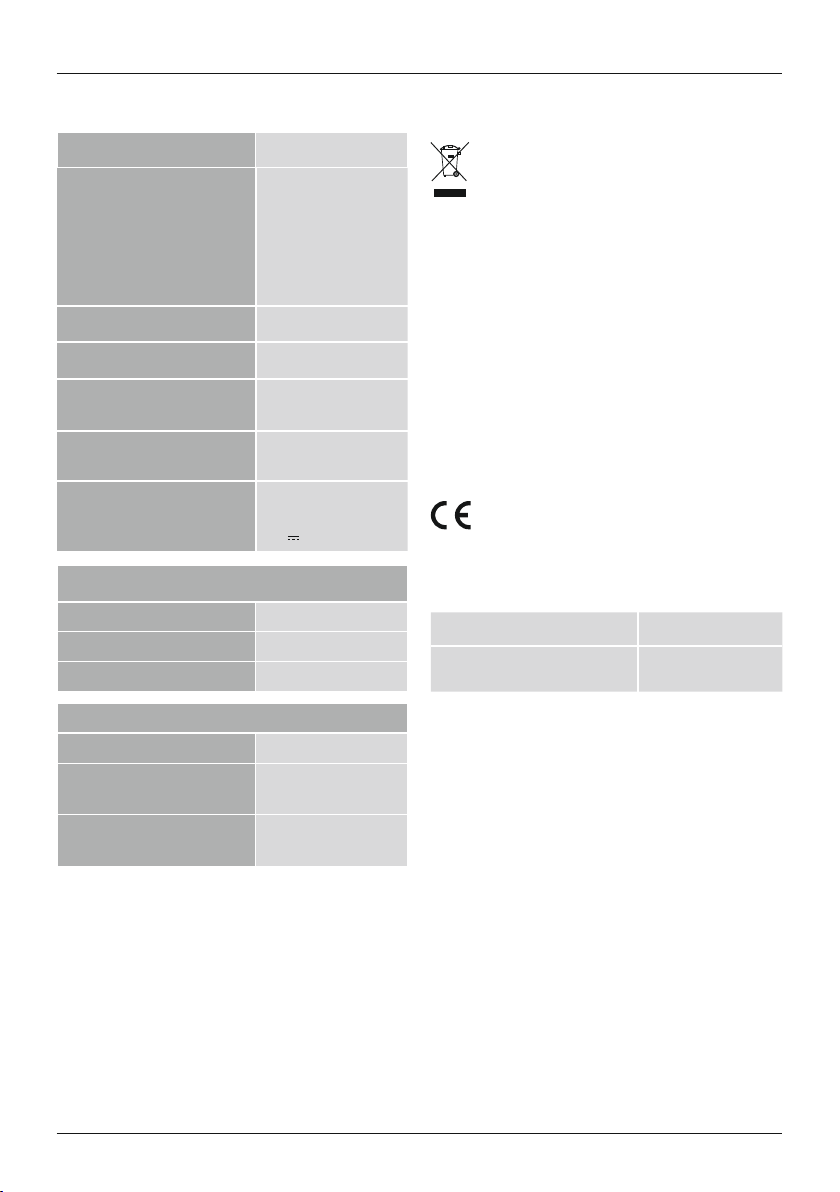
11. Technical Data
Bluetooth
®
Technology
Bluetooth
®
Frequency range:
speakers:
Frequency
160–20000 Hz
Frequency range of
subwoofer:
30–160 Hz
Impedance 6 Ω
Distortion factor ≥ 0.5% (1K, 1W)
Power supply
230 VAC/50Hz/
0,4 AMax
Power supply remote control 2AAA batteries
Cinch, USB
Connections
(Host, Type A, max.
130mA), SD
5V
Performance
Max. total music
performance
100 W
Subwoofer 50 W
Satellites/Centre25W
Size (B xTxH)/Weight
Total ca. 3200 g
Subwoofer
Satellites/Centre
29.3 x16x27.3 cm
ca. 2250 g
10.5 x11x17.2 cm
ca. 470 g
v4.0
12. Recycling Information
Note on environmental protection:
After the implementation of the European
Directive 2012/19/EU and 2006/66/EU in the
national legal system, the following applies:
Electric and electronic devices as wellas
batteries must not be disposed of with household
waste. Consumers areobliged by law to return electrical
and electronic devices as wellasbatteries at the end of
their service lives to the public collecting points set up
for this purpose or point of sale. Details to this are
dened by the national law of the respective country.
This symbol on the product, the instruction manual or
the package indicates that aproduct is subject to these
regulations. By recycling, reusing the materials or other
forms of utilising old devices/Batteries, you aremaking
an important contribution to protecting our
environment.
13. Declaration of Conformity
Hereby,Hama GmbH &CoKGdeclares that the
radio equipment type [00113766] is in
compliance with Directive 2014/53/EU.The full
text of the EU declaration of conformity is available at
the following internet address:
www.hama.com->00113766 ->Downloads.
Frequency band(s)
Maximum radio-frequency power
transmitted
2400 -2483.5
MHz
20 dBm
10
D Bedienungsanleitung
Bedienungselemente und Anzeigen
Lautsprecher
1. Subwoofer
2. Satelliten-Lautsprecher
3. Fernbedienung
4. MODE –Taste
5ã :
–Taste, Titelsprung zurück,
Aus-/Einschalten der Auto-Standby Funktion
6. Lautstärkeregler
::
7ã
–Play/Pause –Taste
:
8ã
–Taste, Titelsprung vorwärts,
Aus-/Einschalten der LED Beleuchtung
9. Bassregler
10. Stereo Audio Eingang Cinch Rechts/Links
11. Satelliten Lautsprecher Anschluss Rechts/Links
12. ON/OFF,Ein-/Ausschalter
13. 230 VNetzanschluß
14. LED 1Power
15. LED 2Power
16. USB/SD-Slot
Fernbedienung
STBY –Ein-/Standbyschalter
MUTE –Stummschaltung
RANDOM –Zufälliger Titel
REPEAT –Titel wiederholen
RESET –setzt das ganze System auf
Werkseinstellungen zurück
BT –Bluetooth
®
Modus
AUX –Auswahl Audioquelle AUX /PC-Anschluss
USB –Auswahl Audioquelle Speichermedium USB
SD –Auswahl Audioquelle SD/SDHC Karte
TREBLE - –Tonhöhenstärke reduzieren
TREBLE + –Tonhöhenstärke erhöhen
TUN- – Ta
ste ist bei dieser Fernbedienung ohne Funktion
TUN+ – Taste ist bei dieser Fernbedienung ohne Funktion
VOL+/- –generelle Lautstärkeregelung (Master)
::
–Play/Pause –Taste
:
–Titelsprung zurück
:
–Titelsprung vorwärts
BASS- –Bassstärke reduzieren
BASS+ –Bassstärke erhöhen
0-9 –Titelnummernauswahl
Vielen Dank, dass Sie sich für ein Hama Produkt
entschieden haben!
Nehmen Sie sich Zeit und lesen Sie die folgenden
Anweisungen und Hinweise zunächst ganz durch.
Bewahren Sie diese Bedienungsanleitung anschließend
an einem sicheren Ort auf,umbei Bedarf darin
nachschlagen zu können. Sollten Sie das Gerät
veräußern, geben Sie diese Bedienungsanleitung an
den neuen Eigentümer weiter.
1. Erklärung von Warnsymbolen und Hinweisen
Gefahr eines elektrischen Schlages
Dieses Symbol weist auf eine Berührungsgefahr
mit nicht isolierten Teilen des Produktes hin,
die möglicherweise eine gefährliche Spannung
von solcher Höhe führen, dass die Gefahr eines
elektrischen Schlags besteht.
Warnung
Wirdverwendet, um Sicherheitshinweise zu
kennzeichnen oder um Aufmerksamkeit auf
besondereGefahren und Risiken zu lenken.
Hinweis
Wirdverwendet, um zusätzlich Informationen oder
wichtige Hinweise zu kennzeichnen.
2. Packungsinhalt
•Subwoofer
•2Satelliten Lautsprecher
•Y-Adapter Audio
•Fernbedienung
•2AAA Batterien
•diese Bedienungsanleitung
3. Sicherheitshinweise
•Das Produkt ist für den privaten, nicht-gewerblichen
Haushaltsgebrauch vorgesehen.
•Schützen Sie das Produkt vor Schmutz, Feuchtigkeit
und Überhitzung und verwenden Sie es nur in
trockenen Räumen.
•Dieses Produkt gehört, wie alle elektrischen Produkte,
nicht in Kinderhände!
11
•Lassen Sie das Produkt nicht fallen und setzen Sie es
keinen heftigen Erschütterungen aus.
•Betreiben Sie das Produkt nicht außerhalb
seiner in den technischen Daten angegebenen
Leistungsgrenzen.
•Halten Sie Kinder unbedingt von dem
Verpackungsmaterial fern, es besteht
Erstickungsgefahr.
•Entsorgen Sie das Verpackungsmaterial sofort gemäß
den örtlich gültigen Entsorgungsvorschriften.
•Nehmen Sie keine Veränderungen am
Gerät vor.Dadurch verlieren Sie jegliche
Gewährleistungsansprüche.
Gefahr eines elektrischen Schlages
• Öffnen Sie das Produkt nicht und betreiben Sie es
bei Beschädigungen nicht weiter.
• Verwenden Sie das Produkt nicht, wenn der ACAdapter,das Adapterkabel oder die Netzzuleitung
beschädigt sind.
• Versuchen Sie nicht, das Produkt selbst zu warten
oder zu reparieren. Überlassen Sie jegliche
Wartungsarbeit dem zuständigen Fachpersonal.
4. Anschlussdiagramm
Warnung -Batterien
• Beachten Sie unbedingt die korrekte Polarität
(Beschriftung +und -) der Batterien und legen
Sie diese entsprechend ein. Bei Nichtbeachtung
besteht die Gefahr des Auslaufens oder einer
Explosion der Batterien.
• Gestatten Sie Kindern nicht ohne Aufsicht das
Wechseln von Batterien.
• Mischen sie alte und neue Batterien nicht, sowie
Batterien unterschiedlichen Typs oder Herstellers.
• Entfernen Sie Batterien aus Produkten, die längere
Zeit nicht benutzt werden.
• Schließen Sie die Batterien nicht kurz.
• Laden Sie Batterien nicht.
• Werfen Sie Batterien nicht ins Feuer.
• Bewahren Sie Batterien außerhalb der Reichweite
von Kindern auf.
12
5. Inbetriebnahme
5.1 Fernbedienung
• Öffnen Sie die Batteriefachabdeckung, welche sich
auf der Rückseite der Fernbedienung bendet.
• Ziehen Sie (gegebenenfalls) die Verschlusslache
zurück und heben Sie den Deckel an. Bei anderen
Modellen der Fernbedienung genügt es die
Abdeckung in die gekennzeichnete Richtung zu
schieben.
Schiebedeckel
• Legen Sie die Batterien polrichtig ein. Die
richtige Polarität wirdimBatteriefach durch die
Kennzeichnung des Plus- und Minuspols dargestellt.
5.2 Lautsprecher
• Verbinden Sie die zwei Satelliten-Lautsprecher mit den
entsprechenden Audioausgängen an der Rückseite
des Subwoofers, wie im Anschlussdiagramm Punkt 4
dargestellt.
• Verbinden Sie dann den entsprechenden
Audioeingang AUX mit Hilfe eines der beilegenden
Audiokabel mit der Signalquelle (Computer/DVD/
Blueray/MP3 Player etc.)
• Verbinden Sie das Netzanschlusskabel des Subwoofers
mit einer intakten und korrekt installierten Steckdose.
Hinweis
• Betreiben Sie das Produkt an einer dafür zugelassenen
Steckdose.
• Achten Sie bei Mehrfachsteckdosen darauf,dass
die angeschlossenen Verbraucher die zulässige
Gesamtleistungsaufnahme nicht überschreiten.
• Die Netzsteckdose muss jederzeit leicht erreichbar sein.
• Trennen Sie das Produkt vom Netz, wenn Sie es längere
Zeit nicht benutzen.
Hinweis –Leitungs-/Empfangsstörungen
• In einer Betriebsumgebung mit vielen
Hochfrequenzsendern können am Produkt
Fehlfunktionen ausgelöst werden. Das Produkt
kehrt in einen fehlerfreien Betriebszustand zurück,
sobald kein störender HF-Einuss mehr besteht.
• In einer Betriebsumgebung mit
leitungsgebundenen Störungen kann am Produkt
eine Fehlfunktion ausgelöst werden. Das Produkt
kehrt in einen fehlerfreien Betriebszustand zurück,
sobald die Leitungsstörung nicht mehr auftritt.
5.3 Ein-/Ausschalten/Standby
• Schalten Sie das Lautsprechersystem ein, indem Sie
den Ein-/Ausschalter ON/OFF an der Rückseite des
Subwoofers auf ON stellen.
• Schalten Sie das Lautsprechersystem vollständig
aus, indem Sie den Ein-/Ausschalter ON/OFF an der
Rückseite des Subwoofers auf OFF stellen.
• Bei eingeschaltetem Lautsprechersystem betätigen
Sie die Taste STBY auf der Fernbedienung oder
die Taste MODE (ca. 3Sek.) an der Bedienfront
des Subwoofers um das Lautsprechersystem in den
Standby-Modus wechseln zu lassen.
• Betätigen Sie im Standby-Modus die Taste STBY
auf der Fernbedienung oder die Taste MODE
an der Bedienfront des Subwoofers, um das
Lautsprechersystem zu aktivieren.
Hinweis -Automatischer Standby
•Beachten Sie, dass das Lautsprechersystem nach
15 Minuten ohne Aktion (keine Audiowiedergabe/
keine sonstigen Aktivitäten) in den Standby-Modus
wechselt.
•Betätigen Sie eine beliebige Taste auf der
Fernbedienung oder am Subwoofer,umdas
Lautsprechersystem wieder zu aktivieren.
•Werksseitig wirddas System mit einem AutoStandby ausgeliefert. Um diesen Modus zu
deaktivieren, drücken Sie für ca. 3Sek. die Taste 5
auf der Vorderseite des Subwoofersystems oder der
Fernbedienung. Im Display erscheint die Anzeige
„E off“ oder „E on“
13

6. Audio-Quellenauswahl
6.1 AUX-Wiedergabe
• Wählen Sie durch mehrmaliges Drücken der Taste
AUX auf der Fernbedienung oder der MODE
Taste am Subwoofer den AUX-Anschluss als
Audioquelle aus. Die Auswahl AUX wirdauf dem
Display am Subwoofer angezeigt und durch die
Sprachinformation „AUX“ signalisiert.
6.2 Wiedergabe über
Bluetooth
®
• Wählen Sie durch mehrmaliges Drücken der Taste
BT auf der Fernbedienung oder der MODE Taste
am Subwoofer Bluetooth als Audioquelle aus. Die
Auswahl BLUE wirdauf dem Display am Subwoofer
angezeigt und durch die Sprachinformation
„Bluetooth“ signalisiert.
6.3 USB/SD-Wiedergabe
• Stecken Sie einen USB Speicher oder SD/HDHC
Speicherkarte in das Gerät.
• Betätigen Sie die Taste USB oder SD auf der
Fernbedienung oder wählen Sie durch mehrmaliges
Drücken der MODE Taste am Subwoofer USB/SD
als Audioquelle aus. Die Auswahl USB/SD wirdauf
dem Display am Subwoofer angezeigt und durch die
Sprachinformation „USB“ signalisiert.
7. Erweiterte Funktionen
7.1 Generelle und individuelle
Lautstärkeregelung
• Betätigen Sie VOL+ oder VOL-,umdie Lautstärke
des Systems zu erhöhen oder zu verringern.
7.2
Bluetooth
• Stellen sie sicher,dass Ihr
Endgerät eingeschaltet ist und dass
aktiviert ist.Stellen Sie sicher,dass der Lautsprecher
sich innerhalb der
Metern bendet.
• Öffnen Sie auf Ihrem Endgerät die
Einstellungen und warten Sie, bis in der Liste der
gefundenen
®
Erstverbindung (Pairing)
Bluetooth
Bluetooth
®
Reichweite von max. 10
Bluetooth
Bluetooth
®
Geräte "Hama" angezeigt
®
fähiges
Bluetooth
®
®
wird.
• Wählen Sie "Hama" aus und warten Sie, bis der
Lautsprecher als verbunden in den
Einstellungen Ihres Endgerätes angezeigt wird.
• Bei erfolgreicher
Bluetooth
Bluetooth
®
–Verbindung wirdBLUE
®
auf dem Display dauerhaft angezeigt.
Hinweis
•Prüfen Sie, ob ihr mobiles Endgerät (MP3-Player,
Mobiltelefon, etc.)
Bluetooth
®
fähig ist.
•Wenn nicht, können Sie den Lautsprecher
nur mittels des beiliegenden Audiokabels zur
Wiedergabe nutzen.
•Beachten Sie, dass die Reichweite von
Bluetooth
®
max. 10 Meter beträgt, ohne Hindernisse wie
Wände, Personen etc.
7.3 Nummernfeld 0-9
• Wählen Sie mit Hilfe des Nummernfeldes auf Ihrer
Fernbedienung eine Audiodatei auf einem USB oder
SD Speichermedium. Die Aushwahl ist nur auf der
aktuelle aktiven Audioquelle möglich.
7.4 LED Hintergrundbeleuchtung
• Werksseitig wirddas System mit einer konstant
leuchtenden Hintergrundbeleuchtung ausgestattet.
• Durch Drücken der Taste 8auf der Vorderseite des
Subwoofersystems oder der Fernbedienung können
Sie die Hintergrundbeleuchtung aus- /einschalten.
8. Wartung und Pflege
• Reinigen Sie dieses Produkt nur mit einem
fusselfreien, leicht feuchten Tuch und verwenden Sie
keine aggressiven Reiniger.
9. Haftungsausschluss
Die Hama GmbH &Co. KG übernimmt keinerlei
Haftung oder Gewährleistung für Schäden, die
aus unsachgemäßer Installation, Montage und
unsachgemäßem Gebrauch des Produktes oder einer
Nichtbeachtung der Bedienungsanleitung und/oder der
Sicherheitshinweise resultieren.
10. Service und Support
Bitte wenden Sie sich bei Fragen zum Produkt gerne an
die Hama-Produktberatung.
Hotline: +49 9091 502-115 (Deu/Eng)
WeitereSupportinformationen nden Sie hier:
www.hama.com
14
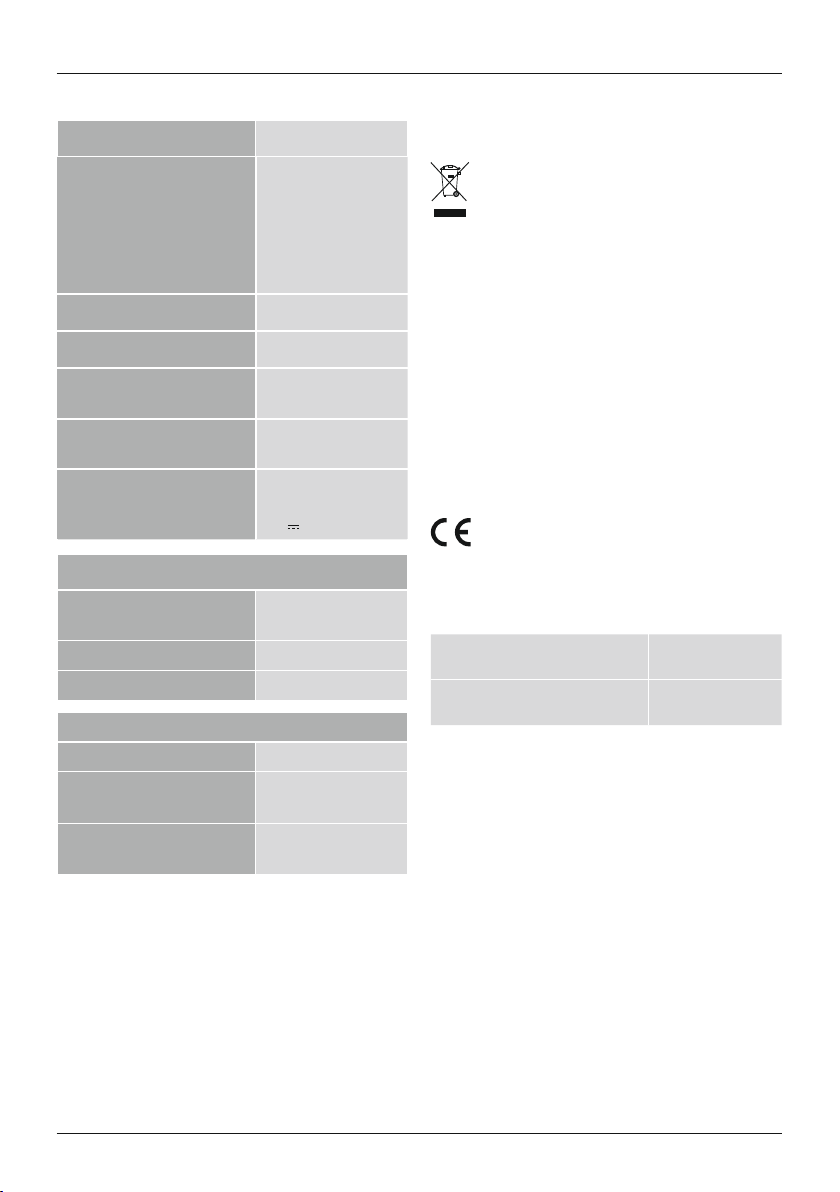
11. Technische Daten
Bluetooth
®
Technologie
Bluetooth
®
Frequenzbereich:
Lautsprecher:
Frequenz
160 –20000 Hz
Frequenzbereich
Subwoofer:
30 –160 Hz
Impedanz 6 Ω
Verzerrung /Klirrfaktor ≥ 0.5% (1K, 1W)
Spannungsversorgung
Stromversorgung
Fe
rnbedienung
230 VAC/50Hz/
0,4 AMax
2AAA Batterien
Cinch, USB
Anschlüsse
(Host, Type A, max.
130mA), SD
5V
Leistung
Max. Musikgesamtleistung 100 W
Subwoofer 50 W
Satelliten/Center 25 W
v4.0
12. Entsorgungshinweise
Hinweise zum Umweltschutz:
Ab dem Zeitpunkt der Umsetzung der
europäischen Richtlinien 2012/19/EU und
2006/66/EG in nationales Recht gilt folgendes:
Elektrische und elektronische Geräte sowie
Batterien dürfen nicht mit dem Hausmüll entsorgt
werden. Der Verbraucher ist gesetzlich verpichtet,
elektrische und elektronische Geräte sowie Batterien am
Ende ihrer Lebensdauer an den dafür eingerichteten,
öffentlichen Sammelstellen oder an die Verkaufsstelle
zurückzugeben. Einzelheiten dazu regelt das jeweilige
Landesrecht. Das Symbol auf dem Produkt, der
Gebrauchsanleitung oder der Verpackung weist auf
diese Bestimmungen hin. Mit der Wiederverwertung,
der stoichen Verwertung oder anderen Formen der
Verwertung von Altgeräten/Batterien leisten Sie einen
wichtigen Beitrag zum Schutz unserer Umwelt.
13. Konformitätserklärung
Hiermit erklärt die Hama GmbH &CoKG, dass der
Funkanlagentyp [00173166] der Richtlinie
2014/53/EU entspricht. Der vollständige Text der
EU-Konformitätserklärung ist unter der folgenden
Internetadresse verfügbar:
www.hama.com->00173166->Downloads.
Frequenzband/Frequenzbänder 2400 -2483.5 MHz
Abgestrahlte maximale
Sendeleistung
20 dBm
Größe (B xTxH)/Gewicht
Gesamt ca. 3200 g
Subwoofer
Satelliten /Center
29,3 x16x27,3 cm
ca. 2250 g
10,5 x11x17,2 cm
ca. 470 g
15
F Mode d‘emploi
Éléments de commande et d'affichage
Haut-parleur:
1. Caisson de graves
2. Haut-parleurs satellites
3. Télécommande
4. Touche MODE
5. Touche
:
,titreprécédent,
Mise hors/sous tension de la fonction de veille
automatique
6. Réglage du volume
7. Touche
::
,lecture/pause
8. Touche :,titreprécédent,
Mise hors/sous tension de l’éclairage LED
9. Réglage des basses
10. Entrée audio stéréo RCAdroite/gauche
11. Connexion haut-parleurs satellites droite/gauche
12. ON/OFF,interrupteur de mise sous/hors tension
13. Entrée secteur 230 V
14. LED 1Power
15. LED 2Power
16. Emplacement USB/SD
Télécommande:
STBY –commutateur de mise sous tension/veille
MUTE –commutateur de mise en sourdine
RANDOM –Chanson aléatoire
REPEAT –Répéter la chanson
RESET –Bluetooth
®
mode
BT –touche sans fonction sur cette télécommande
AUX –sélection de AUX /PCcomme source audio
USB –sélection d’une clé USB comme source audio
SD – sélection d’une carte SD/SDHC comme sour
ce audio
TREBLE - –diminution des aigus
TREBLE + –augmentation des aigus
TUN- –touche sans fonction sur cette télécommande
TUN+ –touche sans fonction sur cette télécommande
VOL+/- –réglage général du volume (Master)
Touche
:
::
,lecture/pause
–titreprécédent
:
–titresuivant
BASS- –diminution des graves
BASS+ –augmentation des graves
0-9 –sélection du numérod’un titre
Nous vous remercions d’avoir choisi un produit Hama.
Veuillez prendreletemps de lirel‘ensemble des
remarques et consignes suivantes. Veuillez conserver
ce mode d‘emploiàportée de main andepouvoir le
consulter en cas de besoin. Transmettez-le au nouveau
propriétaireavec l’appareil le cas échéant.
1. Explication des symboles d‘avertissement et
des remarques
Risque d’électrocution
Ce symbole indique un risque de contact avec
des parties non isolées du produit susceptibles de
conduireuncourant électrique capable de provoquer
un risque d‘électrocution.
Avertissement
Ce symbole est utilisé pour indiquer des consignes
de sécurité ou pour attirer votreattention sur des
dangers et risques particuliers.
Remarque
Ce symbole est utilisé pour indiquer des informations
supplémentaires ou des remarques importantes.
2. Contenu de l‘emballage
• Caisson de basses
• 2haut-parleurs satellites
• Câble adaptateur audio en Y
• Télécommande
• 2piles LR03/AAA
• Mode d'emploi
3. Consignes de sécurité
• Ce produit est destiné àune installation domestique
non commerciale.
• Protégez le produit de toute saleté, humidité, surchauffe
et utilisez-le uniquement dans des locaux secs.
• Cet appareil, comme tout appareil électrique, doit être
gardé hors de portée des enfants !
• Protégez le produit des secousses violentes et évitez
tout choc ou toute chute.
16

• N‘utilisez pas le produit en dehors des limites
de puissance indiquées dans les caractéristiques
techniques.
• Tenez les emballages d‘appareils hors de portée des
enfants, risque d‘étouffement.
• Recyclez les matériaux d’emballage conformément
aux prescriptions locales en vigueur.
• N’apportez aucune modication àl’appareil. Des
modications vous feraient perdrevos droits de
garantie.
Risque d’électrocution
• Ne tentez pas d‘ouvrir le produit en cas de
détérioration et cessez de l’utiliser.
• N‘utilisez pas le produit lorsque l‘adaptateur,le
câble de connexion ou le câble d‘alimentation sont
endommagés.
• Ne tentez pas de réparer l’appareil vous-même ni
d’effectuerdes travaux d’entretien. Déléguez tous
travaux d‘entretien àdes techniciens qualiés.
4. Diagramme de raccordement
Avertissement -les batteries
• Respectez impérativement la polarité des batteries
(indications +et-)lors de leur insertion dans le
boîtier.Risques d‘écoulement et d‘explosion des
batteries si tel n‘est pas le cas.
• N‘autorisez pas àdes enfants de remplacer les
piles d‘un appareil sans surveillance.
• N’utilisez pas simultanément des piles usagées et
des piles neuves ou des piles de différents types.
• Retirez les piles du produit si vous ne comptez pas
l’utiliser pendant un certain temps, àpart s‘il est
utilisé en veille en tant que produit d‘alarme.
• Ne court-circuitez pas les piles.
• Ne tentez pas de recharger les piles.
• Ne jetez pas de piles au feu.
• Conservez les piles hors de portée des enfants.
17

5. Mise en service
5.1 Télécommande
• Ouvrez le couvercle du compartiment àpiles qui se
trouve sur la face arrièredelatélécommande.
• Tirez(le cas échéant) la languette de fermeture
vers l’arrièreetsoulevez le couvercle. Pour d’autres
modèles de télécommande, il sutdeglisser le
couvercle dans la direction marquée.
Couvercle coulissant
• Insérez les piles en respectant la polarité. La polarité
conforme est représentée par les pôles positifs et
négatifs dans le compartiment àpiles.
5.2 Haut-parleurs
• Raccordez les deux haut-parleurs satellites aux
sorties audio situées sur la face arrièreducaisson de
basses, comme indiqué au point 4dudiagramme de
raccordement.
• Raccordez ensuite l’entrée audio AUX àvotresource
audio (ordinateur/lecteur DVD/Blue-ray/lecteur MP3,
etc.) àl’aide d’un des câbles audio fournis.
• Branchez le cordon d’alimentation secteur du caisson
de basses àune prise de courant.
Remarque
• Branchez l'appareil uniquement sur une prise de
courant appropriée.
• En cas de prises multiples, veillez àceque les
appareils consommateurs branchés ne dépassent
pas la puissance absorbée totale admissible.
• La prise de courant doit êtrefacilement accessible
àtout moment.
• Débranchez l’appareil si vous ne l’utilisez pas sur
une période prolongée.
Remarque concernant les problèmes de
lignes /deréception
• Un environnement doté de nombreux émetteurs
haute fréquence est susceptible de provoquer
des dysfonctionnements du produit. Le produit
recommence àfonctionner normalement dès que
l’inuence des hautes fréquences est neutralisée.
• Un environnement sujet àdes perturbations
dues aux lignes est susceptible de provoquer
des dysfonctionnements du produit. Le produit
recommence àfonctionner normalement dès que
les perturbations dues aux lignes sont neutralisées.
5.3 Mise sous/hors tension/en veille
• Mettez le système de haut-parleurs sous tension
en plaçant l’interrupteur ON/OFF,situé sur la face
arrièreducaisson de basses, sur ON.
• Vous pouvez mettrelesystème de haut-parleurs hors
tension en plaçant l’interrupteur ON/OFF,situé sur la
face arrièreducaisson de basses, sur OFF.
• Sur un système de haut-parleurs sous tension, utilisez
la touche STBY de la télécommande ou la touche
MODE située sur le panneau de commande du
caisson de basses (pression d’env.3s)andemettre
le système de haut-parleurs en veille.
• Utilisez la touche STBY de la télécommande ou la
touche MODE située sur le panneau de commande
du caisson de basses anderéactiver le système de
haut-parleurs.
Remarque concernant la veille
automatique
• Veuillez noter que le système de haut-parleurs
se met automatiquement en veille au bout de
15 minutes d'inactivité (aucune lecture/aucune
fonction).
• Appuyez sur n'importe quelle touche de la
télécommande ou du caisson de basses ande
réactiver le système de haut-parleurs.
• Le système est livré par défaut avec une fonction
de veille automatique. Pour désactiver ce mode,
appuyez pendant environ 3secondes sur la touche
5delaface avant du caisson de graves ou de la
télécommande. «Eoff »ou«Eon»apparaît alors
àl’écran.
18

6.Sélection de la source audio
6.1 Lecture AUX
• Sélectionnez AUX comme source audio an appuyant
plusieurs fois sur la touche AUX de la télécommande
ou sur la touche MODE du caisson de basses. La
sélection AUX apparaît àl’écran du caisson de basses
et le message vocal annonce «AUX ».
6.2 Lecture via
• Sélectionnez
Bluetooth
Bluetooth
®
®
comme source audio an
appuyant plusieurs fois sur la touche BT de la
télécommande ou sur la touche MODE du caisson
de basses. La sélection BLUE apparaît àl’écran du
caisson de basses et le message vocal annonce «
Bluetooth ».
6.3 Lecture USB/SD
• Insérez une clé USB ou une carte SD/SDHC dans
l’appareil.
• Utilisez la touche USB ou SD de la télécommande
ou sélectionnez USB/SD comme source audio en
appuyant plusieurs fois sur la touche MODE du
caisson de basses. La sélection USB/SD apparaît à
l’écran du caisson de basses et le message vocal
annonce «USB ».
7. Fonctions avancées
7.1 Réglage général et individuel du volume
• Utilisez la touche VOL+ ou VOL- and’augmenter ou
baisser le volume du système.
7.2 Première connexion
Bluetooth
• Assurez-vous que votreappareil
sous tension et que sa fonction
®
(couplage)
Bluetooth
Bluetooth
®
est bien
®
est bien
activée.
• Assurez-vous que le haut-parleur se trouve dans un
rayon ne dépassant pas la portée
Bluetooth
10 mètres.
• Ouvrez le menu des paramètres
Bluetooth
appareil portable et attendez que l’appareil "Hama"
apparaisse dans la liste des appareils
®
®
sur votre
Bluetooth
max. de
®
détectés.
• Sélectionnez "Hama" et attendez que le hautparleur soit aché avec le statut connecté dans les
paramètres
• BLUE apparaît àl’écran en cas de connexion
Bluetooth
Bluetooth
®
conforme.
®
de votreappareil.
Remarque
• Veuillez contrôler que votreappareil portable
(lecteur MP3, téléphone portable, etc.) est bien
compatible
Bluetooth
®
.
• Si tel n‘est pas le cas, vous pourrez utiliser les
haut-parleurs uniquement àl‘aide du câble audio
fourni.
• Veuillez noter que la portée maximale de la
connexion
Bluetooth
®
est de 10 mètres sans
obstacles tels que parois, personnes, etc.
7.3 Pavé numérique 0-9
• Sélectionnez le chier audio d’une clé USB ou d’une
carte SD en mémoireàl’aide du pavé numérique de
la télécommande. Ce type de sélection n’est possible
qu’à partir de la source audio activée.
7.4 Rétroéclairage LED
• Le système est équipé par défaut d’un rétroéclairage
allumé en permanence.
• Appuyez sur la touche 8delaface avant du caisson
de graves ou de la télécommande pour désactiver/
activer le rétroéclairage.
8. Soins et entretien
•Nettoyez la balance uniquement àl’aide d’un chiffon
non breux légèrement humide ;évitez tout détergent
agressif.
9. Exclusion de garantie
La société Hama GmbH &CoKGdécline toute
responsabilité en cas de dommages provoqués par
une installation, un montage ou une utilisation non
conformes du produit ou encoreprovoqués par un non
respect des consignes du mode d‘emploi et/ou des
consignes de sécurité.
10. Service et assistance
En cas de question concernant le produit, veuillez vous
adresser au service de conseil produits de Hama.
Ligne téléphonique directe :+49 9091 502-115
(allemand/anglais)
Vous trouverez ici de plus amples informations
concernant l‘assistance:www.hama.com
19
11. Caractéristiques techniques
Technologie
Bluetooth
®
Bluetooth
®
Plage de fréquence:
Haut-parleur:
Fréquence
160 –20000 Hz
Plage de fréquence
caisson de graves:
30 –160 Hz
Impédance 6 Ω
Distorsion /taux de distorsion ≥ 0.5% (1K, 1W)
Courant électrique
Alimentation électrique de la
télécommande
230 VAC/50Hz/
0,4 AMax
2piles AAA
Cinch, USB
Connexions
(Host, Type A, max.
130mA), SD
5V
Puissance
Max. puissance musicale
totale
100 W
Caisson de basses 50 W
Satellites /central 25 W
Taille (B xTxH)/poids
Total ca. 3200 g
Caisson de basses
Satellites /central
27,3 x16x24,5 cm
ca. 2250 g
10,5 x11x17,2 cm
ca. 470 g
v4.0
12. Consignes de recyclage
Remarques concernant la protection de
l’environnement:
Conformément àladirective européenne
2012/19/EU et 2006/66/CE, et and‘atteindre
un certain nombred‘objectifs en matièrede
protection de l‘environnement, les règles
suivantes doivent êtreappliquées: Les appareils
électriques et électroniques ainsi que les batteries ne
doivent pas êtreéliminés avec les déchets ménagers. Le
pictogramme “picto” présent sur le produit, son manuel
d‘utilisation ou son emballage indique que le produit
est soumis àcette réglementation. Le consommateur
doit retourner le produit/la batterie usager aux points
de collecte prévus àcet effet. Il peut aussi le remettreà
un revendeur.Enpermettant ennlerecyclagedes
produits ainsi que les batteries, le consommateur
contribueraàlaprotection de notreenvironnement.
C‘est un acte écologique.
13. Déclaration de conformité
Le soussigné, Hama GmbH &CoKG, déclare
que l‘équipement radioélectrique du type
[00113766] est conforme àladirective
2014/53/UE. Le texte complet de la déclaration UE de
conformité est disponible àl‘adresse internet suivante:
www.hama.com->00113766 ->Downloads.
Bandes de fréquences
Puissance de radiofréquence
maximale
2400 -2483.5
MHz
20 dBm
20
E Instrucciones de uso
Elementos de manejo eindicadores
Altavoces:
1. Subwoofer
2. Altavoces satélite
3. Mando adistancia
4. Tecla MODE
5. Tecla
:
,salto al título anterior,
Conectar/desconectar la función Auto standby
6. Regulador de volumen
7. Tecla
::
Reproducción/Pausa
8. Tecla :,salto al título siguiente,
Conectar/desconectar la iluminación LED
9. Regulador de graves
10. Entrada de audio estéreo RCAderecha/izquierda
11. Conexión altavoces satélite derecha/izquierda
12. Interruptor de encendido/apagado ON/OFF
13. Conexión de redde230 V
14. LED Power 1
15. LED Power 2
16. RanuraSD/USB
Mando adistancia:
STBY –Interruptor On/Standby
MUTE –Silenciamiento
RANDOM –Canción aleatoria
REPEAT –Repite la canción
RESET –
Restablece el sistema por completo alos ajustes de fábrica
BT –Bluetooth®modo
AUX – Selección de la conexión AUX/PC como fuente de audio
USB – Selección del medio de memoria USB como fuente de audio
SD – Selección de la tarjeta SD/SDHC como fuente de audio
TREBLE - – Reducción de la intensidad de los tonos agudos
TREBLE + – Aumento de la intensidad de los tonos agudos
TUN- – Tecla sin función en este mando adistancia
TUN+ – Tecla sin función en este mando adistancia
VOL +/- –Regulación de volumen general (maestro)
Tecla ::,Reproducción/Pausa
:
,salto al título anterior
:
,salto al título siguiente
BASS- – Reducción de la intensidad de los tonos graves
BASS+ – Aumento de la intensidad de los tonos graves
0-9 –Selección del númerodetítulo
Le agradecemos que se haya decidido por un producto
de Hama.
Tómese tiempo yléase primerolas siguientes
instrucciones eindicaciones. Después, guarde estas
instrucciones de manejo en un lugar seguroparapoder
consultarlas cuando sea necesario. Si vende el aparato,
entregue estas instrucciones de manejo al nuevo
propietario.
1. Explicación de los símbolos de aviso ydelas
indicaciones
Peligrodesufrir una descarga eléctrica
Este símbolo hace referencia al peligrodecontacto
con partes no aisladas del producto que pueden
conducir una tensión peligrosa de una intensidad tal
que puede provocar una descarga eléctrica.
Aviso
Se utiliza paracaracterizar las indicaciones de
seguridad oparallamar la atención sobrepeligros y
riesgos especiales.
Nota
Se utiliza paracaracterizar informaciones adicionales
oindicaciones importantes.
2. Contenido del paquete
• Subwoofer
• 2altavoces satélite
• Cable adaptador de audio Y
• Mando adistancia
• 2pilas AAA
• Estas instrucciones de manejo
3. Instrucciones de seguridad
• El producto es paraeluso doméstico privado, no
comercial.
• Proteja el producto de la suciedad, la humedad, el
calor excesivo yutilícelo sólo en recintos secos.
• Este producto, como todos los productos eléctricos,
no debe estar en manos de los niños.
• No deje caer el producto ni lo someta asacudidas
fuertes.
21
• No opereelproducto fueradelos límites de potencia
indicados en los datos técnicos.
• Mantenga el material de embalaje fueradel alcance
de los niños, existe peligrodeasxia.
• Deseche el material de embalaje en conformidad con
las disposiciones locales sobreeldesecho vigentes.
• No realice cambios en el aparato. Esto conllevaría la
pérdida de todos los derechos de la garantía.
Peligrodesufrir una descarga eléctrica
• No abraelproducto ynolosiga operando de
presentar deterioros.
• No utilice el producto si el adaptador de AC,el
adaptador del cable oelcable eléctrico están
dañados.
• No intente mantener oreparar el producto por
cuenta propia. -Encomiende cualquier trabajo
de mantenimiento al personal especializado
competente.
4. Diagrama de conexiones
Aviso –Pilas
• Respete siemprelapolaridad correcta (símbolos +
y-)delas pilas ycolóquelas como corresponda. La
no observación de lo anterior conlleva el riesgo de
derrame oexplosión de las pilas.
• No permita alos niños cambiar las pilas sin la
supervisión de una persona adulta.
• No mezcle pilas viejas ynuevas, ni tampoco pilas
de tipos ofabricantes diferentes.
• Saque las pilas de los productos que no se vayan a
utilizar durante un periodo prolongado de tiempo.
• No cortocircuite las pilas.
• No cargue las pilas.
• No arroje las pilas al fuego.
• Mantenga las pilas fueradel alcance de los niños.
22
5. Puesta en funcionamiento
5.1 Mando adistancia
• Abralacubierta del compartimento de pilas que se
encuentraenellado posterior del mando adistancia.
• Retire(de ser necesario) la lengüeta de cierrey
levante la tapa. En otros modelos del mando a
distancia es suciente con deslizar la cubierta en la
dirección indicada.
Cubierta deslizante
• Coloque las pilas atendiendo aque la polaridad sea
la correcta. La polaridad correcta se muestraenel
compartimento parapilas mediante la indicación del
polo positivo ynegativo.
5.2 Altavoces
• Conecte los dos altavoces satélite con las salidas
de audio correspondientes en el lado posterior del
subwoofer,como se muestraeneldiagrama de
conexiones del punto 4.
• Seguidamente, conecte la entrada de audio AUX
correspondiente alafuente de señal (ordenador/DVD/
Blueray/reproductor de MP3, etc.) mediante uno de
los cables de audio adjuntos.
• Conecte el cable de conexión ared delsubwoofer
aunenchufe correctamente instalado yenperfecto
estado.
Nota
• Utilice el producto conectado auna toma de
corriente autorizada.
• En caso de tomas de corriente múltiples,
asegúrese de que los consumidores conectados
no sobrepasan el consumo total de potencia
admisible.
• La toma de corriente debe estar fácilmente
accesible en todo momento.
• Desconecte el producto de la redsinovaa
emplearse durante un tiempo prolongado.
Nota –Interferencias en la línea o
recepción
• En un entorno de funcionamiento con muchos
transmisores de alta frecuencia, pueden producirse
fallos en el funcionamiento en el producto. El
producto retorna aunestado de funcionamiento
libredefallos tan pronto como deje de darse esa
interferencia por alta frecuencia.
• En un entorno de funcionamiento con fallos
vinculados alalínea, pueden producirse fallos de
funcionamiento en el producto. El producto retorna
aunestado de funcionamiento libredefallos tan
pronto como deje de darse esa interferencia en la
línea.
5.3 Encendido/Apagado/Standby
• Encienda el sistema de altavoces llevando el
interruptor de encendido/apagado ON/OFF del lado
posterior del subwoofer alaposición ON.
• Apague por completo el sistema de altavoces
llevando el interruptor de encendido/apagado ON/
OFF del lado posterior del subwoofer alaposición
OFF.
• Con el sistema de altavoces encendido, pulse la tecla
STBY del mando adistancia olatecla MODE (aprox.
3seg.) del panel frontal del subwoofer paraque el
sistema de altavoces pase al modo Standby.
• En el modo Standby,pulse la tecla STBY del mando
adistancia olatecla MODE del panel frontal del
subwoofer paraactivar el sistema de altavoces.
23
Nota –Standby automático
• Tenga en cuenta el sistema de altavoces pasa
al modo Standby si transcurren 15 minutos sin
acción alguna (sin reproducción de audio/otras
actividades).
• Pulse cualquier tecla del mando adistancia o
del subwoofer paravolver aactivar el sistema de
altavoces.
• El sistema se entrega de fábrica con Auto standby.
Para desactivar es modo, mantenga pulsada
durante aprox. 3segundos la tecla 5enellado
delanterodel sistema subwoofer odel mando a
distancia. En la pantalla se visualiza la indicación
«E off» o«Eon»
6. Selección de la fuente de audio
6.1 Reproducción AUX
• Seleccione la conexión AUX como fuente de audio
pulsando varias veces la tecla AUX del mando
adistancia olatecla MODE del subwoofer.La
selección AUX se muestraenlapantalla del
subwoofer yseseñaliza mediante la información de
voz «AUX».
6.2 Reproducción mediante
• Seleccione
Bluetooth
®
como fuente de audio
Bluetooth
®
pulsando varias veces la tecla BT del mando a
distancia olatecla MODE del subwoofer.La
selección BLUE se muestraenlapantalla del
subwoofer yseseñaliza mediante la información de
voz «Bluetooth».
6.3 Reproducción de USB/SD
• Enchufe una memoria USB ouna tarjeta de memoria
SD/SDHC en la unidad.
• Pulse la tecla USB oSDdel mando adistancia o
seleccione, pulsando varias veces la tecla MODE
del subwoofer,USB/SD como fuente de audio. La
selección USB/SD se muestraenlapantalla del
subwoofer yseseñaliza mediante la información de
voz «USB».
7. Funciones avanzadas
7.1 Regulación del volumen individual ygeneral
• Pulse VOL+ o VOL- paraaumentar odisminuir el
volumen del sistema.
7.2 Conexión inicial
• Asegúrese de que su terminal compatible con
Bluetooth
Bluetooth
®
®
.
• Asegúrese de que el altavoz se encuentradentrodel
alcance
Bluetooth
Bluetooth
está encendido ydeque se ha activado
®
de máx. 10 metros.
• En el terminal, abralaconguración
esperehasta que se muestre"Hama" en la lista de los
dispositivos
Bluetooth
®
®
encontrados.
(vinculación)
Bluetooth
®
y
• Seleccione "Hama" yesperehasta que el altavoz
se muestrecomo conectado en la conguración
Bluetooth
• Si la conexión
®
de su terminal.
Bluetooth
®
se realiza correctamente se
muestraBLUEpermanentemente sobrelapantalla.
Nota
• Compruebe que su terminal móvil (reproductor
de MP3, teléfono móvil, etc.) sea compatible con
Bluetooth
®
.
• De no serlo, solo podrá utilizar el altavoz con el
cable de audio adjunto paralareproducción.
• Tenga en cuenta que el alcance
Bluetooth
®
es de
máx. 10 metros sin obstáculos, como pueden ser
paredes, personas, etc.
7.3 Campo numérico 0-9
• Mediante el campo numérico de su mando a
distancia puede seleccionar un archivo de audio de
una memoria USB ouna tarjeta SD de. La selección
solo es posible dentrodelafuente de audio
actualmente activa.
7.4 Retroiluminación LED
• El sistema viene equipado de fábrica con un
retroiluminación activada constantemente.
• Pulsando la tecla 8enellado delanterodel sistema
subwoofer odel mando adistancia puede activar/
desactivar la retroiluminación.
8. Mantenimiento ycuidado
•Limpie este producto sólo con un paño ligeramente
humedecido que no deje pelusas ynoutilice
detergentes agresivos.
24

9. Exclusión de responsabilidad
Hama GmbH &CoKGnoseresponsabiliza ni concede
garantía por los daños que surjan por una instalación,
montaje omanejo incorrectos del producto opor la no
observación de las instrucciones de manejo y/o de las
instrucciones de seguridad.
10. Servicio ysoporte
Si tiene que hacer alguna consulta sobreelproducto,
diríjase al asesoramiento de productos Hama.
Línea directa: +49 9091 502-115 (Alemán/Inglés)
Encontrar más información de soporte aquí:
www.hama.com
11. Datos técnicos
Tecnología
Bluetooth
®
Bluetooth
®
v4.0
Rango de frecuencia:
Altavoces:
Frecuencia
160 –20000 Hz
Rango de frecuencia
subwoofer:
30 –160 Hz
Impedancia 6 Ω
Distorsión/coeciente de
distorsión no lineal
Corriente
Alimentación de corriente del
mando adistancia
≥ 0.5% (1K, 1W)
230 VAC/50Hz/
0,4 AMax
2pilas AAA
Cinch, USB
Conexiones
(Host, Type A, max.
130mA), SD
5V
Potencia
Potencia máx. música 100 W
Subwoofer 50 W
Satélites/centro25W
Tamaño (B xTxH) /peso
Total ca. 3200 g
Subwoofer
Satélites/centro
27,3 x16x24,5 cm
ca. 2250 g
10,5 x11x17,2 cm
ca. 470 g
12. Instrucciones para desecho yreciclaje
Nota sobrelaprotección medioambiental:
Después de la puesta en marcha de la directiva
Europea 2012/19/EU y2006/66/EU en el
sistema legislativo nacional, se aplicaralo
siguiente: Losaparatos eléctricos yelectrónicos,
así como las baterías, no se deben evacuar en la basura
doméstica. El usuario está legalmente obligado allevar
los aparatos eléctricos yelectrónicos, así como pilas y
pilas recargables, al nal de su vida útil alos puntos de
recogida comunales oadevolverlos al lugar donde los
adquirió. Losdetalles quedaran denidos por la ley de
cada país. El símbolo en el producto, en las
instrucciones de uso oenelembalaje hace referencia a
ello. Gracias al reciclaje, al reciclaje del material oa
otras formas de reciclaje de aparatos/pilas usados,
contribuye Usted de forma importante alaprotección
de nuestromedio ambiente.
13. Declaración de conformidad
Porlapresente, Hama GmbH &CoKG, declara
que el tipo de equipo radioeléctrico [00113766]
es conforme con la Directiva 2014/53/UE. El
texto completo de la declaración UE de conformidad
está disponible en la dirección Internet siguiente:
www.hama.com->00113766 ->Downloads.
Banda obandas de frecuencia
2400 -
2483.5 MHz
Potencia máxima de radiofrecuencia 20 dBm
25
R Руководство по эксплуатации
Органы управления ииндикации
Громкоговоритель:
1. Низкочастотный громкоговоритель
2. Высокочастотный громкоговоритель
3. Пультдистанционногоуправления
4. Кнопка MODE
5. Кнопка
:
– предыдущий файл,
Включение/выключение ждущегоавторежима
6. Регулятор громкости
7. Кнопка
::
– воспроизведение/пауза
8. Кнопка :– следующий файл,
Включение/выключение подсветки
9. Регулятор низких частот
10. Звуковой вход стерео,«тюльпан», правый/левый
11. Подключение высокочастотных громкоговорителей, правый/левый
12. ON/OFF, выключатель питания
13. Подключение сети 230 В
14. Светодиод 1, питание
15. Светодиод 2, питание
16. Разъем USB/SD
Пультдистанционногоуправления:
STBY – ВКЛ./режим ожидания
MUTE – отключение звука
RANDOM – Случайная песня
REPEAT – Повторить песню
RESET – восстановление заводских настроек
BT –Bluetooth
®
режим
AUX – выбор разъема AUX/ПК вкачестве источника звука
USB – выбор разъема USB вкачестве источника звука
SD – выбор карты SD/SDHC вкачестве источника звука
TREBLE - – ослабление высоких частот
TREBLE + – усиление высоких частот
TUN- – на этомПДУ кнопка не применяется
TUN+ – на этомПДУ кнопка не применяется
VOL +/- – общая регулировка громкости (главная)
Кнопка
Кнопка
::
– воспроизведение/пауза
:
– предыдущий файл
Кнопка:– следующий файл
BASS- – ослабление низких частот
BASS+ – усиление низких частот
0-9 – выбор номера файла
Благодарим за покупку изделия фирмы Hama.
внимательно ознакомьтесь снастоящей
инструкцией. Храните инструкцию внадежном
месте для справок вбудущем. Вслучае передачи
изделия другому лицу приложите иэту инструкцию.
1. Предупредительные пиктограммы и
инструкции
Опасность поражения электрическим
током
Значок предупреждает об опасности поражения
высоким напряжением вслучае касания
неизолированных токоведущих деталей.
Внимание
Данным значком отмечены инструкции,
несоблюдение которых можетпривести копасной
ситуации.
Примечание
Дополнительная или важная информация.
2. Комплект поставки
• Низкочастотный громкоговоритель
• 2 высокочастотных громкоговорителя
• Звуковой кабель «Y»
• ПДУ
• 2 батареи АА
• Настоящая инструкция
3. Техника безопасности
• Изделие предназначено толькодля домашнего
применения.
• Беречь от грязи, влаги иисточников тепла.
Эксплуатировать тольковсухих условиях.
• Не давать детям!
• Не ронять. Беречь от сильных ударов.
• Не эксплуатировать внепосредственной близости
снагревательными приборами, беречь от прямых
солнечных лучей.
26
• Упаковку не давать детям: опасность асфиксии.
• Утилизировать упаковку всоответствии с
местными нормами.
• Запрещается вносить изменения вконструкцию.
Впротивном случае гарантийные обязательства
аннулируются.
Опасность поражения током
• Изделие не открывать. Запрещается
эксплуатировать неисправное изделие.
• Запрещается эксплуатировать изделие
• при неисправном блокепитания,
соединительном кабеле или кабеле питания.
• Запрещается самостоятельно выполнять
техническое обслуживание или ремонт
устройства. Ремонт разрешается производить
толькоквалифицированному персоналу.
4. Схема подключения
Предупреждение – Батареи
• Загружая батареи, соблюдайте полярность
(+ и -). Несоблюдение полярности можетстать
причиной вытекания или взрыва батарей.
• Детям запрещается заменять батареи без
присмотра взрослых.
• Не применять батареи разных типов, разных
производителей или новые истарые батареи
вместе.
• Вслучае большогоперерыва вэксплуатации
извлечь батареи из устройства.
• Не закорачивать контакты батарей.
• Обычные батареи не заряжать.
• Не бросать батареи вогонь.
• Хранить батареи вместе, недоступном для
детей.
27
5. Ввод вэксплуатацию
5.1 Пульт дистанционного управления
• На задней панели устройства откройте крышку
отсека батарей.
• При необходимости оттяните фиксаториподнимите
крышку. На других моделях ПДУ достаточно
сдвинуть крышку вуказанном направлении.
Сдвигаемаякрышка
• Вставьте батареи, соблюдая полярность.
Полярность указана маркировкой вотсеке
батарей.
5.2 Громкоговорители
• Подключите два высокочастотных громкоговорителя
ксоответствующим разъемам, расположенным на
задней панели низкочастотногогромкоговорителя
(см. схему подключений, пункт 4).
• Спомощью звуковогокабеля (вкомплекте)
соедините разъем AUX систочником сигнала
(компьютер,DVD, Blueray , проигрыватель МР3 ит.д.).
• Сетевой кабель низкочастотногогромкоговорителя
подключите кнадежной розеткеэлектросети.
Примечание
• Прибор разрешается подключать толькок
соответствующей розеткеэлектросети.
• При подключении кколодке снесколькими
розетками убедитесь, чтообщая мощность
потребителей не превышает допустимую.
• Розетка электросети должна всегда оставаться в
непосредственном доступе.
• Если устройство не используется втечение
длительноговремени, отключите егоот
электросети.
Указание: передаваемые по проводам
помехи / помехи при приеме
• Всреде сбольшим количеством
высокочастотных передатчиков возможны
сбои вработе изделия. После устранения
высокочастотных помех изделие возвращается
внормальный режим работы.
• Вокружении спередаваемыми по проводам
помехами возможны сбои вработе изделия.
После устранения передаваемых по проводам
помех изделие возвращается внормальный
режим работы.
5.3 Включение. Выключение. Ждущий режим
• Чтобы включить акустическую систему, на задней
панели низкочастотногогромкоговорителя переведите
выключатель ON/OFF вположение ON (ВКЛ).
• Чтобы включить акустическую систему, на задней
панели низкочастотногогромкоговорителя переведите
выключатель ON/OFF вположение OFF (ВЫКЛ).
• Чтобы перейти вждущий режим, на ПДУ
нажмите кнопку STBY, или на панели управления
низкочастотногогромкоговорителя нажмите иок.3
секунд удерживайте кнопку MODE .
• Чтобы выйти из ждущегорежима, на ПДУ
нажмите кнопку STBY, или на панели управления
низкочастотногогромкоговорителя нажмите кнопку
MODE .
Автоматический ждущий режим
• Акустическая система автоматически переходит
вждущий режим через 15 минут после
последнегонажатия на кнопку или после
окончания воспроизведения.
• Чтобы снова вывести систему из ждущего
режима, нажмите любую кнопку на ПДУ или на
низкочастотном громкоговорителе.
• Система поставляется сфункцией ждущего
авторежима.Чтобы отключить данный режим,
нажмите иок.секунд удерживайте кнопку 5,
расположенную на передней панели системы
или ПДУ. На дисплее появится индикация «E
off» или «E on».
28

6.Выбор источника звука
6.1 Воспроизведение через AUX
• Чтобы вкачестве источника звука выбрать
устройство, подключенное кразъему AUX, на
ПДУ несколькораз нажмите кнопку AUX, или
выберите AUX несколькими нажатиями кнопки
MODE на низкочастотном громкоговорителе.
На дисплее низкочастотногогромкоговорителя
отображается значок «AUX», атакже будет подан
соответствующий голосовой сигнал.
6.2 Воспроизведение через
Bluetooth
®
• Чтобы вкачестве источника звука выбрать устройство,
подключенное по беспроводному протоколу
®
Bluetooth
или выберите
, на ПДУ несколькораз нажмите кнопку BT,
Bluetooth
®
несколькими нажатиями
кнопки MODE на низкочастотном громкоговорителе..
На дисплее низкочастотногогромкоговорителя будет
отображаться значок «BLUE», атакже будет подан
соответствующий голосовой сигнал.
6.3 Воспроизведение через USB/SD
• Подключите носитель USB или SD/SDHC.
• Чтобы вкачестве источника звука выбрать
устройство, подключенное кразъему USB
или SD, на ПДУнажмите кнопку USB/SD, или
выберите USB/SD несколькими нажатиями кнопки
MODE на низкочастотномгромкоговорителе.
На дисплеенизкочастотного громкоговорителя
отображаетсязначок «USB/SD», атакже будет подан
соответствующий голосовой сигнал.
7. Дополнительные функции
7.1 Общая ииндивидуальная регулировка
громкости
• Общая регулировка громкости осуществляется
кнопками VOL+ и VOL-.
7.2 Согласование устройств по протоколу
Bluetooth
• Убедитесь втом, чтоустройство воспроизведения
споддержкой
Bluetooth
• Разместите оба устройства впределах радиуса
действия
метров.
• Откройте настройки
воспроизведения ивспискенайденных устройств
Bluetooth
®
Bluetooth
®
активирована
Bluetooth
®
®
на расстоянии не более 10
Bluetooth
®
выберите "Hama" .
включено ифункция
®
на устройстве
• Выберите "Hama" иподождите, пока
громкоговоритель не появится всписке
подключенных устройств по протоколу
Bluetooth
• Если соединение установлено, на дисплее
отображается «BLUE».
Примечание
• Убедитесь втом, чтомобильное устройство
(MP3-плеер, мобильный телефон ит.п.)
поддерживает функцию
Bluetooth
®
.
• Если нет, громкоговоритель можно
использовать толькосвходящим вкомплект
аудиокабелем.
• Обратите внимание, чтомаксимальный радиус
действия
Bluetooth
®
составляет 10 метров без
препятствий (стен, людей ит.д.).
7.3 Кнопочная панель 0-9
• Спомощью кнопочной панели на ПДУ можно
выбрать звуковой файл на носителей USB,
носителе SD, сохраненную вячейкепамяти. Такой
выбор можно осуществить тольконаисточнике
звука, который применяется внастоящий момент.
7.4 Подсветка
• Система поставляется снепрерывно горящей.
подсветкой.Включение/выключение подсветки
осуществляется кнопкой 8, расположенной на
передней панели системы или ПДУ.
8. Уход итехническое обслуживание
• Чистку изделия производить толькобезворсовой
слегка влажной салфеткой. Запрещается
применять агрессивные чистящие средства.
9. Отказ от гарантийных обязательств
Компания Hama GmbH &CoKGне несет
ответственность за ущерб, возникший вследствие
неправильногомонтажа, подключения и
использования изделия не по назначению, а
такжевследствие несоблюдения инструкции по
эксплуатации итехники безопасности.
10. Отдел техобслуживания
По вопросам ремонтаили замены неисправных
изделий обращайтесь кпродавцу или всервисную
службукомпании Hama.
Горячая линия отдела техобслуживания:
+49 9091 502-115 (немецкий, английский)
Подробнее смотрите здесь:www.hama.com
®
.
29
11. Технические характеристики
Технология
Bluetooth
®
Bluetooth
Диапазон частот:
Громкоговоритель:
160 –20000 Гц
Частота
Диапазон частот
низкочастотного
громкоговорителя:
30 –160 Гц
Сопротивление 6 Ω
Искажения / коэф.
нелинейных искажений
Ток
≥ 0.5% (1K, 1W)
230 VAC/50Hz/
0,4 AMax
Питание ПДУ 2 батареи ААА
Cinch, USB
Разъемы
(Host, Type A, max.
130mA), SD
5V
Мощность
Max. Общая звуковая
мощность
Низкочастотный
громкоговоритель
100 W
50 W
Высокочастотные
громкоговорители
/ центральный
25 W
громкоговоритель
Размер (B xTxH)/Вес
Общий ca. 3200 g
Низкочастотный
громкоговоритель
27,3 x16x24,5 cm
ca. 2250 g
Высокочастотные
громкоговорители/
центральный
10,5 x11x17,2 cm
ca. 470 g
громкоговоритель
12. Инструкции по утилизации
®
v4.0
Охрана окружающей среды:
Смоментапереходанационального
законодательства на европейские нормативы
2012/19/EU и 2006/66/EU действительно
следующее: Электрические иэлектронные
приборы, атакже батареи запрещается
утилизировать собычным мусором. Потребитель,
согласно закону, обязан утилизировать
электрические иэлектронные приборы, атакже
батареи иаккумуляторы после их использования в
специально предназначенных для этого пунктах
сбора, либо впунктах продажи. Детальная
регламентация этих требований осуществляется
соответствующим местным законодательством.
Необходимость соблюдения данных предписаний
обозначается особым значком на изделии,
инструкции по эксплуатации или упаковке. При
переработке, повторном использовании материалов
или при другой форме утилизации бывших в
употреблении приборов Вы помогаете охране
окружающей среды. Всоответствии с
предписаниями по обращению сбатареями, в
Германии вышеназванные нормативы действуют
для утилизации батарей иаккумуляторов.
13. Декларация производителя
Настоящим компания Hama GmbH &CoKG
заявляет, чторадиооборудование типа
[00113766] отвечает требованиям директивы
2014/53/ЕС. Сполным текстом декларации о
соответствии требованиям ЕС можно ознакомиться
здесь:
www.hama.com->00113766 ->Downloads.
Диапазон/диапазоны частот
Максимальная излучаемая
мощность
2400 -2483.5
MHz
20 dBm
30

I Istruzioni per l‘uso
Elementi di comando eindicazioni
Altoparlante:
1. Subwoofer
2. Altoparlanti satelliti
3. Telecomando
4. Tasto MODE
5. Tasto
:
,brano precedente,
Accendere/Spegnerelafunzione di stand-by
automatico
6. Regolatoredel volume
7. Tasto
::
–Play/Pause
8. Tasto :,brano successivo,
Accendere/Spegnerel’illuminazione LED
9. Regolatoredibassi
10. Ingresso audio stereo RCAdestro/sinistro
11. Attacco casse acustiche satellitari destro/sinistro
12. Interruttore ON/OFF
13. Allacciamento alla rete 230V
14. LED 1Power
15. LED 2Power
16. Slot USB /SD
Telecomando:
STBY –Interruttoreon/stand-by
MUTE –InterruttoreMute
RANDOM –canzone casuale
REPEAT –ripeti la canzone
RESET –
Ripristina l’interosistema alle impostazioni di fabbrica
BT –Bluetooth®modo
AUX –Selezione sorgente audio attacco AUX /PC
USB – Selezione sor
gente audio supporto di memoria USB oscheda SD/SDHC
SD –Selezione sorgente audio scheda SD/SDHC
TREBLE - –Riduce la potenza degli alti
TREBLE + –Aumenta la potenza degli alti
TUN- – Questo tasto del telecomando non ha alcuna funzione
TUN+ – Questo tasto del telecomando non ha alcuna funzione
VOL +/- –Regolazione generale del volume (Master)
Tasto ::Play/Pause
:
Tasto
,brano precedente
Tasto :,brano successivo
BASS- –Riduce la potenza dei bassi
BASS+ –Aumenta la potenza dei bassi
0-9 –Scelta del numerodel brano
Grazie per avereacquistato un prodotto Hama!
Prima della messa in esercizio, leggete attentamente
le seguenti istruzioni eavvertenze, quindi conservatele
in un luogo sicuroper una eventuale consultazione. In
caso di cessione dell‘apparecchio, consegnate anche le
presenti istruzioni al nuovo proprietario.
1. Spiegazione dei simboli di avvertimento e
delle indicazioni
Pericolo dovuto ascossa elettrica
Questo simbolo indica un pericolo dovuto al contatto
con parti non isolate del prodotto che potrebbero
provocareuna tensione pericolosa di entità tale da
generareilpericolo di una scossa elettrica.
Attenzione
Viene utilizzato per contrassegnareleindicazioni
di sicurezza oppureper rivolgerel‘attenzione verso
particolari rischi epericoli.
Avvertenza
Viene utilizzato per contrassegnareinformazioni
supplementari oindicazioni importanti.
2. Contenuto della confezione
• Subwoofer
• 2casse acustiche satellitari
• Cavo audio Y
• Telecomando
• 2batterie AAA
• Queste istruzioni per l’uso
3. Indicazioni di sicurezza:
• Il prodotto èconcepito per l’uso domestico privato,
non commerciale.
• Proteggereilprodotto da sporcizia, umidità e
surriscaldamento eutilizzarlo solo in ambienti asciutti.
• Tenerequesto apparecchio, come tutte le
apparecchiatureelettriche, fuori dalla portata dei
bambini!
• Non farecadereilprodotto enon sottoporlo aforti
scossoni!
• Non mettereinesercizio il prodotto al di fuori dei suoi
limiti di rendimento indicati nei dati tecnici.
31
 Loading...