

Page 1

00
176931
Outdoor Sensor
Außensensor
Руководство по эксплуатации
RFWIRELESS
Ch
1
°C
25
.5
%
43
REMOTESENSOR
Operating Instructions
Bedienungsanleitung
Mode d‘emploi
Instrucciones de uso
Istruzioni per l‘uso
Instrukcja obsługi
Návod kpoužití
Návod na použitie
Manual de utilizare
TS34A
GB
D
F
E
RUS
I
PL
CZ
SK
RO
Page 2

RFWIRELESS
Ch
1
°C
25
5
1
43
REMOTESENSOR
.5
%
4
3
2
Page 3

G Operating instruction
Controls and Displays
AMeasuring station
1. LED indicator
2. Battery compartment
3. CHANNEL slide switch =selects channel
4. Recess for wall mounting
5. LCDdisplay
Thank you for choosing aHama product.
Take yourtime and read the followinginstructions and information
completely.Please keep these instructions in asafe place for future
reference. If you sell thedevice, please pass theseoperating instructions
on to the new owner.
1. Explanation of Warning Symbols and Notes
Warning
This symbol is used to indicate safety instructions orto draw your
attention to specic hazards and risks.
Note
This symbol is used to indicate additional information orimportant
notes.
2
Page 4

2. Package Contents
• TS34A OutdoorSensor
• These operating instructions
3. Safety Notes
• The product is intended for private, non-commercial use only.
• Do notoperate the product outside the power limits givenin the
specications.
• Do notuse the product inmoist environments and avoid splashes.
• Do notuse the product inthe immediate vicinity ofheaters or other
heat sources or in direct sunlight.
• Do notuse the product inareas wherethe use ofelectronic devices
is not permitted.
• Do notput the product nearinterference elds, metal frames,
computers, TVs, etc. Electronic devices and window frames can
negatively affect the product’sfunctionality.
• Do notdrop the product and do not expose itto any major shocks.
• Do notopen the device orcontinue to operate it if it becomes
damaged.
• Do notattempt to service orrepair the product yourself.Leave any and
all service work to qualiedexperts.
• Keep the packaging material out of thereach of children due to the
risk of suffocation.
• Dispose ofpackaging material immediately accordingto locally
applicable regulations.
• Do notmodify the product inany way.Doing so voids the warranty.
3
Page 5

Warning –Batteries
• Immediately removeand dispose of dead batteriesfrom the
product.
• Only usebatteries (or rechargeable batteries)that match the
specied type.
• Do notmix old and newbatteries or batteries of adifferent type
or make.
• When insertingbatteries, note the correctpolarity (+ and markings) and insert the batteriesaccordingly.Failure to do so
could result in the batteriesleaking or exploding.
• Do notovercharge batteries.
• Keep batteries out of the reach of children.
• Do notshort circuit the batteries/rechargeable batteries and keep
them away from uncoated metal objects.
4. Getting started
• Unscrew the screws on the batterycompartment (2) on theback of the
measuring station and open it.
• Move theCH slide switch (4)to the left or right to select the channel
on which the measuring station transmits.
• Insert twoAAA batteries with thecorrect polarity.
• Then closethe battery compartment cover.
4
Page 6

Replacing the batteries
• Open thebattery compartment (2), remove and properly dispose of
the dead batteries and insert two new AAA batteries with the correct
polarity.Then close the battery compartment cover.
Note
Beforeuse, make surethat you insertthe batteries in the measuring
station rst and then inthe base station.
5. Installation
Note –Installation
• We recommend initially placing the base and measuringstations
in the intended locations withoutinstalling them and makingall
the settings described in 6.Operation.
• Only installthe stations once theappropriate settings have been
made and astable wireless connectionis established.
5
Page 7
Note
• The wireless transmission range between themeasuring and base
stations is up to 30metres in open spaces.
Beforeinstallation, ensurethat wireless transmission will not
be disrupted by interference or obstacles like buildings, trees,
vehicles, high-voltage lines, etc.
• Beforethe nalinstallation, ensurethat thereissucient
reception between the intended installationlocations.
• When installingthe measuring station, ensurethat it is protected
from direct sunlight and rain.
• The internationalstandardheight for measuring air temperatureis
1.25 m(4ft) above ground.
Warning
• Buy specialor suitable installation materialfrom aspecialised
dealer for wall-mounting.
• Ensurethat nofaulty or damaged parts areinstalled.
• Never applyforce during installation. Thiscould damage the
product.
• Beforeinstallation, ensurethat the chosen wall is suitable for
the weight to be installation,and make surethat thereare
no electrical wires, water,gas or other lines inthe wall at the
installation site.
6
Page 8
• Youcan position the measuring station on alevel outdoor surface
using the base.
• We recommend installing the measuring station securely on an
outdoor wall.
• Install ananchor,screw,nail, etc.in the wall of your choice.
• Hang themeasuring station using theopening intended for this
purpose (4).
6. Operation
6.1. Connection to the measuring station
• To connect the base station andthe measuring station, placethe two
devices as close together aspossible.
• After youinsert the batteries, thebase station automatically searches
for aconnection to the measuring station and performs initial setup.If
the device does not connectautomatically,the manual search program
on the base station mustbe started.
Note
• Initial setuptakes approximately 3minutes.
• During theconnection attempt, the radio symbol and the LED
indicator (1) on the measuringstation will ash.
• Do notpress any buttons duringsetup. Otherwise, values may
not be transmitted correctly and thereisariskof value errors and
inaccuracies.
• The setupprocess is completed whenthe indoor and outdoor
measurement data is displayed on the base station.
• The measured value is automatically updatedby the base device
about every 57 seconds.
7
Page 9

6.2. Selecting the channel/Other measuring stations
Note
• Youcan connect up to three different base stations to the
measuring station. Ensurethat the basestation and measuring
station areset to the samechannel. Suitable base stationscan be
found at www.hama.com
• The transmission channel on the supplied measuring station can
be changed/set (CH1, CH2, CH3).
• The measuringstation is suitable forthe following base stations:
76045, 113964, 123126, 123127,123128, 123129, 136256,
136257, 136258, 136259
6.3. Low battery charge
Note –Replacing the batteries
• Note thatthe stations have tobe resynchronised each time after
you change the batteries inthe measuring or basestation.
• To do this, remove the batteriesfrom the other station and then
reinsert them, or change themas required.
8
Page 10

7. Care and Maintenance
•Only clean this product with aslightlydamp, lint-free cloth and do not
use aggressive cleaning agents.
•Make surethat water does notget into the product.
8. Warranty Disclaimer
Hama GmbH &CoKG assumes no liability and provides no warranty for
damage resulting from improper installation/mounting, improper use of
the product or from failuretoobserve the operating instructions and/
or safety notes.
9. Service and Support
Please contact Hama Product Consulting if you have anyquestions about
this product.
Hotline: +49 9091 502-115 (German/English)
Further support information can befound here:
www.hama.com
9
Page 11

10. Technical Data
Measuring station
Power supply
Measuring range
Thermometer
Hygrometer
Barometer
Measurement increments
Temperature
Humidity
Measuring cycle
thermometer/hygrometer
Barometer
DCF radio-controlled clock No
Hygrometer Yes
Thermometer Yes
Barometer No
Moon phases -
Max. number of measuring stations 3
Frequency 433 MHz
Radio-frequency 0.13 µW
Range ≤30m
2xAAA batteries
-20°C –+60°C/ -4°F –140°F
20% –95%
0,1°C /0,2°F
10
1,5 V
1%
~57s
-
Page 12

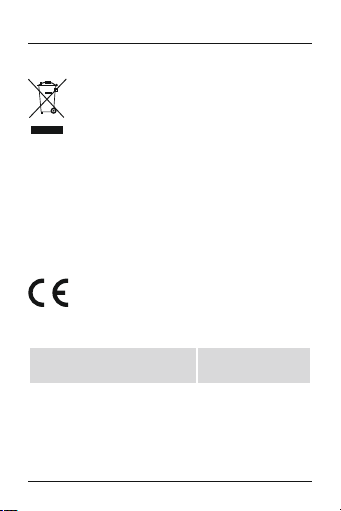
11. Recycling Information
Note on environmental protection:
After the implementation of the European Directive 2012/19/
EU and 2006/66/EU in the national legal system, the
following applies: Electric and electronic devices as well as
batteries must not be disposedof with household waste.
Consumers areobliged by law toreturn electrical and
electronic devices as well as batteries at the endof their service livesto
the public collecting points setup for this purposeor point of sale.Details
to this aredened by thenational law of the respective country.This
symbol on the product, the instruction manual or thepackage indicates
that aproduct is subject to theseregulations. By recycling, reusing the
materials or other forms ofutilising old devices/batteries, youaremaking
an important contribution to protecting our environment.
12. Declaration of Conformity
Hereby,Hama GmbH &CoKG declares that the radio
equipment type [00176931] is in compliance with Directive
2014/53/EU.The full text of theEU declaration of conformity
is available at the followinginternet address:
www.hama.com->00176931->Downloads.
Maximum radio-frequency
power transmitted
0,015 mW
11
Page 13

D Bedienungsanleitung
Bedienungselemente und Anzeigen
AMessstation
1. LED-Anzeige
2. Batteriefach
3. CHANNEL-Schiebeschalter =Kanalauswahl
4. Aussparung für Wandmontage
5. LCDDisplay
Vielen Dank, dass Sie sichfür ein Hama Produkt entschieden haben!
Nehmen Sie sich Zeit undlesen Sie die folgendenAnweisungen und
Hinweise zunächst ganz durch. Bewahren Sie diese Bedienungsanleitung
anschließend an einem sicheren Ort auf,umbei Bedarf darin
nachschlagen zu können. Sollten Siedas Gerät veräußern, gebenSie
diese Bedienungsanleitung an den neuenEigentümer weiter.
1. Erklärung von Warnsymbolen und Hinweisen
Warnung
Wirdverwendet, um Sicherheitshinweise zu kennzeichnenoder um
Aufmerksamkeit auf besondereGefahren und Risikenzu lenken.
Hinweis
Wirdverwendet, um zusätzlich Informationen oderwichtige Hinweise
zu kennzeichnen.
12
Page 14

2. Packungsinhalt
• Außensensor TS34A
• diese Bedienungsanleitung
3. Sicherheitshinweise
• Das Produkt ist für den privaten,nicht-gewerblichen
Haushaltsgebrauch vorgesehen.
• Betreiben Siedas Produkt nicht außerhalbseiner in den technischen
Daten angegebenen Leistungsgrenzen.
• Verwenden Sie das Produkt nicht in einerfeuchten Umgebung und
vermeiden Sie Spritzwasser.
• Betreiben Siedas Produkt nicht in unmittelbarer Nähe der Heizung,
anderer Hitzequellen oder in direkter Sonneneinstrahlung.
• Benutzen Siedas Produkt nicht inBereichen, in denen elektronische
Produkte nicht erlaubt sind.
• Positionieren Siedas Produkt nicht in der Nähe von Störfeldern,
Metallrahmen, Computern und Fernsehern etc.Elektronische Geräte
sowie Fensterrahmen beeinträchtigen die Funktiondes Produktes
negativ.
• Lassen Siedas Produkt nicht fallenund setzen Sie eskeinen heftigen
Erschütterungen aus.
• Öffnen Siedas Produkt nicht undbetreiben Sie es beiBeschädigungen
nicht weiter.
• Versuchen Sie nicht, das Produkt selbst zu warten oder zu
reparieren. Überlassen Sie jegliche Wartungsarbeitdem zuständigen
Fachpersonal.
• Halten SieKinder unbedingt von demVerpackungsmaterial fern, es
besteht Erstickungsgefahr.
• Entsorgen Sie das Verpackungsmaterial sofort gemäß den örtlich
gültigen Entsorgungsvorschriften.
• Nehmen Siekeine Veränderungen am Produkt vor.Dadurch verlieren
sie jegliche Gewährleistungsansprüche.
13
Page 15

Warnung –Batterien
• Entfernen undentsorgen Sie verbrauchte Batterien unverzüglich
aus dem Produkt.
• Verwenden Sie ausschließlich Akkus (oder Batterien), diedem
angegebenen Ty pentsprechen.
• Mischen Siealte und neue Batteriennicht, sowie Batterien
unterschiedlichen Ty ps oder Herstellers.
• Beachten Sieunbedingt die korrekte Polarität (Beschriftung +
und -) der Batterien undlegen Sie diese entsprechend ein. Bei
Nichtbeachtung besteht die Gefahr desAuslaufens oder einer
Explosion der Batterien.
• Laden SieBatterien nicht.
• Bewahren Sie Batterien außerhalb der Reichweitevon Kindern
auf.
• Schließen SieAkkus/Batterien nicht kurz undhalten Sie sie von
blanken Metallgegenständen fern.
4. Inbetriebnahme
• Lösen Siedie Schrauben des Batteriefachs (2) auf der Rückseite der
Messstation und öffnen Sie es.
• Schieben Sieden CH-Schiebeschalter (4) nach links oder rechts, um
den Kanal, auf dem die Messstationsendet, auszuwählen.
• Legen Siezwei AAA Batterien polrichtig ein.
• Schließen Siedie Batteriefachabdeckung anschließend.
14
Page 16

Batterien wechseln
• Öffnen Siedas Batteriefach (2), entnehmenund entsorgen Sie die
verbrauchten Batterien und legen Sie zwei neue AAA Batterien
polrichtig ein. Schließen Sie dieBatteriefachabdeckung anschließend.
Hinweis
Beachten Sie, dass Sie beider Inbetriebnahme immer zuerstdie
Batterien in die Messstation, unddann in die Basisstationeinlegen.
5. Montage
Hinweis –Montage
• Es wirdempfohlen, die Basis- und Messstation zunächst an den
gewünschten Aufstellorten ohne Montage zuplatzieren und alle
Einstellungen -wie in 6. Betrieb beschrieben –vorzunehmen.
• Montieren Sie erst nach korrekter Einstellungund stabiler
Funkverbindung die Station/en.
15
Page 17
Hinweis
• Die Reichweiteder Funkübertragung zwischen derMess- und
Basisstation beträgt im freien Gelände bis zu 30m. AchtenSie
vor der Montage darauf,dass die Funkübertragung nicht durch
Störsignale oder Hindernisse wie Gebäude,Bäume, Fahrzeuge,
Hochspannungsleitungen, u.a. beeinusst wird.
• Stellen Sievor der endgültigen Montage sicher,dass zwischen den
gewünschten Aufstellorten ausreichender Empfang besteht.
• Achten Siebei der Montage der Messstationdarauf,dass diese vor
direkter Sonne und Regen geschützt positioniert ist.
• Die internationaleStandardhöhe für die Messung der
Lufttemperatur beträgt 1,25 m(4ft) über Grund.
Warnung
• Besorgen Sie sich spezielles bzw.geeignetes Montagematerial im
Fachhandel für die Montage ander vorgesehenen Wand.
• Stellen Siesicher,dass keine fehlerhaften oder beschädigten Te ile
montiert werden.
• Wenden Siebei der Montage niemals Gewaltoder hohe Kräfte an.
Diese können das Produkt beschädigen.
• Prüfen Sievor Montage die Eignungder vorgesehenen Wand für
das anzubringende Gewicht und vergewissern Sie sich, dass sich
an der Montagestelle in der Wand keine elektrischen Leitungen,
Wasser-, Gas- oder sonstige Leitungenbenden.
16
Page 18

• Die Messstationkönnen Sie mithilfe desStandfußes auf einer ebenen
Fläche im Außenbereich aufstellen.
• Es wirdempfohlen,die Messstation sicher und festan einer
Außenwand zu montieren.
• Befestigen SieDübel, Schraube, Nagel, etc.in der dafür vorgesehenen
Wand.
• Hängen Siedie Messstation mit derdafür vorgesehenen Aussparung
(4) daran ein.
6. Betrieb
6.1. Verbindung zur Messstation
• Um dieBasisstation und die Messstationmiteinander zu verbinden
stellen Sie beide Geräte sonah wie möglich aneinander.
• Nach demEinlegen der Batterien suchtdie Basisstation automatisch
nach einer Verbindung zur Messstationund führt die Ersteinrichtung
durch.
• Verbindet das Gerät nicht automatisch, muss dermanuelle
Suchvorgang auf der Basisstation gestartet werden.
Hinweis
• Die Ersteinrichtungdauert ca. 3Minuten.
• Während dem Ve rbindungsversuch blinkt das Funksymbol unddie
LED-Anzeige (1) an der Messstation.
• Vermeiden Sie in dieser Zeit jegliche Betätigungder Ta sten!
Andernfalls können Fehler und Ungenauigkeitenbei den Werten
und deren Übertragung entstehen.
• Der Vorgang ist beendet, sobald die Messdaten fürInnen- und
Außenbereich auf der Basisstation angezeigt werden.
• Der Messwertwirdvom Basisgerät etwa alle 57 Sekunden
automatisch aktualisiert.
17
Page 19

6.2. Kanalauswahl/Weitere Messstationen
Hinweis
• Sie könnenbis zu 3verschiedene Basisstationen mit der
Messstation installieren. Achten Sie hierbei auf die identische
Kanaleinstellung an Basis- und jeweiliger Messstation. Pa ssende
Basisstationen nden Sie unter www.hama.com
• Der Senderkanalder mitgelieferten Messstation lässtsich
verändern/ einstellen (CH1, CH2, CH3).
• Die Messstationist für folgende Basisstationengeeignet: 76045,
113964, 123126, 123127, 123128, 123129,136256, 136257,
136258, 136259
6.3. Niedrige Batteriekapazität
Hinweis –Batteriewechsel
• Beachten Sie,dass Sie nach jedemBatteriewechsel an Mess- oder
Basisstation eine neue Synchronisation derStationen erfolgen
muss.
• Nehmen Siedazu die Batterien deranderen Station heraus
und setzen Sie erneut einoder wechseln Sie diesebei Bedarf
ebenfalls aus.
18
Page 20

7. Wartung und Pflege
•Reinigen Sie dieses Produkt nur mit einem fusselfreien, leicht feuchten
Tuch undverwenden Sie keine aggressiven Reiniger.
• Achten Siedarauf,dass kein Wasser in das Produkt eindringt.
8. Haftungsausschluss
Die Hama GmbH &CoKG übernimmt keinerlei Haftung oder
Gewährleistung für Schäden, die aus unsachgemäßer Installation,
Montage und unsachgemäßem Gebrauch des Produktes oder
einer Nichtbeachtung der Bedienungsanleitung und/oderder
Sicherheitshinweise resultieren.
9. Service und Support
Bitte wenden Sie sich beiFragen zum Produkt gerne an die HamaProduktberatung.
Hotline: +49 9091 502-115 (Deu/Eng)
WeitereSupportinformationen nden sie hier:
www.hama.com
19
Page 21

10. Technische Daten
Stromversorgung
Messbereich
Thermometer
Hygrometer
Barometer
Messschritte
Temperatur
Luftfeuchtigkeit
Messzyklus
Thermometer/ Hygrometer
Barometer
DCF-Funkuhr Nein
Hygrometer Ja
Thermometer Ja
Barometer Nein
Mondphasen -
Max. Anzahl Messstationen 3
Frequenz 433MHz
Sendeleistung 0,13 µW
Reichweite ≤30m
-20°C –+60°C/ -4°F –140°F
20
Messstation
1,5 V
2xAAA Batterie
20% –95%
0,1°C /0,2°F
1%
~57s
-
Page 22

11. Entsorgungshinweise
Hinweis zum Umweltschutz:
Ab dem Zeitpunkt der Umsetzungder europäischen
Richtlinien 2012/19/EU und 2006/66/EG in nationales Recht
gilt folgendes: Elektrische und elektronische Geräte sowie
Batterien dürfen nicht mit dem Hausmüll entsorgt werden.
Der Verbraucher ist gesetzlich verpichtet, elektrische und
elektronische Geräte sowie Batterien am Ende ihrer Lebensdauer an den
dafür eingerichteten, öffentlichen Sammelstellen oderan die
Verkaufsstelle zurückzugeben. Einzelheiten dazu regelt dasjeweilige
Landesrecht. Das Symbol auf demProdukt, der Gebrauchsanleitung oder
der Verpackung weist auf diese Bestimmungenhin. Mit der
Wiederverwertung, der stoichen Verwertung oderanderen Formen der
Verwertung von Altgeräten/Batterien leisten Sie einen wichtigen Beitrag
zum Schutz unserer Umwelt.
12. Konformitätserklärung
Hiermit erklärt die Hama GmbH &CoKG,dass der
Funkanlagentyp [00176931] der Richtlinie 2014/53/EU
entspricht. Der vollständige Text der EUKonformitätserklärung ist unter der folgenden Internetadresse verfügbar:
www.hama.com->00176931->Downloads.
Abgestrahlte maximal Sendeleistung 0,015 mW
21
Page 23

F Mode d‘emploi
Éléments de commande et d'affichage
AStation de mesure
1. Achage LED
2. Compartiment àpiles
3. Sélecteur CHANNEL =sélection du canal
4. Fente pour installation murale
5. Écran LCD
Nous vous remercions d’avoir choisi un produit Hama.
Veuillez prendreletemps de lirel‘ensemble des remarques etconsignes
suivantes. Veuillez conserver ce mode d‘emploiàportéede main an
de pouvoir le consulter en cas de besoin. Transmettez-le aunouveau
propriétaireavec l’appareil le cas échéant.
1. Explication des symboles d‘avertissement et des remarques
Avertissement
Ce symbole est utilisé pourindiquer des consignes desécurité ou
pour attirer votreattention sur desdangers et risques particuliers.
Remarque
Ce symbole est utilisé pour indiquer des informations supplémentaires
ou des remarques importantes.
22
Page 24

2. Contenu de l'emballage
• Capteur extérieurTS34A
• Mode d'emploi
3. Consignes de sécurité
• Ce produit est destiné àune installationdomestique non commerciale.
• N‘utilisez pasle produit en dehorsdes limites de puissanceindiquées
dans les caractéristiques techniques.
• N‘utilisez pasle produit dans unenvironnement humide et évitez toute
projection d‘eau.
• Évitez d’utiliserle produit àproximité immédiate d‘un chauffage,
d’autres sources de chaleur ou exposé aux rayons directs du soleil.
• N‘utilisez pasle produit dans leszones dans lesquelles l‘utilisation
d‘appareils électroniques estinterdite.
• Ne placezpas le produit àproximité de champs parasites, de
cadres métalliques, d‘ordinateurs,de téléviseurs, etc. Les appareils
électroniques ainsi que les cadres de fenêtreont une inuence
négative sur le fonctionnement du produit.
• Protégez le produit des secousses violenteset évitez tout chocou
toute chute.
• Ne tentezpas d‘ouvrir le produit en cas de détérioration et cessez
de l’utiliser.
• Ne tentezpas de réparer l’appareil vous-même ni d’effectuer
des travaux d’entretien. Déléguez tous travaux d‘entretien àdes
techniciens qualiés.
• Tenez les emballages d‘appareils hors de portée des enfants, risque
d‘étouffement.
• Recyclez lesmatériaux d’emballage conformément auxprescriptions
locales en vigueur.
• N’apportez aucunemodication àl’appareil. Des modications vous
feraient perdrevos droits de garantie.
23
Page 25
Avertissement –Piles
• Retirez les piles usagées immédiatement duproduit pour les
recycler.
• Utilisez exclusivementdes batteries (ou despiles) du type indiqué.
• N’utilisez passimultanément des piles usagéeset des piles neuves
ou des piles de différents types.
• Respectez impérativement la polarité de lapile (marquage +
et -) lors de l‘insertiondans le boîtier ;risques d‘écoulement et
d‘explosion des piles si teln‘est pas le cas.
• Ne surchargez pas les piles.
• Conservez lespiles hors de portéedes enfants.
• Ne court-circuitez pas les batteries/piles etéloignez-les des objets
métalliques.
4. Mise en service
• Desserrez les vis du compartiment àpiles (2) situé au dos de lastation
de mesureetouvrez le compartiment.
• Poussez le sélecteur CH (4) vers lagauche ou vers la droite pour
sélectionner le canal d’émission de la station de mesure.
• Insérez deux piles LR03/AAA en respectantles indications de polarité.
• Refermez lecouvercle du compartiment àpiles.
24
Page 26

Remplacement des piles
• Ouvrez le compartiment àpiles (2), retirez et éliminez les piles
déchargées, puis insérez deux nouvelles piles LR6/AAA en respectant
les indications de polarité. Refermezle couvercle du compartiment
àpiles.
Remarque
Lors de la premièremise enservice, veuillez premièrement insérer les
piles dans la station demesure, puis dans la station de base.
5. Installation
Remarque concernant l'installation
• Nous vousrecommandons de positionner la stationde base et la
station de mesuredans les endroitsenvisagés sans effectuer le
montage, puis d'effectuer les réglagescomme décrit au chapitre
6. Fonctionnement.
• Procédez ensuiteàl'installation de la/des station(s) après avoir
effectué les réglages et reçuune connexion radio stable.
25
Page 27

Remarque
• La portéede la transmission radioentrelastation de base et la
station de mesureest de 30mdans un espace dégagé. Veuillez
contrôler,avant l'installation, que la portée radio ne soit pas
altérée par des interférences ou des obstacles tels quebâtiments,
arbres, véhicules, lignes haute tension, etc.
• Veuillez contrôler,avantl'installation dénitive, la bonnequalité
de la transmission entreles deuxstations.
• Veuillez également protéger les stations de l'ensoleillementdirect
et de la pluie lorsde l'installation.
• La hauteurstandardinternationale de mesuredelatempérature
de l'air est de 1,25m(4ft) au-dessus du sol.
Avertissement
• En vuede l'installation, procurez-vous le matériel d'installation
adéquat pour le mur concernédans un commerce spécialisé.
• Veuillez contrôler que l'emballage ne contienne aucune pièce
erronée ni endommagée.
• N'appliquez enaucun cas une forceexcessive lors de l'installation.
Une force excessive est susceptible d'endommager le produit.
• Avant l'installation,vériez que le mur prévupour recevoir le
produit dispose d'une force portante susante et qu'aucune
conduite d'électricité, d'eau, de gazni aucune autreconduite ne
passe dans cette partie de la cloison.
26
Page 28

• Vous pouvez également placer la station de mesureàl'extérieur,sur
une surface plane, àl'aide deson pied.
• Nous vousrecommandons d'installer solidement la stationde mesure
àune paroi extérieure.
• Fixez cheville,vis, clou, etc. dansla paroi prévue pour recevoir
l'installation.
• Suspendez lastation de base àl'aide de la fente (4) prévue àcet effet.
6. Fonctionnement
6.1. Connexion vers la station de mesure
• Pour connecter la station de base àlastation de mesure, placez les
deux appareils aussi proches l’un de l’autreque possible.
• La stationde base recherche automatiquementune connexion àla
station de mesureeteffectue la premièreconguration après avoir
inséré les piles.
• Lancez unerecherche manuelle en cas d’échec de la connexion
automatique.
Remarque
• La premièreconguration dureenviron 3minutes.
• Le symboleradio et l’achage LED (1)de la station demesure
clignotent pendant la tentative deconnexion.
• N'appuyez suraucune touche pendant cettephase ;des erreurs,
des mesures inexactes ou une mauvaise transmission pourraient
en résulter.
• La conguration est terminée dès que les valeurs mesurées pour
la zone intérieureetpour la zone extérieureapparaissent àl'écran
de la station de base.
• La stationde base met automatiquementles valeurs àjour,toutes
les 57 secondes environ.
27
Page 29

6.2. Sélection du canal /autres stations de mesure
Remarque
• Vous pouvez installer jusqu’à 3stations de base avec la station de
mesure. Lors de l’installation de stations supplémentaires, veuillez
utiliser les mêmes réglages decanal entrelastation de base et les
stations de mesuresupplémentaires. Vous trouverez des stations
de base adaptées sur www.hama.com
• Il estpossible de modier /derégler le canald’émission de la
station de mesurelivrée (CH1, CH2, CH3).
• La stationde mesureest compatible avec les stations de base
suivantes :76045, 113964, 123126, 123127,123128, 123129,
136256, 136257, 136258, 136259
6.3. Piles faibles
Remarque concernant le remplacement des piles
• Veuillez noter qu'après chaque remplacement de piles de la
station de base ou dela station de mesure, vous devrez effectuer
une nouvelle synchronisation des stations.
• Lors decette synchronisation, extrayez également les piles de
la station qui continuait àfonctionner,puis réinsérez-les ou
remplacez ces dernières.
28
Page 30

7. Soins et entretien
•Nettoyez la balance uniquement àl’aided’un chiffon non breux
légèrement humide ;évitez tout détergentagressif.
• Veillez àcequ’aucun liquide ne pénètredans le produit.
8. Exclusion de garantie
La société Hama GmbH &CoKG déclinetoute responsabilité en cas de
dommages provoqués par une installation, un montage ou uneutilisation
non conformes du produit ou encoreprovoqués par un non respect des
consignes du mode d‘emploi et/oudes consignes de sécurité.
9. Service et assistance
En cas de question concernantle produit, veuillez vous adresser au
service de conseil produits de Hama.
Ligne téléphonique directe :+49 9091502-115 (allemand/anglais)
Vous trouverez ici de plus amples informations concernant l‘assistance :
www.hama.com
29
Page 31
10. Caractéristiques techniques
Alimentation en électricité
Plage de mesure
Thermomètre
Hygromètre
Baromètre
Incréments de mesure
Température
Humidité de l'air
Cycle de mesuredu
thermomètre/hygromètre
Baromètre
Horloge radio-pilotée DCF non
Hygromètreoui
Thermomètreoui
Baromètrenon
Phases de la lune -
Nombremaxi de stations de mesure
Fréquence 433 MHz
Radiofréquence 0,13 µW
Portée ≤30m
-20°C –+60°C/ -4°F –140°F
30
Station de mesure
1,5 V
2xAAA Batterie
20% –95%
0,1°C /0,2°F
1%
~57s
-
3
Page 32

11. Consignes de recyclage
Remarques concernant la protection de l’environnement:
Conformément àladirective européenne 2012/19/EU et
2006/66/CE, et an d‘atteindreuncertain nombred‘objectifs
en matièredeprotectionde l‘environnement, les règles
suivantes doivent êtreappliquées: Les appareilsélectriques
et électroniques ainsi que les batteries ne doivent pasêtre
éliminés avec les déchets ménagers. Le pictogramme “picto” présentsur
le produit, son manuel d‘utilisation ou son emballage indiqueque le
produit est soumis àcette réglementation.Le consommateur doit
retourner le produit/la batterie usageraux points de collecteprévus àcet
effet. Il peut aussi le remettreàunrevendeur. En permettant enn le
recyclage des produits ainsi queles batteries, le consommateur
contribueraàlaprotection denotreenvironnement. C‘est un acte
écologique.
12. Déclaration de conformité
Le soussigné, Hama GmbH &CoKG,déclareque
l‘équipement radioélectrique du type [00176931]est
conforme àladirective 2014/53/UE. Le texte completde la
déclaration UE de conformité est disponible àl‘adresse internet suivante:
www.hama.com->00176931->Downloads.
Puissance de radiofréquence maximale 0,015 mW
31
Page 33

E Instrucciones de uso
Elementos de manejo eindicadores
AEstación de medición
1. Indicador LED
2. Compartimento parapilas
3. Interruptor corredizo CHANNEL =selección decanal
4. Aberturaparaelmontaje enpared
5. Pantalla LCD
Le agradecemos que se haya decidido por un producto de Hama.
Tómese tiempo yléase primerolas siguientes instrucciones eindicaciones.
Después, guarde estas instrucciones de manejo en un lugarseguropara
poder consultarlas cuando sea necesario.Si vende el aparato, entregue
estas instrucciones de manejo alnuevo propietario.
1. Explicación de los símbolos de aviso ydelas indicaciones
Aviso
Se utiliza paracaracterizar las indicacionesde seguridad opara
llamar la atención sobrepeligros yriesgos especiales.
Nota
Se utiliza paracaracterizar informaciones adicionalesoindicaciones
importantes.
32
Page 34

2. Contenido del paquete
• Sensor exteriorTS34A
• Estas instruccionesde manejo
3. Instrucciones de seguridad
• El producto es paraeluso doméstico privado, no comercial.
• No opereelproducto fueradelos límites de potencia indicados en
los datos técnicos.
• No utiliceel producto en entornoshúmedos yevite el contacto con las
salpicaduras de agua.
• No opereelproducto en lasinmediaciones de la calefacción,de otras
fuentes de calor obajo laradiación directa del sol.
• No utiliceel producto en áreas donde no se permitan aparatos
electrónicos.
• No posicioneel producto en lasproximidades de campos de
interferencia, marcos de metal, ordenadores, televisores, etc.Los
dispositivos electrónicos ylos marcos delas ventanas afectan
negativamente al funcionamiento del producto.
• No dejecaer el producto nilo someta asacudidas fuertes.
• No abraelproducto ynolosiga operando de presentar deterioros.
• No intentemantener oreparar el aparatopor cuenta propia.
Encomiende cualquier trabajo de mantenimiento al personal
especializado competente.
• Mantenga elmaterial de embalaje fueradel alcance de los niños,
existe peligrodeasxia.
• Deseche elmaterial de embalaje enconformidad con las disposiciones
locales sobreeldesechovigentes.
• No realicecambios en el aparato. Esto conllevaría la pérdida detodos
los derechos de la garantía.
33
Page 35

Aviso –Pilas
• Retireydeseche deinmediato las pilas gastadas delproducto.
• Utilice exclusivamentepilas recargables (o pilas)que sean del
mismo tipo.
• No mezclepilas viejas ynuevas, ni tampoco pilas de tipos o
fabricantes diferentes.
• Observe siemprelacorrecta polaridad (inscripciones +y-) de las
pilas ycoloque éstas de forma correspondiente. La no observación
de lo anterior conlleva elriesgo de derrame oexplosión de las
pilas.
• No sobrecargue las pilas.
• Mantenga laspilas fueradel alcance de los niños.
• No cortocircuite las pilas recargables/baterías ymanténgalas
alejadas de objetos metálicos.
4. Puesta en funcionamiento
• Suelte eltornillo del compartimento depilas (2) situado en la parte
posterior de la estación demedición yábralo.
• Deslice elinterruptor deslizante CH (4)hacia la izquierda oladerecha
paraseleccionar el canal en elque desee que emita la estación de
medición.
• Coloque dospilas AAA atendiendo alacorrecta polaridad.
• Seguidamente, cierrelacubierta delcompartimento parapilas.
34
Page 36
Cambio de las pilas
• Abraelcompartimento de pilas (2), retireydeseche las pilas gastadas
ycoloque dos pilas AAA nuevas atendiendoalacorrectapolaridad
de las mismas. Seguidamente, cierrelacubierta delcompartimento
parapilas.
Nota
En la puesta en funcionamiento,es importante que coloquelas pilas
en la estación de medición,en primer lugar,y,seguidamente, en la
estación base.
5. Montaje
Nota –Montaje
• Se recomiendacolocar primero, sin montar,laestación de base y
la estación de medición, en los lugares de instalación deseados y
llevar acabo todos los ajustes tal ycomose describe en
6. Funcionamiento.
• Proceda amontarla(s) estación(es) únicamente cuando haya
podido realizar correctamente los ajustes ycuentecon una
conexión inalámbrica estable.
35
Page 37

Nota
• El alcancede la transmisión porradio entrelaestaciónbase yla
estación de medición al airelibreesdehasta 30 m.
• Antes deproceder al montaje, preste atención aque la
transmisión por radio no sevea inuida, entreotros, por
interferencias uobstáculos tales como edicios,árboles, vehículos
olíneas de alta tensión.
• Antes deproceder al montaje denitivo,asegúrese de que cuenta
con recepción suciente entrelos lugaresde instalación deseados.
• Al montarla estación de medición,procuresituarla de maneraque
quede protegida de la radiación directa del sol ydelalluvia.
• La alturaestándar internacional paralamediciónde la
temperaturadel aireesde1,25 m(4pies) sobreelsuelo.
Aviso
• Adquieramaterial demontaje especial oadecuado en uncomercio
especializado paraelmontajeen la pared prevista.
• Compruebe queno haya piezas deterioradasodefectuosas.
• No ejerzanunca fuerza durante elmontaje. El producto podría
verse dañado.
• Antes deempezar con el montaje,compruebe que la pared
puede soportar el peso quese va amontar yasegúrese de que
por el punto de montajede la pared no pasan cables eléctricos ni
tuberías de agua, gas odeotrotipo.
36
Page 38

• Puede colocarla estación de mediciónsobreuna supercie plana en el
exterior utilizando el pie.
• Se recomiendajar la estación de mediciónde forma segurayable
auna pared exterior.
• Fije eltaco, el tornillo, elclavo, etc., en la pared prevista.
• Cuelgue laestación de medición utilizandola abertura(4) prevista
paraello.
6. Funcionamiento
6.1. Conexión con la estación de medición
• Para conectar entresílaestación de medición yelsensor exterior,sitúe
ambos dispositivos lo más cerca posible el uno del otro.
• Una vezcolocadas las pilas, laestación base busca automáticamente
una conexión con la estación de medición, realizando entoncesel
ajuste inicial.
• Si eldispositivo no se conectaautomáticamente, es necesario iniciar el
proceso de búsqueda manual en la estación base.
Nota
• El ajusteinicial duraaprox. 3minutos.
• Durante el intento de conexión, elsímbolo de radiofrecuencia yel
indicador LED (1) de laestación de medición parpadean.
• No pulseninguna tecla mientras dureelajuste. Delo contrario,
pueden producirse fallos oimprecisiones enlos valores ysu
transmisión.
• El proceso naliza en cuanto sevisualizan en la estaciónbase los
valores de medición registrados parainterior yexterior.
• La unidadbase actualiza los valoresde medición cada 57
segundos aproximadamente.
37
Page 39

6.2. Selección de canal/estaciones de medición adicionales
Nota
• Puede instalarhasta 3estaciones base distintas conectadas ala
estación de medición. Al hacerlo,preste atención arealizar ajustes
de canal idénticos en la estación base ylaestación de medición
correspondiente. Encontrará estaciones de medición adecuadas
en www.hama.com
• Es posiblemodicar/ajustar el canal deemisión de la estación de
medición suministrada (CH1, CH2, CH3).
• La estaciónde medición es aptaparalas siguientes estaciones
base: 76045, 113964, 123126, 123127,123128,123129,
136256, 136257, 136258, 136259
6.3. Capacidad de pilas baja
Nota –Cambio de pilas
• Tenga en cuenta quees necesario resincronizar lasestaciones tras
realizar un cambio de pilasen la estación de medición obase.
• Para ello, retirelas pilasde la otraestación yvuelva acolocarlas o,
de ser necesario, proceda asustituirlas.
38
Page 40

7. Mantenimiento ycuidado
•Limpie este producto sólo con un paño ligeramente humedecido que
no deje pelusas ynoutilice detergentes agresivos.
•Asegúrese de que no entreagua en el producto.
8. Exclusión de responsabilidad
Hama GmbH &CoKG no se responsabiliza ni concede garantía por los
daños que surjan por una instalación, montaje omanejo incorrectos del
producto opor la no observaciónde las instrucciones de manejo y/o de
las instrucciones de seguridad.
9. Servicio ysoporte
Si tiene que hacer algunaconsulta sobreelproducto, diríjase al
asesoramiento de productos Hama.
Línea directa: +49 9091 502-115 (Alemán/Inglés)
Encontrar más información de soporte aquí:
www.hama.com
39
Page 41

10. Datos técnicos
Estación de medición
Alimentación de corriente
Rango de medición
Termómetro
Higrómetro
Barómetro
Intervalos de medición
Temperatura
Humedad
Ciclo de medición termómetro/
higrómetro
Barómetro
Radiorreloj DCF No
HigrómetroSí
TermómetroSí
BarómetroNo
Fases lunares -
Nº. máx. de estaciones demedición
Frecuencia 433MHz
Radiofrecuencia 0,13 µW
Alcance ≤30m
1,5 V
2xAAA Batterie
-20°C –+60°C/ -4°F –140°F
20% –95%
0,1°C /0,2°F
1%
~57s
-
3
40
Page 42
11. Instrucciones para desecho yreciclaje
Nota sobrelaprotección medioambiental:
Después de la puesta enmarcha de la directiva Europea
2012/19/EU y2006/66/EU en el sistema legislativo nacional,
se aplicaralosiguiente:Losaparatos eléctricos y
electrónicos, así como las baterías,no se deben evacuaren
la basuradoméstica. El usuario estálegalmente obligado a
llevar los aparatos eléctricos yelectrónicos, así como pilas ypilas
recargables, al nal de suvida útil alos puntos de recogida comunales o
adevolverlos al lugar donde los adquirió. Losdetalles quedaran denidos
por la ley de cadapaís. El símbolo enel producto, en lasinstrucciones de
uso oenelembalaje hacereferencia aello. Gracias alreciclaje, al
reciclaje del material oaotras formas de reciclaje de aparatos/pilas
usados, contribuye Usted de formaimportante alaprotección de nuestro
medio ambiente.
12. Declaración de conformidad
Porlapresente, Hama GmbH &CoKG,declaraque el tipo de
equipo radioeléctrico [00176931] es conformecon la
Directiva 2014/53/UE. El texto completo de la declaración UE
de conformidad está disponible enla dirección Internet siguiente:
www.hama.com->00176931->Downloads.
Potencia máxima de radiofrecuencia 0,015 mW
41
Page 43
R Руководство по эксплуатации
Органы управления ииндикации
АБлок внешнего датчика
1. Светодиодный индикатор
2. Отсекбатарей
3. Ползунковый переключатель CHANNEL=выбор канала
4. Паз для настенногомонтажа
5. ЖК-дисплей
Благодарим за покупку изделия фирмыHama.
внимательно ознакомьтесь снастоящейинструкцией. Храните
инструкцию внадежном месте для справок вбудущем. Вслучае
передачи изделия другому лицу приложите иэту инструкцию.
1. Предупредительные пиктограммы иинструкции
Внимание
Данным значком отмечены инструкции, несоблюдение которых
можетпривести копасной ситуации.
Примечание
Дополнительная или важная информация.
42
Page 44

2. Комплект поставки
• Блок наружногодатчика TS34A
• Настоящая инструкция
3. Техника безопасности
• Изделие предназначенотолькодля домашнегоприменения.
• Соблюдатьтехнические характеристики.
• Беречь отвлаги ибрызг.
• Не эксплуатировать внепосредственной близости с
нагревательными приборами иберечь от прямых солнечных
лучей.
• Не применятьвзапретныхзонах.
• Не размещать рядом смагнитными полями, металлическими
рамками, компьютерами, окнами ит.д. Электронные приборы и
оконные рамы негативно сказываютсянаработе изделия.
• Не ронять.Беречь от сильных ударов.
• Изделие неоткрывать. Запрещается эксплуатироватьнеисправное
изделие.
• Запрещается самостоятельно ремонтировать устройство.
Ремонт разрешается производить толькоквалифицированному
персоналу.
• Упаковку недавать детям: опасность асфиксии.
• Утилизировать упаковкувсоответствии сместными нормами.
• Запрещается вноситьизменения вконструкцию. Впротивном
случае гарантийные обязательства аннулируются.
43
Page 45

Внимание –Батареи
• Израсходованные батареинемедленно удалять из прибора
иутилизировать.
• Разрешается применятьаккумуляторы толькоуказанноготипа.
• Не применятьразличные типы или новыеистарые батареи
вместе.
• Соблюдатьполярностьбатарей (+ и-). Несоблюдение
полярности можетстатьпричиной взрыва батарей.
• Не подвергатьаккумуляторы чрезмерной зарядке.
• Батареи хранитьвбезопасном месте инедавать детям.
• Не закорачивать контакты батарей. Не хранить рядом с
металлическими объектами.
4. Ввод вэксплуатацию
• На заднейпанели блока внешнегодатчика открутите винты и
откройте крышку отсека батарей (2).
• Переведите переключатель CH (4) влево иливправо, чтобы
выбрать канал передачи данных внешним датчиком.
• Вставьте две новые батареи ААА, соблюдая полярность.
• Затем закройтекрышку отсека батарей.
44
Page 46
Замена батарей
• Откройте отсекбатарей (2), удалитеиутилизируйтестарые
батареи. Вставьте две новые батареи АAА, соблюдая полярность.
Закройте крышку отсека батарей.
Инструкция
При вводе вэксплуатацию всегда сначалавставляйте батареи в
блок наружногодатчика, азатемвосновной блок.
5. Монтаж
Инструкция -Монтаж
• Перед темкак монтировать блоки, рекомендуется сначала
завершить настройки вместах будущей установки,как
описано вглаве6.Работа.
• Монтаж следуетпроизводить после того,как правильные
настройки обеспечатнадежную радиосвязь между блоками.
45
Page 47

Инструкция
• Максимально допустимое расстояние между блоками
составляет 30 метров.
• Монтируя блоки,следует учесть, чторазличные препятствия
(стены, деревья, автомобили, высоковольтные линии идр.)
создаютпомехи радиосвязи между блоками.
• Перед монтажом убедитесь, чтовместах расположения
блоков обеспечивается устойчивая радиосвязь.
• Блок внешнегодатчика должен размещаться вместе,
защищенном от воздействия прямых солнечныхлучей и
осадков.
• Международный стандартвысоты для измерения влажности
воздуха составляет 1,25 метра (4 фута) над землей.
Внимание
• Подготовьте монтажный материал (приобретаетсяотдельно),
соответствующий свойствам стены.
• Перед началомэксплуатации убедитесь вотсутствии
дефектных или поврежденных деталей.
• При монтаженеприменять чрезмерных усилий. Впротивном
случае можно повредить устройство.
• Убедитесь, чтостена подходит для монтажа. Встене на
месте монтажа не должно быть электрической проводки,
газопровода, водопровода идругих трубопроводов.
46
Page 48

• Блок внешнегодатчика можно разместить на улице спомощью
подставки.
• Однакорекомендуется монтировать внешний блок на стене.
• Спомощью дюбеля закрепите шуруп на стене.
• Подвесьте блок за соответствующий паз (4).
6. Эксплуатация
6.1. Соединение сблоком внешнего датчика
• Чтобы установить соединение между основным ивнешним
блоками, расположите их как можно ближедруг кдругу.
• После загрузкибатарей основной блок начинает автоматический
поиск сигнала внешнегодатчика ивыполняет операцию ввода
устройства вэксплуатацию.
• Если соединениеавтоматически не установлено, необходимо
выполнить поиск внешнегодатчика вручную.
Примечание
• Настройка привводе вэксплуатацию длится ок. 3минут.
• Во времяпоиска радиосигнала мигаютзначок радиосвязии
светодиодный индикатор(1) на блокевнешнегодатчика.
• Втечение этого времени ненажимайте кнопки устройства! В
противном случае можетвозникнуть сбой точной настройки
значений ипередачи сигнала.
• Автоматическая настройка завершена, когданадисплее
начнут отображаться данные измерения внутрипомещения
ивне помещения.
• Данные надисплее основногоблока обновляются
автоматически приблизительно каждые57 секунд.
47
Page 49
6.2. Выбор канала /дополнительные внешние датчики
Hinweis
• Квнешнему блоку можно подключить до трех основных
блоков. Чтобы установить соединение, основной блок
ивнешний датчик должны работатьнаодном канале.
Совместимые основные блоки можно найтина сайте www.
hama.com.
• Передающий каналвнешнегодатчика из комплектапоставки
изменить невозможно (CH1, CH2, CH3).
• Блок внешнегодатчика подходит кследующим основным
блокам: 76045, 113964, 123126, 123127,123128,123129,
136256, 136257, 136258, 136259
6.3. Низкий заряд батарей
Инструкция -Замена батарей
• После заменыбатарей основногоблокаиблока внешнего
датчика необходимо заново выполнить синхронизацию
блоков.
• Для этого необходимо удалить батареи втом числе издругого
блока, азатемснова загрузить их вотсекбатарей.
48
Page 50

7. Уход итехническое обслуживание
•Чистку изделия производить толькобезворсовой слегкавлажной
салфеткой. Запрещается применять агрессивные чистящие
средства.
• Следите затем, чтобы вустройство не попала вода.
8. Отказ от гарантийных обязательств
Компания Hama GmbH &CoKGненесет ответственность за ущерб,
возникший вследствие неправильногомонтажа, подключения и
использования изделия не по назначению, атакжевследствие
несоблюдения инструкции по эксплуатации итехникибезопасности.
9. Отдел техобслуживания
По вопросам ремонтаили замены неисправныхизделий
обращайтесь кпродавцу или всервисную службукомпании Hama.
Горячая линия отдела техобслуживания:
+49 9091 502-115(немецкий, английский)
Подробнее смотрите здесь: www.hama.com
49
Page 51

10. Технические характеристики
Блок внешнегодатчика
Питание
Диапазон измерения
Термометр
Гигрометр
Барометр
Шаг шкалы
Температура
Влажность воздуха
Цикл измерения
термометра /гигрометра
Барометр
Часы скоррекцией по
радиосигналу точноговремени
Гигрометр Да
Термометр Да
Барометр Нет
Фазы Луны -
Макс. кол-во внешних датчиков 3
Частота 433МГц
излучаемая мощность 0,13 µW
Дальность действия ≤30m
2батареи АА
-20°C –+60°C/ -4°F –140°F
0,1°C /0,2°F
50
1,5 В
20% –95%
1%
~57сек
-
Нет
Page 52

11. Инструкции по утилизации
Охрана окружающей среды:
Смоментапереходанациональногозаконодательства на
европейские нормативы 2012/19/EU и2006/66/EU
действительно следующее: Электрические иэлектронные
приборы, атакже батареи запрещается утилизироватьс
обычным мусором. Потребитель, согласно закону,
обязан утилизировать электрические иэлектронные приборы,а
такжебатареи иаккумуляторы после их использования вспециально
предназначенных для этого пунктах сбора,либо впунктах продажи.
Детальная регламентация этих требований осуществляется
соответствующим местным законодательством. Необходимость
соблюдения данных предписаний обозначается особым значком на
изделии, инструкции по эксплуатации или упаковке. При
переработке, повторном использованииматериалов или при другой
форме утилизации бывших вупотреблении приборовВы помогаете
охране окружающей среды. Всоответствии спредписаниями по
обращению сбатареями, вГермании вышеназванныенормативы
действуютдля утилизации батарей иаккумуляторов.
12. Декларация производителя
Настоящим компания Hama GmbH &CoKGзаявляет, что
радиооборудование типа [00176931] отвечает
требованиям директивы 2014/53/ЕС. Сполным текстом
декларации осоответствии требованиям ЕС можно ознакомиться
здесь: www.hama.com ->00176931->Downloads.
Максимальная излучаемая мощность 0,015 mW
51
Page 53
I Istruzioni per l‘uso
Elementi di comando eindicazioni
AStazione di misurazione
1. LED indicatore
2. Vano batterie
3. Leva CHANNEL =Selezione canale
4. Foro per montaggio aparete
5. Display LCD
Grazie per avereacquistato un prodotto Hama!
Prima della messa in esercizio, leggete attentamente le seguenti istruzioni
eavvertenze, quindi conservatele in un luogo sicuroper una eventuale
consultazione. In caso di cessionedell‘apparecchio, consegnateanche le
presenti istruzioni al nuovo proprietario.
1. Spiegazione dei simboli di avvertimento edelle indicazioni
Attenzione
Viene utilizzato per contrassegnareleindicazioni di sicurezza oppure
per rivolgerel‘a ttenzione verso particolari rischi epericoli.
Avvertenza
Viene utilizzato per contrassegnareinformazioni supplementario
indicazioni importanti.
52
Page 54

2. Contenuto della confezione
• Sensoreesterno TS34A
• Queste istruzioniper l’uso
3. Indicazioni di sicurezza
• Il prodotto èconcepito per l’uso domestico privato, non commerciale.
• Non mettereinesercizio il prodotto al di fuoridei suoi limiti di
rendimento indicati nei dati tecnici.
• Non usareilprodotto in ambienti umidied evitareilcontatto con
gli spruzzi.
• Evitaredimettereinesercizio il prodotto in prossimità di
riscaldamento, altrefonti di caloreola luce diretta del sole.
• Non utilizzareilprodotto in zone incui non sono ammessele
apparecchiatureelettroniche.
• Non posizionareilprodotto nellevicinanze di campi di disturbo,telai
metallici, computer,televisori ecc. Gli apparecchi elettronici egli inssi
delle nestrecompromettono il funzionamento delprodotto.
• Non farecadereilprodotto enon sottoporlo aforti scossoni!
• Non aprireilprodotto enon utilizzarlo più se danneggiato.
• Non tentarediaggiustareoripararel’apparecchio dasoli. Fare
eseguirequalsiasi lavorodiriparazione al personale specializzato
competente.
• Tenerel’imballo fuori dalla portata dei bambini, pericolo di
soffocamento!
• Smaltireimmediatamente ilmateriale d‘imballaggio attenendosi alle
prescrizioni locali vigenti.
• Non apportaremodiche all’apparecchioper evitarediperdereidiritti
di garanzia.
53
Page 55

Attenzione –Batterie
• Rimuovereesmaltireimmediatamente le batterie scariche.
• Utilizzareunicamente accumulatori(o batterie) conformi al tipo
indicato.
• Non utilizzarebatterie di tipi ocostruttori diversi, né mischiare
batterie vecchie enuove.
• Attenersi semprealla corretta polarità (scritte +e-)delle batterie
einserirle di conseguenza. La mancata osservanza comporta la
perdita di potenza oilrischio di esplosione delle batterie.
• Non scaricarecompletamente le batterie.
• Conservarelebatterie al di fuori della portata dei bambini.
• Non cortocircuitarelebatterie etenerle lontano da oggetti
metallici.
4. Messa in esercizio
• Svitarelavite del vano batterie(2) sul retrodella stazione dimisura
eaprirlo.
• Spingerel’interruttoreacursoreCH(4) asinistraoadestraper
scegliereilcanale su cui trasmette la stazionedi misurazione.
• Inseriredue batterieAAA con la polarità corretta.
• Quindi chiudereilcoperchio del vano batterie.
54
Page 56

Sostituzione delle batterie
• Aprireilvano batterie (2), rimuovereesmaltirelebatterie usate
einseriredue batterie AAA nuove con lapolarità corretta. Quindi
chiudereilcoperchio del vano batterie.
Nota
Permettereinfunzione l'apparecchio, inseriresempreprima le
batterie nella stazione di misura, quindi nella stazione base.
5. Montaggio
Nota –Installazione
• Si consigliadi collocarelastazione base edimisuranel luogo
di montaggio desiderato senza montarla edieffettuaretutte le
impostazioni come descritto al capitolo6. Funzionamento.
• Montarela/le stazionisolo dopo avereeffettuato l'impostazione
corretta euncollegamentoradio stabile.
55
Page 57

Nota
• La portatadella trasmissione radio tralastazione base edi
misurazione all'aperto èdimax. 30m.
• Prima delmontaggio prestareattenzione che latrasmissione radio
non venga impedita da segnalidi disturbo oostacoli come edici,
alberi, veicoli, linee di altatensione ecc.
• Prima delmontaggio denitivo, accertarsi chetrailuoghi di
montaggio desiderati vi sia una ricezione suciente.
• Durante il montaggio della stazione dimisurazione, accertarsi
che il luogo d'installazione siaprotetto dalla luce diretta del sole
edalla pioggia.
• L'altezza standardinternazionale per la misurazione della
temperaturadell'aria èpari a1,25 m(4ft) dal suolo.
Attenzione
• Procurarsi il materiale di installazione idoneoper il montaggio alla
parete prevista pressoirivenditori specializzati.
• Vericareche non vengano montati pezzi difettosi odanneggiati.
• Non usaretroppa forza, né violenza durante ilmontaggio per
evitaredidanneggiareilprodotto.
• Prima diprocederealmontaggio,vericareche la parete sia
idonea per il peso damontareeaccertarsi che nel puntodella
parete dove si desideraappenderel’apparecchio nonvi siano cavi
elettrici, né tubazioni di acqua,gas oaltro.
56
Page 58

• La stazionedi misurazione si puòposizionarecon il piedino di
sostegno su una supercie pianaall'esterno.
• Si consigliadi montarelastazione di misurazione in modo sicuroe
stabile su una parete esterna.
• Fissaretasselli, viti,chiodi ecc. alla parete prevista.
• Agganciarelastazione base/di misurazione con il foroprevisto (4).
6. Funzionamento
6.1. Connessione alla stazione di misurazione
• Perconnetteretra di lorolastazione di misurazione eilsensore
esterno, mettereidue apparecchi il più vicino possibile.
• Dopo avereinserito le batterie, la stazione base ricerca
automaticamente la connessione alla stazionedi misurazione.
• Non effettuarelaconnessione automatica, ma avviareilprocesso di
ricerca manuale sulla stazione base.
Nota
• La primacongurazione duraca. 3minuti.
• Durante il tentativo di connessione, ilsimbolo della radio e
l’indicatoreLED della stazione di misurazione(1) lampeggiano.
• Evitaredipremerequalsiasi tasto in questolasso di tempo!
Diversamente si possono manifestareerrori eimprecisioni dei
valori edella lorotrasmissione.
• La proceduraèconclusa non appena sulla stazionebase vengono
visualizzati idati di misurazione per l'interno el'esterno.
• Ivalori misurativengono aggiornati automaticamente
dall'apparecchio base circa ogni 57 secondi.
57
Page 59

6.2. Scelta del canale /altre stazioni di misurazione
Hinweis
• Èpossibile installareno a3diverse stazioni dimisurazione
con il sensoreesterno. Attenzione: ènecessario impostarelo
stesso canale per la stazionebase elastazione di misurazione
corrispondente. Le stazioni di misurazione idonee sono disponibili
sul sito www.hama.com
• Il canaleemittente della stazione dimisurazione in dotazione non
può esseremodicato/impostato (CH1, CH2, CH3).
• La stazionedi misurazione ècompatibile con le seguenti stazioni
di base: 76045, 113964, 123126, 123127,123128, 123129,
136256, 136257, 136258, 136259
6.3. Capacità ridotta delle batterie
Avvertenza –sostituzione delle batterie
• Accertarsi chedopo ogni sostituzione delle batteriesulla
stazione di misurazione osulla stazionebase avvenga una nuova
sincronizzazione delle stazioni.
• Estrarreanche lebatterie dall'altrastazione einserirle nuovamente
o, se necessario, sostituirle.
58
Page 60

7. Cura emanutenzione
• Pulireilprodotto unicamente con unpanno che non lasciapelucchi e
appena inumidito enon ricorrereadetergenti aggressivi.
•Fareattenzione anon farepenetrareacqua nel prodotto.
8. Esclusione di garanzia
Hama GmbH &CoKG non si assume alcuna responsabilità per idanni
derivati dal montaggio ol‘utilizzo scorrettodel prodotto, nonché dalla
mancata osservanza delle istruzioni perl‘uso e/o delle indicazionidi
sicurezza.
9. Assistenza esupporto
In casodidomande sul prodotto, rivolgersialla Consulenza prodottoHama.
Hotline:+49 9091502-115(ted./ing.)
Ulteriori informazioni sul supporto sonodisponibiliqui:www.hama.com
59
Page 61

10. Dati tecnici
Stazione di misurazione
Alimentazione elettrica
Campo di misurazione
Termometro
Igrometro
Barometro
Passi di misurazione
Temperatura
Umidità dell’aria
Ciclo di misurazione
termometro/igrometro
Barometro
Segnale orario via radio DCF No
IgrometroSì
TermometroSì
BarometroNo
Fasi lunari -
Max. numerostazioni di misurazione
Frequenza 433 MHz
Radiofrequenza trasmessa 0,13 µW
Portata ≤30m
1,5 V
2xAAA Batterie
-20°C –+60°C/ -4°F –140°F
20% –95%
0,1°C /0,2°F
1%
~57s
-
3
60
Page 62

11. Indicazioni di smaltimento
Informazioni per protezione ambientale:
Dopo l’implementazione della Direttiva Europea 2012/19/EU
e2006/66/EU nel sistema legale nazionale, cisono le
seguenti applicazioni: Le apparecchiatureelettriche ed
elettroniche elebatterienon devono esseresmaltite coni
riuti domestici. Iconsumatori sono obbligatidalla legge a
restituireIdispositivi elettrici ed elettronici elebatterie alla ne della loro
vita utile ai punti di raccolta pubblici preposti per questo scopo onei
punti vendita. Dettagli di quantoriportato sono deniti dalleleggi
nazionali di ogni stato. Questo simbolo sul prodotto, sulmanuale
d’istruzioni osull’imballo indicano che questo prodotto èsoggetto a
queste regole. Riciclando, ri-utilizzando imateriali outilizzando sotto
altraforma ivecchiprodotti/le batterie, darete un importante contributo
alla protezione dell’ambiente.
12. Dichiarazione di conformità
Il fabbricante, Hama GmbH &CoKG,dichiarache il tipo di
apparecchiaturaradio[00176931] èconforme alla direttiva
2014/53/UE. Il testo completo della dichiarazione di
conformità UE èdisponibile al seguenteindirizzo Internet:
www.hama.com->00176931->Downloads.
Massima potenza a
radiofrequenza trasmessa
0,015 mW
61
Page 63
P Instrukcja obsługi
Elementy obsługi isygnalizacji
AStacja pomiarowa
1. Dioda LED
2. Schowek na baterie
3. Suwak CHANNEL =wybór kanału
4. Otwór do mocowania na ścianie
5. Ekran LCD
Dziękujemy za zakup naszego produktu!
Przed pierwszym użyciem należy dokładnieprzeczytać instrukcję obsługi.
Instrukcję należy przechować, gdyż możebyć jeszcze potrzebna.
1. Objaśnienie symboli ostrzegawczych iwskazówek
Ostrzeżenie
Używane wcelu zwrócenia uwagi na szczególne niebezpieczeństwo
lub ryzyko.
Wskazówki
Używane wcelu zwrócenia uwagi na szczególnie przydatne
informacje.
62
Page 64

2. Zawartość opakowania
• czujnik zewnętrznyTS34A
• niniejsza instrukcjaobsługi
3. Wskazówki bezpieczeństwa
• Produkt jestprzeznaczony do prywatnego, niekomercyjnego użytku
domowego.
• Nie stosowaćproduktu poza zakresem mocy podanym wdanych
technicznych.
• Nie stosowaćproduktu wwilgotnym otoczeniu ichronić go przed
bryzgami wody.
• Nie używaćproduktu wbezpośredniej bliskości ogrzewania,innych
źródeł ciepła ani nie wystawiaćgo na bezpośrednie promieniowanie
słoneczne.
• Nie używaćproduktu wmiejscach, gdzie nie jest dozwolone
stosowanie urządzeń elektronicznych.
• Nie ustawiaćproduktu wpobliżu miejsc wywołujących zakłócenia,
metalowych ram, komputerów,telewizorów itp. Urządzenia
elektroniczne ifutryny okienne wpływają negatywniena działanie
produktu.
• Chronić produkt przed upadkiem isilnymi wstrząsami.
• Nie otwieraćproduktu inie używać go,gdy jest uszkodzony.
• Nie próbowaćnaprawiać samodzielnie urządzenia. Prace serwisowe
zlecać wykwalikowanemu personelowi fachowemu.
• Materiały opakowaniowetrzymać koniecznie zdala od dzieci, istnieje
niebezpieczeństwo uduszenia.
• Materiały opakowaniowenależy natychmiast poddać utylizacjizgodnie
zobowiązującymi przepisami miejscowymi.
• Nie modykowaćurządzenia. Prowadzi to doutraty wszelkich roszczeń
ztytułu gwarancji.
63
Page 65
Ostrzeżenie –Baterii
• Natychmiast usunąćzproduktuzużyte baterie ipoddać je
utylizacji.
• Używać wyłącznieakumulatorów (lub baterii) odpowiadających
podanemu typowi.
• Nie mieszaćstarych inowych baterii ani baterii różnych typów
lub producentów.
• Wkładając baterie,zwrócić koniecznie uwagę nawłaściwe
podłączenie biegunów (znak +i-). Nieprzestrzeganie grozi
wyciekiem lub wybuchem baterii.
• Nie przeciążaćbaterii.
• Przechowywać bateriepoza zasięgiem dzieci.
• Nie zwierać akumulatorów /baterii oraz trzymaćje zdala od
odkrytych przedmiotów metalowych.
4. Uruchamianie
• Odkręcić śrubyschowka na baterie (2)ztyłustacji pomiarowej i
otworzyć schowek.
• Przesunąć przełączniksuwakowy CH (4) wlewo lub wprawo, aby
wybrać kanał, na którym nadaje sygnały stacja pomiarowa.
• Włożyć dwienowe baterie AAA zgodniezoznaczeniem biegunów.
• Następnie zamknąćpokrywę schowka na baterie.
64
Page 66

Wymiana baterii
• Otworzyć schowekna baterie (2), wyjąćizutylizować zużyte baterie i
włożyć dwie nowe baterie typuAA zgodnie zoznaczeniem biegunów.
Następnie zamknąć pokrywę schowka na baterie.
Wskazówka
Przed uruchomieniem należy pamiętać, abyzawsze włożyć najpierw
baterie do stacji pomiarowej, anastępnie do stacji bazowej.
5. Montaż
Wskazówka -montaż
• Zaleca sięustawić najpierw wwybranym miejscu stację bazową
istację pomiarową bez montażu iskongurować wszystkie
ustawienia –jak opisano wpunkcie 6. Praca.
• Zamontować stacjedopieropoprawidłowej konguracji ustawień i
znalezieniu stabilnej łączności radiowej.
65
Page 67

Wskazówka
• Zasięg transmisji radiowej między stacją pomiarowąistacją
bazową wynosi na otwartym terenie maks. 30 m.
• Przed montażemzwrócić uwagę, aby żadnesygnały zakłócające
lub przeszkody,takie jak budynki, drzewa, pojazdy,linie wysokiego
napięcia itp., nie wpływały natransmisję radiową.
• Przed ostatecznymmontażem upewnić się, czymiędzy wybranymi
miejscami ustawienia występuje dostateczny odbiórradiowy.
• Podczas montażu stacji pomiarowej należy pamiętać, aby
zamontować ją wmiejscu zabezpieczonym przedbezpośrednim
promieniowaniem słonecznym ideszczem.
• Międzynarodowa standardowa wysokość dla pomiaru temperatury
powietrza wynosi 1,25 m(4stopy) nad ziemią.
Ostrzeżenie
• Nabyć wspecjalistycznym sklepie odpowiednie materiały
montażowe do montażu na przewidzianejścianie.
• Sprawdzić, czy nie są montowane wadliwebądź uszkodzone
części.
• Podczas montażu nigdy nie wywierać nadmiernej siły.Może to
spowodować uszkodzenie produktu.
• Przed montażemsprawdzić, czy przewidziana ścianajest odporna
na przyjęcie ciężaru mocowanego produktu, iupewnić się, że
wmiejscu montażu na ścianie nie są zainstalowane przewody
elektryczne, wodne, gazowe bądź inneprzewody.
66
Page 68

• Stację pomiarowąmożna ustawić za pomocą podpórki na równym
podłożu na zewnątrz.
• Zaleca siębezpieczne itrwałe zamontowanie stacji pomiarowej na
ścianie zewnętrznej.
• Zamocować kołkirozporowe, śruby,gwoździe itp.na wybranej ścianie.
• Na przeznaczonymdo tego otworze zawiesićstację pomiarową (4).
6. Praca
6.1. Połączenie ze stacją pomiarową
• Aby połączyćstację bazową ze stacjąpomiarową, ustawić oba
urządzenia jak najbliżej siebie.
• Po włożeniu baterii stacja bazowa automatycznie wyszukuje połączenie
ze stacją pomiarową iprzeprowadza pierwsząkongurację.
• Jeżeli nienastąpi automatyczne połączenie, nastacji bazowej należy
uruchomić ręczne wyszukiwanie.
Wskazówka
• Pierwsza konguracja trwa ok. 3minuty.
• Podczas próby nawiązania połączenia miga symbol sygnału
radiowego idiodaLED (1) stacji pomiarowej.
• Nie naciskaćwtymczasie żadnych przycisków! Wprzeciwnym
razie mogą wystąpić niedokładności ibłędy wwartościach iich
transmisji.
• Proces jest zakończony,gdy na stacji bazowej wyświetlane są
zmierzone wartości wewnątrz inazewnątrz.
• Zmierzone wartościsą automatycznie aktualizowane przezstację
bazową co ok. 57 sekund.
67
Page 69

6.2. Wybór kanału/ dodatkowe stacje pomiarowe
Wskazówka
• Ze stacjąpomiarową można połączyć maksymalnie3różnestacje
bazowe. Należy przy tym zwrócićuwagę na identyczne ustawienie
kanałów stacji bazowej iodpowiedniej stacji pomiarowej. Pasujące
stacje pomiarowe można znaleźć na stronie internetowej www.
hama.com
• Kanał nadawczy dostarczonej stacji pomiarowej można zmienić/
ustawić (CH1, CH2, CH3).
• Stacja pomiarowanadaje się do następujących stacji bazowych:
76045, 113964, 123126, 123127,123128, 123129, 136256,
136257, 136258, 136259
6.3. Niski poziom naładowania baterii
Wskazówka –wymiana baterii
• Należy pamiętać,że po każdej wymianiebaterii wstacji
pomiarowej lub bazowej konieczna jest ponowna synchronizacja
obu stacji.
• Wtym celu wyjąć baterie zdrugiej stacji iponownie je włożyćlub
wrazie potrzebytakże wymienić.
68
Page 70

7. Czyszczenie
• Czyścić produkttylko przy użyciu niestrzępiącejsię, lekko zwilżonej
szmatki inie stosować agresywnych detergentów.
• Uważać, abydo wnętrza produktu niewniknęła woda.
8. Wyłączenie odpowiedzialności
Hama GmbH &CoKG nie udziela gwarancji ani nie odpowiada za
szkody wskutek niewłaściwej instalacji, montażuoraz nieprawidłowego
stosowania produktu lub nieprzestrzegania instrukcji obsługi i/lub
wskazówek bezpieczeństwa.
9. Serwis ipomoc techniczna
Wrazie pytań dotyczących produktu prosimy zwrócić się do infolinii
Hama.
Gorąca linia: +49 9091 502-115 (niem./ang.)
Dodatkowe informacje są dostępne na stronie: www.hama.com
69
Page 71

10. Dane techniczne
Stacja pomiarowa
Zasilanie elektryczne
Zakres pomiarowy
Termometr
Higrometr
Barometr
Rozdzielczość pomiaru
Temperatura
Wilgotność powietrza
Cykl pomiarowy
termometru/higrometru
Barometr
Zegar radiowy DCF Nie
Higrometr Tak
Termometr Tak
Barometr Nie
Fazy księżyca -
Maks. liczba stacji pomiarowych 3
Częstotliwość 433 MHz
Transmisji 0,13 µW
Zasięg ≤30m
2xAAA Batterie
-20°C –+60°C/ -4°F –140°F
70
1,5 V
20% –95%
0,1°C /0,2°F
1%
~57s
-
Page 72

11. Informacje dotycząca recyklingu
Wskazówki dotyczące ochrony środowiska:
Od czasu wprowadzenia europejskiej dyrektywy 2012/19/EU i
2006/66/EU do prawa narodowego obowiązują następujące
ustalenia: Urządzeń elektrycznych, elektronicznych oraz
baterii jednorazowych nie należy wyrzucać razem z
codziennymi odpadami domowymi! Użytkownik zobowiązany
prawnie do odniesienia zepsutych, zniszczonych lub niepotrzebnych
urządzeń elektrycznych ielektronicznych do punktuzbiórki lub do
sprzedawcy.Szczegółowe kwestie regulują przepisy prawne danego kraju.
Informuje otym symbol przekreślonego kosza umieszczony na
opakowaniu. Segregując odpady pomagasz chronić środowisko!
12. Deklaracja zgodności
Hama GmbH &CoKG niniejszym oświadcza, że typ
urządzenia radiowego [00176931] jest zgodnyzdyrektywą
2014/53/UE. Pełny tekst deklaracji zgodności UE jest
dostępny pod następującym adresem internetowym:
www.hama.com->00176931->Downloads.
Maksymalna moc transmisji 0,015 mW
71
Page 73

C Návod kpoužití
Ovládací prvky aindikace
AZákladna
1. LED kontrolka
2. Přihrádka na baterie
3. Posuvný přepínač CHANNEL =výběr kanálu
4. Otvor pronástěnnou montáž
5. LCDdisplej
Děkujeme, že jste si vybrali výrobek Hama.
Přečtěte si, prosím, všechny následující pokyny ainformace. Uchovejte
tento text propřípadné budoucí použití.Pokud výrobek prodáte, předejte
tento text novému majiteli.
1. Vysvětlení výstražných symbolů apokynů
Upozornění
Tento symboloznačuje bezpečnostní upozornění, které poukazujena
určitá rizika anebezpečí.
Poznámka
Tento symboloznačuje dodatečné informace nebo důležitépoznámky.
72
Page 74

2. Obsah balení
• Venkovní čidlo TS34A
• tento návodkobsluze
3. Bezpečnostní pokyny
• Výrobek jeurčen knekomerčnímu použití vdomácnosti.
• Přístroj nepoužívejtemimo rozsah předepsaných hodnotvtechnických
údajích.
• Výrobek nepoužívejteve vlhkém prostředí azabraňte styku svodou.
• Výrobek nepoužívejtevbezprostřední blízkosti zdrojů tepla, ani
nevystavujte působení přímého slunečního záření.
• Výrobek nepoužívejtena místech, kde jepoužívání elektronických
zařízení zakázáno.
• Výrobek neumisťujtedo blízkosti zdrojů rušení, kovových rámů,
počítačů, televizorů atd. Elektronická zařízení akovové rámy oken
mohou negativně ovlivnit fungování výrobku.
• Výrobek chraňte před pádem avelkými otřesy.
• Výrobek neotvírejte avpřípadě poškození již dále nepoužívejte.
• Do výrobkunezasahujte aneopravujte ho. Veškeré úkony údržby
přenechejte příslušnému odbornému personálu.
• Obalový materiálodložte mimo dosahu dětí,hrozí riziko udušení.
• Obalový materiálzlikvidujte podle platných předpisůolikvidaci.
• Výrobek žádnýmzpůsobem neupravujte, ztratíte tím nárok na záruku.
73
Page 75

Upozornění –baterie
• Vybité bateriebez odkladu vyměňte azlikvidujte dle platných
předpisů.
• Používejte výhradněakumulátory (nebo baterie) odpovídající
udanému typu.
• Pronapájení tohotovýrobku nekombinujte staré anové baterie,
ani různé typy aznačky baterií
• Při vkládáníbaterií vždy dbejte nasprávnou polaritu (+ a-). Při
nesprávné polaritě hrozí nebezpečí vytečení baterií nebo exploze.
• Baterie zcelanevybíjejte.
• Baterie uchovávejtemimo dosah dětí.
• Akumulátory/baterie nezkratujte azabraňte jejich umístění v
blízkosti neizolovaných kovových předmětů.
4. Uvedení do provozu
• Povolte šroubkypřihrádky na baterie (2) nazadní straně měřící stanice
aotevřete ji.
• Posuňte přepínač CH (4) doleva nebo dopravaprovýběr kanálu, na
kterém bude měřící stanice vysílat.
• Vložte dvěbaterie typu AAA sesprávným pólováním.
• Poté uzavřete kryt přihrádky na baterie.
74
Page 76

Výměna baterií
• Otevřete přihrádkuna baterie (2), vyjměteazlikvidujte vybité baterie
adle správné polarity vložte dvě nové baterie typu AAA. Poté uzavřete
kryt přihrádky na baterie.
Poznámka
Upozorňujeme, že při uvádění doprovozu je nutné vždy nejprve vložit
baterie do venkovního senzoru apotom teprve do základny.
5. Montáž
Poznámka –montáž
• Doporučujeme základnuavenkovnísenzor nejprve umístit na
požadovaném místě instalace bez montážeaprovést všechna
nastavení -jak je popsáno vkapitole 6. Provoz.
• Stanici/stanice montujteaž po správném nastavení apři stabilním
rádiovém spojení.
75
Page 77

Poznámka
• Rozsah rádiovéhopřenosu mezi venkovním senzoremazákladnou
je na volném prostranství až 30 m.
• Před montážídbejte na to, abynebyl rádiový přenos ovlivněn
rušivými signály nebo překážkami, jakojsou budovy,stromy,
vozidla, vysokonapěťová vedení apod.
• Před konečnoumontáží se ujistěte, zdaje mezi požadovanými
místy instalace dostatečný příjem.
• Venkovní senzor namontujte na místě chráněném předpřímým
sluncem adeštěm.
• Mezinárodní standardní výška proměření teploty vzduchuje 1,25
m(4stopy) nadzemí.
Upozornění
• Speciální resp.vhodný montážní materiál promontáž naurčené
zdi zakoupíte ve specializované prodejně.
• Zajistěte, abynedošlo kmontáži vadných nebo poškozených dílů.
• Při montážinikdy nepoužívejte násilí anihrubou sílu. Mohlo by
dojít kpoškození výrobku.
• Před montážízkontrolujte, zda zeď, nakterou chcete zařízení
umístit, vykazuje dostatečnou nosnost, aujistěte se, zda na místě
montáže ve zdi nevedou žádnéelektrické kabely,vodní, plynová
nebo jiná vedení.
76
Page 78
• Venkovní senzor můžete pomocí podstavce postavit venku na rovnou
plochu.
• Doporučujeme namontovatvenkovní senzor bezpečně apevně na
nějakou zvnějších zdí.
• Upevněte hmoždinku,šroub, hřebík apod. dourčené zdi.
• Na nězavěste venkovní senzor (4)pomocí příslušného otvoru.
6. Provoz
6.1. Spojení ssezákladnou
• Prospojení základnístanice směřícístanicí postavte obě zařízeníco
nejblíž ksobě.
• Po vložení baterií základna automaticky vyhledá spojení svenkovním
senzorem aprovede první nastavení.
• Pokud se zařízení nespojí automaticky,jetřeba spustit ruční
vyhledávání na základně.
Upozornění
• První nastavenítrvá cca 3minuty.
• Během pokusuospojeníbliká symbol prorádiový signálaLED
dioda (1) na měřicí stanici.
• Během tétodoby se nedotýkejte žádnýchtlačítek! Jinak může u
hodnot ajejich přenosu dojít kchybám anepřesnostem.
• Proces je ukončen, jakmile se nazákladní stanici zobrazí naměřená
data provenkovní ivnitřní oblast.
• Naměřenou hodnotuzákladní přístroj automaticky aktualizuje
přibližně každých 57 sekund.
77
Page 79
6.2. Výběr kanálu/Další venkovní senzory
Hinweis
• Můžete instalovataž 3různé základní stanice směřící stanicí.V
takovém případě dbejte na stejnénastavení kanálu na základní
apříslušné měřící stanici. Vhodné základní stanice najdete na
www.hama.com
• Vysílací kanáldodané měřicí stanice můžetezměnit/nastavit (CH1,
CH2, CH3).
• Měřící staniceje vhodná pronásledující základní stanice: 76045,
113964, 123126, 123127,123128, 123129, 136256, 136257,
136258, 136259
6.3. Nízká kapacita baterie
Poznámka –výměna baterie
• Upozorňujeme, žepo každé výměně bateriíusenzoru nebo
základny je třeba provést novou synchronizaci stanic.
• Za tímtoúčelem vyjměte baterie izdruhé stanice avložte jeznovu
zpět, nebo je vpřípadě potřebytaké vyměňte.
78
Page 80

7. Údržba ačištění
•Tento výrobek čistěte pouze mírně navlhčeným hadříkemnepouštějícím
vlákna anepoužívejte agresivní čisticí prostředky.
• Dbejte nato, aby se dovýrobku nedostala voda.
8. Vyloučení záruky
Hama GmbH &CoKG nepřebírá žádnou odpovědnost nebo záruku za
škody vzniklé neodbornou instalací, montážínebo neodborným použitím
výrobku nebo nedodržováním návodu kpoužití a/nebo bezpečnostních
pokynů.
9. Servis apodpora
Máte otázky kproduktu ?Obraťte na na poradenské oddělení Hama.
Horká linka: +49 9091 502-115 (německy/anglicky)
Další podpůrné informace naleznete naadrese: www.hama.com
79
Page 81

10. Technické údaje
Napájení
Rozsah měření
Teploměr
Vlhkoměr
Barometr
Rozlišení
Teplota
Vlhkost vzduchu
Cyklus měření
teploměr/vlhkoměr
Barometr
Rádiové hodiny DCF Ne
Vlhkoměr Ano
Teploměr Ano
Barometr Ne
Fáze měsíce -
Max. počet měřicích stanic 3
Frekvence 433 MHz
Radiofrekvenční 0,13 µW
Dosah ≤30m
-20°C –+60°C/ -4°F –140°F
80
Měřicí stanice
1,5 V
2xAAA Batterie
20% –95%
0,1°C /0,2°F
1%
~57s
-
Page 82

11. Pokyny klikvidaci
Ochrana životního prostředí:
Evropská směrnice 2012/19/EU a2006/66/EU ustanovujete
následující: Elektrická aelektronická zařízení stejnějako
baterie nepatří do domovního odpadu.Spotřebitel se
zavazuje odevzdat všechna zařízení abaterie po uplynutí
jejich životnosti do příslušných sběren. Podrobnosti stanoví
zákon příšlušné země. Symbol na produktu, návod kobsluze nebo balení
na toto poukazuje. Recyklací ajinými způsoby zužitkování přispíváte k
ochraně životního prostředí.
12. Prohlášení oshodě
Tímto Hama GmbH &CoKG prohlašuje, že typ rádiového
zařízení [00176931] je vsouladu sesměrnicí 2014/53/EU.
Úplné znění EU prohlášení oshodě je kdispozici na této
internetové adrese:
www.hama.com->00176931->Downloads.
Maximální radiofrekvenční
výkon vysílaný
0,015 mW
81
Page 83

Q Návod na použitie
Ovládacie prvky aindikácie
AMeracia stanica
1. LED indikácia
2. Priehradka na batérie
3. Posuvný spínač CHANNEL =výber kanálov
4. Vybranie prenástennú montáž
5. LCDdisplej
Ďakujeme, že ste sa rozhodliprevýrobok Hama.
Prečítajte si všetky nasledujúce pokyny ainformácie. Uchovajte tento
návod na použitie preprípadné budúcepoužitie. Pokiaľ výrobok predáte,
dajte tento návod novému majiteľovi.
1. Vysvetlenie výstražných symbolov aupozornení
Upozornenie
Tento symboloznačuje bezpečnostné upozornenie, ktoré poukazuje
na určité riziká anebezpečenstva.
Poznámka
Tento symboloznačuje dodatočné informácie, alebo dôležité
poznámky.
82
Page 84

2. Obsah balenia
• Vonkajší snímač TS34A
• Tento návod na použitie
3. Bezpečnostné upozornenia
• Výrobok je určený na nekomerčné použitievdomácnosti.
• Prístroj nepoužívajtemimo rozsahu predpísaných hodnôtvtechnických
údajoch.
• Výrobok nepoužívajte vo vlhkom prostredí azabráňte styku svodou.
• Výrobok nepoužívajte vbezprostrednej blízkosti zdrojov tepla, ani
nevystavujte pôsobeniu priameho slnečného žiarenia.
• Výrobok nepoužívajte na miestach, kde jepoužívanie elektronických
zariadení zakázané.
• Výrobok neumiestňujte do blízkosti zdrojov rušenia,kovových rámov,
počítačov,televízorov atď. Elektronickézariadenia akovové rámy okien
môžu negatívne ovplyvniť fungovanie výrobku.
• Výrobok chráňte pred pádmi aveľkými otrasmi.
• Výrobok neotvárajte avprípade poškodenia ho ďalejnepoužívajte.
• Do výrobkunezasahujte aneopravujte ho. Akékoľvekúkony údržby
prenechajte príslušnému odbornému personálu.
• Obalový materiálodložte mimo dosahu detí,hrozí riziko udusenia.
• Obalový materiálzlikvidujte podľa platných predpisovolikvidácii.
• Výrobok žiadnym spôsobom neupravujte, stratíte tým nárok na záruku.
83
Page 85

Upozornenie –Batérie
• Vybité batériebezodkladne vymeňte azlikvidujte podľa platných
predpisov.
• Používajte výhradneakumulátory (alebo batérie) zodpovedajúce
udanému typu.
• Na napájanietohto výrobku nekombinujte staréanovébatérie,
ani rôzne typy aznačky batérií.
• Pri vkladaníbatérií vždy dbajte nasprávnu polaritu (+ a-). Pri
nesprávnej polarite hrozí nebezpečenstvo vytečenia batérií alebo
explózie.
• Batérie úplnenevybíjajte.
• Batérie uchovávajtemimo dosahu detí.
• Akumulátory/batérie neskratujte azabráňte ich umiestneniu v
blízkosti neizolovaných kovových predmetov.
4. Uvedenie do prevádzky
• Uvoľnite skrutkypriehradky na batérie (2)na zadnej strane
rádiolokačnej stanice apriehradku otvorte.
• Posuňte posuvný spínač CH (4) doľava alebodoprava na zvolenie
kanála, na ktorom rádiolokačná stanica vysiela.
• Vložte dvebatérie typu AAA sosprávnou polaritou.
• Zatvorte potomkryt batériovej priehradky.
84
Page 86

Výmena batérií
• Otvorte priečinokna batérie (2), vyberteazlikvidujte vybité batérie a
vložte dve nové batérie typuAAA podľa polarity.Zatvorte priečinok
na batérie.
Poznámka
Pri uvádzaní do prevádzky dbajte na to, aby bolivždy vkladané najprv
batérie do vonkajšieho senzora/snímača aažpotom dozákladne.
5. Montáž
Poznámka –montáž
• Odporúčame základňuasenzorumiestniť najprv na požadované
miesta inštalácie bez ich montáže avykonať všetky nastavenia –
podľa postupu opísaného včasti 6. Prevádzka.
• Stanice namontujteaž po správnom nastavení adosiahnutí
stabilného rádiového spojenia.
85
Page 87
Poznámka
• Dosah rádiovéhoprenosu medzi senzorom azákladňou je na
voľnom priestranstve až 30 m.
• Pred montážou dbajte na to, abyrádiový prenos nebol ovplyvnený
rušivými signálmi alebo prekážkami, ako sú budovy,stromy,
vozidlá, vysokonapäťové vedenia atď.
• Pred denitívnou montážou sa ubezpečte, čije medzi
požadovanými miestami inštalácie dostatočný príjem.
• Pri montáživonkajšieho senzoradbajte na to, aby bol umiestnený
na takom mieste, kde nebudevystavený účinkom priameho
slnečného žiarenia adažďa.
• Medzinárodná štandardná výška merania teploty vzduchu je 1,25
m(4stopy) nadzemou.
Upozornenie
• Na montážna určenú stenu sivšpecializovanej predajni obstarajte
špeciálny,resp.vhodný montážny materiál.
• Zabezpečte, abyste premontáž nepoužili chybné alebo poškodené
časti.
• Pri montážinikdy nepoužívajte násilie aleboveľkú silu. Mohlo by
tak dôjsť kpoškodeniu výrobku.
• Pred montážou bezpodmienečne skontrolujte vhodnosť stenypre
zavesenie príslušnej hmotnosti aubezpečte sa, že sa vmieste
montáže nenachádzajú vstene žiadne vodovodné, plynové,
elektrické alebo iné vedenia.
86
Page 88

• Vonkajší senzor môžete pomocou stojana postaviť na rovnú plochu
vexteriéri.
• Odporúčame senzornamontovať bezpečne apevne navonkajšiu stenu.
• Pripevnite hmoždinku,skrutku, klinec atď. dopríslušnej steny.
• Senzor zavestepomocou otvoru na zadnejstrane (4).
6. Prevádzka
6.1. Spojenie smeracou stanicou
• Aby stemohli základňovú arádiolokačnú stanicu vzájomne spojiť,
umiestnite obidva prístroje čo najbližšie ksebe.
• Po vložení batérií vyhľadáva základňa automaticky spojenie so
senzorom avykoná prvé nastavenie.
• Ak sasenzor nepripojí automaticky,musí sa na základni spustiť
manuálne vyhľadávanie.
Upozornenie
• Prvé nastavenietrvá asi 3minúty.
• Počaspokusu ospojenie bliká symbolrádiového spojenia aLED
indikácia (1) na rádiolokačnej stanici.
• Počastejto dobysanedotýkajte žiadneho tlačidla! Vopačnom
prípade by mohlo dôjsť kchybám anepresnostiam hodnôt aich
prenosu.
• Postup je ukončený, ak sa na základňovejstanici zobrazia
namerané hodnoty preinteriér aexteriér.
• Základňa nameranú hodnotu automaticky aktualizuje približne
každých 57 sekúnd.
87
Page 89

6.2. Voľba kanálu/ďalšie meracie stanice
Upozornenie
• Môžete nainštalovaťaž 3rôzne základňové stanice s
rádiolokačnou stanicou. Dbajte pritom nazhodné nastavenie
kanála na základňovej apríslušnej rádiolokačnejstanici. Vhodné
základňové stanice nájdete na adrese www.hama.com
• Vysielací kanáldodanej rádiolokačnej stanice jemožné zmeniť/
nastaviť (CH1, CH2, CH3).
• Rádiolokačná stanicaje vhodná prenasledovné základňové
stanice: 76045, 113964, 123126, 123127,123128,123129,
136256, 136257, 136258, 136259
6.3. Nízka kapacita batérie
Poznámka –výmena batérií
• Uvedomte si,že sa po každejvýmene batérií vsenzorealebo
základni musí vykonať nová synchronizácia zariadení.
• Vyberte batériezdruhéhozariadenia aopäť ich vložte alebo ich
vymeňte tiež podľa potreby.
88
Page 90

7. Údržba astarostlivosť
•Načistenie tohto výrobku používajte len navlhčenú utierku, ktorá
nepúšťa vlákna anepoužívajte žiadne agresívnečistiace prostriedky.
• Dbajte nato, aby do výrobkunevnikla voda.
8. Vylúčenie záruky
Firma Hama GmbH &CoKGneručí/nezodpovedá za škody vyplývajúce
zneodbornej inštalácie, montáže alebo neodborného používaniavýrobku
alebo znerešpektovania návodu na používanie a/alebo bezpečnostných
pokynov.
9. Servis apodpora
Sotázkami týkajúcimi sa výrobku sa prosím obráťte na poradenské
oddelenie rmy Hama.
Hotline: +49 9091 502-115 (nem./angl.)
Ďalšie informácie opodporenájdete tu:
www.hama.com
89
Page 91

10. Technické údaje
Napájanie
Merací rozsah
Teplomer
Vlhkomer
Barometer
Rozlíšenie
Teplota
Vlhkosť vzduchu
Merací cyklus
teplomera/vlhkomera
Barometer
Hodiny riadené rádiovým
signálom DCF
Vlhkomer Áno
Teplomer Áno
Barometer Nie
Fázy mesiaca -
Max. počet staníc 3
Frekvencia 433 MHz
Vysokofrekvenčný 0,13µW
Dosah ≤30m
90
Senzor
1,5 V
2xAAA Batterie
-20°C –+60°C/ -4°F –140°F
20% –95%
0,1°C /0,2°F
1%
~57s
-
Nie
Page 92

11. Pokyny pre likvidáciu
Ochrana životného prostredia:
Európska smernica 2012/19/EU a2006/66/EU stanovuje:
Elektrické aelektronické zariadenia, rovnako ako batérie sa
nesmú vyhadzovať do domáceho odpadu.Spotrebiteľ je zo
zákona povinný zlikvidovať elektrické aelektronické
zariadenia, rovnako ako batérie namiesta ktomu určené.
Symbolizuje to obrázok vnávode na použitie,alebo na balení výrobku.
Opätovným zužitkovaním alebo inou formourecyklácie starých zariadení/
batérií prispievate kochrane životného prostredia.
12. Vyhlásenie ozhode
Hama GmbH &CoKG týmto vyhlasuje, že rádiové zariadenie
typu [00176931] je vsúlade sosmernicou 2014/53/EÚ.
Úplné EÚ vyhlásenie ozhode jekdispozícii na tejto
internetovej adrese:
www.hama.com->00176931->Downloads.
Maximálny vysokofrekvenčný 0,015 mW
91
Page 93

M Manual de utilizare
Elemente de comandă și afișaje
AStație de măsurare
1. Așaj LED
2. Compartiment baterii
3. Tasta glisantăCHANNEL =Selectarecanal
4. Decupaj pentru montarepeperete
5. Display LCD
Vă mulţumim că aţi optatpentru un produs Hama.
Pentru început vă rugăm să vă lăsați puțin timp șisă citiți complet
următoarele instrucțiuni și indicații. Vă rugăm să păstraţi manualul de
utilizarelaloc sigur pentru oconsultareulterioară în caz de nevoie.
În caz de înstrăinareaaparatului vărugăm să predați și acest manual
noului proprietar.
1. Explicarea simbolurilor de avertizare și indicații
Avertizare
Se folosește la marcarea instrucțiunilor de siguranță sau la
concentrarea atenției în caz de pericol și riscuri mari.
Instrucțiune
Se folosește pentru marcarea informațiilor și instrucțiunilor
importante.
92
Page 94

2. Conținutul pachetului
• Senzor exteriorTS34A
• Acest manualde utilizare
3. Instrucțiuni de siguranță
• Produsul este conceput numai pentru utilizareprivată și nu
profesională.
• Nu exploataţiprodusul în afaralimitelor deputereindicate în datele
tehnice.
• Nu folosițiprodusul în mediu umedși evitați stropirea cu apă.
• Evitaţi folosirea produsului în imediata apropiereasistemului de
încălzire, aaltor surse de căldurăsau în radiația solară directă.
• Nu folosiţiprodusul în zone undenu sunt admise aparate electronice.
• Nu plasațiprodusul în apropieredecâmpuri perturbatoare,rame de
metal, calculatoare, televizoare, etc. Aparatele electronice precumși
ramele ferestrelor inuențează negativ funcționarea produsului.
• Nu lăsațiprodusul să cadă șinu îl supuneți trepidațiilor puternice.
• Nu deschidețiprodusul și nu-l utilizațiîn continuareîncaz de
deterioare.
• Nu încercaţi să reparaţi sau să depanaţi aparatul. Operaţiile de
reparaţii se execută numai depersonal de specialitate.
• Nu lăsațicopiii să se joacecu materialul pachetului, prezintă pericol
de sufocare.
• Reciclarea materialuluipachetului se execută comformnormelor locale
de salubrizareînvigoare.
• Nu executaţimodicări la aparat. Înacest fel pierdeţi orice drept la
garanţie.
93
Page 95

Avertizare–Bateriile
• Îndepărtați șisalubrizați imediat bateriile folositedin produs.
• Utilizaţi numaiacumulatoare(sau baterii) corespunzătoare
tipulului indicat.
• Nu amestecațibateriile vechi cu celenoi, precum și baterii de
diferite tipuri și producători diferiți.
• Atenţie înmod obligatoriu la polaritateacorectă (marcajele +şi-)
și introduceți-le corespunzător cu acestea. În cazul nerespectării vă
expuneți pericolului scurgerilor sau exploziei bateriilor.
• Nu descărcați bateriile la maximum.
• Păstraţi bateriile astfel încât să nue la îndemâna copiilor.
• Nu scurtcircuitați bateriile/acumulatoarele și nu le apropiați de
obiecte metalice neizolate.
4. Punere în funcțiune
• Desfaceți șuruburilecompartimentului bateriilor (2) depe spatele
stației de măsurareșideschideți-l.
• Pentru selectareacanalului de emisie al stațieide măsurareîmpingeți
tasta glisantă CH (4) ladreapta sau stânga.
• Introduceți două baterii AAA cu polaritateacorectă.
• Închideți compartimentuluibateriilor.
94
Page 96

Înlocuirea bateriilor
• Deschideţi compartimentulbateriilor (2), scoateți șisalubrizați bateriile
folosite și introduceți două baterii AAA noi cu polaritatea corectă.
Închideți compartimentului bateriilor.
Instrucțiune
La punerea în funcțiune introducerea bateriilor se face întotdeauna
mai întâi în stația demăsurareșipeurmă în stația de bază.
5. Montaj
Instrucțiune –montaj
• Se recomandăca stația de bază șistația de măsuraresăeplasate
mai întâi pe locurile doritefără montaj și efectuatetoate setările conform descrierii din 6. Funcționare.
• Montați stația/stațiilenumai după setarea corectă și oconexiune
radio stabilă.
95
Page 97

Instrucțiune
• Raza deacțiune atransmisiei radio întrestația de măsurareși
stația de bază este depână la 30 mpeteren deschis.
• Asigurați-vă înainteamontajului ca transmisia radio să nu e
inuențată de semnale perturbatoaresau obstacoleprecum
clădiri, arbori, vehiculele, linii deînaltă tensiune ș.a.
• Înaintea montajuluinal asigurați-vă că recepțiaeste sucientă
întrelocurile de plasaredorite.
• La montajulstației de măsurareplasarea trebuie să e protejată
împotriva acțiunii directe asoarelui șiploii.
• Înălțimea standardinternațională pentru măsurarea temperaturii
aerului este de 1,25 m(4ft) deasuprasolului.
Avertizare
• Pentru montajul pe peretele prevăzut procurați-vă din comerțul de
specialitate materiale speciale sau adecvate.
• Nu trebuie să e montată nicio componentă defectă sau
deteriorată.
• Nu folosiținiciodată forța sau violențala montaj. Acestea pot
produce deteriorări ale produsului.
• Înainte demontaj vericați dacă pereteleprevăzut este potrivit
pentru greutatea respectivă și asigurați-vă ca la locul montajului
în perete să nu e reelectrice, conducte de apă,de gaze sau
alte țevi.
96
Page 98

• Cu ajutorulpiciorului suport stația demăsurarepoate plasată pe o
suprafață netedă în zona exterioară.
• Se recomandămontarea stației de măsurarestabil şi sigur pe un
perete exterior.
• Fixați dibluri,șuruburi, cuie etc. înperetele prevăzut în aceste sens.
• Agățați stațiade măsurarecuajutorul decupajului (4) prevăzut.
6. Betrieb
6.1. Conexiune cu stația de măsurare
• Pentru conectareastației de bază cu stațiade măsurareplasați cât mai
aproape aparatele unul de altul.
• După introducerea bateriilor stația de bază caută în mod automato
conexiune cu stația de măsurareșiefectuează congurarea inițială.
• Dacă aparatulnu se conectează automat,la stația de bazătrebuie
startat procesul de căutaremanual.
Indicație
• Congurarea inițială durează cca 3minute.
• În timpulcăutării conexiunii simbolul radio și așajul LED (1) dela
stația de măsurareluminează intermitent.
• Evitați oriceacționareatastelor în acest interval de timp! În caz
contrar pot apărea erori sau inexactități ale valorilorși transmisiei
acestora.
• Procesul este nalizat de îndată cedatele de măsurarepentru
zona interioară și exterioară aparașate la stația debază.
• Stație debază actualizează automat valoarea măsurată la ecare
57 de secunde.
97
Page 99

6.2. Selecția canalului /Alte stații de măsurare
Indicație
• Puteți instalapână la 3stații de bază diferite cu stația de
măsurare. În cursul acestei operațiuni aveți grijăla setarea
identică acanalelor de pe stația de bază și ecarestație de
măsurarerespectivă. Stații de bază adecvategăsiți pe www.
hama.com
• Canalul deemisie al stației demăsurarelivrate poate schimbat /
setat (CH1, CH2, CH3).
• Stația demăsurareeste adecvată pentru următoarele stații de
bază: 76045, 113964, 123126, 123127,123128, 123129,
136256, 136257, 136258, 136259
6.3. Capacitate scăzută abateriei
Instrucțiune –Înlocuirea bateriilor
• După ecareînlocuireabateriilor stației de măsuraresau de bază
trebuie efectuată oresincronizareastațiilor.
• Pentru aceasta scoateți bateriile din celeilalte stațiiși introducețile din nou sau dacă este nevoie înlocuiți-le șipe acestea.
98
Page 100

7. Întreţinere şi revizie
•Curățați acest produs numai cu ocârpă fără scame, puțin umedă și nu
folosiți detergenți agresivi. Aveți grijă să nu intreapă înprodus.
• Aveți grijăsă nu intreapă în produs.
8. Excludere de garanție
Hama GmbH &CoKG nu îşi asumă nici orăspunderesau garanție pentru
pagube cauzate de montarea, instalarea sau folosirea necorespunzătoare
aprodusului sau nerespectarea instrucțiunilor de folosiresau/și a
instrucțiunilor de siguranță.
9. Service și suport
Dacă aveți întrebări adresaţi-vă la Hama consultanță privind produsul.
Hotline: +49 9091 502-115 (Ger./Ang.)
Alte informații de suport găsițiaici:
www.hama.com
99
 Loading...