

Hama Save2Data SecureKey, 00181010, 00181011, 00181012, 00181013 Operating Instructions Manual
Page 1

00181010
00181011
00181012
00181013
Save2Data SecureKeyFlash Drive
Operating Instructions
Bedienungsanleitung
GB
D
Page 2

G Operating instruction
Content
1. Explanation of Warning Symbols and Notes ................................................................Page 6
2. Package Contents .........................................................................................................Page 6
3. Safety Instructions .........................................................................................................Page 6
4. Technical Data ...............................................................................................................Page 7
5. Use with a USB connection ...........................................................................................Page 7
6. Charging with the Save2Data SecureKey ......................................................................Page 8
7. Starting up the Save2Data SecureKey...........................................................................Page 8
7.1 Explanation of the most important symbols and
icons of the Save2Data Pro app .................................................................................Page 8/9
8. Settings of the Save2Data Pro App .................................................................................Page 10
8.1 Encrypting the Save2Data SecureKey
8.1.1 Setting up encryption........................................................................................Page 10
8.1.2 Changing the password ....................................................................................Page 10
8.1.3 Removing encryption ........................................................................................Page 11
9. Playback and transfer of pictures, videos and music ......................................................Page 11
9.1 Playback and transfer of pictures
9.1.1 Playback of pictures ..........................................................................................Page 11
9.1.2 Transferring pictures .........................................................................................Page 12/13
9.1.3 Additional options in the context menu .............................................................Page 13/14
9.2 Playback and transfer of videos
9.2.1 Playback of videos ............................................................................................Page 14
9.2.2 Transferring videos............................................................................................Page 14
9.2.3 Additional options in the context menu .............................................................Page 14/15
4
Page 3

9.3 Playback and transfer of music
9.3.1 Music playback .................................................................................................Page 15/16
9.3.2 Transferring music ............................................................................................Page 16
9.3.3 Additional options in the context menu .............................................................Page 16
10. File management via folder structure ...........................................................................Page 16
10.1 Packing files into a .zip file/unpacking ......................................................................Page 17
11. Backing up data and contacts
11.1 Backing up data ......................................................................................................Page 17
11.2 Backing up and restoring contacts ...........................................................................Page 17/18
12. Taking pictures with the Save2Data Pro app ................................................................Page 18
13. Recodring, playback and merging of audio files
13.1 Audio recording and playback ..................................................................................Page 18
13.2 Merging audio recordings ........................................................................................Page 19
13.3 Additional options in the context menu ....................................................................Page 19
14. Warranty Disclaimer ......................................................................................................Page 19
15. Service and Support .......................................................................................................Page 19
Note on environmental protection ......................................................................................Page 36-39
5
Page 4

Thank you for choosing a Hama product.
Take your time and read the following instructions and information completely. Please keep these
instructions in a safe place for future reference. If you sell the device, please pass these operating
instructions on to the new owner.
1. Explanation of Warning Symbols and Notes
Warning
This symbol is used to indicate safety instructions or to draw your attention to specific hazards
and risks.
Note
This symbol is used to indicate additional information or important notes.
2. Package Contents
• “Save2Data SecureKey” Lightning / USB 3.0 flash drive
3. Safety Instructions
• The product is intended for private, non-commercial use only.
• Protect the product from dirt, moisture and overheating, and only use it in a dry environment.
• Do not use the product in the immediate vicinity of heaters or other heat sources or in direct sunlight.
• Do not drop the product and do not expose it to any major shocks.
• Do not attempt to service or repair the product yourself. Leave any and all service work to qualified
experts.
• Do not open the device or continue to operate it if it becomes damaged.
• Dispose of packaging material immediately according to locally applicable regulations.
• Do not modify the product in any way. Doing so voids the warranty.
• Keep this product, as all electrical products, out of the reach of children!
6
Page 5

4. Technical Data
Lightning-USB 3.0 Flash Drive “Save2Data SecureKey”
16 GB: 5V max. 145 mA
Power supply
(USB 3.0)
Storage capacities and
file system
Connections
Operating systems
32 GB: 5V
64 GB: 5V
128 GB: 5V
16 GB – FAT32, 32 GB – FAT32, 64 GB – exFAT, 128 GB – exFAT
USB 3.0 type A
Lightning (8-pin connector)
max. 115 mA
max. 230 mA
max. 237 mA
• Windows 10/8/7/Vista/XP
• Mac OS 10.4 or higher
• iOS 8.0 or higher
• Requires: Installation of the Hama Save2Data Pro app
5. Use with a USB connection
• Use the USB plug to connect the Save2Data SecureKey flash drive to a free USB port on your
computer.
• You can now use the Save2Data SecureKey flash drive like any other USB mass storage device.
• For best results, use a USB 3.0 port.
Note
• Under no circumstance does Hama GmbH & Co KG accept liability for loss of data stored on
data storage media.
• To avoid unintentional data loss, you should regularly make backup copies to more than one
data medium.
• If you use the product over a very long period of time, it may occur that data can no longer
be read, written or deleted.
7
Page 6
Warning – Data Loss
• Always remove the removable storage
medium using the eje ct function of your
operating system.
• If you do not do this, data may be lost.
6. Charging with the Save2Data
SecureKey
The Save2Data SecureKey allows you to
charge your terminal device (iPhone/iPad) using a
computer/notebook or a USB plug-in power supply.
• Connect the Save2Data SecureKey to an
unused USB port on a computer/notebook or
USB plug-in power supply.
• Connect your terminal device (iPhone/iPad) to
your Save2Data SecureKey.
Your terminal device will now begin charging.
Note – Using the Save2Data
SecureKey during charging
• If the Save2Data SecureKey is
connected to a PC/notebook and to
a terminal device, the Save2Data
SecureKey can be accessed only with
the device you connected first (USB =
PC/notebook or Lightning = iPhone/iPad).
7. Starting up the Save2Data SecureKey
• Download Hama’s Save2Data Pro app from
the Apple App Store.
• Connect the Save2Data SecureKey flash drive
to your terminal device (iPhone/iPad) using the
Lightning connector.
• Start the Save2Data Pro app.
Note – Symbol
This symbol is used to indicate when
you must tap the screen at a particular
place in order to perform an action or
open a menu.
7.1 Explanation of the most important
symbols and icons of the Save2Data
Pro app
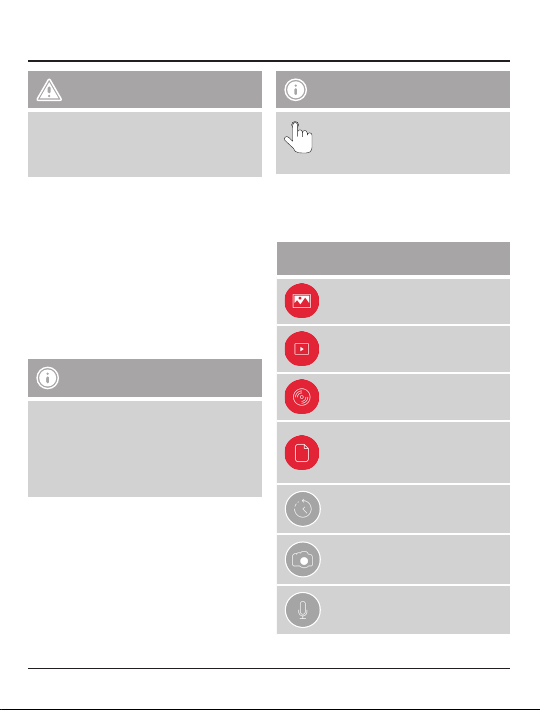
Main Menu
Menu for displaying and
transferring pictures
Menu for playing back and
transferring videos
Menu for playing back music
Menu for accessing the folder
structure of the Save2Data
SecureKey and the terminal
device
Menu for backing up and restoring
data and contacts
Menu for taking pictures and
recording videos directly
Menu for recording audio
8
Page 7
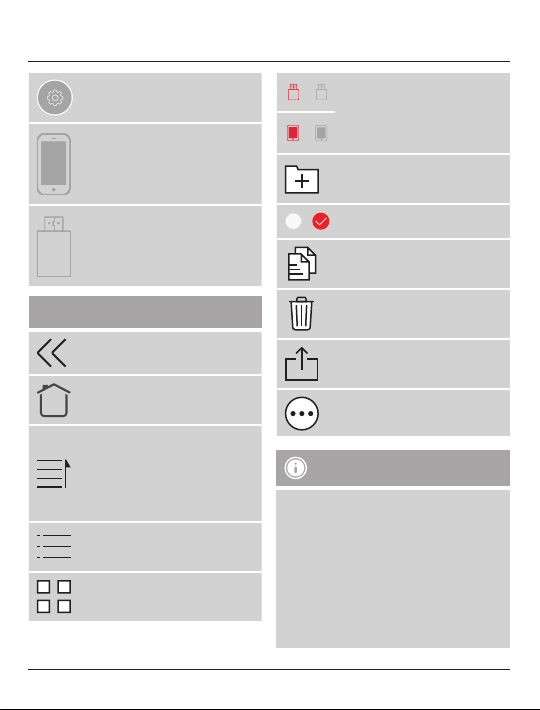
Menu for system settings
Allows access to the data saved on
the terminal device
Displays the amount of storage
used and free on the terminal
device
Allows access to the data saved on
the Save2Data SecureKey
Displays the amount of storage
used and free on the Save2Data
SecureKey
Change between the storage of
/
the Save2Data SecureKey and
that of the terminal device
Red = active storage
/
Grey = inactive storage
Create a new folder in the File/
Folder menu (only when accessing
the Save2Data SecureKey)
Select files/folders on which to use
/
the options in the context menu
Copy the selected file(s)
Additional symbols/icons
Return to previous view
Return to the main menu (only in
the Explorer menu)
When accessing the Save2Data
SecureKey: Opens the menu for
changing the display and sorting
of the data
When accessing the terminal
device: List view of the data
List view of the saved data
(Save2Data SecureKey only)
Preview (thumbnail) of the saved
data
Delete the selected file(s)
Share: Opens the context menu of
the terminal device
More: Opens a menu with various
additional functions
Note – App permissions
• Some features of Hama’s Save2Data Pro
app require certain permissions on your
terminal device (such as backing up/restoring
contact info, backing up pictures, etc.)
• If the app does not have the necessary
permissions, a message is displayed when
the function is executed.
• To allow access, select Hama’s Save2Data
Pro app in the settings of your terminal
device and slide the corresponding switch
to green.
9
Page 8
8. Settings of the Save2Data Pro App
• Settings
• Cache: Allows you to empty the cache (buffer).
• Language: Allows you to set the app language
(a total of eight languages are available).
• Privacy setting:
• External storage encryption:
This option, when enabled, allows you
to encrypt and protect the Save2Data
SecureKey by setting a password. Further
details can be found in the following section.
• Show hidden files:
Enable this option to have files displayed that
are marked with the Hidden attribute.
Note: These hidden files are only visible in the
File/Folder menu.
• Third-Party Player Settings: Choose a
standard player for playback of file formats that
are not supported by iOS but can be played by
third-party players.
Various players are available for selection. To
use one of these players, the corresponding app
must be installed via the App Store.
• Format: With this option, the connected
Save2Data SecureKey is completely formatted
(to FAT32) and all data on it is deleted.
• About: Displays information about the app and
its publisher.
8.1 Encrypting the Save2Data SecureKey
8.1.1 Setting up encryption
• Settings
• Select the Privacy setting menu.
• Enable the control under External storage
encryption.
• Enter your six-character password.
• Re-enter your password for verification.
A message is displayed informing you that the
encryption must be removed before using the
device on a computer.
• Confirm with OK.
Your Save2Data SecureKey is now passwordprotected.
You will be prompted to enter your password
whenever you access the Save2Data Pro app
with the encrypted Save2Data SecureKey.
8.1.2 Changing the password
• Settings
• Select the Privacy setting menu.
•
Change Password
• Enter your existing password.
• Enter your new password.
• Re-enter your new password for verification.
• If you have entered the details correctly, the
change will be applied.
10
Page 9
8.1.3 Removing encryption
• Settings
• Select the Privacy setting menu.
• Disable the control under External storage
encryption.
• Enter your password to remove the encryption of
your Save2Data SecureKey.
Note – Using an encrypted
Save2Data SecureKey
• Once you have encrypted your Save2Data
SecureKey, it will no longer be recognised
on a PC or notebook.
• To be able to use the device again on a PC or
notebook in the usual way, you must remove
the encryption using the Save2Data Pro
app and your password.
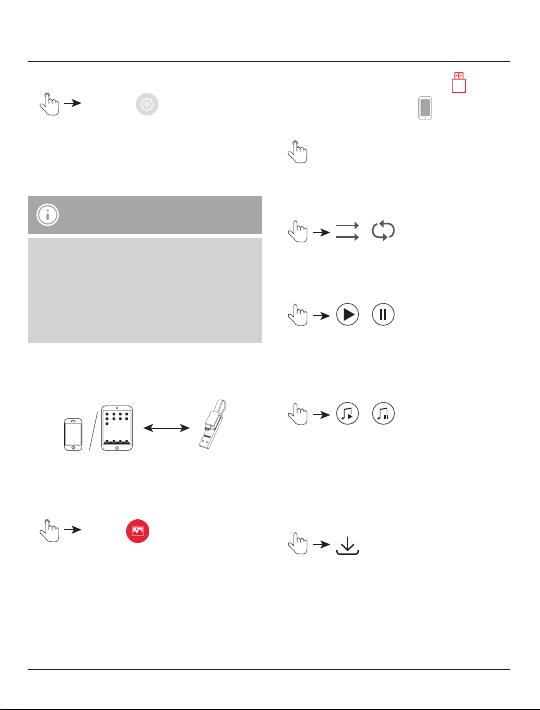
9. Playback and transfer of pictures,
videos and music
9.1 Playback and transfer of pictures
9.1.1 Playback of pictures
• Photos
• By default, the pictures saved on the Save2Data
SecureKey are displayed.
• Choose whether the pictures from
Save2Data SecureKey or
device should be shown.
Tap the picture which is to be displayed.
•
The picture is displayed in playback mode.
• Various options are available.
/
•
Choose whether automatic playback is to stop
after showing the last picture or repeat from the
beginning.
/
•
Start and pause the playback.
Note: After a few seconds, playback switches
into full-screen mode. If you tap the screen,
playback is paused immediately.
/
•
Start and pause the background music.
Note: To enable the background music, first go
to the Music menu and start playing a song.
Then switch back to the Photos menu and start
playback mode. The music continues playing in
the background
•
Save the currently displayed picture directly on
the terminal device (only during playback from
the Save2Data SecureKey flash drive).
the
your terminal
11
Page 10

•
Opens the context menu of the terminal device
with various options.
•
Deletes the picture currently displayed.
9.1.2 Transferring pictures
• Photos
• By default, the pictures saved on the Save2Data
SecureKey are displayed.
• Choose whether the pictures from
Save2Data SecureKey or
device should be transferred.
• If prompted, confirm that the app has permission
to access your photos.
•
Select in the top-right corner of
the display.
•
Use the circle at the left edge of the display to
select the picture(s) that you wish to transfer.
Successful selection is confirmed by this symbol:
• To select all pictures at once, tap Select all at
the top-left corner of the display.
• The menu items displayed at the bottom become
available once a selection is made.
• Various options are available
the
your terminal
12
• Copy (file remains in the source storage)
• Move (picture is removed from the source
storage) (find the Move option under the
menu item More)
Once you have selected one of the options named
above, the other (target) storage location opens.
• At the top-middle edge of the display, you can
choose between internal storage (terminal
devices) and external storage (USB storage).
This allows you to, for example, copy or move
pictures into a sub-folder of your Save2Data
SecureKey.
• Choose the folder in which the copied pictures
are to be saved.
Note – Transferring pictures
and videos
• Be advised that when transferring pictures
or videos from the Save2Data SecureKey to
your terminal device, they can only be saved in
the Photos
• These pictures and videos can then be found
in the gallery on your terminal device.
Note – Save2Data Pro folder
• When you transfer data from the Save2Data
SecureKey to your terminal device, a folder
is created in the internal storage called
Save2Data Pro.
• This folder can only be accessed by the
Save2Data Pro app.
• Please note that if you remove the app from
your terminal device, the files in this folder
will be deleted.
Camara Roll folder.
Page 11

• Before saving the file you may create a new
folder (only on the Save2Data SecureKey, not
on the terminal device).
• To do this, choose the option Create folder in
the bottom-left corner of the display and enter a
name for the folder.
• After selecting the desired target folder, save
the file(s) by selecting the Paste option in the
bottom-right corner of the display.
• Then the transfer window opens to show the
progress of the transfer.
• Successfully transferred data are listed under the
Transfer Completed tab.
• If the transfer is interrupted, the files affected are
listed under the Transfer Failed tab.
•
You are returned to the folder in which you
selected the pictures to be transferred.
•
Deletes the current data transfer display. The
transferred pictures, however, are retained.
Note – Transferring data
Since the procedure for transferring videos etc.
is identical, the corresponding sections of these
instructions refer to this section.
Note – Transferring from and to the
same storage device
It is possible to transfer files from and to the
same storage device (for example, pictures and
videos from the Save2Data SecureKey into
a sub-folder).
9.1.3 Additional options in the context menu
• Photos
• By default, the pictures saved on the Save2Data
SecureKey are displayed.
• Choose whether the pictures from
Save2Data SecureKey or
device should be shown.
•
Select in the top-right corner of
the display
•
Use the circle on the left-hand side to select the
picture(s) that you wish to transfer. Successful
selection is confirmed by this symbol:
• To select all pictures at once, tap Select all at
the top-left corner of the display.
• Aside from the options to copy and move, the
context menu at the bottom edge of the display
also provides other options.
• Delete: Deletes the selected file(s) from the
storage location.
• Share: Opens the context menu of the
terminal device.
the
your terminal
13
Page 12

• More: The Rename option is displayed. This
option is only available for the storage of the
Save2Data SecureKey and with a single file
selected. Enter a new file name and confirm
with OK.
Furthermore, the Hide option is available.
Selected picture files are hidden in the photo
display. The files can be shown again in the
Explorer menu (with the ‘Show hidden files’
option enabled).
Note – Additional option
• The Create Folder, Rename and Hide
options are only available for the storage of
the Save2Data SecureKey.
• Since the procedures for these additional
options are identical for videos, for example,
the corresponding sections of these
instructions refer to this section.
9.2 Playback and transfer of videos
9.2.1 Playback of videos
• Videos
• By default, the videos saved on the Save2Data
SecureKey are displayed.
• Choose whether the video from
Save2Data SecureKey or
device should be play.
•
Tap the video which is to be played.
The video is displayed in playback mode
and playback begins automatically.
the
your terminal
• Various options are available.
•
Switch the screen orientation between horizontal
and vertical.
•
Play the previous video
•
/
Start/pause playback
•
Play the next video
9.2.2 Transferring videos
Note – Transferring videos
• See section 9.1.2
• Procedure identical to transferring pictures
9.2.3 Additional options in the context
menu
Note – Additional options
• See section 9.1.3
• Options identical to context menu for pictures
For videos, there is also an option for the use of a
third-party player (only available for videos on the
Save2Data SecureKey).
14
Page 13

• Videos
By default, the videos saved on the Save2Data
SecureKey are displayed.
•
Select in the top-right corner of the
display
•
Use the circle on the left-hand side to select the
video that you wish to play. Successful selection
is confirmed by this symbol:
•
More
Use third-party player
•
All third-party player apps that are installed and
can be used are displayed.
• You can now play the video in the selected player
or download it (various options are available for
selection, depending on the player).
9.3 Playback and transfer of music
9.3.1 Music playback
• Music
• By default, the songs saved on the Save2Data
SecureKey are displayed.
• Choose whether the music from
Save2Data SecureKey or
device should be played.
•
Tap the song which is to be played.
The song is displayed in playback mode and
playback begins automatically.
the
your terminal
• Various options are available.
•
Opens a list of all songs saved on the
Save2Data SecureKey or terminal device.
•
/ / /
Play songs in order / Repeat entire playlist /
Repeat single song / Play songs in random
order (shue)
•
Play the previous song
•
/
Start/pause playback
•
Play the next song
•
Opens the context menu of the terminal device
•
Adjust volume
• While music is playing, you can still use the
other functions of the Save2Data Pro app. Music
playback will not be interrupted.
The main menu allows you to access the music
player directly.
15
Page 14

•
In the top-left corner of the main menu.
This symbol indicates whether music playback is
currently running or has been paused.
9.3.2 Transferring music
Note – Transferring music
• See section 9.1.2
• Procedure identical to transferring pictures
• Music can only be transferred from
the terminal device to the Save2Data
SecureKey, not the other way.
• Alternatively, you may save music in the
app’s folder, called Save2Data Pro. Music
saved in this folder may only be accessed
using the Save2Data Pro app.
9.3.3 Additional options in the
context menu
Note – Additional options
• See section 9.1.3
• Options identical to context menu for pictures
10. File management via folder structure
• File/Folder
When the Save2Data SecureKey is connected,
you automatically access its storage.
• Choose whether to access the folder structure of
the
Save2Data SecureKey or your
terminal device.
• You can then transfer files between the two
storage locations, as well as move, rename or
delete files.
• The procedure for transferring files is identical to
transferring pictures (see section 9.1.2).
• Aside from data transfers, this menu also allows
you to create new folders.
•
• Enter a folder name and confirm with OK.
Note – Transferring documents
• This menu allows you to open and transfer
documents (such as .pdf documents, tables,
etc.).
• Transferring documents directly to the
terminal device is not possible. You can save
documents only in the Save2Data Pro folder
in the terminal device view.
• This folder is bound to the Save2Data Pro
app. You can access this folder only using
the app.
• If you delete the Save2Data Pro app, any
files contained within the Save2Data pro
folder are also deleted.
16
Page 15

10.1 Packing files into a .zip file/
unpacking
Several files can be packed into a .zip file. This is
only possible when accessing the storage of the
Save2Data SecureKey.
•
File/Folder
When the Save2Data SecureKey is connected,
you automatically access its storage.
•
Select in the top-right corner of the
display
•
Use the circle on the left-hand side to select the
files that you wish to pack. Successful selection
is confirmed by this symbol:
• More
•
Zip
The files are now packed into a .zip file. This can
take some time, depending on the file size or
quantity of data.
The individual files that have been packed are
retained and are not deleted.
• Unpacking a .zip file:
.zip File
•
The packed files are unpacked to a folder. The
name of this folder corresponds to that of the
.zip file. The .zip file itself is retained.
11. Backing up data and contacts
11.1 Backing up data
Note – Backing up data
• This menu only backs up pictures and video
from your terminal device.
• Music must be transferred manually.
•
Backup
• On the left, two options are available: Phone
Backup and Backup Contacts.
By default, Phone Backup
•
Start Backup
• All pictures and videos saved on the terminal
device are automatically backed up on the
Save2Data SecureKey. Files already present
are not saved again.
A folder called Backup is created on the
Save2Data SecureKey. All pictures and videos
that have been backed up can be found in the
Phone Backup sub-folder.
Once the backup is completed, an overview
is shown of the number of files successfully
backed up and the number of files for which the
backup failed.
is selected.
11.2 Backing up and restoring contacts
• Backup
• On the left, two options are available: Phone
Backup and Backup Contacts
By default, the phone backup is selected.
17
Page 16

• Backup Contacts
Pikto nur
weiß ohne
Hintergrund
Pikto nur
weiß ohne
Hintergrund
• A new menu opens on the right side with which
you can either begin the backup or import
contacts.
•
Start Backup
All contacts on the terminal device are saved in
.vcf format.
Once the backup is complete, a message shows
the backup location.
Import Contacts
•
All available contact backups (.vcf files) are
displayed.
Note – Importing contacts
• The file names of saved contact backups are
composed of the date of the backup with no
separators.
•
on the desired backup file
Restoring of the contacts begins.
12. Taking pictures with the Save2Data
Pro app
• Camera
• If prompted, confirm that the app has permission
to access your camera and/or microphone.
At the top edge of the display, you can choose
between photo and video recording.
• If your terminal device is equipped with a flash,
you can enable it.
18
• You can also choose between the front camera
and the main camera of your terminal device.
Note – Saving photos
Photos that you take are saved directly on the
Save2Data SecureKey in a separate folder
(Camera or Video).
13. Recording, playback and merging of
audio files
13.1 Audio recording and playback
• Recorder
•
starts recording audio
Pressing this button again will end recording.
• The recorded audio files can now be played
using the Recorder or Music menu. For a
description of playback using the Music menu,
please see section 9.3.1.
• The file name is composed of an R (= Recorder)
with an underscore and the date and time of
recording (without spaces). All recordings are
saved directly on the Save2Data SecureKey in
the Recorder folder.
Page 17

13.2 Merging audio recordings
Merge
• Recorder
•
Select in the top-right corner of the
display
•
Use the circle on the left-hand side to select the
audio files that you wish to merge. Successful
selection is confirmed by this symbol:
15. Service and Support
Please contact Hama Product Consulting if you
have any questions about this product.
Hotline: +49 9091 502-115 (German/English)
Further support information can be found here:
www.hama.com
•
• Enter a file name of your choice or keep the
13.3 Additional options in the context
• All available options in the context menu are
MP3
in the context menu at the bottom edge of the
screen.
suggested name and confirm with OK.
An additional file is created, which contains the
merged recordings.
menu
explained in section 9.1.3.
14. Warranty Disclaimer
Hama GmbH & Co KG assumes no liability and
provides no warranty for damage resulting from
improper installation/mounting, improper use of
the product or from failure to observe the operating
instructions and/or safety notes.
19
Page 18

D Bedienungsanleitung
Inhaltsverzeichnis
1. Erklärung von Warnsymbolen und Hinweisen ..............................................................Seite 22
2. Packungsinhalt .............................................................................................................Seite 22
3. Sicherheitshinweise ....................................................................................................... Seite 22
4. Technische Daten ...........................................................................................................Seite 23
5. Verwendung via USB Anschluss ....................................................................................Seite 23/24
6. Laden über den Save2Data SecureKey..........................................................................Seite 24
7. Inbetriebnahme des Save2Data SecureKey ..................................................................Seite 24
7.1 Erläuterung der wichtigsten Symbole/Icons der Save2Data Pro App ............................Seite 24/25
8. Einstellungen der Save2Data Pro App .............................................................................Seite 26
8.1 Verschlüsseln des Save2Data SecureKey
8.1.1 Einrichten der Verschlüsselung ..........................................................................Seite 26
8.1.2 Ändern des Passwortes .....................................................................................Seite 26
8.1.3 Entfernen der Verschlüsselung ..........................................................................Seite 27
9. Wiedergabe und Übertragung von Bildern, Videos oder Musik .....................................Seite 27
9.1 Wiedergabe und Übertragung von Bildern
9.1.1 Wiedergabe von Bildern....................................................................................Seite 27/28
9.1.2 Übertragung von Bildern...................................................................................Seite 28/29
9.1.3 Weitere Optionen des Kontextmenüs .................................................................Seite 29/30
9.2 Wiedergabe und Übertragung von Videos
9.2.1 Wiedergabe von Videos ....................................................................................Seite 30
9.2.2 Übertragung von Videos ...................................................................................Seite 30
9.2.3 Weitere Optionen des Kontextmenüs .................................................................Seite 30/31
20
Page 19

9.3 Wiedergabe und Übertragung von Musik
9.3.1 Wiedergabe von Musik .....................................................................................Seite 31/32
9.3.2 Übertragung von Musik ....................................................................................Seite 32
9.3.3 Weitere Optionen des Kontextmenüs .................................................................Seite 32
10. Dateiverwaltung über die Ordnerstruktur .....................................................................Seite 32
10.1 Dateien in eine .zip Datei zusammenfassen/entpacken .............................................Seite 33
11. Sicherung von Daten und Kontakten
11.1 Sicherung von Daten ...............................................................................................Seite 33
11.2 Sicherung und Wiederherstellung von Kontakten ......................................................Seite 33/34
12. Aufnahme von Bildern mit der Save2Data Pro App ......................................................Seite 34
13. Aufnahme, Wiedergabe und Zusammenführung von Audioaufzeichnungen
13.1 Aufnahme und Wiedergabe von Audioaufzeichnungen .............................................Seite 34
13.2 Zusammenführen von Audioaufzeichnungen ............................................................Seite 35
13.3 Weitere Optionen des Kontextmenüs ........................................................................Seite 35
14. Haftungsausschluss .......................................................................................................Seite 35
15. Service und Support .......................................................................................................Seite 35
Entsorgungshinweise ...........................................................................................................Seite 36-39
21
Page 20

Vielen Dank, dass Sie sich für ein Hama Produkt entschieden haben!
Nehmen Sie sich Zeit und lesen Sie die folgenden Anweisungen und Hinweise zunächst ganz durch.
Bewahren Sie diese Bedienungsanleitung anschließend an einem sicheren Ort auf, um bei Bedarf darin
nachschlagen zu können. Sollten Sie das Gerät veräußern, geben Sie diese Bedienungsanleitung an den
neuen Eigentümer weiter.
1. Erklärung von Warnsymbolen und Hinweisen
Warnung
Wird verwendet, um Sicherheitshinweise zu kennzeichnen oder um Aufmerksamkeit auf
besondere Gefahren und Risiken zu lenken.
Hinweis
Wird verwendet, um zusätzlich Informationen oder wichtige Hinweise zu kennzeichnen.
2. Packungsinhalt
• Lightning-USB 3.0 Flash Drive „Save2Data SecureKey“
3. Sicherheitshinweise
• Das Produkt ist für den privaten, nicht-gewerblichen Haushaltsgebrauch vorgesehen.
• Schützen Sie das Produkt vor Schmutz, Feuchtigkeit und Überhitzung und verwenden Sie es nur in
trockenen Räumen.
• Betreiben Sie das Produkt nicht in unmittelbarer Nähe der Heizung, anderer Hitzequellen oder in
direkter Sonneneinstrahlung.
• Lassen Sie das Produkt nicht fallen und setzen Sie es keinen heftigen Erschütterungen aus.
• Versuchen Sie nicht, das Produkt selbst zu warten oder zu reparieren. Überlassen Sie jegliche
Wartungsarbeit dem zuständigen Fachpersonal.
• Öffnen Sie das Produkt nicht und betreiben Sie es bei Beschädigungen nicht weiter.
• Entsorgen Sie das Verpackungsmaterial sofort gemäß den örtlich gültigen Entsorgungsvorschriften.
• Nehmen Sie keine Veränderungen am Produkt vor. Dadurch verlieren sie jegliche
Gewährleistungsansprüche.
• Dieses Produkt gehört, wie alle elektrischen Produkte, nicht in Kinderhände!
22
Page 21

4. Technische Daten
Lightning-USB 3.0 Flash Drive „Save2Data SecureKey“
16 GB: 5V max. 145 mA
Stromversorgung
(USB 3.0)
Kapazitäten und
Dateisystem
Anschlüsse
Betriebssysteme
32 GB: 5V
64 GB: 5V
128 GB: 5V
16 GB – FAT32, 32 GB – FAT32, 64 GB – exFAT, 128 GB – exFAT
USB 3.0 Typ A
Lightning (8 Pin-Anschluss)
max. 115 mA
max. 230 mA
max. 237 mA
• Windows 10 / 8 / 7 / Vista / XP
• Mac OS 10.4 oder neuere Versionen
• iOS 8.0 oder neuere Versionen
• Voraussetzung: Installation der Hama App Save2Data Pro
5. Verwendung via USB-Anschluss
• Schließen Sie den Save2Data SecureKey Flash Drive über den USB Stecker an einer feien USB Buchse
Ihres Computers an.
• Sie können den Save2Data SecureKey Flash Drive nun wie einen herkömmlichen USB Massenspeicher
verwenden.
• Die besten Ergebnisse erzielen Sie, indem Sie einen USB 3.0 Anschluss verwenden.
Hinweis
• Die Firma Hama GmbH & Co KG haftet unter keinen Umständen für den Verlust von Daten,
die auf Datenträgern gespeichert werden.
• Um einen unbeabsichtigten Datenverlust zu vermeiden, sollten Sie regelmäßig
Sicherungskopien auf mehr als einem Datenträger erstellen.
• Wenn Sie das Produkt über einen sehr langen Zeitraum verwenden, können möglicherweise
keine Daten mehr gelesen, geschrieben oder gelöscht werden.
23
Page 22

Warnung – Datenverlust
• Entfernen Sie den Wechseldatenträger
immer über die Auswurffunktion Ihres
Betriebssystems.
• Bei Nichtbeachtung kann Datenverlust
nicht ausgeschlossen werden!
6. Laden über den Save2Data SecureKey
Der Save2Data SecureKey bietet Ihnen die
Möglichkeit, Ihr Endgerät (iPhone/iPad) mit Hilfe
eines Computers/Notebooks oder eines USBSteckernetzteils aufzuladen.
• Verbinden Sie Ihren Save2Data SecureKey mit
einem freien USB Anschluss eines Computers/
Notebooks oder eines USB-Steckernetzteils.
• Verbinden Sie Ihr Endgerät (iPhone/iPad) mit
Ihrem Save2Data SecureKey.Ihr Endgerät wird
nun aufgeladen.
Hinweis - Nutzung des Save2Data
SecureKey während des
Ladevorgangs
• Ist der Save2Data SecureKey mit einem
PC/Notebook und einem Endgerät
verbunden, kann nur mit dem zuerst
angeschlossenen Gerät (USB = PC/
Notebook bzw. Lightning = iPhone/
iPad) auf den
zugegriffen werden.
7. Inbetriebnahme des Save2Data
SecureKey
• Laden Sie die Hama App Save2Data Pro aus
dem Apple App Store herunter.
• Schließen Sie den Save2Data SecureKey Flash
Drive mit Hilfe des Lightning Anschlusses an Ihr
Endgerät (iPhone/iPad) an.
Save2Data SecureKey
24
• Öffnen Sie die App Save2Data Pro.
Hinweis – Symbol
Dieses Symbol wird verwendet, wenn
Sie den Bildschirm an einer bestimmten
Stelle berühren müssen, um eine
Aktion durchzuführen oder ein Menü
zu öffnen.
7.1 Erläuterung der wichtigsten Symbole/
Icons der Save2Data Pro App
Hauptmenü
Menü zur Betrachtung und
Übertragung von Bildern
Menü zur Wiedergabe und
Übertragung von Videos
Menü zur Wiedergabe von Musik
Menü zum Zugriff auf die
Ordnerstruktur des Save2Data
SecureKey und des Endgeräts
Menü zum Sichern und
Wiederherstellen von Daten und
Kontakten
Menü, zur direkten Aufnahme von
Bildern und Videos
Menü zur Aufnahme von
Audioaufzeichnungen
Page 23

Menü für Systemeinstellungen
Ermöglicht Zugriff auf die auf dem
Endgerät gespeicherten Daten
Anzeige des belegten und
verfügbaren Speichers des
Endgerätes
Ermöglicht Zugriff auf die auf
dem Save2Data SecureKey
gespeicherten Daten
Anzeige des belegten und
verfügbaren Speichers des
Save2Data SecureKey
Weitere Symbole/Icons
Zurück zur vorherigen Ansicht
Zurück in das Hauptmenü
(nur im Menü Explorer)
Bei Zugriff auf den Save2Data
SecureKey: Öffnet Menü zur
Änderung der Ansicht und
Sortierung der Daten.
Bei Zugriff auf das Endgerät:
Listenansicht der Daten
Listenansicht der gespeicherten
Daten (nur Save2Data
SecureKey)
Vorschauansicht (Thumbnail) der
gespeicherten Daten
Wechsel zwischen dem Speicher
/
des Save2Data SecureKey und
dem Speicher des Endgerätes
Rot = aktiver Speicher
/
Grau = inaktiver Speicher
Neuen Ordner im Menü Explorer
erstellen (nur bei Zugriff auf
Save2Data SecureKey)
Auswahl von Dateien/Ordnern
zur Verwendung der Optionen im
/
Kontextmenü
Kopieren der ausgewählten
Datei(en)
Löschen der ausgewählten
Datei(en)
Teilen: Öffnet das Kontextmenü
des Endgerätes
Mehr: Öffnet Menü mit diversen
weiteren Funktionen.
Hinweis – App Berechtigung
• Die Hama App Save2Data Pro benötigt
für einige Funktionen die Berechtigung zum
Zugriff auf Ihr Endgerät (z.B. Kontaktdaten
sichern/ wiederherstellen, Bilder sichern, etc.)
• Sollte die App keine Berechtigung haben,
erhalten Sie bei Ausführung einer solchen
Funktion eine entsprechende Meldung.
• Um den Zugriff zu erlauben, wählen Sie
die Hama App Save2Data Pro in den
Einstellungen Ihres Endgerätes aus und
schieben den entsprechenden Regler auf grün.
25
Page 24

8. Einstellungen der Save2Data Pro App
• Einstellungen
• Cache: Bietet die Option zum Leeren des Cache
Speicher (Puffer Speicher).
• Sprache wählen: Möglichkeit zur Einstellung
der App-Sprache. (insgesamt 8 Sprachen
verfügbar)
• Privatsphäre-Einstellungen:
• Verschlüsselung externer Speicher:
Durch Aktivieren dieser Option erhalten Sie
die Möglichkeit den Save2Data SecureKey
mit einem Passwort zu versehen und somit
zu verschlüsseln und zu schützen. Weitere
Details finden Sie im nachfolgenden Punkt.
• Versteckte Dateien anzeigen:
Durch Aktivieren dieser Option werden
Dateien sichtbar, welche mit dem Attribut
Versteckt markiert sind.
Hinweis: Diese versteckten Dateien sind nur
im Menü Explorer sichtbar.
• Drittanbieter-Player-Einstellungen: Wählen
Sie einen Standardplayer, falls Sie Dateiformate
wiedergeben möchten, die nicht von iOS
unterstütz werden, aber von einem Drittanbieter
Player wiedergegeben werden können.
Es stehen verschiedene Player zur Auswahl.
Zur Nutzung eines dieser Player muss die
entsprechende App über den App Store
installiert sein.
• Formatieren: Der angeschlossene Save2Data
SecureKey wird komplett formatiert (in FAT32)
und alle darauf befindlichen Daten werden
gelöscht.
• Über: Zeigt nähere Informationen zu der App
und dem Herausgeber an.
8.1 Verschlüsseln des Save2Data
SecureKey
8.1.1 Einrichten der Verschlüsselung
• Einstellungen
• Wählen Sie das Menü Privatsphäre-
Einstellungen.
• Aktivieren Sie den Regler im Punkt
Verschlüsselung externer Speicher.
• Geben Sie Ihr sechsstelliges Passwort ein.
• Geben Sie Ihr Passwort zur Verifizierung erneut
ein.
Sie erhalten einen Hinweis, dass die
Verschlüsselung vor Verwendung an einem
Computer wieder entfernt werden muss.
• Bestätigen Sie mit OK.
Ihr Save2Data SecureKey ist nun mit einem
Passwort vor unbefugtem Zugriff geschützt.
Bei jedem Zugriff auf die App Save2Data Pro
mit dem verschlüsselten Save2Data SecureKey
werden Sie aufgefordert, Ihr Passwort
einzugeben.
8.1.2 Ändern des Passwortes
• Einstellungen
• Wählen Sie das Menü Privatsphäre-
Einstellungen.
•
Passwort ändern
• Geben Sie Ihr bisheriges Passwort ein.
• Geben Sie Ihr neues Passwort ein.
• Geben Sie Ihr neues Passwort zur Verifizierung
erneut ein.
• Nach fehlerfreier Eingabe wird die Änderung
durchgeführt.
26
Page 25

8.1.3 Entfernen der Verschlüsselung
• Einstellungen
• Wählen Sie das Menü Privatsphäre-
Einstellungen.
• Deaktivieren Sie den Regler im Punkt
Verschlüsselung externer Speicher.
• Geben Sie Ihr Passwort ein, um die
Verschlüsselung Ihres Save2Data SecureKey
aufzuheben.
Hinweis – Nutzung eines
verschlüsselten Save2Data
SecureKey
• Sobald Sie Ihren Save2Data SecureKey
verschlüsselt haben, wird dieser an einem PC
oder Notebook nicht mehr erkannt.
• Um das Gerät wieder wie gewohnt an einem
PC oder Notebook nutzen zu können, muss
die Verschlüsselung mittels der Save2Data
Pro App und Ihrem Passwort entfernt
werden.
9. Wiedergabe und Übertragung von
Bildern, Videos oder Musik
9.1 Wiedergabe und Übertragung von
Bildern
9.1.1 Wiedergabe von Bildern
• Fotos
Standardmäßig werden die auf dem Save2Data
SecureKey gespeicherten Bilder angezeigt.
• Wählen Sie, ob die Bilder vom
SecureKey oder von Ihrem
wiedergegeben werden sollen.
Berühren Sie das Bild, welches
•
wiedergegeben werden soll.
Das Bild wird im Wiedergabemodus angezeigt.
• Sie erhalten verschiedene Optionen.
/
•
Wählen Sie, ob die Wiedergabe nach Anzeige
des letzten Bildes stoppt oder erneut beginnen
soll.
/
•
Starten oder pausieren Sie die Wiedergabe.
Hinweis: nach wenigen Sekunden wechselt die
Wiedergabe in den Vollbildmodus. Wenn Sie
den Bildschirm berühren, wird die Wiedergabe
umgehend pausiert.
/
•
Starten oder pausieren Sie die Hintergrundmusik.
Hinweis: Um die Hintergrundmusik zu aktivieren,
gehen Sie zuerst in das Menü Musik und starten
Sie die Wiedergabe eines Titels. Wechseln Sie
nun wieder in das Menü Fotos und starten Sie
den Wiedergabemodus. Die Musik wird im
Hintergrund weiterspielen.
•
Speichert das wiedergegebene Bild direkt
auf dem Endgerät (nur bei Wiedergabe vom
Save2Data SecureKey).
Save2Data
Endgerät
27
Page 26

•
Öffnet das Kontextmenü des Endgerätes mit
verschiedenen Optionen.
•
Löscht das aktuell dargestellte Bild
9.1.2 Übertragung von Bildern
• Fotos
• Standardmäßig werden die auf dem Save2Data
SecureKey gespeicherten Bilder angezeigt.
• Wählen Sie, ob die Bilder vom
SecureKey oder von Ihrem
übertragen werden sollen.
• Bestätigen Sie ggf., dass die App auf Ihre Fotos
zugreifen darf.
•
Auswählen in der rechten oberen
Display-Ecke.
•
Wählen Sie über den Kreis am linken Displayrand
das oder die Bilder aus, die Sie übertragen
möchten. Die erfolgreiche Auswahl wird durch
dieses Symbol bestätigt:
Die unten angezeigten Menüpunkte werden
nach erfolgter Auswahl verfügbar.
• Wenn Sie alle Bilder auf einmal markieren
möchten, wählen Sie Alle auswählen in der
linken oberen Display-Ecke.
• Sie erhalten verschiedene Optionen
Save2Data
Endgerät
28
• Kopieren (Datei bleibt auf dem
ursprünglichen Speicher erhalten)
• Verschieben (Datei wird vom ursprünglichen
Speicher entfernt) (Sie finden die Option
Verschieben in dem Menüpunkt Mehr)
Nachdem Sie eine der oben genannten
Optionen gewählt haben, öffnet sich der
jeweils andere Zielspeicherort.
• Am Displayrand Mitte/oben können Sie
zwischen Interner Speicher (Endgeräte) und
Externer Speicher (USB Speicher) wählen.
So können Sie z.B. Bilder in einen Unterordner
ihres Save2Data SecureKey kopieren oder
verschieben.
• Wählen Sie den Ordner in den die kopierten
Bilder eingefügt werden sollen.
Hinweis – Übertragung von Bildern
und Videos
• Beachten Sie, wenn Sie Bilder oder Videos
vom Save2Data SecureKey auf Ihr
Endgerät überspielen, können Sie diese nur
in den Ordner Photos
einfügen.
• Diese Bilder und Videos sind dann auch in
der Galerie Ihres Endgerätes zu finden.
Hinweis – Ordner Save2Data Pro
• Beim Übertragen von Dateien vom
Save2Data SecureKey auf Ihr Endgerät
steht Ihnen im internen Speicher der Ordner
Save2Data Pro zur Verfügung.
• Auf diesen Ordner kann nur über die
Save2Data Pro App zugegriffen werden.
• Beachten Sie, dass die Dateien in diesem
Ordner gelöscht werden, sollten Sie die App
von Ihrem Endgerät entfernen.
Aufnahmen
Page 27

• Vor dem Einfügen haben Sie die Möglichkeit,
einen neuen Ordner zu erstellen (nur auf
dem Save2Data SecureKey, nicht auf dem
Endgerät).
• Wählen Sie dazu die Option Ordner erstellen
in der linken unteren Display-Ecke aus und
geben Sie einen Ordnernamen ein.
• Wenn Sie den gewünschten Ordner gewählt
haben, fügen Sie die Datei(en) über die Option
Einfügen in der rechten unteren Display-Ecke
ein.
• Im Anschluss öffnet sich das Transferfenster, in
welchem Sie die Übertragung nachverfolgen
können.
Die erfolgreich übertragenen Daten finden Sie
unter dem Reiter Transfer beendet.
Sollte die Übertragung nicht fehlerfrei ablaufen,
werden die entsprechenden Dateien unter dem
Reiter Transfer fehlg. angezeigt.
•
Sie gelangen zurück in den Ordner, in dem die zu
übertragenden Bilder ausgewählt wurden.
•
Löscht die aktuelle Datentransferanzeige. Die
übertragenen Bilder bleiben jedoch erhalten.
Hinweis – Übertragung von Daten
Da die Übertragung von z.B. Videos auf
die gleiche Weise abläuft, wird an den
entsprechenden Stellen auf dieses Kapitel
verwiesen.
Hinweis – Übertragung innerhalb
desselben Speicherortes
Bei dieser Übertragungsvariante können auch
Dateien innerhalb desselben Speicherorts
übertragen werden (z.B. Bilder oder Videos vom
Save2Data SecureKey in einen Unterordner
kopieren).
9.1.3 Weitere Optionen des Kontextmenüs
• Fotos
Standardmäßig werden die auf dem Save2Data
SecureKey gespeicherten Bilder angezeigt.
• Wählen Sie, ob die Bilder vom
SecureKey oder von Ihrem
angezeigt werden sollen.
•
Auswählen in der rechten oberen
Display-Ecke
•
Wählen Sie über den Kreis auf der linken Seite,
das oder die Bilder aus, die Sie übertragen
möchten. Die erfolgreiche Auswahl wird durch
dieses Symbol bestätigt:
• Wenn Sie alle Bilder auf einmal markieren
möchten, wählen Sie Alle auswählen in der
linken oberen Display-Ecke.
• Neben den Optionen zum Kopieren und
Verschieben bietet das Kontextmenü am
unteren Displayrand weitere Möglichkeiten:
• Löschen: Entfernt die gewünschte(n)
Datei(en) vom jeweiligen Speicherort.
• Teilen: Öffnet das Kontextmenü des Endgerätes.
Save2Data
Endgerät
29
Page 28

• Mehr: Die Option Umbenennen wird
angezeigt. Diese Option ist nur verfügbar,
wenn Sie den Speicher des Save2Data
SecureKey gewählt haben und nur eine
einzelne Datei ausgewählt wurde. Geben Sie
einen neuen Dateinamen ein und bestätigen
Sie mit OK.
Des Weiteren erhalten sie die Option
Verstecken. Ausgewählte Bilddateien
werden in der Foto-Anzeige ausgeblendet.
Die Dateien können im Explorer Menü wieder
sichtbar gemacht werden (bei aktivierter
Option „Versteckte Dateien anzeigen“).
Hinweis – Weitere Optionen
• Die Optionen Neuer Ordner, Umbenennen
und Verstecken sind nur für den Speicher
des Save2Data SecureKey verfügbar.
• Da die weiteren Optionen für z.B. Videos auf
die gleiche Weise funktionieren, wird an den
entsprechenden Stellen auf dieses Kapitel
verwiesen.
9.2 Wiedergabe und Übertragung von
Videos
9.2.1 Wiedergabe von Videos
• Videos
• Standardmäßig werden die auf dem Save2Data
SecureKey gespeicherten Videos angezeigt.
• Wählen Sie, ob die Videos vom
SecureKey oder von Ihrem
wiedergegeben werden sollen.
•
Berühren Sie das Video, welches
wiedergegeben werden soll.
Das Video wird im Wiedergabemodus
angezeigt und die Wiedergabe startet automatisch.
Save2Data
Endgerät
30
• Sie erhalten verschiedene Optionen.
•
Wechseln Sie Bildschirmausrichtung zwischen
horizontal und vertikal.
•
Wiedergabe des vorherigen Videos
•
/
Wiedergabe starten / pausieren
•
Wiedergabe des nächsten Videos
9.2.2 Übertragung von Videos
Hinweis – Übertragung von Videos
• Siehe Punkt 9.1.2
• Identischer Ablauf zur Übertragung von
Bildern
9.2.3 Weitere Optionen des Kontextmenüs
Hinweis – Weitere Optionen
• Siehe Punkt 9.1.3
• Identische Optionen des Kontextmenüs bei
Bildern
Eine weitere Option nur für Videos, ist die
Verwendung eines Drittanbieter-Players (nur
für Videos auf dem Save2Data SecureKey
verfügbar!).
Page 29

• Videos
Standardmäßig werden die auf dem Save2Data
SecureKey gespeicherten Videos angezeigt.
Auswählen in der rechten oberen
•
Display-Ecke
•
Wählen Sie über den Kreis auf der linken Seite
das Video aus, das Sie wiedergeben möchten.
Die erfolgreiche Auswahl wird durch dieses
Symbol bestätigt:
•
Mehr
Drittanbieter-Player benutzen
•
Es werden alle installierten Drittanbieter-Player
Apps angezeigt, welche verwendet werden
können.
• Sie können das Video nun in dem ausgewählten
Player wiedergeben oder herunterladen (je nach
Player verschiedene Optionen zur Auswahl)
9.3 Wiedergabe und Übertragung von Musik
9.3.1 Wiedergabe von Musik
• Musik
• Standardmäßig werden die auf dem Save2Data
SecureKey gespeicherten Titel angezeigt.
• Wählen Sie, ob die Musik vom
SecureKey oder von Ihrem
wiedergegeben werden soll.
•
Berühren Sie den Titel, der wiedergegeben
Save2Data
Endgerät
werden soll.
Der Titel wird im Wiedergabemodus angezeigt
und die Wiedergabe startet automatisch.
• Sie erhalten verschiedene Optionen:
•
Öffnet eine Liste mit allen auf dem Save2Data
SecureKey oder Endgerät gespeicherten Titeln.
•
/ / /
Titel der Reihe nach wiedergeben / Komplette
Playlist wiederholen / Einzelnen Titel wiederholen
/ Beliebige Wiedergabe von Titeln (Shue)
•
Wiedergabe des vorherigen Titels
•
/
Wiedergabe starten / pausieren
•
Wiedergabe des nächsten Titels
•
Öffnet das Kontextmenü des Endgerätes
•
Lautstärke regeln
• Sie können während der gestarteten
Musikwiedergabe die weiteren Funktionen
der Save2Data Pro App nutzen. Die
Musikwiedergabe wird nicht unterbrochen
Über das Hauptmenü haben Sie direkten Zugriff
auf den Musik-Player.
31
Page 30

•
In der linken oberen Ecke des Hauptmenüs.
Dieses Symbol zeigt Ihnen an, ob die
Musikwiedergabe derzeit läuft oder pausiert.
9.3.2 Übertragung von Musik
Hinweis – Übertragung von Musik
• Siehe Punkt 9.1.2
• Identischer Ablauf zur Übertragung von
Bildern
• Musik kann nur vom Endgerät auf den
Save2Data SecureKey übertragen werden,
nicht umgekehrt.
• Alternativ können Sie Musik in den App-
eigenen Ordner namens Save2Data Pro
speichern. Auf in diesem Ordner gespeicherte
Musik können Sie nur über die Save2Data
Pro App zugreifen.
9.3.3 Weitere Optionen des Kontextmenüs
Hinweis – Weitere Optionen
• Siehe Punkt 9.1.3
• Identische Optionen des Kontextmenüs bei
Bildern
10. Dateiverwaltung über die
Ordnerstruktur
• Explorer
Bei angeschlossenem Save2Data SecureKey
greifen Sie automatisch auf dessen Speicher zu.
• Wählen Sie, ob Sie auf die Ordnerstruktur des
Save2Data SecureKey oder die Ihres
Endgerätes zugreifen.
• Anschließend können Sie Dateien zwischen
beiden Speichern austauschen, verschieben,
umbenennen oder löschen.
• Die Übertragung von Dateien erfolgt identisch
zur Übertragung von Bildern, siehe Punkt 9.1.2.
• Neben der Datenübertragung, können Sie in
diesem Menü auch neue Ordner erstellen.
•
• Geben Sie einen Ordnernamen ein und
bestätigen Sie mit OK.
Hinweis – Übertragung von
Dokumenten
• In diesem Menü haben Sie die Möglichkeit
Dokumente (z.B. PDF Dateien, Tabellen) zu
öffnen und zu übertragen.
• Eine Übertragung von Dokumenten auf das
Endgerät direkt ist nicht möglich. Sie können
Dokumente nur in den Ordner Save2Data Pro
in der Endgeräteansicht speichern.
• Dieser Ordner ist an die Save2Data Pro App
gebunden. Nur mittels dieser App können Sie
auf diesen Ordner zugreifen.
• Wenn Sie die Save2Data Pro App löschen,
werden auch die in dem Save2Data Pro
Ordner befindlichen Dateien gelöscht.
32
Page 31

10.1 Dateien in eine .zip Datei
zusammenfassen/entpacken
Mehrere Dateien lassen sich in eine Zip-Datei
zusammenfassen. Dies ist ausschließlich bei Zugriff
auf den Speicher des Save2Data SecureKey
möglich.
•
Explorer
Bei angeschlossenem Save2Data SecureKey
greifen Sie automatisch auf dessen Speicher zu.
•
Auswählen in der rechten oberen
Display-Ecke.
•
Wählen Sie über den Kreis auf der linken Seite
die Dateien aus, die Sie zusammenfassen
möchten. Die erfolgreiche Auswahl wird durch
dieses Symbol bestätigt:
• Mehr
•
Zip
Die Dateien werden nun zu einer .zip Datei
zusammengefasst. Je nach Dateigröße bzw.
Menge der Daten kann dies einige Zeit in
Anspruch nehmen.
Die zusammengefassten Einzeldateien bleiben
erhalten und werden nicht gelöscht.
• Entpacken einer .zip Datei:
.zip Datei
•
Die zusammengefassten Dateien werden in
einen Ordner entpackt. Die Bezeichnung dieses
Ordners entspricht der Bezeichnung der .zip
Datei. Die .zip Datei selbst bleibt erhalten.
11. Sicherung von Daten und Kontakten
11.1 Sicherung von Daten
Hinweis – Datensicherung
• In diesem Menü werden nur Bilder und
Videos von Ihrem Endgerät gesichert.
• Musik muss manuell übertragen werden.
•
Backup
Links bietet Ihnen das Menü zwei Möglichkeiten:
Telefon-Backup oder Backup-Kontakte.
Standardmäßig ist das
ausgewählt.
•
Backup starten
Es werden automatisch alle auf dem Endgerät
gespeicherten Bilder und Videos auf dem
Save2Data SecureKey gesichert.
Bereits gesicherte Dateien werden nicht erneut
gespeichert.
Auf dem Save2Data SecureKey wird ein
Ordner mit dem Namen Backup erstellt.
In dem Unterordner Phone Backup sind alle
gesicherten Bilder und Videos zu finden.
Nach Abschluss der Sicherung erhalten Sie eine
Übersicht, wie viele Dateien erfolgreich gesichert
wurden und bei wieviel Dateien die Sicherung
fehlgeschlagen ist.
11.2 Sicherung und Wiederherstellung
von Kontakten
• Backup
• Links bietet Ihnen das Menü zwei Möglichkeiten:
Telefon-Backup oder Backup-Kontakte
Standardmäßig ist die Datensicherung ausgewählt.
Telefon-Backup
33
Page 32

• Backup-Kontakte
Pikto nur
weiß ohne
Hintergrund
Pikto nur
weiß ohne
Hintergrund
• Auf der rechten Seite öffnet sich ein neues
Menü, mit dem Sie entweder das Backup starten
oder Kontakte importieren können.
•
Backup starten
• Alle auf dem Endgerät befindlichen Kontakte
werden als .vcf Datei gesichert.
Nach Abschluss der Sicherung erhalten Sie eine
Meldung mit dem Speicherort der Sicherung.
•
Kontakte importieren
Alle verfügbaren Kontaktsicherungen
(.vcf Dateien) werden angezeigt.
Hinweis – Importieren von
Kontakten
• Die Dateinamen der gespeicherten
Kontaktsicherungen setzen sich aus dem
Datum der jeweiligen Sicherung zusammen
und sind ohne Trennung geschrieben.
auf die gewünschte Sicherungsdatei
•
Wiederherstellung der Kontakte erfolgt.
12. Aufnahme von Bildern mit der
Save2Data Pro App
• Kamera
• Bestätigen Sie ggf., dass die App auf Ihre
Kamera bzw. ihr Mikrofon zugreifen darf.
Am oberen Bildschirmrand können Sie zwischen
Foto und Videoaufnahme wählen.
• Verfügt Ihr Endgerät über einen Blitz, können Sie
diesen aktivieren.
34
•
• Sie haben ebenfalls die Möglichkeit zwischen
Frontkamera und Hauptkamera Ihres Endgerätes
zu wechseln.
Hinweis – Bilder speichern
• Die aufgenommenen Bilder werden direkt
auf dem Save2Data SecureKey in einem
separaten Ordner (Camera bzw. Video)
gespeichert.
13. Aufnahme, Wiedergabe
und Zusammenführung von
Audioaufzeichnungen
13.1 Aufnahme und Wiedergabe von
Audioaufzeichnungen
• Rekorder
•
startet die Audioaufzeichnung
Erneutes betätigen dieser Schaltfläche beendet
die Aufnahme
• Die aufgenommenen Audiodateien können
nun über das Rekorder- oder das Musikmenü
wiedergegeben werden. Über das Menü Musik
erfolgt die Wiedergabe analog zu Punkt 9.3.1
• Der Dateiname setzt sich aus einem R
(=Rekorder) mit Unterstrich und dem Datum und
der Uhrzeit der Aufnahme (ohne Leerzeichen)
zusammen. Alle Aufnahmen werden direkt auf
dem Save2Data SecureKey in den Ordner
Recorder gespeichert.
Page 33

13.2 Zusammenführen von
Audioaufzeichnungen
• Rekorder
•
Auswählen in der rechten oberen
Display-Ecke
•
Wählen Sie über den Kreis auf der linken Seite,
die Audiodateien aus, die Sie zusammenführen
möchten. Die erfolgreiche Auswahl wird durch
dieses Symbol bestätigt:
15. Service und Support
Bitte wenden Sie sich bei Fragen zum Produkt
gerne an die Hama-Produktberatung.
Hotline: +49 9091 502-115 (Deu/Eng)
Weitere Supportinformationen finden sie hier:
www.hama.com
•
• Geben Sie den gewünschten Dateinamen ein
MP3
im Kontextmenü am unteren Bildschirmrand.
oder behalten Sie den vorgeschlagenen Namen
bei und bestätigen Sie mit OK.
Eine zusätzliche Datei entsteht, welche sich
aus den Zusammengeführten Aufnahmen
zusammensetzt.
Zusammenführen
13.3 Weitere Optionen des Kontextmenüs.
• Alle verfügbaren Optionen des Kontextmenüs
finden Sie unter Punkt 9.1.3 erklärt.
14. Haftungsausschluss
Die Hama GmbH & Co KG übernimmt keinerlei
Haftung oder Gewährleistung für Schäden, die
aus unsachgemäßer Installation, Montage und
unsachgemäßem Gebrauch des Produktes oder
einer Nichtbeachtung der Bedienungsanleitung
und/oder der Sicherheitshinweise resultieren.
35
Page 34

G Note on environmental protection:
After the implementation of the European Directive 2012/19/EU and 2006/66/EU in the national legal
system, the following applies:
Electric and electronic devices as well as batteries must not be disposed of with household waste. Consumers
are obliged by law to return electrical and electronic devices as well as batteries at the end of their service
lives to the public collecting points set up for this purpose or point of sale. Details to this are defined by the
national law of the respective country.
This symbol on the product, the instruction manual or the package indicates that a product is subject to
these regulations.
By recycling, reusing the materials or other forms of utilising old devices/Batteries, you are making an
important contribution to protecting our environment.
D Hinweis zum Umweltschutz:
Ab dem Zeitpunkt der Umsetzung der europäischen Richtlinien 2012/19/EU und 2006/66/EG in nationales
Recht gilt folgendes:
Elektrische und elektronische Geräte sowie Batterien dürfen nicht mit dem Hausmüll entsorgt werden.
Der Verbraucher ist gesetzlich verpflichtet, elektrische und elektronische Geräte sowie Batterien am Ende
ihrer Lebensdauer an den dafür eingerichteten, öffentlichen Sammelstellen oder an die Verkaufsstelle
zurückzugeben. Einzelheiten dazu regelt das jeweilige Landesrecht. Das Symbol auf dem Produkt, der
Gebrauchsanleitung oder der Verpackung weist auf diese Bestimmungen hin. Mit der Wiederverwertung,
der stofflichen Verwertung oder anderen Formen der Verwertung von Altgeräten/Batterien leisten Sie einen
wichtigen Beitrag zum Schutz unserer Umwelt.
F Remarques concernant la protection de l’environnement:
Conformément à la directive européenne 2012/19/EU et 2006/66/CE, et afin d'atteindre un certain nombre
d'objectifs en matière de protection de l'environnement, les règles suivantes doivent être appliquées:
Les appareils électriques et électroniques ainsi que les batteries ne doivent pas être éliminés avec les déchets
ménagers. Le pictogramme “picto” présent sur le produit, son manuel d'utilisation ou son emballage indique
que le produit est soumis à cette réglementation. Le consommateur doit retourner le produit/la batterie
usager aux points de collecte prévus à cet effet. Il peut aussi le remettre à un revendeur. En permettant
enfin le recyclage des produits ainsi que les batteries, le consommateur contribuera à la protection de notre
environnement. C'est un acte écologique.
E Nota sobre la protección medioambiental:
Después de la puesta en marcha de la directiva Europea 2012/19/EU y 2006/66/EU en el sistema legislativo
nacional, se aplicara lo siguiente:
Los aparatos eléctricos y electrónicos, así como las baterías, no se deben evacuar en la basura doméstica.
El usuario está legalmente obligado a llevar los aparatos eléctricos y electrónicos, así como pilas y pilas
recargables, al final de su vida útil a los puntos de recogida comunales o a devolverlos al lugar donde
los adquirió. Los detalles quedaran definidos por la ley de cada país. El símbolo en el producto, en las
instrucciones de uso o en el embalaje hace referencia a ello. Gracias al reciclaje, al reciclaje del material o a
otras formas de reciclaje de aparatos/pilas usados, contribuye Usted de forma importante a la protección de
nuestro medio ambiente.
36
Page 35

R Охрана окружающей среды:
С момента перехода национального законодательства на европейские нормативы 2012/19/EU и
2006/66/EU действительно следующее:
Электрические и электронные приборы, а также батареи запрещается утилизировать с обычным
мусором. Потребитель, согласно закону, обязан утилизировать электрические и электронные
приборы, а также батареи и аккумуляторы после их использования в специально предназначенных
для этого пунктах сбора, либо в пунктах продажи. Детальная регламентация этих требований
осуществляется соответствующим местным законодательством. Необходимость соблюдения данных
предписаний обозначается особым значком на изделии, инструкции по эксплуатации или упаковке.
При переработке, повторном использовании материалов или при другой форме утилизации бывших
в употреблении приборов Вы помогаете охране окружающей среды. В соответствии с предписаниями
по обращению с батареями, в Германии вышеназванные нормативы действуют для утилизации
батарей и аккумуляторов.
I Informazioni per protezione ambientale:
Dopo l’implementazione della Direttiva Europea 2012/19/EU e 2006/66/EU nel sistema legale nazionale, ci
sono le seguenti applicazioni:
Le apparecchiature elettriche ed elettroniche e le batterie non devono essere smaltite con i rifiuti domestici.
I consumatori sono obbligati dalla legge a restituire I dispositivi elettrici ed elettronici e le batterie alla fine
della loro vita utile ai punti di raccolta pubblici preposti per questo scopo o nei punti vendita. Dettagli di
quanto riportato sono definiti dalle leggi nazionali di ogni stato. Questo simbolo sul prodotto, sul manuale
d’istruzioni o sull’imballo indicano che questo prodotto è soggetto a queste regole. Riciclando, ri-utilizzando
i materiali o utilizzando sotto altra forma i vecchi prodotti/le batterie, darete un importante contributo alla
protezione dell’ambiente.
N Notitie aangaande de bescherming van het milieu:
Ten gevolge van de invoering van de Europese Richtlijn 2012/19/EU en 2006/66/EU in het nationaal juridisch
system, is het volgende van toepassing:
Elektrische en elektronische apparatuur, zoals batterijen mag niet met het huisvuil weggegooid worden.
Consumenten zijn wettelijk verplicht om electrische en elctronische apparaten zoals batterijen op het einde
van gebruik in te dienen bij openbare verzamelplaatsen speciaal opgezet voor dit doeleinde of bij een
verkooppunt. Verdere specificaties aangaande dit onderwerp zijn omschreven door de nationale wet van
het betreffende land. Dit symbool op het product, de gebruiksaanwijzing of de verpakking duidt erop dat
het product onderworpen is aan deze richtlijnen. Door te recycleren, hergebruiken van materialen of andere
vormen van hergebruiken van oude toestellen/batterijen, levert u een grote bijdrage aan de bescherming
van het mileu.
J Υπόδειξη σχετικά με την προστασία περιβάλλοντος:
Από τη στιγμή που η Ευρωπαϊκή Οδηγία 2012/19/EU και 2006/66/EE ενσωματώνεται στο εθνικό δίκαιο
ισχύουν τα εξής:
Οι ηλεκτρικές και οι ηλεκτρονικές συσκευές καθώς και οι μπαταρίες δεν επιτρέπεται να πετιούνται στα οικιακά
απορρίμματα. Οι καταναλωτές υποχρεούνται από τον νόμο να επιστρέφουν τις ηλεκτρικές και ηλεκτρονικές
συσκευές καθώς και τις μπαταρίες στο τέλος της ζωής τους στα δημόσια σημεία περισυλλογής που έχουν
δημιουργηθεί γι’ αυτό το σκοπό ή στα σημεία πώλησης. Οι λεπτομέρειες ρυθμίζονται στη σχετική νομοθεσία.
Το σύμβολο πάνω στο προϊόν, στο εγχειρίδιο χρήσης ή στη συσκευασία παραπέμπει σε αυτές τις διατάξεις.
Με την ανακύκλωση, επαναχρησιμοποίηση των υλικών ή με άλλες μορφές χρησιμοποίησης παλιών
συσκευών / Μπαταριών συνεισφέρετε σημαντικά στην προστασία του περιβάλλοντος. Στη Γερμανία ισχύουν
αντίστοιχα οι παραπάνω κανόνες απόρριψης σύμφωνα με τον κανονισμό για μπαταρίες και συσσωρευτές.
37
Page 36

P Wskazówki dotyczące ochrony środowiska:
Od czasu wprowadzenia europejskiej dyrektywy 2012/19/EU i 2006/66/EU do prawa narodowego obowiązują
następujące ustalenia:
Urządzeń elektrycznych, elektronicznych oraz baterii jednorazowych nie należy wyrzucać razem z codziennymi
odpadami domowymi! Użytkownik zobowiązany prawnie do odniesienia zepsutych, zniszczonych lub
niepotrzebnych urządzeń elektrycznych i elektronicznych do punktu zbiórki lub do sprzedawcy. Szczegółowe
kwestie regulują przepisy prawne danego kraju. Informuje o tym symbol przekreślonego kosza umieszczony
na opakowaniu. Segregując odpady pomagasz chronić środowisko!
H Környezetvédelmi tudnivalók:
Az európai irányelvek 2012/19/EU és 2006/66/EU ajánlása szerint, a megjelölt időponttól kezdve, minden
EU-s tagállamban érvényesek a következők:
Az elektromos és elektronikai készülékeket és az elemeket nem szabad a háztartási szemétbe dobni! A
leselejtezett elektromos és elektronikus készülékeket és elemeket, akkumulátorokat nem szabad a háztartási
szemétbe dobni. Az elhasznált és működésképtelen elektromos és elektronikus készülékek gyűjtésére
törvényi előírás kötelez mindenkit, ezért azokat el kell szállítani egy kijelölt gyűjtő helyre vagy visszavinni
a vásárlás helyére. A termék csomagolásán feltüntetett szimbólum egyértelmű jelzést ad erre vonatkozóan
a felhasználónak. A régi készülékek begyűjtése, visszaváltása vagy bármilyen formában történő újra
hasznosítása közös hozzájárulás környezetünk védelméhez.
C Ochrana životního prostředí:
Evropská směrnice 2012/19/EU a 2006/66/EU ustanovujete následující:
Elektrická a elektronická zařízení stejně jako baterie nepatří do domovního odpadu. Spotřebitel se zavazuje
odevzdat všechna zařízení a baterie po uplynutí jejich životnosti do příslušných sběren. Podrobnosti stanoví
zákon příšlušné země. Symbol na produktu, návod k obsluze nebo balení na toto poukazuje.
Recyklací a jinými způsoby zužitkování přispíváte k ochraně životního prostředí.
Q Ochrana životného prostredia:
Európska smernica 2012/19/EU a 2006/66/EU stanovuje:
Elektrické a elektronické zariadenia, rovnako ako batérie sa nesmú vyhadzovať do domáceho odpadu.
Spotrebiteľ je zo zákona povinný zlikvidovať elektrické a elektronické zariadenia, rovnako ako batérie na
miesta k tomu určené. Symbolizuje to obrázok v návode na použitie, alebo na balení výrobku. Opätovným
zužitkovaním alebo inou formou recyklácie starých zariadení/batérií prispievate k ochrane životného
prostredia.
O Nota em Protecção Ambiental:
Após a implementação da directiva comunitária 2012/19/EU e 2006/66/EU no sistema legal nacional, o
seguinte aplica-se:
Os aparelhos eléctricos e electrónicos, bem como baterias, não podem ser eliminados juntamente com o lixo
doméstico. Consumidores estão obrigados por lei a colocar os aparelhos eléctricos e electrónicos, bem como
baterias, sem uso em locais públicos específicos para este efeito ou no ponto de venda. Os detalhes para
este processo são definidos por lei pelos respectivos países. Este símbolo no produto, o manual de instruções
ou a embalagem indicam que o produto está sujeito a estes regulamentos. Reciclando, reutilizando os
materiais dos seus velhos aparelhos/baterias, esta a fazer uma enorme contribuição para a protecção do
ambiente.
38
Page 37

T Çevre koruma uyarısı:
Avrupa Birliği Direktifi 2012/19/EU ve 2006/66/EU ulusal yasal uygulamalar için de geçerli olduğu tarihten
itibaren:
Elektrikli ve elektronik cihazlarla piller normal evsel çöpe atılmamalıdır. Tüketiciler için, artık çalışmayan
elektrikli ve elektronik cihazları piller, kamuya ait toplama yerlerine götürme veya satın alındıkları yerlere geri
verme yasal bir zorunluluktur. Bu konu ile ilgili ayrıntılar ulusal yasalarla düzenlenmektedir. Ürün üzerinde,
kullanma kılavuzunda veya ambalajda bulunan bu sembol tüketiciyi bu konuda uyarır. Eski cihazların geri
kazanımı, yapıldıkları malzemelerin değerlendirilmesi veya diğer değerlendirme şekilleri ile, çevre korumasına
önemli bir katkıda bulunursunuz. Yukarıda adı geçen atık toplama kuralları Almanya’da piller ve aküler için
de geçerlidir.
M Instrucţiuni pentru protecţia mediului înconjurător:
Din momentul aplicării directivelor europene 2012/19/EU şi 2006/66/EU în dreptul național sunt valabile
următoarele:
Aparatele electrice şi electronice nu pot fi salubrizate cu gunoiul menajer. Consumatorul este obligat conform
legii să predea aparatele electrice și electronice la sfârșitul duratei de utilizare la locurile de colectare publice
sau înapoi de unde au fost cumpărate.
Detaliile sunt reglementate de către legislaţia țării respective. Simbolul de pe produs, în instrucţiunile de
utilizare sau pe ambalaj indică aceste reglementări. Prin reciclarea, revalorificarea materialelor sau alte
forme de valorificare a aparatelor scoase din uz aduceți o contribuție importantă la protecția mediului nostru
înconjurător.
S Not om miljöskydd:
Efter implementeringen av EU direktiv 2012/19/EU och 2006/66/EU i den nationella lagstiftningen, gäller
följande:
Elektriska och elektroniska apparater samt batterier får inte kastas i hushållssoporna. Konsumenter är
skyldiga att återlämna elektriska och elektroniska apparater samt batterier vid slutet av dess livslängd till, för
detta ändamål, offentliga uppsamlingsplatser. Detaljer för detta definieras via den nationella lagstiftningen
i respektive land. Denna symbol på produkten, instruktionsmanualen eller på förpackningen indikerar att
produkten innefattas av denna bestämmelse. Genom återvinning och återanvändning av material/batterier
bidrar du till att skydda miljön och din omgivning.
L Ympäristönsuojelua koskeva ohje:
Siitä lähtien, kun Euroopan unionin direktiivi 2012/19/EU ja 2006/66/EU otetaan käyttöön kansallisessa
lainsäädännössä, pätevät seuraavat määräykset:
Sähkö- ja elektroniikkalaitteita ja paristoja ei saa hävittää talousjätteen mukana. Kuluttajalla on lain
mukaan velvollisuus toimittaa sähkö- ja elektroniikkalaitteet niiden käyttöiän päätyttyä niille varattuihin
julkisiin keräyspisteisiin tai palauttaa ne myyntipaikkaan. Tähän liittyvistä yksityiskohdista säädetään
kulloisenkin osavaltion laissa. Näistä määräyksistä mainitaan myös tuotteen symbolissa, käyttöohjeessa tai
pakkauksessa. Uudelleenkäytöllä, materiaalien/paristoja uudelleenkäytöllä tai muilla vanhojen laitteiden
uudelleenkäyttötavoilla on tärkeä vaikutus yhteisen ympäristömme suojelussa.
39
Page 38

Hama GmbH & Co KG
86652 Monheim / Germany
www.hama.com
iPhone, i Pod, iPad, Ligh tning and Apple A pp Store are tradem arks of Apple I nc., registere d in the U.S.
and other countries.
“Made for i Pod”, “Made for iPhon e” and “Made for iPad ” mean that an elec tronic access ory has been
design ed to connect spe cifically to iP od, iPhone and iPa d respectiv ely, and has been ce rtified by the
develo per to meet Appl e performanc e standards. A pple is not respo nsible for the ope ration of this de vice
or its com pliance with sa fety and regula tory standa rds. Please not e that the use of this a ccessory wi th
iPod or iP hone may effec t wireless pe rformance.
All list ed brands are trad emarks of the co rresponding co mpanies. Erro rs and omissions e xcepted,
and subje ct to technical c hanges. Our gen eral terms of deli very and paym ent are applied.
00181010_11_12_13 / 09.17
 Loading...