

Haier HWF5300, HWF5200, HWF5000 User Manual
Front Load Clothes Washer
Front Load Clothes Washer (french)
Lavadora de Ropa Carga Frontal
User Manual
Model # HWF5300, HWF5200, HWF5000
Guide de l’Utilisateur
Modéle # HWF5300, HWF5200, HWF5000
Manual del Usuario
Para Modelo de # HWF5300, HWF5200, HWF5000
Quality ß Innovation ß Style

English
IMPORTANT SAFETY INSTRUCTIONS
WARNING - To reduce the risk of fire, electric shock, or injury to persons
when using your appliance, follow the basic precautions, including the
following:
1. Read all of the instructions before using this appliance.
2. Use this appliance only for its intended purpose as described in this user manual.
3. This washer must be properly installed in accordance with the installation instructions
before it is used.
4. Unplug your washer before cleaning.
5. Never unplug your washer by pulling on the power cord. Always grasp the plug firmly
and pull straight out from the outlet.
6. Do not operate your washer in the presence of explosive flames.
7. Do not use the washer for commercial clothes washing.
8. Do not tamper with controls.
9. Do not allow children to play on or in the appliance. Close supervision of children is
necessary when the appliance is used near children.
10. Washer must be grounded, see grounding instructions on page 2.
11. Under certain conditions, hydrogen gas may be produced in a hot-water system that
has not been used for 2 weeks or more HYDROGEN GAS IS EXPLOSIVE. If the hot
water system has not been used for such a period, before using a washing machine,
turn on all hot-water faucets and let the water flow from each for several minutes. This
will release any accumulated hydrogen gas. As the gas is flammable, do not smoke or
use an open flame during this time.
12. Do not wash articles that have been previously cleaned in, washed in, soaked in, or
spotted with gasoline, dry-cleaning solvents or other flammable or explosive substances
to the wash water. These substances give off vapours that could ignite or explode.
13. Do not add gasoline, dry-cleaning solvens, or other flammable or explosive substances
to wash water. These substances give off vapours that could ignite or explode.
14. Before the appliance is removed from service or discarded, remove the door.
15. Do not reach into the appliance if the tub or agitator is moving.
16. Do not install or store this appliance where it will be exposed to the weather.
17. Do not repair or replaace any part of the appliance or atempt any servicing unless spe
cifically recommended in the user-maintenance instructions or in published user repair
instructions that you understand and have the skills to carry out.
SAVE THESE INSTRUCTIONS

21
English
DANGER
Risk of child entrapment. Before you throw away your old
appliance, take off the door so that children may
not easily get trapped inside.
Thank you for purchasing our Haier
product. This easy-to-use manual
will guide you in getting the best
use of your washer.
Remember to record the model and
serial number. They are on a label
in back of the washer.
Model number
Serial number
Date of purchase
Staple your receipt to your manual. You will need it to obtain
warranty service.
This appliance must be grounded. In the event of malfunction or breakdown,
grounding will reduce the risk of electric shock by providing a path of least
resistance for electric current. This appliance is equipped with a cord having an
equipment-grounding conductor and a grounding plug. The plug must be plugged
into an appropriate outlet that is properly installed and grounded in accordance
with all local codes and ordinances.
Warning – Improper connections of the equipment-grounding conductor can
result in a risk of electric shock. Check with a qualified electrician or serviceman
if you are in doubt as to whether the appliance is properly grounded.
GROUNDING INSTRUCTIONS
X
This appliance must be grounded. In the event of an electrical short circuit,
grounding reduces the risk of electric shock by providing an escape wire for
the electric current. This appliance is equipped with a cord having a grounding
wire with a grounded plug. The plug must be inserted into an outlet that is
properly installed and grounded.
• Improper use of the plug can result in a risk of electric shock.
• Consult a qualified electrician or service person if the grounding
instructions are not completely understood or if doubt exists as to
whether the appliance is properly grounded.
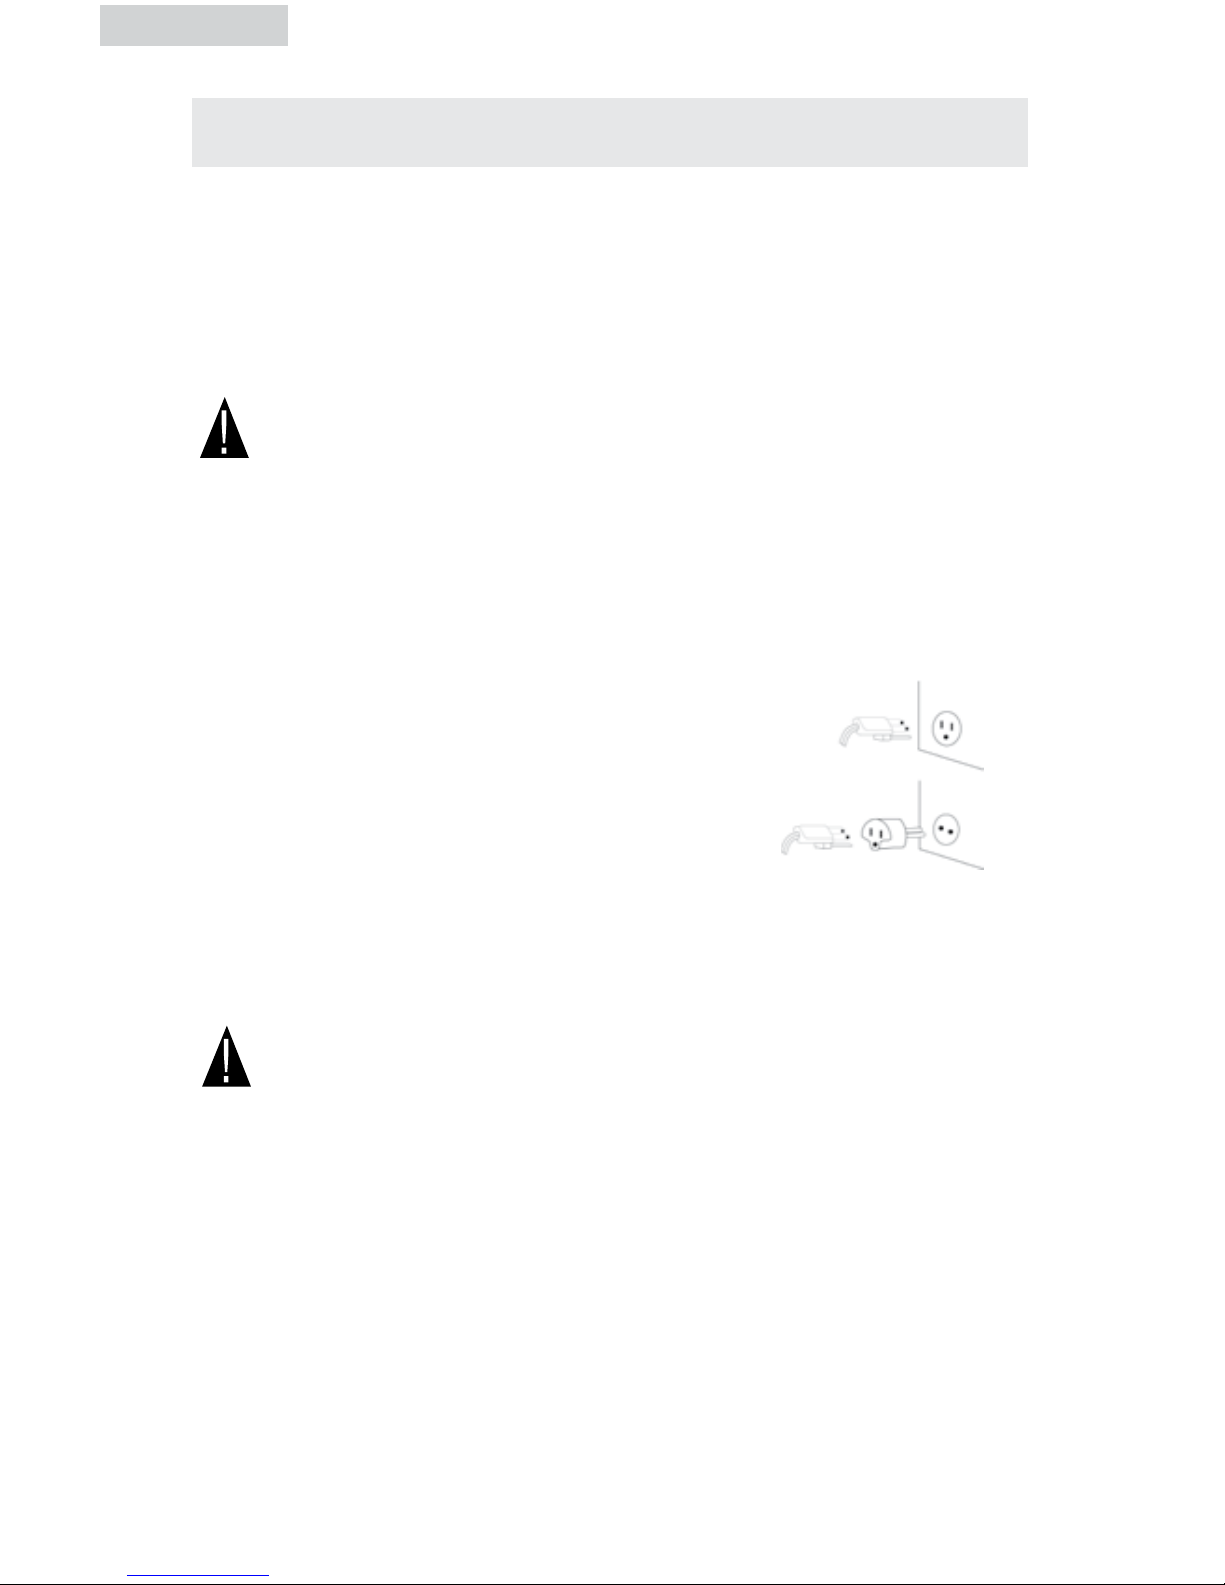
Wiring Requirements:
• This appliance must be plugged into at least
15 AMP 120 VOLT, 60 HZ GROUNDED OUTLET.
Note: Where a standard two-prong outlet is
encountered, it is the personal responsibility
and obligation of the consumer to have
it replaced with a properly grounded
three-prong outlet.
Extension Cords:
We do not recommend that you use an extension cord.
Power Interruptions
Occasionally there may be power interruptions due to thunderstorms or other
causes. Remove the power cord from AC outlet when a power outage occurs.
When power has been restored re-plug power cord to AC outlet. If outage is for
a prolonged period, clean washer before using it again.
3
English
ELECTRICAL CONNECTIONS

4
English
TABLE OF CONTENTS
SAFETY INSTRUCTIONS ................................................................. 1
GROUNDING INSTRUCTIONS ....................................................... 2
ELECTRICAL CONNECTING .............................................................
3
PARTS AND FEATURES ................................................................... 5
Front ................................................................................................. 5
Back ................................................................................................. 6
INSTALLATION INSTRUCTIONS .....................................................
7
Tools and Materials Required .............................................................. 7
Unpacking Your Washer .................................................................... 8
Installation ....................................................................................... 10
OPERATIONAL INSTRUCTIONS ...................................................
12
Control Panel .................................................................................. 12
Program Selection ............................................................................ 14
Loading .......................................................................................... 16
Proper Use of Dispenser ................................................................... 16
Washing Methods ............................................................................ 17
Normal Operating Sounds ................................................................ 18
CARE AND CLEANING GUIDE .....................................................
19
Cleaning and Maintenance ............................................................... 19
Moving and Vacationing .................................................................. 20
Storage of Your Washer ................................................................... 20
Troubleshooting .......................................................................... 21
Technical Specification ................................................................ 23
Warranty ..................................................................................... 24
5
English
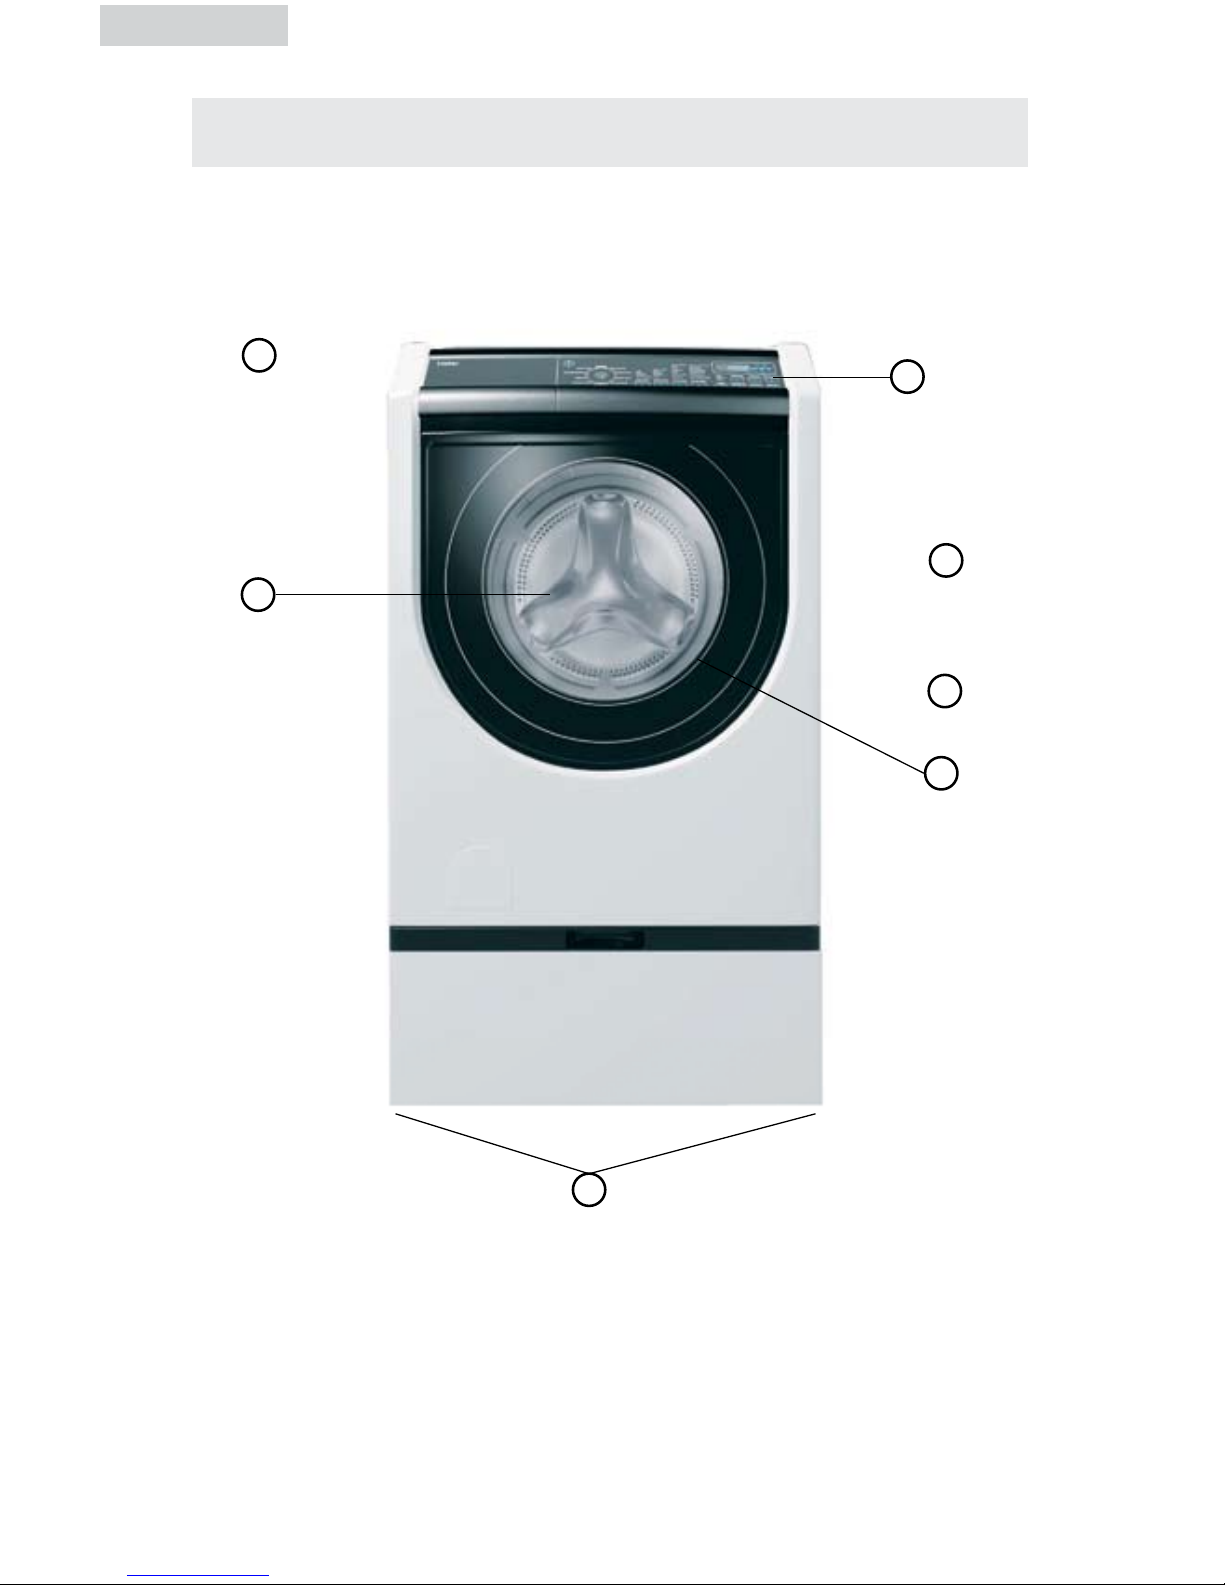
1. Detergent / Softner Dispenser
2. See-through Glass Door
3. Control Panel
4. Cabinet
5. Coin/Button Trap
6. Wash Tub
7. Adjustable Leveling Legs
(Not Shown)
3
4
2
Front
1
5
PARTS AND FEATURES
6
7
English
6
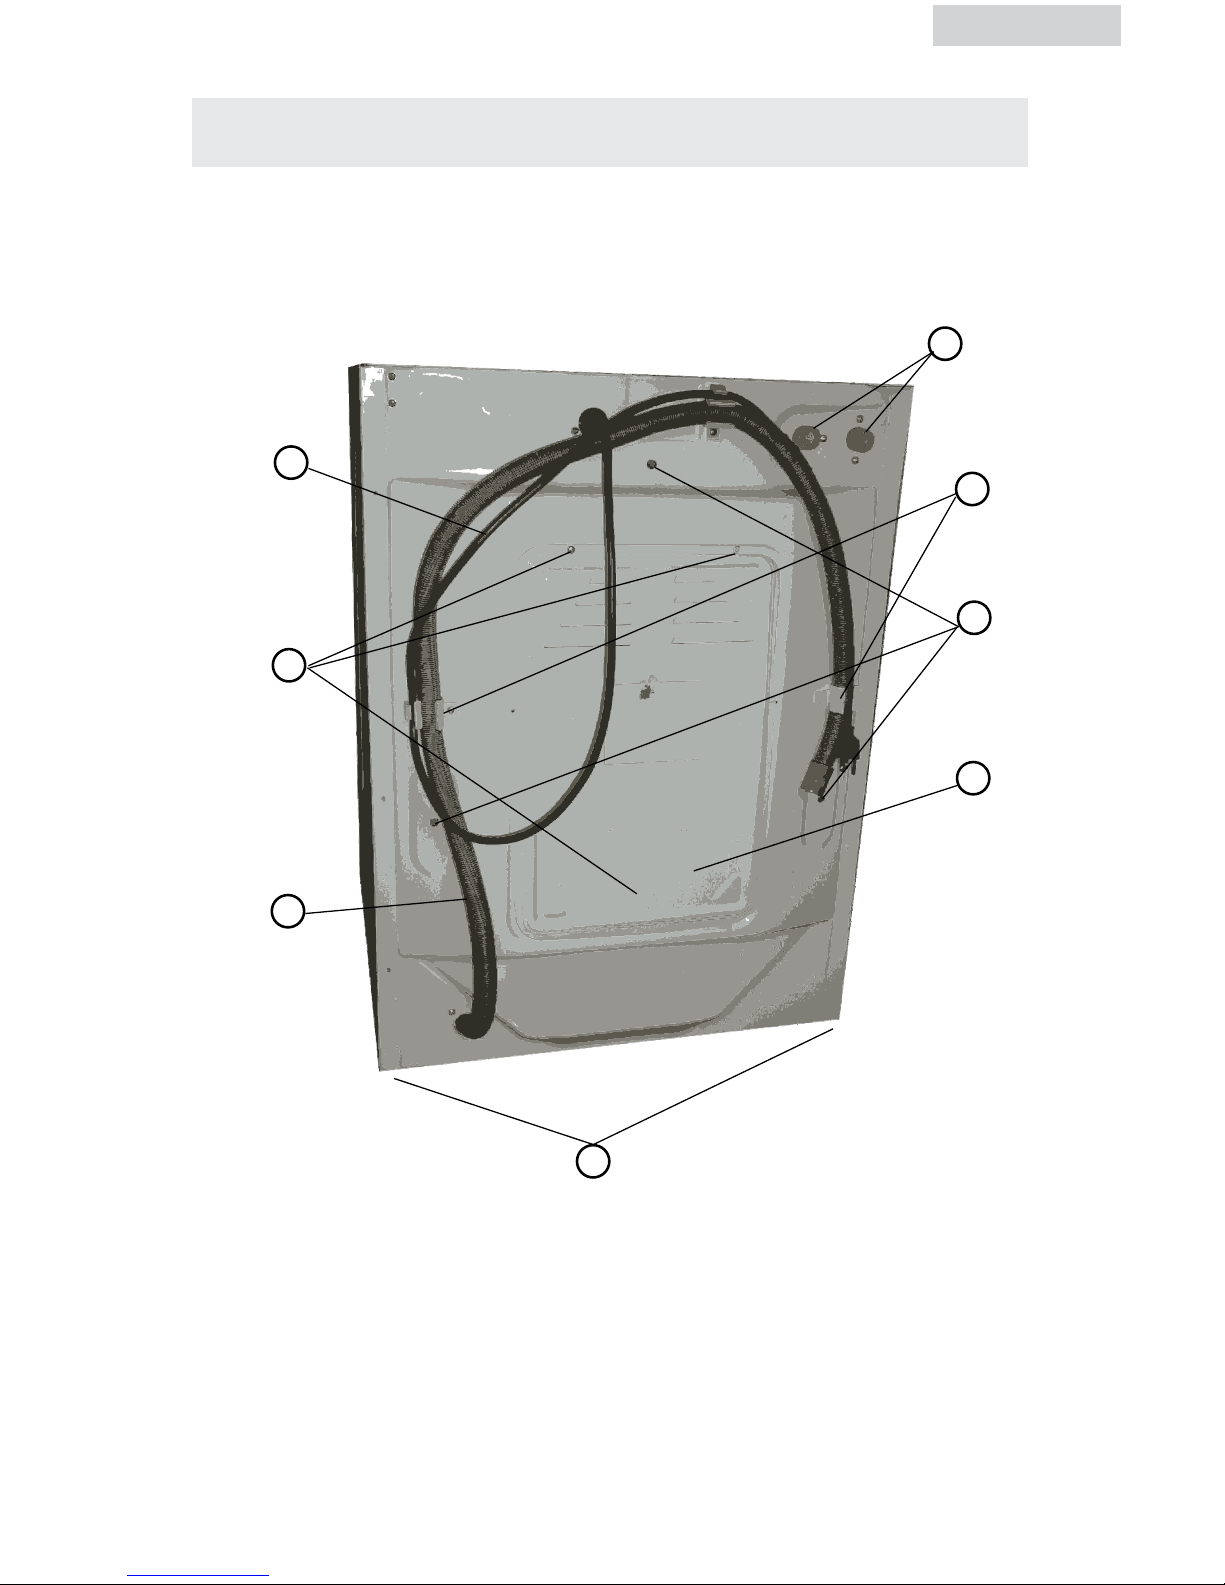
Back
PARTS AND FEATURES
1. Power Supply Cord
2. Back Plate Screw (3)
3. Drainage Hose
4. Drainage Hose Clip (3)
5. Transportation Bolt (4)
6. Back Plate
7. Adjustable Leveling Legs
(Not Shown)
8. Valve (Hot and Cold)
9. Vent
7
1
2
3
6
5
4
8
7
English
INSTALLATION INSTRUCTIONS
Tools and Materials Required
You will need to have the following tools
to help you in the installation of your washer:
• Scissors
• Standard Screwdriver
• Pliers
• Wrench
• Tape Measure
• Gloves
• Level
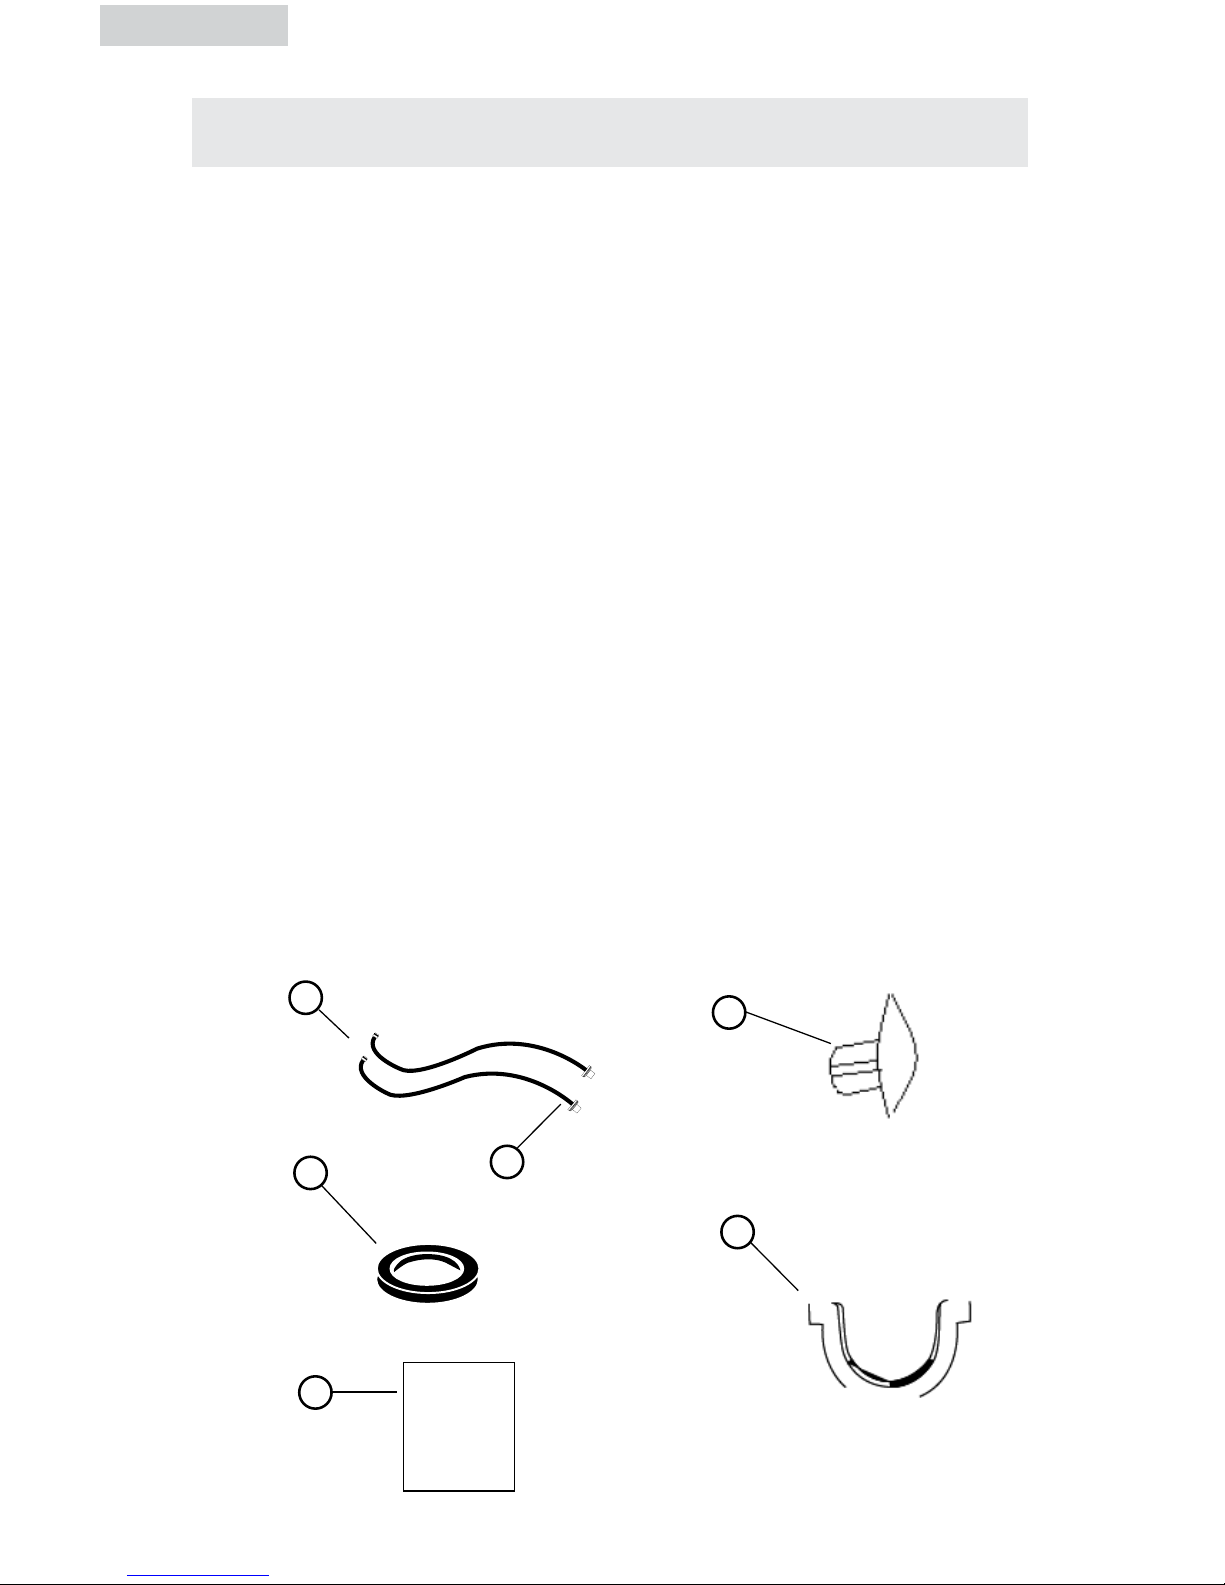
Accessories Supplied Quantity
1. Hot & Cold Water Inlet Hoses 2
2. Pressure Regulator 2
(Attached to Hot & Cold Water Inlet Hoses)
3. Flat Water Inlet Hose Washers 4
(Installed in each end of water inlet hoses)
4. Use & Care Guide (Not Shown) 1
5. Plastic Plugs to cover 3
transportation bolt holes
6. Goose Neck 1
1
3
4
5
6
USER MANUAL
2

English
8
Unpacking Your Appliance
• Remove all packing materials including transportation bolts.
• Inspect and remove any remains of packing, tape or printed materials before
using the washer.
• Transportation Bolts must be removed before using the machine. Once
removed, save them so when moving you can reinstall to protect the machine
from damage during shipping.
• Water inlet hoses and other accessories are packed and placed in the drum.
Bolt
Bolt
Center bolt
 Loading...