

Haier HM1200TX, HM1400TX User Manual
HM1400TX HM1200TX

Dear customers, congratulations. You have once again made a wise and
sensible purchase. By choosing our Washing machine you not only found
the best in advanced technology, but above all you have found a faithful,
untiring and reliable friend.
Your machine is strong, reliable and long lasting. All those qualities which
have made the our trademark famous the world over.
From today, these qualities are at your disposal to help you resolve your
daily household problems.
Your machine is easy to use. Read this owner's manual carefully since
contains all the instructions for safe installation, use and maintenance.
Remember to keep your owner's manual in a safe place so that you can
refer to it whenever you need to.
FUNCTION INTRODUCTION.............................................3-4
INSTALLATION...................................................................5-7
CLOSE UP..........................................................................8-10
USING INSTRUCTIONS.....................................................11-15
MAINTENANCE..................................................................16
SOLUTION TO PROBLEMS............................................17-18
ATTACHED CHART:
GUIDE FOR SELECTING PROGRAMME..........................19
WARNING............................................................................20
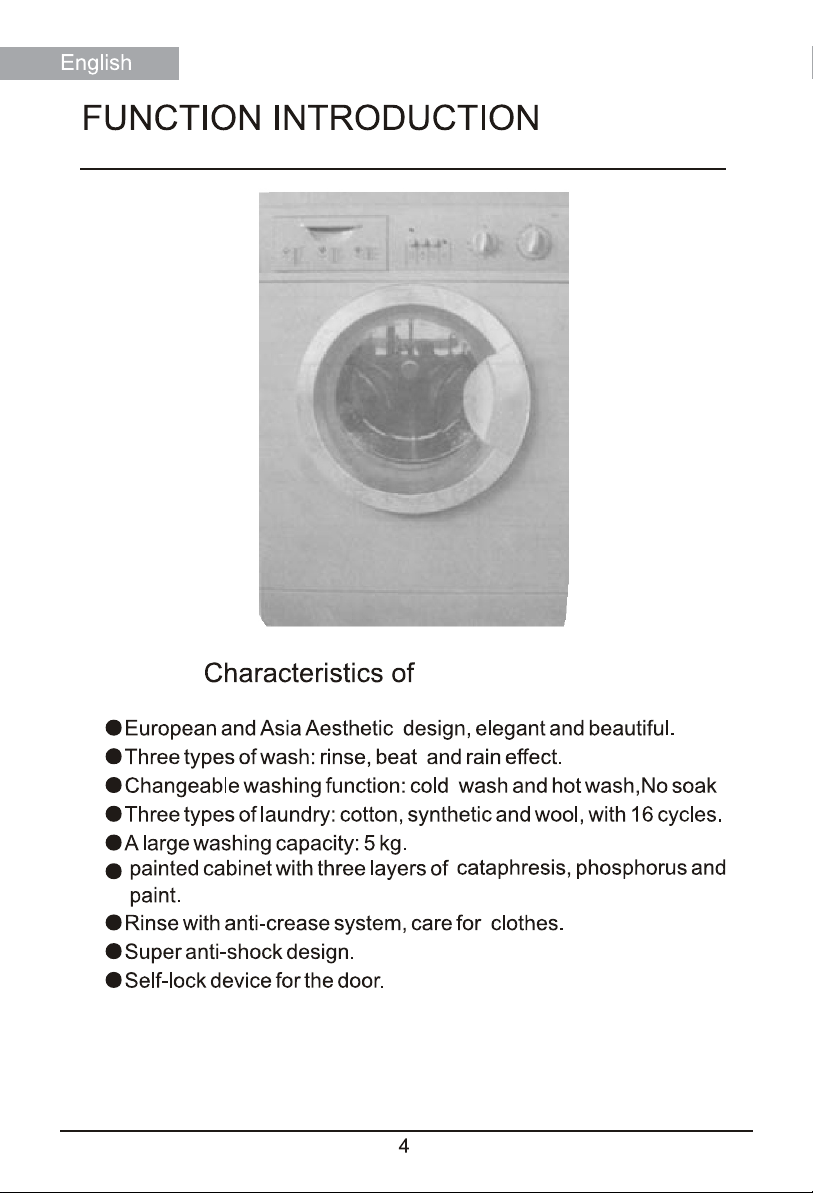
FUNCTION INTRODUCTION
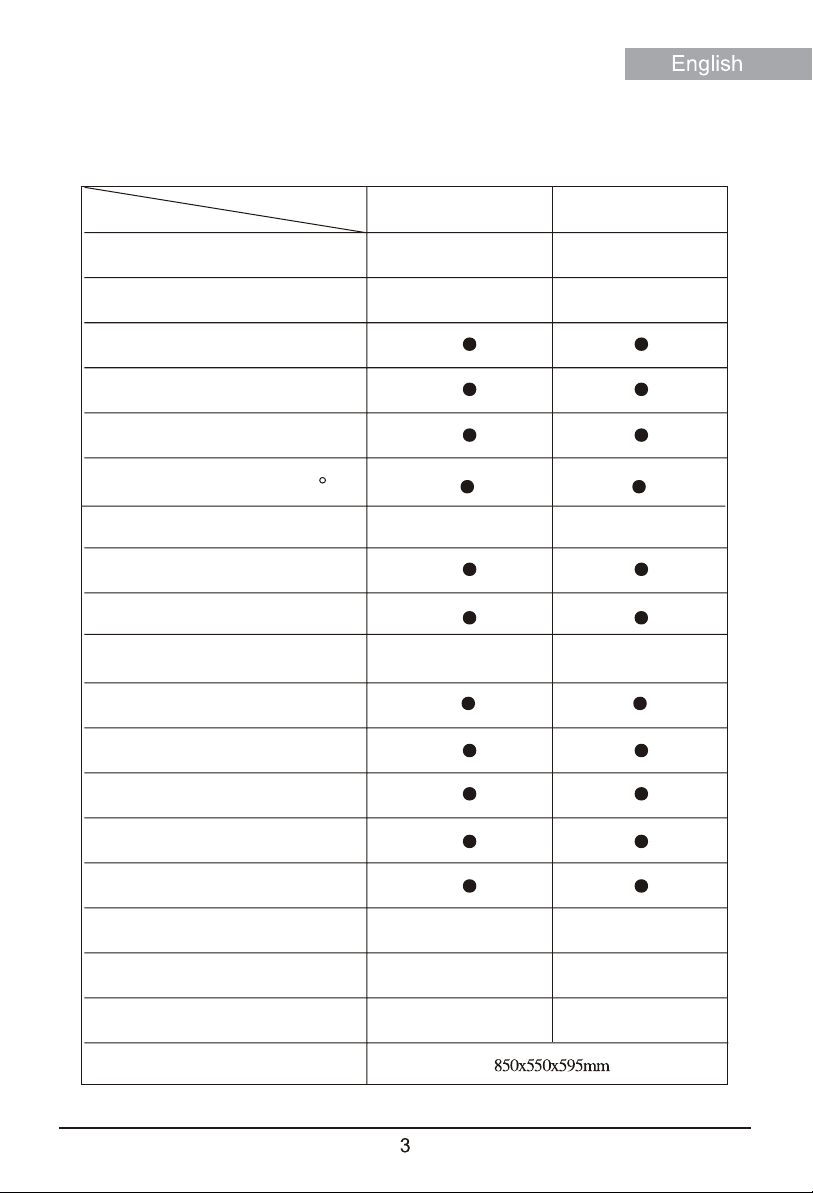
FUNCTION COMPARING TABLE
FUNCTION
MODE
Washing capacity
Programmes
Cotton
Synthetic
Wool
Adjustable thermostat(0~90 C)
Cold wash button
Speed button
Economic button
Spin speed
Power switch
ON/OFF
Rinse
HM1400TX HM1200TX
5Kg
18
1400r/min 1200r/min
5Kg
18
Stainless steel tub
Door-locking device
Power
Power(Wash)
Power(Spin)
Weight
HX WXD
300W 300W
700W 700W
72Kg 72Kg
HM1400TX HM1200TX
Installation
Unpacking
levelling and
positioning
Remove the package and check that the machine is
undamaged.
If you have any doubts, do not use the machine and call on
a qualified technician. Keep all packing parts (plastic bag,
foam rubber, screws etc.) out of the reach of children
since they could be dangerous.
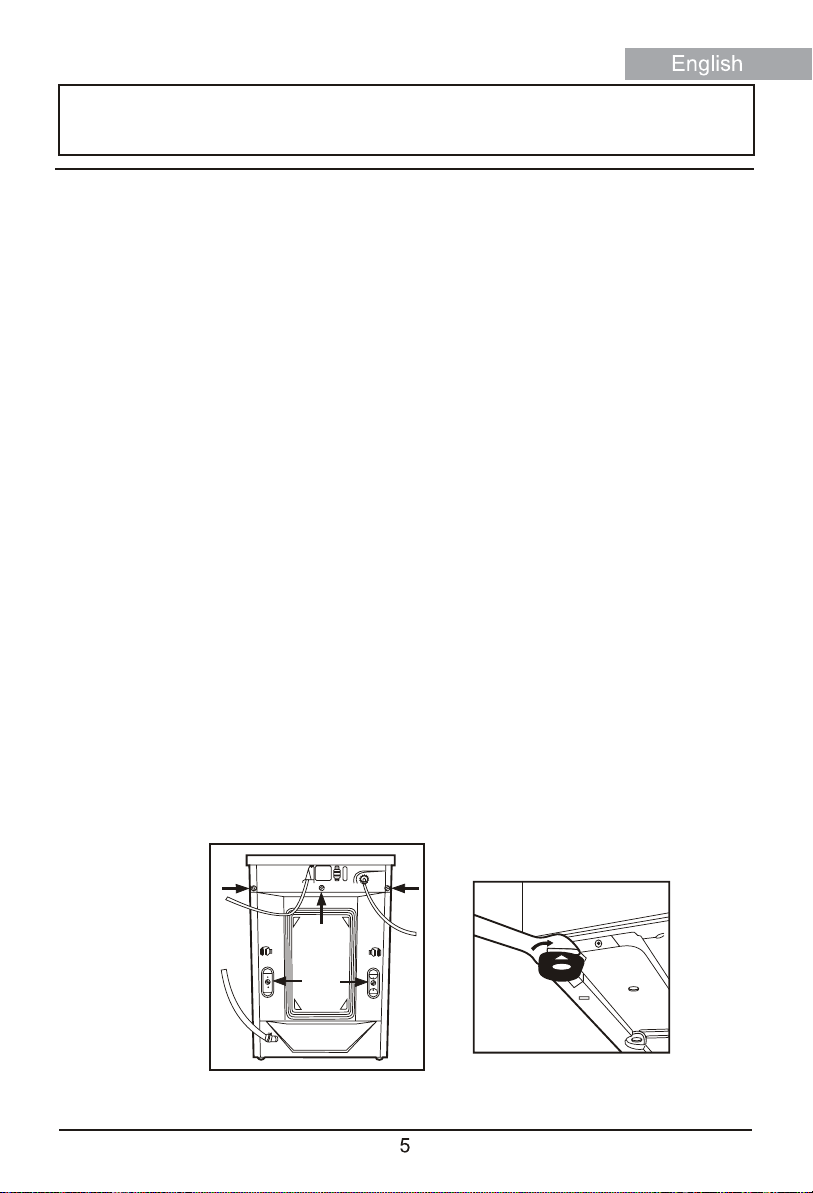
Important: The inside of the washing machine which
consists of a floating unit, is fixed with screws at the back
of the cabinet (Fig.1) during transport. Before starting the
machine remember to release the floating unit by
removing the above screws . To prevent water spray from
entering the machine, remember to close the holes left
open by the screws with the plastic caps provided in the
packet containing the owner's manual. And rescrew the
holes where the iron piece is taken down with the former
two screws.Attention:keep the packing screws and plastic
caps in a safe place for later use. It is important for the
machine to be perfectly level (the angle of inclination on
the work surface must not be more than 2 degrees). For
this reason the machine is fitted with adjustable feet used
for levelling the machine before use (Fig.2). In the case of
flooring with carpeting, remember to check that the
ventilation in the support area is not plugged.
Fig.1
Fig.2

Installation
Electric
connectio
Connection
of tap and
Loading
Hose
Connect the plug to a socket provided with efficient
earthing. Or use the spare earthing wire supplied
together with the machine and the earthing terminal
located on the left-upper corner of the back of your
machine (Warning: this appliance must be earthed as a
safety measure according to the law). Make sure that
the voltage and frequency available correspond with
the values stated on the data plate located at the back of
the machine and that the electric system is
dimensioned to withstand the maximum current shown
on the data plate. If the socket the machine is
connected to does not correspond with the plug,
replace the plug with a suitable one and avoid using
adaptors or shunts since they could cause overheating
and burn out.The spare eathing wire is absolutely not
allowed to be connected to water pipe,heating pipe or
other kinds of pipes.
Connect the inlet hose to a cold water tap with a 3/4
gas threaded opening, and fit the filter and the rubber
gasket supplied with the washing machine. Check that
it is tightly screwed to the tap (Fig. 3).
Fig. 3
If the water piping is new or has not been used for a
long time, before making the connection, let the water
run until it is clear and free from impurities.
This step is necessary to ensure that the incoming
water does not clog and possibly damage the machine.
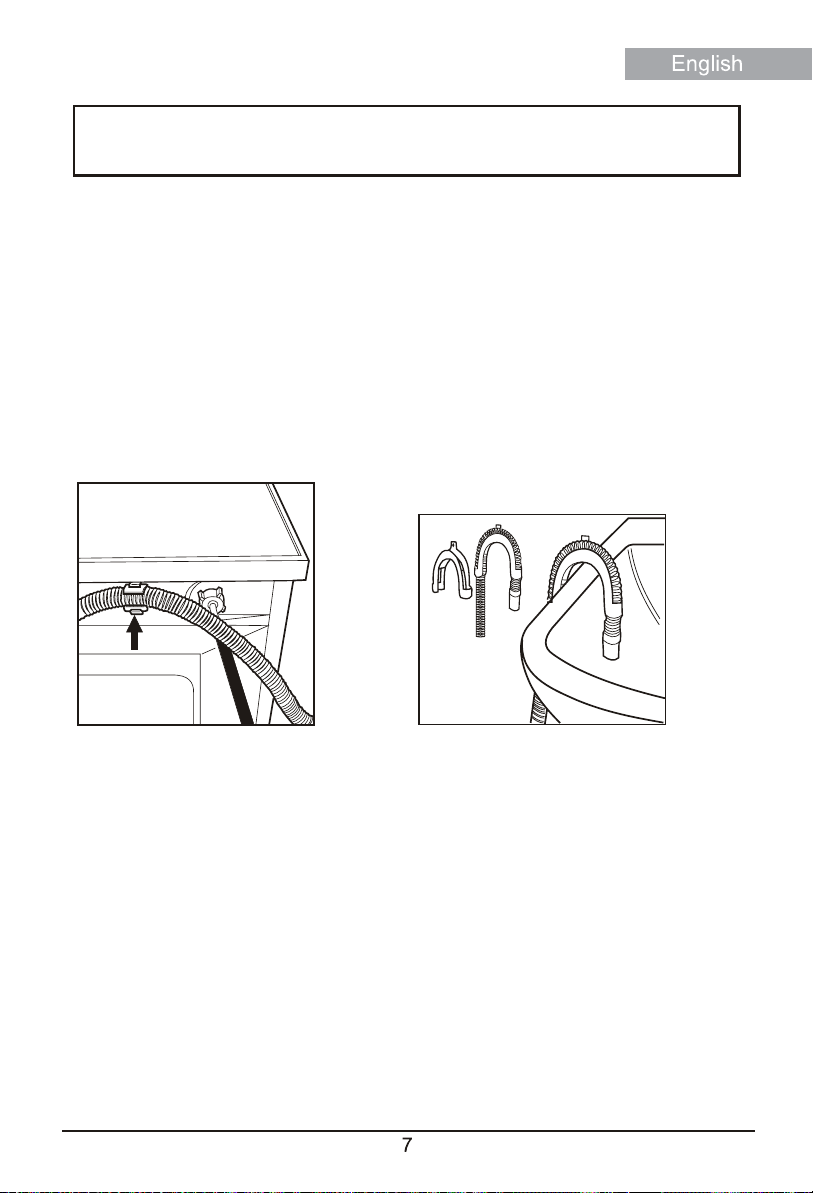
Installation
Connection of
the Drain Hose
Fig.4
Connecting
WaterSupply
Connect the drain hose to a drain duct (with
internal diameter of at least 4 cm.) or place it for
drainage into a sink or a tub, ensuring that there
are no kinks or bends. The free end must be at a
height of between 80 and 100 cm. Should it be
necessary to fix the end of the hose at a height of
less than 80 cm from the floor, the hose must be
fixed in the appropriate hook on the upper part of
the back panel (Fig.4) or use the supplied
support to fix the drain hose.(Fig.5)
Fig.5
Insert stainless steel screen washers into end of
each supply hose and attach that end of supply
hose to your 3/4" water tap spigot.Be sure that
you match up cold water to "C" .
Note:Home Centers also have"Y" connectors
and "Couplings" which enable you to connect
the machine to your sinks faucet.
 Loading...