


HFD635WISS

Table of contents
The appearance, color and design of the refrigerator
may very from the actual product.
Product Features ...................................................................... 1
Name of Components............................................................... 2
Safety Notice ......................................................................... 3-6
Disassembly and Assembly of Door ...................................... 7-8
Preparation of Doors/Drawers...............................................8-9
Connecting the Water Supply Line ......................................... 10
Getting Started ........................................................................11
Product Function ...............................................................12-14
How to save energy ................................................................ 15
About Refrigerating Chamber ............................................ 15-16
Precautions for Refrigerating Food......................................... 17
Smart Use of Refrigerating Compartment ..................................... 18
About Freezing Chamber ..................................................18-19
Usage of Ice Maker and the Cold Water Dispenser ............... 20
How to Use the Water Dispenser ........................................... 21
Water Dispenser Precautions ................................................. 21
Cleaning and Discontinued Use. ......................................................... 22-26
FAQ (stange voice in refrigerator) ..................................... 27-28
Please read this Operation Manual carefully before using the appliance.
Keep this Manual for future reference.
See the physical object for the appearance, color and the door pattern.
Safety instructions
Intended use: This appliance has been designed exclusively for use in dry-interior
households. Every other use is improper and may lead to injuries
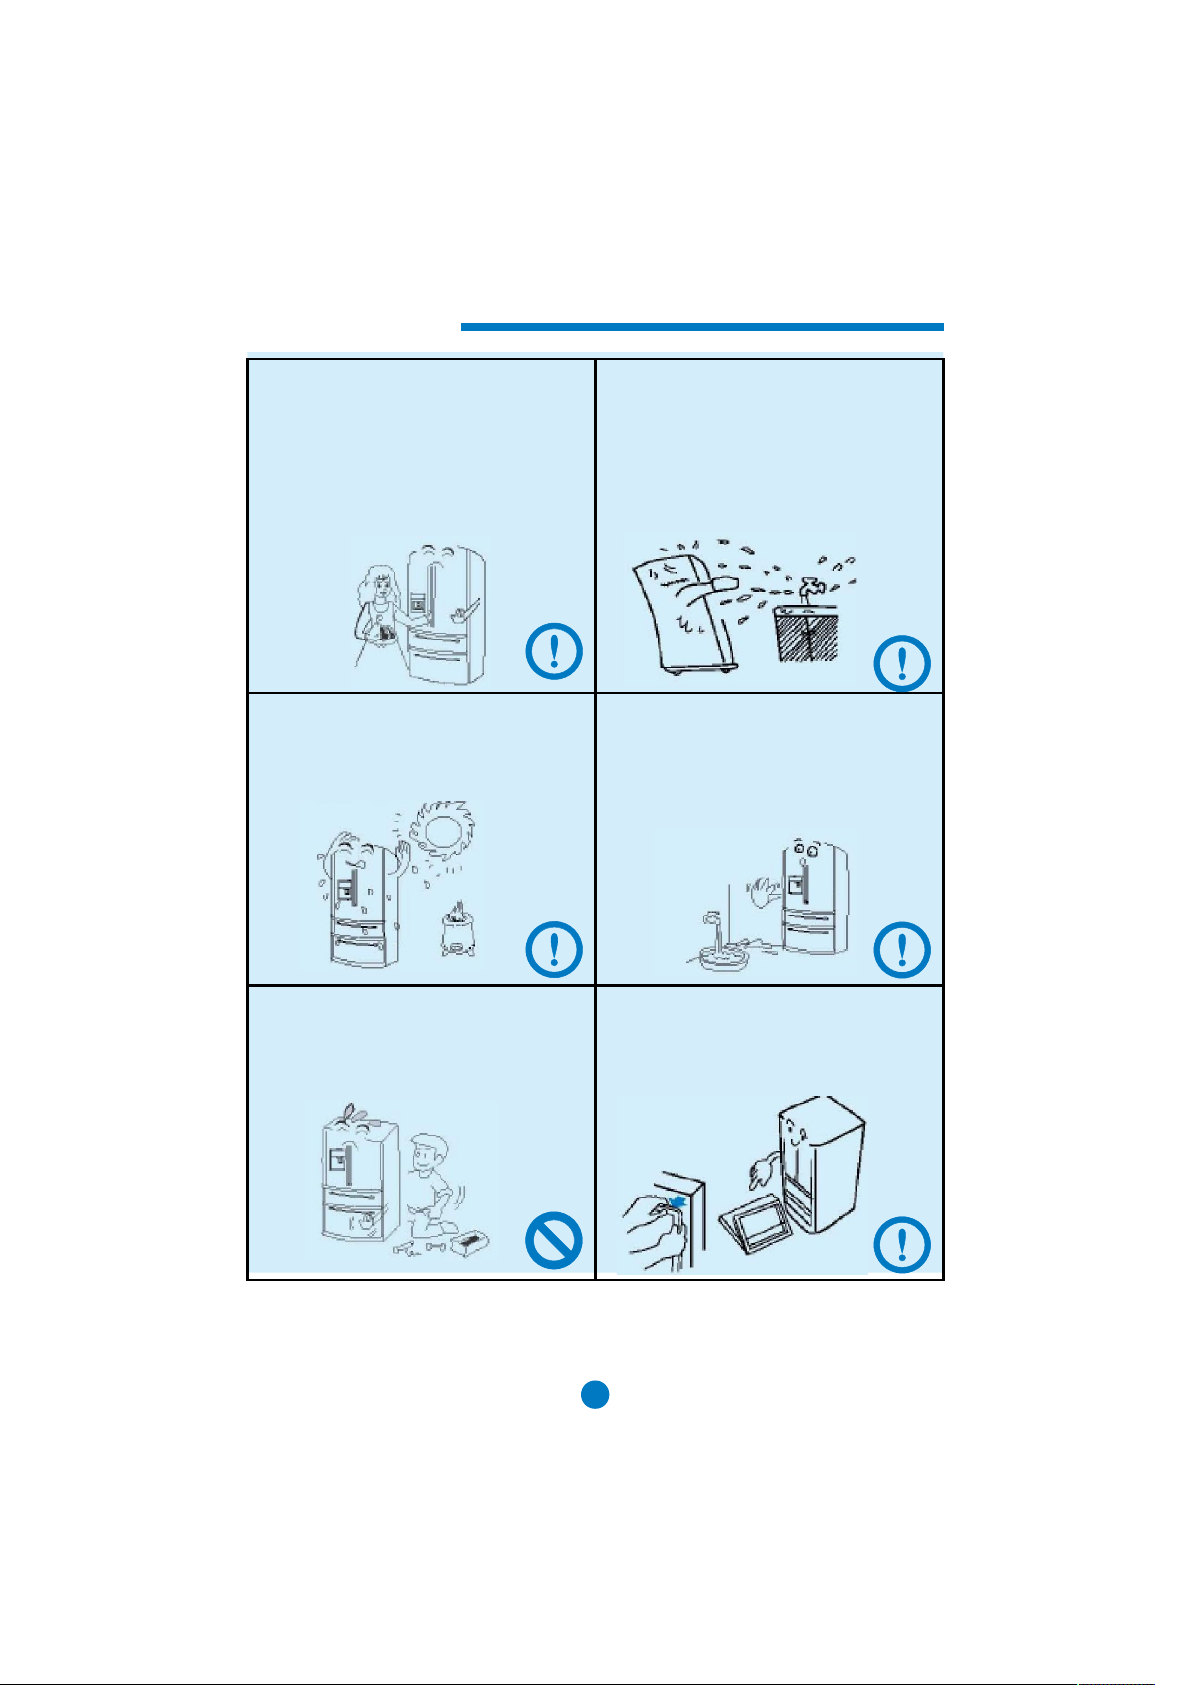
Hold the plug, not the cable, when unplugging the refrigerator.
Ensure that the power cable is not squashed or damage by the refrigerator.
Do not apply any pressure to the power cable.
Take care not to roll over the power cable or damage it when moving the
refrigerator.
When the power cable is damaged or the plug is worn, turn off the refrigerator and
consult an authorized service agent for replacement.
,
refrigerant refrigerator
turn off the valve of the leaking gas, open the doors and windows and do not unplug
a plug in the power cable of the refrigerator or any other appliance.
Do not store medicines, bacteria or chemical agents in the refrigerator. This
refrigerator is a household appliance. It is not recommended to store materials that
require strict temperatures.
the refrigerator, to avoid personal injury caused by falling or electric shock caused
by contact with water.
door may de-align, door bin may break or the refrigerator may topple.
Also do not step or apply heavy weight on drawers when putting in or
remove items.
Do not touch the inside surface of the freezer storage compartment when in
operation, especially with wet hands,as your hands may freeze onto the surface.
Close the doors only with the handles. The gap between the doors and the
cabinet is very narrow. Do not extend hands in these areas to avoid pinching
or
.
.
children standing within your range of door movement.
refngerator when cleaning, nor place the refrigerator in a damp area or location
where it might be splashed with water.
Disassembly and alteration of the refrigerator must be authorized. Any agitated
movement of the refrigerator may damage the cooling pipes. Property damage
or personal injury may result. Repair of the refrigerator must be performed by
professional personnel.
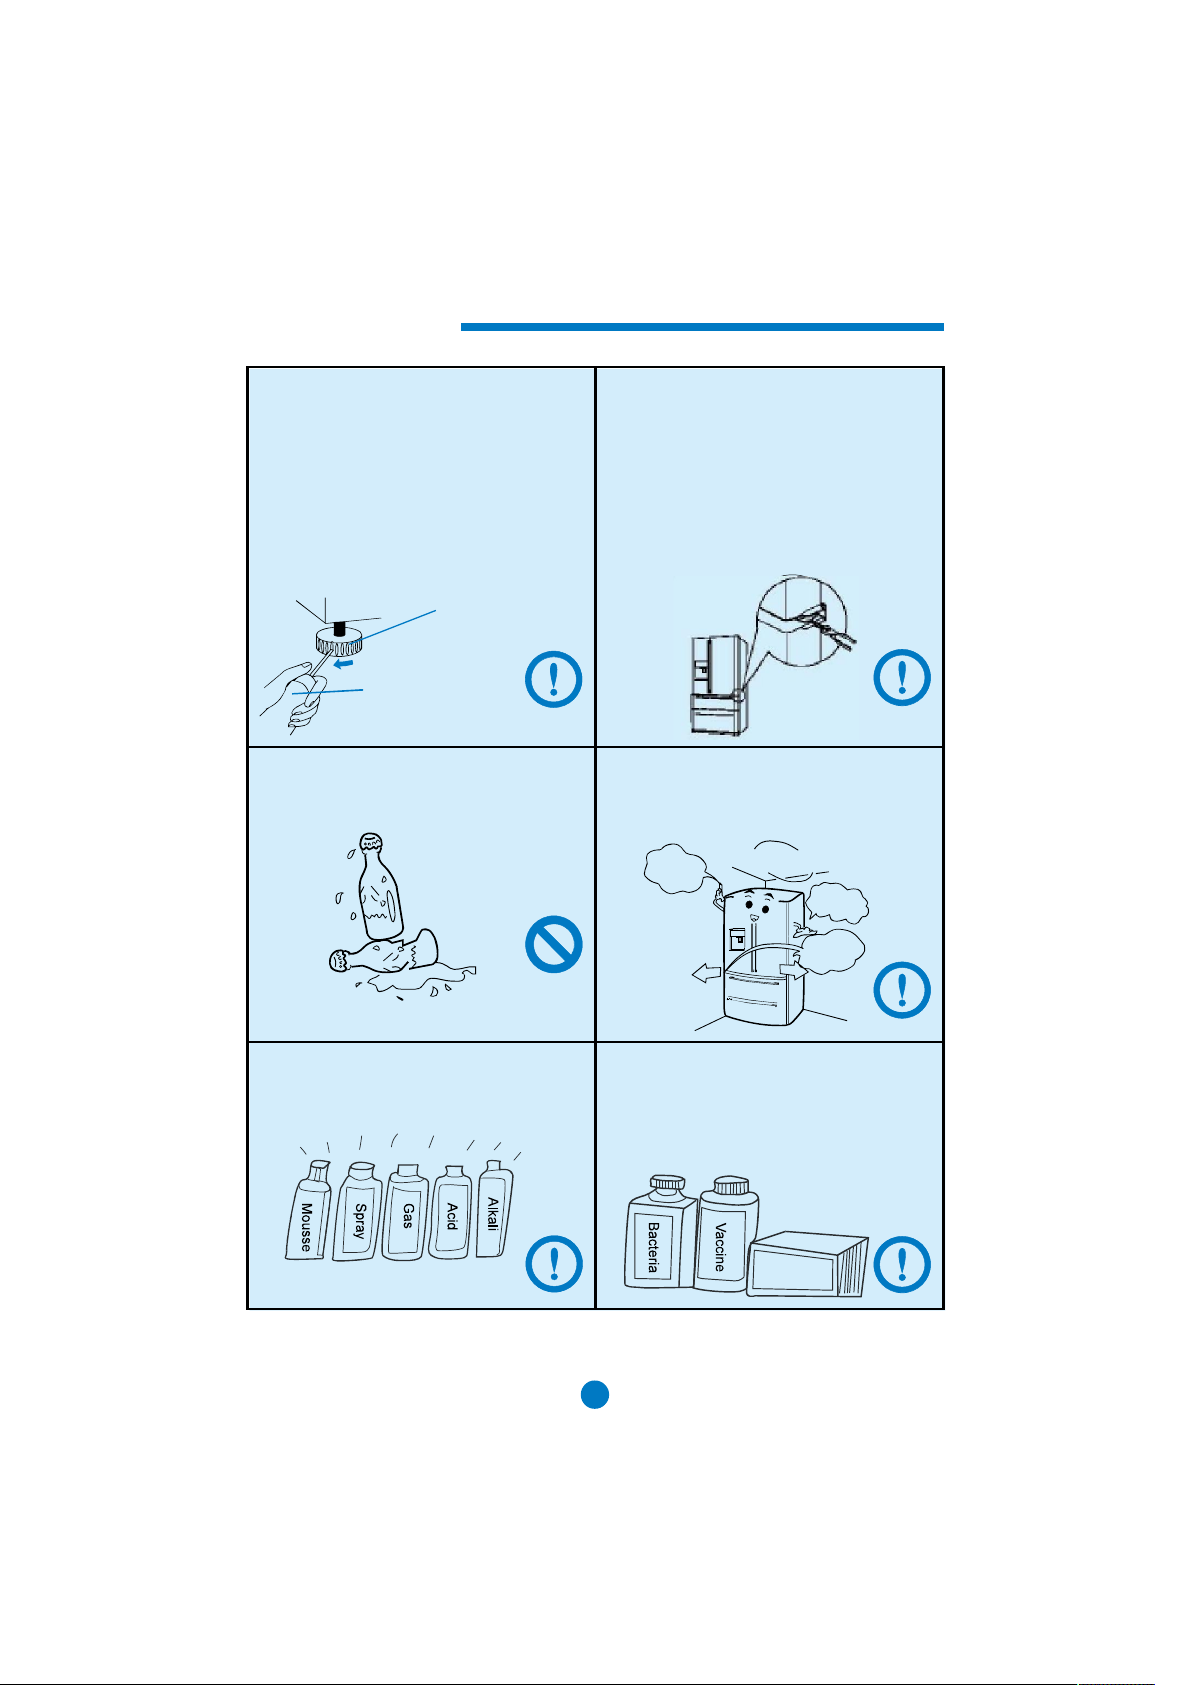
Never store bottled beer or beverages in the freezer compartment as it will
burst during freezing.
n the freezer

Safety instructions
Unplug the refrigerator in the event of a power interruption or before cleaning.
Allow at least 5 minutes before restarting the refrigerator, as frequent starting may
damage the compressor.
When discarding the refrigerator and to avoid the accidental trapping of children,
please remove all doors, door seals and shelves.
Do not use electrical devices inside the food storage comportment of the
appliance, unless they are of the type recommended by the manufacturer
This appliance can be used by children age from 8 years and above.
Do not over load or store items in the freezer compartments to avoid
longer operation time on the compressor or lead to spoilage of foods.
It is recommended not to exceed the load line of the drawers.
The total weight of foods should not exceed 30kg.
Do not use mechanical devices or other means to accelerate the defrosting
process, other than those recommended by the manufacturer.
Children should be supervised to ensure that they do not play with the appliance.
SAFETY INSTRUCTIONS FOR INSTALLATION
Never place the refrigerator in a damp area or location where it might be splashed with
water. Clean and dry water splashes and stains with a soft clean cloth.
The refrigerator should be placed in a well-ventilated place not far from a drink water
source. Ensure a space of at least 20 cm above and 5 cm around the refrigerator,
1000mm cavity would be required.
Keep ventilation openings in the appliance or in the in-built structure clear of
obstruction, The refrigerator is operated by a 220-240 VAC/50 Hz power supply.
r
temperature control or compressor, or there may be an abnormal noise when operating.
In such case, an automatic regulator shall be mounted.
A dedicated socket with reliable grounding must be provided for the refrigerator. The
pin (grounding) socket. Never cut off or disassemble the grounding.
The appliance must be positioned so that the plug remains accessible.
If the supply cord is damaged, it must be replaced by the manufacturer, its service
Do not damage the refrigerant circuit.

Product Features
Full width shelf design, more convenience for storing and
accessing food.
Fuzzy Function
The refrigerator can be automatically adjusted to the best refrigerating condition
according to the chamber temperature and ambient temperature .
Spacious and luxurious design
The refrigerator has a spacious and accessible capacity in both compartments
as well as a luxurious design.
Fluoride-free, frostless, complete air cooling refrigeration, deep
cooling, and rapid freezing.
Defrost and pre-refrigeration
The refrigerator will make judgment on the temperature in the refrigerator before
defrosting, and the compressor will automatically and rapidly refrigerate after
defrosting.
Equipped with condensing unit, heat dissipation by blower,
better refrigeration effect, and long service life of
compressor.
Open door alarm, touch-sensitive button, large-screen LED
display.
Drawers have track way. They can be pushed and pulled smoothly.
Deodorant Brick
It separates the refrigerating chamber and freezing chamber, avoiding tainting.
1
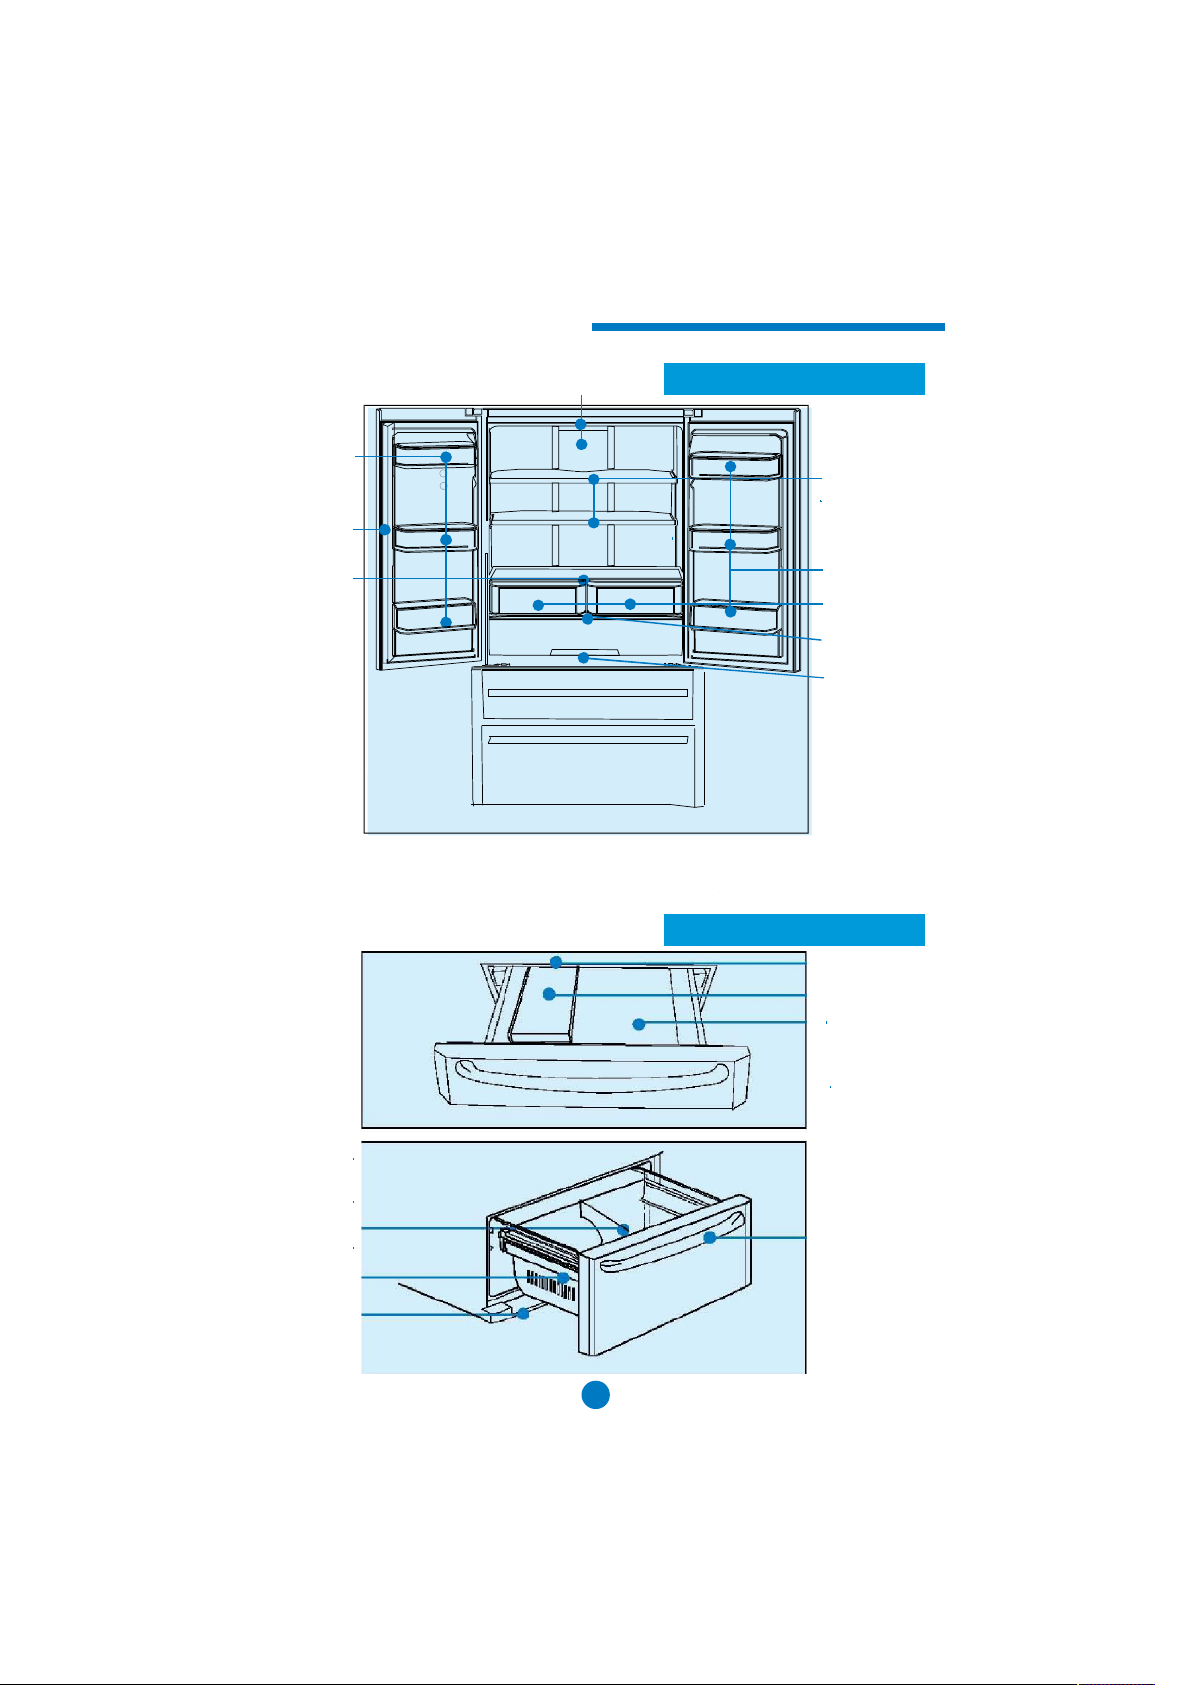
Name of Components
Door Bin
Vertical Beam
Crisper Cover
Lamp
Refrigerating Chamber
Adjustable Shelves
Door Bin
Crisper
Drawer Cover
Full Width
Drawer
Freezing Chamber
Ice Maker
Ice Tray
Small Freezer
Drawer Bin
Full Width.
Drawer Divider
Large Freezer
Drawer
Fridge Kick
Panel
Handle
2
Safety Notice
Dear user,
Thank you for purchasing and using this Haier refrigerator. For your better understanding
of the instruction and better use of the product, we would like to explain the signs which
appear throughout the instruction manual, as follow:
All action with this sign is prohibited; it may cause product damages or
endanger the personal safety of users.
Prohibit
All action with this sign is related to the safe use of products and the
personal safety of users. Operation must follow the requirement strictly;
otherwise it may cause product damages or endanger the personal safety
Warning
Caution
of users.
Any action with this sign shall be paid more attention. Otherwise it will
cause product damages and other damages due to improper operation.
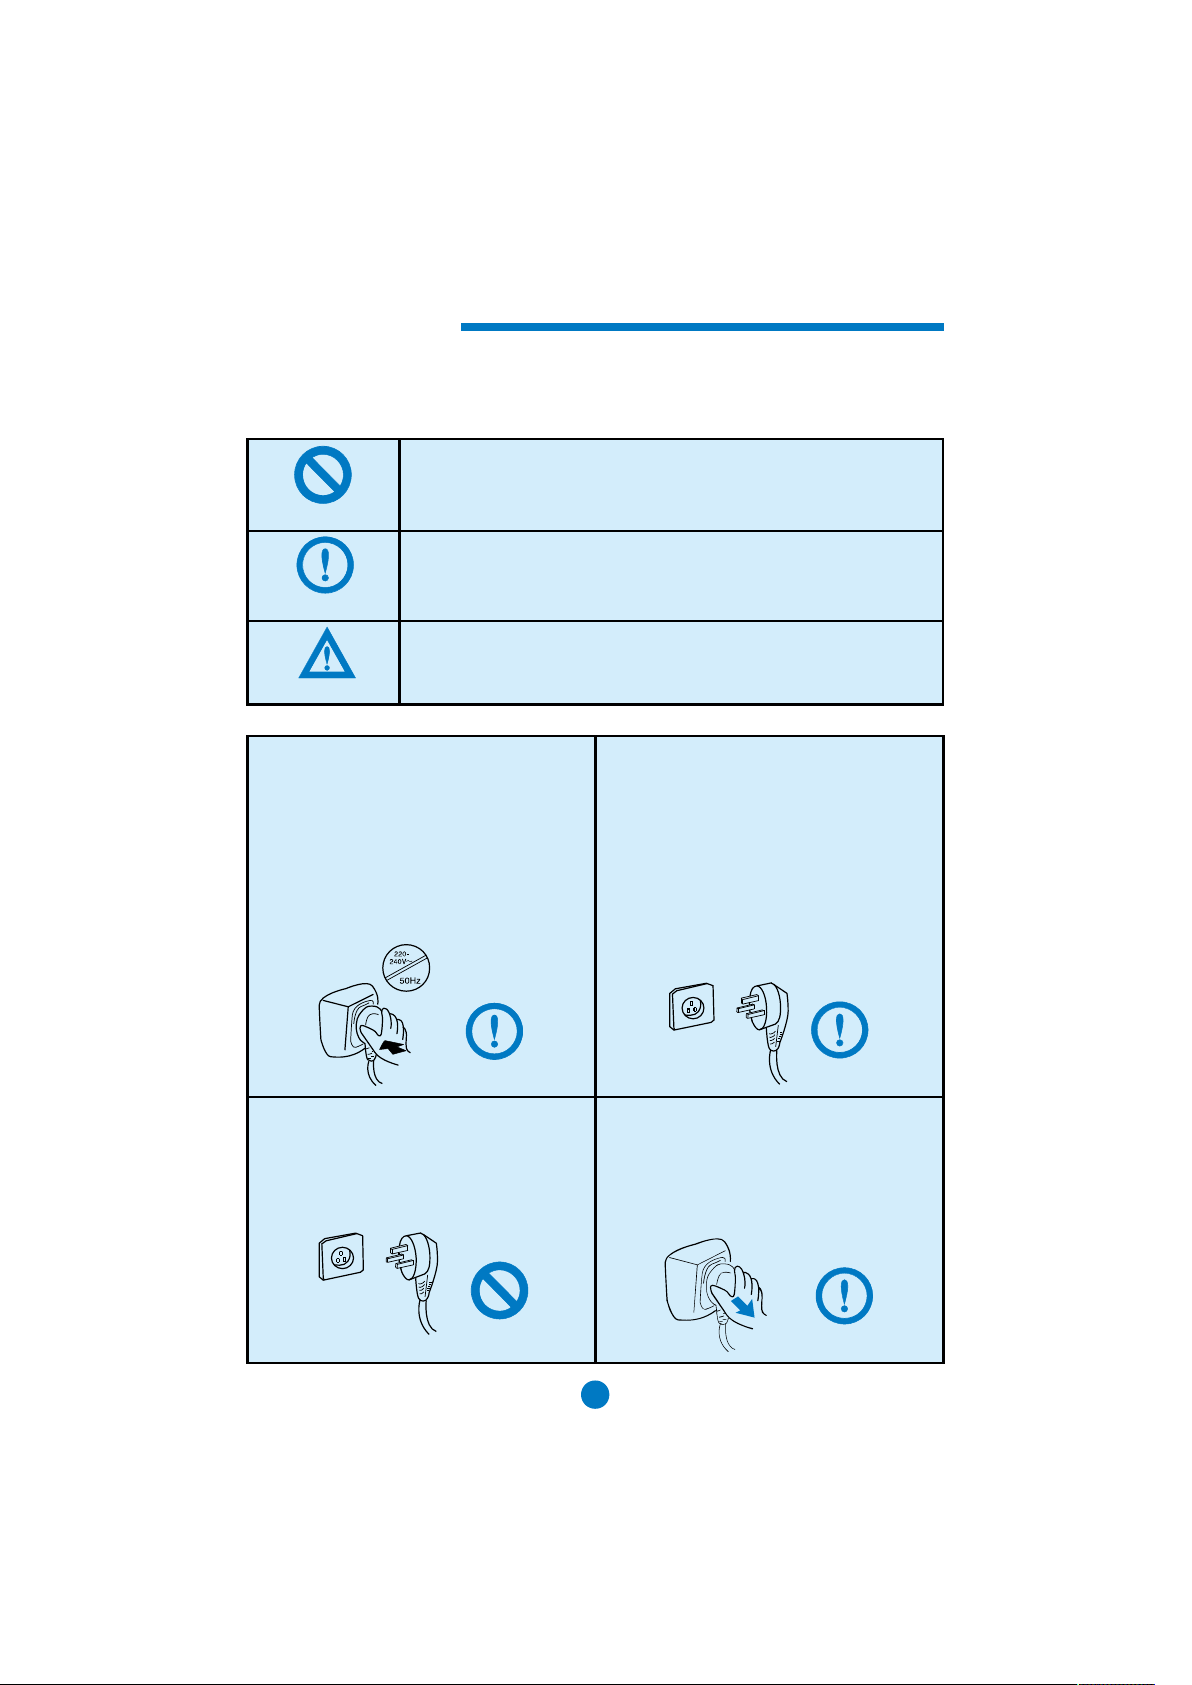
The refrigerator use AC 220-240V/50Hz
power supply.
When the power cord is damaged
When the power cord is damaged or the plug
is worn, do not use. If this occur,please contact
local customer servce.
An independent, dedicated and grounded
power socket should be used for the
product.The power plug of the refrigerator
has three-pins (for grounding), which
complies with standard. Under no
circumstance should the third (grounding)
pin of the power plug be dismantled or
removed. After installing the refrigerator,
the plug should be accessible.Warning!
The plug should be attached firmly with
the socket.
Unplug the power when:
1. Before cleaning and maintenance
2. When replacing the lamp
3
Safety Notice
Do not damage the power cord
1. Do not pull the power cord to disconnect
the plug of refrigerator. The plug shall be held
tightly and directly detached from the socket.
2. The body of refrigerator shall not press on
the power cord and do NOT stamp on the
power cord.
3. Please be careful when moving the
refrigerator from the wall, do not press or
damage the power cord.
It is recommended not to place power boards,
power supply or microwave oven on the
refrigerator. Do not use electrical appliances
inside the refrigerator to avoid electromagnetic
interference or other accidents.
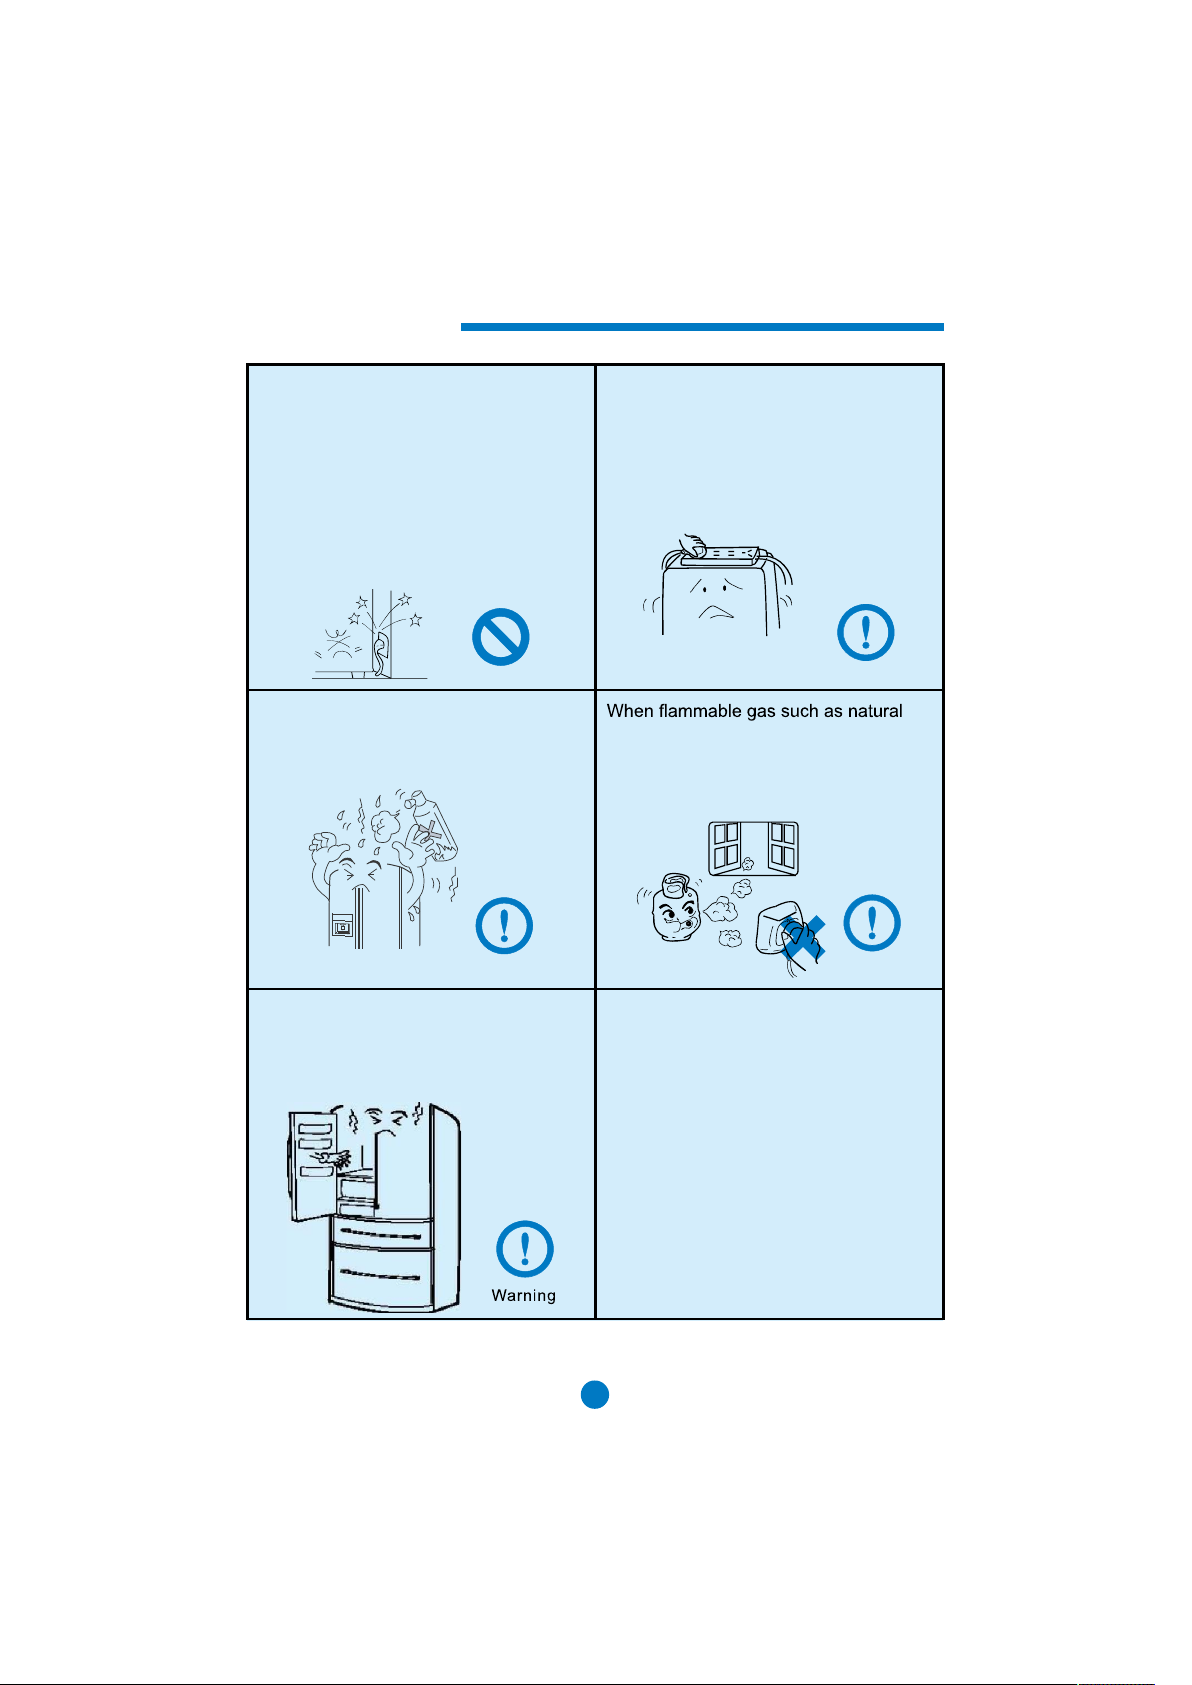
Do not store or use gasoline or other combustibles around the refrigerator to avoid fire.
After the refrigerator is in operation, do
not touch the cold surface in the freezing
chamber, particularly when hands are damp
or wet. Skin may adhere to these extremely
cold surfaces.
gas leaks
1. Close the valve which leaks the gas,
2. Open house door and window,
3. Do not u np lu g/plu g the pow er plug o f
refrigerator or other electrical appliance.
4
Safety Notice
When opening or closing the door, always use
the handles. The space between the doors
and the body is small. Use caution and ensure
hands and fingers do not get jammed in these
gaps. Watch for others before opening doors.
The refrigerator should not be placed near
heat source. Also avoid direct sunlight onto
the the appliance to avoid impact to
performance.
Do not spray water or place the refrigerator in a
wet prone area. Doing so will impact the
electrical and insulation performance of the
refrigerator.
Do not place the refrigerator in a dampl or wet
place where water could be easily splashed on
to the appliance. If water or dirt is on the
appliance, it should be wiped down with a soft
cloth to avoid rusting or impact to the
electrical insulation.
Dismantling and alteration of the refrigerator is
prohibited. Do not damage the refrigeration
circuit. Maintenance and service should only
be carried out by a service agent.
When your refrigerator is discarded or no l
onger in use, please remove the doors, door
seals and shelves to avoid accidental trapping
of infant or children.
5
Safety Notice
The refrigerator should be placed on a flat
and solid surface. Do not use the
insulation packaging foam to elevate the
appliance.Adjustable levelling feet can
help to adjust alignment. This is by
turning them either clockwise or
counterclockwise, clockwise will raise
your appliance and counterclockwise
will lower your appliance. Refer to image
below.
Alignment
Leveling Leg
Flat Screwdriver
Never store bottled beer or beverages in the
freezer compartment as it will burst during
freezing.
Door Alignment
If the two doors of refrigerating chamber is not
aligned, please align the doors as following:
1. Use one hand to raise the door at the hinge
in the middle.
2. The other hand insert a spacer with pliers,
as shown.
3. Insert remained spacers till the doors is
aligned. (3 cramp rings are provided with the
product)
The refrigerator shall be placed in wellventilated place. Clearance of 20cm or above
shall be left around the refrigerator including
the back.100cm cavity would be required.
20cm or
above to
top
Distance
5cm
or above to
back
5cm or
above to left
and right
Never place combustibles, explosives,highly
corrosive acid/alkali in the refrigerator.
The product is household refrigerator.
According to the national standard, household
refrigerator is only suitable for food, cannot
be used for other purpose, such as storing
blood, chemicals, cosmetics, medicine, and
biological products.
Chemical
agent
6

Disassembly and Assembly of Door
Before disassembling and assembling the doors, please remove any items from
the door bins, then remove the door bin.Turn off the power to the appliance and
close off the water source to avoid injuries, product or property loss.
Caution
Do not allow children to play inside the compartment after removing the
doors or drawer.
Refr. Right Door Disassembly and Assembly
1.
hinge cover with screwdriver, and then
remove the upper hinge cover.
3. Raise the door and place in an
appropriate location.
5. The door can be installed by reverse steps.
2.
right hinge with hex driver, and move
forward the upper right hinge and the door,
and then remove right upper hinge.
4. Middle hinge may be removed if necessary.
Refr. Left Door Disassembly and Assembly
1.
hinge cover with screwdriver, and then
remove the upper hinge cover.
2. Disconnect the wire terminal, and separate
the connectors on the upper right corner
at the back. Remove humidity sensor, and
then remove the screw with hex driver.
Move forward the hinge, water pipe, and
door, and then remove the upper left hinge.
7

Disassembly and Assembly of Door
Refr. Left Door Disassembly and Assembly
3. Remove the door and place it in an
appropriate location.
5. The door can be installed by reverse steps.
Disassembly and Assembly of Ice Receiving Drawer
1. Pull the drawer to the maximum length at
2. The Ice Receiving Drawer can be Install by
reverse steps.
Disassembly and Assembly of Freezer Drawer
1.
and then remove the drawer.
4. Middle hinge may be removed if necessary.
1. Follow the direction of the arrow 1, pull
out the gear at the horizontal station.
2. Follow the direction of the arrow2, bend
pole of gear, and then splite.
Preparation
1. Remove all package
2. Check out the accessories and materials
Check out the items in the box according to the packing list. It varies, please make
query to the seller.
3. Place your refrigerator into proper location
4. It is better to clean your refrigerator before use (see section leaning for details)
5. Standing
After leveling and cleaning, the refrigerator shall be kept standing more than 6 hours
before connecting to power supply to ensure the normal running of the refrigerator.
Let the refrigerator run for 6 hours before loading with food.
8

Preparation
6. Installing the Kick Panel
The Kick Panel should be located inside the refrigerating chamber upon unboxing your
appliance. Take out the Kick Panel and install it to the front bottom of the appliance.
Refer to illustration below. Use 2 screws supplied with the appliance.
Please wear gloves when dismantle the bottom decorative strip and adjustable
Caution
7. Disassembly and Assembly of the Handle of Refr. Door
Find the door grub screws and screw them into the holes on the door (Fig. 1)
Get one handle and align the holes on the handle to the screws on the door.
Use the hex allen key to screw the hex screw into the grub screw (Fig. 2).
Follow the same step with other handle. Both handles can be removed by
reversing this procedure.
leveling legs to avoid injury to your hands.
(Fig. 1)
8. Disassembly and Assembly of the Handle of Freezer Door
Find the door grub screws and screw them into the holes on the door (Fig. 3)
Get one handle and align the holes on the handle to the screws on the door.
Use the hex allen key to screw the hex screw into the grub screw (Fig. 4).
Follow the same step with other handle. Both handles can be removed by
reversing this procedure.
9
(Fig. 2)
Connecting the Water Supply Line
(Fig. 4-12)
Cut the water pipe according to need and avoid bending the water pipe too much.
Usually, the pipe length should be less than 5m. If the water pipe is too long, the cold water
Insert one end of the water supply pipe into the water inlet on the rear of the appliance (Fig.4-12).
Connect the other end into the plastic adaptor. Screw the adaptor onto a suitable 1/2" BSP
connector water outlet.
The water pressure should be between 0.l5~0.6MPa for correct operation of the cold water
dispenser .
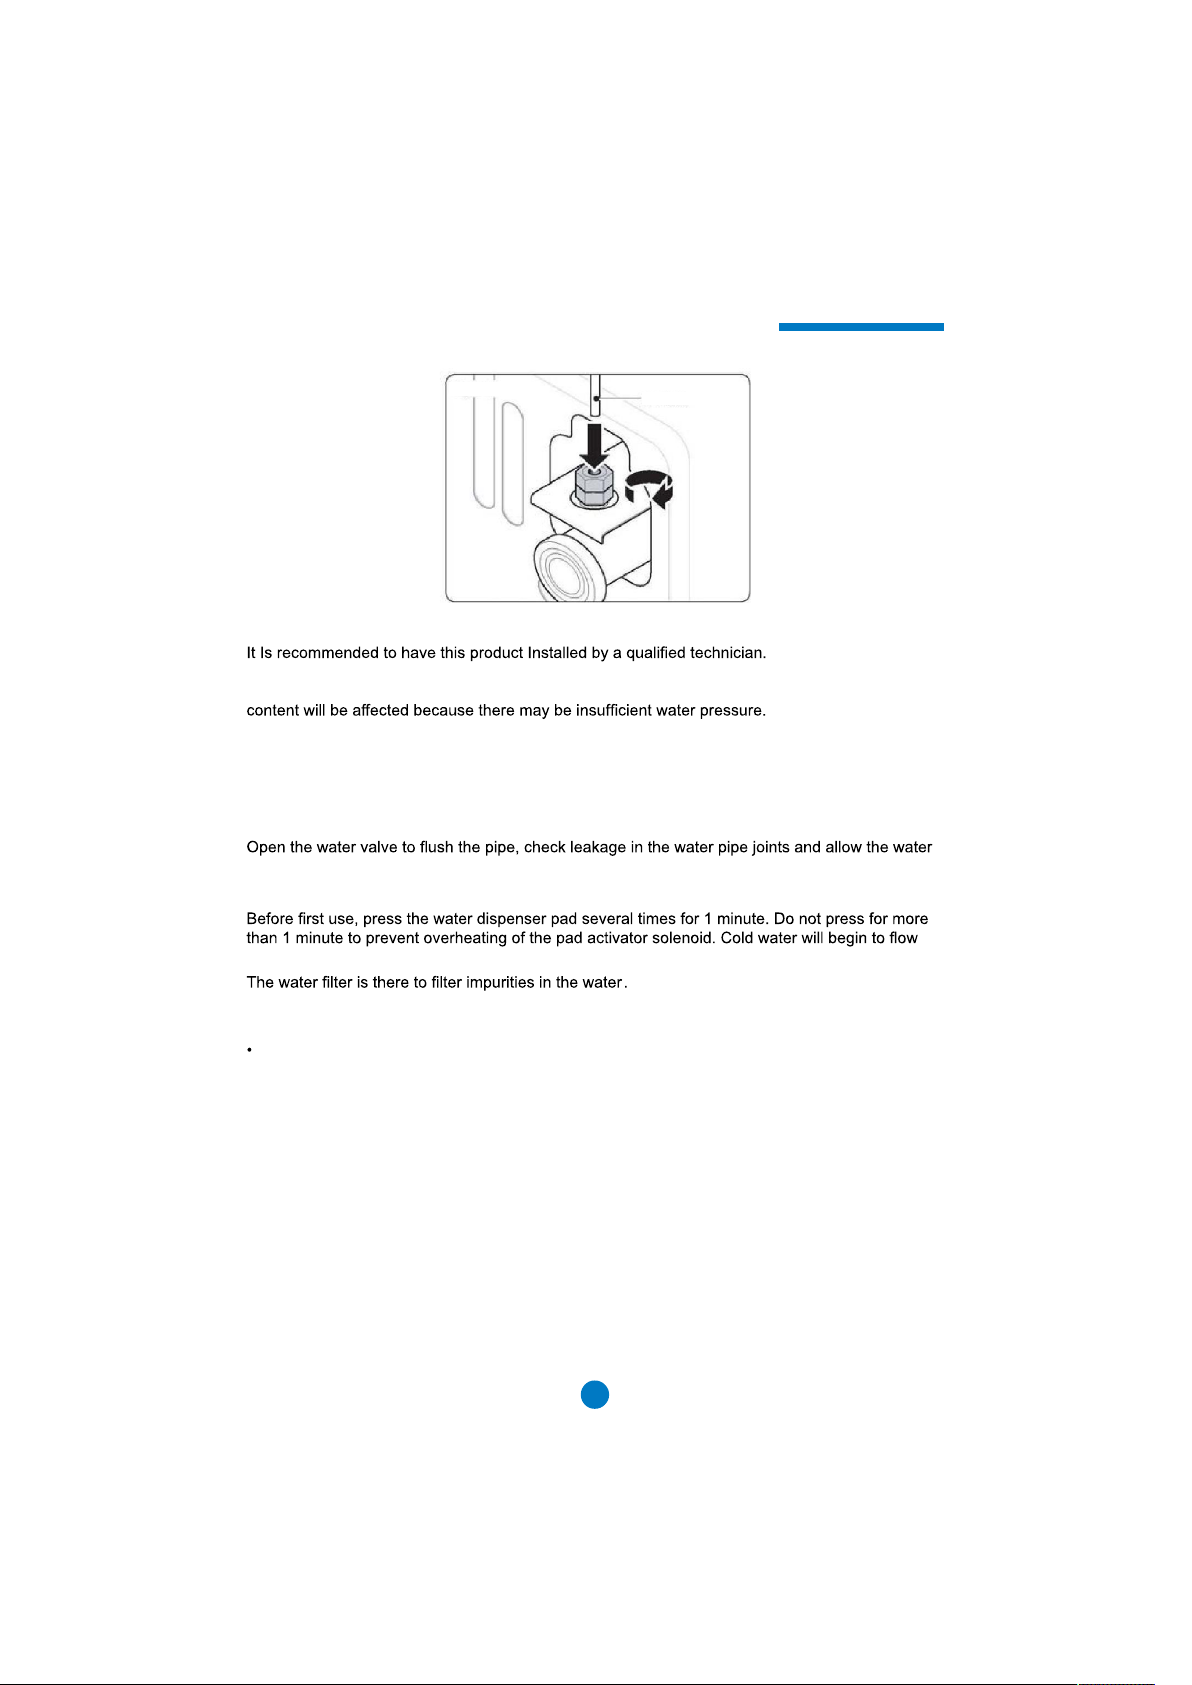
to run until it is clear.
The water pipe cannot withstand heat. Keep it away from all heat sources.
from the outlet.
Water pipe
It cannot sterilise or destroy anything, so be certain to connect the water pipe to a drinkable water
source.
After the refrigerator is installed, put the water supply pipe in a suitable place to prevent
crushing and damage.
10

Getting Started
1. Power On
Immediately after the power on, the temperature is displayed as the actual temperature of the
refrigerating and freezing chamber. At this time, the set temperature for refrigerating is 5t, the set
temperature for freezing is -IffC, the buttons are in unlocked stutus.
refrigerator will run under the settings set at the last time. (See Power Outage Memory Function
for details)
2. Operation Mode of the Refrigerator
Within the applicable temperature range of the refrigerator, as long as you have
selected the Fuzzy Mode, you will not need to adjust other settings to maintain
Caution
You may select one of the two modes below to set your refrigerator as needed.
(1) Fuzzy Mode: We recommend using the Fuzzy Mode, unless there is a special need to use
otherwise. (See Fuzzy Function Setting for details)
(2) Manual Mode: The temperature can be set by using temperature control button. (See
Temperature Setting and Adjustment for details)
3. Put the food into your refrigerator
Allow the refrigerator to operate for awhile, before loading it with food
and items. Do not overfill your refrigerator.
the best freezing effect regardless of the ambient temperature changes.
4. Putting food in freezer compartment
If you have lots of fresh frozen foods (such as meats)
place it in the freezer chamber . Note, start "Super Freeze"
function 12 hours prior.
When the temperature setting changes, the inner temperature will be balanced
after a while.The length of the period depends on the changes made to the
Caution
temperature setting, the ambient temperature, door-open times, and the food
stored in the refrigerator.
11

Product Function
J
L
A. Function Selection Select Super Freezing,
Fuzzy, Holiday and Lock.
C. Freezing Temperature Control Button:adjust
freezing temperature;
E. Freezing Temperature Display Icon F. Refrigerating Temperature Display Icon
H. Holiday Icon I. Fuzzy Icon L.Ice Icon
Super Freezing Icon Lock Icon
J.
B.
the selected function;
D. Refrigerating Temperature Control Button:
adjust refrigerating temperature;
K.
K
1. Holiday Function Setting
In the unlocked status, press "Function Select Button", select the Holiday function, at this time
displays, and enter the Holiday function; If you want to exit the Holiday function, please press
blink press down the"Function Select button",the Holiday Icon will switch off,and
the Holiday function is exited.
Caution
will
will
Before activating the Holiday function, please empty the refrigerating chamber to
avoid food spoilage.
2. Fuzzy Function Setting
In Fuzzy status, refrigerator will adjust the temperature setting automatically according to the
ambient temperature and the temperature within the refrigerator.
No manual control is required. In the unlocked status, press "Function Select Button", select the
Fuzzy function,then “Fuzzy Icon”will blink,press down the”Function Confirmation Button:,
the Fuzzy Icon will display and enter the function of Fuzzy; If you want to exit the Fuzzy function,
please press the "Function Select Button", select the Fuzzy function, the "Fuzzy Icon" is still
switch
Fuzzy function is exited.
f and the
12

Product Function
3.
Super Freezing Function Setting
Super Freeze function is designed to maintain the nutritional values of the food inside the freezing
chamber. It will reach freezing temperature and conditions in a reduced time
press "Function Select Button", select the Super Freezing function, at this time the "Super Freezing
Icon" is
enter the Super Freezing function; If you wish to exit the Super Freeze function, please press the "
Function Select button" and select the "Super Freeze" function will switch off and the function is exited.
Select Super Freezing functions in Fuzzy status, the Fuzzy status will exit
automatically; additionally, select Fuzzy function in Super Cooling or Super
Caution
4.
Lock/Unlock Functions Setting
In unlocked status, press "Function Select Button", select the Lock function, the "Lock Icon" blinks,
Lock Icon will be off and the locked status is exited. In the locked status, the functional controls
of refrigerating temperature, freezing temperature,Holiday, Fuzzy,and Super Freezing are not
available.
Freezing status, the Super Freezing Caution status will exit automatically.
Temperature Setting and Control
5.
(1 ) Control of Freezing Temperature
In the unlocked status, press "Freezing Chamber Temperature Control Button", the original
freezing chamber setting temperature will start to blink. Enter freezing chamber temperature setting
status, since then for each single press of this button, the freezing chamber setting temperature is
displayed in cyclic form by "-14, -15, -16, -17,-18,-19, -20, -21, -22", if no button-pressing operation
13

Product Function
(2) Control of Refrigerating Temperature
In the unlocked status, press" Refrigerating Temperature Control Button ", the original refrigerating
chamber setting temperature will start to blink. Enter refrigerating chamber temperature setting status,
since then for each single press of this button, the refrigerating chamber setting temperature is
displayed in cyclic form by "09, 08, 07, 06, 05, 04, 03, 02, 01", if no button-pressing operation is
(3) ln the status of Holiday, Fuzzy the refrigerating temperature
control is not available; in Fuzzy and Super Freezing status, the freezing temperature control is not
available.
6. Alarm Function
Open-door Alarm Function. When the refrigerator door is left opened or ajar for a long period of time,
the refrigerator will sound an alarm in a time interval to remind you to close the door.
7. Energy-saving Display Control Function
30 seconds after button-pressing operation, display screen backlight will be off, this is to conserve
energy. When pressing any buttons or opening the door, the display panel will light up.
8. Power Outage Memory Function
When refrigerator has a power outage, the instantaneous working status during the outage is
memorized. After the power is on, the refrigerator will still run according to the setting tags and
function states before the power outage.
9. Ice maker switch function setting
First power on,ice maker is in off state.If you wish to use the Ice Maker, press "Function Select
Button" and select the "Ice Icon". The icon should be blinking, now press "Function Confirmation
Button" and the Ice Icon will display and the function is ready to use.
Caution
The Lock function is not memorised. The refrigerator is at unlocked status when
the power is on.
14

How to save energy
(1) lnstall the appliance in a cool, well ventilated room, far from a heat source (radiator, cooker,
etc.), not in direct sunlight.
(2) The time and frequency for opening of the doors should as short as possible, For example,
store food in an organized way will reduce your time when you take something out from the
appliance.
(3) Store the food covered or packaged.
(4) Let the hot food or drinks to cool down before placing them in the appliance.
(5) When thawing frozen food, place it in the refrigerator compartment. You can use the low
temperature of the frozen food cool the food in the refrigerator compartment.
(6) Do not store too much food in the appliance, this may block air circulation.
(7) Temperature setting , the lower the temperature set in the compartment, the higher the energy
consumption. So it is better to set a higher temperature if your food storage condition is optimal.
(8) Keep the large freezing drawer closed, take out the small freezing drawer, and then take out
and put the food in the small freezing drawer; in this way, larger using space can be achieved and
power consumption of refrigerator can be reduced.
About Refrigerating Chamber
Please put frequently use or short-term storage
items in this chamber.
Adjusting the temperature level can maintain the average
temperature between 0-10 For most of the areas in the
refrigerating chamber, but it can not make long-term preservation
for food, and the refrigerating chamber can only be used as a
short-term storage chamber.
The height of shelf is adjustable
The shelves can be adjusted to your desired height for food storage.
To remove the shelf, lift the shelf in an upwards incline position,
then pull out.To relocate, tilt the front of the shelf up and guide the
shelf hook into the slots at the desired height. Then lower the front
of the shelf to lock the hook into place.
Make sure the both ends of shelf are on level position. If it can not be level,
the shelf may fall or the food may drop out.
Caution
15
Lift up and take out
removing
Upwards
incline

About Refrigerating Chamber
Removing the Crisper Cover
First remove the crispers and put in a suitable location.
Reach in to the rear of the cover and lift in a same
direction as 1 then pull it out in direction 2
Full Width Drawer
W
1. Slide the Temperature Control Panel to the left to
increase the cool air access into the full width drawer.
This is a relatively low temperature setting within this
r.
drawer.
2. Sliding the Temperature Control Panel to the right
will decrease cool air access into this drawer. This is a
relatively higher temperature setting in this drawer.
Storage area recommendation for
different kinds of food
Due to the cold air circulation inside the
refrigerator, there are temperature variations at
different parts inside the refrigerator, so different
kinds of food should be placed in different
temperature zones.
(1) eggs, butter and cheese, etc
(2) zip-top can, tin can and seasoning, etc
(3) beverages and other kinds of bottled foods
(4) pickled food, tin can, etc
(5) meat products and snack foods, etc
(6) wheaten food, noodle, tin, milk and tofu, etc
(7) fruits, vegetable and salad, etc
(8) cooked meat and sausages, etc
Refrigerating Chamber Light and Its
Replacement
Temperature
Control Panel
Parameters for each light: DC12V, 1W The light is LED
light with low energy consumption and long operation
life. If any unusual activity occurres, do not remove it at
your own discretion, please contact after-sale service
personnel immediately for a replacement.
16
Precautions for Refrigerating Food
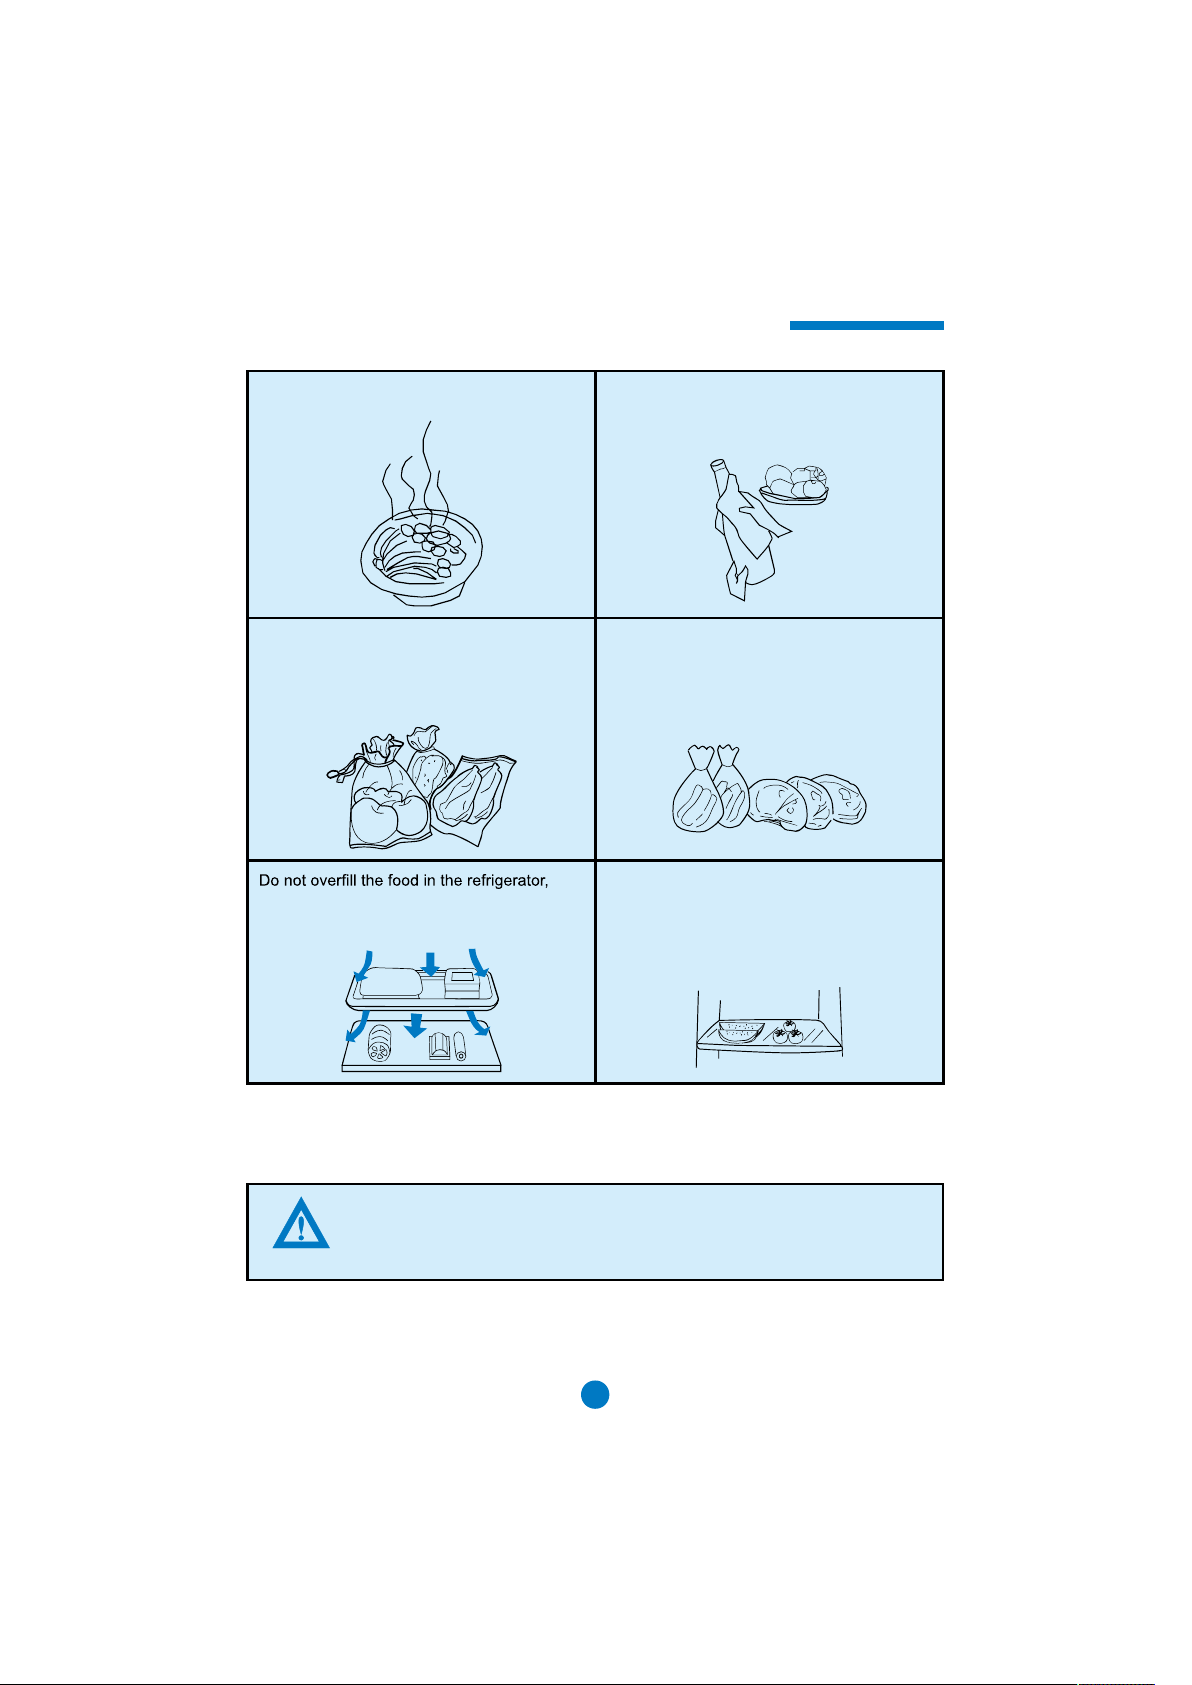
Do not put hot food into the refrigerator before
cooling it to room temperature.
It is recommended to sealed foods before
putting them in the refrigerator to prevent
evaporation and odors spoilage to other foods.
separate the foods accordingly and and leave
space for air circulation so that a better
refrigerating result is achieved.
It is not recommended to put foods which are
not clean or have excessive water residue.
This could lead to frosting or spoilage and
create a hazard.
Try to arrange and store your foods depending
on frequency of use. This will help with energy
consumption as you will have doors opened at
a minimal.
.
Food storage should not be too close to the
inner wall. Higher moisture content
food should not be close to the shelf inner
wall to avoid being frozen, so please keep
some distance from the inner wall when
managing the food.
Caution
The food in the refrigerator, especially greasy food that has contact with
the liner for a long-term period, will cause corrosion to the liner. Avoid
possibly direct contact between food and the liner. When the liner is stained
Caution with oil, please clean it in a timely manner.
17

Smart Use of Refrigerating Chamber
(1) Leaves of radish food should be cut off to prevent the nutrients absorption by the leaves.
(2) Put the frozen food into refrigeration chamber for defrosting, this can refrigerate the food
with the low temperature from the frozen food and also for energy saving.
(3) Foods and produce such as onion, garlic, ginger, water chestnuts or root vegetables can be
preserved under normal ambient temperature.
(4) Foods such as zucchini, rockmelon,, papaya, banana or pineapple are not suitable for
refrigeration because it will accelerate ripening.
When closing the left door of the refrigeration chamber, ensure the Vertical Beam
is is in a closed position, otherwise the door will not close properly, causing the
Caution
Caution
temperature to rise inside the chamber and the door alarm may sound.
When closing the left door of the refrigeration chamber, ensure the Vertical Beam
is is in a closed position, otherwise the door will not close properly, causing the
temperature to rise inside the chamber and the door alarm may sound.
About Freezing Chamber
Freezing chamber is for long-term food storage
The freezing chamber can keep food fresh for longer, but do refer
and comply to the guides marked on the the food packaging.
About Small Freezer Drawer
The small freezer drawer is equipped with an all-in-one ice maker.
A small removable ice box captures ice. This box can be removed
when necessary.If you require more space in the Large Freezer
Drawer compartment, you may move the Small Freezer Drawer tub out,
allowing an open space in height for the Large Freezer Drawer.
Adjusting the divider in the Large Freezer Drawer
A divider is supplied to assist divide loads in 2 parts.
This divider can be moved as desired according to food type.
18

About Freezing Chamber
Please take good care of your children and pets, do not let them play In the
drawer in case of any unnecessary harms. Please do not dismantle the freezing
Warning
Freezing Chamber Light and Its Replacement
Light parameters: DC12V, 1W
If any unusual activity occurs, do not remove it at your own discretion, please contact after-sale
service personnel immediately for a replacement.
Frozen Food Precautions
drawer plate.
Divide the food into appropriate small portions
in order to freeze it entirely.
It also can better guarantee the quality when
defrosting and cooking. Each portion of food
should not be heavier than 2.5kg.
Do not put hot food into the freezing chamber
before cooling to room temperature.
Please start up “Quick-freezing” function in
advance of 12 hours if a large number of
foods need to be freezedall at once.
Before placing foods and items in the freezer,
ensure the packaging or item is dry. This will
avoid them being frozen together. The
packaging should tasteless, airtight, non-toxic,
free of contamination to avoid odor and quality
deterioration.
For convenience and reminder, try to label a
date, deadline and name on the food packaging.
It is recommended only to take out the required
amount of food from the freezer for defrosting,
as defrosted foods should not be re-frozen
unless cooked. This will affect taste quality.
19

Usage of Ice Maker and the Cold Water Dispenser
1. Preparation before using the ice maker and cold water dispenser:
a.) Measure and cut the supplied water connection hose as required. Avoid bending the hose too much.
Usually the length should be less than 5 metres. If the water hose is too long, cold water content could be
affect because of not enough water pressure.
b.) The water hose can not withstand heat. Keep it away from any heat source.
c.) Please have a licensed, qualified tradesperson to install the water connection to the appliance.
d.) During the first use, to supply water to the reservoir tank, press the water dispenser pad for 1 minute,
several times. Do not hold longer than 1 minute as it may overheat the pad activator solenoid.
Cold water should begin to flow from the outlet.
e.) The water pressure should be between 0.15~.0.6MPa.
f.) A water filter is for removing chlorine and contaminants from the water. It cannot sterilize or destroy,
so please ensure your water source is from a drinkable source.
2. Precautions
a.) To prevent the water hose from freezing, do not install the hose in places below 0°C
Open water faucet to flush hose and check leakage in water hose joints.
b.)
c.)When temperature of ice maker is equal to or below -15 ,the ice maker will begin to make ice.
d.)
After the fridge is installed, ensure that the hose is properly placed to prevent kinking or possible damage.
e.)
At this time, we suggest going to your local authorized Haier after-sale service center
f.)The ice maker should only be connected to a source of drinkable water.
Ice maker Working Principle:
3.
The ice maker tray periodically receives an automatic flow of water to the ice maker ice cube tray.Once the
water freezes a sensor on the tray recognizes cubes have been made and automatically twists the tray to drop
the ice cubes into the ice bucket.Capacity of the ice maker depends on the ambient temperature,frequency of
freezer door openings,and freezer compartment cooling temperature setting.Typical ice harvest per day is 4
poinds of ice.
indicator light will turn on.
Note
After first plugging in your refrigerator it typically takes 24 hours to make your
first batch of ice cubes.
20

How to Use the Water Dispenser
The use of the cold water dispenser.
During the first use, to supply water to the reservoir tank, press the water dispenser pad for
1 minute, several times. Do not hold longer than 1 minute as it may overheat the pad activator
solenoid. Cold water should begin to flow from the outlet.
It is normal for the first few cups of water to be a little warmer then the remaining cups
freezer drawer if you like very cold water.
Do not put your hands or foreign objects into the outlet or the
ice maker box
Warning
Water Dispenser Precautions
1. .
2. When dispensing water please keep yourcup under the outlet for a few seconds
after disengaging the dispenser tab to catch all the water droplets.
3.
21

Cleaning and Discontinued Use
Frost Removing of the Freezing Chamber
Automatic way of frost removing is applied in the freezing chamber of this
refrigerator. Manual operation is not in needed.
Cleaning
Food left in the refrigerator will release unpleasant smells, so periodic cleaning is
in
advised.
Unplug the power supply plug before cleaning for safety. Dip soft towel
or sponge to warm water (neutral detergent may be added) to clean the
refrigerator. Wipe out water on the surface of the refrigerator with dry towel.
Scrubbing brush, wire brush, abrasive (such as tooth paste,cleanser and etc),
organic solvent (such as gasoline, banana oil and acetone, etc) hot water,
Caution
Caution
acid or base are not to be used.
(1) As the refrigerator is quite heavy; protect the ground when you move the
refrigerator for cleaning and maintenance. Keep the refrigerator standing in
movement. Shake is not advised to protect the ground.
(2) Spraying is avoided in cleaning to guarantee the electrical insulation.
(3) ln the cleaning of electrical parts like the switch and the lamp, dry wiping must
be applied after electricity is cut down.
(4) Wet hands on the surface of the freezing chamber to avoid sticking of the
skin to the parts.
(5) Hot water is forbidden from cleaning the icy glass shelves to avoid physical
damage and treasury loss due to break of the glass resulted by severe change
of temperature.
(6) The door seal is easy to smear. Please keep it clean.
Cleaning Door Bins
Hold both sides of the door bin; lift it up in direction (1) and then pull it out in direction (2).
To reinstall, reverse this step after cleaning.
22

Cleaning and Discontinued Use
Cleaning the shelves
Lift the shelf up and pull it out. Dip soft towel
or sponge to warm water (neutral detergent
may be added) to clean the shelf. It can be
fixed in the reverse direction after cleaning.
Cleaning of the Crisper
Simply pull the crisper out and lift It up.
Dip soft towel or sponge to warm water
(neutral detergent may be added) to clean the
after cleaning.
Crisper Cover
Cleaning of the Full Width
Drawer and its cover
Pull the drawer out forward and
lift it up; get the crisper and the
drawer down and lay them in a
proper place. Then lift the cover
up and pull it out forward. Dip
soft towel or sponge to warm
water (neutral detergent may be
added) to clean the drawer. It can
Cleaning of the Crisper Cover.
Get the crisper down and lay it in a proper
place. Lift the cover up and pull it out forward.
Dip soft towel or sponge to warm water (neutral
detergent may be added) to clean the cover
(notice that the cover is made of glass plate
and plastic shelf. Attention should be paid to
the glass plate to avoid damage.). It can be
Crisper
after cleaning.
23

Cleaning and Discontinued Use
Ice Maker
Remove the Ice Tray from the Small Freezer Drawer.
detergent may be added) to clean. Simply place It back Into the small drawer after cleaning.
Small Freezer Drawer
Simply pull the Small Freezer Drawer out and lift out the Small Freezer Drawer Bin. Dip soft towel
or sponge to warm water(neutral detergent may be added) to clean the drawer.It can be fixed in
the reverse direction after cleaning.
Dip soft towel or sponge to warm water (neutral
Large Freezer Drawer
Simply pull the Large Freezer Drawer out and lift out the Large Freezer Drawer Bin
(neutral detergent may be added) to clean the bin. It can be fixed in the reversw
direction after cleaning.
24

Cleaning and Discontinued Use
Disassembly and Assembly of Freezer
Small Door
Pull the freezer small drawer out. Then lift up
the freezer small door and pull it up to get the
freezer small door down.
Disassembly and Assembly of Freezer
Large Door
Pull the freezer large drawer out. Then lift up
the freezer small door and pull it up to get the
freezer large door down.
Suspension
Power Failure and Discontinued Use
Within 1-2 hours of power failure, the refrigerator can
store food.If the power failure lasts over 24 hours,
frozen foods and items will all unfreeze.
Never place more food into the refrigerator after power failure.
Avoid opening the doors too often.
If power failure is known in advance, use ice cubes to assist
with refrigerating foods and items.
Discontinued use
If the refrigerator will not be in use, unplug the power and clean the
refrigerator, following the guides above. The doors should remain
open to prevent odors from building up.
25

Cleaning and Discontinued Use
Never use the refrigerator in common situation in avoidance of impact on the
work life of the refrigerato
After the refrigerator has been unplugged, please wait at least 5 minutes before
Caution
powering up the refrigerator again. This will help the prolong the life of the
refrigerator.
While vacant
If you are vacant from your house, please power off your electricity and appliance.
Remove all foods. Clean and dry all surface. Leave doors open to avoid build
up of unpleasant odors.
After the levelling stools cease to work, they are to be properly handled or handed
to professionals. Never throw them away at will to prevent harming the Warning
Warning
environment or provoking other dangers.
In Movement
Unplug the power supply. Take all foods out ......Secure moving and fragile
parts with tape or remove them and transport separately. Close the doors
and tape up to prevent them from opening while in transit. In movement,
the refrigerator should not angle more then 45 degree (angle in the vertical
direction).
r.
r.
Forbidder
Never lay the refrigerator down.
26

FAQ
When operating the refrigerator for the first time,
you may hear noises This is the refrigerator
entering the initial stage then into a steady state.
As it stabilizes the noise should lessen.
y.
There will be a normal hum while the fan is
in operation.
Whir
Whir
As the ambient temperature changes, parts
throughout the refrigerator may expand or
contract, so you may hear noises.
Crack
Crack
evaporator, it will produce a noise that
sound
heard in evaporator and compressor; when
when the refrigerator stops working, such noise
may also continuously or discontinuously
substance.
Babble
Babble
Tap-tap is a normal sound when the
compressor is working, or when you are
starting up or shutting down the refrigerator.
Click
Click
When working the defrosting cycle, water
like Chi-Chi. After the cycle gets completed,
there may occurs small cracking sounds,
and a boiling sound or Gu-Gu sound may be
heard from evaporator. These are the normal
sounds during defrosting operation.
Sizzle
Gurgle
27

FAQ
When the refrigerator has been operating for a
while, the body of the refrigerator may get warm
or hot. This is normal.
Water droplets may appear on outside
surface and center beam between doors
when air humidity is high, just wipe them
with soft cloth.
When the refrigerator has been operating for a
while, the vertical beam installed on the inside
of the left door will get warm. This is normal
as it is designed to prevent condensation.
Meaning of crossed out wheeled dustbin:
Do not dispose of electrical appliances as unsorted municipal waste, use separate collection
facilities . Contact you local government for information regarding the collection systems
can leak into the groundwater and get into the food chain,damaging your health and well-being.
28
 Loading...