

Page 1
Installation and User Manual
Manuel d’installation et d’utilisation
Manual de instalación y del usuario
HFC3501ACW, HF50CW20W
HF50CM23NW, HF71CW20W
HF71CM33NW, HF71CL53NW
Manual Defrost Chest Freezer
Congélateur bahut à dégivrage manuel
Congelador horizontal de descongelación
manual
Part # 0570000226 REV A
Page 2

Page 3

TABLE OF CONTENTS
FREEZER SAFETY ................................................................................................ 2
PARTS AND FEATURES ....................................................................................... 5
INSTALLATION REQUIREMENTS .........................................................................6
Location Requirements .................................................................................................6
Electrical Requirements ................................................................................................7
FREEZER INSTALLATION ....................................................................................8
Step 1 - Unpack Freezer ................................................................................................ 8
Step 2 - Complete the Installation ...............................................................................9
FREEZER USE ...................................................................................................... 9
Control ...........................................................................................................................9
Freezer Lock and Key ...................................................................................................10
Freezer Baskets ........................................................................................................... 10
FREEZER CARE ................................................................................................. 11
Cleaning .......................................................................................................................11
Defrosting and Draining ..............................................................................................12
Vacation and Moving ................................................................................................... 13
Reinstalling/Using Freezer Again ................................................................................ 13
TROUBLESHOOTING ........................................................................................ 14
LIMITED WARRANTY ........................................................................................16
RECORD KEEPING
Thank you for purchasing this Haier
product. This user manual will help you
get the best performance from your
new freezer.
For future reference, record the model
number, serial number, and the date
of purchase. The model/serial number
plate is located on a label inside the
freezer.
Staple your proof of purchase to this
manual to aid in obtaining warranty
service if needed.
___________________________________
Model number
___________________________________
Serial number
___________________________________
Date of purchase
1
Page 4
FREEZER SAFETY
Your safety and the safety of others are very important.
We have provided many important safety messages in this manual and
on your appliance. Always read and obey all safety messages.
This is the safety alert symbol.
This symbol alerts you to potential hazards that can
kill or hurt you and others. All safety messages will
follow the safety alert symbol and either the word
“DANGER,” “WARNING” or “CAUTION.”
These words mean:
An imminently hazardous situation. You
DANGER
WARNING
CAUTION
All safety messages will tell you what the potential hazard is, tell you
how to reduce the chance of injury, and tell you what can happen if the
instructions are not followed.
could be killed or seriously injured if you
don’t immediately follow instructions.
A potentially hazardous situation
which, if not avoided, could result in
death or serious bodily injury.
A potentially hazardous situation
which, if not avoided, may result in
moderate or minor injury.
2
Page 5
IMPORTANT SAFETY
INSTRUCTIONS
WARNING: To reduce the risk of re, electrical shock, injury to persons,
or damage when using the freezer, follow basic precautions, including
the following:
Use this appliance only for
•
its intended purpose as
described in this user manual.
This freezer must be properly
•
installed in accordance with
the installation instructions
before it is used. See
grounding instructions in the
installation section.
Flammable refrigerant used.
•
Do not use mechanical
devices to defrost freezer.
Do not puncture refrigerant
tubing.
Flammable refrigerant used.
•
To be repaired only by trained
service personnel. Do not
puncture refrigerant tubing.
Flammable refrigerant
•
used. Dispose of properly in
accordance with federal or
local regulations.
Flammable refrigerant used.
•
Follow handling instructions
carefully. Risk of re or
explosion due to puncture of
refrigerant tubing.
Plug into a grounded 3 prong
•
outlet.
Do not remove ground prong.
•
Do not use an adapter.
•
Do not use an extension cord.
•
Do not repair or replace any
•
part of the appliance unless
specically recommended in
the manual. All other servicing
should be referred to a
qualied technician.
Disconnect power before
•
servicing.
Replace all parts and panels
•
before operating.
Use nonammable cleaner.
•
Keep ammable materials and
•
vapors, such as gasoline, away
from freezer.
Cabinet edges along stamp/
•
cutout areas may be sharp.
Avoid placing hands, ngers
or other appendages near
these areas.
This freezer should not
•
be recessed or built-in
an enclosed cabinet. It is
designed for freestanding
installation only.
Before discarding or removing
•
from service, remove the
door. This will reduce the
possibility of danger to
children.
READ AND SAVE THESE
INSTRUCTIONS
3
Page 6
State of California Proposition 65 Warnings:
WARNING
WARNING: This product contains one or more chemicals known to the
State of California to cause cancer.
WARNING: This product contains one or more chemicals known to the
State of California to cause birth defects or other reproductive harm.
PROPER DISPOSAL OF YOUR OLD REFRIGERATED APPLIANCE
Suffocation Hazard
Remove doors or lid from your old freezer or refrigerator.
Failure to do so can result in death or brain damage.
IMPORTANT: Child entrapment and suocation are not problems of the past. A
junked or abandoned freezers or refrigerators are still dangerous – even if it will sit
for “just a few days.” If you are getting rid of your old refrigerator or freezer, please
follow these instructions to help prevent accidents.
Before You Throw Away Your Old Freezer or Refrigerator:
Remove the doors or lid.
•
Leave any shelves in place so that children may not easily climb inside.
•
Important information to know about disposal of refrigerants:
Dispose of freezer in accordance with Federal and Local regulations.
Refrigerants must be evacuated by a licensed, EPA certied refrigerant
technician in accordance with established procedures.
4
Page 7
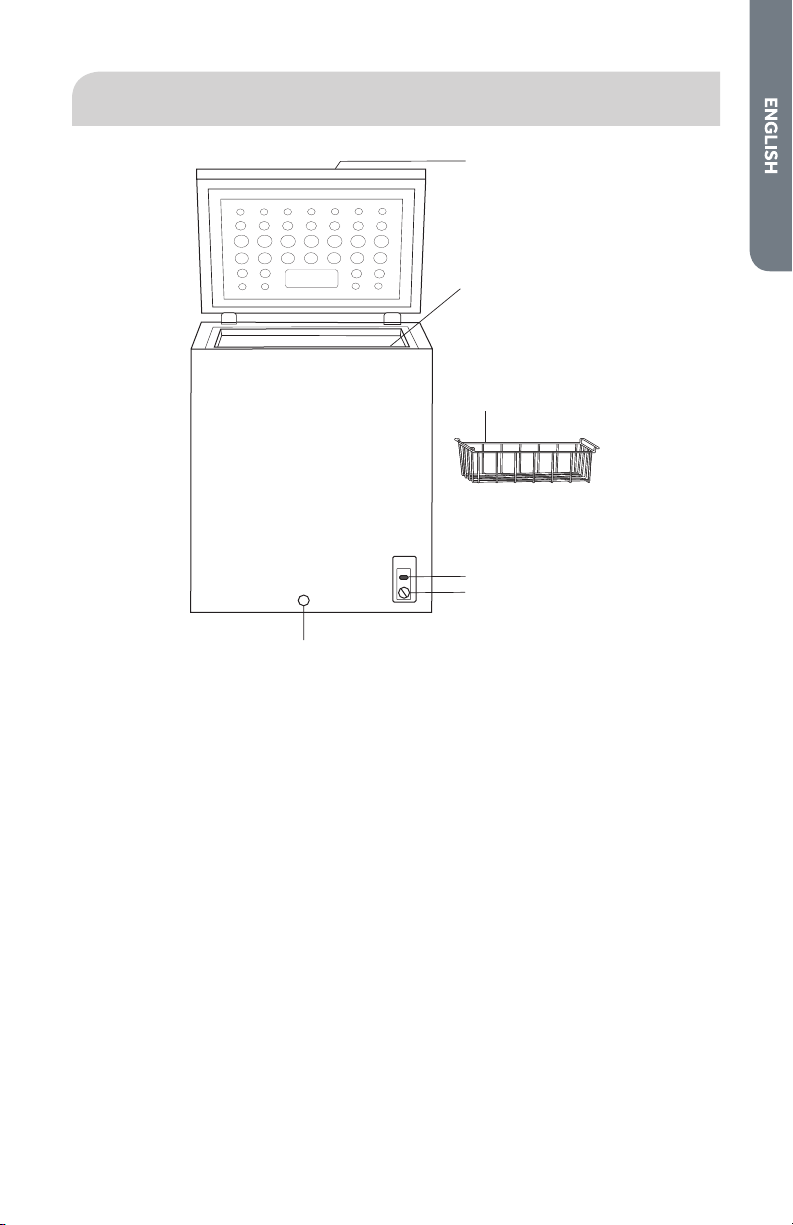
PARTS AND FEATURES
f
a
b
c
d
e
a Lock with Key
(modelHF71CL53NW only)
b Interior Drain Plug
(not shown - see insert)
c Vinyl Coated Wire Basket
d Power Indicator - green light
(onsome models)
e Temperature Control Adjustment
f Exterior Drain Plug
5
Page 8
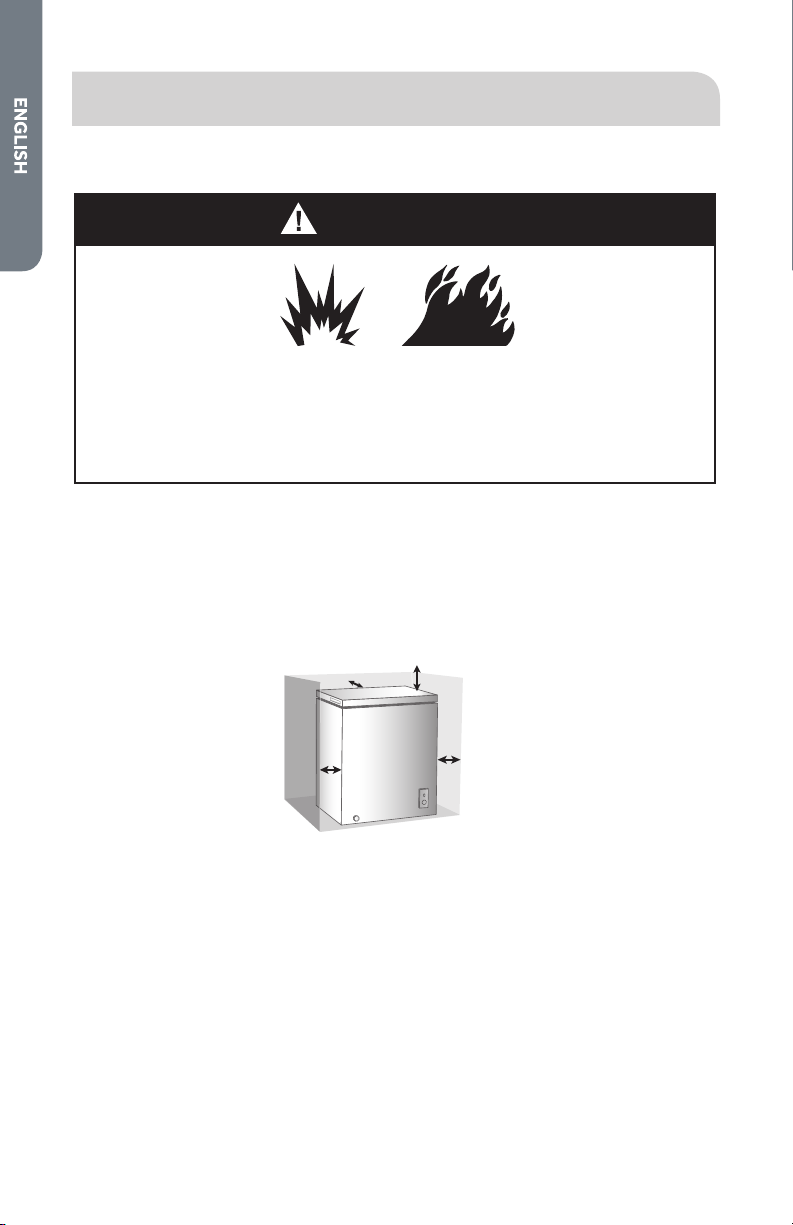
INSTALLATION REQUIREMENTS
WARNING
LOCATION REQUIREMENTS
Explosion and Fire Hazard
Keep flammable materials and vapors, such as gasoline, away from
appliance.
Failure to do so can result in death, explosion or fire.
IMPORTANT: This freezer is designed for freestanding installation only. It should
not be recessed or built-in an enclosed cabinet. To ensure your freezer works
at optimum eciency, you should install it in a location where there is proper air
circulation, and electrical connections.
Recommended Clearances:
4"
(10.2 cm)
4"
(10.2 cm)
Do not install your freezer in any location not properly insulated or heated such
•
as a garage. Your freezer was not designed to operate in temperature settings
below 55˚F (13°C).
Select a suitable location for the freezer on a hard even surface away from direct
•
sunlight or heat source e.g. radiators, baseboard heaters, cooking appliances
etc. Any oor unevenness should be corrected.
Place the freezer on a oor strong enough to support it fully loaded.
•
6
Do Not
BlockTop
4"
(10.2 cm)
Page 9
ELECTRICAL REQUIREMENTS
WARNING
Electrical Shock Hazard
Plug into a grounded 3 prong outlet.
Do not remove the ground prong from the power cord plug.
Do not use an adapter.
Do not use an extension cord.
Failure to do so can result in death, fire or electrical shock.
Before you move your freezer to a location, it is important to make sure you have
the proper electrical connection.
Recommended Grounding Method
A 115 Volt, 60 Hz., AC only, 15-amp fused, grounded electrical supply is required. It
is recommended that a separate circuit serving only your freezer be provided. Use
an outlet that cannot be turned o by a switch. Do not use an extension cord.
7
Page 10
FREEZER INSTALLATION
WARNING
STEP 1 - UNPACK FREEZER
Fire or Explosion Hazard
Do not puncture refrigerant tubing.
Follow handling instructions carefully.
Flammable refrigerant used.
Failure to do so can result in death, explosion or fire.
IMPORTANT: Handle with care when moving freezer to avoid either damaging the
refrigerant tubing or increasing the risk of a leak.
IMPORTANT: When moving the freezer, never tilt it more than a 45° angle. This could
damage the compressor and the sealed system. If the freezer has been placed in
a horizontal position for any period of time, wait 24 hours before plugging in the
freezer to allow the refrigerant to settle.
1. Remove and dispose of/recycle all packing materials. This includes the foam
base and all adhesive tape. Remove all protective packaging covering the
freezer.
2. Remove user manual and other printed material before turning on the freezer.
3. Clean the exterior surface with a soft cloth.
8
Page 11
STEP 2 - COMPLETE THE INSTALLATION
WARNING
Electrical Shock Hazard
Plug into a grounded 3 prong outlet.
Do not remove the ground prong from the power cord plug.
Do not use an adapter.
Do not use an extension cord.
Failure to do so can result in death, fire or electrical shock.
1. Plug into a grounded 3 prong outlet.
2. Using a carpenter’s level, make sure the freezer is level from front to back, and
from side to side. Shim if necessary.
FREEZER USE
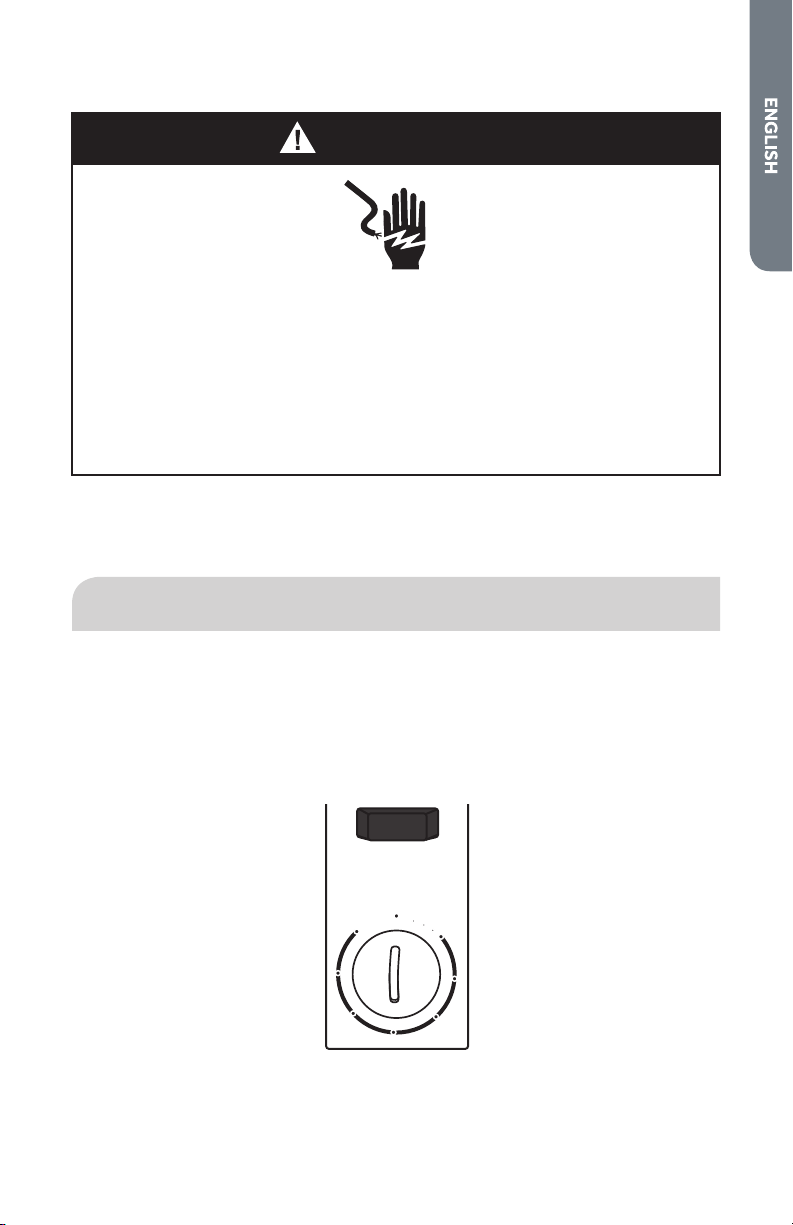
CONTROL
The control, located on the front of the freezer cabinet, is an adjustable dial with
Temperature settings ranging from 1 (Least Cold) to 7 (Coldest), and O.
1. Turn the temperature control dial to 4 (Recommended Setting).
2. Allow the freezer to cool for several hours before adding food.
OFF
7
6
5
ADJUSTING THE TEMPERATURE
The recommended setting (4) is designed to maintain the temperature at or near
0°F (-17.8°C) under normal operating conditions.
1
2
3
4
9
Page 12
To Adjust the Freezer Temperature:
1. Adjust the control dial to one of the adjacent settings 3 (less cold) or 5 (colder).
NOTE: Except when starting the freezer, do not adjust the control more than
one setting at a time.
2. Wait 24 hours between adjustments for the freezer temperature to stabilize.
POWER ON INDICATOR - (ON SOME MODELS)
The Power On indicator illuminates when the freezer is properly connected to
electrical power.
IMPORTANT: Turning the control dial to OFF does not disconnect the freezer from
the power supply. Even when Cooling is turned O, the Power On indicator will
remain illuminated as long as the freezer is plugged into an outlet.
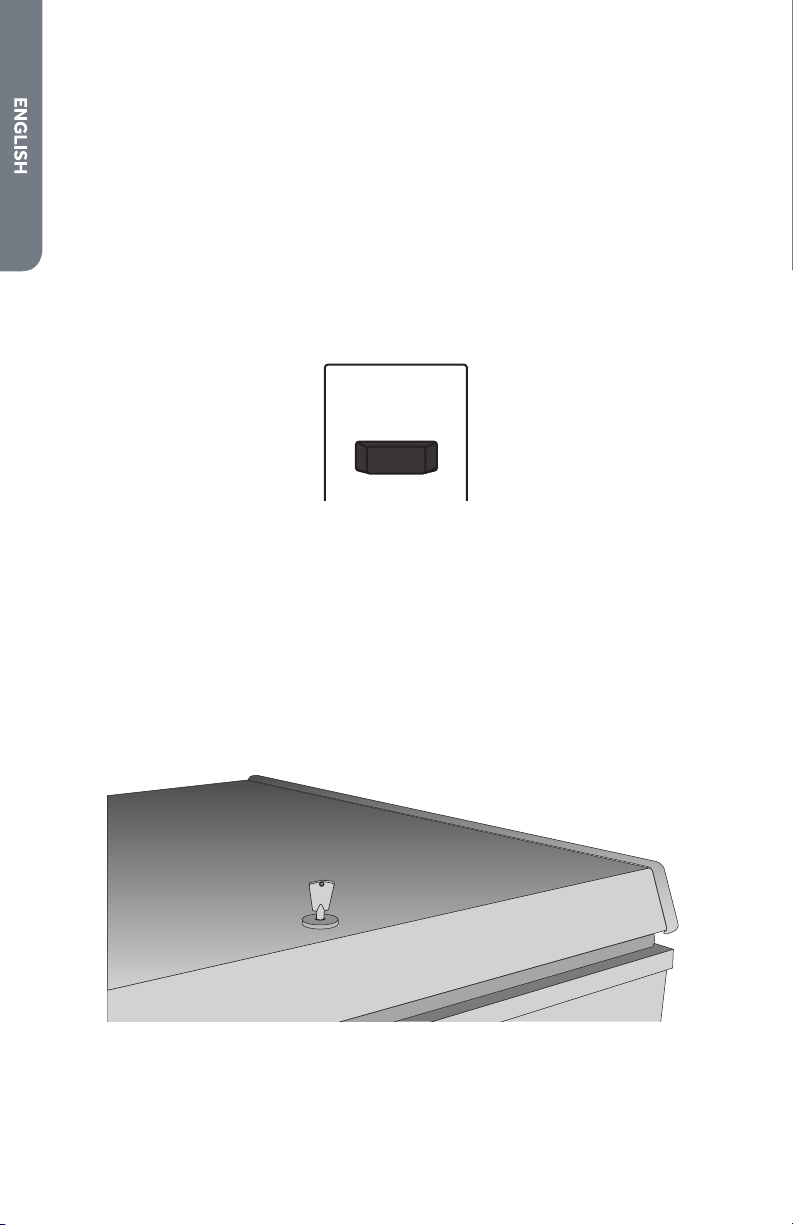
FREEZER LOCK AND KEY
IMPORTANT:
Store the freezer key in a location away from the freezer and not easily accessible
•
to children.
The key slot is spring loaded or equivalent so that the key must be manually held
•
in the lock in any position of the lock.
To Lock/Unlock the Freezer:
Close the freezer lid, insert the key, push in and turn the key to lock. To unlock, insert
the key, push in and turn the key in the opposite direction.
FREEZER BASKETS
For storage exibility, your freezer comes with two removable wire baskets. The
removable freezer baskets allow easier access to foods used frequently.
10
Page 13
FREEZER CARE
CLEANING
WARNING
Explosion Hazard
Use nonflammable cleaner.
Failure to do so can result in death, explosion or fire.
IMPORTANT: Do not use harsh chemicals, ammonia, chlorine bleach, concentrated
detergent, solvents, abrasives or metal scouring pads to clean your freezer inside or
out. They can damage and/or discolor the freezer nish.
WARNING
Electrical Shock Hazard
Unplug your appliance or disconnect power before cleaning.
Failure to do so can result in death, electric shock or personal injury.
1. Unplug freezer or disconnect power.
2. Before using cleaning products, always read and follow manufacturer’s
instructions and warnings to avoid personal injury or product damage.
3. Wash interior surfaces, accessories, and outer frame with cold water and a little
baking soda.
4. Dry thoroughly with a soft cloth.
5. Plug in or reconnect power.
11
Page 14
DOOR GASKETS
DANGER
Gaskets must be kept clean and pliable to assure a proper seal.
Clean door gaskets every 3 months with solution of baking soda and warm
•
water.
Petroleum jelly applied lightly on the hinge side of gaskets will keep the gasket
•
pliable and assure a good seal.
DEFROSTING AND DRAINING
Fire or Explosion Hazard
Flammable refrigerant used.
Do not use mechanical devices to defrost freezer.
Do not puncture refrigerant tubing.
Failure to do so can result in death, explosion or fire.
For most ecient operation and minimum energy consumption, defrost whenever
the frost becomes " (6 mm) thick.
IMPORTANT:
Do not use metal instruments to defrost freezer.
•
Do not use boiling water as it may damage the freezer.
•
1. Turn the temperature control to OFF and unplug the freezer.
NOTE: Defrosting usually takes a few hours. To defrost faster keep the freezer
door open.
2. Place a tray (not included) in front of the freezer, beneath the exterior drain plug
to collect the water. Remove the interior drain plug, and then remove (unscrew)
the exterior drain plug to allow the water to ow out into the tray.
NOTE: Water that has accumulated at the bottom of the freezer during
defrosting will drain into the tray. Monitor the tray under the drain to avoid
overow.
3. When defrosting is complete, wipe the interior of the freezer with a soft cloth,
and replace the drain plug.
12
Page 15
WARNING
Electrical Shock Hazard
WARNING
Plug into a grounded 3 prong outlet.
Do not remove the ground prong from the power cord plug.
Do not use an adapter.
Do not use an extension cord.
Failure to do so can result in death, fire or electrical shock.
4. Plug into a grounded 3 prong outlet.
5. Reset the temperature control to your preferred setting.
6. Return the food into the freezer.
VACATION AND MOVING
Fire or Explosion Hazard
Do not puncture refrigerant tubing.
Follow handling instructions carefully.
Flammable refrigerant used.
Failure to do so can result in death, explosion or fire.
IMPORTANT: When moving freezer, handle with care to avoid either damaging the
refrigerant tubing or increasing the risk of a leak.
IMPORTANT: When moving the freezer, never tilt it more than a 45° angle. This could
damage the compressor and the sealed system.
For long vacations or absences:
Remove food from freezer.
•
Turn the temperature control to OFF.
•
Unplug or disconnect power.
•
13
Page 16
Clean the door gaskets. See “Cleaning.”
WARNING
•
Prop open the doors to allow air to circulate inside.
•
REINSTALLING/USING FREEZER AGAIN
If the freezer has been placed in a horizontal or tilted position for any period of time
wait 24 hours before plugging in the freezer to allow the refrigerant to settle.
1. Clean Freezer. See “Cleaning.“
2. Move freezer to desired location. Check that it is level and shim, if necessary.
Electrical Shock Hazard
Plug into a grounded 3 prong outlet.
Do not remove the ground prong from the power cord plug.
Do not use an adapter.
Do not use an extension cord.
Failure to do so can result in death, fire or electrical shock.
3. Plug into grounded 3 prong outlet.
TROUBLESHOOTING
First try the solutions suggested here to possibly avoid the cost of a service call.
PROBLEM POSSIBLE CAUSE(S) SOLUTION
Freezer does not
run
14
The freezer is unplugged. Plug freezer into a grounded
The circuit breaker is
tripped or turned o /
Fuse is blown.
The temperature control
is turned to OFF.
The compressor cycle is
not complete.
3prong outlet.
Reset / Turn on circuit breaker or
replace fuse
Turn the temperature control to
a setting between 1 and 7.
Wait 30 to 40 minutes to see
whether the freezer will start.
Page 17
PROBLEM POSSIBLE CAUSE(S) SOLUTION
Compressor runs
too frequently
Food temperature
is too warm
Food temperature
is too cold.
Freezer has an
odor
Gurgling sound
Clicking
The temperature is hot
and/or humid.
The freezer door is ajar. Completely close the freezer
The door gasket is not
sealing properly.
Frequent or prolonged
door openings.
The freezer door is
blocked open.
The door is opened
frequently.
A large load of food was
recently added.
The freezer door is not
sealing properly.
The control is not
set to a cold enough
temperature.
The control is set to a
too cold setting.
The freezer needs
cleaning.
Food is improperly
wrapped or sealed and is
giving o odor.
Refrigerant circulating
through the cooling coils.
The temperature control
cycling on and o.
This may be normal to maintain
constant temperature during
high temperature and humid
days.
door.
Clean the door gasket. See
“Cleaning.”
Limit door openings to maintain
the internal temperature of the
freezer.
Rearrange or remove items from
blocking open the freezer door.
Limit door openings.
Allow time for recently added
warm food to cool to freezer
temperature.
Clean door gasket. See
“Cleaning.”
Adjust the temperature control
to a colder setting.
Adjust the temperature control
to a less cold setting.
Clean the freezer. See
“Cleaning.”
Wrap and seal food tightly before
storing in the freezer.
This sound is normal.
This sound is normal.
FOR MORE HELP, VISIT HAIER.COM OR CALL THE CONSUMER
HELP LINE AT 1-877-337-3639.
15
Page 18

LIMITED WARRANTY
CARRY-IN SERVICE
FULL ONE YEAR WARRANTY
12 Months on Parts and Labor
(Carry-In only)
5 Years on Sealed System
(Carry-In only)
For 12 months from the date of original
retail purchase, Haier will repair or replace
any part free of charge including labor
that fails due to a defect in materials or
workmanship.
Haier may replace or repair at their sole
discretion any part, sub system including
the entire product.
LIMITED WARRANTY
NOTE: This warranty commences on
the date the item was purchased, and
the original purchase receipt must be
presented to the authorized service
representative before warranty repairs are
rendered.
Exceptions: Commercial Use Warranty
90 days labor from date of original purchase
90 days parts from date of original
purchase
No other warranty applies.
FOR CARRY-IN WARRANTY
SERVICE
All service must be performed by a Haier
authorized service center. For the name
and telephone number of the nearest
authorized service center, please call
1-877-337-3639.
Before calling please have available the
following information:
Model number and serial number of your
appliance. The name and address of the
dealer you purchased the unit from and
the date of purchase.
A clear description of the problem.
A proof of purchase (sales receipt).
This warranty covers carry-in appliance
services within the contiguous United
States and Canada and where available in
Alaska, Hawaii and Puerto Rico.
16
What is not covered by this warranty:
Replacement or repair of household fuses,
circuit breakers, wiring or plumbing.
A product whose original serial number
has been removed or altered.
Any service charges not specically
identied as normal such as normal service
area or hours.
Damage incurred in shipping.
Damage caused by improper installation
or maintenance.
Damage from misuse, abuse accident, re,
ood, or acts of nature.
Damage from service other than an
authorized Haier dealer or service center.
Damage from incorrect electrical current,
voltage or supply.
Damage resulting from any product
modication, alteration or adjustment not
authorized by Haier.
Adjustment of consumer operated
controls as identied in the owner’s
manual.
All attachments, accessories and
disposable parts.
Labor, service transportation, and shipping
charges for the removal and replacement
of defective parts beyond the initial
12-month period.
Damage from other than normal
household use.
Any transportation and shipping charges.
THIS LIMITED WARRANTY IS GIVEN
IN LIEU OF ALL OTHER WARRANTIES,
EXPRESS ED OR IMPLIED, INCLUDING BUT
NOT LIMITED TO, THE WARRANTIES OF
MERCHANTABILITY AND FITNESS FOR A
PARTICULAR PURPOSE
The remedy provided in this warranty is
exclusive and is granted in lieu of all other
remedies.
This warranty does not cover incidental
or consequential damages, so the above
limitations may not apply to you. Some
states do not allow limitations on how long
an implied warranty lasts, so the above
limitations may not apply to you.
This warranty gives you specic legal
rights, and you may have other rights,
which vary from state to state.
Haier America
Wayne, NJ 07470
Page 19

TABLE DES MATIÈRES
SÉCURITÉ DU CONGÉLATEUR .......................................................................... 18
PIÈCES ET CARACTÉRISTIQUES ....................................................................... 21
EXIGENCES D’INSTALLATION ...........................................................................22
Exigences d’emplacement .......................................................................................... 22
Spécications électriques ........................................................................................... 23
INSTALLATION DU CONGÉLATEUR ................................................................. 24
Étape 1 - Déballage du congélateur ............................................................................24
Étape 2 - Fin de l’installation ......................................................................................25
UTILISATION DU CONGÉLATEUR ...................................................................... 25
Commande ..................................................................................................................25
Verrou et clé du congélateur .......................................................................................26
Paniers de congélateur ..............................................................................................27
ENTRETIEN DU CONGÉLATEUR ........................................................................ 27
Nettoyage ....................................................................................................................27
Dégivrage et vidange ...................................................................................................29
Vacances et déménagement ...................................................................................... 30
Réinstallation/réutilisation du congélateur ................................................................31
DÉPANNAGE ..................................................................................................... 32
GARANTIE LIMITÉE ........................................................................................... 34
DOCUMENTS À CONSERVER
Merci d’avoir acheté ce produit Haier.
Ce manuel d’utilisation vous aidera
à obtenir la meilleure performance
possible de votre nouveau congélateur.
Pour référence ultérieure, inscrire le
numéro de plaque signalétique et la
date d’achat. La plaque signalétique est
située sur une étiquette à l’intérieur du
congélateur.
Pour faciliter l’obtention d’un service
sous garantie, agrafer la preuve de la
date d’achat à ce manuel.
___________________________________
Numéro de modèle
___________________________________
Numéro de série
___________________________________
Date d’achat
17
Page 20

SÉCURITÉ DU CONGÉLATEUR
Votre sécurité et celle des autres est très importante.
Nous donnons de nombreux messages de sécurité importants dans ce
manuel et sur votre appareil ménager. Assurez-vous de toujours lire
tous les messages de sécurité et de vous y conformer.
Voici le symbole d’alerte de sécurité.
Ce symbole d’alerte de sécurité vous signale les
dangers potentiels de décès et de blessures graves à
vous et à d’autres. Tous les messages de sécurité
suivront le symbole d’alerte de sécurité et le mot
“DANGER”, “AVERTISSEMENT” ou “ATTENTION”.
Ces mots signifient :
Une situation de danger
DANGER
AVERTISSEMENT
ATTENTION
Tous les messages de sécurité vous diront quel est le danger potentiel
et comment réduire le risque de blessure et ce qui peut se produire en
cas de non-respect des instructions.
imminent. Vous courez le risque
d’un décès ou de blessures
graves si vous ne suivez pas
immédiatement les instructions.
Une situation potentiellement
dangereuse qui, si vous ne
l’évitez pas, peut provoquer la
mort ou des blessures graves.
Une situation potentiellement
dangereuse qui, si vous ne
l’évitez pas, peut entraîner des
blessures légères à modérées.
18
Page 21

IMPORTANTES INSTRUCTIONS
DE SÉCURITÉ
AVERTISSEMENT : An de réduire le risque d’incendie, de choc
électrique, de blessures corporelles ou de dommage lors de l’utilisation
du congélateur, il convient d’observer certaines précautions
fondamentales, notamment :
Utiliser cet appareil
•
uniquement dans le but
auquel il est destiné et tel que
décrit dans le présent manuel
d’utilisation.
Avant utilisation, ce
•
congélateur doit être
correctement installé
conformément aux
instructions d’installation.
Voir les instructions de mise
à la terre incluses dans les
instructions d’installation.
Utilisation d’un liquide
•
frigorigène inammable. Ne
pas dégivrer le congélateur
par des moyens mécaniques.
Ne pas perforer le circuit
frigorigène.
Utilisation d’un liquide
•
frigorigène inammable.
Toute réparation doit être
eectuée par un technicien
de service qualié. Ne pas
perforer le circuit frigorigène.
Utilisation d’un liquide
•
frigorigène inammable.
Mettre au rebut d’une
manière appropriée en
conformité avec la législation
fédérale ou locale.
Utilisation d’un liquide
•
frigorigène inammable.
Suivre attentivement les
instructions de manipulation.
Risque d’incendie ou
d’explosion dû à la perforation
du circuit frigorigène.
Brancher sur une prise de
•
courant à 3 alvéoles, reliée à
la terre.
Ne pas enlever la prise de
•
liaison à la terre.
Ne pas utiliser d’adaptateur.
•
Ne pas utiliser de rallonge.
•
Ne réparer ni remplacer
•
aucune pièce de l’appareil
sans recommandation
spécique du manuel. Toutes
les autres tâches d’entretien
doivent être eectuées par
un technicien qualié.
Déconnecter la source de
•
courant électrique avant
l’intervention.
Replacer pièces et panneaux
•
avant de faire la mise en
marche.
Utiliser un produit de
•
nettoyage ininammable.
Tenir les matières et les
•
vapeurs inammables, telles
que l’essence, à l’écart du
congélateur.
Les bords de la caisse,
•
les zones de découpe et
les zones comportant un
code d’identication ou
des découpes peuvent
être tranchantes. Tenir les
mains, les doigts ou autres
appendices éloignés de ces
zones.
19
Page 22

IMPORTANTES INSTRUCTIONS
AVERTISSEMENT
DE SÉCURITÉ
Le congélateur ne doit pas
•
être encastré ni installé dans
un placard fermé. Il est conçu
uniquement pour être utilisé
d’une manière autoportante.
Avant de jeter l’appareil
•
ou de le rendre inutilisable,
retirer la porte. Cela réduira la
possibilité de danger pour les
enfants.
LIRE ET CONSERVER CES
INSTRUCTIONS
MISE AU REBUT DE VOTRE VIEIL APPAREIL RÉFRIGÉRÉ
Risque de suffoquer
Enlever les portes ou le couvercle de votre vieux congélateur ou
réfrigérateur.
Le non-respect de cette instruction peut causer un décès ou des
lésions cérébrales.
IMPORTANT : Le problème des enfants pouvant se retrouver coincés et suoquer
n’est pas un problème du passé. Un appareil réfrigéré jeté ou abandonné est encore
dangereux, même s’il est laissé abandonné pendant “quelques jours seulement”.
Si vous vous débarrassez de votre vieil appareil réfrigéré, veuillez suivre les
instructions suivantes pour aider à éviter les accidents.
Avant de jeter votre vieil appareil réfrigéré :
Ôter les portes ou le couvercle.
•
Laisser les tablettes en place de sorte que les enfants ne puissent pas y pénétrer
•
facilement.
Informations importantes à propos de la mise au rebut de réfrigérants :
Mettre le congélateur au rebut en conformité avec la législation fédérale ou
locale. Les réfrigérants doivent être évacués par un technicien en réfrigération
agréé et certié EPA en conformité avec les procédures établies.
20
Page 23

PIÈCES ET CARACTÉRISTIQUES
f
a
b
c
d
e
a Verrou avec clé (modèle
HF71CL53NW uniquement)
b Bonde de vidange intérieure
(non illustrée - voir encart)
c Panier métallique enduit de vinyle
d Témoin lumineux d’alimentation
- lumière verte (sur certains
modèles)
e Réglage de la commande de
température
f Bonde de vidange extérieure
21
Page 24

EXIGENCES D’INSTALLATION
AVERTISSEMENT
EXIGENCES D’EMPLACEMENT
Risque d'explosion
Garder les matériaux et les vapeurs inflammables, telles que l'essence,
loin de l’appareil.
Le non-respect de cette instruction peut causer un décès, une
explosion ou un incendie.
IMPORTANT : Ce congélateur est conçu uniquement pour être utilisé d’une manière
autoportante. Il ne doit pas être encastré ni installé dans un placard fermé. Pour
vous assurer que le congélateur fonctionne à son ecacité optimale, il doit être
installé dans un endroit où la circulation d’air et les raccordements électriques sont
appropriés.
Distances de dégagement recommandées :
4"
(10,2 cm)
4"
(10,2 cm)
Ne pas installer le congélateur dans un endroit incorrectement isolé ou
•
chaué comme par exemple un garage. Le congélateur n’a pas été conçu pour
fonctionner à des températures inférieures à 55 °F (13 °C).
Choisir un emplacement approprié pour le congélateur, sur une surface dure et
•
homogène, à l’abri de la lumière directe du soleil ou d’une source de chaleur (p.
ex. radiateurs, plinthes chauantes, appareils de cuisson, etc.) Toute irrégularité
du plancher doit être corrigée.
Placer le congélateur sur un plancher susamment robuste pour supporter son
•
poids lorsqu’il est entièrement chargé.
22
Ne pas
obstruer le
sommet
4"
(10,2 cm)
Page 25

SPÉCIFICATIONS ÉLECTRIQUES
AVERTISSEMENT
Risque de choc électrique
Brancher sur une prise à 3 alvéoles reliée à la terre.
Ne pas enlever la broche de liaison à la terre du cordon d'alimentation.
Ne pas utiliser un adaptateur.
Ne pas utiliser un câble de rallonge.
Le non-respect de cette instruction pourrait causer un décès, un
incendie ou un choc électrique.
Avant de déplacer le congélateur à son emplacement nal, il est important de
s’assurer que le raccordement électrique est approprié.
Méthode recommandée de liaison à la terre
Chaque appareil doit être alimenté par un circuit 115 volts (CA seulement, 60 Hz)
relié à la terre et protégé par un fusible de capacité 15 A. Il est recommandé d’utiliser
un circuit distinct pour alimenter le congélateur uniquement. Utiliser une prise de
courant dont l’alimentation ne peut pas être interrompue par un interrupteur. Ne
pas utiliser de rallonge.
23
Page 26

INSTALLATION DU CONGÉLATEUR
AVERTISSEMENT
ÉTAPE 1 - DÉBALLAGE DU CONGÉLATEUR
Incendie ou Risque d'explosion
Ne pas perforer le circuit frigorigène.
Suivre attentivement les instructions de manipulation.
Utilisation d’un liquide frigorigène inflammable.
Le non-respect de cette instruction peut causer un décès, une
explosion ou un incendie.
IMPORTANT : Manipuler le congélateur avec précautions lorsqu’il est déplacé soit
pour éviter d’endommager le circuit frigorigène, soit pour diminuer le risque de
fuites.
IMPORTANT : Lorsque le congélateur est déplacé, ne jamais l’incliner à plus de 45°.
Cela pourrait endommager le compresseur et le système scellé. Si le congélateur a
été placé en position horizontale pendant un moment, attendre 24 heures avant de
brancher le congélateur pour que le réfrigérant se remette en place.
1. Ôter et jeter/recycler tous les matériaux d’emballage. Ceci inclut le socle
en polystyrène et tout le ruban adhésif. Ôter tout l’emballage protecteur
recouvrant le congélateur.
2. Ôter le manuel d’utilisation et tout autre imprimé avant de mettre en marche le
congélateur.
3. Nettoyer la surface extérieure avec un chion doux.
24
Page 27

ÉTAPE 2 - FIN DE L’INSTALLATION
AVERTISSEMENT
Risque de choc électrique
Brancher sur une prise à 3 alvéoles reliée à la terre.
Ne pas enlever la broche de liaison à la terre du cordon d'alimentation.
Ne pas utiliser un adaptateur.
Ne pas utiliser un câble de rallonge.
Le non-respect de cette instruction pourrait causer un décès, un
incendie ou un choc électrique.
1. Brancher sur une prise de courant à 3 alvéoles, reliée à la terre.
2. Avec un niveau, vérier que le congélateur est d’aplomb transversalement et
d’avant en arrière. Corriger l'aplomb à l'aide d'une cale si nécessaire.
UTILISATION DU CONGÉLATEUR
COMMANDE
La commande, située à l'avant de la caisse du congélateur, est un bouton rotatif
réglable du niveau 1 (le moins froid) au niveau 7 (le plus froid), et la position d’arrêt.
1. Tourner le bouton rotatif de commande de température sur la position 4 (réglage
recommandé).
2. Laisser le congélateur refroidir pendant plusieurs heures avant d’y ajouter des
aliments.
OFF
7
6
5
1
2
3
4
25
Page 28

RÉGLAGE DE LA TEMPÉRATURE
Le réglage recommandé (4) est conçu pour maintenir la température à environ 0 °F
(-17,8 °C) dans des conditions de fonctionnement normales.
Pour régler la température du congélateur :
1. Régler le bouton rotatif de commande sur l'une des positions adjacentes 3
(moins froid) ou 5 (plus froid).
REMARQUE : Ne pas régler la commande de plus d'un réglage à la fois, sauf lors
de la mise en marche du congélateur.
2. Attendre 24 heures entre chaque réglage pour que la température du
congélateur puisse se stabiliser.
TÉMOIN D'ALIMENTATION - (SUR CERTAINS MODÈLES)
Le témoin d'alimentation s'allume lorsque le congélateur est convenablement
raccordé à l'alimentation électrique.
IMPORTANT: Tourner le bouton rotatif de commande en position OFF (arrêt)
ne débranche pas le congélateur de l’alimentation électrique. Même lorsque
le refroidissement est désactivé, le témoin d'alimentation reste allumé aussi
longtemps que le congélateur est raccordé à une prise électrique.
VERROU ET CLÉ DU CONGÉLATEUR
IMPORTANT :
Ranger la clé du congélateur à l'écart du congélateur dans un endroit hors de
•
portée des enfants.
Le trou de serrure est équipé d'un ressort ou d'un mécanisme équivalent; ainsi la
•
clé doit être maintenue manuellement dans le verrou quelle que soit sa position.
26
Page 29

Pour verrouiller/déverrouiller le congélateur :
Fermer le couvercle du congélateur, insérer la clé, l'enfoncer et verrouiller en
tournant la clé. Pour déverrouiller, insérer la clé, l'enfoncer et tourner la clé dans le
sens opposé.
PANIERS DE CONGÉLATEUR
Pour une plus grande souplesse de rangement, le congélateur est équipé de deux
paniers métalliques amovibles. Les paniers métalliques amovibles permettent
d'atteindre plus facilement les aliments consommés fréquemment.
ENTRETIEN DU CONGÉLATEUR
NETTOYAGE
AVERTISSEMENT
Risque d'explosion
Utiliser un produit de nettoyage ininflammable.
Le non-respect de cette instruction peut causer un décès, une
explosion ou un incendie.
IMPORTANT : Ne pas utiliser de produits chimiques corrosifs, d’ammoniaque,
d’agent de blanchiment, de détergents concentrés, de solvant ou de tampons
à récurer métalliques ou abrasifs pour nettoyer l’intérieur ou l’extérieur du
congélateur. Ceux-ci peuvent endommager et/ou décolorer le ni du congélateur.
27
Page 30

Risque de choc électrique
AVERTISSEMENT
Débrancher votre appareil ou déconnecter la source de courant
électrique avant de le nettoyer.
Le non-respect de cette instruction peut causer un décès, un choc
électrique ou blessures.
1. Débrancher le congélateur ou déconnecter la source de courant électrique.
2. Avant d’utiliser des produits de nettoyage, toujours lire et suivre les instructions
et avertissements du fabricant an d’éviter toute blessure ou dommage au
produit.
3. Laver les surfaces intérieures, les accessoires et le cadre extérieur à l’eau froide
avec un peu de bicarbonate de soude.
4. Sécher soigneusement avec un chion doux.
5. Brancher l’appareil ou reconnecter la source de courant électrique.
JOINTS D’ÉTANCHÉITÉ DE LA PORTE
Les joints doivent être maintenus propres et souples pour assurer une étanchéité
convenable.
Nettoyer les joints d’étanchéité de la porte tous les 3 mois avec une solution de
•
bicarbonate de soude et d’eau chaude.
Un peu de vaseline appliquée sur les joints côté charnière maintiendra la
•
souplesse du joint et garantira une bonne étanchéité.
28
Page 31

DÉGIVRAGE ET VIDANGE
DANGER
Incendie ou Risque d'explosion
Utilisation d’un liquide frigorigène inflammable.
Ne pas dégivrer le congélateur au moyen d’un quelconque dispositif
mécanique.
Ne pas perforer le circuit frigorigène.
Le non-respect de cette instruction peut causer un décès, une
explosion ou un incendie.
Pour un fonctionnement optimal et une consommation énergétique minimale,
eectuer un dégivrage lorsque la glace forme une couche de ” (6 mm) d’épaisseur.
IMPORTANT :
Ne pas dégivrer le congélateur à l’aide d’un instrument métallique.
•
Ne pas utiliser d’eau bouillante, car cela pourrait endommager le congélateur.
•
1. Tourner et placer la commande de température à OFFet débrancher le
congélateur.
REMARQUE : Le dégivrage prend généralement quelques heures. Pour accélérer
le dégivrage, garder la porte du congélateur ouverte.
2. Placer un plateau (non inclus) devant le congélateur, en-dessous de la bonde de
vidange extérieure pour récupérer l’eau. Retirer la bonde de vidange intérieure,
puis retirer la bonde de vidange extérieure en la dévissant pour laisser l'eau
s'écouler dans le récipient.
REMARQUE : L’eau qui s’est accumulée au fond du congélateur durant le
dégivrage va se vidanger dans le récipient. Surveiller le récipient durant la
vidange pour éviter tout débordement.
3. Lorsque le dégivrage est terminé, essuyer l’intérieur du congélateur avec un
chion doux et réinstaller la bonde de vidange.
29
Page 32

Risque de choc électrique
AVERTISSEMENT
Brancher sur une prise à 3 alvéoles reliée à la terre.
Ne pas enlever la broche de liaison à la terre du cordon d'alimentation.
Ne pas utiliser un adaptateur.
Ne pas utiliser un câble de rallonge.
Le non-respect de cette instruction pourrait causer un décès, un
incendie ou un choc électrique.
4. Brancher sur une prise de courant à 3 alvéoles, reliée à la terre.
5. Réinitialiser la commande de température au réglage souhaité.
6. Remettre les aliments en place dans le congélateur.
VACANCES ET DÉMÉNAGEMENT
AVERTISSEMENT
Incendie ou Risque d'explosion
Ne pas perforer le circuit frigorigène.
Suivre attentivement les instructions de manipulation.
Utilisation d’un liquide frigorigène inflammable.
Le non-respect de cette instruction peut causer un décès, une
explosion ou un incendie.
IMPORTANT : Le congélateur doit être manipulé avec précautions lorsqu’il est
déplacé soit pour éviter d’endommager le circuit frigorigène, soit pour diminuer le
risque de fuites.
IMPORTANT : Lorsque le congélateur est déplacé, ne jamais l’incliner à plus de 45°.
Cela pourrait endommager le compresseur et le système scellé.
30
Page 33

Lors de vacances ou d’une absence prolongée :
AVERTISSEMENT
Retirer les aliments du congélateur.
•
Placer la commande de température à la position d’arrêt.
•
Débrancher ou déconnecter la source de courant électrique.
•
Nettoyer les joints de la porte. Voir “Nettoyage”.
•
Bloquer la porte en position ouverte pour permettre à l’air de circuler à
•
l’intérieur.
RÉINSTALLATION/RÉUTILISATION DU CONGÉLATEUR
Si le congélateur a été placé en position horizontale ou inclinée pendant un moment,
attendre 24 heures avant de brancher le congélateur pour que le réfrigérant se
remette en place.
1. Nettoyer le congélateur. Voir “Nettoyage”.
2. Déplacer le congélateur à l'emplacement désiré. Vérier son aplomb et le
corriger à l'aide d'une cale si nécessaire.
Risque de choc électrique
Brancher sur une prise à 3 alvéoles reliée à la terre.
Ne pas enlever la broche de liaison à la terre du cordon d'alimentation.
Ne pas utiliser un adaptateur.
Ne pas utiliser un câble de rallonge.
Le non-respect de cette instruction pourrait causer un décès, un
incendie ou un choc électrique.
3. Brancher à une prise à trois alvéoles reliée à la terre.
31
Page 34

DÉPANNAGE
Essayer d’abord les solutions suggérées ici pour éviter le coût d’un appel de service.
PROBLÈME CAUSE(S) POSSIBLE(S) SOLUTION
Le congélateur ne
fonctionne pas
Le compresseur
se met en
marche trop
fréquemment
La température
des aliments est
trop chaude
Le congélateur est
débranché.
Le disjoncteur est ouvert
ou déclenché/un fusible
est grillé
La commande de
température est réglée
sur la position d’arrêt.
Le cycle du compresseur
n’est pas terminé.
La température est
élevée et/ou humide.
La porte du congélateur
est entrebâillée.
Le joint de la porte
ne se ferme pas
hermétiquement
Ouvertures fréquentes
ou prolongées de la
porte.
La porte du congélateur
est bloquée en position
ouverte.
La porte est ouverte
fréquemment.
Une grande quantité
d’aliments a été
récemment ajoutée.
La porte du congélateur
ne se ferme pas
hermétiquement.
La commande de
température n’a
pas été réglée à
une température
susamment froide.
Brancher le congélateur sur une
prise à 3 alvéoles reliée à la terre.
Réenclencher le disjoncteur ou
remplacer le fusible.
Régler la commande de
température sur une position
comprise entre 1 et 7.
Attendre 30 à 40 minutes pour
voir si le congélateur démarre.
Ceci peut être normal pour
maintenir une température
constante lorsqu’il fait chaud et
humide
Fermer complètement la porte
du congélateur.
Nettoyer le joint de la porte. Voir
“Nettoyage”.
Limiter les ouvertures de la porte
pour maintenir la température
interne du congélateur.
Repositionner ou retirer des
articles pouvant bloquer la porte
du congélateur en position
ouverte.
Limiter les ouvertures de la
porte.
Attendre que des aliments tièdes
qui viennent juste d’être ajoutés
refroidissent à la température du
congélateur.
Nettoyer le joint de la porte. Voir
“Nettoyage”.
Régler la commande de
température à un réglage plus
froid.
32
Page 35

PROBLÈME CAUSE(S) POSSIBLE(S) SOLUTION
La température
des aliments est
trop froide
Le congélateur a
une odeur
Gargouillement
Clics
La commande est placée
à un réglage trop froid.
Le congélateur doit être
nettoyé.
Les aliments n’ont
pas été correctement
emballés ou placés
dans des contenants
hermétiques et libèrent
des odeurs.
Le réfrigérant circule
dans les serpentins de
refroidissement.
La commande de
température fonctionne
par intermittence.
Régler la commande de
température à un réglage moins
froid.
Nettoyer le congélateur. Voir
“Nettoyage”.
Emballer et placer correctement
les aliments dans des contenants
hermétiques avant de les
entreposer dans le congélateur.
Ceci est normal.
Ceci est normal.
POUR OBTENIR DE L’AIDE SUPPLÉMENTAIRE, VISITER
HAIER.COM OU CONTACTER LA LIGNE D’ASSISTANCE À LA
CLIENTÈLE AU 1-877-337-3639.
33
Page 36

GARANTIE LIMITÉE
SERVICE APRÈS-VENTE EN MAGASIN
GARANTIE COMPLÈTE D’UN AN
12 mois sur les pièces et la main
d’œuvre
(service après-vente en magasin
uniquement)
5 ans sur le système scellé
(service après-vente en magasin
uniquement)
Pendant 12 mois à compter de la date
d’achat d’origine, Haier réparera ou
remplacera gratuitement n’importe quelle
pièce (main-d’œuvre comprise) comportant
un défaut de matériau ou de fabrication.
Haier peut choisir à sa seule discrétion
de remplacer ou réparer des pièces, des
sous-systèmes ou le produit tout entier.
GARANTIE LIMITÉE
REMARQUE : Cette garantie prend eet à la
date à laquelle l’article a été acheté et le reçu
de l’achat d’origine doit être présenté au
représentant de dépannage autorisé avant
qu’une quelconque réparation sous garantie
ne soit eectuée.
Exceptions : Garantie à usage commercial
90 jours sur la main-d’œuvre à compter de la
date d’achat d’origine
90 jours sur les pièces à compter de la date
d’achat d’origine
Aucune autre garantie ne s’applique.
POUR LE SERVICE APRÈS-VENTE
EN MAGASIN SOUS GARANTIE
Tout dépannage doit être eectué par un
centre de dépannage autorisé Haier. Pour le
nom et le numéro de téléphone du centre de
dépannage autorisé le plus proche de votre
domicile, composer le 1-877-337-3639.
Avant d’appeler le centre, veuillez garder à
disposition les renseignements suivants :
Numéros de plaque signalétique de
l’appareil. Le nom et l’adresse du revendeur
auprès duquel vous avez acheté l’appareil,
ainsi que la date d’achat.
Une description claire du problème
rencontré.
Une preuve d’achat (reçu de vente).
Cette garantie est valable pour le service
des appareils domestiques aux États-Unis
contigus et au Canada et lorsque le service
est disponible, en Alaska, à Hawaï et Porto
Rico.
Cette garantie ne couvre pas :
Le remplacement ou la réparation des
fusibles, disjoncteurs, du câblage ou du
circuit de plomberie du domicile.
34
Un produit dont le numéro de série d’origine
a été enlevé ou modié.
Tous les frais de dépannage non identiés
comme étant normaux tel un dépannage
dans une zone ou une tranche horaire
normale.
Les dommages liés à l’expédition.
Les dommages liés à une installation ou un
entretien inadapté.
Les dommages causés par l’un des éléments
suivants : mauvaise utilisation, utilisation
abusive, accident, incendie, inondation ou
castastrophe naturelle.
Les dommages résultant d’un dépannage
fourni par une entité autre qu’un revendeur
ou centre de dépannage autorisé Haier.
Les dommages causés par un courant, une
tension ou une alimentation électrique
incorrects.
Les dommages résultant d’une quelconque
modication ou altération du produit ou d’un
ajustement non autorisé par Haier.
Un ajustement des commandes utilisées
par le consommateur tel qu’identié dans le
manuel de l’utilisateur.
Tout accessoire ou pièce jetable.
Les frais de main-d’œuvre, de transport pour
dépannage et d’expédition pour le retrait et
le remplacement de pièces défectueuses audelà de la période de 12 mois.
Les dommages liés à une utilisation autre
qu’une utilisation domestique normale.
Tout frais de transport et d’expédition.
CETTE GARANTIE LIMITÉE REMPLACE TOUTE
AUTRE GARANTIE EXPRESSE OU IMPLICITE,
Y COMPRIS, MAIS PAS SEULEMENT, LES
GARANTIES DE QUALITÉ MARCHANDE OU
D’APTITUDE À UN USAGE PARTICULIER.
Le recours oert dans cette garantie
est exclusif et se substitue à toute autre
garantie.
Cette garantie ne couvre pas les dommages
fortuits ou indirects; aussi les limitations
décrites ci-dessus peuvent ne pas
s’appliquer à votre cas. Certains États ne
permettent pas de limitation sur la durée
d’une garantie implicite, aussi les limitations
décrites ci-dessus peuvent ne pas
s’appliquer à votre cas.
Cette garantie vous confère des droits
juridiques spéciques. Vous pouvez
également jouir d’autres droits qui peuvent
varier d’un État à l’autre.
Haier America
Wayne, NJ 07470
Page 37

ÍNDICE
SEGURIDAD DEL CONGELADOR ....................................................................... 36
PIEZAS Y CARACTERÍSTICAS ...........................................................................39
REQUISITOS DE INSTALACIÓN ......................................................................... 40
Requisitos de ubicación ...............................................................................................40
Requisitos eléctricos ...................................................................................................41
INSTALACIÓN DEL CONGELADOR .................................................................. 42
Paso 1 - Cómo desempacar el congelador .................................................................42
Paso 2 - Completar la instalación ..............................................................................43
USO DEL CONGELADOR ................................................................................... 43
Control .........................................................................................................................43
Bloqueo y llave del congelador ....................................................................................44
Canastillas del congelador .........................................................................................45
CUIDADO DEL CONGELADOR .......................................................................... 45
Limpieza .......................................................................................................................45
Descongelamiento y desagüe.....................................................................................47
Vacaciones y mudanza ................................................................................................48
Cómo volver a instalar o usar el congelador nuevamente ........................................49
SOLUCIÓN DE PROBLEMAS .............................................................................. 50
GARANTÍA LIMITADA ........................................................................................ 52
INFORMACIÓN A TENER EN CUENTA
Le agradecemos la compra de este
producto de marca Haier. Este manual
para el usuario le ayudará a obtener
el mejor funcionamiento de su nuevo
congelador.
Para referencia futura, anote el número
de modelo y de serie y la fecha de
compra. La placa con el número de
modelo o de serie está ubicada en una
etiqueta dentro del congelador.
Engrape la prueba de compra de este
manual para asistirle cuando necesite
obtener servicio bajo la garantía.
___________________________________
Número de modelo
___________________________________
Número de serie
___________________________________
Fecha de compra
35
Page 38

SEGURIDAD DEL CONGELADOR
Su seguridad y la seguridad de los demás es muy importante.
Hemos incluido muchos mensajes importantes de seguridad en este
manual y en su electrodoméstico. Lea y obedezca siempre todos los
mensajes de seguridad.
Este es el símbolo de advertencia de seguridad.
Este símbolo le llama la atención sobre peligros
potenciales que pueden ocasionar la muerte o una
lesión a usted y a los demás. Todos los mensajes de
seguridad irán a continuación del símbolo de
advertencia de seguridad y de la palabra “PELIGRO”,
“ADVERTENCIA” o “PRECAUCIÓN”.
Estas palabras significan:
Se trata de una situación de
PELIGRO
ADVERTENCIA
PRECAUCIÓN
Todos los mensajes de seguridad le dirán el peligro potencial, le dirán
cómo reducir las posibilidades de sufrir una lesión y lo que puede
suceder si no se siguen las instrucciones.
peligro inminente. Si no sigue las
instrucciones de inmediato,
usted puede morir o sufrir una
lesión grave.
Se trata de una situación
posiblemente peligrosa que, de
no evitarse, podría causar la
muerte o una lesión grave.
Se trata de una situación
posiblemente peligrosa que, de
no evitarse, podría causar
lesiones moderadas o leves.
36
Page 39

INSTRUCCIONES IMPORTANTES
DE SEGURIDAD
ADVERTENCIA: Para reducir el riesgo de incendio, choque eléctrico,
lesiones a personas o daños al utilizar el congelador, siga precauciones
básicas, incluyendo las siguientes:
Use este aparato solamente
•
para el propósito que fue
diseñado, como se describe
en este manual para el
usuario.
Antes de usar este
•
congelador, deberá ser
debidamente instalado de
acuerdo con las instrucciones
de instalación. Consulte las
instrucciones de puesta
a tierra en la sección de
instalación.
El refrigerante usado
•
es inamable. No use
dispositivos mecánicos para
descongelar el congelador. No
perfore el tubo refrigerante.
El refrigerante usado es
•
inamable. Únicamente,
personal de servicio
capacitado deberá realizar las
reparaciones necesarias. No
perfore el tubo refrigerante.
El refrigerante usado es
•
inamable. Deshágase del
aparato de acuerdo con
las normativas federales o
locales.
El refrigerante usado
•
es inamable. Siga con
cuidado las instrucciones de
manipulación. Existe riesgo
de incendio o explosión por
una perforación del tubo
refrigerante.
Enchufe en un contacto
•
de conexión a tierra de 3
terminales.
No quite el terminal de
•
conexión a tierra.
No utilice un adaptador.
•
No utilice un cable eléctrico
•
de extensión.
No repare ni reemplace
•
ningún componente del
aparato a menos que se
recomiende especícamente
en el manual. Todas las demás
tareas de mantenimiento
deben ser realizadas por un
técnico calicado.
Desconecte el suministro
•
de energía antes de realizar
tareas de mantenimiento.
Vuelva a colocar todas las
•
piezas y paneles antes de
poner en marcha.
Utilice un limpiador no
•
inamable.
Mantenga los materiales y
•
vapores inamables, tales
como gasolina, alejados del
congelador.
Los bordes del gabinete a lo
•
largo de las zonas de recorte
pueden ser losos. Evite
colocar las manos, dedos u
otras extremidades cerca de
estas zonas.
37
Page 40

INSTRUCCIONES IMPORTANTES
ADVERTENCIA
DE SEGURIDAD
Este congelador no debe ser
•
empotrado ni integrado a un
armario cerrado. Se diseñó
únicamente para instalarse de
forma independiente.
Antes de desechar o dejar de
•
utilizar el aparato, quítele la
puerta. Esto evitará que los
niños se lastimen.
LEA Y GUARDE ESTAS
INSTRUCCIONES
CÓMO DESHACERSE ADECUADAMENTE DE SU APARATO
REFRIGERADOR VIEJO
Peligro de asfixia
Remueva las puertas o la tapa de tu viejo congelador o refrigerador.
No seguir esta instrucción puede ocasionar la muerte o daño al
cerebro.
IMPORTANTE: El atrapamiento y asxia de niños no es un problema del pasado. Un
aparato refrigerador desechado y abandonado es un peligro, aun si va a quedar ahí
“por unos pocos días”. Si usted está por deshacerse de su aparato refrigerador viejo,
siga las instrucciones a continuación para evitar accidentes.
Antes de descartar su aparato refrigerador viejo:
Quite la puerta o la tapa.
•
Deje los estantes en su lugar así los niños no pueden meterse adentro con
•
facilidad.
Información importante para saber acerca del desecho de refrigerantes:
Deshágase del congelador siguiendo los reglamentos federales y locales.
Los refrigerantes deberán ser evacuados por un técnico certicado en
refrigeración por EPA (Agencia de protección del medioambiente) según los
procedimientos establecidos.
38
Page 41

PIEZAS Y CARACTERÍSTICAS
f
a
b
d
e
c
a Bloqueo con llave (solo modelo
HF71CL53NW)
b Tapón de desagüe interno
(no se muestra - ver inserto)
c Canasta de alambre con
revestimiento de vinilo
d Indicador de encendido -luz
verde (en algunos modelos)
e Ajuste del control de temperatura
f Tapón de desagüe externo
39
Page 42
REQUISITOS DE INSTALACIÓN
ADVERTENCIA
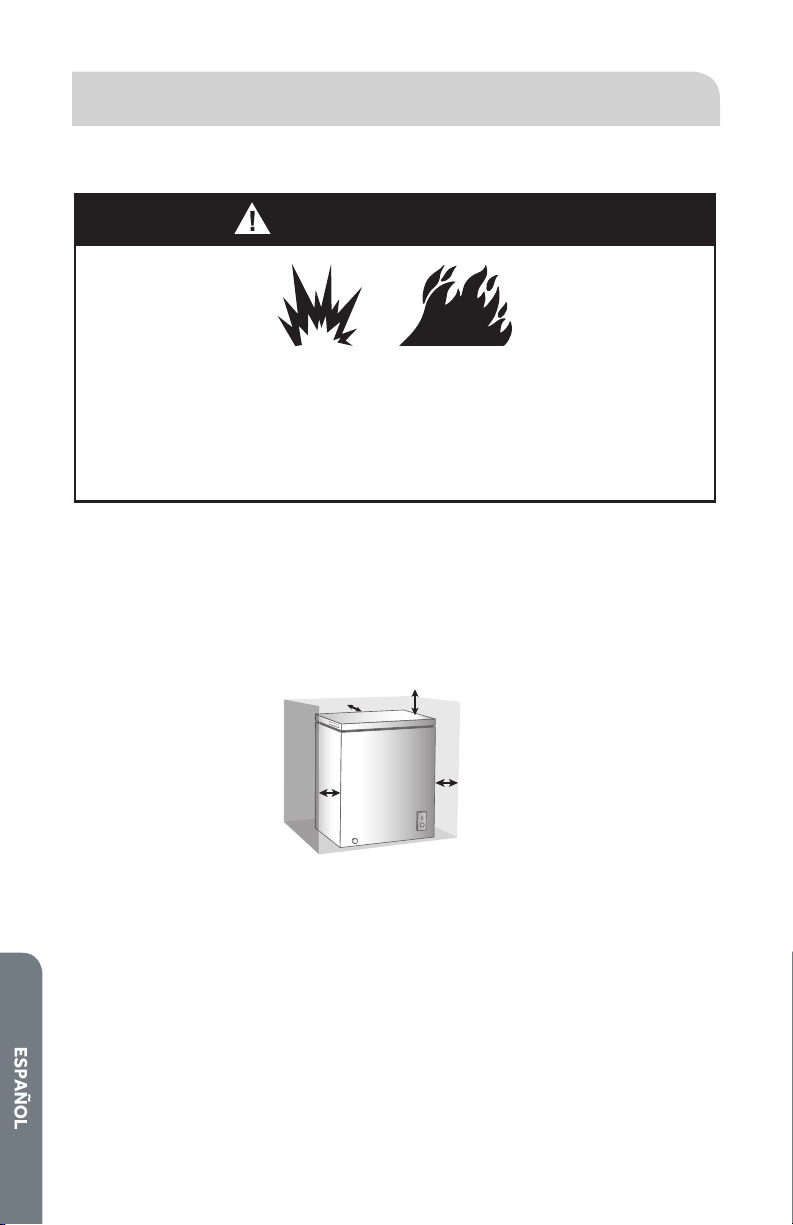
REQUISITOS DE UBICACIÓN
Peligro de Explosión o Incendio
Mantenga los materiales y vapores inflamables, tales como gasolina,
alejados del aparato.
No seguir esta instrucción puede ocasionar la muerte, explosión, o
incendio.
IMPORTANTE: Este congelador se ha diseñado para instalarse de forma
independiente únicamente. No debe estar empotrado ni integrado en un armario
cerrado. Para asegurarse de que el congelador funciona con la máxima eciencia,
lo debe instalar en una ubicación donde haya circulación de aire y conexiones
eléctricas adecuadas.
Espacios libres recomendados:
4"
(10,2 cm)
4"
(10,2 cm)
No instale el congelador en cualquier ubicación que no esté correctamente
•
aislada o climatizada como un garage. El congelador no fue diseñado para
funcionar en ajustes de temperatura por debajo de 55 °F (13 °C).
Seleccione una ubicación adecuada para el congelador en una supercie sólida
•
y nivelada alejada de la luz solar directa o una fuente de calor, por ej. radiadores,
zócalos radiantes, aparatos de cocción, etc. Debe corregir cualquier desnivel en
el piso.
Coloque el congelador sobre un piso que sea lo sucientemente fuerte como
•
para soportar el peso cuando esté completamente cargado.
40
No bloquee
la parte
superior
4"
(10,2 cm)
Page 43

REQUISITOS ELÉCTRICOS
ADVERTENCIA
Peligro de Choque Eléctrico
Conecte a un contacto de pared de conexión a tierra de 3 terminales.
No quite el terminal de conexión a tierra del cable de alimentación.
No use un adaptador.
No use un cable eléctrico de extensión.
No seguir estas instrucciones puede ocasionar la muerte, incendio o
choque eléctrico.
Antes de mover el congelador a su ubicación, es importante asegurarse de que tiene
la conexión eléctrica adecuada.
Método de conexión a tierra recomendado
Se requiere una fuente de energía eléctrica de 115 Voltios, 60 Hz, CA solamente
y con fusibles de 15 amperios, debidamente conectados a tierra. Se recomienda
utilizar un circuito separado sólo para su congelador. Use un tomacorriente que no
se pueda apagar con un interruptor. No use un cable eléctrico de extensión.
41
Page 44
INSTALACIÓN DEL CONGELADOR
ADVERTENCIA
PASO 1 - CÓMO DESEMPACAR EL CONGELADOR
Peligro de Explosión o Incendio
No perfore el tubo refrigerante.
Siga con cuidado las instrucciones de manipulación.
El refrigerante usado es inflamable.
No seguir esta instrucción puede ocasionar la muerte, explosión, o
incendio.
IMPORTANTE: Tenga cuidado al mover el congelador para evitar dañar el tubo
refrigerante o aumentar el riesgo de fuga.
IMPORTANTE: Cuando mueva el congelador, nunca lo incline a un ángulo superior
a 45°. Podría dañar el compresor y el sistema sellado. Si ha colocado el congelador
en posición horizontal sin importar el período de tiempo, espere 24 horas antes de
enchufarlo para que se asiente el refrigerante.
1. Quite y deseche todos los materiales de embalaje o recíclelos. Esto incluye
la base de espuma y toda la cinta adhesiva. Quite el embalaje protector que
recubre el congelador.
2. Quite el manual para el usuario y cualquier otro material impreso antes de
encender el congelador.
3. Limpie la supercie exterior con un paño suave.
42
Page 45

PASO 2 - COMPLETAR LA INSTALACIÓN
ADVERTENCIA
Peligro de Choque Eléctrico
Conecte a un contacto de pared de conexión a tierra de 3 terminales.
No quite el terminal de conexión a tierra del cable de alimentación.
No use un adaptador.
No use un cable eléctrico de extensión.
No seguir estas instrucciones puede ocasionar la muerte, incendio o
choque eléctrico.
1. Enchufe el aparato a un tomacorriente de 3 terminales con conexión a tierra.
2. Con un nivel de carpintero, cerciórese de que el congelador esté nivelado de lado
a lado y de frente hacia atrás. Coloque una cuña si es necesario.
USO DEL CONGELADOR
CONTROL
El control, ubicado en la frente del gabinete del congelador, es un cuadrante
regulable con ajustes que oscilan desde 1 (menos frío) hasta 7 (más frío), y OFF.
1. Gire el cuadrante de control de temperatura a 4 (ajuste recomendado).
2. Deje que el congelador se enfríe durante algunas horas antes de agregar
alimentos.
OFF
7
6
5
1
2
3
4
43
Page 46

CÓMO REGULAR LA TEMPERATURA
El ajuste recomendado (4) se diseñó para mantener la temperatura en 0 °F (-17,8 °C)
o cercana a esta, bajo condiciones normales de funcionamiento.
Para regular la temperatura del congelador:
1. Ajuste el cuadrante de control a uno de los ajustes adyacentes, 3 (menos frío) o
5 (más frío).
NOTA: No ajuste el control en más de un ajuste por vez, excepto cuando
encienda el congelador.
2. Espere 24 horas entre los ajustes para que se estabilice la temperatura del
congelador.
INDICADOR DE ENCENDIDO (EN ALGUNOS MODELOS)
El indicador de encendido se ilumina cuando el congelador está correctamente
conectado al suministro eléctrico.
IMPORTANTE: Al girar el cuadrante de control hacia OFF (Apagado), el congelador
no se desconecta del suministro de energía. Aun cuando Cooling (Enfriamiento) esté
apagado, el indicador de encendido permanecerá iluminado mientras el congelador
esté enchufado en el tomacorriente.
BLOQUEO Y LLAVE DEL CONGELADOR
IMPORTANTE:
Guarde la llave del congelador en un lugar alejado de este y que no esté al
•
alcance de los niños.
La ranura de la llave tiene un mecanismo de resorte o equivalente para que la
•
llave se pueda mantener manualmente en la cerradura en cualquier posición de
esta.
44
Page 47

Para bloquear/desbloquear el congelador:
Cierre la tapa del congelador, inserte la llave, empuje hacia adentro y gire la llave para
bloquear. Para desbloquear, inserte la llave, empuje hacia adentro y gire la llave en
dirección opuesta.
CANASTILLAS DEL CONGELADOR
Para una mayor exibilidad en el almacenamiento, su congelador viene con dos
canastillas de alambre removibles. Las canastillas del congelador removibles
permiten un mejor acceso a los alimentos que se utilizan con frecuencia.
CUIDADO DEL CONGELADOR
LIMPIEZA
ADVERTENCIA
Peligro de Explosión
Use un limpiador no inflamable.
No seguir esta instrucción puede ocasionar la muerte, explosión o
incendio.
IMPORTANTE: No use productos químicos fuertes, amoníaco, blanqueador con
cloro, detergente concentrado, solventes o estropajos de metal o abrasivos para
limpiar su congelador por dentro o por fuera. Estos pueden dañar o decolorar el
acabado del congelador.
45
Page 48

Peligro de choque eléctrico
ADVERTENCIA
Desenchufe el aparato o desconecte el suministro de energía antes de
limpiarlo.
No seguir esta instrucción puede ocasionar la muerte, choque eléctrico
o daños personales.
1. Desenchufe el congelador o desconecte el suministro de energía.
2. Antes de usar productos de limpieza, siempre lea y siga las instrucciones del
fabricante y las advertencias para evitar lesiones físicas o daños al producto.
3. Lave las supercies interiores, los accesorios y el marco exterior con agua fría y
un poco de bicarbonato de sodio.
4. Seque bien con un paño suave.
5. Enchufe o vuelva a conectar el suministro de energía.
JUNTAS DE LA PUERTA
Las juntas deben mantenerse limpias y exibles para asegurar un sellado adecuado.
Limpie las juntas de la puerta cada 3 meses con una solución de bicarbonato de
•
sodio y agua tibia.
El petrolato ligeramente aplicado en el lado de las bisagras de las juntas
•
mantendrá la junta exible y asegurará un buen sellado.
46
Page 49

DESCONGELAMIENTO Y DESAGÜE
PELIGRO
Peligro de Explosión o Incendio
El refrigerante usado es inflamable.
No utilice dispositivos mecánicos para descongelar el congelador.
No perfore el tubo refrigerante.
No seguir esta instrucción puede ocasionar la muerte, explosión, o
incendio.
Para un funcionamiento más ecaz y menor consumo de energía, descongele el
congelador cuando se acumule una cantidad aproximada de hielo de ¼” (6 mm) de
espesor.
IMPORTANTE:
No utilice instrumentos metálicos para descongelar el congelador.
•
No utilice agua hirviendo ya que podría dañar el congelador.
•
1. Gire el control de la temperatura a OFF y desenchufe la congelador.
NOTA: En general, el descongelamiento puede tardar algunas horas. Para
descongelar más rápido, mantenga la puerta del congelador abierta.
2. Coloque una bandeja (no incluida) frente al congelador, debajo del tapón de
desagüe exterior para recolectar el agua. Retire el tapón de desagüe del interior
y quite (desatornille) el exterior del tapón de desagüe para permitir que el agua
uya hacia la bandeja.
NOTA: El agua acumulada en la parte inferior del congelador durante el
descongelamiento desaguará dentro de la bandeja. Controle el recipiente debajo
del desagüe para evitar derrames.
3. Cuando la descongelación se haya completado, limpie el interior del congelador
con un paño suave y reemplace el tapón de desagüe.
47
Page 50

ADVERTENCIA
Peligro de Choque Eléctrico
ADVERTENCIA
Conecte a un contacto de pared de conexión a tierra de 3 terminales.
No quite el terminal de conexión a tierra del cable de alimentación.
No use un adaptador.
No use un cable eléctrico de extensión.
No seguir estas instrucciones puede ocasionar la muerte, incendio o
choque eléctrico.
4. Enchufe el aparato a un tomacorriente de 3 terminales con conexión a tierra.
5. Vuelva a jar el control de temperatura en la posición que desee.
6. Vuelva a colocar los alimentos en el congelador.
VACACIONES Y MUDANZA
Peligro de Explosión o Incendio
No perfore el tubo refrigerante.
Siga con cuidado las instrucciones de manipulación.
El refrigerante usado es inflamable.
No seguir esta instrucción puede ocasionar la muerte, explosión, o
incendio.
IMPORTANTE: Tenga cuidado al mover el congelador para evitar dañar el tubo
refrigerante o aumentar el riesgo de fuga.
IMPORTANTE: Cuando mueva el congelador, nunca lo incline a un ángulo superior a
45°. Podría dañar el compresor y el sistema sellado.
48
Page 51

En el caso de ausencias o vacaciones prolongadas:
ADVERTENCIA
Retire los alimentos del congelador.
•
Gire el control hacia la OFF.
•
Desenchufe o desconecte el suministro de energía.
•
Limpie las juntas de la puerta. Vea “Limpieza”.
•
Abra las puertas para permitir la circulación del aire dentro del congelador.
•
CÓMO VOLVER A INSTALAR O USAR EL CONGELADOR
NUEVAMENTE
Si ha colocado el congelador en posición horizontal o inclinada sin importar el
período de tiempo, espere 24 horas antes de enchufarlo para que se asiente el
refrigerante.
1. Limpie el congelador. Vea “Limpieza”.
2. Mueva el congelador a la ubicación deseada. Verique el nivel y coloque una
cuña, si es necesario.
Peligro de Choque Eléctrico
Conecte a un contacto de pared de conexión a tierra de 3 terminales.
No quite el terminal de conexión a tierra del cable de alimentación.
No use un adaptador.
No use un cable eléctrico de extensión.
No seguir estas instrucciones puede ocasionar la muerte, incendio o
choque eléctrico.
3. Enchufe el aparato a un tomacorriente de 3 terminales con conexión a tierra.
49
Page 52

SOLUCIÓN DE PROBLEMAS
Pruebe las soluciones sugeridas aquí y posiblemente se evite el gasto de una
visita de servicio técnico.
PROBLEMA POSIBLE(S) CAUSA(S) SOLUCIÓN
El congelador no
funciona
El compresor
funciona con
demasiada
frecuencia
La temperatura
de los alimentos
está demasiado
elevada
El congelador está
desenchufado.
Se ha disparado o
se ha apagado el
cortacircuitos/Se ha
quemado un fusible.
El control de
temperatura se
encuentra en OFF.
El ciclo del compresor no
ha terminado.
La temperatura es
elevada o hay humedad.
La puerta del congelador
está entreabierta.
La junta de la puerta no
sella correctamente.
La puerta se abre con
frecuencia o durante
períodos prolongados.
La puerta del congelador
queda abierta debido a
un bloqueo.
La puerta se abre con
frecuencia.
Se ha agregado
recientemente una gran
cantidad de alimentos.
La puerta del congelador
no sella correctamente.
El control no se jó en
una temperatura lo
sucientemente fría.
Enchufe el congelador a un
tomacorriente de 3 terminales
con conexión a tierra.
Reinicie/encienda el
cortacircuitos o reemplace el
fusible.
Gire el control de temperatura a
un ajuste entre 1 y 7.
Espere 30 a 40 minutos para
vericar si el congelador
funciona.
Esto puede ser normal para
mantener la temperatura
constante en los días húmedos y
de altas temperaturas.
Cierre completamente la puerta
del congelador.
Limpie la junta de la puerta. Vea
“Limpieza”.
Disminuya la cantidad de veces
que abre la puerta para mantener
la temperatura interna del
congelador.
Acomode o quite alimentos que
bloquean la abertura de la puerta
del congelador.
Disminuya la cantidad de veces
que abre la puerta.
Si agregó alimentos tibios
recientemente, espere a que
se enfríen a la temperatura del
congelador.
Limpie la junta de la puerta. Vea
“Limpieza”.
Regule el control de temperatura
a un ajuste más frío.
50
Page 53

PROBLEMA POSIBLE(S) CAUSA(S) SOLUCIÓN
La temperatura
de los alimentos
está demasiado
fría
El congelador
tiene mal olor
Sonido de
gorgoteo
Chasquidos
El control se ha jado en
un ajuste demasiado frío.
El congelador necesita
limpieza.
Los alimentos están
envueltos o sellados de
manera inadecuada y
emanan olores.
Hay refrigerante
circulando en el
serpentín de
enfriamiento.
El control de
temperatura se enciende
y se apaga.
Regule el control de temperatura
a un ajuste menos frío.
Limpie el congelador. Vea
“Limpieza”.
Envuelva y selle bien los
alimentos antes de guardarlos en
el congelador.
Este sonido es normal.
Este sonido es normal.
SI NECESITA MÁS AYUDA, VISITE HAIER.COM O COMUNÍQUESE
CON LA LÍNEA DE AYUDA AL CONSUMIDOR LLAMANDO AL
1-877-337-3639.
51
Page 54

GARANTÍA LIMITADA
SERVICIO PARA LLEVAR
GARANTÍA COMPLETA POR UN AÑO
12 meses en piezas y mano de obra
(llevar sólo)
5 años en el sistema de sellado
(llevar sólo)
Durante 12 meses a partir de la fecha de
compra original en la tienda, Haier reparará o
reemplazará cualquier pieza del aparato sin
costo, incluyendo la mano de obra, si la misma
falla debido a defectos en los materiales o en la
mano de obra.
Haier puede reemplazar o reparar, a su sola
discreción, cualquier pieza, subsistema, incluso
el producto entero.
GARANTÍA LIMITADA
NOTA: Esta garantía comienza en la fecha
de compra de este producto, y el recibo
original deberá presentarse al representante
autorizado de servicio antes de hacerse las
reparaciones bajo la garantía.
Excepciones: Garantía bajo uso comercial
90 días en la mano de obra a partir de la
fecha de compra original
90 días en las piezas a partir de la fecha de
compra original
No es aplicable ninguna otra garantía.
PARA OBTENER SERVICIO PARA
LLEVAR BAJO LA GARANTÍA
Todo servicio deberá ser realizado por un
centro de servicio autorizado por Haier.
Para obtener el nombre y el número de
teléfono del centro de servicio autorizado
más cercano, llame al 1-877-337-3639.
Antes de llamar, tenga a mano la siguiente
información:
Número de modelo y de serie del aparato.
El nombre y la dirección del distribuidor
en donde compró la unidad y la fecha de
compra.
Una descripción clara del problema.
Un comprobante de compra (recibo de
compra).
Esta garantía cubre servicios para llevar
para electrodomésticos dentro de los
Estados Unidos continental y Canadá y
donde esté disponible en Alaska, Hawaii y
Puerto Rico.
Lo que no está cubierto bajo esta garantía:
Reemplazo o reparación de fusibles
domésticos, cortacircuitos, cableado o
plomería.
52
Un producto cuyo número de serie original
haya sido removido o alterado.
Cualquier cargo por servicio que no haya
sido identicado especícamente como
servicio normal, como puede ser el área o
las horas de servicio.
Daños ocurridos durante el transporte.
Daños ocasionados por la instalación o el
mantenimiento inadecuados.
Daños por el uso incorrecto, abuso,
accidente, incendio, inundación o
fenómenos de la naturaleza.
Daños debidos al servicio efectuado por
un distribuidor o centro de servicio que
sea diferente del autorizado por Haier.
Daños ocasionados por la corriente,
el voltaje o el suministro eléctrico
incorrectos.
Daños que resulten de cualquier
modicación hecha en el producto,
alteración o ajustes no autorizados por
Haier.
Ajuste de los controles manejados por el
cliente según han sido identicados en el
manual del propietario.
Todos los aditamentos, accesorios y
piezas desechables.
Cargos por mano de obra, transporte para
el servicio y envío para la remoción y el
reemplazo de las piezas defectuosas que
se efectúen después del período inicial de
12 meses.
Daños ocasionados por un uso diferente al
doméstico normal.
Cualquier gasto de transporte y de envío.
ESTA GARANTÍA LIMITADA REEMPLAZA
TODAS LAS OTRAS GARANTÍAS,
EXPRESAS O IMPLÍCITAS QUE INCLUYAN,
ENTRE OTRAS, LAS GARANTÍAS DE
COMERCIABILIDAD O DE CAPACIDAD
PARA UN PROPÓSITO EN PARTICULAR
El recurso provisto en esta garantía es
exclusivo y está otorgado en lugar de
cualquier otro recurso.
Esta garantía no cubre daños incidentales
o consecuentes, de modo que las
limitaciones indicadas anteriormente
pueden no aplicarse en su caso. Algunos
estados no permiten las limitaciones
acerca de cuánto tiempo dura una garantía
implícita, de modo que las limitaciones
arriba indicadas quizás no le correspondan.
Esta garantía le otorga derechos legales
especícos, y es posible que usted tenga
otros derechos, los cuales varían de un
estado a otro.
Haier America
Wayne, NJ 07470
Page 55

Page 56

IMPORTANT
Do Not Return This Product To The Store
If you have a problem with this product, please contact the
“Haier Customer Satisfaction Center” at
DATED PROOF OF PURCHASE, MODEL #, AND SERIAL #
REQUIRED FOR WARRANTY SERVICE
1-877-337-3639.
IMPORTANT
Ne pas Réexpédier ce Produit au Magasin
Pour tout problème concernant ce produit, veuillez contacter
le service des consommateurs “Haier Customer Satisfaction Center” au
1-877-337-3639.
PREUVE D'ACHAT DÁTÉE, NUMÉRO DE MODÈLE ET LE NUMÉRO DE SÉRIE
REQUIS POUR LE SERVICE DE GARANTIE
IMPORTANTE
No regrese este producto a la tienda
Si tiene algún problema con este producto, por favor contacte el
“Centro de Servicio al Consumidor de Haier” al
1-877-337-3639 (Válido solo en E.U.A).
NECESITA UNA PRUEBA DE COMPRA FECHADA, NÚMERO DE MODELO
Y DE SERIE PARA EL SERVICIO DE LA GARANTÍA
Made in China
Fabriqué en Chine
Hecho en China
HFC3501ACW, HF50CW20W
HF50CM23NW, HF71CW20W
HF71CM33NW, HF71CL53NW
Issued: November 2015 Printed in China Part # 0570000226 REV A
Haier America
Wayne, NJ 07470
 Loading...