

Page 1
Instruction Sheet
USB Installation and Operation
Safety
To ensure that the protection provided by this equipment is not impaired, do not use or install
this equipment in any manner other than that specified in this document.
This symbol, if noted on the instrument, references the instruction manual for operation and/or safety information.
Electrical equipment marked with this symbol may not be disposed of in European public disposal systems after 12
August 2005. In conformity with European local and national regulations (EU Directive 2002/96/EC), European
electrical equipment users must now return old or end-of life equipment to the Producer for disposal at no charge to
the user.
Note: For return for recycling, please contact the equipment producer or supplier for instructions on how to return
end-of-life equipment, producer-supplied electrical accessories, and all auxiliary items for proper disposal.
DOC306.53.00780
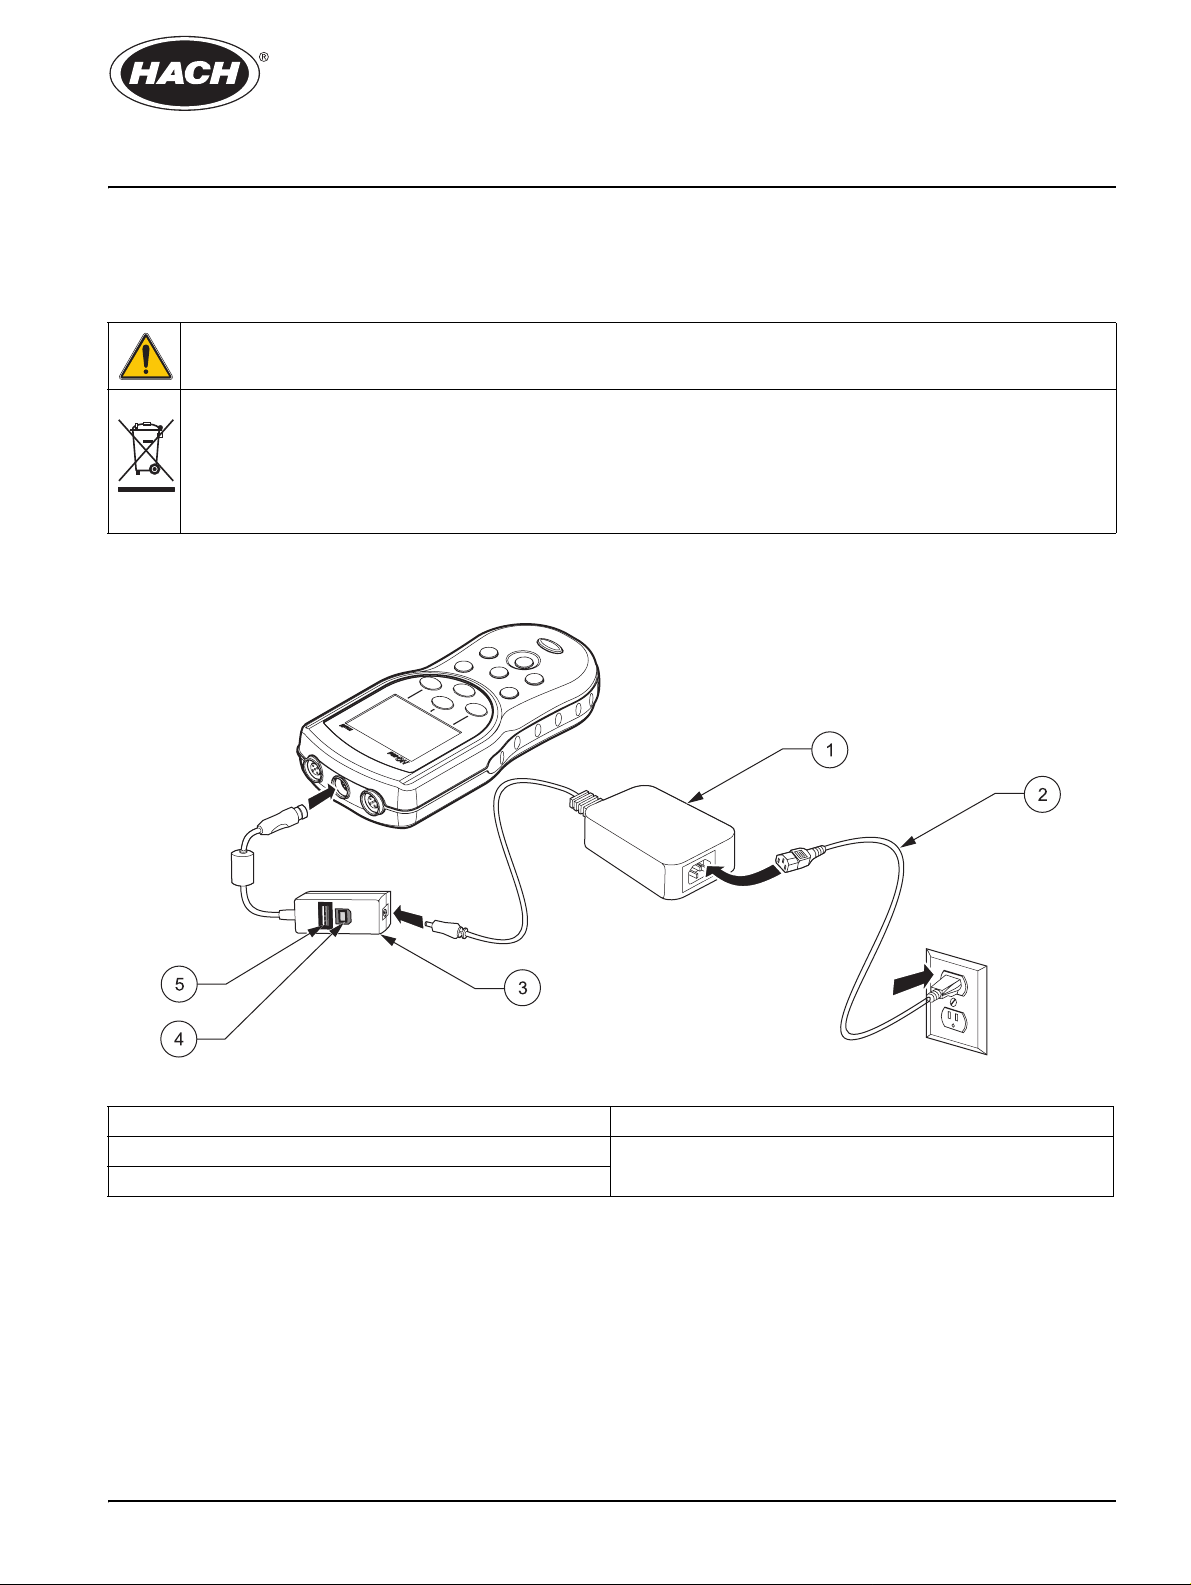
Figure 1 Components for HQ Meter Software Upgrade
1 AC-DC Power Supply 4 Personal Computer Port
2 Power Cord 5 Flash Upgrade Port
3 USB/DC Power Adapter
Transferring data
Note: If the response time is slow when transferring data, reformat the flash memory stick or computer to
use the file allocation table (FAT 16 or 32) format.
Data can be transferred to a printer, flash memory stick or printer using the USB connector on
the HQd USB/DC adapter . The mete r must be power ed up af te r being co nnected to AC power
for data transfer to occur.
1
Page 2
USB Installation and Operation
Sending data to a printer or flash memory stick
1. Connect the HQd meter to an electrical outlet using the
USB/DC power adapter.
2. Connect the printer cable or flash memory stick to the
USB - Peripheral
peripheral USB connector on the USB/DC power adapter. Turn
the meter on.
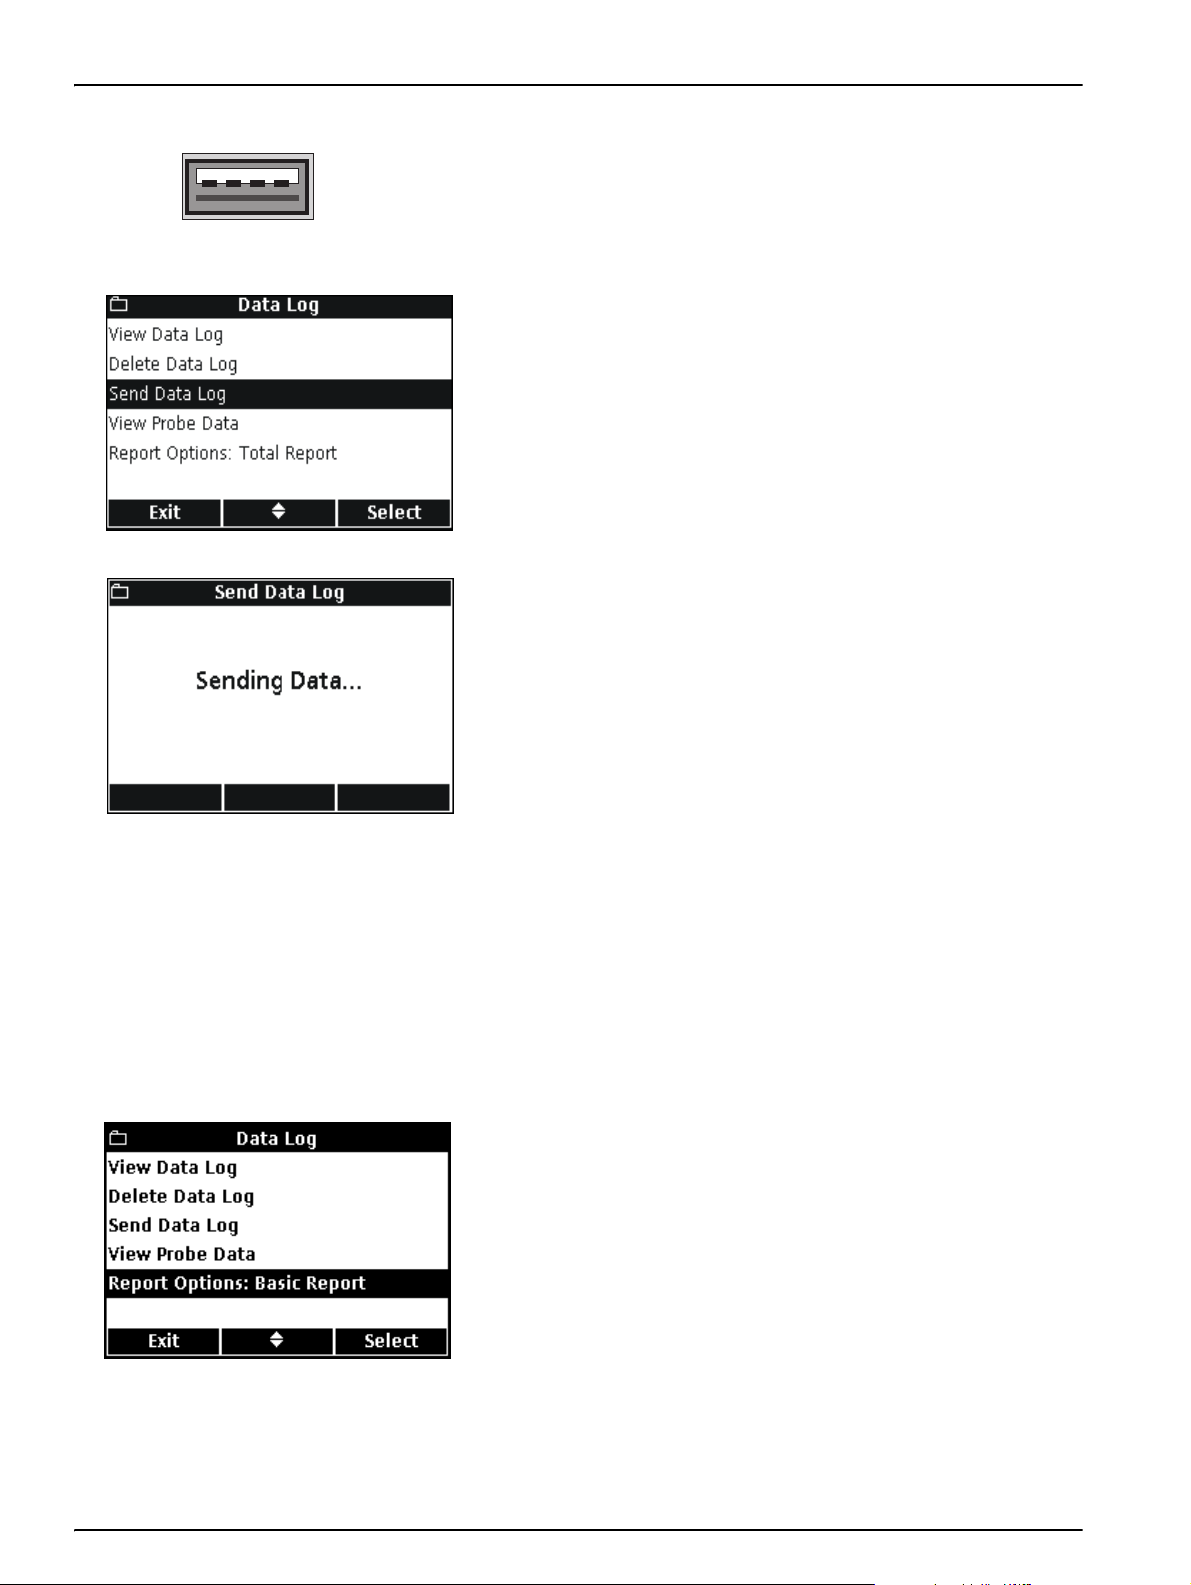
3. Press the
4. Use the
the
DATA LOG key on the HQd meter.
UP and DOWN keys to highlight Send Data Log. Press
GREEN/RIGHT key under Select.
5. The display will show “Sending Data” to indicate that the data
are being stored to the flash memory stick or sent to the printer.
All measurement data, calibration data and check standard
results will be printed at the level of detail selected under
Report Options.
Important Note: The HQd meter can connect directly to a USB
compatible 72-column page printer.
Note: In addition to data, all user-created methods present on a meter are
copied to the flash memory stick. When the memory stick is used by
another meter, these methods are copied to the new meter. See Archiving
and Exchanging Methods”in the HQ40 Series Portable Meters user
manual.
Selecting report options
Note: Do not unplug the flash memory stick or the printer cable while the
"Sending Data" screen is displayed, or the meter may lock up.
The data log can be printed at three levels of detail: Basic Report,
Advanced Report or Total Report. The report option displayed on
the data log screen indicates the level of detail currently selected.
To select a different report option:
1. Press the
2. Use the
the
DATA LOG key.
UP and DOWN keys to highlight Report Options. Press
GREEN/RIGHT key under Select.
2
Page 3

Printing calibration data
USB Installation and Operation
3. Use the UP and DOWN keys to select the desired report type.
Press the
Calibration data are printed as part of the data log, but can also be
printed from the stored information in the probe. Printed calibration
reports are shown in Vi ewing Calibration Report s in the HQd Series
Portable Meters user manual.
To print the calibration data stored in the probe:
GREEN/RIGHT key under OK.
1. Press the
2. Use the
Press the
Note: A probe must be connected to the meter to use the View Probe
Data function.
DATA LOG key.
UP and DOWN keys to highlight View Probe Data.
GREEN/RIGHT key under Select.
3. If only one probe is connected, proceed to step 4. If two probes
are connected (HQ40d), the connected probes will be
displayed. Use the
probe. Press the
UP and DOWN keys to highlight the desired
GREEN/RIGHT key under Select.
4. Use the
UP and DOWN keys to highlight Send Current
Calibration or Send Calibration History:
• Send Current Calibration: sends the most recent
calibration information.
• Send Calibration History: sends all calibration
information that is stored in the probe.
Press the
GREEN/RIGHT key under Select.
3
Page 4

USB Installation and Operation
Sending data to a computer
USB - Host
5. The display will show “Sending Data” to indicate the data is
being sent to the printer.
Important Note: Do not disconnect the printer cable while the
"Sending Data" screen is displayed, or the meter may lock up.
1. Load the HQd PC Application Software supplied with the
HQd meter onto a PC.
2. Turn off the meter, connect the HQd meter to an electrical
outlet using the USB/DC power adapter and then turn on
the meter.
3. Connect a USB cable (Cat. No. 59240-00) to the host USB
connector on the USB/DC adapter and to the computer.
4. Open the HQd PC Application Software on the PC. Click the
green triangle shown in the menu bar to initiate a connection.
5. Press the
6. Use the
Press the
DATA LOG key on the HQd meter.
UP and DOWN keys to highlight Send Data Log.
GREEN/RIGHT key under Select.
7. The meter display will show “Sending Data”. The data will
appear in the PC Application Software window. The file is
saved in Comma Separated Values (.csv) file format.
Note: For more information on working with CSV files, refer to the
Working with Data section of the HQd PC Application Software CD.
For more information on viewing data log reports, see Archiving
and Exchanging Methods in the HQ Series Portable Meters user
manual (Cat. No. HQ40d18).
FORTECHNICAL ASSISTANCE, PRICE INFORMATION AND ORDERING:
In the U.S.A.–
Outside the U.S.A.–
On the Worldwide Web – ; E-mail –
© Hach Company, 2006. All rights reserved. Printed in the U.S.A.
Call 800-227-4224
toll-free
Contact the HACH office or distributor serving you.
www.hach.com techhelp@hach.com
HACH COMPANY
WORLD HEADQUARTERS
Telephone: (970) 669-3050
FAX:(970) 669-2932
 Loading...