

Page 1

DOC022.L2.90639
DR300
02/2019, Edition 2
User Manual
Brugervejledning
Instrukcja obsługi
Bruksanvisning
Руководство пользователя
Εγχειρίδιο χρήσης
Käyttöopas
Kullanıcı Kılavuzu
Page 2

English.................................................................................................. 3
Dansk.................................................................................................. 25
Polski................................................................................................... 48
Svenska.............................................................................................. 73
Suomi.................................................................................................. 96
Русский............................................................................................. 119
Türkçe............................................................................................... 145
Ελληνικά............................................................................................ 168
2
Page 3
Table of contents
Product components on page 6 Calibration on page 15
Install the batteries on page 7 Maintenance on page 20
User interface and navigation
on page 8
Do a test on page 11 Replacement parts and accessories
Troubleshooting on page 21
on page 24
Specifications
Specifications are subject to change without notice.
Specification Details
Dimensions (W x H x D) 6.9 x 15.7 x 3.4 cm (2.7 x 6.2 x 1.3 in.)
Enclosure IP67, waterproof at 1 m (3.3 ft) for 30 minutes when
Light source Light emitting diode (LED)
Detector Silicon photodiode
Display LCD with backlight
Weight 0.25 kg (0.55 lb)
Power requirements 4 AAA batteries; approximate life of 5000 tests (use of
Operating environment 0 to 50 °C (32 to 122 °F), 0 to 90% relative humidity
Storage temperature –20 to 55 °C (–4 to 131 °F), 0 to 80% relative humidity
Wavelength Fixed wavelength ±2 nm, different for each model
Filter bandwidth 15 nm
Absorbance range 0 to 2.5 Abs
Sample cell 25 mm (10 mL) and 1 cm (10 mL)
Data storage Last 50 measurements
battery compartment is closed and locked.
backlight decreases this number)
Rechargeable batteries are not recommended.
non-condensing
non-condensing
English 3
Page 4
Specification Details
Bluetooth®
Certifications CE
Warranty 1 year (EU: 2 years)
1
Bluetooth® is on when the optional Hach
Communication Dongle is installed.
General information
In no event will the manufacturer be liable for direct, indirect, special,
incidental or consequential damages resulting from any defect or
omission in this manual. The manufacturer reserves the right to make
changes in this manual and the products it describes at any time,
without notice or obligation. Revised editions are found on the
manufacturer’s website.
Safety information
N O T I C E
The manufacturer is not responsible for any damages due to misapplication or
misuse of this product including, without limitation, direct, incidental and
consequential damages, and disclaims such damages to the full extent
permitted under applicable law. The user is solely responsible to identify critical
application risks and install appropriate mechanisms to protect processes
during a possible equipment malfunction.
Please read this entire manual before unpacking, setting up or
operating this equipment. Pay attention to all danger and caution
statements. Failure to do so could result in serious injury to the
operator or damage to the equipment.
Make sure that the protection provided by this equipment is not
impaired. Do not use or install this equipment in any manner other than
that specified in this manual.
1
The Bluetooth® word mark and logos are registered trademarks
owned by the Bluetooth SIG, Inc. and any use of such marks by
HACH is under license.
4 English
Page 5
Use of hazard information
D A N G E R
Indicates a potentially or imminently hazardous situation which, if not avoided,
will result in death or serious injury.
Indicates a potentially or imminently hazardous situation which, if not avoided,
could result in death or serious injury.
Indicates a potentially hazardous situation that may result in minor or moderate
injury.
Indicates a situation which, if not avoided, may cause damage to the
instrument. Information that requires special emphasis.
W A R N I N G
C A U T I O N
N O T I C E
Precautionary labels
Read all labels and tags attached to the instrument. Personal injury or
damage to the instrument could occur if not observed. A symbol on the
instrument is referenced in the manual with a precautionary statement.
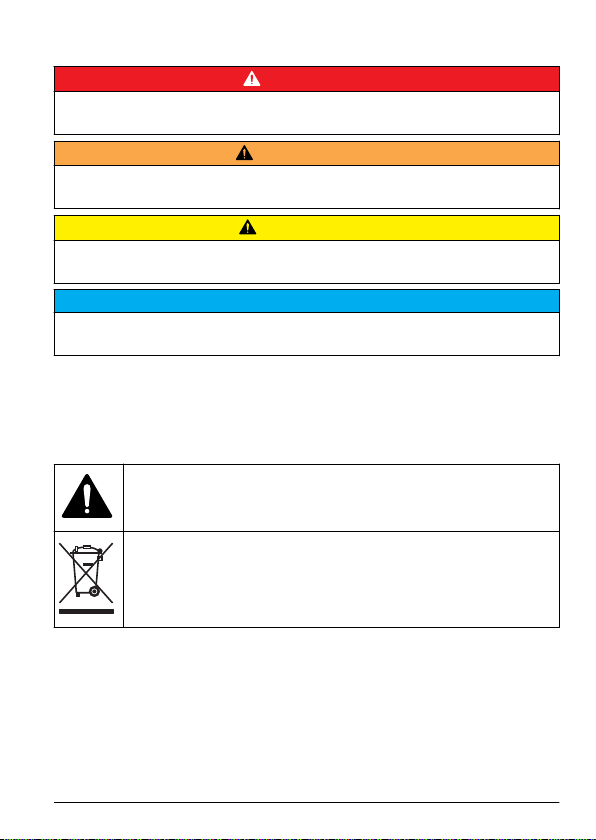
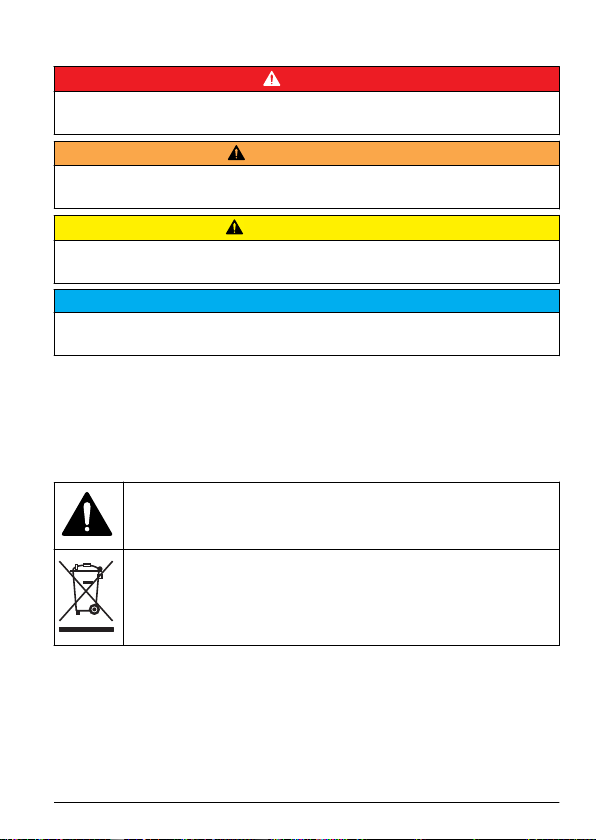
This symbol, if noted on the instrument, references the instruction
manual for operation and/or safety information.
Electrical equipment marked with this symbol may not be disposed
of in European domestic or public disposal systems. Return old or
end-of-life equipment to the manufacturer for disposal at no charge
to the user.
Certification
Canadian Radio Interference-Causing Equipment Regulation,
IECS-003, Class B:
Supporting test records reside with the manufacturer.
This Class B digital apparatus meets all requirements of the Canadian
Interference-Causing Equipment Regulations.
English 5
Page 6

Cet appareil numérique de classe B répond à toutes les exigences de
la réglementation canadienne sur les équipements provoquant des
interférences.
FCC Part 15, Class "B" Limits
Supporting test records reside with the manufacturer. The device
complies with Part 15 of the FCC Rules. Operation is subject to the
following conditions:
1. The equipment may not cause harmful interference.
2. The equipment must accept any interference received, including
interference that may cause undesired operation.
Changes or modifications to this equipment not expressly approved by
the party responsible for compliance could void the user's authority to
operate the equipment. This equipment has been tested and found to
comply with the limits for a Class B digital device, pursuant to Part
15 of the FCC rules. These limits are designed to provide reasonable
protection against harmful interference when the equipment is operated
in a commercial environment. This equipment generates, uses and can
radiate radio frequency energy and, if not installed and used in
accordance with the instruction manual, may cause harmful
interference to radio communications. Operation of this equipment in a
residential area is likely to cause harmful interference, in which case
the user will be required to correct the interference at their expense.
The following techniques can be used to reduce interference problems:
1. Move the equipment away from the device receiving the
interference.
2. Reposition the receiving antenna for the device receiving the
interference.
3. Try combinations of the above.
Product overview
This instrument is a portable filter photometer used for testing water.
Note: This instrument has not been evaluated to measure chlorine and
chloramines in medical applications in the United States.
Product components
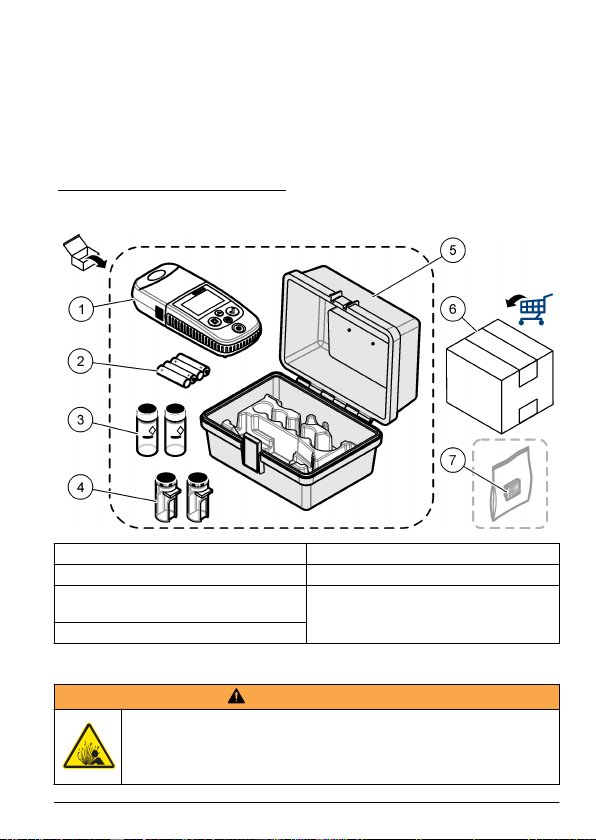
Make sure that all components have been received. Refer to Figure 1.
If any items are missing or damaged, contact the manufacturer or a
6 English
Page 7

sales representative immediately. Figure 1 is an example and shows
the parts supplied with LPV445.99.00110. Other instruments come with
different components.
Figure 1 Product components
1 DR300 5 Storage case
2 AAA alkaline batteries 6 Reagents
3 Sample cells, 25 mm (10 mL),
glass
4 Sample cells, 1 cm (10 mL), plastic
7 Hach Communication Dongle
(optional, supplied separately)
Install the batteries
W A R N I N G
Explosion hazard. Incorrect battery installation can cause the release
of explosive gases. Be sure that the batteries are of the same
approved chemical type and are inserted in the correct orientation.
Do not mix new and used batteries.
Refer to Figure 2 to install the batteries. Then, push to set the
instrument to on.
English 7
Page 8
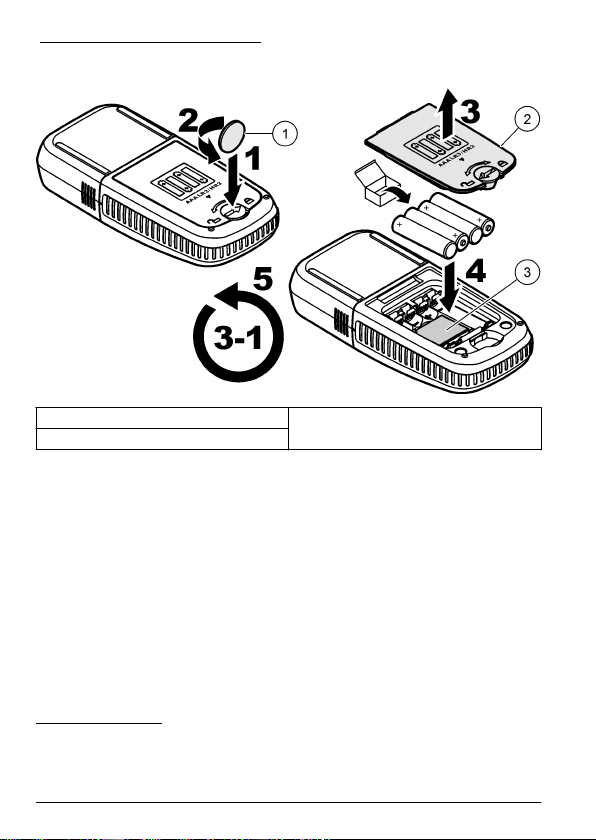
Figure 2 Install the batteries
1 Coin 3 Plastic insert for dongle
2 Battery cover
User interface and navigation
Keypad description
Figure 3 shows the keypad and gives the key functions.
2
Only remove the plastic insert to install the Hach Communication
Dongle. Refer to the installation instructions supplied with the
dongle.
8 English
2
Page 9
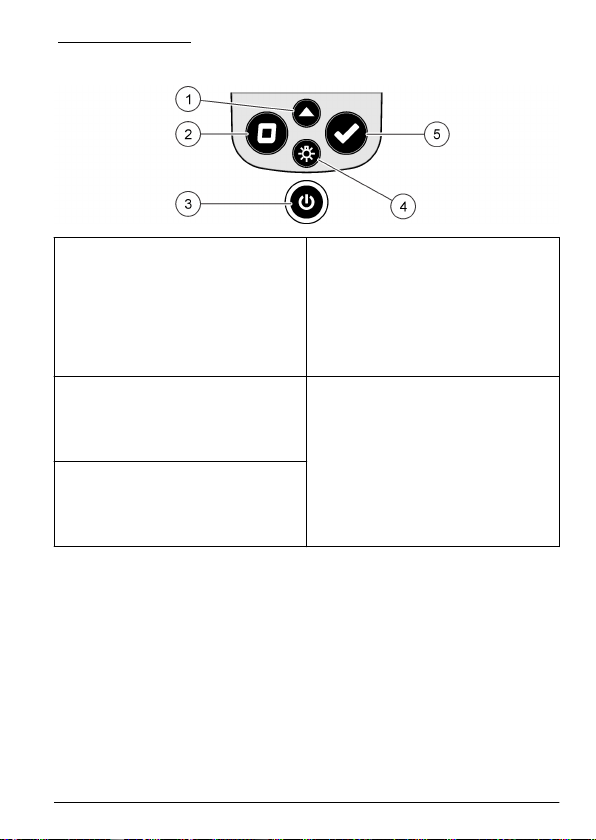
Figure 3 Keypad
1 Range key: Selects the
measurement range (e.g., LR or
HR).
Push and hold for 3 seconds to
enter or exit menu mode.
In menu mode, scrolls up or
increases the value of the selected
digit.
2 Zero key: Sets the zero value
before a measurement.
In menu mode, goes back one
menu level or moves the cursor to
the previous digit.
3 Power key: Sets the power to on
and off.
Push and hold for 5 seconds to
reset the instrument. The
calibration is not deleted.
4 Backlight key: Sets the backlight
to on and off.
In menu mode, scrolls down or
decreases the value of the selected
digit.
5 Read key: Starts a sample
measurement.
In menu mode, selects the menu
option shown or moves the cursor
to the next digit.
English 9
Page 10
Display description
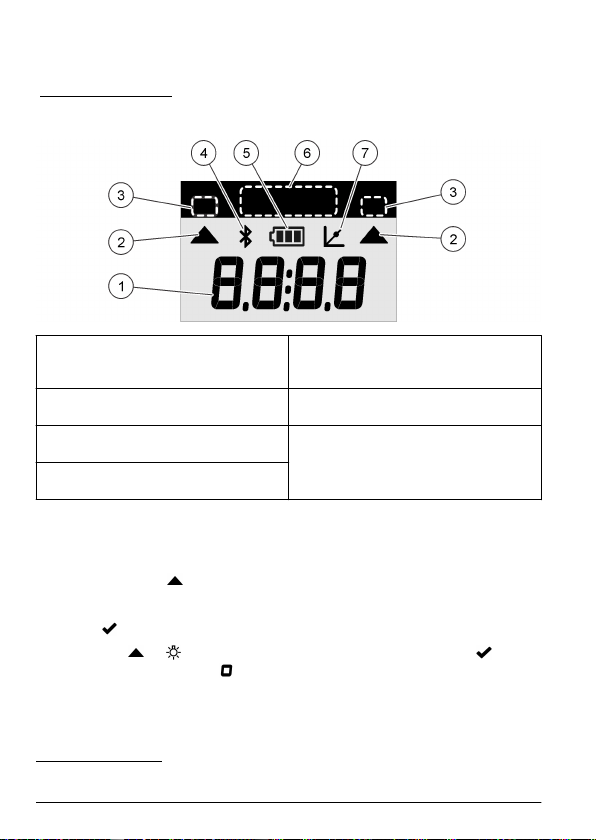
Figure 4 shows the values and icons shown on the display.
Figure 4 Display
1 Numeric display: Measured value
or menu options
2 Range icon: Points to the selected
measurement range
3 Measurement ranges or
parameters
4 Bluetooth® icon: Bluetooth® is
on3.
5 Battery icon: Battery power level.
Flashes when the battery power
level is low.
6 Parameter and measurement
ranges
7 Calibration adjusted icon: The
factory default calibration was
adjusted or a user-entered
calibration curve was entered.
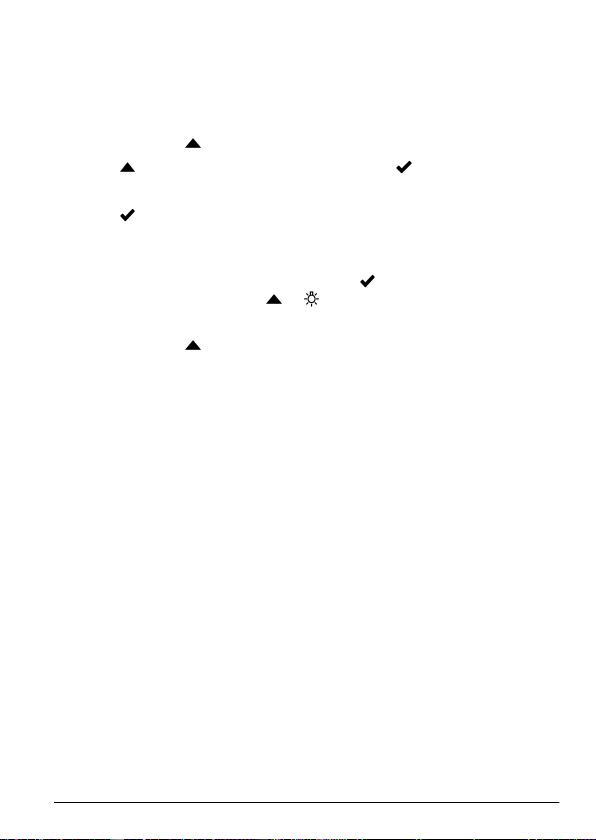
Set the time
Set the time (24-hour format).
1. Push and hold for 3 seconds to enter menu mode.
The time shows (or 00:00).
2. Push to set the time.
3. Push the or to change the number that flashes. Push to go
to the next digit. Push to go to the previous digit.
3
Shows when the Hach Communication Dongle is installed.
10 English
Page 11
Do a test
D A N G E R
Chemical or biological hazards. If this instrument is used to monitor a
treatment process and/or chemical feed system for which there are
regulatory limits and monitoring requirements related to public health,
public safety, food or beverage manufacture or processing, it is the
responsibility of the user of this instrument to know and abide by any
applicable regulation and to have sufficient and appropriate
mechanisms in place for compliance with applicable regulations in
the event of malfunction of the instrument.
Chemical exposure hazard. Obey laboratory safety procedures and
wear all of the personal protective equipment appropriate to the
chemicals that are handled. Refer to the current safety data sheets
(MSDS/SDS) for safety protocols.
Chemical exposure hazard. Dispose of chemicals and wastes in
accordance with local, regional and national regulations.
The generic steps to do a test follow.
To do a test for a specific parameter (e.g., chlorine), download the test
procedure from the manufacturer's website. Refer to Download a test
procedure on page 14.
1. Push to select the applicable measurement range (e.g., LR or
HR).
2. Prepare the blank. Refer to the test procedure.
3. Clean the sample cell with a no-lint cloth.
4. Insert the blank sample cell into the cell holder. Make sure to install
the blank sample cell in the correct and consistent orientation so
that the results are more repeatable and precise. Refer to Figure 5.
5. Install the instrument cap over the cell holder. Refer to Figure 6.
6. Push to set the instrument zero.
D A N G E R
C A U T I O N
English 11
Page 12

7. Remove the blank sample cell.
8. Prepare the sample. Refer to the test procedure.
9. Clean the sample cell with a no-lint cloth.
10. Insert the sample cell into the cell holder. Make sure to install the
sample cell in the correct and consistent orientation so that the
results are more repeatable and precise. Refer to Figure 5.
11. Install the instrument cap over the cell holder. Refer to Figure 6.
12. Push . The display shows the results in concentration units or
absorbance.
Note: The result flashes if the result is less or more than the instrument
range.
13. Remove the sample cell from the cell holder.
14. Immediately empty and rinse the sample cell. Rinse the sample cell
and cap three times with deionized water (or distilled water).
Note: As an alternative, use tap water to rinse the sample cell if the samples
measured have a higher concentration than the tap water.
12 English
Page 13
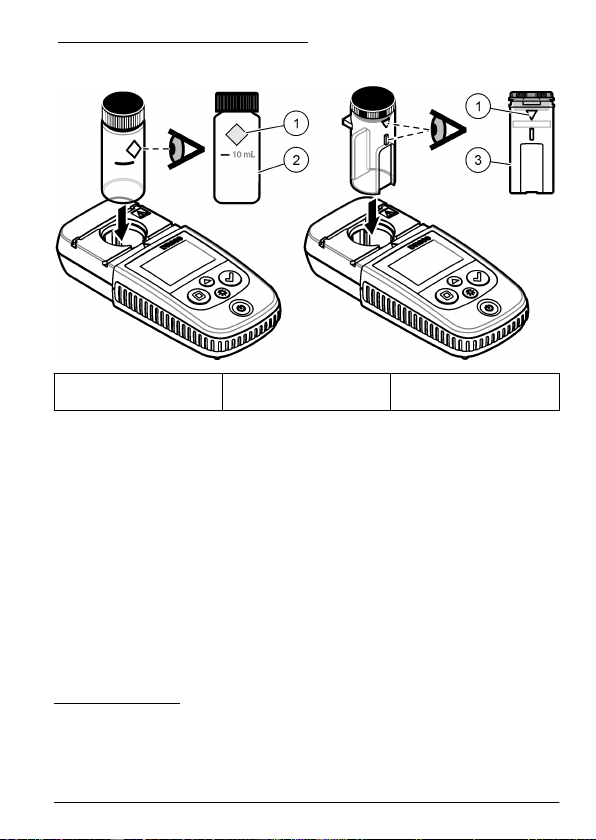
Figure 5 Sample cell orientation
1 Orientation mark
4
Some variants of the instrument have sample cells without an
orientation mark.
5
Use the glass sample cell for low-range chlorine tests.
6
Use the plastic sample cell for high-range chlorine tests.
4
2 Sample cell, 25-mm
(10 mL), glass
5
3 Sample cell, 1-cm
(10 mL), plastic
6
English 13
Page 14

Figure 6 Install the instrument cap over the cell holder
Download a test procedure
1. Go to http://www.hach.com.
2. Enter "DR300" in the Search box.
3. Select the applicable instrument from the list.
4. Click the Downloads tab.
5. Scroll down to "Methods/Procedures".
6. Click the link for the applicable test procedure to download it.
14 English
Page 15
Show measurements
Note: The instrument saves a maximum of 50 measurements. After
50 measurements are done, new measurements replace the oldest
measurements.
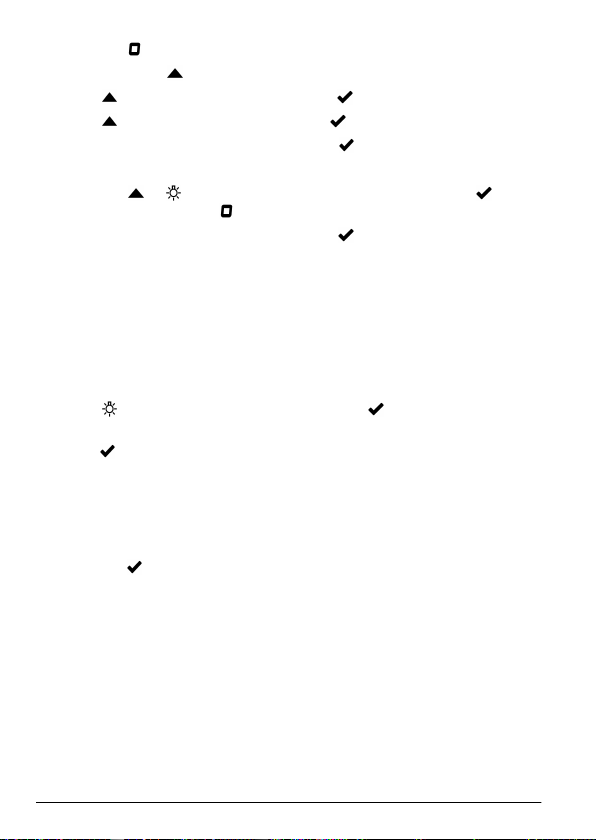
1. Push and hold for 3 seconds.
2. Push until "rCL" (recall) shows, then push .
"– 01 –" shows. Measurement 01 is the last measurement done.
3. Push to scroll forward.
The measurement number is followed by the measurement value
and then the time.
4. To go to a measurement number, push until a measurement
number shows, then push or .
Note: Measurements cannot be deleted.
5. Push and hold for 3 seconds to go back to measurement mode.
Calibration
This instrument is calibrated at the factory. No user calibration is
necessary.
Standard calibration adjust
Use the standard calibration adjust (SCA) option when a calibration
must be adjusted to meet regulatory requirements. The factory
calibration is adjusted slightly with the standard calibration adjust
(SCA) option so that the instrument shows the expected value of the
standard solution. The adjusted calibration is then used for all test
results. This adjustment can increase the test accuracy when there are
slight variations in the reagents or instruments.
Note: For instruments with factory-calibrated ranges or methods, the standard
calibration adjust (SCA) feature is disabled when a user-entered calibration is
entered into the instrument. To set SCA back to on, set the instrument to the
factory default calibration. Refer to Set to the factory default calibration
on page 20.
English 15
Page 16
Do a standard calibration adjust
1. Complete the test procedure for the range to calibrate. For the
sample, use the standard solution concentration given in the test
procedure documentation.
Note: If a standard solution concentration is not given in the test procedure
documentation, a different known standard can be used.
2. When the test procedure is completed, push and hold for
3 seconds.
3. Push until “SCA” shows, then push .
The display shows the standard calibration adjust value.
4. If a different known standard is used, enter the value of the
standard:
a. Push until "Edit" shows, then push .
b. Enter the value of the standard.
Push the or to change the number that flashes. Push to
go to the next digit. Push to go to the previous digit.
5. Push to add the standard calibration adjust value to the factory
calibration curve.
Set the standard calibration adjust to off
To use the factory default calibration again, set standard calibration
adjust (SCA) to off.
1. Push and hold for 3 seconds to enter menu mode.
2. Push until "SCA" shows, then push .
3. Push until "OFF" shows, then push .
Note: To set the SCA function to on again, do a standard calibration adjust.
User-entered calibration curve
This instrument accepts a user-prepared calibration curve. The
calibration curve can be from 0 to 2.5 absorbance. Make sure that the
calibration curve includes standard values that are less and more than
the range of interest.
The instrument range will be the same as the calibration range. For
example, when the standards that are used are 1.00, 2.00 and 4.00.
The instrument range is 1.00 to 4.00.
16 English
Page 17
There are two options to enter a user calibration curve:
• Enter a calibration curve with standards—The standard solution
values are entered with the keypad and the absorbance values are
measured.
• Enter a calibration curve with the keypad—The standard solution
values and absorbance values are entered with the keypad.
Note: If the instrument is set to off or the instrument power is removed before a
user-entered calibration curve is completed, the calibration curve is not saved.
The instrument automatically switches off in user-entered calibration entry mode
after 60 minutes of no activity. User-entered calibrations are completed when the
user goes out of calibration (cal) mode or edit mode.
Enter a calibration curve with standards
W A R N I N G
Chemical exposure hazard. Obey laboratory safety procedures and
wear all of the personal protective equipment appropriate to the
chemicals that are handled. Refer to the current safety data sheets
(MSDS/SDS) for safety protocols.
C A U T I O N
Chemical exposure hazard. Dispose of chemicals and wastes in
accordance with local, regional and national regulations.
Note: As an alternative, deionized water can be used for the blank unless the
sample is significantly more turbid or has more color than deionized water.
1. Push to set the instrument to the range to calibrate (e.g., LR or
HR).
2. Prepare the blank. Refer to the test procedure.
3. Clean the sample cell with a no-lint cloth.
4. Set the instrument to zero.
a. Insert the blank sample cell in the cell holder.
b. Install the instrument cap over the cell holder.
English 17
Page 18
c. Push . The display shows “- - - -”, then “0.00”.
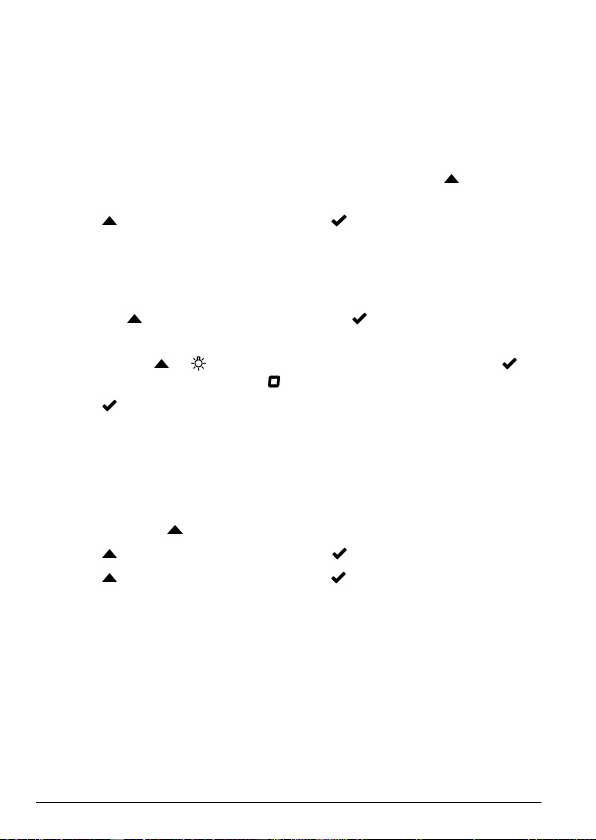
5. Push and hold for 3 seconds to enter menu mode.
6. Push until "USEr" shows, then push .
7. Push until "CAL" shows, then push .
8. When "S0" shows on the display, push .
9. Enter 00.00 (or 000.0) for the blank value.
Push the or to change the number that flashes. Push to go
to the next digit. Push to go to the previous digit.
10. When “A0” shows on the display, push to measure the
absorbance of the blank.
The display shows the absorbance value for "S0".
11. Remove the sample cell from the cell holder.
12. Prepare the sample. Refer to the test procedure. For the sample,
use the standard solution concentration given in the test procedure
documentation.
13. Clean the sample cell with a no-lint cloth.
14. Push to show "S1" (or "Add"), then push .
15. Enter the concentration value of the first calibration standard, then
push .
16. When "A1" shows on the display, do the steps that follow to
measure the absorbance:
a. Insert the reacted standard sample cell in the cell holder.
b. Install the instrument cap over the cell holder.
c. Push . The display shows the absorbance value for "S1".
17. The calibration is completed with two calibration points. If additional
standards are necessary for calibration:
Do steps 11 and 16 again to measure more calibration standards.
18. Remove the sample cell from the cell holder.
18 English
Page 19

19. Immediately empty and rinse the sample cell. Rinse the sample cell
and cap three times with deionized water (or distilled water).
Note: As an alternative, tap water can be used to rinse the sample cell if the
concentration of the parameter in the tap water is less than the samples
measured.
20. Push and hold for 3 seconds to go back to measurement mode.
Enter a calibration curve with the keypad
At least two data pairs are necessary to enter a user-prepared
calibration curve. A concentration value and the absorbance value for
the given concentration is necessary for each data pair. A maximum of
10 data pairs can be entered.
1. Push to set the instrument to the range to calibrate (e.g., LR or
HR).
2. Push and hold for 3 seconds to enter menu mode.
3. Push until "USEr" shows, then push .
4. Push until "Edit" shows, then push .
5. When "S0" shows on the display, push .
6. Enter the first data pair.
The first data pair is S0 (concentration value) and A0 (absorbance
value).
• Push or to change the number that flashes.
• Push to go to the next digit.
• Push to go to the previous digit.
7. Do steps 5 and 6 again to enter the second data pair (S1 and A1).
8. The calibration is completed with two data pairs. If additional data
pairs are necessary for calibration:
a. When “Add” shows, push .
b. Do steps 5 and 6 again to enter more data pairs.
9. Push and hold for 3 seconds to go back to measurement mode.
English 19
Page 20
Set to the factory default calibration
To remove a user-entered calibration curve from the instrument and
use the factory calibration, do the steps that follow:
1. Push and hold for 3 seconds to enter menu mode.
2. Push until "USEr" shows, then push .
3. Push until "dFL" (default) shows, then push .
Maintenance
C A U T I O N
Multiple hazards. Only qualified personnel must conduct the tasks
described in this section of the document.
N O T I C E
Do not disassemble the instrument for maintenance. If the internal components
must be cleaned or repaired, contact the manufacturer.
Clean the instrument
Clean the exterior of the instrument with a moist cloth and a mild soap
solution and then wipe the instrument dry as necessary.
Clean the sample cells
Chemical exposure hazard. Obey laboratory safety procedures and
wear all of the personal protective equipment appropriate to the
chemicals that are handled. Refer to the current safety data sheets
(MSDS/SDS) for safety protocols.
C A U T I O N
C A U T I O N
Chemical exposure hazard. Dispose of chemicals and wastes in
accordance with local, regional and national regulations.
Most laboratory detergents are used at recommended concentrations.
Neutral detergents, such as Liquinox, are safer to use when regular
20 English
Page 21
cleaning is necessary. To decrease the cleaning times, increase the
temperature or use an ultrasonic bath. To complete the cleaning, rinse
a few times with deionized water and then let the sample cell air dry.
Sample cells may also be cleaned with acid, followed by a thorough
rinse with deionized water.
Note: Always use acid to clean sample cells that were used for low-level metal
tests.
Special cleaning methods are necessary for individual procedures.
When a brush is used to clean sample cells, take extra care to avoid
scratches on the interior surfaces of the sample cells.
Replace the batteries
Replace the batteries when the battery power level is low. Refer to
Install the batteries on page 7.
Troubleshooting
Error Description Solution
E-00 No Zero In user calibration mode, a standard
E-01 Ambient light
E-02 LED error
error
7
7
solution was measured before the
instrument zero was set. Measure a blank
solution to set the instrument to zero.
There is ambient light in the cell holder.
Make sure that the instrument cap is fully
installed on the cell holder. Refer to Do a
test on page 11.
The LED (light source) is out of
regulation. Replace the batteries. Make
sure that the LED in the cell holder
comes on when or is pushed.
7
When an E-01 or E-02 error occurs on a measurement, the
display shows "_.__". The decimal place depends on the
chemistry. If the E-01 or E-02 error occurs while the instrument is
set to zero, set the instrument to zero again.
English 21
Page 22
Error Description Solution
E-03 Standard adjust
error
• The measured value of the standard
solution is more than the adjustment
limits. Prepare a fresh standard.
• The standard solution is not within the
concentration range that can be used
for standard calibration adjust. Prepare
a standard with a value at or near the
recommended concentrations given in
the procedure.
• Make sure that the concentration of the
standard solution is entered correctly.
Reading flashes
followed by
E-04
The reading is
more or less than
the instrument
8
range.
If the reading is less than the instrument
range, make sure that the instrument cap
is fully installed on the cell holder.
Measure a blank. If the blank reading is
not zero, set the instrument to zero again.
If the reading is more than the instrument
range, identify if there is a light blockage in
the cell holder. Dilute the sample. Do the
test again.
E-06 Absorbance error The absorbance value is not correct or the
user-entered calibration curve has fewer
than two points. Enter or measure the
absorbance value again.
E-07 Standard value
error
The standard solution concentration is
equal to another standard solution
concentration that is already entered in the
user-entered calibration curve. Enter the
correct standard concentration.
E-09 Flash error
The instrument is not able to save data.
Push and hold for 5 seconds to reset
the instrument.
E-10 Environment
temperature too
high or too low
The ambient temperature is out of range.
Use the instrument only in the specified
operating conditions. Refer to
Specifications on page 3.
8
The value that flashes will be 10% over the upper test range limit.
22 English
Page 23
Error Description Solution
E-12 Low battery
E-13 Parameter load
E-14 followed
by "_.__" or "0"
if no zero was
present
E-15 followed
by "_.__"
E-20 Signal
E-21 Signal
E-22 Hardware error The electronic system is defective.
power
failure
Zero
measurement
invalid
Absorbance too
high
measurement out
of range
measurement
unstable
Battery power is too low. Replace the
batteries. Refer to Install the batteries
on page 7.
The memory of the instrument is defective.
Contact technical support.
The zero measurement is too low. Use a
sample cell filled with water and try again.
If the error continues, contact technical
support.
Identify if there is a light blockage in the
cell holder. Clean the cell holder. Dilute
the sample. Do the test again.
Note: This instrument can not read absorbance
values higher than 3.5 Abs.
There is too much light on the light
detector. Make sure that the instrument
cap is fully installed on the cell holder. Do
the test again. If the error continues,
contact technical support.
There is an unstable signal on the light
detector. There is too much or unstable
ambient light. Make sure that the
instrument cap is fully installed on the cell
holder. Do the test again. If the error
continues, contact technical support.
Contact technical support.
The following errors can occur immediately after an instrument update.
Error Description Solution
E-30 No application There was an error during the application update.
E31 Bootloader update
failed
A valid application was not found on the
instrument. Update the instrument again.
There was an error during the transmission of the
bootloader update. Update the bootloader again.
English 23
Page 24
Error Description Solution
E-32 Application update
failed
E-66 Update failed The instrument is defective. Contact technical
There was an error during the transmission of the
application update. Update the instrument again.
support.
Replacement parts and accessories
W A R N I N G
Personal injury hazard. Use of non-approved parts may cause
personal injury, damage to the instrument or equipment malfunction.
The replacement parts in this section are approved by the
manufacturer.
Note: Product and Article numbers may vary for some selling regions. Contact
the appropriate distributor or refer to the company website for contact
information.
Replacement parts
Description Quantity Item no.
AAA batteries, alkaline 4/pkg 4674300
Instrument cap 1 LPZ445.99.00006
Battery cover 1 LPZ445.99.00007
Sample cell, 25 mm (10 mL), glass 6/pkg 2427606
Sample cell, 1 cm (10 mL), plastic 2/pkg 4864302
Accessories
Description Quantity Item no.
Hach Communication Dongle 1 LPV446.99.00012
Soft-sided case/holster 1 5953100
24 English
Page 25
Indholdsfortegnelse
Produktkomponenter på side 29 Kalibrering på side 37
Isæt batterierne på side 29 Vedligeholdelse på side 42
Brugergrænseflade og navigation
på side 30
Udfør en test på side 33 Reservedele og tilbehør på side 46
Fejlsøgning på side 43
Specifikationer
Specifikationerne kan ændres uden varsel.
Specifikation Detaljer
Mål (B x H x D) 6.9 x 15.7 x 3.4 cm (2.7 x 6.2 x 1.3")
Kabinet IP67, vandtæt ned til 1 m (3,3 ft) i 30 minutter, når
Lyskilde Lysafgivende diode (LED)
Detektor Silikonefotodiode
Trykfølsom skærm LCD med baggrundsbelysning
Vægt 0.25 kg (0.55 lb)
Strømkrav 4 AAA-batterier; ca. levetid på 5000 test (brug af
Driftsmiljø 0 til 50 °C (32 til 122 °F), 0 til 90 % relativ luftfugtighed,
Opbevaringstemperatur –20 til 55 °C (-4 til 131 °F), 0 til 80 % relativ
Bølgelængde Fast bølgelængde ±2 nm, forskellig for hver model
Filterbåndbredde 15 nm
Absorbansområde 0 til 2,5 Abs
Prøvecelle 25 mm (10 mL) og 1 cm (10 mL)
Datalagring Seneste 50 målinger
batterirummet er lukket og låst.
baggrundsbelysning reducerer dette tal)
Genopladelige batterier anbefales ikke.
ikke-kondenserende
luftfugtighed, ikke-kondenserende
Dansk 25
Page 26

Specifikation Detaljer
Bluetooth®
Certificeringer CE
Garanti 1 år (EU: 2 år)
1
Bluetooth® er aktiveret, når den valgfrie Hach
kommunikationsdongle er installeret.
Generelle oplysninger
Producenten kan under ingen omstændigheder holdes ansvarlig for
direkte, indirekte, specielle, hændelige eller følgeskader der opstår på
baggrund af en defekt eller udeladelse i denne vejledning. Producenten
forbeholder sig ret til når som helst at foretage ændringer i denne
manual og de beskrevne produkter uden varsel eller forpligtelser.
Reviderede udgaver kan findes på producentens webside.
Oplysninger vedr. sikkerhed
B E M Æ R K N I N G
Producenten er ikke ansvarlig for eventuelle skader på grund af forkert
anvendelse eller misbrug af dette produkt, herunder uden begrænsning direkte
skader, hændelige skader eller følgeskader, og fraskriver sig ansvaret for
sådanne skader i det fulde omfang, som tillades ifølge gældende lov. Kun
brugeren er ansvarlig for at identificere alvorlige risici ved anvendelsen og
installere relevante mekanismer til beskyttelse af processerne i forbindelse med
en eventuel fejl på udstyret.
Læs hele manualen, inden udpakning, installation eller betjening af
dette udstyr. Overhold alle farehenvisninger og advarsler. Undladelse
heraf kan medføre, at brugeren kommer alvorligt til skade eller
beskadigelse af apparatet.
Kontroller, at den beskyttelse, som dette udstyr giver, ikke forringes.
Du må ikke bruge eller installere dette udstyr på nogen anden måde
end den, der er angivet i denne manual.
1
Bluetooth® mærket og logoerne er registrerede varemærker ejet
af Bluetooth SIG, Inc., og enhver brug af sådanne mærker af
HACH sker under licens.
26 Dansk
Page 27
Brug af sikkerhedsoplysninger
F A R E
Angiver en eventuel eller overhængende farlig situation, der vil medføre
dødsfald eller alvorlige kvæstelser, hvis den ikke undgås.
Angiver en potentiel eller umiddelbart farlig situation, som kan resultere i død
eller alvorlig tilskadekomst, hvis den ikke undgås.
Indikerer en potentiel farlig situation, der kan resultere i mindre eller moderat
tilskadekomst.
B E M Æ R K N I N G
Angiver en situation, der kan medføre skade på instrumentet, hvis ikke den
undgås. Oplysninger, der er særligt vigtige.
A D V A R S E L
F O R S I G T I G
Sikkerhedsmærkater
Læs alle skilte og mærkater, som er placeret på apparatet. Der kan
opstå person- eller instrumentskade, hvis forholdsreglerne ikke
respekteres. I håndbogen refereres der til et symbol på instrumentet
med en forholdsregelerklæring.
Hvis dette symbol findes på instrumentet, henviser det til
instruktionsmanualen vedrørende drifts- og/eller
sikkerhedsoplysninger.
Elektrisk udstyr mærket med dette symbol må, i Europa, ikke
bortskaffes i sammen med husholdningsaffald eller offentligt affald.
Returner gammelt eller udtjent udstyr til producenten til bortskaffelse
uden gebyr.
Certificering
Canadian Radio Interference-Causing Equipment Regulation,
IECS-003, Klasse B:
Producenten opbevarer understøttende testfortegnelser.
Dansk 27
Page 28

Dette Klasse B digitale apparat opfylder alle krav i Canadian
Interference-Causing Equipment Regulations.
Cet appareil numérique de classe B répond à toutes les exigences de
la réglementation canadienne sur les équipements provoquant des
interférences.
FCC del 15, klasse ''B'' grænser
Producenten opbevarer understøttende testfortegnelser. Enheden
overholder Afs. 15 i FCC's regelsæt. Anvendelsen er underlagt
følgende betingelser:
1. Udstyret må ikke forårsage skadelig interferens.
2. Udstyret skal acceptere modtaget interferens, hvilket omfatter
interferens, der kan forårsage uønsket drift.
Ændringer og modifikationer af dette udstyr, som ikke er udtrykkeligt
godkendt af den part, som er ansvarlig for overholdelsen, kan ophæve
brugerens ret til at betjene udstyret. Dette udstyr er blevet testet og
fundet i overensstemmelse med grænserne for en Klasse B digital
enhed i henhold til afsnit 15 i FCC-reglerne. Disse grænser er udformet
til at yde rimelig beskyttelse mod skadelig interferens, når udstyret
betjenes i et kommercielt miljø. Dette udstyr genererer, bruger og kan
udsende radiofrekvensenergi og kan, hvis det ikke installeres og
anvendes i overensstemmelse med brugervejledningen, forårsage
skadelige interferens for radiokommunikationer. Anvendelse af dette
udstyr i et beboelsesområde vil sandsynligvis forårsage skadelig
interferens, i hvilket tilfælde brugeren skal udbedre inteferensen for
egen regning. Følgende teknikker kan anvendes til at reducere
problemer med interferens:
1. Flyt udstyret væk fra den enhed, som modtager interferensen.
2. Indstil modtageantennen på den enhed, der modtager interferens,
igen.
3. Prøv kombinationer af ovennævnte.
Produktoversigt
Dette instrument er et bærbart filterfotometer, som bruges til kontrol af
vand.
BEMÆRK: Dette instrument er ikke blevet evalueret til måling af klor og
kloraminer i medicinske anvendelser i USA.
28 Dansk
Page 29
Produktkomponenter
Sørg for, at alle komponenter er modtaget. Se i Figur 1. Kontakt
producenten eller forhandleren med det samme, hvis der er mangler
eller er defekte dele i sendingen. Figur 1 Er et eksempel og viser de
dele, der leveres med LPV445.99.00110. Andre instrumenter leveres
med andre komponenter.
Figur 1 Produktkomponenter
1 DR300 5 Opbevaringskuffert
2 AAA alkaline-batterier 6 Reagenser
3 Prøvekuvetter, 25 mm (10 mL),
glas
4 Prøvekuvetter, 1 cm (10 mL), plast
7 Hach kommunikationsdongle
(ekstraudstyr, leveres separat)
Isæt batterierne
Eksplosionsfare. Ved forkert isætning af batterier kan der slippe
eksplosive gasser ud. Sørg for, at batterierne er af den samme
godkendte kemiske type og isat i den rigtige retning. Isæt ikke nye
og brugte batterier sammen.
A D V A R S E L
Dansk 29
Page 30

Se under Figur 2 vedrørende installation af batterierne. Tryk derefter
på for at tænde instrumentet.
Figur 2 Isæt batterierne
1 Mønt 3 Plastindlæg til donglen
2 Batteridæksel
2
Brugergrænseflade og navigation
Beskrivelse af tastatur
Figur 3 viser tastaturet og angiver tasternes funktioner.
2
Fjern kun plastikstykket, og montér Hach kommunikationsdonglen.
Se installationsvejledningen, der følger med donglen.
30 Dansk
Page 31

Figur 3 Tastatur
1 Område-tast: Vælger måleområdet
(f.eks. LR eller HR).
Tryk og hold den nede i 3 sekunder
for at åbne eller lukke menutilstand.
I menutilstand, rul opad eller øg
værdien af det valgte ciffer.
2 Nul-tast: Indstiller nulværdien før
en måling.
I menutilstand, går et trin tilbage
eller flyt markøren til forrige ciffer.
3 Tast for tænd/sluk: Slår strømmen
til og fra.
Hold knappen indtrykket i
5 sekunder for at nulstille
instrumentet. Kalibreringen bliver
ikke slettet.
4 Tast for baggrundsbelysning:
Slår baggrundsbelysningen til og
fra.
I menutilstand skal du rulle nedad
eller reducere værdien af det valgte
ciffer.
5 Læs-tast: Starter en prøvemåling.
I menutilstand vælger en menu
indstilling eller flytter markøren til
næste ciffer.
Dansk 31
Page 32

Display beskrivelse
Figur 4 viser de værdier og ikoner, der vises på displayet.
Figur 4 Display
1 Numerisk display: Målt værdi eller
menuindstillinger
2 Områdeikon: Viser det valgte
måleområde
3 Måleområder eller parametre 7 Ikon for justeret kalibrering:
4 Bluetooth® ikon: Bluetooth® er
aktiveret3.
5 Batteriikon: Batteriniveau. Blinker
ved lavt batteriniveau.
6 Parameter- og måleområder
Fabriksstandardkalibreringen blev
justeret eller en brugerangivet
kalibreringskurve blev indtastet.
Indstil tiden
Indstil klokkeslæt (24-timers format).
1. Tryk på og hold nede i 3 sekunder for at starte menutilstand.
Tiden viser (eller 00:00).
2. Tryk på for at ændre tidsindstillingen.
3. Tryk på eller for at ændre tallet, der blinker. Tryk på for at gå
til næste ciffer. Tryk på for at gå tilbage til det forrige ciffer.
3
Viser, hvornår Hach kommunikationsdonglen er installeret.
32 Dansk
Page 33

Udfør en test
F A R E
Kemiske eller biologiske farer. Hvis dette instrument anvendes til at
overvåge en behandlingsproces og/eller et kemisk tilførselssystem,
hvor der gælder lovbestemte begrænsninger og overvågningskrav i
forbindelse med folkesundhed, offentlig sikkerhed, føde- og
drikkevareproduktion eller -forarbejdning, ligger ansvaret hos
brugeren af instrumentet med hensyn til at kende og overholde
enhver gældende bestemmelse og at sikre tilstrækkelige og egnede
tiltag for at overholde gældende bestemmelser, såfremt instrumentet
ikke fungerer.
Risiko for at blive udsat for kemiske stoffer Overhold laboratoriets
sikkerhedsprocedurer, og bær alt det personlige beskyttelsesudstyr,
der er nødvendigt for at beskytte dig mod de kemikalier, du bruger.
Se de aktuelle sikkerhedsdataark (MSDS/SDS) for
sikkerhedsprotokoller.
Fare for eksponering for kemiske stoffer. Bortskaf kemikalier og
affald i overensstemmelse med lokale, regionale og nationale
bestemmelser.
De generelle trin for at udføre en test følger herunder.
Gennemfør en test af et bestemt parameter (f.eks. Klor) ved at
downloade testproceduren fra producentens hjemmeside. Se
Download en testprocedure på side 36
F A R E
F O R S I G T I G
.
1. Tryk på
for at vælge det relevante måleområde (f.eks. LR eller
HR).
2. Forbered blindprøven. Se testproceduren.
3. Rengør prøvekuvetten med en fnugfri klud.
4. Isæt kuvetten med blindprøven i kuvetteholderen. Sørg for at
installere kuvetten med blindprøven ikorrekt og i korrekt retning,
herved opnås repeterbare og præcise målinger. Se Figur 5.
Installer instrumenthætten over kuvetteholderen. Se Figur 6.
5.
Dansk 33
Page 34

6. Tryk på for at nulstille instrumentet.
7. Fjern kuvetten med blindprøven.
8. Klargør prøven. Se testproceduren.
9. Rengør prøvekuvetten med en fnugfri klud.
10. Isæt prøvekuvetten i kuvetteholderen. Sørg for at installere
kuvetten korrekt og i korrekt retning, herved repeterbare og præcise
målinger. Se Figur 5.
11. Installer instrumenthætten over kuvetteholderen. Se Figur 6.
12. Tryk på . Displayet viser resultaterne i koncentrationsenheder
eller absorbans.
BEMÆRK: Resultatet blinker, hvis det ligger uden for instrumentets område.
13. Fjern prøvekuvetten fra celleholderen.
14. Tøm og skyl prøvekuvetten med det samme. Skyl prøvekuvetten og
låget tre gange med afioniseret vand (eller destilleret vand).
BEMÆRK: Som alternativ kan der bruges vand fra hanen til at skylle
prøvecellen, hvis prøverne, der måles, har en højere koncentration end vand
fra hanen.
34 Dansk
Page 35

Figur 5 Kuvetteretning
1 Orienteringsmærke 42 Prøvekuvette, 25-mm
4
Nogle varianter af instrumentet har prøvekuvetter uden et
retningsmærke.
5
Brug prøvekuvetten i glas til måling af prøver med lavt klorindhold.
6
Brug prøvekuvetten i plast til måling af prøver med højt
(10 mL), glas
5
3 Prøvekuvette, 1-cm
(10 mL), plastik
klorindhold.
Dansk 35
6
Page 36

Figur 6 Installer instrumenthætten over kuvetteholderen
Download en testprocedure
1. Gå til http://www.hach.com.
2. Indtast "DR300" i søgefeltet.
3. Vælg det relevante instrument på listen.
4. Klik på fanen Downloads.
5. Rul ned til "Metoder og procedurer".
6. Klik på linket til den relevante testprocedure for at downloade den.
36 Dansk
Page 37

Vis målinger
BEMÆRK: Instrumentet kan maksimalt gemme 50 målinger i hukommelsen.
Efter 50 målinger erstattes de ældste målinger af nye målinger.
1. Tryk på og hold nede i 3 sekunder.
2. Tryk på , indtil "rCL" (genkald) vises, og tryk derefter på .
"– 01 –" vises. Måling 01 er den seneste udførte måling.
3. Tryk for at bladre fremad.
Nummeret for målingen efterfølges af den målte værdi og derefter
tid.
4. Find nummeret for målingen ved at trykke på , indtil det vises, og
tryk derefter eller .
BEMÆRK: Målinger kan ikke slettes.
5. Tryk på og hold nede i 3 sekunder for at gå tilbage til
måletilstand.
Kalibrering
Dette instrument er kalibreret på fabrikken. Ingen brugerkalibrering er
nødvendig.
Justering af standardkalibrering
Brug justering af standardkalibrering (SCA), når en kalibrering skal
justeres for at opfylde lovgivningsmæssige krav. Fabrikskalibreringen
er justeret en smule i forhold til standardkalibreringens (SCA)
justeringsindstilling, så instrumentet viser den forventede værdi af
standardopløsningen. Den justerede kalibrering benyttes derefter til
alle testresultater. Denne justering kan øge nøjagtigheden af testen,
når der er små variationer i reagenser eller instrumenter.
BEMÆRK: For instrumenter med fabrikskalibrerede områder eller metoder
deaktiveres standardkalibreringsjusteringen (SCA), når en brugerindtastet
kalibrering indtastes i instrumentet. For at indstille SCA igen skal du indstille
instrumentet til fabriksindstillingerne for kalibrering. Se Indstil til fabrikkens
standardkalibrering på side 42.
Dansk 37
Page 38

Udfør en justering af standardkalibrering
1. Fuldførelse af testproceduren for området, der skal kalibreres.
Anvend koncentrationen af standarden opgivet i test procedurens
dokumentation.
BEMÆRK: Hvis en standardløsnings koncentration ikke er angivet i
testprocedurens dokumentation, kan en anden kendt standard bruges.
2. Når testen er fuldført, skal du trykke og holde nede i 3 sekunder.
3. Tryk på , indtil "SCA" vises, og tryk derefter på .
Displayet viser standardkalibreringens justeringsværdi.
4. Hvis en anden kendt standard anvendes, skal standardværdien
indtastes:
a. Tryk på , indtil "EDIT" (Rediger) vises, og tryk derefter på .
b. Indtast værdien for standarden.
Tryk på eller for at ændre tallet, der blinker. Tryk på for at
gå til næste ciffer. Tryk på for at vende tilbage til det forrige
ciffer.
5. Tryk på for at tilføje standardkalibreringens justeringsværdi til
fabrikkens kalibreringskurve.
Indstil justering af standardkalibrering til off
Hvis du vil bruge fabrikskalibreringen igen, skal du indstille
standardkalibrering (SCA) til off.
1. Tryk på og hold nede i 3 sekunder for at starte menutilstand.
2. Tryk på , indtil "SCA" vises, og tryk derefter på .
3. Tryk på , indtil "OFF" (fra) vises, og tryk derefter på .
BEMÆRK: For at indstille SCA-funktionen til on igen, udfør en justering af
standardkalibrering.
Brugerindtastet kalibreringskurve
Dette instrument accepterer en brugerklargjort kalibreringskurve.
Kalibreringskurven kan være fra 0 til 2,5 absorbans. Sørg for, at
kalibreringskurven inkluderer standardværdier, som er mindre og
højere end det område, du interesserer dig for.
38 Dansk
Page 39

Instrumentets område er det samme som kalibreringsområdet. Hvis de
standarder, som anvendes, f.eks. er 1,00, 2,00 og 4,00, er
instrumentets område 1,00 til 4,00.
En brugerkalibreringskurve kan indtastes på to måder:
• Indtast en kalibreringskurve ved hjælp af standarder—
Standardværdierne for opløsningen indtastes med tastaturet, og
absorbansværdierne måles.
• Indtast en kalibreringskurve ved hjælp af tastaturet—
Standardværdierne for opløsningen og absorbansværdierne
indtastes med tastaturet.
BEMÆRK: Hvis instrument slukkes, eller strømmen afbrydes, før en
brugerangivet kalibreringskurve er fuldført, gemmes kalibreringskurven ikke.
Instrumentet slukker automatisk i tilstanden for brugerindtastet kalibrering efter
60 minutter uden aktivitet. Brugerindtastede kalibreringer er fuldført, når brugeren
forlader kalibrerings- (cal) eller redigeringstilstanden.
Indtast en kalibreringskurve med standarder
A D V A R S E L
Risiko for at blive udsat for kemiske stoffer Overhold laboratoriets
sikkerhedsprocedurer, og bær alt det personlige beskyttelsesudstyr,
der er nødvendigt for at beskytte dig mod de kemikalier, du bruger.
Se de aktuelle sikkerhedsdataark (MSDS/SDS) for
sikkerhedsprotokoller.
F O R S I G T I G
Fare for eksponering for kemiske stoffer. Bortskaf kemikalier og
affald i overensstemmelse med lokale, regionale og nationale
bestemmelser.
BEMÆRK: Afioniseret vand kan bruges som blindprøve, medmindre prøven er
væsentligt mere uklar eller har mere farve end afioniseret vand.
1. Tryk på for at indstille instrumentet til området for at kalibrere
(f.eks. LR eller HR).
2. Forbered blindprøven. Se testproceduren.
3. Rengør prøvekuvetten med en fnugfri klud.
Dansk 39
Page 40

4. Indstil instrumentet til nul.
a. Isæt kuvetten med blindprøven i kuvetteholderen.
b. Installer instrumenthætten over kuvetteholderen.
c. Tryk på . Displayet viser "- - - -" og derefter "0.00".
5. Tryk på og hold nede i 3 sekunder for at starte menutilstand.
6. Tryk på , indtil "USEr" (Bruger) vises, og tryk derefter på .
7. Tryk på , indtil "CAL" vises, og tryk derefter på .
8. Når "S0" vises på displayet, skal du trykke på .
9. Indtast 00,00 (eller 000,0) til den blinde værdi.
Tryk på eller for at ændre tallet, der blinker. Tryk på for at gå
til næste ciffer. Tryk på for at vende tilbage til det forrige ciffer.
10. Når ''A0'' vises på displayet, skal du tryk for at måle absorbansen
for blindprøven.
Displayet viser absorbansværdien for "S0".
11. Fjern prøvekuvetten fra celleholderen.
12. Klargør prøven. Se testproceduren. Anvend koncentrationen af
standarden opgivet i test procedurens dokumentation.
13. Rengør prøvekuvetten med en fnugfri klud.
14. Tryk på for at vise "S1" (eller "ADD"), og tryk derefter på
15. Indtast koncentrationsværdien for den første kalibreringsstandard,
og tryk derefter på
16. Når "A1" vises på displayet, skal du følge disse trin for at måle
absorbans:
a. Sæt prøvekuvetten med den reagerede standard i
kuvetteholderen.
b. Installer instrumenthætten over kuvetteholderen.
c. Tryk på . Displayet viser absorbansværdien for "S1".
17. Kalibreringen fuldføres med to kalibreringspunkter. Hvis yderligere
standarder er nødvendige for kalibrering:
Udfør trin11og16 igen for at måle flere kalibreringsstandarder.
18. Fjern prøvekuvetten fra celleholderen.
40 Dansk
Page 41

19. Tøm og skyl prøvekuvetten med det samme. Skyl prøvekuvetten og
låget tre gange med afioniseret vand (eller destilleret vand).
BEMÆRK: Som et alternativ kan vand fra hanen bruges til at skylle
prøvecellen, hvis koncentration af parameteret i vand fra hanen er mindre
end de målte prøver.
20. Tryk på og hold nede i 3 sekunder for at gå tilbage til
måletilstand.
Indtast en kalibreringskurve ved hjælp af tastaturet
Der skal bruges mindst to datapar for at indtaste en brugerklargjort
kalibreringskurve. En koncentrationsværdi og absorbansværdien for
den givne koncentration kræves for hvert datapar. Der kan maksimalt
indtastes 10 datapar.
1. Tryk på for at indstille instrumentet til området for at kalibrere
(f.eks. LR eller HR).
2. Tryk på og hold nede i 3 sekunder for at starte menutilstand.
3. Tryk på , indtil "USEr" (Bruger) vises, og tryk derefter på .
4. Tryk på , indtil "EDIT" (Rediger) vises, og tryk derefter på .
5. Når "S0" vises på displayet, skal du trykke på .
6. Indtast det første datapar.
Det første datapar er S0 (koncentrationsværdi) og
A0 (absorbansværdien).
• Tryk på eller for at ændre det tal, der blinker.
• Tryk på for at gå til næste ciffer.
• Tryk på for at vende tilbage til det forrige ciffer.
7. Udfør trinnene5–6 igen for at indtaste det andet datapar (S1 og
A1).
8. Kalibreringen fuldføres med to datapar. Hvis yderligere datapar er
nødvendige for kalibrering:
a. Tryk på , når ''Add'' (Tilføj) vises.
b. Udfør trinnene 5–6 igen for at indtaste flere datapar.
9. Tryk på og hold nede i 3 sekunder for at gå tilbage til
måletilstand.
Dansk 41
Page 42

Indstil til fabrikkens standardkalibrering
Hvis du vil fjerne en brugerindtastet kalibreringskurve fra instrumentet
og bruge fabrikskalibrering, skal du følge trinene nedenfor:
1. Tryk på og hold nede i 3 sekunder for at starte menutilstand.
2. Tryk på , indtil "USEr" (Bruger) vises, og tryk derefter på .
3. Tryk på , indtil "dFL" (standard) vises, og tryk derefter på .
Vedligeholdelse
F O R S I G T I G
Flere risici. Kun kvalificeret personale må udføre de opgaver, som er
beskrevet i dette afsnit i dokumentet.
B E M Æ R K N I N G
Du må ikke skille instrumentet ad ved vedligeholdelse. Kontakt producenten,
hvis de interne komponenter skal rengøres eller repareres.
Rengør instrumentet
Rengør instrumentet udvendigt med en fugtig klud og en mild
sæbeopløsning, og tør derefter instrumentet efter behov.
Rengør kuvetterne
F O R S I G T I G
Risiko for at blive udsat for kemiske stoffer Overhold laboratoriets
sikkerhedsprocedurer, og bær alt det personlige beskyttelsesudstyr,
der er nødvendigt for at beskytte dig mod de kemikalier, du bruger.
Se de aktuelle sikkerhedsdataark (MSDS/SDS) for
sikkerhedsprotokoller.
F O R S I G T I G
Fare for eksponering for kemiske stoffer. Bortskaf kemikalier og
affald i overensstemmelse med lokale, regionale og nationale
bestemmelser.
De fleste laboratorieopløsningsmidler bruges ved anbefalede
koncentrationer. Neutrale laboratorieopløsningsmidler, som f.eks.
42 Dansk
Page 43

Liquinox, er mere sikre, når regelmæssig rengøring er nødvendig. For
at reducere antallet af rengøringer kan du forøge temperaturerne eller
bruge et ultralydsbad. For at afslutte rengøringen skal du skylle efter
nogle gange med deioniseret vand og lade kuvetten lufttørre.
Kuvetterne kan også rengøres med syre, fulgt af en omhyggelig
skylning med deioniseret vand.
BEMÆRK: Brug altid syre til at rengøre kuvetter, der er blevet brug til tests med
lavt metalniveau.
Specielle rengøringsmetoder er nødvendige til individuelle procedurer.
Når der bruges en børste til at rengøre kuvetter, skal du være ekstra
forsigtig for at undgå skrammer på kuvetternes indvendige overflade.
Udskift batterierne
Udskift batterierne, når batteristrømniveauet er lavt. Se Isæt batterierne
på side 29.
Fejlsøgning
Error (Fejl) Beskrivelse Løsning
E-00 Ingen nulstilling I brugerkalibreringstilstand blev der målt
E-01 Fejl med lys fra
E-02 LED-fejl
omgivelserne
7
en standardopløsning, før instrumentets
nul blev indstillet. Mål en blind opløsning
for at indstille instrumentet til nul.
Der er lys fra omgivelserne i
7
kuvetteholderen. Sørg for, at
instrumenthætten er fuldt installeret på
kuvetteholderen. Se Udfør en test
på side 33.
LED'en (lyskilden) overholder ikke
reglerne. Udskift batterierne. Tjek, at
LED'en i celleholderen tændes, når der
trykkes på eller .
7
Når der opstår en E-01 eller E-02 fejl på en måling, viser displayet
"_.__". Decimalpladsen afhænger af kemien. Hvis fejlen E-01 eller
E-02 indtræder, mens instrumentet er indstillet til nul, skal du
indstille instrumentet til nul igen.
Dansk 43
Page 44

Error (Fejl) Beskrivelse Løsning
E-03 Fejl ved
standardjustering
• Den målte værdi for
standardopløsningen er over
justeringsgrænserne. Klargør en ny
standard.
• Standardopløsningen er ikke inden for
det koncentrationsområde, som kan
bruges til justering af
standardkalibrering. Klargør en
standard med en værdi på eller i
nærheden af de anbefalede
koncentrationer, som er angivet i
proceduren.
• Sørg for, at standardopløsningens
koncentration er indtastet korrekt.
Aflæsning
blinker efterfulgt
af E-04
Aflæsningen er over
eller under
instrumentets
8
område.
Hvis aflæsningen er mindre end
instrumentområdet, skal du sørge for, at
instrumenthætten er fuldt installeret på
kuvetteholderen. Mål en blindprøve Hvis
aflæsningen for blindprøven ikke er nul,
skal du indstille instrumentet til nul igen.
Hvis aflæsningen er større end
instrumentområdet, skal du fastslå, om
der er lysblokering i celleholderen.
Fortynd prøven. Udfør testen igen.
E-06 Absorbansfejl Absorbansværdien er ikke korrekt, eller
den brugerindtastede kalibreringskurve
har mindre end to punkter. Indtast eller
mål absorbansværdien igen.
E-07 Fejl ved
standardværdi
Standardopløsningens koncentration er
lig med en anden standardopløsnings
koncentration, som allerede er indtastet i
den brugerindtastede kalibreringskurve.
Indtast den korrekte
standardkoncentration.
8
Værdien, der blinker, er 10 % over den øvre testgrænse.
44 Dansk
Page 45

Error (Fejl) Beskrivelse Løsning
E-09 Fejl ved blink
Instrumentet kan ikke gemme data.
Tryk på, og hold nede i 5 sekunder
for at nulstille instrumentet.
E-10 Den omgivende
temperatur er for
høj eller for lav
Den omgivende temperatur er uden for
gyldigt interval. Brug kun instrument i de
angivne driftsforhold. Se Specifikationer
på side 25.
E-12 Lav batteristrøm Batteriet er næsten afladet. Udskift
batterierne. Se Isæt batterierne
på side 29.
E-13 Parameters
belastningsfejl
E-14 efterfulgt
Nul-måling ugyldig Nul-målingen er for lav. Brug en
af "_.__" eller
"0", hvis intet
nul var til stede
E-15 efterfulgt
Absorbans for høj Undersøg, om der er en let blokering i
af "_.__"
E-20 Signalmåling uden
for område
Instrumentets hukommelse er defekt.
Kontakt teknisk support.
målecelle fyldt med vand, og prøv igen.
Kontakt teknisk support, hvis fejlen
fortsat opstår.
celleholderen. Rengør celleholderen.
Fortynd prøven. Udfør testen igen.
BEMÆRK: Dette instrument kan ikke læse
absorbansværdier højere end 3,5 Abs.
Der er for meget lys på lysdetektor. Sørg
for, at instrumenthætten er fuldt
installeret på kuvetteholderen. Udfør
testen igen. Kontakt teknisk support,
hvis fejlen fortsat opstår.
E-21 Signalmåling ustabil Der er et ustabilt signal på lysdetektor.
Der er for meget eller ustabilt omgivende
lys. Sørg for, at instrumenthætten er
fuldt installeret på kuvetteholderen.
Udfør testen igen. Kontakt teknisk
support, hvis fejlen fortsat opstår.
E-22 Hardwarefejl Det elektroniske system er defekt.
Kontakt teknisk support.
Dansk 45
Page 46

Følgende fejl kan opstå umiddelbart efter et instrument er opdateret.
Error
(Fejl)
E-30 Intet program Der opstod en fejl under opdatering af
E31 Opdatering af bootloader
E-32 Programopdateringen
E-66 Opdatering mislykkedes Instrumentet er defekt. Kontakt teknisk
Beskrivelse Løsning
programmet. Et gyldigt program blev ikke
fundet på instrumentet. Opdater
instrumentet igen.
mislykkedes
mislykkedes
Der opstod en fejl under overførslen af
opdatering af bootloader. Opdatering af
bootloader igen.
Der opstod en fejl under overførsel af
programopdateringen. Opdater
instrumentet igen.
support.
Reservedele og tilbehør
A D V A R S E L
Risiko for personskade. Anvendelse af ikke-godkendte dele kan
medføre personskade, beskadigelse af instrumentet eller fejlfunktion
af udstyret. Reservedelene i dette afsnit er godkendt af producenten.
BEMÆRK: Produkt- og varenumre kan variere i visse salgsregioner. Kontakt den
relevante distributør, eller se virksomhedens webside for kontaktinformation.
Reservedele
Beskrivelse Mængde Varenr.
AAA-batterier, alkaline 4/pk. 4674300
Instrumenthætte 1 LPZ445.99.00006
Batteridæksel 1 LPZ445.99.00007
Prøvecelle, 25 mm/10 mL (glas) 6/pk. 2427606
Prøvecelle, 1 cm/10 mL (plastik) 2/pk. 4864302
46 Dansk
Page 47

Tilbehør
Beskrivelse Mængde Varenr.
Hach kommunikationsdongle 1 LPV446.99.00012
Blød bæretaske/etui 1 5953100
Dansk 47
Page 48

Spis treści
Komponenty urządzenia
na stronie 52
Wkładanie baterii na stronie 53 Konserwacja na stronie 66
Interfejs użytkownika i nawigacja
na stronie 54
Przeprowadzanie testu na stronie 57 Części zamienne i akcesoria
Kalibracja na stronie 61
Rozwiązywanie problemów
na stronie 68
na stronie 71
Dane techniczne
Dane techniczne mogą ulec zmianie bez wcześniejszego
powiadomienia.
Dane techniczne Informacje szczegółowe
Wymiary (szer. × wys.
× dł.)
Obudowa IP67, wodoodporna na głębokości 1 m (3,3 stopy)
Źródło światła Dioda świecąca (LED)
Detektor Fotodioda krzemowa
Wyświetlacz LCD z podświetleniem
Masa 0,25 kg (0,55 funta)
Wymagania dotyczące
zasilania
Warunki pracy 0 do 50°C (32 do 122°F); 0 do 90% wilgotności
Temperatura podczas
przechowywania
Długość fali Stała długość fali ±2 nm, różna w zależności
Szerokość pasma
filtracji
6,9 x 15,7 x 3,4 cm (2,7 x 6,2 x 1,3 cala)
przez 30 min, gdy komora baterii jest zamknięta
i zablokowana.
4 baterie AAA; przybliżony czas eksploatacji
to 5000 testów (użycie podświetlenia zmniejsza liczbę
testów)
Akumulatory nie są zalecane.
względnej, bez kondensacji
–20 do 55°C (–4 do 131°F), 0 do 80% wilgotności
względnej bez kondensacji
od modelu
15 nm
48 Polski
Page 49

Dane techniczne Informacje szczegółowe
Zakres absorbancji 0 do 2.5 Abs
Kuweta 25 mm (10 mL) i 1 cm (10 mL)
Pamięć danych 50 ostatnich pomiarów
Bluetooth®
Certyfikaty CE
Gwarancja 1 rok (UE: 2 lata)
1
Komunikacja Bluetooth® jest włączona, gdy
zainstalowany jest opcjonalny komunikacyjny klucz
sprzętowy firmy Hach.
Ogólne informacje
W żadnym przypadku producent nie ponosi odpowiedzialności
za bezpośrednie, pośrednie, specjalne, przypadkowe lub wtórne
szkody wynikające z błędu lub pominięcia w niniejszej instrukcji
obsługi. Producent zastrzega sobie prawo do dokonania zmian
w niniejszej instrukcji obsługi i w produkcie, której dotyczy w dowolnym
momencie, bez powiadomienia lub zobowiązania. Na stronie
internetowej producenta można znaleźć poprawione wydania.
Informacje dotyczące bezpieczeństwa
P O W I A D O M I E N I E
Producent nie ponosi odpowiedzialności za ewentualne szkody wynikłe
z niewłaściwego stosowania albo użytkowania tego produktu, w tym, bez
ograniczeń za szkody bezpośrednie, przypadkowe i wtórne, oraz wyklucza
odpowiedzialność za takie szkody w pełnym zakresie dozwolonym przez
obowiązujące prawo. Użytkownik jest wyłącznie odpowiedzialny
za zidentyfikowanie krytycznych zagrożeń aplikacji i zainstalowanie
odpowiednich mechanizmów ochronnych procesów podczas ewentualnej awarii
sprzętu.
Prosimy przeczytać całą niniejszą instrukcję obsługi przed
rozpakowaniem, włączeniem i rozpoczęciem użytkowania urządzenia.
Należy zwrócić uwagę na wszystkie informacje dotyczące
niebezpieczeństwa i kroków zapobiegawczych. Niezastosowanie się
1
Znak słowny i logo Bluetooth® są zastrzeżonymi znakami
towarowymi należącymi do Bluetooth SIG, Inc. i każde użycie
takich znaków przez firmę HACH jest objęte licencją.
Polski 49
Page 50

do tego może spowodować poważne obrażenia obsługującego lub
uszkodzenia urządzenia.
Należy upewnić się, czy systemy zabezpieczające wbudowane
w urządzenie pracują prawidłowo. Nie używać ani nie instalować tego
urządzenia w inny sposób, aniżeli podany w niniejszej instrukcji.
Korzystanie z informacji o zagrożeniach
N I E B E Z P I E C Z E Ń S T W O
Wskazuje potencjalnie lub bezpośrednio niebezpieczną sytuację, która — jeśli
się jej nie zapobiegnie — doprowadzi do śmierci lub poważnych obrażeń.
O S T R Z E Ż E N I E
Wskazuje na potencjalną lub bezpośrednio niebezpieczną sytuację, która, jeżeli
się jej nie uniknie, może doprowadzić do śmierci lub ciężkich obrażeń.
Wskazuje na potencjalnie niebezpieczną sytuację, która może doprowadzić
do mniejszych lub umiarkowanych obrażeń.
P O W I A D O M I E N I E
Wskazuje sytuację, która — jeśli się jej nie zapobiegnie — może doprowadzić
do uszkodzenia urządzenia. Informacja, która wymaga specjalnego
podkreślenia.
U W A G A
Etykiety ostrzegawcze
Przeczytaj wszystkie etykiety dołączone do urządzenia.
Nieprzestrzeganie zawartych na nich ostrzeżeń może doprowadzić
do obrażeń ciała i/lub uszkodzenia urządzenia. Symbol umieszczony
na urządzeniu jest zamieszczony w podręczniku i opatrzony informacją
o należytych środkach ostrożności.
50 Polski
Page 51

Ten symbol, jeżeli znajduje się na przyrządzie, odsyła do instrukcji
obsługi i/lub informacji dotyczących bezpieczeństwa.
Urządzeń elektrycznych oznaczonych tym symbolem nie wolno
wyrzucać do europejskich publicznych systemów utylizacji odpadów.
Wyeksploatowane urządzenia należy zwrócić do producenta w celu
ich utylizacji. Producent ma obowiązek przyjąć je bez pobierania
dodatkowych opłat.
Certyfikaty
Kanadyjska regulacja prawna dotycząca sprzętu powodującego
zakłócenia odbioru radiowego, IECS-003, klasa B:
Stosowne wyniki testów dostępne są u producenta.
Ten cyfrowy aparat klasy B spełnia wszystkie wymogi kanadyjskich
regulacji prawnych dotyczących sprzętu powodującego zakłócenia.
Cet appareil numérique de classe B répond à toutes les exigences
de la réglementation canadienne sur les équipements provoquant des
interférences.
FCC Część 15, Ograniczenia Klasy ''B''
Stosowne wyniki testów dostępne są u producenta. Niniejsze
urządzenie spełnia warunki Części 15 Zasad FCC. Przy pracy
obowiązują poniższe warunki:
1. Sprzęt nie może powodować szkodliwego zakłócenia.
2. Sprzęt musi akceptować wszelkie odbierane zakłócenia, w tym
zakłócenia, które mogą powodować niepożądane działanie.
Zmiany oraz modyfikacje tego urządzenia, które nie zostały wyraźnie
zaakceptowane przez stronę odpowiedzialną za zgodność, mogą
spowodować pozbawienie użytkownika upoważnienia do korzystania
z niniejszego urządzenia. To urządzenie zostało przetestowane
i odpowiada granicom dla klasy B urządzenia cyfrowego, stosownie
do części 15 przepisów FCC. Ograniczenia te zostały wprowadzone
w celu zapewnienia należytej ochrony przed szkodliwymi zakłóceniami,
gdy urządzenie jest użytkowane w środowisku komercyjnym. Niniejsze
urządzenie wytwarza, używa i może wydzielać energię o częstotliwości
radiowej oraz, jeśli nie jest zainstalowane i używane zgodnie
z instrukcją obsługi, może powodować szkodliwe zakłócenia
Polski 51
Page 52

w łączności radiowej. Istnieje prawdopodobieństwo,
że wykorzystywanie tego urządzenia w terenie mieszkalnym może
spowodować szkodliwe zakłócenia. W takim przypadku użytkownik jest
zobowiązany do usunięcia zakłóceń na własny koszt. W celu
zmniejszenia problemów z zakłóceniami można wykorzystać poniższe
metody:
1. Odsunąć sprzęt od zakłócanego urządzenia.
2. Zmienić pozycję anteny odbiorczej urządzenia zakłócanego.
3. Spróbować kombinacji powyższych metod.
Charakterystyka produktu
To urządzenie jest przenośnym fotometrem z filtrem do analizy wody.
Uwaga: To urządzenie nie ma atestu do pomiaru chloru i chloraminy
w zastosowaniach medycznych w USA.
Komponenty urządzenia
Upewnić
Rysunek 1. W przypadku braku lub uszkodzenia jakiegokolwiek
elementu należy niezwłocznie skontaktować się z producentem lub z
jego przedstawicielem handlowym. Rysunek 1 (przykładowy)
przedstawia elementy dostarczane wraz z LPV445.99.00110. Inne
przyrządy są dostarczane z innymi elementami.
się, że zostały dostarczone wszystkie komponenty. Patrz
Polski
52
Page 53

Rysunek 1 Elementy produktu
1 DR300 5 Skrzynka
2 Baterie alkaliczne AAA 6 Odczynniki
3 Kuwety, 25 mm (10 mL), szklane 7 Komunikacyjny klucz sprzętowy
4 Kuwety, 1 cm (10 mL), plastikowe
Hach (opcjonalny, dostarczany
oddzielnie)
Wkładanie baterii
O S T R Z E Ż E N I E
Zagrożenie wybuchem. Niewłaściwie zainstalowane baterie mogą
uwalniać gazy wybuchowe. Upewnij się, że dopuszczony skład
chemiczny baterii / akumulatorów jest ten sam. Sprawdź czy zostały
zainstalowane we właściwy sposób. Nie używać razem zużytych
i nowych baterii.
Aby dowiedzieć się, jak włożyć baterie, patrz Rysunek 2. Następnie
nacisnąć przycisk , aby włączyć przyrząd.
Polski 53
Page 54

Rysunek 2 Wkładanie baterii
1 Moneta 3 Plastikowa wkładka do klucza
2 Pokrywa komory baterii
sprzętowego
2
Interfejs użytkownika i nawigacja
Opis klawiatury
Rysunek 3 pokazuje blok przycisków i obsługiwane przez nie główne
funkcje.
2
Aby zainstalować komunikacyjny klucz sprzętowy firmy Hach,
wystarczy wyjmować tylko plastikową wkładkę. Patrz instrukcja
instalacji dołączona do klucza sprzętowego.
54 Polski
Page 55

Rysunek 3 Klawiatura
1 Przycisk zakresu: wybiera zakres
pomiarowy (np. LR lub HR).
Nacisnąć i przytrzymać przez 3 s,
aby wejść do trybu menu lub
z niego wyjść.
W trybie menu służy do przewijania
w górę lub zwiększania wartości
wybranej cyfry.
2 Przycisk zerowania: ustawia
wartość zerową przed pomiarem.
W trybie menu wraca o jeden
poziom menu lub przesuwa kursor
do poprzedniej cyfry.
3 Przycisk zasilania: włącza
i wyłącza zasilanie.
Nacisnąć i przytrzymać przez 5 s,
aby zresetować przyrząd.
Kalibracja nie jest usuwana.
4 Przycisk podświetlenie: włącza
i wyłącza podświetlenie.
W trybie menu służy do przewijania
w dół lub zmniejszania wartości
wybranej cyfry.
5 Przycisk odczytu: rozpoczyna
pomiar próbki.
W trybie menu wybiera wyświetloną
opcję menu lub przesuwa kursor
do następnej cyfry.
Polski 55
Page 56

Opis wyświetlacz
a
Rysunek 4 pokazuje wartości i ikony widoczne na wyświetlaczu.
Rysunek 4 Wyświetlacz
1 Wyświetlacz numeryczny:
zmierzone wartości lub opcje menu
2 Ikona zakresu: wskazuje wybrany
zakres pomiarowy.
3 Zakresy lub parametry pomiarowe 7 Ikona kalibracji skorygowanej:
4 Ikona Bluetooth®: Bluetooth® jest
włączony.3.
5 Ikona baterii:
baterii. Miga, gdy poziom
naładowania baterii jest niski.
6 Parametry i zakresy pomiarowe
fabryczna kalibracja została
skorygowana lub wprowadzona
została krzywa kalibracji
zdefiniowana przez użytkownika.
poziom naładowania
Ustawianie godziny
Ustawić godzinę (format 24-godzinny).
1. Nacisnąć i przytrzymać przycisk
menu.
Zostanie wyświetlona godzina (lub 00:00).
2. Nacisnąć przycisk , aby ustawić godzinę.
3. Za pomocą przycisków i zmienić migającą liczbę. Nacisnąć ,
aby przejść do następnej cyfry. Nacisnąć przycisk , aby przejść
do poprzedniej cyfry.
3
Wskazuje, kiedy jest zainstalowany komunikacyjny klucz
sprzętowy firmy Hach.
56 Polski
przez 3 s, aby wejść do trybu
Page 57

Przeprowadzanie testu
N I E B E Z P I E C Z E Ń S T W O
Zagrożenia chemiczne lub biologiczne. Jeżeli to urządzenie jest
wykorzystywane do monitorowania systemów uzdatniania lub
doprowadzania substancji chemicznych, których działanie definiują
przepisy prawa oraz wymagania dotyczące zdrowia
i bezpieczeństwa publicznego czy też normy dotyczące wytwarzania
lub przetwarzania żywności lub napojów, to na użytkowniku
spoczywa odpowiedzialność za znajomość i przestrzeganie tychże
przepisów, regulacji i norm oraz stosowanie właściwych urządzeń
pozwalających działać zgodnie z przepisami w razie
nieprawidłowego działania niniejszego urządzenia.
N I E B E Z P I E C Z E Ń S T W O
Narażenie na działanie substancji chemicznych. Należy przestrzegać
procedur bezpieczeństwa stosowanych w laboratoriach oraz
stosować wszystkie środki ochrony osobistej wymagane
w przypadku używanych substancji chemicznych. Protokoły
warunków bezpieczeństwa można znaleźć w aktualnych kartach
charakterystyki (MSDS/SDS) materiałów.
Narażenie na działanie substancji chemicznych. Usuwać substancje
chemiczne i odpady zgodnie z przepisami lokalnymi, regionalnymi
i państwowymi.
Poniżej przedstawiono ogólne kroki, które należy wykonać w celu
przeprowadzenia testu.
Aby wykonać test dla określonego parametru (np. chloru), należy
pobrać procedurę testową ze strony internetowej producenta. Patrz
Pobieranie procedury testowej na stronie 60.
U W A G A
1. Nacisnąć przycisk , aby wybrać odpowiedni zakres pomiarowy
(np. LR lub HR).
2. Przygotować ślepą próbę. Patrz procedura testowa.
3. Wyczyścić kuwetę za pomocą niestrzępiącej się szmatki.
4. Włożyć kuwetę ze ślepą próbą do uchwytu kuwety. Zadbać
o włożenie kuwety ze ślepą próbą w prawidłowej i konsekwentnej
Polski 57
Page 58

orientacji, tak aby wyniki były bardziej powtarzalne i precyzyjne.
Patrz Rysunek 5.
5.
Założyć nasadkę przyrządu na uchwyt kuwety. Patrz Rysunek 6.
6. Nacisnąć przycisk , aby wyzerować urządzenie.
7. Wyjąć kuwetę ze ślepą próbą.
8. Przygotować próbkę. Patrz procedura testowa.
9. Wyczyścić kuwetę za pomocą niestrzępiącej się szmatki.
10. Włożyć kuwetę ze ślepą próbą do uchwytu kuwety. Zadbać
o włożenie kuwety w prawidłowej i konsekwentnej orientacji, tak
aby wyniki były bardziej powtarzalne i precyzyjne.
Patrz Rysunek 5.
11. Założyć nasadkę przyrządu na uchwyt kuwety. Patrz Rysunek 6.
12. Nacisnąć przycisk . Wyświetlacz pokazuje wyniki w jednostkach
stężenia lub absorbancji.
Uwaga: Wynik miga, jeśli jego wartość jest mniejsza lub większa niż zakres
pomiarowy.
13. Wyjąć kuwetę z uchwytu kuwety.
14. Niezwłocznie opróżnić i przepłukać kuwetę. Przepłukać kuwetę
i nasadkę trzy razy wodą dejonizowaną (lub destylowaną).
Uwaga: Alternatywnie, jeśli zmierzone próbki mają wyższe stężenie niż woda
z kranu, należy użyć wody z kranu do przepłukania kuwety.
58 Polski
Page 59

Rysunek 5 Orientacja kuwety
1 Znacznik orientacji42 Kuweta,
25 mm (10 mL),
5
szklana
4
Niektóre wersje przyrządu mają kuwety bez znaku orientacyjnego.
5
Do badania chloru w niskim zakresie należy użyć szklanej kuwety.
6
Do badania chloru w wysokim zakresie należy użyć plastikowej
3 Kuweta,
1 cm (10 mL),
plastikowa
6
kuwety.
Polski 59
Page 60

Rysunek 6 Założyć nasadkę przyrządu na uchwyt kuwety
Pobieranie procedury testowej
1. Przejść do http://www.hach.com.
2. Wpisać „DR300” w polu wyszukiwania.
3. Wybrać odpowiedni przyrząd z listy.
4. Kliknąć kartę „Downloads” (Pobieranie).
5. Przejść do „Methods/Procedures” (Metody/procedury).
6. Kliknąć łącze do odpowiedniej procedury testowej, aby ją pobrać.
60 Polski
Page 61

Wyświetlanie pomiarów
Uwaga: Przyrząd zapisuje maksymalnie 50 pomiarów. Po wykonaniu
50 pomiarów nowe pomiary będą zastępować najstarsze pomiary.
1. Nacisnąć i przytrzymać przycisk przez 3 s.
2. Naciskać przycisk do momentu pojawienia się napisu „rCL”
(Przywołaj), a następnie nacisnąć przycisk .
Zostanie wyświetlony napis „– 01 –”. Pomiar 01 jest ostatnim
wykonanym pomiarem.
3. Nacisnąć przycisk , aby przejść do przodu.
Po numerze pomiaru następuje wartość pomiaru, a dalej godzina.
4. Aby przejść do numeru pomiaru, naciskać przycisk
aż do wyświetlenia numeru pomiaru, a następnie nacisnąć przycisk
lub .
Uwaga: Pomiarów nie można usunąć.
5. Nacisnąć i przytrzymać przycisk przez 3 s, aby wrócić do trybu
pomiaru.
Kalibracja
Kalibracja tego przyrządu została przeprowadzona w fabryce.
Przeprowadzenie kalibracji przez użytkownika nie jest konieczne.
Korygowanie kalibracji na podstawie wzorca
Opcji korygowania kalibracji na podstawie wzorca (SCA) należy użyć,
gdy należy dostosować kalibrację w celu spełnienia wymogów
prawnych. Kalibracja fabryczna jest nieznacznie dostosowywana
za pomocą opcji korygowania kalibracji na podstawie wzorca (SCA),
tak aby przyrząd wyświetlał oczekiwaną wartość roztworu wzorcowego.
Skorygowana kalibracja jest następnie wykorzystywana dla wszystkich
wyników badań. Taka korekta może zwiększyć dokładność badania,
gdy występują niewielkie różnice w odczynnikach lub przyrządach.
Uwaga: W przypadku przyrządów z fabrycznie skalibrowanymi zakresami lub
metodami funkcja korygowanie kalibracji na podstawie wzorca (SCA) jest
wyłączana po wprowadzeniu do przyrządu kalibracji wprowadzanej przez
użytkownika. Aby ponownie włączyć funkcję SCA, należy ustawić przyrząd
z powrotem na domyślną kalibrację fabryczną. Patrz Ustawianie fabrycznej
kalibracji domyślnej na stronie 66.
Polski 61
Page 62

Korygowanie kalibracji na podstawie wzorca
1. Zakończyć procedurę testową dla zakresu kalibracji. Dla próbki
należy stosować stężenie roztworu wzorcowego podane
w dokumentacji procedury testowej.
Uwaga: Jeżeli w dokumentacji procedury testowej nie podano stężenia
roztworu wzorcowego, można zastosować inny znany wzorzec.
2. Po zakończeniu procedury testowej należy nacisnąć i przytrzymać
przycisk przez 3 s.
3. Naciskać przycisk do momentu pojawienia się napisu „SCA”,
a następnie nacisnąć przycisk .
Na wyświetlaczu pojawi się wartość korygowania kalibracji
na podstawie wzorca.
4. Jeśli jest używany inny znany wzorzec, wprowadzić wartość
wzorca:
a. Naciskać przycisk do momentu pojawienia się napisu „Edit”
(Edycja), a następnie nacisnąć przycisk .
b. Wprowadzić wartość wzorca.
Za pomocą przycisków i zmienić migającą liczbę.
Nacisnąć przycisk , aby przejść do następnej cyfry. Nacisnąć
przycisk , aby przejść do poprzedniej cyfry.
5. Nacisnąć przycisk , aby dodać wartość korygowania kalibracji
na podstawie wzorca do krzywej kalibracji fabrycznej.
Wyłączanie korekty kalibracji na podstawie wzorca
Aby ponownie używać domyślnej kalibracji fabrycznej, wybrać dla
funkcji korygowania kalibracji na podstawie wzorca (SCA) ustawienie
wyłączone.
1. Nacisnąć i przytrzymać przycisk przez 3 s, aby wejść do trybu
menu.
2. Naciskać przycisk do momentu pojawienia się napisu „SCA”,
a następnie nacisnąć przycisk .
3. Naciskać przycisk do momentu pojawienia się napisu „OFF”,
a następnie nacisnąć przycisk .
Uwaga: Aby ponownie włączyć funkcję SCA, wykonać korygowanie kalibracji
na podstawie wzorca.
62 Polski
Page 63

Kalibracja zdefiniowana przez użytkownika
Urządzenie to akceptuje krzywą kalibracji zdefiniowaną przez
użytkownika. Krzywa kalibracji mieści się w zakresie absorbancji
od 0 do 2,5. Upewnić się, że krzywa kalibracji obejmuje wartości
wzorca, które są mniejsze i większe niż zakres zainteresowań.
Zakres urządzenie mieści się w zakresie kalibracji. Na przykład, jeśli
używane wzorce mają wartość 1,00, 2,00 i 4,00. Zakres urządzenia
wynosi od 1,00 do 4,00.
Istnieją dwie możliwości wprowadzenia krzywej kalibracji zdefiniowanej
przez użytkownika:
• Wprowadzanie krzywej kalibracji za pomocą wzorców – Wartości
roztworów wzorca są wprowadzane za pomocą bloku przycisków
i wartości absorbancji są mierzone.
• Wprowadzanie krzywej kalibracji z bloku przycisków – Wartości
roztworów wzorca i wartości absorbancji są wprowadzane
za pomocą bloku przycisków.
Uwaga: Jeśli urządzenie zostanie wyłączone lub zasilanie urządzenia zostanie
wyłączone przed zakończeniem procedury krzywej kalibracji zdefiniowanej przez
użytkownika, krzywa kalibracji nie zostanie zapisywana. Urządzenie
automatycznie przełącza się w tryb wprowadzania kalibracji zdefiniowanej przez
użytkownika po 60 minutach braku aktywności. Kalibracje zdefiniowane przez
użytkownika są zakończone po wyjściu użytkownika z trybu kalibracji (CAL) lub
trybu edycji.
Wprowadzanie krzywej kalibracji za pomocą wzorców
O S T R Z E Ż E N I E
Narażenie na działanie substancji chemicznych. Należy przestrzegać
procedur bezpieczeństwa stosowanych w laboratoriach oraz
stosować wszystkie środki ochrony osobistej wymagane
w przypadku używanych substancji chemicznych. Protokoły
warunków bezpieczeństwa można znaleźć w aktualnych kartach
charakterystyki (MSDS/SDS) materiałów.
U W A G A
Narażenie na działanie substancji chemicznych. Usuwać substancje
chemiczne i odpady zgodnie z przepisami lokalnymi, regionalnymi
i państwowymi.
Polski 63
Page 64

Uwaga: Alternatywnie do ślepej próby można używać wody dejonizowanej, jeśli
próbka jest znacznie bardziej mętna lub ma barwę intensywniejszą niż
dejonizowana woda.
1. Nacisnąć przycisk , aby ustawić przyrząd na zakres kalibracji (np.
LR lub HR).
2. Przygotować ślepą próbę. Patrz procedura testowa.
3. Wyczyścić kuwetę za pomocą niestrzępiącej się szmatki.
4. Wyzerować urządzenie.
a. Włożyć ślepą kuwetę do uchwytu kuwety.
b. Założyć nasadkę urządzenia na uchwyt kuwety.
c. Nacisnąć przycisk . Na wyświetlaczu pojawi się ciąg znaków
„- - - -”, a następnie „0.00”.
5. Nacisnąć i przytrzymać przycisk przez 3 s, aby wejść do trybu
menu.
6. Naciskać przycisk do momentu pojawienia się napisu „USEr”
(Użytkownik), a następnie nacisnąć .
7. Naciskać przycisk do momentu pokazania się napisu „CAL”
(Kalibracja), a następnie nacisnąć przycisk .
8. Gdy na wyświetlaczu pojawi się napis „S0”, nacisnąć przycisk .
9. Wprowadzić 00.00 (lub 000.0) dla wartości ślepej próby.
Za pomocą przycisków i zmienić migającą liczbę. Nacisnąć
przycisk , aby przejść do następnej cyfry. Nacisnąć przycisk ,
aby przejść do poprzedniej cyfry.
10. Gdy na wyświetlaczu pojawi się napis „A0”, nacisnąć przycisk ,
aby wykonać pomiar absorbancji ślepej próby.
Na wyświetlaczu pojawi się wartość absorbancji dla „S0”.
11. Wyjąć kuwetę z uchwytu kuwety.
12. Przygotować próbkę. Patrz procedura testowa. Dla próbki należy
stosować stężenie roztworu wzorcowego podane w dokumentacji
procedury testowej.
13. Wyczyścić kuwetę za pomocą niestrzępiącej się szmatki.
14. Nacisnąć przycisk , aby wyświetlić „S1” (lub „Add”), a następnie
nacisnąć przycisk .
64 Polski
Page 65

15. Wprowadzić wartość stężenia pierwszego wzorca kalibracji,
a następnie nacisnąć przycisk .
16. Gdy na wyświetlaczu pojawi się napis „A1”, wykonać następujące
czynności, aby zmierzyć absorbancję:
a. Włożyć kuwetę wzorca reagującego do uchwytu kuwety.
b. Założyć nasadkę przyrządu na uchwyt kuwety.
c. Nacisnąć przycisk . Na wyświetlaczu pojawi się wartość
absorbancji dla „S1”.
17. Kalibracja została zakończona dla dwóch punktów kalibracji. Jeśli
konieczne są dodatkowe wzorce do kalibracji:
Wykonać ponownie czynności z kroków 11 i 16, aby zmierzyć
więcej wzorców kalibracji.
18. Wyjąć kuwetę z uchwytu kuwety.
19. Niezwłocznie opróżnić i przepłukać kuwetę. Przepłukać kuwetę
i nasadkę trzy razy wodą dejonizowaną (lub destylowaną).
Uwaga: Alternatywnie do płukania kuwety można użyć wody z kranu, jeżeli
stężenie parametru w wodzie z kranu jest mniejsze niż w mierzonych
próbkach.
20. Nacisnąć i przytrzymać przycisk przez 3 s, aby wrócić do trybu
pomiaru.
Wprowadzanie krzywej kalibracji z bloku przycisków
Co najmniej dwie pary danych są niezbędne do wprowadzenia krzywej
kalibracji zdefiniowanej przez użytkownika. Każda para danych dotyczy
wartości stężenia i absorbancji dla danego stężenia. Maksymalnie
można wprowadzić 10 par danych.
1. Nacisnąć przycisk , aby ustawić przyrząd na zakres kalibracji (np.
LR lub HR).
2. Nacisnąć i przytrzymać przycisk przez 3 s, aby wejść do trybu
menu.
3. Naciskać przycisk do momentu pojawienia się napisu „USEr”
(Użytkownik), a następnie nacisnąć .
4. Naciskać przycisk do momentu pojawienia się napisu „Edit”
(Edycja), a następnie nacisnąć przycisk .
5. Gdy na wyświetlaczu pojawi się napis „S0”, nacisnąć przycisk .
Polski 65
Page 66

6. Wprowadzić pierwszą parę danych.
Pierwsza para danych to S0 (wartość stężenia) i A0 (wartość
absorbancji).
• Za pomocą przycisków i zmienić migającą liczbę.
• Nacisnąć przycisk , aby przejść do następnej cyfry.
• Nacisnąć przycisk , aby przejść do poprzedniej cyfry.
7. Wykonać ponownie czynności z kroków 5 i 6, aby wprowadzić
drugą parę danych (S1 i A1).
8. Kalibracja została zakończona dla dwóch par danych. Jeśli
konieczne są dodatkowe pary danych do kalibracji:
a. Gdy pojawi się napis „Add” (Dodaj), nacisnąć przycisk .
b. Wykonać ponownie czynności z kroków 5 i 6, aby wprowadzić
więcej par danych.
9. Nacisnąć i przytrzymać przycisk przez 3 s, aby wrócić do trybu
pomiaru.
Ustawianie fabrycznej kalibracji domyślnej
Aby usunąć wprowadzoną przez użytkownika krzywą kalibracji
z przyrządu i używać kalibracji fabrycznej, należy wykonać następujące
czynności:
1. Nacisnąć i przytrzymać przycisk przez 3 s, aby wejść do trybu
menu.
2. Naciskać przycisk do momentu pojawienia się napisu „USEr”
(Użytkownik), a następnie nacisnąć .
3. Naciskać przycisk do momentu pojawienia się napisu „dFL”
(Domyślna), a następnie nacisnąć przycisk .
Konserwacja
Wiele zagrożeń. Tylko wykwalifikowany personel powinien
przeprowadzać prace opisane w tym rozdziale niniejszego
dokumentu.
66 Polski
U W A G A
Page 67

P O W I A D O M I E N I E
Nie demontować urządzenia w celu konserwacji. Skontaktuj się z producentem.
gdy komponent wewnętrzny wymaga czyszczenia lub naprawy.
Czyszczenie urządzenia
Oczyścić zewnętrzną powierzchnię instrumentu wilgotną ściereczką
i łagodnym roztworem mydła, a następnie wytrzeć instrument
do sucha.
Czyszczenie kuwet
U W A G A
Narażenie na działanie substancji chemicznych. Należy przestrzegać
procedur bezpieczeństwa stosowanych w laboratoriach oraz
stosować wszystkie środki ochrony osobistej wymagane
w przypadku używanych substancji chemicznych. Protokoły
warunków bezpieczeństwa można znaleźć w aktualnych kartach
charakterystyki (MSDS/SDS) materiałów.
U W A G A
Narażenie na działanie substancji chemicznych. Usuwać substancje
chemiczne i odpady zgodnie z przepisami lokalnymi, regionalnymi
i państwowymi.
Używa się większości detergentów laboratoryjnych w zalecanych
stężeniach. Naturalne środki czyszczące (np. Liquinox)
są bezpieczniejsze w użytkowaniu, gdy konieczne jest regularne
czyszczenie. Aby skrócić czas czyszczenia, należy podwyższyć
temperaturę lub skorzystać z łaźni ultradźwiękowej. Aby zakończyć
czyszczenie, przepłucz kilkakrotnie za pomocą dejonizowanej wody
i pozostaw zbiornik do wyschnięcia.
Zbiorniki próbek można również wyczyścić kwasem, a następnie
przepłukać dejonizowaną wodą.
Uwaga: Jeśli zbiorniki były używane podczas testów na niskie stężenia metali,
zawsze używaj kwasu do ich czyszczenia.
W indywidualnych procedurach konieczne jest stosowanie specjalnych
metod czyszczenia. Jeżeli czyszczenie zbiorników próbek wymaga
użycia szczoteczki, pamiętaj żeby zachować szczególną ostrożność
i nie zarysować ich wewnętrznej powierzchni.
Polski 67
Page 68

Wymiana baterii
Baterie należy wymienić, jeśli poziom naładowania baterii jest niski.
Zobacz punkt Wkładanie baterii na stronie 53.
Rozwiązywanie problemów
Błąd Opis Rozwiązanie
E-00 Brak wyzerowania W trybie kalibracji zdefiniowanej przez
E-01 Błąd światła
E-02 Błąd diody LED
otoczenia
7
użytkownika roztwór wzorcowy został
zmierzony przed wyzerowaniem
przyrządu. Zmierzyć roztwór ślepej próby,
aby ustawić zero przyrządu.
Światło otoczenia dochodzi do uchwytu
kuwety. Upewnić się, że nasadka
przyrządu jest dokładnie nałożona
na uchwyt kuwety. Patrz Przeprowadzanie
testu na stronie 57.
7
Diody LED (źródło światła) nie można
wyregulować. Wymienić baterie.
Upewnić się, że dioda LED w uchwycie
kuwety świeci, jeśli naciśnięty jest
przycisk lub
7
Jeśli podczas pomiaru wystąpi błąd E-01 lub E-02,
na wyświetlaczu pojawi się napis „_.__”. Miejsce po przecinku
zależy od substancji chemicznej. Jeśli błąd E-01 lub
E-02 występuje po wyzerowaniu urządzenia, powtórzyć czynność
zerowania.
68 Polski
Page 69

Błąd Opis Rozwiązanie
E-03 Błąd korekty
wzorca
• Wartość zmierzona roztworu
wzorcowego wykracza poza limity
regulacji. Przygotować świeży wzorzec.
• Roztwór wzorcowy nie mieści się
w zakresie stężeń, które mogą być
stosowane do korygowania kalibracji
na podstawie wzorca. Przygotować
wzorzec, którego wartość jest równa lub
przybliżona wartościom zalecanych
stężeń podanych w procedurze.
• Upewnić się, że wprowadzone stężenie
roztworu wzorcowego jest poprawne.
Odczyt miga,
a za nim jest
wyświetlony
napis E-04
Odczyt wykracza
poza zakres
przyrządu.
8
Jeśli odczyt jest mniejszy niż zakres
przyrządu, upewnić się, że nasadka
przyrządu jest całkowicie zainstalowana
na uchwycie kuwety. Dokonać pomiaru
ślepej próby. Jeśli odczyt ślepej próby nie
jest równy zero, ponownie wyzerować
przyrząd.
Jeśli odczyt wykracza poza zakres
przyrządu sprawdzić, czy strumień światła
nie jest blokowany w uchwycie kuwety.
Rozcieńczyć próbkę. Wykonać test
ponownie.
E-06 Błąd absorbancji Wartość absorbancji jest obarczona
błędem lub krzywa kalibracji
wprowadzona przez użytkownika nie
ma co najmniej dwóch punktów.
Wprowadzić lub zmierzyć wartość
absorbancji ponownie.
E-07 Błąd wartości
wzorca
Stężenie roztworu wzorcowego jest równe
stężeniu innego roztworu wzorcowego,
który już został wprowadzony na krzywej
kalibracji wprowadzonej przez
użytkownika. Wprowadzić poprawne
stężenie wzorca.
8
Wartość, która miga, przekracza o 10% górny limit zakresu testu.
Polski 69
Page 70

Błąd Opis Rozwiązanie
E-09 Błąd pamięci
Flash
Przyrząd nie może zapisać danych.
Nacisnąć i przytrzymać przycisk przez
5 s, aby zresetować przyrząd.
E-10 Zbyt wysoka lub
zbyt niska
temperatura
otoczenia
E-12 Niski poziom
naładowania
baterii
E-13 Błąd wczytania
parametru
Temperatura otoczenia jest poza
zakresem. Przyrządu należy używać tylko
w określonych warunkach pracy. Patrz
Dane techniczne na stronie 48.
Poziom naładowania baterii jest zbyt niski.
Wymienić baterie. Patrz Wkładanie baterii
na stronie 53.
Pamięć przyrządu jest uszkodzona.
Skontaktować się z działem pomocy
technicznej.
Błąd E-14,
po którym jest
wyświetlany
napis „_.__” lub
„0”, jeśli nie
Nieprawidłowy
pomiar zerowy
Pomiar zerowy jest zbyt niski. Użyć
kuwety z próbką wypełnioną wodą
i spróbować ponownie. Jeśli błąd nadal
występuje, skontaktować się z pomocą
techniczną.
wykonano
zerowania.
Błąd E-15,
po którym jest
wyświetlany
napis „_.__”
E-20 Pomiar sygnału
Absorbancja zbyt
wysoka
poza zakresem
Sprawdzić, czy światło nie jest blokowane
w uchwycie kuwety. Wyczyścić uchwyt
kuwety. Rozcieńczyć próbkę. Wykonać
test ponownie.
Uwaga: Przyrząd nie może odczytać wartości
absorbancji wyższych niż 3,5 Abs.
Do detektora dociera zbyt dużo światła.
Upewnić się, że nasadka przyrządu jest
dokładnie nałożona na uchwyt kuwety.
Wykonać test ponownie. Jeśli błąd nadal
występuje, skontaktować się z pomocą
techniczną.
70 Polski
Page 71

Błąd Opis Rozwiązanie
E-21 Pomiar sygnału
niestabilny
E-22 Błąd sprzętowy Układ elektroniczny jest uszkodzony.
Niestabilny sygnał na detektorze światła.
Oświetlenie otoczenia jest zbyt duże lub
niestabilne. Upewnić się, że nasadka
przyrządu jest dokładnie nałożona
na uchwyt kuwety. Wykonać test
ponownie. Jeśli błąd nadal występuje,
skontaktować się z pomocą techniczną.
Skontaktować się z działem pomocy
technicznej.
Następujące błędy mogą wystąpić natychmiast po aktualizacji
przyrządu.
Błąd Opis Rozwiązanie
E-30 Brak aplikacji Podczas aktualizacji aplikacji wystąpił błąd.
E31 Aktualizacja bootloadera
nie powiodła się
E-32 Aktualizacja aplikacji nie
powiodła się
E-66 Aktualizacja nie powiodła
się
W przyrządzie nie znaleziono prawidłowej
aplikacji. Ponownie zaktualizować przyrząd.
Podczas przesyłania aktualizacji bootloadera
wystąpił błąd. Ponownie zaktualizować
bootloader.
Podczas przesyłania aktualizacji aplikacji
wystąpił błąd. Ponownie zaktualizować
przyrząd.
Przyrząd jest uszkodzony. Skontaktować się
z działem pomocy technicznej.
Części zamienne i akcesoria
O S T R Z E Ż E N I E
Zagrożenie obrażeniami ciała. Stosowanie niezatwierdzonych części
grozi obrażeniami ciała, uszkodzeniem przyrządu lub
nieprawidłowym działaniem urządzeń. Części zamienne wymienione
w tym rozdziale zostały zatwierdzone przez producenta.
Uwaga: Numery produktów i części mogą być różne w różnych regionach.
Należy skontaktować się z odpowiednim dystrybutorem albo znaleźć informacje
kontaktowe na stronie internetowej firmy.
Polski 71
Page 72

Części zamienne
Opis Ilość Nr poz.
Baterie AAA, alkaliczne 4/op 4674300
Nasadka urządzenia 1 LPZ445.99.00006
Pokrywa komory baterii 1 LPZ445.99.00007
Kuweta, 25 mm (10 mL), szklana 6/op 2427606
Kuweta, 1 cm (10 mL), plastikowa 2/op. 4864302
Akcesoria
Opis Ilość Nr poz.
Komunikacyjny klucz sprzętowy Hach 1 LPV446.99.00012
Etui z miękkimi bokami / futerał 1 5953100
72 Polski
Page 73

Innehållsförteckning
Produktens komponenter på sidan 77 Kalibrering på sidan 85
Installera batterierna på sidan 77 Underhåll på sidan 90
Användargränssnitt och navigering
på sidan 78
Utför ett test på sidan 81 Reservdelar och tillbehör på sidan 95
Felsökning på sidan 92
Specifikationer
Specifikationerna kan ändras utan föregående meddelande.
Specifikation Information
Mått (B x H x D) 6.9 x 15.7 x 3.4 cm (2.7 x 6.2 x 1.3 tum)
Hölje IP67, vattentät till 1 m (3,3 fot) i 30 minuter när
Ljuskälla Lysdiod (LED)
Detektor Silikonfotodiod
Display LCD med bakgrundsbelysning
Vikt 0.25 kg (0.55 tum)
Effektkrav 4 AAA-batterier; ungefärlig hållbarhet = 5000 tester
Omgivning vid användning 0 till 50 °C (32 till 122 °F); 0 till 90 % relativ
Förvaringstemperatur -20 till 55 °C (-4 till 131 °F), 0 till 80 % relativ
Våglängd Fast våglängd ±2 nm, olika för varje modell
Filter bandbredd 15 nm
Absorbansområde 0 till 2,5 Abs
Provcell 25 mm (10 mL) och 1 cm (10 mL)
Datalagring De senaste 50 mätningarna
batteriluckan är stängd och låst.
(kortare hållbarhet om bakgrundsbelysningen
används)
Uppladdningsbara batterier rekommenderas inte.
luftfuktighet, icke-kondenserande
luftfuktighet, icke-kondenserande
Svenska 73
Page 74

Specifikation Information
Bluetooth®
Certifieringar CE
Garanti 1 år (EU: 2 år)
1
Bluetooth® är på när tillvalet Hach
kommunikationsdongel är installerat.
Allmän information
Tillverkaren är under inga omständigheter ansvarig för direkta,
särskilda, indirekta eller följdskador som orsakats av eventuellt fel eller
utelämnande i denna bruksanvisning. Tillverkaren förbehåller sig rätten
att göra ändringar i denna bruksanvisning och i produkterna som
beskrivs i den när som helst och utan föregående meddelande och
utan skyldigheter. Reviderade upplagor finns på tillverkarens webbsida.
Säkerhetsinformation
A N M Ä R K N I N G :
Tillverkaren tar inget ansvar för skador till följd av att produkten används på fel
sätt eller missbrukas. Det omfattar utan begränsning direkta skador, oavsiktliga
skador eller följdskador. Tillverkaren avsäger sig allt ansvar i den omfattning
gällande lag tillåter. Användaren är ensam ansvarig för att identifiera kritiska
användningsrisker och installera lämpliga mekanismer som skyddar processer
vid eventuella utrustningsfel.
Läs igenom hela handboken innan instrumentet packas upp, monteras
eller startas. Följ alla faro- och försiktighetshänvisningar. Om dessa
anvisningar inte följs kan användaren utsättas för fara eller
utrustningen skadas.
Kontrollera att skyddet som ges av den här utrustningen inte är skadat.
Utrustningen får inte användas eller installeras på något annat sätt än
så som specificeras i den här handboken.
1
Bluetooth®-märket och logotyperna är registrerade varumärken
som ägs av Bluetooth SIG, Inc. och all användning av sådana
märken av HACH sker under licens.
74 Svenska
Page 75

Anmärkning till information om risker
F A R A
Indikerar en potentiellt eller överhängande riskfylld situation som kommer att
leda till livsfarliga eller allvarliga skador om den inte undviks.
Indikerar en potentiellt eller överhängande riskfylld situation som kan leda till
livsfarliga eller allvarliga skador om situationen inte undviks.
F Ö R S I K T I G H E T
Indikerar en potentiellt riskfylld situation som kan resultera i lindrig eller måttlig
skada.
A N M Ä R K N I N G :
Indikerar en potentiellt riskfylld situation som kan medföra att instrumentet
skadas. Information som användaren måste ta hänsyn till vid hantering av
instrumentet.
V A R N I N G
Varningsdekaler
Beakta samtliga dekaler och märken på instrumentet. Personskador
eller skador på instrumentet kan uppstå om de ej beaktas. En symbol
på instrumentet beskrivs med en försiktighetsvarning i
bruksanvisningen .
Denna symbol, om den finns på instrumentet, refererar till
bruksanvisningen angående drifts- och/eller säkerhetsinformation.
Elektrisk utrustning markerad med denna symbol får inte avyttras i
europeiska hushållsavfallssystem eller allmänna avfallssystem.
Returnera utrustning som är gammal eller har nått slutet på sin
livscykel till tillverkaren för avyttring, utan kostnad för användaren.
Certifiering
Canadian Radio Interference-causing Equipment Regulation,
IECS-003, Klass B:
Stödjande testresultat finns hos tillverkaren.
Svenska 75
Page 76

Den digitala apparaten motsvarar klass B och uppfyller alla krav enligt
kanadensiska föreskrifter för utrustning som orsakar störning.
Cet appareil numérique de classe B répond à toutes les exigences de
la réglementation canadienne sur les équipements provoquant des
interférences.
FCC del 15, klass ''B'' gränser
Stödjande testresultat finns hos tillverkaren. Denna utrustning uppfyller
FCC-reglerna, del 15. Användning sker under förutsättning att följande
villkor uppfylls:
1. Utrustningen bör inte orsaka skadlig störning.
2. Utrustningen måste tåla all störning den utsätts för, inklusive
störning som kan orsaka driftsstörning.
Ändringar eller modifieringar av utrustningen, som inte uttryckligen har
godkänts av den part som ansvarar för överensstämmelsen, kan
ogiltigförklara användarens rätt att använda utrustningen. Den här
utrustningen har testats och faller inom gränserna för en digital enhet
av klass B i enlighet med FCC-reglerna, del 15. Dessa gränser har
tagits fram för att ge rimligt skydd mot skadlig störning när utrustningen
används i en kommersiell omgivning. Utrustningen genererar,
använder och kan utstråla radiofrekvensenergi och kan, om den inte
installeras och används enligt handboken, leda till skadlig störning på
radiokommunikation. Användning av utrustningen i bostadsmiljö kan
orsaka skadlig störning. Användaren ansvarar då för att på egen
bekostnad korrigera störningen. Följande tekniker kan användas för att
minska problemen med störningar:
1. Flytta utrustningen bort från den utrustning som tar emot
störningen.
2. Positionera om mottagningsantennen för den utrustning som tar
emot störningen.
3. Prova med kombinationer av ovanstående.
Produktöversikt
Detta instrument är en bärbar filterfotometer som används för att
kontrollera vatten.
Observera: Detta instrument är inte utvecklat för mätning av klor och kloraminer i
medicinska tillämpningar i USA.
76 Svenska
Page 77

Produktens komponenter
Se till att alla delar har tagits emot. Mer information finns i Figur 1. Om
några komponenter saknas eller är skadade ska du genast kontakta
tillverkaren eller en återförsäljare. Figur 1 är ett exempel och visar de
delar som medföljer LPV445.99.00110. Andra instrument levereras
med andra komponenter.
Figur 1 Produktens komponenter
1 DR300 5 Förvaringsväska
2 Alkaliska AAA-batterier 6 Reagenser
3 Provceller, 25 mm (10 mL), glas 7 Hach kommunikationsdongel
4 Provceller, 1 cm (10 mL), plast
(tillval, säljs separat)
Installera batterierna
V A R N I N G
Explosionsrisk. Felaktig placering av batterierna kan göra att
explosiva gaser frisätts. Kontrollera att batterierna är av samma
godkända kemiska typ och har placerats i rätt riktning. Blanda inte
nya och redan använda batterier.
Installationsanvisningar för batterierna finns i Figur 2. Tryck sedan på
för att starta instrumentet.
Svenska 77
Page 78

Figur 2 Installera batterierna
1 Mynt 3 Plastinsats för dongel
2 Batterilock
Användargränssnitt och navigering
Beskrivning av knappsatsen
Figur 3 visar knappsatsen och beskriver huvudfunktionerna.
2
Ta endast bort plastinsatsen när du ska installera en Hach
kommunikationsdongel. Läs installationsanvisningarna som
medföljde dongeln.
78 Svenska
2
Page 79

Figur 3 Tangentsats
1 Områdesknapp: Väljer mätområde
(t.ex. LR eller HR).
Håll intryckt i 3 sekunder för att
öppna eller avsluta menyläget.
I menyläget bläddrar du uppåt eller
ökar värdet på den valda siffran.
2 Nollknapp: Ställer in nollvärdet
före en mätning.
I menyläget går du tillbaka en
menynivå eller flyttar markören till
föregående siffra.
3 Strömknapp: Slår på och av
strömmen.
Håll intryckt i 5 sekunder för att
återställa instrumentet.
Kalibreringen tas inte bort.
4 Knapp för bakgrundsbelysning:
Slår på och av
bakgrundsbelysningen.
I menyläget bläddrar du nedåt eller
minskar värdet på den valda siffran.
5 Avläsningsknapp: Startar en
provmätning.
I menyläget väljer du det
menyalternativ som visas eller
flyttar markören till nästa siffra.
Svenska 79
Page 80

Beskrivning av displayen
Figur 4 visar värdena och symbolerna som visas i displayen.
Figur 4 Display
1 Numerisk display: Uppmätt värde
eller menyalternativ
2 Områdesikon: Visar det valda
mätområdet
3 Mätområden eller parametrar 7 Symbol för ändrad kalibrering:
4 Bluetooth®-ikon: Bluetooth® är
på3.
5 Batteriikon: Batteriets
laddningsnivå. Blinkar när
batterinivån är låg.
6 Parameter och mätområden
Den fabriksinställda kalibreringen
har ändrats eller en
användaranpassad
kalibreringskurva har matats in.
Ställ in tiden
Ställ in tiden (24-timmarsformat).
1. Håll intryckt i 3 sekunder för att öppna menyläget.
Tiden visas (eller 00:00).
2. Tryck på för att ställa in tiden.
3. Tryck på eller för att ändra siffran som blinkar. Tryck på för
att gå till nästa siffra. Tryck på för att gå till föregående siffra.
3
Visas när Hach kommunikationsdongel är installerad.
80 Svenska
Page 81

Utför ett test
Kemisk eller biologisk fara. Om detta instrument används för att
övervaka en behandlingsprocess och/eller kemiskt matningssystem
som det finns regelverk och övervakningskrav för vad gäller
folkhälsa, allmän säkerhet, mat- eller dryckestillverkning eller
bearbetning, är det användarens ansvar att känna till och följa
gällande lagstiftning och att använda tillräckliga och lämpliga
säkerhetsmekanismer enligt gällande bestämmelser i händelse av fel
på instrumentet.
Risk för kemikalieexponering. Följ laboratoriets säkerhetsanvisningar
och bär all personlig skyddsutrustning som krävs vid hantering av
kemikalier. Läs aktuella datablad (MSDS/SDS) om
säkerhetsanvisningar.
F A R A
F A R A
F Ö R S I K T I G H E T
Risk för kemikalieexponering. Kassera kemikalier och avfall enligt
lokala, regionala och nationella lagar.
Nedan visas de allmänna stegen för att utföra ett test.
Om du vill testa en viss parameter (t.ex. klor) hämtar du testproceduren
från tillverkarens webbplats. Se Hämta en testprocedur på sidan
1. Tryck på
för att välja lämpligt mätområde (t.ex. LR eller HR).
84.
2. Förbered blankprovet. Se avsnittet om testförfarandet.
3. Rengör provcellen med en luddfri trasa.
4. Sätt i blankprovcellen i cellhållaren. Se till att montera
blankprovcellen korrekt med rätt orientering så att resultaten blir
mer repeterbara och exakta. Se Figur 5.
Montera instrumentlocket över cellhållaren. Se Figur 6.
5.
6. Tryck på för att nollställa instrumentet.
7. Ta bort blankprovcellen.
Svenska 81
Page 82

8. Förbered provet. Se avsnittet om testförfarandet.
9. Rengör provcellen med en luddfri trasa.
10. Sätt provcellen i cellhållaren. Se till att montera provcellen korrekt
med rätt orientering så att resultaten blir mer repeterbara och
exakta. Se Figur 5.
11. Montera instrumentlocket över cellhållaren. Se Figur 6.
12. Tryck på . Displayen visar resultaten i koncentrationsenheter eller
absorbans.
Observera: Resultatet blinkar om resultatet ligger utanför instrumentets
område.
13. Ta ut provcellen ur cellhållaren.
14. Töm och skölj provcellen med en gång. Skölj provcellen och locket
tre gånger med avjoniserat (eller destillerad) vatten.
Observera: Du kan även använda kranvatten till att skölja provcellen om de
uppmätta proverna har högre koncentration än kranvattnet.
82 Svenska
Page 83

Figur 5 Orientering av provcell
1 Orienteringsmärke42 Provcell, 25 mm
(10 mL), glas
4
Vissa varianter av instrumentet har provceller utan
orienteringsmärkning.
5
Använd glasprovcellen för tester med låg klorhalt.
6
Använd plastprovcellen för tester med hög klorhalt.
5
3 Provcell, 1 cm
(10 mL), plast
Svenska 83
6
Page 84

Figur 6 Montera instrumentlocket över cellhållaren
Hämta en testprocedur
1. Gå till http://www.hach.com.
2. Ange "DR300" i sökfältet.
3. Välj aktuellt instrument i listan.
4. Klicka på fliken Downloads (Hämtningar).
5. Bläddra ned till "Methods/Procedures" (Metoder/tillvägagångssätt).
6. Klicka på länken för aktuell testprocedur för att hämta den.
84 Svenska
Page 85

Visa mätningar
Observera: Instrumentet sparar som mest 50 mätningar. När du har gjort
50 mätningar ersätter nya mätningar de äldsta mätningarna.
1. Håll intryckt i 3 sekunder.
2. Håll intryckt tills "rCL" (återkalla) visas och tryck sedan på .
"– 01 –" visas. Mätning 01 är den senaste mätningen som gjorts.
3. Tryck på för att bläddra framåt.
Mätningsnumret följs av mätvärdet och tidpunkten.
4. Om du vill gå till ett mätningsnummer trycker du på tills
mätningsnumret visas, och trycker sedan på eller .
Observera: Du kan inte ta bort mätningar.
5. Håll intryckt i 3 sekunder för att gå tillbaka till mätningsläget.
Kalibrering
Instrumentet är fabrikskalibrerat. Användaren behöver inte kalibrera
det.
Justera standardkalibreringen
Använd alternativet SCA (Standardkalibreringsjustering) när du måste
justera en kalibrering för att uppfylla olika föreskrifter.
Fabrikskalibreringen justeras något med alternativet SCA så att
instrumentet visar standardlösningens förväntade värde. Den justerade
kalibreringen används sedan för alla testresultat. Den här justeringen
kan öka testets noggrannhet när det finns små variationer i reagenser
eller instrument.
Observera: För instrument med fabrikskalibrerade mätområden eller metoder
inaktiveras funktionen SCA när en användarangiven kalibrering matas in i
instrumentet. Om du vill använda SCA igen ställer du in den fabriksinställda
standardkalibreringen. Se Ställ in fabriksinställd standardkalibrering
på sidan 90.
Svenska 85
Page 86

Utför en standardkalibreringsjustering
1. Slutför testproceduren för området du vill kalibrera. Använd
standardlösningens koncentration från testprocedurens
dokumentation för provet.
Observera: Om det inte står någon standardkoncentration i
dokumentationen kan du använda en annan känd standard.
2. När testproceduren är färdig håller du in i 3 sekunder.
3. Håll intryckt tills "SCA" visas och tryck sedan på .
Värdet för standardkalibreringsjusteringen visas på displayen.
4. Om en annan känd standard används anger du värdet för den
standarden:
a. Håll intryckt tills "Edit" (Redigera) visas och tryck sedan på
.
b. Ange värdet för standarden.
Tryck på eller för att ändra siffran som blinkar. Tryck på
för att gå till nästa siffra. Tryck på för att gå till föregående
siffra.
5. Tryck på för att lägga till värdet för
standardkalibreringsjusteringen till den fabriksinställda
kalibreringskurvan.
Stäng av standardkalibreringsjusteringen
Om du vill använda den fabriksinställda standardkalibreringsjusteringen
igen sätter du SCA (Standard calibration adjust) till Off (Av).
1. Håll intryckt i 3 sekunder för att öppna menyläget.
2. Håll intryckt tills "SCA" visas och tryck sedan på .
3. Håll intryckt tills "OFF" (Av) visas och tryck sedan på .
Observera: Om du vill aktivera SCA-funktionen igen gör du en
standardkalibreringsjustering.
Användaranpassad kalibrering kurva
Det går att använda en användaranpassad kalibreringskurva på detta
instrument. Kalibreringskurvan kan ligga mellan 0 och 2,5 absorbans.
Se till att kalibreringskurvan omfattar standardvärden som ligger
utanför intresseområdet.
86 Svenska
Page 87

Instrumentets intervall motsvarar kalibreringsområdet. Till exempel, om
standardvärdena som används är 1,00, 2,00 och 4,00 så är
instrumentets interval 1,00 till 4,00.
Det finns två sätt att mata in en användaranpassad kalibreringskurva:
• Mata in en kalibreringskurva med standardvärden –
Standardlösningens värden matas in med knappsatsen och
absorptionsvärdena mäts.
• Mata in en kalibreringskurva med knappsatsen – Värdena för
standardlösningen och absorptionsvärdena matas in med
knappsatsen.
Observera: Om instrumentet stängs av eller strömmen slås av innan en komplett
användaranpassad kalibreringskurva angivits, sparas inte kalibreringskurvan.
Instrumentet stängs automatiskt av efter 60 minuters inaktivitet i inmatningsläget
för användaranpassad kalibreringskurva. Användaranpassade kalibreringar är
klara när användaren lämnar kalibreringsläget (cal) eller inmatningsläget.
Mata in en kalibreringskurva med standardvärden
V A R N I N G
Risk för kemikalieexponering. Följ laboratoriets säkerhetsanvisningar
och bär all personlig skyddsutrustning som krävs vid hantering av
kemikalier. Läs aktuella datablad (MSDS/SDS) om
säkerhetsanvisningar.
F Ö R S I K T I G H E T
Risk för kemikalieexponering. Kassera kemikalier och avfall enligt
lokala, regionala och nationella lagar.
Observera: Du kan också använda avjoniserat vatten för blankprovet så länge
provet inte är betydligt mer grumligt eller färgat än avjoniserat vatten.
1. Tryck på för att ställa in vilket område som ska kalibreras (t.ex.
LR eller HR).
2. Förbered blankprovet. Se avsnittet om testförfarandet.
3. Rengör provcellen med en luddfri trasa.
Svenska 87
Page 88

4. Nollställ instrumentet.
a. Sätt i blankprovcellen i cellhållaren.
b. Montera instrumentlocket över cellhållaren.
c. Tryck på . I displayen visas "- - - -" och sedan "0.00".
5. Håll intryckt i 3 sekunder för att öppna menyläget.
6. Håll intryckt tills "USER" (Användare) visas och tryck sedan på
.
7. Håll intryckt tills "CAL" visas och tryck sedan på .
8. När du ser "S0" på displayen trycker du på .
9. Ange 00,00 (eller 000,0) för blankprovsvärdet.
Tryck på eller för att ändra siffran som blinkar. Tryck på för
att gå till nästa siffra. Tryck på för att gå till föregående siffra.
10. Mät blankprovets absorbans genom att trycka på när "A0" visas
på displayen.
Displayen visar absorbansvärdet för "S0".
11. Ta ut provcellen ur cellhållaren.
12. Förbered provet. Se avsnittet om testförfarandet. Använd
standardlösningens koncentration från testprocedurens
dokumentation för provet.
13. Rengör provcellen med en luddfri trasa.
14. Tryck på tills "S1" (eller "Add" (Lägg till)) visas och tryck sedan
på .
15. Ange koncentrationen från den första kalibreringsstandarden och
tryck sedan på .
16. När "A1" visas på displayen utför du följande steg för att mäta
absorbansen:
a. Sätt i provcellen med den reagerade standardlösningen i
cellhållaren.
b. Montera instrumentlocket över cellhållaren.
c. Tryck på . Displayen visar absorbansvärdet för "S1".
17. Kalibreringen har avslutats med två kalibreringspunkter. Om det
krävs ytterligare standardvärden för kalibreringen:
88 Svenska
Page 89

Upprepa steg 11 och 16 igen för att mäta fler
kalibreringsstandarder.
18. Ta ut provcellen ur cellhållaren.
19. Töm och skölj provcellen med en gång. Skölj provcellen och locket
tre gånger med avjoniserat (eller destillerad) vatten.
Observera: Du kan också använda kranvatten till att skölja provcellen om
parameterns koncentration i kranvattnet är mindre än i det uppmätta provet.
20. Håll intryckt i 3 sekunder för att gå tillbaka till mätningsläget.
Mata in en kalibreringskurva med knappsatsen
Minst två datapar måste matas in för en användaranpassad
kalibreringskurva. Ett koncentrationsvärde samt absorptionsvärdet för
den givna koncentrationen krävs för varje datapar. Högst 10 datapar
kan matas in.
1. Tryck på för att ställa in vilket område som ska kalibreras (t.ex.
LR eller HR).
2. Håll intryckt i 3 sekunder för att öppna menyläget.
3. Håll intryckt tills "USER" (Användare) visas och tryck sedan på
.
4. Håll intryckt tills "Edit" (Redigera) visas och tryck sedan på .
5. När du ser "S0" på displayen trycker du på .
6. Ange det första dataparet.
Det första dataparet är S0 (koncentration) och A0 (absorbans).
• Tryck på eller för att ändra siffran som blinkar.
• Tryck på för att gå till nästa siffra.
• Tryck på för att gå till föregående siffra.
7. Upprepa steg 5 och 6 igen för att mata in det andra dataparet
(S1 och A1).
8. Kalibreringen har avslutats med två datapar. Om det krävs
ytterligare datapar för kalibreringen:
a. När du ser "Add" (Lägg till) trycker du på .
b. Upprepa steg 5 och 6 igen för att mata in fler datapar.
9. Håll intryckt i 3 sekunder för att gå tillbaka till mätningsläget.
Svenska 89
Page 90

Ställ in fabriksinställd standardkalibrering
Om du vill ta bort en användardefinierad kalibreringskurva från
instrumentet och använda den fabriksinställda kalibreringen gör du så
här:
1. Håll intryckt i 3 sekunder för att öppna menyläget.
2. Håll intryckt tills "USER" (Användare) visas och tryck sedan på
.
3. Håll intryckt tills "dFL" (standardvärdet) visas och tryck sedan på
.
Underhåll
F Ö R S I K T I G H E T
Flera risker. Endast kvalificerad personal får utföra de moment som
beskrivs i den här delen av dokumentet.
A N M Ä R K N I N G :
Ta inte isär instrumentet för att utföra underhåll. Kontakta tillverkaren om de
inre delarna behöver rengöras eller repareras.
Rengöra instrumentet
Rengör instrumentets utsida med en fuktig duk och en mild tvållösning,
och torka sedan av instrumentet efter behov.
Rengör provcellerna
F Ö R S I K T I G H E T
Risk för kemikalieexponering. Följ laboratoriets säkerhetsanvisningar
och bär all personlig skyddsutrustning som krävs vid hantering av
kemikalier. Läs aktuella datablad (MSDS/SDS) om
säkerhetsanvisningar.
90 Svenska
Page 91

F Ö R S I K T I G H E T
Risk för kemikalieexponering. Kassera kemikalier och avfall enligt
lokala, regionala och nationella lagar.
De flesta rengöringsmedel för laboratorier används vid
rekommenderade koncentrationer. Naturliga lösningsmedel, så som
Liquinox, är säkrare att använda när regelbunden rengöring är
nödvändig. För att minska rengöringstillfällena, öka temperaturen eller
använd ett ultraljudsbad. Avsluta rengöringen med att skölja några
gånger med avjoniserat vatten och sedan låta provcellen lufttorka.
Provceller kan även rengöras med syra, följt av en grundlig sköljning
med avjoniserat vatten.
Observera: Använd alltid syra för att rengöra provceller som har använts för att
testa låga nivåer av metall.
Specialmetoder för rengöring krävs för individuella procedurer. Om en
borste används för att rengöra provcellerna, var extra noga med att inte
repa de inre ytorna på provcellerna.
Byta ut batterierna
Byt ut batterierna om batteriernas laddningsnivå är låg. Se Installera
batterierna på sidan 77.
Svenska 91
Page 92

Felsökning
Fel Beskrivning Lösning
E-00 Ingen nollpunkt En standardlösning uppmättes i
E-01 Omgivningsljusfel
E-02 LED-fel
E-03 Standardinställningsfel
7
7
användarkalibreringsläget innan
instrumentet nollställdes. Mät en
blanklösning för att nollställa
instrumentet.
Omgivningsljuset tränger in i
cellhållaren. Se till att
instrumentlocket har monterats
korrekt över cellhållaren. Se Utför ett
test på sidan 81.
Det finns ingen spänning på
lysdioden (ljuskällan). Byt ut
batterierna. Kontrollera att lysdioden
i cellhållaren tänds när eller
trycks in.
• Det uppmätta värdet för
standardlösningen ligger utanför
inställningsgränserna. Förbered en
ny standardlösning.
• Standardlösningen ligger utanför
koncentrationsområdet som kan
användas för
standardkalibreringsinställning.
Förbered en standardlösning med
ett värde som motsvarar eller ligger
nära de rekommenderade
koncentrationerna för processen.
• Se till att standardlösningens
koncentration är korrekt angiven.
7
Om felet E-01 eller E-02 inträffar vid en mätning visar displayen
"_.__". Decimalen beror på kemin. Om felet E-01 eller
E-02 inträffar när instrumentet nollställs ska instrumentet
nollställas igen.
92 Svenska
Page 93

Fel Beskrivning Lösning
Avläsningen
blinkar följt
av E-04
E-06 Absorbansfel Absorbansvärdet är inte korrekt eller
E-07 Standardvärdesfel Standardlösningen har samma
E-09 Flash-fel
E-10 Omgivningstemperaturen
E-12 Låg batterinivå Batterinivån är för låg. Byt ut
E-13 Fel vid
Avläsningen ligger utanför
instrumentets område.
är för hög eller för låg
parameterinläsning
8
Se till att instrumentlocket har
monterats korrekt över cellhållaren
om avläsningen ligger under
instrumentets område. Mät en
blanklösning. Om avläsningen av
blanklösningen inte är lika med noll
ska instrumentet nollställas igen.
Kontrollera om det finns en lätt
blockering i cellhållaren om
avläsningen överskrider instrumentets
område. Späd provet. Gör om testet.
den användaranpassade
kalibreringskurvan har färre än två
punkter. Ange eller mät
absorptionsvärdet igen.
koncentration som en annan
standardlösningskoncentration som
redan har matats in i den
användaranpassade
kalibreringskurvan. Mata in en korrekt
standardkoncentration.
Instrumentet kan inte spara data.
Håll intryckt i 5 sekunder för att
återställa instrumentet.
Omgivningstemperaturen är utanför
giltigt intervall. Använd bara
instrumentet inom de angivna
driftsvillkoren. Se Specifikationer
på sidan 73.
batterierna. Se Installera batterierna
på sidan 77.
Instrumentets minne är skadat.
Kontakta teknisk support.
8
Värdet som blinkar ligger 10 % över den övre
testområdesgränsen.
Svenska 93
Page 94

Fel Beskrivning Lösning
E-14 följt av
"_.__" eller
"0" om ingen
nollpunkt
hittades
E-15 följt av
"_.__"
E-20 Signalmätning utanför
E-21 Instabil signalmätning Ljussensorns signal är instabil.
E-22 Hårdvarufel Elektroniksystemet är skadat.
Ogiltig nollmätning Nollmätningen är för låg. Använd en
Absorbansen är för hög Se efter om cellhållaren är blockerad.
giltigt område
provcell fylld med vatten och försök
igen. Om felet kvarstår, kontakta
teknisk support.
Rengör cellhållaren. Späd provet. Gör
om testet.
Observera: Instrumentet kan inte läsa av
absorbansvärden högre än 3,5 Abs.
Det är för mycket ljus på ljussensorn.
Se till att instrumentlocket har
monterats korrekt över cellhållaren.
Gör om testet. Om felet kvarstår,
kontakta teknisk support.
Omgivningsljuset är för starkt eller
instabilt. Se till att instrumentlocket
har monterats korrekt över
cellhållaren. Gör om testet. Om felet
kvarstår, kontakta teknisk support.
Kontakta teknisk support.
Följande fel kan inträffa direkt när instrumentet har uppdaterats.
Fel Beskrivning Lösning
E-30 Inget program Ett fel inträffade vid
E31 Det gick inte att uppdatera
bootloadern
E-32 Programuppdateringen
misslyckades
E-66 Uppdateringen misslyckades Instrumentet är defekt. Kontakta teknisk
programuppdateringen. Inget giltigt
program hittades i instrumentet.
Uppdatera instrumentet igen.
Ett fel inträffade när bootloaderuppdateringen överfördes. Uppdatera
bootloadern igen.
Ett fel inträffade när
programuppdateringen överfördes.
Uppdatera instrumentet igen.
support.
94 Svenska
Page 95

Reservdelar och tillbehör
V A R N I N G
Risk för personskada. Användning av icke godkända delar kan
orsaka personskador eller skador på maskinen eller utrustningen.
Reservdelar i detta avsnitt är godkända av tillverkaren.
Observera: Produkt- och artikelnummer kan variera i olika försäljningsregioner.
Kontakta lämplig återförsäljare eller se företagets webbsida för att få
kontaktinformation.
Reservdelar
Beskrivning Antal Produktnr.
AAA-batterier, alkaliska 4/pkt 4674300
Instrumentlock 1 LPZ445.99.00006
Batterilock 1 LPZ445.99.00007
Provcell, 25 mm (10 mL), glas 6/pkt 2427606
Provcell, 1 cm (10 mL), plast 2/pkt 4864302
Tillbehör
Beskrivning Antal Produktnr.
Hach kommunikationsdongel 1 LPV446.99.00012
Mjuk bärväska/hölster 1 5953100
Svenska 95
Page 96

Sisällysluettelo
Tuotteen osat sivulla 99 Kalibrointi sivulla 108
Paristojen asentaminen sivulla 100 Huolto sivulla 113
Käyttöliittymä ja selaaminen
sivulla 101
Testaaminen sivulla 104 Varaosat ja lisävarusteet sivulla 118
Vianmääritys sivulla 115
Tekniset tiedot
Tekniset tiedot voivat muuttua ilman ennakkoilmoitusta.
Ominaisuus Tiedot
Mitat (L x K x S) 6,9 x 15,7 x 3,4 cm (2,7 x 6,2 x 1,3 tuumaa)
Kotelo IP67, vesitiivis 30 minuutin ajan 1 metrin (3,3 jalan)
Valonlähde LED
Detektori Silikoninen fotodiodi
Näyttö LCD-näyttö taustavalolla
Paino 0,25 kg (0,55 paunaa)
Tehovaatimukset 4 AAA-paristoa; kesto noin 5000 testiä (taustavalon
Käyttöympäristö 0–50 °C (32–122 °F), 0–90 %:n tiivistymätön
Säilytyslämpötila –20–55 °C (-4–131 °F), 0–80 %:n tiivistymätön
Aallonpituus Kiinteä aallonpituus ±2 nm, vaihtelee
Suodattimen kaistanleveys 15 nm
Absorbanssialue 0–2,5 Abs
Näytekyvetti 25 mm (10 mL) ja 1 cm (10 mL)
Muisti 50 viimeisintä mittausta
syvyydessä, kun paristokotelo on kiinni ja lukittu.
käyttö pienentää testimäärää)
Ladattavia paristoja ei suositella.
suhteellinen kosteus
suhteellinen kosteus
mallikohtaisesti
96 Suomi
Page 97

Ominaisuus Tiedot
Bluetooth®
Sertifioinnit CE
Takuu 1 vuosi (EU: 2 vuotta)
1
Bluetooth® on käytössä, kun Hachtiedonsiirtovastaanotin on asennettu.
Yleistietoa
Valmistaja ei ole missään tapauksessa vastuussa suorista,
epäsuorista, erityisistä, tuottamuksellisista tai välillisistä vahingoista,
jotka johtuvat mistään tämän käyttöohjeen virheestä tai puutteesta.
Valmistaja varaa oikeuden tehdä tähän käyttöohjeeseen ja kuvaamaan
tuotteeseen muutoksia koska tahansa ilman eri ilmoitusta tai
velvoitteita. Päivitetyt käyttöohjeet ovat saatavana valmistajan
verkkosivuilta.
Turvallisuustietoa
H U O M A U T U S
Valmistaja ei ole vastuussa mistään virheellisestä käytöstä aiheutuvista
vahingoista mukaan lukien rajoituksetta suorista, satunnaisista ja välillisistä
vahingoista. Valmistaja sanoutuu irti tällaisista vahingoista soveltuvien lakien
sallimissa rajoissa. Käyttäjä on yksin vastuussa sovellukseen liittyvien kriittisten
riskien arvioinnista ja sellaisten asianmukaisten mekanismien asentamisesta,
jotka suojaavat prosesseja laitteen toimintahäiriön aikana.
Lue nämä käyttöohjeet kokonaan ennen tämän laitteen pakkauksesta
purkamista, asennusta tai käyttöä. Kiinnitä huomiota kaikkiin vaara- ja
varotoimilausekkeisiin. Niiden laiminlyönti voi johtaa käyttäjän
vakavaan vammaan tai laitteistovaurioon.
Jotta laitteen suojaus ei heikentyisi, sitä ei saa käyttää tai asentaa
muuten kuin näissä ohjeissa kuvatulla tavalla.
1
Bluetooth®-sanamerkki ja -logot ovat Bluetooth SIG, Incin
omistamia rekisteröityjä tavaramerkkejä, ja HACHin mahdollinen
merkkien käyttö on luvanvaraista.
Suomi 97
Page 98

Vaaratilanteiden merkintä
V A A R A
Ilmoittaa mahdollisesti vaarallisesta tai välittömän vaaran aiheuttavasta
tilanteesta, joka aiheuttaa kuoleman tai vakavan vamman.
Osoittaa potentiaalisesti tai uhkaavasti vaarallisen tilanteen, joka, jos sitä ei
vältetä, voisi johtaa kuolemaan tai vakavaan vammaan.
Ilmoittaa mahdollisesti vaarallisesta tilanteesta, joka voi aiheuttaa lievän tai
kohtalaisen vamman.
H U O M A U T U S
Ilmoittaa tilanteesta, joka saattaa aiheuttaa vahinkoa laitteelle. Tieto, joka vaatii
erityistä huomiota.
V A R O I T U S
V A R O T O I M I
Varoitustarrat
Lue kaikki laitteen tarrat ja merkinnät. Ohjeiden laiminlyönnistä voi
seurata henkilövamma tai laitevaurio. Laitteen symboliin viitataan
käsikirjassa, ja siihen on liitetty varoitus.
Tämä symboli, jos se on merkitty kojeeseen, viittaa kojeen
käsikirjaan käyttö- ja/tai turvallisuustietoja varten.
Sähkölaitteita, joissa on tämä symboli, ei saa hävittää yleisille tai
kotitalousjätteille tarkoitetuissa eurooppalaisissa jätteiden
hävitysjärjestelmissä. Vanhat tai käytöstä poistetut laitteet voi
palauttaa maksutta valmistajalle hävittämistä varten.
Sertifiointi
Canadian Radio Interference-Causing Equipment Regulation,
IECS-003, luokka B:
Tarkemmat testitulokset ovat valmistajalla.
Tämä luokan B digitaalinen laite vastaa kaikkia Kanadan häiriöitä
tuottavista laitteista annettujen säädösten vaatimuksia.
98 Suomi
Page 99

Cet appareil numérique de classe B répond à toutes les exigences de
la réglementation canadienne sur les équipements provoquant des
interférences.
FCC Osa 15, luokan ''B'' rajoitukset
Tarkemmat testitulokset ovat valmistajalla. Laite vastaa FCCsäädösten osaa 15. Laitteen toimintaa koskevat seuraavat ehdot:
1. Laite ei saa aiheuttaa haitallisia häiriöitä.
2. Laitteen on voitava vastaanottaa häiriöitä, mukaan lukien häiriöt,
jotka voivat olla syynä epätoivottuun toimintaan.
Tähän laitteeseen tehdyt, muut kuin yhteensopivuudesta vastaavan
osapuolen hyväksymät muutokset tai muokkaukset saattavat johtaa
käyttäjän menettämään oikeutensa käyttää tätä laitetta. Tämä laite on
testattu ja sen on todettu olevan luokan B digitaalinen laite, joka vastaa
FCC-säädösten osaa 15. Nämä rajoitukset on laadittu antamaan
kohtuullinen suoja haitallisilta häiriöiltä , kun laitetta käytetään
kaupallisessa ympäristössä. Tämä laite kehittää, käyttää ja saattaa
säteillä radiotaajuusenergiaa, ja näiden ohjeiden vastaisesti
asennettuna tai käytettynä se saattaa aiheuttaa haitallisia häiriöitä
radioliikenteeseen. Tämän laitteen käyttö asuinalueella aiheuttaa
todennäköisesti haitallisia häiriöitä, missä tapauksessa käyttäjän on
korjattava tilanne omalla kustannuksellaan. Häiriöitä voidaan vähentää
seuraavilla tavoilla:
1. Siirrä laite kauemmas häiriötä vastaanottavasta laitteesta.
2. Sijoita häiriötä vastaanottavan laitteen antenni toiseen paikkaan.
3. Kokeile edellä annettujen ohjeiden yhdistelmiä.
Tuotteen yleiskuvaus
Tämä laite on kannettava suodatinfotometri, jota käytetään veden
tutkimiseen.
Huomautus: Tätä laitetta ei ole hyväksytty lääketieteellisten sovellusten kloorin
ja kloramiinien mittaukseen Yhdysvalloissa.
Tuotteen osat
Varmista, että laitteen mukana on toimitettu kaikki tarvittavat osat.
Katso Kuva 1. Jos jokin tarvikkeista puuttuu tai on viallinen, ota
välittömästi yhteys valmistajaan tai toimittajaan. Kuva 1 on esimerkki
Suomi 99
Page 100

ja näyttää LPV445.99.00110:n mukana tulevat osat. Muiden laitteiden
mukana tulee eri osia.
Kuva 1 Tuotteen osat
1 DR 300 5 Säilytyskotelo
2 AAA-alkaliparistot 6 Reagenssit
3 Näyteastiat, 25 mm (10 mL), lasia 7 Hach-tiedonsiirtovastaanotin
4 Näyteastiat, 1 cm (10 mL), muovia
(valinnainen, toimitetaan erikseen)
Paristojen asentaminen
V A R O I T U S
Räjähdysvaara. Akun asentaminen väärin voi vapauttaa räjähtäviä
kaasuja. Varmista, että akut ovat samaa hyväksyttyä kemiallista
tyyppiä ja että ne on asennettu oikein päin. Älä käytä uusia ja
vanhoja akkuja sekaisin.
Paristojen asentaminen on esitetty kohdassa Kuva 2. Paina sitten näppäintä kytkeäksesi laitteen virran.
100 Suomi
 Loading...