

Haag-Streit AT 900 D Instructions For Use Manual
© HAAG-STREIT AG, 3098 Koeniz, Switzerland - HS-Doc. No. 1500.7220067.04180 – 18. Edition / 2020 – 01
DEUTSCHENGLISHFRANÇAISITALIANOESPAÑOLNEDERLANDS
PORTUGUÊS
SVENSKA
SVENSKA
PORTUGUÊS
DEUTSCHENGLISHFRANÇAISITALIANOESPAÑOLNEDERLANDS
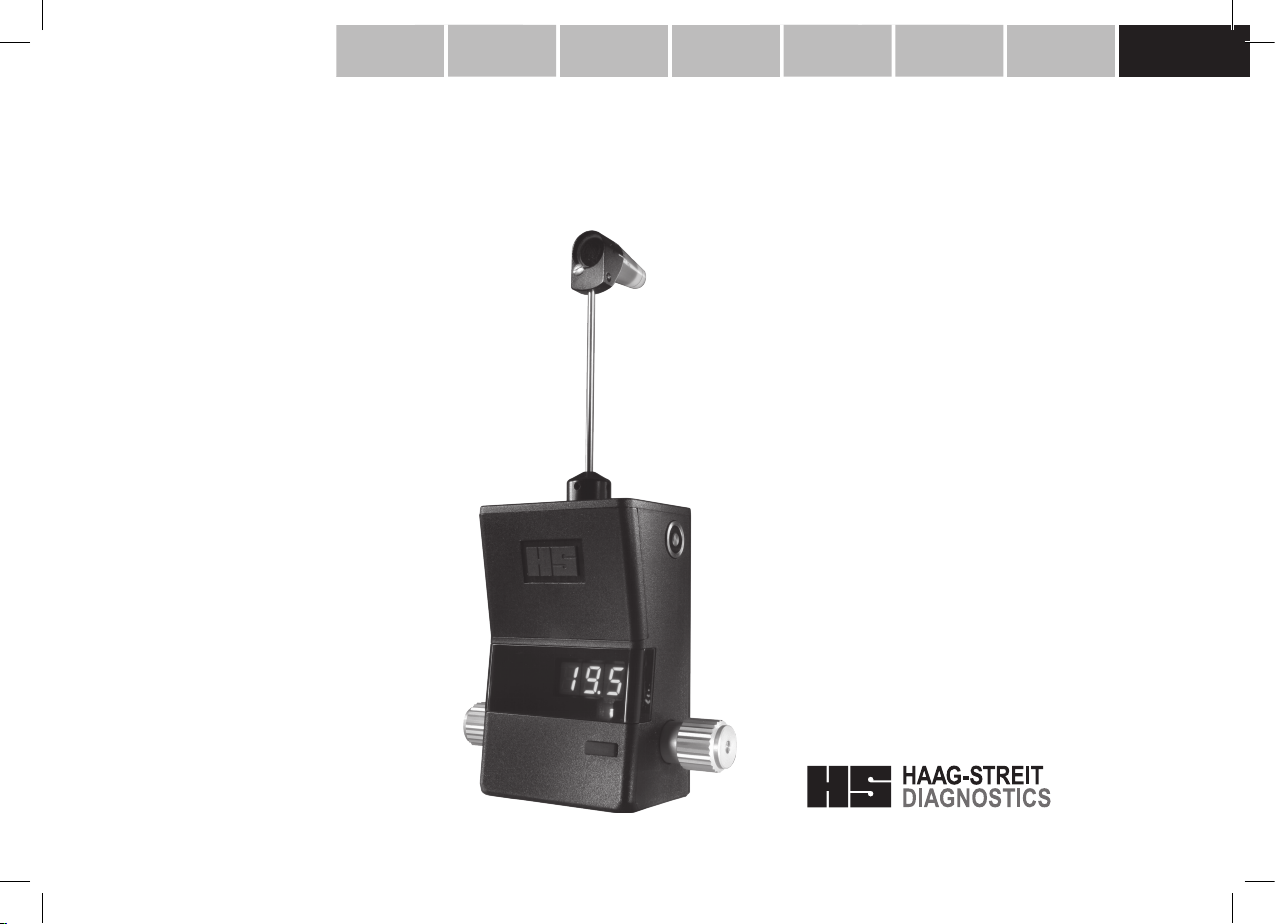
INSTRUCTIONS FOR USE
Applanation tonometer
AT 900® D
18. Edition / 2020 – 01
DOC. no. 1500 1500.1400209.04000
01-IFU_AT900D-7220067-04180_eng.indd 101-IFU_AT900D-7220067-04180_eng.indd 1 21.01.2020 11:12:1521.01.2020 11:12:15
1
© HAAG-STREIT AG, 3098 Koeniz, Switzerland - HS-Doc. No. 1500.7220067.04180 – 18. Edition / 2020 – 01
DEUTSCHENGLISH FRANÇAIS ITALIANO ESPAÑOL NEDERLANDS
PORTUGUÊS
SVENSKA
Introduction
Thank you for choosing a Haag-Streit device. Provided you comply carefully
with the regulations in this instructions for use, we can guarantee the reliable and
unproblematic use of our product.
WARNING!
INSTRUCTIONS FOR USE
Applanation tonometer
AT 900® D
18. Edition / 2020 – 01
Purpose of use
The Goldman digital tonometer is an appliance that serves to measure intraocular
pressure, according to the Goldman method. The measuring of the pressure re‑
quires to maintain a uniform applanation of the surface of the cornea. It is specially
indicated in Glaucoma disease.
Contraindication
There is no absolute contraindication for execution of the tonometry. Appropriate
professional assessment and caution are necessary.
WARNING!
Applanation tonometry may only be conducted by appropriately trained
and qualied medical personnel.
Read the instruction manual carefully before commissioning this product. It contains important information regarding the safety of the user
and patient.
NOTE!
Federal law restricts this device to sale by or on the order of a physician
or licensed practitioner.
2
01-IFU_AT900D-7220067-04180_eng.indd 201-IFU_AT900D-7220067-04180_eng.indd 2 21.01.2020 11:12:1621.01.2020 11:12:16

© HAAG-STREIT AG, 3098 Koeniz, Switzerland - HS-Doc. No. 1500.7220067.04180 – 18. Edition / 2020 – 01
DEUTSCHENGLISHFRANÇAISITALIANOESPAÑOLNEDERLANDS
PORTUGUÊS
SVENSKA
Contents
1. Safety ................................................................................... 4
1.1 Areas of application of the device ...........................................................................4
1.2 Ambient conditions ..................................................................................................4
1.3 Shipment and unpacking ........................................................................................4
1.4 Installation warnings ..............................................................................................4
1.5 Operation, environment ..........................................................................................4
1.6 Disinfection .............................................................................................................5
1.6.1 Cleaning and disinfection of the measuring prism ..................................................5
1.6.2 Visual inspection of the measuring prisms for damages .........................................5
1.6.3 Service life of reusable measuring prisms ..............................................................6
1.6.4 Tonosafe .................................................................................................................6
1.6.5 Monthly device checks ............................................................................................6
1.7 Warranty and product liability ..................................................................................6
1.8 Symbols ..................................................................................................................6
2. Introduction .......................................................................... 7
2.1 Overview ................................................................................................................7
2.2 System components ..............................................................................................7
2.3 Bluetooth adapter (optional) ....................................................................................7
3. Appliance assembly / installation ...................................... 7
3.1 Model R ...................................................................................................................7
3.2 Model T ...................................................................................................................7
3.3 Model BQ ................................................................................................................7
3.4 Which slit lamp with which tonometer .....................................................................8
3.5 Description models .................................................................................................8
3.6 Magnet unit for automatic L/R detection .................................................................8
4. Commissioning .................................................................... 8
4.1 Switching the device on and off ..............................................................................9
4.2 Programming the settings .......................................................................................9
4.3 LED indicator ..........................................................................................................9
4.4 Setting the display brightness .................................................................................9
4.5 Adjusting the volume ...............................................................................................9
4.6 BluetoothTM function ................................................................................................9
4.7 Battery status ........................................................................................................10
5. Operation ........................................................................... 10
5.1 Measuring tips .......................................................................................................10
5.2 Astigmatism ..........................................................................................................10
5.3 How pressure is measured ...................................................................................10
5.4 Preparing the patient .............................................................................................10
5.5 Patient instructions ................................................................................................10
5.6 Preparation of slit lamp and tonometer .................................................................10
5.7 Measuring correctly ...............................................................................................11
5.8 Sources of error ....................................................................................................11
5.8.1 Incorrect distance to the patient ...........................................................................12
5.8.2 Position too far to the right/left ..............................................................................12
5.8.3 Position too high/low .............................................................................................13
5.8.4 Incorrect pressure .................................................................................................13
6. Software / Help menu / Error messages .......................... 13
6.1 Error messages on the tonometer display ............................................................13
7. Technical data .................................................................... 14
8. Maintenance ....................................................................... 14
8.1 Repairs ..................................................................................................................14
8.2 Cleaning and disinfection ......................................................................................14
8.3 Checking the tonometer .......................................................................................15
8.4 Changing the battery .............................................................................................16
A. Appendix ............................................................................ 17
A.1 Accessory original HAAG‑STREIT measuring prism ............................................17
A.2 Accessory tonosafe ...............................................................................................17
B. Legal regulations ............................................................... 17
C. Classication ..................................................................... 17
D. Disposal ............................................................................. 17
E. Standards ........................................................................... 17
F. Information and manufacturer's declaration
regarding electromagnetic compatibility (EMC) ............ 18
F.1 General .................................................................................................................18
F.2 Emitted interference (standard table 1) .................................................................18
F.3 Immunity (standard table 2) ..................................................................................19
F.4 Immunity for non‑life support devices (standard table 4) ......................................20
F.5 Safe distances for non‑life‑supporting devices (standard table 6)) .......................21
01-IFU_AT900D-7220067-04180_eng.indd 301-IFU_AT900D-7220067-04180_eng.indd 3 21.01.2020 11:12:1621.01.2020 11:12:16
3
© HAAG-STREIT AG, 3098 Koeniz, Switzerland - HS-Doc. No. 1500.7220067.04180 – 18. Edition / 2020 – 01
DEUTSCHENGLISH FRANÇAIS ITALIANO ESPAÑOL NEDERLANDS
PORTUGUÊS
SVENSKA
1. Safety
DANGER!
Transport: Temperature
from
−40°C
to
+70°C
Storage:
Use:
Relative humidity
from
30%
to
90%
1.1 Areas of application of the device
The device is intended for use in doctor's practices, hospitals, and optometrists' and
opticians' premises.
1.2 Ambient conditions
1.3 Shipment and unpacking
• Before you unpack the appliance, check whether the packaging shows traces of
incorrect handling or damage. If this is the case, notify the transport company that
has delivered the goods to you. Unpack the equipment together with a represen‑
4
01-IFU_AT900D-7220067-04180_eng.indd 401-IFU_AT900D-7220067-04180_eng.indd 4 21.01.2020 11:12:1621.01.2020 11:12:16
tative of the transport company. Make a report of any damaged parts. This report
must be signed by you and by the representative of the transport company.
• Leave the device in the packaging for a few hours before unpacking it (conden‑
sation).
• Check the appliance for damage after it is unpacked. Return defective applianc‑
es in the appropriate packaging.
Failure to comply with these instructions may result in material damage
or pose a danger to patients or users.
WARNING!
These warnings must absolutely be complied with to guarantee
safe operation of the product and to avoid any danger to users and to
patients.
NOTE!
Important information: please read carefully.
• Store packaging material carefully, so that it can be used for possible returns or
when moving.
NOTE!
Check the calibration of the instrument before rst use according to the
instructions in section 8.3.
1.4 Installation warnings
WARNING!
• Do not modify this equipment without authorization of the manufac‑
turer. Installation and repairs may only be performed by trained spe‑
cialists.
• Any third‑party device must be connected in compliance with the EN
60601‑1 standard.
• The optional magnet unit for automatic L/R detection may only be
used with the . Other measuring devices, especially mechanical to‑
nometers, may be affected by the strong magnetic eld.
• The device must not be stacked or placed in close proximity to other
electronic devices.
Air pressure
Relative humidity
Temperature
Air pressure
Relative humidity
Temperature
Air pressure
from
from
from
from
from
from
from
500 hPa
10%
−10°C
700 hPa
10%
+10°C
800 hPa
to
to
to
to
to
to
to
1060 hPa
95%
+55°C
1060 hPa
95%
+35°C
1060 hPa
1.5 Operation, environment
NOTE!
• When performing assembly on appliances from other manufacturers,
the connecting dimensions of the diverse tonometer models are to be
taken into account!
• Check: Are the connection parts properly positioned (tonometer on
the slit lamp, measuring prisms)?
WARNING!
• The examination is to be performed at the medical professional’s dis‑
cretion and consideration in cases of active infections and lesions of
the eye. Certain conditions could falsify measured values and the pro‑
cedure may interfere with the patient’s condition.
• Use only original HAAG‑STREIT Goldmann tonometer measuring
prisms or the sterile disposable measuring prisms TonoSafe from
HAAG‑STREIT.
NOTE!
This appliance must only be operated by qualied and trained person‑
nel. The owner is responsible for their training.

© HAAG-STREIT AG, 3098 Koeniz, Switzerland - HS-Doc. No. 1500.7220067.04180 – 18. Edition / 2020 – 01
DEUTSCHENGLISHFRANÇAISITALIANOESPAÑOLNEDERLANDS
PORTUGUÊS
SVENSKA
1.6 Disinfection
NOTE!
The device does not need to be disinfected. For more information on
cleaning, please refer to the 'Maintenance' chapter.
1.6.1 Cleaning and disinfection of the measuring prism
DANGER!
The measuring prisms are made of PMMA. Please take note of the
following restrictions:
- Do not disinfect with alcohol
- Do not clean with acetone
- Do not disinfect using UV radiation
- Do not sterilise using steam or ethylene oxide
- Do not expose to temperatures above 60°C
WARNING!
Reusable measuring prisms are not shipped disinfected and must
becleanedanddisinfectedbeforetheirrstuseinaccordance
with the separate instructions for use on the cleaning and disinfection of tonometer measuring prisms, contact glasses, and
DESINSET (HS item no. 7220315).
• Preparation may only be conducted by qualied and trained person‑
nel. Their training is the responsibility of the user.
• Appropriate professional assessment and caution are necessary.
• Only use clean, undamaged, and disinfected measuring prisms!
• Please observe the separate instructions for use on the cleaning and
disinfection of tonometer measuring prisms, contact glasses, and
DESINSET (HS item no. 7220315)!
• The operator shall be liable in the event of non‑observance of the
cleaning and disinfecting process!
NOTE!
• Only those disinfectants tested by HAAG‑STREIT for material com‑
patibility may be used for disinfection.
• The current list is enclosed with every tonometer and measuring
prism, and can also be found on the HAAG‑STREIT AG website
(www.HAAG‑STREIT.com).
• The separate instructions for use on the cleaning and disinfection of
tonometer measuring prisms, contact glasses, and DESINSET is to
be consulted regarding the exact functioning, concentration, working
times, and idle times.
• Improper preparation can result in the transmission of diseases to the
patient and user as well as damage to the measuring prism.
• Residue from cleaning agents and disinfectants may irritate and burn
the patient’s eye.
• As a rule, the measuring prisms may be prepared together with each
other, but not with any other products.
• In order to achieve a efcient disinfection and storage of tonometer
measuring prisms, we recommend the use of our DESINSET. For a
selection of cleaning and disinfection agents please refer to the in‑
structions for use “Cleaning and disinfection” and to our “List of Dis‑
infectants”. The efcacy of the disinfectants on tonometer measuring
prisms must be guaranteed by the user or the reprocessing responsi‑
ble person with the validation of their own disinfection process.
• The validation report is available from HAAG‑STREIT on request.
• A summary of the validation report can be found on the HAAG‑STREIT
website (www.HAAG‑STREIT.com).
• The operator accepts liability for the use of other disinfectants.
• Single‑use prisms must be replaced after every examination ‑ see
separate instructions for use.
• The instructions for use referred to above, the brief instructions on the
disinfection of tonometer measuring prisms and additional information
can be found on our website www.HAAG‑STREIT.com at any time.
1.6.2 Visual inspection of the measuring prisms for damages
DANGER!
Never use damaged measuring prisms.
Prior to every use, the contact surface of the measuring prism must be
inspected for contaminants or damage (scratches, cracks and sharp
edges). This must be performed with a slit lamp microscope at 10x
to16xmagnication.
01-IFU_AT900D-7220067-04180_eng.indd 501-IFU_AT900D-7220067-04180_eng.indd 5 21.01.2020 11:12:1621.01.2020 11:12:16
5
© HAAG-STREIT AG, 3098 Koeniz, Switzerland - HS-Doc. No. 1500.7220067.04180 – 18. Edition / 2020 – 01
DEUTSCHENGLISH FRANÇAIS ITALIANO ESPAÑOL NEDERLANDS
PORTUGUÊS
SVENSKA
Haag-Streit products must be used only for the purposes and in the manner des-
www.haag-streit-usa.com.
•
•
•
•
•
•
For US
•
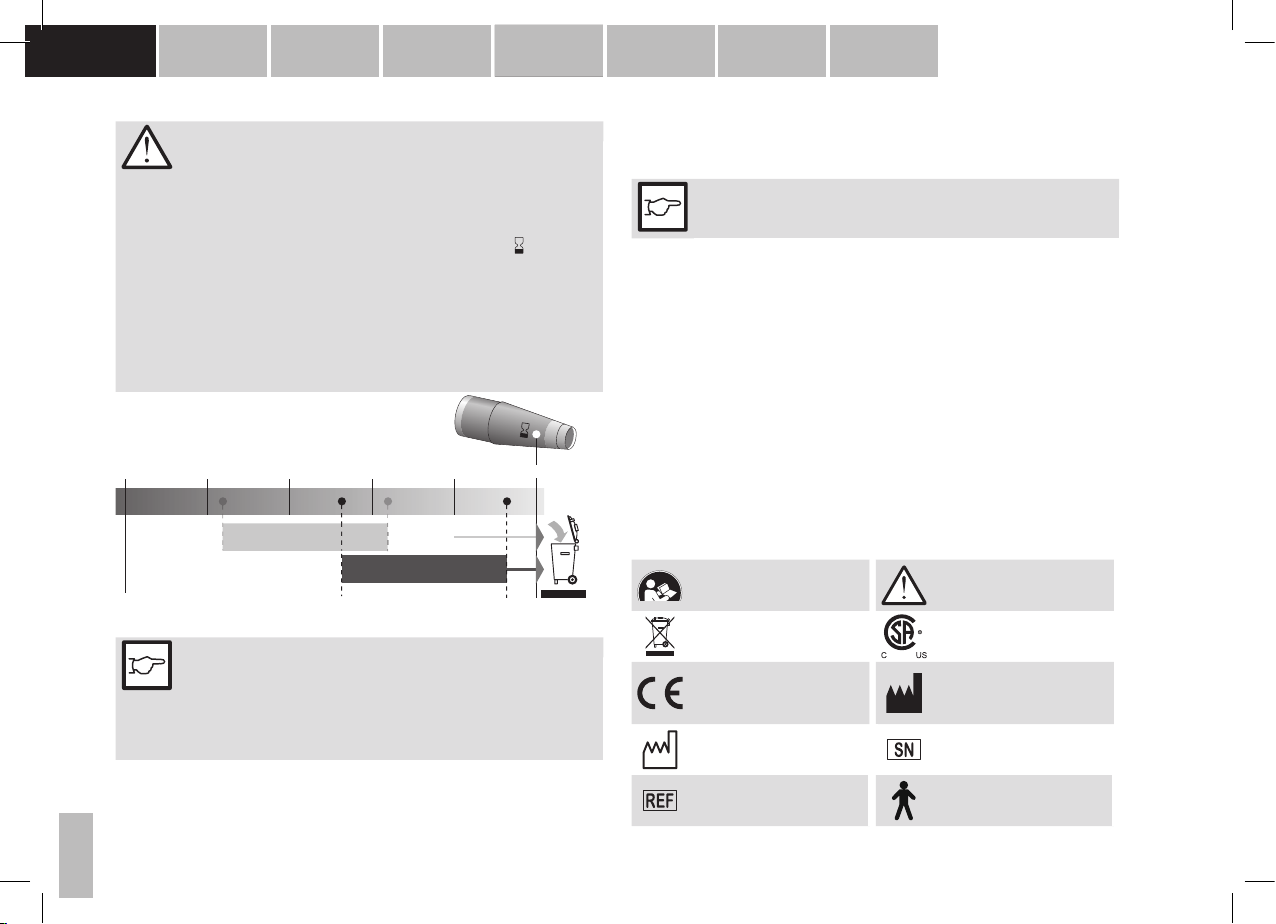
1.6.3 Service life of reusable measuring prisms
WARNING!
How long can measuring prisms be used?
Due to the large number of variables to be considered (type and con‑
centration of the disinfectant used, number of patients, handling, etc.)
it is practically impossible to provide exact information on how often
and/or how long a measuring prism can be used under safe conditions.
The measuring prisms are stamped with an expiry date ( YYYY‑MM).
They must not be used beyond this date. HAAG‑STREIT recommends
a maximum service life of two years before the expiry date. This ser‑
vice life applies subject to normal conditions of use, i.e., in compliance
with the instructions contained in these instructions for use. The ser‑
vice life starts with the rst use. The above-mentioned time periods do
not apply to damaged measuring prisms; these must be immediately
replaced.
Year:
01234 5
First use
Service life:
Maximum two years
First use
Replace
Service life:
Maximum two years
1.6.4 Tonosafe
NOTE!
Tonosafe was developed to avoid the necessary cleaning and disinfec‑
tion of measuring prisms from applanation tonometers. Tonosafe is a
disposable applanation and optical duplication prism for Goldmann and
Perkins applanation tonometers, for single use.
Additional details can be found in the separate instructions for use.
Replace
1.6.5 Monthly device checks
The tonometer must be checked on a monthly basis as described in the 'Mainte‑
nance' chapter. A check will be absolutely necessary if external force is applied
(e.g., striking or dropping the appliance).
NOTE!
If a repair is necessary, please contact your HAAG‑STREIT represent‑
ative.
1.7 Warranty and product liability
cribed in the documents distributed with the product.
The product must be treated as described in the ‘Safety’ chapter. Improper handling can damage the product. This would void all guarantee claims.
Continued use of a product damaged by incorrect handling may lead to personal
injury. In such a case, the manufacturer will not accept any liability.
Haag-Streit does not grant any warranties, either expressed or implied, including
implied warranties of merchantability or fitness for a particular use.
Haag-Streit expressly disclaims liability for incidental or consequential damage
resulting from the use of the product.
This product is covered by a limited warranty granted by your seller.
A only:
This product is covered by a limited warranty, which may be reviewed at
1.8 Symbols
Read the instructions for use
attentively
Disposal instructions. See
"Disposal" section.
European certicate of con‑
formity
Year of production Serial number
General warning: Read the ac‑
companying documentation
Test symbol of CSA with ap‑
proval for USA
Manufacturer
6
01-IFU_AT900D-7220067-04180_eng.indd 601-IFU_AT900D-7220067-04180_eng.indd 6 21.01.2020 11:12:1721.01.2020 11:12:17
HS reference number Product classication Type B

© HAAG-STREIT AG, 3098 Koeniz, Switzerland - HS-Doc. No. 1500.7220067.04180 – 18. Edition / 2020 – 01
DEUTSCHENGLISHFRANÇAISITALIANOESPAÑOLNEDERLANDS
PORTUGUÊS
SVENSKA
LOT number Must not be re‑used
Expiry date (2017‑10 = end of
October 2017)
2. Introduction
The applanation tonometer functions according to the 'Goldmann method': mea‑
surement of the pressure required to maintain a uniform applanation of the surface
of the cornea. The precise measurement of the applanation surface is conducted
with the slit lamp at 10x magnication.
The pressure measurement is conducted on a slit lamp with the patient sitting down
and is a routine test carried out as part of the standard slit lamp microscopy.
2.1 Overview
1. Measuring prisms (application part)
2. Sensor arm
3. Battery compartment lid
4. Battery compartment locking mechanism
5. Type plate (bottom side)
6. Function key
7. Insert for control weight
8. Digital display
9. Knob
10. Bluetooth adapter (optional)
2.2 System components
The Applanation Tonometer system is composed of the following devices:
• Applanation Tonometer
• Bluetooth adapter (optional)
• PC or laptop
2.3 Bluetooth adapter (optional)
There is an optional Bluetooth adapter available to transfer the measured data directly
to the patient management of the Eyesuite software. The activation of the Bluetooth
function is described in Chapter 4.6. The description of the software installation can be
1
2
3
7
found in the EyeSuite Setup Manual, the usage instructions for the Bluetooth adapter
and the description of the error messages are included in the Help section of the soft‑
ware. The help can be opened via the F1 key or in the [?] ‑ [Help] menu.
3. Appliance assembly / installation
WARNING!
Installation, repairs and modications may only be performed by
trained specialists.
3.1 Model R
A pivot is required for use of the Applanation Tonometer model R o n the BM 900 slit
lamp. It is assembled as follows:
1. Unscrew the mounting screw found at the top, on the microscope's middle cyl‑
inder housing.
2. Leave the spring in the aperture.
3. Position and screw on tightly the pivot for the tonometer.
4. Place the tonometer bearer arm on the pivot's pin and swivel the tonometer to
the right until it snaps into position. The tonometer will remain in this position
even when not in use.
5. When using the BI 900, BM 900 and BM 900 V, the stop peg must be assem‑
bled (a), and when using the BC 900 or BD 900, it must be removed (b).
(b)(a)
3.2 Model T
The Applanation Tonometer is tucked into one of the holes on the horizontal guide
plate over the slit lamp axis using the peg from the tonometer base.
3.3 Model BQ
Connect the tonometer at the provided interface to the right side of the microscope
arm.
NOTE!
The cover screw on the left side of the arm is loosened by turning it in
a clockwise direction using the screwdriver (applies only for late tonom‑
eter deliveries).
01-IFU_AT900D-7220067-04180_eng.indd 701-IFU_AT900D-7220067-04180_eng.indd 7 21.01.2020 11:12:1721.01.2020 11:12:17
7
© HAAG-STREIT AG, 3098 Koeniz, Switzerland - HS-Doc. No. 1500.7220067.04180 – 18. Edition / 2020 – 01
DEUTSCHENGLISH FRANÇAIS ITALIANO ESPAÑOL NEDERLANDS
PORTUGUÊS
SVENSKA
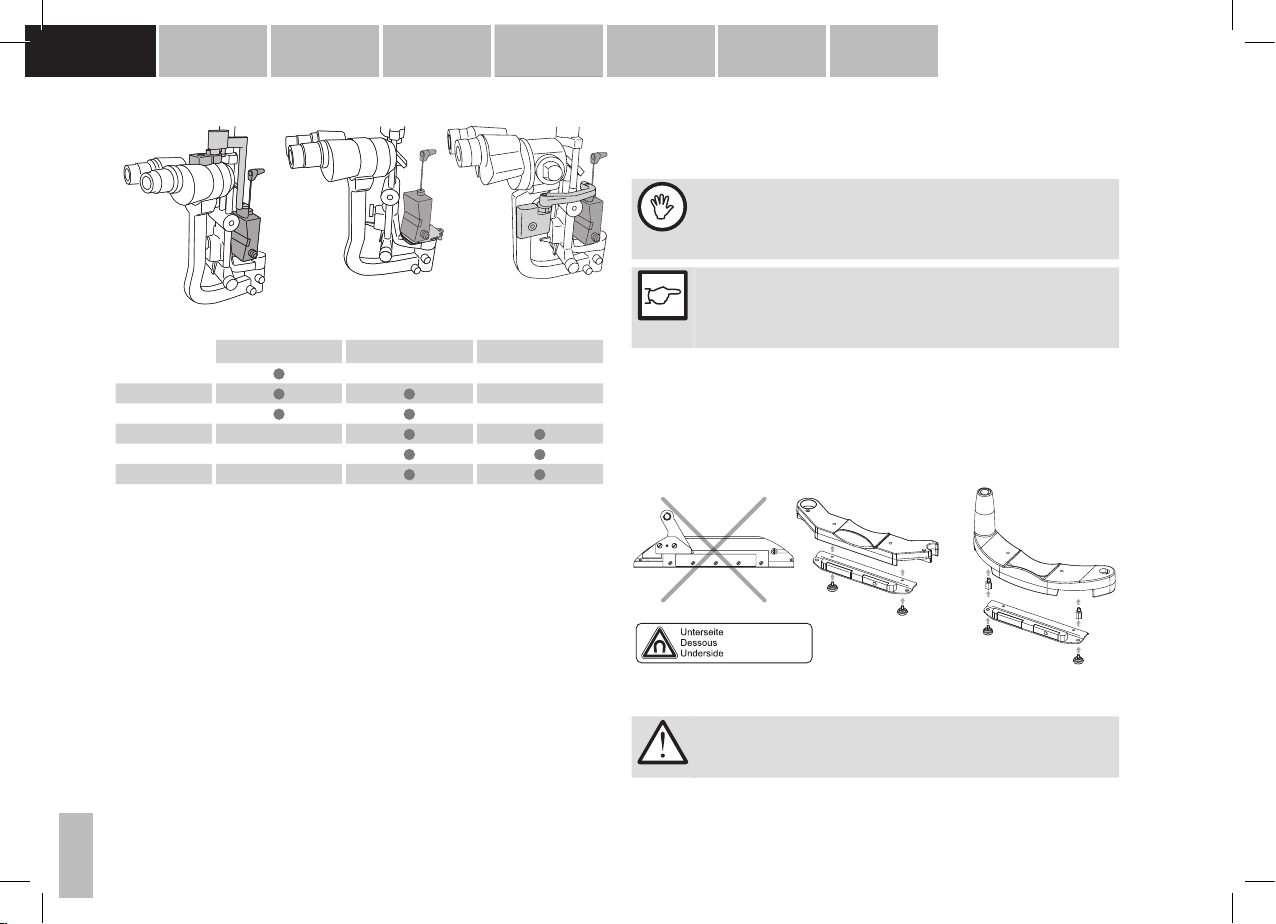
3.4 Which slit lamp with which tonometer
3.6 Magnet unit for automatic L/R detection
The magnet unit for the AT 900 D in combination with the EyeSuite Tonometry soft‑
ware makes it possible to display the intraocular pressure (IOP) and the information
on the eye in which the pressure was measured.
Model R Model T Model BQ
Model R Model T Model BQ
BD 900
BM 900
BI 900
BP 900
BQ 900
BX 900
• For metal chin rests (13), screw the magnet unit directly into the rear, closer to‑
gether holes on the chin rest using the knurled screws.
• For plastic chin rests (14), screw the two spacer sleeves into the provided
threaded sockets on the chin rest rst and then afx the magnet unit into the ex‑
ternal holes on the spacer sleeves using the knurled screws.
• Check that you can still see the bottom side label (15) after assembly when you
view the chin rest from below.
3.5 Description models
• The Applanation Tonometer model R can be left on the slit lamp permanently.
It is fastened to the microscope on a mounting base and swiveled in front of the
microscope for the examination. The observation of the applanated surface is
conducted monocularly – only through the left eyepiece.
• The Applanation Tonometer model T is set on the guide plate over the slit lamp
axis, for tonometry purposes. The instrument can be moved between two posi‑
tions on the guide plate for observation through the right or left eyepiece. The
sensor arm with the measuring prism projects from the bottom side into the
beam path of the microscope and the illumination.
• The Applanation Tonometer model BQ has a working position and two resting
positions. To set the correct angle of incidence of the illumination, the tonometer
is swiveled and the illumination apparatus is positioned to the left of the tonom‑
eter bracket. The patient's left and right eyes can be easily examined in this posi‑
tion (no 60° position). The applanated surface is observed monocularly through
the right eyepiece of the stereo microscope.
4. Commissioning
PROHIBITED
The magnet unit may not be used with conventional mechanical Gold‑
mann applanation tonometers, as the magnets can cause erroneous
results with these instruments.
NOTE!
The magnet unit cannot be used with the attachment cart with rail for
the Hruby lens. If you have this type of attachment cart afxed on your
head rest, please remove it.
Nur mit von Haag-Streit zugelassenem
Digital-Tonometer verwenden
Utilisation qu'avec Tonomètre approuvé
par Haag-Streit
Use only with Digital Tonometer approved
by Haag-Streit
13
15
14
WARNING!
It is imperative to read the 'Safety' section and observe its precautions
before operating the equipment.
8
01-IFU_AT900D-7220067-04180_eng.indd 801-IFU_AT900D-7220067-04180_eng.indd 8 21.01.2020 11:12:1821.01.2020 11:12:18
 Loading...