

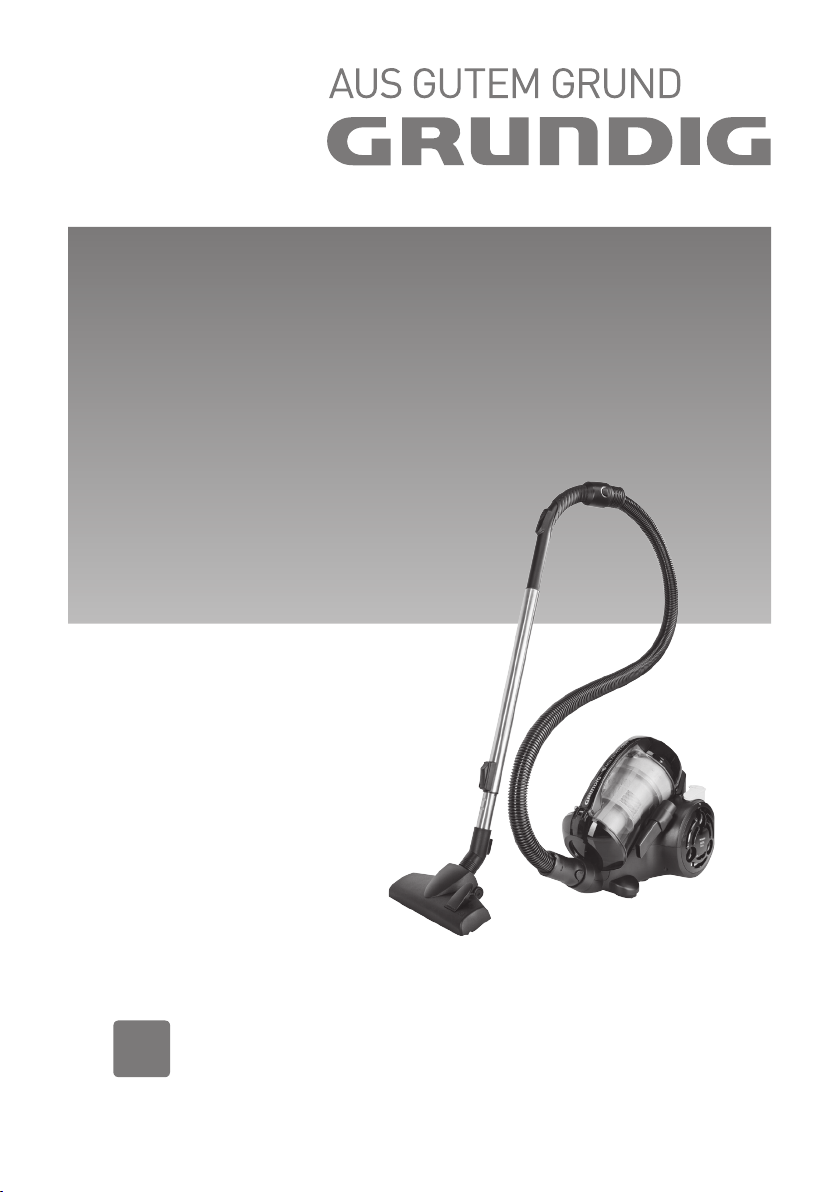
MULTI-CYCLONIC
VACUUM CLEANER
VCC 6270 C
ENGLISH
EN

________________________________________________________
F
P
Q
O
A
B C
D
G
D
E
F
G
H
MN
R S T U V W
IJKL
3

SAFETY ____________________________________
Please read this instruction manual thoroughly prior to using this
appliance! Follow all safety instructions in order to avoid damages due to improper use!
Keep the instruction manual for
future reference. Should this appliance be given to a third party,
then this instruction manual must
also be handed over.
Always keep hair, clothing and
▪
any other utensils away from
the appliance during operation
in order to prevent injury and
damages.
The appliance is designed for
▪
domestic use only. Claims on
the guarantee are not valid if the
appliance is used for industrial
or commercial purposes.
Observe these instructions in
▪
order to prevent damage to the
appliance or danger arising
from improper use.
Do not use on wet surfaces and
▪
do not attempt to use it on wet
objects.
Do not use the appliance in wet
▪
surroundings.
Do not use the appliance with
▪
wet hands.
This appliance is designed for
▪
vacuuming dust and dust particles. Do not attempt to use it on
large objects which could block
the appliance and damage the
appliance..
Do not use it on cigarette stubs,
▪
ash from a fireplace or matches.
This could cause a fire.
This appliance is not designed
▪
for cleaning people or animals.
Do not insert any foreign objects
▪
into the suction intake. Always
keep the suction intake free of
all objects.
Do not stand the appliance up-
▪
right while you are cleaning.
Do not roll the appliance over
▪
the power cord.
Do not pull the power cord
▪
round sharp edges and do not
squash it.
If you move the appliance to an-
▪
other room, always disconnect
the power cord and carry the
appliance by the handle.
Never move the appliance by
▪
pulling on the power cord.
Never operate the appliance
▪
without the dust container or filter.
Change the filter when neces-
▪
sary.
Only use original GRUNDIG
▪
accessories when exchanging
parts.
4
ENGLISH

SAFETY ____________________________________
Check if the mains voltage on
▪
the rating label corresponds to
your local mains supply. The
only way to disconnect the appliance from the mains is to pull
out the plug.
Always pull out the power cord
▪
before cleaning or carrying out
any maintenance on the appliance.
Whenever possible, insert the
▪
power cord plug directly into
the socket. Avoid using extension cables or multipoint connectors.
For additional protection, this
▪
appliance should be connected
to a household residual current
device with a maximum rating of
30 mA. Consult your electrician
for advice.
Pull out the power plug after
▪
use. Do not disconnect the plug
by pulling on the cable.
Do not close any doors on top
▪
of the power cord.
Never use the appliance if it or
▪
the power cord is visibly damaged. This also applies if the
appliance has accidentally become wet. Please contact your
specialist dealer if this is the
case.
Our GRUNDIG Household Ap-
▪
pliances meet all the applicable
safety standards; thus if the appliance or the power cord is
damaged, it must be replaced
by the dealer, a service centre
or a similarly qualified and authorised service person to avoid
any danger arising. Faulty or unqualified repair work may cause
danger and risk to the user.
Keep the appliance away from
▪
children.
This appliance can be used
▪
by children aged from 8 years
and above and persons with
reduced physical, sensory or
mental capabilities or lack of experience and knowledge if they
have been given supervision or
instruction concerning use of the
appliance in a safe way and understand the hazards involved.
Children shall not play with the
appliance. Cleaning and user
maintenance shall not be made
by children without supervision.
Do not dismantle the appliance
▪
under any circumstances. No
warranty claims are accepted
for damage resulting from improper handling.
ENGLISH
5

SAFETY ____________________________________
The vacuum cleaner is very
▪
powerful; thus before plugging
the cord into the wall socket,
make sure the switch is in the
‘Off’ position. Hold the vacuum
cleaner firmly when starting and
while using it.
If the inlet, hose or telescopic
▪
tube is blocked, switch off the
vacuum cleaner and remove the
blockages before re-starting the
vacuum cleaner.
Washing filters improves vac-
▪
uum performance. Make sure
all the filters are completely dry
before inserting back into the
vacuum cleaner.
Caution
The motor is equipped with a
▪
thermal cut-out. If for any reason, the vacuum cleaner should
over-heat, the thermostat will
automatically turn the unit off.
Should this occur, unplug the
vacuum cleaner from the wall
socket.
Remove the dirt container and
▪
empty. Clean the filters. Allow
the cleaner to cool for approximately 1 hour. Continue operating the appliance by inserting
the power plug into the wall
socket and switching it back on.
If the appliance does not start,
wait another 30 minutes and repeat the above-mentioned steps.
6
ENGLISH

AT A GLANCE ______________________________
Dear Customer,
Congratulations on the purchase of your new
GRUNDIG Multi-Cyclonic Vacuum Cleaner
VCC 6270 C.
Please read the following user notes carefully to
ensure you can enjoy your quality GRUNDIG
product for many years to come.
A responsible approach!
GRUNDIG focuses on contractually agreed social working conditions with fair wages for both
internal employees and suppliers,
as well as on the efficient use of
raw materials with continual
waste reduction of several tonnes of plastic each
year – and availability of at least 5 years for all
accessories.
For a future worth living.
For a good reason. Grundig.
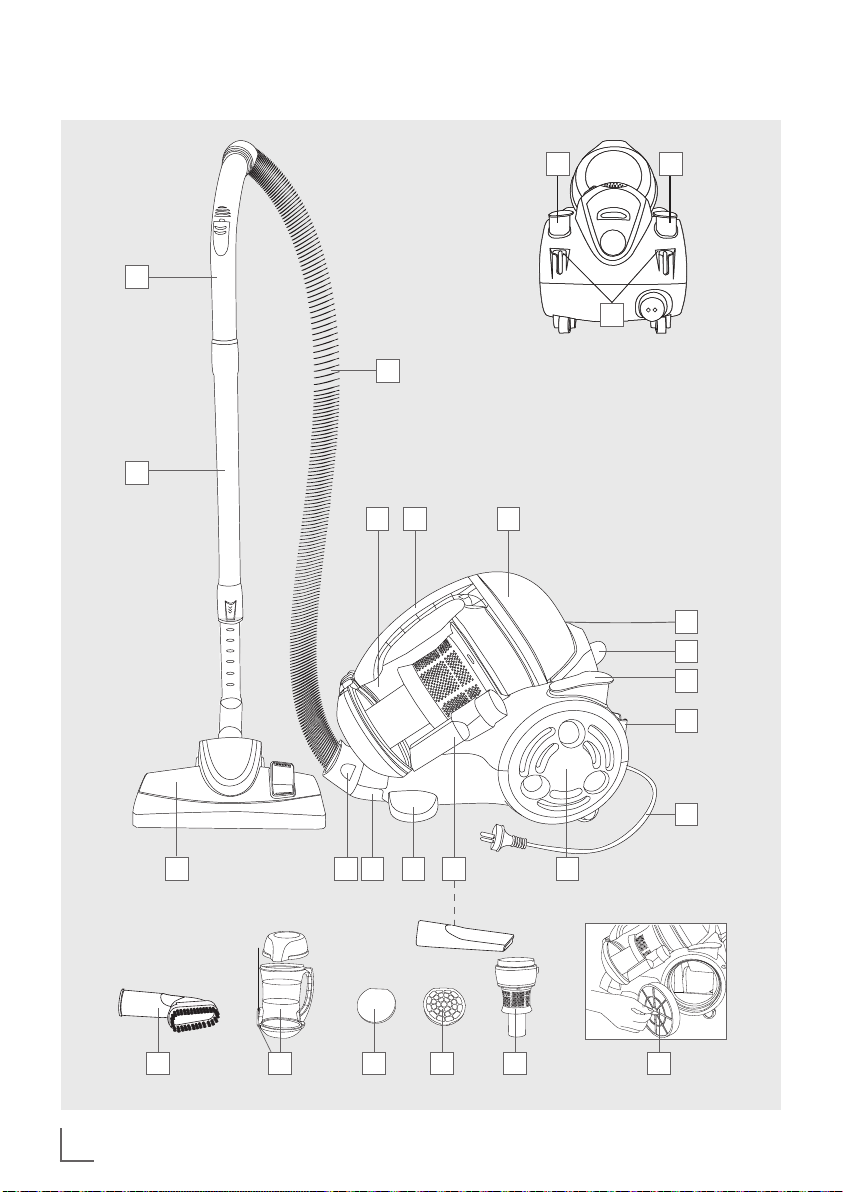
Controls and parts
See the figure on page 3.
A
Dust container
B
Dust container carrying handle
C
Dust container upper cover
D
Power cord rewind button
E
Dust container release button
F
On/Off
G
Park position
H
Power cord with plug
I
HEPA filter cover
J
Crevice tool
K
Small wheel
L
Flexible hose adapter
M
Hose release button
N
Multi-floor brush
O
Metal telescopic tube
P
Handle
Q
Flexible hose
R
Furniture brush
S
Dust quick release button
T
Foam filter
U
Motor protection filter
V
Cyclone assembly
W
HEPA outlet filter
ENGLISH
7

OPERATION _______________________________
Notes
■ Check the appliance for damage caused by
delivery/transportation and for lacking parts.
Caution
■ Keep the package material out of the reach
of children.
Attaching/Detaching the dust
container
1 Pull the power plug H out.
2 Press the dust container release button E to
remove the dust container A and remove
the dust container by holding from the dust
container carrying handle B.
3 Ensure that the upper cover C is seated
firmly when the dust container A is placed
correctly.
2 Insert the wide end of the telescopic tube O
to the other end of the flexible hose Q.
3 Install the adjustable multi-floor brush N to the
telescopic tube O.
Assembly of the appliance
1 Insert the hose Q into the flexible hose
adapter L. Flexible hose Q shall be seated
with a click.
8
ENGLISH
4 Pull out the power cord H in the required
length carefully before plugging in the
appliance to the mains.
Caution
■ Always pull out at least two thirds of the cord
to prevent the power cord H from overheating during the operation of the appliance.
Cord should be pulled out between the yellow
and red signs on the cord ideally.
■ Never pull out the power cord
red mark. Pulling out the cord beyond the red
mark may damage the appliance.
5 Plug in the power cord H to a suitable mains
supply outlet.
H
beyond the

OPERATION _______________________________
6 Switch on the appliance by pressing the
On/Off button F.
Note
■ You may use suction control to adjust the
suction power during operation. The more
you open the control, the more the suction
power shall be decreased.
Notes
■ You can directly attach the required accessory
to the handle P firstly by removing the
telescopic tube O.
■ Accessories can also be attached to the end
of the telescopic extension tube to reach
further points. Remove the multi-floor brush
and attach the desired accessories.
■ Narrow crevice tool
corners and cracks
J
: For narrow places,
7 After use, press the On/Off button F to switch
off the appliance and remove the power cord
plug H from the wall socket.
8 Press power cord rewind button D to rewind
the power cord H.
Using the carpet and hard floor
brush
There is an adjusting mechanism on the left side
of the brush with an indicator for carpet and
hard surfaces. You can adjust the brush to a
suitable position to the surface to be vacuumed
with the adjusting mechanism. Use your brush
at normal position (hair brushes concealed) to
clean carpets and rugs. To clean hard floors
such as parquet, vinyl or linoleum, change the
position of adjustment mechanism and clean
with hair brushes.
■ Furniture Brush
and etc.
R
: For carpet, flooring, stairs
ENGLISH
9

INFORMATION ______________________________
Cleaning and maintenance
■ Before cleaning, unplug the appliance from
mains and let the vacuum cleaner to cool
down completely.
■ Do not immerse the vacuum cleaner in water
or in any other liquid. Ensure that no liquid
gets inside the appliance during cleaning.
■ Components may be cleaned as follows:
Cleaning the dust container
1 The dust inside the dust container should be
emptied when it reaches Max level.
2 Press the dust container release button E to
remove the dust container A by holding from
the dust container handle B.
3 Press dust quick release button S over a
dustbin, for emptying the dust container A.
Cleaning cyclone assembly
and dust container
1 Empty the dust container A if it is filled
with dirt.
2 Open the dust container cover C by
turning it counterclockwise. Remove the
cyclone assembly V, foam filter T and
motor protection filter U.
3 Wash the cyclone assembly V in warm
water, if required, and wait until the
cyclone group is dry.
4 Clean the dust container A with a damp
cloth, if necessary.
5 Wash the filter in warm water.
10
6 Lightly tap across the filter to remove
excessive water. Repeat this and wait until
it is dried by itself. Do not use any heating
device for drying.
7 Make sure that all components are
completely dried before installing all
components to the appliance and
switching on the appliance.
8 Replace the cyclone assembly V, foam
filter T and motor protection filter U in
their places and close the upper cover C
so that it is seated with a click.
ENGLISH

INFORMATION ____________________________
Cleaning the Filters
Note
■ This appliance should be maintained regularly
by the user.
■ Low suction power or damage to the appliance
may occur if the filters of this appliance are not
cleaned.
■ We advise you to clean HEPA filter regularly
(e.g. after every two operations or in a shorter
time). If the suction power is low, please clean
the filters before operating the appliance.
■ Dust and dirt blocking the filters should always
be cleaned.
■ All filters should be cleaned at least after
every two operations and should be replaced
every 6 months or a year due to the usage
conditions of your vacuum cleaner.
■ Foam filter
and HEPA outlet filter should be cleaned
, motor protection filter U
T
W
regularly. You can wash the filters with liquid
soap and then use them when they are dried.
Filters should be cleaned after every two
operations; otherwise, the suction power may
be decreased and it may cause a foul smell.
1 To remove the dust blocking the filter, gently
tap the HEPA output filter W on a hard
surface
2 Use a small brush (not included in this model)
to clean the outer surface of the HEPA filter.
Thus, you can remove the rough part of the
dust.
3 Wash the filter in warm water.
4 Repeat this process and wait until it is
completely dried by itself naturally. Do not use
any heating device for drying.
Note
■ Do not use cleaning agents and do not touch
unnecessarily the delicate filter surface.
■ Always ensure that both filters and appliance
are completely dried before installing the filter
to the appliance. Remove the plug of your appliance from mains supply before performing
cleaning or maintenance operations.
■ White coating of the HEPA filter shall become
paler in time. This is normal and does not affect
the performance of the filter.
ENGLISH
11

INFORMATION ____________________________
Appliance surface care
■ Clean the appliance with a damp cloth. Then,
wait until it is dried.
Caution
■ Never use petrol, thinner and harsh or
abrasive cleaning agents to clean the
appliance.
■ Store the vacuum cleaner out of the reach of
children.
Parking the vacuum cleaner
■ A hook is available on the floor brush to park
the vacuum cleaner. It is possible to hang the
floor brush to the relevant park position G
with this hook.
Troubleshooting
Disconnect your appliance from mains supply
and wait until it completely cools down before
applying any resolution described in the troubleshooting section.
PROBLEM CAUSE REMEDY
Suction
power is
very low.
Unit
stopped
abruptly
while operating.
Suction power
control is very
wide.
Blocked floor
brush.
Dust chamber
is full.
Filters are dirty. Clean the
Thermic might
be blown.
Close the
control.
Remove the
blockage in
floor brush.
Empty the
dust container
Cleaning and
filters
filters.
Clean the
dust container
and filters.
Continue on
cleaning after
40 minutes.
12
Thermic Motor Protector
Your vacuum cleaner is equipped with a thermic
protector that protects the appliance when the
motor is excessively heated due to low intake
power and blocked filter. If the exhaust outlet of
your vacuum cleaner heats up and the cleaner
stops suddenly by itself, follow the procedure
below:
1 Turn off and unplug the vacuum cleaner.
2 Look for the cause of the overheating (blocked
hose, blocked filter, etc.).
ENGLISH

INFORMATION ____________________________
3 Wash the filters, especially the HEPA filter by
removing the fine dust carefully, if required.
Let the filters dry completely before replacing
them.
4 Wait for about 40 minutes to allow cooling
of the motor and deactivation of the safety
mechanism.
5 After 40 minutes, plug in the vacuum cleaner
and turn it on.
6 If the vacuum cleaner does not operate,
unplug it again and check whether more time
is required to allow deactivation of the safety
mechanism by waiting for 20 minutes more.
Note
■ If your product sucks large pieces of paper,
napkin or socks, this will cause clogging in the
air channels and your product’s suction power
will suddenly drop.
■ In such a case, open the lower body plug by
turning it, remove the objects inside and place
the plug back to continue with the vacuum
cleaning.
Environmental note
This product has been manufactured with highquality parts and materials which can be re-used
and are suitable for recycled.
Therefore, do not dispose of the product
with normal domestic waste at the end
of its service life. Take it to a collection
point for the recycling of electrical and
electronic equipment. This is indicated
by this symbol on the product, in the operating
manual and on the packaging.
Please consult your local authorities to find out
where the nearest collection point is.
Help protect the environment by recycling used
products.
Technical data
This product conforms to the European
directives 2004/108/EC, 2006/95/EC,
2009/125/EC, 2010/30/EU and
2011/65/EU.
Power supply: 220 - 240V~, 50/60 Hz
Power:
Maximum 1200 W
Nominal 1000 W
Energy efficiency class
C
Protection class: II
Design and specifications subject to change without notice.
ENGLISH
13

Grundig Intermedia GmbH
Beuthener Strasse 41
D–90471 Nürnberg
www.grundig.com
72011 908 8300 14/30
 Loading...