

Grundig SPACE FIDELITY PA 3, SPACE FIDELITY PA 3 I, SPACE FIDELITY PA 3 II User Manual

PA 3
SPACE FIDELITY - THE MAIN BENEFITS
Captivatingly emotional sound
Space Fidelity creates a two-channel sound field throughout the listening space.
The entire room turns into a stereo chamber, filled to the brim with music.
Unique high-performance design ‘Plug and Play’ HiFi.
In the Grundig Space Fidelity system, all the functions of high-end HiFi are
packed into a single stand-alone unit with stunningly avant-garde styling.
The speakers are built-in, in the form of the Space Fidelity tube, so there are no
boxes to connect with unsightly cables.
The sound image is the same everywhere in the room.
With conventional stereo systems, you only hear stereo when you are inside an
area of a few square metres between and in front of the speakers.
Space Fidelity gives you a thrilling personal stereo experience everywhere you
go in the listening space.
Space fidelity’s stereo is not focused in the centre of the room at all. It follows
you around, like the eyes of the Mona Lisa. Wherever you go, you hear the
same unique live sound: Space Fidelity sound.
SPACE FIDELITY - THE BACKGROUND
Surround sound systems try to produce realistic 3-dimensional sound. But with
five speakers, it demands space, and is not always easy to fit into the room
decor. Because of this, various alternative solutions have appeared. All aim to
create a surround sound effect from a compact, easy-to-handle source.
These systems invariably use side lobing from speakers. The direct sound is
minimized, and surround sound is generated by reflections from the walls of the
listening space. This method can generate all-round sound, but cannot by its
nature reproduce clean stereo.
Space Fidelity is itself based on side-lobing. But it is not dependent on wall
reflections and therefore reproduces natural, true-to-life sound.
For a stereo channel, Space Fidelity produces a bi-polar energy field that
creates an air flow, equally powerfull in both directions, so, in effect, it creates
circular sound pressure fields.
Wherever you may be in the listening space, Space Fidelity gives a much
broader stereo sound sensation. Damping of the walls does not detract from the
live-performance quality of the sound, and in certain circumstances may indeed
improve it.
Space Fidelity’s acoustic tube creates precisely controlled acoustical coupling
between two conventional cone loudspeakers, one for each stereo channel, at
the opposite ends of the tube.
Inside the tube, the nature and geometry of the damping material (a bundle of
very narrow evenly distributed channels) absorbs and controls, to avoid the
reflections. This mutual interaction achieves wide-ranging freedom from
reflections and good level response over the full frequency range.
As a result, the tube emits intrinsically synchronous wave fronts, with precise
phase relations. The sound is natural, three dimensional and still free of
blurring and loss of definition.
SETTING UP SPACE FIDELITY
Space Fidelity is very good-natured, and you can stand it almost anywhere to
enjoy superb sound. But if you want to feel the full force of this exciting system,
give it a little ‘breathing space’.
• Give it one-and-a-half to three metres of free space on both sides.
• Stand it off thirty centimetres from the wall.
• Then move back, sit back, and experience it. The most exciting sound you
ever heard.
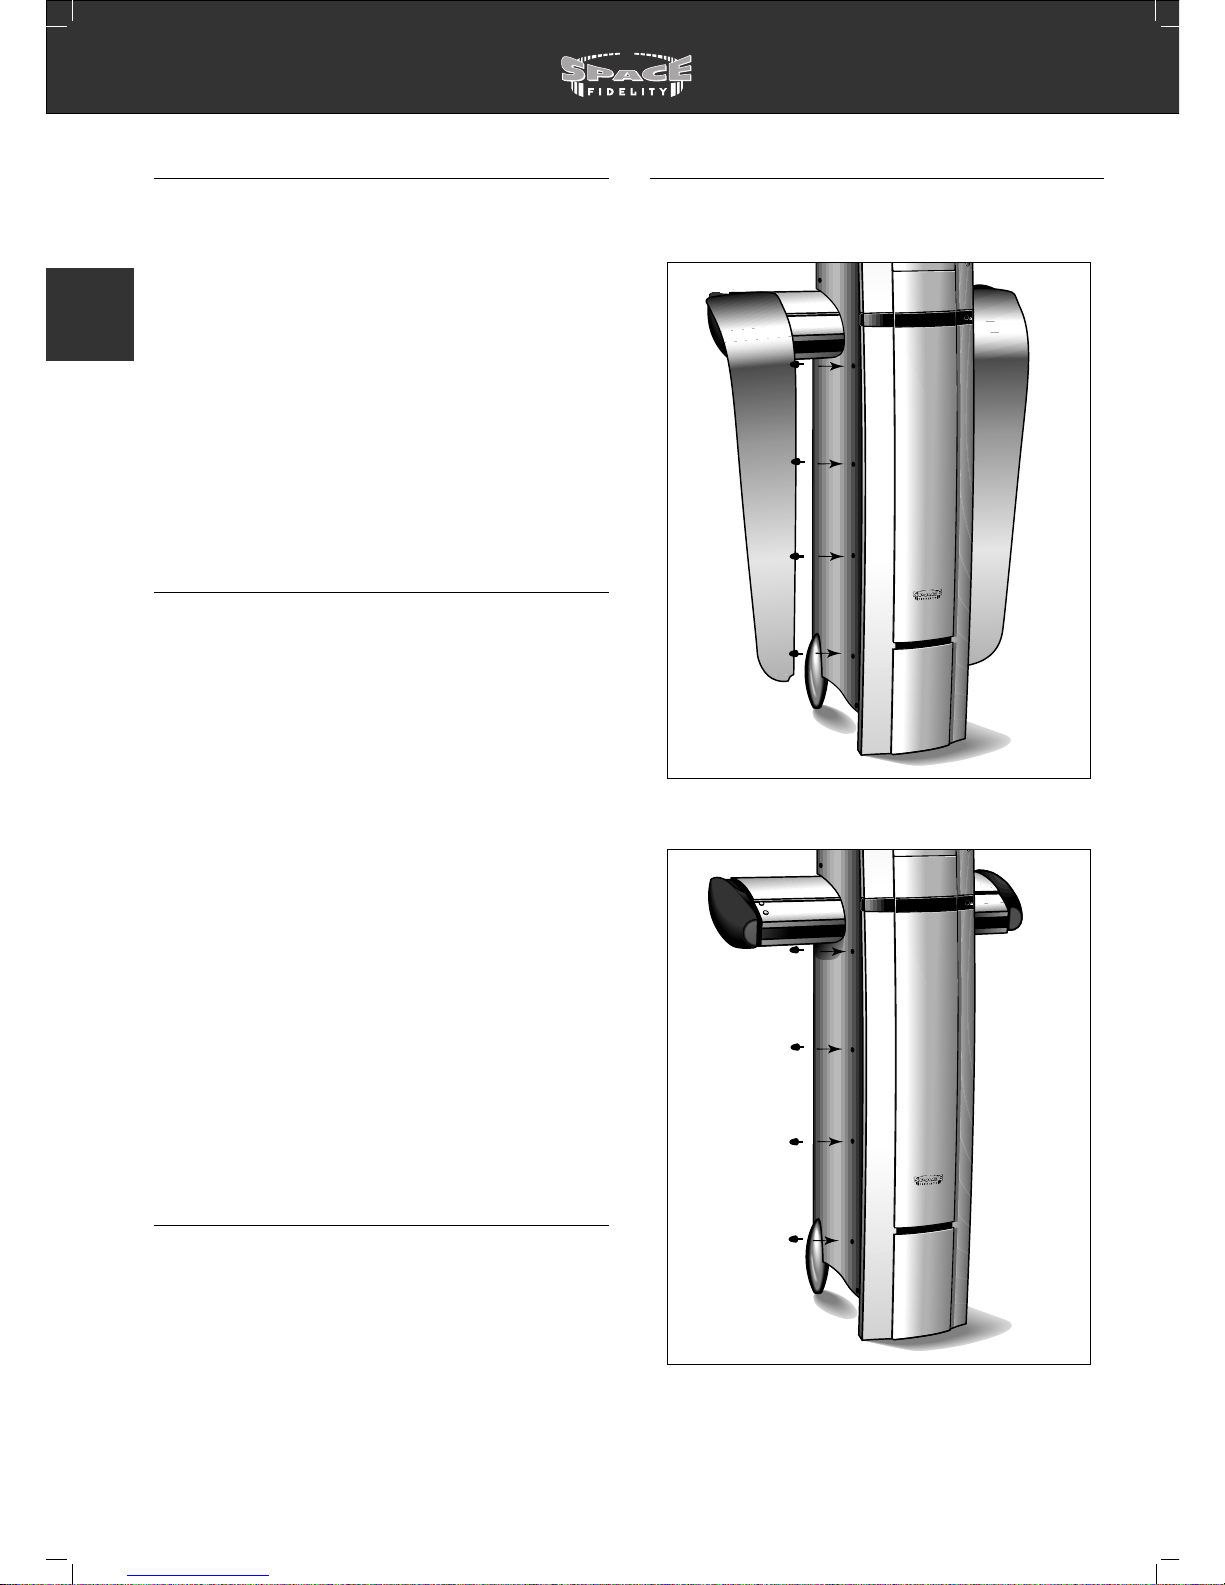
MOUNTING THE WINGS ON SPACE FIDELITY
The wings are supplied with Space Fidelity PA 3 II and available as an
accessory for Space Fidelity PA 3 I.
• Mount the wings on the system as shown below.
• In case you do not wish to mount the wings, you may also insert the
supplied knobs that cover the holes in the side of your system.
• If you wish to remove the knobs again, the best way to do this is pressing
them forward or backward with your thumb and pulling them out.
OPEN/
CLOSE
H
E
A
D
P
H
O
N
E
S
D
I
S
C
S
E
L
E
C
T
1
2
3
4
5
6
7
OPEN/
CLOSE
OPEN/
CLOSE
H
E
A
D
P
H
O
N
E
S
D
I
S
C
S
E
L
E
C
T
1
2
3
4
5
6
7
OPEN/
CLOSE
©
20
INTRODUCTION INSTALLATION
GB
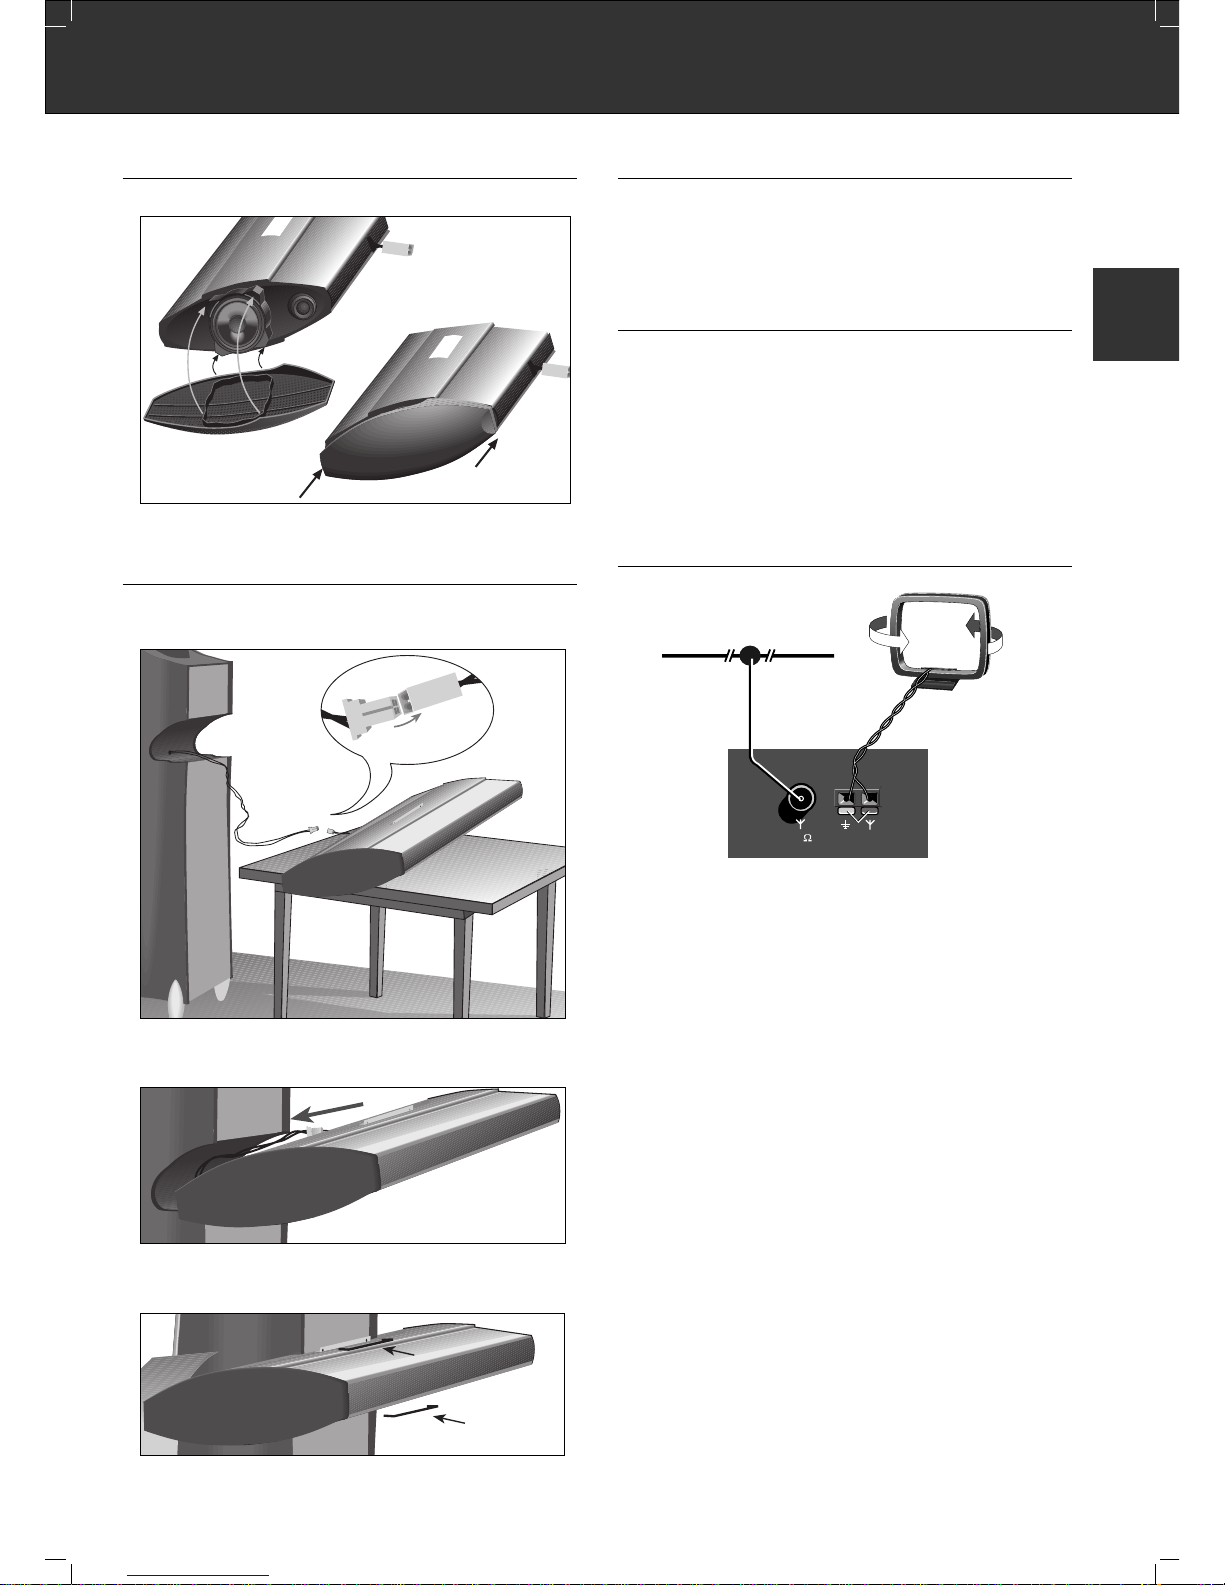
MOUNTING SPEAKER COVERS TO THE TUBE
• Mount the speaker covers to the tube as shown in the illustrations below.
TUBE CONNECTION
• Connect the plug of the tube to the plug of the cables coming out at the back
of your unit.
• Insert the tube in your unit as shown in the illustration until it clicks in place.
Make sure that the connection cable is put behind the tube in the system.
To disconnect the tube, insert the two supplied tools as shown, and take the
tube out of your system.
POWER SUPPLY CONNECTION
• Only connect the unit to a 230V~, 50/60 Hz a.c. power source.
• Always ensure that the voltage indicated on the unit's rating plate agrees with
you local power supply. If this is not the case, consult your dealer or
customer service center. The rating plate is found on the back of the unit.
CONNECTING OTHER EQUIPMENT
Before connecting any other programme sources, always switch off Space
Fidelity. In addition, note the correct connection of the stereo channels:
R: right (red)
L: left (white).
AUX IN/OUT Connect the LINE OUT sockets of your other equipment, e.g. tape
-or DAT recorder, TV, DSR tuner, etc. to the sockets AUX IN.
Connect the LINE IN sockets of your other equipment, e.g. tape or DAT recorder to the sockets AUX OUT.
ANTENNA CONNECTION
Only a good antenna system (broadband cable connection to your own antenna
system, or a common house antenna system) can guarantee optimum reception
quality, especially for FM stereo broadcasts.
FM 75 Ω
• The FM 75 Ω socket is used for connection to the Community or Cable Antenna System or to a roof-mounted FM antenna with an impedance of 75 Ohm.
• If non of these are available, you may use the cast (wire) antenna supplied for
nearby station (reception could be poor). You should not, however, change
the length of the cast antenna.
AM LOOP ANTENNA
• For AM reception, connect the supplied wires to the AM LOOP ANTENNA
terminals and position the antenna for best reception.
• The elevated antenna b as well as earth e can also be connected to these
sockets in place of the frame antenna.
Note: do not place the AM loop antenna on the unit, as this unit employs a
computing device which could cause interference.
FM 75
AM LOOP ANTENNA
FM
TOP SIDE
OBEN
1
1
2
2
TOP SI
D
OBEN
©
21
INSTALLATION
GB
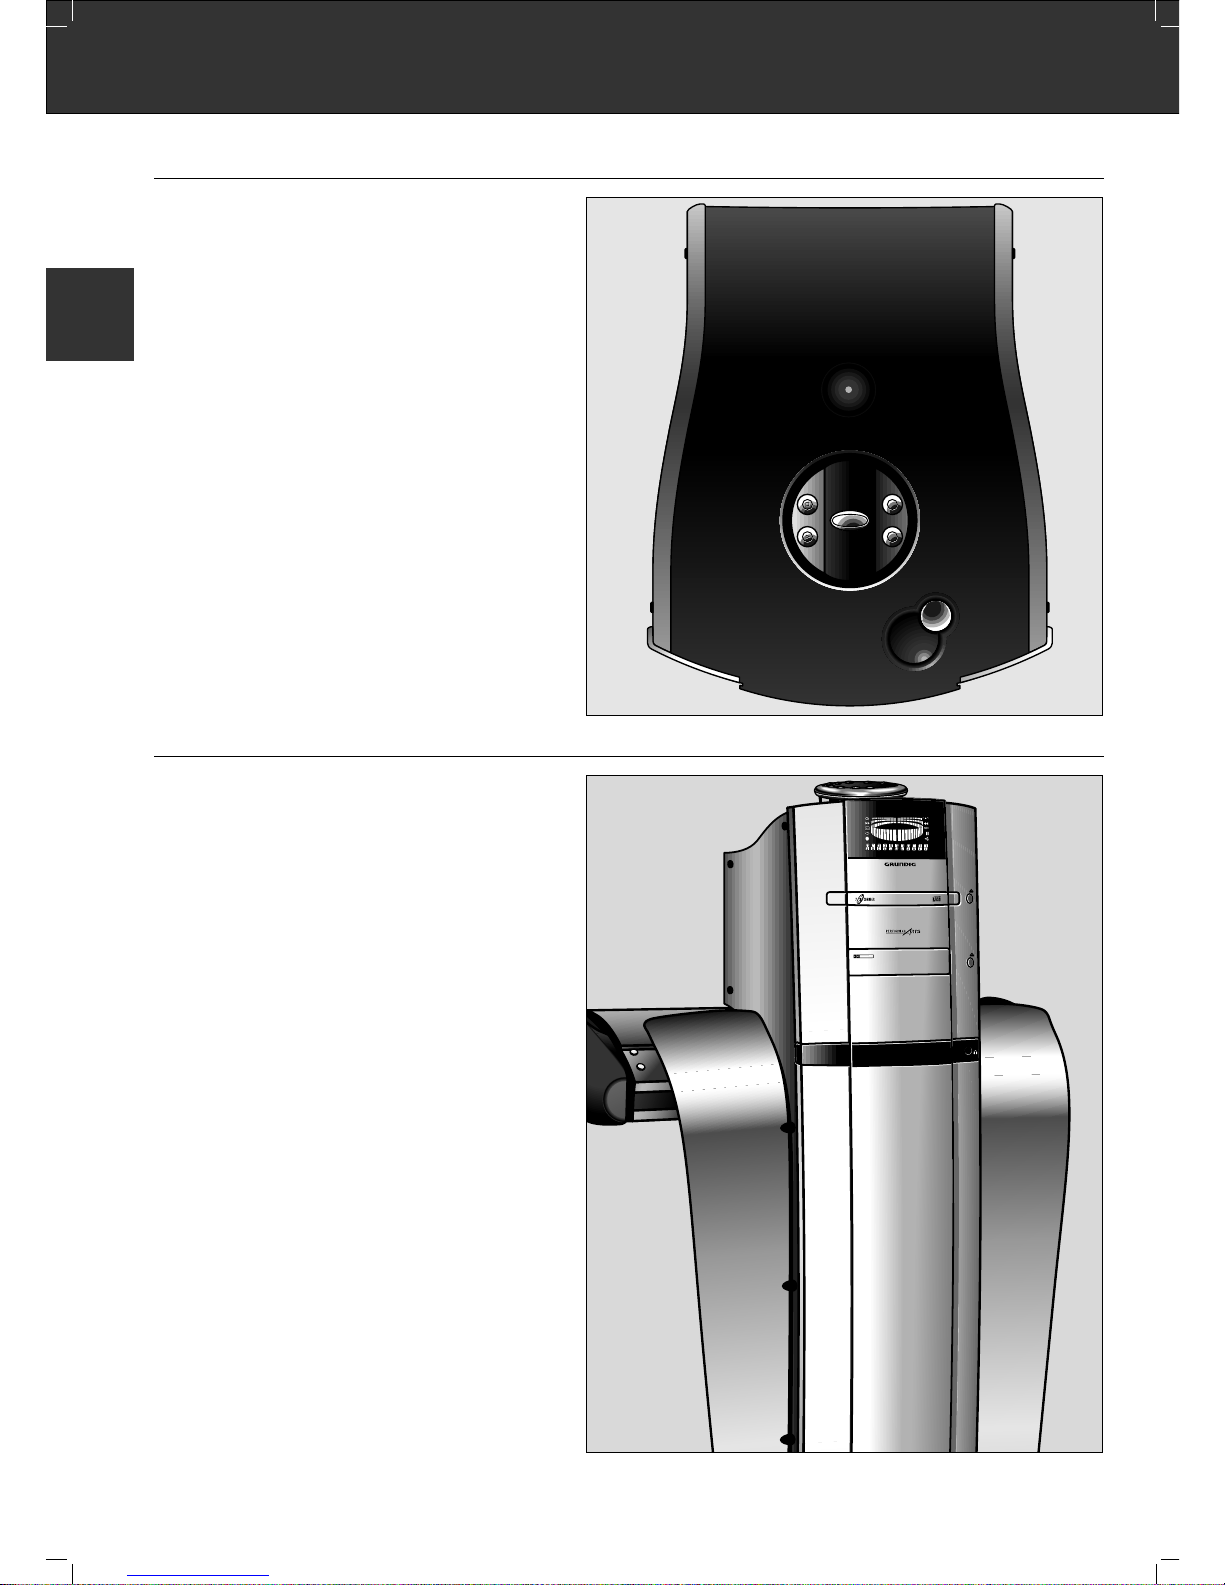
TOP OF THE SYSTEM
POWER Switches the system on and off.
When the power is switched off, the set is separated
from the mains supply. (no power consumption).
POWER SOUND Toggles between three sound settings:
POWER SOUND, FLAT and USER.
IR SENSOR Receives signals from the remote control.
Under remote control (emergency keys).
SOURCE Selects the different sound sources and mute function
in the following order:
CD –> TUNER –> TAPE –> AUX –> MUTE –> CD.
B Starts playback of a CD or cassette.
9 Stops a CD or a cassette
+/– Adjusts the volume level (0 - 63)
FRONT OF THE SYSTEM
DISC / Opens and closes the CD compartment
OPEN/CLOSE
TAPE / Opens and closes the cassette compartment
OPEN/CLOSE
DISC SELECT Selects the CD you wish to hear or the compartment
1...7 in which you wish to load a CD
p This socket is for connecting standard stereo head-
phones with a 6.3 mm jack.
The system´s speaker outputs are automatically
switched off when the headphone jack is inserted,
and are automatically switched on again when it is
removed.
DISC
OPEN/
CLOSE
OPEN/
CLOSE
TAPE
H
E
A
D
P
H
O
N
E
S
DISC SELECT
1 2 3 4 5 6 7
DISC
OPEN/
CLOSE
OPEN/
CLOSE
TAPE
DOLBY B NR
POWER
SOUND
POWER
POWER
SOUND
POWER
SOURCE
SOURCE
+
+
–
–
©
22
A SHORT OVERVIEW OF SPACE FIDELITY
GB
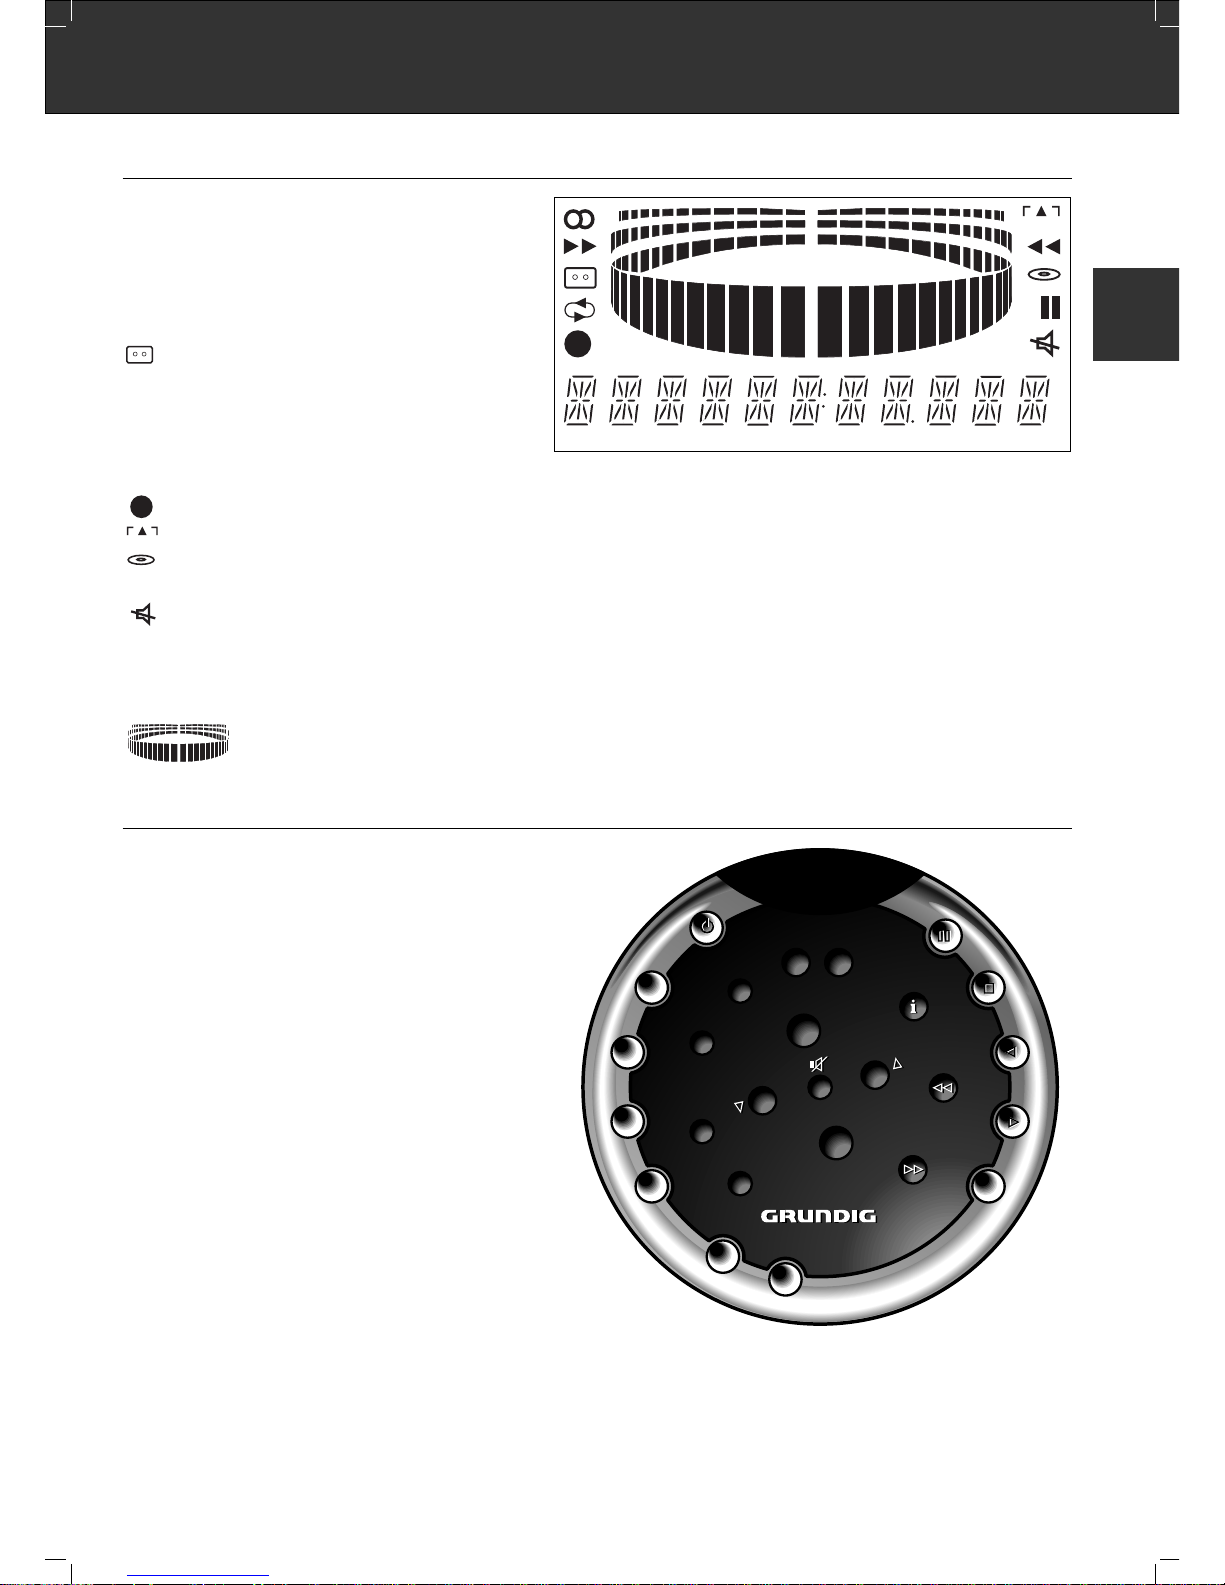
DISPLAY
The display indicates
ɳ – when receiving FM stereo stations
QR – during station search, during fast cassette winding,
during CD search function.
B – during CD play and cassette playback forward.
A – during cassette playback reverse.
– when the source TAPE is selected
∫ – indicates the TAPE reverse mode:
å The tape stops at the end of each side.
∂ Playback (+ recording) of both cassette sides;
after which the tape stops at the end of the second
side.
∫ Continuous playback of both cassette sides.
– during the recording function
– If the unit is optimally tuned to a radio station.
– when the source CD is selected
; – when the system is in CD or TAPE PAUSE mode.
– when the sound is muted
kHz / MHz – for FM reception the frequencies are indicated in MHz
and for MW reception in kHz.
########### – in this part of the display all relevant messages are
displayed.
– indicates the output signal
REMOTE CONTROL
Changing the batteries
If the range of your infrared remote control seems to decrease, or if
certain individual functions can no longer be carried out, you should
replace the batteries.
Two mignon 1.5 Volt LR03 size AAA are required.
To change the batteries, open the compartment on the back
of the remote control.
Ensure that the batteries are inserted properly
(note the markings in the compartment).
And in the interest of the environment:
Remember that batteries must always be disposed of properly.
For functional overview of remote control see next pages
rec
rec
MHz
kHz
©
23
A SHORT OVERVIEW OF SPACE FIDELITY
GB
CD-COPY
RECORD
MEMORY
CANCEL
MODE
PTY
CD-COPY
RECORD
MEMORY
CANCEL
+
+
–
–
MODE
PTY
POWER
SOUND
CONTROL
SOUND
AUX
TAPE
TUNER
CD
DISC
POWER
SOUND
CONTROL
SOUND
AUX
TAPE
TUNER
CD
DISC
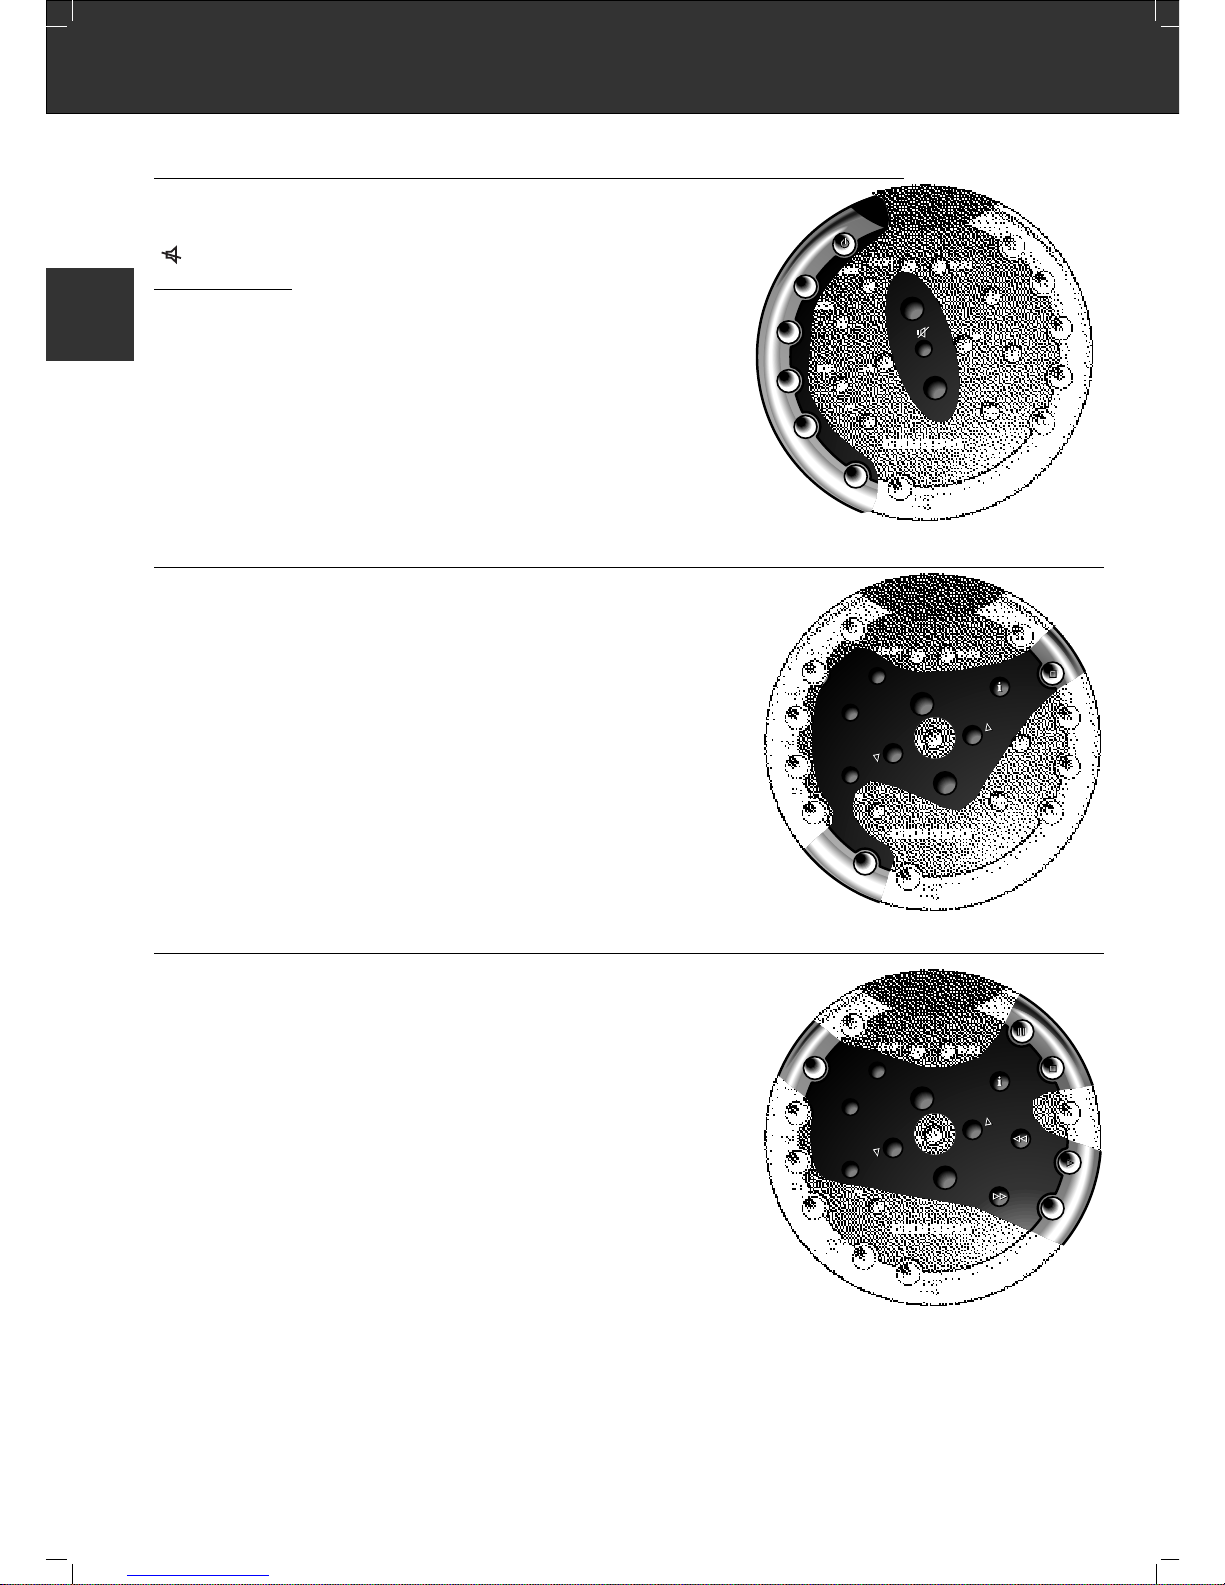
GENERAL FUNCTIONS
y switches the unit to STAND BY.
+ / – adjusts the volume
mutes the speakers
SOURCE
SELECTION
CD selects the CD changer.
TUNER selects the TUNER (radio).
TAPE selects the TAPE (cassette deck)
AUX selects the AUX (auxiliary) input.
SOUND CONTROL selects the sound control mode
POWER SOUND toggles between three sound settings:
POWER SOUND ™ FLAT ™ USER ™ POWER SOUND.
AFTER SELECTING SOUND CONTROL
Press
3 / 4 to scroll through the sound presets.
9 to switch the sound settings to neutral (FLAT).
Ǻ to change the brightness of the display from
‘normal brightness’ to ‘50% brightness’ to ‘display
off’.
MODE to call up the BASS and TREBLE adjustment mode:
then press + / – to adjust the bass tones: BASS
3 / 4 to adjust the high tones: TREBLE.
MEMORY to store user sound presets at the lowest memory
location
CANCEL to delete user sound presets.
AFTER SELECTING CD
Press
DISC to enter the disc selection mode.
then press 3 / 4 to select the disc (compartment).
B to start playback
9 to stop playback
; to switch the player to PAUSE.
Ǻ to change the information on the display
When pressing longer, the EDIT mode will be entered in which you can assign
names to CD’s with the following keys:
+ / – to go to a next/previous position on the display (cursor)
3 / 4 to go through the alphabet, 0-9 and space symbol.
CANCEL to clear the name.
QR to start forward or backward search.
3 / 4 to skip to next or previous tracks.
MEMORY to call up the programming mode or to save individual tracks.
press more than 2 seconds to review the tracks in the programme.
CANCEL to omit individual tracks from the programme
press more than 2 seconds to delete the complete programme.
press more than 10 seconds to delete all CD titles.
MODE to select the SHUFFLE and REPEAT mode:
then press + / – to select the desired shuffle mode:
SHUFFLE ONE (disc) ™ SHUFFLE ALL (discs) ™ SHUFFLE OFF.
3 / 4 to select the desired repeat mode:
REPEAT ALL (discs) ™ REPEAT OFF
.
©
24
A SHORT FUNCTIONAL OVERVIEW OF THE REMOTE CONTROL
GB
CD-COP
MEMORY
CANCEL
MODE
PTY
CD-COP
MEMORY
CANCEL
MODE
PTY
CONTROL
SOUND
AUX
TAPE
TUNER
CD
CONTROL
SOUND
AUX
TAPE
TUNER
CD
+
+
–
–
CD-COPY
RECORD
MEMORY
CANCEL
MODE
PTY
CD-COPY
RECORD
MEMORY
CANCEL
+
+
–
–
MODE
PTY
POWER
SOUND
CONTROL
SOUND
CD
DISC
POWER
SOUND
CONTROL
SOUND
R
CD
DISC
CD-COPY
RECORD
MEMORY
CANCEL
MODE
PTY
CD-COPY
RECORD
MEMORY
CANCEL
+
+
–
–
MODE
PTY
SOUND
AUX
TAPE
TUNER
CD
DISC
SOUND
AUX
TAPE
TUNER
CD
DISC
 Loading...