

Page 1
JUG BLENDER
SM5040
EN
Product code 1805307
Page 2

Page 3
_________________________________________________________
A
B
C
D
E
F
G
H
I
J
K
L
M
3
Page 4

SAFETY AND SET-UP ______________________
Please read this instruction manual thoroughly before
using this appliance! Follow all the safety instructions to
avoid damage caused by improper use.
Keep the instruction manual for future reference.
Should this appliance be given to a third party, then
this instruction manual must also be handed over.
This appliance can be used by children aged from 8
years and above and persons with reduced physical,
sensory or mental capabilities or lack of experience
and knowledge if they have been given supervision
or instruction concerning use of the appliance in
a safe way and understand the hazards involved.
Children shall not play with the appliance. Cleaning
and user maintenance shall not be made by children
without supervision.
Always disconnect the appliance from the supply
if it is left unattended and before assembling,
disassembling or cleaning.
This appliance shall not be used by children. Keep
the appliance and its cord out of reach of children.
Use this device solely for its intended purpose.
Only use this device indoors. Do not use this device
outdoors or in the bathroom.
The manufacturer assumes no liability for possible
damages that may have been caused by incorrect
usage or mishandling of the device.
ENGLISH 17
Page 5

SAFETY AND SET-UP ______________________
Do not leave this device unattended as long as it is
in use. Extreme caution is advised when this device
is being used near children and persons who are
restricted in their physical, sensory or mental abilities.
Appliances can be used by persons with reduced
physical, sensory or mental capabilities or lack of
experience and knowledge if they have been given
supervision or instruction concerning use of the appliance
in a safe way and if they understand the hazards
involved. Children shall not play with the appliance.
Do not place this device on hotplates (gas, electric
or coal stoves, etc.). Keep this device away from all
hot surfaces.
Always operate this device on a flat, solid, clean and
dry surface.
Do not open the casing under any circumstances.
Our GRUNDIG Household Appliances meet all the
applicable safety standards; thus if the appliance
or power cord is damaged, it must be repaired
or replaced by the dealer, a service centre or a
similarly qualified and authorized service person to
avoid any danger. Faulty or unqualified repair work
may cause danger and risks to the user.
Do not operate this device with wet hands or when
standing on a wet floor.
Only use the original accessories or those that are
recommended by the manufacturer. The use of
ENGLISH18
Page 6

SAFETY AND SET-UP ______________________
accessories other than those mentioned above can
result in fire, electric shock or other accidents.
Danger of suffocation! Keep all packaging
materials away from children, especially small children.
Dispose of the packaging materials properly. Inform
yourself at the local authorities regarding collection
points or garbage separation.
Remove all protective foils and packaging material
prior to usage.
Clean all parts prior to usage.
This appliance is intended for household use only.
Prior to using the device for the first time, make
sure that your type of power and power supply
corresponds to the information on the label.
For additional protection, this appliance should be
connected to a household residual current device
with a rating of no more than 30 mA. Consult your
electrician for advice.
This device is supplied with power as long as it is still
connected to the power supply.
Dry the appliance and all parts before connecting
it to the mains supply and before attaching the
accessories.
Make sure that there is no danger that the cord
could be accidentally pulled or that someone could
trip over it when the device is in use.
ENGLISH 19
Page 7

SAFETY AND SET-UP ______________________
Position the device in such a way that the plug is
always accessible.
Never touch the power plug with wet or damp hands.
Unplug the device before each cleaning and when
the device is not in use.
Prevent damage to the power cord by not squeezing,
bending or rubbing it on sharp edges.
Keep the cord away from hot surfaces and open flames.
Do not pull on the power cord when disconnecting
the plug from the power outlet. Do not wrap the
power cord around the device.
Using an extension cord with this device is not
recommended.
Do not immerse the appliance, power cord or power
plug in water or in other liquids.
Clean the appliance with a damp cloth only.
Do not stick any foreign objects inside the outer casing.
Care shall be taken when handling the sharp cutting
blades, emptying the bowl and during cleaning.
Remove the attachments prior to cleaning.
The blades, slicers and shredders are very sharp!
To avoid injury, handle with the utmost care,
especially when removing and cleaning them.
Do not touch any moving parts on this device.
Wait until it has come to a complete standstill.
The attachments must be properly installed and containers
locked into place prior to switching on this device.
ENGLISH20
Page 8

SAFETY AND SET-UP ______________________
Only lift the cover once the moving parts have come
to a complete standstill.
Remove the cutting tools before removing any food.
Should food particles still remain in the filler hole,
do not try to remove them with your finger, but
rather use the stopper or another piece of food.
Should a piece of food be difficult to remove, then
switch off the device, unplug it from the power
supply and take it apart.
Prior to changing the attachments, make sure the
device is switched off and unplugged.
Do not immerse the cutter unit into water.
Risk of injury! Extreme caution is advised when
handling the blades in order to avoid serious cut wounds.
To guarantee the safety of the device, do not alter
the safety features in any way.
A spatula may be used to remove food from the
container. To do this, the device must be switched
off. Should you use your finger, extreme caution is
advised in order to avoid cut wounds.
Always make sure that the jug is sitting correctly and
is locked into place.
Before the jug is taken off the motor unit, always wait
until the motor has come to a standstill.
Never operate this device without a cover.
Danger of burns! Do not fill the jug with hot liquids.
Never operate this device when it is empty.
ENGLISH 21
Page 9

SAFETY AND SET-UP ______________________
This device is only intended for short periods of use and
should only be in continuous use for a maximum of 3
minutes. After use, let the device cool down sufficiently.
Remove bones and stones from fruit to prevent the
blades or the device from becoming damaged. Do not
put especially hard foods (e.g. turnip) into the device.
Caution! Do not crush ice and blend frozen food.
Switch off the appliance and disconnect from supply
before changing accessories or approaching parts
that move in use.
Products sold in the UK have a British Standard
plug. In the event of an electrical overload the fuse
may blow. Please have the fuse replaced by the
manufacturer or qualified service personnel. Position
the appliance so the power plug is always accessible.
This appliance is intended to be used in household
and similar applications such as:
–staff kitchen areas in shops, offices and other
working environments;
–farm houses;
–by clients in hotels, motels and other residential
type environments;
–bed and breakfast type environments.
Be careful if hot liquid is poured into the food
processor or blender as it can be ejected out of the
appliance due to a sudden steaming.
ENGLISH22
Page 10

AT A GLANCE ____________________________
Dear Customer,
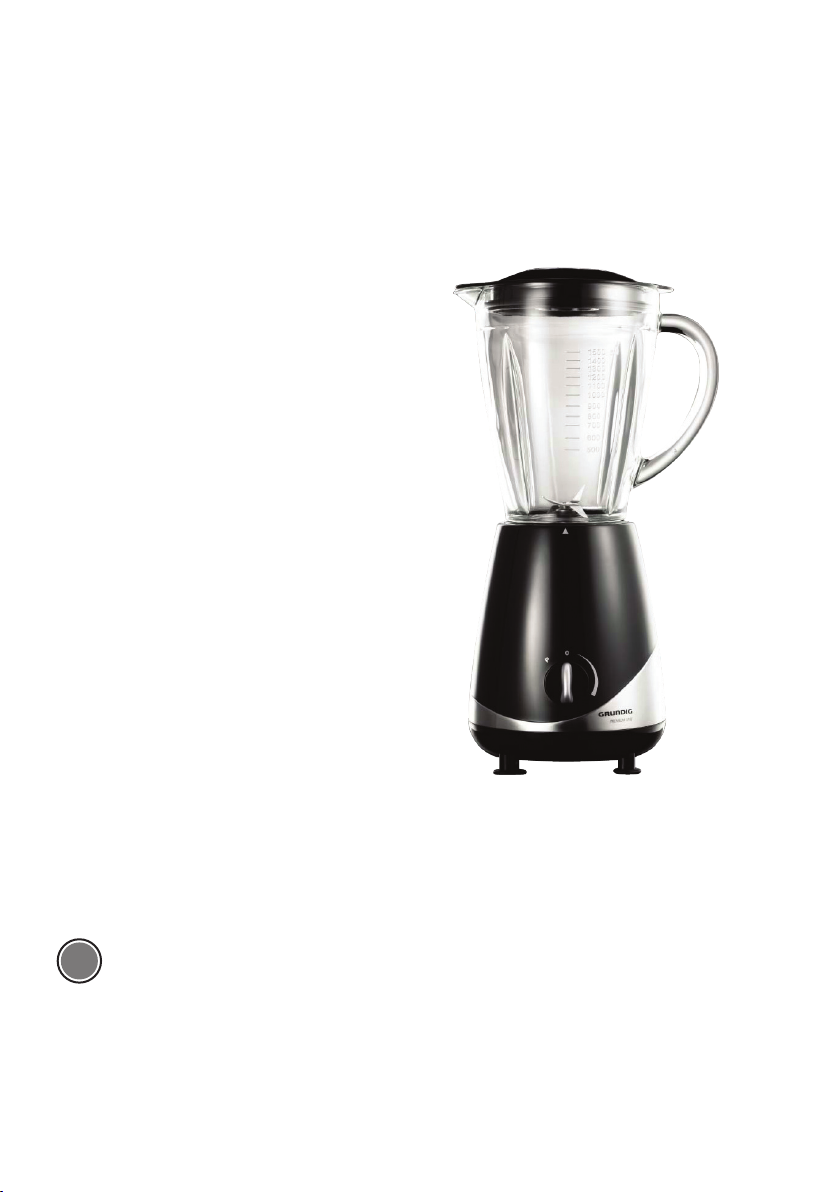
Congratulations on the purchase of your new
GRUNDIG Jug Blender SM 5040.
Please read the following user notes carefully to
ensure you can enjoy your quality GRUNDIG
product for many years to come.
A responsible approach!
GRUNDIG focuses on contractually agreed
social working conditions with fair
wages for both internal employees
and suppliers, as well as on the
efficient use of raw materials with
continual waste reduction of several tones of
plastic each year.
For a future worth living.
For a good reason. Grundig.
Special features
This appliance is perfectly suitable forpreparing
and mixing of shkes, drinks, coctails, soups and
much more.
Recipe
Extra virgin coconut juice
Ingredients:
700g coconut
800ml cold, boiled Wasser
Preparation:
Cut the coconut into 15 x 15mm pieces and put
them into the jar. Add the cold, boiled water and
blend at max. speed until the coconut pieces are
smashed (max. 3 mins.).
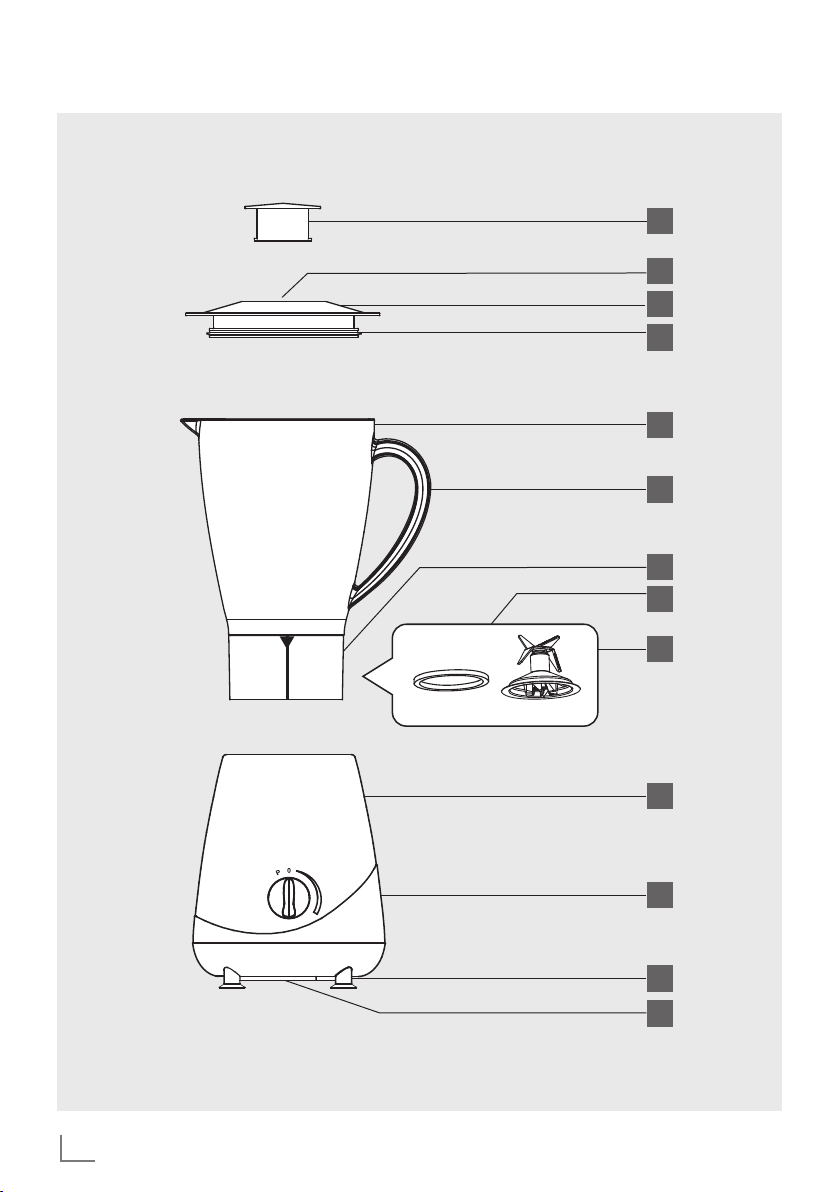
Controls and parts
See the figure on page 3.
A
Measuring cup
B
Lid opening
C
Lid
D
Sealing ring
E
Glass jug
F
Jug handle
G
Jug base
H
Sealing ring
I
Cutter unit
J
Motor housing
K
Control dial
L
Non-slip feet
M
Cable storage coil
ENGLISH 23
Page 11

OPERATION _____________________________
Notes
Upon delivery, the glass jar E, lid C,
measuring cup
cutter unit
already assembled.
Preparation
Remove all packaging and stickers materials
and dispose of them according to the
applicable legal regulation.
Prior to first use
The parts must be cleaned prior to first use.
To do this, proceed as follows:
1 Take the entire unit off the motor housing J
and place it on a level surface, e.g. on the
kitchen counter.
2 The lid C can be removed from the glass
jug by pushing on it lightly upwards with
your thumb.
3 Turn the measuring cup counter clockwise
as far as it will go and take it upwards out
of the lid opening
4 Take the sealing ring D off of the lid. Due
to its flexibility, the sealing ring can be lifted
off with your fingers. Do not use any tools
as this could damage the sealing ring.
5 Now set the glass jug with the opening
facing down on a level surface.
6 Take off the jug base by turning it counter
clockwise until it comes off (see diag.). The
cutter unit inside the jug base stays in the
glass jug.
A
, sealing rings D H,
I
and the jug base G are
B
.
Caution
The blades are very sharp. Therefore do
not touch the cutter unit with your fingers.
Risk of injury!
8 Clean all parts, with the exception of the
motor housing as described in “Cleaning
and Care”.
9 Then re-assemble the jug blender in the
reverse order. Set the glass jug with the
opening facing down on a level surface.
10 Lay the cutter unit sealing ring in the middle
on the glass jug.
11 Then insert the cutter unit with the blades
evenly into the opening of the base of the
glass jug (see diag.). Push down a little so that
the sealing ring presses onto the cutter unit.
12 Screw the jug base onto the glass jug by
turning it clockwise (see diag.). Hold the jug
F
handle
and screw the jug base on tightly.
7 The cutter unit can now carefully be lifted
out of the jug (see diag.). The sealing ring
H
can now be removed from the cutter unit.
ENGLISH24
13 Put the sealing ring on the lid. Make sure that
the sealing ring is sitting on the lid evenly.
14 Press the lid levelly onto the glass jug.
Page 12

OPERATION _____________________________
15 Put the measuring cup into the lid. The
protrusions on the measuring cup fit perfectly
into the grooves in the lid opening. Turn the
measuring cup counter clockwise as far as it
will go to secure it.
16 Turn the glass jug over and place it upright
onto the motor unit. The white line with arrow
on the base of the jug must be located under
the white arrow on the motor unit.
17 Cut the food into small pieces before using
the appliance.
Operation
1 Place the device on an even and dry
surface. The non-slip feet
stability of the device.
2 Make sure that the power cord is
disconnected from the power supply and
the control dial
food into the glass jug.
3 Take the glass jug off the motor unit and
open the lid.
4 Now put the items to be blended in the
glass jug. The ingredients should only be
about 2-5 cm long. The maximum filling
quantity is 1.5 l. The filling quantity is
indicated on the glass jug in litres from
0.5-1.5 LTR and in ounces from 20-50 OZ.
Add water to ensure the jug blender
functions smoothly.
The mixing ratio between hard foods and
water is usually 2:3.
Caution
Do not put or blend hot foods or liquids
in the glass jug. Never let the jug blender
operate while empty (without food). Danger
of overheating!
5 Close the lid. Make sure that the measuring
cup is inside the lid opening and is secured.
6 Connect the power plug to a suitable
power outlet.
7 The cutting speed can be variably adjusted
with the control dial.
K
L
ensure the
is on O before putting
Note
This device also has a turbo function. This
will briefly increase the speed of the blades,
to chop food for example. This is especially
suitable for vegetables or nuts. Depending on
the type of the food you would like to chop,
it is recommended to either begin with a low
speed or to use the turbo function. The turbo
function (position P) should only be used for
a few seconds. As soon as the turbo function
is released, the blender automatically
switches to position 0.
8 If ingredients are to be added during the
blending process, then add them through
the opening in the lid. To do this, take out
the measuring cup.
9 After the desired consistency of the blended
food has been reached, turn the control dial
to 0 to switch off the blender.
Caution
The operating time of the jug blender must
not exceed 3 minutes at a time.
10 Pull the power plug out of the power outlet.
11 Remove the glass jug from the motor unit.
12 Take off the lid and pour the mixture into
glasses or other containers.
Note
As soon as the glass jug is empty, it should be
rinsed out with warm water.
ENGLISH 25
Page 13

INFORMATION __________________________
Tips for preparing of food
To ensure that the food is optimally
blended, add the liquids to the glass jug
first and then the hard foods.
The jug blender cannot perform the
following functions: Beat egg whites,
whip cream, make mashed potatoes,
chop meat, mix dough, extract fruit or
vegetable juice.
The following foods should never be
put into the jug blender as they could
damage it: bones, large pieces of
completely frozen food or hard foods
like turnip.
Cleaning and care
Caution
Never use petrol, solvents or abrasive
cleaners, metal objects or hard brushes to
clean the appliance.
Do not touch the blades with your bare
hands as they are very sharp. Use a brush
instead.
Clean the jug blender after each use. Do not
let any food remains harden on and inside
the jug blender. This will make it more difficult
to clean it later.
1 Prior to cleaning, always pull the power
plug out of the power outlet.
2 Let the appliance cool down completely.
3 Clean the housing with a soft, damp cloth
and some dish soap.
4 All other parts – except the housing – are
dishwasher safe.
Caution
Never put the motor housing or power cord
in water or any other liquids and never hold
them under running water.
Notes
For rapid cleaning, the glass jug can be
filled with warm water and dish soap. Put the
control dial on turbo function a few times.
Then remove the glass jug from the motor
housing and rinse it out with clear water.
Clean all parts of the glass jug unit and take
it apart as described under “Prior to first use”.
The glass jug, lid, measuring cup, sealing
rings and the jug base can be manually
cleaned with dish soap and warm water or in
the dishwasher. However, the temperature in
the dishwasher should not exceed 70°C.
Caution
Do not immerse the cutter unit into water.
Clean the cutter unit with a brush and warm
soapy water. Be careful not to touch the
blade with your fingers!
After cleaning, rinse it with clear water. Leave
the cutter unit in an upright position and in a
safe place to air dry. The cutter unit should
be left to dry in a location that is out of reach
of children!
Risk of injury!
Storage
If you will not be using the jug blender for a
longer period of time, then store it away carefully.
If you do not plan to use the appliance for a
long period of time, please store it carefully.
Make sure that the appliance is unplugged
and completely dry.
To store the blender, wrap the power cord
around the cable storage coil
of the blender. Store the blender in a dry, cool
location that is protected from moisture.
Do not wrap the power cord around the
appliance.
Store it in a cool and dry place.
Make sure the appliance is always kept out
of the reach of children.
M
, on the bottom
ENGLISH26
Page 14

INFORMATION __________________________
Technical data
Operating voltage: 220-240V~ 50Hz
Input power: 650W
Short time usage: 3 min
Noise level: 80 dB(A)
This products conforms to the
European directives 2004/108/
EC, 2006/95/EC, 2009/125/
EC and 2011/65/EU
Technical and design modifications reserved.
Environmental note
This product has been made from high-quality
parts and materials which can be re-used and
recycled.
Therefore, do not throw the product away
with normal household waste at the end of
its service life. Take it to a collection point for
recycling electrical and electronic devices. This
is indicated by this symbol on the product, in the
operating manual and on the packaging.
Please find out about collection points operated
by your local authority.
Help protect the environment by recycling used
products.
ENGLISH 27
Page 15

www.grundig.com
720119083300 14/42
TCC Global N.V., 10/Floor, Tower H, World Trade Center
Amsterdam, Zuidplein 84, 1077XV Amsterdam, The Netherlands
 Loading...