

Grundig SH 24, SH 30 User Manual
Sh 24
CE
Das Produkt erfüllt die EG-Richtlinien
»89/336/CEE, 73/23/CEE, 93/68/CEE«
CE
The product is in accordance with following
EC-Directives: “89/336/CEE, 73/23/CEE, 93/68/CEE“
CE
Il prodotto rispetta le norme Europee
«89/336/CEE, 73/23/CEE, 93/68/CEE»
CE
Le produit est conforme aux directives européennes:
01/2008
ENGLISH
Stenorette Sh 24
Steno-Cassette 30
«89/336/CEE, 73/23/CEE, 93/68/CEE»
CE
Dit produkt voldoet aan de EG-richtlijnen
»89/336/CEE, 73/23/CEE, 93/68/CEE«
CE
Produkten uppfyller EG-riktlinjerna
»89/336/CEE, 73/23/CEE, 93/68/CEE«
CE
Produktet opfylder EU-bestemmelserne
«89/336/CEE, 73/23/CEE, 93/68/CEE»
CE
Este producto cumple las siguiente directrices de
la CE: «89/336/CEE, 73/23/CEE, 93/68/CEE»
www.grundig-gbs.com
DIN 32 750-T
0 5 10 15 20 25 30
-
0
1
I N D E X
M I C .
0 5 10 15 20 25 30
DIN 32 750-T
steno-cassette 30
1
4
D I C T.V O L
2
3
4
5
6
7
8
9
10
11
Netzbetrieb
4
Mains operation
12
13
14
Funzionamento con la rete
Fonctionnament sur secteur
Gebruik met de adapter
Nätdrift
15
Netdrift
Funcionamiento a red
-
0
0 5 10 15 20 25 30
DIN 32 750-T
steno-cassette 30
1
2
3
4
5
6
7
2
0 5
DIN 32 75
steno
Batterien Batterijen
Batteries Batterier
Pile Batterierne
Piles Pilas
3
0 5
DIN 32 75
steno
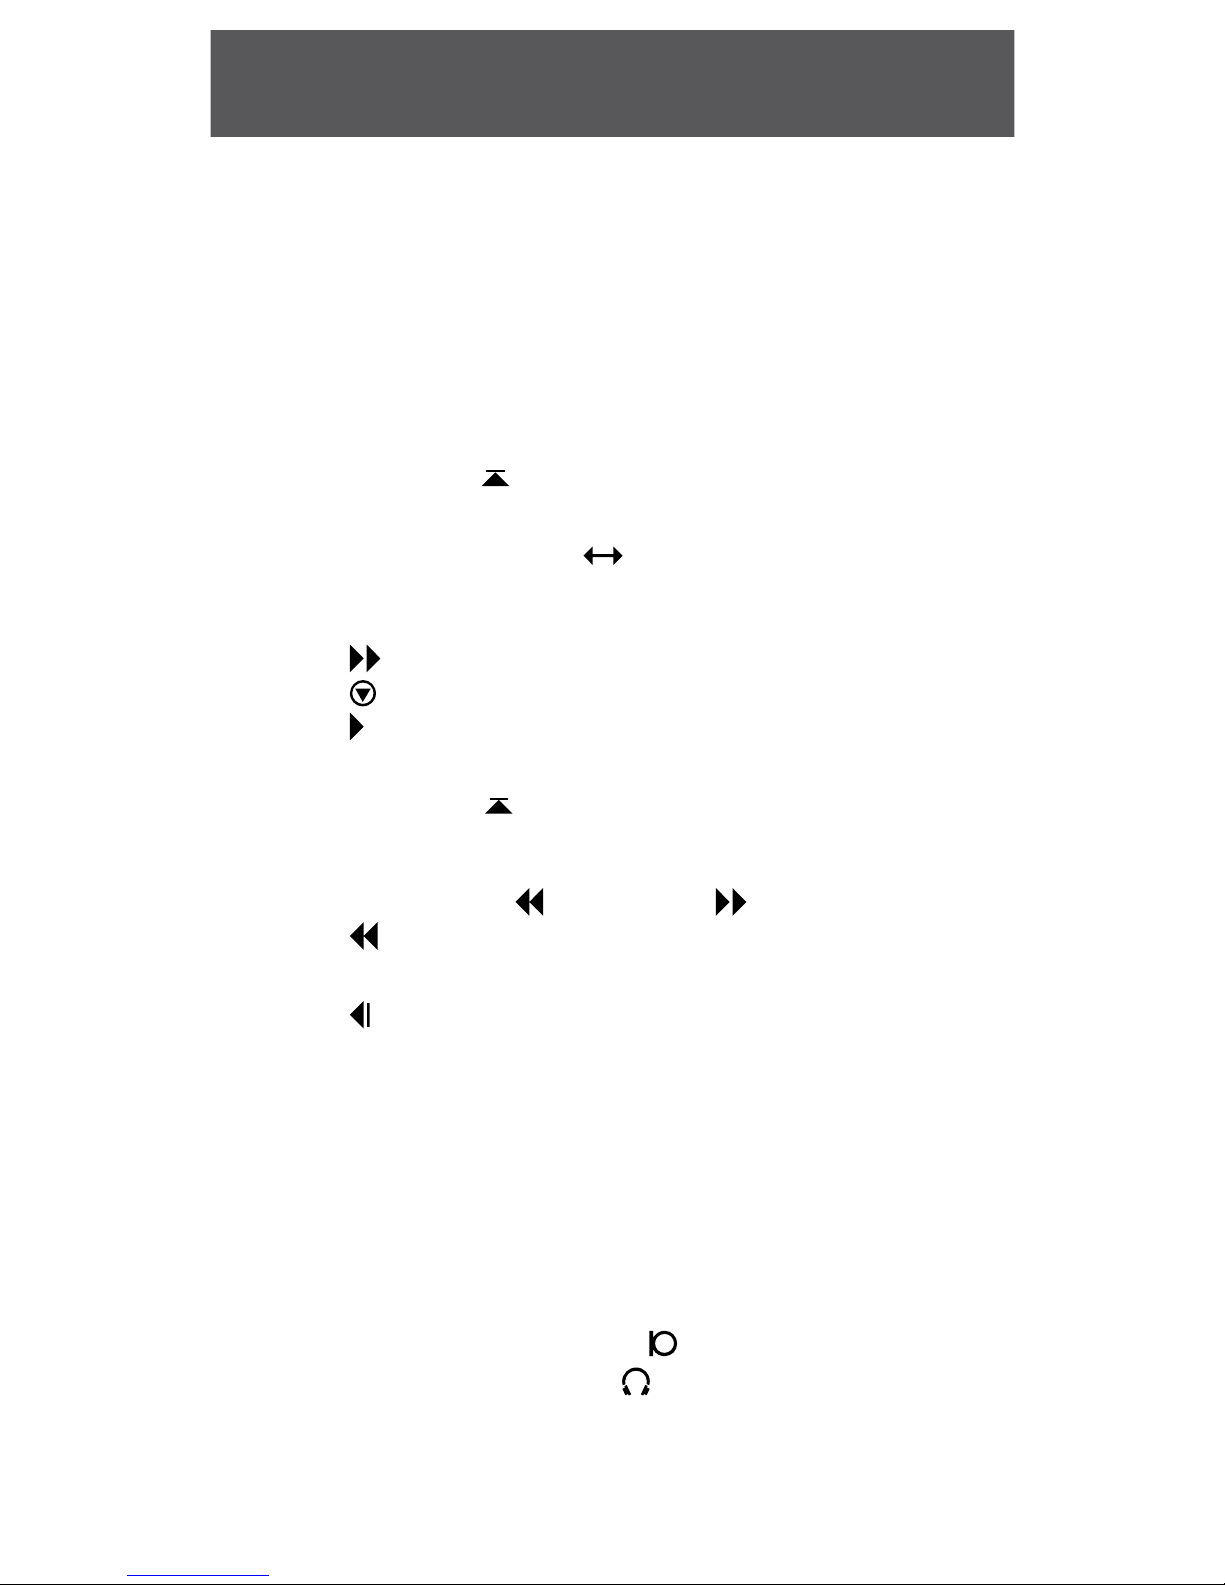
Abbildung zum Text »Bandberührende Teile«,
Seite 13.
Figure to text "tape contacting parts" ,
page 13
Figura riferita al capitolo «Parti a contatto con il
nastro», pagina 13
Figure au text «Eléments au contact avec la
bande», page 13
Afbeelding bij de tekst ”Delen die de band
aanraken”, pagina 13
Bild till texten »Bandberörande delar«,
sidan 13
Illustration til teksten »Båndberørende dele«,
side 13
8
9
10
11
12
13
14
15
Ilustración para el texto «Piezas en contacto
con la cinta», página 13
Akkuset 462
Rechargeable batteries
462
Accumulatori 462
Accumulateurs 462
Akku´s 462
Ackumulator 462
Akkumulator 462
Baterias 462
Netzbetrieb
4
Mains operation
Funzionamento con la rete
Fonctionnament sur secteur
Gebruik met de adapter
Nätdrift
Netdrift
Funcionamiento a red

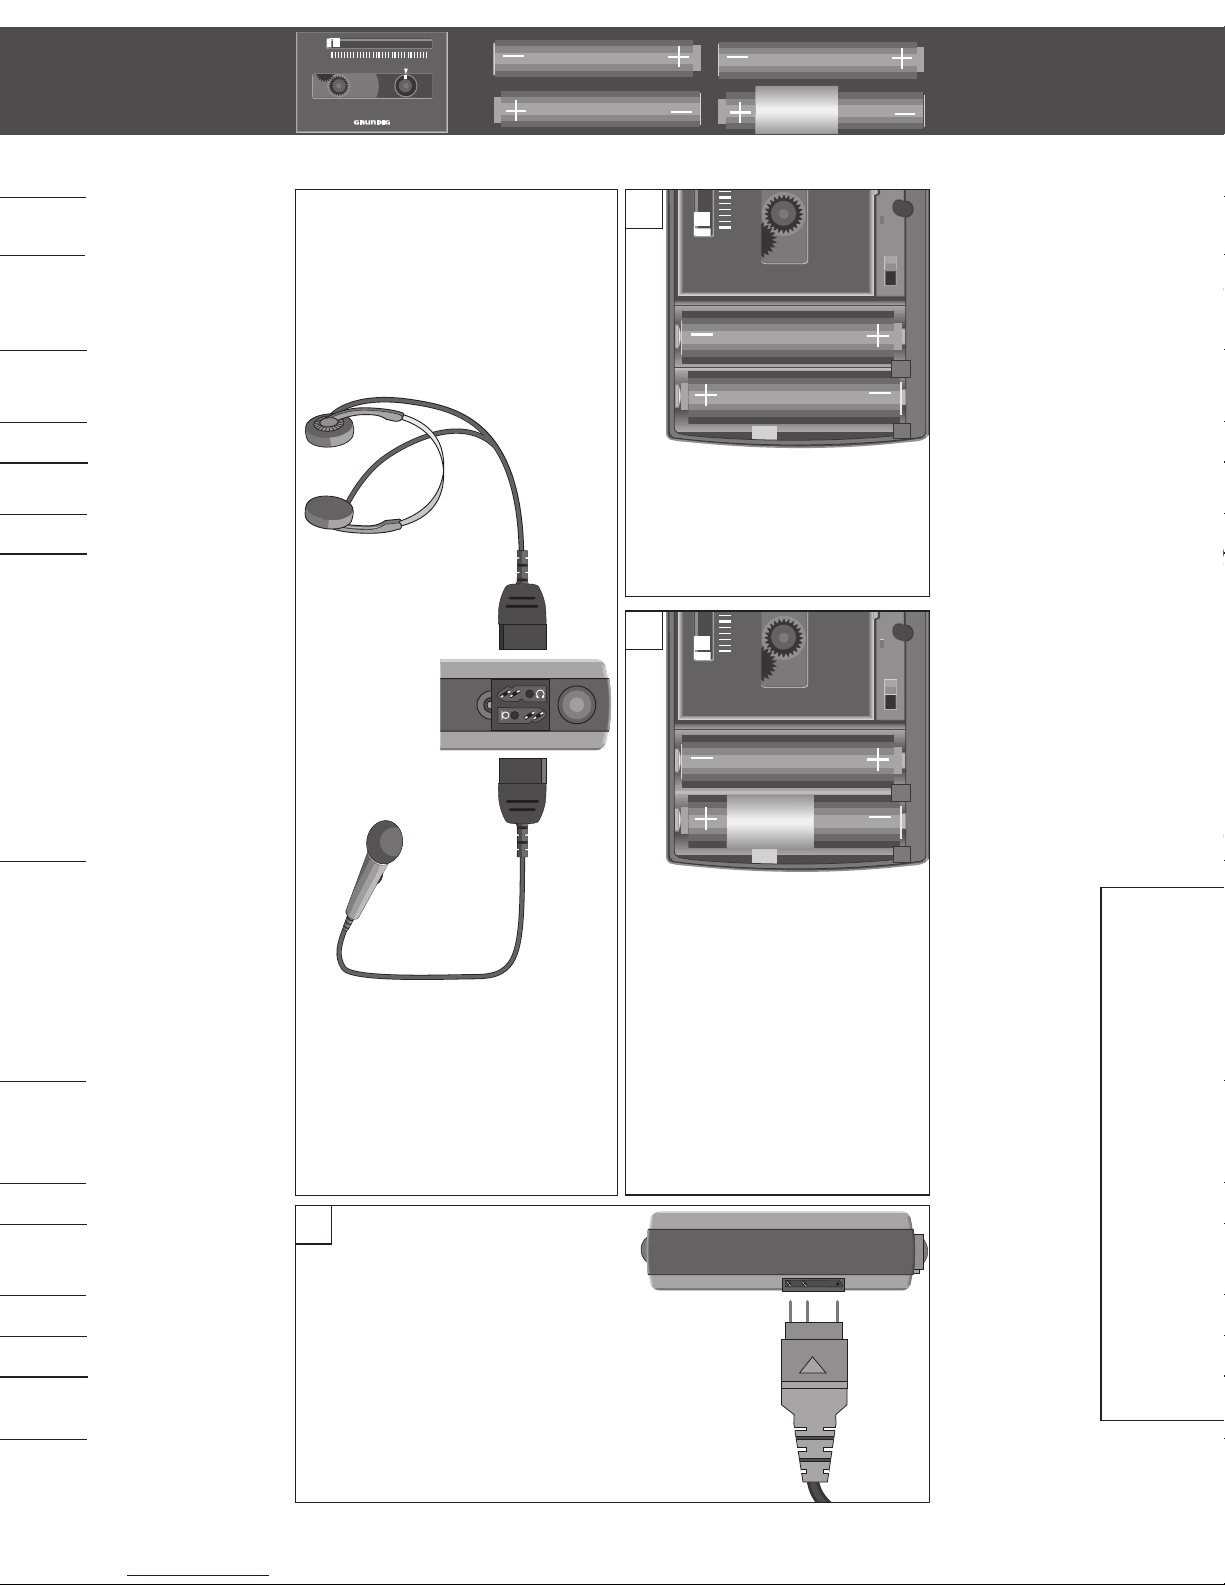
1
GB
Supply Voltage
Battery, rechargeable battery,
mains operation
Battery/rechargeable battery condition indicator
(plus recording indicator): Lights up when recording.
Goes out when the batteries/rechargeable batteries
are weak. Recording is still possible until the motor
stops (sound signal).
Battery operation with two 1.5V/LR6/AA batteries
(alkaline-manganese), leak-proof. Remove batteries
from the unit when they are exhausted or if the
unit is not to be used for a long period of time. No
responsibility will be accepted for damage caused
by leaking batteries!
Rechargeable battery operation with rechargeable batteries 462. Charge the rechargeable
batteries in the unit with the power supply/charging
unit 679. Charging time approx. 22 hours. During
charging, the unit can be used with all functions.
Battery/rechargeable battery compartment
Press and hold down the LID LOCK button, then
remove sliding cover from the unit.
Inserting batteries: Ensure correct polarity (+/–); see
gure [2]. Inserting rechargeable batteries: Observe
correct polarity and position. Insert the rechargeable battery with the removed sheathing into the
compartment with the lateral charging contact; see
g. [3]. Ret and close sliding cover.
Mains operation with the power supply/charging
unit 679; see gure [4].
Slide the plug till the end stop into the portable
dictation machine.
Inserted batteries are disconnected;
the rechargeable batteries 462 is charged.
2
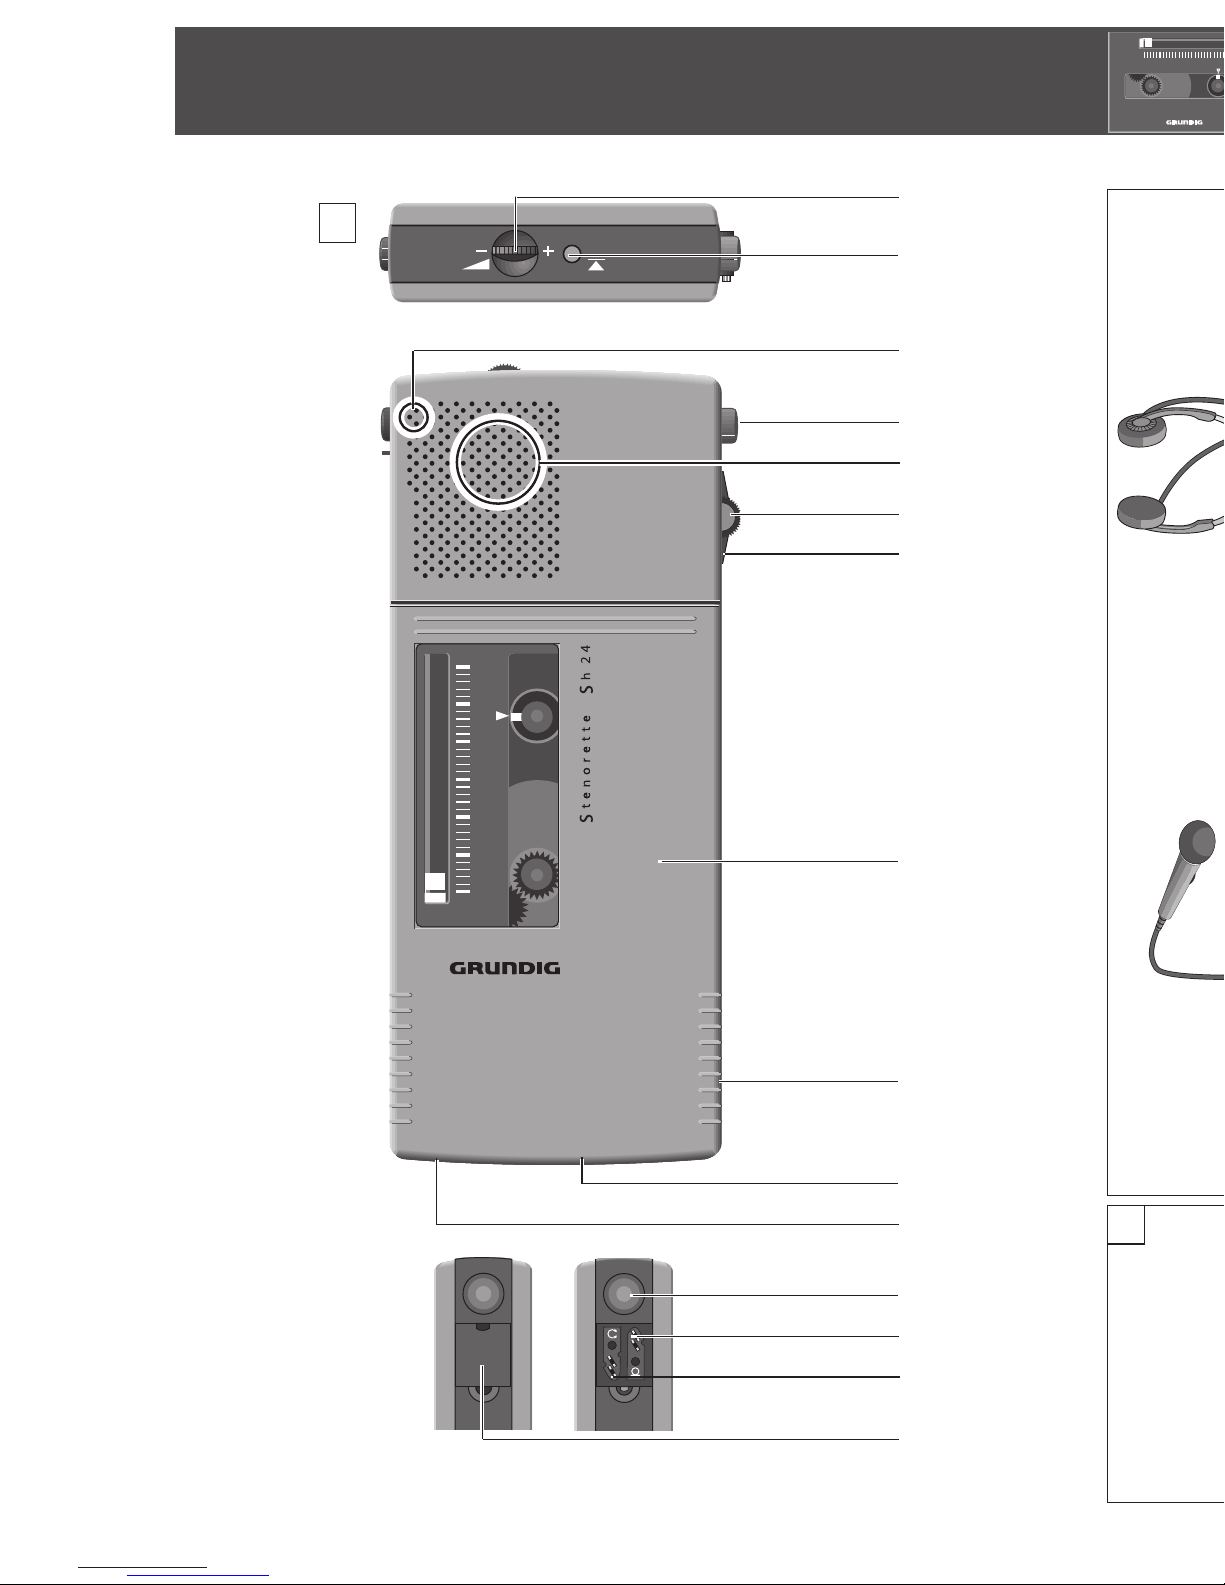
Controls and Sockets
Please open folder at beginning of booklet!
1 Playback volume control (turn)
2
DICT. indication
Lights up during recording.
3
Microphone
4
Recording button
Press the “ DICTATE“ button (locks in).
5
Loudspeaker
6
Switch-on lock red green
Prevents accidental switching on.
7
Slide-switch
Fast forward (search)
Stop
Start playback
Start recording:
Press “
DICTATE” button
beforehand (locks in).
Stop recording: Set sliding switch
briey to “ REWIND” or “ FFWD”.
Rewind (search)
8
Sliding cover
9
LID LOCK button:
Press and slide cover down.
10
Mains/charging unit 679 connection
11
VA switch for voice-activated start/stop during
recording.
12
INDEX button: end mark: Press the button briey
during recording. Info mark: Press the button
longer during recording. Index mark: Press the
button during playback.
13
Microphone connection
14
Earphone connection
15
Cover: Press and slide down.
 Loading...