

Page 1
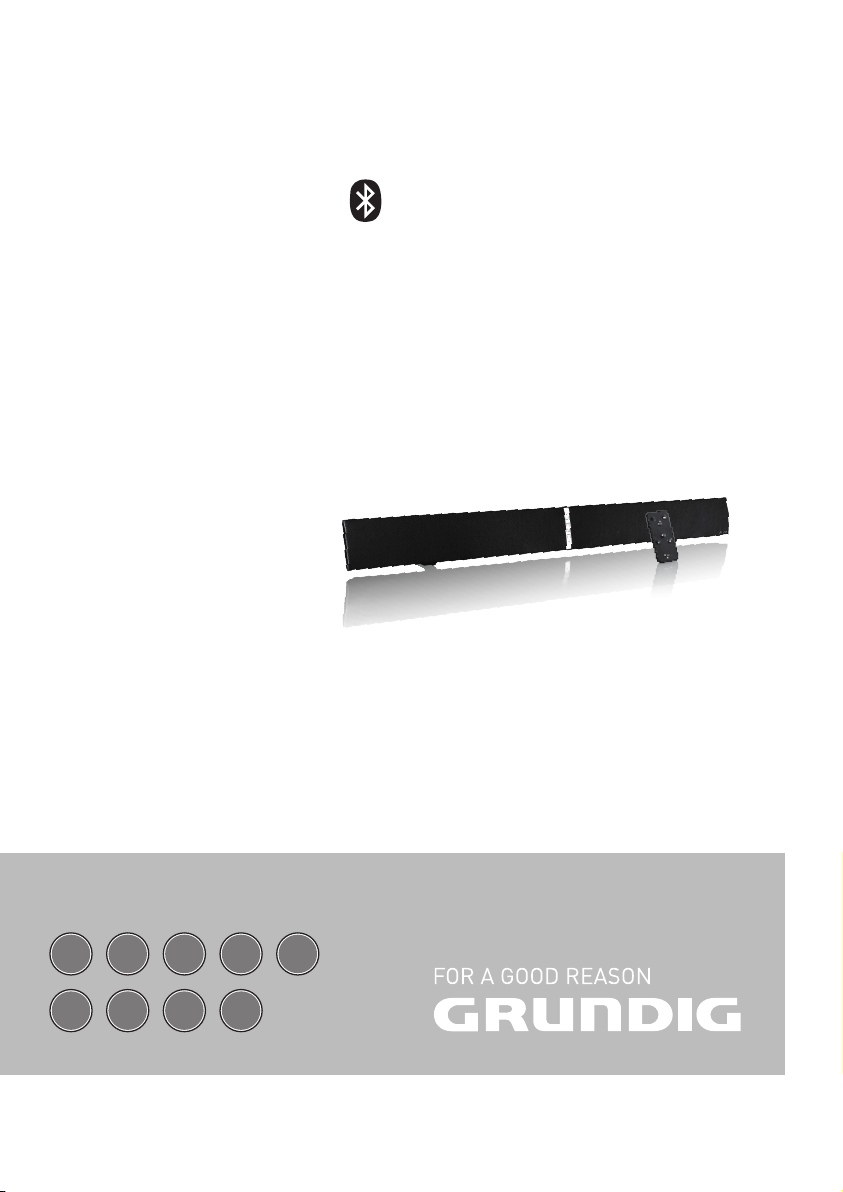
SOUNDBAR
GSB 800
©
DE EN FR IT
DA SV TR
PL
ES
Page 2

Page 3
-----------------------------------------------------------------------------------------------------------------------------------------------------------------------------
A
B
3
Page 4

-----------------------------------------------------------------------------------------------------------------------------------------------------------------------------
DEUTSCH
5 AUFSTELLEN UND SICHERHEIT
6 AUF EINEN BLICK
7 VORBEREITEN/ANSCHLIESSEN
8 WANDMONTAGE
10 BETRIEB
12 INFORMATIONEN
ENGLISH
13 ASSEMBLY AND SAFETY
14 AT A GLANCE
15 PREPARATION/CONNECTION
16 WALL MOUNTING
18 OPERATION
20 INFORMATION
FRANCAIS
21 MONTAGE ET SÉCURITÉ
22 APERÇU
23 PRÉPARATIOON/CONNEXION
24 FIXATION MURALE
26 FONCTIONNEMENT
28 INFORMATIONS
ITALIANO
29 MONTAGGIO E SICUREZZA
30 PANORAMICA
31 PREPARAZIONE/COLLEGAMENTO
32 MONTAGGIO A PARETE
34 FUNZIONAMENTO
36 INFORMAZIONI
ESPAÑOL
37 MONTAJE Y SEGURIDAD
38 VISIÓN GENERAL
39 PREPARACIÓN Y CONEXIÓN
40 MONTAJE EN PARED
42 FUNCIONAMIENTO
44 INFORMACIÓN
DANKS
45 MONTERING OG SIKKERHED
46 HURTIGT OVERBLIK
47 FORBEREDELSE/TILSLUTNING
48 VÆGMONTERING
50 BETJENING
52 INFORMATION
SVENSKA
53 MONTERING OCH SÄKERHET
54 EN ÖVERSIKT
55 FÖRBEREDELSE/ANSLUTNING
56 VÄGGMONTERING
58 ANVÄNDNING
60 INFORMATION
POLSKI
61 MONTAŻ I BEZPIECZEŃSTWO
62 W SKRÓCIE
63 PRZYGOTOWANIE / PRZYŁĄCZENIE
64 MONTAŻ NA ŚCIANIE
66 OBSŁUGA
68 INFORMACJE
TÜRKÇE
69 KURULUM VE GÜVENLİK
70 GENEL BAKIŞ
71 HAZIRLIK/BAĞLANTI
72 DUVARA MONTAJ
74 ÇALIŞTIRMA
76 BİLGİLER
4
Page 5

ASSEMBLY AND SAFETY
--------------------------------------------------------------------------------
Please read the following instructions before assembly:
7
The Soundbar is designed for audio playback.
All other uses are expressly excluded.
7
If you want to set up the Soundbar on shelving units, in cupboards, etc., please ensure that
there is adequate ventilation. There must be a
free area of at least 10 cm on either side and
above the Soundbar.
7
Do not cover the Soundbar with newspapers,
tablecloths, curtains, etc.
7
When setting up the Soundbar, please note
that furniture surfaces may be covered with
various finishes or synthetic materials that often
contain chemical substances. These substances
can attack the material of the unit base among
other things. This can leave residues on the furniture surface, which may be difficult or impossible to remove.
7
If the Soundbar is subjected to big variations
in temperature, for example when transported
from a cold to a warm place, do not use the
Soundbar for at least two hours.
7
The Soundbar is designed to be used in dry
rooms. Should you nevertheless decide to
operate it outdoors, you must ensure that it is
protected from moisture (dripping or splashing
water).
7
Only use the Soundbar in a temperate climate.
7
Do not place the Soundbar close to a radiator
or in direct sunlight; this can affect the cooling
system.
7
Do not place any containers with liquids inside
(e.g. vases) on top of the Soundbar.
7
Do not place any open sources of fire (e.g. candles) on top of the Soundbar.
7
Do not use any cleaning agents; these may
damage the casing. Cleanse the device using
a clean and dry cloth.
7
Do not expose the battery to extreme heat,
such as for example sunlight, radiators, fire, etc.
7
The remote control contains a button cell.
Please always keep the remote control and the
button cell out of reach of children.
7
If the button cell is accidentally swallowed, it
can lead to burns and even death within two
hours. You should therefore see a doctor immediately.
7
Keep new and used batteries out of reach of
children. If the battery compartment cannot be
closed safely, do not continue to use the device
and keep out of reach of children.
7
Remove the battery if used up or if you do not
use the device for a long time. We do not assume liability for damage caused by leaked
batteries.
7
The batteries, even those free from heavy metals, must not be disposed of as domestic waste.
Used batteries must be discarded in used battery collection containers found at commercial
or public waste management services.
7
You must never open the Soundbar. In case
of damage due to improper tampering, any
claims for guarantee are lost.
7
Storms are a danger to any electronic device.
Even if the Soundbar is switched off, it may still
become damaged as a result of lightning striking the mains. In case of a storm, you must always pull the mains plug.
Notes:
7
Do not connect any devices when your device is switched on. Also switch the other devices off before connecting them!
7
Do not plug the mains plug of your device
into the socket until all external devices have
been connected!
Please ensure that the mains plug is freely ac-
cessible!
RF Exposure Warning
7
This equipment must be installed and operated
in acordance with provided manual. The device comprised a built-in antenna, and must not
be co-located or operating in conjunction with
any other antenna or transmitter.
ENGLISH
13
Page 6

AT A GLANCE
------------------------------------------------------------------------------------------------------------------------
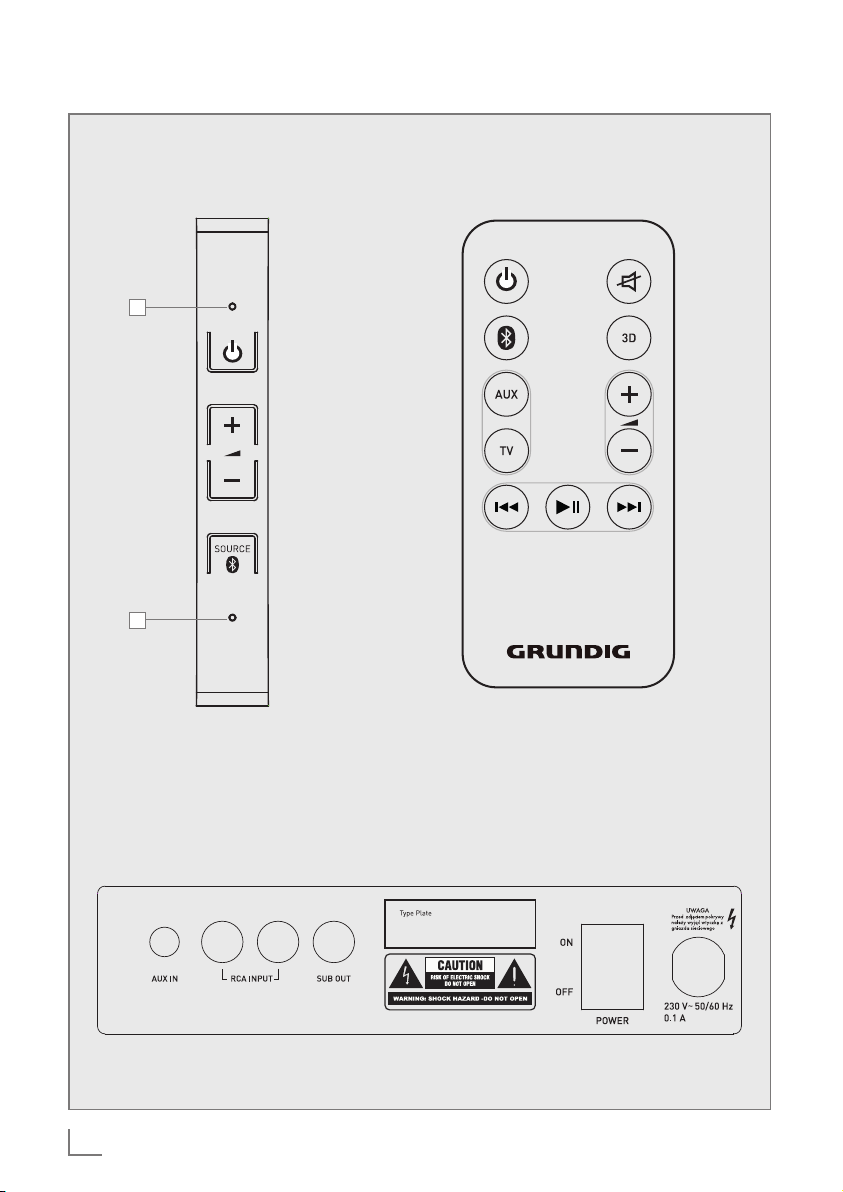
See the figure on page 3.
Controls are on the front page
A
LED,
– lights up red whenever the
device is in standby mode;
– lights up white if the source
device "TV" has been selected.
– lights up orange if the source
device "Aux In" has been
selected.
– Flashes red when the sound is
muted.
Switches the device on from
8
+ V Increases the volume.
– V Decreases the volume.
SOURCE Press briefly to select the source
Press and hold to start Bluetooth
B
LED flashes rapidly during the
standby mode and back off
again.
device "TV", "external device"
and "Bluetooth".
pairing; the display B flashes
rapidly.
Bluetooth pairing process.
Connection jacks and controls on
the back page
AUX IN Audio signal input (ø 3.5 mm)
for connecting an external
device.
RCA INPUT Audio signal input (Cinch) for
connecting the LCD TV.
SUB OUT Audio signal output (Cinch) for
an external subwoofer.
POWER Switches the device on and off.
ON/OFF
230V Mains cable.
50/60Hz 0.1A
Note:
7
The Soundbar is only completely separated from the
mains once the mains plug
has been pulled.
Remote control buttons
Switches the device on from
8
Mutes the Soundbar speakers
S
Press briefly to select the source
press and hold to start Bluetooth
3D Activates stereo spread.
AUX Selects the source device con-
TV Selects the source device "TV"
+ V – Volume change.
Selects the previous track in
Starts playback in Bluetooth
Selects the next track in Blue-
standby mode and back off
again.
and unmutes them again.
device "Bluetooth";
pairing.
nected to the »AUX IN« jack.
(in the jack »RCA INPUT«).
Bluetooth mode.
mode and switches between
play/pause.
tooth mode.
14
ENGLISH
Page 7

PREPARATION/CONNECTION
----------------------------------------------------------
Preparation
Activate the remote control battery
1 Remove protection film from the battery com-
partment.
– The remote control is now functional.
Change remote control batteries
(TYPE CR 2025)
Note:
7
If your device no longer responds to the
remote control commands, the battery may
be dead. It is imperative that dead batteries
be removed. We do not assume liability for
damage caused by leaked batteries.
Caution:
7
Danger of explosion if battery is incorrectly
replaced. Replace only with the same or
equivalent type.
1 Hold the remote control with the back side fac-
ing up.
2 Push the detent of the battery holder to the right
and remove battery holder.
3 Remove used battery and insert new battery
into the battery holder, positive pole facing upward.
4 Push battery holder into the remote control until
it clicks into place.
Connecting
Connect Soundbar to the LCD TV
1 Connect a standard audio lead to the
»RCA INPUT« jacks of the Soundbar.
– Please be aware of the left and right chan-
nels when doing so (white = left channel,
red = right channel).
2 Connect audio lead to the audio output jacks
of the LCD TV.
Connect subwoofer to the Soundbar
1 If a subwoofer is to be connected, connect
standard audio cable to the »SUB OUT« jack
of the Soundbar and the audio input jack of the
subwoofer.
Connect external device
An external device, such as a MP3-Player for example, can be connected to the »AUX IN« jack.
1 Connect a standard audio lead to the
»AUX IN« jack of the Soundbar.
2 Connect adapter cable to the external device.
Note:
7
The LCD TV can also be connected via the
»AUX IN« jack if it is not equipped with audio output jacks. In such cases please use the
headphone jack.
Connect mains cable
Check that the mains voltage indicated on the
type label (on the back of the device) corresponds to the local mains voltage. If this is not the
case, please consult your specialist dealer.
1 Plug mains cable plug into the socket
(230V~, 50/60 Hz).
Caution:
7
The Soundbar is connected to the mains via
the mains cable. If you want to disconnect
the Soundbar from the mains completely,
you must pull the mains plug.
7
Please ensure that the mains cable is freely
accessible during operation and is not obstructed by any other objects.
ENGLISH
15
Page 8

WALL MOUNTING
-----------------------------------------------------------------------------------------------------
Caution:
7
The ground must be firm and capable of handling the load.
7
Use mountings that are appropriate for the
weight of the device (weight of the Soundbar
GSB 800 plus DIN safety = approx. 2.5 kg).
7
For wooden or hollow wall structures use suitable plugs and screws. Seek advice from a
specialist dealer.
Warning:
7
In order to prevent injuries, the device must
be securely fastened to the wall in accordance with the installation instructions.
Note:
7
Installation of the Soundbar GSB 800 for
professional use (e.g. in a bistro) must only
be carried out by an electrically qualified
person, in accordance with the applicable
construction regulations as per VDE 0100.
1 Determine place of installation and mark drill
holes.
– The distance between drill holes of the
Soundbar is 64 centimetres.
3 Screw in the two supplied screws. Distance of
screw head from the wall 4 mm.
4 Detach unit base from the Soundbar, rotate
180°.
5 Place the included washer and then the snap
ring onto the fixing bolt and reattach the unit
base through the second drill hole.
2 Drill the holes (8 mm ∅) in the wall and insert
the plugs included.
16
ENGLISH
6 Affix the included spacers to the back of the
unit base.
Page 9

WALL MOUNTING
-----------------------------------------------------------------------------------------------------
7 Connect a standard audio lead to the
»RCA INPUT« jack of the Soundbar.
– Please be aware of the left and right chan-
nels when doing so (white = left channel,
red = right channel).
Note:
7
If a subwoofer is to be connected, connect
standard audio cable to the »SUB OUT«
jack of the Soundbar.
8 Carefully slide the Soundbar over the bolt
heads.
9 Connect audio lead to the audio output jacks
of the LCD TV.
Note:
7
If a subwoofer is to be connected, connect
the audio cable to the subwoofer.
10 Plug mains cable into the socket.
Caution:
7
The Soundbar is connected to the mains via
the mains cable. If you want to disconnect
the Soundbar from the mains completely,
you must pull the mains plug.
7
Please ensure that the mains cable is freely
accessible during operation and is not obstructed by any other objects.
ENGLISH
17
Page 10

OPERATION
------------------------------------------------------------------------------------------------------------------------------
TV mode
1 Switch Soundbar into standby mode using
»POWER ON/OFF«.
– The LED A lights up red.
2 Switch Soundbar on from standby mode using
»8«.
– The LED A lights up white.
Note:
7 After Power on the source device "TV" is se-
lected automatically.
3 Select source device "TV" using »TV« on the
remote control.
4 Adjust the volume using »+ V« or »V –«.
Note:
7 If the TV has a "regulated" audio output, the
volume may be adjusted using the remote
control for the TV. Please consult the TV manual for information about this.
5 Mute the volume using »S«.
6 Switch Soundbar into Standby mode using
»8«.
7 Switch Soundbar off using »POWER ON/
OFF«.
Note:
7 If an "external" device is connected to the
»AUX IN« jack, this source device may be
selected using »AUX« on the remote control.
7 If no audio signal is available on the sockets
»RCA INPUT« and »AUX IN«, the Sound-bar switches automatically to Stand-by mode
after 15 minutes. For further use switch on
the Soundbar again.
Bluetooth mode
Compatible with the following
devices
Your device can be paired with all current, Bluetooth-enabled devices that adhere to the A2DP
standard. This applied to smartphones, laptops
and tablet PCs for example.
Search for and connect to auxiliary
Bluetooth device
1 Switch Soundbar into standby mode using
»POWER ON/OFF«.
– The LED A lights up red.
2 Switch Soundbar on from standby mode using
»8«.
3 Select "Bluetooth" source device by pressing
» « on the remote control.
4 Activate the Bluetooth function on the auxiliary
Bluetooth device.
5 Press and hold » « on the remote control of
the GSB 800.
– The LED B flashes rapidly.
6 Start the search function on the auxiliary Blue-
tooth device.
– After a short period of time, your GSB 800 is
displayed on the Bluetooth device.
7 Select the GSB 800 on the Bluetooth device
and connect it.
8 When the auxiliary Bluetooth device is paired
with your device, the LED B of your GSB 800
flashes slowly.
Note:
7
Your GSB 800 can only receive and play
back the audio signal from one Bluetooth
device; up to 8 devices can nevertheless be
paired.
18
ENGLISH
Page 11

OPERATION
------------------------------------------------------------------------------------------------------------------------------
Activate a paired auxiliary Bluetooth device
Notes:
7
Auxiliary Bluetooth devices must only be
paired once (depending on the auxiliary
Bluetooth device).
7 When leaving and then returning to the re-
ception range of the GSB 800, the auxiliary
Bluetooth device will pair with it automatically.
7 The GSB 800 will only connect automati-
cally with the last paired auxiliary Bluetooth
device.
7
If the auxiliary Bluetooth device is not detected, it must be reactivated via its menu.
Playback of auxiliary Bluetooth
device
1 Begin playback on auxiliary Bluetooth device.
2 Set the desired volume using »+ V –«.
Note:
7 The volume can also be adjusted from the
auxiliary Bluetooth device.
3 Mute the volume using »S« on the remote
control.
4 Stop playback on auxiliary Bluetooth device.
Notes:
7 Various functions can also be controlled us-
ing the remote control of the GSB 800:
– Select play-pause using »eII«,
– Continue playback by pressing »eII«
again;
– select previous track using » «;
– select next track using » «.
7 Please note that the data transfer range can
be up to 9 m, depending on the auxiliary
Bluetooth device and the structural conditions.
ENGLISH
19
Page 12

INFORMATION
------------------------------------------------------------------------------------------------------------------
2200
Technical Information
This device is
suppressed in
accordance with
the applicable EC
Directives.
This product conforms to European Directives
1999/5/EC, 2009/125/ EC and 2011/65/EU.
The type label can be found on the back of the
device.
CE declaration of conformity
The CE declaration of conformity for the device can be found as a PDF file on the Grundig
homepage, www.grundig.com/download/doc.
Power supply:
230 V~, 50/60 Hz
Max. power input:
Operation 40±5 W, Standby ≤ 0.5 W
Power output:
DIN 45324, 10% THD 2 x 20 W
Frequency response:
20 Hz - 20 kHz
S/N ratio:
≥ 70 dB
Separation:
≥ 45 dB
Dimensions and weight:
W x H x D 99 x 9.3 x 7 cm
Weight approx. 2.5 kg
Environmental note
This product has been manufac-
tured with high quality parts and
materials which can be reused
and are suitable for recycling.
The product must therefore not be disposed of
as domestic waste at the end of its life cycle, but
must instead be handed over at a collection point
for recycling electrical and electronic devices.
The accompanying symbol on the product, in the
manual or on the packaging makes this clear.
Please consult your local authorities to find out the
location of the nearest collection point.
By helping to further process used products,
you are contributing to the preservation of the
environment.
Technical and design modifications reserved!
20
ENGLISH
Page 13

Grundig Intermedia GmbH
Beuthener Strasse 41
90471 Nürnberg
www.grundig.com
72011 412 0100 13/30
 Loading...