

Grundig Eaton G4000A Operation Manual

G4000A
O P E R ATION M A N UAL
w w w . e t o n c o r p . c o m
A M / F M / S H O RTWAV E R AD I O

TABLE OF CONTENTS
2
G 4 00 0 A O P ER AT IO N MA NU A L
3
QUICK SETUP ........................................................................
YOUR RADIO AT-A-GLANCE ..........................................................
INITIAL SETUP .......................................................................
SUPPLYING POWER AND USING EXTERNAL ANTENNAS .....................
GENERAL RADIO OPERATION........................................................
SHORTWAVE RADIO OPERATION .................................................
STORING STATIONS INTO MEMORY ................................................
USING THE CLOCK, ALARM,AND SLEEP TIMER FEATURES ................
MORE INFORMATIONABOUT SHORTWAVE ..................................
GETTING STARTED WITH SINGLE SIDEBAND (SSB);
MARITIME & AERONAUTICAL WEATHERAND
COMMUNICATION FREQUENCIES; HAM RADIO
COMMUNICATION FREQUENCIES; TIME SIGNALS..........................
TECHNICAL INFORMATION .........................................................
INDEX TO THE RADIO’S CONTROLS .......................................
SERVICE INFORMATION .........................................................
ONE YEAR LIMITED WARRANTY ..............................................
1
2
3
4
5
6
7
8
9
10
11
12
13
14
4
5
6
7
8
11
13
14
16
24
31
32
33
34
page
• From the United States: (800) 872-2228
• From Canada: (800) 637-1648
• From Everywhere Else: (650) 903-3866
• Email: customersvc@etoncorp.com
• Internet: www.etoncorp.com
DO YOU NEED HELP?
Here’s how to contact us:
G 4 00 0 A O P ER AT IO N MA NU A L
5
• A 23 foot “reel” antenna for shortwave reception
• Earphones
WHAT ’ S I N C L U D E D W I T H T H E
G4000 A ?
• Owner’s Manual
• Warranty card
• A Grundig AC adaptor for use on 110-120 VAC
outlets in the Americas
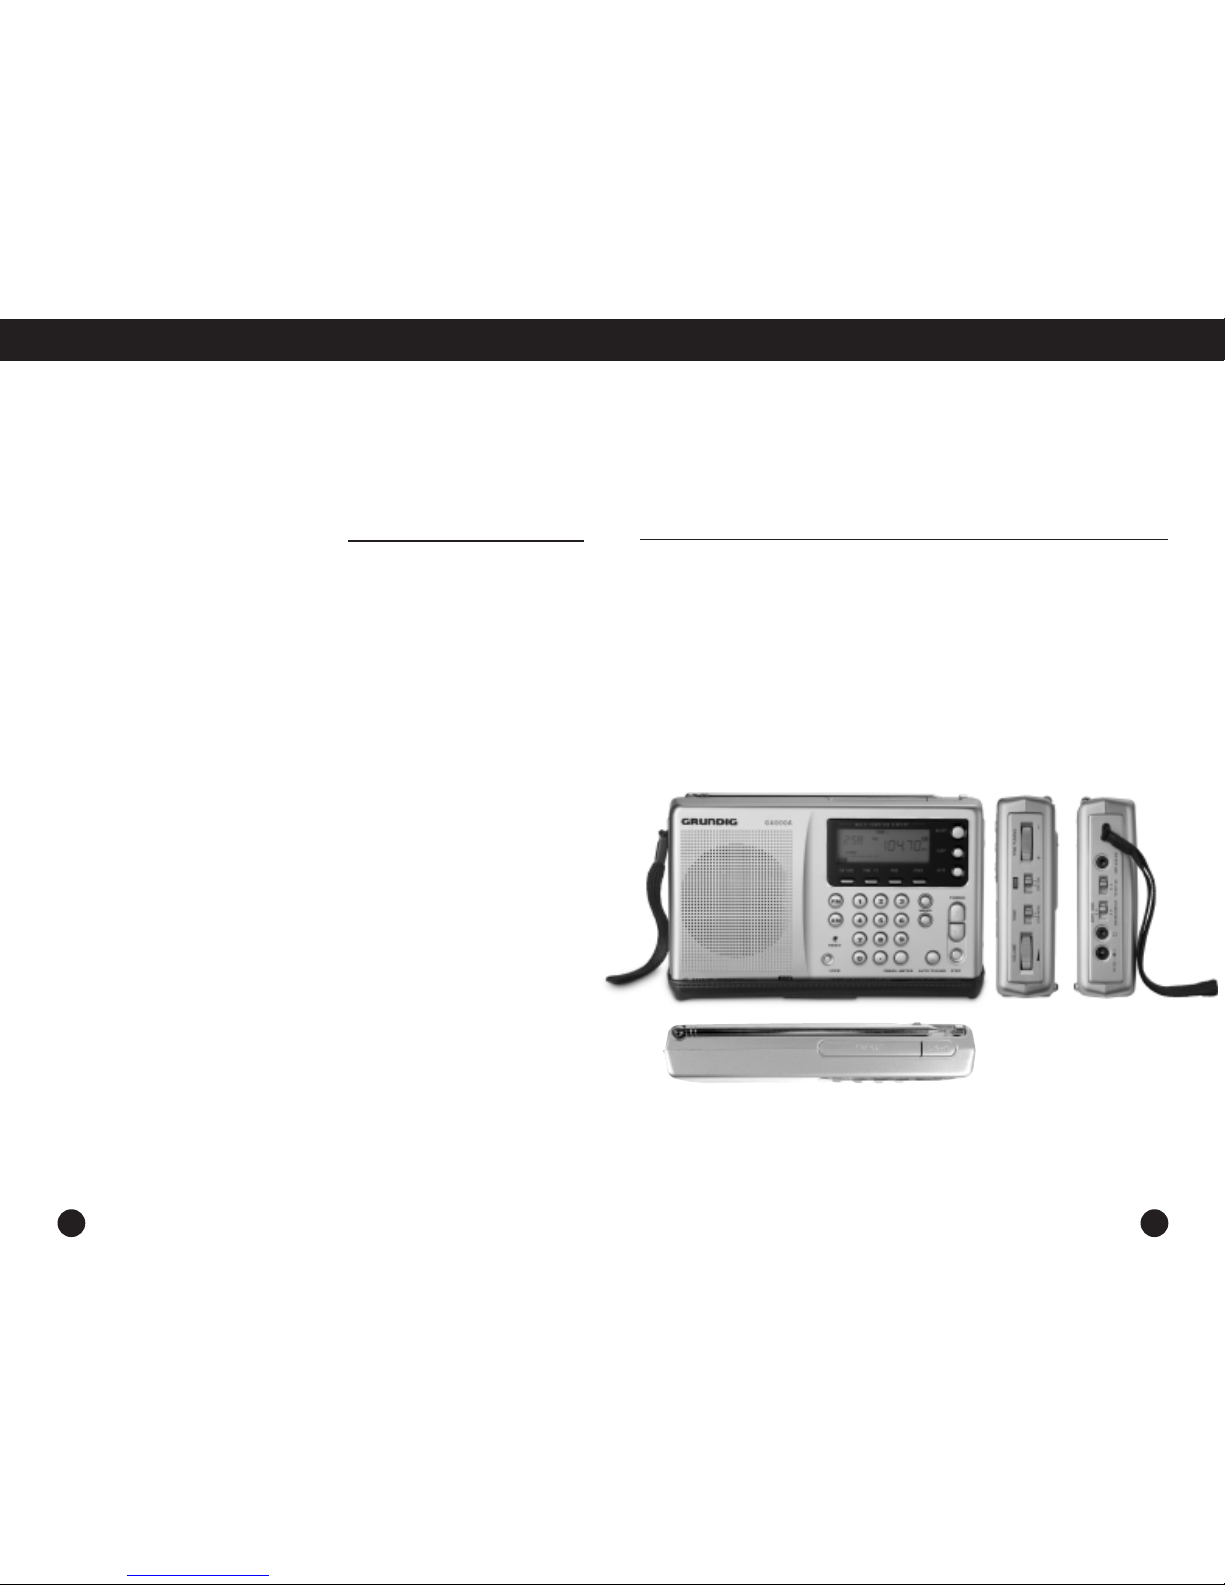
2 YOUR RADIO AT-A-GLANCE
4
BUT PL EA S E R E A D T H E REST OF
THE MA NU A L L AT E R!
1. Insert batteries or connect the included
AC adaptor.
2. Set the DX/LOCAL switch to DX (left side
of radio).
3. Turn the SSB switch OFF (right side of
radio).
4. Fully extend the telescopic antenna.
5. With the radio off, press and release the
AM button once.
6. Immediately press and release the
STEP button. “10KHz” now appears in
the right side of the display, and will
disappear in a few seconds. (See page
6 for more information about this
procedure.)
7. Turn the radio on by pressing the ON/OFF
button.
1 QUICK SETUP

G 4 00 0 A O P ER AT IO N M AN U AL
7
HOW TO U S E T H E I N C L U D E D
“REEL ” ANTEN N A AND THE
EXTER N A L ANT E N N A SO C K E T
(left side of t h e r a d i o )
The SW EXT.ANT. Socket is for shortwave antennas.
Use it with the included “reel” antenna.Always
fully unroll the “reel” antenna and place it as high
off the floor as possible, next to the windows.
PROFE S S I O N A L LY E N G I N E E RE D
ANTEN N A S
Professionally engineered, outdoor shortwave
antennas, available through specialized retailers,
can also be used. Use the SW.EXT.ANT. Socket
mentioned above.The socket is a 1/8 inch mono
socket, used in conjunction with a 1/8 inch mono
plug, such as the plugs often used for mono earphones. If you would like advice about shortwave
antennas, please call Etón technical support at
1-800-872-2228 for U.S. and 1-800-637-1648
for Canada.
HOW TO I N S TAL L BAT T E R I E S
Install six AA alkaline batteries. Follow the diagram
imprinted on the back of the radio near the battery
compartment. With the radio face down and the
battery compartment toward you:
• The flat ends (-) of the bottom batteries go
toward the left.
• The flat ends (-) of the top batteries go toward
the right.
AC AD A PT O R U S E
The Grundig adaptor supplied with this product is
only for use in the Americas, where household AC
voltage is 110-120 volts AC. Do not use this adaptor in countries with household AC voltage of 220240 volts AC.
USING YOUR GR UN D I G A C
ADAPT O R
1. Plug the adaptor into a household outlet.
2. Insert plug into the radio’s DC 9 V socket.
NOTE: when using the adaptor, it is OK to leave
batteries in the radio.
4 SUPPLYING POWER AND USING EXTERNAL ANTENNAS
6
3 INITIAL SETUP
IMPORTA N T ! S E T U P F O R N O R T H
AMERI C A N USE
If you do not live in the United States or
Canada, the radio is set up at the factory for
the 9 kilohertz spacing used for your AM
(MW) stations. This part of the initial setup
can be ignored.
North America’s AM stations are exactly 10 kilohertz
apart. At the factory, the radio is set up for the 9
kilohertz spacing of stations in Europe. To change
this to the 10KHZ spacing:
1. With the radio OFF, press and release the AM
button once.
2. Immediately press and release the STEP button.
“10 KHz” now appears in the right side of the
display and will disappear in a few seconds.
This change will be permanently in the radio’s memory
as long as batteries are not taken out for a period of
ten minutes or more.
When traveling outside of the Americas, use the
same procedure as above to set the spacing back
to 9 kilohertz.
ADDIT I O N A L S E T U P
INFOR M AT I ON
1. On the right side of the radio, set the SSB switch
to the OFF position. This feature is described on
page 24. NOTE: the FINE TUNING control, on
the right side of the radio, is only activated and
needed when the G4000A is in the SSB mode.
You do not need to use this control when listening
to regular AM, FM, and shortwave broadcasts.
On the left side of the radio, set the DX/LOCAL
switch to the DX position. DX allows for maximum
sensitivity, the preferred position.

G 4 00 0 A O P ER AT IO N M AN U AL
9
DIREC T FREQU E N C Y E N T RY
If you know the exact frequency of the station
you want to hear, directly enter it using the keypad
and immediately press the FREQU./METER button.
Pressing the FREQU./METER button finalizes the
entry. Be sure to include the decimal point in FM
frequencies.Any kind of frequency may be entered
regardless of what kind of frequency you are
presently tuned to,e.g. you can enter an FM
frequency even if you are presently in shortwave.
AM STATION EXAMPLE: to tune the frequency
810 kilohertz in the AM band, press 8 1 0 , then
press the FREQU./METER button.
FM STATION EXAMPLE: to tune the frequency
105.7 megahertz in the FM band, press 1 0 5 . 7,
then press the FREQU./METER button. Be sure to
include the decimal point in FM frequencies.
SHORTWAVE STATION EXAMPLE: to tune the
frequency 5975 kilohertz in the shortwave 49 meter
band, press 5975 then the FREQU./METER button.
HOW TO U S E T H E
STERE O / M O N O S W I T C H ( l e f t
side of t h e r a d i o )
For true stereo reproduction in FM, select STEREO
when you use earphones or headphones. When
STEREO is selected, and the broadcast is in stereo,
two circles appear above and to the right of the
frequency in the display. Use the MONO position
whenver reception is poor or marginal.
HOW TO U S E T H E T O N E SW I T C H
Experiment and let your ears judge which position,
HIGH or LOW, you like best.
GENERAL RADIO OPERATION continued
8
5 GENERAL RADIO OPERATION
HOW TO T U R N T H E R A D I O O N
AND OF F
Press the ON/OFF button.
HOW TO L I S T E N T O Y O U R L O C A L
AM STAT I O N S
1. On the G4000A, the AM broadcast band is
called medium wave. When you are listening to AM,
the letters “MW” appear in the display.
2. Press the ON/OFF button to turn the radio on.
3. Press the AM button several times,until MW
appears near the center of the display.
4. If “STEP” appears in the display, press the STEP
button to choose 10 KHz tuning rate.
5. Automatically tune using the AUTO TUNING
button.The radio will automatically stop on stations.
A quick press-and-release tunes up-frequency; a long
press-and-release tunes down-frequency.
6. Manually tune using the TUNING button.
HOW TO U S E T H E W I D E / N A R R O W
SWITC H (left side of r a d i o )
Experiment with this switch and let your ears be your
guide.WIDE gives the best audio fidelity; NARROW
best minimizes interference from other nearby stations.
This switch is used for AM, shortwave, and longwave
listening.
HOW TO L I S T E N T O Y O U R L O C A L
FM STAT I O N S
1. Press the FM button.
2. Automatically tune using the AUTO TUNING
button.The radio will automatically stop on stations.
A quick press-and-release tunes up-frequency;
a long press-and-release tunes down-frequency.
3. Manually tune using the TUNING buttons.

G 4 00 0 A O P ER AT IO N M AN U AL
11
For example,the 19 meter shortwave band encompasses the frequency range of 15100 to 15600
kilohertz. The band chart on the back of the
G4000A shows the frequency range for each band.
HOW TO E N T E R A S H O R T W AVE
BAND
EXAMPLE: To enter the 25 meter band:
1. Press 2 5
2. Press the FREQU./METER button.
HOW TO T U N E A R O U N D I N A
SHORTWAV E B A N D
AUTO TUNING: The radio will find stations for you
within the shortwave band you have entered. In
shortwave, this feature only works within the shortwave bands shown on the back of the radio (see
the chart titled “SHORTWAVE BAND AUTOTUNING
RANGES”).
HOW T O LI S T E N TO S H O R T WAV E
STAT I O N S
If you already know the specific frequency of a
shortwave station, enter it, using the direct frequency
entry technique described earlier. For a complete list
of shortwave frequencies, use the major shortwave
publications mentioned on page 23.
Even if you do not know any specific frequencies of
shortwave stations,you can find them by going into
a shortwave band and tuning around, as described
below.
WHAT I S A SH O RT W AVE B AN D
If you have ever listened to AM or FM radio, then
you already know what a band is. The AM band is
530-1600 KHz; the FM band is 88-108 MHz.A
band is simply a frequency range where stations are
located. When you look for stations in these
“bands”, you simply tune around until you find a
station you like. Shortwave is similar, and the shortwave bands have names like 25 meters,31 meters,
49 meters, etc. These are abbreviated 25m, 31m
and 49m. Just like in AM and FM radio, one simply
gets into the shortwave band and tunes around,
looking for stations.
6 SHORTWAVE RADIO OPERATION
10
GENERAL RADIO OPERATION continued
HOW TO U S E T H E S T E P BU T T O N
In AM (MW), SW, and LW (see below), the STEP
button provides selection of the best tuning steps,
in kilohertz.This button is not functional in FM. The
tuning step rate is indicated in the lower right of
the display, e.g. “STEP 5”. Use these guidelines:
• AM (MW): 10 KHz in the Americas; 9 KHz
outside of the Americas
• LW (longwave): 9 KHz for broadcast stations.
Note: You will probably not hear any stations in
the Americas, as LW is not used for broadcast
stations. It is used in Europe and other parts of
the world for broadcasts to those areas.
• SSB: 1KHz
HOW T O U S E THE L O C K B U T T O N
When lock is on, the word LOCK appears in the
upper right area of the display. Using this feature
has no effect on alarm functions.
When the radio is on: Pressing the LOCK button
locks all keys except the ON/OFF button and the
SNOOZE button.
When the radio is off: Pressing the LOCK button
locks all keys. This will keep the radio from accidentally turning on when packed in a briefcase,etc.
When you want to listen to your radio,press LOCK
and then the ON/OFF switch.
HOW T O U S E THE A M B U T T O N ’ S
LA ST STATIO N M EMORY FEAT URE
Pressing the AM button over and over steps
through the last station tuned in MW, SW and LW.
HOW TO U S E T H E V O L U M E
CONTR O L KNOB
Use this to control the loudness of the radio.
HOW AN D W H E N T O U S E THE
RESET FEAT U R E
If the radio operates erratically, gently poke an
opened paper clip into the RESET hole on the front
of the radio. Normal operation may be restored.
Note that this procedure erases all memories and
resets the clock
 Loading...