

Page 1

The Gold Technical Support Line:1902 215 259
Personal Product Support
(Charges will apply at $2.95 per minute)
CDS2600iP
Music Station with Universal
Dock for iPod
Page 2

Introduction
Thank you for buying this Grundig product, which is designed to give you many
years of trouble-free service.
In the unlikely event that your product fails to work normally, please call the below
free phone number to discuss the problem with one of our qualified service
engineers.
Your safety and the safety of others is important.
Please therefore, ensure you read the “Safety Instructions” before you operate
this unit.
Safety is important
Warranty
Australia.
Grundig Warranty: 1800 509 394
New Zealand
Grundig Warranty: 0800 450 259
You may already be familiar with using a similar unit, but please take time to read
these instructions. They are designed to familiarize you with the unit’s many
features and to ensure you get the very best from your purchase.
Page 3

IMPORTANT SAFETY INSTRUCTIONS.....................................................
..........
... 2
PRECAUTIONS FOR UNIT...................................................................................... 3
PRECAUTIONS FOR DISCS................................................................................... 3
TABLE OF CONTENTS....................................................................................
........ 1
IMPORTANT NOTES....................................................
........................................
... 4
PREPARATION FOR USE.............................................................
.......................... 5
LOCATION CONTROLS AND INDICATOR...................................
................
.......... 6
REMOTE CONTROL.....................................................................
........................... 7
CONNECTING EXTERNAL DEVICES.....................
......................
.......................... 8
OPERTING INSTRUCTIONS................................................................................... 9
RADIO OPERATION.......................................................................................
........13
CD OPERATION..........................................................................................
.........
.. 16
PLAYING MP3 & WINDOWS MEDIA FORMATTED AUDIO...............
........
........... 23
USB OPERATION.............................................................
..................................... 30
iPod OPERATION......................................................................
............
.........
....... 31
SPECIAL FUNCTIONS...........................................................
....................
........... 34
CARE AND MAINTENANCE...................................................
.............................. 39
TROUBLESHOOTING GUIDE.................................................
............................. 40
ENGLISH
TABLE OF CONTENTS
1
BEFORE WE BEGIN
Thank you for purchasing this audio product. This is your assurance
of quality, performance
and value. Our engineers
have included many useful and convenient features in this product.
Please be sure to read this Owner's Manual
completely to make sure you are getting the
maximum benefit from each feature.
This product was manufactured using the highest quality
components and standards of
workmanship. It was tested by inspectors and found to be in perfect
working order before
it left our factory. However, there is always the chance that
some problem may occur
because of rough handling during shipment to the retail store or to the final consumer.
If, after reading this Manual, you experience any problems with the
operation of this product,
please refer to the instructions for obtaining services at the end of this Manual.
Once again, thanks for purchasing this audio product.
For future reference, record the serial number in the space provided.
Model No: CDS2600iP
Serial Number:
CLASS 1 LASER PRODUCT
This product contains a low power Laser Device.
Page 4
1. READ INSTRUCTIONS - All the safety and operating instructions should be read before the product is operated.
2. RETAIN INSTRUCTIONS - The safety and operating instructions should be retained for future reference.
3. HEED WARNINGS - All warnings on the product and in the operating instructions should be adhered to.
4. FOLLOW INSTRUCTIONS - All operating and use instructions should be followed.
5. CLEANING - Unplug this product from the wall outlet before cleaning. Do not use liquid cleaners or aerosol cleaners. Use
a damp cloth for cleaning.
6. ATTACHMENTS - Do not use attachments not recommended by the product manufacturer as they may cause hazards.
7. WATER AND MOISTURE - Do not use this product near water - for example, near a bath tub, wash bowl, kitchen sink,
or lau ndry tub; in a wet basement; or near a swimming pool; and the like.
8. ACCESSORIES - Do not place this product on an unstable cart, stand, tripod, bracket, or table.
The product may fall, causing serious injury to a child or adult, and serious damage to the product.
Use only with a cart, stand, tripod, bracket, or table recommended by the manufacturer, or sold
with the product. Any mounting of the product should follow the manufacturer instructions, and
should use a mounting accessory recommended by the manufacturer.
A Product and Cart Combination Should Be Moved with Care - Quick stops, excessive force and
uneven surfaces may cause the product and cart combination to overturn.
9. VENTILATION - Slots and openings in the cabinet are provided for ventilation and to ensure reliable operation of the
product and to protect it from overheating, and these openings must not be blocked or covered. The openings should never
be blocked by placing the product on a bed, sofa, rug or other similar surface. This product should not be placed in a built-in
installation, such as a bookcase or rack, unless proper ventilation is provided or the manufacturer* instructions have been
adhered to.
10. POWER SOURCES - This product should be operated only from the type of power source indicated on the marking
label. If you are not sure of the type of power supply to your home, consult your product dealer or local power company. For
products intended to operate from battery power, or other sources, refer to the operating instructions.
11. GROUNDING OR POLARIZATION - This product may be equipped with a polarized alternating-current line plug (a plug
having one blade wider than the other). This plug will fit into the power outlet only one way. This is a safety feature: If you
are unable to insert the plug fully into the outlet, try reversing the plug. If the plug should still fail to fit, contact your electrician
to replace your obsolete outlet. Do not defeat the safety purpose of the polarized plug.
12. POWER-CORD PROTECTION - Power-supply cords should be routed so that they are not likely to be walked on or
pinched by items placed upon or against them, paying particular attention to cords at plugs, convenience receptacles, and
the point where exit from the product.
13. NON-USE PERIODS - The power cord of the product should be unplugged from
the outlet when left unused for long periods of time.
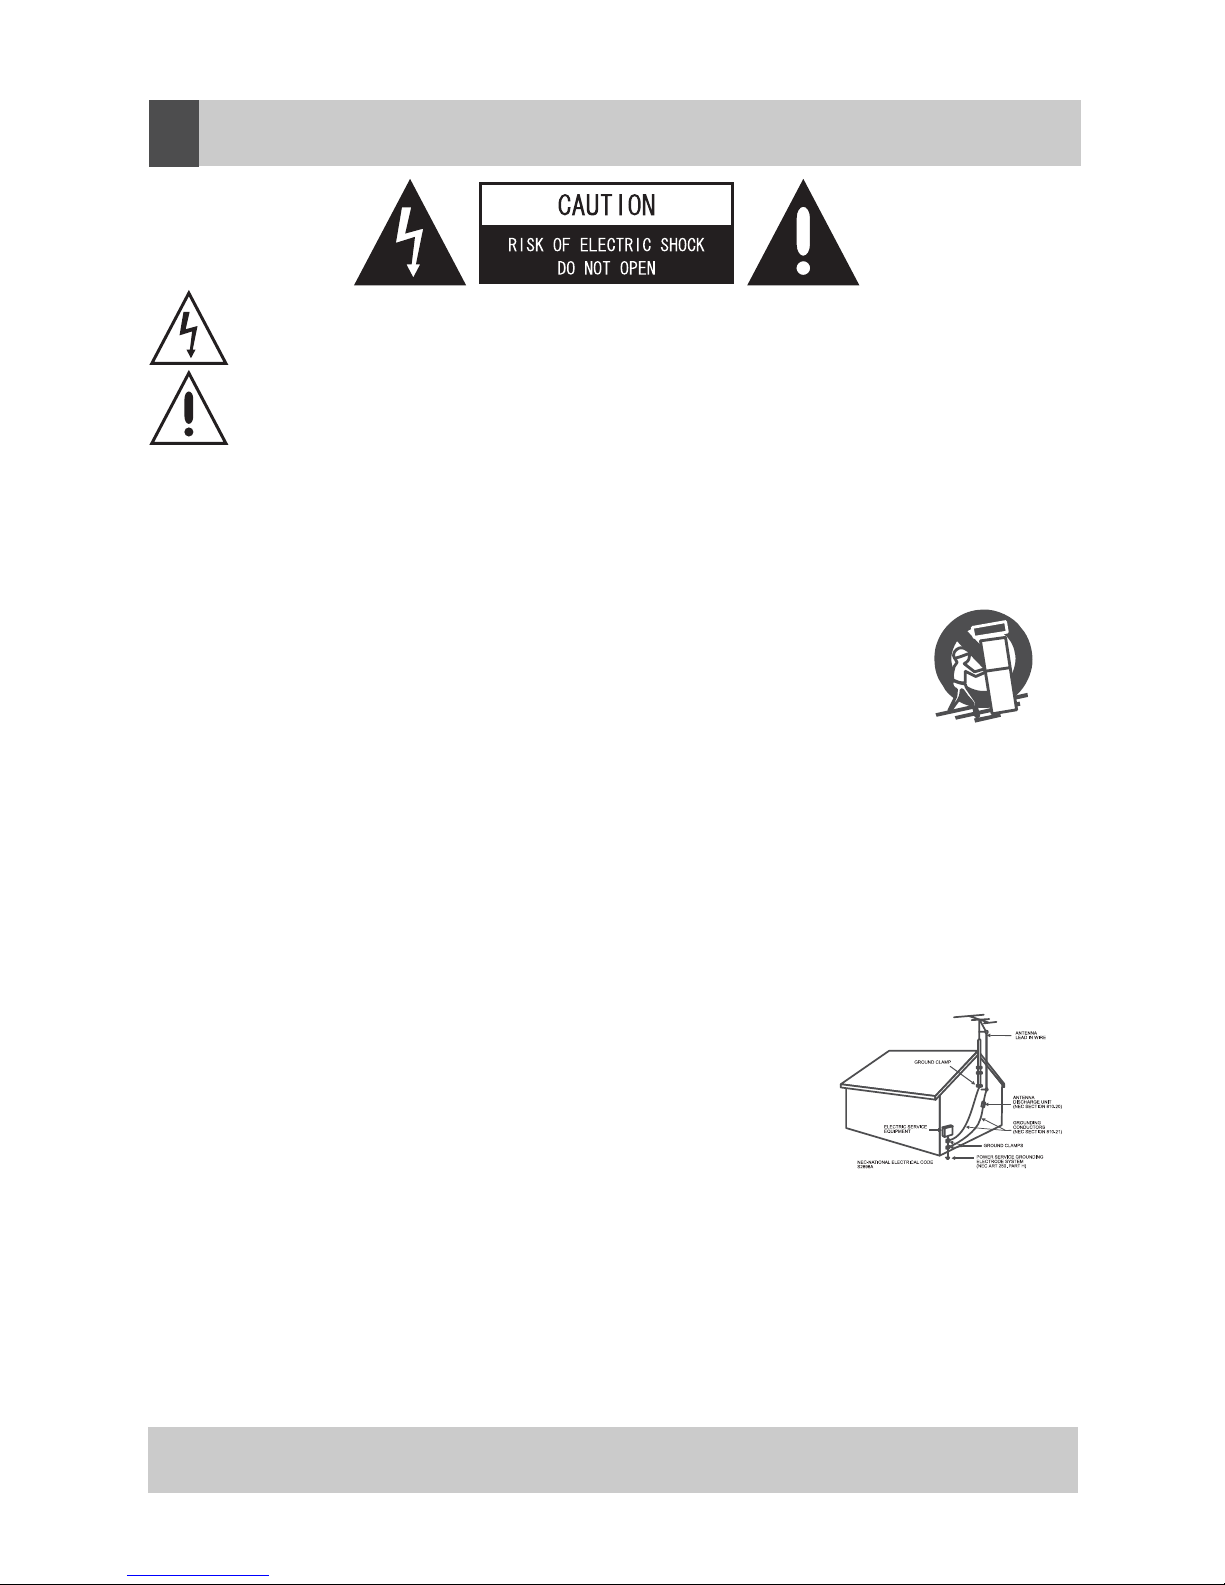
14. OUTDOOR ANTENNA GROUNDING - If an outside antenna or cable system
is connected to the product, be sure the antenna or cable system is grounded
so as to provide some protection against voltage surges and built-up static charges.
Article 810 of the National Electrical Code, ANSI/NFPA 70, provides information with
regard to proper grounding of the mast and supporting structure, grounding of the lead
-in wire to an antenna discharge unit, size of grounding conductors, location of antennadischarge unit, connection to grounding electrodes, and requirements for the grounding
electrode. See Figure 1.
15. LIGHTNING - For added protection for this product during a lightning storm, or when it is left unattended and unused for
long periods of time, unplug it from the wall outlet and disconnect the antenna or cable system. This will present damage to
the product due to lightning and power-line surges.
16. POWER LINES - An outside antenna system should not be located in the vicinity of overhead power lines or other electric
light or power circuits, or where it can fall into such power lines or other electric light or power circuits, or where it can fall
into such power lines or circuits. When installing an outside antenna system, extreme care should be taken to keep from
touching such power lines or circuits as contact with them might be fatal.
17. OVERLOADING - Do not overload wall outlets, extension cords, or integral convenience receptacles as this can result
in a risk of fire or electric shock.
18. OBJECT AND LIQUID ENTRY - Never push objects of any kind into this product through openings as they may touch
dangerous voltage points or short-out parts that could result in a fire or electric shock. Never spill liquid of any kind on the
product.
The lightning flash with arrowhead symbol within an equilateral triangle is intended to alert the user to the
presence of uninsulated dangerous voltage within the product enclosure that may be of sufficient magnitude
to constitute a risk of electric shock to persons.
The exclamation point within an equilateral triangle is intended to alert the user to the presence of important
operating and maintenance (servicing) instructions in the literature accompanying the appliance.
ENGLISH
IMPORTANT SAFETY INSTRUCTIONS
2
Page 5

19. SERVICING - Do not attempt to service this product yourself as opening or removing covers may expose you to
dangerous voltage or other hazards. Refer all servicing to qualified service personnel.
20. DAMAGES REQUIRING SERVICE - Unplug this product from the wall outlet and refer servicing to qualified service
personnel under the following conditions.
a) When the power-supply cord or plug is damaged.
b) If liquid has been spilled, or objects have fallen into the product.
c) If the product has been exposed to rain or water.
d)
If the product does not operate normally by following the
operating instructions. Adjust only those controls that are
covered by the operating instructions as an improving adjustment of other controls may result in damage and will
often require extensive work by a qualified technician to restore the product to its normal operation.
e) When the product exhibits a distinct change in performance - this indicates a need for service.
21. REPLACEMENT PARTS - When replacement parts are required, be sure the service technician has used replacement
parts specified by the manufacturer or have the same characteristics as the original part, Unauthorized substitutions may
result in fire, electric shock or other hazards.
22. SAFETY CHECK - Upon completion of any service or repair to this product, ask the service technician to perform
safety checks to determine that the product is in proper operating condition.
23. HEAT - The product should be situated away from heat sources such as radiators, heat registers, stoves or other
products (including amplifiers) that produce heat.
HANDLING DISC
• To keep the disc clean, do not touch the play sides of the disc.
• Do not attach paper or ape to the disc.
• Keep the disc away from direct sunlight or heat sources.
• Store the disc in a disc case after playback.
CLEANING DISC
• Before playback, wipe the disc outwards from the center with clean cloth.
• Do not use any type of solvent such as thinner, benzine, commercially available cleaners or anti-static spray.
SECURITY
• Before operation, check if the voltage of the unit is in line with the local voltage.
• Hold the plug to disconnect it from the mains outlet. Do not pull the power cord.
•
When the plug of the unit is connected to the mains outlet, the unit will be still connected to AC even of the power is
turned off.
•
Disconnect the plug as soon as liquid or objects enter the unit. The unit cannot be used until being checked by experts.
•
Do not open the cabinet. Laser rays employed by the unit may damage eyes. Any servicing should be done by qualified
service personnel.
PLACEMENT
• Put the unit where ventilation is good enough to prevent overheating.
• Never put the unit in direct sunlight or near heat sources.
• Put the unit horizontally, never put any heavy object on the unit.
•
To protect the pickup, do not put the unit where there is much dust. If there is dust on the pickup, use a cleaning disc
to clean it.
• Refer to the operation instructions of the cleaning disc you bought.
CONDENSATION
Moisture will appear on the pickup lens in the following cases:
• The unit is suddenly moved from a cold place to a warm place.
• Use the unit in a humid place.
In these cases, switch off and leave the unit in a good ventilation place for about one
hour to evaporate the water.
CLEANING
•
Use soft cloth with a little neutral detergent to wipe the cabinet, panel and controls. Never use abrasive paper, polishing
powder or solvent like alcohol and gasoline.
CAUTION!
HAZARDOUS LASER RADIATION WHEN
OPEN AND INTERLOCK FAILED OR
DEFEATED. AVOID EXPOSURE TO BEAM.
CLASS 1 LASER PRODUCT
ENGLISH
PRECAUTIONS FOR UNIT
ENGLISH
PRECAUTIONS FOR DISCS
3
Page 6
4
Avoid installing this unit in places
exposed to direct sunlight or close
to heat radiating appliances such
as electric heaters, on top of other
stereo equipment that radiates heat ,
places lacking ventilation or dusty
areas, places subject to constant
vibration and/or humid or moist
areas.
Do not attempt to clean this unit with
chemical solvents as this might damage
the finish. Use a clean dry cloth.
Operate controls and switches as
described in the manual.
Before turning on the power, make
certain that the connecting cords and
power cord are properly installed.
Store your CDs in a cool area to avoid
damage from heat.
When moving the set, be sure to first
disconnect the power cord and remove
cords connected to other equipment.
disposal of this product, you will help prevent potentially hazardous to the environment
and to human health, which could otherwise be caused by unsuitable waste handling
of this product. The recycling of materials will help conserve natural resources.
Please do not therefore dispose of your old electrical and electronic equipment with
your household waste. For more detailed information about recycling of this product,
please contact your local city office, your household waste disposal service or the shop
where you purchased the product.
ENGLISH
IMPORTANT NOTES
Page 7
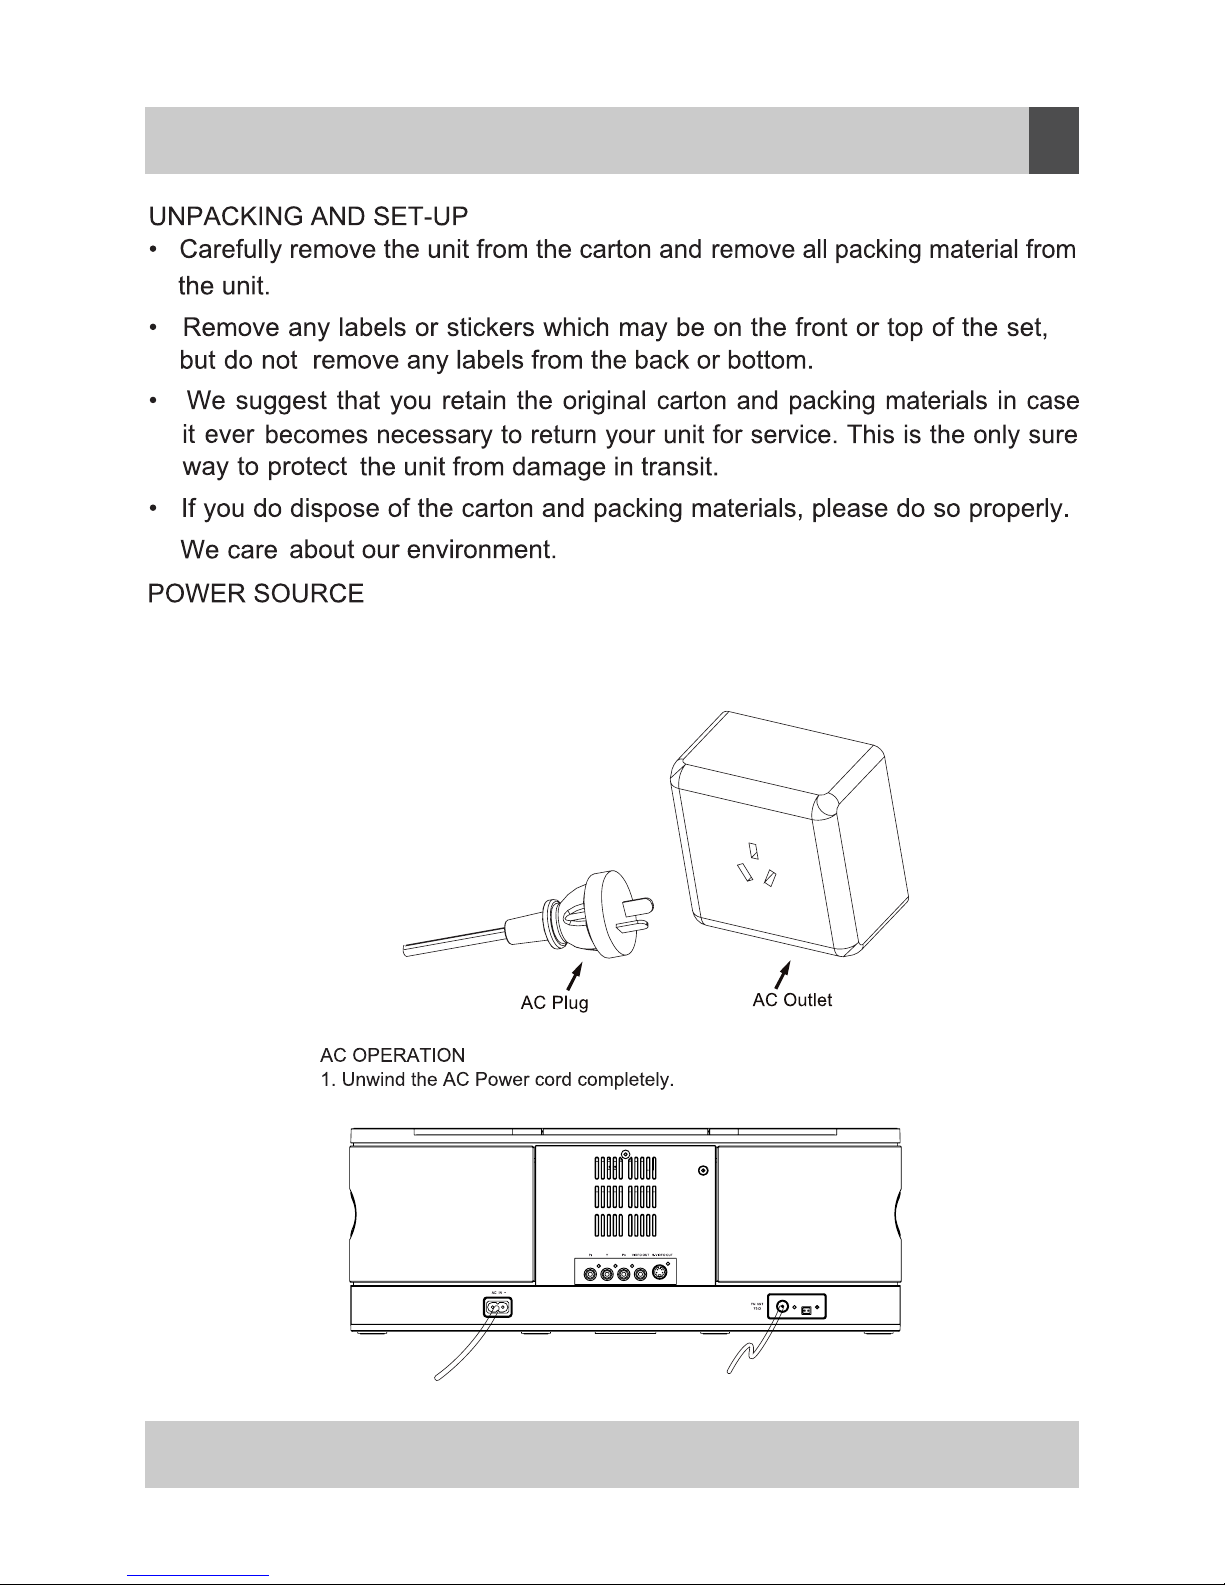
This system is designed to operate on
230~240V 50Hz AC house current. Connecting
this system to any other power supply could result in damage to the unit which is
not covered by your warranty.
2. Insert the plug into any convenient 230~240V 50Hz AC outlet.
ENGLISH
PREPARATION FOR USE
5
MWANT
Page 8

1. EQ Button
2. PRESET - Button
3. PRESET + Button
4. TUNING SKIP/SEARCH Button
5. TUNING SKIP/SEARCH Button
6. CD Door
7. FUNCTION Button
8. PLAY/PAUSE Button
9. STOP/BAND Button
10. VOLUME Button
11. VOLUME Button
12. POWER Button
13. Remote Sensor
14. CD Door OPEN/CLOSE Button
15. STANDBY/ON indicator
16. PHONES Jack
17. AUDIO IN Jack
18. iPod/USB Tray
19. AC IN Jack
20. Component Pr Jack
21. Component Y Jack
22. Component Pb Jack
23. VIDEO OUT Jack
24. S-VIDEO OUT Jack
25. FM ANT Jack
26. MW ANT Jack
16
17
18
19
20
21
22
23
25
24
26
6
ENGLISH
LOCATION OF CONTROLS AND INDICATOR
MWANT
Page 9
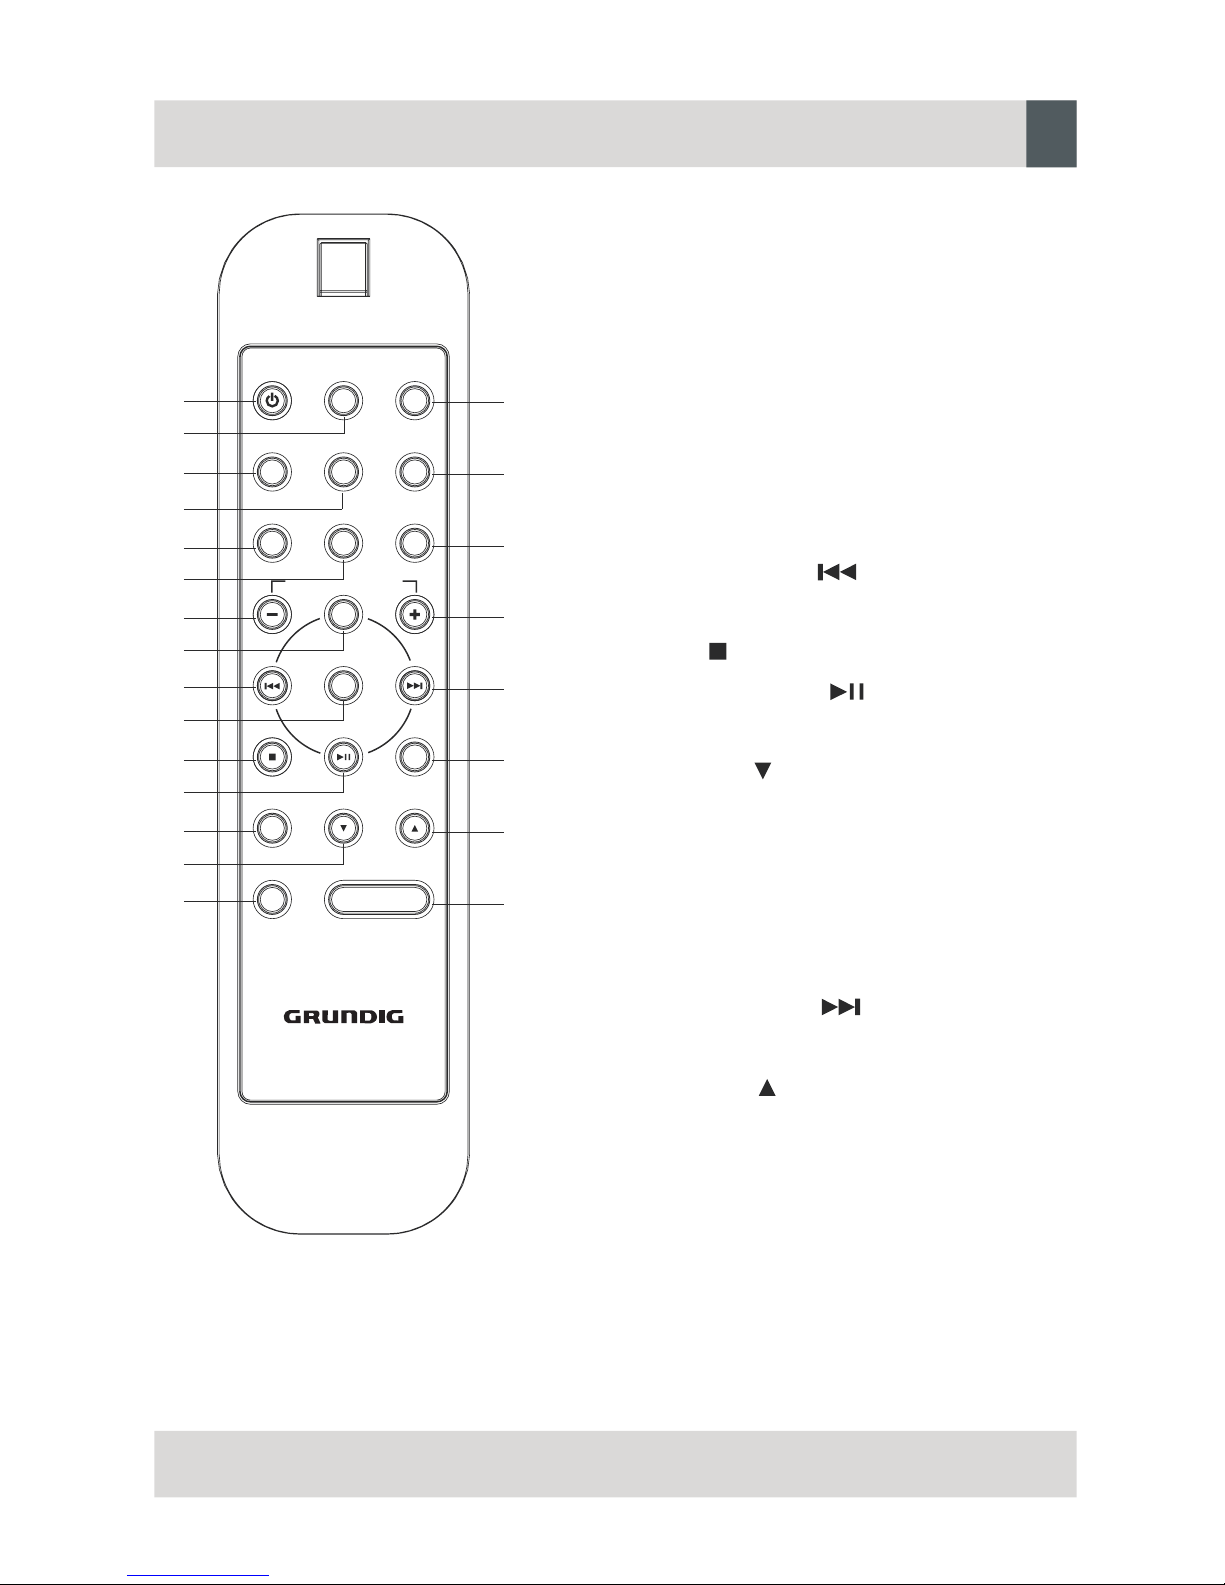
6. RANDOM Button
1. STANDBY / ON Button
2. ST/ESP / ID3 / FIND Button
3. EQ Button
4. DBBS Button
5. REPEAT / VIDEO OUT Button
7. PRESET /ALBUM / MEMU - Button
8. MENU/ INTRO Button
9. SKIP TUNING Button
10. SELECT Button
11. STOP Button
12. PLAY /P AUSE Button
13. MUTE Button
14. VOLUME Button
15. AUX Button
16. TIMER Button
17. SLEEP Button
18. PROG /CLK Button
19. PRESET /ALBUM / MEMU + Button
20. SKIP TUNING Button
21. BAND Button
22. VOLUME Button
23. FUNCTION Button
TIMERSTANDBY/ON
EQ DBBSSLEEP
PRO G /
CLK
MUTE
VOLUME
PRESET /ALBUM/MENU
MENU /INTRO /PAUSE
SELECT
PLAY
BAND
STOP
AUX
FUN CTION
ST /ESP
ID3 / FIND
REPEAT /
VIDEO OUT
RANDOM
1
2
3
4
5
6
7
8
9
10
11
12
13
14
15
16
17
18
19
20
21
22
23
ENGLISH
REMOTE CONTROL
7
Page 10
tnempiuqelanretxE
ton(elbaC
)dedulcni
ton(elbaC
)dedulcni
VTfotupniOEDIV-SoT
VT
VT
ton(elbaC
)dedulcni
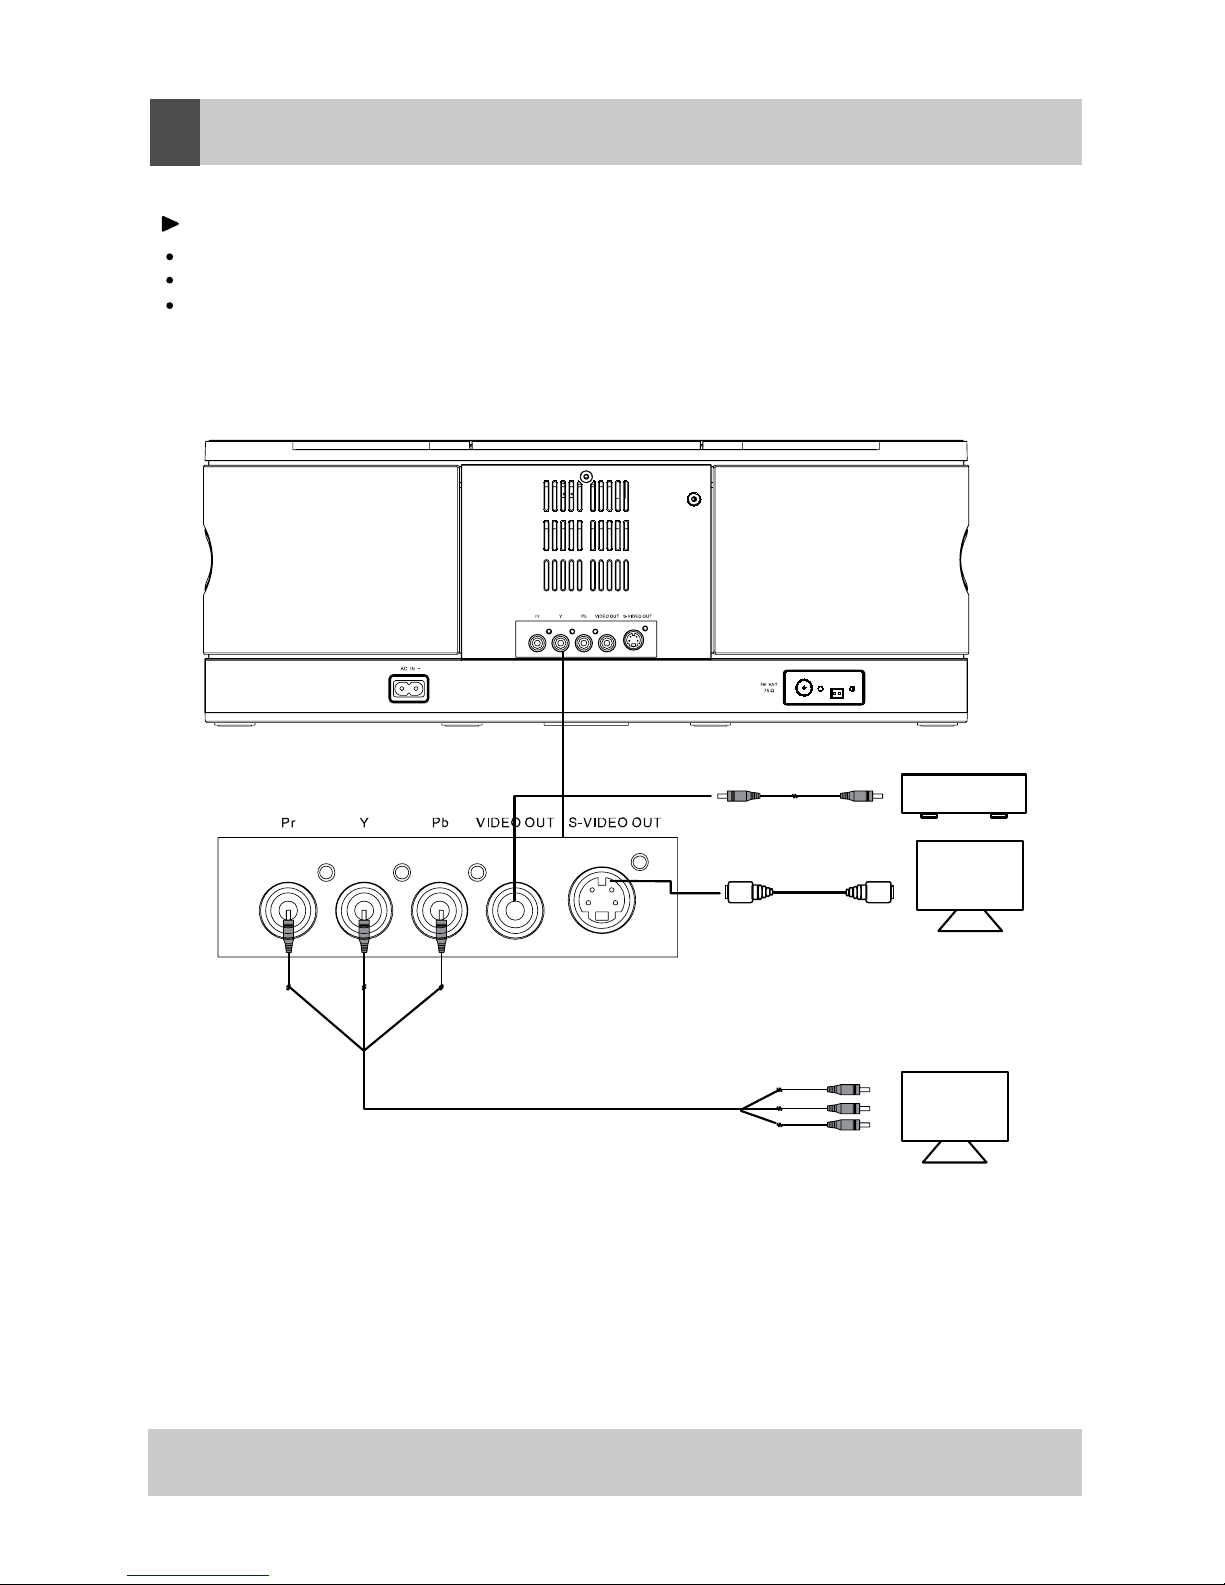
.wolebnwohssasnoitcennocehtetelpmoC
.dedulcniton,elbacOEDIVnaseriuqernoitcennocOEDIV
.dedul
cniton,elbac
OEDIV-SnaseriuqernoitcennocOEDIV-S
Pr / Y / Pb connection requires an component cable, not included.
To Component input of TV
8
ENGLISH
CONNECTING EXTERNAL DEVICES
MW ANT
Page 11

Make sure that you have fully extended the FM antenna wire.
Make sure that you have installed batteries in the remote control handset.
Make sure that the system is connected to an AC outlet that is always
“live”.
Do not connect the system to an AC outlet controlled by a wall switch.
General Controls
Most of the main functions of this system can be operated by the controls on the front
panel of the main unit, or by the buttons on the remote control handset. If a specific
function can only be operated by the remote handset, or by the top panel controls,
this will be clearly indicated in the instructions.
When operating this system with the remote control handset make sure that the
IR(Infrared) transmitter on the front of the remote handset is pointed at the remote
sensor on the front panel of the main unit.
The effective operating range of the remote control is approximately 15 feet. Please
note that bright sunlight or room lighting may interfere with the remote control
operation. If the remote is not operating properly try reducing the brightness of the
room or moving closer to the main unit. If this does not solve the problem, it may be
time to change the remote control battery.
ENGLISH
OPERATING INSTRUCTIONS
9
Page 12
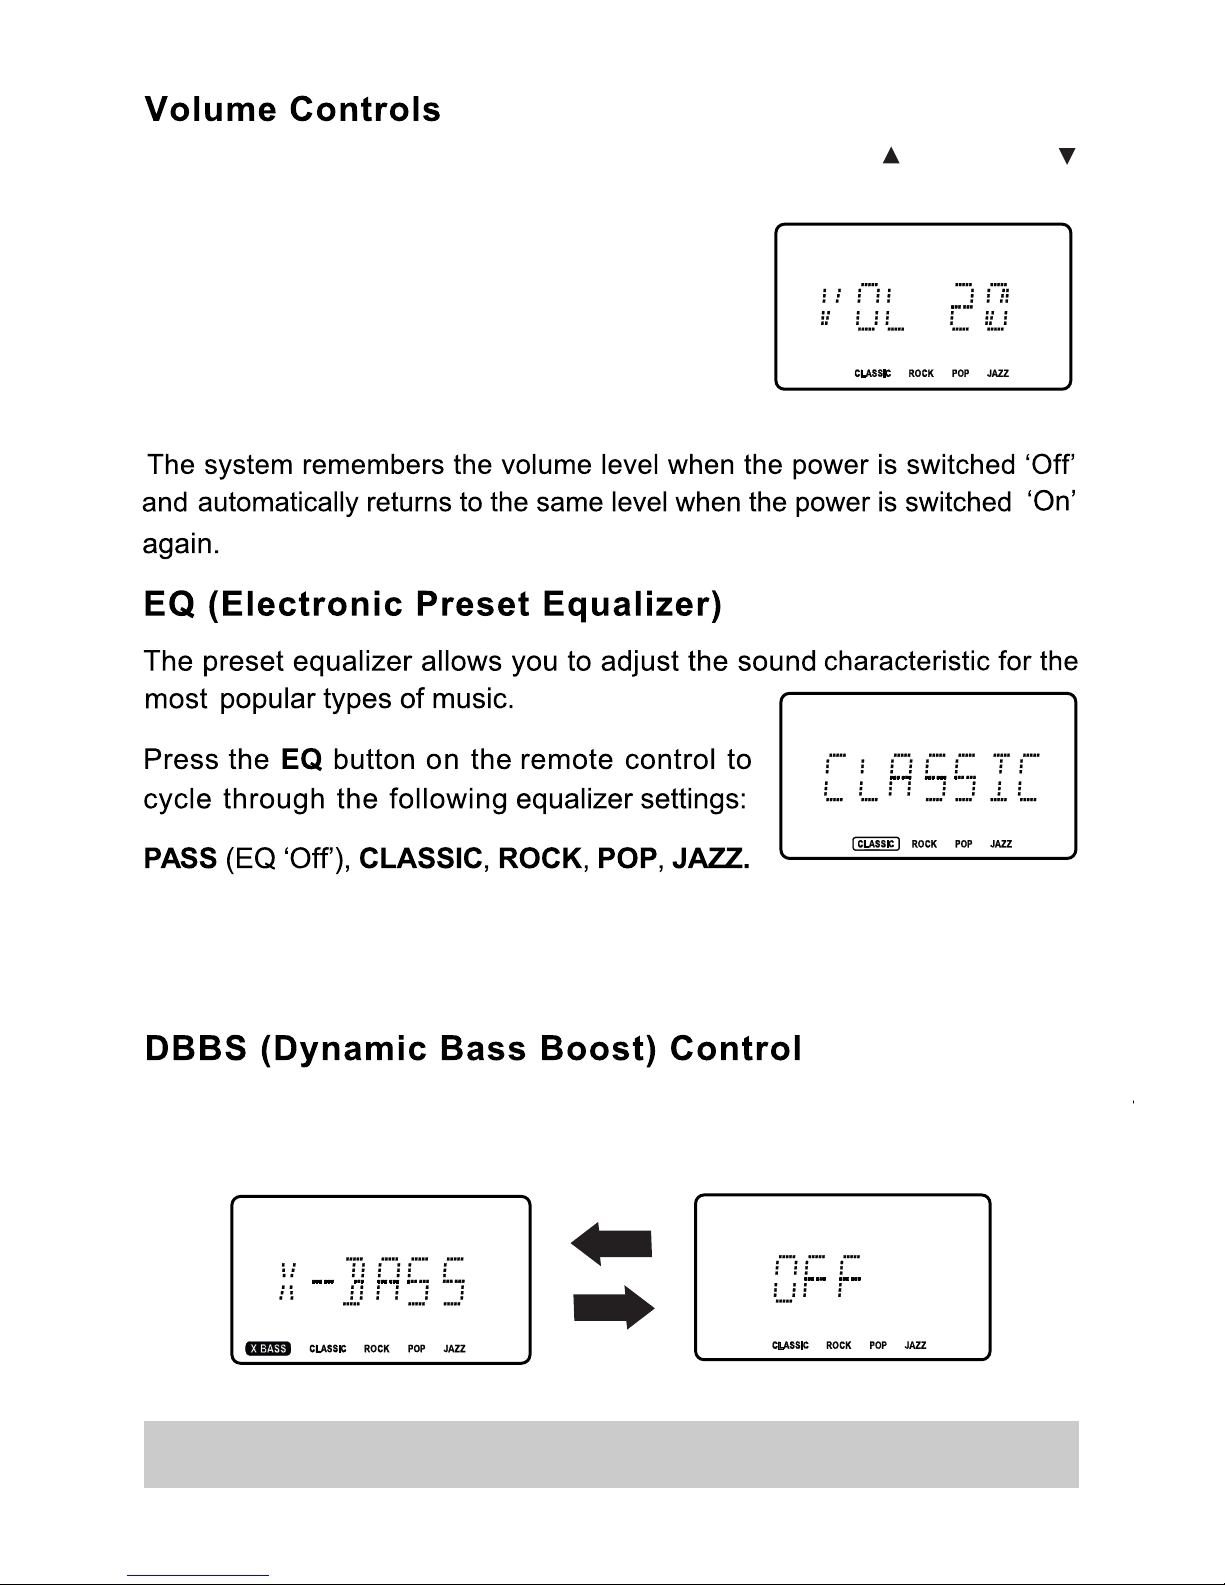
To increase or decrease the system volume press the
VOLUME or VOLUME
buttons on the remote control or VOLUME Control on the front panel.
The Volume Level Indicator will appear on the
display when you change the volume level.
The level indicator ranges from “00” (Minimum)
to “30” (Maximum).
The appropriate EQ indicator briefly appears in the display to confirm your selection.
Press the DBBS button on the remote control to increase the bass response.
Press again to cancel the Bass Boost function.
The system remembers the EQ setting when the power is switched ‘Off’ and
returns to the same setting when the power is switched ‘On’ again.
10
Page 13
11
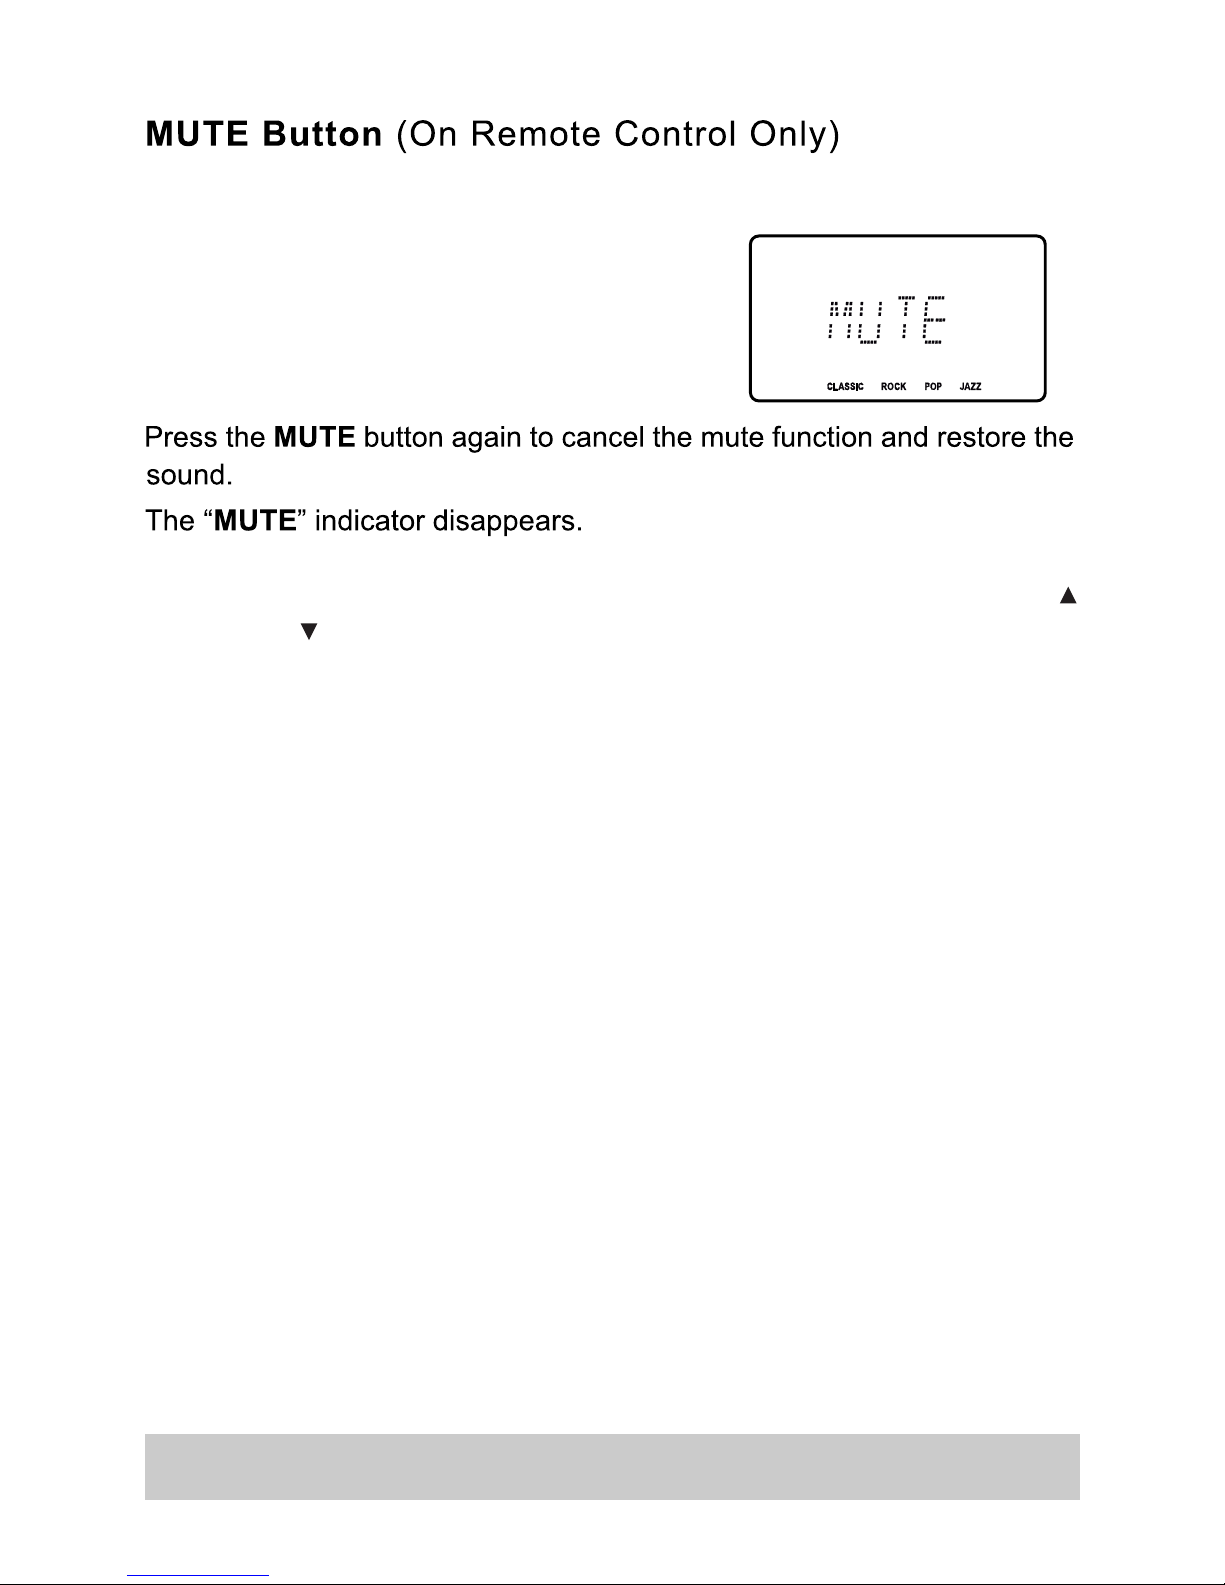
Press the MUTE button on the remote control to shut off the speakers temporarily,
for example, to answer the telephone.
The sound stops and the “MUTE” indicator
flashes in the display.
The mute function will also be canceled automatically by pressing the VOLUME
or VOLUME buttons.
Page 14

remote control. “24 HOUR” flashes on display.
Press the
Press the SKIP/TUNING or buttons to set the display to the correct minutes.
SKIP/TUNING or
buttons to set the display to the correct hour.
12
Page 15

The display lighting comes on and the display
briefly shows “HELLO”.
An MW or FM frequency will apperar on the display.
Press the TUNER/BAND button to switch
between the MW and FM bands if necessary.
Repeatedly press the SKIP/TUNING or buttons until the display shows
the exact frequency of the desired station. Use the Manual Tuning method to
tune to weak or distand stations that are not strong enough to be recognized
by the Automatic Tuning system.
Depress and hold the SKIP/TUNING or buttons the display begins
to move, then release the buttons.
The Tuner will search up or down the band
for the next strong signal and stop on that station. Repeat this procedure until
the tuner stops on your desired station.
4.) If you tuned to an FM Stereo station the ST
indicator will appear in the displa y.If FM
Stereo reception is noisy or weak,
press the ST/ESP/ID3/FIND button
on the remote control to select the FM
Mono mode.
6.) When you are finished listening press the STANDBY/ON button to return the
system to the Standby (Off) mode.
The display lighting goes off and the display changes from radio frequency to
correct time.
ENGLISH
RADIO OPERATION
13
Page 16

Hits For Better Reception
FM: The FM lead wire antenna on the back panel should be extended to its full
length. You may also have to vary the direction of this antenna until you find
the position that provides the best reception.
FM ANT
MW ANT
MW
: Insert the wire of loop aerial into the MW AERIAL connector on the unit.
Adjust
the position of the loop aerial until you find the position that provides
the best
reception for your favorite MW stations.
FM ANT
14
MW ANT
MW ANT
Page 17

1.) Press the PROGRAM/CLOCK button on
the remote control. The display shows
“PRG” and the channel number “01”
indicator flashes.
Repeat Step 3 until you have stored up to 30 stations on the FM band, then
press the BAND button to switch to the MW band and follow the same
procedure to enter up to 10 MW station in the tuner memory.
15
13
Page 18

3.) Press the CD Door on the top panel to open the CD door.
16
ENGLISH
CD OPERATION
Page 19

by pressing the ST/ESP/ID3/FIND button on the
17
Page 20

18
During playback, repeatedly press the SKIP/TUNING or buttons to
skip to higher or lower numbered tracks. Playback will begin on the selected
track.
During playback, depress and hold the SKIP/TUNING or buttons to
search within a track at high speed to locate a specific musical passage.
Release the SKIP/TUNING or buttons when you hear the desired
passage.
Normal speed playback will resume at that point.
Page 21

One Track Repeat
Select the track to be repeated and begin playback.
Rress the REPEAT / VIDEO OUT button
on remote control once.
The indicator appears in the display and the
selected track will be repeated continuously.
All Tracks Repeat
Load the disc in the player and begin playback.
Press the REPEAT / VIDEO OUT button on the
remote control twice.
The ALL
indicator appears in the display. All tracks on the disc will be repeated
continuously.
To cancel Repeat playback mode press the REPEAT / VIDEO OUT button until
the ALL indicators disappear from the display.
Repeat mode can also be cancelled by opening the CD door, switching to the
TUNER
or AUX mode, or pressing the STANDBY/ON button to return the system
to the
Standby (Off) mode.
Repeat Playback (On Remote Control Only)
The Repeat function in this system allows you to continuously repeat a single track,
or the entire disc. The Repeat function can be activated during playback or while
the player is stopped.
19
Page 22

Load a CD in the player as usual and then
press the RANDOM button on the remote
control handset.
To stop Random playback, press the RANDOM button on the remote control
again.
The RNDM indicator disappears and normal playback will resume from that point.
20
The Random playback feature allows you play all the tracks on the disc in random
order.
You can select random playback while the disc is playing or when the player is
stopped.
The RNDM indicator appears in the display.
The player will randomly select a track from the disc and begin playback.
Random playback will continue until all tracks have played once, then the player
stops.
Page 23

21
Then press the SKIP/TUNING or buttons to
select the first track on the disc to be programmed.
Page 24

Then press the REPEAT / VIDEO OUT button on the remote control twice.
22
Page 25

CDs that contain compressed MP3 or Windows Media formatted audio (WMA) files
can store approximately 10 times as much music as a normal CDs. It is possible
to record up 10 hours of music in MP3/WMA format on a single disc.
Audio files may be downloaded from the Internet onto your computer’s hard drive
or ‘ripped’ from normal CDs. They are then compressed into MP3/WMA format
files by
software on your computer and recorded or ‘burned’ onto blank discs.
Typicall when making your own MP3/WMA CDs you will
organize the song titles
into
‘Directories’, also called ‘Albums’, by artist, or by type of music.
NOTE : Because MP3/WMA CDs contain so much more information than normal
CDs
this CD player will take longer to ‘Read’ all of te information on an MP3/WMA
disc.
You may see the flashing “READ” indicator for a
minute or more before playback begins. This is normal
and note an indication f any problem with your player.
Most of the normal CD operations described in this manual also apple to MP3/WMA
CDs. However there are a few differences in MP3/WMA CD playback functions,
and these are described on the following pages.
MP3/WMA CD “Reading” Time And Display Information
As mentioned above, because MP3/WMA CDs contain much more information
that
normal CDs it takes longer for the player to ‘Read’ an MP3/WMA disc and
display
he Table of Contents information.
After you load an MP3/WMA CD in the player the player will read each of the
‘Directories’
(or ‘Albums’) on the disc, one at a time, and display the Directory
Number and the
cumulative number of tracks in the directories that have already
been read.
For example if we insert an MP3/WMA CD containing 11 ‘Directories’ (or ‘Albums’)
and a total of
172 “files” or tracks, the display will show:
ENGLISH
PLAYING MP3&WINDOWS MEDIA FORMATTED AUDIO
23
Page 26

Press and hold the ST/ESP/ID3/FIND button to scroll through the “ID3 text”
Press and hold the ST/ESP/ID3/FIND button again to return to Track and
Play-time display.
24
The PLAY/PAUSE, SKIP/TUNING , SKIP/TUNING and STOP
controls. have the same functions for MP3/WMA CDs as they do for normal CDs.
Page 27

select the track to be repeated and start playback as usual. Then press the
REPEAT / VIDEO OUT button on the remote
control once.
Begin playback as usual, then press the REPEAT / VIDEO OUT button twice.
Press the REPEAT / VIDEO OUT button
3 times.
To cancel Repeat Playback, press the REPEAT / VIDEO OUT button until the
“ALL ALBUM” indicators disappear.
25
Page 28

Press the RANDOM button the “RNDM” indicator
appears in the display.
MP3/WMA ID3 Support / information Display
26
Page 29

When programming the tracks on an MP3/WMA CD you must also select
the Directory Number of the tracks being programmed.
27
Page 30

Load the MP3/WMA CD in the player and wait until the player reads the Table
of Contents on the disc and shows the total number of ‘Albums’ (Directories)
and ‘Tracks’ (Files) on the disc.
For example in the illustration the disc contains 9
Albums and 56 Tracks.
Press the ST/ESP/ID3/FIND button on the remote control once.
28
Page 31

Load the MP3/WMA CD in the player and wait until the player reads the Table
of Contents on the disc and shows the total number of ‘Albums’ (Directories)
and ‘Tracks’ (Files) on the disc.
For example in the illustration the disc contains 9
Albums and 56 Tracks.
Press the ST/ESP/ID3/FIND button on the remote control twice. The Search
Album symbol ALBUM will appear in the display and the player will enter the
Album Search mode beginning with Album 01.
The display will show the name the Album.
Press the SKIP/TUNING “ ” button repeatedly to scroll through all the Albums
on the disc in numberical order.
When you see the desired Album name on the display press the PLAY/
PAUSE button to begin immediate playback of the first track in that album.
Note: If the album name is not recognized, or if the album was not propenly
named, the display will show “NONE”.
29
Page 32

ENGLISH
USB OPERATION
30
Playing MP3/WMA Audio Files on Portable USB Storage Devices
(including
iPod shuffle)
Note:
The USB port on this system enables playback of songs only in MP3 and WMA formats
(without Digital Rights Management (DRM)). It cannot play songs
purchased from iTunes or
other songs in AAC format, songs in ATRAC format or songs purchased from walmart.
com and some other online music retailers. It may be possible to convert your music to one of
the playable compressed formats, or burn it to an audio CD, depending on the DRM restrictions.
If you wish to play back songs that you have purchased from iTunes directly from your iPod
shuffle, please follow the instructions on page 8 for connecting the shuffle’s headphone output
jack to the system’s AUX IN inputs.
1.) Turn the system ‘On’ as usual.
2.) Press the FUNCTION button repeatedly until the
main display shows “USB”.
3.
Connect your portable USB storage
device to the
USB port on the front panel of this system as shown in the
illustration.
Note: The portable USB drive can only be connected one way, usually with the printed side
facing up. If you have trouble connecting your USB storage device to the USB port, do not
force it. This may damage the connector. Instead turn the device ver and try connecting it
again.
4.)
The player will read the information on the external
device and the display will show the total number of
‘tracks’ or files on the device.
5.) Press the PLAY/PAUSE button to begin playback.
Adjust the VOLUME, EQ, and DBBS controls as desired.
You can skip tracks with the SKIP TUNING “ ” or “ ” button just as you would
with a nornal CD.
You can skip albums with the ALBUM/MEM.CH “+” or “-” buttons.
You may press the ST/ESP/ID3/FIND button to display the albm name, then press
the SKIP TUNING “ ” or “ ” buttons to skip as desireds.
Note: if the album name is not recognized, or if the album was not properly named,
the display will show “NOTE”.
6.) Playback will continue until the last track has played and then the display will
again show the total number of tracks, albums on the USB device.
You may also press the STOP button to stop playback at any time.
7.) If you are finished listening remove the external device from the USB port and
return it to its protective storage case.
Playback from all USB devices is not guaranteed
Page 33

Choosing the Correct Adaptor
When connecting an iPod to this iPod Dock, please ensure that the
correct adapter plate is used. FAILURE TO DO SO MAY RESULT IN
DAMAGE TO THE iPod.
This iPod Dock comes with 6 removable dock adapters. Using the
correct adapter ensures the proper fit for your iPod and helps to
reduce the stress on the connector when operating the iPod.
NOTE: The adapter for iPod nano is already installed in the dock.
To place a dock adapter:
1. Refer to the compatibility table below and select the
correct dock adapter for the iPod.
2. Place the proper adapter into the dock and press it
into position. The adapter will only go in one way.
The iPod dock connector should fit through the opening
in the bottom of the adapter.
3. Carefully align and then gently insert the iPod into the
dock.(The
iPod must not be in a case or “SKIN”)
4. To remove a dock adapter, first remove the iPod,
then grip the adapter and pull gently upwards.
ENGLISH
iPod OPERATION
31
Page 34

32
PLAYING VIDEO FROM iPod
This unit supports playback of video from video capable iPod models You
can view images and video stored on your iPod on a TV
To play video from iPod
1. Refer to your iPod documentation to be sure it is video capable
2. Ensure the video output on your iPod is turned on
3. Make sure the unit and TV are connected using an S VIDEO or
composite
video connection
Video Settings
TV out
On
Page 35

33
REPEAT/
Remote
VIDEO OUT
Remote
Remote
Remote
Remote
Select iPod video output when in the
video or photo mode.
Control
Location
Function
MENU
SELECT
Main unit, remote
Main unit, remote
Main unit, remote
Press once to select track
Press to play, press again to pause
Press to stop
iPod MENU function
iPod SELECT function
iPod scroll up
iPod scroll down
Video output Features
iPod Model
3G
iPod
iPod
mini
4G
iPod
iPod
photo
iPod
nano
5G
iPod
2G
iPod
iPod
Classic
3G
nano
iPod
touch
Composite No Yes
S-v ideo No Yes
Component No No
No
No
No
No
No
No
No
No
No
No
No
No
Yes
Yes
No
Yes
Yes
Yes
Yes
Yes
Yes
Yes
Yes
Yes
4. Make sure the iPod is securely docked into the unit using the correct
dock adapter
5. Select iPod mode using FUNCTION button
6. Play video on your iPod or start a slideshow Video will play on your TV
and audio through the unit s speakers
Playing Music and Video From Your iPod
Press PLAY on the iPod, main unit or remote. The music playback will start.
You can control all of the iPod’s functions including menu navigation from the
remote control, and to select tracks, play, pause and stop and from the main unit
CHOOSING THE CORRECT ADAPTER
Charging your iPod
When
an iPod is docked into the system it will be provided power to charge
You will notice a charging indication on the screen of the iPod when it is
charging You may leave the iPod docked to the system for extended
periods charging will automatically stop when the battery is fully charged
FAILURE TO DO SO MAY DAMAGE THE iPod
When an iPod is inserted into the dock, it will go to standby mode then turn off.
Whilst the iPod is docked in the system, it will recharge (until fully charged).
Please note that older 3rd generation iPod cannot be charged by this unit.
Page 36

TIMER Operation (On Remote Control Only)
This system includes a programmable Timer function. You can use the timer to wake
you up to iPod TUNER, or to your favorite CD.
The timer can be programmed while the unit is in the Standby (Power Off) mode, the TUNER,
CD, or iPod mode.
Press the SKIP/TUNING or buttons to
set the display to the desired turn ‘On’ hour.
Press the TIMER button. The Minute digits
begin flashing.
set the display to the desired turn ‘On’ minute.
Press the TIMER button again.
Press the TIMER button. The Minute digits
begin flashing.
the display to the desired turn ‘Off ’ hour.
The “ OFF” appears in the display,
the Hour digits begins flashing.
34
ENGLISH
SPECIAL FUNCTIONS
Press the SKIP/TUNING or buttons to
Press the SKIP/TUNING or buttons to set
Page 37

35
set the display to the desired turn ‘Off’ minute.
Press the SKIP/TUNING or buttons to select turn “On” iPod, TUNER
or CD mode.
Press the TIMER buttons again.
TUNER flashes in the display.
Press the TIMER buttons.
At the selected Timer ‘On’ time, the unit will turn on.
To stop the unit sooner, press the STANDBY/ON button.
The power turns ‘Off’, but the Timer remains set and will turn the unit on again
at the same time on the following day.
The volume increases gradually to the preset level. It will sound until the turn
“Off” time is reached and the power shut off automatically.
“VOL 13” flashes in the display indicating you
may now adjust the turn ‘On’ Volume level.
set the turn “On” Volume level as desired.
Press the TIMER button again to confirm.
The display will show Timer settings in sequence
once more.
The indicator remains “On”.
Press the SKIP/TUNING or buttons to
Press the SKIP/TUNING or buttons to
Page 38

36
If you do not want the Timer to turn the unit on the following day, press the
TIMER button once.
To re-program the Timer, press and hold the TIMER button until the Hour
digits begins flashing. Then repeat the steps 2-11 on pages 34-35.
Notes: If the unit truns on to CD function it will only play until the end of the
disc and then stop. If your CD is only 45 minutes, the unit will only play for
45 minutes but the power will remain ‘On’ until turn ‘Off’ time is reached.
The indicator disappears in the display.
Press the TIMER button again to reactivate the Timer, the indicator
resappears.
Page 39

37
This system includes a programmable Sleep Timer that allows you to fall asleep
to between 10 and 90 minutes of music and then shuts the power ‘Off’ automatically.
Turn the system ‘On’ and operate either the TUNER or CD function as usual.
Press the SLEEP button on the remote control.
Continue pressing the SLEEP button to decrease the amount of sleep timer
operation.
Each time you press the SLEEP button you subtract 10 minutes to the sleep
timer. The minimum sleep timer operation is 10 minutes.
The display will show “SLEEP 90” indicating
that the sleep timer will shut the power off
after 90 minutes.
Adjust the VOLUME control to the desired level. Remember that the level you
select for the sleep to music function is the same level you will hear when the
timer turns the system on in the morning.
To operate the sleep timer:
Page 40

38
Auxiliary Operation
You can listen to an auxiliary audio source connected to the AUX IN jacks on the
back panel of this unit (refer to page 8 for connection information.)
Press the FUNCTION button or AUX button on remote control to select the Aux
function.
The AUX indicator appears in the display.
Operate the external device as you would normally.
When you hear the music from
your external source adjust the VOLUME, EQ and
DBBS controls of this system as desired.
Page 41

COMPACT DISC CARE
To remove a disc from its storage case, press down on the center of the case
and lift the disc out, holding it carefully by the edges.
Fingerprints and dust should be carefully wiped off the disc’s recorded surface
with a soft cloth. Unlike conventional records, compact discs have no grooves
to collect dust and microscopic debris, so gently wiping with a soft cloth should
remove most particles. Wipe in a straight line from the inside to the outside of
the disc. ASmall dust particles and light stains will have absoultely no effect on
reproduction quality.
Clean the disc periodically with a soft, lint-free, dry cloth, Never use detergents
or abrasive cleaners to clean the disc. If necessary, use a CD cleaning kit.
Never write on or affix labels to the surface of compact discs.
CARE OF THE CABINET
If the cabinet becomes dusty wipe it with a soft dry dust cloth. Do not use any wax,
polish sprays, or abrasive cleaners on the cabinet.
CAUTION
Never allow any water or other liquids to get inside the unit while cleaning.
ENGLISH
CARE AND MAINTENANCE
39
Page 42

Symptom
Radio
Noise or sound
distorted on FM or
MW broadcasts.
FM STEREO indicator
does not light.
MW or FM, no sound.
CD Player will not play.
CD skips while playing.
Possible Cause
Station not tuned properly for
FM or MW.
FM: Wire aerial is not
positioned correctly .
Loop aerial is not positioned
correctly.
FM station is mono or station
signal is weak.
Function is not set to Tuner.
Volume at minimum.
Function is not set to CD.
CD is not installed or installed
incorrectly.
Disc is dirty or scratched.
Solution
Retune FM or MW broadcast
station.
Extend FM wire aerial.
Reposition so that the best
reception is obtained.
Extend FM aerial. Try other
strong stations.
Press TUNER button to select
Tuner function.
Increase Volume.
Press FUNCTION button to
select CD function.
Insert CD with label side up.
Press FUNCTION button to
select USB function.
Wipe disc with cloth or use
another disc.
Compact Disc Player
USB will not play
No sound from on the unit
speaker system.
Function is not set to USB.
USB DEVICE is not installed or
installed incorrectly.
Playback using any USB
DEVICE cannot be
guaranteed, please try another
USB DEVICE.
Increase the volume level on
the audio source device.
Insert USB DEVICE in to slot.
USB , iPod Player
Remarks:
If troubleshooting (see above) does not eliminate the problem, disconnect the unit
from the mains power and re-connect after a few seconds. Resetting causes the
unit to restore its factory default setting and results in all the setting made by the
user being deleted.
Incompatible USB DEVICE
used.
Input source is low.
iPod volume control does
not increase audio volume
Use the unit volume control for
volume control when the iPod
is docked on the unit.
iPod volume control only
controls volume output to the
headphone jack.
R
R
R
R
40
ENGLISH
TROUBLESHOOTING GUIDE
Page 43

Warranty
Please keep your receipt as proof of purchase.
This product is warranted for any
defect in materials or workmanship for one year after the original date of purchase.
This product is for normal domestic and office use only. This warranty does not
cover damage from misuse or neglect , accidental damage, vermin infestation,
excessive voltages such us lightning or power surges or any alternation that affects
the performance or reliability of the product.
This guarantee is subject to the following provisions:
Grundig Helpline: 1800 509 394 Australia
Grundig Helpline: 0800 450 259 New Zealand
This guarantee is in addition to, and does not diminish, your
statutory or legal rights.
In the unlikely event that your product fails to work normally, please contact the
Grundig Helpline 1800 509 394 (Australia) or 0800 450 259 (New Zealand)
and have your receipt of purchase on hand.
PO BOX 6287
Silverwater NSW 1811
www.grundig.net.au
It is only valid within boundaries of the country of purchase;
The manufacturer disclaims any liability for incidental or consequential
damaged.
This product must be used solely for domestic purposes;
The guarantee does not cover accidental damage;
The guarantee will be rendered invalid if the product is resold or has been
damaged by inexpert repair;
The product must be correctly assembled and operated in accordance with
the instructions contained in the manual;
 Loading...