

Page 1

Elektrorasenmäher
Electric Lawnmower
Elektrische grasmaaier
Tondeuse électrique
Tagliaaerba elettrico
Máquina de cortar relva eléctrica
Kosiarka elektryczna
Elektrická travn
í sekačka
Elektrická kosačka
Елeктр
ичеcка косачка за трева
Elektrinė vejapjovė
ERM 1846 G
DE
GB
NL
FR
IT
PT
PL
CZ
SK
BG
LT
Originalbetriebsanleitung
Translation of the original instructions for use
Vertaling van de originele gebruiksaanwijzing
Traduction de la notice d’utilisation originale
Traduzione delle istruzioni per l’uso in originale
Tradução do manual de instruções original
Tłumaczenie oryginalnej instrukcji obsługi
Překlad originálního návodu k obsluze
Preklad originálneho návodu na obsluhu
Превод на оригиналното ръководство за употреба
Vertimas iš originalių eksploatavimo instrukcijoje
Page 2

14
16
15
1
2
12
11
10
9
4
13
6
4
6
3
4
5
6
7
8
4
Page 3
1
4
19
3
21
20
4
3
3
7
7
20
20
22
Page 4

24
11
5
7
2
15
13
25
26
Page 5
DE
Originalbetriebsanleitung ...........................................6
Translation of the original instructions for use ......18
GB
NL
Vertaling van de originele gebruiksaanwijzing .......29
FR
Traduction de la notice d’utilisation originale ........41
IT
Traduzione delle istruzioni per l’uso in originale ...54
Tradução do manual de instruções original ...........66
PT
Tłumaczenie oryginalnej instrukcji obsługi ............78
PL
CZ
Překlad originálního návodu k obsluze ...................91
Preklad originálneho návodu na obsluhu .............102
SK
BG
Превод на оригиналното ръководство
за употреба .............................................................113
LT
Vertimas iš originalių eksploatavimo
instrukcijoje .............................................................126
Page 6

DE
Bitte lesen Sie vor der ersten Inbe-
triebnahme die Betriebsanleitung
aufmerksam durch, um eine falsche
Handhabung zu vermeiden. Bewahren Sie diese Anleitung gut
auf, damit Ihnen die Informationen
jederzeit zur Verfügung stehen.
Inhalt
Lieferumfang ......................................... 6
Verwendungszweck.............................. 6
Sicherheitshinweise ............................. 7
Bildzeichen/Aufschriften auf dem Gerät 7
Sicherheitshinweise in der Anleitung . 7
Allgemeine Sicherheitshinweise ........ 7
Allgemeine Beschreibung ..................11
Funktionsbeschreibung .....................11
Übersicht ...........................................11
Montage ............................................... 12
Bügelgriff montieren ......................... 12
Grasfangkorb montieren .................. 12
Bedienung ........................................... 12
Grasfangkorb einhängen /
abnehmen ........................................ 12
Schnitthöhe einstellen ...................... 13
Ein- und Ausschalten ...................... 13
Füllstandsanzeige ............................ 13
Arbeiten mit dem Rasenmäher ........ 13
Reinigung/Wartung/Lagerung ........... 14
Allgemeine Reinigungs- und
Wartungsarbeiten ............................. 14
Messer austauschen ........................ 14
Lagerung .......................................... 15
Entsorgung/Umweltschutz ................. 15
Technische Daten ............................... 15
Garantie ............................................... 16
Reparatur-Service............................... 16
Fehlersuche ........................................ 17
Ersatzteile............................................ 17
Zubehör .............................................. 17
Original EG-Konformitätserklärung ..138
Explosionszeichnung ....................... 142
Grizzly Service-Center ..................... 143
Lieferumfang
Nehmen Sie das Gerät vorsichtig aus der
Packung und prüfen Sie, ob die nachfolgenden Teile vollständig sind:
- Rasenmäher mit montiertem unterem
Holm und Bügelgriff mit Gerätekabel
- Grasfangkorb (zweiteilig)
- Kabelzugentlastung
- 2 Kabelhalter
- Montagematerial Bügelgriff
- Montagematerial Fangkorb
- Betriebsanleitung
Verwendungszweck
Das Gerät ist nur für das Mähen von
Rasen- und Grasächen im häuslichen
Bereich bestimmt.
Dieses Gerät ist nicht zur gewerblichen
Nutzung geeignet. Bei gewerblichem Einsatz erlischt die Garantie.
Jede andere Verwendung, die in dieser
Anleitung nicht ausdrücklich zugelassen
wird, kann zu Schäden am Gerät führen
und eine ernsthafte Gefahr für den Benutzer darstellen.
Das Gerät ist zum Gebrauch durch
Erwachsene bestimmt. Kinder sowie
Personen, die mit dieser Anleitung nicht
vertraut sind, dürfen das Gerät nicht
benutzen. Die Benutzung des Gerätes
bei Regen oder feuchter Umgebung ist
verboten.
Der Hersteller haftet nicht für Schäden,
die durch bestimmungswidrigen Gebrauch
oder falsche Bedienung verursacht wurden.
6
Page 7

DE
Sicherheitshinweise
Dieser Abschnitt behandelt die grundlegenden Sicherheitsvorschriften bei der
Arbeit mit dem Elektro-Rasenmäher.
Bildzeichen/Aufschriften auf
dem Gerät
Achtung!
Lesen Sie die Betriebsanleitung
aufmerksam durch.
Verletzungsgefahr durch wegge-
schleuderte Teile.
Umstehende Personen von dem
Mäher fern halten.
Vorsicht - Scharfe Schneidmes-
ser! Füße und Hände fernhalten.
Verletzungsgefahr!
Motor ausschalten und Netz-
stecker ziehen vor Einstellungsoder Reinigungsarbeiten oder
wenn sich das Netzkabel verfangen hat oder beschädigt ist.
Gefahr durch beschädigtes Netz-
kabel. Netzkabel von dem Gerät
und den Schneidmessern fernhalten!
Gefahr! Füße und Hände vom
Messerbalken fernhalten.
Verletzungsgefahr!
Beim Loslassen des Starthe-
bels schaltet das Gerät ab.
Füllstandsanzeige am Grasfangkorb:
Füllstandsanzeige geöffnet:
Grasfangkorb leer
Füllstandsanzeige geschlossen:
Grasfangkorb gefüllt
Sicherheitshinweise in der Anleitung
Gefahrenzeichen mit Angaben
zur Verhütung von Personen-
oder Sachschäden.
Gebotszeichen (anstelle des Ausru-
fungszeichens ist das Gebot erläutert) mit Angaben zur Verhütung von
Schäden.
Hinweiszeichen mit Informationen
zum besseren Umgang mit dem
Gerät.
Schutzklasse II
Angabe des Schallleistungspe-
L
WA
gels L
dB
in dB.
wa
Elektrogeräte gehören nicht in
den Hausmüll.
Schnittkreis
Allgemeine Sicherheitshinweise
Wichtig! Lesen Sie die Betriebsan-
leitung sorgfältig. Bewahren Sie die
Betriebsanleitung zum Nachlesen
auf.
Dieses Gerät kann bei unsach-
gemäßem Gebrauch ernsthafte
Verletzungen verursachen. Um
Personen- und Sachschäden zu
7
Page 8

DE
vermeiden, lesen und beachten Sie
unbedingt die folgenden Sicherheitshinweise und machen Sie sich
mit allen Bedienteilen gut vertraut.
Warnung! Dieses Elektrowerkzeug
erzeugt während des Betriebs ein
elektromagnetisches Feld. Dieses
Feld kann unter bestimmten Umständen aktive oder passive medizinische Implantate beeinträchtigen.
Um die Gefahr von ernsthaften
oder tödlichen Verletzungen zu
verringern, empfehlen wir Personen
mit medizinischen Implantaten ihren
Arzt und den Hersteller vom medizinischen Implantat zu konsultieren,
bevor die Maschine bedient wird.
Vorbereitung:
• Dieses Gerät ist nicht dafür bestimmt,
durch Personen (einschließlich Kinder)
mit eingeschränkten physischen, sensorischen oder geistigen Fähigkeiten
oder mangels Erfahrung und/oder mangels Wissen benutzt zu werden; es sei
denn, sie werden durch eine für ihre Sicherheit zuständige Person beaufsichtigt oder erhalten von ihr Anweisungen,
wie das Gerät zu benutzen ist.
• Kinder sollen beaufsichtigt werden, um
sicherzustellen, dass sie nicht mit dem
Gerät spielen.
• Erlauben Sie niemals Kindern oder anderen Personen, die die Bedienungsanleitung nicht kennen, das Gerät zu
benutzen. Örtliche Bestimmungen können das Mindestalter der Bedienungsperson festlegen.
• Setzen Sie das Gerät niemals ein,
während Personen, besonders Kinder
und Haustiere, in der Nähe sind.
• Der Bediener oder Nutzer ist für Unfälle
oder Schäden an anderen Menschen
oder deren Eigentum verantwortlich
• Überprüfen Sie das Gelände, auf dem
das Gerät eingesetzt wird und entfernen Sie Steine, Stöcke, Drähte oder
andere Fremdkörper, die erfasst und
weggeschleudert werden können.
• Tragen Sie geeignete Arbeitskleidung
wie festes Schuhwerk mit rutschfester
Sohle und eine robuste, lange Hose.
Benutzen Sie das Gerät nicht, wenn
Sie barfuß gehen oder offene Sandalen tragen. Vermeiden Sie das Tragen
loser Kleidung oder Kleidung mit hängenden Schnüren oder Gürteln.
• Führen Sie vor jeder Benutzung eine
Sichtprüfung des Gerätes durch.
Benutzen Sie das Gerät nicht, wenn
Schutzeinrichtungen (z.B. Prallschutz
oder Grasfangsack), Teile der Schneideinrichtung oder Bolzen fehlen, abgenutzt oder beschädigt sind. Zur
Vermeidung einer Unwucht dürfen beschädigte Werkzeuge und Bolzen nur
satzweise ausgetauscht werden.
• Seien Sie vorsichtig bei Geräten mit
mehreren Schneidwerkzeugen, da die
Bewegung eines Messers zur Rotation
der übrigen Messer führen kann.
• Benutzen Sie nur Ersatz- und Zubehörteile, die vom Hersteller geliefert
und empfohlen werden. Der Einsatz
von Fremdteilen führt zum sofortigen
Verlust des Garantieanspruches.
• Vor dem Gebrauch sind immer Anschlussleitung und Verlängerungsleitung auf Anzeichen von Beschädigung
oder Abnutzung zu untersuchen. Falls
die Leitung im Gebrauch beschädigt
wird, muss sie sofort vom Versorgungsnetz getrennt werden. Berühren Sie die Leitung nicht, bevor sie
getrennt ist. Benutzen Sie das Gerät
nicht, wenn die Leitung abgenutzt oder
beschädigt ist.
.
8
Page 9

DE
Arbeiten mit dem Gerät:
Führen Sie Füße und Hände beim
Arbeiten nicht in die Nähe oder
unter rotierende Teile. Es besteht
Verletzungsgefahr!
Beachten Sie den Lärmschutz und
örtliche Vorschriften.
• Schalten Sie den Motor nach Anweisung ein und nur dann, wenn Ihre
Füße in sicherem Abstand von den
Schneidwerkzeugen sind.
• Benutzen Sie das Gerät nicht bei
Regen, bei schlechter Witterung, in
feuchter Umgebung oder an nassem
Rasen. Arbeiten Sie nur bei Tageslicht
oder guter Beleuchtung.
• Arbeiten Sie mit dem Gerät nicht, wenn
Sie müde oder unkonzentriert sind
oder nach der Einnahme von Alkohol
oder Tabletten. Legen Sie immer rechtzeitig eine Arbeitspause ein. Gehen
Sie mit Vernunft an die Arbeit.
• Achten Sie beim Arbeiten auf einen
sicheren Stand, insbesondere an
Hängen. Arbeiten Sie immer quer
zum Hang, niemals auf- oder abwärts.
Seien Sie besonders vorsichtig, wenn
Sie die Fahrtrichtung am Hang ändern.
Arbeiten Sie nicht an übermäßig steilen Hängen.
• Führen Sie das Gerät nur im Schritttempo. Seien Sie besonders vorsichtig,
wenn Sie das Gerät umkehren, zu sich
heranziehen oder rückwärts gehen.
• Schalten Sie das Gerät mit Vorsicht
entsprechend den Anweisungen in
dieser Anleitung ein. Achten Sie auf
ausreichenden Abstand der Füße zu
rotierenden Messern.
• Kippen Sie das Gerät nicht beim Starten, außer wenn dies beim Anlaufen in
hohem Gras erforderlich ist. In diesem
Fall kippen Sie das Gerät durch Drücken des Bügelgriffs so, dass die Vorderräder des Geräts leicht angehoben
werden. Überprüfen Sie immer, dass
sich beide Hände in Arbeitsstellung be-
nden, bevor das Gerät wieder auf den
Boden zurückgestellt wird.
• Arbeiten Sie nie ohne Grasfangsack
oder Prallschutz. Halten Sie sich immer entfernt von der Auswurföffnung.
• Starten Sie den Motor nicht, wenn Sie
vor dem Auswurfschacht stehen.
Achtung Gefahr! Messer läuft nach.
Es besteht Verletzungsgefahr.
• Das Gerät darf nicht angehoben oder
transportiert werden, solange der
Motor läuft. Schalten Sie das Gerät
ab, wenn es zum Transport gekippt
werden muss, wenn andere Flächen
als Rasen überquert werden und wenn
das Gerät zu und von den zu mähenden Flächen gebracht wird.
• Halten Sie die Grasauswurföffnung
stets sauber und frei. Entfernen Sie
Schnittgut nur im Stillstand des Gerätes.
• Hinterlassen Sie das Gerät nie unbeaufsichtigt am Arbeitsplatz.
• Arbeiten Sie nicht mit einem beschädigten, unvollständigen oder ohne
die Zustimmung des Herstellers umgebauten Gerät. Verwenden Sie das
Gerät nie mit beschädigten Schutzeinrichtungen oder Abschirmungen oder
fehlenden Sicherheitseinrichtungen
wie Ablenk- und/oder Grasfangeinrichtungen.
• Überlasten Sie Ihr Gerät nicht. Arbeiten
Sie nur im angegebenen Leistungsbereich und ändern Sie nicht die Reglereinstellungen am Motor. Verwenden
9
Page 10

DE
Sie keine leistungsschwachen Maschinen für schwere Arbeiten. Benutzen
Sie Ihr Gerät nicht für Zwecke, für die
es nicht bestimmt ist.
• Benutzen Sie das Gerät nicht in der
Nähe von entzündbaren Flüssigkeiten
oder Gasen. Bei Nichtbeachtung besteht Brand- oder Explo sions gefahr.
• Niemals das Gerät aufheben oder
wegtragen, wenn der Motor läuft.
• Schalten Sie das Gerät aus, ziehen Sie
den Netzstecker ab und vergewissern
Sie sich, dass alle beweglichen Teile
still stehen:
- immer, wenn Sie die Maschine verlassen,
- bevor Sie die Auswurföffnung reinigen oder Blockierungen beseitigen,
- wenn das Gerät nicht verwendet
wird,
- bevor Sie das Gerät überprüfen, reinigen oder daran arbeiten,
- wenn das Netzkabel beschädigt
oder verheddert ist,
- wenn das Gerät beim Arbeiten einen Fremdkörper getroffen hat oder
wenn ungewohnte Vibrationen auftreten. Untersuchen Sie in diesem
Fall das Gerät auf Beschädigungen
und lassen Sie es ggf. reparieren.
• Bringen Sie Hände oder Füße niemals
in die Nähe oder unter rotierende Teile.
Bei Sichelmähern darf sich nie vor die
Grasauswurföffnung gestellt werden.
Wartung und Lagerung:
sind und das Gerät in einem sicheren
Arbeitszustand ist.
• Suchen Sie den Mäher nach eventuellen Beschädigungen ab.
• Führen Sie die erforderlichen Reparaturen beschädigter Teile durch.
• Versuchen Sie nicht, das Gerät selbst
zu reparieren, es sei denn, Sie besitzen hierfür eine Ausbildung. Sämtliche
Arbeiten, die nicht in dieser Anleitung
angegeben werden, dürfen nur von
uns ermächtigten Kundendienststellen
ausgeführt werden.
• Bewahren Sie das Gerät an einem trockenen Ort und außerhalb der Reichweite von Kindern auf.
• Behandeln Sie Ihr Gerät mit Sorgfalt.
Halten Sie die Werkzeuge scharf
und sauber, um besser und sicherer
arbeiten zu können. Befolgen Sie die
Wartungsvorschriften.
• Tragen Sie Schutzhandschuhe, wenn
Sie die Schneideinrichtung wechseln.
• Überprüfen Sie die Grasfangeinrichtung regelmäßig auf Verschleiß und
Verformungen. Ersetzen Sie aus Sicherheitsgründen verschlissene oder
beschädigte Teile. Seien Sie beim Einstellen der Messer besonders vorsichtig, damit Ihre Finger nicht zwischen
den rotierenden Messern und fest
stehenden Teilen der Maschine eingeklemmt werden.
• Überprüfen Sie, dass nur Ersatzschneidwerkzeuge verwendet werden,
die vom Hersteller zugelassen sind.
• Achten Sie beim Warten der Schneidmesser darauf, dass selbst dann, wenn
die Spannungsquelle abgeschaltet
ist,die Schneidmesser bewegt werden
können.
• Sorgen Sie dafür, dass alle Muttern,
Bolzen und Schrauben fest angezogen
10
Elektrische Sicherheit:
• Achten Sie darauf, dass die Netzspannung mit den Angaben des Typenschildes übereinstimmt.
• Schließen Sie das Gerät nach Möglichkeit nur an eine Steckdose mit
Fehlerstrom-Schutzeinrichtung (FI-
Page 11

DE
Schalter) mit einem Auslösestrom von
nicht mehr als 30 mA an.
• Vermeiden Sie Körperberührungen mit
geerdeten Teilen (z.B. Metallzäune,
Metallpfosten).
•
Verwenden Sie nur zugelassene
Netzkabel der Bauart H05VV-F oder
H07RN-F, die höchstens 75 m lang und
für den Gebrauch im Freien bestimmt
sind. Der Litzenquerschnitt des Netzkabels muss mindestens 2,5 mm
gen. Rollen Sie eine Kabeltrommel vor
Gebrauch immer ganz ab. Überprüfen
Sie das Kabel auf Schäden.
• Verwenden Sie für die Anbringung des
Netzkabels die dafür vorgesehene Kabelaufhängung.
• Halten Sie das Netzkabel beim Arbeiten von dem Schneidwerkzeug fern.
Die Schneidmesser können das Netzkabel beschädigen und zum Berühren
spannungsführender Teile führen. Führen Sie das Netzkabel grundsätzlich
hinter der Bedienungsperson.
• Benutzen Sie das Netzkabel nicht, um
den Stecker aus der Steckdose zu ziehen. Schützen Sie das Netzkabel vor
Hitze, Öl und scharfen Kanten.
• Schalten Sie das Gerät aus und ziehen
Sie den Netzstecker aus der Steckdose, wenn das Netzkabel beschädigt ist.
Wenn die Anschlussleitung dieses Gerätes beschädigt wird, muss sie durch
den Hersteller oder seinen Kunden-
dienst oder eine ähnliche qualizierte
Person ersetzt werden, um Gefährdungen zu vermeiden.
• Verbinden Sie kein beschädigtes
Netzkabel mit dem Stromnetz. Berühren Sie kein beschädigtes Netzkabel,
solange es mit dem Stromnetz verbunden ist. Ein beschädigtes Netzkabel
kann zum Berühren spannungsführender Teile führen.
2
betra-
Allgemeine Beschreibung
Funktionsbeschreibung
Der Elektro-Rasenmäher besitzt ein parallel
zur Schnittebene sich drehendes Schneidwerkzeug. Er ist mit einem leistungsstarken
Elektromotor, einem robusten Metallgehäuse, einem Sicherheitsschalter und einem
Prallschutz sowie einem Grasfangkorb mit
Füllstandsanzeige ausgestattet. Zusätzlich
ist das Gerät 7-fach höhenverstellbar und
hat leichtgängige Räder.
Die Funktion der Bedienteile entnehmen
Sie bitte den nachfolgenden Beschreibungen.
Die Abbildungen für die Bedienung
des Gerätes nden Sie auf den Seiten 2-4.
Übersicht
1 Bügelgriff
2 Starthebel
3 Obere Sterngriffmutter
4 Unterer Holm
5 Prallschutz
6 Untere Sterngriffmutter
7 Grasfangkorb
8 Hinterräder
9 Vorderräder
10 Gerätegehäuse
11 Hebel zur Schnitthöhenverstel-
lung
12 Kabelhalter
13 Kabelzugentlastung
14 Gerätekabel
15 Entriegelungsknopf
(nicht sichtbar)
16 Netzkabel
11
Page 12
DE
Montage
Ziehen Sie vor allen Arbeiten an
dem Gerät den Netzstecker.
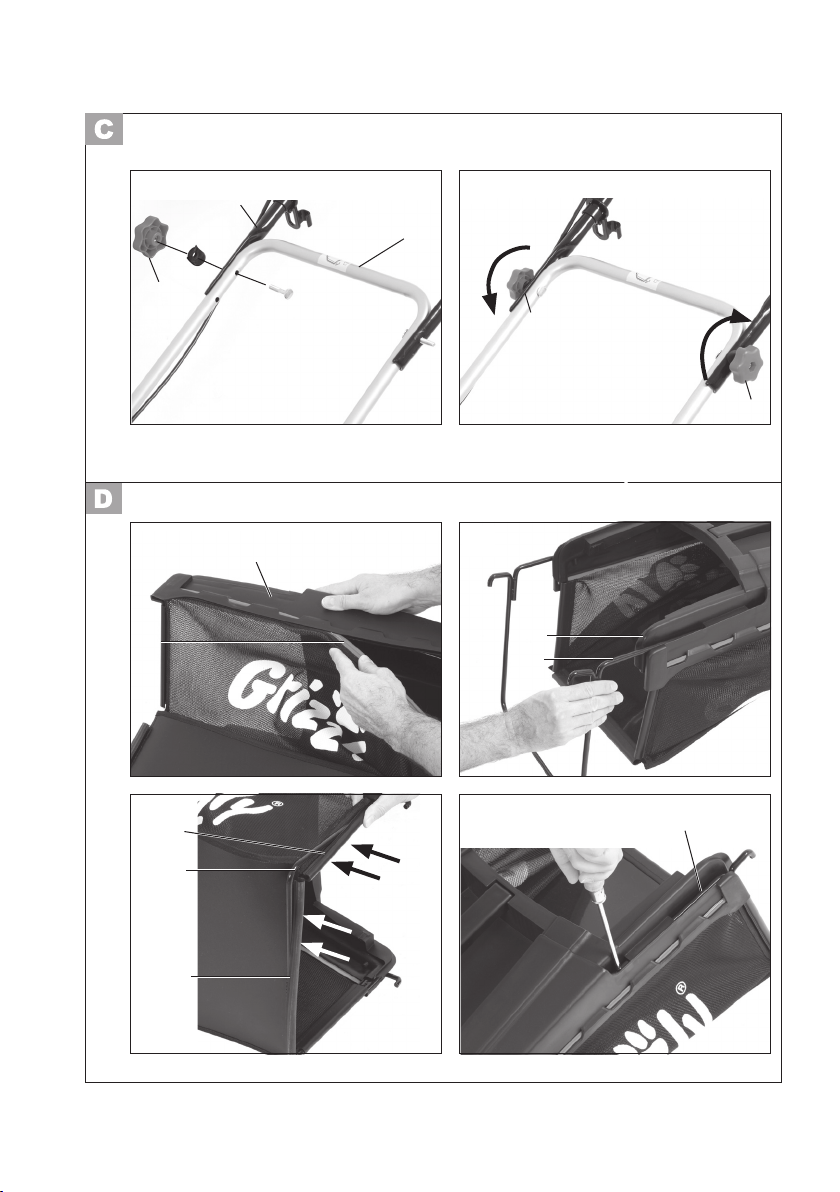
Bügelgriff montieren
Unteren Holm montieren:
Schrauben Sie die Sterngriff-
Kabelhalter einklipsen:
Klipsen Sie den Kabelhalter
12
Positionieren Sie die Enden des
unteren Holmes (4) in den Halteblechen und stecken Sie jeweils eine Schraube von außen
durch.
Positionieren Sie die beilie-
genden Unterlegscheiben und
setzen Sie die unteren Sterngriffmuttern (6) auf.
Bitte beachten Sie, dass die
Sterngriffmuttern innen montiert
werden müssen.
Schrauben Sie die Sterngriff-
muttern (6) fest.
Bügelgriff montieren:
Befestigen Sie den Bügel-
griff (1) mit den beiliegenden
Schrauben, den Unterlegscheiben und den oberen
Sterngriffmuttern (3) rechts
und links am unteren Holm
(4). Es sind zwei Positionen
möglich.
Drehen Sie die Sterngriffmut-
ter (3) im Uhrzeigersinn.
muttern (3) fest.
, 12) am unteren Holm ein
(
und xieren Sie damit das
Gerätekabel (
, 14).
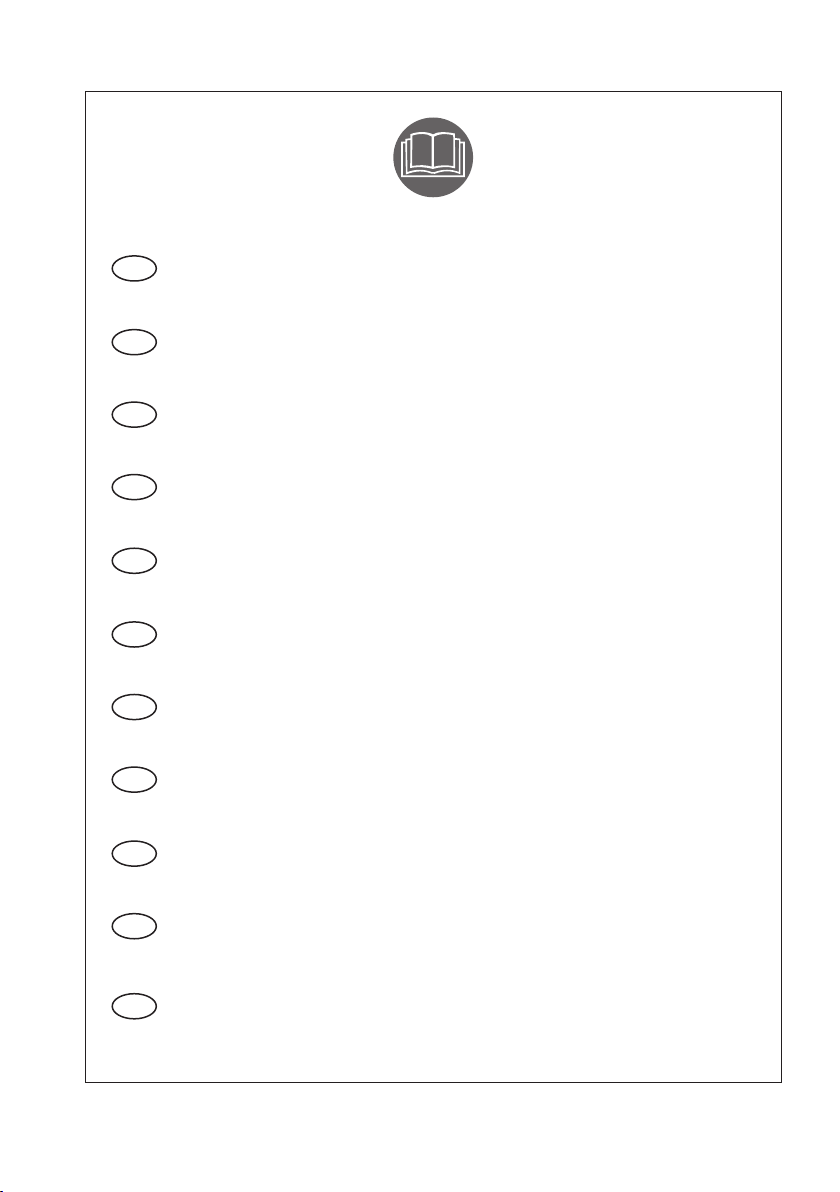
Grasfangkorb montieren
Grasfangkorb zusammenbauen:
Klipsen Sie die Gummilippe am
Fangkorbnetz (19) in die Hartschale des Grasfangkorbs (7)
ein.
Schieben Sie das Metallgestell
(20) in die Hartschale. Achten
Sie darauf, dass das Metallgestell vollständig eingeschoben
ist.
Stülpen Sie die KunststoffLaschen (21) und (22) über das
Metallgestell (20).
Fixieren Sie das
(20) mit den beiliegenden
Schrauben.
Metallgestell
Bedienung
Achtung: Gerät nicht ohne
vollständig angebrachten Prallschutz oder Grasfangkorb betreiben. Es besteht Verletzungsgefahr!
Grasfangkorb einhängen / abnehmen
1. Heben Sie den Prallschutz (5)
an.
2. Hängen Sie den Grasfangkorb (7)
in die dafür vorgesehene Aufhängung (24) an der Rückseite des
Gerätes ein.
3. Positionieren Sie den Prallschutz
(5) auf dem Grasfangkorb (7), er
hält diesen an richtiger Position.
4. Zum Abnehmen des Grasfangkorbes (7) heben Sie den Prallschutz (5) an und hängen den
Grasfangkorb aus. Klappen Sie
den Prallschutz an das Gerätegehäuse zurück.
Page 13

DE
Zum Entleeren des Grasfangkorbs
siehe auch Kapitel „Entsorgung/
Umweltschutz“.
Schnitthöhe einstellen
Schalten Sie das Gerät aus, ziehen
Sie den Netzstecker und warten Sie
den Stillstand des Messers ab. Es
besteht die Gefahr von Personenschäden.
Greifen Sie den Hebel (11) zur
Schnitthöhenverstellung und führen Sie ihn an der Rasterung vorbei
auf die gewünschte Einstellung der
Schnitthöhe.
Das Gerät besitzt 7 Positionen zur Einstellung der Schnitthöhe:
25 - 75 mm
Die richtige Schnitthöhe beträgt bei einem
Zierrasen etwa 30 - 45 mm, bei einem
Nutzrasen etwa 30 - 65 mm.
Für den ersten Schnitt in der Sai-
son sollte eine hohe Schnitthöhe
gewählt werden.
knopf (15) am Handgriff und
halten gleichzeitig den Starthebel (2) gedrückt. Lassen Sie
den Entriegelungsknopf (15)
los.
5. Zum Ausschalten lassen Sie
den Starthebel (2) los.
Nach dem Ausschalten des
Gerätes dreht sich das Messer
noch für einige Sekunden. Berühren Sie das laufende Messer
nicht. Es besteht die Gefahr von
Personenschäden.
Füllstandsanzeige
Seitlich am Grasfangkorb ist eine Füllstandsanzeige angebracht. Die aerodynamische Luftführung der Klappe sorgt
zusätzlich für die optimale Füllung.
Füllstandsanzeige geöffnet:
Grasfangkorb leer
Füllstandsanzeige geschlossen:
Grasfangkorb gefüllt
Arbeiten mit dem Rasenmäher
Ein- und Ausschalten
1. Formen Sie aus dem Ende des
Netzkabels eine Schlaufe und
hängen diese in die Kabelzugentlastung (13) ein.
2. Schließen Sie das Gerät an die
Netzspannung an.
3. Achten Sie vor dem Einschalten
darauf, dass das Gerät keine
Gegenstände berührt.
4. Zum Einschalten
drücken Sie den
Entriegelungs-
1
2
Regelmäßiges Mähen regt die Graspanze zu einer verstärkten Blattbildung an,
lässt aber gleichzeitig Unkrautpanzen
absterben. Daher wird der Rasen nach jedem Mähvorgang dichter und es entsteht
ein gleichmäßig belastbarer Rasen.
Der erste Schnitt erfolgt ab etwa April bei
einer Aufwuchshöhe von 7 - 8 cm. In der
Hauptvegetationszeit wird der Rasen mindestens einmal pro Woche gemäht.
• Beginnen Sie mit dem Mähen in der
Nähe der Steckdose und arbeiten Sie
von der Steckdose weg.
13
Page 14

DE
• Führen Sie das Netzkabel immer hinter sich und bringen Sie es nach dem
Wenden auf die schon gemähte Seite.
• Führen Sie das Gerät im Schritttempo
in möglichst geraden Bahnen. Für ein
lückenloses Mähen sollten sich die
Bahnen immer um wenige Zentimeter
überlappen.
• Stellen Sie die Schnitttiefe so ein,
dass das Gerät nicht überlastet wird.
Andernfalls kann der Motor beschädigt werden.
• Arbeiten Sie an Hängen immer quer
zum Hang. Seien Sie besonders
vorsichtig beim Rückwärtsgehen und
Ziehen des Gerätes.
• Reinigen Sie das Gerät nach jedem
Einsatz wie im Kapitel „Reinigung,
Wartung, Lagerung“ beschrieben.
Schalten Sie nach der Arbeit und
zum Transport das Gerät aus,
ziehen Sie den Netzstecker und
warten Sie den Stillstand des Messers ab. Es besteht die Gefahr von
Personenschäden.
Reinigung/Wartung/
Lagerung
Lassen Sie Arbeiten, die nicht
in dieser Anleitung beschrieben
sind, von einer von uns ermächtigten Kundendienststelle
durchführen. Verwenden Sie nur
Originalteile.
Tragen Sie beim Umgang mit dem
Messer Handschuhe.
Schalten Sie vor allen Wartungs-
und Reinigungsarbeiten das Gerät
aus, ziehen Sie den Netzstecker
und warten Sie den Stillstand des
Messers ab.
14
Allgemeine Reinigungs- und
Wartungsarbeiten
Spritzen Sie den Rasenmäher nicht
mit Wasser ab. Es besteht die Gefahr eines elektrischen Schlages.
• Halten Sie das Gerät stets sauber. Verwenden Sie zum Reinigen eine Bürste
oder ein Tuch, aber keine scharfen Reinigungs- bzw. Lösungsmittel.
• Entfernen Sie nach dem Mähen anhaftende Panzenreste mit einem Holz-
oder Plastikstück von den Rädern, den
Lüftungsöffnungen, der Auswurföffnung
und dem Messerbereich. Verwenden Sie
keine harten oder spitzen Gegenstände,
Sie könnten das Gerät beschädigen.
• Ölen Sie von Zeit zu Zeit die Räder.
• Kontrollieren Sie den Rasenmäher vor
jedem Gebrauch auf offensichtliche Mängel wie lose, abgenutzte oder beschädigte Teile. Prüfen Sie den festen Sitz
aller Muttern, Bolzen und Schrauben.
• Überprüfen Sie Abdeckungen und
Schutzeinrichtungen auf Beschädigungen und korrekten Sitz. Tauschen
Sie diese gegebenenfalls aus.
Messer austauschen
Ist das Messer stumpf, so kann es von
einer Fachwerkstätte nachgeschliffen
werden.
Ist das Messer beschädigt oder zeigt eine
Unwucht, so muss es ausgewechselt werden (siehe Kapitel Ersatzteile).
1. Drehen Sie das Gerät um.
2. Benutzen Sie feste Handschuhe
und halten Sie das Messer
(25) fest. Drehen Sie die Messerschraube (26) gegen den
Uhrzeigersinn mit Hilfe eines
Page 15

DE
Schraubenschlüssels von der
Motorspindel ab.
3. Bauen Sie das neue Messer
in umgekehrter Reihenfolge
wieder ein. Achten Sie darauf,
dass das Messer richtig positioniert ist und die Schraube fest
angezogen ist.
Lagerung
Damit das Gerät weniger Platz be-
ansprucht, lösen Sie die vier Sterngriffmuttern und klappen Sie den
Bügelgriff und den unteren Holm
zusammen. Achten Sie darauf,
dass die Kabel nicht eingeklemmt
werden.
• Bewahren Sie das Gerät trocken und
außerhalb der Reich weite von Kindern
auf.
• Lassen Sie den Motor abkühlen, be-
vor Sie das Gerät in geschlossenen
Räumen abstellen.
• Umhüllen Sie das Gerät nicht mit Ny-
lonsäcken, da sich Feuchtigkeit bilden
könnte.
Wir haften nicht für durch unsere Geräte
hervorgerufene Schäden, sofern diese
durch unsachgemäße Reparatur oder
den Einsatz von Nicht-Originalteilen bzw.
durch nicht bestim-mungsgemäßen Gebrauch verursacht werden.
• Geben Sie das Gerät an einer Verwertungsstelle ab. Die verwendeten
Kunststoff- und Metallteile können
sortenrein getrennt werden und so einer Wiederverwertung zugeführt werden. Fragen Sie hierzu unser ServiceCenter.
• Werfen Sie geschnittenes Gras nicht
in die Mülltonne, sondern führen Sie
es der Kompostierung zu oder verteilen Sie es als Mulchschicht unter
Sträuchern und Bäumen.
• Die Entsorgung Ihrer defekten eingesendeten Geräte führen wir kostenlos
durch.
Technische Daten
Elektro-Rasenmäher...........ERM 1846 G
Aufnahmeleistung des Motors ...... 1800 W
Netzspannung ............ 230-240 V~, 50 Hz
Schutzklasse ......................................II
Schutzart ...........................................IP24
Leerlaufdrehzahl .......................2900 min
Schnittkreis ......................................46 cm
Schnitthöhe............................. 25 - 75 mm
Gewicht..........................................28,5 kg
Volumen Grasfangkorb ........................60 l
Schalldruckpegel
(L
) ..........................82,7 dB(A), KpA=3 dB
pA
Schallleistungspegel (L
garantiert ...................................... 96 dB
gemessen...93,1 dB(A), K
Vibration (a
) ........... 1,09 m/s2, K=1,5 m/s
n
)
wA
=1,78 dB(A)
wA
-1
2
Entsorgung/Umweltschutz
Führen Sie Gerät, Zubehör und Verpackung einer umweltgerechten Wiederverwertung zu.
Elektrogeräte gehören nicht in den
Hausmüll.
Dieses Gerät ist für den Betrieb an einem
Stromversorgungsnetz mit einer Systemimpedanz Zmax am Übergabepunkt
(Hausanschluss) von maximal 0,269 Ohm
vorgesehen.
Der Anwender hat sicherzustellen, dass
das Gerät nur an einem Stromversorgungsnetz betrieben wird, das diese Anforderung erfüllt.
15
Page 16

DE
Wenn nötig, kann die Systemimpedanz
beim lokalen Energieversorgungsunternehmen erfragt werden.
Lärm- und Vibrationswerte wurden entsprechend den in der Konformitätserklärung genannten Normen und Bestimmungen ermittelt.
Technische und optische Veränderungen
können im Zuge der Weiterentwicklung
ohne Ankündigung vorgenommen werden. Alle Maße, Hinweise und Angaben
dieser Betriebsanleitung sind deshalb
ohne Gewähr. Rechtsansprüche, die aufgrund der Betriebsanleitung gestellt werden, können daher nicht geltend gemacht
werden.
Garantie
• Für dieses Gerät leisten wir 24 Monate
Garantie.
• Dieses Gerät ist nicht zur gewerblichen Nutzung geeignet. Bei gewerblichem Einsatz erlischt die Garantie.
• Schäden, die auf natürliche Abnutzung,
Überlastung oder unsachgemäße Bedienung zurückzuführen sind, bleiben
von der Garantie ausgeschlossen.
Bestimmte Bauteile unterliegen einem
normalen Verschleiß und sind von der
Garantie ausgeschlossen. Insbesondere
zählen hierzu: Messer.
• Voraussetzung für Garantieleistungen ist
zudem die Einhaltung der Hinweise zur
Reinigung und Wartung.
• Schäden, die durch Material- oder Herstellerfehler entstanden sind, werden
unentgeltlich durch Ersatzlieferung oder
Reparatur beseitigt. Voraussetzung ist,
dass das Gerät unzerlegt und mit Kaufund Garantienachweis an den Händler
zurückgegeben wird.
Reparatur-Service
• Sie können Reparaturen, die nicht der
Garantie unterliegen, gegen Berechnung
von unserem Service-Center durchführen lassen. Unser Service-Center erstellt
Ihnen gerne einen Kostenvoranschlag.
Wir können nur Geräte bearbeiten, die
ausreichend verpackt und frankiert eingesandt wurden.
• Achtung: Bitte liefern Sie Ihr Gerät
im Reklamations- oder Servicefall gereinigt und mit einem Hinweis auf den
Defekt an unsere Service-Adresse.
Unfrei - per Sperrgut, Express oder
mit sonstiger Sonderfracht - einge-
schickte Geräte werden nicht angenommen.
• Die Entsorgung Ihrer defekten eingesendeten Geräte führen wir kostenlos
durch.
16
Page 17

Fehlersuche
Problem Mögliche Ursache Fehlerbehebung
Steckdose, Kabel, Leitung,
Gerät startet nicht
Motor setzt aus
Arbeitsergebnis nicht
zufriedenstellend oder
Motor arbeitet schwer
Messer rotiert nicht
Abnorme Geräusche,
Klappern oder Vibrationen
Netzspannung fehlt
Ein-/Ausschalter defekt
Motor defekt
Gras zu lang
Blockierung durch Fremdkörper
Schnitthöhe zu niedrig Geringere Schnitthöhe einstellen
Messer stumpf
Messerbereich verstopft Gerät reinigen
Messer falsch montiert Messer korrekt einbauen
Messer durch Gras blo-
ckiert
Messerschraube locker Messerschraube festziehen
Messerschraube locker Messerschraube festziehen
Messer beschädigt Messer austauschen
Stecker prüfen, ggf. Reparatur
durch Elektrofachmann
Reparatur durch KundendienstKohlebürsten abgenutzt
Größere Schnitthöhe einstellen.
Durch Drücken des Griffholms
die Vorderräder leicht anheben.
Fremdkörper entfernen
Messer schleifen lassen oder
austauschen
Gras entfernen
DE
Ersatzteile
Verwenden Sie zum Nachkauf von Ersatzteilen die angegebene Service-Adresse oder
Fax-Nummer. Geben Sie bei der Bestellung unbedingt die Bestellnummer an.
Ersatzmesser ...................................................................................... 91095561
Fangkorb ............................................................................................. 91095660
Zubehör
Mulchkit (nicht im Lieferumfang enthalten) .......................................... 91099492
17
Page 18

GB
Contents
Scope of Delivery ............................... 18
Intended Use ....................................... 18
Safety Information .............................. 19
Pictorial Diagrams on the Equipment 19
Symbols used in the instructions ..... 19
General Safety Information .............. 19
General Description ........................... 23
Function Description ........................ 23
Summary .......................................... 23
Assembly............................................. 23
Assembling the Curved Handle ....... 23
Installing the grass catcher .............. 23
Operation ............................................. 24
Mounting / removing the
grass catcher ................................... 24
Adjusting the Cut Height ................. 24
Switching On and Off ....................... 24
Level gauge ..................................... 24
Working with the Lawnmower .......... 25
Cleaning, Maintenance and Storage . 25
General Cleaning and
Maintenance Work ........................... 25
Changing the Blade ......................... 25
Storage ............................................ 26
Waste disposal and environmental
protection ............................................ 26
Technical Specications .................... 26
Guarantee ............................................ 27
Repair Service..................................... 27
Trouble Shooting ................................ 28
Spare parts .......................................... 28
Translation of the original EC
declaration of conformity ................ 138
Exploded Drawing ............................ 142
Grizzly Service-Center ..................... 143
Before initial use, please read the
operating instructions carefully, in
order to avoid incorrect handling.
Keep the instructions in a safe place
and pass them on to any subsequent user so the information is
available at all times.
Scope of Delivery
Carefully remove the equipment from the
packaging and check whether the following parts are complete:
- Lawn mower with mounted lower bar
and curved handle with connection
cable
- Grass catcher (in two parts)
- Strain relief
- 2 cable hooks
- Mounting material, curved handle
- Mounting material, grass catcher
- Instruction Manual
Intended Use
The equipment is designed only for mowing domestic lawns and grass areas.
Any other use that is not expressly permitted in these instructions may result in
damage to the equipment and represent a
serious risk to the user.
This equipment is not suitable for commercial use. Commercial use will invalidate the guarantee.
The equipment is intended for use by
adults. It is not to be used by children
or people who are unfamiliar with these
instructions. The use of the equipment is
prohibited in the rain or a damp environment.
The manufacturer will not be liable for
damages caused by use other than for the
intended purpose or by incorrect operation.
18
Page 19

GB
Safety Information
This section covers the basic safety regulations when working with the electric
lawnmower.
Pictorial Diagrams on the
Equipment
Caution!
Read the operating instructions
carefully.
Risk of injury from parts being
thrown up.
Keep nearby people away from
the mower.
Caution – sharp cutting blade!
Keep feet and hands away. Risk
of injury!
Switch off the motor and discon-
nect the plug before adjustment
or repair work or if the power cable is caught or damaged.
Danger of damaged power cable.
Keep the power cable away from
the cutting blade!
Noise level specication
L
WA
L
dB
in dB.
wa
The equipment switches off
when the start lever is released.
Level gauge:
Flap open:
grass catcher empty
Flap closed:
grass catcher full
Symbols used in the instructions
Hazard symbols with informa-
tion on prevention of personal
injury and property damage.
Precaution symbol (explanation of
precaution instead of exclamation
mark) with information on prevention
of harm / damage.
Notice symbol with information on
how to handle the device properly.
General Safety Information
Important! Please read the operat-
ing instructions carefully and keep
the manual for future reference.
Protection class II
Do not dispose of electrical equip-
ment in domestic waste.
Cutting circle
Danger! Keep feet and hands
away from the blade bar.
Risk of injury!
This equipment may cause serious
injury in the case of improper use.
In order to avoid injury to people
and damage to property, the following safety information must be
observed and users must familiarise themselves with all operating
parts.
Warning! During operation, this
electric tool generates an electro-
19
Page 20
GB
magnetic eld which, under certain
circumstances, may impair the
functionality of active or passive
medical implants. To reduce the
risk of serious or lethal injuries,
we recommend that persons with
medical implants consult their doctor and the manufacturer of their
medical implant before operating
the machine.
Preparation:
• This appliance is not intended for use
by persons (including children) with
reduced physical, sensory or mental
capabilities, or lack of experience
and knowledge, unless they have
been given supervision or instruction
concerning use of the appliance by a
person responsible for their safety.
• Do not allow the use of this equipment
by children or others who are unfamiliar with these operating instructions.
Local regulations may specify the
minimum age of the operator.
• Do not use the equipment when people and particularly children or pets
are nearby.
• Children must be supervised in order
to ensure that they do not play with
the equipment.
• The operator or user is responsible for
accidents, injuries to other people or
damage to the property of others.
• Check the terrain on which the equipment is to be used and remove
stones, sticks, wires and other foreign
objects that could become caught and
thrown up.
• Wear suitable work clothing such as
stable shoes with non-slip soles and
robust, long trousers. Do not use the
equipment when barefoot or when
wearing open sandals.
Do not wear loose clothing or clothes
that straps or belts suspend from.
• Before each use, carry out a visual inspection of the equipment. Do not use
the equipment if protective devices
(e.g. collision guard or grass bag),
parts of the cutting device or bolts are
missing, worn or damaged. To avoid
imbalance, damaged tools and bolts
are to be replaced only in sets.
• Take care with equipment that has
several cutting tools, as the movement of one blade may result in the
rotation of the other blades.
• Use only spare parts and accessories
supplied and recommended by the
manufacturer. The use of non-original
parts will immediately invalidate the
guarantee.
• Prior to use, always check the cord
and extension cord for signs of damage or wear. Immediately disconnect
the cord from the mains in case it is
damaged in use. Do not touch the
cord until it is unplugged. Do not operate the appliance if the cord is worn or
damaged.
Working with the Equipment:
Do not place feet or hands near or
under rotating parts when working.
Risk of injury!
Observe the noise protection and
local regulations.
• Switch on the motor according to the
instructions and only when your feet
are at a safe distance from the cutting
tools.
• Do not use the equipment in the rain,
20
Page 21

GB
in poor weather, in a damp environment, or on wet grass. Work only in
daylight or with good lighting.
• Do not work with the equipment when
tired, lacking concentration or under
the inuence of alcohol or drugs. Always take breaks in good time. Take a
sensible approach to the work.
• When working, ensure a rm stance,
particularly on slopes. Always work
across the slope, never upwards or
downwards. Take particular care when
changing the direction of travel on the
slope. Do not work on excessively
steep slopes.
• Run the equipment only at a walking
pace. Take particular care when turning the equipment around, pulling it
towards you or going backwards.
• Switch on the equipment carefully and
in accordance with the directions in
these instructions. Ensure sufcient
distance between feet and the rotating
blades.
• Do not tilt the equipment when starting other than if it is necessary to do
so when starting up in long grass. In
this case, tilt the equipment by pressing down the handle bar such that
the front wheels of the equipment are
raised. Always check that both hands
are in the working position before returning the equipment to the ground.
• Do not work without the grass bag or
collision guard. Keep away from the
ejection hole at all times.
• Do not start the motor while standing
in front of the discharge duct.
Caution! Danger! The blade contin-
ues to run after switching off.
There is a risk of injury.
• The equipment is not to be lifted or
transported while the motor is running.
Switch off the equipment if it has to
be tilted in transit, when crossing surfaces other than grass, and when the
equipment is being transported to and
from the surfaces to be mowed.
• Always keep the grass ejection hole
clean and clear. Remove cut material
only when the equipment is stopped.
• Do not leave the equipment unattended in the workplace.
• Do not work with equipment that is
damaged, incomplete, or has been
modied without the authorisation
of the manufacturer. Do not use the
equipment with damaged safety
devices or screens or with missing
safety equipment such as deection
and/or grass collection devices.
• Do not overload the equipment. Work
only within the specied power range
and do not change the regulator settings on the motor. Do not use lowpowered machines for heavy work. Do
not use your equipment for purposes
other than those for which it is designed.
• Do not use the equipment near
inammable liquids or gases. Nonobservance will result in a risk of re
or explosion.
• Do not lift or carry the equipment
when the motor is running.
• Turn off the appliance, unplug it from
the mains and check that all moving
parts are at rest:
- Whenever you leave the machine,
- Before cleaning the ejection hole
or removing blockages,
- When the equipment is out of use,
- Before checking, cleaning or working on the equipment,
- If the power cable is damaged or
frayed,
21
Page 22

GB
- If the equipment has hit a foreign
object or if strange vibrations occur
during work. In this case, check the
equipment for damage and have it
repaired if applicable.
• Do not place feet or hands near or
under rotating parts. Do not stand in
front of the grass ejection hole during
sickle mowing.
Maintenance and Storage:
When servicing the blades, re-
member that they can move even
if the power source is off.
• Ensure that all nuts, bolts and screws
are tightened rmly and the equip-
ment is in safe working condition.
• Check the mower for any damages.
• Repair damaged parts as appropriate.
• Do not attempt to repair the equip-
ment yourself unless you have been
trained to do so. Any work not specied in these instructions is to be carried out only by customer service
centres that we have authorised.
• Keep the equipment in a dry location
and out of reach of children.
• Handle the equipment with care. Keep
tools sharp and clean, in order to facilitate better and safer work. Follow
the maintenance instructions.
• Wear protective gloves when changing the cutting device.
• Regularly check the grass collection
device for wear and strains. For safety
reasons, replace worn or damaged
parts. When adjusting the blades, take
particular care to avoid ngers being
trapped between the rotating blades
and xed parts of the machine.
• Check that only replacement tools
authorised by the manufacturer are
used.
22
Electrical Safety:
• Ensure that the mains voltage matches
the specications on the rating plate.
• If possible, connect the equipment only
to a socked with a residual currentoperated protective device (RCD) with
a release current of more than 30 mA.
• Avoid bodily contact with earthed
parts (e.g. metal fences, metal posts).
• Use only authorised power cables of
type H05VV-F or H07RN-F, which are
no more than 75 m long and suitable
for outdoor use. The power cable
wire cross section must be at least
2.5 mm
2
. Always completely unroll
cable drums before use. Check the
cable for damage.
• To x on the power cable, use the
cable suspension intended for the purpose.
• Keep the power cable away from the
cutting tool when working. The cutting
blades may damage the power cable
and result in contact with live parts. Always run the power cable behind the
operator.
• Do not use the power cable to pull
the plug from the socket. Protect the
power cable from heat, oil and sharp
edges.
• Switch off the equipment and disconnect the plug from the socket if the
power cable is damaged. If the power
cable is damaged, it must be replaced
by the manufacturer, the customer
services of the same, or a qualied
person, in order to avoid hazards.
• Do not connect a damaged power
cable to the mains. Do not touch
a damaged power cable when it is
connected to the mains. A damaged
power cable may result in contact with
live parts.
Page 23

GB
General Description
Function Description
The electric lawnmower has a cutting tool,
which turns parallel to the cutting level.
It features a powerful electrical drive, a
sturdy metal casing, a safety switch, a
collision guard as well as a grass catcher
with level gauge. Additionally, the equipment is height adjustable to seven levels
and has smooth-running wheels.
For the function of the operating parts,
please refer to the descriptions below.
The illustration how to handle the ap-
pliance can be found on page 2-4.
Summary
1 Curved handle
2 Start lever
3 Top star grip
4 Lower bar
5 Collision guard
6 Bottom star grip
7 Grass catcher
8 Back wheels
9 Front wheels
10 Housing
11 Cutting height adjuster
12 Cable holder
13 Cable strain relief
14 Connection cable
15 Release button (not visible)
16 Mains cable
Assembly
Disconnect the plug before any
work on the equipment. There is a
risk of injury.
Assembling the Curved Handle
Fitting the lower bar:
Position the ends of the bottom
bar (4) in the holding plates and
insert a screw into each from
the outside.
Position the enclosed washers
and t the bottom star grip (6).
Please note that the star grips
must be tted inside.
Screw the star grip (6) in place.
Install curved handle:
Screw the star grip (3) in place.
Clipping in the cable holder:
Clip the cable holder (
Use the enclosed screws to x
the bow handle (1), with the
washers and top star grip (3) to
the right and left on the bottom
bar (4). There are two possible
positions.
Turn the star grip (3) clockwise.
into the bottom bar and use it to
secure the equipment cable (
14).
12)
Installing the grass catcher
Assemble the grass catcher:
Clip the rubber lip of the grass
catcher net (19) into the hard
plastic tray of the grass catcher
(7).
Push the metal frame (20) into
the hard shell. Ensure that the
metal shell is pushed in fully.
Pull plastic tabs (21) and (22)
over the metal frame (20).
Fix the metal frame (20) using
the enclosed screws.
23
Page 24

GB
Operation
Attention: Do not operate the ap-
pliance until the collision guard
and grass catcher are fully installed. Risk of injury!
Mounting / removing the grass
catcher
1. Lift the collision guard (5).
2. Place the grass catcher (7) on the
mounting bracket (24) provided at
the back of the lawn mower.
3. Lower the collision guard (5)
onto the grass catcher (7) - it
will keep it in place.
4. To remove the grass catcher
(7), lift the collision guard (5)
and unhook the grass catcher
from the mounting bracket. Flap
down the collision guard to the
housing.
On emptying the grass catcher
also refer to section “Disposal/environment”.
Adjusting the Cut Height
Switch off the equipment, discon-
nect the plug and wait for the blade
to stop. There is a risk of injury.
The correct height is around 30 – 45 mm
for a decorative lawn and around
30 –65 mm for a used lawn.
A higher cut height should be se-
lected for the rst cut of the season.
Switching On and Off
1. Turn the end of the mains lead
into a loop and hook it into the
cable strain relief (13).
2. Connect the equipment to the
power supply.
3. Before switching on, ensure that
the equipment is not in contact
with any objects.
4. To switch on, press
the release button
(15) on the handle
at the same time
as pressing the start lever (2).
Release the release button (15).
5. To switch off, release the start
lever (2).
After switching off the equip-
ment, the blade continues to
turn for several seconds. Do not
touch the moving blade. There
is a risk of injury.
1
2
Level gauge
Hold the cutting height adjuster
(11) and move it to the correct cutting height, as appropriate.
The equipment has 7 positions for
adjusting the cut height:
25 - 75 mm
24
The level gauge is located on the side of
the grass catcher. The aerodynamic air
guidance provided by the ap also optimises the lling.
Flap open:
grass catcher empty
Flap closed:
grass catcher full
Page 25

Working with the Lawnmower
Regular mowing encourages increased foliation of the grass and kills off weeds at the
same time. Therefore, not only does each
mowing increase the density of the lawn, it
also produces an evenly resilient lawn.
The rst cut is to be made in around April,
at a growth height of 70 – 80 mm. In the
main vegetation period, the lawn is to be
mowed at least once a week.
GB
Wear gloves when handling the
blade
Switch off the equipment before all
maintenance and cleaning work,
disconnect the plug and wait until
the blade stops.
General Cleaning and Maintenance Work
• Start mowing near the socket and
work away from the socket.
• Always keep the extension cable behind you and when you turn, move it to
the side that has already been mowed.
• Run the equipment at a walking pace,
in tracks that are as even as possible.
For gap-free mowing, the tracks should
always overlap by a few centimetres.
• Adjust the cut height so the equipment
is not overloaded. Otherwise, the motor may be damaged.
• On slopes, always work across the
slope. Take particular care when going
backwards and pulling the equipment.
• Clean the equipment after each use,
as described in the chapter on “Cleaning, Maintenance and Storage”.
Switch off the equipment after work
and in order to transport it, disconnect the plug and wait until the blade
stops. There is a risk of injury.
Cleaning, Maintenance
and Storage
Have work that is not described
in these instructions carried out
by a customer service centre
that we have authorised. Use
only original parts.
Do not hose down the lawnmow-
er with water.
• Always keep the equipment clean. To
clean, use a brush or cloth but no detergent or solvent.
• After mowing, use a piece of wood
or plastic to remove adherent plant
remains from the wheels, ventilation
holes, ejection hole and blade area.
Do not use hard or pointed objects, as
these may damage the blade.
• Oil the wheels from time to time.
• Before each use, check the lawnmower
for obvious defects such as loose, worn
or damaged parts. Check that all nuts,
bolts and screws are sitting rmly.
• Check the covers and protective de-
vices for damage and check that they
are sitting correctly. Replace them if
necessary.
Changing the Blade
If the blade is blunt, it can be sharpened
by a specialist workshop. If the blade
is damaged or showing signs of imbalance, it must be replaced (see chapter on
“Spare Parts”).
1. Turn the equipment over.
2. Use sturdy gloves and hold
25
Page 26

GB
the blade rmly (25). Turn the
blade screw (26) anticlockwise
off of the motor spindle using a
screwdriver.
3. Install the new blade in the
reverse order. Ensure that the
blade is positioned correctly and
the screw tightened rmly.
Storage
To reduce the space required in
storage, loosen the four star grips
and fold down the curved handle
and bottom bar. Make sure the cables are not caught.
• Keep the equipment dry and out of
reach of children.
• Allow the motor to cool before storing
the equipment in a conned space.
• Do not cover the equipment with nylon
bags as moisture could build up.
We will not be liable for damages caused
by our equipment where these are caused
by improper repair or the use of nonoriginal parts or by use other than for the
intended purpose.
Waste disposal and environmental protection
Do not dispose of used oil in the sewage
system or drains. Dispose of used oil in
an environmentally correct manner - bring
it to a waste disposal center.
Be environmentally friendly. Return the tool,
accessories and packaging to a recycling
centre when you have nished with them.
Machines do not belong with do-
mestic waste.
• The plastic and metal parts employed
can be separated out and thus recycled use can be implemented. Ask our
Service-Center for details.
• Throw the cut grass on the compost.
Do not throw it in the normal household waste.
• Defective units returned to us will be
disposed of for free.
Technical Specications
Electric Lawnmower ...........ERM 1846 G
Motor input power .........................1800 W
Mains voltage ............. 230-240 V~, 50 Hz
Protection class ..................................II
Protection type...................................IP24
Idling speed ..............................2900 min
Cutting circle ....................................46 cm
Cut height ............................... 25 - 75 mm
Weight ...........................................28,5 kg
Lawn bag volume ................................60 l
Sound pressure level at the operator’s position
(LpA) .............................82,7 dB(A), KpA=3 dB
Sound power level (L
)
wA
guaranteed .............................. 96 dB(A)
measured ... 93,1 dB(A), K
Vibration (a
) ........... 1,09 m/s2, K=1,5 m/s
n
=1,78 dB(A)
wA
This device is designed for operation on
a power supply network with a system
impedance Zmax at the transfer point
(domestic connection) of a maximum of
0.269 Ohms.
The user must ensure that the device is
operated only on a power supply network
that fulls this requirement.
If necessary, the local power supply company can be asked for the system impedance.
Noise and vibration values were determined according to the standards and
stipulations mentioned in the declaration
of conformity.
-1
2
26
Page 27

GB
Technical and optical changes can be carried out in the course of further development without notice. All dimensions, references and information of this instruction
manual are therefore without guarantee.
Legal claims, which are made on the basis of the instruction manual, cannot thus
be considered as valid.
Guarantee
• This appliance has a 24-month guarantee.
• This equipment is not suitable for commercial use. Commercial use will invalidate the guarantee.
• Damages, which can be attributed
to natural wear, overloading or inappropriate use, are excluded from the
guarantee. Certain component parts
are subject to a normal wear and are
excluded from the guarantee. In particular, these include: blade.
• Furthermore, the prerequisite for guarantee services is that the references
indicated in the operating instructions
regarding cleaning and maintenance
have been adhered to.
• Damage, which has been caused
from material or manufacturing faults,
will be made good free of charge, by
replacement delivery or repair.
This requires that the appliance is re-
turned to the merchant undismantled
and with proof of purchase and guarantee.
Repair Service
• Repairs, which are not covered by
the guarantee, can be carried out for
charge by our service center. Our
service center will be glad to provide
you with a cost estimate.
We can only process devices which
have been packaged sufciently and
which have been dispatched with correct stamping.
• Note: In case of complaint or service,
please deliver your device cleaned,
and with an indication of the defect, to
our service address.
Devices sent in freight collect - by
bulk freight, express or with other
special freight - are not accepted.
• Defective units returned to us will be
disposed of for free.
27
Page 28

GB
Trouble Shooting
Problem Possible Cause Fault Fixing
Check the socket, cable, wire and
Power is off
Equipment does not
start
Motor stops Blockage by foreign object Remove the foreign object
Result unsatisfactory
or motor labours
Blade fails to turn
Strange noises, rattling or vibrations
Defective on/off switch
Defective motor
Grass too long
Cut height too low Set a higher cut height
Blade blunt
Blade area blocked Clean the equipment
Blade assembled incor-
rectly
Blade blocked by grass Remove the grass
Blade screw loose Tighten the blade screw
Blade screw loose Tighten the blade screw
Blade damaged Replace the blade
plug and have any repairs carried
out by an electrician
Repair by customer servicesWorn carbon brushes
Set a greater cut height. Lift the
front wheels slightly by pressing
down on the handle bar.
Have the blade sharpened or replace it
Install the blade correctly
Spare parts
When ordering spare parts, please use the indicated Service-Center address or fax
number. Please indicate the part number with your order.
Spare blade ....................................................................................................91095561
Grass catcher ..................................................................................................91095660
Accessories
Mulching kit (not included) ...............................................................................91099492
28
Page 29

NL
Inhoud
Omvang van de levering .................... 29
Gebruiksdoeleinde ............................. 29
Veiligheidsinstructies......................... 30
Pictogrammen/opschriften op
het apparaat ..................................... 30
Symbolen in de handleiding ............. 30
Algemene veiligheidsinstructies ....... 30
Algemene beschrijving ...................... 34
Beschrijving van de werking ............ 34
Overzicht .......................................... 34
Montage ............................................... 35
Beugelhandgreep monteren ............ 35
Grasvangmand monteren ................ 35
Bediening ............................................ 35
Grasvangmand inhaken / afnemen .. 35
Snoeihoogte instellen ....................... 36
In- en uitschakelen ......................... 36
Niveau-indicator ............................... 36
Werken met de grasmaaier .............. 36
Reiniging/onderhoud/opslag ............. 37
Algemene reinigings- en
onderhoudswerkzaamheden ............ 37
Mes uitwisselen ................................ 37
Opslag .............................................. 38
Berging en milieu ............................... 38
Technische gegevens ........................ 38
Garantie ............................................... 39
Reparatieservice ................................. 39
Opsporing van fouten ........................ 40
Vervangstukken .................................. 40
CE-conformiteitsverklaring ............. 138
Explosietekening .............................. 142
Grizzly Service-Center ..................... 143
Gelieve vóór de eerste ingebruik-
name de gebruiksaanwijzing
aandachtig door te nemen om een
foutieve hantering te vermijden.
Bewaar de handleiding goed en
geef ze aan iedere volgende gebruiker door, opdat de informatie te
allen tijde ter beschikking staat.
Omvang van de levering
Neem het apparaat voorzichtig uit de verpakking en kijk na, of de hierna volgende
onderdelen volledig zijn:
- Grasmaaier met gemonteerde onderste hoofdligger en beugelhandgreep
met apparaatsnoer
- Grasvangmand (tweedelig)
- Trekontlasting van het snoer
- 2 snoerhouders
- Montagemateriaal beugelhandgreep
- Montagemateriaal vangmand
- Gebruiksaanwijzing
Gebruiksdoeleinde
Het apparaat is voor het maaien van
gazons en grasvlakten in huishoudelijke
kring bestemd.
Dit apparaat is niet geschikt voor commercieel gebruik. Bij commercieel gebruik
vervalt de garantie.
Ledere andere toepassing, die in deze
handleiding niet uitdrukkelijk toegestaan
wordt, kan tot beschadigingen leiden en een
ernstig gevaar voor de gebruiker vormen.
Het apparaat is voor het gebruik door
volwassenen bestemd. Kinderen alsook
personen, die met deze handleiding niet vertrouwd zijn, mogen het apparaat niet gebruiken. Het gebruik van het apparaat bij regen
of een vochtige omgeving is verboden.
De fabrikant is niet aansprakelijk voor beschadigingen, die door een niet-doelmatig
gebruik of een foutieve bediening veroorzaakt werden.
29
Page 30

NL
Veiligheidsinstructies
Deze paragraaf behandelt de fundamentele veiligheidsinstructies bij het werk met
de elektrische grasmaaier.
Pictogrammen/opschriften op
het apparaat
Opgelet!
Neem de gebruiksaanwijzing
aandachtig door.
Gevaar voor verwondingen door
weggeslingerde onderdelen.
Omstanders op een veilige af-
stand tot de maaier houden.
Opgepast – scherpe snoeimessen!
Voeten en handen op een veilige
afstand houden. Gevaar voor verwondingen! Motor uitschakelen en
netstekker uittrekken vóór instellings- of reinigingswerkzaamheden
of als het netsnoer vastgeraakt of
beschadigd is.
Gevaar door beschadigd net-
snoer. Netsnoer op een veilige
afstand tot het apparaat en van
het snoeimes houden!
Gevaar! Voeten en handen
op een veilige afstand van de
mesbalk houden.
Gevaar voor verwondingen!
Bij het loslaten van de
starthefboom schakelt het
apparaat uit.
Niveau-indicator
Klep geopend:
Grasvangmand leeg
Klep gesloten:
Grasvangmand vol
Symbolen in de handleiding
Gevaarsymbolen met gegevens
ter preventie van lichamelijke
letsels en materiële schade.
Gebodsteken (in plaats van het
uitroepingsteken is het gebod toegelicht) met gegevens ter preventie van
beschadigingen.
Aanwijzingsteken met informatie
voor een betere omgang met het
apparaat.
Vermelding van het geluidsniveau
L
WA
L
dB
in dB
wa
Beschermingsklasse II
Elektrische apparaten horen niet
thuis bij huisvuil.
Snijdcirkel
30
Algemene veiligheidsinstructies
Belangrijk! Lees de gebruiksaan-
wijzing zorgvuldig. Bewaar de gebruiksaanwijzing om ze na te lezen.
Dit apparaat kan bij een on-
oordeelkundig gebruik ernstige
verwondingen veroorzaken. Om
lichamelijke letsels en materiële
schade te vermijden, leest u de
onvoorwaardelijk volgende veilig-
Page 31

NL
heidsinstructies en neemt u ze in
acht en maakt u zich goed met alle
bedieningsonderdelen vertrouwd.
Waarschuwing! Dit elektrische
gereedschap produceert tijdens
de werking een elektromagnetisch
veld. Dit veld kan in bepaalde omstandigheden actieve of passieve
medische implantaten in negatieve
zin beïnvloeden. Om het gevaar
voor ernstige of dodelijke verwondingen te verminderen, adviseren
wij personen met medische implantaten, hun arts en de fabrikant
van het medische implantaat te
raadplegen voordat de machine
bediend wordt.
Voorbereiding:
• Dit apparaat is er niet voor bestemd,
door personen (kinderen inbegrepen)
met beperkte fysieke, zintuiglijke of
geestelijke capaciteiten of bij ontstentenis van ervaring en/of bij gebrek aan
kennis gebruikt te worden, tenzij ze
onder het toezicht van een voor hun veiligheid instaande persoon staan of van
deze persoon aanwijzingen krijgen, hoe
het apparaat te gebruiken is.
• Geef nooit toestemming aan kinderen
of andere personen, die de gebruiksaanwijzing niet kennen, het apparaat
te gebruiken. Lokale bepalingen
kunnen de minimumleeftijd van de
persoon, die het apparaat bedient,
vastleggen.
•
Maak nooit gebruik van het apparaat
terwijl andere mensen, in het bijzonder
kinderen, en huisdieren in de buurt zijn.
• Op kinderen moet er toezicht uitgeoefend worden om te vrijwaren dat ze
niet met het apparaat spelen.
• De operator of gebruiker is enkel voor
ongevallen of schade aan andere mensen of aan hun eigendom verantwoordelijk.
•
Controleer het terrein, waarop het apparaat gebruikt wordt, en verwijder
stenen, stokken, draden of andere
vreemde voorwerpen, die vastgegrepen en weggeslingerd kunnen worden.
• Draag geschikte werkkledij zoals vast
schoeisel met slijpvrije zool en een
robuuste, lange broek. Gebruik het
apparaat niet als u blootsvoets stapt
of open sandalen draagt. Vermijd het
dragen van losse kledij of kledij met
hangende touwtjes of ceinturen.
• Voer telkens vóór gebruik een visuele controle van het apparaat door.
Gebruik het apparaat niet als beschermingsinrichtingen (bijvoorbeeld
stootbescherming of grasvangzak),
onderdelen van de snoei-inrichting
of bouten ontbreken, versleten of
beschadigd zijn. Ter preventie van
een onbalans mogen beschadigde
werktuigen en bouten slechts per set
uitgewisseld worden.
• Wees voorzichtig bij apparaten met
meerdere snoeiwerktuigen, omdat de
beweging van een mes tot een rotatie
van de overige messen kan leiden.
• Gebruik enkel reserveonderdelen
en toebehoren, die door de fabrikant
geleverd en aanbevolen worden. Het
gebruik van vreemde onderdelen leidt
tot het onmiddellijke verlies van de
garantieclaim.
• Vóór het gebruik dienen netsnoer en
verlengsnoer altijd op tekenen van
beschadiging of slijtage onderzocht te
worden. Indien het snoer tijdens het
gebruik beschadigd wordt, moet het
onmiddellijk van het stroomnet verbroken worden. Raak het snoer niet aan
voordat het van het stroomnet verbro-
31
Page 32

NL
ken is. Gebruik het apparaat niet wanneer het snoer versleten of beschadigd
is.
Werken met het apparaat:
Breng voeten en handen bij het
werken niet in de nabijheid van of
onder roterende onderdelen. Er
bestaat gevaar voor verwondingen!
Neem de bescherming tegen la-
waaihinder en lokale voorschriften
in acht.
• Schakel de motor volgens instructies
in en slechts dan, wanneer uw voeten zich op een veilige afstand tot de
snoeiwerktuigen bevinden.
• Gebruik het apparaat niet bij regen,
bij slechte weersomstandigheden, in
een vochtige omgeving of op een nat
gazon. Werk uitsluitend bij daglicht of
bij een goede verlichting.
• Werk niet met het apparaat als u moe
of ongeconcentreerd bent of na het
innemen van alcohol of tabletten. Las
altijd tijdig een werkpauze in. Ga met
verstand aan het werk.
• Let bij het werken op een veilige
stand, in het bijzonder op hellingen.
Werk altijd dwars op de helling, nooit
op- of neerwaarts. Wees uiterst voorzichtig wanneer u de rijdrichting op de
helling wijzigt. Werk niet op overdreven steile hellingen.
• Bedien het apparaat slechts stapvoets. Wees uiterst voorzichtig wanneer u het apparaat omkeert, het naar
u toe trekt of achteruit stapt.
• Schakel het apparaat voorzichtig in
overeenstemming met de in deze
handleiding vermelde instructies in.
Let op voldoende afstand tot de voeten tot roterende messen.
• Kantel het apparaat niet bij het starten, behalve als dit bij het starten op
hoog gras noodzakelijk is. In dit geval
kantelt u het apparaat door zodanig
op de hoofdligger van de handgreep
te duwen, dat de voorwielen van
het apparaat gemakkelijk opgetild
worden. Controleer altijd dat beide
handen zich in de werkstand bevinden voordat het apparaat weer op de
grond neergezet wordt.
• Werk nooit zonder grasvangzak of
stootbescherming. Houd u altijd op
een veilige afstand tot de uitwerpopening.
• Start de motor niet wanneer u vóór de
uitwerpschacht staat.
Opgelet: gevaar! Mes loopt na.
Er bestaat gevaar voor verwondingen.
• Het apparaat mag niet opgetild of getransporteerd worden zolang de motor
draait. Schakel het apparaat uit als het
voor het transport gekanteld moet worden als andere oppervlakten dan gazons overgestoken moeten worden en
wanneer het apparaat naar en weg van
de te maaien oppervlakten gebracht
wordt.
• Houd de grasuitwerpopening steeds
netjes en vrij. Verwijder snoeiafval enkel
bij stilstand van het apparaat.
• Laat het apparaat nooit zonder toezicht
op het werkterrein achter.
• Werk niet met een beschadigd, onvolledig of zonder de toestemming van de
fabrikant omgebouwd apparaat. Gebruik
het apparaat nooit met beschadigde beschermingsinrichtingen, afschermingen
of ontbrekende veiligheidsmechanis-
32
Page 33

NL
men, zoals richtingwijzigende of grasvanginrichtingen.
• Overbelast uw apparaat niet. Werk uitsluitend in het aangegeven vermogensgebied en wijzig de regelaarinstellingen
aan de motor niet. Gebruik geen machines meteen laag prestatievermogen
voor zware werken. Gebruik uw apparaat niet voor doeleinden, waarvoor het
niet bestemd is.
• Gebruik het apparaat niet in de nabijheid
van ontvlambare vloeistoffen of gassen.
Bij veronachtzaming bestaat er brandof explosiegevaar.
• Nooit het apparaat optillen of wegdragen wanneer de motor draait.
• Schakel het apparaat uit, trek de netstekker af en vergewis u dat alle beweegbare onderdelen stilstaan:
- altijd, wanneer u de machine verlaat,
- voordat u de uitwerpopening reinigt of
blokkeringen verhelpt,
- wanneer het apparaat niet gebruikt
wordt,
- voordat u het apparaat controleert,
reinigt of eraan werkt,
- wanneer het netsnoer beschadigd of
verstrikt geraakt is,
- wanneer het apparaat tijdens het werken op een vreemd voorwerp gestoten is of wanneer er zich ongewone
trillingen voordoen. Onderzoek in dit
geval het apparaat op beschadigingen en laat het eventueel repareren.
• Breng handen en voeten nooit in de
nabijheid van of onder roterende onderdelen. Bij cirkelmaaiers mag men nooit
vóór de grasuitwerpopening gaan staan.
Onderhoud en opslag:
• Let er bij het onderhoud van de snijd-
messen op dat zelfs wanneer de spanningsbron uitgeschakeld is de snijdmessen in beweging kunnen komen.
• Zorg ervoor dat alle moeren, bouten
en schroeven vast aangedraaid zijn en
dat het apparaat zich in een veilige toestand voor het werk bevindt.
• Controleer de maaier op eventuele beschadigingen.
• Voer de noodzakelijke reparaties van
beschadigde onderdelen door.
• Tracht niet het apparaat zelf te repareren, tenzij u hiervoor opgeleid bent. Al
de werkzaamheden, die niet in deze
handleiding vermeld worden, mogen
uitsluitend door ons gemachtigde klantenserviceafdelingen uitgevoerd worden.
• Bewaar het apparaat op een droge
plaats en buiten het bereik van kinderen.
• Behandel uw apparaat met zorg. Houd
de werktuigen scherp en netjes om beter en veiliger te kunnen werken. Volg
de onderhoudsvoorschriften op.
• Draag beschermende handschoenen
wanneer u de snoei-inrichting wisselt.
• Controleer de grasvanginrichting regelmatig op slijtage en vervormingen.
Vervang omwille van de veiligheid
versleten of beschadigde onderdelen.
Wees bij de instelling van de messen
uiterst voorzichtig, opdat uw vingers niet
tussen de roterende messen en vaststaande onderdelen van de machine
gekneld worden.
• Controleer, dat er uitsluitend reservesnoeiwerktuigen gebruikt worden, die
door de fabrikant toegestaan zijn.
Elektrische veiligheid:
• Let erop dat de netspanning met de op
het typeaanduidingplaatje vermelde gegevens overeenstemt.
• Sluit het apparaat zo mogelijk enkel op
een stopcontact met aardlekschakelaar (differentieelschakelaar) met een
33
Page 34

NL
uitschakelstroom van niet meer dan 30
mA aan.
• Vermijd lichamelijk contact met geaarde
onderdelen (bijvoorbeeld metalen omheiningen, metalen palen).
• Gebruik uitsluitend toegestane netsnoeren van het type H05VV-F of H07RN-F,
die hoogstens 75 m lang en voor het
gebruik in de open lucht bestemd zijn.
De draaddwarsdoorsnede van het netsnoer moet minstens 2,5 mm
gen. Rol een kabeltrommel vóór gebruik
altijd helemaal af. Controleer het snoer
op beschadigingen.
• Gebruik om het netsnoer aan te brengen de daarvoor voorziene snoerophanging.
• Houd het netsnoer tijdens het werken
op een veilige afstand tot het snoeiwerktuig. De snoeimessen kunnen het
netsnoer beschadigen en tot contact
met spanningvoerende onderdelen
leiden. Leid het netsnoer in principe
achter de persoon, die het apparaat bedient.
• Gebruik het netsnoer niet om de stekker uit het stopcontact te trekken. Bescherm het netsnoer tegen hitte, olie en
scherpe kanten.
• Schakel het apparaat uit en trek het
netsnoer uit het stopcontact als het netsnoer beschadigd is. Als het netsnoer
beschadigd wordt, moet het door de fabrikant, door zijn klantenserviceafdeling
of door een gekwaliceerde persoon
vervangen worden om gevaren te vermijden.
• Verbind geen beschadigd netsnoer
met het stroomnet. Raak geen beschadigd netsnoer aan zolang het met het
stroomnet verbonden is. Een beschadigd netsnoer kan tot contact met spanningvoerende onderdelen leiden.
2
bedra-
Algemene beschrijving
Beschrijving van de werking
De elektrische grasmaaier beschikt over
een parallel met het snoeiniveau draaiend
snoeiwerktuig. Hij is met een elektrische
motor met een zeer groot prestatievermogen, een slijtvaste metalen behuizing,
een veiligheidsschakelaar, een stootbescherming en ook een grasvangmand met
niveau-indicator uitgerust. Aanvullend is
het apparaat 7-voudig in hoogte verstelbaar en heeft het lichtlopende wielen.
Gelieve voor de werking van de bedieningsonderdelen de hierna volgende beschrijvingen te raadplegen.
De afbeeldingen voor de bediening
en het onderhoud vindt u op de zijden 2 - 4.
Overzicht
1 Beugelhandgreep
2 Starthefboom
3 Bovenste stergreepmoer
4 Onderste hoofdligger
5 Stootbescherming
6 Onderste stergreepmoer
7 Grasvangzak
8 Achterwielen
9 Voorwielen
10 Apparaatbehuizing
11 Hefboom voor een verstelling
van de snoeihoogte
12 Kabelhouder
13 Trekontlasting van het snoer
14 Apparaatsnoer
15 Ontgrendelknop (niet zichtbaar)
16 Netsnoer
34
Page 35

NL
Montage
Trek vóór alle werkzaamheden aan
het apparaat de netstekker uit.
Beugelhandgreep monteren
Onderste hoofdligger monte-
ren:
Positioneer de uiteinden van de
onderste hoofdligger (4) in de
fenderbevestigingen en steek
telkens één schroef langs buiten
door.
Positioneer de bijgevoegde
onderlegplaatjes en breng de
onderste stergreepmoeren (6)
aan.
Gelieve in acht te nemen dat de
stergreepmoeren aan de binnenzijde gemonteerd moeten
worden.
Schroef de stergreepmoeren (6)
vast.
Beugelhandgreep monteren:
Kabelhouder inklikken:
Klik de kabelhouder (
Bevestig de beugelgreep (1)
met de bijgevoegde schroeven, de onderlegplaatjes en
de bovenste stergreepmoeren
(3) rechts en links aan de onderste hoofdligger (4). Er zijn
twee posities mogelijk
Draai de stergreepmoer (3) in
de richting van de wijzers van
de klok
Schroef de stergreepmoeren
(3) vast.
de onderste hoofdligger in en
zet daarmee het apparaatsnoer
(
.
14).
.
12) aan
Grasvangmand monteren
Grasvangmand ineenzetten:
Klik de rubberlip aan het vang-
mandnet (19) in de harde
schaal van de grasvangmand
(7) vast.
Schuif het metalen onderstel
(20) in de harde schaal. Let
erop dat het metalen onderstel
volledig ingeschoven is.
Stulp de lipjes van kunststof
(21) en (22) over het metalen
onderstel (20).
Zet het metalen onderstel (20)
met de bijgevoegde schroeven vast.
Bediening
Opgelet: apparaat niet zonder
volledig aangebrachte stootbescherming of grasvangmand bedienen. Er bestaat gevaar voor
verwondingen!
Grasvangmand inhaken / afnemen
1. Til de stootbescherming (5) op.
2. Haak de grasvangmand (7) in
de daarvoor voorziene ophanging (24) aan de achterzijde van
het apparaat in.
3. Positioneer de stootbescherming (5) op de grasvangmand
(7), hij houdt deze in de juiste
positie.
4. Om de grasvangmand (7) af
te nemen, tilt u de stootbescherming (5) op en haakt u
de grasvangmand uit. Klap de
stootbescherming terug aan de
apparaatbehuizing.
35
Page 36

NL
Om de grasvangmand te ledigen,
verwijzen wij ook naar hoofdstuk
„Afvalverwijdering/milieubescherming“.
Snoeihoogte instellen
Schakel het apparaat uit, trek het
netsnoer uit en wacht de stilstand
van het mes af. Er bestaat gevaar
voor lichamelijke letsels.
Neem de hefboom (11) voor een
verstelling van de snoeihoogte
vast en breng deze voorbij de
grendelinrichting op de gewenste
instelling van de snoeihoogte.
Het apparaat beschikt over 7 posities voor
de instelling van de snoeihoogte:
25 - 75 mm
De correcte snoeihoogte bedraagt bij een
siergazon ongeveer 30 - 45 mm, bij een
nuttig gazon ongeveer 30 - 65 mm.
Voor de eerste snoeibeurt van het
seizoen dient er een hoge snoeihoogte gekozen te worden.
In- en uitschakelen
1. Vorm uit het uiteinde van het
netsnoer een lus en haak deze
in de trekontlasting (13) van het
snoer in.
2. Sluit het apparaat op de netspanning aan.
3. Let er vóór het inschakelen op
dat het apparaat geen voorwerpen raakt.
4. Om in te schake-
len, drukt u de ontgrendelknop (15)
1
2
aan de handgreep in en houdt u
gelijktijdig de starthefboom (2)
ingedrukt. Laat de ontgrendelknop (15) los.
5. Om uit te schakelen, laat u de
starthefboom (2) los.
Na het uitschakelen van het ap-
paraat draait het mes nog enkele
seconden lang. Raak het draaiende mes niet aan. Er bestaat
gevaar voor lichamelijke letsels.
Niveau-indicator
Zijdelings aan de grasvangmand is een
niveau-indicator aangebracht. De aërodynamische luchtgeleiding van de klep zorgt
aanvullend voor de optimale vulling.
Klep geopend:
Grasvangmand leeg
Klep gesloten:
Grasvangmand vol
Werken met de grasmaaier
Het regelmatige maaien zet de grasplant
tot een versterkte bladvorming aan, maar
laat tegelijkertijd onkruidplanten afsterven.
Daarom wordt het gazon telkens nadat er
gemaaid werd dichter en ontstaat er een
gelijkmatig belastbaar gazon.
De eerste snoeibeurt vindt plaats ongeveer
vanaf april bij een groeihoogte van 70 - 80
mm. In de hoofdvegetatietijd wordt het gazon minstens één keer per week gemaaid.
• Begin met het maaien in de nabijheid
van het stopcontact en werk van het
stopcontact weg.
• Leid het verlengsnoer altijd achter u
en breng het na het keren tot aan de
36
Page 37
NL
reeds gemaaide zijde.
• Leid het apparaat stapvoets in zo
recht mogelijke banen. Om volledig te
maaien, dienen de banen zich altijd
enkele centimeters te overlappen.
• Stel de snoeidiepte zodanig in, dat het
apparaat niet overbelast wordt. In het
andere geval kan de motor beschadigd worden.
• Werk op hellingen altijd dwars op de
helling. Wees uiterst voorzichtig wanneer u achteruitstapt en het apparaat
voorttrekt.
• Reinig het apparaat telkens na gebruik zoals in hoofdstuk „Reiniging,
onderhoud, opslag“ beschreven.
Schakel na het werk en voor het
transport het apparaat uit, trek de
netstekker uit en wacht de stilstand
van het mes af. Er bestaat gevaar
voor lichamelijke letsels.
Reiniging/onderhoud/
opslag
Laat werkzaamheden, die niet
in deze handleiding beschreven
zijn, door een door ons gemach-
tigde klantenserviceafdeling
doorvoeren. Gebruik uitsluitend
originele onderdelen.
Algemene reinigings- en
onderhoudswerkzaamheden
Spuit de grasmaaier niet met
water schoon.
• Houd het apparaat steeds netjes. Gebruik voor de reiniging een vorstel of
een doek, maar geen reinigings- c.q.
oplosmiddelen.
• Verwijder na het maaien vastklevende
plantenresten met een stuk hout of
plastic van de wielen, de ventilatieopeningen, de uitwerpopening en
het bereik van de messen. Gebruik
geen harde of puntige voorwerpen, ze
ouden het apparaat kunnen beschadigen.
• Smeer van tijd tot tijd de wielen met
olie in.
• Controleer de grasmaaier telkens vóór
gebruik op klaarblijkelijke tekortkomingen, zoals losse, versleten of beschadigde onderdelen. Ga de vaste zitting
van alle moeren, bouten en schroeven
na.
• Controleer afdekkingen en beschermingsinrichtingen op beschadigingen
en een correcte zitting. Wissel deze
eventueel uit.
Mes uitwisselen
Draag bij de omgang met het mes
handschoenen.
Schakel vóór alle onderhouds- en
reinigingswerkzaamheden het apparaat uit, trek de netstekker uit en
wacht de stilstand van het mes af.
Als het mes stomp is, kan het door een
gespecialiseerde werkplaats bijgeslepen
worden. Als het mes beschadigd is of een
onbalans vertoont, moet het gewisseld
worden (zie hoofdstuk “Reserveonderdelen”).
1. Draai het apparaat om.
2. Gebruik vaste handschoenen
en houd het mes vast (25).
Draai de messchroef (26) tegen
37
Page 38

NL
de richting van de wijzers van
de klok van de motorspil..
3. Monteer het nieuwe mes weer
in omgekeerde volgorde. Let
erop dat het mes correct gepositioneerd en dat de schroef
vast aangedraaid is
Opslag
Opdat het apparaat minder plaats
in beslag neemt, draait u de vier
stergreepmoeren los en vouwt u
de beugelgreep en de onderste
hoofdligger samen. Let erop dat de
snoeren niet geklemd raken.
• Bewaar het apparaat droog en buiten
het bereik van kinderen.
• Laat de motor afkoelen voordat u het
apparaat in gesloten ruimten wegzet.
• Omhul het apparaat niet met nylon-
zakken, omdat er vochtigheid zou
kunnen ontstaan.
Wij zijn niet aansprakelijk voor door onze
apparaten teweeggebrachte beschadigingen, voor zover deze door een onoordeelkundige reparatie of door het gebruik
van niet-originele onderdelen c.q. door
een niet-doelmatig gebruik veroorzaakt
worden.
Berging en milieu
Giet afgwerkte olie niet in de riool of afvoer. Ontdoet u zich op een milieuvriendelijke manier van uw afgewerkte olie, geef
de oli aan een afvalinzamelpunt af.
Breng het apparaat, de toebehoren en de
verpakking naar een geschikt recyclagepunt.
Machines horen niet thuis in het
huisafval.
• De kunststoffen en metalen onderdelen kunnen volgens soort gescheiden
worden en zijn zo voor recyclage geschikt.
Voor vragen hieromtrent kunt u te-
recht bij ons servicecenter.
• Breng snoeiafval naar een recyclingpark en werp het niet in de vuilnisbak.
• De afvalverwijdering van uw defecte
ingezonden apparaten voeren wij gratis door.
Technische gegevens
Elektrische grasmaaier ......ERM 1846 G
Opnamevermogen van de motor ... 1800 W
Netspanning ............... 230-240 V~, 50 Hz
Beschermingsklasse...........................II
Veiligheidsklasse ...............................IP24
Onbelast toerental ....................2900 min
Snijdcirkel ........................................46 cm
Snoeihoogte ........................... 25 - 75 mm
Gewicht..........................................28,5 kg
Volume grasvangmand ........................60 l
Geluidsdrukniveau
(L
) .............................82,7 dB(A), KpA=3 dB
pA
Geluidsvermogensniveau (L
gewaarborgd ............................ 96 dB(A)
gemeten .............. 93,1 dB(A), K
Trilling (a
)...............1,09 m/s2, K=1,5 m/s
n
Dit apparaat is voor de werking aan een
stroomnet met een systeemimpedantie
Zmax op het overdrachtpunt (huisaansluiting) van maximaal 0,269 ohm voorzien.
De gebruiker dient ervoor te zorgen dat
het apparaat uitsluitend bediend wordt
aan een stroomnet, dat aan deze eis voldoet.
)
wA
=3 dB
wA
-1
2
38
Page 39

NL
Zo nodig, kan de systeemimpedantie
bij het lokale energiebedrijf opgevraagd
worden. Geluids- en trilwaarden worden
in overeenstemming met de in de conformiteitverklaring vermelde normen en
bepalingen vastgesteld.
Technische en optische wijzigingen kunnen in het kader van de verdere ontwikkeling zonder aankondiging doorgevoerd
worden. Alle in deze gebruiksaanwijzing
vermelde afmetingen, aanwijzingen en
gegevens zijn daarom niet bindend. Wettige aanspraken, die op basis van deze
gebruiksaanwijzing gemaakt worden, kan
men daarom niet doen gelden.
Garantie
• Wij geven 24 maanden garantie op dit
product.
• Beschadigingen, die op natuurlijke
slijtage, overbelasting of onachtzame
bediening berusten, vallen niet onder
de garantie. Bepaalde bouwelementen zijn onderhevig aan slijtage en
vallen niet onder de garantie. Hiertoe
behoren vooral: mes.
• Voorwaarde voor de garantie is bovendien, dat de in de gebruiksaanwijzing opgegeven onderhoudsintervallen werden nageleefd als ook de
richtlijnen i.v.m. reiniging, onderhoud
en reparatie.
•
Beschadigingen die door produktie of
materiaalfouten ontstaan zijn, worden
kostenloos door vervangstukken of reparatie verholpen. Voorwaarde voor deze
bepaling is wel, dat het apparaat intact
en met koop- en garantiebewijs aan ons
servicecenter wordt overhandigd.
Reparatieservice
• U kunt reparaties die niet onder de
garantie vallen, tegen betaling laten
uitvoeren door ons servicecenter. Zij
brengen graag eerst een offerte uit.
Wij bewerken alleen apparaten die,
voldoende zijn verpakt en voldoende
gefrankeerd worden opgestuurd.
Wij kunnen apparaten slechts behan-
delen indien ze voldoende verpakt en
gefrankeerd toegezonden werden.
• Opgelet: stuur in geen geval defekte
machines met volle olietank op. Leeg
de tank! Eventuele beschadigingen
(olie loopt uit als de machine zijwaarts
of op de kop gesteld wordt) of brandbeschadigingen die door het transport
zijn ontstaan, worden ten laste van de
afzender gelegd.
• Ongefrankeerde – oningepakt, express of andere speciale zendingen
– toegezonden machines worden
niet aangenomen.
• De afvalverwijdering van uw defecte
ingezonden apparaten voeren wij gratis door.
39
Page 40

NL
Opsporing van fouten
Probleem Mogelijke oorzaak Oplossing van de fout
Stopcontact, snoer, leiding, stekker
nakijken, eventueel reparatie door
vakkundig geschoold elektricien
Reparatie door klantenserviceafdeling
Grotere snoeihoogte instellen.
Door te duwen op de hoofdligger
van de handgreep de voorwielen
lichtjes optillen.
Vreemd voorwerp verwijderen
Gras verwijderen
Apparaat start niet
Motor valt stil
Werkresultaat niet
bevredigend of motor
werkt moeilijk
Mes roteert niet
Abnormale geluiden,
gerammel of trillingen
Netspanning ontbreekt
Schakelaar “Aan/uit” defect
Koolborstels versleten
Motor defect
Gras te lang
Blokkering door vreemd
voorwerp
Snoeihoogte te laag Snoeihoogte instellen
Mes stomp Mes laten slijpen of uitwisselen
Mesbereik verstopt Apparaat reinigen
Mes foutief gemonteerd Mes correct monteren
Mes door gras geblok-
keerd
Messchroef los Messchroef vast aandraaien
Messchroef los Messchroef vast aandraaien
Mes beschadigd Mes uitwisselen
Vervangstukken
De onderstaande reserveonderdelen kunt u via het Grizzly servicecenter bestellen.
Bij bestellingen dient u het machinetype en het artikelnummer aan te geven.
Reservemes ..................................................................................................91095561
Grasvangzak ..................................................................................................91095660
Accessoires
Mulchkit (niet in het leveringspakket inbegrepen) ..........................................91099492
40
Page 41

FR
Table des matières
Volume de la livraison ........................ 41
Domaine d’emploi ............................... 41
Consignes de sécurité ....................... 42
Pictogrammes / Inscriptions sur
l’appareil ........................................... 42
Symboles utilisés dans le mode
d’emploi ............................................ 42
Consignes de sécurité générales ..... 42
Description générale .......................... 46
Description du fonctionnement ........ 46
Vue d’ensemble ............................... 47
Montage ............................................... 47
Monter la poignée en arceau ........... 47
Monter le panier collecteur d’herbe .. 47
Utilisation ............................................ 48
Accrocher / retirer le panier
collecteur d’herbe ............................. 48
Régler la hauteur de coupe .............. 48
Mettre sous et hors tension ............. 48
Afchage du niveau de remplissage 49
Travailler avec la tondeuse à gazon 49
Nettoyage / Maintenance / Stockage 49
Travaux généraux de
maintenance et de nettoyage ........... 49
Changer la lame ............................... 50
Stockage .......................................... 50
Elimination et écologie ...................... 50
Données techniques .......................... 51
Garantie ............................................... 51
Service de réparation ......................... 52
Pièces de rechange ............................ 52
Recherche des pannes ...................... 53
Traduction de la déclaration de
conformité CE originale ................... 139
Vue éclatée ........................................ 142
Grizzly Service-Center ..................... 143
Avant la première mise en service,
veuillez lire attentivement ces instructions d’utilisation. Conservez
soigneusement ces instructions et
transmettez-les à tous les utilisateurs
suivants an que les informations se
trouvent constamment à disposition.
Volume de la livraison
Retirez l’appareil prudemment de l’em-
ballage et vériez si les parties suivantes
sont complètes :
- Tondeuse à gazon avec barre inférieure montée et poignée en arceau
avec câble d’appareil
- Panier collecteur d’herbe (en deux
parties)
- Dispositif de décharge de traction de
câble
- 2 xations de câble
- Matériel de montage de la poignée en
arceau
- Matériel de montage du panier collecteur
- Mode d’emploi
Domaine d’emploi
L’appareil est uniquement conçu pour
couper le gazon et l’herbe des pelouses
dans le domaine familial.
Cet appareil n’est pas adapté à une utilisation industrielle. Toute utilisation indus-
trielle met n à la garantie.
Toute autre application qui n’est pas catégoriquement autorisée dans ce mode
d’emploi peut entraîner des dommages
sur l’appareil et présenter un grave danger pour l’utilisateur.
L’appareil a été conçu pour être utilisé par
des adultes. Les enfants ainsi que les personnes qui ne connaissent pas ce mode
d’emploi ne doivent pas utiliser l’appareil.
L’utilisation de l’appareil est interdite en
cas de pluie ou dans un environnement
humide.
Le fabricant n‘est pas responsable des
dommages qui seraient causés par un
usage contraire aux prescriptions ou par
une manipulation non conforme
41
Page 42
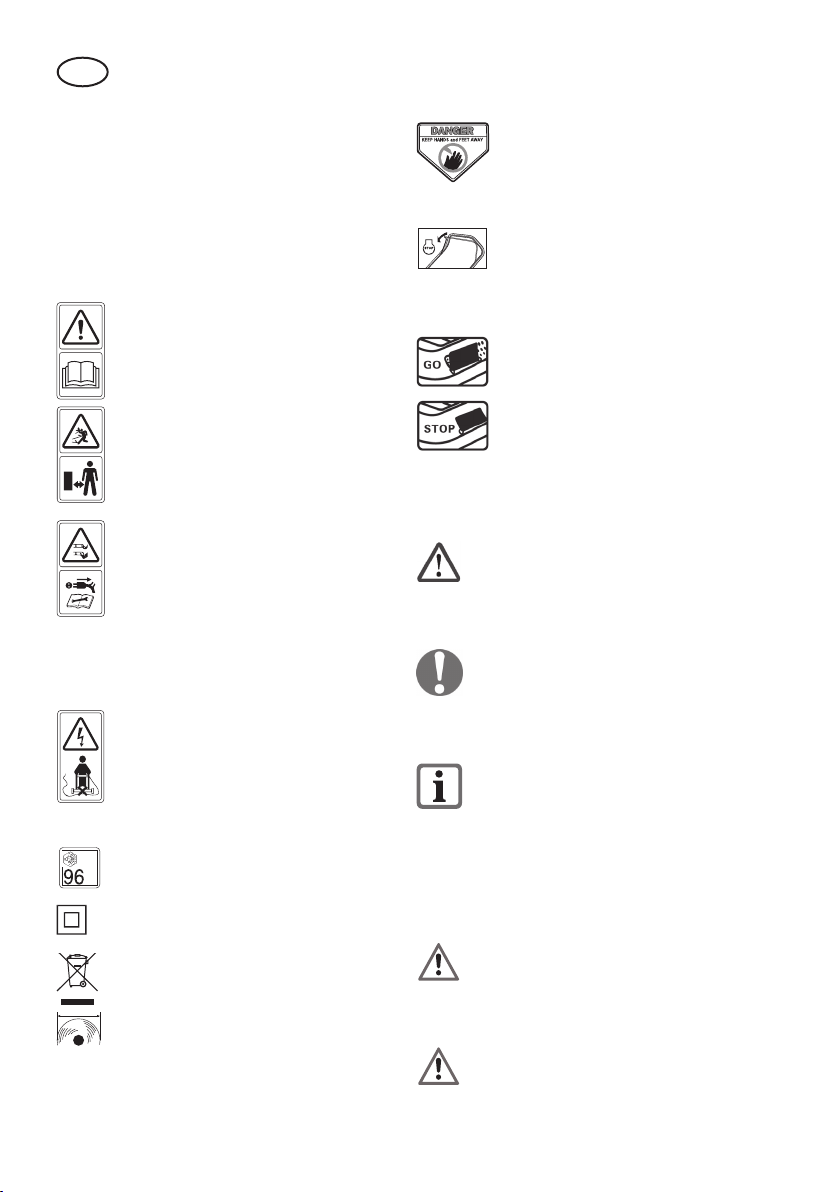
FR
Consignes de sécurité
Cette section traite des principales
normes de sécurité en cas de travail avec
la tondeuse à gazon électrique.
Pictogrammes / Inscriptions
sur l’appareil
Attention !
Lisez attentivement le mode
d’emploi.
Risque de blessure par les parti-
cules éjectées de la coupe
Tenir les personnes à distance du
faucheur.
Attention - Lames de coupe acé-
rées ! Tenir à distance les pieds
et les mains. Risque de blessure!
Avant tout réglage ou travail de
nettoyage ou si le câble d’alimentation secteur est bloqué ou est
endommagé, arrêter le moteur et
retirer la che de secteur
Danger en cas de câble d’alimen-
ta-tion secteur endommagé.Tenir
le câble d’alimentation secteur
à distance de l’appareil et de la
lame de coupe !
Danger! Tenir les pieds et les
mains à distance de la barre
porte-lame.
Risque de blessure!
En relâchant le levier de dé-
marrage l‘appareil s‘arrête.
Afchage du niveau de remplissage
Clapet ouvert :
Panier collecteur d‘herbe vide
Clapet fermé :
Panier collecteur d‘herbe vide
Symboles utilisés dans le
mode d’emploi
Signes de danger avec conseils
de prévention des accidents sur
les personnes ou des dégâts
matériels.
Signes indicatifs (l’impératif est expli-
qué à la place des points d’exclamation) avec conseils de prévention des
dégâts.
Signes de conseils avec des infor-
mations pour une meilleure manipulation de l’appareil.
Indication du niveau sonore Lwa
L
WA
en dB.
dB
Classe de protection II
Ne pas jeter l’appareil électrique
avec les ordures ménagères.
Diamètre de coupe
42
Consignes de sécurité générales
Important ! Lisez attentivement la
notice d’utilisation. Conservez la
notice d’utilisation pour consultation ultérieure.
En cas d’usage non conforme, cet
appareil peut causer des blessures
Page 43

FR
graves. Pour éviter des dommages personnels et des dégâts
matériels, lisez et faites respecter
impérativement les consignes de
sécurité suivantes, connaissez
parfaitement les dispositifs de
commande.
Avertissement ! Pendant son fonc-
tionnement cet outil électrique produit un champ électromagnétique
qui, dans certaines circonstances,
peut perturber des implants
médicaux actifs ou passifs. Pour
diminuer le risque de blessures
graves ou mortelles, nous recommandons aux personnes portant
des implants médicaux de consulter leur médecin et le fabricant de
l’implant médical avant d’utiliser
cette machine.
Préparatifs :
• Cet appareil n’est pas prévu pour être
utilisé par des personnes (y compris les
enfants) dont les capacités physiques,
sensorielles ou mentales sont réduites,
ou des personnes dénuées d’expérience ou de connaissance, sauf si elles
ont pu bénécier, par l’intermédiaire
d’une personne responsable de leur
sécurité, d’une surveillance ou d’instructions préalables concernant l’utilisation
de l’appareil.
• Il convient de surveiller les enfants pour
s’assurer qu’ils ne jouent pas avec l’appareil.
• Ne permettez jamais à des enfants ou à
d’autres personnes qui ne connaissent
pas le mode d’emploi d’utiliser l’appareil. Les prescriptions locales peuvent
xer l’âge minimum de l’opérateur.
• Les enfants doivent être surveillés pour
garantir qu’ils ne jouent pas avec l’appareil.
• N’utilisez jamais l’appareil lorsque des
personnes, en particulier des enfants et
des animaux domestiques se tiennent
à proximité.
• L’opérateur ou l’utilisateur est responsable des accidents ou dégâts sur les
autre personnes ou sur leurs propriétés.
Inspectez le terrain sur lequel l’appareil
sera employé et retirez les pierres, les
branches, les ls ou autres corps hétérogènes qui pourraient être happés puis
éjectés par la lame.
• Portez des vêtements de travail appropriés, tels que de solides chaussures
avec semelles antidérapantes et un
pantalon long et épais. N’utilisez pas
l’appareil, si vous êtes pieds nus ou
portez des sandalettes.
Evitez de porter des vêtements lâches
ou des habits avec des ceintures ou
des cordelettes pendantes.
• Avant chaque utilisation, effectuez un
examen visuel de l’appareil. N’utilisez
pas la tondeuse si certains appareillages de protection (par exemple
la protection anti-chocs ou le sac de
ramassage), des parties du dispositif de
coupe ou des boulons manquent, sont
usés ou sont endommagés. Pour éviter
un déséquilibre, les outils endommagés
et les boulons ne peuvent être échangés que partiellement.
• Soyez prudent avec les appareils
comportant plusieurs outils de coupe,
puisque le mouvement d’une lame peut
entraîner la rotation des lames restantes.
• Utilisez seulement des pièces de rechange et des accessoires qui ont été
fournis et sont recommandés par le
fabricant. L’utilisation de pièces étrangères entraîne une annulation immédiate du droit de garantie
• Avant emploi, il faut toujours contrô-
43
Page 44

FR
ler, les câbles de raccordement et
de prolongation an de détecter tout
dommage ou signe d’usure. Si un câble
est endommagé en cours d’utilisation,
il doit être immédiatement déconnecté
du réseau d’approvisionnement. Ne
touchez pas le câble avant qu’il n’ait été
déconnecté. N’utilisez pas l’appareil, si
le câble est usé ou est endommagé.
Travailler avec l’appareil :
Pendant le travail, ne placez pas
les pieds et les mains à proximité
ou sous les pièces rotatives. Vous
risquez de vous blesser !
Faites attention à la protection
contre le bruit et aux instructions
locales.
• Allumez le moteur après avoir lu les
instructions et seulement si vos pieds
sont à distance de sécurité des outils
tranchants.
• N’utilisez pas l’appareil sous la pluie,
par mauvais temps, dans un environnement humide ou sur du gazon mouillé.
Travaillez seulement à la lumière du
jour ou avec un bon système d’éclairage.
• Ne travaillez pas avec l’appareil jusqu’à
épuisement, si vous êtes fatigué ou
déconcentré ou après avoir bu de l’alcool ou pris des médicaments. Faites
toujours une pause de temps en temps.
Respectez des temps de travail raisonnables.
• Pendant le travail, faites attention à
avoir une position stable, en particulier
sur des terrains en pente. Ne travaillez
jamais de travers sur une pente ou en
descente. Soyez particulièrement prudent si vous changez le sens de dépla-
cement sur une pente. Ne travaillez pas
sur des pentes excessivement raides.
• Dirigez l’appareil seulement à la vitesse
du pas. Soyez particulièrement prudent
si vous faites faire demi-tour à l’appareil, en vous approchant de lui ou si
vous vous déplacez en arrière.
• Mettez l’appareil en marche avec prudence, conformément aux instructions
de ce guide d’utilisation. Faites attention
à respecter une distance sufsante
entre les pieds et les lames.
• Ne basculez pas l’appareil lors de la
mise en marche à moins que cela ne ce
soit nécessaire en étant arrêté dans de
hautes herbes. Dans ce cas, basculez
l’appareil en appuyant sur la barre de
poignée de telle sorte que les roues
avant de l’appareil se soulèvent légère-
ment. Contrôlez toujours que les deux
mains se trouvent en position de travail
avant que l’appareil ne soit reposé à
nouveau sur le sol.
• Ne travaillez jamais sans le sac de
ramassage ou la protection anti-chocs.
Tenez-vous toujours à distance de l’ouverture d’éjection.
• Ne démarrez pas le moteur, si vous
vous trouvez devant le puits d’éjection.
Attention ! Après arrêt, la lame de la
tondeuse continue de tourner pendant quelques instants.
Risque de blessure !
• L’appareil ne doit pas être soulevé ou
être transporté tant que le moteur fonctionne. Mettez l’appareil hors tension,
s’il doit être basculé an d’être transporté, an de traverser des surfaces autre
que gazonnées pour le déplacer jusqu’à
d’autres emplacements à tondre.
• Conservez toujours propre et libre d’accès l’ouverture d’éjection de l’herbe. Re-
44
Page 45

FR
tirez les déchets de coupe uniquement
après l’arrêt de l’appareil.
• Ne laissez jamais l’appareil sans surveillance sur le lieu de travail.
• Ne travaillez pas avec un appareil endommagé, incomplet ou modié sans le
consentement du fabricant de l’appareil.
N’utilisez jamais l’appareil avec des appareillages de protection endommagés
ou les dispositifs de protection ou des
installations de sécurité manquantes,
tel que dispositif de projection et / ou de
ramassage d’herbe.
• Ne surchargez pas votre appareil.
Travaillez seulement dans la gamme
de puissance indiquée et ne changez
pas les réglages du moteur. N’utilisez
aucune machine d’un rendement faible
pour de lourds travaux. N’utilisez pas
votre tondeuse pour des buts pour lesquels elle n’a pas été conçue.
• N’utilisez pas l’appareil à proximité de
liquides inammables ou de gaz. En
cas d’inobservation de cette consigne,
il existe un risque d’incendie ou d’explosion.
• Ne soulevez jamais l’appareil, ne le
transportez pas lorsque le moteur
tourne
• Eteignez l‘appareil, retirez la che de
secteur et assurez-vous que toutes les
parties mobiles sont arrêtées :
- toujours, quand vous quittez la ma-
chine,
- avant que vous nettoyiez l’ouverture
d’éjection ou éliminiez la cause des
blocages,
- si l’appareil n’est pas utilisé,
- avant de contrôler, nettoyer l’appareil
ou de travailler sur celui-ci,
- Si le câble d’alimentation secteur est
endommagé ou s’il s’est enchevêtré,
- Si l’appareil a rencontré un corps
hétérogène pendant le travail ou si
les vibrations inaccoutumées se produisent. En ce cas, examinez dans
l’appareil an de détecter d’éventuels dommages et faites le réparer
si nécessaire.
- N’approchez jamais les mains ou les
pieds à proximité des pièces mobiles.
Lors des travaux de fauchage, ne
jamais les mettre devant l’ouverture
d’éjection de l’herbe.
• Ne pas mettre en route le moteur
lorsqu’on est face à la goulotte
d’éjection
Maintenance et stockage :
• En cas de travaux de maintenance sur
les lames de coupe - n’oubliez pas que
si seule la source de tension est mise
hors circuit, la lame de coupe peut encore bouger.
• Faites en sorte que tous les écrous,
les boulons et les vis soient solidement
serrés et que l’appareil soit en état de
travailler en sécurité
• Examinez la faucheuse pour détecter
d’éventuels dommages.
• Exécutez les réparations nécessaires
des parties endommagées.
• N’essayez pas de réparer vous-même
l’appareil à moins que vous ne possédiez pour cela la formation correspondante. Tous les travaux qui ne sont pas
mentionnés dans ce mode d’emploi ne
peuvent être exécutés que dans les
ateliers de service après-vente autorisés.
• Conservez l’appareil dans un endroit
sec et hors de la portée des enfants.
• Manipulez votre appareil avec soin.
Conservez les lames de coupe acérées
et propres an de pouvoir travailler
mieux et plus vite. Respectez les règlements d’entretien.
45
Page 46

FR
• Si vous changez le dispositif de coupe,
portez des gants de protection.
• Contrôlez régulièrement le dispositif
de collecte de l’herbe an de détec-
ter usure et déformations. Pour des
raisons de sécurité, remplacez les
pièces usées ou endommagées. Soyez
particulièrement prudent an de ne pas
coincer vos doigts entre les lames rota-
tives et les parties xes de la machine.
• Vériez que vous n’utilisez que des
lames de recharge autorisées par le
fabricant.
Sécurité électrique :
• Faites attention à ce que la tension de
réseau corresponde aux indications de
la plaque signalétique.
• Dans la mesure du possible, branchez
l’appareil seulement à une prise de courant munie d’un appareillage de protection de courant de défaut (commutateur
FI) avec un courant de déclenchement
ne dépassant pas 30 milliampères.
• Evitez les contacts avec les corps ayant
des parties enterrées (par exemple, des
clôtures métalliques, des poteaux en
métal).
• Utilisez seulement les câbles d’alimentation secteur admis du type de
construction H05VV-F ou H07RN-F qui
sont conçus pour un usage en plein
air et avec une longueur maximale de
75 m. La coupe transversale de cordon
du câble d’alimentation secteur doit
faire au moins 2,5 mm². Avant utilisation, déroulez toujours le câble dans sa
totalité et vériez que celui-ci n’est pas
endommagé.
• Utilisez pour la xation du câble d’alimentation secteur la suspension à
câble prévue à cet effet.
• Pendant les travaux de coupe, main-
tenez le câble d’alimentation secteur
à distance de la lame de coupe. Les
lames de coupe peuvent endommager
le câble d’alimentation secteur et venir
au contact de pièces sous tension.
Dirigez le câble d’alimentation secteur
toujours derrière l’utilisateur.
• N’utilisez pas le câble d’alimentation
secteur pour tirer sur la che de la prise
de courant. Protégez le câble d’alimentation secteur de la chaleur, de l’huile
et de tout contact avec des bords aiguisés.
• Si les câbles d’alimentation secteur sont
endommagés, mettez l’appareil hors
tension et retirez la che de secteur de
la prise de courant. Si le câble d’alimentation est endommagé, il doit être remplacé par le fabricant, son service après
vente ou des personnes de qualication
similaire an d’éviter un danger.
• Ne connectez aucun câble d’alimen-
tation secteur endommagé au réseau
électrique. Ne touchez aucun câble
d’alimentation secteur endommagé
tant que celui-ci est connecté au réseau
électrique. Un câble d’alimentation secteur endommagé peut être en contact
avec des parties sous tension.
Description générale
Description du fonctionnement
La tondeuse à gazon électrique est munie
d’un outil tranchant rotatif travaillant en
parallèle au niveau de coupe. Elle est
équipée d’un électromoteur à hautes performances, d’un solide boîtier métallique, d’un
interrupteur de sécurité et d’une protection
anti-chocs ainsi que d’un panier collecteur
d’herbe avec afchage du niveau de remplissage. De plus l’appareil est réglable en
hauteur sur 7 positions différentes et ses
roues sont manoeuvrables.
46
Page 47
FR
Les descriptions suivantes vous indiquent
le fonctionnement des dispositifs de commande.
Vous trouverez en pages 2-4 un
croquis explicatif des organes de
service les plus importants.
Vue d’ensemble
1 Poignée en arceau
2 Levier de démarrage
3 Écrou moleté supérieur
4 Barre inférieure
5 Protection anti-chocs
6 Écrou moleté supérieur
7 Sac de ramassage
8 Roues arrière
9 Roues avant
10 Boîtier de l’appareil
11 Levier pour réglage en hauteur
de la coupe
12 Support de câble
13 La décharge de traction de câ-
ble
14 Câble de l’appareil
15 Bouton de déverrouillage (non
visible)
16 Câble d‘alimentation de secteur
Montage
Avant d’exécuter un quelconque
travail sur l’appareil, retirez la che
de secteur.
Monter la poignée en arceau
Monter la barre inférieure :
Placez les extrémités de la
barre inférieure (4) dans les
tôles d’arrêt et à chaque fois in-
sérez une vis depuis l’extérieur.
Placez les rondelles plates four-
nies à la livraison et mettez en
place les écrous moletés inférieurs (6)
Faites bien attention à monter
les écrous moletés à l’intérieur.
Serrez solidement les écrous
moletés (6).
Monter la poignée en arceau :
Serrez solidement les écrous
Enclipsez les supports de câble
Fixez la poignée en arceau (1)
avec les vis fournies à la livraison, les rondelles plates et les
écrous moletés supérieurs (3)
sont placés à droite et à gauche
de la barre inférieure (4). Deux
positions sont possibles.
Tournez l‘écrou moleté (3) dans le
sens des aiguilles d‘une montre.
moletés (3).
Enclipsez les supports de
câble:
(
12) sur la barre inférieure
et xez l’ensemble au câble de
l’appareil (
14).
Monter le panier collecteur
d’herbe
Monter le panier collecteur
d’herbe:
Enclipsez la lèvre en caout-
chouc au let du panier collecteur (19) dans la coque dure du
panier collecteur d’herbe (7).
Poussez la structure en métal
dans la coque dure (20). Faitesbien attention à ce que la structure en métal soit introduite en
totalité.
Placez les languettes en
plastique (21) et (22) au dessus
47
Page 48

FR
de la structure en métal (20).
Fixez la structure en métal (20)
avec les deux vis jointes à la
livraison.
Utilisation
Attention : l’appareil ne doit pas
être utilisé sans la protection antichocs correctement mis en place
ou le panier collecteur d’herbe. Il
existe un risque de blessure !
Accrocher / retirer le panier
collecteur d’herbe
1. Soulevez la protection antichocs (5).
2. Accrochez le panier collecteur
d’herbe (7) dans la suspension
prévue à cet effet (24) au dos
de l’appareil.
3. Positionnez la protection antichocs (5) sur le panier collecteur d’herbe (7), ceui-ci la maintient en position correcte.
4. Pour retirer le panier collecteur
d’herbe (7) soulevez la protection
anti-chocs (5) et décrochez le panier collecteur d’herbe. Rabattez
ensuite vers l’arrière la protection
anti-chocs sur le boîtier d’appareil.
Pour vider le panier collecteur
d’herbe, consultez le chapitre „Elimination des déchets / Protection
de l’environnement“.
Régler la hauteur de coupe
Mettez l’appareil hors tension, retirez
la che de secteur et attendez l’arrêt
complet de la lame. Il existe un risque
de dommage sur le personnel.
Saisissez le levier de réglage de
hauteur de coupe (11) et dirigez
le sur l’indexage pour obtenir la
hauteur de coupe souhaitée.
L‘appareil dispose de 7 positions pour
régler la hauteur de coupe : 25 - 75 mm
La hauteur de coupe correcte pour un gazon
d’ornement est environ 30 - 45 mm, pour un
gazon utilitaire d’environ 30 - 65 mm.
Pour la première coupe en début de
saison, nous conseillons de choisir
une haute hauteur de coupe
Mettre sous et hors tension
1. Formez une boucle à l’extrémité
du câble d’alimentation secteur
et accrochez-la au dispositif de
décharge de traction de câble
(13).
2. Connectez l’appareil à la tension de réseau.
3. Avant la mise sous tension faite
attention à ce que l’appareil ne
touche aucun objet.
4. Pour la mise sous
tension, appuyez
sur le bouton de
déverrouillage
(15) de la poignée et simultanément, gardez enfoncé le levier
de démarrage (2). Relâchez le
bouton de déverrouillage (15).
5. Pour mettre hors tension, relâchez le levier de démarrage (2).
Après la mise hors tension de
l’appareil, la lame tourne encore
pendant quelques secondes. Ne
touchez pas la lame en rotation.
Vous pourriez vous blesser.
1
2
48
Page 49

FR
Afchage du niveau de remplissage
Un afchage du niveau de remplissage
se trouve sur le côté du panier collecteur
d’herbe. La circulation d’air aérodynamique du couvercle permet d’obtenir un
remplissage optimal.
Clapet ouvert :
Panier collecteur d‘herbe vide
Clapet fermé :
Panier collecteur d‘herbe vide
Travailler avec la tondeuse à
gazon
Un fauchage à intervalles réguliers contribue au renforcement de la pousse de
l’herbe mais fait cependant simultanément dépérir les mauvaises herbes. C’est
pourquoi après chaque coupe, le gazon
devient plus dense et que coupé régulièrement, il résiste mieux à la charge.
La première coupe s’effectue partir du
mois d’avril quand la hauteur de l’herbe
est de 70 - 80 mm. Pendant la période de
pousse principale, le gazon est fauché au
moins une fois par semaine.
• Dirigez le câble de prolongation toujours
derrière vous puis disposez le sur la partie de la pelouse déjà tondue.
• Poussez la tondeuse à la vitesse d’un
marcheur en essayant de tondre en
ligne droite. Pour obtenir une belle
tonte, les chemins parcourus doivent
toujours se chevaucher de quelques
centimètres.
• Réglez la profondeur de coupe de
telle façon que l’appareil ne soit pas
surchargé. Dans le cas contraire, le
moteur peut être endommagé.
• En cas de terrain en pente, travaillez
toujours transversalement. Soyez particulièrement prudent lorsque vous reculez avec l’appareil ou que vous le tirez
• Nettoyez l’appareil après chaque utili-
sation tel que décrit dans le chapitre :
« Nettoyage, maintenance, stockage ».
Une fois le travail terminé et pour
le transport de l’appareil, retirez la
che de secteur et attendez l’arrêt
complet de la lame. Vous risqueriez sinon de vous blesser.
Nettoyage / Maintenance /
Stockage
Faites exécuter les travaux qui
ne sont pas décrits dans ce
mode d’emploi, par le technicien d’un service après-vente
disposant de notre autorisation.
Utilisez seulement des pièces
d’origine.
Si vous manipulez la lame, portez
des gants.
Avant toutes les opérations de
maintenance et les travaux de
nettoyage, mettez l’appareil hors
tension, retirez la che de secteur
et attendez l’arrêt complet de la
lame.
Travaux généraux de maintenance et de nettoyage
N’aspergez jamais la tondeuse à
gazon avec l’eau.
• Conservez l’appareil toujours propre.
Pour le nettoyage, utilisez une brosse
49
Page 50

FR
ou un chiffon mais aucun produit de
nettoyage ou de solvant.
• Une fois la tonte terminée, avec une
spatule en bois ou en matière plastique, éliminez les restes de plantes
qui adhèrent aux parois et aux roues,
aux buses d’aération, dans l’ouverture
d’éjection et autour de la lame.
N’utilisez aucun objet dur ou acéré,
vous pourriez endommager l’appareil.
• Graissez en temps en temps les roues.
•
Avant chaque utilisation, contrôlez la
tondeuse à gazon pour détecter les
manques évidents, les pièces usées ou
endommagées. Vériez que tous les
écrous, boulons et vis tiennent bien.
• Contrôlez les couvercles et les ap-
pareillages de protection pour vérier
leur bonne tenue et détecter des dommages éventuels Echangez ceux-ci
s’il y a lieu.
Changer la lame
Si est la lame est émoussée, il est possible de la faire aiguiser dans un atelier
spécialisé. Si la lame est endommagée
ou présente un déséquilibre, elle doit être
échangée (voir le chapitre Pièces de
rechange).
1. Retournez l’appareil.
2. Utilisez des gants épais et
maintenez solidement la lame
(25). A l’aide d’une clé à écrous,
tournez la vis de la lame (26)
dans le sens inverse des aiguilles d’une montre par rapport
à l’axe du moteur.
3. Montez une nouvelle lame en
sens inverse. Faites attention à
ce que la lame soit positionnée
correctement et que la vis soit
solidement vissée.
Stockage
An que l’appareil prenne moins
de place, desserrez les quatre
écrous moletés et repliez la poignée en arceau et la barre inférieure. Faites alors attention - à ne
pas coincer les câbles.
• Conservez l’appareil au sec et en hors
de la portée des enfants.
• Faites refroidir le moteur avant que
vous ne déposiez l’appareil dans un
local fermé.
• N’entourez l’appareil avec un sac de
nylon car de l’humidité pourrait se former.
Nous ne sommes pas responsable des
dégâts provoqués par nos appareils, si de
tels dommages sont dus à une réparation
incorrecte ou l’utilisation de pièces non
d’origine ou par un usage non conforme
aux prescriptions.
Elimination et écologie
Ne jetez pas les huiles usagées dans les
canalisations. Eliminez-les écologiquement, rapportez-les dans une déchetterie.
Respectez la réglementation relative à la
protection de l’environnement (recyclage)
pour l’élimination de l’appareil, des accessoires et de l’emballage.
Il ne faut pas se débarrasser des
machines par le biais des ordures
ménagères.
• Videz soigneusement le réservoir
d’huile et remettez votre tronçonneuse
dans une déchetterie. Les pièces en
matière plastique et en métal peuvent
être triées et recyclées. Demandez
50
Page 51

FR
conseil sur ce point à notre centre de
services.
• Jetez les déchets de coupe dans le
composte et non pas dans les ordures
ménagères.
• Nous exécutons gratuitement l’élimination des déchets de vos appareils
renvoyés défectueux.
Données techniques
Tondeuse à gazon électrique ERM 1846 G
Puissance absorbée du moteur ....1800 W
Tension de réseau ...... 230-240 V~, 50 Hz
Classe de protection ...........................II
Type de protection .............................IP24
Régime de ralenti .....................2900 min
Diamètre de coupe ..........................46 cm
Hauteur de coupe .......................25 - 75 mm
Poids..............................................28,5 kg
Volumes du panier de
ramassage d’herbe ..............................60 l
Niveau de pression acoustique
(L
) .............................82,7 dB(A), KpA=3 dB
pA
Niveau sonore (L
garanti ..................................... 96 dB(A)
mesuré ........... 93,1 dB(A), K
Vibration (a
Cet appareil est prévu pour l’exploitation
sur un réseau d’alimentation en courant avec une impédance de système
Zmax au point de transfert (branchement
d’abonné) avec un maximum de 0,269
ohms.
L’utilisateur doit s’assurer que l’appareil
est exploité uniquement avec un réseau
d’alimentation en courant qui remplit cette
demande.
Si nécessaire, l’impédance du système
peut être demandée à l’entreprise locale
d’alimentation en énergie. Les valeurs
acoustiques et de vibration ont été calculées sur la base des normes et prescrip-
)
wA
=1,78 dB
) ........... 1,09 m/s2, K=1,5 m/s
n
wA
tions mentionnées dans la déclaration de
conformité.
Nous nous réservons le droit de mettre
cette notice à jour sans avertissement en
y apportant des modications techniques
et optiques. Toutes les dimensions, informations et données mentionnées dans
cette notice d’utilisation le sont par conséquent sans garantie. Les revendications
juridiques se fondant sur cette brochure
ne peuvent donc être prises en considération.
Garantie
• Nous accordons 24 mois de garantie
-1
2
pour cet appareil.
• Les dommages dus à l’usure normale,
la surcharge ou le maniement incorrect sont exclus des droits de garantie. Certaines pièces sont soumises
à une usure normale et sont exclues
des droits de garantie. En particulier:
la lame.
• En outre, les droits de garantie sont
valables à condition que les intervalles d’entretien indiqués dans le
mode d’emploi et les consignes de
nettoyage et d’entretien aient été respectés.
• Les dommages dus à un défaut de
matériel ou à un vice de fabrication
seront éliminés gratuitement soit par
un remplacement, soit par une réparation. La condition préalable est de
rapporter au détaillant l’appareil dans
son intégrité avec le justicatif d’achat
et de garantie.
51
Page 52

FR
Service de réparation
• Vous pouvez faire exécuter les réparations qui ne sont pas soumises à la
garantie par notre centre de services
contre facturation. Nous vous établissons volontiers un devis. Nous ne
pouvons traiter que les appareils qui
sont correctement emballés et sufsamment affranchis.
• Condition : l’appareil ne devra pas
avoir été démonté, et devra être accompagné d’une preuve d’achat et de
garantie lorsque vous l’adresserez à
notre centre de service.
• Les appareils expédiés en port dû,
en colis encombrant, en express
ou par frêt spécial ne seront pas
acceptés.
• Nous exécutons gratuitement l’élimination des déchets de vos appareils
renvoyés défectueux.
Pièces de rechange
Vous pouvez commander directement les pièces détachées suivantes chez votre revendeur ou bien par l’intermédiaire du centre de services Grizzly. Lorsque vous désirez
commander, prière d’indiquer le type de machine et le numéro de la pièce détachée.
Lame de rechange ......................................................................................... 91095561
Sac de ramassage........................................................................................... 91095660
Accessoires
Kit de débroussaillage (ne fait pas partie du volume de la livraison) ........... 91099492
52
Page 53

Recherche des pannes
Problème Cause possible Résolution des pannes
Contrôler la prise de courant,
Pas de tension de éseau
Interrupteur marche/arrêt
défectueux
L‘appareil ne démarre
pas
Le moteur s‘arrête Blocage par corps étranger Retirer le corps étranger
Les résultats de la
coupe ne sont pas
satisfaisants ou le
moteur ne tourne pas
correctement
La lame ne tourne
pas
Bruits anormaux,
Bruits de ferraille ou
vibrations
Balais de charbon usés
Moteur défectueux
Herbe trop haute
Hauteur de coupe trop
basse
Lame émoussée
Zone autour de la lame
bouchée
Lame mal montée Monter la lame correctement
Lame bloquée par de
l’herbe
Vis de la lame desserrée
Vis de la lame desserrée
Lame endommagée Echanger la lame
les câbles, la commande, la
prise, si nécessaire, faire réparer par un électricien de métier
Réparation par le service aprèsvente
Régler sur une hauteur de
coupe plus haute. Exercer une
poussée sur la Barre de poi-
gnée an d’alléger la pression
sur les roues avant.
Régler la hauteur de coupe
Faire aiguiser la lame ou la
changer
Nettoyer l‘appareil
Retirer l’herbe
Serrer à fond la vis de la lame
de coupe
Serrer à fond la vis de la lame
de coupe
FR
53
Page 54

IT
Indice
Volume di fornitura ............................ 54
Destinazione d’uso ............................ 54
Norme di sicurezza ............................ 55
Simboli/scritte sull’apparecchio ....... 55
Norme de sicurezza nelle istruzioni .. 55
Indicazioni di sicurezza generali ..... 55
Descrizione generale......................... 59
Descrizione del funzionamento ....... 59
Vista d’insieme ................................ 59
Montaggio .......................................... 60
Montaggio Impugnatura .................. 60
Montaggio cestello raccoglierba ..... 60
Comando ............................................ 60
Inserimento/rimozione cestello
raccoglierba .................................... 60
Regolazione dell’altezza del taglio .. 61
Accensione e spegnimento ............ 61
Indicatore del livello di riempimento 61
Lavorare con il tagliaerba ................ 61
Pulizia/manutenzione/stoccaggio .... 62
Lavori di pulizia e manutenzione
generali ........................................... 62
Sostituzione lama ............................ 62
Stoccaggio ...................................... 63
Smaltimento/Tutela dell’ambiente .... 63
Dati tecnici ......................................... 63
Garanzia .............................................. 64
Servizio di riparazione ...................... 64
Ricerca guasti .................................... 65
Ricambi............................................... 65
Traduzione della dichiarazione
di conformità CE originale .............. 139
Disegno esploso .............................. 142
Grizzly Service-Center .................... 143
Si prega di leggere con attenzione
le presenti istruzioni per l’uso la prima volta che si usa l’apparecchio.
Conservare con cura il presente
manuale d’uso e consegnarlo al
successivo utilizzatore prestando
attenzione che sia sempre a disposizione di chi usa l’apparecchio.
Volume di fornitura
Rimuovere delicatamente l’apparecchio
dall’imballaggio e controllare se i seguenti
componenti sono completi:
- Tagliaerba con montante inferiore e
impugnatura ad arco montati con cavo
elettrico
- Cestello raccoglierba (composto da
due parti)
- Scarico trazione cavo
- 2 serracavi
- Materiale di montaggio impugnatura
ad archetto
- Materiale di montaggio cesto raccoglierba
- Istruzioni per l’uso
Destinazione d’uso
L’apparecchio è concepito esclusivamente
per tagliare il prato e le superci erbose
nel settore domestico.
Questo apparecchio non è adatto per
l’uso industriale. In caso di un impiego per
uso industriale decade la garanzia.
Qualsiasi altro utilizzo non espressamente
autorizzato nelle presenti istruzioni , può
causare danni all’apparecchio e rappresentare un serio pericolo per l’utilizzatore.
L’apparecchio è destinato all’uso da parte
di adulti. Bambini e persone che non hanno familiarizzato con le presenti istruzioni
non devono usare l’apparecchio. L’uso
dell’apparecchio in presenza di pioggia o
in ambienti umidi è vietato.
Il produttore declina ogni responsabilità
per danni causati da un uso improprio o
un comando errato.
54
Page 55

IT
Norme di sicurezza
Questa sezione tratta le indicazioni di
sicurezza fondamentali durante il lavoro
con il tagliaerba elettrico.
Simboli/scritte sull’apparecchio
Attenzione!
Leggere attentamente le istruzioni d’uso.
Pericolo di lesioni a causa di parti
catapultate.
Tenere lontane le persone dal
tosaerba.
Attenzione – Lame da taglio af-
late! Tenere lontani piedi e mani.
Pericolo di lesioni!
Spegnere il motore e staccare la
spina elettrica prima di eseguire
i lavori di regolazione o di pulizia
oppure se il cavo di rete è inceppato o danneggiato.
Pericolo a causa del cavo di rete
danneggiato.
Tenere il cavo di rete lontano
dall’apparecchio e dalla lama da
taglio!
Indicazione del livello di rumore
L
WA
L
dB
in dB.
wa
Classe di protezione II
Gli apparecchi elettrici non devo-
no essere smaltiti insieme ai riuti
domestici.
Cerchio di taglio
Pericolo! Tenere lontani mani e
piedi dalla barra di lame.
Pericolo di lesioni!
Durante il rilascio della leva di
avvio l’apparecchio si spegne.
Indicatore del livello di riempimento
Sportello aperto:
Cesto raccoglierba vuoto
Sportello chiuso:
Cesto raccoglierba pieno
Norme de sicurezza nelle
istruzioni
Simboli di pericolo con indica-
zioni relative alla prevenzione di
danni a cose e persone.
Simboli di divieto (al posto del punto
esclamativo il divieto viene delucidato) con indicazioni relative alla
prevenzione di danni.
Simboli di avvertenza con infor-
mazioni relative ad un uso corretto
dell’apparecchio
Indicazioni di sicurezza generali
Importante! Leggere attentamente
le istruzioni. Conservare le istruzioni per l’uso per una consultazione
postuma.
In caso in uso improprio questo
apparecchio può causare lesioni
gravi. Per evitare danni a persone
e cose, leggere e osservare tassativamente le seguenti indicazioni di
sicurezza e familiarizzare con tutti i
componenti di comando.
55
Page 56

IT
Avvertenza! Questo utensile elet-
trico genera un campo magnetico
durante il funzionamento. In determinate condizioni questo campo
può compromettere gli impianti
medici attivi o passivi. Per ridurre
il pericolo di lesioni gravi o letali, consigliamo alle persone con
impianti medici di consultare il
medico e il produttore dell’impianto
medico prima di azionare la macchina.
Preparazione:
• Questo apparecchio non è concepito
per essere usato da persone (compresi
bambini) con limitate capacità siche,
sensoriali o mentali o senza sufciente
esperienza e/o che non hanno le nozioni necessarie, salvo nei casi in cui siano
sorvegliati da una persona responsabile
per la loro sicurezza oppure vengano
istruiti su come usare l’apparecchio.
• Non permettere mai a bambini o ad
altre persone, che non conoscono le
istruzioni d’uso, di usare l’apparecchio. Alcune disposizioni locali prevedono un’età minima per l’utilizzatore.
• Non usare mai l’apparecchio quando
si trovano nelle vicinanze persone, in
particolare bambini e animali domestici.
• Bambini devono essere sorvegliati,
per garantire che non giochino con
l’apparecchio.
• L’operatore o utilizzatore è responsabile per infortuni o danni ad altre
persone o alla proprietà delle stesse.
• Controllare l’area nella quale viene
impiegato l’apparecchio e rimuovere
pietre, bastoni, li metallici o altri corpi
estranei che possono essere catturati
e catapultati.
• Indossare apposito abbigliamento da
lavoro come scarpe chiuse con suola
antiscivolo e un pantalone lungo resistente. Non usare l’apparecchio scalzi
o con i sandali.
Evitare di indossare capi di abbigliamento aperti o con lacci o cinte pendenti.
• Prima di ogni uso, eseguire un controllo visivo dell’apparecchio. Non
usare l’apparecchio in caso di dispositivi di sicurezza (p. es. protezione
antiurto o cesto raccoglierba), componenti del dispositivo di taglio o bulloni mancanti, usurati o danneggiati.
Per evitare uno sbilanciamento, gli
utensili e bulloni danneggiati devono
essere sostituiti nel set.
• Prestare particolare attenzione quando si usano apparecchio con più utensili da taglio, in quando il movimento
della lama può provocare la rotazione
delle restanti lame.
• Usare solo ricambi e accessori forniti
e consigliati dal produttore. L’impiego
di corpi estranei comporta l’immediata
esclusione del diritto di garanzia.
• Prima dell’uso, controllare sempre
la conduttura di collegamento e la
prolunga per vericare la presenza di
eventuali segni di danneggiamento o
usura. Se la conduttura è stata danneggiata durante l’uso, deve essere
immediatamente staccata dalla rete.
Non toccare la conduttura prima di
averla staccata. Non usare l’apparecchio se la conduttura è consumata o
danneggiata.
Lavorare con l’apparecchio:
Non tenere i piedi e le mani vicino
o sotto alle parti rotanti durante il
lavoro. Pericolo di lesioni!
56
Page 57

IT
Osservare la protezione antirumo-
re e le disposizioni locali.
• Accendere il motore secondo le istruzioni e solo, quando i piedi sono posizionati ad una distanza sicura dagli
utensili da taglio.
• Non usare l’apparecchio in presenza
di pioggia o maltempo, in ambienti
umidi o sul prato bagnato. Lavorare
solo con la luce diurna o con una
buona illuminazione.
• Non lavorare con l’apparecchio, se si
è stanchi o poco concentrati o dopo
l’assunzione di alcol o farmaci. Fare
una pausa ad intervalli regolari. Lavorare con raziocinio.
• Durante il lavoro, prestare attenzione
ad una posizione stabile, in particolare
sui pendii. Lavorare sempre trasversalmente al pendio, mai su è giù.
Prestare particolare attenzione, quando si cambia la direzione di marcia sui
pendii. Non lavorare su pendii eccessivamente ripidi.
• Condurre l’apparecchio a passo d’uomo. Prestare particolare attenzione,
quando si gira o tira verso di se l’apparecchio o si cammina all’indietro.
• Accendere l’apparecchio con cautela
secondo le indicazioni contenute nelle
presenti istruzioni. Prestare attenzione
ad una sufciente distanza dei piedi
dalle lame rotanti .
• Non ribaltare l’apparecchio durante
l’avviamento, salvo nei casi in cui sia
necessario per la partenza nell’erba
alta. In questo caso, ribaltare l’apparecchio premendo l’impugnatura
in modo tale che le ruote anteriori
dell’apparecchio vengano leggermente sollevate. Controllare sempre che
le due mani si trovano in posizione di
lavoro, prima di riappoggiare l’appa-
recchio sul terreno.
• Non lavorare mai senza cesto raccoglierba o protezione antiurto. Tenersi
sempre lontani dall’apertura di espulsione dell’erba.
• Non avviare il motore quando si è posizionati davanti al vano di espulsione.
Attenzione pericolo! La lama conti-
nua a ruotare. Pericolo di lesioni.
• L’apparecchio non deve essere sollevato o trasportato, n tanto che il mo-
tore gira. Spegnere l’apparecchio nel
caso in cui debba essere ribaltato per
il trasporto, si debbano attraversare su-
perci diverse dal prato e l’apparecchio
venga condotto verso le e lontano dalle
superci da tagliare.
• Tenere l’apertura di espulsione dell’er-
ba sempre pulita e libera. Rimuovere
l’erba tagliata solo quando l’apparecchio è fermo.
• Non lasciare mai l’apparecchio incustodito sul posto di lavoro.
• Non lavorare con l’apparecchio danneggiato, incompleto o trasformato
senza il consenso del produttore. Non
usare mai l’apparecchio con dispositivi
di sicurezza o schermature danneggiati oppure senza i dispositivi di sicurezza come i dispositivi di deviazione
e/o di raccolta dell’erba.
• Non sovraccaricare l’apparecchio.
Lavorare solo nel campo di potenza
specicato e non modicare le impostazioni di regolazione del motore.
Non usare apparecchi a bassa potenza per lavori pesanti. Non usare l’apparecchio per scopi diversi da quelli
per cui è stato concepito .
• Non usare l’apparecchio nelle vicinanze di liquidi o gas inammabili. La
mancata osservanza di questa indica-
57
Page 58

IT
zione comporta rischi di incendio o di
esplosione.
• Non sollevare o trasportare mai l’apparecchio mentre il motore gira.
• Spegnere l’apparecchio, staccare la
spina e assicurarsi che tutte le parti
mobile siano ferme:
- sempre quando si abbandona la
macchina,
- prima di pulire l’apertura di espul-
sione dell’erba o di rimuovere i
bloccaggi,
- quando l’apparecchio non viene
usato,
- prima di controllare o pulire l’appa-
recchio oppure effettuare lavori sul
medesimo,
- quando il cavo di rete è danneg-
giato o aggrovigliato,
- quando l’apparecchio incontra un
corpo estraneo durante il lavoro
oppure subentrano vibrazioni insolite. In questo caso controllare l’ap-
parecchio per vericare la presenta
di eventuali danneggiamento, ed
eventualmente farlo riparare.
• Non posizionare mai le mani o i piedi
vicino o sotto le parti rotanti. In caso di
tosatura con la falce, non posizionarsi
mai davanti all’apertura di espulsione
dell’erba .
Manutenzione e stoccaggio:
• Durante gli interventi di manutenzione
delle lame da taglio, assicurarsi che
le lame da taglio siano movibili anche
quando la fonte di tensione è spenta.
• Assicurarsi che tutti i dadi, viti e bulloni siano ben stretti e l’apparecchio sia
in condizioni di lavoro sicure.
• Controllare il tosaerba per assicurarsi
che non vi siano danneggiamenti.
• Effettuare le riparazioni necessarie
delle parti danneggiate.
• Non tentare di riparare autonomamente l’apparecchio, salvo nel caso in
cui si è adeguatamente istruiti. Tutti
i lavori non specicati nelle presenti
istruzioni d’uso devono essere effettuati esclusivamente dai centri di assistenza clienti da noi autorizzati.
• Conservare l’apparecchio in un luogo
asciutto e fuori dalla portata di bambini.
• Trattare l’apparecchio con cura. Tenere gli utensili aflati e puliti, in modo
tale da garantire condizioni di lavoro
migliori e più sicure. Seguire le disposizioni di manutenzione.
• Indossare guanti di protezione ,
quando si sostituisce il dispositivo da
taglio.
• Controllare regolarmente il dispositivo
raccoglierba per vericare l’eventuale
presenza di usura e deformazioni. Per
motivi di sicurezza, sostituire le parti
usurate o danneggiate. Prestare particolare attenzione durante la regolazione delle lame, in modo tale da evitare
che le dita non vengano schiacciate
tra le lame rotanti e le parti sse della
macchina.
• Assicurarsi che vengano usati solo
utensili da taglio di ricambio autorizzati dal produttore.
Sicurezza elettrica:
• Prestare attenzione che la tensione di
rete corrisponda alle indicazioni riportate sulla targhetta dell’apparecchio.
• Possibilmente allacciare l’apparecchio
solo ad una presa provvista di circuito
di sicurezza per correnti di guasto (interruttore FI) con una corrente di apertura di massimo 30 mA an.
• Evitare il contatto del corpo con le
parti messe a terra (p. es. recinzioni o
pali metallici).
• Usare solo cavi di rete ammessi del
58
Page 59

IT
tipo H05VV-F o H07RN-F, con una
lunghezza massima di 75 m e concepiti per l’uso all’esterno. Il diametro
del cavo di rete deve corrispondere
minimo a 2,5 mm
srotolare sempre completamente la
bobina del cavo. Controllare il cavo
per vericare la presenza di eventuali
danneggiamenti.
• Per il ssaggio del cavo di rete usare
la spira del cavo prevista.
• Durante il lavoro, tenere il cavo di
rete lontano dall’utensile da taglio. Le
lame da taglio possono danneggiare
il cavo di rete e provocare il contatto
con le parti conduttive. In generale,
condurre il cavo di rete dietro l’utilizzatore.
• Non usare il cavo di rete per staccare
la spina dalla presa. Proteggere il
cavo di rete dal calore, dall’olio e da
spigoli vivi.
• Spegnere l’apparecchio e staccare la
spina elettrica dalla presa, se il cavo
di rete è danneggiato. Se il cavo di
rete viene danneggiato, deve essere
sostituito dal produttore, dal suo centro di assistenza clienti oppure da una
persona qualicata, al ne di evitare
pericoli.
• Non collegare un cavo di rete danneggiato alla rete di alimentazione. Non
toccare un cavo di rete danneggiato,
n tanto che è collegato alla rete di
alimentazione. Un cavo di rete danneggiato può provocare il contatto
con le parti conduttive.
2
. Prima dell’uso,
Descrizione generale
Descrizione del funzionamento
Il tosaerba elettrico è possiede un utensile
di taglio rotante parallelo al livello di taglio.
Questo è dotato di un elettromotore potente, un alloggiamento metallico robusto,
un interruttore di sicurezza e una protezione antiurto come anche di un sacco
raccoglierba con visualizzazione del livello
di riempimento. Inoltre l’apparecchio è regolabile in altezza a 7 livelli ed è dotato di
rotelle facili da manovrare.
Il funzionamento dei componenti è riportato nelle seguenti descrizioni.
Le gure relative al comando
dell‘apparecchio si trovano nelle
pagine 2-4.
Vista d’insieme
1 Impugnatura ad arco
2 Dadi ad alette
3
4 Montante inferiore
5 Protezione antiurto
6 Dado con testa a stella inferiore
7 Cestello raccoglierba
8 Ruote posteriori
9 Ruote anteriori
10 Alloggiamento apparecchio
11 Leva per la regolazione dell’al-
12 Serracavi
13 Scarico della trazione cavo
14 Cavo dell’apparecchio
15 Pulsante di sblocco (non a vi-
16 Cavo di rete
Dado con testa a stella superiore
tezza di taglio
sta)
59
Page 60

IT
Montaggio
Prima di effettuare qualsiasi lavoro
all’apparecchio, staccare la spina
elettrica.
Montaggio Impugnatura
Montaggio braccio inferiore
dell’impugnatura:
Posizionare le estremità del
montante inferiore (4) nelle
lamiere di supporto e inlare rispettivamente una vite
dall‘esterno.
Fissaggio serracavo:
Attaccare il serracavi (
Posizionare le rondelle fornite e
inserire i dadi con testa a stella
inferiori (6).
Osservare che i dati con testa
a stella devono essere montati
internamente.
Stringere i dadi con testa a stella
(6).
Montaggio dell‘impugnatura
ad archetto:
Fissare l’impugnatura (1) con le
viti fornite, le rondelle e i dadi
con testa a stella superiori (3)
a destra e sinistra sul montante
inferiore (4). Sono possibili due
posizioni.
Girare il dado con testa a stella
(3) in senso orario. Stringere i
dadi con testa a stella (3).
sul montante inferiore e ssare
quindi il cavo dell’apparecchio
(
14).
12)
Montaggio cestello raccoglierba
Assemblaggio raccoglierba:
Agganciare il labbro di gomma
sul cestino raccoglierba (19)
nell’alloggiamento del cestino
raccoglierba (7).
Inserire la struttura metallica (20)
nella sede rigida. Prestare attenzione che la struttura metallica
sia inserita completamente.
Ripiegare le linguette di plastica
(21) e (22) sulla struttura metallica (20).
Fissare la struttura metallica
(20) con le viti fornite.
Comando
Attenzione: non azionare l’ap-
parecchio senza la protezione
antiurto o il cestino raccoglierba
completamente montati. Perico-
lo di lesioni!
Inserimento/rimozione cestello raccoglierba
1. Sollevare la protezione antiurto
(5).
2. Appendere il cestello raccoglierba (7) nell’apposita sospensione
(24) sul lato posteriore dell’apparecchio.
3. Posizionare la protezione antiurto (5) sul cestello raccoglierba
(7), lo tiene bloccato nella posizione corretta.
4. Per rimuovere il cestello raccoglierba (7) sollevare la protezione antiurto (5) e staccare il
cestello raccoglierba. Rimettere
la protezione antiurto sull’alloggiamento dell’apparecchio.
60
Page 61

IT
Per svuotare il cestello raccoglier-
ba, vedi anche capitolo „Smaltimento/tutela dell’ambiente “.
Regolazione dell’altezza del
taglio
Spegnere l’apparecchio, staccare
la spina elettrica e attendere l’arresto della lama. Rischio di danni a
persone.
Afferrare la leva (11) per la re-
golazione dell’altezza di taglio e
farla scorrere sul meccanismo di
bloccaggio no a raggiungere la
posizione desiderata per l’altezza
di taglio
L’apparecchio è dotato di 7 posizioni per
la regolazione dell’altezza di taglio:
25 - 75 mm
L’altezza di taglio corretta per un prato
decorativo corrisponde a circa 30 - 45
mm, per un prato calpestabile a circa 3065 mm.
Per il primo taglio della stagione si
consiglia di scegliere un’altezza di
taglio elevata.
sull’impugnatura e contemporaneamente tenere premuta la
leva di avviamento (2). Rilasciare il pulsante di sbloccaggio
(15).
5. Per spegnere l’apparecchio, rilasciare la leva di avviamento (2).
Dopo lo spegnimento dell’appa-
recchio la lama continua a girare
per alcuni secondi. Non toccare
la lama in movimento. Rischio di
danni a persone.
Indicatore del livello di riempimento
Sul lato del cesto raccoglierba si trova un
indicatore del livello di riempimento. La
conduzione dell‘aria aerodinamica della
valvola garantisce inoltre un riempimento
ottimale.
Sportello aperto:
Cesto raccoglierba vuoto
Sportello chiuso:
Cesto raccoglierba pieno
Lavorare con il tagliaerba
Accensione e spegnimento
1. Formare con l’estremità del cavo
di rete un cappio e appenderlo
nello scarico trazione cavo (13).
2. Allacciare l’apparecchio alla
tensione di rete.
3. Prima di procedere all’accensione, prestare attenzione che
l’apparecchio non tocchi oggetti.
4. Per accendere
l’apparecchio, premere il pulsante di
sbloccaggio (15)
2
Una tosatura regolare stimola la formazione rafforzata delle foglie e al contempo
provoca la distruzione dell’erbaccia. Per
questo motivo, dopo ogni intervento di to-
satura il prato diventa più tto e omogeneo.
Il primo taglio avviene circa a partire da
aprile con un’altezza di crescita di 70
- 80 mm. Nella stagione vegetativa principale il prato deve essere tosato minimo
una volta a settimana.
1
• Iniziare a tosare nelle vicinanze della
presa e proseguire allontanandosi dalla stessa.
61
Page 62
IT
• Condurre la prolunga sempre dietro di
se e, dopo l’inversione, condurla sul
lato già tosato.
• Condurre l’apparecchio a passo d’uomo eseguendo traiettoria più dritte
possibili. Per una tosatura perfetta,
le traiettorie dovrebbero sovrapporsi
di alcuni centimetri.
• Regolare la profondità di taglio in
modo tale da non sovraccaricare
l’apparecchio. Altrimenti si rischia di
danneggiare il motore.
• Sui pendii lavorare sempre trasversalmente. Prestare particolare attenzione
durante le manovre di retromarcia e
quando si tira l’apparecchio.
• Pulire l’apparecchio dopo ogni impiego come descritto nel capitolo „Pulizia, manutenzione, stoccaggio“.
Dopo il lavoro e per il trasporto,
spegnere l’apparecchio, staccare
la spina di rete e attendere l’arresto della lama. Rischio di danni a
persone.
Pulizia/manutenzione/
stoccaggio
Lavori di pulizia e manutenzione generali
Non spruzzare il tosaerba con
acqua.
• Tenere l’apparecchio sempre pulito.
Per la pulizia, usare una spazzola o
un panno senza detergenti o solventi.
• Rimuovere eventuali residui di piante
rimaste attaccate dopo la tosatura
con un pezzo di legno o di plastica
dalle ruote, dalle aperture di ventilazione, all’apertura di espulsione
dell’erba e dalla zona della lama. Non
usare oggetti duri o appuntivi, possono danneggiare l’apparecchio.
• Lubricare di tanto in tanto le ruote.
• Controllare il tosaerba prima di ogni
uso per vericare la presenza di even-
tuali difetti evidenti, come parti allentate, usurate o danneggiate. Controllare
la corrette sede di tutti i dadi, bulloni e
viti.
• Controllare le coperture e i dispositivi
di sicurezza per vericare l’eventuale
presenza di danneggiamenti e la corretta sede. Eventualmente, provvedere alla sostituzione
Fare effettuare i lavori non de-
scritti nelle presenti istruzioni
d’uso da un centro di assistenza
clienti da noi autorizzato. Usare
solo ricambi originali.
Indossare guanti quando si ma-
neggia la lama.
Prima di effettuare qualsiasi lavoro
di manutenzione o pulizia, spegnere l’apparecchio, staccare la spina
di rete e attendere l’arresto della
lama.
62
Sostituzione lama
Se la lama è smussato, può essere aflata da un’ofcina specializzata. Se la lama
è danneggiata o presenta uno sbilanciamento, deve essere sostituita (vedi capitolo Ricambi).
1. Capovolgere l’apparecchio.
2. Usare guanti resistenti e tenere
ferma la lama (25). Svitare la
vite della lama (26) in senso antiorario mediante un cacciavite
dal mandrino motore.
Page 63

IT
3. Rimontare la nuova lama nella
sequenza invertita. Prestare
attenzione che la lama sia posizionata correttamente e la vite
sia ben stretta
Stoccaggio
Per ridurre il più possibile lo spa-
zio di ingombro dell’apparecchio,
allentare i quattro dadi con testa
a stella e richiudere l’impugnatura
e il montante inferiore. Prestare
attenzione a non schiacciare i cavi.
• Conservare l’apparecchio in un luogo
asciutto e fuori dalla portata di bambini. Allentare i dadi ad alette e ribaltare
il manico, in modo tale che l’apparecchio occupi meno spazio. Assicurarsi
che i cavi non siano schiacciati.
• Lasciare raffreddare il motore, prima
di riporre l’apparecchio in un ambiente
chiuso.
• Non avvolgere l’apparecchio nei sac-
chi di nylon, in quanto potrebbe formarsi umidità.
Decliniamo ogni responsabilità per danni
causati dai nostri apparecchi, qualora tali
danni siano dovuti ad una riparazione
non conforme o dall’impiego di ricambi non originali o da un uso improprio
dell’apparecchio.
Smaltimento/Tutela
dell’ambiente
Effettuare lo smaltimento dell’apparecchio, degli accessori e della confezione
nel rispetto dell’ambiente presso un punto
di raccolta per riciclaggio.
Le apparecchiature non devono
essere smaltite insieme ai riuti
domestici.
• Consegnare l’apparecchiatura presso
un centro di raccolta e recupero. Le
parti plastiche e di metallo usate potranno essere selezionate e avviate
al recupero. Chiedere informazioni a
riguardo al nostro centro assistenza
clienti.
• Lo smaltimento degli apparecchio
difettosi consegnati viene effettuato
gratuitamente.
• Introdurre il materiale tagliano nel
compostaggio e non gettarlo nel secchio della spazzatura.
Dati tecnici
Tagliaaerba elettrico ...........ERM 1846 G
Potenza assorbita del motore .......1800 W
Tensione nominale....... 230-240 V~, 50 Hz
Classe di protezione ...........................II
Tipo di protezione .............................. IP24
Numero di giri al minimo ...........2900 min
Cerchio di taglio ...............................46 cm
Altezza taglio .......................... 25 - 75 mm
Peso ..............................................28,5 kg
Volume cesto raccoglierba ..................60 l
Livello di pressione acustica
(L
) .............................82,7 dB(A), KpA=3 dB
pA
Livello di potenza acustica (L
garantito .................................. 96 dB(A)
misurato ......... 93,1 dB(A), K
Vibrazione (a
) ........ 1,09 m/s2, K=1,5 m/s
n
Il presente apparecchio è progettato per il
funzionamento con una rete di distribuzione dell’energia elettrica con un’impedenza
di sistema Zmax al punto di trasferimento
(collegamento domestico) paria a 0,269
Ohm al massimo. L’utente è tenuto ad
accertare che l’apparecchio venga messo
)
wA
wA
=1,78 dB
-1
2
63
Page 64

IT
in funzione esclusivamente con una rete
di distribuzione dell’energia elettrica che
rispetti detto requisito.
Se necessario, le aziende di fornitura di
energia elettrica locali sono in grado di
fornire l’impedenza del sistema.
I valori di rumore sono stati rilevati adeguatamente corrispondentemente alle
norme e disposizioni citate nella dichiarazione di conformità.
Modiche tecniche ed estetiche possono
essere apportate nel corso dello sviluppo
ulteriore di questo senza annuncio. Tutte le
misure, indicazioni e dati di queste istruzioni per l’uso sono perciò senza garanzia. Le
rivendicazioni di diritti, che si dovessero far
valere in base alle istruzioni per l’uso, sono
da ritenersi perciò non valide.
Garanzia
• Per questo apparecchio forniamo 24
mesi di garanzia. Questo apparecchio
non è adatto per l’uso industriale.
In caso di un impiego per uso industria-
le decade la garanzia.
• I danni riconducibili ad usura, sovraccarico o utilizzo improprio non sono coperti
da garanzia. Alcune parti sono soggette
a normale usura e non sono coperte da
garanzia.
• Requisito essenziale per le prestazioni
in garanzia è inoltre che le indicazioni riportate alla voce Pulizia e Manutenzione
siano state rispettate.
• I danni che siano risultati da difetti del
materiale o errori di costruzione verranno eliminati senza alcun costo, tramite
sostituzione del prodotto o la riparazione
dello stesso.
Per usufruire della garanzia è necessa-
rio che l’apparecchio sia spedito - non
smontato - al nostro Centro di Assistenza unitamente alla prova d’acquisto e al
tagliando di garanzia.
Servizio di riparazione
• Riparazioni non soggette a garanzia possono essere effettuate dal nostro centro di
assistenza pagando in base al calcolo di
quest’ultimo. Il nostro centro d’assistenza
stilerà volentieri un preventivo per i nostri
clienti. Possiamo trattare solo apparecchi
che siano ben imballati e che siano inviati
con un’affrancatura sufciente. I rischi di
trasporto sono a carico del mittente.
• Attenzione: siete pregati di non inviare
mai attrezzature con il serbatoio dell’olio
pieno. È di massima importanza svuotare il serbatoio. Eventuali danni alle
cose (l’olio fuoriesce quando si appoggia
l’attrezzatura lateralmente o testa in giù!)
ossia danni d’incendio durante il trasporto sono a carico del mittente.
Attrezzature inviate con tassa a cari-
co del destinatario - via collo ingombrante, espresso oppure con altro
tipo di carico speciale - non vengono
accettate.
• Lo smaltimento degli apparecchio
difettosi consegnati viene effettuato
gratuitamente.
64
Page 65

Ricerca guasti
Problema Possibile causa Rimedio
Controllare la presa, il cavo,
la conduttura, la spina ed
eventualmente fare riparare
da un elettricista esperto
Riparazione da parte del
centro di assistenza clienti
Impostare un‘altezza di taglio superiore. Sollevare leggermente le ruote anteriori
premendo l‘impugnatura.
Rimuovere il corpo estraneo
Impostare un‘altezza di taglio inferiore
Fare arrotare o sostituire la
lama
Montare correttamente la
lama
L‘apparecchio non si accende
Il motore si spegne
Il risultato del lavoro non
è soddisfacente oppure il
motore è lento
La lama non ruota
Rumori anormali, battito o
vibrazioni
Tensione di rete mancante
Interruttore di accensione/
spegnimento difettoso
Spazzola di carbone consumata
Motore difettoso
Erba troppo alta
Bloccaccio da parte di corpi
estranei
Altezza di taglio troppo
bassa
Lama smussata
Zona lama intasata Pulire l‘apparecchio
Lama montata in modo
errato
Lama bloccata dall‘erba Rimuovere l‘erba
Vite della lama allentata Stringere la vite della lama
Vite della lama allentata Stringere la vite della lama
Lama danneggiata Sostituire la lama
IT
Ricambi
Per ordinare parti di ricambio rivolgersi al servizio di assistenza tecnica all’indirizzo o
numero di fax indicato.
Lame di ricambio .......................................................................................... 91095561
Cestello raccoglierba ..................................................................................... 91095660
Accessori
Kit di pacciamatura (non compreso nel volume di fornitura) ......................... 91099492
65
Page 66

PT
Índice
Volume de fornecimento .................... 66
Fim de aplicação................................. 66
Indicações de segurança ................... 67
Pictogramas/inscrições na máquina 67
Símbolos colocados no manual ....... 67
Indicações gerais de segurança ...... 67
Descrição geral ................................... 71
Descrição do funcionamento ........... 71
Vista de conjunto ............................. 71
Montagem ............................................ 72
Montagem do punho em arco .......... 72
Montar o cesto de recolha de relva .. 72
Operação ............................................. 72
Colocar/tirar o cesto de
recolha de relva ............................... 72
Regulação da altura de corte ........... 73
Como ligar e desligar ...................... 73
Indicação do nível de enchimento ... 73
Execução de serviços com a
máquina de cortar relva ................... 74
Limpeza/Manutenção/Armazenamento 74
Serviços gerais de limpeza ede
manutenção ..................................... 74
Substituição das lâminas ................. 75
Armazenamento ............................... 75
Eliminação/Protecção do ambiente .. 75
Dados técnicos ................................... 75
Garantia ............................................... 76
Serviço de reparação ......................... 76
Localização de avarias....................... 77
Peças sobressalentes ........................ 77
Tradução do original da Declaração
de conformidade CE ......................... 139
Designação de explosão.................. 142
Grizzly Service-Center ..................... 143
Leia, por favor, para a sua seguran-
ça e para a segurança dos outros,
atentamente o manual de instruções
antes de começar a trabalhar com
esta máquina. Guarde o manual em
lugar bem seguro para que possa
ter acesso, a qualquer momento, a
todas as informações necessárias.
66
Volume de fornecimento
Retirar cuidadosamente o aparelho da
embalagem e vericar a presença das
seguintes peças:
- Corta-relvas com barra inferior e manípulo com cabo de alimentação montados
- Cesto de recolha de relva (de duas
partes)
- Compensador de tracção do cabo
- 2 suportes do cabo
- Material de montagem da pega da
armação
- Material de montagem do cesto de
recolha da relva
- Manual de Instruções
Fim de aplicação
O aparelho destina-se unicamente para
cortar superfícies de relva e grama em
áreas domésticas.
Este aparelho não é adequado para uso
comercial. A garantia é anulada em caso
de utilização para ns comerciais.
Qualquer outra utilização não autorizada
especicamente neste manual pode causar danos ao aparelho e representar um
risco grave para o utilizador.
O aparelho foi concebido para ser utilizado por adultos. Crianças e pessoas
não familiarizadas com este manual de
serviço não devem utilizar o aparelho. É
proibido utilizar o aparelho sob a chuva
ou em ambientes húmidos.
O fabricante não se responsabiliza por
danos causados pela utilização fora das
especicações ou pelo manuseio incorrecto do aparelho.
Page 67

PT
Indicações de segurança
Este capítulo trata das indicações básicas
de segurança a serem observadas durante a execução de serviços com a máquina
de cortar relva eléctrica.
Pictogramas/inscrições na máquina
Atenção!
Ler cuidadosamente o manual de
instruções de serviço.
Perigo de ferimentos causados
por objectos ejectados.
Outras pessoas presentes no
local devem ser mantidas afastadas da máquina de cortar relva.
Cuidado - Lâminas de corte aa-
das! Manter os pés e as mãos
afastados. Perigo de lesão!
Desligar o motor e retirar a cha
da tomada de rede antes de
executar serviços de ajuste e de
limpeza ou quando o cabo de
ligação à rede estiver enroscado
ou danicado.
Perigo se o cabo de rede estiver
danicado.
Manter o cabo de rede afastado
do aparelho e da lâmina de corte!
Indicação do nível de potência
L
WA
sonora L
dB
Classe de protecção II
Não deitar aparelhos eléctricos
no lixo doméstico.
Círculo de corte
em dB.
wa
Perigo! Manter os pés e as
mãos afastados da barra da
lâmina.
Perigo de ferimentos!
Ao soltar o interruptor da ala-
vanca de arranque, a máquina
desliga-se.
Indicação do nível de enchimento:
Tampa aberta: cesto de reco-
lha da erva vazio
Tampa fechada:
cesto de recolha da erva cheio
Símbolos colocados no manual
Símbolos de perigo com infor-
mações sobre a prevenção de
danos pessoais e materiais.
Símbolos de ordens (ao invés do
símbolo de interrogação, a ordem é
esclarecida) com informações sobre
a prevenção de danos.
Avisos de instrução, com informa-
ções sobre o melhor manuseamento com o aparelho.
Indicações gerais de segurança
Importante! Leia o manual de ins-
truções com atenção. Guarde este
manual de instruções para posterior consulta.
Este aparelho pode causar feri-
mentos graves se não for utilizado
da maneira apropriada. Para evitar
danos físicos e materiais, é favor
ler e obedecer às indicações de
67
Page 68

PT
segurança dadas a seguir, assim
com familiarizar-se com todas as
unidades de comando.
Aviso! Em funcionamento, esta fer-
ramenta eléctrica gera um campo
electromagnético. Em determinadas situações, este campo pode
inuenciar o funcionamento correcto de dispositivos médicos activos ou passivos implantados. Para
reduzir o perigo de ferimentos
graves ou mortais, recomendamos
que as pessoas portadoras deste
tipo de implantes consultem o seu
médico de família e o fabricante do
respectivo dispositivo médico implantado antes de usar a máquina.
Preparação:
• Este aparelho não deve ser utilizado por
pessoas (inclusive crianças) com de-
ciências físicas, sensoriais ou mentais,
ou com pouca experiência e/ou falta de
conhecimento, excepto quando for supervisionado por um encarregado pela
sua segurança ou quando receber dele
instruções especícas de como usá-lo.
• Nunca permita a crianças ou outras
pessoas que não conheçam o manual
de serviço utilizar o aparelho. Regulamentos locais podem especicar a idade mínima do operador do aparelho.
• Não utilizar o aparelho quando pessoas,
nomeadamente crianças, e animais estiverem próximo a ele.
• Cuidar das crianças para assegurar que
elas não brinquem com o aparelho.
• O operador ou o utilizador responsabiliza-se por acidentes e danos causados a outras pessoas ou às suas
propriedades.
• Controlar a zona onde o aparelho
será utilizado e remover pedras, pe-
daços de pau, os e outros corpos
estranhos que podem ser apanhados
e arremessados pelo aparelho.
• Usar roupa de trabalho apropriada,
como calçados resistentes com sola
antiderrapante e uma calça comprida
e robusta. Não utilizar o aparelho se
estiver descalço ou com sandálias.
Evite o uso de vestuário largo ou de
vestuário com cordões ou cintos pendentes.
• Fazer sempre uma inspecção visual
no aparelho antes de usá-lo. Não utilizar o aparelho se houver dispositivos
de segurança (p. ex. protector contra
choques ou saco de recolha de relva), partes do dispositivo de corte ou
pinos ausentes, gastos ou avariados.
Para evitar o desequilíbrio, as ferramentas danicadas devem ser substituídas em conjunto.
• Tomar cuidado especial com os aparelhos com diversos dispositivos de
corte, pois o movimento de uma lâmina pode causar a rotação das outras
lâminas.
• Utilizar unicamente peças sobressalentes e acessórios que foram fornecidos ou recomendados pelo fabricante.
O emprego de peças de terceiros
implica a perda imediata da reivindicação de garantia.
• Antes da utilização é necessário vericar sempre o cabo de ligação e a
extensão elétrica em relação a danos
ou a desgaste. Se o cabo se danicar
durante a utilização, ele deverá ser
desligado imediatamente da rede de
abastecimento. Não toque no cabo
antes de ele ter sido desligado da tomada elétrica. Não utilize a máquina
se o cabo estiver desgastado ou dani-
cado.
68
Page 69

PT
Execução de serviços com o aparelho:
Durante a execução dos serviços,
não pôr os pés nem as mãos perto
ou em baixo das partes giratórias.
Perigo de lesão!
Ter em atenção as regras de pro-
tecção contra ruídos e os regulamentos locais.
• Ligar o motor de acordo com as instruções e somente quando os seus
pés estiverem a uma distância segura
dos dispositivos de corte.
• Não utilizar o aparelho sob a chuva,
mau tempo, em sítios húmidos ou
sobre a relva molhada. Trabalhar
somente durante o dia ou sob boas
condições de iluminação.
• Não trabalhar com o aparelho se estiver cansado ou não concentrado no
serviço, nem após ter ingerido álcool
ou medicamentos. Fazer sempre uma
pausa de tempo apropriado durante o
serviço. Trabalhar sempre com bom
senso.
• Certicar-se de que se encontra numa
posição segura, nomeadamente se
estiver a trabalhar em declives. Trabalhar sempre transversalmente ao
declive, nunca voltado para cima nem
para baixo. Tomar cuidado especial
ao mudar de posição no declive. Não
trabalhar em declives acentuados de
mais.
• Utilizar o aparelho somente à velocidade do passo. Tomar cuidado principalmente ao virar, puxar para frente
ou recuar o aparelho.
• Ligar cuidadosamente o aparelho de
acordo com as indicações dadas neste manual. Cuidar para que haja uma
distância suciente entre os pés e as
lâminas giratórias do aparelho.
• Não virar o aparelho ao ligá-lo, a menos que isso seja necessário quando
for arrancá-lo sobre uma relva alta.
Neste caso, erguer o aparelho pressionando a haste do manípulo de
maneira que as rodas da frente do
aparelho quem levemente erguidas.
Cuidar para que as duas mãos estejam sempre na posição de trabalho
antes de abaixar o aparelho novamente ao chão.
• Nunca trabalhar sem o saco de recolha de relva ou sem o protector contra
choques. Manter-se sempre afastado
da abertura de ejecção.
• Não inicie o motor, se se encontrar à
frente da calha de descarga.
Atenção, perigo! A lâmina continua
a girar. Perigo de lesão.
• O aparelho não deve ser levantado
ou transportado enquanto o motor
estiver a funcionar. Desligar o aparelho quando tiver de virá-lo para poder
transportá-lo, quando for atravessar
outras superfícies que não sejam de
relva e quando tiver de transportar o
aparelho até ao/de volta do sítio onde
a relva tem de ser cortada.
• Manter a abertura de ejecção da relva
sempre limpa e desimpedida. Eliminar
os resíduos de corte somente com o
aparelho desligado.
• Nunca deixar o aparelho sem vigilância no local de serviço.
• Não trabalhar com um aparelho avariado, incompleto ou que tenha sido
modicado sem a autorização do
fabricante. Nunca utilizar o aparelho
se os dispositivos de segurança e as
protecções estiverem danicados ou
se os dispositivos de segurança, p.
69
Page 70

PT
ex. os deectores e os dispositivos de
recolha de relva estiverem ausentes.
• Não sobrecarregar o aparelho. Trabalhar somente no intervalo de potência
admitido e não alterar os ajustes do
regulador no motor. Não utilizar máquinas de baixa potência para executar serviços pesados. Não utilizar o
aparelho para executar serviços para
os quais ele não está autorizado.
• Não utilizar o aparelho nas proximidades de líquidos ou gases inamáveis.
A inobservância desta regra representa riscos de incêndio ou de explosão.
• Nunca levantar nem transportar o
aparelho com o motor em funcionamento.
• Desligue a máquina, retire a cha da
tomada elétrica e certique-se de que
todas as peças movíveis se encontram imobilizadas:
- sempre que deixar o aparelho sem
vigilância,
- antes de limpar a abertura de ejecção ou remover bloqueios,
- quando o aparelho não for utilizado,
- antes de controlar, limpar ou executar serviços no aparelho,
- quando o cabo de ligação à rede
estiver danicado ou emaranhado,
- quando, durante o serviço, o aparelho tiver entrado em contacto
com objectos estranhos ou quando
houver vibrações anormais. Neste caso, inspeccionar o aparelho
quanto à presença de avarias e, se
for necessário, solicitar a sua reparação.
• Nunca aproximar as mãos ou os pés
das partes móveis do aparelho, nem
colocá-los debaixo das mesmas. Nunca car em frente à abertura de ejecção da relva ao cortá-la com a foice.
Manutenção e armazenamento:
• Ao efetuar trabalhos de manutenção
nas lâminas de corte, tenha em conta
que elas se poderão mover mesmo
quando a fonte de alimentação se encontrar desligada.
• Cuidar para que todas as porcas, os
pinos e os parafusos estejam bem
apertados e que o aparelho esteja
num estado seguro de funcionamento.
• Inspecione o corta-relva em relação a
eventuais danos.
• Efetue as reparações necessárias das
peças danicadas.
• Não tentar reparar o aparelho por
conta própria, a menos que possua
formação especíca para tal. Todos
os serviços que não se encontram
indicados neste manual de instruções
só devem ser executados por nós ou
por um centro de assistência técnica
por nós autorizado.
• Manter o aparelho num sítio seco e
fora do alcance das crianças.
•
Manusear cuidadosamente o apare-
lho. Manter as ferramentas aadas e
limpas a m de poder trabalhar de ma-
neira melhor e mais segura. Observar
os regulamentos de manutenção.
• Usar luvas de protecção quando for
substituir o dispositivo de corte.
• Controlar regularmente o dispositivo
de recolha de relva quanto à presença de desgaste e deformações. Por
motivos de segurança, substituir as
peças com desgaste ou avariadas.
Tomar cuidado especial quando for
substituir as lâminas para que os seus
dedos não quem presos entre as
lâminas móveis e as partes xas da
máquina.
• Certicar-se de que somente sejam
usadas ferramentas de corte sobressalentes autorizadas pelo fabricante.
70
Page 71

PT
Segurança eléctrica:
• Cuidar para que a tensão de rede
coincida com as indicações dadas na
placa de características do aparelho.
• Se for possível, ligar o aparelho somente numa tomada com um disjuntor
de corrente de avaria (RCD) com uma
corrente de activação não superior a
30 mA.
• Evitar o contacto do corpo com partes
ligadas à terra (p. ex. cercas de metal,
postes de metal).
• Utilizar somente cabos de rede
autorizados do tipo H05VV-F ou
H07RN-F, que tenham, no máximo,
75 m de comprimento e que estejam
autorizados para uso ao ar livre. A
secção transversal do cordão do
cabo de rede deve ser de, no mínimo, 2,5 mm
o tambor de cabos antes de usar o
aparelho. Controlar se o cabo não
apresenta avarias.
• Para xar o cabo de rede, utilizar a
suspensão do cabo prevista para
isso.
• Durante a execução dos serviços,
manter o cabo de rede afastado das
ferramentas de corte. As lâminas de
corte podem danicar o cabo de rede
e causar o contacto com peças condutoras de electricidade. Segurar o
cabo de rede sempre atrás do operador do aparelho.
• Não utilizar o cabo de rede para puxar
a cha da tomada da rede. Proteger o
cabo de rede contra a acção do calor,
óleo e bordas aadas.
• Desligar o aparelho e retirar a cha da
tomada quando o cabo de rede estiver
danicado. Quando a conexão elétrica
deste aparelho estiver danicada, ela
deve ser substituída por uma conexão
apropriada através a assistência téc-
2
. Desenrolar totalmente
nica do fabricante ou por pessoa devi-
damente qualicada, evitando assim,
transtornos perigosos.
• Não ligar nenhum cabo de rede danicado à rede eléctrica. Não tocar em
cabos de rede avariados enquanto
eles estiverem ligados à rede eléctrica. Ao ser tocado, um cabo de rede
avariado pode descarregar corrente
eléctrica.
Descrição geral
Descrição do funcionamento
A máquina de cortar relva eléctrica possui
uma ferramenta de corte que gira paralelamente ao plano de corte. Ele está equipado
com um poderoso motor eléctrico, uma
caixa de metal resistente, um interruptor de
segurança e um pára-choques, bem como
com um cesto de recolha da relva cortada
com indicador de nível. Adicionalmente, o
corta-relvas dispõe de uma regulação em
altura de 7 posições e de rodas que permitem um deslocamento fácil.
Para obter informações acerca do funcionamento das unidades de comando, é favor
consultar as indicações dadas a seguir.
As guras acerca da operação do
aparelho encontram-se nas páginas 2-4.
Vista de conjunto
1 Punho em arco
2 Protector de tracção do cabo
3 Porca de manípulo estrelado
superior
4 Haste inferior
5 Protector contra choques
6 Porca de manípulo estrelado
inferior
71
Page 72

PT
7 Saco de recolha de relva
8 Rodas traseiras
9 Rodas dianteiras
10 Corpo da máquina
11 Alavanca para regular a altura
de corte
12 Suporte para cabo
13 Protector de tracção do cabo
14 Cabo de alimentação da máquina
15 Botão de desbloqueio (não visível)
16 Cabo elétrico
Montagem
Retirar a cha da rede eléctrica
sempre antes de executar serviços
no aparelho.
Montagem do punho em arco
Montagem da trave inferior:
Posicione as extremidades da
trave inferior (4) nas chapas de
suporte e insira respetivamente
um parafuso pelo lado de fora.
Posicione as anilhas fornecidas
e coloque as porcas de manípu-
lo estrelado inferiores (6).
Note que as porcas de manípu-
lo estrelado têm de ser monta-
das no interior.
Aparafuse bem as porcas de
manípulo estrelado (6).
Montagem da pega da arma-
ção:
Fixe a pega da armação (1)
com os parafusos, as anilhas
e a porcas de manípulo estre-
lado superiores (3) juntamen-
te fornecidas no lado direito e
esquerdo da trave inferior (4).
São possíveis duas posições.
Rode a porca de manípulo
estrelado (3) no sentido dos
ponteiros do relógio.
Aparafuse bem as porcas de
manípulo estrelado (3).
Prender o suporte do cabo
com clipes:
Prenda o suporte do cabo
(
12) na trave inferior e xe
os cabos da máquina (
14).
Montar o cesto de recolha de
relva
Montar as peças do cesto de
recolha de relva:
Fixe as tiras de borracha da
rede do cesto de recolha (19)
no casco duro do cesto de recolha da relva cortada (7).
Introduza a armação de metal
(20) no casco duro. Certique-
se de que a armação de metal
está totalmente inserida.
Coloque as talas de plástico
(21) e (22) através da armação
de metal (20).
Fixe a armação de metal (20)
com os parafusos fornecidos.
Operação
Atenção: Não utilize a máquina
sem o resguardo de protecção
ou o cesto de recolha de relva
totalmente montados. Existe pe-
rigo de ferimento!
Colocar/tirar o cesto de recolha de relva
1. Levante o resguardo de protecção (5).
72
Page 73

PT
2. Engate o cesto de recolha de
relva (7) no respectivo alojamento (24) na parte de trás da
máquina.
3. Posicione o resguardo de protecção (5) no cesto de recolha
de relva (7), para que seja mantido na posição certa.
4. Para tirar o cesto de recolha de
relva (7), levante o resguardo
de protecção (5) e desengate o
cesto de recolha de relva. Rebata
o resguardo de protecção até encostar no corpo da máquina.
Para esvaziar o cesto de recolha
de relva, consulte também o capítulo “Eliminação/protecção do
meio ambiente”.
Regulação da altura de corte
Desligar o aparelho, retirar a cha
da rede eléctrica e esperar as lâminas pararem de girar. Perigo de
lesões físicas.
Segue na alavanca (11) de regu-
lação da altura de corte e passe-a
pelo ponto de retenção até à regulação desejada da altura de corte.
A máquina possui 7 posições destinadas
ao ajuste da altura de corte:
25 - 75 mm
Numa relva decorativa, a altura correcta de corte é de aprox. 30 - 45 mm;
numa relva para outra utilidade, aprox.
30 - 65 mm.
Deverá seleccionar uma altura de
corte elevada aquando do primeiro
corte realizado na estação.
Como ligar e desligar
1. Dê uma volta com a ponta do
cabo de alimentação e suspenda-o no respectivo compensador de tracção (13).
2. Ligar o aparelho à tensão de
rede.
3. Antes de ligar, certicar-se de que
o aparelho não se encontre em
contacto com nenhum objecto.
4. Para ligar, premir
o botão de desbloqueio (15) existente no manípulo e,
ao mesmo tempo, manter premida a alavanca de arranque
(2). Soltar o botão de desbloqueio (15).
5. Para desligar, soltar a alavanca
de arranque (2).
Após desligar o aparelho, a lâ-
mina continua a girar durante
alguns segundos. Não tocar na
lâmina em movimento. Perigo
de lesões físicas.
1
2
Indicação do nível de enchimento
Na parte lateral do cesto de recolha da
relva está montado um indicador do nível
de enchimento. O uxo de ar aerodinâmico da tampa também assegura um enchimento ideal.
Tampa aberta: cesto de reco-
lha da erva vazio
Tampa fechada:
cesto de recolha da erva cheio
73
Page 74
PT
Execução de serviços com a
máquina de cortar relva
O corte regular da relva reforça a formação das folhas das gramíneas e, ao mes-
mo tempo, denha as ervas daninhas.
Assim, a relva torna-se mais densa após
cada corte e obtém-se uma relva que
suporta cargas de maneira mais homogénea.
O primeiro corte deve ser feito por volta
de Abril quando a altura da relva tiver
atingido 70 - 80 mm. No período de crescimento principal, pode-se cortar a relva,
pelo menos, uma vez por semana.
• Iniciar o corte na zona próxima à tomada e trabalhar afastando-se dela.
• Levar o cabo de extensão sempre
atrás de si e colocá-lo sobre a zona já
cortada ao virar.
•
Conduzir o aparelho à velocidade de
passo em faixas de corte as mais rectas possíveis. Para obter um corte sem
falhas, as faixas de corte devem sempre se sobrepor alguns centímetros.
• Regule a altura de corte de forma a
não sobrecarregar a máquina. Caso
contrário, é possível que o motor sofra danos.
• Trabalhar sempre numa posição
transversal em relação ao declive. Tomar muito cuidado ao andar para trás
e quando for puxar o aparelho.
• Limpar o aparelho sempre após usá-
lo de acordo com as indicações dadas
no capítulo „Limpeza, manutenção e
armazenamento“.
Desligar o aparelho após a execu-
ção do serviço e para transportá-
-lo, retirar a cha da rede eléctrica
e aguardar a parada da lâmina de
corte. Perigo de lesões físicas.
Limpeza/Manutenção/Armazenamento
Solicitar a execução dos servi-
ços não indicados neste manual
de instruções a um centro de
assistência à clientela por nós
autorizado. Utilizar unicamente
peças originais.
Usar luvas ao manusear a lâmina..
Desligar o aparelho antes de exe-
cutar qualquer serviço de manutenção e de limpeza no aparelho,
retirar a cha da rede eléctrica e
aguardar a parada da lâmina de
corte. Perigo de lesões físicas.
Serviços gerais de limpeza
ede manutenção
Não lavar a máquina de cortar
relva com uma mangueira
• Manter o aparelho sempre limpo.
Para a limpeza, utilizar uma escova
ou um pano, mas não usar solventes
nem produtos de limpeza.
• Após o corte da relva, remover os
restos de plantas retidos nas rodas,
nas aberturas de ventilação, na abertura de ejecção e na zona da lâmina
usando um objecto em plástico ou
madeira. Não utilizar objectos duros
ou pontiagudos, pois eles podem da-
nicar o aparelho.
• Lubricar as rodas de vez em quando.
• Controlar a máquina de cortar relva
sempre antes de utilizá-la quanto à
presença de avarias evidentes, tais
como peças soltas, gastas ou ava-
riadas. Vericar se todas as porcas,
pinos e parafusos estão apertados.
74
Page 75

PT
• Vericar se as coberturas e os dispositivos de protecção se encontram
porventura danicados e estão na
posição correcta. Se for necessário,
fazer a substituição dos mesmos.
Substituição das lâminas
Se a lâmina estiver romba, ela poderá ser
aada numa ocina especializada. Se a
lâmina estiver danicada ou apresentar
um desequilíbrio, ela terá de ser substituída (ver capítulo “Peças sobressalentes”).
1. Virar o aparelho.
2. Usar luvas resistentes e manter
a lâmina xa (25) Girar o parafuso da lâmina (26) no sentido
inverso ao dos ponteiros do
relógio com a ajuda de uma
chave de parafusos para fora
do eixo do motor.
3. Montar a nova lâmina na se-
quência inversa. Ter em conta
a posição correcta da lâmina e
certicar-se de que os parafusos estejam bem apertados.
Armazenamento
Para que a máquina ocupe menos
espaço, desaperte as quatro porcas
de manípulo estrelado e dobre a
pega da armação ao encontro da
trave inferior. Certique-se de que o
cabo não é trilhado.
• Manter o aparelho seco e fora do alcance das crianças.
• Deixar o motor arrefecer antes de guardar o aparelho num local fechado.
• Não embrulhar o aparelho num saco
de nylon, pois pode haver acumulação de humidade.
Não nos responsabilizamos por danos
causados pelos nossos aparelhos se eles
forem devidos à reparação incorrecta ou à
utilização de peças não originais e ao em-
prego do aparelho fora das especicações.
Eliminação/Protecção do
ambiente
Levar aparelhos, acessórios e embalagens a uma reciclagem que não polua
com o meio ambiente.
Aparelhos eléctricos não perten-
cem ao lixo doméstico.
Entregar o aparelho para um posto de
reciclagem. As peças de material plástico
e metálicas utilizadas podem ser separadas por tipo e, assim, entregues para
reciclagem. Consultar, quanto a isso, o
nosso Service-Center. A eliminação do
aparelhos inutilizado que nos enviar será
realizada por nós gratuitamente.
Dados técnicos
Máquina de cortar relva eléctrica
ERM 1846 G
Potência de entrada do motor ...... 1800 W
Tensão de rede ........... 230-240 V~, 50 Hz
Classe de protecção ...........................II
Tipo de protecção .............................. IP24
Rotação à vazio ........................2900 min
Círculo de corte ...............................46 cm
Altura de corte ........................ 25 - 75 mm
Peso ..............................................28,5 kg
Volume do cesto de recolha de relva ..60 l
Nível de intensidade sonora
(L
) ..........................82,7 dB(A), KpA=3 dB
pA
Nível de potência sonora (L
garantida ................................. 96 dB(A)
medida ........... 93,1 dB(A), K
Vibração (a
) ........... 1,09 m/s2, K=1,5 m/s
n
wA
)
=1,78 dB
wA
-1
2
75
Page 76

PT
Este dispositivo destina-se a uma operação numa rede de abastecimento com
uma impedância de sistema Zmáx no
ponto de transferência (conexão de casa)
de, no máximo, 0,269 Ohm.
O utilizador deve assegurar-se que o
dispositivo é utilizado apenas numa rede
de abastecimento que preencha este requisito.
Se necessário, a impedância de sistema
pode ser consultada na empresa fornecedora de energia local.
Os valores de ruído e de vibrações foram
apurados de acordo com as normas e
disposições mencionadas na declaração
de conformidade. Design e características
técnicas sujeitos a alterações sem aviso
prévio. Não nos responsabilizamos, por
isso, por todas as medidas, indicações e
informações contidas neste manual. Títulos que possam se feitos valer devido às
informações contidas neste manual não
poderão, por isso, ser postos em vigor.
Garantia
• Concedemos 24 meses de garantia a
este aparelho.
• Este aparelho não é adequado para
uso comercial. A garantia é anulada
em caso de utilização para ns comerciais.
• Esta garantia não contempla danos
provocados por desgaste natural,
sobrecarga ou uso indevido do aparelho. Determinadas peças estão sujei-
tas a um desgaste natural cando, por
isso, excluídas da garantia.
• A garantia será também ainda válida
com a condição de que as instruções
sobre a limpeza e manutenção, referidas
neste manual, tenham sido respeitadas.
• Danos que tenham sido causados
por defeitos de material ou de fabrico
serão, nesse caso, substituídas as
peças ou reparadas gratuitamente.
Para tal, o aparelho deverá ser devol-
vido aos nossos Serviços de Assistência Técnica completamente montado
mediante a apresentação da factura
de compra e do certicado de garantia.
Serviço de reparação
• Poderá encarregar os nossos Serviços de Assistência Técnica de efectuar reparações que não são cobertas
pela garantia, remunerando os respectivos serviços. Os nossos Serviços
de Assistência Técnica terão muito
gosto em fazer um orçamento para si.
No entanto, só poderemos reparar
aparelhos que tenham sido devidamente embalados e se o remetente
tiver pago a respectiva franquia.
• Não serão aceites aparelhos que
tenham sido enviados pelo remetente sem este ter pago a franquia
– caso se trate de mercadoria volumosa ou correio expresso ou outro
tipo de carga especial.
• A eliminação do aparelhos inutilizado
que nos enviar será realizada por nós
gratuitamente.
76
Page 77

Localização de avarias
Problema Causa possível Correcção da avaria
Vericar a tomada, o cabo,
a linha eléctrica e a cha e,
se for necessário, solicitar a
reparação a um electricista.
Reparação pelo centro de
assistência à clientela.Escovas de carvão gastas.
Regular uma altura de corte
maior. Levantar um pouco
as rodas dianteiras premindo a haste do punho
Remover os corpos estranhos.
Regular uma altura de corte.
Montar correctamente a
lâmina.
Remover a relva.
Apertar o parafuso da lâmina.
Apertar o parafuso da lâmina.
O aparelho não arranca.
Falha do motor.
Resultado de corte insatisfatório ou o motor tra-
balha com diculdade.
A lâmina não gira.
Ruídos, chocalhos ou vibrações anormais.
Não há tensão de rede.
Interruptor liga/desliga com
defeito.
Motor com defeito.
Relva longa de mais.
Bloqueio causado por corpos estranhos.
Altura de corte baixa de
mais.
Lâmina romba. Aar ou substituir a lâmina.
Zona da lâmina obstruída. Limpar o aparelho.
Lâmina montada de manei-
ra incorrecta
Lâmina bloqueada pela
relva.
Parafuso da lâmina frouxo.
Parafuso da lâmina frouxo.
Lâmina avariada. Substituir a lâmina.
PT
Peças sobressalentes
Utilizar, para compras posteriores de peças sobresselentes, o endereço da assistência
técnica ou o número de fax fornecido. Fornecer, quando do pedido, obrigatoriamente, o
número de pedido.
Lâmina sobressalente .................................................................................. 91095561
Saco de recolha de relva ............................................................................... 91095660
Acessórios
Kit de mondar (não incluído no escopo de fornecimento) ............................. 91099492
77
Page 78

PL
Spis treści
Zakres dostawy................................... 78
Przeznaczenie ..................................... 78
Wskazówki bezpieczeństwa .............. 79
Symbole na urządzeniu ................... 79
Symbole w instrukcji obsługi ............ 79
Ogólne wskazówki bezpieczeństwa . 80
Opis ogólny ......................................... 84
Opis działania .................................. 84
Przegląd ........................................... 84
Montaż ................................................. 84
Montaż uchwytu pałąkowego ........... 84
Montaż worka do zbierania
skoszonej trawy ............................... 85
Obsługa ............................................... 85
Zawieszenie/ zdjęcie worka do
zbierania/trawy ................................. 85
Ustawienie wysokości koszenia ....... 85
Włączenie i wyłączenie ................... 85
Wskaźnik poziomu ........................... 86
Praca przy użyciu kosiarki do trawy . 86
Czyszczenie/ konserwacja/
przechowywanie ................................. 86
Ogólne czyszczenie i prace
konserwacyjne ................................. 87
Wymiana noża ................................. 87
Przechowywanie .............................. 87
Utylizacja/ ochrona środowiska ........ 88
Dane techniczne ................................. 88
Gwarancja ........................................... 89
Serwis naprawczy............................... 89
Wykrywanie błędów ........................... 90
Części zamienne ................................. 90
Tłumaczenie oryginalnej
deklaracji zgodności WE ................. 140
Rysunek samorozwijający ............... 142
Grizzly Service-Center ..................... 143
Przed pierwszym uruchomieniem
urządzenia uważnie przeczytaj
tę instrukcję obsługi. Przechowuj
tę instrukcję w dobrze zabezpieczonym miejscu i przekazuj ją
każdemu kolejnemu właścicielowi
urządzenia, aby zawarte w niej informacje były zawsze dostępne dla
osób używających urządzenia.
Zakres dostawy
Proszę ostrożnie wyciągnąć urządzenie z
opakowania i sprawdzić, czy dostarczone
zostały wszystkie poniższe części:
- Kosiarka do trawy z zamontowanym
dolnym trzonkiem i pałąkiem uchwytowym z kablem
- Kosz na trawę (dwuczęściowy)
- Zaczep zabezpieczający kabel przed
rozciąganiem
- 2 uchwyty kabla
- Materiał do montażu uchwytu pałąkowego
- Materiał do montażu kosza
- Instrukcja obsługi
Przeznaczenie
Urządzenie jest przeznaczone wyłącznie
do koszenia trawy na powierzchniach zieleni w obszarze domowym.
To urządzenie nie jest przeznaczone do
zastosowania komercyjnego. W przypad-
ku użytkowania komercyjnego wygasają
prawa z tytułu gwarancji.
Każde inne zastosowanie, które nie zostało
dozwolone w jednoznaczny sposób, może
prowadzić do uszkodzeń urządzenia i stanowić poważne zagrożenie dla użytkownika.
Urządzenie jest przeznaczone wyłącznie do
użytku przez osoby dorosłe. Dzieciom oraz
78
Page 79
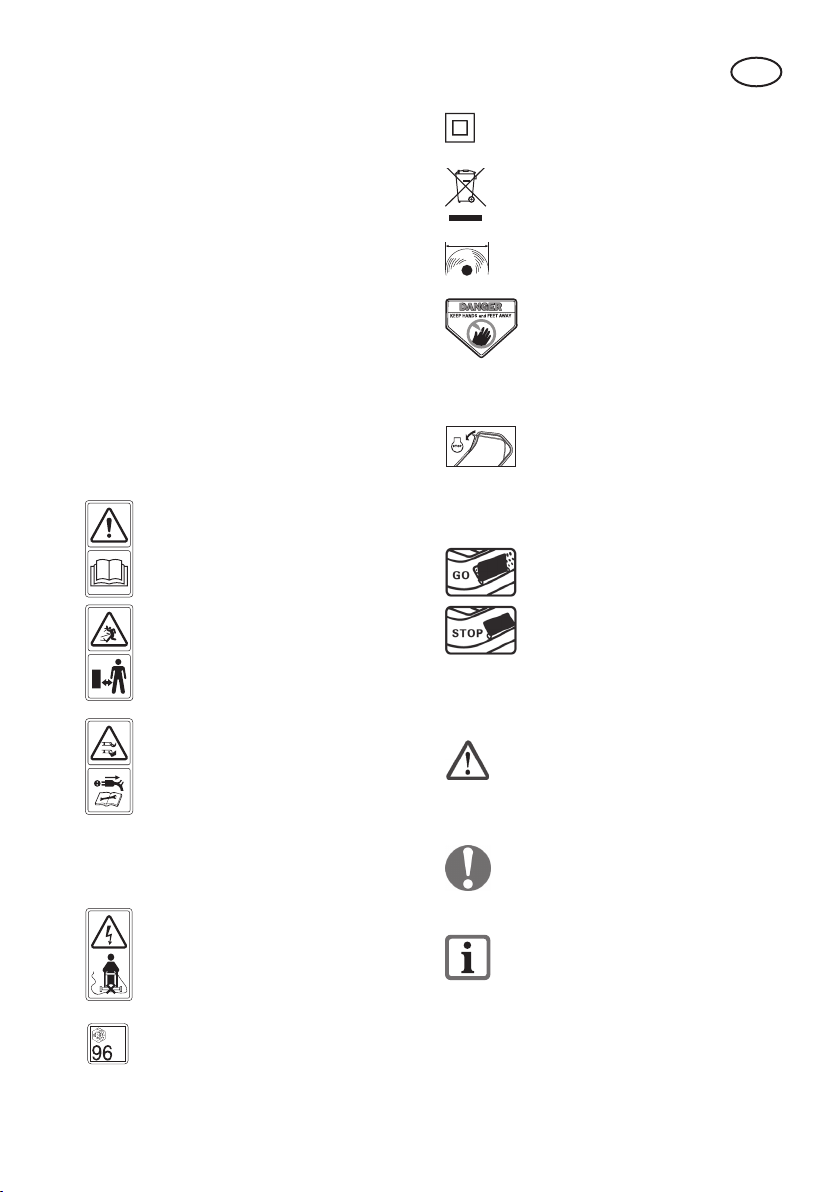
PL
osobom, które się nie zaznajomiły z niniejszą instrukcją, urządzenia nie wolno eksploatować. Eksploatacja urządzenia w deszczu
i wilgotnym otoczeniu jest zabroniona.
Producent nie ponosi odpowiedzialności
cywilnej za szkody, które są powodowane
ze względu na użycie niezgodne z przeznaczeniem i nieprawidłową obsługę.
Wskazówki bezpieczeństwa
W niniejszym ustępie zajęto się podstawowymi przepisami bezpieczeństwa w trakcie pracy przy użyciu elektrycznej kosiarki do trawy.
Symbole na urządzeniu
Uwaga!
Proszę uważnie przeczytać niniejszą instrukcję obsługi.
Niebezpieczeństwo urazów ze
względu na wyrzucane części.
Trzymać z daleka od tej kosiarki
osoby stojące w pobliżu.
Ostrożnie - ostre noże! Trzymać z
daleka ręce i nogi. Niebezpieczeństwo doznania obrażeń ciała!
Przed wykonaniem prac nastaw-
czych i czyszczenia, lub gdy kabel
sieciowy się poplątał, albo jest
uszkodzony, wyłączyć silnik i wyciągnąć wtyczkę sieciową.
Niebezpieczeństwo ze względu
uszkodzony kabel. Kabel sieciowy
trzymać z daleka od urządzenia i
noża tnącego!
Poziom ochrony II
Urządzeń elektrycznych nie należy
wyrzucać wraz z odpadami i śmieciami z gospodarstw domowych
Okrąg cięcia
Zagrożenie! Stopy i dłonie
trzymać z dala od belki
nożowej.
Niebezpieczeństwo odniesienia obrażeń!
W chwili zwolnienia dźwigni ro-
zruchowej urządzenie wyłącza
się.
Wskaźnik poziomu napełnienia:
Klapa otwarta: Kosz pusty
Klapa zamknięta: Kosz pełny
Symbole w instrukcji obsługi
Symbol niebezpieczeństwa z
informacjami na temat ochrony
osób i zapobiegania szkodom
materialnym.
Znak nakazu (w miejscu wykrzyknika
objaśnienie nakazu) z informacjami
na temat zapobiegania szkodom.
Znak informacyjny ze wskazówka-
mi ułatwiającymi posługiwanie się
urządzeniem.
Informacje odnośnie poziomu
L
WA
mocy akustycznej L
dB
in dB.
wa
79
Page 80
PL
Ogólne wskazówki bezpie-
czeństwa
Ważne! Przeczytać dokładnie in-
strukcję obsługi. Przechowywać
instrukcję, aby móc do niej zajrzeć
w dowolnej chwili.
W przypadku nieprawidłowej
eksploatacji urządzenie może
spowodować poważne urazy. W
celu uniknięcia szkód osobowych
i rzeczowych, proszę koniecznie
przeczytać i przestrzegać następujących wskazówek bezpieczeństwa
ię dobrze zaznajomić ze wszystkimi częściami obsługi.
Ostrzeżenie! To urządzenie elek-
tryczne wytwarza w czasie pracy
pole elektromagnetyczne. Pole to
może w określonych warunkach
wpływać na aktywne lub pasywne
implantaty medyczne. Aby zmniej-
szyć niebezpieczeństwo doznania
poważnych lub śmiertelnych obrażeń, zalecamy osobom posiadającym implantaty medyczne
skonsultowanie się z lekarzem i
producentem implantatu przed roz-
poczęciem obsługiwania maszyny.
Przygotowanie:
• Urządzenie nie jest przeznaczone do
użytku przez osoby (łącznie z dziećmi),
które posiadają ograniczone zdolności
zyczne, psychiczne lub sensoryczne,
lub które nie posiadają doświadczenia
lub/i wiedzy, chyba, że będą one we
właściwy sposób nadzorowane lub poinstruowane w zakresie obsługi urządzenia przez upoważnioną osobę.
• Proszę nigdy nie pozwalać dzieciom i
innym osobom, które nie znają niniej-
szej instrukcji obsługi, eksploatować
tego urządzenia. Lokalne postanowienia mogą ustalać minimalny wiek osób
obsługujących urządzenie.
• Proszę nigdy nie stosować urządzenia
w czasie, w którym w pobliżu są osoby,
a szczególnie dzieci, oraz zwierzęta
domowe.
• Dzieci należy nadzorować, aby wykluczyć zabawę urządzeniem.
• Osoba obsługująca lub użytkownik są
odpowiedzialni za wypadki i urazy innych osób oraz ich mienia.
• Proszę sprawdzić teren, w którym eksploatowane jest urządzenie, i usunąć
kamienie, kije, druty oraz inne ciała
obce, które mogą zostać uchwycone i
wyrzucone.
• Proszę zawsze nosić odpowiednią
odzień roboczą i stabilne obuwie z
przeciwpoślizgową podeszwą oraz
wytrzymałe, długie spodnie. Urządzenia nie należy używać, gdy chodzą
Państwo boso lub noszą niezapinane
sandały.
Unikać noszenia luźnej odzieży,
odzieży ze zwisającymi sznurami czy
paskami.
• Przed każdym użyciem należy przeprowadzić kontrolę wzrokową urządzenia. Proszę nie eksploatować
urządzenia, gdy brak jest urządzeń
ochronnych (np. osłony odbojowej lub
worka do zbierania skoszonej trawy),
części urządzenia tnącego, lub trzpienie są zużyte lub uszkodzone. W celu
uniknięcia niewyważenia, uszkodzone
narzędzia i trzpienie można wymieniać
jedynie jako zestawy.
• W przypadku urządzeń z wieloma
narzędziami tnącymi zachować ostrożność, gdyż ruch jednego noża może
prowadzić do rotacji pozostałych noży.
• Proszę używać wyłącznie części za-
80
Page 81

PL
miennych i części wyposażenia, które
zostały dostarczone i są zalecane
przez producenta. Użycie obcych
części zamiennych prowadzi do utraty
roszczeń z tytułu gwarancji.
• Przed użyciem należy zawsze sprawdzić przewód zasilający oraz przedłużacz pod kątem widocznych oznak
uszkodzenia lub zużycia. W przypadku
uszkodzenia przewodu podczas pracy
należy go natychmiast odłączyć od
sieci. Nie dotykać przewodu przed jego
odłączeniem. Nie używać urządzenia z
uszkodzonym lub zużytym kablem.
Praca przy użyciu urządzenia
Proszę w trakcie pracy nie przysta-
wiać nóg i rąk w pobliże obracających się części lub pod te części.
Istnieje niebezpieczeństwo doznania
obrażeń!
Przestrzegać przepisów dotyczących
ochrony przed hałasem i przepisów
lokalnych.
• Proszę wyłączyć silnik zgodnie z instrukcją i jedynie w przypadku, gdy Państwa
nogi stoją się w bezpiecznej odległości
od narzędzi tnących.
• Proszę nie stosować urządzenia w
deszczu, w złych warunkach atmosfe-
rycznych, w wilgotnym otoczeniu lub na
mokrej trawy. Pracę należy wykonywać
przy dziennym świetle lub przy dobrym
oświetleniu.
• Pracy przy użyciu urządzenia nie należy
wykonywać w przypadku zmęczenia lub
braku koncentracji, lub po spożyciu alkoholu wzgl. tabletek. Należy zawsze w
odpowiednim czasie robić przerwę. Do
pracy należy podchodzić z rozsądkiem.
• W trakcie pracy proszę zwrócić uwagę
na stabilną pozycję, a szczególnie na
pochyłościach. Pracę należy zawsze
wykonywać w poprzek pochyłości, nigdy
do góry lub w dół. Proszę zachować
szczególną ostrożność, gdy zmieniają
Państwo na pochyłości kierunek jazdy.
Pracy nie należy wykonywać na zbyt
dużych pochyłościach.
• Urządzenie prowadzić wyłącznie w tempie kroku pieszego. Proszę zachować
szczególną ostrożność, gdy odwracają
Państwo urządzenie, przyciągają je do
siebie, lub też, gdy poruszają się Państwo do tyłu.
• Proszę ostrożnie włączyć urządzenie
zgodnie z instrukcjami z niniejszej in-
strukcji obsługi. Proszę zwrócić uwagę
na odpowiednią odległość nóg do obracających się noży.
• Nie przechylać urządzenia w trakcie
uruchomienia z wyjątkiem, gdy jest to
konieczne w trakcie rozruchu w wysokiej
trawie. W tym przypadku proszę przechylić urządzenie poprzez naciśnięcie
pałąka chwytowego tak, aby przednie
koła urządzenia zostały lekko podniesione. Proszę przed ponownym odstawieniem urządzenia na podłożu zawsze
sprawdzać, czy obydwie ręce znajdują
się pozycji roboczej.
• Nigdy nie należy wykonywać pracy bez
worka do zbierania skoszonej trawy lub
osłony odbojowej. Proszę zawsze trzymać się z dale od otworu wylotowego.
• Nie uruchamiać silnika stojąc przed
otworem wylotowym.
Uwaga, niebezpieczeństwo! Nóż ob-
raca się jeszcze przez pewien czas.
Istnieje niebezpieczeństwo obrażeń.
• Urządzenia nie wolno podnosić lub
transportować w czasie, w którym silnik
pracuje. Urządzenie należy wyłączać,
81
Page 82

PL
gdy jest koniecznie jego przewrócenie w
celu wykonania transportu, przekrocze-
nia powierzchni innych niż trawa, lub w
przypadku, gdy urządzenie jest umiesz-
czane lub odbierane z powierzchni przeznaczonych do koszenia.
• Otwór wylotowy trawy musi być stale
czysty i wolny. Ścięty materiał należy
usuwać jedynie przy zatrzymanym urzą-
dzeniu.
• Nigdy nie zostawiać urządzenia w miejscu pracy bez nadzoru.
• Nie należy pracować przy użyciu
urządzenia, które jest uszkodzone,
niekompletne, lub które zostało przebu-
dowane bez zgody producenta. Nigdy
nie używać urządzenia z uszkodzonymi
urządzeniami zabezpieczającymi lub
osłonami, lub też w przypadku braku
urządzeń zabezpieczających, takich jak
urządzeń odchylających i/lub urządzeń
do zbierania skoszonej trawy.
• Nie przeciążać urządzenia. Należy pracować tylko w podanym przedziale mocy,
nie należy zmieniać ustawień regulatora
przy silniku. Do cięższych pracy nie stosować maszyn o niższej mocy. Proszę
nie stosować urządzenia do celów, do
których nie jest ono przeznaczone.
• Nie eksploatować urządzenia w pobliżu
palnych cieczy i gazów. W przypadku
nieprzestrzegania tych zaleceń istnieje
niebezpieczeństwo pożaru lub wybuchu.
• Nigdy nie podnosić lub odnosić urządzenia w przypadku pracującego silnika.
• Wyłączyć urządzenie, wyciągnąć wtyczkę z gniazdka i upewnić się, że wszystkie ruchome części są zatrzymane:
- zawsze, gdy oddalają się Państwo od
maszyny,
- przed czyszczeniem otworu wylotowe-
go lub usunięciem blokad,
- jeżeli urządzenie nie jest używane,
- przed sprawdzeniem, czyszczeniem i
pracy przy użyciu urządzenia,
- jeżeli kabel sieciowy jest uszkodzony
lub poplątany,
- jeżeli w trakcie pracy urządzenie natraa na ciało obce lub pojawiają się nie-
normalne wibracje. W takim przypadku
należy sprawdzić urządzenie pod
kątem uszkodzeń lub je ewentualnie
naprawić.
• Proszę w żadnym wypadku nie umieszczać rąk i nóg w pobliżu obracających
się części lub pod nimi. W przypadku
koszenia przy użyciu sierpowatych noży
nie wolno się nigdy ustawiać przed
otworem wyrzutowym trawy.
Konserwacja i przechowywanie:
Podczas konserwacji noży należy
pamiętać o tym, że noże mogą się
poruszyć nawet przy odłączonym
źródle napięcia.
• Proszę zadbać o to, aby wszystkie
nakrętki, trzpienie i śruby były dobrze
dokręcone, i aby urządzenie było w
bezpiecznym stanie eksploatacyjnym.
• Przejrzeć kosiarkę pod kątem ewentualnych uszkodzeń.
• Naprawić uszkodzone części.
• Nie należy podejmować prób naprawiania urządzenia we własnym zakresie, chyba, że posiadają Państwo
w tym zakresie wykształcenie zawodowe. Wszystkie prace, które nie są
podane w niniejsze instrukcji, mogą
być wykonywane wyłącznie przez
upoważnione przez nas placówki ser-
wisowe.
• Urządzenie należy przechowywać w
suchym miejscu poza zasięgiem
dzieci.
• Z urządzeniem należy obchodzić się
z należytą troską. Narzędzia nale-
82
Page 83

PL
ży utrzymywać tak, aby były ostre
i czyste, co umożliwia łatwiejsze i
bezpieczniejsze wykonywanie pracy.
Proszę przestrzegać instrukcji (przepisów) konserwacyjnych.
• Proszę nosić rękawice, gdy zmieniają
Państwo urządzenie tnące.
• Należy regularnie sprawdzać urządzenie do zbierania trawy pod kątem
zużycia i deformacji. Ze względów
bezpieczeństwa zużyte i uszkodzone
części należy wymieniać. Proszę w
trakcie ustawiania noży zachować
szczególną ostrożność, aby Państwa
palce nie zostały zakleszczone pomiędzy obracającymi się nożami i nieruchomymi częściami maszyny.
• Proszę sprawdzać, czy są używane
zapasowe narzędzia tnące, które są
dopuszczone przez producenta.
Bezpieczeństwo elektryczne:
• Proszę zwrócić uwagę na to, aby napięcie sieciowe było zgodne z danymi
znajdującymi się na tabliczce znamio-
nowej.
• W miarę możliwości urządzenie należy podłączać jedynie do gniazda sieciowego z wyłącznikiem ochronnym
prądowym (wyłącznikiem FI) o prądzie
wyzwalającym nie przekraczającym
30 mA.
• Proszę uniknąć kontaktu ciała z uziemionymi częściami (z płotami metalowymi, słupkami metalowymi).
• Należy stosować wyłącznie dopusz-
czone kable sieciowe typu konstrukcji
H05VV-F lub H07RN-F, których długość wynosi maksymalnie 75 m, i które są przeznaczone do stosowania na
zewnątrz. Przekrój poprzeczny prze-
wodu plecionego kabla sieciowego
musi wynosić przynajmniej 2,5 mm
2
.
Przed użyciem należy zawsze całko-
wicie rozwinąć bęben kablowy. Proszę
sprawdzać kabel pod kątem uszkodzeń.
• W celu zamocowania kabla sieciowego proszę zastosować przewidziane w
tym celu zawieszenie do kabla.
• Kabel sieciowy należy utrzymywać z
daleka od narzędzia tnącego. Noże
tnące mogą uszkodzić kabel sieciowy i prowadzić do dotknięcia części
przewodzących napięcie. Osoba obsługująca powinna prowadzić kabel
sieciowy zasadniczo za sobą.
• Proszę nie używać kabla sieciowego
do wyciągania wtyczki z gniazda sieciowego. Kabel należy chronić przed
wysoką temperaturą, olejem i ostrymi
krawędziami.
• Jeżeli przewód łączący jest uszkodzony, urządzenie należy wyłączyć i
wtyczkę sieciową wyciągnąć z gniazdka wtykowego. Jeżeli kabel sieciowy
zostanie uszkodzony, to musi on, w
celu uniknięcia uszkodzeń, zostać wymieniony przez producenta lub przez
jego serwis, albo też przez wykwalikowaną osobę.
• Proszę nie podłączać uszkodzonego
kabla sieciowego do sieci elektrycznej. Uszkodzonego kabla sieciowego
nie wolno dotykać, gdy jest on podłączony do sieci elektrycznej. Uszkodzony kabel sieciowy może prowadzić
do dotknięcia części przewodzących
napięcie elektryczne.
83
Page 84
PL
Opis ogólny
Opis działania
Kosiarka elektryczna posiada narzędzie
obracające się równolegle do płaszczyzny cięcia. Jest ona wyposażona w silnik
elektryczny dużej mocy, solidną obudowę
metalową, wyłącznik bezpieczeństwa,
zderzak oraz kosz na skoszoną trawę ze
wskaźnikiem poziomu. Dodatkowo urządzenie można przestawiać na 7 różnych
wysokości i jest ono wyposażone w lekkobieżne kółka.
Sposób działania części obsługi proszę
zaczerpnąć z poniższych opisów.
Ilustracje sposobu obsługi i konser-
wacji znajdziesz na stronie 2 - 4
Przegląd
1 Uchwyt pałąkowy
2 Dźwignia włączająca
3 Górna solidną obudowę
metalową,
4 Dolny trzonek
5 Osłona odbojowa
6 Dolne solidną obudowę
metalową,
7 Worek do zbierania skoszonej
trawy
8 Tylne kółka
9 Przednie kółka
10 Obudowa kosiarki do trawy
11 Dźwignia do ustawiania wyso-
kości koszenia
12 Uchwyt kabla
13 Zaczep zabezpieczający kabel
przed rozciąganiem
14 Kabel urządzenia
15 Przycisk odryglowujący
(niewidoczny)
16 kabel sieciowy
Montaż
Przed wszelkimi pracami na urządzeniu należy wyciągać wtyczkę
sieciową.
Montaż uchwytu pałąkowego
Montaż kabłąka dolnego:
Umieścić końce kabłąka dolne-
go (4) w uchwytach blaszanych
i przetknąć z każdej strony od
zewnątrz śrubę.
Umieścić dostarczone w komplecie podkładki i nałożyć dolne
nakrętki z uchwytem gwiaz-
dowym (6).
Należy pamiętać o tym, że
nakrętki z uchwytem gwiazdowym muszą być zamontowane wewnątrz.
Dokręcić mocno nakrętki z uchwytem gwiazdowym (6).
Montaż pałąka uchwytowego:
Dokręcić mocno nakrętki z uch-
Zapinanie uchwytu kabla:
Zatrzasnąć uchwyt kablowy (
Zamocować uchwyt kabłąkowy
(1) załączonymi w komplecie
śrubami, podkładkami i górnymi
nakrętkami z uchwytem gwiaz-
dowym (3) po stronie prawej i
lewej do kabłąka dolnego (4).
Możliwe są dwie pozycje.
Obracać nakrętki z uchwytem
gwiazdowym (3) w kierunku ruchu wskazówek zegara.
wytem gwiazdowym (3).
12) na kabłąku dolnym i zamocować nimi kabel zasilający urządze-
nie (
14).
84
Page 85

PL
Montaż worka do zbierania
skoszonej trawy
Składanie kosza na trawę:
Wepnij uszczelkę gumową siatki
worka (19) do misy worka na
trawę (7).
Wsunąć konstrukcję metalową
(20) do szalki. Zwrócić uwagę
na to, by konstrukcja metalowa
była całkowicie wsunięta.
Nałożyć płaskowniki plastikowe (21) i (22) na konstrukcję
metalową (20).
Zamocować konstrukcję
metalową (20) załączonymi w
komplecie śrubami.
Obsługa
Uwaga: Nie używaj urządzenia
bez prawidłowo założonego,
kompletnego zderzaka albo
kosza na trawę. Niebezpieczeń-
stwo zranienia!
Zawieszenie/ zdjęcie worka do
zbierania/trawy
1. Podnieś zderzak (5).
2. Zawieś kosz na trawę (7) w
przewidzianym do tego celu
zaczepie (24) na tylnej części
urządzenia.
3. Ustaw zderzak (5) na koszu na
trawę (7), utrzymuje on kosz w
odpowiednim położeniu.
4. Aby zdjąć i/lub opróżnić kosz na
trawę (7) podnieś zderzak (5) i
odczep kosz. Przechyl zderzak
do obudowy urządzenia.
Opróżnianie kosza na trawę patrz
rozdział „Utylizacja i ochrona śro-
dowiska”.
Ustawienie wysokości koszenia
Wyłączyć urządzenie, wyciągnąć
wtyczkę sieciową i poczekać, aż
nóż zatrzyma się. Istnieje niebezpieczeństwo szkód osobowych.
Chwyć dźwignię (11) do ustawiania
wysokości koszenia i przemieść ją
przez zapadki w położenie żądanej
wysokości koszenia.
Wysokość koszenia można ustawić
w 7 pozycjach: 25 - 75 mm
Prawidłowa wysokość koszenia wynosi
w przypadku trawnika ozdobnego około
30-45 mm, a trawnika użytkowego około
40-65 mm.
W przypadku pierwszego koszenia
w sezonie należy wybrać większą
wysokość koszenia.
Włączenie i wyłączenie
1. Złóż na końcu kabla sieciowego
pętlę i zawieś ją w zaczepie
chroniącym kabel przed rozcią-
ganiem (13).
2. Podłączyć urządzenie do napięcia sieciowego.
3. Proszę przed włączeniem zwrócić uwagę na to, aby urządzenie
nie dotykało do żadnych przed-
miotów.
4. W celu włączenia
proszę nacisnąć
przycisk odryglo-
wujący (15), znajdujący się przy uchwycie i jednocześnie przytrzymać dźwignię
włączającą (2). Zwolnić przycisk
odryglowujący (15).
1
2
85
Page 86

PL
5. W celu wyłączenia urządzenia,
dźwignię włączającą należy
zwolnić (2).
Po wyłączeniu urządzenia nóż
obraca się jeszcze przez parę
sekund. Proszę nie dotykać poruszającego się noża. Istnieje
niebezpieczeństwo doznania
szkód osobowych.
Wskaźnik poziomu
Kosz na trawę posiada z boku wskaźnik
poziomu. Aerodynamiczne sterowanie
klapką dodatkowo ułatwia optymalne napełnianie worka.
Klapka otwarta:
kosz na trawę jest pusty
Klapka zamknięta:
kosz na trawę jest pełny
Praca przy użyciu kosiarki do
trawy
Regularnie koszenie trawy pobudza trawę
do silniejszego tworzenia liści, przyczynia
się jednocześnie do obumierania chwastów. Dlatego też po każdym koszeniu
trawy trawa uzyskuje większą gęstość
i jednocześnie można ją równomiernie
obciążać.
Pierwsze koszenie należy wykonać mniej
więcej na początku kwietnia, gdy wysokość trawy osiąga 70 - 80 mm. W głównym okresie wegetacyjnym trawę należy
kosić przynajmniej raz w tygodniu.
• Koszenie należy rozpoczynać w pobli-
żu gniazda wtykowego i poruszać się
w kierunku od tego gniazda.
• Kabel przedłużający należy zawsze prowadzić za sobą i po zawróceniu należy
go umieszczać po skoszonej stronie.
• Proszę prowadzić urządzenie w tempie kroku pieszego po w miarę możliwości prostych pasach. W celu prze-
prowadzenia koszenia bez luk, pasy
powinny zawsze zachodzić na siebie
na szerokości paru centymetrów.
• Głębokość koszenia należy ustawić
tak, aby urządzenie nie zostało przeciążone. W przeciwnym razie może
dojść do uszkodzenia silnika.
• Pracę na pochyłościach należy wykonywać zawsze poprzecznie do stoku.
Proszę zachować szczególną ostrożność w trakcie cofania się i ciągnięcia
urządzenia.
• Po każdym użyciu proszę wyczyścić
urządzenie w sposób opisany w roz-
dziale „Czyszczenie, konserwacja,
przechowywanie“).
Po pracy i w celu przetransporto-
wania urządzenia należy go wyłączyć, wyciągnąć wtyczkę sieciową
i poczekać, aż nóż zatrzyma się.
Istnieje niebezpieczeństwo dozna-
nia szkód osobowych.
Czyszczenie/ konserwacja/ przechowywanie
Proszę zlecać wykonanie prac,
które nie są opisane w niniejszej
instrukcji, przez upoważnioną
przez nas placówkę serwisową.
Proszę stosować wyłącznie oryginalne części zamienne.
W trakcie manipulowania nożem
należy nosić rękawice.
86
Page 87

PL
Proszę przed wykonaniem prac
konserwacyjnych i czyszczenia wyłączyć urządzenie, wyciągnąć wtyczkę
sieciową i poczekać, aż nóż zatrzyma się. Istnieje niebezpieczeństwo
doznania szkód osobowych.
Ogólne czyszczenie i prace
konserwacyjne
Nie spryskiwać kosiarki do tra-
wy wodą.
• Urządzenie należy stale utrzymywać
w czystości. Do czyszczenia stosować
szczotkę lub szmatkę, jednakże nie
należy używać żadnych środków do
czyszczenia lub rozpuszczalników.
• Po koszeniu przylegające resztki roślin należy usuwać z kółek, otworów
wentylacyjnych, otworu wyrzutowego
i komory noża kawałkiem drewna lub
plastiku. W tym celu nie stosować
twardych i spiczastych narzędzi, gdyż
mogą one uszkodzić urządzenie.
• Kółka należy od czasu do czasu oliwić.
• Przed każdym użyciem kosiarkę do
trawy należy sprawdzać pod kątem
widocznych usterek, takich jak nie
przytwierdzone lub uszkodzone części.
Proszę sprawdzić, czy nakrętki, trzpienie
i śruby są dobrze przymocowane.
• Proszę sprawdzić osłony i urządzenia ochronne pod kątem uszkodzeń i
stabilności przymocowania. W razie
konieczności należy je wymienić.
Wymiana noża
1. Proszę obrócić urządzenie.
2. Używać odpornych rękawic
ochronnych i przytrzymać nóż
(25). Odkręcić śrubę noża w
kierunku odwrotnym do ruchu
zegara (26) za pomocą klucza
płaskiego z wrzeciona silnika.
3. Zamontować nowy nóż w odwrotnej kolejności. Zwrócić uwagę na to, aby nóż był ustawiony
w prawidłowej pozycji i aby śruba była dobrze dokręcona.
Przechowywanie
Aby urządzenie zajmowało mniej
miejsca, odblokować cztery nakrętki z uchwytem gwiazdowym i
złożyć kabłąk uchwytu i kabłąk dolny. Zwrócić uwagę na to, aby nie
zacisnąć kabli.
• Urządzenie należy przechowywać w
suchym miejscu poza zasięgiem dzieci.
• Przed ustawieniem urządzenia w za-
mkniętym pomieszczeniu poczekać,
aż silnik ostygnie.
• Nie zapakowywać urządzenia w worki
nylonowe, gdyż może się wytwarzać
wilgoć.
Odpowiedzialności cywilnej nie ponosimy
za szkody wywołane przez nasze urządzenia, jeżeli zostaną wywołane z powodu nieprawidłowo wykonanej naprawy lub
zastosowania nieoryginalnych części zamiennych wzgl. zastosowania urządzenia
niezgodnego z przeznaczeniem.
Jeżeli nóż jest tępy, to jego ostrzenie
może wykonać warsztat specjalistyczny.
Jeżeli nóż jest uszkodzony lub wykazuje
niewyważenie, to należy go wymienić
(patrz rozdział „Części zamienne“).
87
Page 88

PL
Utylizacja/ ochrona środowiska
Přístroj, příslušenství a obal odevzdejte
v souladu s požadavkami na ochranu
životního prostředí do recyklační sběrny.
Urządzeń elektrycznych nie należy
wyrzucać razem z odpadami domo-
wymi.
•
Oddaj urządzenie w punkcie recy-klingu.
Użyte do produkcji urządzenia części plastikowe i metalowe mogą zostać od siebie precyzyjnie oddzielone, a następnie
poddane utylizacji. Zwróć się po poradę
do naszego Centrum Serwisowego.
• Utylizację przesłanych nam uszko-
dzonych urządzeń przeprowadzamy
bezpłatnie.
• Przekaż wycięty materiał do komposto-
wania, nie wyrzucaj go do kontenera na
śmieci.
Dane techniczne
Elektryczna kosiarka
do trawy ...............................ERM 1846 G
Moc pobierana przez silnik ........... 1800 W
Napięcie sieciowe ....... 230-240 V~, 50 Hz
Klasa ochrony .....................................II
Rodzaj ochrony..................................IP24
Prędkość obrotowa biegu
jałowego ...................................2900 min
Okrąg cięcia.....................................46 cm
Wysokość koszenia ....................... 25 - 75 mm
Ciężar ............................................28,5 kg
Pojemność kosza do zbierania trawy ..60 l
Poziom ciśnienia akustycznego
(L
) ..........................82,7 dB(A), KpA=3 dB
pA
Poziom mocy ciśnienia akustycznego (L
gwarantowany ......................... 96 dB(A)
zmierzony ....... 93,1 dB(A), K
Wibracje (a
) ........... 1,09 m/s2, K=1,5 m/s
n
=1,78 dB
wA
Urządzenie przeznaczone jest do pracy w
sieci zasilającej o impedancji systemowej
Zmax w punkcie zdawczo-odbiorczym
(przyłącze domowe) maks. 0,269 omów.
Użytkownik musi zapewnić, że urządzenie
będzie eksploatowane tylko w sieci spełniającej te wymagania.
W razie potrzeby informacji o impedancji
systemowej można zasięgnąć w lokalnym
zakładzie energetycznym. Parametry akustyki i wibracji zostały określone zgodnie
z normami wymienionymi w Deklaracji
Producenta.
Zmiany techniczne i optyczne mogą być
wprowadzane bez zapowiedzi w trakcie
procesu dalszego rozwoju urządzenia.
Wszelkie wymiary, wskazówki i dane
podane w niniejszej instrukcji obsługi są
w związku z tym podawane w sposób
niewiążący. Roszczenia zgłaszane na
podstawie treści instrukcji obsługi są nieważne.
-1
)
wA
2
88
Page 89

PL
Gwarancja
• Na niniejsze urządzenie udzielamy
24-miesiącznej gwarancji.
• To urządzenie nie jest przeznaczone
do zastosowania komercyjnego.
W przypadku użytkowania komercyj-
nego wygasają prawa z tytułu gwaran-
cji.
• Szkody wywołane przez naturalne
zużycie, przeciążenie lub nieprawidłową obsługę są wykluczone z zakresu
gwarancji. Niektóre części konstrukcyjne ulegają normalnemu zużyciu i
są wykluczone z zakresu gwarancji.
• Warunkiem skorzystania z uprawnień
gwarancyjnych jest ponadto prze-
strzeganie wskazówek dotyczących
oczyszczania i konserwacji urządze-
nia.
• Szkody wywołane wadami materiałowymi lub produkcyjnymi zostaną bezpłatnie usunięte przez dostarczenie
zastępczego urządzenia bądź przez
naprawę.
Warunkiem skorzystania ze świadcze-
nia gwarancyjnego jest przekazanie
nierozmontowanego urządzenia wraz
z dowodem zakupu i gwarancji naszemu Centrum Serwisowemu.
Serwis naprawczy
• Naprawy nie objęte gwarancją można
zlecać odpłatnie naszemu centrum
serwisowemu. Nasze Centrum Ser-
wisowe chętnie sporządzi kosztorys
naprawy.
Przyjmujemy tylko urządzenia, które
zostały nam przysłane w odpowiednim opakowaniu z opłaceniem pełnego kosztu przesyłki.
• Uwaga: W przypadku reklamacji gwa-
rancyjnej lub zlecenia naprawy użytkownik powinien dostarczyć oczyszczone urządzenie wraz z informacją
o usterce pod adres naszego punktu
serwisowego.
Przesyłki nadane bez uiszczenia
wystarczającej opłaty pocztowej,
w charakterze przesyłki o nietypowych wymiarach, ekspresem lub
inną przesyłką specjalną nie będą
przyjmowane.
• Utylizację przesłanych nam uszkodzonych urządzeń przeprowadzamy
bezpłatnie.
89
Page 90

PL
Wykrywanie błędów
Problem Możliwa przyczyna Usuwanie błędów
Sprawdzić gniazdo wtykowe,
Zanik napięcia sieciowego
Włącznik/ wyłącznik jest
Urządzenie nie uruchamia się
Silnik wyłącza się Blokada przez obce ciało Usunąć obce ciała
Wynik koszenia nie jest
zadawalający lub utrudniona praca silnika
Nóż nie obraca się
Nienormalne odgłosy,
stukanie lub wibracje
uszkodzony
Szczotki węglowe są zużyte
Uszkodzony silnik
Trawa jest za długa
Wysokość koszenia jest za
mała
Nóż jest tępy
Komora noża jest zatkana Wyczyścić urządzenie
Nóż jest zamontowany w
nieprawidłowy sposób
Nóż jest zablokowany przez
trawę
Śruba noża jest poluzowana Dokręcić śrubę noża
Śruba noża jest poluzowana Dokręcić śrubę noża
Nóż jest uszkodzony Wymienić nóż
kabel, przewód, wtyczkę,
ewentualnie zlecić naprawę
fachowcowi-elektrykowi
Naprawa przez serwis
Ustawić wyższą wysokość
koszenia. Podnieść lekko
przednie kółka poprzez naciśnięcie na pałąk uchwytowy
Ustawić mniejszą wysokość
koszenia
Zlecić naostrzenie noża lub
go wymienić
Zamontować nóż w prawidłowy sposób
Usunąć trawę
Części zamienne
Nabywaj części zamienne pod podanym adresem serwisowym lub numerem
Zapasowy nóż ................................................................................................91095561
Worek do zbierania skoszonej trawy ...............................................................91095660
telefaksu.
Akcesoria
Zestaw do mulczowania (nie wchodzi w zakres dostawy)...............................91099492
90
Page 91

CZ
Obsah
Objem dodávky ................................... 91
Účel použití ......................................... 91
Bezpečnostní pokyny......................... 92
Symboly v návodu ............................ 92
Symboly v návodu ............................ 92
Obecné bezpečnostní pokyny .......... 92
Obecný popis ...................................... 95
Popis funkce .................................... 95
Přehled ............................................. 96
Návod k montáži ................................. 96
Montáž rámové rukojeti .................... 96
Montáž sběrného koše ..................... 96
Obsluha ............................................... 97
Zavěšení/sejmutí sběrného koše ..... 97
Nastavení výšky sekání ................... 97
Zapnutí a vypnutí ............................. 97
Indikace naplnění ............................. 97
Práce se sekačkou ........................... 98
Čištění/údržba/skladování ................. 98
Čištění a obecná údržba .................. 98
Výměna nože ................................... 98
Skladování ....................................... 99
Odklízení a ochrana okolí .................. 99
Technické údaje .................................. 99
Záruka ................................................ 100
Opravy - služby ................................. 100
Hledání chyb ..................................... 101
Náhradní díly ..................................... 101
Překlad originálního prohlášení
o shodě CE ........................................ 140
Výkres sestavení .............................. 142
Grizzly Service-Center ..................... 143
Před prvním uvedením do provozu
si prosím pozorně přečtěte tento
návod k obsluze. Tento návod dob-
ře uschovejte a předejte jej každému dalšími uživateli, aby byly tyto
informace kdykoliv k dispozici.
Objem dodávky
Vybalte nástroj a zkontrolujte, je-li kompletní:
- Sekačky na trávu s připojeným spodní
rukojeť a zacházet se zařízeními, s
kabelem
- Sběrný koš
- Odlehčení kabelu
- 2 držáky kabelů
- Montážní materiál rukojeti
- Montážní materiál Sběrný koš
- Návod k obsluze
Účel použití
Přístroj je určen pouze pro sekání trávníků
a trávy v domácí oblasti.
Tento přístroj není určený pro komerční
využití. Při komerčním použití záruka za-
nikne.
Jakékoliv jiné použití, které tento návod
výslovně nepřipouští, může vést k poškození přístroje a může představovat vážné
nebezpečí pro uživatele.
Přístroj je určen k použití dospělou osobou. Děti a osoby, které nejsou s tímto
návodem obeznámeny, přístroj nesmějí
obsluhovat.
Obsluhující osoba nebo uživatel je odpovědný za nehody nebo škody na ostatních
osobách nebo jejich majetku.
Výrobce neručí za škody, které byly způsobeny použitím v rozporu s daným urče-
ním nebo chybnou obsluhou.
91
Page 92

CZ
Bezpečnostní pokyny
Tato část pojednává o základních bezpečnostních předpisech při práci s benzínovou sekačkou.
Symboly v návodu
Varování!
Přečtěte si návod k obsluze.
Nebezpečí poranění odmrštěný-
mi částmi.
Zabraňte přístupu okolo stojících
osob k přístroji.
Opatrně – ostré nože! Nohy a
ruce musí být v dostatečné vzdálenosti od přístroje. Nebezpečí
poranění!
Před nastavováním nebo čiště-
ním, po zamotání či poškození
síťového kabelu vypněte motor a
vytáhněte síťovou zástrčku.
Nebezpečí vyplývající z poško-
zeného síťového kabelu. Síťový
kabel udržujte v dostatečné vzdálenosti od přístroje a řezacích
nožů!
L
WA
Údaj o hladině hluku Lwa v dB
dB
Třída ochrany II
Elektrické přístroje nepatří do do-
mácího odpadu
Průměr střihu
Nebezpečí! Nohy a ruce musí
být v dostatečné vzdálenosti
od nožové lišty.
Nebezpečí poranění!
92
Po uvolnění startovací páčky
se přístroj vypne
Indikace naplnění:
Klapka otevřená:
Sběrný koš prázdný
Klapka zavřená:
Sběrný koš plný
Symboly v návodu
Výstražné značky s údaji pro za-
bránění škodám na zdraví anebo
věcným škodám.
Příkazové značky (namísto výkřič-
níku je vysvětlován příkaz) s údaji
pro prevenci škod.
Informační značky s informacemi
pro lepší zacházení s nástrojem.
Obecné bezpečnostní pokyny
Důležité! Pozorně si přečtěte tento
návod k obsluze. Návod k obsluze
uschovejte pro další potřebu.
Tento přístroj může při neodborném
používání způsobit vážná poranění.
Aby nedošlo k poranění osob a
věcným škodám, bezpodmínečně
si přečtěte a dodržujte následující
bezpečnostní pokyny a seznamte
se se všemi obslužnými díly.
Varování! Toto elektrické nářadí
vytváří během provozu elektromagnetické pole. Toto pole může
za určitých okolností omezovat
aktivní nebo pasivní lékařské implantáty. Pro snížení nebezpečí
Page 93
CZ
vážného nebo smrtelného zranění
doporučujeme osobám s lékařskými implantáty před obsluhou stroje
konzultovat implantát se svým lé-
kařem a výrobcem.
Příprava:
• Tento přístroj není určen k tomu, aby
jej používaly osoby (včetně dětí) s
omezenými fyzickými, senzorickými
nebo duševními schopnostmi, a/
nebo osoby, které nemají zkušenosti
s tímto přístrojem či mají nedostatek
vědomostí. Mohou jej používat pod
dohledem osoby zodpovědné za jejich
bezpečnost nebo po instruktáži, jak
přístroj používat.
• Malé děti by měly být pod dozorem,
aby bylo zajištěno, že si s přístrojem
nebudou hrát.
• Nedovolte, aby přístroj používaly děti
nebo osoby, které neznají návod k
obsluze. Místní ustanovení mohou
specikovat minimální stáří obsluhující
osoby.
• Přístroj nikdy nepoužívejte v blízkosti
osob, zejména dětí a domácích zvířat.
• Obsluha nebo uživatel je odpovědný
za nehody či poškození jiných lidí
nebo jejich vlastnictví.
• Zkontrolujte terén, kde budete přístroj
používat, odstraňte kameny, klacky,
dráty nebo jiná cizí tělesa, která by
mohl přístroj zachytit a odmrštit.
• Noste vhodný pracovní oděv, jako jsou
pevná obuv s neklouzavou podrážkou
a pevné, dlouhé kalhoty. Přístroj nepoužívejte, jste-li naboso nebo v otevře-
ných sandálech.
Při práci nenoste volný oděv nebo
oděv s dlouhými šňůrkami nebo pásky.
• Před každým použitím proveďte vizuální kontrolu přístroje. Přístroj nepoužívejte, pokud chybí, jsou poškozená
nebo opotřebovaná ochranná zařízení
(např. ochrana proti odraženým předmětům nebo sběrný koš), části řezacího zařízení nebo čepy. K zabránění
nevyvážení mohou být poškozené
nástroje a čepy vyměňovány jen v sa-
dách.
• U přístrojů s několika řeznými nástroji
buďte opatrní, protože pohyb jednoho
nože může způsobit rotaci ostatních
nožů.
• Používejte jen ty náhradní díly a
příslušenství, které byly dodány a doporučeny výrobcem. Používání cizích
dílů vede k okamžité ztrátě nároku na
záruku.
• Před použitím vždy zkontrolujte, zda
připojovací a prodlužovací kabel
nevykazují známky poškození nebo
opotřebení. Bude-li kabel při používání
poškozen, musíte jej okamžitě odpojit
z el. sítě. Před odpojením se kabelu
nedotýkejte. Přístroj nepoužívejte, je-li
kabel poškozený nebo opotřebený.
Práce s přístrojem:
Nohy a ruce nesmíte mít v blízkosti
nebo pod rotujícími díly. Hrozí ne-
bezpečí poranění!
Dodržujte ochranu proti hluku a
místní předpisy.
Motor nastartujte podle pokynů a jen
tehdy, máte-li nohy v dostatečné vzdálenosti od řezných nástrojů.
• Přístroj nepoužívejte v dešti, při špatném počasí, ve vlhkém prostředí nebo
na mokré trávě. Pracujte jen při denním světle či dobrém osvětlení.
• S přístrojem nepracujte, pokud jste
unaveni nebo se nemůžete soustředit, po požití alkoholu či léků. Během
93
Page 94

CZ
práce si vždy včas udělejte přestávku.
Pracujte s rozumem.
• Vždy dbejte, abyste při práci stáli stabilně, zejména na svazích. Pracujte
příčně ke svahu, nikdy ne přímo dolů
nebo nahoru. Buďte velmi opatrní při
změně směru jízdy na svahu. Nepracujte na příliš strmých svazích.
• Přístroj používejte jen při pomalé rychlosti. Buďte velmi opatrní při obracení,
přitahování přístroje či při jízdě po-
zpátku.
• Přístroj opatrně zapněte podle pokynů
v tomto návodu. Dbejte na dostateč-
nou vzdálenost nohou od rotujících
nožů.
• Přístroj při startování nenaklánějte,
ledaže je to zapotřebí při nájezdu do
vysoké trávy. V tomto případě přístroj
nakloňte zatlačením úchytné rukojeti
dolů tak, že přední kola přístroje lehce
nadzvednete nahoru. Vždy zkontrolujte, zda se obě ruce nachází v pracovní
poloze, dříve než přístroj zase položíte
zpět na zem.
• Nikdy nepracujte bez sběrného koše
nebo ochrany proti odraženým předmětům. Vždy se zdržujte v dostatečné
vzdálenosti od vyhazovacího otvoru.
• Motor nespouštějte, pokud stojíte před
vyhazovací šachtou.
Pozor, nebezpečí! Nůž dobíhá.
Hrozí nebezpečí poranění.
• Přístroj byste neměli zvedat nebo přepravovat, pokud běží motor. Přístroj
vypněte, pokud musí být kvůli přepravě nakloněn, křížíte-li jiné plochy než
travnaté a jedete-li s ním směrem k
nebo od ploch, které mají být posekány.
• Vyhazovací otvor trávy musí být stále
čistý a volný. Posekanou trávu odstra-
ňujte jen po zastavení stroje.
• Přístroj nenechávejte na pracovišti bez
dozoru.
• Nepracujte s poškozeným, nekompletním přístrojem nebo s přístrojem
přestavěným bez souhlasu výrobce.
Přístroj nikdy nepoužívejte s poškozenými ochrannými zařízeními nebo
kryty či s chybějícími bezpečnostními
zařízeními, jako jsou usměrňovací
zařízení a/nebo zařízení k zachytávání
trávy.
• Přístroj nepřetěžujte. Pracujte jen v
uvedeném výkonovém rozsahu a ne-
měňte nastavení regulátoru na motoru. Pro těžké práce nepoužívejte stroje
se slabým výkonem. Přístroj nepoužívejte k účelům, pro které není určen.
• Přístroj nepoužívejte v blízkosti hořlavých kapalin nebo plynů. V opačném
případě může dojít k požáru nebo vý-
buchu.
• Přístroj nikdy nezvedejte nebo neodnášejte, pokud motor běží.
• Přístroj vypněte a vytáhněte síťovou
zástrčku a přesvědčte se, zda se zastavily všechny pohyblivé díly:
- vždy, když opouštíte stroj,
- před čištěním vyhazovacího otvoru
nebo odstraněním zablokování,
- pokud přístroj nepoužíváte,
- před kontrolou, čištěním a údržbou
na stroji,
- je-li síťový kabel poškozený nebo
zamotaný,
- narazí-li přístroj při práci na překáž-
ku nebo dojde k nezvyklým vibracím.
V tomto případě zkontrolujte poškození přístroje a event. jej nechte
opravit.
• Nikdy nedávejte ruce a nohy do blízkosti rotujících částí nebo pod ně. U
rotačních sekaček nikdy nesmíte stát
před otvorem k vyhazování trávy.
94
Page 95

CZ
Údržba a skladování:
• Při údržbě nožů dávejte pozor, zda lze
s noži pohybovat dokonce i tehdy, je-li
odpojen zdroj napětí.
•
Přesvědčte se, zda jsou všechny matice, svorníky a šrouby pevně utaženy a
zda lze s přístrojem bezpečně pracovat.
• U sekačky zkontrolujte možná poško-
zení.
• Proveďte potřebné opravy poškozených dílů.
• Nikdy se nepokoušejte přístroj sami
opravovat, ledaže jste k tomu kompetentní na základě vašeho vzdělání.
Veškeré práce, které nejsou uvedeny
v tomto návodu, mohou provádět jen
námi autorizované zákaznické servisy.
• Přístroj uchovávejte na suchém místě
a mimo dosah dětí.
• O váš přístroj se řádně starejte. K
zajištění optimální a bezpečné práce
musí být nástroje čisté a ostré. Řiďte
se předpisy o údržbě.
• Měníte-li řezací zařízení, navlékněte si
ochranné rukavice.
• Pravidelně kontrolujte sběrný koš na
trávu, zda není opotřebován nebo
zdeformován. Z bezpečnostních důvodů vyměňte opotřebované nebo
poškozené části. Při nastavování nožů
obzvlášť opatrní, abyste si nepřiskřípli
prsty mezi rotující nože a pevné části
sekačky.
• Zkontrolujte, zda jsou použity náhradní
řezné nástroje schválené výrobcem.
Elektrická bezpečnost:
• Dbejte, aby síťové napětí odpovídalo
údajům uvedeným na typovém štítku.
• Přístroj podle možnosti připojujte jen
k zásuvkám s ochranným vypínačem
proti chybnému proudu (vypínač FI) se
jmenovitým proudem ne větším než
30 mA.
• Zabraňte dotyku těla s uzemněnými
díly (např. s kovovými ploty, kovovými
sloupky).
• Používejte jen schválené síťové kabely H05VV-F nebo H07RN-F, které jsou
dlouhé maximálně 75 cm a jsou určeny pro použití v terénu. Průřez vodiče
síťového kabelu musí činit minimálně
2
2,5 mm
kabel z kabelového bubnu. Zkontroluj-
te poškození kabelu.
• K uchycení síťového kabelu použijte k
tomu určené zavěšení.
• Při práci udržujte síťový kabel mimo
dosah řezacího nástroje. Řezné nože
mohou poškodit síťový kabel a přijít
do styku s vodivými díly. Síťový kabel
musí ze zásady vždy být za obsluhují-
cí osobou.
• Při vytahování zástrčky ze zásuvky
netahejte za kabel. Síťový kabel
chraňte před teplem, olejem nebo ost-
rými hranami.
• Přístroj vypněte a vytáhněte síťovou
zástrčku ze zásuvky, je-li síťový kabel poškozen. V případě poškození
síťového kabelu musí být tento kabel
vyměněn výrobcem, jeho zákaznickým
servisem nebo jinou kvalikovanou
osobou, aby se předešlo nebezpečí
úrazu.
• Poškozený síťový kabel nepřipojujte
k síti. Poškozeného síťového kabelu
se nedotýkejte, je-li připojen k síti.
Poškozený síťový kabel může vést ke
kontaktu s vodivými díly.
. Před použitím odviňte celý
Obecný popis
Popis funkce
Elektrická sekačka má řezný nástroj
otáčející se paralelně s řeznou rovinou.
Je vybavena výkonným elektromotorem,
95
Page 96
CZ
robustním kovovým krytem, bezpečnostním spínačem, ochranou proti odraženým
předmětům a sběrným košem s indikací
naplnění. Navíc lze přístroj 7násobně výškově přestavit a má lehce jdoucí kola.
Funkce obslužných částí je popsána následovně.
Přehled
1 Rámová rukojeť
2 Startovací páčka
3 Horní hvězdicová matice s ruko-
jetí
4 Spodní rukojeť
5 Ochrana proti odraženým před-
mětům
6 Spodní hvězdicová matice s ru-
kojetí
7 Sběrný koš
8 Zadní kola
9 Přední kola
10 Kryt přístroje
11 Páčka k nastavení výšky řezu
12 Kabelový držák
13 Odlehčení kabelu od tahu
14 Přístrojový kabel
15 Odblokovací tlačítko (není vidět)
16 Síťový kabel
nasaďte hvězdicové matice s
rukojetí (6).
Dbejte, že musí být hvězdicové
matice s rukojetí namontovány
zevnitř.
Přišroubujte hvězdicové matice
s rukojetí (6).
Montáž rámové rukojeti:
Rámovou rukojeť (1) upevněte
přiloženými šrouby, podložkami
a horními hvězdicovými matice-
mi s rukojetí (3) vpravo a vlevo
na spodní rukojeť (4). Jsou
možné dvě polohy.
Přišroubujte hvězdicové matice
Uchycení kabelových držáků
Hvězdicovými maticemi s rukojetí (3) otáčejte ve směru hodinových ručiček.
s rukojetí (3).
sponami:
Kabelové držáky ( , 12)
sponami uchyťte ke spodnímu držadlu a zaxujte jimi
přístrojový kabel
( 14).
Montáž sběrného koše
Návod k montáži
Před jakoukoli prací na přístroji
vytáhněte síťovou zástrčku ze zá-
suvky.
Montáž rámové rukojeti
Montáž spodní rukojeti:
Konce spodní rukojeti (4) na-
polohujte do přídržných plechů
a zvenčí prostrčte vždy jeden
šroub.
Umístěte přiložené podložky a
96
Sestavení sběrného koše:
Pryžovou chlopeň na síti sběr-
ného koše (19) za pomoci spon
uchyťte ve skořepině sběrného
koše (7).
Kovový rám (20) zasuňte do
skořepiny. Dbejte, aby byl kovový rám úplně zasunutý.
Plastové třmeny (21) a (22)
přehrňte přes kovový rám (20).
Kovový rám (20) zaxujte
přiloženými šrouby
Page 97

CZ
Obsluha
Pozor: Přístroj neprovozujte bez
připevněného sběrného koše
nebo bez ochrany proti odraženým předmětům. Nebezpečí
poranění!
Zavěšení/sejmutí sběrného
koše
1. Nadzvedněte ochranu proti od-
raženým předmětům (5)
2. Sběrný koš (7) zavěste do připraveného závěsu (24) na zadní
straně přístroje.
3. Napolohujte ochranu proti
odraženým předmětům (5) na
sběrném koši (7), udrží jej ve
správné poloze.
4. K sejmutí sběrného koše (7)
nadzvedněte ochranu proti odraženým předmětům (5) a vyvěste
sběrný koš. Ochranu proti odraženým předmětům sklopte zpět na
kryt přístroje.
K vyprázdnění sběrného koše viz
také kapitolu „Likvidace/ochrana
životního prostředí“.
Správná výška sekání u okrasného trávníku činí přibližně 30 - 45 mm, v případě
užitkového trávníku přibližně 40 - 65 mm.
Pro první sekání v sezóně by měla
být zvolena vysoká výška sekání.
Zapnutí a vypnutí
1. Z konce síťového kabelu udělejte smyčku a zavěste jej do
odlehčení kabelu od tahu (13).
2. Přístroj připojte k síťovému napětí.
3. Před zapnutím dbejte, aby se
přístroj nedotýkal žádných předmětů.
4. K zapnutí stiskněte
odblokovací tlačítko
(15) na držadle a
současně držte
stisknutou startovací páčku (2).
Uvolněte odblokovací tlačítko (15).
5. K vypnutí uvolněte startovací
páčku (2).
Po vypnutí přístroje se nůž ještě
několik vteřin otáčí. Nedotýkejte
se pohybujícího se nože. Hrozí
nebezpečí poranění.
1
2
Nastavení výšky sekání
Přístroj vypněte, vytáhněte síťovou
zástrčku a počkejte, až se nůž zastaví. Hrozí nebezpečí poranění.
Uchopte páčku (11) k nastavení
výšky řezu a zaveďte ji do vybrání
pro požadovanou výšku řezu.
Přístroj má 7 poloh k nastavení výšky
řezu: 25 - 75 mm
Indikace naplnění
Na boku sběrného koše je umístěna indikace naplnění. Aerodynamické vedení
vzduchu klapky dodatečně zajišťuje optimální plnění.
Klapka otevřená:
Sběrný koš prázdný
Klapka zavřená:
Sběrný koš plný
97
Page 98
CZ
Práce se sekačkou
Pravidelné sekání aktivuje traviny k ze-
sílené tvorbě listů a zároveň odumírá
plevel. Proto je trávník po každém sekání
hustější a vzniká stejnoměrně zatížitelný
trávník.
K prvnímu sekání by mělo dojít zhruba v
dubnu při výšce porostu 7 - 8 cm. V hlavním vegetačním období se trávník seká
minimálně jednou za týden.
• Se sekáním začněte v blízkosti zásuvky a pokračujte směrem od zásuvky.
• Síťový kabel vždy táhněte za sebou a
po obrácení jej položte na již poseka-
nou stranu.
• Veďte přístroj rychlostí chůze pokud
možno v rovných dráhách. Pro sekání
bez mezer by se dráhy měly vždy o
několik centimetrů překrývat.
• Hloubku řezu nastavte tak, aby nebyl
přístroj přetěžován.
• Na svazích pracujte vždy šikmo ke
svahu. Neposunujte se směrem doza-
du.
• Po každém použití přístroj vyčistěte,
jak je popsáno v kapitole „Čištění a
údržba“.
Přístroj po práci a k přepravě vy-
pněte, vytáhněte síťovou zástrčku
a počkejte, až se nůž zastaví. Hrozí nebezpečí poranění.
Čištění/údržba/skladování
Zajistěte provádění oprav a údrž-
by, které nejsou popsány v tomto
návodě, specializovanou opravnou. Používejte pouze originální
náhradní díly.
Při manipulaci s nožem noste ru-
kavice.
Před jakoukoli údržbou a čištěním
přístroj vypněte, vytáhněte síťovou
zástrčku a počkejte, až se nůž za-
staví.
Čištění a obecná údržba
Neostřikujte tento nástroj vodou a
nečistěte ho pod tekoucí vodou. Existuje nebezpečí elektrického úderu.
• Udržujte přístroj stále v čistotě. K čištění
použijte kartáček nebo hadřík, ale žádné
agresivní čisticí prostředky nebo rozpouštědla.
• Po sekání odstraňte kusem dřívka nebo
plastu přichycené zbytky rostlin. Vyčistěte zejména větrací otvory, vyhazovací
otvor a nožovou oblast. Nepoužívejte
tvrdé ani špičaté předměty, mohly by
přístroj poškodit.
• Občas naolejujte kola.
• Před každým použitím zkontrolujte, zda
sekačka nevykazuje viditelné nedostatky, jako uvolněné, opotřebované nebo
poškozené díly. Zkontrolujte dotažení
všech matic, čepů a šroubů.
• Zkontrolujte, zda kryty a ochranná zařízení nejsou poškozena a jsou správně
usazena. V případě potřeby je vyměňte.
Výměna nože
Je-li nůž tupý, tak by jej měl nabrousit odborný servis.
Je-li nůž poškozený nebo se zdá nevyvážený, tak musí být vyměněn (viz kapitolu
Náhradní díly).
98
Page 99
CZ
1. Otočte přístroj.
2. Použijte pevné rukavice a přidržte nůž (25). Šroubem nože
(26) otáčejte proti směru hodinových ručiček za pomocí klíče
směrem od vřetena motoru.
3. Při montáži nového nože postupujte zase v opačném pořadí.
Dbejte, aby byl nůž ve správné
poloze a šroub pevně utažený
Skladování
Aby přístroj nezabíral tolik místa,
uvolněte čtyři hvězdicové matice s
rukojetí a sklopte rámovou a spod-
ní rukojeť. Dbejte, aby nedošlo ke
skřípnutí kabelu.
• Přístroj uchovávejte na suchém místě
chráněném proti prachu, a mimo dosah dětí.
• Dříve než přístroj odstavíte v uza-
vřených prostorách, nechejte motor
ochladit.
• Přístroj nebalte do plastových sáčků,
protože by mohl zvlhnout a dostala by
se do něj plíseň.
Neručíme za škody vyvolané našimi přístroje, pokud byly tyto způsobeny neodbornou opravou nebo použitím cizích dílů,
popř. použitím k neurčenému účelu.
Odklízení a ochrana okolí
Přístroj, příslušenství a obal odevzdejte v
souladu s požadavkami na ochranu životního prostředí do recyklační sběrny.
Elektrické přístroje nepatří do do-
mácího odpadu
• Odevzdejte jej ve sběrně šrotu. Použité
díly z plastu a kovu se tam dle druhu
materiálu roztřídí a mohou se pak zavést do recyklace. Dotažte se k tomuto
tématu ve Vašem servisním středisku.
• Posekaný materiál uložte na kompost,
neodhazujte jej do popelnice.
• Likvidaci vašich zaslaných poškozených přístrojů provádíme bezplatně.
Technické údaje
Přístroj .................................ERM 1846 G
Příkon ........................................... 1800 W
Jmenovité vstupní
napětí.......................... 230-240 V~, 50 Hz
Třída ochrany .....................................II
Druh ochrany ..................................... IP24
Otáčky naprázdno ....................2900 min
Průměr střihu ...................................46 cm
Výška řezu .............................. 25 - 75 mm
Hmotnost .......................................28,5 kg
Objem sběrného koše .........................60 l
Hladina akustického tlaku
(L
) .............................82,7 dB(A), KpA=3 dB
pA
Úroveň akustického výkonu (L
zaručená ......................................96 dB
měřená ....... 93,1 dB(A), K
Vibrace (a
) ............. 1,09 m/s2, K=1,5 m/s
n
Tento přístroj je určený pro provoz v síti
el. proudu s impedancí systému Z max
v místě připojení (domovní přípojka) do
hodnoty maximálně 0,269 Ohm.
Uživatel musí zabezpečit, aby byl přístroj
provozovaný jen připojením do sítě el.
proudu, která tento požadavek plní.
Pokud je to nutné, tak se na impedanci v
systému můžete zeptat místního energetického podniku.
Akustické hodnoty a hodnoty vibrace byly
určeny dle norem a předpisů, jmenovaných v prohlášení o konformitě. Technic-
)
wA
=1,78 dB(A)
wA
-1
2
99
Page 100

CZ
ké a optické změny mohou být v rámci
dalšího vývoje provedeny bez oznámení.
Všechny míry, pokyny a údaje tohoto
návodu k obsluze nejsou proto zaručeny.
Právní nároky, které budou kladeny na
základě tohoto návodu k obsluze, nelze
proto uplatnit.
Záruka
Na tento přístroj poskytujeme záruku 24
měsíců.
Tento přístroj není určený pro komerční
využití. Při komerčním použití záruka za-
nikne.
Škody, které byly způsobeny přirozeným
opotřebením, přetížením anebo neodbornou obsluhou, jsou ze záruky vyloučeny.
Určité konstrukční části podléhají jejich
běžnému opotřebení a jsou proto ze záruky vyloučeny. Patří k nim především:
Náhradní nůž.
Předpokladem pro poskytnutí záručního
plnění je kromě toho, že byly dodrženy
pokyny pro čištění a údržbu.
Škody, které vznikly v důsledku závad
materiálu anebo chyb výrobce, budou
bezplatně odstraněny náhradní dodávkou
anebo opravou.
Předpokladem je vrácení nerozmontovaného přístroje prodejci spolu s kupním a
záručním dokladem.
Opravy - služby
Předpokladem je, že se nástroj vrátí našemu Grizzly service-centru v rozloženém
stavu s dokladem o koupi a s dokladem
o záruce.Můžeme se zabývat pouze
přístrojmi, které byly zaslány dostatečně
zabalené a vyplacené.
Pozor: V případě reklamace anebo servisu zašlete prosím Váš přístroj na naši servisní adresu vyčištěný a s upozorněním
na poruchu.
Nevyplacené – jako neskladné zboží,
expres nebo zvláštní dopravou – zaslané přístroje nebudou přijaty.
Likvidaci vašich zaslaných poškozených
přístrojů provádíme bezplatně.
100
 Loading...