


FM/1 digi 20

Dimensions
The FM/1 digi 20 is a compact electronic 24 hour/
7 day time switch module, with heavy duty relay contacts
for switching low or line voltage loads. Applicable for
time of day control of pumps, fans, heaters, HVAC control circuits, lighting, machinery and many other types of
commercial, industrial, and agricultural equipment.
The FM/1 digi 20 model features large keys with
unique “circular programming” for easy programming, a
large LCD display and capacitor backup to retain program memory during power outages.
TECHNICAL DATA:
Channels: 1
Programs: 20
Holiday Program: No
Daylight time changeover: Manual
Manual 3 way override: On-Auto-Off
Shortest switching time: 1 minute
Reserve carryover: 100 hrs.
Input voltage models available:
24VAC/DC; 120VAC; 208/240VAC
Switching output: SPDT relay
Switch ratings:
16A res. @ 277VAC
1000W Tungsten @ 250VAC; 500W @ 125VAC
SPECIFICATIONS:
Input draw: 4VA
Input frequency: 50 or 60Hz
Wiring connections: 1/4” quick connects
Ambient temperature: –20°F to 140°F (–28°C to 60°C)
UL and Canadian UL recognized: File E83486
INSTALLATION & WIRING:
Note: Although the FM models contain some degree of spike and electrical noise protection, as with all electronic devices, these units can be
affected by electrical noise. Therefore, it is recommended that they be
powered from a voltage source that has no switching devices or inductive
loads connected.
1. Check the input and output ratings marked on the unit to make sure
this product is suitable for your supply voltage, load, and application.
2. Disconnect supply power prior to installation to prevent electrical
shock.
3. Install in accordance with all applicable National and Local electrical
code requirements.
MOUNTING OPTIONS:
The standard FM/1 models may be surface mounted inside a panel or
flush mounted with MK-FM mounting kit, available from Grasslin. Indoor
NEMA 1, and outdoor NEMA 3R enclosures are available for stand-alone
mounting. Consult Grasslin catalog or price sheet for various options.
A mounting base (MB-FMPC) is available for printed circuit board
mounting. A clear plastic dust cover (DC-FM) is also available.
Models are also available with screw terminals and DIN rail mounting,
or for flush mounting with housing and clear cover. (Digi 20A & Digi 20E)
FM/1 digi 20
One Channel Electronic Time Switch
Terminal Connections
TIME
SWITCH
M
1 2 3 4 5
POWER
COM NO NC
TIMER INTERNAL WIRING
FIELD WIRING
LOAD
■ KEYPAD DESCRIPTION
Setting the Time/Automatic Run Mode
Prog. Program Mode
Res.* Reset: Clears all programs and time
Select ON or OFF in Prog. Mode, Manual Override in Run Mode
±1h* Manual Daylight Change Key
h Setting the Hour (12:– – AM)
m Setting the Minute (12:01 AM)
Day Set Day(s) for time and programs
*Recessed keys; use a pen point to press
■ LCD DISPLAY ELEMENTS
The LCD incorporates a number of different elements to display
various data and information.
■ PROGRAMS
The Digi 20 will accept up to 20 programs
A program consists of:
1. An ON or OFF command
2. Time of day (Hour and Minute)
3. Single day or multiple days
A program is required for each ON event, and a program is
required for each OFF event.
NOTE: MULTIPLE ON OR OFF EVENTS MAY BE PROGRAMMED.
For example, Program 1 may turn the office air conditioning ON at 8AM
Mon.-Fri. Program 2 may turn the air conditioning OFF at 5PM Mon.-Fri.
If someone is working late, they may press the override key to
turn on the air conditioning. If they forget to press the override key
again when they leave, the air conditioning will stay on all night (or
all weekend).
To prevent this from occurring, additional OFF times may be
programmed.
• Program 3 can turn the air conditioning OFF at 6PM.
• Program 4 can turn the air conditioning OFF at 7PM.
• Program 5 can turn the air conditioning OFF at 8PM., etc.
!
IMPORTANT: BEFORE PROCEEDING WITH SETTING THE
TIME AND PROGRAMMING THE UNIT, PRESS THE RESET
KEY TO CLEAR ALL DATA FROM THE MEMORY.
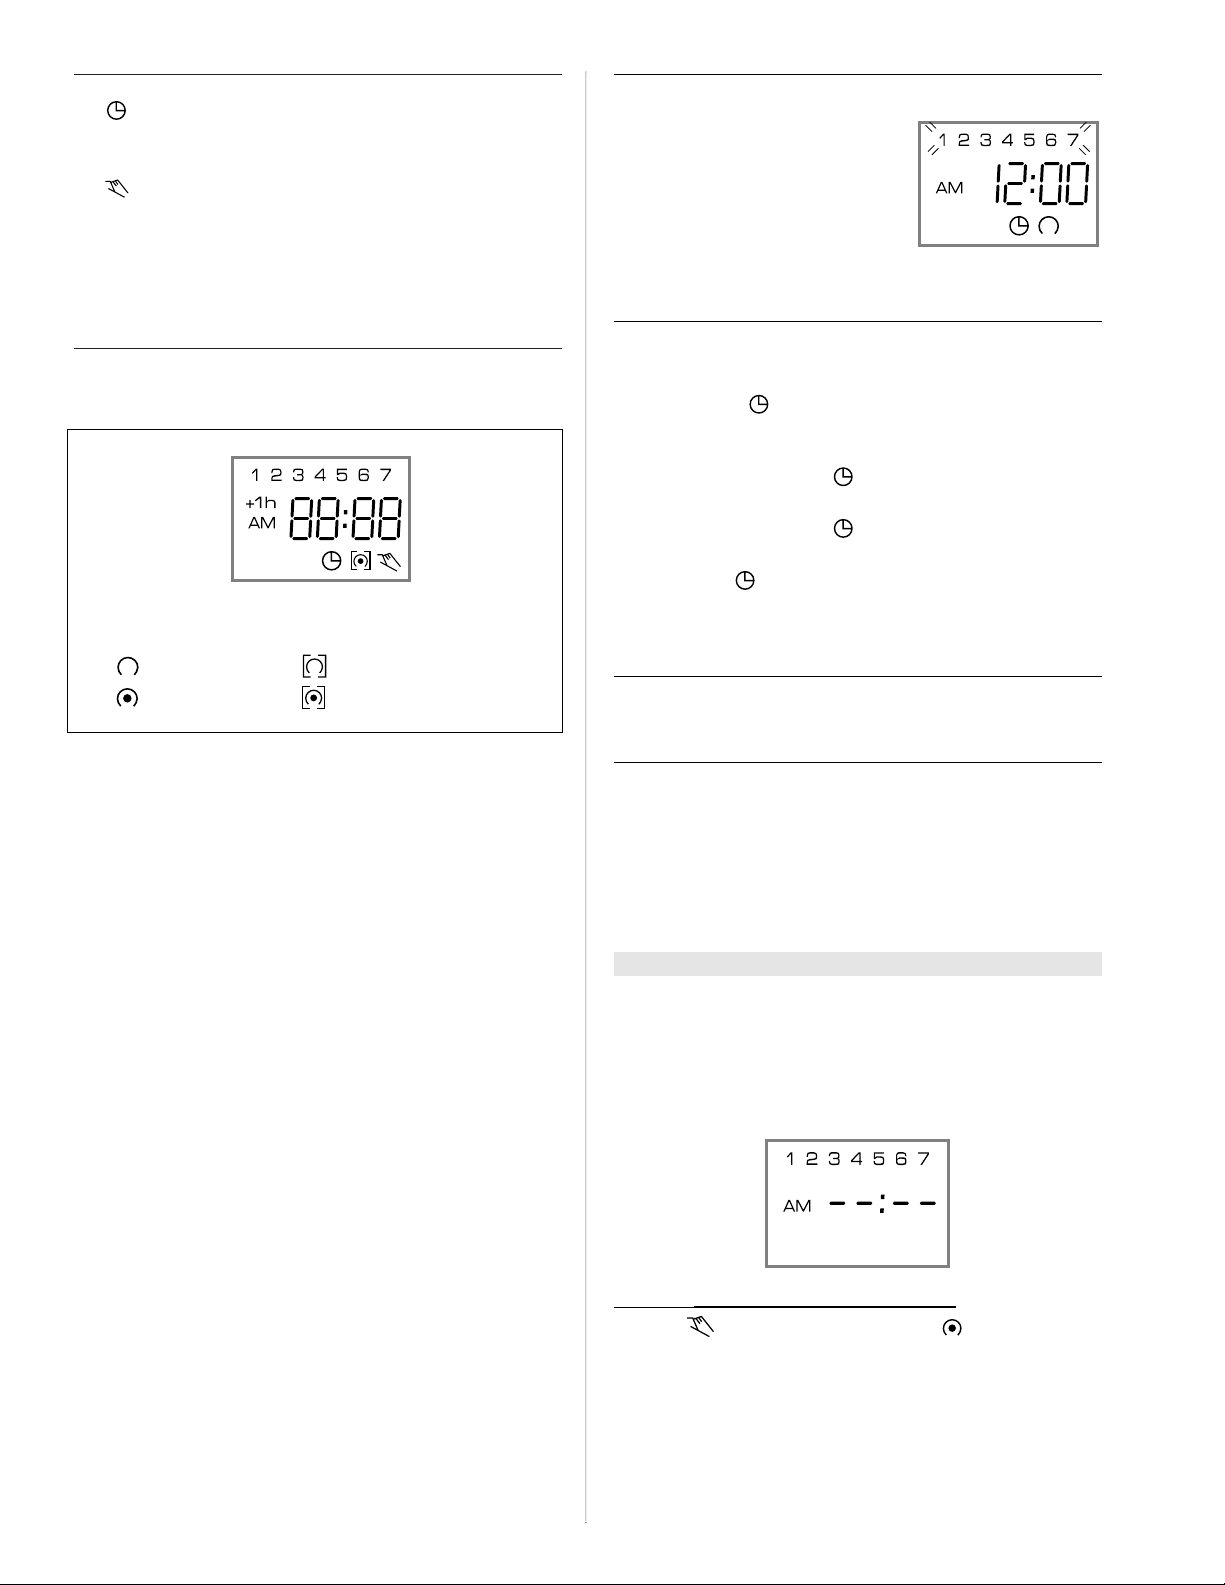
■ SELECTING AM/PM OR MILITARY TIME
After pressing reset, the display may
show AM (right). The numbered day
symbols will be flashing on and off.
If the display does not show AM, it is
in military time mode (24:00 hr.) To
change to AM/PM mode, press and hold
the h key and press the ±1h key once.
AM will appear in display.
If display is in AM mode and military
mode is desired, press and hold the h key, press the ±1h key once.
■ SETTING THE TIME
NOTE: If the h and m keys are held down longer than 2 seconds,
the numbers will advance rapidly.
Press and hold the key during the following:
(If Daylight Savings Time is in effect, press
±1h
first)
1. Press h to advance to the current hour
(while holding down the key)
2. Press m to advance to the current minute
(while holding down the key)
3. Press Day repeatedly to advance to current day (while holding
down the key)
NOTE: If the days are flashing, it indicates the day of the week was
not set when setting the time. The timer cannot be programmed unless
the day of the week is entered.
■ MANUAL DAYLIGHT TIME CHANGEOVER
Each year, in the Spring, press ±1h to advance the time an hour. In
the Fall, press ±1h to set back an hour.
■
PROGRAMMING 24 HOUR OR 7 DAY SCHEDULES
It is helpful to write out the program schedules
before
beginning. See last page.
!
IMPORTANT: THE CURRENT TIME OF DAY AND DAY OF
WEEK MUST BE SET PRIOR TO PROGRAMMING. SEE “SETTING THE TIME”
Example
Program 1: ON at 7:00AM Monday thru Saturday
Program 2: OFF at 5:00PM Monday thru Friday
Program 3: OFF at 7:00PM Saturday
Three programs need to be entered.
Press Prog. key only once. Display shows:
Program 1
(ON at 7:00AM Monday thru Saturday)
Press key once ON symbol appears
Press h key to 07AM
Press m key once to 00
Press Day key once 1 2 3 4 5 6 is displayed
Press Prog. key to enter
Days of the Week ➠
Daylight Time Symbol ➠
AM and PM Symbol ➠
➠
➠
➠
➠
Time of Day or
Switching Time
Manual Override ON
ON/OFF Symbol
OFF Symbol
ON Symbol
Continuous OFF Symbol
Continuous ON Symbol
Run Mode Symbol
 Loading...