

Page 1
DE
Betriebsanleitung 2
EN
Operating instructions 36
FR
Manuel ‘utilisation 48
IT
Manuale dell‘utente 72
ES
Manual de instrucciones 94
PT
Manual de instruções 118
NL
Handleiding 130
CS
Provozní návod 154
SV
Bruksanvisning 176
NO
Bruksanvisning 198
DA
Driftsvejledning 220
FI
Käyttö- ja huolto-ohje 244
PL
Instrukcja eksploatacji 268
HU
Kezelési útmutató 290
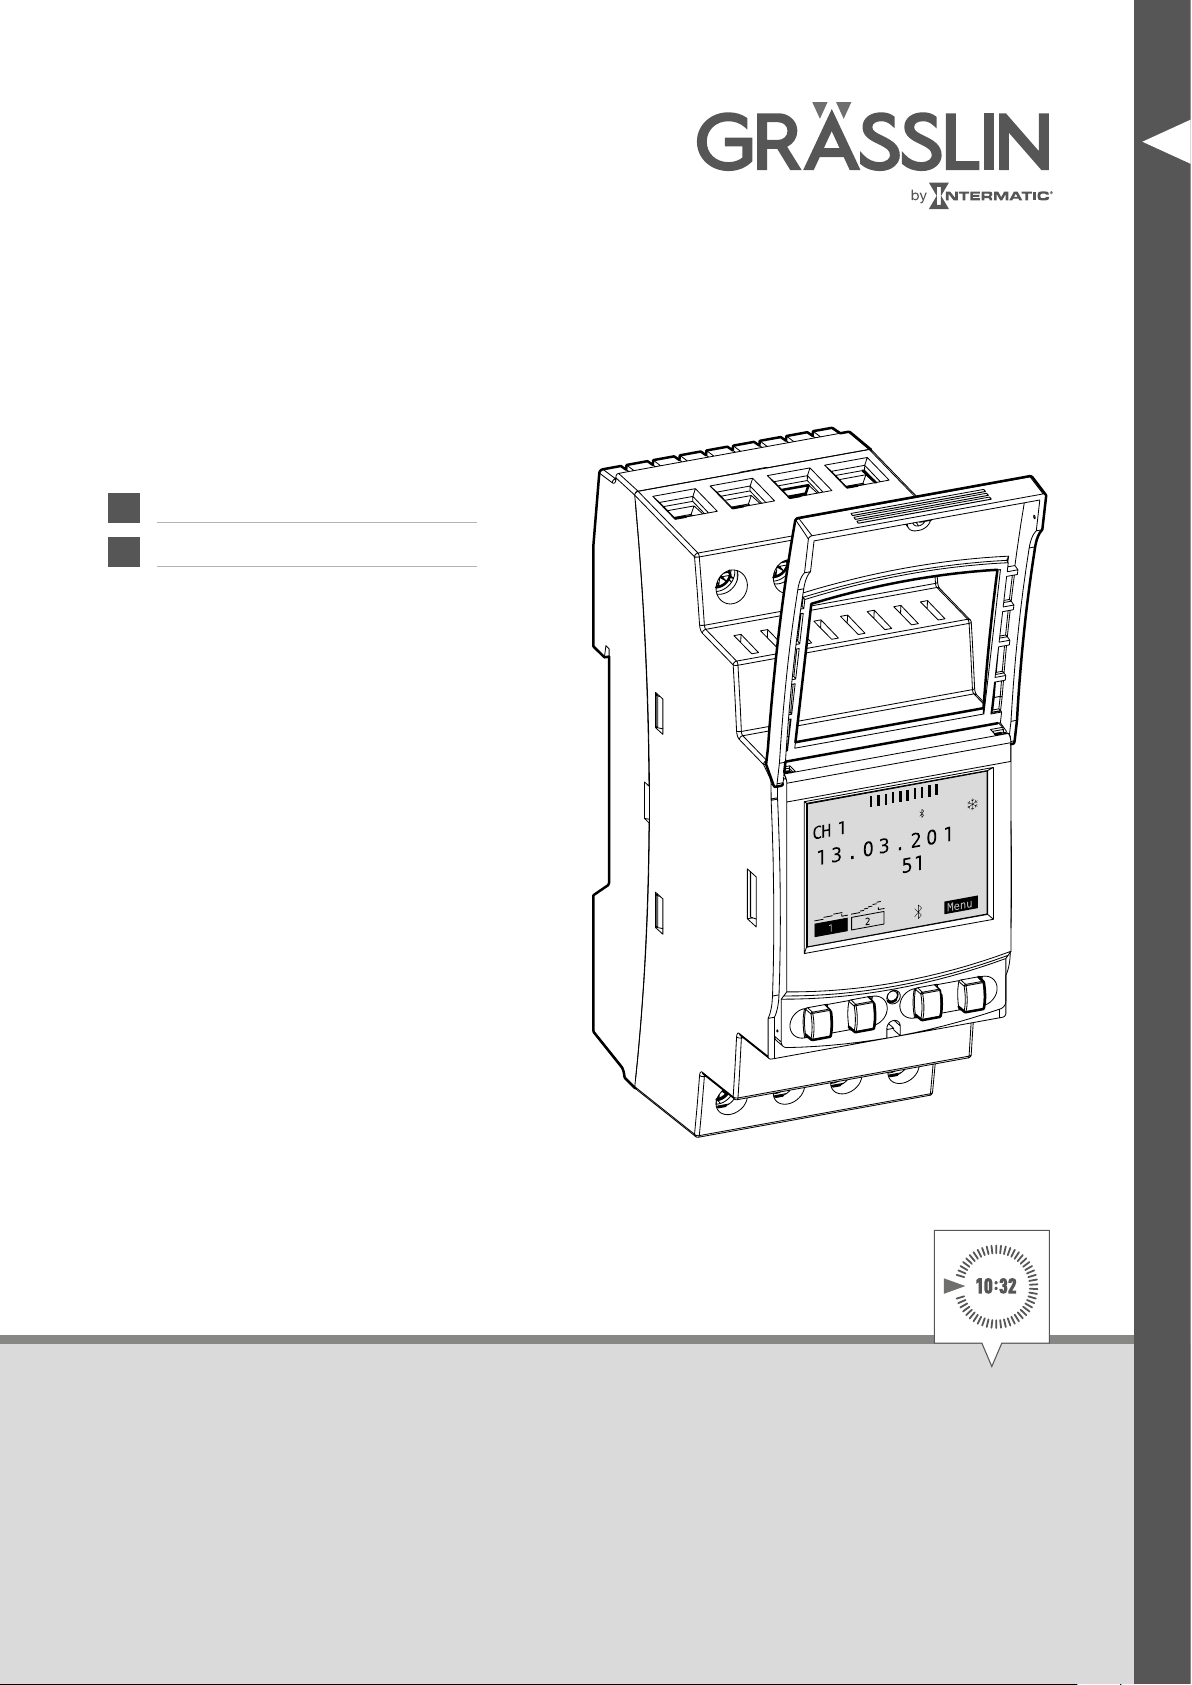
6
09:00
talento smart
Page 2
Table of Contents
Safety Information .................37
Information about the device .........38
Description of the device ................................38
Intended Use .........................................38
Technical Data ........................................38
Declaration of Conformity ...............................38
FCC certication ......................................39
Assembly and Installation ...........40
Installation on a DIN-rail ................................40
Circuit diagram .......................................40
Operation and Setting .............. 41
Display and Function Keys ...............................41
Overview of menu structure ..............................42
Initial commissioning ...................................43
Programming .........................................44
Conguration .........................................57
Set date and time .....................................64
Switch summer / winter time .............................65
Language setting ......................................66
Automatic / manual operation ............................67
EN
Maintenance and Service ...........69
Distribution partners ...................................69
Software update ......................................69
Disposal and Recycling .............70
36
Page 3
Safety Information
Risk of death due to electrical shock!
Incorrect assembly and installation of the device can result in life-threatening electrical
WARNING
Please note:
• National regulations and safety regulations
• Guarantee is invalidated if you tamper with the device or modify it
• Minimum diameter of the exible lines for the connecting terminals: 1 mm
• Maximum diameter of the exible lines for the connecting terminals: 2,5 mm
Read this manual and pay attention to its contents to ensure that the device works perfectly and that you
can work safely with it.
voltages.
This product should be installed by an electric specialist according to current installation
standards.
EN
2
2
37
Page 4

Information about the device
Description of the device
Digital DIN-rail time switch
• Date-independent programming
• Date-dependent programming
• Pulse, cycle and random programming*
• Sunrise/sunset related programming
• Program creation by means of PC and mobile devices
• Bluetoothlow energy interface
Intended Use
• The device is suitable for the following applications:
− Lighting in private and commercial areas
− Advertising signs
− Street lighting
− Shop lighting
− Devices, motors and pumps control
− Roller blinds and sun blinds control
− Simulation of home presence
• Only suitable for use on dry premises
• Do not use close to devices with inductive discharge (motors, transformers, etc.)
• Install only on DIN-rails
EN
Technical Data
You can nd the technical data for the devices that are described in this manual at:
www.graesslin.de/technical-data
Declaration of Conformity
You can nd the declaration of conformity for the devices that are described in this manual at:
www.graesslin.de/doc
* These functions depend on variant.
38
Page 5

FCC certication
FCC ID: 2AHH7-DG
This device complies with part 15 of FCC Rules. Operation is subject to the following two conditions;
(1) This device may not cause harmful interference, and (2) this device must accept any interference
received, including interference that may cause undesired operation.
Labelling Requirments
The Original Equipment Manufacturer (OEM) must ensure that FCC labelling requirements are met.
This includes a clearly visible label on the outside of the OEM enclosure specifying the appropriate
Grässlin GmbH FCC identier for this product as well as the FCC Notice above.
The FCC identiers is: 2AHH7-DG
This FCC identier are valid for Talento Smart x15 and Talento Smart x25, for details. In any case the
end product must be labelled exterior with:
“Contains FCC: 2AHH7-DG”
EN
39
Page 6
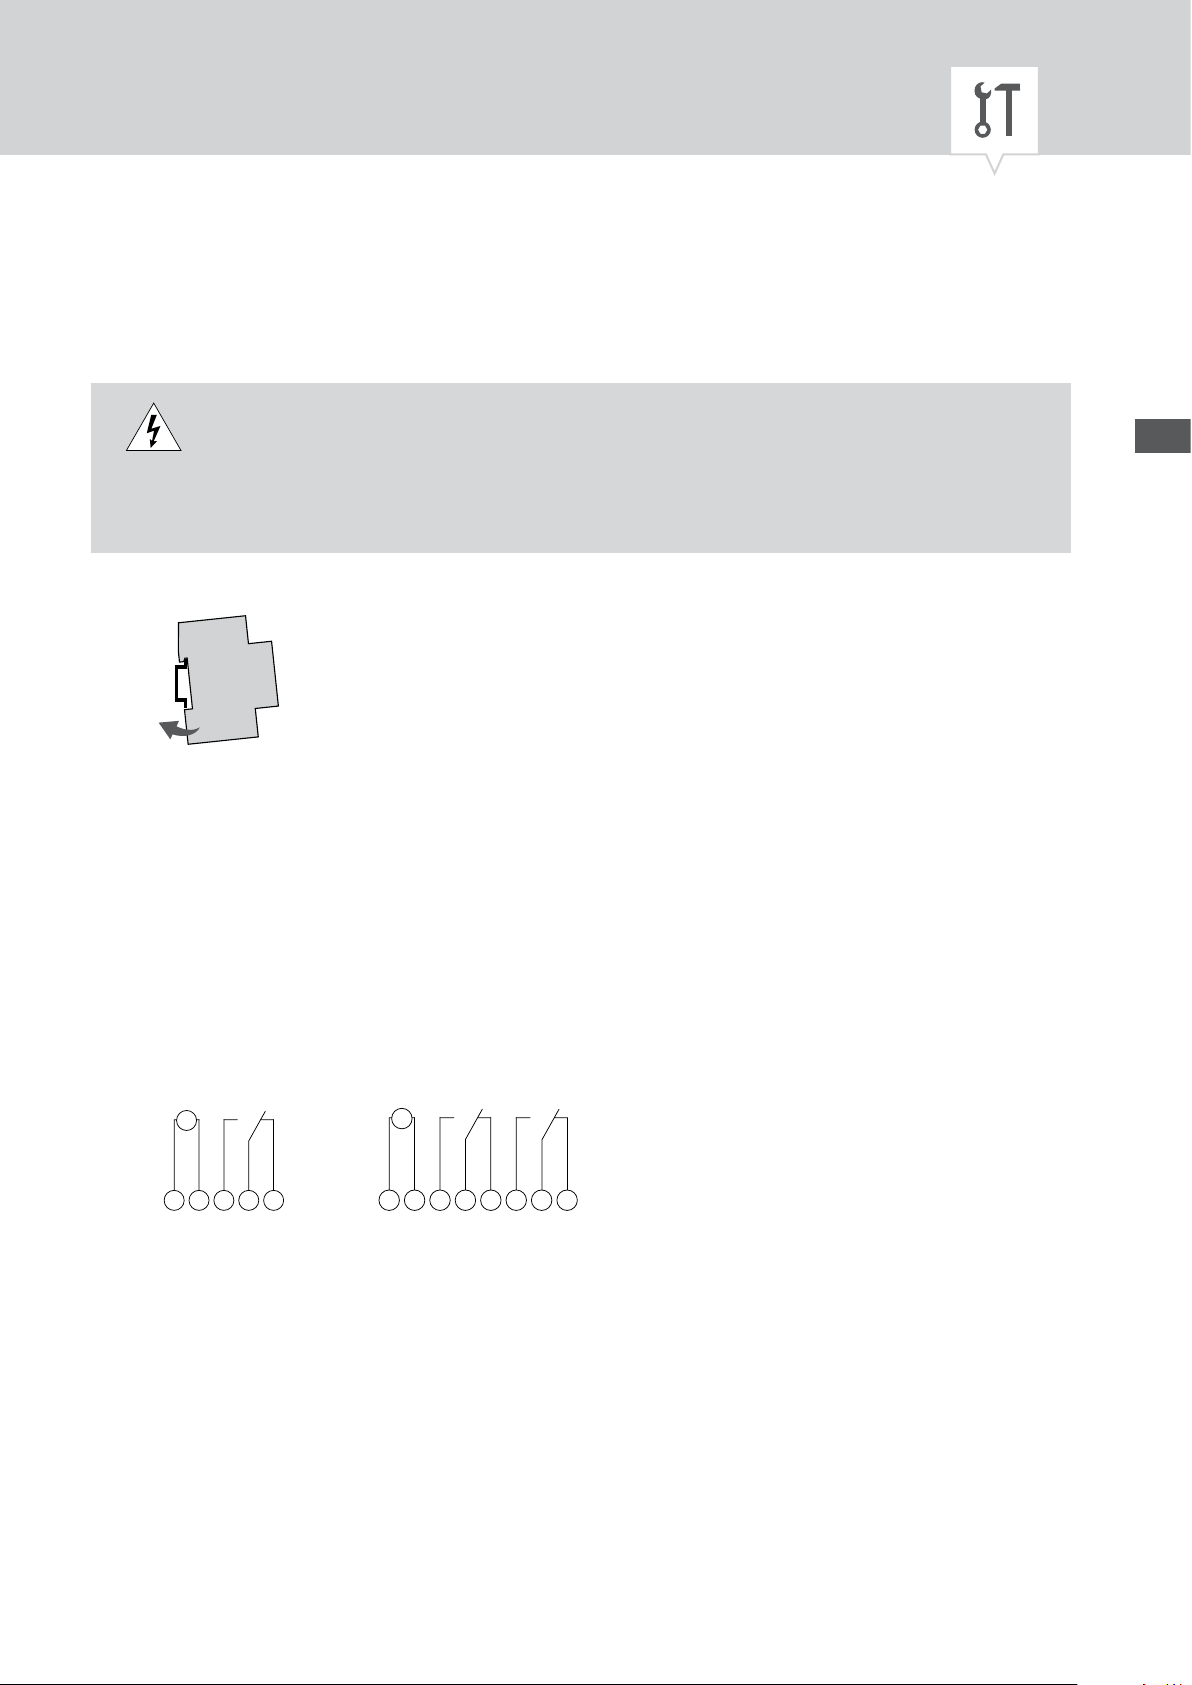
Assembly and Installation
Risk of death due to electrical shock!
Incorrect assembly and installation of the device can result in life-threatening electrical
WARNING
Installation on a DIN-rail
1. Place the device onto the DIN-rail from the top at a slight angle.
2. Press it backwards until it clicks into place.
voltages.
This product should be installed by an electric specialist according to current installation standards.
EN
Circuit diagram
CH1 = Channel 1
CH2 = Channel 2
CH1
M
~
LN
123
1 channel variant 2 channel variant
Install the device according to the circuit diagram (with one or two channels depending on the
variant).
M
~
LN
CH1
1235 6
CH2
7
40
Page 7
G
H
I
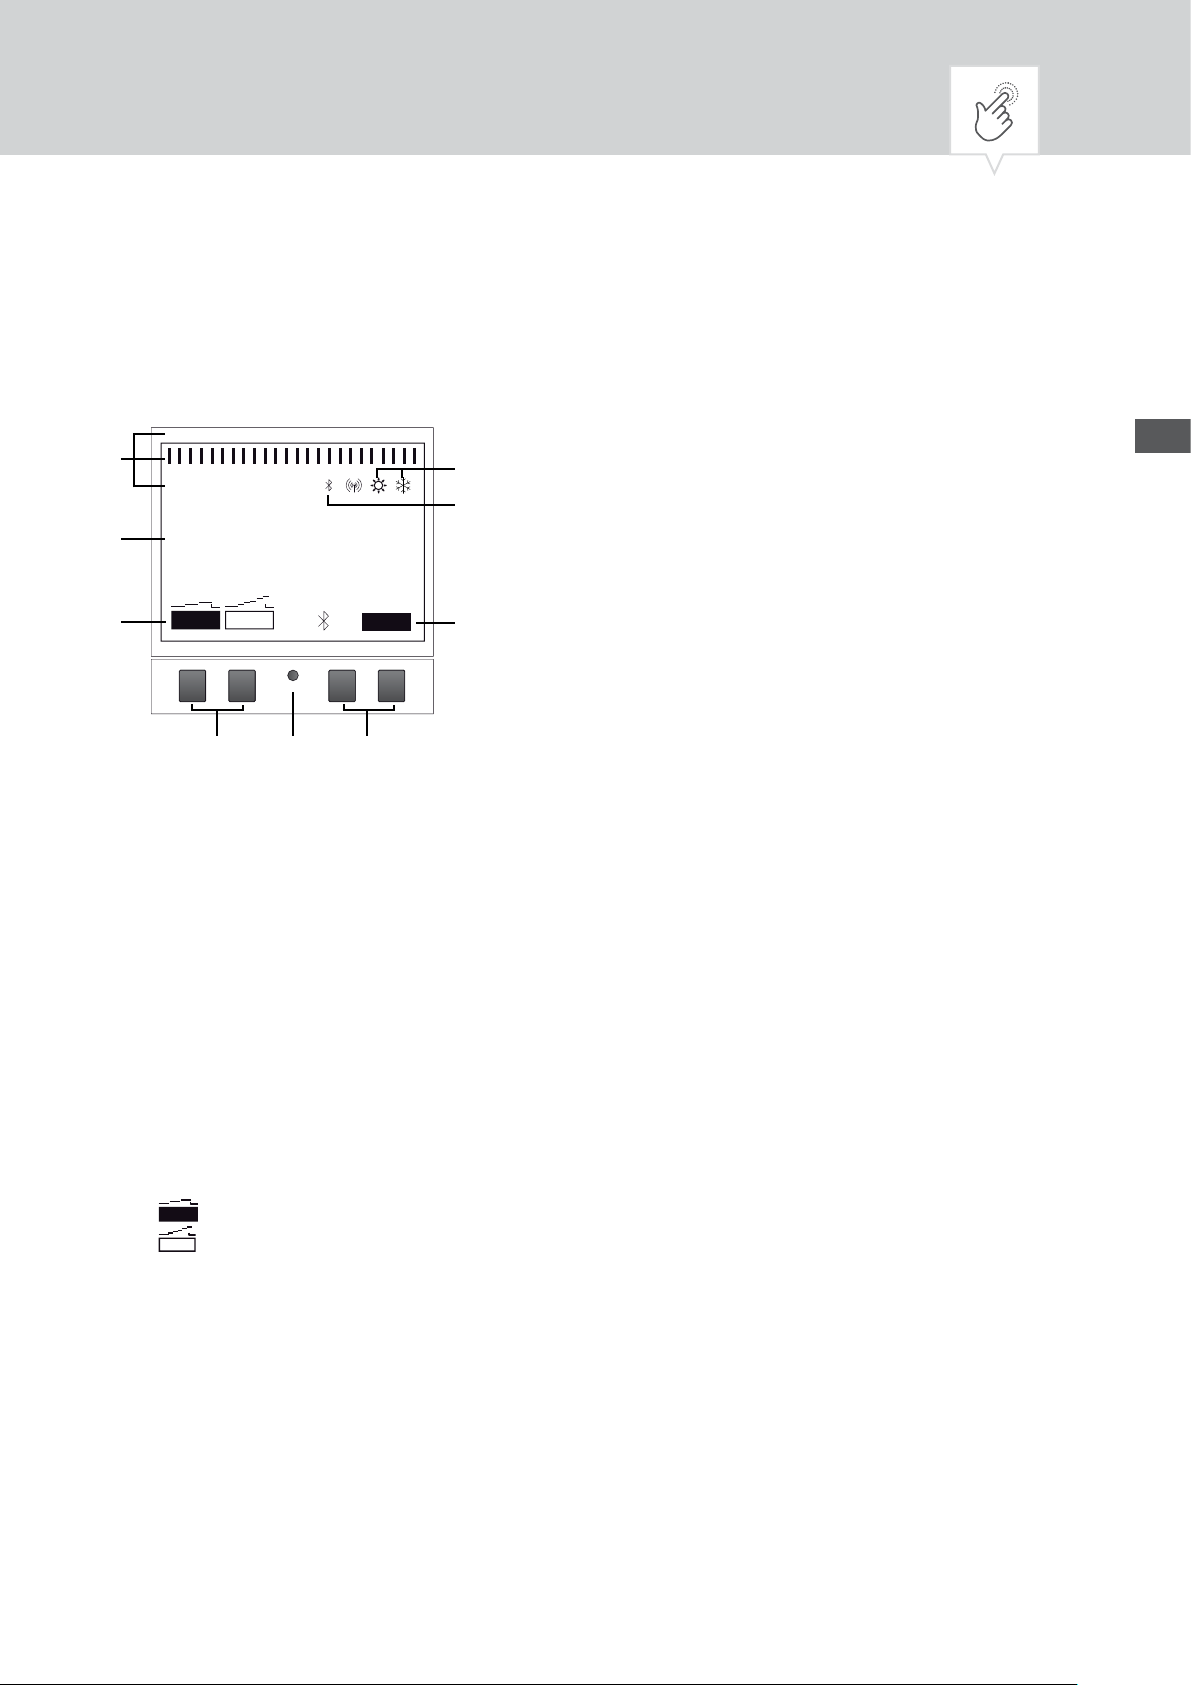
Operation and Setting
Display and Function Keys
1 6 12 18 24
C
B
A
CH 1
OvrFix
13.03.2016
09:00
OVRFIX
1 2
51
Menu
D
E
F
Display:
A Function displays of the buttons on the left
B Date and time or menu navigation
C Programmed switching times
D Display of summertime/wintertime
E Bluetooth display
F Function displays of the buttons on the
right
Buttons:
G Buttons on right
H Reset button
I Buttons on left
EN
Function displays of the two buttons on the right (G):
Menu Leave auto mode and enter programming Mode
ESC Press briey = Goes back one step
Press for a long time (about 2sec) = Goes back to auto mode
OK Make the selection and apply it
< Undo the last input, e.g. when entering the time
Function displays of the two buttons on the left (I):
1
Channel status for channel 1
2
Channel status for channel 2
˄ Page upwards in the menu
˅ Page downwards in the menu
- Press briey = The displayed value (hour, minute, etc.) is decremented by 1/
Press for a long time (about 2sec) = fast scrolling
+ Press briey = The displayed value (hour, minute, etc.) is incremented by 1/
Press for a long time (about 2sec) = fast scrolling
41
Page 8

Overview of menu structure
Menu
EN
Program
New
View Edit/
Delete All
S /Wi Timeu
Config
Light
Astro*
Hour-Counter
PIN
Mod *e
Bluetooth
Language
Dat /e Time
24 Hours
AM/PM
Auto
Calibr 1
Calibr 2
No
* These functions depend on variant.
English
Deutsch
Français
Español
Portuges
Italiano
...
42
Page 9
Initial commissioning
When delivered, the device is in automatic mode with default settings for time, date and language
(English).
When the menu buttons are rst operated, a wizard walks you through the basic settings that you can
check during initial commissioning and adjust if necessary.
Menu
Language
*English
Astro*
The following settings are queried during initial commissioning:
• Language; see „Language setting“ on page 66
• Location information (country, coordinates) for astro calculation; see "Location information"
on page 58
OK
EN
OK
OK
* These functions depend on variant.
43
Page 10

Programming
Switch-off commands have priority over switch-on commands.
INFORMATION FOR PROGRAM CREATION
The device is programmed in the following steps:
• Setting data or date range
In this menu, you can specify on which day and at what time (date from ... to) the device is turned
on or off.
• Setting the function and switching time
Under this menu item, you specify which switching command is performed at which time
(ON, OFF, pulse*, cycle*, random*). This can be specied per channel for different date ranges or
date-independent.
EN
* These functions depend on variant.
44
Page 11
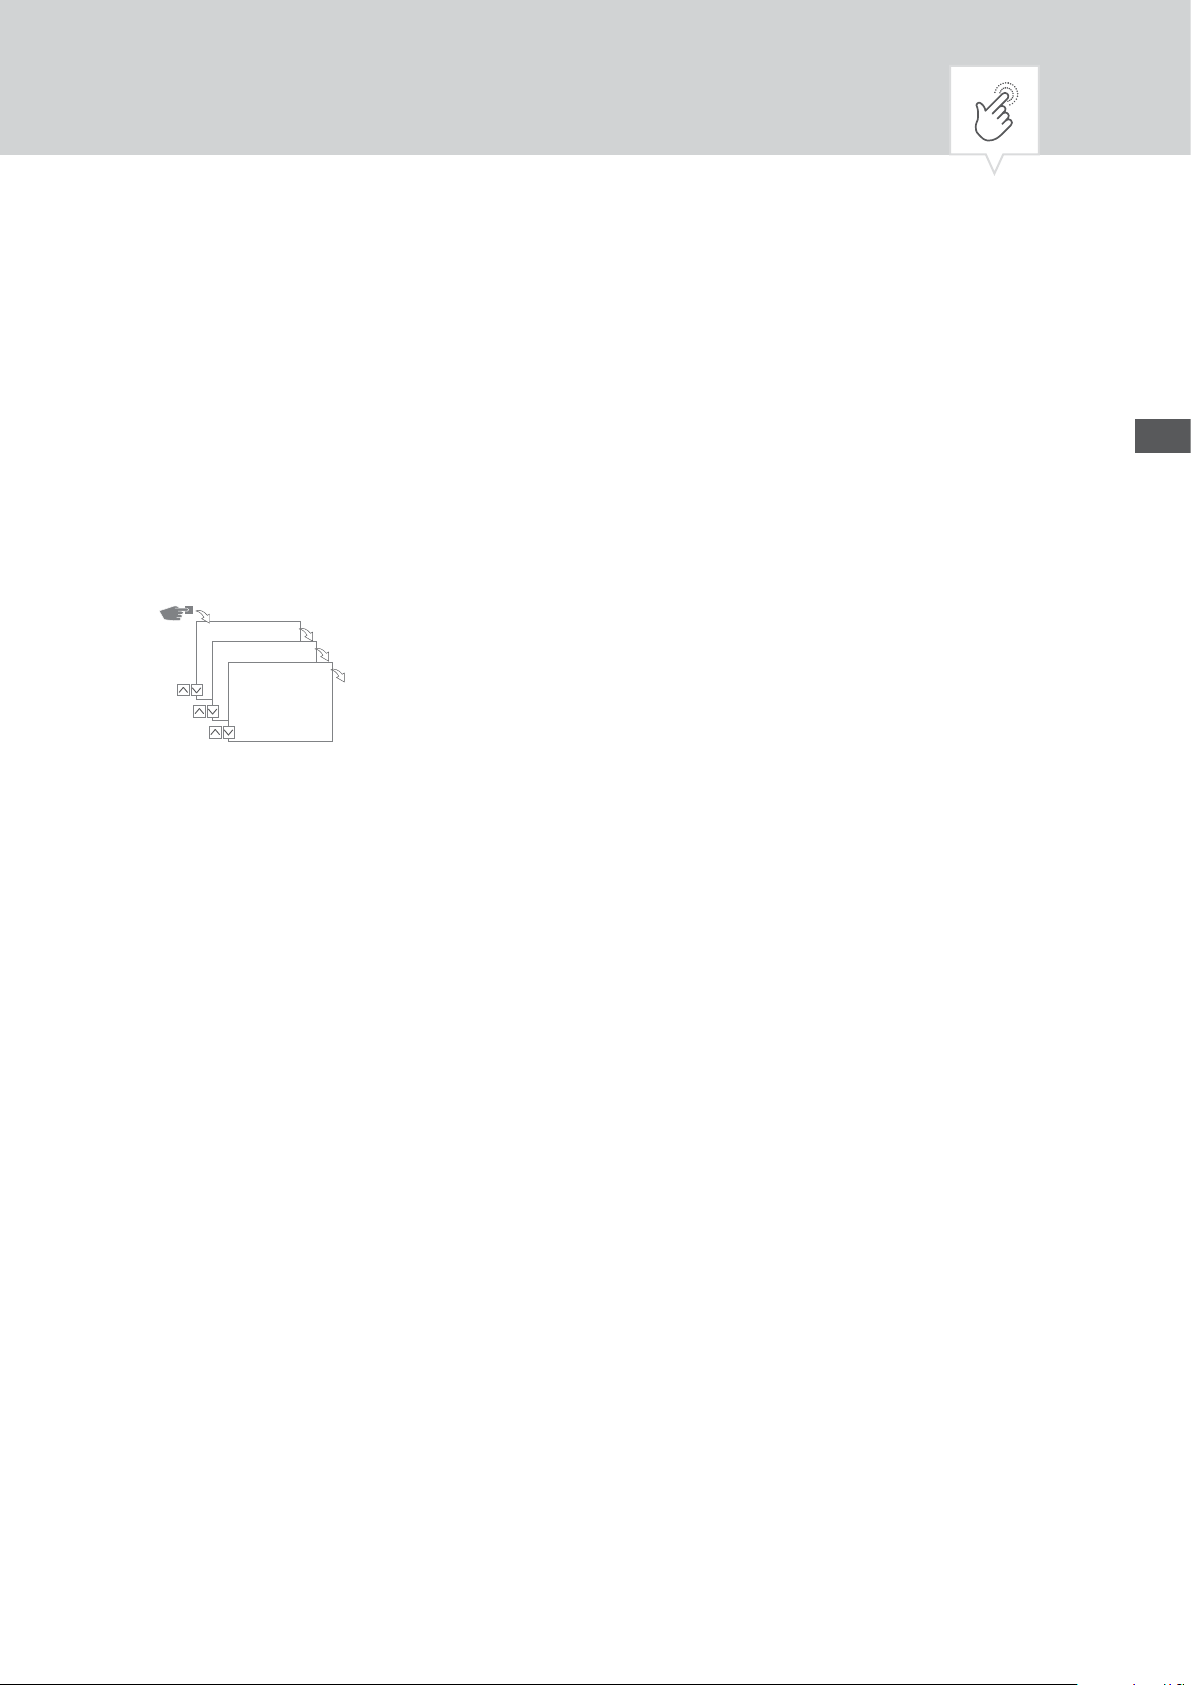
CREATE NEW SWITCHING PROGRAM
Menu
Menu
Program
New
With Date?
No
OK
OK
OK
Select FNC
...
Programming without date
Program
New
With Date?
Yes
OK
OK
OK
OK
Date from
2015.10.01
... Dya
Date to
2015.10.02
...Dya
OK
OK
AddeDat?
No
OK
Select FNC
...
OK
OK
Programming with date
To create a new switching program, press the key
1. Select
2. Select
Program and
New and
conrm with
conrm with
OK.
OK.
Menu
:
The number of available program memory spaces is displayed briey (PXXX). The number of available
switching channel memory spaces (Dxxx) then appears.
The available memory spaces depend on the variant of the device.
EN
3. In step
–
With date?
No
and
specify with
OK
, the device should be programmed without date range.
The switching commands are valid date-independent.
Proceed with action step to step 4.
– Specify
Yes
and
OK
so that the device will be programmed with a date range.
The switching commands are valid for the dates and periods which are dened in the programming, also see page 46.
You can dene multiple date ranges. If the time periods have been determined, end the query
No
after the last date range with
If you have congured the location information (astro function) in the device, you can choose when
.
changing, whether the device should be switched directly to sunrise and sunset via the day limit.
The astro function is not available in all versions of the device, see also „Location information (Ast
ro)“ on page 58.
-
45
Page 12
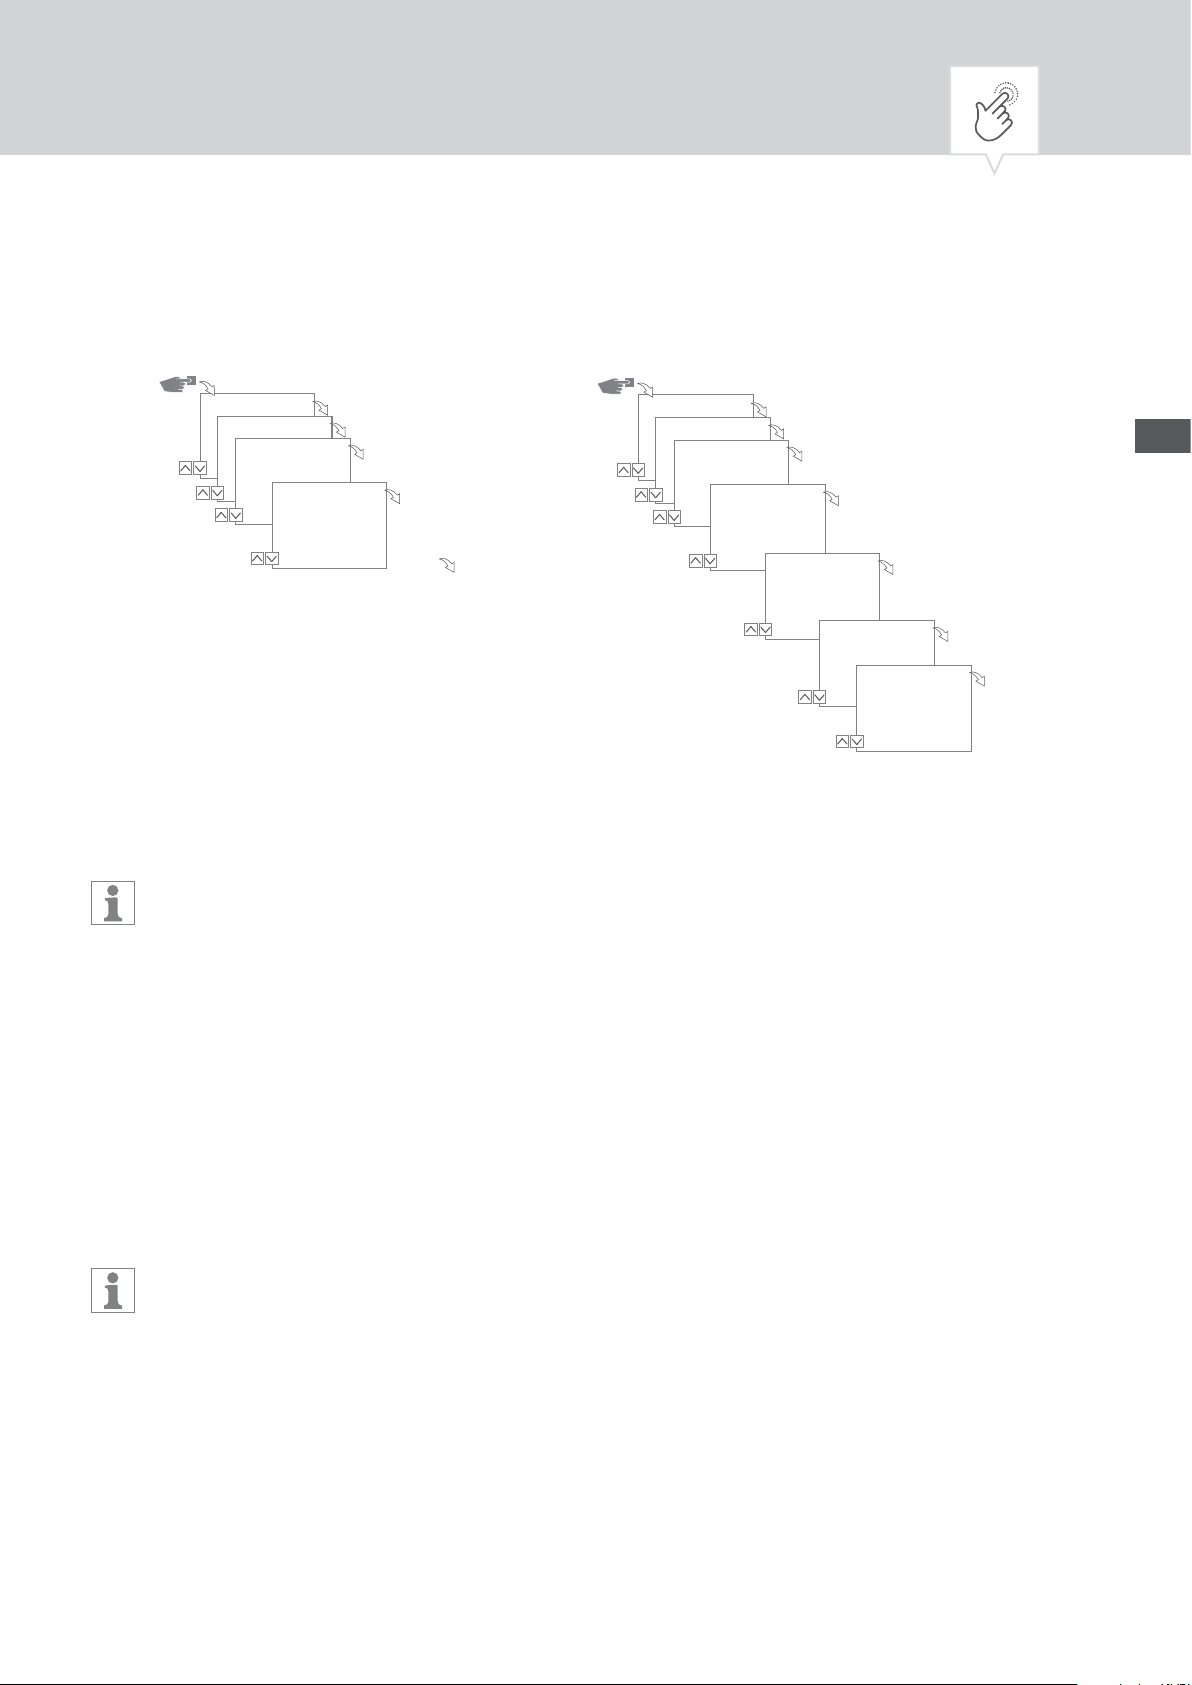
4. In step
ON
−
SELECT FCT
(FCT = Function), specify the type of switching command:
Select the times at which a channel should be switched on A.
OFF
−
Select the times at which a channel should be switched off B.
Pulse
−
Select the settings for pulse programming C.
Cycle
−
Select the settings for cycle programming D.
Random ON
−
Select the settings for random program ON E.
Random OFF
−
Select the settings for random program OFF F.
OK
5. Select the desired function and confirm with
.
The number of available switching command memory spaces appears (CXXX).
The available memory spaces depend on the variant of the device.
EN
USING WILDCARDS
You can use wildcards when entering the date. This allows you to program recurring switching times
that are always to be carried out, for example, always the rst of the month. Instead of annual or
monthly numbers, choose the wildcards **** for the year and ** for the month.
Below you see how date entries appear and how you can use wildcards:
2016.03.13 - 2016.03.13
•
The switching command is executed only on 13 March 2016.
2016.03.13 - 2016.03.20
•
The switching command is executed between 13 March 2016 and 20 March 2016.
2016.**.13 - 2016.**.13
•
The switching command is executed the 13th of every month in 2016.
****.**.01 - ****.**.01
•
The switching command is always executed annually on the rst day of a month.
Die Wildcards für die Jahre nden Sie bei der Datumseingabe indem Sie vor die aktuelle Jahreszahl
blättern. Die Wildcards für die Monate nden Sie zwischen Dezember und Januar.
46
Page 13

A
Programming command
Menu
Program
New
With Date?
Yes/No
OK
OK
OK
ON
Time
09:01
Hour
OK
Time
09:50
Minute
OK
Days
12345-Mo-Fr
OK
Channels
1
CH1
Add Times
Yes/No
OK
OK
Priority
High
EN
OK
OK
1. Press
2. Select
Menu
button:
Program
and conrm with OK.
For clarication of the following action steps, see ow chart.
New
3. Select
4. In step
conrm with
5. Select
6. Enter hour and minute of the switch-on time (+/-) and conrm each with
and conrm with OK.
With Date?
OK
ON
and conrm with OK.
specify whether the device is to be activated on a certain date and - if yes -
(see also page 45).
OK
.
NOTE: The data for sunrise and sunset should be considered in connection with the astro-variant.
The choice of these parameters is between 24:00 and 00:00.
OK
7. Set the weekday(s) (+/-) to which the switching time should apply, and conrm with
.
NOTE: The weekdays 1-5, 6-7 and 1-7 are preset. Individual weekdays can be set (+/-) under
"Select days".
OK
8. Select channel (+/-) for which the switching time should be set, and conrm with
.
NOTE: The plus sign stands for an active, the minus sign for an inactive channel.
Yes
9. Select
to create an additional switching time, or No to determine the possible priority.
The choice of priority is possible in advanced mode only; see „Dening prioritisation of
programs“ on page 54.
47
Page 14

OK
B
Programming command
OFF
EN
Menu
Program
New
1. Press
2. Select
With Date?
Yes/No
Menu
button:
Program
OK
Select FNC
OFF
Time
09:01
Hour
OK
OK
and conrm with OK.
OK
Time
09:50
Minutes
OK
Days
12345-Mo-Fr
OK
Channels
1
CH1
OK
Add Times
Yes/No
Priority
High
OK
OK
For clarication of the following action steps, see ow chart.
New
3. Select
4. In step
conrm with
5. Select
6. Enter hour and minute of the switch-off time (+/-) and conrm each with
and conrm with OK.
With Date?
OK
OFF
and conrm with OK.
specify whether the device is to be activated on a certain date and - if yes -
(see also page 45).
OK
.
NOTE: The data for sunrise and sunset should be considered in connection with the astro-variant.
The choice of these parameters is between 24:00 and 00:00.
OK
7. Set the weekday(s) (+/-) to which the switching time should apply, and conrm with
.
NOTE: The weekdays 1-5, 6-7 and 1-7 are preset. Individual weekdays can be set (+/-) under
"Select days".
OK
8. Select channel (+/-) for which the switching time should be set, and conrm with
.
NOTE: The plus sign stands for an active, the minus sign for an inactive channel.
Yes
9. Select
to create an additional switching time, or No to determine the possible priority.
The choice of priority is possible in advanced mode only; see „Dening prioritisation of
programs“ on page 54.
48
Page 15

C
Pulse programming
(1)
(2)
15:00 h
(1) Start time
(2) Duration
This feature is not available in all variants of the device.
A pulse switching command consists of:
• Start time
• Duration = switching ON
– shortest switching time ON = 1 second
– longest switching time ON = max. 2 hours
Example:
Channel 1 will be switched daily from Monday to Friday at 15:00 for a duration of 30 seconds.
EN
Menu
Program
New
With Date?
Yes/No
OK
OK
OK
Select FNC
Impulse
Time
15:00
... Minutes
OK
OK
Impulse
00:00:30
... Seconds
Days
12345-Mo–Fr
Channels
1–
CH1
Add Time?
No
OK
OK
OK
Priority
Low
OK
OK
49
Page 16

1. Press
2. Select
Menu
button:
Program
and conrm with OK.
For clarication of the following action steps, see ow chart.
New
3. Select
4. In step
conrm with
5. Select
6. Enter hour and minute of the start time (+/-) and conrm each with
and conrm with OK.
With Date?
OK
Pulse
and conrm with OK.
specify whether the device is to be activated on a certain date and - if yes -
(see also page 45).
OK
.
NOTE: The data for sunrise and sunset should be considered in connection with the astro-variant.
The choice of these parameters is between 24:00 and 00:00.
OK
7. Enter hour(s), minute(s) and second(s) of the pulse duration (+/-) and conrm with
8. Set the weekday(s) (+/-) to which the switching time should apply, and conrm with
.
OK
.
NOTE: The weekdays 1-5, 6-7 and 1-7 are preset. Individual weekdays can be set (+/-) under
"Select days".
OK
9. Select channel (+/-), for which the pulse is to be set, and conrm with
.
NOTE: The plus sign stands for active, the minus sign for an inactive channel.
Yes
10. Select
to create an additional switching time, or No to determine the possible priority.
The choice of priority is possible in advanced mode only; see „Dening prioritisation of
programs“ on page 54.
EN
50
Page 17

D
19:00 h9:00 h
(2)
(3)
(1)
Cycle programming
(1) Start time
(2) Period ON
(3) Period OFF
Cycle programming is possible in advanced mode only.
EN
A cycle switching command consists of:
• Start time
• Period ON = Switching ON
• Period OFF = Switching OFF
Example:
Channel 1 is switched on from Monday 9:00 to Friday 19:00 every 30 minutes for 10 minutes.
Start time 9:00
Duration ON 10 minutes
Duration OFF 30 minutes
Separate OFF command 19:00
To end the cycle, an independent command
Off
must be set.
A nesting of cycle programs is not allowed
51
Page 18

Menu
Program
New
With Date?
Yes/No
OK
OK
OK
Select FNC
Cycle
Time
09:00
... Minutes
OK
OK
Period ON
00:10:00
. Minute ..s
Period OFF
00:30:00
. Minute ..s
OK
Days
12345-Mo–Fr
OK
Channels
1–
CH1
Priority
High
EN
OK
OK
OK
1. Press
2. Select
Menu
button:
Program
and conrm with OK.
For clarication of the following action steps, see ow chart.
New
3. Select
4. Specify in step
yes - conrm with
5. Select
6. Enter hour and minute of the start time (+/-) and conrm each with
7. Enter period ON (+/-) and conrm each with
8. Enter period OFF (+/-) and conrm each with
9. Select weekdays (+/-) on which the cycle should be started and conrm with
and conrm with OK.
With DATE
OK
(see also page 45).
Cycle
and conrm with OK.
? whether the device should be activated on a certain date and - if
OK
.
OK
.
OK
.
OK
.
NOTE: The weekdays 1-5, 6-7 and 1-7 are preset. Individual weekdays can be set (+/-) under
„Select days“.
OK
10. Select channel (+/-) for which the cycle should be set, and conrm with
.
NOTE: The plus sign stands for active, the minus sign for an inactive channel.
11. And choose possible
Priority
.
The choice of priority is possible in advanced mode only; see „Dening prioritisation of pro
grams“ on page 54.
You program the command
Select FCT
menu to end the cycle switching com-
OFF
in the
mand.
-
52
Page 19

OK
E
Random programming
Menu
EN
Program
New
With Date?
Yes/No
OK
OK
OK
Select FNC
Random ON
Time
15:00
Hour...
OK
Offset
+02:00
Hour ...
Days
12345-Mo–Fr
OK
Days
12345-Mo–Fr
OK
Channels
1–
CH1
OK
OK
OK
Priority
High
Random programming is possible in advanced mode only.
Example: Random 15:00 +02:00 1 2 3 4 5 1
Channel 1 is switched on Monday to Friday between 15:00 and 17:00. The exact switch-on time point
is random in this range.
Menu
1. Press
2. Select
button:
Program
and conrm with OK.
For clarication of the following action steps, see ow chart.
New
3. Select
4. Specify in step
- conrm with
5. Select
and conrm with OK.
With Date
OK
(see also page 45).
Random ON
or
whether the device should be activated on a certain date and - if yes
Random OFF
and conrm with Ok.
NOTE: The period of the random switching is dened with ± 2 hours.
Ok
6. Enter hour and minute of start (+/-) and conrm each with
7. Enter hour and minute of the range of the random programming (+/-) and conrm each with
.
Ok
.
NOTE: The weekdays 1-5, 6-7 and 1-7 are preset. Individual weekdays can be set (+/-) under
„Select days“.
Ok
8. Set weekday on which the device should randomly switch and conrm with
Ok
9. Select channel (+/-) which is to be programmed, and conrm with
NOTE: The plus sign stands for active, the minus sign for an inactive channel.
10. And choose possible
Priority
.
.
.
The choice of priority is possible in advanced mode only; see „Dening prioritisation of
programs“ on page 54.
53
Page 20

DEFINING PRIORITISATION OF PROGRAMS
You specify the order in which the programs of the device should be run using prioritisation. You can
thus execute a daily switching command, but can dene via a higher priority, that, for example, other
switching times of the device are valid during holidays.
The choice of priority is only possible in advanced mode.
By default, the priority is specied as follows:
• Without date very low
• With date reference medium
• With individual date high
The following priorities can be set:
• Very Low
• Low
• Medium
• High
• Very High
Example:
A daily program switches on the device every day from morning 08:00 to 17:00 in the afternoon. If,
for example, you do not want the device to switch on on weekends of a holiday, create a program
with a higher priority for these days. This program takes precedence over the other settings.
EN
54
Page 21

VIEW, EDIT OR DELETE PROGRAM
Menu
Program
View Edit/
PRG List
Prg X (1|1)
OK
PRG 1
List Dates
Dat 1/1e
2015.11.22
2016.11.23
OK
OK
1/4
OK
OK
Dat 1e
Change
Date from
2015.11.22
1/4
Date to
2016.11.24
In order to view, edit or delete a program, press the
1. Select
2. Select
Program
Read/Change
3. Select program and conrm with
4. Select List (
yourself, or select
and conrm with OK.
and conrm with OK.
OK
.
date entries, switching times, priority
Delete program
to delete the selected program.
OK
OK
...Day
Dat 1/1e
2015.11.22
2016.11.24
Menu
key:
OK
Dat 1e
Change
EN
OK
ESC
) that you want to view or edit
The choice of priority is only possible in advanced mode.
5555
Page 22

DELETE ALL PROGRAMS
Menu
Program
Delete All
1. Press
2. Select
3. Select
4. Select
OK
OK
Delete All
Yes/No
Menu
button.
Program
OK
and conrm with OK.
Delete all
Yes
and conrm with OK.
EN
and conrm with OK.
5656
Page 23

Conguration
BACKLIGHT
In the
Light
Menu
Con gfi
menu, you specify how long the backlight stays on after the last key press.
OK
Light
Light
*2 Min
OK
OK
The following settings are possible:
Fix ON
•
The backlight of the display remains on continuously.
•
2 Min
The backlight of the display is automatically switched off two minutes after the last keystroke.
Menu
1. Press
2. Select
3. Select
4. Select the desired setting and conrm with
button.
Config
Light
and conrm with OK.
and conrm with OK.
OK
.
EN
57
Page 24

LOCATION INFORMATION (ASTRO)
You dene the location information in the
Astro
menu.
This feature is not available in all variants of the device.
Menu
EN
Con gfi
Astro
Country
Countries
* .United Kin
OK
OK
OK
United Kin..
*City
OK
The following settings are possible:
Country
•
Country name and city of the location.
Coordinates
•
Latitude and longitude of the location.
1. Press
2. Select
3. Select
4. Select submenu
Menu
button.
Config
Astro
and conrm with OK.
menu and conrm with OK.
COUNTRY
or
Coordinates
5. Make settings and conrm with
OK
and conrm with OK.
.
5858
Page 25

HOUR METER
Reading hour meter
You can see how many operating hours your DIN-rail time switches is switched on in the
counter
menu.
Menu
Read hour
EN
Config
Hour-Counter
1. Press
2. Select
3. Select
4. Select
Service
Channels
CH1
Menu
Config
Hour counter
Read
OK
OK
OK
Hours
1000 H
Service
OK
button.
and conrm with OK.
and conrm with OK.
and conrm with OK.
5. Select the desired channel.
Service meter
You specify the number of operating hours that will pass for a service message to be displayed for a
channel in the
Hour meter service
menu. This is shown in the display as soon as the counter has
reached the hour value set by you.
Menu
Config
Hour-Counter
Service
Channels
CH1
OK
OK
Hours
1000 H
Service
OK
OK
Menu
6. Press
7. Select
8. Select
9. Select
button.
Config
Hour counter
Service
and conrm with OK.
and conrm with OK.
and conrm with OK.
10. Select the channel and conrm with
11. Set count value and conrm with
OK
OK
.
.
59
Page 26

PIN
You specify whether a PIN entry is required for setting the device in the
The following settings are possible:
No PIN
•
Entering a PIN is not required to change settings of the device.
PIN Enter
•
Entering a PIN is required to change settings of the device.
Menu
PIN
menu.
EN
Config
PIN
PIN
Set PIN
Set PIN
1234
SET PIN
1. Press
2. Select
3. Select
Menu
Config
PIN
and conrm with OK.
4. Select Enter
5. For selection
OK
OK
OK
OK
PIN
PIN set
OK
button.
and conrm with OK.
No PIN
PIN Enter
or
PIN
enter (+/-) the PIN and conrm with OK.
and conrm with OK.
6060
Page 27

MODE
You specify whether you want to only use the standard functions or the advanced functions of the
Mode
device in the
Menu
menu.
EN
Config
Mode
Mode
*Standard
OK
OK
OK
The following settings are possible:
Standard
•
The following functions are available:
− ON/OFF command
− Sunrise and sunset related programming (only for devices with astro function)
− Automatic prioritisation
Advanced
•
The following functions are available:
− ON/OFF command
− Sunrise and sunset related programming (only for devices with astro function)
− Automatic prioritisation
− Pulse programming
− Cycle programming
− Random programming
− User-dened prioritization
SET MODE
1. Press
2. Select
3. Select
4. Select
Menu
button.
Config
Mode
Standard
and conrm with OK.
and conrm with OK.
or
Advanced
setting and conrm with OK.
61
Page 28

BLUETOOTH
Certain functions of the device can be controlled by Bluetooth via the
ne, tablet, etc.).
Menu
Bluetooth
menu (smart pho-
EN
Config
Bluetooth
Smart Link
General
OK
OK
OK
The following settings are possible:
•
Smart Link
– MAC address
– Device name
General
•
– Version number of software
– Serial number of device
CREATING BLUETOOTH CONNECTION
1. Press the Bluetooth button on the device (DIN-rail time switch).
The Bluetooth icon will ash for two minutes. If a mobile device or a PC connects, the Bluetooth
icon remains continually visible.
2. Searching the app for new devices.
If the device is found, it is displayed in the app in the list of available devices.
If a connection is established for the rst time, the device connects automatically as soon as the
range of the Bluetooth connection has been reached. You can then control the time switch with the
mobile device; see operating instructions for the app.
If the time switch is protected via a PIN, this must be entered on the mobile device.
6262
Page 29

DISPLAY DURING DATA TRANSMISSION
The following appears on the display of the time switch during the transmission of programs or conguration from a mobile device:
EN
63
Page 30

Set date and time
You specify the format for the display of the time in the
Menu
Date/Time
menu.
EN
Date/Time
12/24Hours
*24Hours
Date
2015.09.28
...Day
OK
OK
OK
Time
12:10
... Minute
Time Zone
+01:00h
OK
1st Weekday
* Monday
The following settings are possible:
24 Hours
•
The time is displayed in 24-hour format.
AM/PM
•
The time is displayed in 12-hour format:
− AM = morning
− PM = afternoon
OK
OK
Menu
1. Press
2. Select
button.
Date/Time
and conrm with OK.
3. Select (˅/˄) setting and conrm with
4. Enter data according to the setting
24 Hours
− Date
− Clock
− Time Zone
− First weekday
Example:
1st day = Sunday ... 1-5 = Su-Th
1st day = Monday ... 1-5 = Mo-Fr
OK
.
or
AM/PM
:
64
Page 31

Switch summer / winter time
You specify the variants for switching from summer to winter time in the
Menu
Su/Wi
menu.
EN
S/Wi Timeu
S/Wi Timeu
*Auto
Auto
*EU
OK
OK
OK
The following settings are possible:
Auto
•
Factory setting of the legal requirement (USA or EU). This is recalculated each year.
Adjust 1
•
Automatic programming:
The summer/winter time is automatically recalculated for each year.
− The switchover takes place on the rst Sunday of the selected month if the entered date is
between the 1st and 15th.
− The switchover takes place on the last Sunday of the selected month if the entered date is
between the 16st and 31st.
− The changeover takes place on the respective Sunday from 2 to 3 am (summertime) or from 3
to 2 am (wintertime).
Adjust 2
•
Automatic programming:
Switching always takes place every year on the same date entered.
•
No
No switching.
Menu
1. Press
2. Select
3. Make the desired setting and conrm with
• For selection of
button.
Su/Wi Time
Adjust 1
and conrm with OK.
or
Adjust 2
OK
.
, enter the data for month and day and conrm with OK .
65
Page 32

Language setting
You specify the language of the display texts in the
Menu
Language
menu.
EN
Language
*English
1. Press
2. Select
Menu
Language
OK
OK
button.
and conrm with OK.
3. Select the desired language and conrm with
OK
.
66
Page 33

Automatic / manual operation
Set the operating mode in which the device is to be operated via the left function key:
EN
CH 1
OvrFix
13.03.2016
09:00
OVRFIX
1 2
The following settings are possible:
• Permanently ON (FIX)
• Permanently OFF (FIX)
• Override mode (OVR)
• Automatic mode
To adjust the channel state for channel 1 or channel 2, press the appropriate left function button until
the desired mode is selected.
51
Menu
OVERRIDE MODE
The override mode (temporarily overrides a running program) allows the user to terminate the running
program early or to start a later start-up program prematurely. This depends on the current channel
status. The override function is valid only for the current program and is retained until the next pro
gram change. Then the device will return to automatic mode.
-
67
Page 34

SWITCHING STATE DISPLAY
As an example for channel 1, the switching status display appears as follows:
Channel Fix OFF Channel Fix ON Override ON
There is no display over the icon for the channel in automatic mode.
From the automatic mode, you can make the following settings using the corresponding function
key for channel 1 or channel 2, taking into account the starting point:
• ON
– Press 1x = Override OFF
– Press 2x = Channel Fix OFF
– Press 3x = Channel Fix ON
• OFF
– Press 1x = Override ON
– Press 2x = Channel Fix ON
– Press 3x = Channel Fix OFF
EN
68
Page 35

Maintenance and Service
Distribution partners
You can nd our distributor partners at the following address:
www.graesslin.de/distributors
Software update
You can nd current software updates at the following address via the search function:
www.graesslin.de
For the installed version under the Bluetooth settings, see „Bluetooth“ on page 62.
EN
69
Page 36

Disposal and Recycling
You must correctly dispose of devices, batteries/rechargeable batteries or packaging materials
according to legal provisions and ordinances.
Please pay attention to the information below relating to the disposal of defective system components or
of the system itself according to the useful product life:
• Carry out disposal correctly, i.e. separated according to the material groups of the parts to be
disposed of.
• Never put batteries/rechargeable batteries (Directive 2006/66/EC), electrical or
electronic scrap in with domestic refuse. Use appropriate depots.
• Always carry out disposal in an environmentally friendly way and in accordance with any local
statutes or laws.
EN
70
Page 37

Grässlin GmbH
Bundesstraße 36
78112 St. Georgen
Germany
+49 (0) 7724 / 933-0
+49 (0) 7724 / 933-240
www.graesslin.de
info@graesslin.de
80.10.1456.7/0316/V01
 Loading...