

Gorenje D9665N, D9866E, SP10 EXCL HP A+++, D76SY2B Detailed Instructions
EN
DETAILED
INSTRUCTIONS
HOW TO USE YOUR
DRYER
www.gorenje.com

We thank you for the
confidence you have shown us by
purchasing this dryer. Your new
dryer complies with the requirements
of modern laundry care; it will
dry your laundry quickly, leaving
it soft and smooth, while use of
special programs will not deform
it. SenzoCare technology will allow
simple operation of the dryer with
very low power consumption.
This appliance is designed exclusively
for household use for clothes which
may be drying in a dryer.

3
TABLE OF CONTENTS
348248
DRYING
STEPS
CLEANING
AND
MAINTANCE
OF THE
APPLIANCE
INTRODUCTION
TROUBLESHOOTING
GETTING
STARTED
OTHER
4 APPLIANCE
5 Technical information
6 ControL panel description
8 SAFETY PRECAUTIONS
10 INSTALLATION AND CONNECTION
10 Selecting the room
13 Installation
14 Condensate discharge
15 Electrical connections
16 Moving and transport
16 Subsequent transport
17 Emptying the steam generator tank
18 Ionizer system
18 Steam generator system
19 BEFORE THE FIRST USE
22 DRYING STEPS (1 - 7)
22 1. Step: Check the tags on your laundry
23 2. Step: Preparing the laundry
26 3. Step: Selecting a program
29 4. Step: Additional functions
30 5. Step: Style
32 6. Step: Program start-up
32 7. Step: End of drying cycle
33 CLEANING AND MAINTENANCE
34 Cleaning the filter on the lower side of the door opening
35 Cleaning the net filter in the door
36 Cleaning the heat pump filter
37 Cleaning the steam generator tank filter
38 Emptying the condensate tank
39 Cleaning the dryer
40 INTERRUPTING AND CHANGING THE PROGRAM
41 What to do...?
43 TIPS AND RECOMMENDATIONS FOR DRYING AND ECONOMIC USE
OF YOUR DRYER
44 DISPOSAL
45 TYPICAL CONSUMPTION TABLE

4
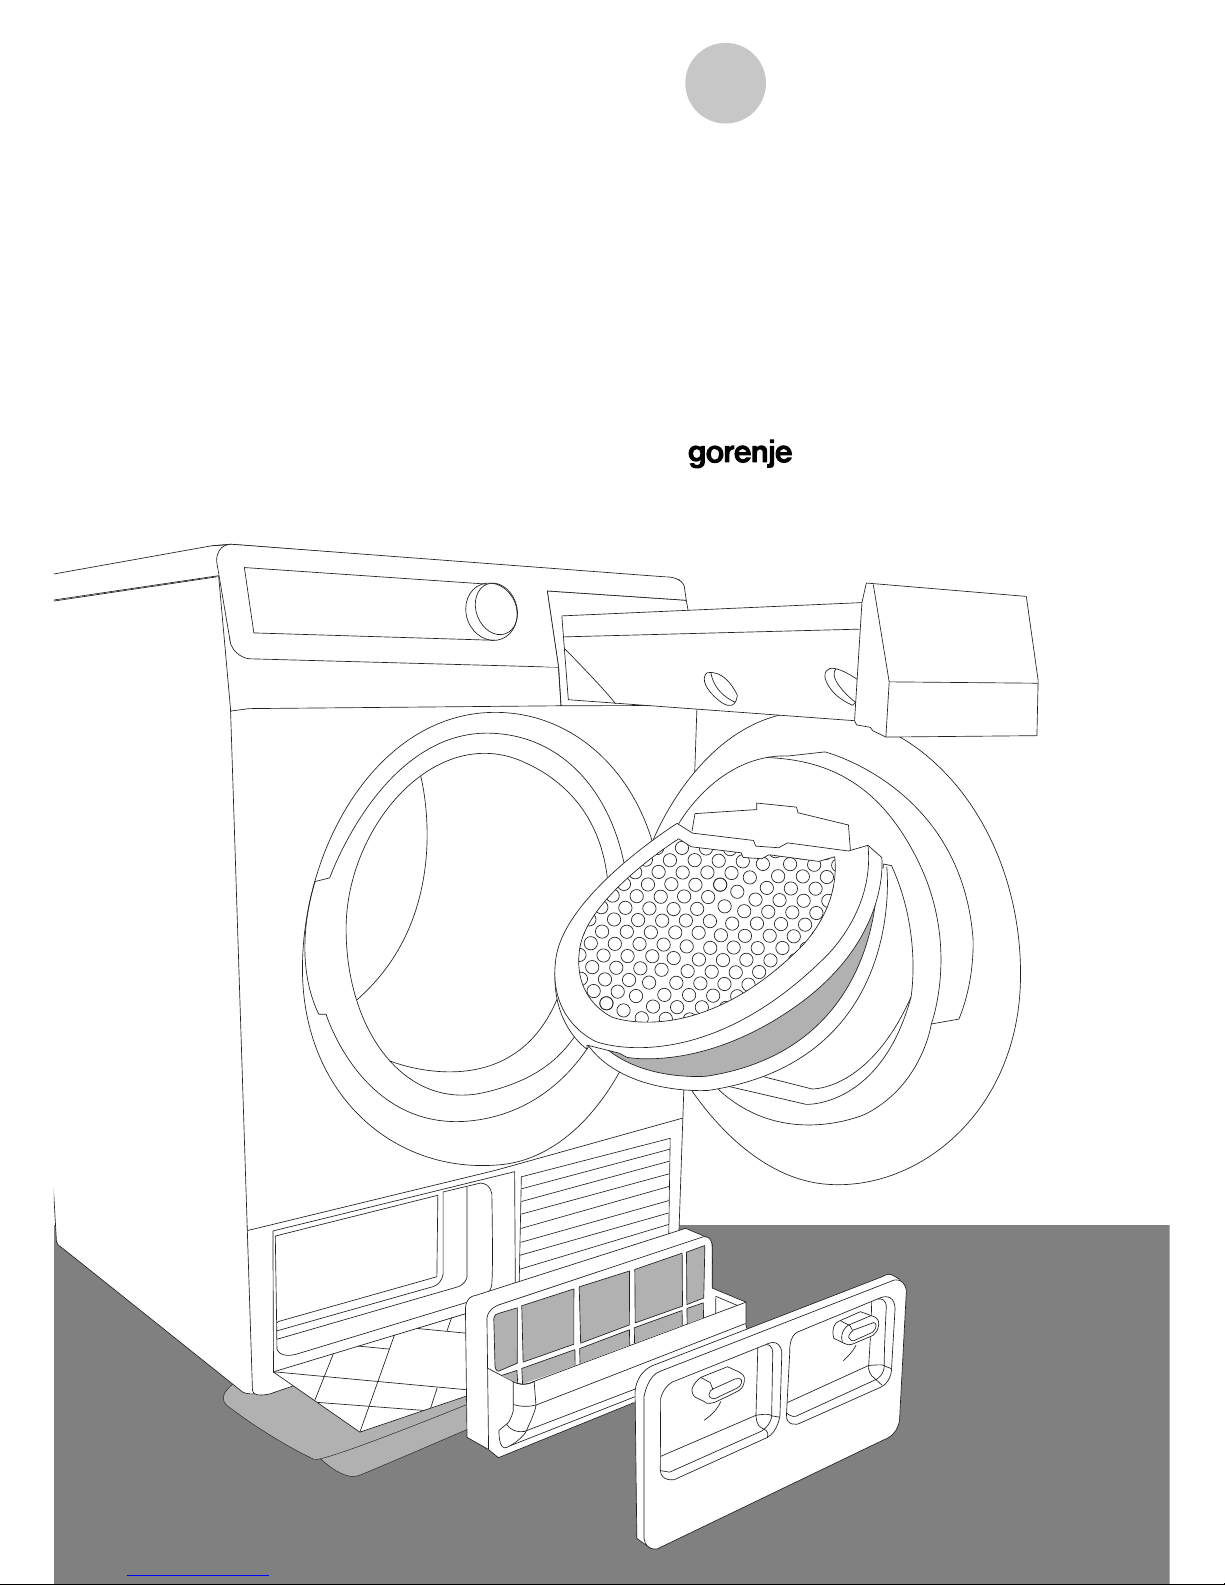
APPLIANCE
(DRYER DESCRIPTION)
1
2
3
5
6
7
8
4
1
2
3
3
3
3
348248
FRONT
1 Program selector dial
2 Control panel
3 Condensate tank
4 Door
5 Net filter
6 Heat pump filter
7 Air vent
8 Rating plate
BACK
1 Condensate discharge pipe
2 Power cord
3 Adjustable feet

5
TECHNICAL INFORMATION
(DEPENDING ON THE MODEL)
TYPE: SP10/XXX
Art.No.: XXXXXX
AC 220-240V 50 Hz
Pmax.: XXXXW
10A
MADE IN SLOVENIA
MODEL: XXXXXX
Ser.No.: XXXXXX
RXXXX/300g
X
kg
IPX4
348248
The rating plate with the basic information on the dryer is located under the door frame.
Width
600mm
Height
850mm
Depth
600mm
Depth with door
open
1100mm
Weight
XX/YY kg
(depending on the
model)
Rated voltage
See rating plate
Fuse
See rating plate
Nominal power
See rating plate
Amount of
refrigerant
See rating plate
Type of refrigerant
R407C / R134a
(depending on the
model)
Maximum load
See rating plate
The rating plate
6
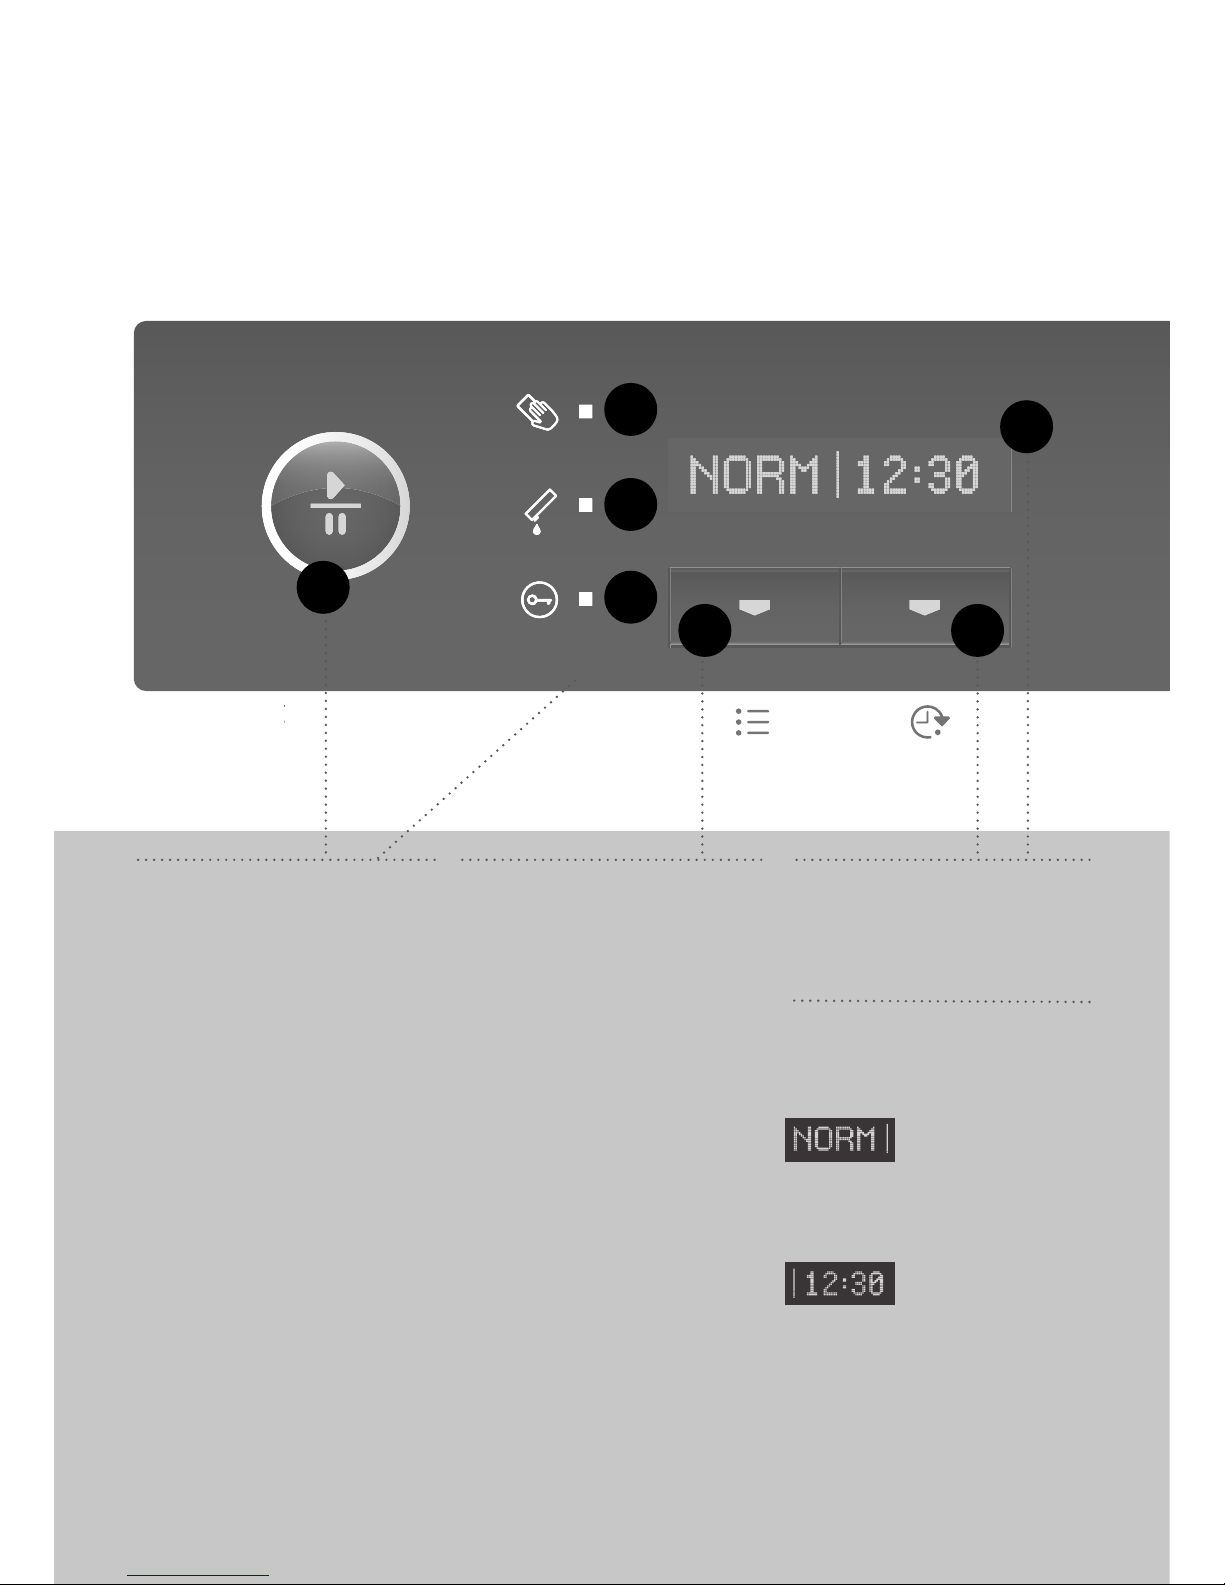
CONTROL PANEL DESCRIPTION
FOR MODELS: A) IONIZER + STEAM AND B) IONIZER
ST
ART|
1
43
5
2a
2b
2c
348248
1
START/ PAUSE key,
use this key to start or
stop the program. When
selected, the signal light on
the key will flash. When the
program has started it will
be lit continuously.
2
a , b , c : SIGNAL
LIGHTS are on: when
it is necessary to clean the
filter, empty the condensate
tank or when the child lock
is on.
3
STYLE key
NORMALcare
GENTLEcare (low
temperature)
4
START DELAY key,
to select the delayed
start of the drying program.
5
DISPLAY showing
theDRYING STYLEon
the left
and DELAYED START or
time to the end of the cycle
on the right
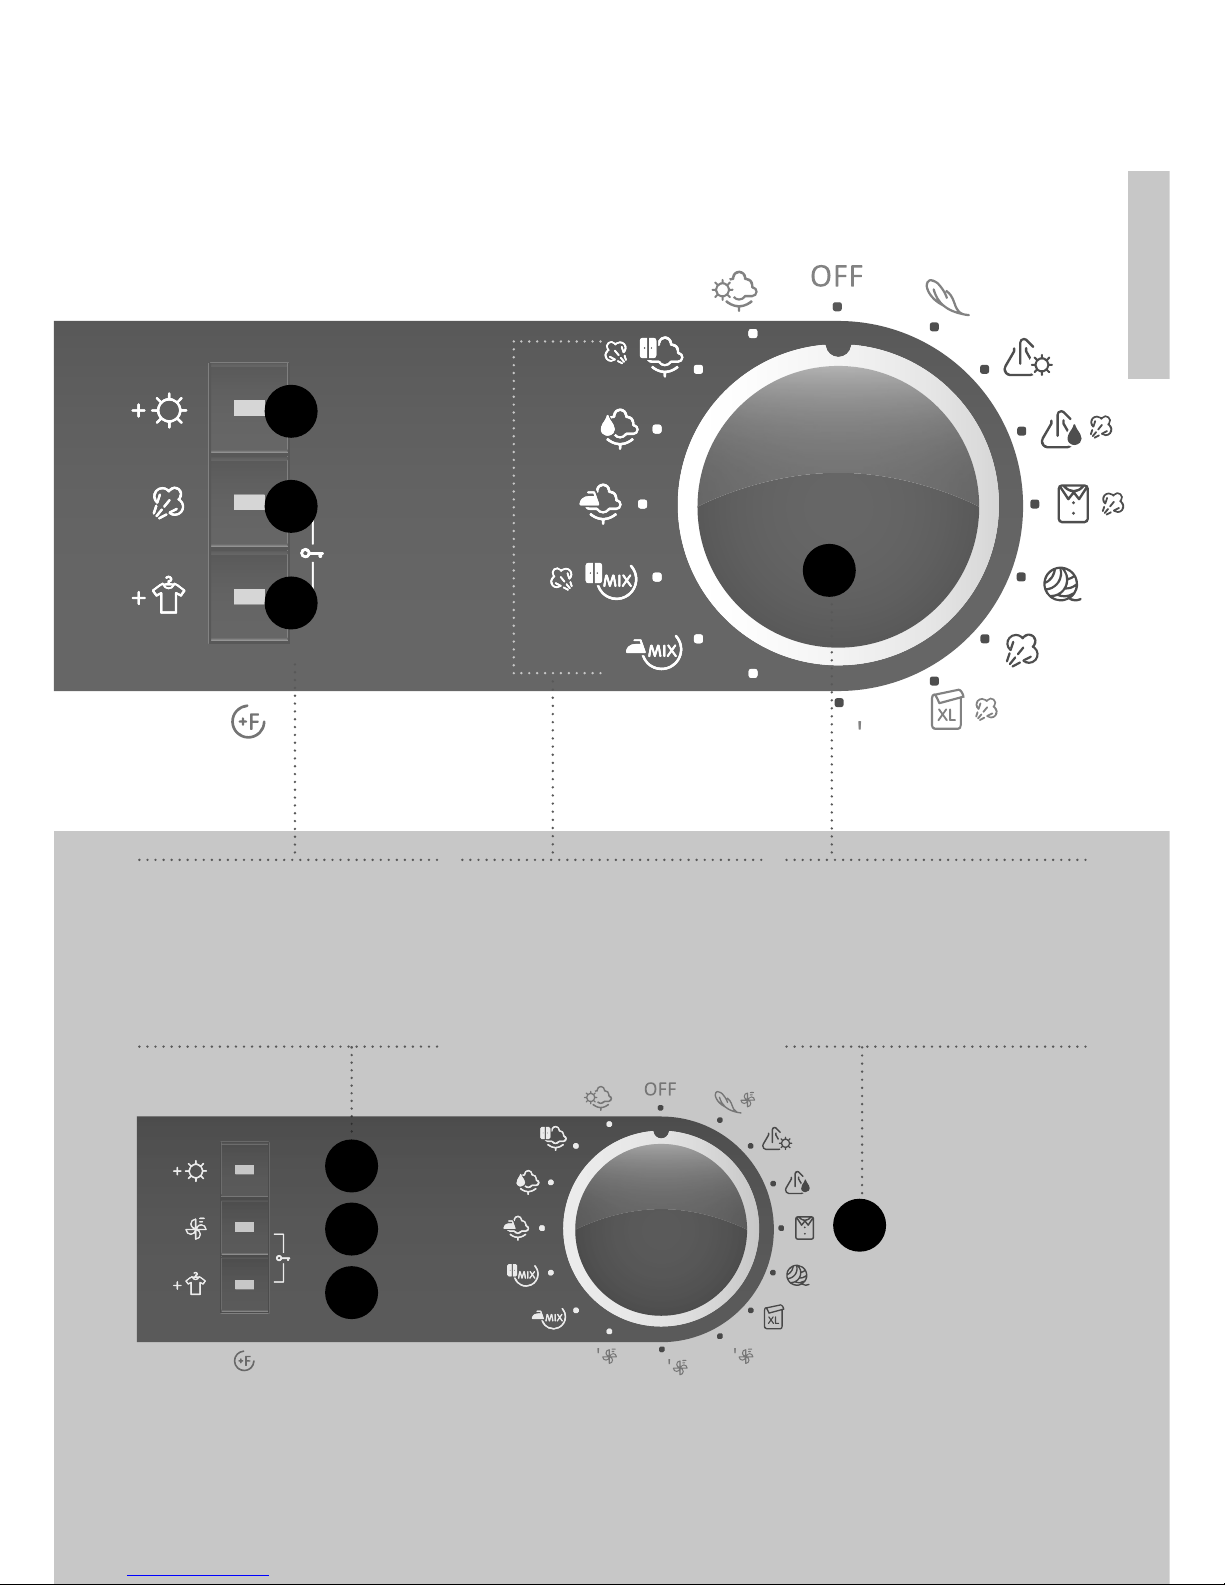
A) IONIZER + STEAM
7
90
6c
7
6b
6a
6b
6a
6c
7
348248
6
a , b , c : ADDITIONAL
FUNCTION keys, to
extend or adjust the basic
programs.
7
ON/OFF and PROGRAM
SELECTOR dial
MOST USED PROGRAMS
B) IONIZER

8
SAFETY PRECAUTIONS
348248
Please don´t use the appliance unless you
have studied and understood the instruction
manual.
Your dryer is intended solely for household
use.
If the dryer is used for professional, for-profit
purpose or purpose exceeding normal use
in a household, or if the dryer is used by a
person who is not a consumer, the warranty
period shall be equal to the shortest warranty
period required by relevant legislation.
Before connecting the dryer to the power
mains, please read carefully the instructions
for use which describe the dryer and its
correct and safe use. The instructions apply
for several appliance types/models; thus,
settings or equipment may be described
herein which is not available in your dryer.
Failure to observe instructions or incorrect
use of the dryer, can lead to damage of
laundry, dryer or the user.
Store the instruction manual nearby the
dryer.
Do not allow the children to play with the
appliance.
Prevent your children and pets to enter the
dryer drum.
Air in the dryer environment should not
contain dust particles.
The air where the dryer is installed, should
be well ventilated to prevent feedback of
gases released from the gas appliances with
open fire (e.g. fireplace).
The dryer back wall can be hot danger of
burns.
Clean the filters after each drying cycle. If
you have removed the filters, replace them
before the next drying cycle.
Always switch off the dryer after use (the
program selector switch should be in the
"OFF" position) and unplug the power cord
from the wall outlet (to prevent the hazard of
lightning or voltage overload).
The dryer employs the heat pump system to
heat the air.
The system consists of a compressor and
heat exchangers.
After running the dryer, compressor
operation, or the sound of flowing liquid,
may be somewhat louder. This is not a sign
of malfunction and it will not affect useful life
of the appliance. In time, dryer operation and
this noise will become more quiet.
Leave any repairs and similar tasks on the
dryer to an expert.
Unprofessional repair may result in an
accident or major malfunction. Call the
authorized service department (see list of
service departments attached).
The warranty does not cover (consumables
(light bulbs), minor deviations in colour,
increased noise which is a consequence of
the appliance age and does not affect the
functionality of the appliance, and aesthetic
defects on components that do not affect
the functionality and safety of the appliance.

9
348248
TO REDUCE FIRE HAZARD, PLEASE READ THE
FOLLOWING INSTRUCTIONS:
Do not dry in the dryer any laundry, that has not been
washed earlier.
Use the dryer only to dry laundry that was washed with
water. Do not dry any laundry that was washed of cleaned
with inflammable cleaners or substances (such as gasoline,
trichloroethylene etc.) as this may result in an explosion.
Laundry stained with oil, acetone, alcohol, oil derivatives,
stain removers, turpentine, wax, and wax removers should
be washed in a washing machine with hot water and
detergent before it is dried in the dryer.
Clothing that includes latex, rubber parts, shower and
bathing caps, and laundry or covers with rubber foam
should not be dried in the dryer.
Laundry conditioners or similar products have to be used in
compliance with manufacturer's instructions.
The appliance is manufactured in
compliance with all effective safety
standards.
Nevertheless, we recommend it is not used
by persons with impaired physical or mental
abilities and motor skills, or persons with
deficient experience or knowledge, without
due supervision. The same recommendation
applies to the use of appliance by minors.
Never stop the drying cycle before it is
completed; if you do interrupt the cycle
for any reason, be careful when removing
the laundry from the drum as it is very hot.
Quickly remove the laundry from the drum
and spread it to allow it to cool down as
quickly as possible.
10
INSTALLATION AND
CONNECTION
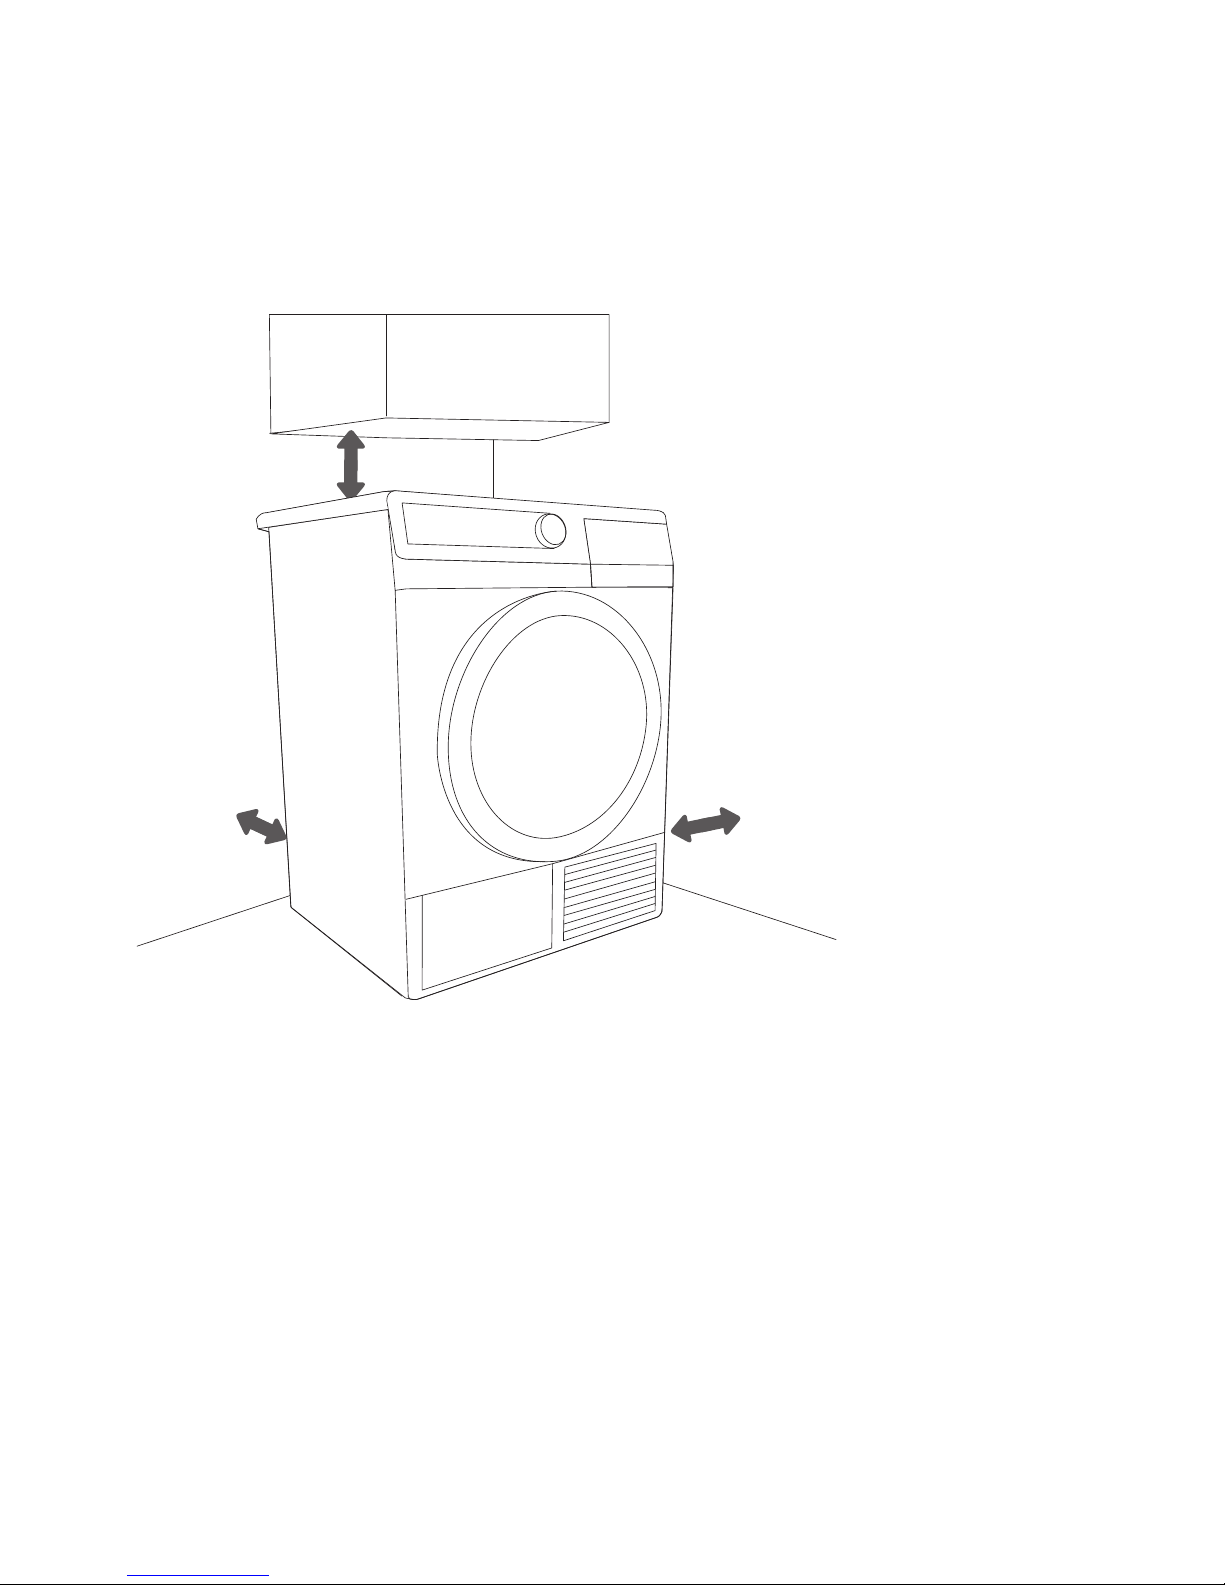
SELECTING THE ROOM
10 cm
10 cm
5 cm
348248
Ventilation slots and the opening on the front and rear side should always be kept free.
Do not install the appliance in a room where there is danger of frost.
The room in which the appliance is installed should be adequately ventilated, with
temperature between 10°C and 25°C. When the dryer is operated at a lower ambient
temperature, condensate can accumulate in the appliance interior. Frozen water in the
condensate tank or pump may damage the dryer.
The surrounding illumination in the installation room should be adequate to read the front
panel properly.
When installing the dryer in a room, note the required clearance as indicated in the image.
In case of failure to heed the required minimum clearance, the dryer may overheat.
11
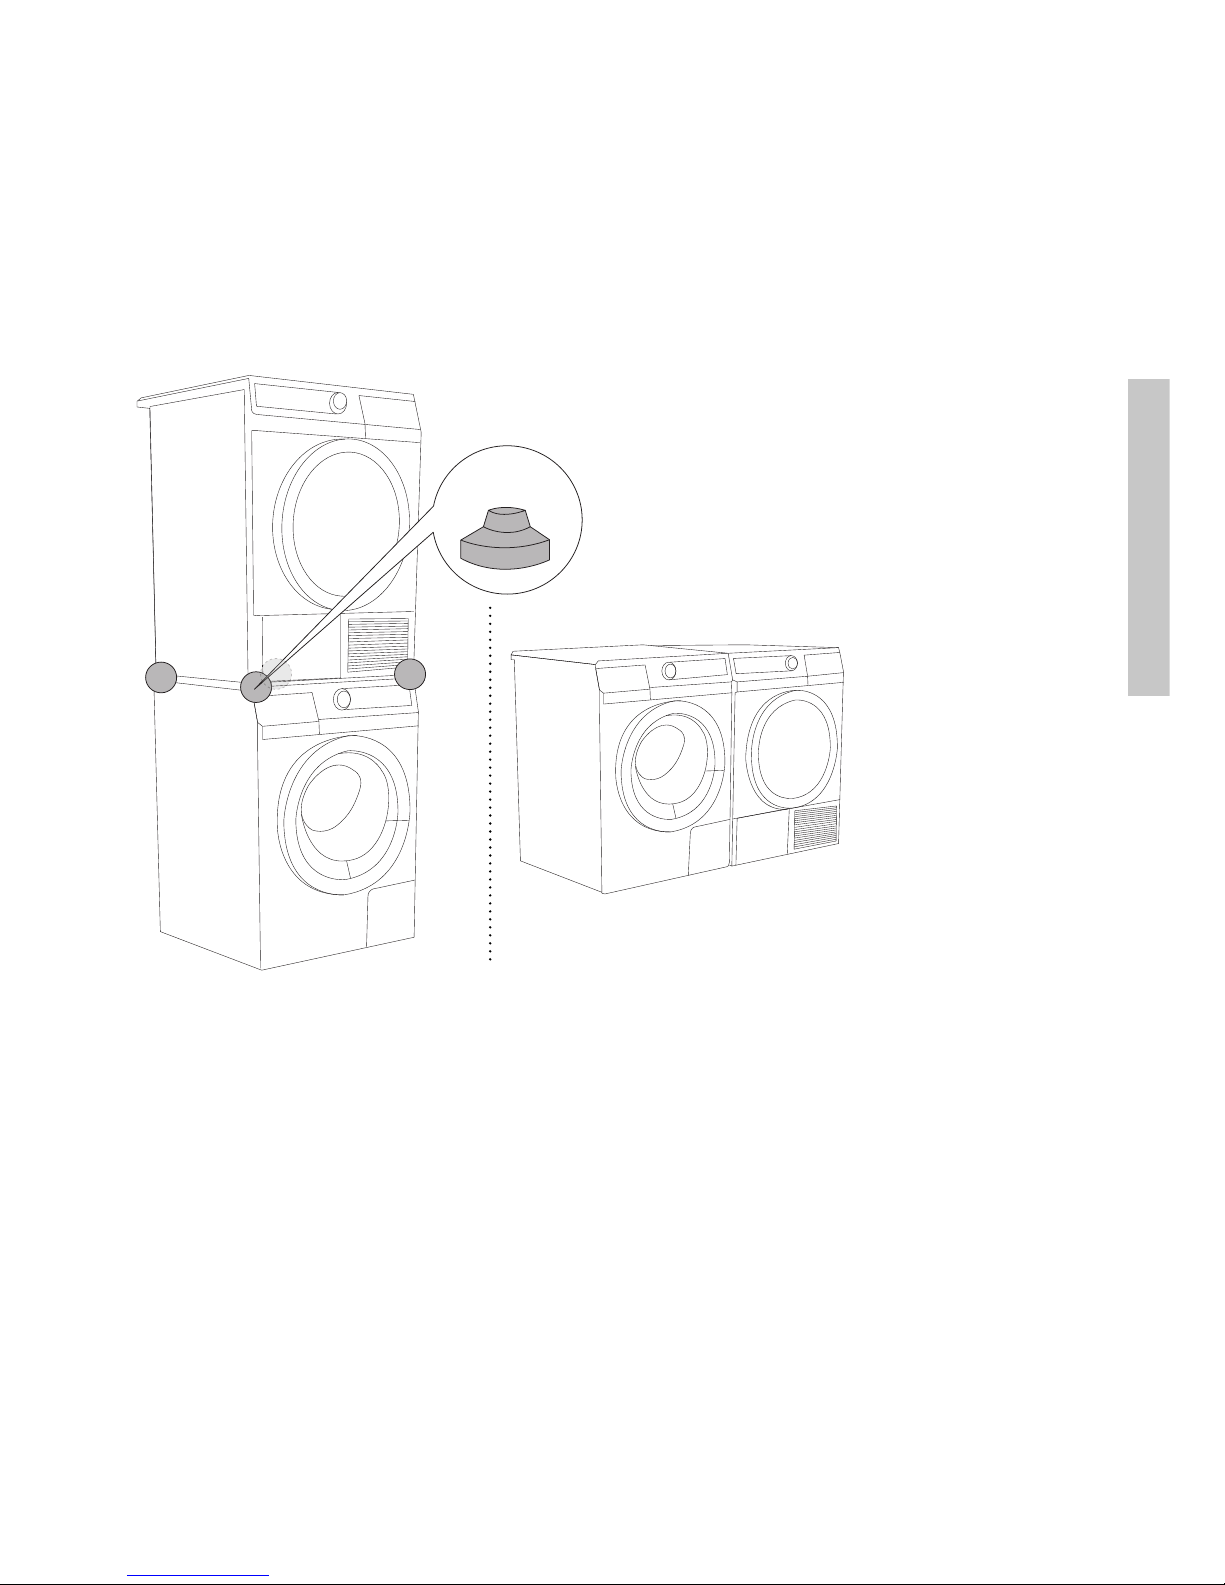
POSITIONING THE APPLIANCE
4X
348248
Positioning the appliance on top of the washing machine by using the vacuum feets or
side by side.
Dryer can be stand freely on the floor or on a washing machine of the same dimensions
– minimum width 517 mm, minimum depth 476 mm. The surface on which the dryer is
placed should be clean and level.
Use the vacuum feet attached; they are designed to prevent the dryer from sliding.
(Vacuum feet are attached or can be purchased (depending on model))
Washing machine on which you wish to install the dryer must be able to bear the weight
of the dryer (see washing machine's rating plate or technical information).

12
348248
Do not place the dryer behind lockable or sliding door or door
with a hinge opposite the dryer. Install the dryer in such way
that the door can always be freely opened.
Never block the cool air opening (see dryer description).
Drying machine on top should be placed by at least two
persons.
Do not place the dryer on a carpet with long fibres as this may
impede air circulation.
The appliance may not be in contact with a wall or adjacent
furniture.
13
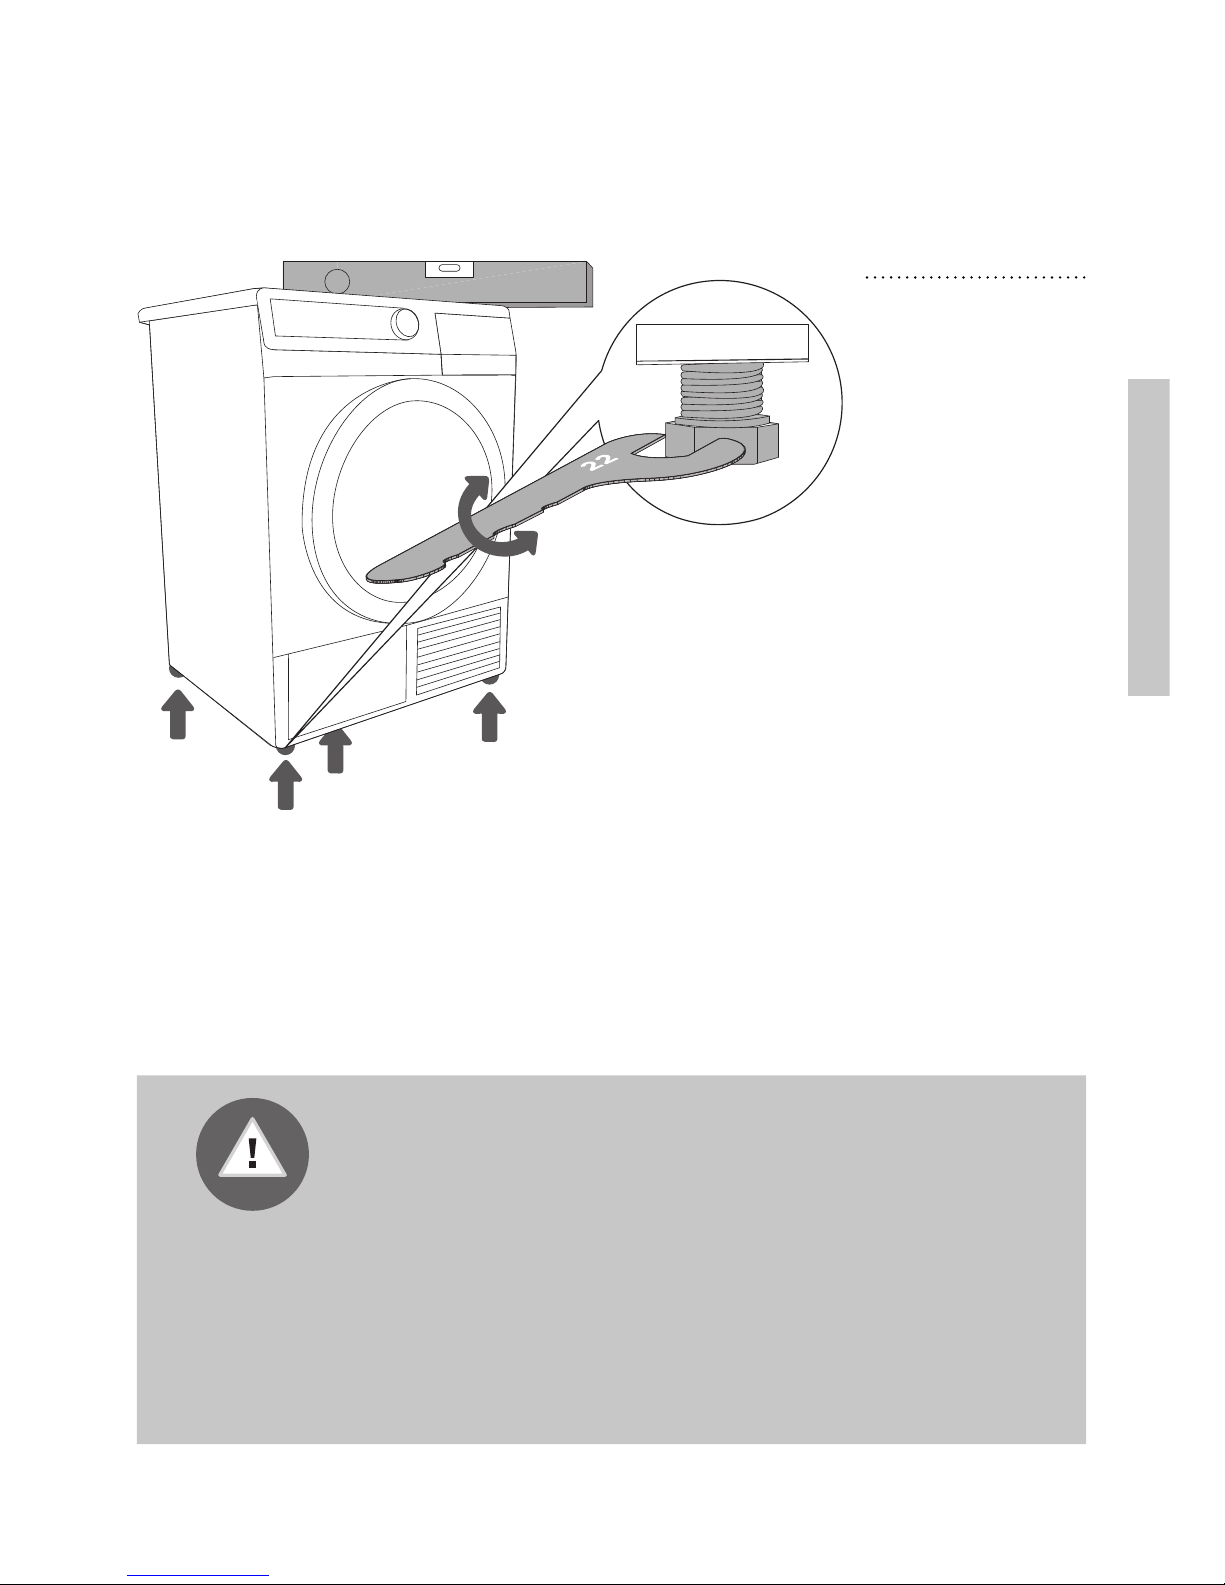
INSTALLATION
348248
Level the dryer in
longitudinal and
traverse direction
by rotating the
adjustable feet
which allow levelling
by +/- 1 cm. Use
key nr. 22 and spirit
level.
Floor on which the machine is placed must have a concrete
base. They must be clean and dry; otherwise, the machine may
slide. Also clean the adjustable feet.
The appliance must stand level and stable on a solid base.
Vibrations, moving of the appliance across the room, or loud
operation due to improperly adjusted feet are not covered by
the warranty.
Sometimes, unusual or loud noise may appear during
appliance operation; these are mostly the result of improper
installation.

14
CONDENSATE DISCHARGE
max 80 cm
348248
The moisture from the laundry is extracted in the condenser unit
and accumulated in the condensate tank.
During the drying process, a control light will warm you of a full
condensate tank which has to be emptied.
Interruption of the drying cycle due to full condensate tank can be
avoided by running the condensate discharge tube found at the
back of the appliance directly into a drain.
If the condensate discharge tube is run into a drain, make sure
the tube is firmly secured. This will prevent any water spillage
which could result in unexpected damage.
In this case, the steam generator tank will not be filled
automatically. It will always require manual filling (see section
Filling and replenishing the steam generator tank).
1
Pull the tube to
remove it with
flat screw-driver,
from the holder on
the appliance back
wall (on the left
hand side under the
cover).
2
Install tube into
the drain, at
a height of 80 cm
from the ground.
15
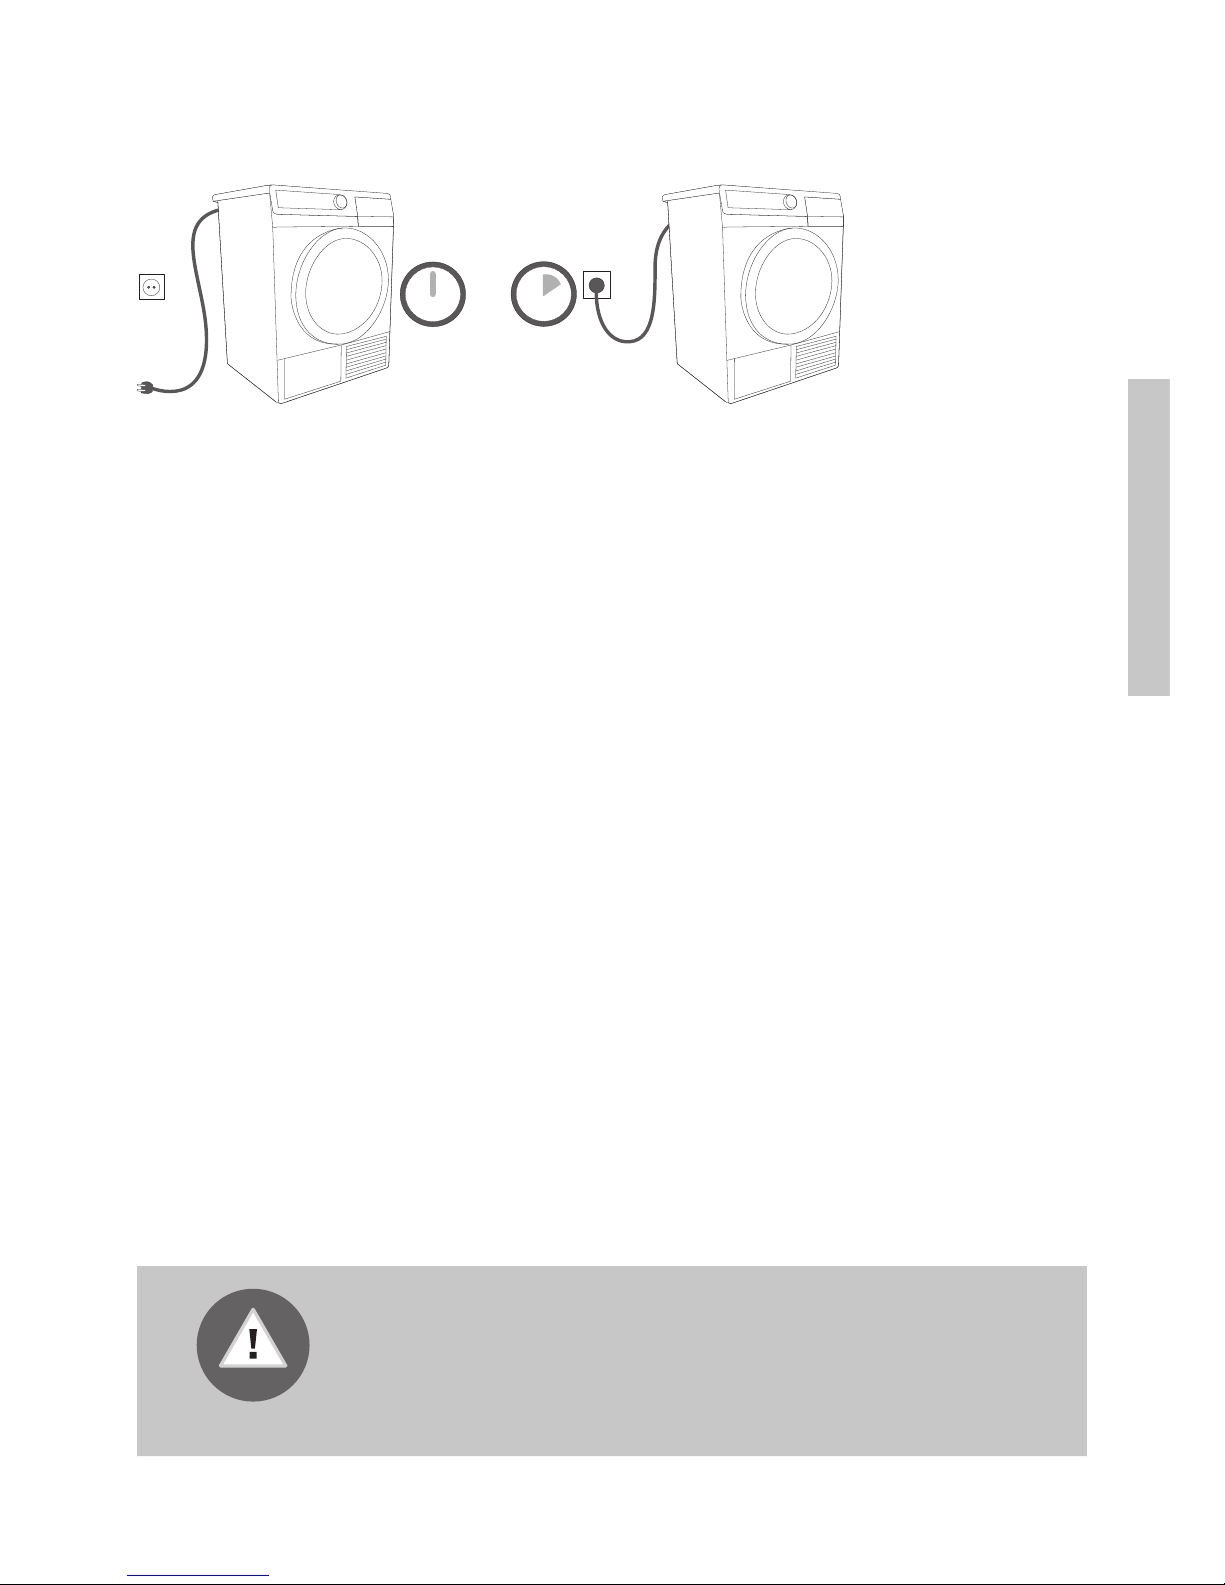
ELECTRICAL CONNECTIONS
2h
348248
The dryer should be left to stand still for at least two hours
before it is connected to the power mains to allow the system to
stabilize.
Use the power cord to connect the dryer to the power mains
through a power outlet. The dryer may not be connected to the
power mains through an extension cable (danger of overheating
and fire). Nominal voltage and other information is given on the
rating plate located under the door frame.
To prevent from damage by excess voltage on the mains due
to lightning strike we recommend to use a class I over-voltage
protector between the machine and the mains.
After installation, the wall outlet should be freely accessible.
The outlet should be fitted with an earth contact (in
compliance with the relevant regulations).
A damaged power cord may only be replaced by a person
authorized by the manufacturer.
 Loading...