

Page 1

GoPro Studio 2.0
User Manual for Mac Operating Systems
Page 2

TABLE OF CONTENTS
INTRODUCTION ................................................................................................................................................... 1
What is GoPro Studio? ................................................................................................................................................................................................................. 1
Learning Resources .................................................................................................................................................................................................................. 2
User Manual ............................................................................................................................................................................................................................... 2
Readme File ............................................................................................................................................................................................................................... 2
Online Help and Support .......................................................................................................................................................................................................... 2
Installing GoPro Studio ................................................................................................................................................................................................................. 3
UNDERSTANDING THE WORKFLOW ............................................................................................................. 4
Using GoPro Studio as a Stand-Alone App lic ation .................................................................................................................................................................. 4
Using GoPro Studio with 3rd Party Applications ........................................................................................................................................................................ 4
Why Convert to the GoPro CineForm Format? ......................................................................................................................................................................... 5
THE GOPRO STUDIO IMPORTER .................................................................................................................... 6
Launch GoPro Studio ............................................................................................................................................................................................................... 6
Preferences ................................................................................................................................................................................................................................ 6
OVERVIEW OF THE USER INTERFACE ......................................................................................................... 8
Step 1: VIEW & TRIM ................................................................................................................................................................................................................... 9
Step 2: EDIT ................................................................................................................................................................................................................................. 10
The Player Window’s Three States ...................................................................................................................................................................................... 10
Step 3: EXPORT .......................................................................................................................................................................................................................... 12
Menu Commands ........................................................................................................................................................................................................................ 13
GoPro Studio Preferences ..................................................................................................................................................................................................... 16
CAMERA SOFTWARE UPDATES ................................................................................................................... 17
Updating HERO4 Camera Software ......................................................................................................................................................................................... 17
Page 3

Updating HERO3+ Camera Software ....................................................................................................................................................................................... 19
Updating HERO3+ and HERO4 Camera Software from a Memory Card Reader............................................................................................................. 20
IMPORTING MEDIA FROM YOUR GOPRO CAMERA ................................................................................. 21
USING GOPRO STUDIO ................................................................................................................................... 23
Step 1: VIEW & TRIM ................................................................................................................................................................................................................. 23
Creating a New Project .......................................................................................................................................................................................................... 23
Importing Source Video Files ................................................................................................................................................................................................ 23
Previewing Files in the Player Window ................................................................................................................................................................................ 25
Converting Files ....................................................................................................................................................................................................................... 26
Working with Time Lapse Sequences .................................................................................................................................................................................. 32
Step 2: EDIT ................................................................................................................................................................................................................................. 35
Using GoPro Edit Templates ................................................................................................................................................................................................. 36
Creating your Own Edit Using a Blank Template ............................................................................................................................................................... 55
Step 3: EXPORT .......................................................................................................................................................................................................................... 61
Exporting a Movie ................................................................................................................................................................................................................... 61
Exporting Still Images ............................................................................................................................................................................................................. 63
Updating HERO2 Camera Firmware ........................................................................................................................................................................................ 64
Getting Started......................................................................................................................................................................................................................... 64
Updating your HD HERO2 ..................................................................................................................................................................................................... 64
Registering Your Wi-Fi BacPac™ ......................................................................................................................................................................................... 65
Updating Your Wi-Fi BacPac ................................................................................................................................................................................................. 65
Updating Your Wi-Fi Remote................................................................................................................................................................................................. 65
Configuring Your Wi-Fi BacPac™ (optional) ....................................................................................................................................................................... 66
Troubleshooting Tips .............................................................................................................................................................................................................. 66
Advanced Features ..................................................................................................................................................................................................................... 67
Working with 3D Video Files .................................................................................................................................................................................................. 67
Page 4

Working with Keyframes ........................................................................................................................................................................................................ 71
Global Playback Settings in the EDIT Room ...................................................................................................................................................................... 73
The GoPro CineForm Codec Status Viewer ....................................................................................................................................................................... 77
Moving GoPro CineForm Files to Other Computers .......................................................................................................................................................... 80
USING GOPRO STUDIO WITH 3RD PARTY APPLICATIONS ...................................................................... 82
Importing GoPro CineForm Files .............................................................................................................................................................................................. 82
Working with Files in the Media Bin .......................................................................................................................................................................................... 83
Previewing Clips in the Player Window................................................................................................................................................................................ 84
Diverging from the Previous Workflow ..................................................................................................................................................................................... 84
Using GoPro CineForm Files in Other Applications ............................................................................................................................................................... 91
Avoiding Re-Transcoding ....................................................................................................................................................................................................... 91
Switching Between GoPro Studio and Other Applications................................................................................................................................................ 92
Exporting GoPro CineForm Files .......................................................................................................................................................................................... 93
APPENDIX A: KEYBOARD SHORTCUTS ...................................................................................................... 94
APPENDIX B: GOPRO STUDIO EXPORT PRESETS .................................................................................. 96
APPENDIX C: THE GOPRO CINEFORM CODEC......................................................................................... 98
Compression Sub-System ......................................................................................................................................................................................................... 98
ACTIVE METADAT ATM TECHNOLOGY OVERVIEW ......................................................................................................................................................... 102
Page 5

GoPro Studio 2.5 User Manual
INTRODUCTION
Welcome to GoPro Studio, a video editing application that makes it easy to create
professional-quality videos from your GoPro content.
What is GoPro Studio?
GoPro Studio makes it easy to import your GoPro media from your camera to your
computer and create professional-quality videos. We’ve taken our most popular GoPro
videos and turned them into GoPro Edit Templates that help fast-track you to an
incredible edit. The music, edit points, slow-motion effects and more have been dialed—
all you have to do is replace our video clips with yours. Or if you want to create edits from
scratch, you can do that, too. Trim and mix clips. Add titles, music, audio tracks and
more. Adjust video playback speeds for ultra slow motion and fast motion—Flux™ makes
speed changes super smooth. Plus, view HiLight Tags to quickly find your best clips for
more convenient editing.
share with the world.
GoPro Studio enables you to do the following:
• Easily create engaging GoPro-style videos
• Automatically import your GoPro media from the camera to your computer via USB
connection or microSD card reader
• GoPro Edit Templates help fast-track you to an incredible edit by dialing the music,
edit points, motion effects and more
• Trim, edit and mix video clips
• Add titles, music, audio tracks and more
• Flux™ enables super smooth ultra slow-motion and fast-motion speed changes
• View HiLight Tags to quickly find your best clips for more convenient editing
• Fisheye adjustment control
• Export video still frames at full resolution
• Create videos from Time Lapse photo sequences
• Edit immersive 3D videos (requires Dual HERO System
• Update your camera software for the latest features and best performance
• Automatically sync your camera’s time with your computer’s time
1
It’s never been easier to make engaging GoPro-style videos to
1
2
)
3
1
Page 6

GoPro Studio 2.5 User Manual
• Supports GoPro, Canon, Nikon and other constant frame rate H.264 mp4 and
1
Compatible with HERO4 cameras only. 2Sold separately. 3Compatible with HERO4 and HERO
cameras only.
4
formats
.mov
4
.mov files are not supported in Windows 8.
Learning Resources
GoPro offers several ways to help you learn how to use GoPro Studio. There’s the User
Manual that you are reading now and an online support website,
gopro.com/studiosupport
.
User Manual
The User Manual explains how to use GoPro Studio, giving an overview of the product’s
purpose and highlighting its various workflow options. It goes into detail about each and
every feature that the software offers, explaining its purpose and usage. It’s a great
resource to help you get the most out of your GoPro Studio experience.
Readme File
The Readme file installs with GoPro Studio and includes release notes for the current
and previous versions as well as a list of current known issues.
Online Help and Support
In addition to the User Manual, further learning materials are available at
gopro.com/studiosupport
asked questions. If you have a question or issue that you don’t see addressed in the
tutorials or FAQ, please contact our support team and we’ll be happy to help answer your
questions.
. There you’ll find workflow tutorials and answers to frequently
2
Page 7
GoPro Studio 2.5 User Manual
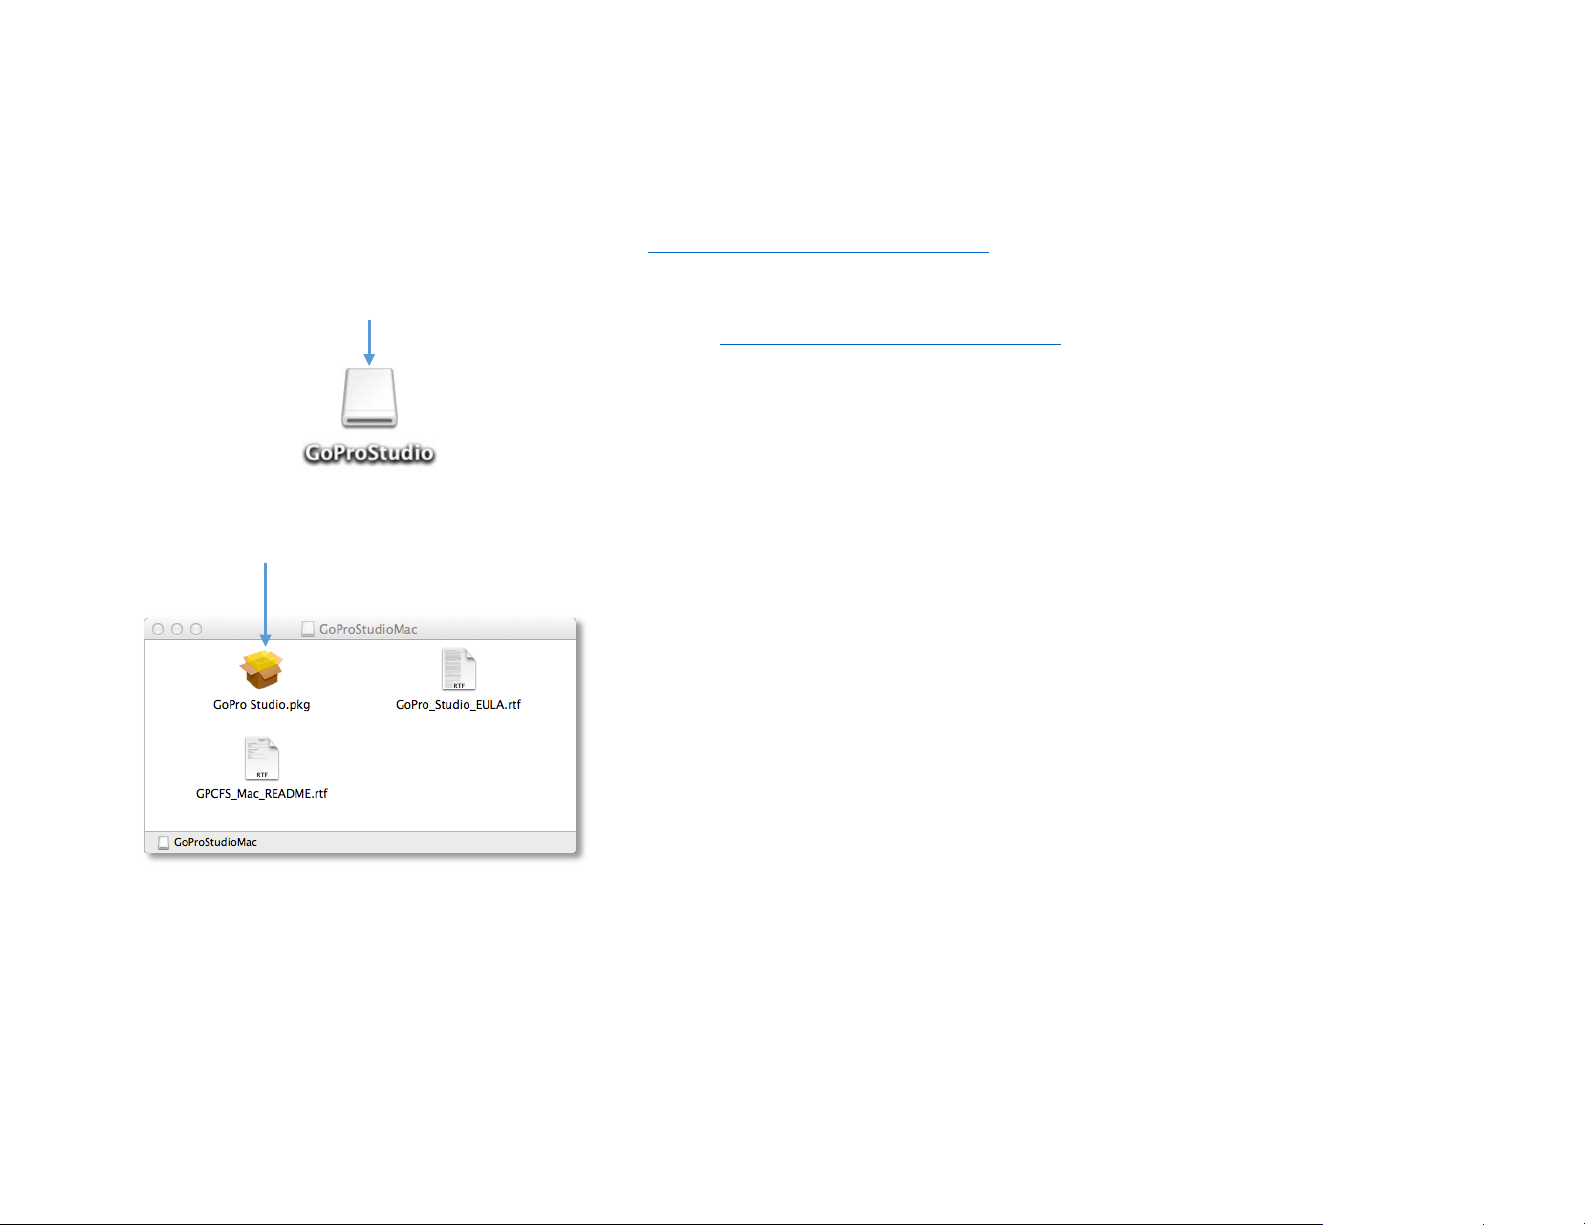
Removable Media Icon
Installer Package
Installing GoPro Studio
GoPro Studio is installed by launching the installer file that can be downloaded from
http://shop.gopro.com/softwareandapp
1. Verify that your computer meets the minimum system requirements for your
operating system and hardware. System requirements can be found at
http://shop.gopro.com/softwareandapp
2. After the file has finished downloading, you will ha ve a file named,
“GoProStudioMac-2.5.x.xxx.dmg” (the x’s will be replaced by the specific version
and build number of the version you have downl oad ed)
3. Double-click on the downloaded file to create the installer package on your
desktop. You will see a progress bar dialog indicating the extraction process.
When complete, you will have a new removeable media icon on your disktop that
may look similar to the image on the left.
4. Double-click on the GoPro Studio DMG icon on your desktop to open a window
containing the installer package.
5. Double-Click on the icon in the window that resembles a box. This will launch the
Install Wizard which will guide you through t he installation process.
.
.
NOTE: The GoPro Studio installation wi zard automatically chooses the most appropriate
default install location based on your system. Do not modify the default location unless
you are an experienced user.
3
Page 8

GoPro Studio 2.5 User Manual
UNDERSTANDING THE WORKFLOW
There are two ways of using GoPro Studio. The first way is as a stand-alone, start-tofinish video editing application. The second way is to use GoPro Studio in tandem with
other 3
Pro, Apple Final Cut Pro and others. This User Manual will discuss each of these
workflows in separate chapters. The two workflows are as follows:
Using GoPro Studio as a S tand-Alone Application
In this workflow you trim and convert your camera source files into GoPro CineForm files,
then use GoPro Studio to combine clips, add color effects and speed changes, music and
titles, all using the built-in storyboard editor (the built-in GoPro Edit Templates make this
a quick and easy process). Then you export your movie to various formats—YouTube,
Vimeo or a high-quality Master file for archival purposes. With this workflow, all you need
is a compatible computer and GoPro Studio.
Using GoPro Studio with 3rd Party Applications
In this advanced workflow, you convert your camera source files into GoPro CineForm
files, use GoPro Studio to add color effects, adjust framing and other settings, then use
those same GoPro CineForm files in other 3
processing. This workflow requires another video editing or compositing application to be
installed on your computer. Some of the popular professional applications are Adobe
After Effects, Adobe Premiere Pro, Apple Final Cut Pro, Avid Media Composer and Sony
Vegas. GoPro CineForm files are also compatible with various consumer-level products,
such as iMovie, Adobe Premiere Elements, Sony Movie Studio Platinum and Windows
Movie Maker.
NOTE: GoPro CineForm files are saved as standard MOV files so applications that
support this file format should be able to use GoPro CineForm files.
rd
party video editing applications such as Adobe After Effects, Adobe Premiere
rd
party applications for further editing or
4
Page 9

GoPro Studio 2.5 User Manual
Why Convert to the GoPro CineForm Format?
The first step in any GoPro Studio workflow is to convert your source files into the GoPro
CineForm format. This is very important and there are several reasons to do this.
All consumer-level cameras and many professional-level cameras record in highly
compressed video formats designed to capture large amounts of data very quickly and
save that data onto an SD card or other portable media format in as small a file as
possible. This is great for recording large amounts of data onto a small space, but these
compression formats are not designed nor optimized for maintaining image quality during
editing or color correction processes. Because these formats are so compressed, they
often require an ultra po wer f ul computer to decode (playback) the files without
performance degradation (choppy playback or dropped frames).
Because of this, many professional filmmakers and consumer-level videographers use
what is called a Digital Intermediate (DI). A DI is an exact copy of the data from the
original video file saved in a file format that is specifically optimized for higher image
quality and fast playback on modern computer systems. This makes for a much better
editing experience.
The GoPro CineForm format (or codec) is the Digital Intermediate (DI) used in all GoPro
Studio workflows and is one of the best in the industry—used by indie filmm ak ers and
Hollywood studios alike. It has been standardized by SMPTE (Society of Motion Picture &
Television Engineers) as the VC-5 codec.
Ultimately, GoPro CineForm files are better for editing than camera source files. They
improve on image quality and playback speed, as well as provide the Active Metadata
architecture required to enable the re al-time image development and enhancement
features available in GoPro Studio’s EDIT Room.
NOTE: You can learn more about the GoPro CineForm Codec and its Active Metadat a
technology in the APPENDIX
section of this user manual.
TM
TM
5
Page 10
GoPro Studio 2.5 User Manual
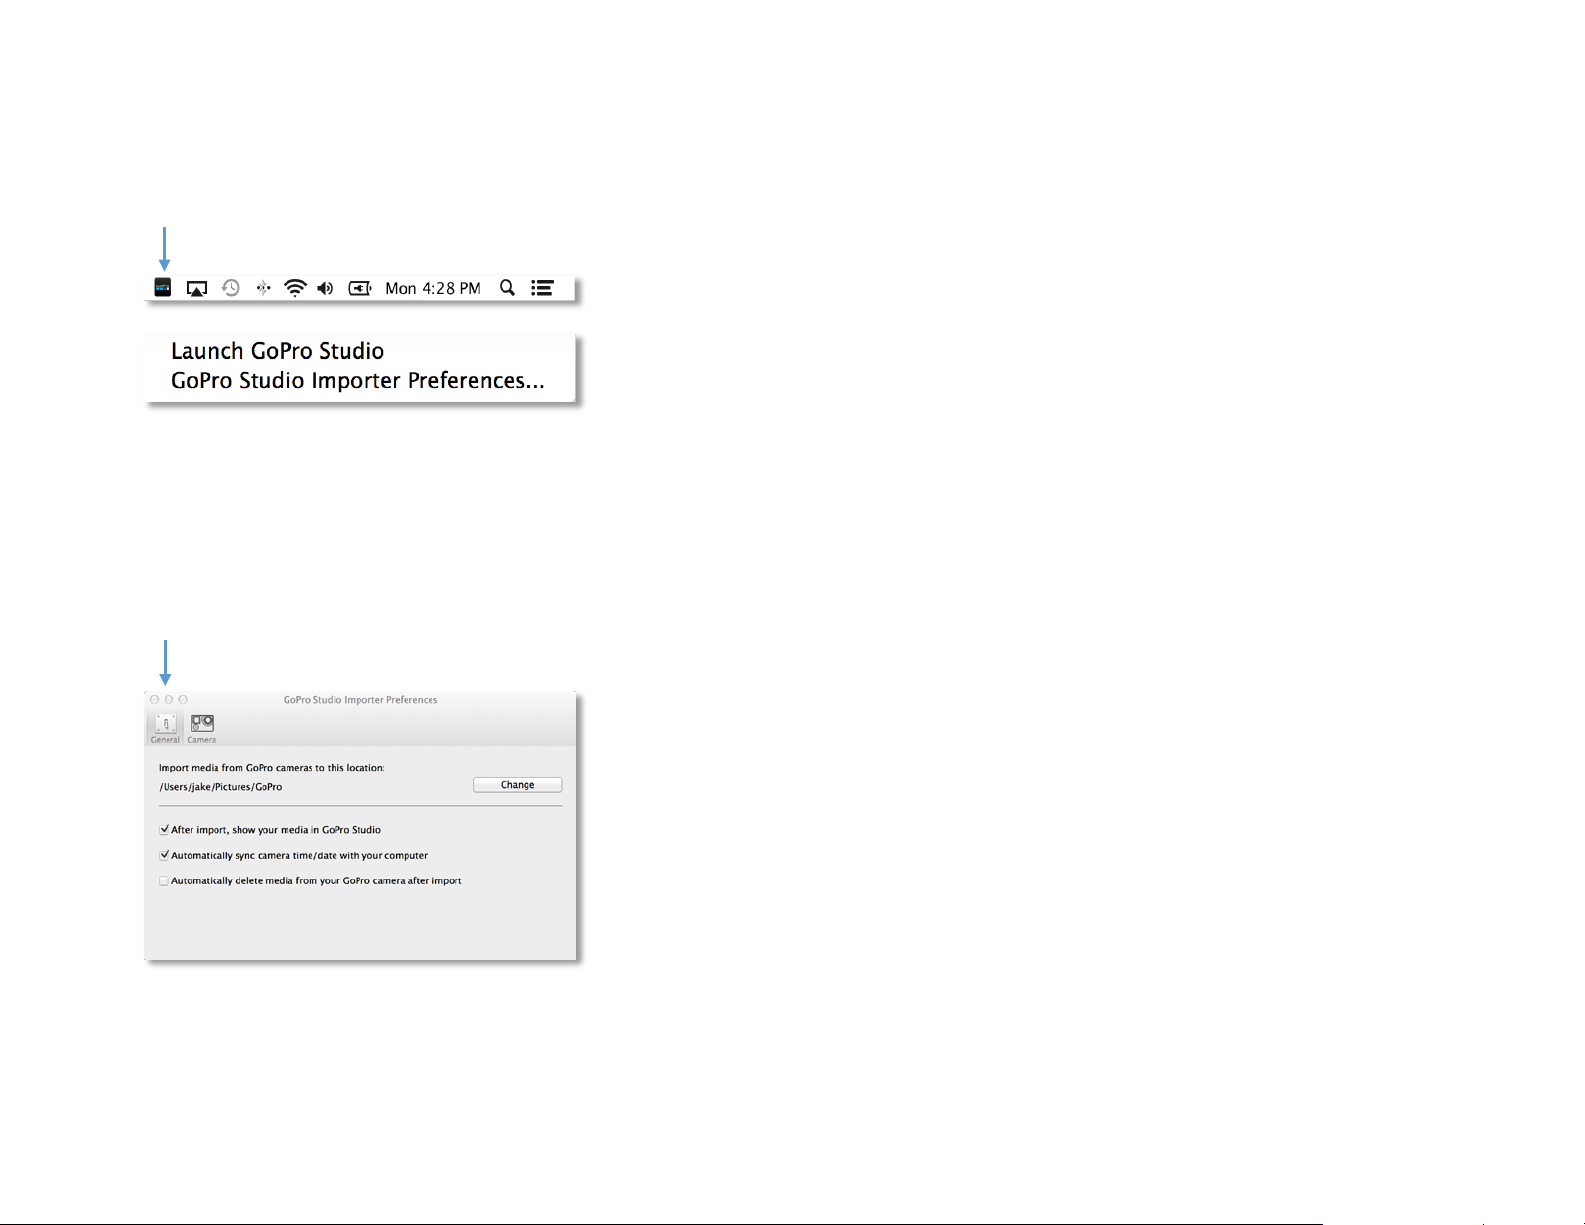
GoPro Studio Importer
GENERAL TAB
The GoPro Studio Importer Preferences Panel
THE GOPRO STUDIO IMPORTER
After GoPro Studio has been installed, a new icon appears the Windows System Tray
(this is the area next to your system clock down in the lower right-hand corner of your
screen). This is called the GoPro Studio Importer and it replaces the GoPro CineForm
Status Viewer system tray application from previous versions of GoPro Studio.
Clicking (or right-clicking) on the GoPro Studio menu bar application will reveal a pop-up
menu with two options.
Launch GoPro Studio
Clicking on the Launch GoPro Studio option opens the GoPro Studio application.
Preferences
Clicking the GoPro Studio Importer Preferences option launches the GoPro Studio
Importer Preferences Window, where you will see two tabs at the top, which separate the
two preference panels – General and Camera.
GENERAL PREFERENCES
The GENERAL tab is indicated by the on/off switch icon at the top of the Preferences
Window and it contains the following GoPro Studio Importer settings.
IMPORT MEDIA FROM GOPRO CAMERAS TO THIS LOCATION
By default, the GoPro Studio Importer will import media into a GoPro subfolder in the
current user’s Pictures folder. We recommend keeping this as the default location but you
are welcome to select a different location if desired. Click on the CHANGE button to
manually select a new import destination.
6
Page 11

GoPro Studio 2.5 User Manual
CAMERA TAB
AFTER IMPORT, SHOW YOUR MEDIA IN GOPRO STUDIO
By default, this option is enabled and it causes GoPro Studio application to launch after
the import process with your most recently imported photos and videos loaded in t he
GoPro Studio Import Bin, ready to view and trim.
NOTE: Mulitple photos will be loaded into GoPro Studio as timelapse sequences, even if
they are not part of a sequence. Use the playback controls to manually step through each
individual photo.
AUTOMATICALLY SYNC CAMERA TIME AND DATE WITH COMPUTER
By default, this option is enabled and it causes your GoPro camera (when connected) to
sync the date and time with your computer. Its good to keep this option enabled as it
ensures your GoPro camera always has the correct time.
AUTOMATICALLY DELETE MEDIA FROM YOUR GOPRO CAMERA AFTER IMPORT
By default, this option not selected and it is okay to leave it unchecked, however, if you
know that you will always want to delete the files after importing, then it’s a good idea to
enable this option here. By enabling this option, you will not be prompted whether or not
to delete the files after import.
CAMERA PREFERENCES
The CAMERA tab is accessible by clicking on the camera icon at the top of the
Preferences Window. This is where you assign a folder name for your GoPro camera.
After assigning a folder name, the GoPro Studio Importer will use this location for all
media imported from this particular camera.
NOTE: When plugging in a GoPro camera for the first time, if you agree to let GoPro
Studio Importer manage the importing of your GoPro camera files, you will be prompted
to create a folder for that particular camera. The folder name chosen there is the same as
the one that will show here in the CAMERA tab in the GoPro Studio Preferences Window.
7
Page 12
GoPro Studio 2.5 User Manual
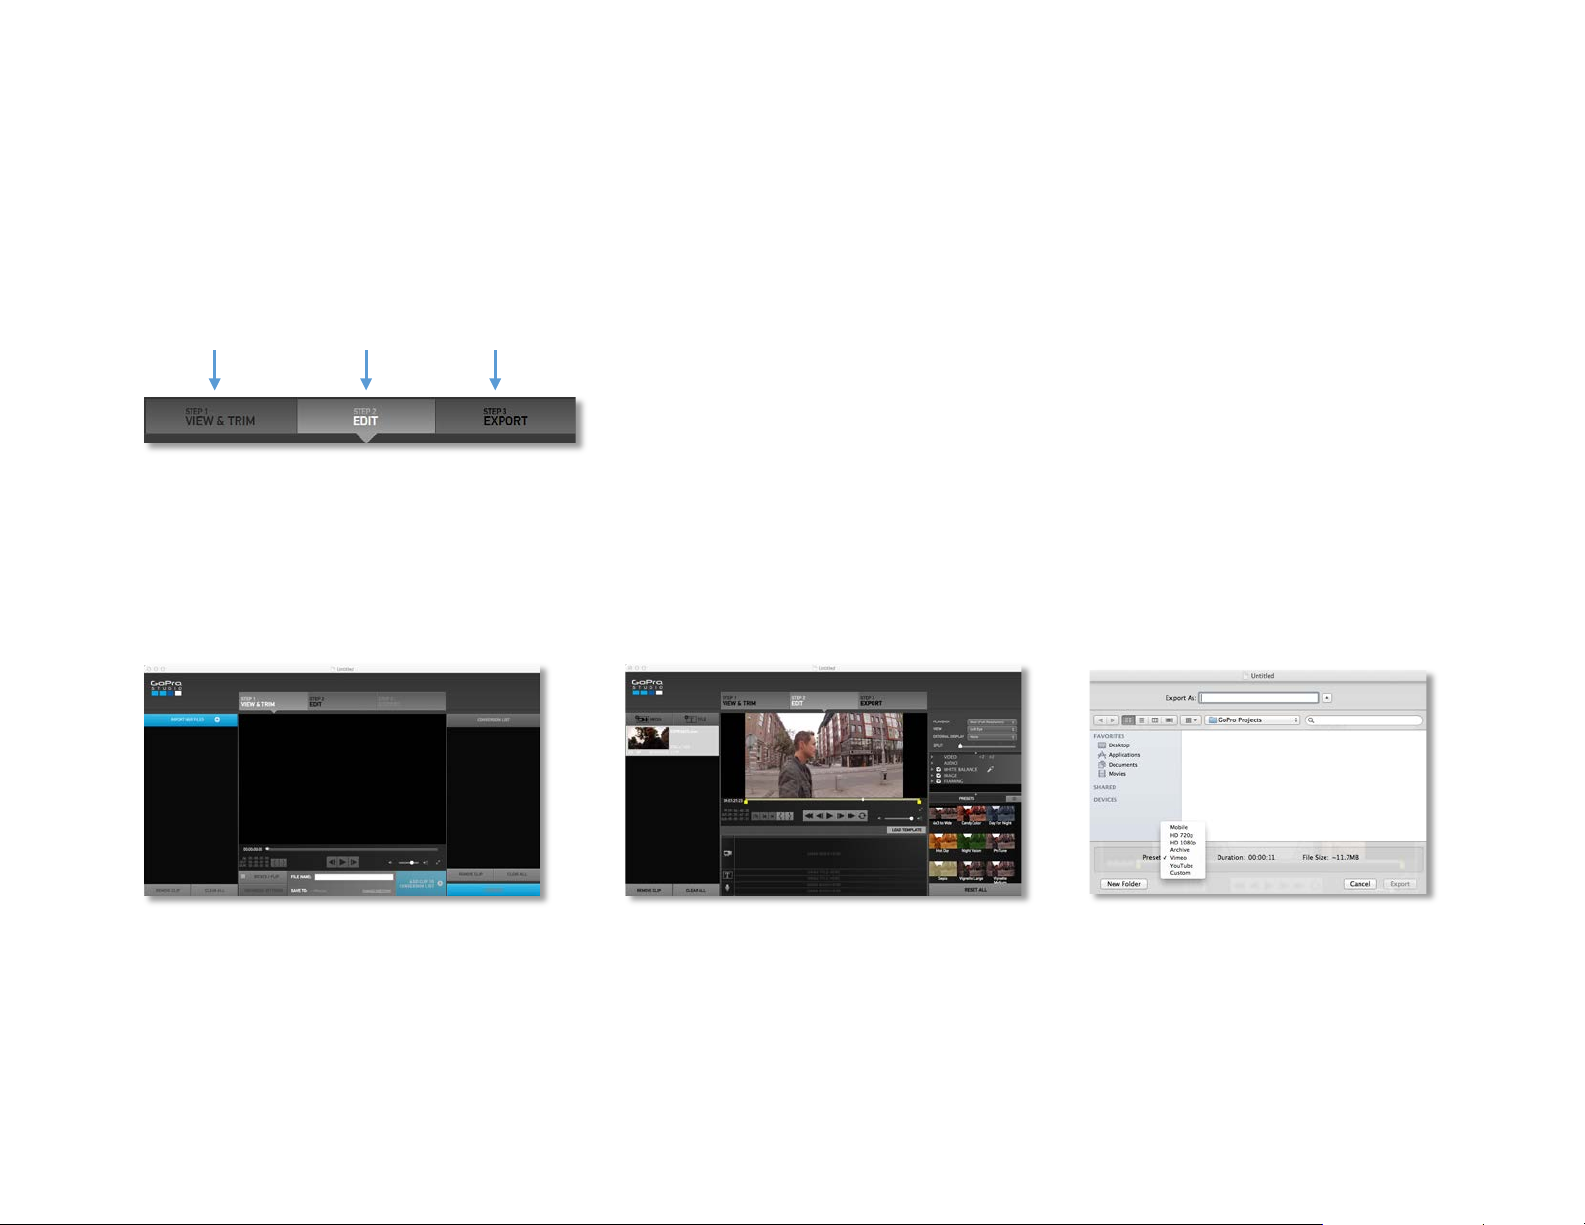
Work Area Selection Buttons
VIEW & TRIM
EDIT
EXPORT
STEP 1: VIEW & TRIM
STEP 2: EDIT
STEP 3: EXPORT
OVERVIEW OF THE USER INTERFACE
The GoPro Studio application consists of three main workflow steps:
• Step 1: VIEW & TRIM
• Step 2: EDIT
• Step 3: EXPORT
Each of these steps is accomplished using three different work areas in the user
interface. When you launch GoPro Stu dio , VIEW & TRIM is the active work area. The
Work Area Selection buttons at the top of the user interface allow you to switch between
the VIEW & TRIM, EDIT and EXPORT work areas.
NOTE: The first time you launch GoPro Studio, the Import Tutorial will appear. The
Import Tutorial gives you a brief walkthrough of how to use the IMPORT Room. You can
step through the tutorial using the NEXT buttons or cancel out of it by clicking the SKIP
TUTORIAL button.
8
Page 13

GoPro Studio 2.5 User Manual
Work Area Selection Buttons
Add to Conversion List Button
Playback Controls
Convert All Button
Import Button
Trim Point Buttons
File Name Box
Rotate / Flip and
Buttons
Change Directory Button
Conversion List
Full-screen Button
Volume Controls
Play-head
Remove Clip Buttons
Playback Slider
Import Bin
Player Window
Step 1: VIEW & TRIM
The VIEW & TRIM work area, or “VIEW & TRIM Room”, is where you view your source files, select initial trim points using your best footage and
choose advanced conversion settings. You then add your source files to a conversion list for batch processing into GoPro CineForm files. If you
have not converted any of your source files into GoPro CineForm files, this is where you should start.
Advanced Conversion Settings
9
Page 14

GoPro Studio 2.5 User Manual
Work Area Selection Buttons
Add Media Button
Add Title Button
Media Bin
Remove Clip Buttons
Trim, Split and
Clip Navigation Controls
Playback Controls
Storyboard
Volume Controls
Player Window
Global Playback Settings
Video & Audio Playback
Settings
Color Correction,
Framing & 3D Controls
Effect Presets
Load Template Button
Reset All Settings Button
Storyboard Time Indicator
Step 2: EDIT
The EDIT work area, or “EDIT Room”, is where you do further trimming, combine multiple videos on a storyboard and add effects, music and titles.
If you have already converted your source files to GoPro CineForm files, click the STEP 2 EDIT button at the top of the user interface to switch to
the EDIT Room.
10
Page 15
GoPro Studio 2.5 User Manual
Player Window
The Player Window’s Three States
In the EDIT Room, the Player Window is used to playback your files and clips. The Player
Window displays the contents of the Media Bin, the complete Storyboard as well as
individual clips on the Storyboard.
The Player Window has three different states which are determined by the area of focus
in the EDIT Room work area.
1. When a file or clip is selected in the Media Bin, the Player Window will display
the current frame in selected file. The Storyboard becomes grayed out when the
Player Window is being used by clips in the Media Bin.
2. When the Storyboard is selected, the Player Window will display the contents of
the Storyboard. You can use the yellow Storyboard Time Indicator bar to drag to
specific locations on the Storyboard. As you do, the Pla yer will upd ate to display
the current frame.
3. When an individual clip is selected in the Storyboard, adjusting the IN or OUT
point markers will cause the Player Window to display only the selected clip.
When this happens, the yellow Storyboard Time Indicator bar on the Storyboard
will become grayed out, indicating that only one clip is being used in the Player
Window rather than the entire Storyboard.
More specific information about the Player W indow and Playback Controls can be found
throughout the User Manual.
11
Page 16
GoPro Studio 2.5 User Manual
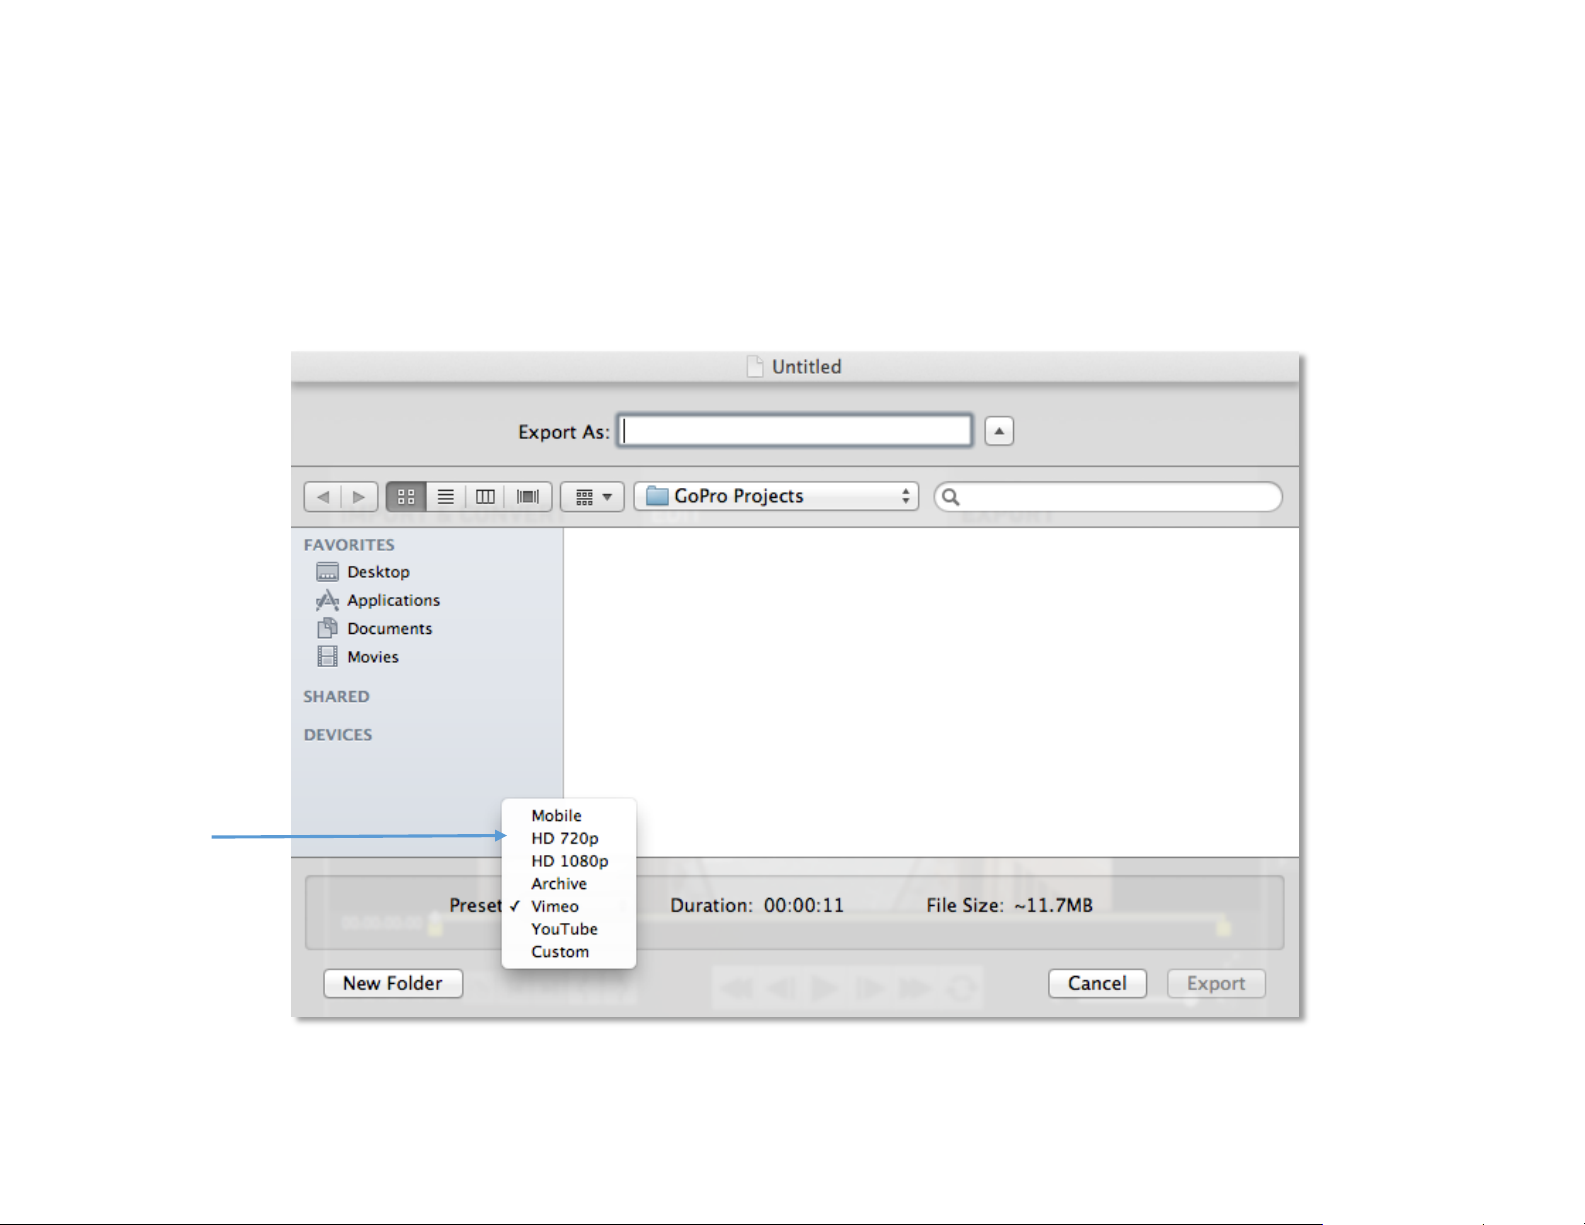
Export Presets
Step 3: EXPORT
The EXPORT work area, or “EXPORT Window”, is where you export your movie to a new file, ready to share with the world. Here you’ll be able to
choose from a variety of preset export formats or create your own custom export setting. When you are done editing your project in the ED IT
Room, click the STEP 3 EXPORT button to launch the EXPORT Window.
12
Page 17
GoPro Studio 2.5 User Manual
Menu Commands
The menubar at the top of the screen is comprised of six main menus, FILE, EDIT,
VIEW, SHARE, WINDOW and HELP.
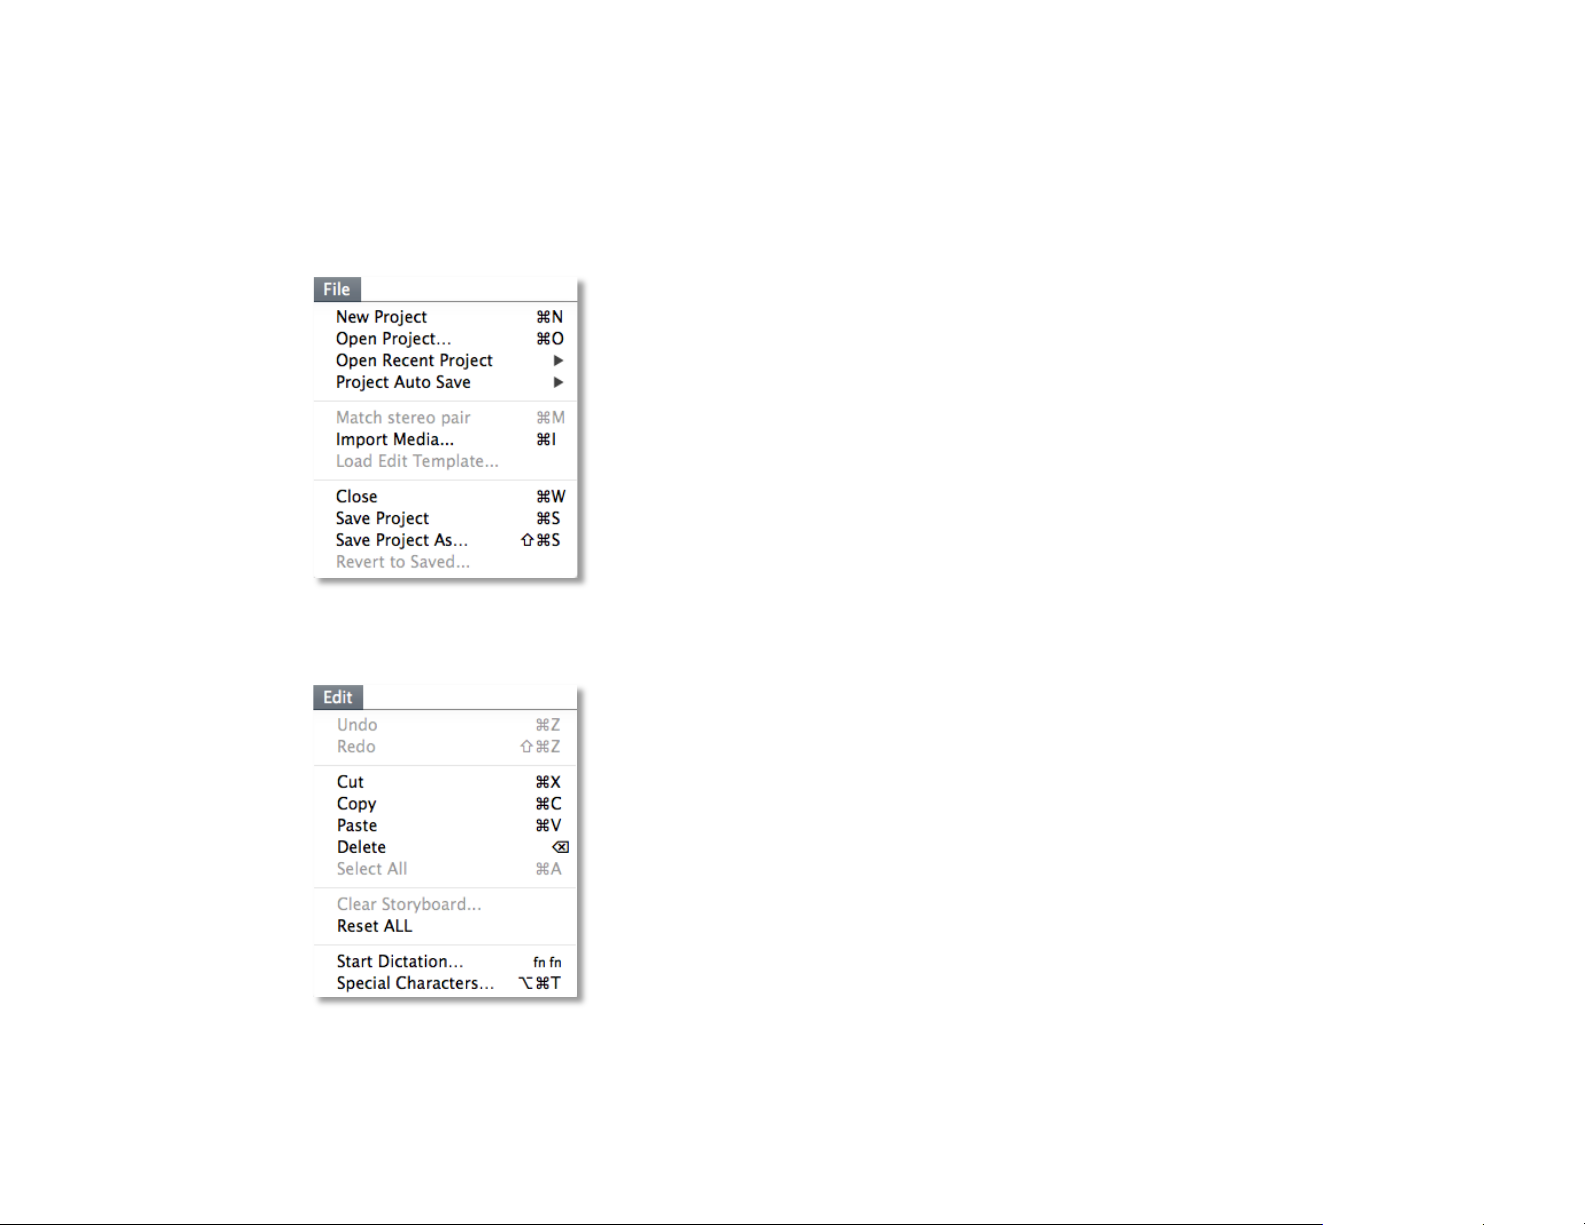
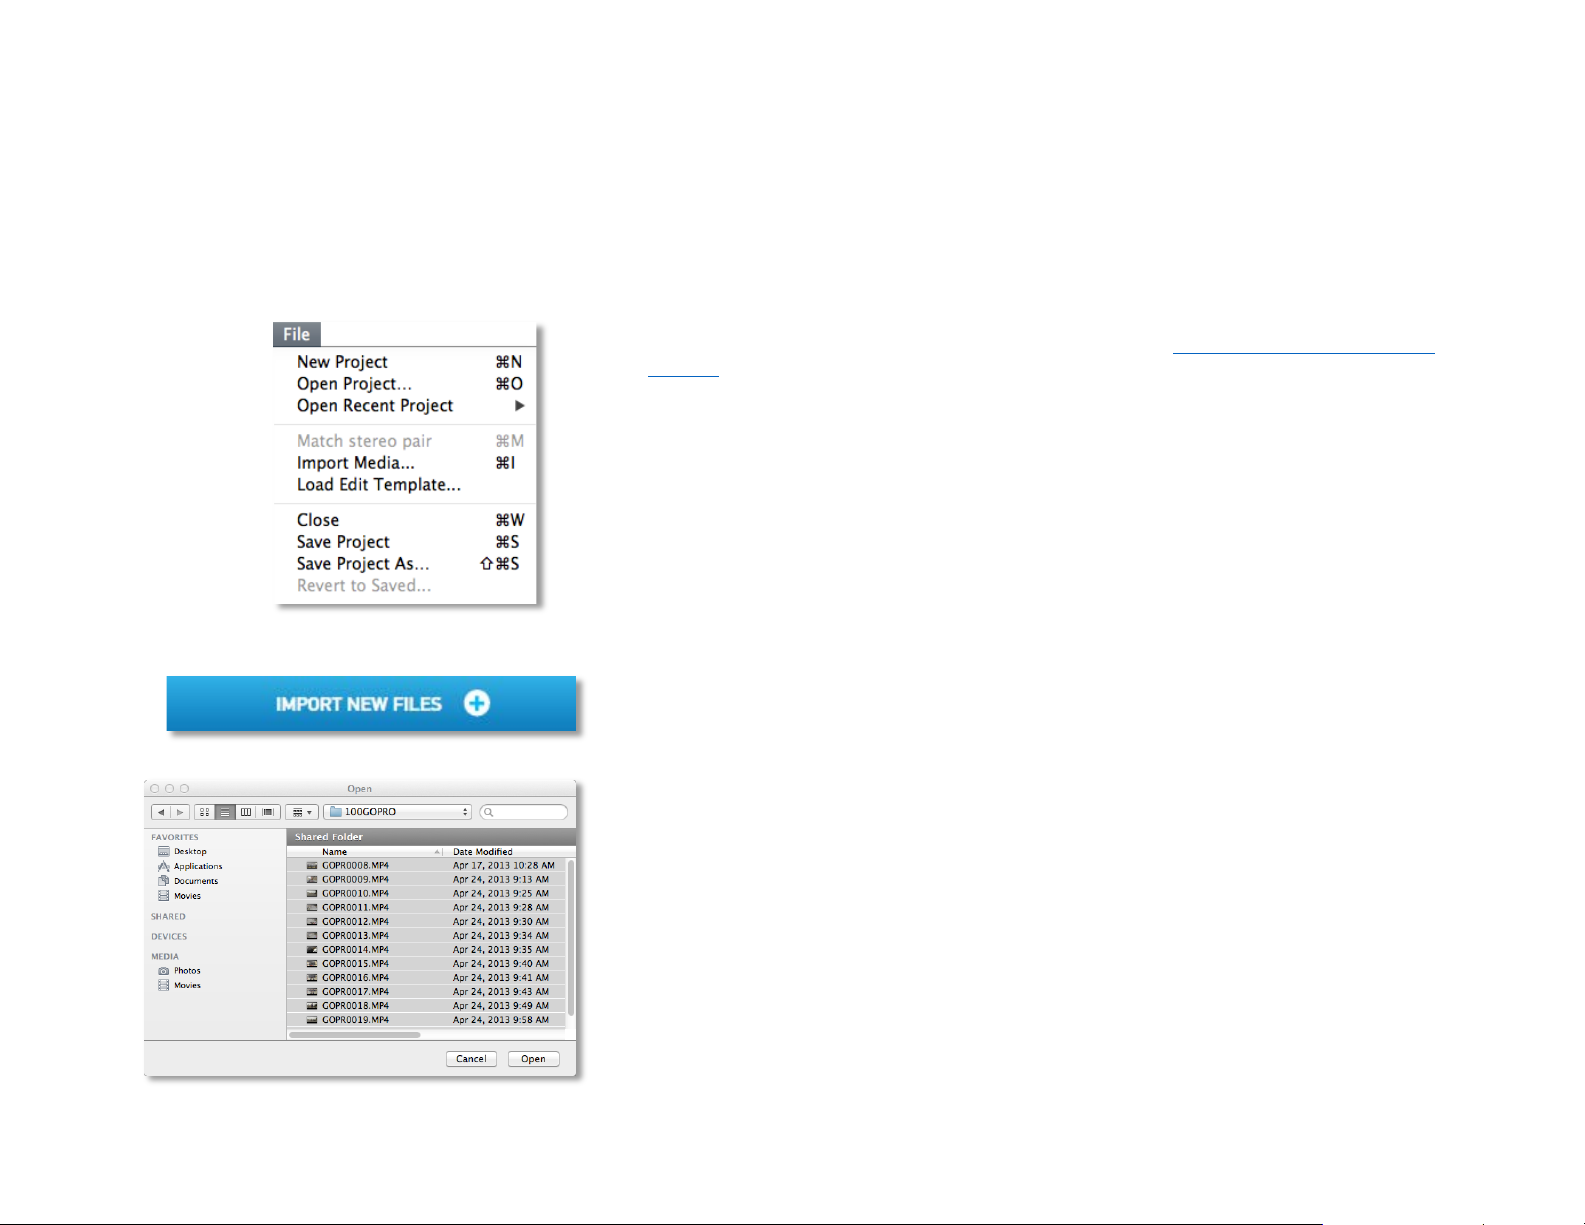
The FILE menu includes the following commands:
• New Project creates a new GoPro Studio project.
• Open Project opens an existing GoPro Studio project.
• Open Recent Project shows a sub-menu listing recently used GoPro Studio
projects.
• Project Auto Save shows a sub-menu listing options which deter mine whether
or not the Auto Save feature is used and the frequency in which GoPro Studio
will automatically save a back-up file of the current project.
• Match stereo pair muxes left and right video files into stereo (3D) files.
• Import Media… launches a Finder window where files can be selected for
importing into GoPro Studio.
• Load GoPro Edit Template… launches the Edit Template Selection Window.
• Close closes the current GoPro Studio project.
• Save Project saves the current GoPro Studio project.
• Save Project As… saves the current GoPro Studio project with a new name.
• Revert to Saved… restores the current GoPro Studio project
The EDIT menu includes the following commands:
• Undo allows you to undo the 50 most recent changes to the storyboard.
• Redo allows you to redo an action after previously using the ‘Undo’ command.
• Cut removes storyboard elements and clip attribues from a clip and copies them
to the clipboard.
• Copy copies Storyboard elements and clip attributes to the clipboard.
• Paste pastes Storyboard elements and clip attributes from the clipboard to the
Storyboard or Storyboard elements.
• Clear Storyboard clears the Storyboard of all content.
• Reset ALL clears all clip attributes from every clip on the Storyboard.
13
Page 18
GoPro Studio 2.5 User Manual
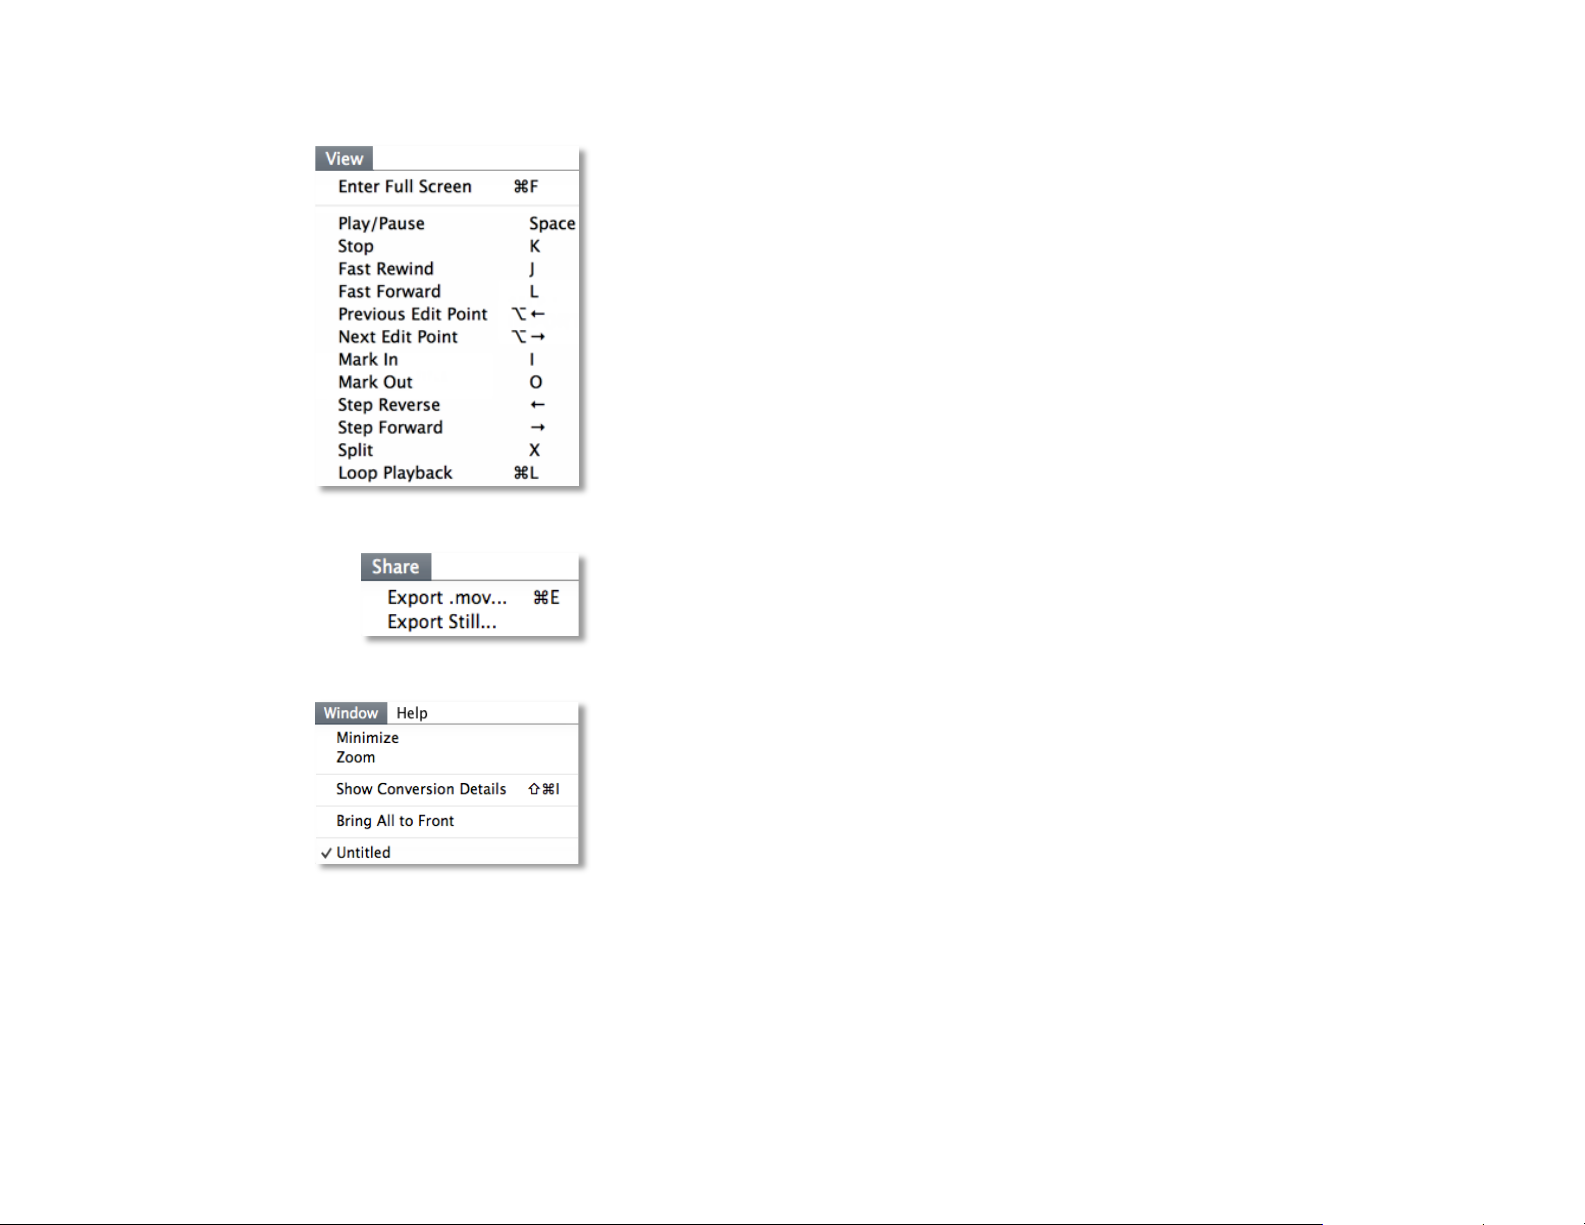
The VIEW menu includes the following commands:
• Enter Full Screen causes the contents of the Player Window to fill the screen.
• Play/Pause starts and stops playback of the Storyboard or the selected video
clip in the Import Bin, Media Bin or Storyboard in the Player Window.
• Stop halts playback of the Storyboard or the selected clip in the Player Window.
• Fast Rewind plays the Storyboard or the selected clip in high-speed reverse.
• Fast Forward plays the Storyboard or the selected clip in high-speed forward.
• Previous Edit Point moves the Storyboard Time Indicator to the previous clip
on the Storyboard
• Next Edit Point moves the Storyboard Time Indicator to the next clip on the
Storyboard
• Mark In creates a trim point which determines the starting frame of the clip.
• Mark Out creates a trim point which determines the ending frame of the
selected clip.
• Step Reverse steps backwards through the Storyboard or selected clip one
frame.
• Step Forward steps forward through the Storyboard or selected clip one frame.
• Split cuts the selected clip on the Storyboard into two clips.
• Loop Playback causes the Storyboard or selected clip to repeat over and over.
The SHARE menu includes the following commands:
• Export .mov… launches the Export Window.
• Export Still… launches the Export Still Window.
The WINDOW menu includes the following commands:
• Minimize hides GoPro Studio.
• Zoom causes GoPro Studio to fill the screen.
• Show Conversion Details displays the conversion settings for the clip.
• Bring All to Front causes all GoPro Studio application components to appear
in front of any other applications that are currently on the screen.
14
Page 19

GoPro Studio 2.5 User Manual
The HELP menu includes the following commands:
• Launch Import/Edit Tutorial opens the Import or Edit Room Tutorial.
• GoPro Studio Manual… opes the GoPro Studio User Manual.
• Online Support launches your web browser to the GoPro.com help page.
• Import/Edit Tutorial… Launces either the Import Room or Edit Room Tutorial.
• Device Window opens the Device Window where you can update HERO2,
Wi-Fi BacPac
is updated at gopro.com/update
The GOPRO STUDIO menu includes the following commands:
• About GoPro Studio displays window indicating the GoPro Studio versi on and
build number.
• Preferences launches the preferences window (described below).
• Hide GoPro Studio hides GoPro Studio while keeping the application open in
the Dock.
• Hide Others hides all other applications in the Dock while keeping GoPro Studio
active.
• Quit GoPro Studio closes the application. If you have not recently saved the
current project, it will prompt you with the opt ion to ‘Sav e’, ‘Do n’t Sa ve’ or
‘Cancel’.
TM
and Wi-Fi Remote product software (HERO3 camera software
).
15
Page 20

GoPro Studio 2.5 User Manual
GoPro Studio Preferences
The GoPro Studio Preferences panel can be accessed via the GoPro Studio menu or
by pressing ‘command+,’ on your keyboard. In the Preferences panel, you can enable or
disable the following features by checking or unchecking the box next to the listed feature
(a check means it is enabled):
• Use time of day for timecode uses the time of day from the source file and
writes it into the timecode track of the converted file.
• Use reel name in destination appends the reel name to the filename of the
converted file.
• Auto-start conversions causes files to automatically start converti ng as soon as
they are added to the conversion list.
• Automatically Import From GoPro Cameras causes the media from a GoPro
Camera to be automatically copied to the computer when the camera is
connected
• Auto Save periodically saves a back-up file of the current project.
In addition to being able to turn Auto Save ON or OFF, you can also choose the time
interval that GoPro Studio will use for automatically saving a back-up file of the current
project. You have the choice of the following intervals:
• ½ Minute (30 Seconds)
• 1 Minute
• 5 Minutes
• 15 Minutes
• 30 Minutes
• 60 Minutes
NOTE: The Auto Save feature is turned ON by default and it’s a good idea to keep it
enabled. This way, if you ever have a system crash or accidently close GoPro Studio
without saving the main project file, you can recover your work using the Auto Save
project file. The Auto Save project file is saved in the same folder as the main project file.
16
Page 21

GoPro Studio 2.5 User Manual
CAMERA SOFTWARE UPDATES
As a company, GoPro is always innovating and always improving the features in our
cameras. One of the ways we do this is by releasing periodic camera software updates.
These provide camera performance enhancements, bugs fix and new features. GoPro
Studio makes it easy to install these software updates onto your GoPro cameras.
Refer to the list below to know which update method is right for your particular GoPro
HERO camera model.
• GoPro HERO2 camera software is updated by following the steps in the section
called, “Updating Hero2 Camera Firmware
• GoPro HERO3 camera software is updated through our support website at
gopro.com/support/product-updates-support
• GoPro HERO3+ camera software is updated by following the steps in the section
called, “Updating HERO3+ Camera Software
• GoPro Hero4 camera software is updated by following the steps in the section
called, “Updating HERO4 Camera Software
”.
.
”.
.”
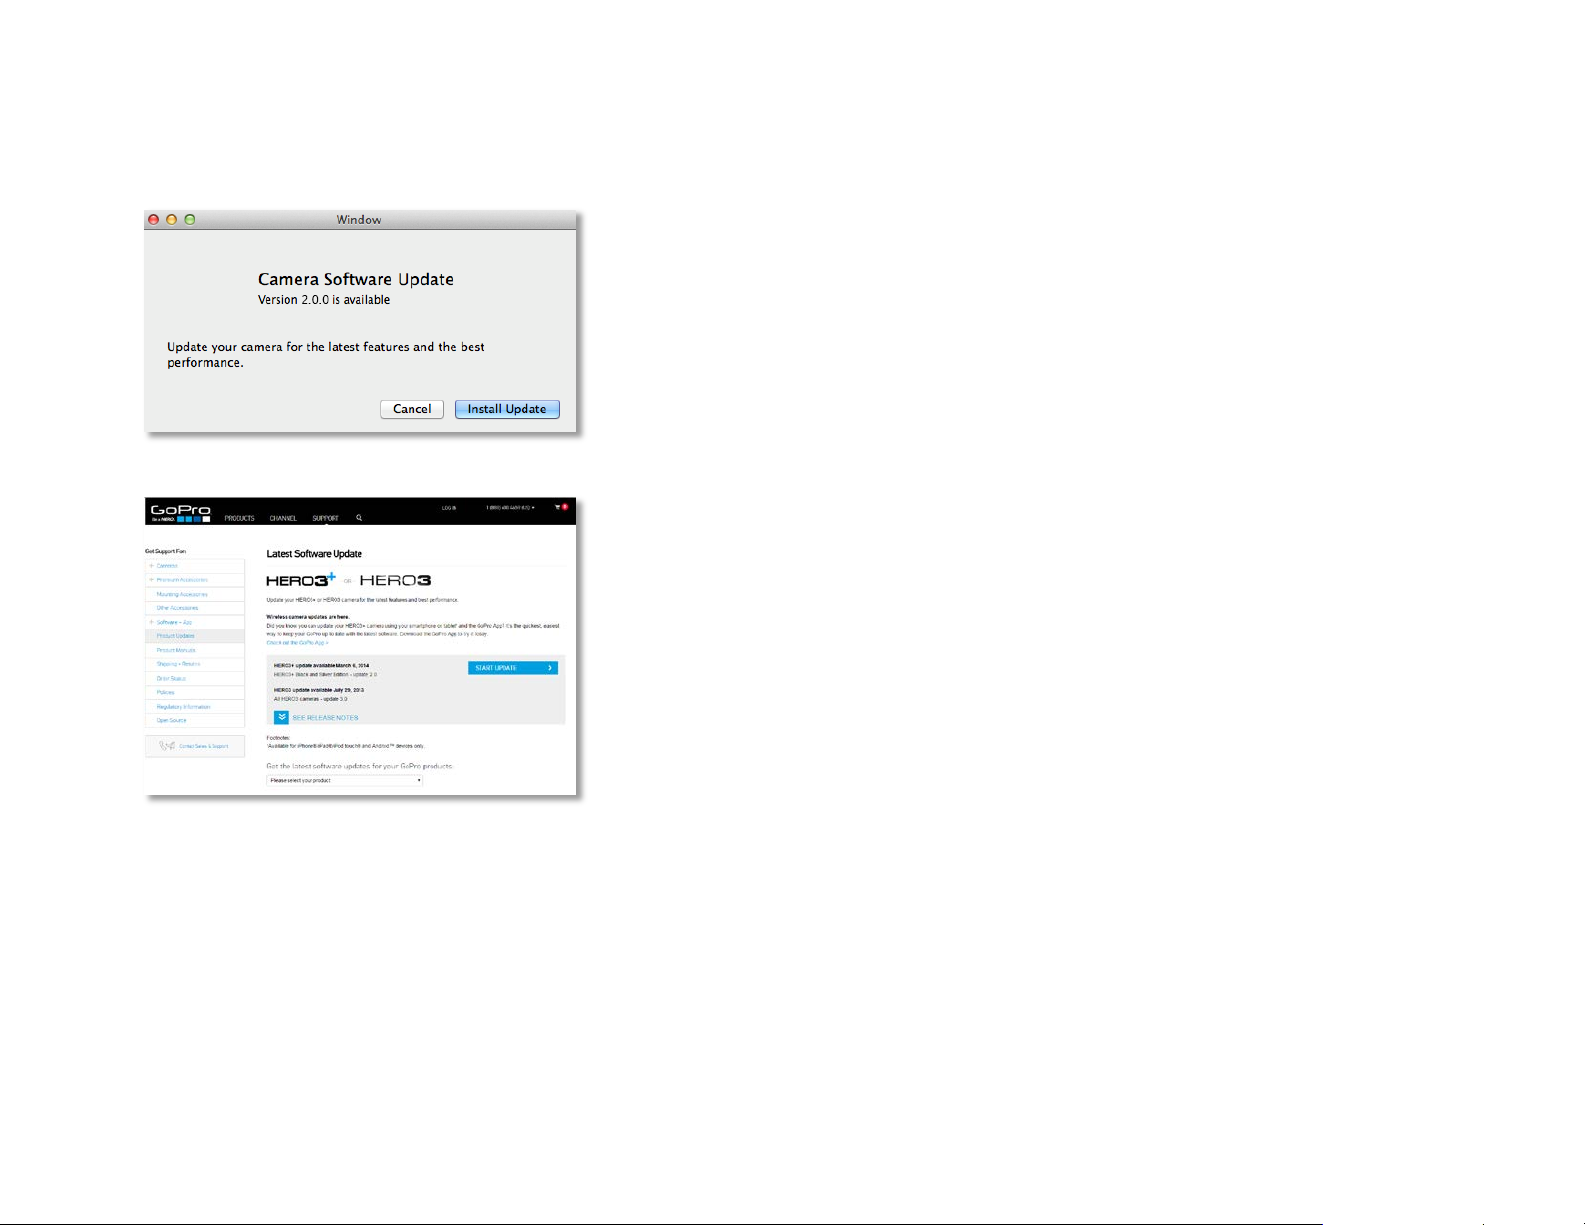
Updating HERO 4 Camera Software
The following explains how to update the camera software in your GoPro HERO4
camera. In addition to the camera, you’ll need a memory card and a USB cable.
Step 1 – Make sure a memory card is plugged into the camera.
Step 2 – Turn on the camera.
Step 3 – Plug in the USB cable to the computer.
Step 4 – Plug the other end of the USB cable into the camera.
At this point, if GoPro Studio is installed, it will detect the camera and if there is an update
available, it will open the Camera software update window and display the release notes
for the latest update.
Click CONTINUE to move on to the next step.
17
Page 22

GoPro Studio 2.5 User Manual
The End User License Agreement will appear.
Check the box to indicate that you accept the terms of the License Agreement.
Then click CONTINUE to move on to the next step.
A window will appear indicating that the camera software is downloading.
Once downloaded, the camera software will be installed onto the camera.
Your camera may restart a couple of times during the update process. Wait until the
process is complete before attempting to use your camera.
Click on the DONE button.
18
Page 23
GoPro Studio 2.5 User Manual
Updating HERO 3+ Camera Soft ware
The following explains how to update the camera software in your GoPro HERO3+
camera. In addition to the camera, you’ll need a memory card and a USB cable.
Step 1 – Make sure a memory card is plugged into the camera.
Step 2 – Turn on the camera.
Step 3 – Plug in the USB cable to the compter.
Step 4 – Plug the other end of the USB cable into the camera.
If GoPro Studio is installed, it will detect the camera and if there is an update available, it
will prompt you to install it.
Click the INSTALL UPDATE button to begin the update process.
At this point, your default web browser will launch, taking you to the GoPro Support
website where the latest camera software can be downloaded and installed. Follow the
steps there to complete the camera software update.
19
Page 24
GoPro Studio 2.5 User Manual
Updating HERO 3+ and HERO4 Camera Software from a Memory Card Reader
The following explains how to update the camera software in your GoPro HERO3+ or
HERO4 camera using a memory card reader rather than a USB cable. You’ll need a
memory card and a memory card reader.
Step 1 – Insert your SD card into your HERO3+ or HERO4 and then power on
the camera. This initializes the card for use on a GoPro camera.
Step 2 – Remove the memory card from the camera and insert it into the memory
card reader.
Step 3 – Plug the memory card reader into the computer (unless it is already
plugged in or built into the computer).
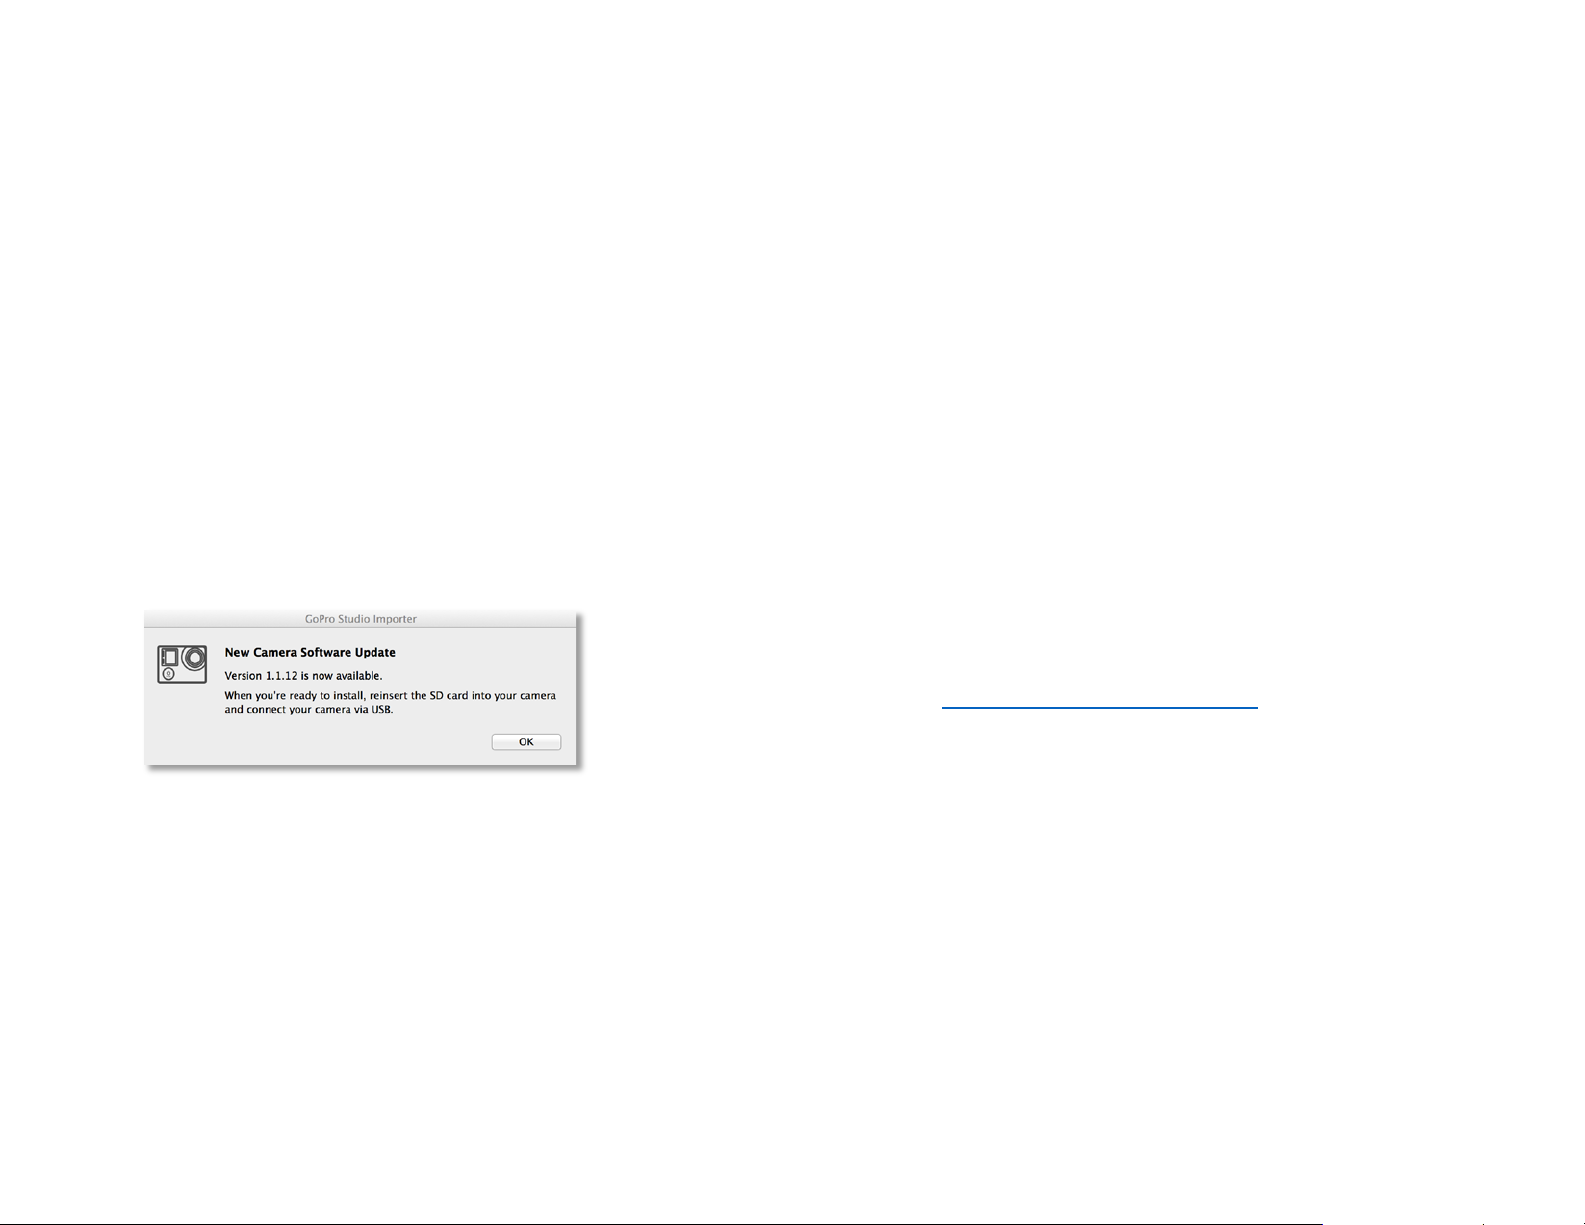
When GoPro Studio recognizes that the SD card a window will appear instructing you to
reinsert the SD card into your camera and then connect your camera to the computer via
USB.
With the camera connected via USB, click the OK button.
At this point, if you have a HERO4 camera the update procedure proceeds as described
previously, in the section called, “Updating HERO4 Camera Software
If you’re updating a HERO3+, you’ll be taken to the GoPro Support website, where you’ll
be guided through the rest of the camera software update process.
”.
20
Page 25

GoPro Studio 2.5 User Manual
IMPORTING MEDIA FROM YOUR GOPRO CAMER A
When starting a new GoPro Studio project, you must first transfer the media from your
GoPro camera to your computer. With GoPro Studio installed, the GoPro Studio Importer
makes this a quick and easy process.
Your GoPro camera records video files in the DCIM directory on your SD card. There are
two ways to access these files on your computer:
• Method 1: Turn your camera on and then connect it to your computer using a
USB cable.
• Method 2: Remove the SD card from the camera and use an internal or external
SD card reader (this method requires a microSD card adapter if you use a
HERO3 or newer camera).
STEP 1: Allow the GoPro Studio Importer manage your media
Once you have mounted your SD card using one of the methods above, if this is the first
time you have plugged in a GoPro camera or SD card to this computer, you will be
prompted to choose whether or not you would like to use the GoPro Studio Importer as
the default importer for GoPro cameras.
You are welcome to ‘opt-out’ and import your files using an alternative method, but the
GoPro Studio Importer does a great job of transferring all your media into an organized
structure on your computer in a folder that you specify. It is for this reason that we
recommend that you click on the YES button and allow the GoPro Studio Importer to
handle the import process.
STEP 2: Create a folder for your camera files
After agreeing to let GoPro Studio Importer manage your GoPro media, you will be
prompted to create a folder name for the specific camera that is plugged into the
computer. A default name (based on the camera model) will be offered. You can
customize this if you want, or leave it as it is. This will be the folder name on your
computer where the media will be imported into.
21
Page 26
GoPro Studio 2.5 User Manual
Click on the CONTINUE button to move on to the next step.
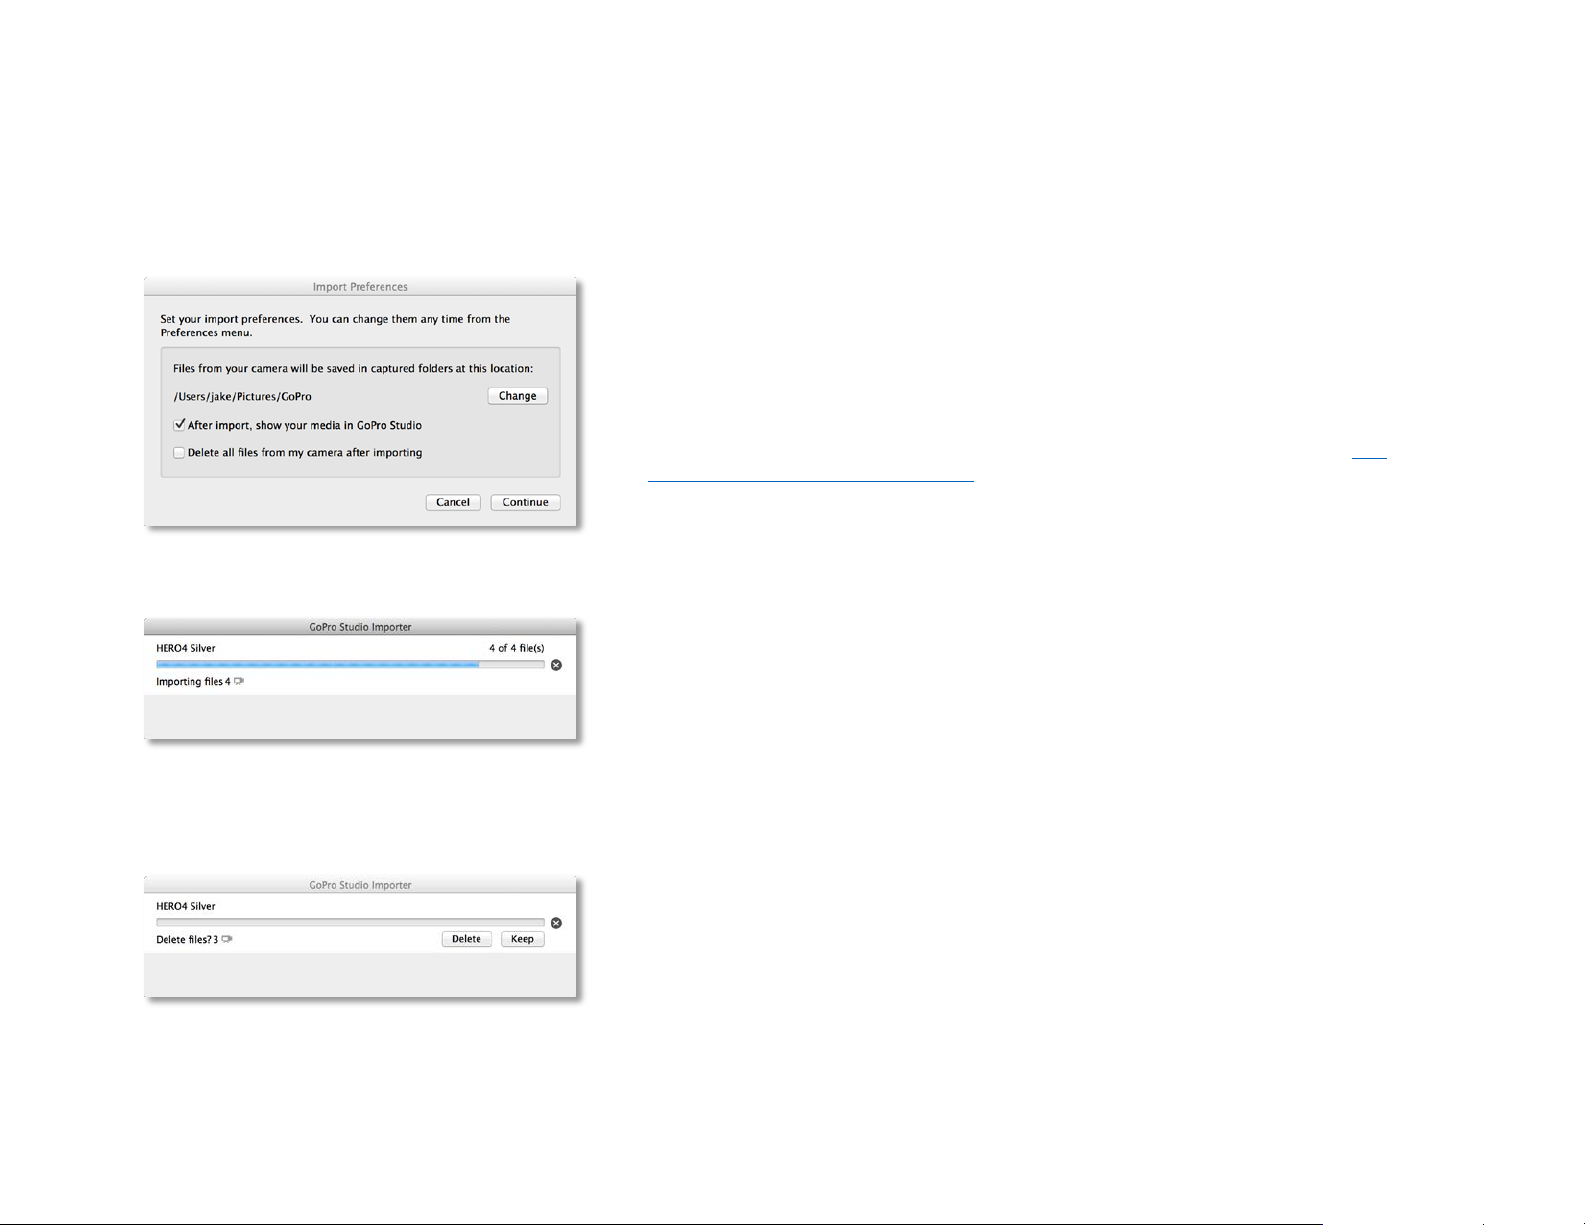
STEP 3: Set your import preferences
Next you’ll be asked to select your preferences, which include the following options:
• Changing the folder where your GoPro camera’s media is imported into
• Selecting whether to show your media in GoPro Studio after import
• Selecting whether to automatically delete the files from your GoPro after import
NOTE: These settings can be changed later by using the GoPro Studio Importer
application in the Mac Menu Bar as described previously in the section called, “
GoPro Studio Importer - Preferences"
Once you’ve decided on your preferenc es , click CONTINUE.
The
STEP 4: Watch your media get transferred
At this point the media from the camera should be transferring to the computer. The
progress bar gives a rough indication of how long the import process is going to take.
Clicking on the X button will cancel the import.
NOTE: GoPro video files can be quite large and GoPro CineForm files (especially 3D
files) are even larger. With this in mind, make sure you have plenty of disk space for both
your source files and the converted GoPro CineForm files.
STEP 5: GoPro Studio launches
After the import process is complete, GoPro Studio launches with all your media imported
into the Import Bin, ready for you to view and trim.
If GoPro Studio is already running at the time the import process completes, you will be
prompted whether or not you would like to create a new project or add the files to the
existing project.
22
Page 27
GoPro Studio 2.5 User Manual
USING GOPRO STUDI O
Step 1: VIEW & TRIM
If you used the GoPro Studio Importer to transfer your camera media to your computer,
your videos and photos should already be imported into the Import Bin in a GoPro Studio
Project. If that is the case, skip down to the section called, “
Window”. But if you chose not to automatically launch GoPro Studio after import, you
should now bring your media files into GoPro Studio to view and prepare them for
conversion into GoPro CineForm files.
Creating a New Project
If GoPro Studio is not currently running, launch it by using the “Launch Pad” or by clicking
on the GoPro Studio icon in your Applications folder.
NOTE: If this is your first time launching GoPro Studio, the Import Tutorial will appear.
The Import Tutorial gives you a brief walkthrough of how to use the IMPORT Room. You
can step through the tutorial by using the NEXT buttons or cancel out of it by clicking the
SKIP TUTORIAL button.
Before going any further, it’s a good idea to save the project and give it a project name.
1. Go to the File menu and click Save Project (or press ‘Command+S’ on your
keyboard).
2. Browse to the folder where you would like to save your project.
3. Type a name for your project in the File name box.
4. Click the Save button to create the new project file.
NOTE: Your new GoPro Studio project file will be saved with a “.GCS” file extension.
Previewing Files in the Player
Importing Source Video Files
To import your video files, do the following:
23
Page 28

GoPro Studio 2.5 User Manual
1. Click the IMPORT NEW FILES button (or press ‘Command+I’ on your keyboard)
and browse to the folder that contains the files you want to import.
2. Highlight the videos you want to im port and click Open.
3. Press ‘Command+S’ on your keyboard to save the project.
TIP: You can import an entire folder of clips by simply dragging the folder from a Finder
Window and dropping it onto the Import Bin.
24
Page 29

GoPro Studio 2.5 User Manual
2D / 3D Indicator
Filename
Image Size
Frame Rate
Frame Count
Time lapse Icon
Video Icon
PLAY Button
Play-head
Playback Slider
Step Backwards
Step Forward
HiLight Tag Indicator
Previewing Files in the Player Window
After importing your files, you’ll see them represented as thumbnails in the Import Bin on
the left-hand side of GoPro Studio’s IMPORT Room. Along with each thumbnail, the
following file details are indicated:
• Filename
• Image Size
• Frame Rate or Frame Count
• 2D or 3D
• HiLight Tags exist
• Video or Time lapse Icon
• Duration
You can select files in the Import Bin by clicking on them or using the up and down arrow
keys on your keyboard to cycle through them.
To remove a clip from the Import Bin, select the clip you wish to remove and click on the
REMOVE CLIP button at the bottom of the Import Bin or press the ‘delete’ k e y on your
keyboard.
To remove all clips from the Import Bin, click the CLE AR ALL button at the bottom of the
Import Bin.
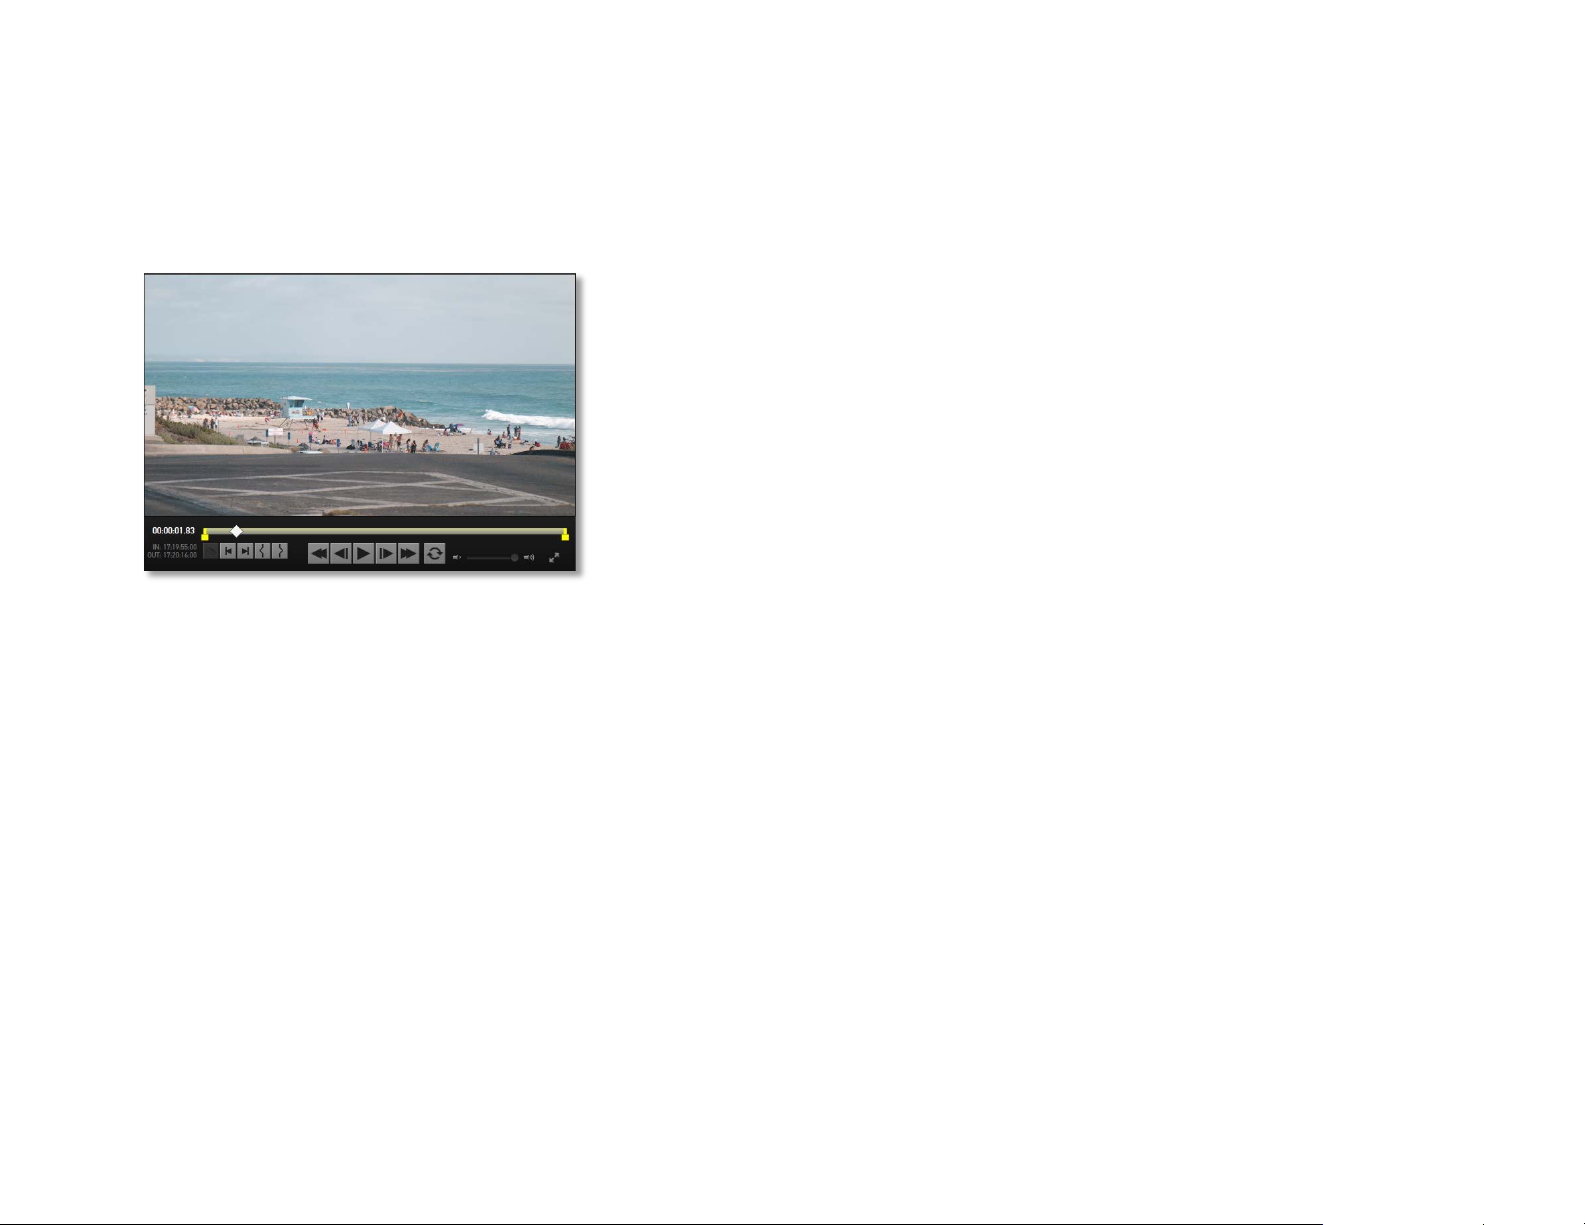
You can preview your files in the Player Window by using the Playback Controls.
• With a clip selected, press the PLAY button in the Playback Controls (or the
SPACEBAR on your keyboard) to see the clip playback in the Player Window.
• Use the Step Forward and Step Backwards buttons to step through the clip one
frame at a time.
NOTE: Depending on your computer specifications and the in-camera recording format
used, the files may play back choppy. This is to be expected and one of the reasons we
will be converting the files into the GoPro CineForm format.
You can also use the Play-head on the Playback Slider to navigate through the clip. To
do this, click on the diamond-shaped Play-head and drag left or right through the
Playback Slider. While doing this, the Player Window will update to show the current
frame.
25
Page 30
GoPro Studio 2.5 User Manual
Converting Files
You can rotate, trim and select advanced conversion settings on a file before converting it
into a GoPro CineForm File. There are different reasons for performing each of these
actions, as explained below.
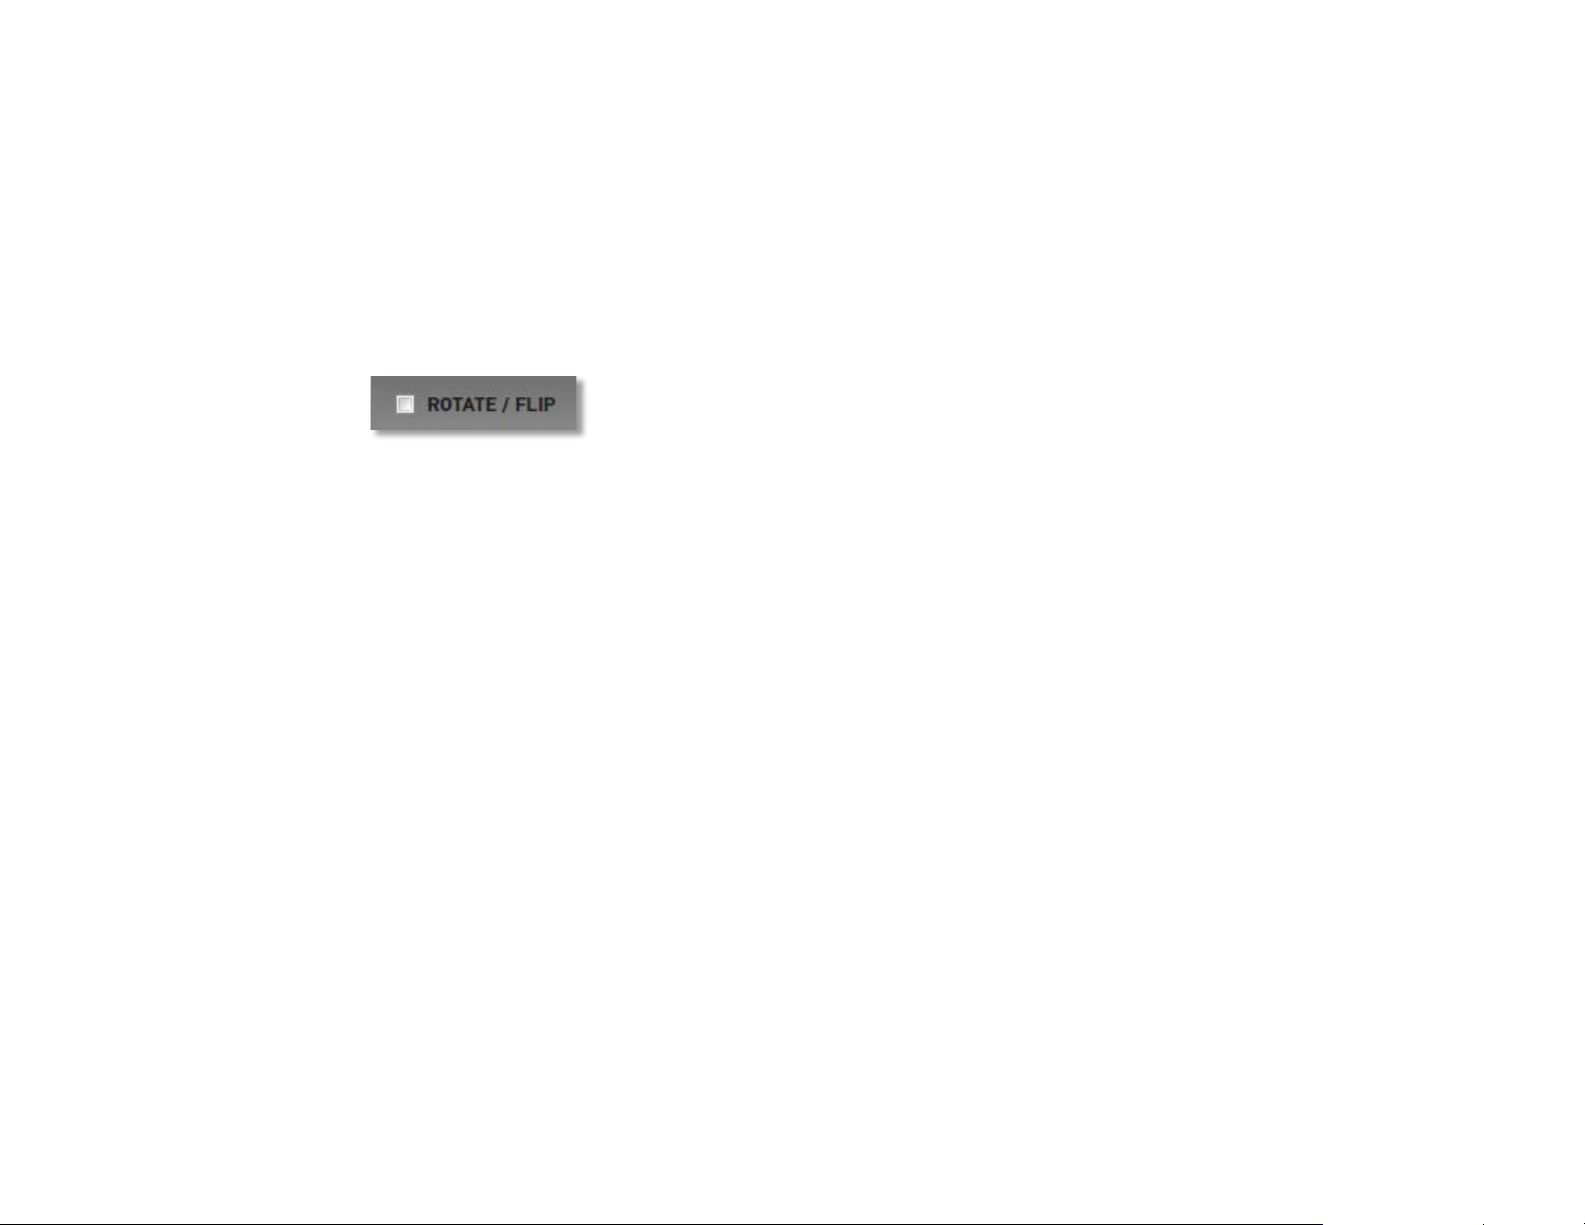
Using the Rotate / Flip Option
When shooting with a GoPro camera, some situations will require you to mount it upsidedown. There is an in-camera setting to flip the video during recording (which we
recommend you use). If you forgot to use that option, GoPro Studio gives you an easy
way to account for this in the converted GoPro CineForm file.
1. Select a source file by clicking on it in the Import Bin.
2. Click on the ROTATE / FLIP button.
After performing these steps your file will appear right-side-up in the Playback Window,
and after the conversion your converted GoPro CineForm file will be right-side-up as well.
26
Page 31

GoPro Studio 2.5 User Manual
MARK IN Button
MARK OUT Button
Playback Slider
Unused Portions of File
IN & OUT Point Locations
HiLight Tags
Setting Initial Trim Points
GoPro Studio lets you trim your source file before converting it to a GoPro CineForm file.
This is helpful in reducing the size of the converted file and it eliminates any unwanted
portions of the initial recording from being included in the converted file. By using the
MARK IN and MARK OUT buttons you can trim the file to include only the portion(s) of
the recording that you actu ally want to keep. Do this to choose your favorite shots and to
make your editing experience easier and more fun.
1. Select a source file by clicking on it in the Import Bin.
2. Move the Play-head on the Playback Slider to the desired start point of your clip
and press the MARK IN button to trim the beginning of the file.
3. Now move the Play-head to the desired end point of your clip and press the
MARK OUT button to trim the end of the file.
Clicking on the MARK IN and/or MARK OUT buttons will mark your trim points by
darkening the unused portions of the file on the Playback Slider. To undo your trimming,
simply move the Play-head to a new location and click on the MARK IN or MARK OUT
button again.
If your clip has any HiLight tags, they will show up on the Playback Slider as yellow
vertical markers. You can use these as a guide to quickly find the HiLights from your
recorded videos. Then simply set your IN and OUT points around the HiLight tag.
Now you can add the file to the Conversion List or set advanced conversion settings.
TIP: If you want to convert multiple portions of the same source file, mark the IN and OUT
points for the first clip and then add it to the conversion list. Then repeat the IN and OUT
point marking process to choose new trim points for the second clip and then add the
second clip to the conversion list. Repeat these steps for as many clips as you would like
to make from the original file.
27
Page 32

GoPro Studio 2.5 User Manual
Choosing Advanced Conversion Sett ings
When you select a file for conversion, GoPro Studio chooses default conversion settings
based on the file’s original format. You can keep the default settings or customize them to
meet specialized needs. This section will provide information about the various advanced
conversion settings and explain why they are useful in certain situations.
Click on the ADVANCED SETTINGS button to open the Advanced Settings shade panel.
IMAGE SIZE
Use the IMAGE SIZE setting to adjust the resolution of the converted clip. The source
file’s resolution is identified by the word “Source” next to it (as shown in the screenshot to
the left). You can keep the source setting or change it to a different resolution. Some
reasons to change the resolution are as follows:
• You shot at a higher resolution than your desired output format (e.g. source was
2.7K but your output format is 1080p)
• You shot at a lower resolution and want to upscale it to a resolution that matches
your desired output format (source was 720p 120fps but your output is 1080p
30fps)
• You shot in a format that uses a 4:3 aspect ratio but your desired output format is
16:9
NOTE: In GoPro Studio’s EDIT Room, you can mix and match resolutions on a single
storyboard so it is not crucial that you change the image size in the conversion process.
However, if you are planning on taking your converted clips into other applications that
don’t let you mix resolutions, it’s a good idea to convert to the resolution that you’ll be
using in those applications.
MAKE 16:9
The MAKE 16:9 option appears as a checkbox when you select a new IMAGE SIZE of
1080p or smaller and the source video has a 4:3 aspect ratio. When checked, it scales
and stretches the 4:3 image to fill a 16:9 frame.
28
Page 33

GoPro Studio 2.5 User Manual
FRAME RATE
Use the FRAME RATE setting to adjust the frame rate of the converted file. The source
file’s frame rate is identified by the word ‘Source’ showing next to it. One reason to
change the frame rate is to create a smooth slow-motion effect. Let’s say that you
recorded using one of the camera’s higher frame rate modes, such as 1080p 60. Using
the Frame Rate option you could change the frame rate to 30 fps resulting in a converted
file that plays in slow-motion at half the speed of the original source file.
Please note that frame rates below 23.976 are meant to be used with Time lapse
sequences, so avoid those if you are working with video files. We’ll discuss more about
Time lapse conversions in the section “Working with Time lapse Sequences
NOTE: In GoPro Studio’s EDIT Room, you can mix and match frame rates and change
the speed of clips on a single storyboard so it is not crucial that you change the frame
rate in the conversion process. However, if you are planning on taking your converted
clips into other applications that don’t let you mix frame rates, it’s a good idea to convert
to the frame rate that you’ll be using in those applications.
SPEED UP and MOTION BLUR
Using the SPEED UP option is a great way to simulate a time lapse look from video files.
When checking this option, a slider and entry box appear. Use the slider to select the
number of video frames to be skipped or type a number in the box. The more frames you
skip, the more sped up the converted file will be.
The MOTION BLUR option also appears once you’ve checked the Speed Up option.
Check this option to give your converted file a motion-blur effect, which is often useful to
produce the smoothest time lapse output.
”.
29
Page 34

GoPro Studio 2.5 User Manual
QUALITY
The QUALITY setting affects the data-rate used in the converted GoPro CineForm file.
The data-rates will always vary, based on the complexity (image detail) in the source file,
but you can choose whether to use Low, Medium or High.
The default is Medium which will be a very high-quality video file. You can choose High
quality, which may or may not end up creating a significant visual quality difference in the
image. If you know you need to make significant changes to color in a clip, the extra
quality might be beneficial but it will create a larger file and may take longer to process
when you choose to convert. Even the Low quality setting is a relatively high-quality
video file yet takes up less space on your hard drive.
REMOVE FISHEYE
GoPro cameras are famous for their wide-angle look. T his is beneficial if you want your
image to have a large field of view (FOV). However, in some situations you might want to
reduce the FOV that you get when shooting in one of the camera’s wide modes.
Checking the REMOVE FISHEYE option applies a “lens adjustment” to the converted
GoPro CineForm file giving it a smaller FOV.
REMEMBER SETTINGS
To process future clips in your Import Bin with the same settings, check the REMEMBER
SETTINGS box before closing the Advanced Settings window.
30
Page 35

GoPro Studio 2.5 User Manual
Selecting a Destination for Converted Files
To specify a file name or destination other than the default provided for the converted file,
use the FILE NAME text box (below the Pla yback Contr ols) and the CHANGE
DIRECTORY button.
Adding Files to the Conversion List
Whether or not you’ve flipped your file, trimmed it, changed the conversion settings or
renamed it, when you’re ready to convert it select it in the Import Bin and click the ADD
CLIP TO CONVERSION LIST. You should now see the file’s thumbnail in the
CONVERSION LIST. Repeat this step for as many clips as you’d like to convert.
TIP: You can select multiple clips in the Import Bin and add them to the conversion list all
at once. To do this, hold down the ‘Command’ key while selecting files in the Import Bin,
or press ‘Command+A’ on the keyboard to select all the clips at once. With the clips
selected, click the ADD CLIP TO CONVERSION LIST button.
To verify that the clips in the Conversion List will be converted with the correct settings,
select Show Conversion Details option in the Window menu or press
‘Command+SHIFT+I’ to show the Conversion Details window. The settings for the
original file are shown on the left and the settings for the converted GoPro CineForm file
are shown on the right.
When your clips have been added to the Conversion List, click the CONVERT button to
start the batch conversion process. Once the batch has started, you can still add more
clips to the conversion list, if needed. When the conversion is complete, click the
PROCEED TO STEP 2 button to switch to the EDIT Room.
31
Page 36

GoPro Studio 2.5 User Manual
Before moving on to the next chapter, let’s take a moment to look at the techniques used
to convert time lapse sequences into GoPro CineForm files as the import and conversion
steps for these source files require some specific considerations.
Working with Time Lapse Sequences
The process for converting time lapse sequences into GoPro CineForm files is similar to
one used for converting video files. However, there are a couple of minor differences in
how you go about importing the files and choosing your conversion settings.
About the File Structure
When you record a time lapse on your GoPro camera, the images are saved as individual
.JPG files (or frames) in a folder called “100GOPRO”. If your recording contains more
than 999 frames, the camera breaks the files up into separate folders. The second folder
will be called “101GOPRO” and the third “102GOPRO”, etc. In order for GoPro Studio to
convert the files properly, you’ll need to keep the folders separate, just like they are on
the SD card.
Importing Time Lapse Sequences
The process for converting time-lapse sequences into GoPro CineForm files is as follows:
1. Copy the time lapse folders from the DCIM folder on the SD card to a location on
your computer. We suggest creating a specific folder for your GoPro Studio
projects.
2. Click the IMPORT NEW FILES button and browse to the folder that contains the
time lapse sequences you want to import.
3. Highlight the folders you want to import and click Open.
4. Press ‘Command+S’ on your keyboard to save the project.
32
Page 37

Time lapse Icon
GoPro Studio 2.5 User Manual
Previewing Files in the Player Window
After importing your sequence folders, you’ll see them represented as thumbnails in the
Import Bin on the left-hand side of GoPro Studio’s IMPORT Room. There is one thing
that differentiate these from your video files.
• The time lapse icon is shown directly under the thumbnail instead of the video
icon.
Despite the difference, you can still preview a time lapse sequence in the Player Window
by selecting it in the Import Bin and using the Playback Controls.
By default, timelapse sequences will pla y in the Import Room at 30fps and will skip many
frames on layback. If you have a slow disk (USB or Network), the playback may not work
at all. Selecting the option to Play All Frames in the View menu will force the sequence
to show all the frames but it play at much slower than 30fps.
Trimming, Rotating and choosing Conversion Settings
Time lapse sequences can be trimmed and flipped in the same way that video files can
be, but when choosing your advanced conversion settings there are some additional
things to consider.
IMAGE SIZE
Time lapse sequences can be recorded using the different shooting modes (accessible in
the camera menu). Each of these modes results in a different resolution.
You can convert these files using the Source resolution, but doing so will result in very
large files. If the final output of your project is intended for broadcast or uploading to the
web, consider downscaling the time lapse to 1080p during the conversion process. This
will create a smaller and more manageable file.
TIP: The benefit to converting the sequence using the source file’s resolution is that you
can zoom in and pan to specific regions within the larger frame size without degradation
of image quality during editing but it will require a faster computer to ensure smooth file
playback.
33
Page 38

GoPro Studio 2.5 User Manual
FRAME RATE
When converting time lapse sequences, GoPro Studio sets the default frame rate to
29.97 frames per second. So if you have a sequence consisting of 300 frames at 29.97
frames per second, your converted clip will play for about 10 seconds. If you want the
same number of frames to play for a longer span of time, change the Frame Rate value
to a lower setting.
NOTE: Choosing the exact frame rate prior to conversion is not crucial because you can
always speed up or slow down the converted GoPro CineForm clip on the Storyboard in
the EDIT Room.
SPEED UP and MOTION BLUR
Speeding up a clip is a great way to remove extra frames in a time lapse sequence.
When checking SPEED UP option, a slider and entry box appear. Use the slider to select
the number of time lapse frames to be skipped or type a number in the box. The more
frames you skip the more sped up the con vert ed fil e wi ll be.
The MOTION BLUR option is enabled once you’ve checked the SPEED UP option.
Check this option to give your converted file a motion-blur effect.
34
Page 39

GoPro Studio 2.5 User Manual
Step 2: EDIT
GoPro Studio’s EDIT Room allows you to view, rearrange and enhance your converted
GoPro CineForm clips.
In the Edit Room you can:
• Trim and combine multiple clips on a storyboard
• Add transitions
• Add music or other audio
• Add titles
• Change playback speed
• Add fade in and fade out effects
• Adjust color, framing and 3D convergence
• Apply preset ‘looks’ to create dramatic effects on your clips
When you first open the EDIT Room, the Browse Edit Templates window will appear. In
this window, you’re presented with the opt ion to use a blank template or to choose from a
list of available GoPro Edit Templates.
In this chapter you’ll learn about how to create a movie using a GoPro Edit Template as
well as how to create a movie from scratch using a blank template.
35
Page 40

GoPro Studio 2.5 User Manual
Thumbnail
Title
Duration & Number of Clips
Description
Edit Templates
Create Button
Using GoPro Edit Templates
GoPro Edit Templates are based on our most popular GoPr o videos , and make it easy
for you to turn your content into epic GoPro-style edits.
Follow these steps to create a video using a GoPro Edit Template:
.
1. Select a GoPro Edit Template from the Browse Edit Templates window.
2. The Edit Template then populates the Storyboard, complete with sample video
clips, music and titles.
3. Replace the Edit Template content on the Storyboard with your own content.
4. Then you’re ready to export the Storyboard and share it with the world.
Selecting a GoPro Edit Template
The Browse Edit Template window lists the available GoPro Edit Templates installed on
your computer. GoPro Studio insta lls with three Edit Templates and you can install more
by downloading them from the GoPro Edit Template gallery at gopro.com.
1. If you’re not already looking at the Browse Edit Template window, make sure
you’re in GoPro Studio’ EDIT Room and click on the LOAD TEMPLATE button
located directly above the Storyboard or select Load Edit Tempate from the File
menu.
2. Browse the Edit Template Selection Window to find the GoPro Edit Template that
you would like to use. Notice that each Edit Template lists the title, artist and
song, a brief description, duration, number of clips used and tempo.
3. Click on the desired Edit Template to select it and then click the CREATE button.
NOTE: If this is your first time selecting a GoPro Edit Template, the EDIT Tutorial will
appear. The EDIT Tutorial gives you a brief walkthrough of how to use the Edit
Templates in the EDIT Room.
At this point GoPro Studio should have populated the Storyboard with the Edit Template
that you chose.
36
Page 41

Template Titles
Audio Tracks
Video Track
Title Tracks
GoPro Bumper
Target Area
Target Area
Optional Target Area
Music Soundtrack
Storyboard Time Indicator
Template Details
GoPro Studio 2.5 User Manual
Identifying GoPro Edit Template Elements
When loaded, the GoPro Edit Template places sample content onto the Storyboard
consisting of the following elements:
• GoPro Bumpers These optionally remain at the front and the end of the
Storyboard
• Target Areas Replace these elements with your own video clips before exporting
• Optional Replacement Areas Optionally replace these with your video cli ps
• Template Titles You can move these to new locations on the storyboard or
delete them entirely
• Audio This element is locked in place and provides the template’s music
soundtrack
Each of the Target Areas are synced to the music soundtrack and locked in place on the
Storyboard. While you can’t change their duration or position, all other aspects (frames to
show, speed, color, framing, etc.) are under your creative control.
37
Page 42

Previous Clip Button
Next Clip Button
Decrease Speed
Play
Increase Speed
Step Backwards
Loop
Step Forward
GoPro Studio 2.5 User Manual
Use the Scroll bar at the bottom of the Storyboard window to access portions of the
Storyboard that go past the borders of the Storyboard window.
The Navigation Controls allow you to cycle forward and backwards through each Edit
Template element on the Storyboard.
• Use the Previous Clip button to move to the previous element.
• Use the Next Clip button to move to the next element.
Viewing a GoPro Edit Template in the Player Window
Before you begin replacing the GoPro Edit Template content with your own video clips,
it’s a good idea to play back the Storyboard a few times to get a feel for the flow of the
Edit Template.
• Click on a clip in the Storyboard and then drag the yellow Storyboard Time
Indicator to the beginning of the Storyboard and press the PLAY button in the
Playback Controls (or the SPACEBAR on your keyboard) to see the all clips
played back sequentially.
• The Decrease Speed and Increase Speed buttons can be used to play the
video faster or slower.
• Use the Step Forward and Step Backwards buttons to step through the
Storyboard one frame at a time.
• Press the LOOP button to cause playback to automatically start over from the
beginning when the Play-head reaches the end of the Storyboard. Press it again
to turn looping off.
Tip: As you play through the GoPro Edit Template, pay particular attention to its use of
slow-paced scenes and high-action scenes. This is important because when replacing
these Target Areas with your own video clips, you’ll want to match the energy level of the
content you’re replacing. This will ensure that your edits line up with the existing musical
cues in the Edit Template’s soundtrack.
Once you have a good feel for the flow of the GoPro Edit Template, you’re ready move
on to the next section, where you’ll learn how to replace the Target Areas with your own
video clips.
38
Page 43

GoPro Studio 2.5 User Manual
Previewing Clips in the Player Window
If you recently converted files in the IMPORT Room and pressed the PROCEE D TO
STEP 2 button, you should see your converted GoPro CineForm files in the Media Bin on
the left-hand side of the work area. If you don’t see any files in the Media Bin, follow the
steps below.
1. Click the ADD MEDIA button and browse to the location of your converted GoPro
CineForm files.
2. Highlight the files you wish to import and click Open.
3. After the files have loaded into the Media Bin, press ‘Command+S’ on your
keyboard to save your project.
Clips loaded into the Media Bin are represented as thumbnails, similar to how they look in
the Import Bin in the IMPORT Room. Along with each thumbnail, the following clip details
are indicated:
• Filename
• Image Size
• Frame rate or Frame Count
• 2D or 3D
• Video or Time lapse Icon
• Duration
You can select clips in the Media Bin by clicking on them or by using the up and down
arrow keys on your keyboard to cycle through them.
To remove a clip from the Media Bin, select the clip you wish to remove and click on the
REMOVE CLIP button at the bottom of the Media Bin.
To remove all clips from the Media Bin, click the CL E AR AL L button at the bottom of the
Media Bin.
39
Page 44

GoPro Studio 2.5 User Manual
Step Forward
Decrease Speed
Play
Increase Speed
Step Backwards
Play-head
Playback Slider
Loop
Click on a clip in the Media Bin to select it. That loads it into the Player Window. Now you
can use the Playback Controls to playback the clip and view it in the Player Window.
• Press the PLAY button in the Playback Controls (or the SPACEBAR on your
keyboard) to see the clip playback in the Player Window.
• The Decrease Speed and Increase Speed buttons can be used to play the
video faster or slower.
• Use the Step Forward and Step Backwards buttons to step through the clip one
frame at a time.
• Press the LOOP button to cause playback to automatically start over from the
beginning when the Play-head has reaches the end of the clip. Press it again to
turn looping off.
You can also use the Play-head on the Playback Slider to navigate through the clip. To
do this, click on the diamond-shaped Play-head and drag left or right through the
Playback Slider.
NOTE: This is called “scrubbing”.
40
Page 45

GoPro Studio 2.5 User Manual
MARK IN Button
MARK OUT Button
Replacing Target Areas With Your Video Clips
With your video clips loaded in the Media Bin, you’re ready to start replacing GoPro Edit
Template content on the Storyboard using the following steps:
1. Select the desired clip in the Media Bin.
2. Move the Play-head on t he Pla ybac k Slider to the desired start location of your
clip and press the MARK IN button to trim the beginning of the clip. The yellow IN
Point marker will move to this position on the Playback Slider indicating the new
start location. Don’t worry about the OUT Point as we will address that later.
3. Click and drag the clip to the Storyboard and drop it onto the Target Area you
wish to replace (a green box will highlight the Target Area indicating that an
approved clip replacement is about to occur).
4. Optionally, click the MUTE button on the clip’s thumbnail on the Storyboard to
disable sound from the video clip.
5. Press ‘Command+S’ to save your project.
6. Repeat these steps using the other video clips in your Media Bin (or different
portions of the same clip) until each Target Area on the Storyboard has been
replaced.
After a Target Area has been replaced, the “target” icon is removed and the thumbnail
changes to represent the first frame of your video clip. At any time during this process,
you can use the PLAY button to playback the Storyboard in the Player Window.
TIP: Dragging the same source clip from the Media Bin onto consecutive Target Areas
will result in the IN Point of the clip in the later Target Area to line up with the OUT Point
of the clip in the previous Target Area. This is a great way to use a larger portion of a clip
than a single Target Area will allow. NOTE: this only works if you do not manually change
the IN or OUT Points of the source clip in the Media Bin.
41
Page 46

GoPro Studio 2.5 User Manual
Disclosure Triangle
Segment Slider Bar
Refining Clips Within Target Areas
After replacing all the Target Areas with your own clips and playing back the Storyboard,
you may discover that some of your clips don’t quite fit in the Target Areas where you put
them. This is actually to be expected as there is usually a pretty good chance that the
edit points in your video clip are not the exact same length as the edit points in the Target
Area, thus causing your clip to be cut short or last too long .
GoPro Studio helps you get around situations like this by using the following techniques:
• Moving the SEGMENT SLIDER BAR
• Adjusting the speed of the clip
Let’s look at few situations where you might need to refine your clip in the Target Area.
SITUATION #1
What if your clip gets cut off before the desired action of the clip is played? In order to fix
this, you could do the following to slide the clip into place:
1. Select the clip on the Storyboard by clicking on it. A yellow border appears
around the thumbnail of the selected clip.
2. Click and drag the Segment Slider Bar to the point where the desired action of
the clip lies within the yellow area of the Segment Sli d er Bar or drag the Playhead to a new start or end point and click the MARK IN or MARK OUT buttons.
If the desired action is still too long to fit into the Target Area, you can use the VIDEO
panel to speed up the clip to make it fit.
1. Make sure the clip is still selected on the Storyboard.
2. Click the Disclosure Triangle to the left of the word “VIDEO” on the right-hand
side of GoPro Studio’s EDIT Room.
3. Using the slider or text entry box, increase the speed to the point where the
entire desired action of the clip fits into the length of the Target Area.
NOTE: Some experimentation will likely be required here to get achieve the des ire d
results.
42
Page 47

GoPro Studio 2.5 User Manual
SITUATION #2
Now let’s say that the desired action in your clip fits in the Target Area, but there is also
an extra portion of the clip playing at the end that you did not wish to include. In order to
fix this, you could use the VIDEO CONTROLS panel to slow down the clip.
1. Select the clip on the Storyboard.
2. Click the Disclosure Triangle to the left of the word “VIDEO” on the right-hand
side of GoPro Studio’s EDIT Room.
3. Using the slider or text entry box, decrease the speed to the point where the
entire desired action in the video clip fits into the length of the Target Area.
NOTE: Some experimentation will likely be required here to achieve the desired results.
SITUATION #3
What if your clip is not long enough to fill a Target Area? When this happens, you
will see a red box with an X in it as you hover over a Target Area with your shorter
clip. In this situation you’ll need to select a longer clip for this Target Area and
drop this shorter clip onto a shorter Target Area.
At this point your Storyboard should be looking pretty good and it may actually be ready
to export. However, there are man y other enhancements that you can add to your
Storyboard and/or individual clips to make it even more epic. Some of these
enhancements are:
• Applying fades to video and audio clips
• Applying color and effect presets to video clips
• Adding additional titles or music to the Storyboard
The following sections of this user manual explain how to incorporate these additional
features into your movie.
43
Page 48

GoPro Studio 2.5 User Manual
Disclosure Triangle
Adjusting Video Playback Settings
GoPro Studio lets you adjust certain parameters that determine how your video clip will
playback on the Storyboard. You can change the speed of a clip or have it fade in or out.
To access these controls, select a clip in the Storyboard and then click the Disclosure
Triangle to the left of the word “VIDEO” on the right-hand side of GoPro Studio’s EDIT
Room. This will open up the VIDEO control panel giving you access to the following
settings:
• SPEED Use the slider or text entry box to select the speed (in percentage) at
which the clip will be played back. 100% is normal speed, 50% is half speed, etc.
Clicking the REVERSE checkbox causes the file to play in reverse at the chosen
speed.
When a speed change is applied to a clip on the Storyboard, the ENABLE FLUX
checkbox appers. FLUX is a feature of GoPro Studio that analyzes the footage
frame by frame and inserts new frames based on the original frames. It then,
blends them all together to smooth out the action. With Flux enabled on clips,
export times will be significantly longer due to the extra processing that GoPro
Studio has to perform. For quicker export times, we recommend applying Flux to
shorter clips or only during moments of fast paced action.
Clicking the REVERSE checkbox causes the file to play in reverse at the chosen
speed.
• FADE IN When used, this setting causes the selected clip to FADE IN from
black. Use the slider or text entry box to select the duration (in seconds) of the
FADE.
• FADE OUT When used, this setting causes the selected clip to FADE OUT to
black. Use the slider or text entry box to select the duration (in seconds) of the
FADE.
To reset the SPEED value, click on the word ‘SPEED’.
TIP: Next to the words VIDEO are two quick shortcut buttons that will adjust the playback
speed of a clip. Click the ÷2 button to cause the clip to play at half its current speed. Click
it a second time to half the speed again. Click the X2 button to cause the clip to play at
double the current speed.
44
Page 49

GoPro Studio 2.5 User Manual
Disclosure Triangle
Adjusting Audio Playback Settings
If your video clip contains audio as well, GoPro Studio lets you adjust certa in par a meters
that will determine how the audio portion will playback on the Storyboard.
To access these controls, select a clip in the Storyboard and then click the Disclosure
Triangle to the left of the word “AUDIO” on the right-hand side of GoPro Stud io ’s EDI T
Room. This will open the AUDIO controls panel giving you access to the following
settings:
• LEVEL dB Use the slider or text entry box to select the volume level (in dB) at
which the clip will be played back.
• FADE IN This setting causes the selected clip to FADE IN from silence. Use the
slider or text entry box to select the duration (in seconds) of the FADE.
• FADE OUT When used, this setting causes the selected clip to FADE OUT to
silence. Use the slider or text entry box to select the duration (in seconds) of the
FADE.
To reset the LEVEL value, click on the word ‘LEVEL dB’.
Click on the Disclosure Triangle to close the AUDIO controls panel.
TIP: To completely disable the audio from a Video Clip, click on the AUDIO MUTE button
in the clip’s thumbnail.
45
Page 50

GoPro Studio 2.5 User Manual
Enable Checkbox
Eye Dropper
Color Correcting Clips
The underlying Active Metadata
enables you to do real-time non-destructive image development adjustments to your
clips. These adjustments affect the overall color and tone of your clips. The controls to
apply these adjustments are located i n the WHITE BALANCE and IMAGE control panels
on the right-hand side of GoPro Studio’s EDIT Room.
WHITE BALANCE
Select a clip on the Storyboard and then click on the Disclosure Triangle to the left of
the words “WHITE BALANCE” to open the WHITE BALANCE panel giving you access to
the following settings:
• TEMPERATURE Use the slider or step controls to adjust the overall temperature
of the image.
• TINT Use the slider or step controls to adjust the overall tint of the image.
• KEYFRAMES For advanced users, the white balance settings can be keyframed.
Use the + button to add a white balance keyframe to the clip. This locks in the
white balance settings for the current frame on the Storyboard. You can then
move the Play-head to another location on the Playback Slider to add another
keyframe where you can have different white balance settings. This is a great
way to have the white balance settings change over the duration of the clip.
TM
architecture used in the GoPro CineForm codec
For a clip with a white element in the scene, click on the EY E Dro p per and then click on
the white element of your image in the Playback Window to have GoPro Studio
automatically adjust the white balance based on that element.
Click on an individual control to reset its value.
Click on the Disclosure Triangle to close the WHITE BALANCE panel.
TIP: Clicking on the Enable Checkbox will toggle the WHITE BALANCE adjustments ON
or OFF for the selected clip on your Storyboard. Checking the box enables the controls.
Unchecking it disables them. You can use this to quickly switch back and forth between
seeing the clips with the adjustments applied and the original images.
46
Page 51

GoPro Studio 2.5 User Manual
Enable Checkbox
IMAGE CONTROLS
Select a clip on the Storyboard and then click on the Disclosure Triangle to the left of
the words “IMAGE” to open the IMAGE controls panel giving you access to the following
settings:
• EXPOSURE Use the slider or step controls to adjust the brightness and
darkness of the image.
• CONTRAST Use the slider or step controls to adjust the relative definition
between bright and dark areas of the image.
• SATURATION Use the slider or step controls to adjust the vibrancy of the colors
in the image.
• SHARPNESS Use the slider or step controls to adjust the softness and
sharpness of the image.
• KEYFRAMES For advanced users, the image control settings can be keyframed.
Use the + button to add a white balance keyframe to the clip. This locks in the
image control settings for the current frame on the Storyboard. You can then
move the Play-head to another location on the Playback Slider to add another
keyframe where you can have different image control settings. This is a great
way to have the image control settings change over the duration of the clip.
Click on an individual control to reset only its value.
Click on the Disclosure Triangle to close the IMAGE CONROLS panel.
TIP: Clicking on the Enable will toggle the IMAGE adjustments ON or OFF for the
selected clip on your Storyboard. Checking the box enables the controls. Unchecking it
disables them. You can use this to quickly switch back and forth between seeing the clips
with the adjustments applied and the original images.
47
Page 52

GoPro Studio 2.5 User Manual
Enable Checkbox
Framing Clips
The FRAMING CONTROLS allow you to change the composition of your clips. Select a
clip on the Storyboard and then click on the Disclosure Triangle to the left of the words
“FRAMING CONTROLS” to open the FRAMING CONTROLS panel giving you access to
the following settings:
• ZOOM When you want to get closer to the subject in your video, use the slider or
step controls to adjust scale of the image.
• HORIZONTAL Use the slider or step controls to adjust the horizontal location of
the image.
• VERTICAL Use the slider or step controls to adjust the vertical location of the
image.
• ROTATION Use the slider or step controls to slightly rotate the clip.
• H.ZOOM When mixing 4x3 and 16x9 video sources, use this slider or step
controls to adjust the horizontal scaling of the image.
• H.DYNAMIC Use this slider or step controls to adjust the horizontal stretch point
of the image. This control is best used in tandem with the H.ZOOM control and
helps preserve the normal look of people if they have been stretched by 4x3 to
16x9 conversion.
• KEYFRAMES For advanced users, the framing controls can be keyframed. Use
the + button to add a framing keyframe to the clip. This locks in the framing
control settings for the current frame. You can then move the Play-head to
another location to add another keyframe where you can have different framing
control settings.
• FLIP Use the check boxes to enable or disable horizontal or vertical flipping on
the image. Enable both of these options if you simply shot your scene upsidedown.
Click on an individual control to reset its value.
Click on the Disclosure Triangle to close the FRAMING controls panel.
TIP: Clicking on the Enable Checkbox will toggle the FRAMING adjustments ON or OFF
for the selected clip on your Storyboard. Checking the box enables the controls.
Unchecking it disables them. You can use this to quickly switch back and forth between
seeing the clips with the framing adjustments applied and the original images.
48
Page 53

GoPro Studio 2.5 User Manual
Apply ing Effect Presets
In GoPro Studio’s EFFECT PRESETS panel, you can choose from several pre-made
color and vignette effects and apply them to your clips on the storyboard. This is a quick
and easy way to make your clips look more dynamic. Select a clip on the Storyboard and
then click on one of the following EFFECT PRESETS to apply it to the clip:
• NONE resets all Color Correction and Framing adjustments to their defaults.
• PROTUNE applies a saturation and contrast adjustment to footage shot in the
Protune mode making it look more ‘punchy’ (applied automatically to Protune
enabled clips).
• 1970S applies a warm color effect that simulates film shot in the 1970s.
• 4X3 CENTER CROP zooms in on a clip shot with a 4x3 aspect ratio while
cropping the top and bottom portions of the image.
• 4X3 TO WIDE applies a combination of framing adjustments to transform a clip
shot in 4x3 aspect ratio to a 16:9 image.
• CANDY COLOR applies a highly saturated color effect to the clip.
• DAY FOR NIGHT applies a color effect that simulates footage that was shot at
night.
• HOT DAY applies a warm color effect that simulates being close to the sun.
• NIGHT VISION applies a green tint over the image simulating an infrared look
that you see when using night vision goggles.
• SEPIA applies a bro wnish and unsaturated effect to achieve a sepia tone look.
• VIGNETTE LARGE applies a large vignette to the image.
• VIGNETTE MEDIUM applies a medium-sized vignette to edges of the image.
• VIGNETTE OFF applies a small vignette to the edges of the image.
To create your own PRESET, do the following:
1. Select a video clip on the Storyboard.
2. Use the WHITE BALANCE, IMAGE CONTROLS and FRAMING CONTROLS to
dial in your own custom look.
3. Click the little gear icon next to the PRESET Title to open the Manage Presets
window.
4. Click the ‘+’ button in the
5. Type in a new preset name check or uncheck the settings you want to save.
6. Click ‘OK’ to add the PRESET.
Press the RESET ALL button to return all of the WHITE BALANCE, IMAGE, FRAMING
and EFFECT PRESETS applied on a clip to their default values. Or click and drag the FX
icon on the clip’s thumbnail off the top of the Storyboard.
49
Page 54

GoPro Studio 2.5 User Manual
Copying Settings from One Clip to Another
If you’re happy with the look of a particular clip and want to apply those same settings to
another clip, you can easily accomplish this by doing the following:
1. Click on the FX icon on clip that has the settings you want to copy to other clips.
2. Then click on the FX icon and choose Copy from the Edit menu (or press
‘Command+C’ on your keyboard)
3. Click on the FX icon on the clip where you want to copy the settings to.
4. Then select Paste from the Edit menu (or press ‘Command+V’ on your
keyboard).
5. Continue pasting these settings on any additional clips by repeating steps 4 and
5 above.
To remove the settings from a clip, secondary-click on the FX Icon and select Cut from
the Edit menu (or press ‘Command+V’ on your keyboard).
NOTE: The Copy and Paste functions are for transferring Color Correction, Framing and
Preset Effects to other clips. However, Video and Audio Playback Settings, cannot be
copied from one clip to another.
50
Page 55

GoPro Studio 2.5 User Manual
Adding Music or Sound Effects
To enhance your movie, GoPro Studio allows you to add additional audio files to the
Storyboard. The audio formats currently supported by GoPro Studio are:
• mp3
• wav
• aiff
• m4a
• caf.
To add an audio file, you must first import it into the Media Bin.
1. Click the ADD MEDIA button at the top of the Media Bin.
2. Browse to the location of your audio file.
3. Highlight the audio file and click Open.
After importing an audio file, its thumbnail (a microphone on a music staff) will appear in
the Media Bin. From here you can add it to your Storyboard by doing the following:
1. Scroll through the Media Bin to find the audio file that you’d like to add.
2. Click and drag the file from the Media Bin to the audio track that does not already
contain the GoPro Edit Template’s music soundtrack.
3. Repeat these steps to add additional audio files to the Storyboard
As you drag audio files to the Storyboard, GoPro Studio uses a green box to indicate the
spot where the file will be inserted. This makes it easier for you to line up the audio file
with other portions of your Storyboard. The box will grow or shrink in size depending on
the length of the video clips under which the audio file is being placed.
TIP: Dragging an audio file directly on top of an existing video clip will cause the audio file
to start at the same time as that video clip.
After placing an audio file, you can rearrange it by selecting it and dragging it to a new
location. You can shorten or lengthen the audio file by clicking and dragging its edges.
You can remove an audio file from the Storyboard by selecting it and pressing the ‘delete’
key on your keyboard or by dragging it off the top of the Storyboard.
51
Page 56

GoPro Studio 2.5 User Manual
When an audio file is selected on the Storyboard, the AUDIO control panel appears on
the right-hand side of GoPro Studio’s EDIT Room giving you access to the following
settings:
• LEVEL dB Use the slider or text entry box to select the volume level (in dB) at
which the clip will be played back.
• FADE IN When used, this setting causes the selected clip to FADE IN from
silence. Use the slider or text entry box to select the duration (in seconds) of the
FADE.
• FADE OUT When used, this setting causes the selected clip to FADE OUT to
silence. Use the slider or text entry box to select the duration (in seconds) of the
FADE.
To reset the LEVEL value, click on the word ‘LEVEL dB’.
TIP: To disable the existing audio from a Video Clip, click on the AUDIO MUTE button in
the clip’s thumbnail. This is a good way to keep it from interfering with your new audio
file.
52
Page 57

GoPro Studio 2.5 User Manual
OUT Point Marker
MARK OUT Button
Adding Titles
To further enhance your movie, GoPro Studio lets you add titles to your
Storyboard. When using a GoPro Edit Template, you can add titles to either of the
two Title Tracks. When adding a title to one of the Title Tracks, the title will be
superimposed over the video clip or clips that appear directly above it on the
Storyboard.
To add a title to your Storyboard, do the following:
1. Click the ADD TITLE button at the top of the Media Bin. A thumbnail
representing the title will appear in the Med ia Bi n with the word “T itle” on
it.
2. Now click and drag the title from the Media Bin to the Storyboard at the
desired location on one of the two Title Tracks.
As you drag a title to a Title Track on the Storyboard, GoPro Studio uses a green box to
indicate the spot where the title will be inserted. This makes it easier for you to line up the
title with other portions of your Storyboard. The box will grow or shrink in size depending
on the length of the video clips under which the audio file is being placed.
To adjust the duration of a title on a Title Track, do the following:
1. Select the title on the Storyboard. You’ll know it’s selected by the yellow box
surrounding it.
2. Click and drag the left or right edges of the yellow box surrounding it to lengthen
or shorten the title. You can also set a new out point for the title by clicking the
MARK OUT Button or moving the OUT Point marker on the playback slider to a
new end point.
To move a title earlier or later in time, simply click and drag it to a new location on the
Storyboard.
53
Page 58

GoPro Studio 2.5 User Manual
Title Text Box
Font Panel Window
To change the text in this title, do the following:
1. Select the title on the Storyboard.
2. Type the new text in the TEXT Box in the TITLE properies panel on the
right-hand side of GoPro Studio’s EDIT Room.
The TITLE PROPERTIES panel also lets you adjust the following attributes of
your title:
• OPACITY Changes the transparency of the text.
• BASELINE Adjusts the line spacing between lines when there are
multiple lines of text.
• KERNING Adjusts the spacing between letters.
• PARALLAX Adjusts the closeness or farness of the text in 3D space.
• FADE IN Changes the Fade In of the Title (in seconds).
• FADE OUT Changes the Fade Out of color, use the Title (in seconds).
Clicking on the Font Name in the Title properties panel will open the Font
panel window where you can select font attributes.
Last, but certainly not least, to place the title where you want it to appear in
horizontal and vertical space in the Player Window, do the following:
1. Select the title in the Storyboard.
2. Click and drag the title in the Player Window to move it to the desired
horizontal and vertical location.
TIP: Select a title in the MEDIA Bin and use the Font Panel Window to set a style
for it. Then every instance of that title that is dragged onto the Storyboard will
inherit that style.
54
Page 59

GoPro Studio 2.5 User Manual
Creating your Own Edit Using a Blank Template
Once you’ve mastered the art of using GoPro Edit Templates, you might feel the need to
get even more creative and create your own edit. In the Browse Edit Templates
window, select the “BLANK TEMPLATE” option and then click the CREATE button or just
click the CANCEL button. This will allow you to create your own edit from scratch starting
with a blank Storyboard rather than a GoPro Edit Template.
At this point, you should already see your converted GoPro CineForm files in the Media
Bin on the left-hand side of the work area. If you don’t s ee an y files in the Media Bin, refer
to the instructions in the “Previewing Clips in the Player Window
chapter.
” section in the previous
55
Page 60

GoPro Studio 2.5 User Manual
Mute Button
Clip Insert Indicator
Audio Tracks
Video Track
Title Tracks
Storyboard Time Indicator
Clips on Storyboard
Selected Clip
FX Icon
Adding Clips to the Storyboard
The Storyboard portion of GoPro Studio’s EDIT Room allo ws you to combine multiple
clips into one compelling video. The Storyboard is located directly underneath the Player
Window and Playback Controls and consists of 1 Video Track, 2 Audio Tracks and 2 Title
Tracks.
Clips can be added to the Storyboard by doing the following:
1. Scroll through the Media Bin to find the clip you wish to add.
2. Click and drag the clip’s thumbnail to the video track on the Storyboard.
3. Repeat these steps to add more clips to the Storyboard.
4. Press ‘Command+S’ to save your project.
Clips on the Storyboard are represented as thumbnails. A yellow border around the
thumbnail indicates the selected clip. The thumbnails also inclu de:
• Filename
• FX Icon (click and drag this off the top of the Storyboard to remove all Color
Correction, 3D Convergence and Framing adjustments)
• Audio MUTE Button (click on this to toggle audio on and off for the selected
clip)
As you drag video clips to the Storyboard, GoPro Studio uses a vertical green line to
indicate the spot where the clip will be inserted. This makes it easier for you to know if
your clips are being inserted between other clips or appended to the end of the
storyboard.
56
Page 61

GoPro Studio 2.5 User Manual
Decrease Speed
Play
Increase Speed
Loop
Step Backwards
Step Forward
Storyboard Time
Indicator
Clip Insert Indicator
Previous Clip Button
Next Clip Button
The Navigation Controls allow you to cycle forward and backwards through each edit
point on the Storyboard.
• Use the Previous Clip button to move to the previous edit point.
• Use the Next Clip button to move to the next edit point.
Viewing the Storyboard in the Player Window
The same Playback Controls used to playback clips in the Media Bin are used to control
playback of the Storyboard.
• Click on a clip in the Storyboard and then press the PLAY button in the Playback
Controls to see all the clips in the Storyboard played back in sequence.
• The Decrease Speed and Increase Speed buttons can be used to play the
video faster or slower.
• Use the Step Forward and Step Backwards buttons to step through the
Storyboard one frame at a time.
• Press the LOOP button to cause playback to start over from the beginning when
the Play-head reaches the end of the Storyboard. Press it again to turn looping
off.
You can also use the Storyboard Time Indicator (the vertic al yello w bar) to na viga te
through the Storyboard. To do this, just click on the Storyboard Time Indicator and drag it
left or right through the Storyboard.
Rearranging Clips
You can rearrange clips on the Storyboard by clicking and dragging them to new
locations. Once again, a vertical green line indicates the spot where the clip is being
moved to. You can delete a clip, by selecting it and pressing the ‘delete’ key on your
keyboard or by dragging it off the top of the Storyboard.
When you’re done rearranging your clips, press the PLAY button in the Playback
Controls to confirm that the clips are in the desired order. If so, press ‘Command+S’ to
save your project—it’s a good idea to save your project periodically.
57
Page 62

GoPro Studio 2.5 User Manual
Playback Slider
MARK IN Button
IN Point Marker
OUT Point Marker
MARK OUT Button
Trimming Clips
There will likely be situations where you don’t want to use the entire clip on your
Storyboard. Fortunately, GoPro Studio makes it easy for you to trim clips before or after
moving them to the Storyboard.
Trimming Clips in the Media Bin
To trim a clip prior to adding it to the Storyboard, do the following:
1. Select the desired clip in the Media Bin.
2. Move the Play-head on the Playback Slider to the desired start location of your
clip and press the MARK IN button to trim the beginning of the clip. The yellow IN
Point marker will move to this spot on the Playback Slider indicating the new start
location.
3. Now move the Play-head to the desired end location of your clip and press the
MARK OUT button to trim the end of the clip. The yellow OUT Point marker will
move to this spot on the Playback Slider indicating the new end location.
4. Drag the clip to the Storyboard.
5. Repeat these steps if you wish to add multiple portions of the same file to the
Storyboard.
TIP: Dragging the yellow IN and OUT POINT markers to new locations along the
Playback Slider will also trim the IN and OUT points. You might find this to be a quicker
method for trimming clips.
Trimming Clips on the Storyboard
To trim a clip after it has been added to the Storyboard, do the following:
1. Select the clip you wish to trim on the Storyboard. Move the Play-head on the
Playback Slider to the desired start location of your clip and press the MARK IN
button to trim the beginning of the clip.
2. Now move the Play-head to the desired end location of your clip and press the
MARK OUT button to trim the end of the clip.
TIP: Alternatively, you can drag the yellow IN and OUT POINT markers to new locations
to set new IN and OUT Points for the clip.
58
Page 63

GoPro Studio 2.5 User Manual
SPLIT Button
Add Transition Icon
Dissolve Icon
Splitting Clips
After dragging some clips to the Storyboard, you may find yourself in a situation where
you want to insert a clip in the middle of another clip. To do this, you can use the SPLIT
button.
1. Move the Play-head or the Storyboard Time Indicator to the location where you
would like to insert the new clip.
2. Press the SPLIT button to split the clip in two.
3. Drag the new clip between the two split clips.
TIP: If you position the Play-head at the first frame of a clip, clicking the SPLIT button will
split the clip in half.
Adding Transitions
When playing back your Storyboard, the default transition between two clips is a ‘CUT’.
You have the option, however of using a ‘DISSOLVE’ instead.
To change the transition from a ‘CUT ‘to a ‘DISSOLVE’, do the following:
1. On the Storyboard, click the ADD TRANSITION icon (+ sign) between the two
clips where you’d like to add the dissolve. Once added, the + sign will change to
a new icon, indicating that it is now a ‘DISSOLVE’.
2. Move the Storyboard Time Indicator to a couple of seconds behind the transition
point and press the PLAY button to see that the new transition has been applied.
To change the duration of a ‘DISSOLVE’, click on the Dissolve Icon to select it. Then
move the Play-head to the desired out po int on the Pla ybac k Slider and press the MARK
OUT button or move the OUT Point Marker to a new position on the Playback Slider.
To remove a ‘DISSOLVE’, click and drag the Dissolve Icon off the top of the Storyboard
or select it and press the ‘DELETE’ key on your keyboard.
NOTE: Transitions use frames from the end of the first clip and the beginning of the
following clip. The number of frames used depends on the duration of the transition. The
number of frames in the transition cannot exceed the number of frames in the shortest
clip.
59
Page 64

GoPro Studio 2.5 User Manual
IN Point Marker
OUT Point Marker
Additional Enhancements
You can further enhance the clips on your Storyboard by using the features mentioned in
the “Using GoPro Edit Templates
and audio playback controls, color-correction and framing controls, and the ability to add
color and effect presets, titles and audio files. For the most part, you can refer to the
specific instructions mentioned previously but there are a couple of things to note in
regards to adding titles and audio files.
Adding Music
When using a GoPro Edit Template, one of the Audio Tracks is used up by the template’s
music soundtrack so you only have one Audio Track available for additional audio files.
When using a Blank Template, however, you have the ability to add audio files to either
of the two Audio Tracks because there is no existing music soundtrack.
Adding Titles
In addition to being able to add titles to one of the two available Title Tracks, when using
a Blank Template you can add titles directly to the Video Track as well.
As you drag a title to the Video Track. GoPro Studio uses a vertical green line to indicate
the spot where the title will be inserted.
To adjust the duration of a title on the Video Track, select the title and drag the yellow
OUT POINT markers on the Playback slider to lengthen or shorten the title.
To move a title earlier or later in time, simply click and drag it to a new location on the
Storyboard.
” section of this user manual. These include the video
60
Page 65

GoPro Studio 2.5 User Manual
Step 3: EXPORT
When you’re done editing your Storyboard and are happy with how it looks, you’ll want to
share it with the world. With GoPro Studio you can export your completed Storyboard
(combining all the video clips, titles and audio tracks into a single file) using one of the
standard export options des igne d for spec if ic target dis tr ibuti on out lets, or you can cr eate
your own custom export settings. You can also export single frames of your video clips or
Storyboard.
Exporting a Movie
To access the Export Window, click on a clip on the storyboard to make sure the
Storyboard is selected rather than a clip in the Media Bin. Then do one of the following:
• Click on the EXPORT button at the top of GoPro Studio’s work area
• Select the Export .mov… option from the SHARE menu
• Or click ‘Command+E’ on your keyboard
In the Export Window you can choose from any of the following export options:
• YouTube (creates an average quality h.264 mov file with a bit rate of 8Mbps)
• Vimeo (creates an above average quality h.264 mov f il e with a bit rate of
15Mbps)
• Mobile Device (creates a low quality h.264 mov file with a bit rate of 2Mbps)
• HD 720p (creates an average quality h.264 mov file wi th a 720p frame size and a
bit rate of 8Mbps)
• HD 1080p (creates an above average quality h.264 mov file with a 1080p frame
size and a bit rate of 15Mbps)
• Archive/Edit (creates a GoPro CineForm mov file using user-selectable quality
level)
• Custom (lets the user choose the format, frame size, frame rate and quality
settings)
When clicking on the “Custom” option, the previously selected preset’s settings become
the starting point for customization.
61
Page 66

GoPro Studio 2.5 User Manual
NOTE: The default frame rate for an export is determined by the frame rate used by the
majority of the clips on the Storyboard. Exporting to frame rates above 30 fps is not
recommended if you wish to retain compatibility with modern electronic devices and
streaming services..
If FLUX processing has been applied to any clip on the Storyboard, the EXPORT Window
will show an option to disable it. Simply uncheck the ‘Enable checkbox to disable Flux on
the current export. You might want to do this to speed up rendering times as Flux
enabled exports require a significant amount of GoPro Studio processing, which slows
down the export process. However, keeping it enabled will result in the smooth looking
slow and fast motion effects.
Select the export preset that best meets the needs for your project and distribution outlets
and then do the following:
1. Browse to the desired folder location and type a filename in the ‘File name’ box.
2. Click SAVE to start the export process.
3. A progress bar will appear giving you an idea of how long the export will take.
NOTE: Exporting may take a few minutes or even longer depending on the length of your
Storyboard and the speed of your computer’s processor.
62
Page 67

GoPro Studio 2.5 User Manual
Exporting Still Images
In addition to being able to export your Storyboard, GoPro Studio also lets you export a
single frame (in JPG format) from a clip or the Storyboard. This enables you to share
images from your video clips as though they were still photos. Exporting still images out
of GoPro Studio is done using the Export Image W indow, whic h can be accessed by
selecting the ‘Export Still…’ command in the SHARE menu.
In the Export Still window you can choose from any of the following export options:
• Small (creates a file with an image size of 853 x 480)
• Medium (creates a file with an image size of 1280 x 720)
• Large (creates a file with an image size of 1920 x 1080)
• Native (creates a file with the same image size as the source clip or Storyboard)
To export a still image, do the following:
1. Select a clip in the Media Bin or the Storyboard.
2. Click and drag the Play-head on the Playback Sider to the desired frame you’d
like to export.
3. Select ‘Export Still…’ in the SHARE menu.
4. In the Export Still window, select the desired export size.
5. Browse to the desired location.
6. Then click ‘Export’ to export the file.
63
Page 68

GoPro Studio 2.5 User Manual
Updating HERO 2 Camera Firmware
GoPro Studio offers a way for you to update the product software in your HD HERO2
camera, Wi-Fi BacPac
Device Window, which you can access by selecting ‘Device Window’ from the HELP
menu.
IMPORTANT NOTE: This process is only for updating the HD HERO2, Wi-Fi BacPac
and Wi-Fi Remote. To update an original HD HERO, click here
HERO3+, click here. HERO4 cameras are updated automatically when plugged into a
computer that has GoPro Studio installed.
Getting Started
• Make sure your HD HERO2, Wi-Fi BacPac and Wi-Fi Remote are fully charged
before beginning update process.
• Make sure your HD HERO2 has an SD card inserted (format your SD card using
your HD HERO2 camera, and take at least one test photo or video before
initializing the update process).
• Remove any accessories (such as the LCD BacPac™ or Battery BacPac™) from
your HD HERO2 camera.
• Make sure your GoPro Studio software is up-to-date. For updates, go to
http://cineform.com/downloads.aspx
• Make sure your computer has an active connection to the internet.
TM
and Wi-Fi Remote. You can perform these tasks from within the
. To update a HERO3 or
Updating your HD HERO2
1. Without any BacPac accessories connected, power ON your HD HERO2 camera
and connect it to your computer via USB.
2. Launch the GoPro Studio application. An Update Available notice will appear.
3. Press the SHOW DETAILS button, and this wil l lau nch the Devic e Window.
4. Select your HD HERO2 camera from the list, and click UPDATE.
5. Wait for the Update process to complete (camera may beep and lights will flash),
and when process completes you may disconnect and power OFF your camera.
64
Page 69

GoPro Studio 2.5 User Manual
Registering Your Wi-Fi BacPac™
1. Power ON your HD HERO2 camera and connect your Wi-Fi BacPac (with power
ON) to the back of your camera. Also power ON your Wi-Fi Remote.
2. With your Wi-Fi BacPac attached to your HD HERO2 camera, connect your Wi-Fi
BacPac to your computer via USB (make sure to connect through the USB port
on Wi-Fi BacPac, not the USB port on the HD HERO2 camera).
3. If another Update Available notice appears, you should click the SHOW
DETAILS button again to get back to the Device Window.
4. Select your Wi-Fi BacPac from the list in Device Window in GoPro CineForm
Studio, and click the REGISTER button.
5. Fill out and submit the Product Registration web form you are directed to.
Updating Your Wi-Fi BacPac
1. Back in the Device Window, the list should refresh and show an Update Available
for your Wi-Fi BacPac.
2. Select your Wi-Fi BacPac from the list and click the UPDATE button if an update
is available (a press of the Refresh button may be required for Device Window to
update and confirm Product Registration is complete).
3. Wait for update pr oces s to com plete. Up-to-date version will be reflected when
Device Window refreshes, and your Wi-Fi Remote should now show Update
Available.
Updating Your Wi-Fi Remote
1. After your Wi-Fi BacPac has been updated, your Wi-Fi Remote will show
Connected (may require a press of the Refresh button at this point while devices
reconnect after Wi-Fi BacPac update is completed).
2. Select your Wi-Fi Remote from the list, and click UPDATE if one is available.
3. Wait for update process to complete, which may take a few minutes. DO NOT
unplug your Wi-Fi BacPac or power OFF your HD HERO2 camera during this
process! (NOTE: If your Wi-Fi Remote is plugged into power during this update
process, you may have to turn the device OFF for the update process to
complete).
4. Up-to-date version will be reflected when Device Window refreshes.
65
Page 70

GoPro Studio 2.5 User Manual
Configuring Your Wi-Fi BacPac™ (optional)
1. Select your Wi-Fi BacPac from the list, and press CONFIGURE.
2. Change the name and password (password must be at least 8 ASCII characters).
3. Click OK.
NOTE: We highly encourage you to change your password, as your Wi-Fi BacPac is set
to the factory default password ‘goprohero’.
Troubleshooting Tips
We recommend unplugging any peripheral devices that may be plugged into your
computer (including USB hubs and devices, external displays or Thunderbolt devices)
before updating your GoPro devices.
If your GoPro devices are not recognized in the Device Window, try the following:
1. Press the REFRESH in the Device Window.
2. Unplug the device(s) and power cycle, then reconnect device(s) with power ON.
3. Try connecting your device(s) to a different USB port on your computer.
4. Try re-launching the GoPro Studio application, and/or re-launching the Device
Window.
Contact GoPro Support for additional information: http://gopro.com/support
66
Page 71

GoPro Studio 2.5 User Manual
Advanced Features
Working with 3D Video Files
With GoPro Studio, you can convert files recorded using a GoPro Dual HERO System
into 3D GoPro CineForm files (also called Stereo GoPro CineForm files). As with
converting 2D files, there is some preparation required before importing these files into
GoPro Studio.
About the File Structure
The GoPro Dual HERO System records video files on two separate SD cards—one from
the camera representing the LEFT eye, and one from the camera representing the
RIGHT eye. The files from the LEFT camera are saved in a folder called “100S3D_L”
while the files from the RIGHT camera are saved in a folder called “100M3D_R”. In order
for GoPro Studio to convert the files properly, you’ll need to keep the folders separate,
just like they are on the SD cards.
Importing 3D Video Files
The process for converting files captured using a GoPro Dual HERO System into 3D
GoPro CineForm files is as follows:
1. Copy the “100M3D_R” and the “100S3D_L” folders from the DCIM folder on the
SD card to a location on your computer. It is very important to place both these
folders in the same location. For example, create a new folder on your computer
that represets the event; for example, “bike ride” and then copy both the LEFT
and RIGHT eye camera folders into that same folder. In the top folder (“bike
ride”) you should see both “100M3D_R” and 100S3D_L” listed as separate
folders.
2. Click the IMPORT NEW FILES button and browse to the “100M3D_R” folder that
contains the files you want to import.
3. Select the top folder and click Open. If you used the above method for
maintaining the correct file structure, GoPro Studio will automatically locate the
corresponding files from the “100S3D_R” and “100S3D_L” folders and import
these files as 3D.
4. Press ‘Command+S’ on your keyboard to save the project.
67
Page 72

GoPro Studio 2.5 User Manual
Manually Importing
There may occasionally be times in which you will need to manually import a pair of 3D
files. This can be the case if your files have been renamed or moved to folders that are
not using the default folder names recorded in-camera. Fortunately, GoPro Studio lets
you manually import and pair these files using the Manual Import option.
1. Secondary-click on a blank area of the Import Bin and select “Manual Import…” from
the context menu that is displayed. This opens the Manual Import Window.
2. Use the BROWSE buttons to find the left and right source files.
3. The SKIP BACK and SKIP AHEAD buttons can be used to step through the clips
frame-by-frame. Use these to compare your left and right images to make sure that
they are synced with each other.
4. Click the OK button to pair the two clips.
After importing your 3D files, you’ll see the word “3D” underneath their thumbnails in the
Import Bin. This indicates that the files were successfully imported as 3D video files. You
can now trim them and choose advanced conversion settings in the same way that you
can with 2D files.
68
Page 73

GoPro Studio 2.5 User Manual
Enable Checkbox
Adjusting 3D Convergence
When a 3D clip is selected on the Storyboard, the 3D CONVERGENCE controls appear
in the right-hand column of GoPro Studio’s EDIT Room. These controls allow you to
change the feeling of depth and distance in your 3D video clips.
Select a 3D clip on the Storyboard and then click on the Disclosure Triangle to the left
of the words “3D CONVERGENCE” to open the 3D CONVERGENCE controls panel
giving you access to the following settings:
• HORIZONTAL Use the slider or step controls to modify the relative horizontal
positioning between the left and right camera views, influencing how far in or out
of the screen objects appear.
• VERTICAL Use the slider or step controls to modify the relative vertical
positioning between the left and right camera views, correcting any vertical offset
for an easier-to-view 3D image.
• SKEW Use the slider or step controls to modify the relative skew or rotational
values between the left and right camera views, correcting any rotational offset
between the left and right cameras for an easier-to-view 3D image.
• KEYFRAMES For advanced users, the 3D convergence controls can be
keyframed. Use the + button to add a 3D convergence keyframe to the clip. This
locks in the 3D convergence settings for the current frame on the Storyboard.
You can then move the Play-head to another location on the Playback Slider to
add another keyframe where you can have different 3D convergence settings
• SWAP EYES Use this checkbox to swap the left and right camera views in the
selected clip, correcting for instances when the left and right camera files got
switched during recording.
Click on the Disclosure Triangle to close the 3D CONVERGENCE controls panel.
TIP: Clicking on the Enable Checkbox will toggle the 3D CONVERGENCE CONTROLS
adjustments ON or OFF for the selected clip on your Storyboard. You can use this to
quickly switch back and forth between seeing the clips with the 3D convergence
adjustments applied and the original images.
Exporting
69
Page 74

GoPro Studio 2.5 User Manual
When exporting a 3D file or Storyboard, the EXPORT 3D As pop-up menu appears in the
EXPORT Window, giving a choice of using the following 3D formats for your exported file:
• Left Eye (2D)
• Side-by-Side (Most 3D TVs)
• Over-Under (Some 3D TVs)
• Anaglyph (3D on 2D display)
Select the option that best meets the needs for your project and distribution outlets and
then:
1. Browse to the desired folder location and type a filename in the ‘File name’ box.
2. Then click EXPORT to start the export.
NOTE: Exporting may take a few minutes or even longer depending on the length of your
Storyboard and the speed of your computer’s processor.
70
Page 75

GoPro Studio 2.5 User Manual
Add Keyframe
Working with Keyframes
In GoPro Studio’s EDIT Room, the KEYFRAMES controls can be used to dynamically
change how a clip will look when played back in the Media Bin or Storyboard.
Keyframes are available in each of the following effect control panels:
• 3D Convergence
• White Balance
• Image
• Framing
Let’s look at a couple of different ways that you can use the KEYRAMES controls to
affect the look of your clips.
EXAMPLE #1
Let’s say that you want your clip to gradually change from color to black and white.
Here’s how you would accomplish this effect using KEYFRAMES in the IMAGE controls
panel:
1. Select a clip in either the Media Bin or the Storyboard and move the playhead to
the beginning of the clip.
2. Press the ‘+’ button next to the KEYFRAMES. Doing this enables the keyframe
feature and adds a new keyframe at the beginning of the clip.
3. Move the Play-head to a new location on the Playback Slider and the “+” button
again to add a new keyframe.
4. Now drag the SATURATION slider a ll the wa y to the lef t to change its value to
‘0’.
5. Move the Storyboard Time Indicator to the beginning of the clip and press the
PLAY button in the Playback Controls to see your clip gradually change from
color to black and white.
71
Page 76

GoPro Studio 2.5 User Manual
Play
Step Forward
EXAMPLE #2
Now let’s say that you want the first part of your clip to be in color and then immediately
change from color to black and white from one frame to the next. Here’s how to
accomplish this effect:
1. Select a clip in either the Media Bin or the Storyboard and in the IMAGE controls
panel, use the slider or step controls to set the SATURATION value to the default
of ‘1’. You can also click on the word ‘SATURATION’ and that will set it to the
default value.
2. Move the Play-head to a new location on the Playback Slider and press the ‘+’
button. Unlike Example #1, this time leave the SATURATION value at ‘1’.
3. Then use the STEP FORWARD button in the Playback Controls to move forward
one frame on the Playback Slider and press the ‘+’ button again.
4. Now drag the SATURATION slider all the way to the left to change its value to
‘0’. This will apply the new SATURATION value to the remainder of the clip.
5. Press the PLAY button to see the clip playback in color at first and then instantly
change to black & white when it reaches the point where you’ve changed the
SATURATION value.
In both of these examples, you can continue to add more keyframes to further affect the
look of your clips. Use the step controls to cycle through existing keyfames and press the
‘-‘ button to remove an existing keyframe.
NOTE: The above examples demonstrated the use of keyframes in the Image Controls
Panel. The same techniques can be used in the 3D Convergence, White Balance and
Framing Controls panels as well.
72
Page 77

GoPro Studio 2.5 User Manual
Global Playback Settings in the EDIT Room
While in the EDIT Room, please take notice of the GL OBAL PLAYBACK SET TIN GS
panel found in the upper right-hand corner of GoPro Studio’s EDIT Room.
It’s important to recognize that the Global Playback Settings are not the same as the clipbased Video and Audio Playback Controls or the clip-based Color Correction and
Framing Controls which appear just below the Global Playback Settings panel. They are
different in that the Global Playback Settings affect how ALL GoPro CineForm files are
played back (or decoded) while the clip-based controls only affect individual clips.
We will now look at each of the options in the Global Playback Settings.
PLAYBACK
The PLAYBACK option determines the decode resolution used to playback GoPro
CineForm files within the GoPro Studio application and offers the following choices:
• AUTO
• BEST (FULL-RES)
• BETTER (HALF-RES)
• GOOD (QUARTER-RES)
Choose the option that provides the best playback performance for your computer. If the
files are playing back choppy in the Preview W indow, change to one of the lower settin gs
or use the “AUTO” setting to allow GoPro Studio to choose the best option for your
computer.
NOTE: When you export your storyboard (explained later) you will be able to choose
between several export options, none of which are affected by the PLAYBACK setting
chosen here. This option ONLY affects the ‘playback’ of files within GoPro Studio’s EDIT
Room.
73
Page 78

GoPro Studio 2.5 User Manual
VIEW
The VIEW option determines the video display type that GoPro Studio’s Player Window
will use to playback 3D GoPro CineForm files and offers the following choices:
• LEFT EYE displays only the left eye of a 3D clip or the only eye for 2D clips
• RIGHT EYE displays only the right eye of your 3D clip or the only eye for 2D clips
• ANAGLYPH: RED/CYAN displays left and right eye tinted for viewing with RED
& CYAN 3D glasses
• ANAGLYPH: RED/CYAN/BW displays left and right eye in black & white and
tinted for viewing with RED/CYAN 3D glasses
• ANAGLYPH: RED/CYAN/OPTIMIZED displays left and right eye tinted for
optimal viewing with RED/CYAN 3D glasses
• ANAGLYPH: AMBER/BLUE displays left and right eye tinted for viewing with
AMBER/BLUE 3D glasses
• ANAGLYPH: AMBER/BLUE/BW displays left and right eye in black and white
and tinted for viewing with AMBER/BLU E 3D glasses
• ANAGLYPH: GREEN/MAGENTA displays left and right eye tinted for viewing
with GREEN/MAGENTA 3D glasses
• ANAGLYPH: GREEN/MAGENTA/BW displays both left and right eye in black
and white and tinted for viewing with GREEN/MAGENTA 3D glasses
• LINE INTERLEAVED displays left and right eye by alternating between every
other horizontal line—used for certain polari zed, pass ive 3D disp lays and
polarized glasses
• ONION SKIN displays left and right eye superimposed together in normal color—
useful to help align images during convergence adjustments
• DIFFERENCE displays the differences between the left eye and the right eye—
useful to help align images during convergence adjustments
• SIDE-BY-SIDE displays left and right eye next to each other, scaled horizontally
into one frame—used by common 3D monitors and television sets
• OVER-UNDER displays left and right eye stacked on top of each other and
scaled vertically into one frame—used by common 3D monitors and televisions
• FREE-VIEW displays left and right eye side by side in normal aspect ratio
NOTE: When working with 2D clips, always use the ‘LEFT EYE’ option to ensure proper
playback.
74
Page 79

GoPro Studio 2.5 User Manual
EXTERNAL DISPLAY
The EXTERNAL DISPLAY option determines the video display type for a secondary
monitor (if you have one connected) and offers the following choices:
• NONE (secondary monitor is not used)
• LEFT EYE displays only the left eye of a 3D clip or the only eye for 2D clips
• RIGHT EYE displays only the right eye of your 3D clip or the only eye for 2D clips
• ANAGLYPH: RED/CYAN displays left and right eye tinted for viewing with RED
& CYAN 3D glasses
• ANAGLYPH: RED/CYAN/BW displays left and right eye in black & white and
tinted for viewing with RED/CYAN 3D glasses
• ANAGLYPH: RED/CYAN/OPTIMIZED displays left and right eye tinted for
optimal viewing with RED/CYAN 3D glasses
• ANAGLYPH: AMBER/BLUE displays left and right eye tinted for viewing with
AMBER/BLUE 3D glasses
• ANAGLYPH: AMBER/BLUE/BW displays left and right eye in black and white
and tinted for viewing with AMBER/BLUE 3D glasses
• ANAGLYPH: GREEN/MAGENTA displays left and right eye tinted for viewing
with GREEN/MAGENTA 3D glasses
• ANAGLYPH: GREEN/MAGENTA/BW displays both left and right eye in black
and white and tinted for viewing with GREEN/MAGENTA 3D glasses
• LINE INTERLEAVED displays left and right eye by alternating between every
other horizontal line—used for certain polari zed, pass ive 3D disp lays and
polarized glasses
• SIDE-BY-SIDE (displays side-by-side 3D mode on secondary display—used by
3D monitors that support this mode)
• OVER-UNDER displays left and right eye stacked on top of each other and
scaled vertically into one frame—used by common 3D monitors and televisions
NOTE: When working with 2D clips, always use the ‘LEFT EYE’ option to playback the
contents of the Player Window on a secondary monitor. If you’d rather not use a
secondary monitor at all, use the ‘NONE’ option.
75
Page 80

GoPro Studio 2.5 User Manual
Before (no adjustments)
After (with 1970s Preset)
SPLIT
The SPLIT option allows you to easily see the effects of your Active Metadata
adjustments (made using the clip-based Color Correction, Framing Controls and Effect
Presets) by splitting the image into ‘before’ (uncorrected) and ‘after’ (corrected) sides.
The left side of the image is the ‘before’ view while the right side of the image is the ‘after
view’. The slider lets you choose where that split occurs in the image frame.
NOTE: For normal use, you’ll want to keep the SPLIT POINT slider all the way to the left.
This will ensure that you’ll be able to see all the Effect Presets, Color Correction and
Framing adjustments that have been applied to your clips. Only use the slider if you want
to compare your adjustments to the original file.
TM
76
Page 81

GoPro Studio 2.5 User Manual
Status Viewer
Active MetadataTM applied in iMovie
The GoPro CineForm Codec Status Viewer
The “GoPro CineForm Status Viewer” is an optional application that can be loaded into
the Mac menu bar. To run this application, browse to your Applications/GoPro/Tools
folder and double click on the “StereoModeStatus” application. Once in the menu bar it
appears an icon that represents the current playback view mode.
When playing GoPro CineForm files in applications other than GoPro Studio, you can use
the Status Viewer to determine various decode settings. To be more specific, the Status
Viewer allows you to do the following:
• Enable or Disable Active Metad ata adjus tments for desktop playback
• Choose the desired 3D Display Type for desktop playback
• Modify other desktop playback decode settings
To view these decode settings in action we will need to load a GoPro CineForm file in
GoPro Studio’s EDIT Room while simultaneously viewing that same file in Windows
Media Player (or other application that supports playback of standard AVI or MOV files).
1. Select a GoPro CineForm file in the Media Bin in GoPro Studio’s EDIT Room.
2. Now import that same file into iMovie and in the iMovie import dialog be sure to
uncheck the ‘Optimize Media’ option and select the ‘Move files’ radio button
option. The file played in iMovie should look the same as the file when played in
GoPro Studio’s EDIT Room.
3. Switch back to GoPro Studio. With the file still selected in the Media Bin, apply
an effect PRESET to the clip (such as the 1970s preset). The file should now
play in GoPro Studio’s Player Window with the effect preset applied. Note: if the
file was ‘moved’ in iMovie, you will need to reim por t it into Stud io from the new
location where iMovie moved it to. This is usually an iMovie Events folder.
4. Once again, switch over to iMovie where you should now see the file playing with
the same effect preset applied.
Active Metadata adjustments applied to GoPro CineForm files in the Media Bin of GoPro
Studio’s EDIT Room affect how the files are played back in other applications as well.
This is one of the unique features of the GoPro CineForm codec as it allows you to
customize your files without having to render or export new versions of them.
77
Page 82

GoPro Studio 2.5 User Manual
Active Metadata
With the Status Viewer Icon, you can toggle the Active Metadata adjustments on or off so
that your files can easily be played in other applications with or without the adjustments
that you’ve applied in the GoPro Studio’s EDIT Room. Using the Active Metadata
menu in the Status Viewer, you can enable or disable the following Active Metadata
settings:
• White Balance
• Primaries (image controls)
• Looks (3D-LUTs)
• Orientation (3D controls)
• Framing
• Image Flips
• Overlays
• Tools
To turn off the adjustments for a particular Active Metadata control, simply uncheck it
from this sub-menu. To re-enable an adjustment, simply re-check it.
NOTE: The Tools and Overlay Active Metadata controls only apply to the Premium and
Professional versions of GoPro Studio (sold separately). If you are using the free version,
its best to keep these unchecked.
TM
sub-
78
Page 83

GoPro Studio 2.5 User Manual
3D Display Type
The 3D Display Type sub-menu in the GoPro CineForm Status Viewer determines the
video display type that 3
CineForm files similar to the way the VIEW option does this in GoPro Studio’s EDIT
Room.
• LEFT EYE displays only the left eye of a 3D clip or the only eye for 2D clips
• RIGHT EYE displays only the right eye of your 3D clip or the only eye for 2D clips
• SIDE-BY-SIDE displays left and right eye next to each other and scaled
horizontally into one frame—used by common 3D monitors and televisions
• STACKED displays left and right eye stacked on top of each other and scaled
vertically into one frame—used by common 3D monitors and televisions
• FIELDS displays left and right eye by alternating between every other horizontal
line—used for certain polarized, passive 3D displays and polarized glasses
• ONION SKIN displays left and right eye superimposed together in normal color—
useful to help align images during convergence adjustments
• DIFFERENCE displays the differences between the left eye and the right eye—
useful to help align images during convergence adjustments
• FREE-VIEW displays left and right eye side by side in normal aspect ratio
• ANAGLYPH: RED/CYAN displays left and right eye tinted for viewing wit h
RED/CYAN 3D glasses
• ANAGLYPH: RED/CYAN/BW displays left and right eye in black and white and
tinted for viewing with RED/CYAN 3D glasses
• ANAGLYPH: RED/CYAN/OPTIMIZED displays left and right eye tinted for
optimal viewing with RED/CYAN 3D glasses
• ANAGLYPH: AMBER/BLUE displays left and right eye tinted for viewing with
AMBER/BLUE 3D glasses
• ANAGLYPH: AMBER/BLUE/BW displays left and right eye in black and white
and tinted for viewin g wi th AMBER/BLUE 3D glasses
• ANAGLYPH: GREEN/MAGENTA displays left and right eye tinted for viewing
with GREEN/MAGENTA 3D glasses
• ANAGLYPH: GREEN/MAGENTA/BW displays both left and right eye in black
and white and tinted for viewing with GREEN/MAGENTA 3D glasses
NOTE: When working with 2D clips, always use the ‘2D option to ensure proper
playback.
rd
party video applications will use to playback 3D GoPro
79
Page 84

GoPro Studio 2.5 User Manual
Moving GoPro CineForm Files to Other Computers
As detailed in previous chapters, the 3D Color and Framing adjustments applied to
converted GoPro CineForm files in GoPro Studio’s EDIT Room are accomplished using
the GoPro CineForm Codec’s Active Metadata
saved in a database file on your computer’s hard drive.
The default location for the database files is “C:\Users\Public\CineForm\LUTs” on
Windows computers and “Macintosh HD/Library/Application Support/CineForm/LUTs/” on
Mac computers.
When your computer plays back a GoPro CineForm file, it cross-references the database
and plays back the file with the settings it finds there. If you were to move these files to
another computer, they will not pla y with the adjust ments applied…unless you copied the
database files as well.
As an alternative to copying the database files, you could share a single database
location across multiple computers. You can change the database location to a shared
network drive or a Dropbox location. With a shared database location, your GoPro
CineForm files will playback with the same Active Metadata
system (Windows or Mac) that is pointing to the shared database.
To change the database on a Mac system:
1. Launch the Mac System Preferences
2. Click on the GoPro icon in the ‘Other’ section of the System Preferences.
3. In the Processes panel, type in the desired location for the database in the LUTs
Path: text entry box (shared network location or Dropbox folder).
4. Close the system preferences.
5. Repeat these steps on any other Mac computers on which you wish to have the
database shared.
Now any time you make an adjustment to a GoPro CineForm file in Studio’s EDIT Room,
those adjustments will be applied to the clip on your other computers as well.
TM
technology. This Active Metadata is
TM
adjustments on every
80
Page 85

GoPro Studio 2.5 User Manual
To change the database location on a Windows system:
1. Download and unzip this file:
http://software.gopro.com/other/MoveLUTsAndDatabase.zip
2. Then double-click on the “MoveLUTsAndDatabase.vbs” file to launch the Move LUT
directory script.
3. Type in the desired location for the database (shared network drive or Dropbox
folder) and click OK.
4. Repeat these steps on any other Windows computers on which you wish to have the
database shared.
NOTE: This technique is only used for GoPro CineForm files whose adjustments have
been applied directly in the Media Bin in GoPro Studio’s EDIT Room. Adjustments made
to instances of clips loaded onto the Storyboard use a separate internal database and
cannot be moved from one computer to anot her.
81
Page 86

GoPro Studio 2.5 User Manual
USING GOPRO STUDI O W ITH 3
RD
PARTY APPLICATIONS
As mentioned in the chapter “Understanding the Workflow
a stand-alone application or in tandem with other 3rd party applications. In this chapter we
will discuss the latter workflow using GoPro Studio with other applications. The overall
process for this workflow is as follows:
1. Convert your source files into GoPro CineForm files.
2. Apply Image Development and other Acti ve Met ada ta adj us tments to the GoPro
CineForm files using GoPro Studio’s EDIT Room.
3. Take those same GoPro CineForm files (without exporting) into your other
applications for editing.
4. Optionally switch back and forth between your other application and GoPro
Studio to make further adjustments and enhancements to the files.
5. Export a high-quality master file in the other application using the GoPro
CineForm codec.
NOTE: Some understanding of your 3rd party applications are required for a portion of
this workflow. Please refer to the documentation included with those applications wher e
necessary.
”, GoPro Studio can be used as
Importing GoPro Ci neForm Files
The process of importing and converting source files in this workflow is the same as if
you were using GoPro Studio as a stand-alone application, so rather than repeat
information that was already discussed, we’ll simply refer you to the chapter “
IMPORT Room”.
Using the
82
Page 87

GoPro Studio 2.5 User Manual
Working with Files in the Media Bin
Once you’ve converted your source files into GoPro CineForm files, you’re ready to start
working with them in GoPro Studio’s EDIT Room. If you’re not already there, launch
GoPro Studio and go to the EDIT Room.
NOTE: If the Edit Template Selection Window appears, select the “BLANK TEMPLATE”
option and then click the CREATE button.
If you don’t see your converted GoPro CineForm files in the Media Bin, do the following:
1. Click the ADD MEDIA button and browse to the location of your converted GoPro
CineForm files.
2. Highlight the files you wish to import and click Open.
3. After the files have loaded into the Media Bin, press ‘Command+S’ on your
keyboard to save your project.
Clips loaded into the Media Bin are represented as thumbnails, similar to how they look in
the Import Bin in the IMPORT Room. Along with each thumbnail, the following clip details
are indicated:
• Filename
• Image Size
• Frame rate or Frame Count
• 2D or 3D
• Video or Time lapse Icon
• Duration
You can select different files in the Media Bin by simply clicking on them or by using the
up and down arrow keys on your keyboard to cycle through them.
To remove a clip from the Media Bin, select the clip you wish to remove and click on the
REMOVE CLIP button at the bottom of the Media Bin or press the ‘delete’ key on your
keyboard.
To remove all clips from the Media Bin, click the CL E AR AL L button at the bottom of the
Media Bin or press ‘Command+A’ on your keyboard to select all the clips and then press
the ‘delete’ key.
83
Page 88

GoPro Studio 2.5 User Manual
Step Forward
Decrease Speed
Play
Increase Speed
Step Backwards
Loop
Play-head
Playback Slider
Previewing Clips in the Player Window
Click on a file in the Media Bin to select it. That loads it into the Player Window. Now you
can use the Playback Controls to playback the clip and view it in the Player Window.
• Press the PLAY button in the Playback Controls (or the SPACEBAR on your
keyboard) to see the clip playback in the Player Window.
• The Decrease Speed and Increase Speed buttons can be used to play the
video faster or slower.
• Use the Step Forward and Step Backwards buttons to step through the clip one
frame at a time.
• Press the LOOP button to cause playback to start over from the beginning when
the Play-head reaches the end of the clip.
You can also use the Play-head on the Playback Slider to navigate through the clip. To
do this, just click on the diamond-shaped Play-head and drag left or right through the
Playback Slider.
Diverging from the Previous Workflow
Before we go any further, it should be pointed out that this is where the “Using GoPro
Studio with 3
Stand-Alone Application workflow”.
Rather than applying color correction, framing and other adjustments to your clips on the
Storyboard, you’ll be applying the adjustments to the clips while they are still in the Media
Bin. In fact, the Storyboard is not used at all in this wor kf low.
Now that we have cleared that up, let’s add Active Metadata
in the Media Bin.
rd
Party Application” workflow diverges from the “Using GoPro Studio as a
TM
adjustments to your clips
84
Page 89

Enable Checkbox
Eye Dropper
GoPro Studio 2.5 User Manual
Color Correcting Clips
The underlying Active Metadata architecture used in the GoPro CineForm codec enables
you to do real-time non-destructive image development adjustments to your clips. These
adjustments affect the overall color and tone of your clips. The controls to apply these
adjustments are located in the WHITE BALANCE and IMAGE CONTROLS panels on the
right-hand side of GoPro Studio’s EDIT Room.
WHITE BALANCE
Select a clip in the Media Bin and then click on the Disclosure Triangle to the left of the
words “WHITE BALANCE” to open the WHITE BALANCE controls panel giving you
access to the following settings:
• TEMPERATURE Use the slider or step controls to adjust the overall color
temperature of the image.
• TINT Use the slider or step controls to adjust the overall tint of the image.
• KEYFRAMES Use the + button to add a white balance keyframe to the clip. This locks in
the white balance settings for the current frame in the clip.
For a clip with a white element in the scene, click on the Eye Dropper and then click on
the white element of your image in the Playback Window to have GoPro Studio
automatically adjust the white balance based on that element.
Click on an individual control to reset only its value.
Click on the Disclosure Triangle to close the WHITE BALANCE panel.
TIP: Clicking on the Enable Checkbox will toggle the WHITE BALANCE adjustments ON
or OFF for all clips in the Media Bin. You can use this to quickly switch back and forth
between seeing the clips with the adjustments applied and the original images.
85
Page 90

GoPro Studio 2.5 User Manual
Enable Checkbox
IMAGE CONTROLS
Select a clip in the Media Bin and then click on the Disclosure Triangle to the left of the
word “IMAGE” to open the IMAGE controls panel giving you access to the following
settings:
• EXPOSURE Use the slider or step controls to adjust the brightness and darkness
of the image.
• CONTRAST Use the slider or step controls to adjust the relative definition
between bright and dark areas of the image.
• SATURATION Use the slider or step controls to adjust the vibrancy of the colors
in the image.
• SHARPNES Use the slider or step controls to adjust the softness and sharpness
of the image.
• KEYFRAMES Use the + button to add a white balance keyframe to the clip. This
locks in the image control settings for the current frame in the clip. You can then
move the Play-head to another location on the Playback Slider to add another
keyframe where you can have different image control settings. This is a great
way to have the image control settings change over the duration of the clip.
Click on an individual control to reset only its value.
Click on the Disclosure Triangle to close the IMAGE CONR OLS pan el.
TIP: Clicking on the Enable Checkbox will toggle the IMAGE CONTROLS adjustments
ON or OFF for ALL clips in the Media Bin. You can use this to quickly switch back and
forth between seeing the clips with the adjustments applied and the original images.
86
Page 91

GoPro Studio 2.5 User Manual
Enable Checkbox
Framing Clips
GoPro Studio’s FRAMING controls allow you to change the composition of your clips.
Select a clip in the Media Bin and then click on the Disclosure Triangle to the left of the
words “FRAMING” to open the FRAMING controls panel giving you access to the
following settings:
• ZOOM Use the slider or step controls to adjust scale of the image.
• HORIZONTAL Use the slider or step controls to adjust the horizontal location of
the image.
• VERTICAL Use the slider or step controls to adjust the vertical location of the
image.
• ROTATION Use the slider or step controls to slightly rotate the clip clockwise or
counter-clockwise.
• H.ZOOM Use the slider or step controls to adjust the horizontal scaling of the
image.
• H.DYNAMIC Use the slider or step controls to adjust the horizontal stretch point
of the image. This control is best used in tandem with the H.ZOOM control.
• KEYFRAMES Use the + button to add a framing keyframe to the clip. This locks
in the framing control settings for the current frame in the clip. You can then
move the Play-head to another location on the Playback Slider to add another
keyframe where you can have different framing control settings. This is a great
way to have the framing control settings change over the duration of the clip.
• FLIP Use the check boxes to enable or disable horizontal or vertical flipping on
the image.
Click on an individual control to reset only its value.
Click on the Disclosure Triangle to close the FRAMING controls panel.
TIP: Clicking on the Enable Checkbox will toggle the FRAMING CONTROLS adjustments
ON or OFF for all clips in the Media Bin. You can use this to quickly switch back and forth
between seeing the clips with the framing adjustments applied and the original images.
87
Page 92

GoPro Studio 2.5 User Manual
Enable Checkbox
Adjusting 3D Convergence
When a 3D clip is selected in the Media Bin, the 3D CONVERGENCE controls appear in
the right-hand column of GoPro Studio’s EDIT Room. These controls allow you to change
the feeling of depth and distance in your 3D video clips.
Select a 3D clip in the Media Bin and then click on the Disclosure Triangle to the left of
the words “3D CONVERGENCE” to open the 3D CONVERGENCE controls panel giving
you access to the following settings
• HORIZONTAL Use the slider or step controls to modify the relative horizontal
positioning between the left and right camera views.
• VERTICAL Use the slider or step controls to modify the relative vertical
positioning between the left and right camera views
• SKEW Use the slider or step controls to modify the relative skew or rotational
values between the left and right camera views.
• KEYFRAMES Use the + button to add a 3D convergence keyframe to the clip.
This locks in the 3D convergence settings for the current frame in the clip. Yo u
can then move the Play-head to another location on the Playback Slider to add
another keyframe where you can have different 3D convergence settings
• SWAP EYES Use this checkbox to swap the left and right camera views in the
selected clip.
Click on the Disclosure Triangle to close the 3D CONVERGENCE controls panel.
TIP: Clicking on the Enable Checkbox will toggle the 3D CONVERGENCE controls
adjustments ON or OFF for all clips in the Media Bin. You can use this to quickly
switch back and forth between seeing the clips with the 3D convergence adjustments
applied and the original images.
88
Page 93

GoPro Studio 2.5 User Manual
Applying Effect Preset s
In GoPro Studio’s EFFECT PRESETS panel, you can choose from several pre-made
color and vignette effects and apply them to your clips in the Media Bin. This is a quick
and easy way to make your clips look more dynamic. Select a clip in the Media Bi n and
then click on one of the following EFFECT PRESETS to apply it to the clip:
• NONE resets all Color Correction and Framing adjustments to their defaults.
• PROTUNE applies a saturation and contrast adjustment to footage shot in the
Protune mode in the HD HERO2 and HERO3, making it look more punchy.
• 1970S applies a warm color effect that simulates film shot in the 1970s.
• 4X3 CENTER CROP zooms in on a clip shot with a 4x3 aspect ratio while
cropping the top and bottom portions of the image.
• 4X3 TO WIDE applies a combination of framing adjustments to transform a clip
shot in 4x3 aspect ratio to a 16:9 image.
• CANDY COLOR applies a highly saturated color effect to the clip.
• DAY FOR NIGHT applies a color effect that simulates footage that was shot at
night.
• HOT DAY applies a warm color effect that simulates being close to the sun.
• NIGHT VISION applies a green tint over the image simulating an infrared look
that you see when using night vision goggles.
• SEPIA applies a bro wnish and unsaturated effect to achieve a sepia tone look.
• VIGNETTE LARGE applies a large vignette to the image.
• VIGNETTE MEDIUM applies a medium-sized vignette to edges of the image.
• VIGNETTE OFF applies a small vignette to the edges of the image.
To create your own PRESET, do the following:
1. Select a video clip on the Storyboard.
2. Use the WHITE BALANCE, IMAGE CONTROLS and FRAMING CONTROLS to
dial in your own custom look.
3. Click the little gear icon next to the PRESET Title to open the Manage Presets
window.
4. Click the ‘+’ button in the
5. Type in a new preset name check or uncheck the settings you want to save.
6. Click ‘OK’ to add the PRESET.
Press the RESET ALL button to return all of the WHITE BALANCE, IMAGE CONTROLS,
FRAMING CONTROLS and EFFECT PRESETS applied on a clip to their default values.
89
Page 94

GoPro Studio 2.5 User Manual
Copying Settings from One Clip to Another
If you’re happy with the look of a particular clip and want to apply some or all of the
settings to another clip, you can easily accomplish this by doing the following:
1. Click on clip in the Media Bin that has the settings you want to copy to other
clips.
2. Then select “Copy” from the EDIT Menu (or press ‘Command+C’ on your
keyboard).
3. Now click on the clip where you want to copy the settings to.
4. Then select “Paste” from the EDIT Menu (or press ‘Command+V’ on your
keyboard).
5. Continue pasting these settings on any additional clips by repeating steps 4 and
5 above. To apply the same settings to ALL the clips in the Media Bin, press
‘Command+A’ to select all the clips and then select “Paste” from the EDIT Menu
or press ‘Command+V’.
90
Page 95

GoPro Studio 2.5 User Manual
Using GoPro CineForm Files in Other Applications
There are many video editing, color correction and compositing applications available
today. GoPro CineForm files are compatible with those that support standard Windows
AVI and QuickTime MOV files.
Avoiding Re-Transcoding
For most 3
GoPro CineForm files into the application. Some of these applications, however, will
attempt to re-‘transcode’ or ‘optimize’ your video files during the import process. This is
not necessary with GoPro CineForm files because they are already optimized and if you
re-transcode them, you’ll lose the ability to make further adjustments to them in GoPro
Studio.
Below, we’ll discuss how to disable or get around the re-transcoding process that some
specific 3
NOTE: In some consumer-level applications, it is impossible to avoid the re-transcoding
process. In these situations, the GoPro CineForm workflow ends when you import your
GoPro CineForm files into those applications. However, you will be able to continue using
the workflow employed by that particular application.
rd
party applications you can use its standard import method to load your
rd
party applications employ.
Importing Into AVID Media Composer
When importing GoPro CineForm files into AVID Media Composer, use the ‘Link to AMA’
option in the Media Composer File menu. This will force Media Composer to import the
GoPro CineForm files as standard GoPro CineForm QuickTime files rather than retranscode them into AVID’s DNxHD format.
Importing Into iMovie
When importing GoPro CineForm files into iMovie, uncheck the ‘Optimize video’ option in
the ‘Import Movies…’ dialog box. This will ensure that your GoPro CineForm files will not
be re-transcoded into Apple Intermediate files.
91
Page 96

GoPro Studio 2.5 User Manual
Importing Into Final Cut Pro X
When using GoPro CineForm files in Final Cut X project, set the following options in the
Final Cut Pro X Preferences:
• In the 'Import Media…’ panel, uncheck the 'Create optimized media' option.
• In the 'Playback' panel, uncheck the 'Background render' option.
This will ensure that your GoPro CineForm files will not be re-transcoded to Apple
Intermediate files.
NOTE: Other applicat ions may require you to perform similar steps to allow your GoPro
CineForm files to import normally. Please refer to those ap plic ati ons’ own manuals for
specific instructions on how to do so.
Switching Between GoPro Studio and Other Applications
While using your GoPro CineForm files in other applications, at any time, you can switch
focus back to GoPro Studio’s EDIT Room and apply further adjustments to refine the look
of your clips. Then switch back to the 3
updated with the new look.
rd
party application to see your clips immediately
Disabling Timeline Frame Caching
Some non-linear editing applications use what is called ‘frame-caching’ to improve
playback performance. When frame-caching is employed, the Active Metadat a
adjustments made in GoPro Studio may not appear right away when you play back the
file in the 3
that the file has changed and therefore plays its frames from the cache rather than redecoding the source file. To get around this, you can do any or all of the following:
rd
party application. This is because the 3rd party application doesn’t realize
• Disable frame caching (if possible)
• Clear the cache (if possible)
• Play or scrub through the timeline to flush the cache.
• Change timeline resolution (this clears the cache in Adobe Premiere Pro)
TM
92
Page 97

GoPro Studio 2.5 User Manual
Exporting GoPro CineForm Files
When you’re done editing in your 3
master GoPro CineForm file. The method for doing this will differ from application to
application so please refer to the application’s own manual for specific instructions.
NOTE: When exporting to the GoPro CineForm codec using 3
is an encoding limit of 1920 x 1080 resolution with the free version of GoPro Studio. This
means that if you wish to encode at resolutions higher than 1920 x 1080 using 3
applications, you will need to use GoPro Studio Premium or GoPro Studio Professional
(available at cineform.com
).
rd
party application you can export a high-quality
rd
party applications, there
rd
party
93
Page 98

APPENDIX A: KEYBOARD SHORTCUTS
Preferences
⌘ ,
GoPro Studio
Hide GoPro Studio
⌘ H
GoPro Studio
Hide Others
⌥ ⌘ H
GoPro Studio
Quit GoPro Studio
⌘ Q
GoPro Studio
Cycle throuth Windows
⌘ ’
GoPro Studio
New Project
⌘ N
File
Open Project
⌘ O
File
Match stereo pair
⌘ M
File
Import Media...
⌘ I
File
Close
⌘ W
File
Save Project
⌘ S
File
Save Project As…
⇧⌘ S
File
Page Setu p...
⇧⌘ P
File
Undo
⌘ Z
Edit
Redo
⇧⌘ Z
Edit
Cut
⌘ X
Edit
Copy
⌘ C
Edit
Paste
⌘ V
Edit
Paste Special...
⇧⌘ V
Edit
Delete
⌫
Edit
Select All
⌘ A
Edit
Enter Full Screen
⌘ F
View
Play/Pause
␣
View
Stop
K
View
Fast Rewind
J
View
Fast Forward
L
View
GoPro Studio 2.5 User Manual
94
Page 99

Mark In
I
View
Mark Out
O
View
Step Reverse
←
View
Step Forward
→
View
Previous Edit
⌥ ←
View
Next Edit
⌥ →
View
Split
X
View
Loop Playback
⌘ L
View
Export .mov...
⌘ E
Share
Minimize
⌘ M
Window
Show Clip Details
⇧⌘ I
Window
Template Description...
⇧⌘ T
Window
GoPro Studio 2.5 User Manual
95
Page 100

APPENDIX B: GOPRO STUDIO EXPORT PRESETS
PRESET
RESOLUTION
Export Format
Bitrate
Framerate
Mobile
640x360
H264
1.5Mbps
Source FPS
Exported FPS
<47.95fps
Native
47.95
23.976
50.00
25.00
59.94
29.97
100.00
25.00
119.88
29.97
240.00
29.97
HD 720p
1280x720
H264
<30fps =7Mbps
23.976, 29.97,
Native
47.95
23.976
100.00
25.00
119.88
59.94
240.00
59.94
HD
1920x1080
H264
15Mbps
Source FPS
Exported FPS
<47.95fps
Native
47.95
23.976
50.00
25.00
59.94
29.97
100.00
25.00
119.88
29.97
240.00
29.97
Archive
Source
CineForm
Low
High
Native
The following table presents the particular characteristics of each export preset available in the EXPORT Window:
GoPro Studio 2.5 User Manual
1080p
>30fps=15Mbps
Medium
59.94
96
 Loading...