

GOLDSTAR MV1735xx INSTALLATION INSTRUCTIONS
- 10 -
LEARN ABOUT YOUR MICROWAVE OVEN
This section discusses the concepts behind microwave cooking and introduces you to the basics you need to
know to operate your microwave oven. Please read this information before use.
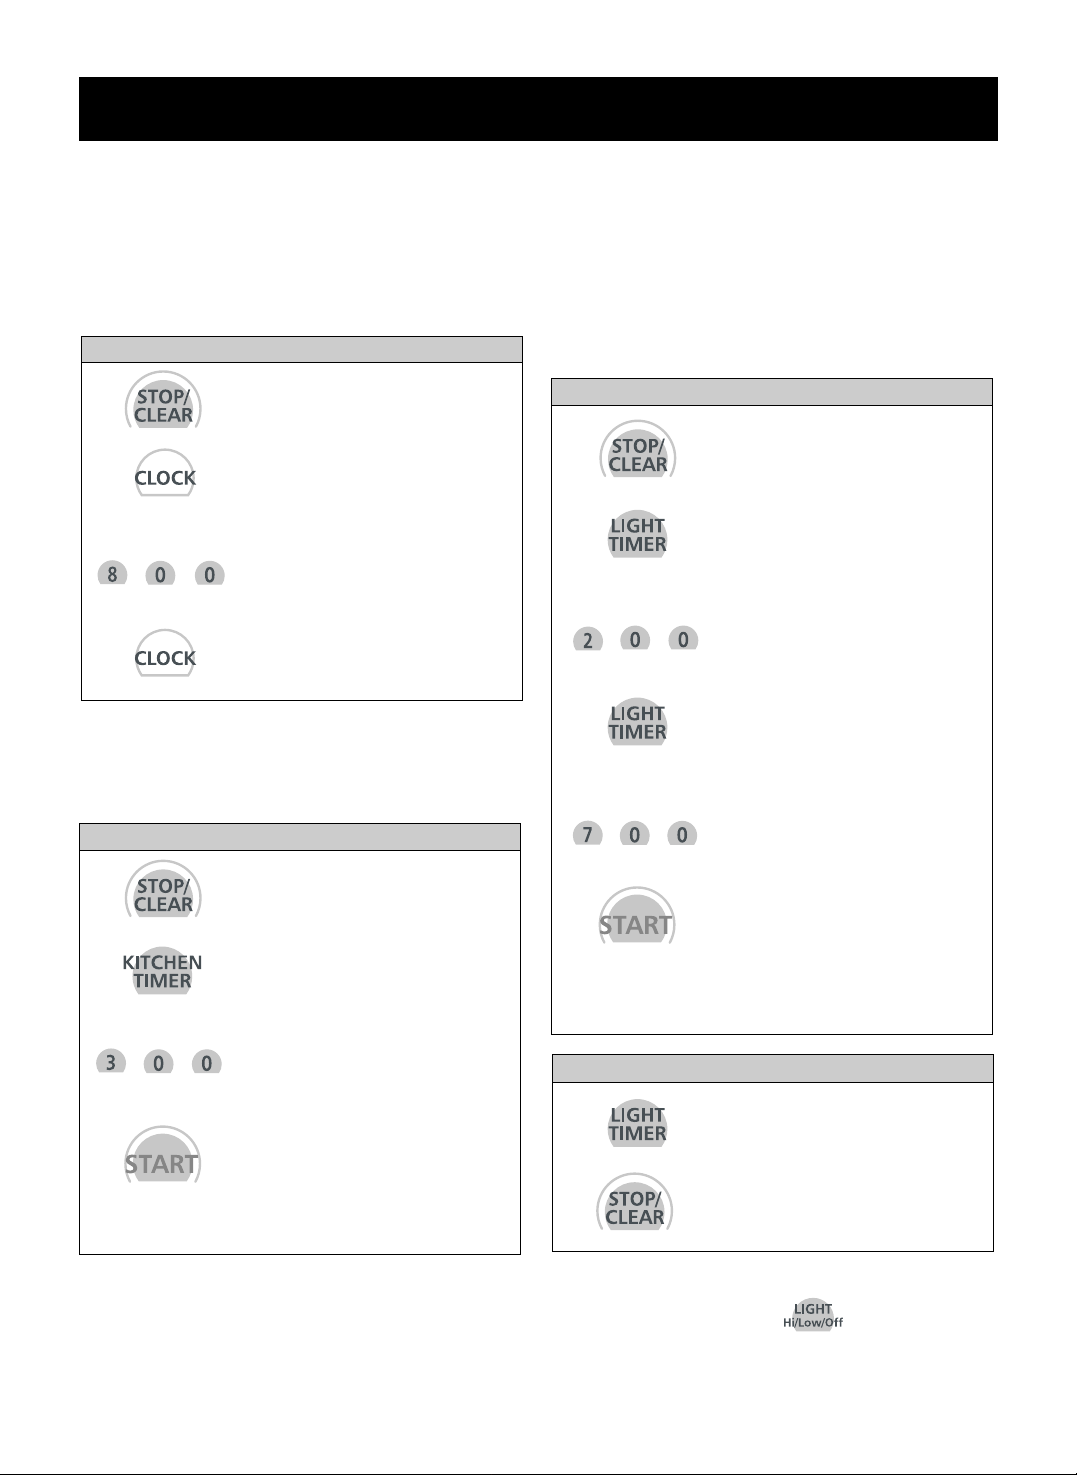
CLOCK(TIME OF DAY)
This oven includes a 24-hour clock.
OPERATION
1. Press Stop/Clear.
2. Press Clock.
(Press once for AM,
twice for PM.)
3. Enter the time by using the
number key.
4. Press Clock(or Start).
Example: To set 8:00 AM.
1. Press Stop/Clear.
2. Press Kitchen Timer.
3. Enter the time by using the
number key.
4. Press Start.
When the time is over, you
will hear seventh long beep
and END will display.
Example: To count 3 minutes.
KITCHEN TIMER
You can use your microwave oven as a timer. Use the
Timer for timing up 99 minutes, 99 seconds.
LIGHT TIMER
You can set the LIGHT to turn on and off automatically
at any time you want. The light comes on at the same
time every day until reset.
1. Press Stop/Clear.
2. Press Light Timer.
(Press once for AM,
twice for PM.)
3. Enter the time you want the
LIGHT to turn on.
4. Press Light Timer again.
(Press once for AM,
twice for PM.)
5. Enter the time you want the
LIGHT to turn off.
6. Press Start.
Example: Turn on 2:00 AM, turn off 7:00 AM.
1. Press Light Timer.
2. Press Stop/Clear.
NOTE: To reset that time to turn on and off the
LIGHT, repeat steps 1 to 5.
Example: To cancel the Light timer.
NOTE: If you want to cancel the Light Timer in
operation, you should press key.
- 11 -
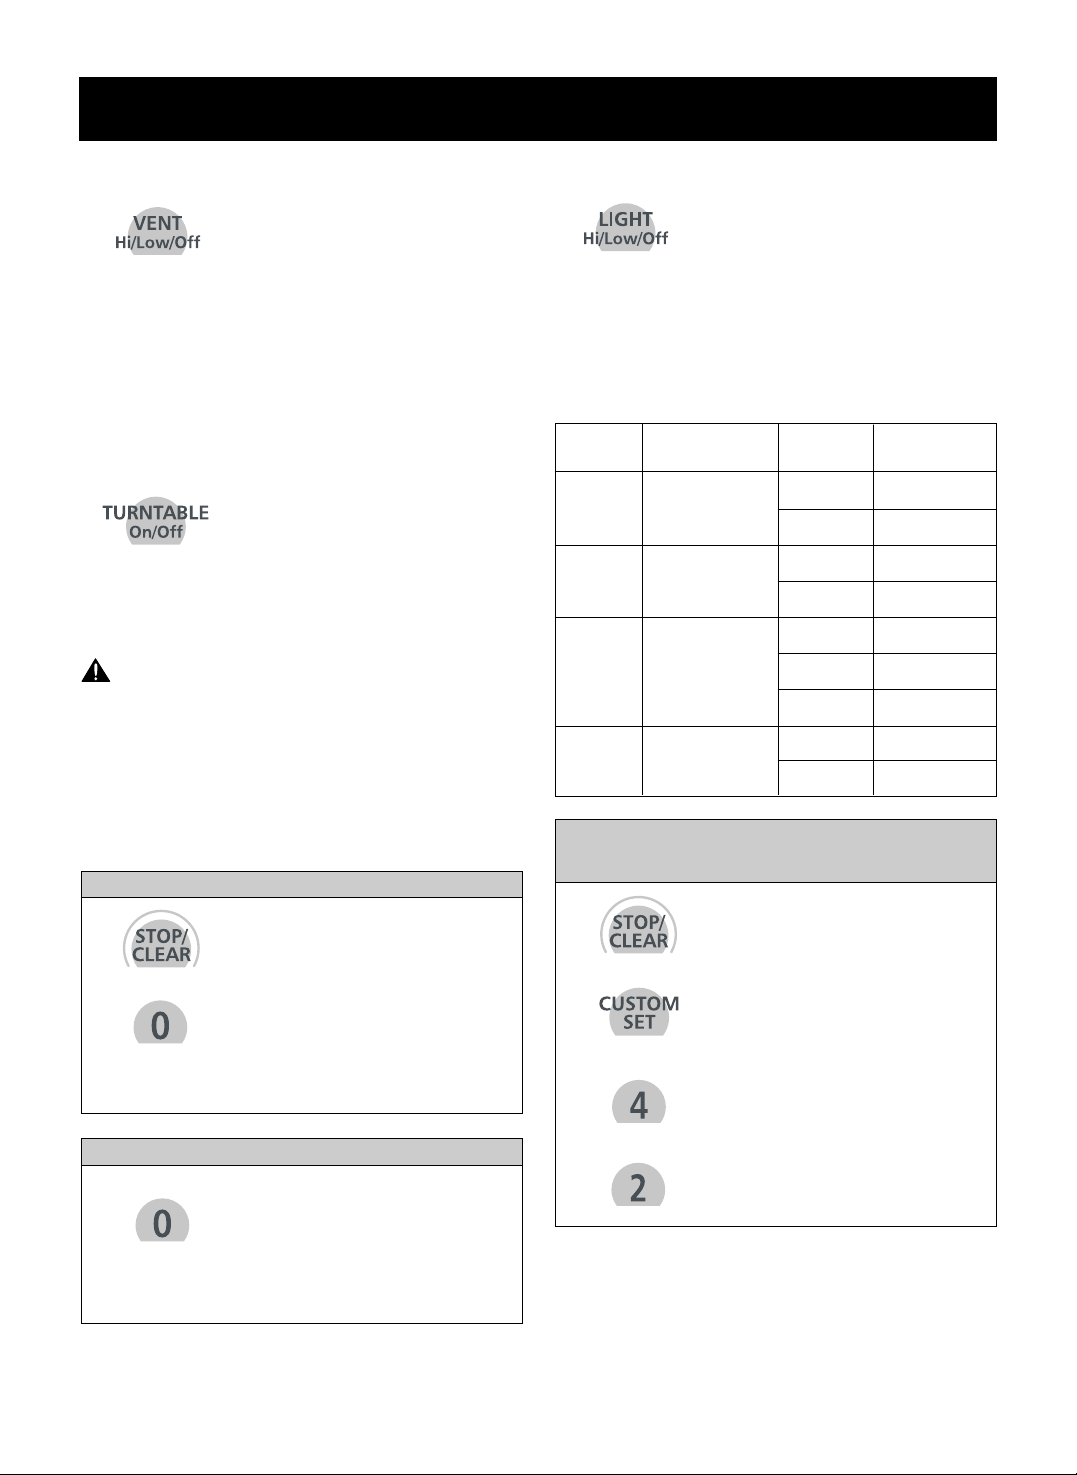
TURNTABLE ON/OFF
For best cooking results, leave the
turntable on. It can be turned off for
large dishes. Press Turntable On/Off
to turn the turntable on or off.
NOTE: Sometimes the turntable can become hot to
touch. Be careful touching the turntable during
and after cooking.
VENT HI/LOW/OFF
The Vent moves steam and other
vapors from the surface cooking.
Press Vent once for High fan speed,
twice for Low fan speed, or three
times to turn the fan off.
NOTE: If the temperature around the microwave oven
gets too hot, the fan in the vent hood will automatically
turn on at the LOW setting to cool the oven. It may
stay on up to an hour to cool the oven. When this
occurs, you can not turn the fan off manually.
CUSTOM SET
You can change the default values for beep sound,
clock, display scroll speed and defrost weight.
See following chart for more information.
NUMBER
1
1
2
1
2
1
2
3
1
2
2
Beep ON/OFF
control
Sound ON
Sound OFF
Clock ON
Clock OFF
Slow speed
Normal speed
Fast speed
Lbs.
Kg.
Clock display
control
Scroll speed
control
Defrost weight
mode select
3
4
FUNCTION
RESULT
1. Press Stop/Clear.
2. Press Custom Set.
3. Press number 4.
4. Press number 2.
Example: To change defrost weight mode.
(from Lbs. to Kg.)
NUMBER
LIGHT HI/LOW/OFF
Press Light once for bright light,
twice for night light, or three times
to turn the light off.
OPERATION
CHILD LOCK
You may lock the key to prevent the microwave from
being accidentally started or used by children.
1. Press Stop/Clear.
2. Press and hold 0 more than 4
seconds.
LOCKED will appear in the
display window with two beeps.
To set the Child lock.
1. Press and hold 0 more than 4
seconds. LOCKED will
disappear and you hear two
beeps. At this time the oven is
ready.
To cancel the Child lock.
WARNING:
DO NOT RUN THE OVEN EMPTY WITHOUT FOOD
IN IT.

- 12 -
HOLD WARM
You can safely keep hot, cooked food warm in your
microwave oven for up to 99 minutes. You can use
Hold Warm by itself or to follow a cooking cycle
automatically.
NOTES:
• Hold Warm operates for up to 99 minutes
99 seconds.
• Food cooked covered should be covered during
Hold Warm.
• Pastry items (pies, turnovers, etc.) should be
uncovered during Hold Warm.
• Complete meals kept warm on a dinner plate could
be covered during Hold Warm.
OPERATION
1. Press Stop/Clear.
2. Press Hold Warm.
3. Press Start.
Example: To use the Hold warm.
Ez On
A time-saving pad, this simplified control lets you
quickly set and start microwave cooking without
the need to touch START pad.
1. Press Stop/Clear.
2. Press Ez On twice.
The oven begins cooking
and display shows time
counting down.
Example: To cook for 1 minutes.
HELP
The Help display feature information and helpful hints.
Press Help, then select a key.
1. Press Stop/Clear.
2. Press Help.
3. Press Popcorn.
Example: To learn about Popcorn.
MORE/LESS
By using the More or Less keys, all of the one touch,
time cook program and etc. can be adjusted to cook
food for a longer or shorter time.
Pressing More will add 10 seconds of the cooking time
each time you press it. Pressing Less will subtract 10
seconds of cooking time each time you press it.
1. Press Stop/Clear.
2. Press Popcorn.
3. Press number 1.
4. Press More.
NOTE: Press the More or Less
key during time countdown.
Example: To adjust the 1.75 oz Popcorn cooking
time for a longer time.
NOTE:
If you touch Ez On, it will add 30 seconds up to
3 minutes; after 3 minutes, every touch will add
1 minute up to 99 min 59 seconds.
- 13 -
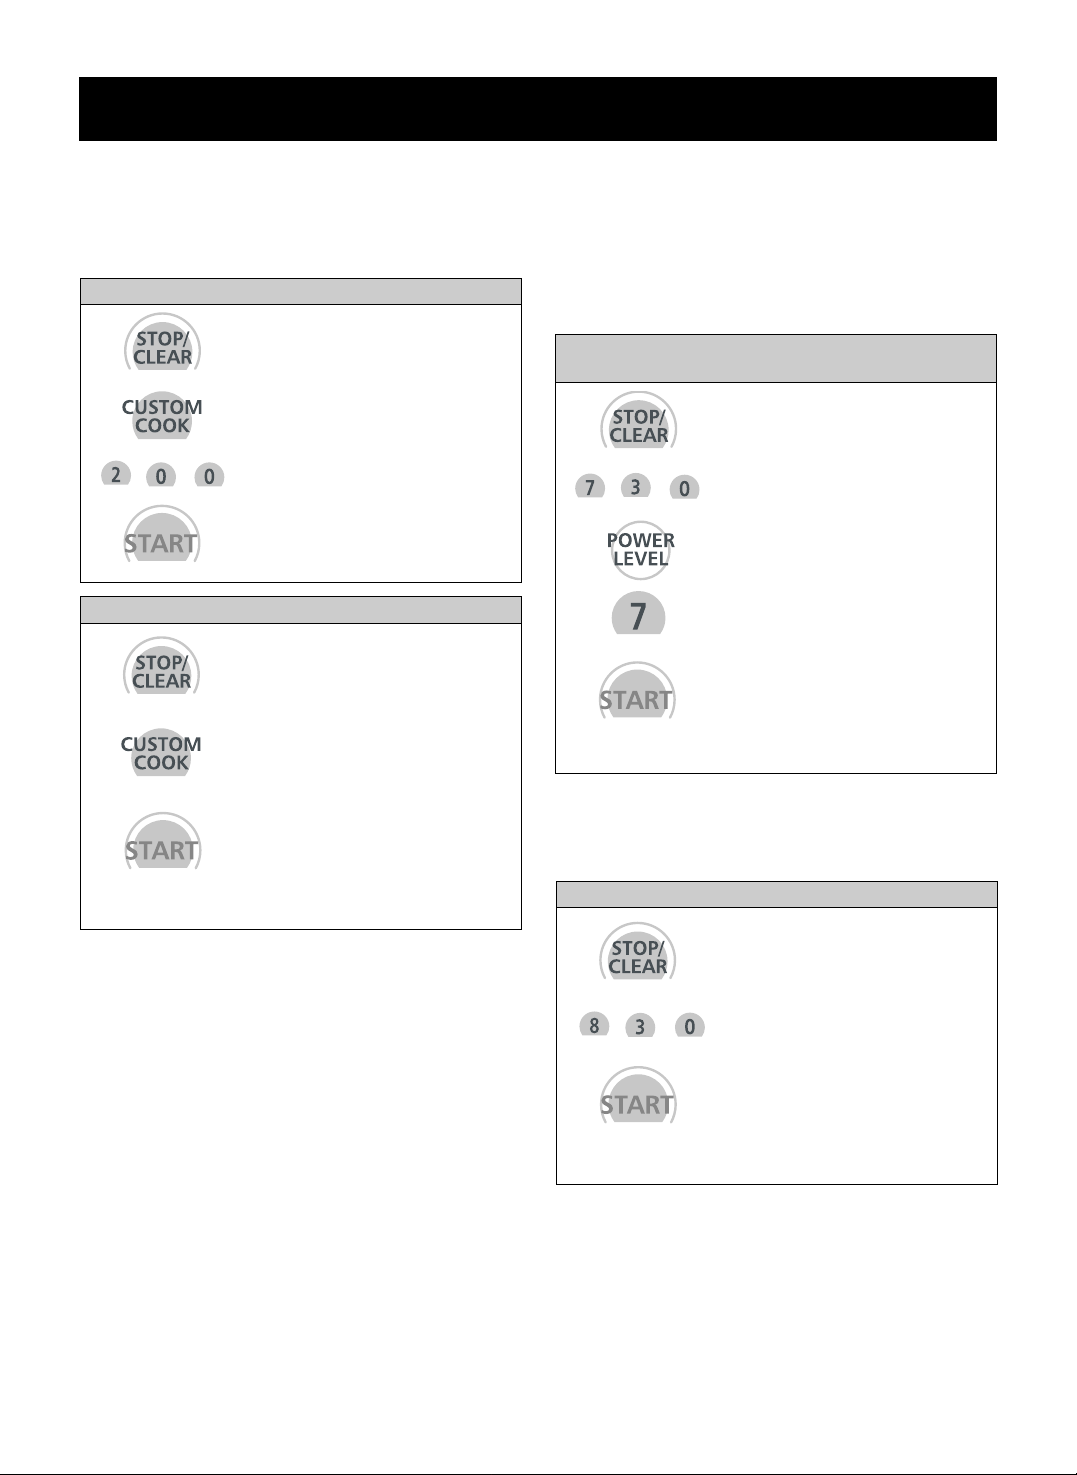
1. Press Stop/Clear.
2. Press Custom Cook.
3. Enter the cook time.
4. Press Start.
Example: To memorize for 2 minutes.
CUSTOM COOK
Custom Cook lets you recall one cooking instruction
previously placed in memory and begin cooking
quickly.
OPERATION
COOKING AT HIGH COOK
POWER
1. Press Stop/Clear.
2. Enter the cook time.
3. Press Start.
When the cook time is over,
you will hear four beeps and
END will display.
Example: To cook food for 8 minutes 30 seconds.
1. Press Stop/Clear.
2. Press Custom Cook.
3. Press Start.
When the cook time is over,
you will hear four beeps and
END will display.
Example: To recall the Custom Cook.
1. Press Stop/Clear.
2. Enter the cook time.
3. Press Power Level.
4. Enter the power level.
5. Press Start.
When the cook time is over,
you will hear four beeps and
END will display.
Example: To cook food for 7 minutes 30 seconds
at 70% power.
COOKING AT LOWER POWER
LEVELS
HIGH power cooking does not always give you the
best results with foods that need slower cooking, such
as roasts or custards. Your oven has 10 power
settings in addition to HIGH.
 Loading...